
KH 2307 - Chaîne Hi-Fi SILVERCREST - Notice d'utilisation et mode d'emploi gratuit
Retrouvez gratuitement la notice de l'appareil KH 2307 SILVERCREST au format PDF.

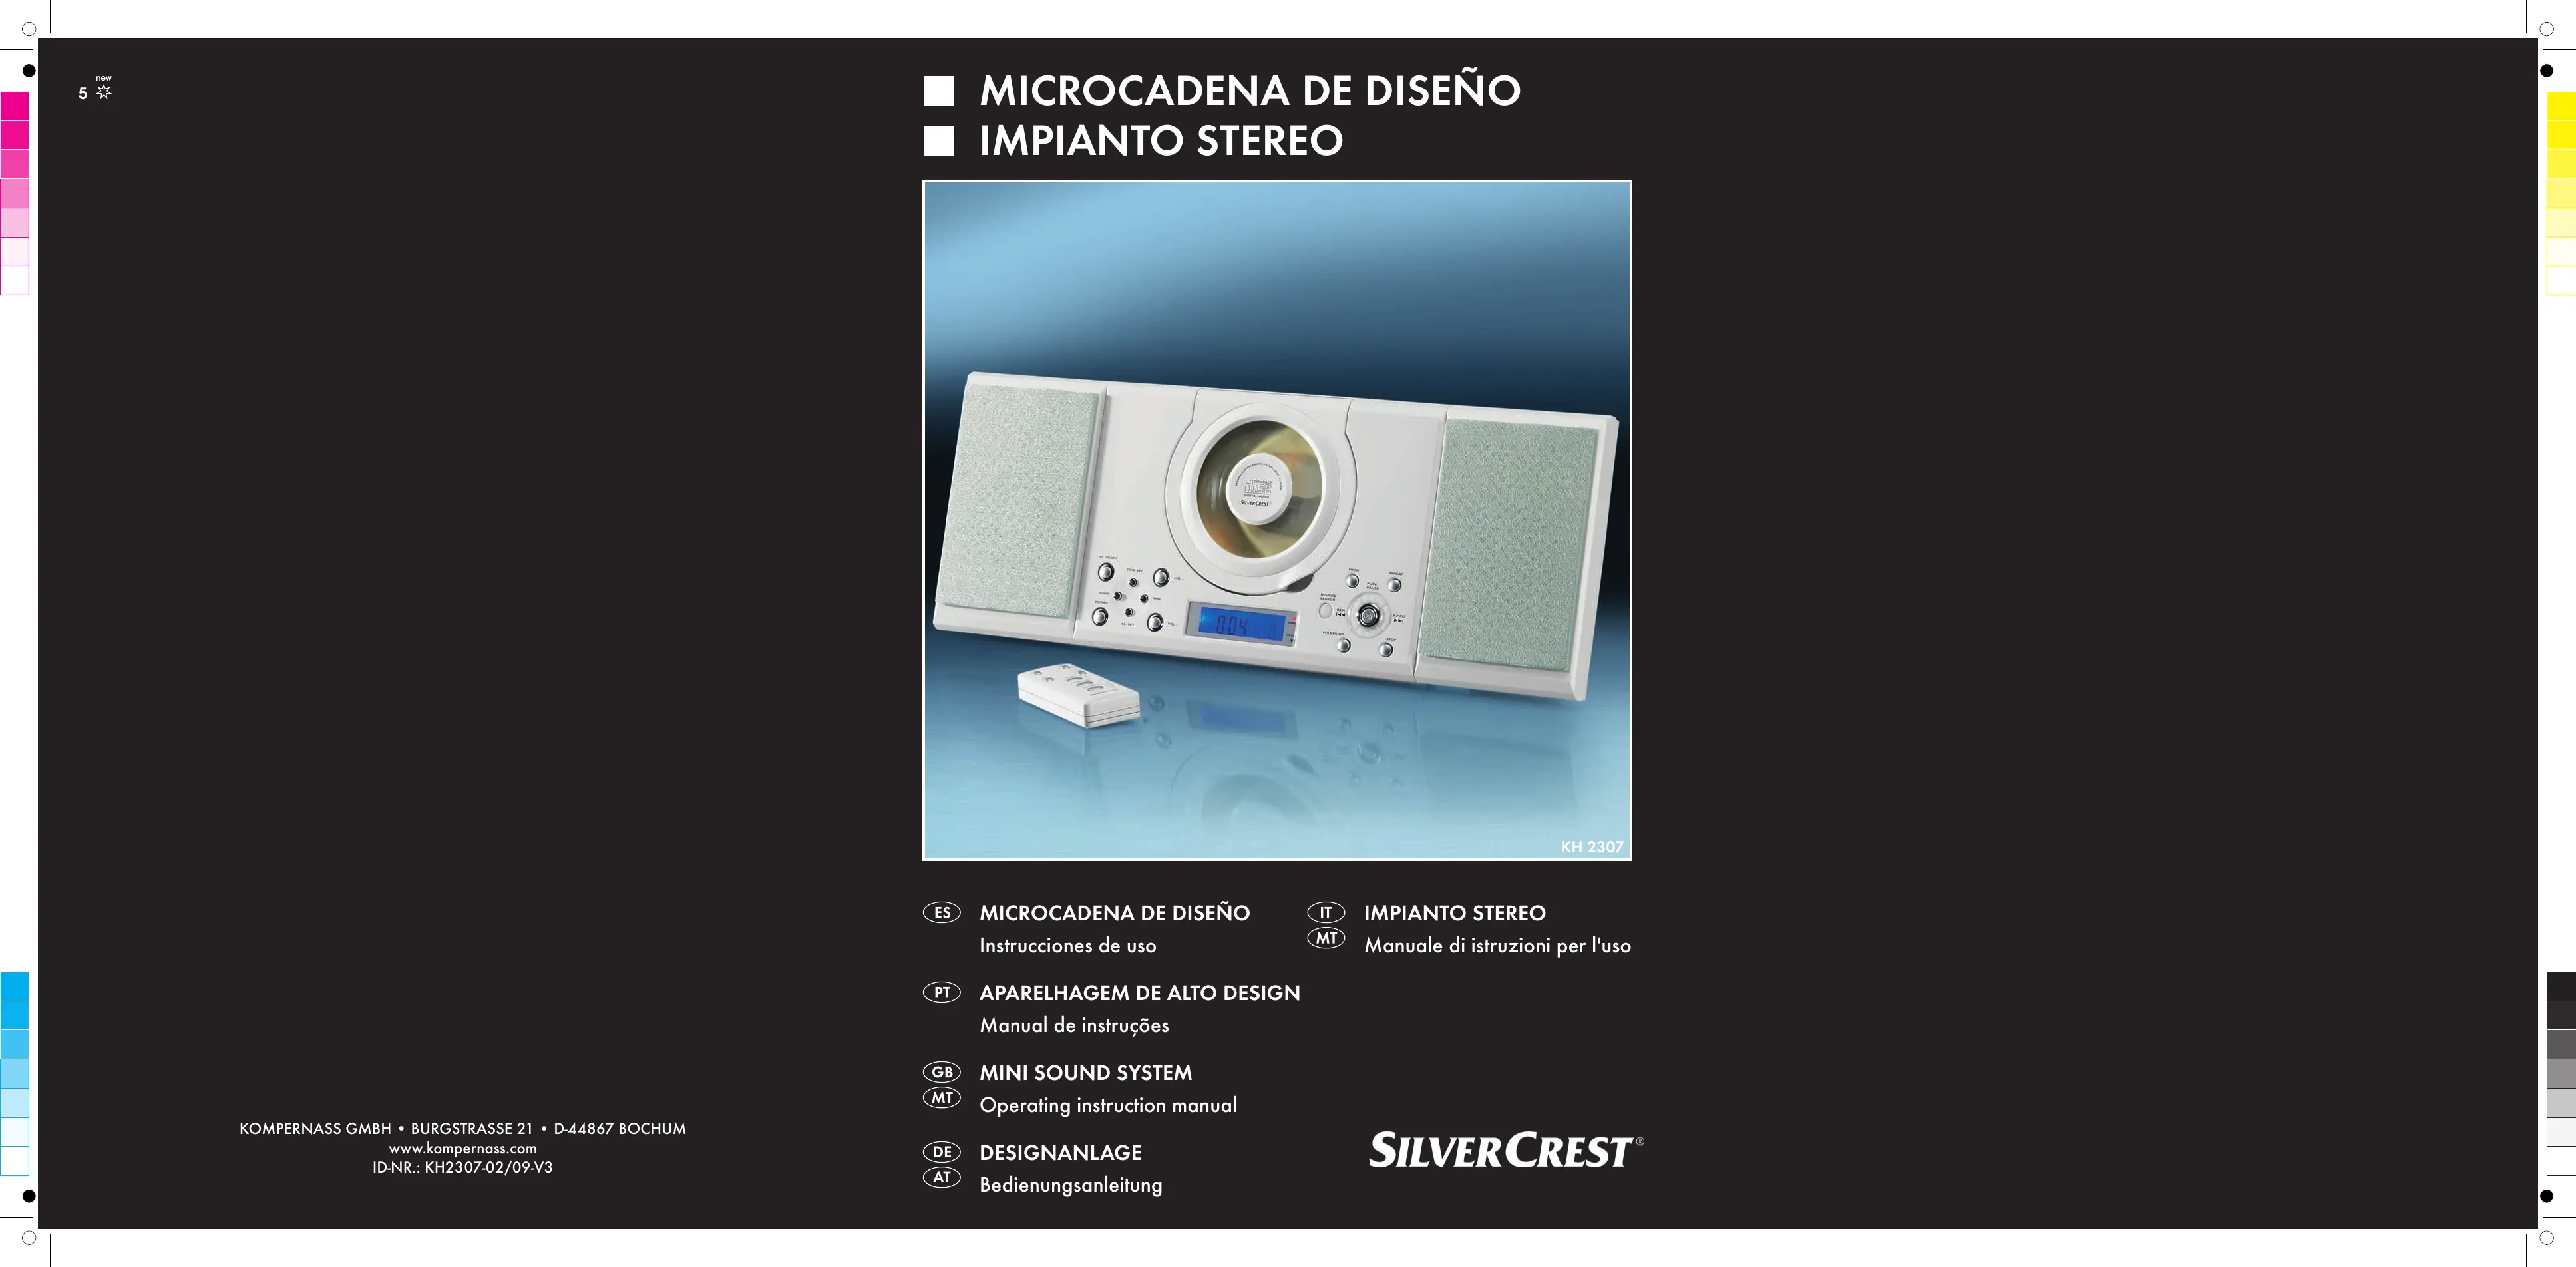


| Type de produit | Chaîne Hi-Fi |
| Marque | SILVERCREST |
| Modèle | KH 2307 |
| Tension nominale | 230 V~, 50 Hz |
| Consommation électrique | En veille : 3 W ; En fonctionnement : 14 W |
| Gammes de fréquence radio | FM : 87,5 - 108 MHz ; AM : 526,5 - 1606,5 kHz |
| Dimensions appareil principal | 25 x 18 x 6,2 cm (L x P x H) |
| Dimensions chaque enceinte | 11 x 18 x 6,2 cm (L x P x H) |
| Poids appareil principal | Environ 1008 g |
| Poids chaque enceinte | Environ 280 g |
| Puissance de sortie | 2 x 1,2 W RMS |
| Entrée AUX | Jack 3,5 mm |
| Sortie casque | Jack 3,5 mm |
| Laser CD | Classe 1 |
| Température de fonctionnement | 5 °C à 40 °C |
| Température de stockage | -20 °C à 60 °C |
| Classe de protection | II |
| Piles télécommande | 2 x 1,5 V (AAA, LR03) |
| Piles mémoire | 2 x 1,5 V (AA, LR6) - non fournies |
| Fonctions principales | Radio FM/AM, lecteur CD audio et MP3, entrée AUX, minuterie (éveil/sommeil), répétition et lecture aléatoire, programmation de pistes |
| Nettoyage | Débrancher, essuyer avec un chiffon légèrement humide. Ne pas utiliser de solvants. |
| Consignes de sécurité importantes | Ne pas ouvrir le boîtier, éviter l'humidité, débrancher avant nettoyage, tenir les piles hors de portée des enfants. |
FOIRE AUX QUESTIONS - KH 2307 SILVERCREST
Questions des utilisateurs sur KH 2307 SILVERCREST
0 question sur cet appareil. Repondez a celles que vous connaissez ou posez la votre.
Poser une nouvelle question sur cet appareil
Téléchargez la notice de votre Chaîne Hi-Fi au format PDF gratuitement ! Retrouvez votre notice KH 2307 - SILVERCREST et reprennez votre appareil électronique en main. Sur cette page sont publiés tous les documents nécessaires à l'utilisation de votre appareil KH 2307 de la marque SILVERCREST.
MODE D'EMPLOI KH 2307 SILVERCREST
MICROCADENA DE DISEÑO
IMPIANTOSTEREO
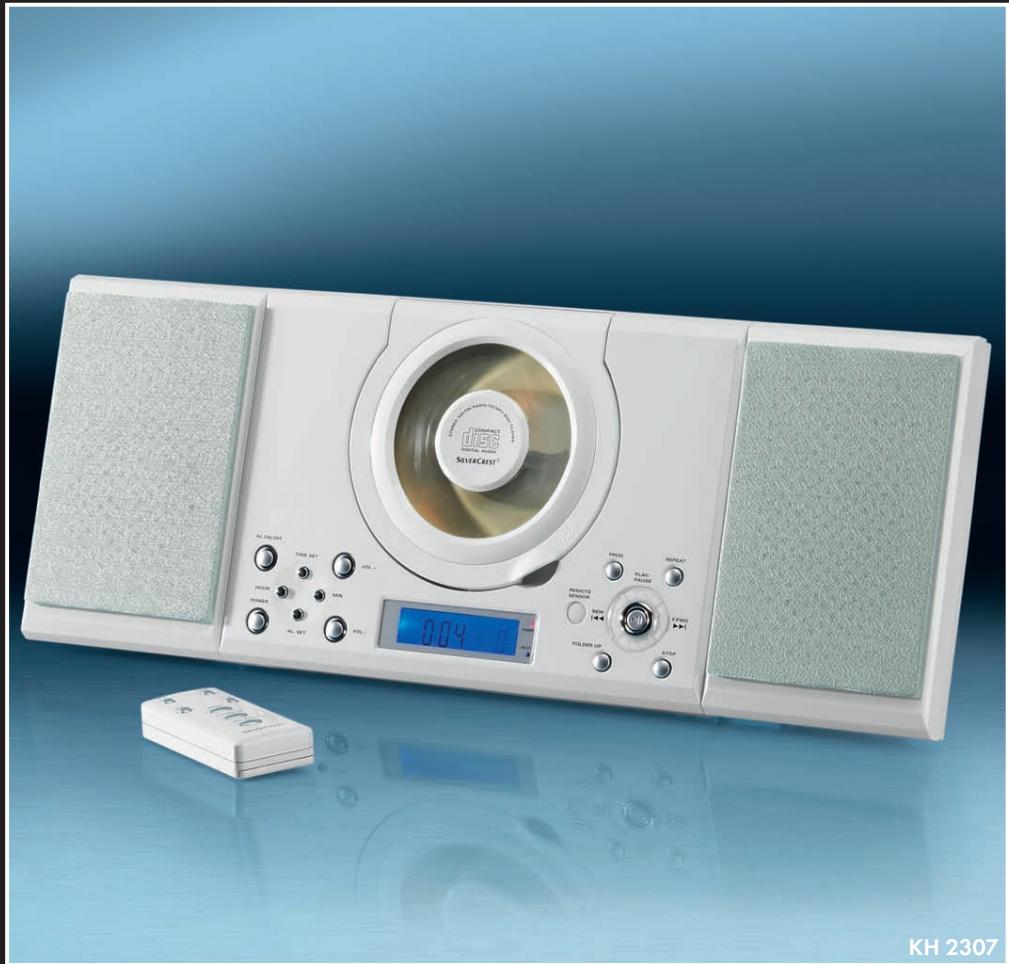
ES MICROCADENA DE DISEÑO
Instrucciones de uso
IT IMPIANTOSTEREO
MT Manuale di istruzioni per l'uso
APARELHAGEM DE ALTO DESIGN
Manual de instruções
GB MINI SOUND SYSTEM
MT Operating instruction manual
DE DESIGNANLAGE
AT Bedienungsanleitung
Uso conforme al previsto 2
Volumen de suministro 2
2
Instrucciones de seguridad 2
Montaje del aparato 3
Los elementos de mando 3
Colocar las pilas 4
Manejo del mando a distancia 4
Conectar los componentes 4
Encender y apagar el aparato 4
Ajustar la hora 4
Seleccionar la fuente de programa 4
Ajustar el volumen 4
Utilizar auriculares 4
Manejo de la radio 4
Manejo del reproductor de CD 5
Funciones MP3 6
Funcionamento AUX 7
Funcionamento del temporizador 7
Cuidado y limpieza 8
Solutionar anomalias de func tion 8
Evacuación 8
Declaracion de conformidad CE 8
Importador 8
Observaciones importantes sobre la garantía 8
Uso conforme al previsto
Esta microcadena está exclusivamente indicada para reproducir CDs de audio, CDs de MP3, CD-R, CD-RW y para reproducir programas de radio. La microcadena no está prevista para uso comercial o en ambitos industriales. No se asumeonga garantía por daños resultantes de un uso no conforme al previsto del aparato.
Volumen de suministro
1 microcadena
2 altavoces
1 mando a distancia (incl. 2 pilas)
1 instrucciones de uso
Datasétécnicos
| Tensión nominal: | 230 V~, 50 Hz |
| Consumo de potencia: | |
| en standby | 3 varios |
| en funciona}=14 varios | |
| Gama de Frequencias | |
| de radio: | MW (AM): 526,5 - 1606,5 kHzUKW (FM): 87,5 - 108 MHz |
| Medidas (L x Al x A) | |
| Aparato principal: | 25 x 18 x 6,2 cm |
| Cada caja: | 11 x 18 x 6,2 cm |
| Peso | |
| Aparato principal: | 1008 g aprox. |
| Cada caja: | 280 g aprox. |
| Potencia de salute: | 2 x 1,2 varios RMS |
| Entrada AUX: | conectar jack de 3,5 mm |
| Salida para auriculas: | conectar jack de 3,5 mm |
| Tensión de salute max. | |
| en salute de auriculas: | 60 mV |
| Láser CD: | Clase de láser 1 |
| Temperatura de service : | 5° - 40°C |
| Temperatura dealmacenamento : | -20° - 60°C |
| Clase de protección: | II ☑ |
| Pilas: | |
| Mando a distancia: | 2 x 1,5 V, (AAA, LRO3) Micro |
| Mantenimiento | |
| de memoria: | 2 x 1,5 V, (AA, LR6) Mignon |
Las caracteristicas sociales del aparato posibilitán el ajuste de un Campo de Frequencias de MW (AM) 525-1635 kHz, o bien FM (UKW) 87,2-108,6 MHz. Endietables paises poden existir regulaciones naciales divergentes a lasgames de Frequencia de radio existentes. Tenga en cuenta que está prohibido transmitir authereros o para finesdistinctos las informaciones recibidas que queden fuera de la gama de Frequencias radioeléctricas asignada.
Instrucciones de seguridad
- No deje que los niños manejen aparatos electricos sin supervisión, ya que ellos no siempre��uen valorar correctamente los posiblespeligos.
-
Para registrar un encendido involuntario, extraiga la clavija de red cuando de cada uso y antes de cada limpieza.
-
Compruebe el aparato y todas las piezas si presentan daños visibles. Sólo en estado correcto puede functionar el concepto de seguridad del aparato.
!Riesgo de explosión!
- No arroje las pilas al fuego.
- No vuelva a cargar las pilas.
- Nunca abra, esta ni suele las pilas. iExiste riesgo de explosión y de lesiones!
- Compruebe las pilas de forma regular. Las pilas vaciadas能把ducir daños en el mando a distancia o en el aparato.
- Cuando no vaya a utiliser el aparato durante un periodo prolongado, extraiga las pilas.
- Si las pilas se han vaciado, utilise guantes protectores y limpie el compartmento de las pilas y los contactos de las pilas con un trapo seco.
! Peligro de descarga electrica!
- Conecte el aparato a una base de enchufe con una tension de red de 230V /50Hz .
- No conecte el aparato cuando el cable de connexion o la clavija de red está danados.
- Deje que el servicios de atencion al cliente repare o cambie inmediamente los cables de connexion o aparatos que no funciona en correctamente o esten danados.
- Nosumerjuna nunca el aparato en agua. Limpielo solo con un trapo ligeramente humedecido.
- No exponga el aparato a la lluvia ni lo utilizes en lugaros mojados o humedes.
- Tenga en cuidado de que el cable de connexion no se meje ni humedezca nunca durante el funcionaimiento.
- Queda prohibido abrir la carcaja del aparato o intentar repararlo. En el interior del aparato hay un rayo láser invisible ("láser de类产品 1"). En este caso no está protegado y perdá el derecho a la garantía.
- No coloque objetos con agua, como p. ej. jarrones, encima o al lado del aparato.
- Nota acerca de la desconexión de la red Para deselectar el aparato Completely de la red es Neededo extraer la clavija de red de la base de enchufe. Por lo tanto debe colocar el aparato de modo que quede siempre garantizo el acces libre a la base de red, para poder extraer inmediamente la clavija de red en caso de emergencia. Para evaporar el peligro de incendio, en caso de no utiliser el aparato durante un periodo prolongado, por exemple durante las vacaciones, deben extraer Completely la clavija de red de la base de enchufe.
Coja el cable de red siempre por la clavija. No tire del propio cable ni toque nunca el cable de red con las manos mojadas, ya que thiso podria provocar un cortocircuito o descarga electrica. No coloque el aparato, muebles ni similares sobre el cable de red yonga en cuidado de no aplastarlo. No haga nunca un nudo en el cable de red ni lo empalme conOthers cables.Coloque el cable de red de modo que nadie lo pueda pisar.Un cable de red danado能把 originar un incendio o bien una descarga electrica. Compruebe periodicamente el cable de red. Si estuviese dañado,pongase en contacto con el serviceo de atencion al cliente autorizzato más proximo or dirijase al establishimiento de comprara para sustituirlo.

jRiesgo de incendio!
- No utilise el aparato en la proximidad de superficies calientes.
- No coloque el aparato en lugares donde quede expuesto directamente a la radiación solar o a fuentes de luz artificiales. De otro modo podra sobrecalentarse y danarse de forma irreplicable.
- Nocede nunca el aparato desatendido durante su funciona.
- No cubra nunca la rejilla de ventilación del aparato cuando está connectado.
- No coloque sobre el aparato fuentes de llama abierta, como p. ej. velas.
- En caso de tormenta o de temporal con riesgo de que se produzcan rayos, desconecte el aparato de la red electrica.

jPeligro de lesiones!
- Mantenga a los niños alejados de la linea de alimentación y del aparato. Los niños a veces menospecializar los riesgos que pueda encontrarearlos aparatos electricos.
Procure un apoyo estable del aparato. - En caso de que se caiga el aparato o está danado, no debenponerlo de nuevo en functionamento.Dejeque compruebe el aparato personal especialistaequalificado y en su caso que lo repare.
- Los niños no deben tener acceso a las pilas. Los niños peuvent meterse las pilas en la boca y atragantarse. En caso de ingestión de una pila consulte inmediamente con un Médico.
- Este produit no está disnado para que sea utilizado por personas (incluidos niños) con capacities fisicas, sensoriales o mentales limitadas o bien falta de experiencia y/o falta de conocimiento, a no ser que Sean supervisas por una persona responsable de su seguridad o se les hayan proportionado instrucciones sobre como utiliser el producto. Los niños deben estar siempre bajo vigilancia con el fin de asegurar que no juguen con el producto.

jPeligro de lesiones en los ojos!
- Este aparato está provisto de un "laser de classe 1". No abra nunca el aparato y no intente repararlo. El rayo láser invisible pourrait dañar sus ojos.

jPrecaución!
Indicaciones sobre impulsos de tension (EFT / transistorio electrico rápido) y cargas electrostáticas:
Para que el aparato vuelva a functionar con normalidad después de un fallo debido a un transitorio electrico rápido (impulso de tension) oarga electroestática, seranecessary reponer el producto (probamente deba desconectarlo y volverlo a conectar a la alimentacion electrica).
Indicación: Una descarga electroestática se produce cuando se camina con zapatos con suela de plástico sobre una alfombra que contiene asimismo componentes de plástico. Por medio de la fricción de la suela de zapato con la alfombra, se genera una carga en el cuerpo que se descarga al momento en que se toca un objeto electréricamente conductor, como por exemple la maneta de una puerta o bien la carrocería de un vehiclulo. Para la descarga es suficiente si se aproxima uno poco cm al objeto conductor. No esnecessary el contacto directo para que se produzca la descarga. La carga pueda derivarse por medio de un arco voltaico. La descarga también puede producirse a工程技术 de piezas de plástico.
Montaje del aparato
Saque la microcadena y los accesorios del embalaje.
Retire todas las protecciones de transporte y lasCNTas / láminas adhesivas.
Cokoque la microcadena sobre una superficie recta y horizontal. Paraarlo, despliegue los apoyos de la parte posterior del aparato principal y las cajas. Cokoque la microcadena de modo que la tapa de la bandeja del CD se puedaAbrir completeness.
Coloque los altavoces a la derecha y la izquierda de la microcadena.
Internacionalmente, para elles extraigas totalmente los dispositivos de fijación de las cajas a la红线 de izquierda del aparato principal (aprox. 3,5mm) y colocque la caja derecha e izquierda con su carril guía en el dispositivo de fijación correspondiente, hasta que las partes inferiores de la caja y el aparato principal encajen una con另一边.
Internacionalmente, el pararato principal y/o las cajas a lapared mediate los dispositivos para colgar situados en las partes posteriores. Los separadores de la parte posterior de las cajas sirven para darles estabilidad.
Loselementosde mando
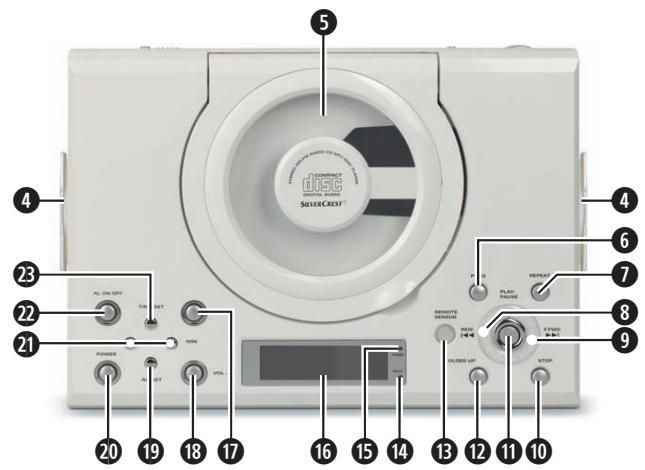
En el aparato:
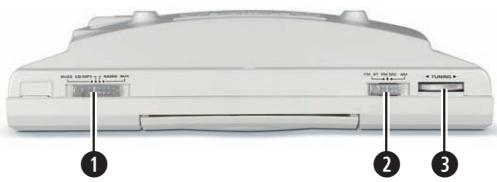
1 Conmutador de sistemas
FM ST - FM MO - AM - Interruptor de banda de radio
3 Regulador TUNING - Sintonizacion de emisoras
Dispositivos de fijación de las cajas
Bandeja del CD
PROG -para grab programas de CD
7 REPEAT -activa la funciona de repetition y la reproduccion aleatoria
- salto de pista del CD hacía atras
F.FWD -salto de pista del CD hacía delante
STOP -finalizar reproduccion del CD
- iniciar/pausar la reproduccion del CD
12 FOLDER UP -para seleccionar carpetas en elfuncionamento de CD de MP3
REMOTE SENSOR - sensor infrarrojos para la seals del mando a distancia
FM.ST -indicador FM estereo
15 POWER -indicador de funciona miento
16 Pantalla LCD
17 VOL + - subir el volumen
18 VOL - - bajar el volumen
AL. SET -para la entrada eindicacion del tiempo de encendido /apagado
20 POWER - Apagar / Encender
2 HOUR / MIN -teclas para introducir la hora
AL. ON/OFF -controla el encendido/apagado autom.
23 TIME SET -para introducir la hora
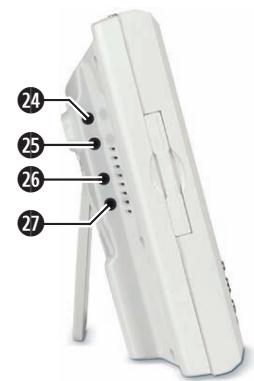
24 AUX - entrada para conectar dispositivos de audio
- Salida de auriculares
26 SP R -conexión de altavoz "derecha"
SP L - conexión de altavoz "izquierda"
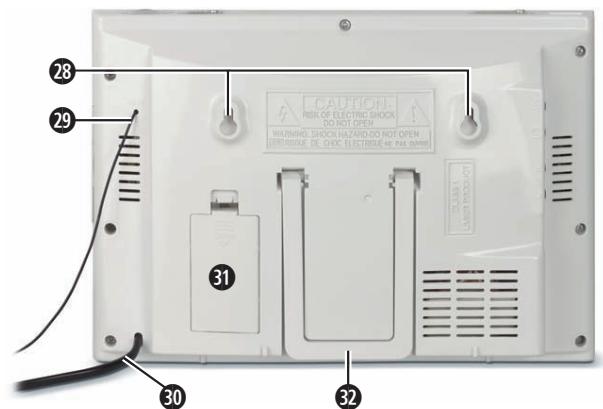
Ojal para colgar para el montaje en pared
Antena flexible FM (UKW)
30 Cable de alimentación
Compartimento de las pilas (mantimiento de memoria)
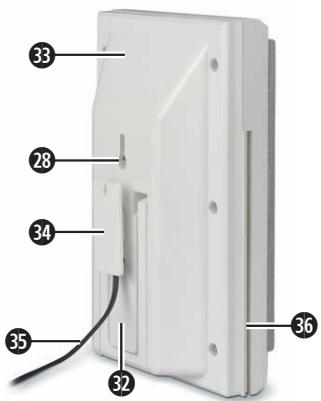
Apoyos del aparato
Caja altavoz
34 Separador para el montaje en la pared
35 Cable de altovoz
3 Carril guia para el dispositivo de fijacion de las cajas
En el mando a distancia:
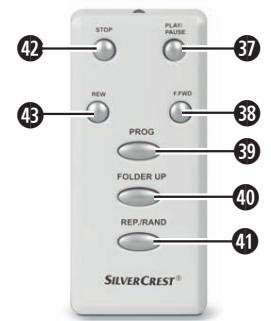
37 PLAY/PAUSE -iniciar/detener reproduccion del CD
F.FWD -salto de pista del CD hacia delante
PROG -paragrabprogramasdeCD
FOLDER UP -para seleccionar carpetas en elfuncionamento de CD de MP3
REP./RAND -activa la direccion de repetition y la reproduccion aleatoria
STOP -finalizar reproduccion del CD
REW -salto de pista del CD hacía atrás
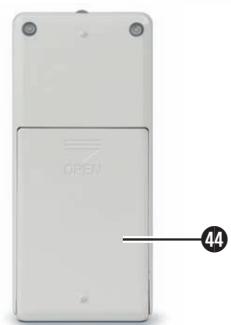
4 Compartimento de las pilas (pare posterior)
Colocar las pilas
Puede utiliser la microcadena con 2 pilas de 1,5 V tipo AA, de modo que en caso de corte de corriente no se pierda la información memorizada de la hora y el temporizador.
El mando a distancia necessities 2 × 1,5 V tipo AAA.
Las pilas para el mantenimiento de datos en caso de corte de corriente no está incluidas en el volumen de suministro.
Abra el compartmento de las pilas en la parte posterior del aparato y el situado en la parte posterior del mando a distancia.
Coloque las pilas de acuerdo con la polaridad indicada en el compartmentimiento de pilas.
Con cuidado, ciderre la tapa del compartmentimiento de pilas hasta que se enclave.
Si el aparato deja de reacciónar correctamente a las señales del mando a distancia, las pilas está agotadas. Cambielas por pilas新品as del mesmo tipo.
Manejo del mando a distancia
Dirija el mando a distancia hacía el aparato cuandoacesoonas teclas. El mando a distancia funciona a una distancia de aprox. 5m y en un angulo de al menos 60^ respecto al aparato. Para que se produzca la transmisión de las senales no debe haber ningún objeto entre el aparato y el mando a distancia.
Conectar los componentes
Altavoces
Conecte el cable de altovoz correspondiente al altovoz derecho con la connexion de altovoz derecha "SP R" al aparato.
Conecte el cable de altovoz correspondiente al altovoz izquierdo con la connexion de altovoz izquierda "SP L" al aparato.
Alimentación de corriente
Conecte la clavija de red del cable de alimentacion a una base de enchufe correctamente instalada de 230V /50Hz
Encender y apagar el aparato
Para encender el aparato, Coloque el interruptor de funciona en la posicion CD/MP3, RADIO o AUX y pulse la tecla POWER. La microcadena está ahora en funciona y elindicador rojo POWER, asi como la iluminacion azul de fondo de la pantalla esan encendidos.
Para apagar el aparato, Coloque el interruptor de referencia 1 en la posicion BUZZ, o bien pulse la tecla POWER.
Para Separar el aparato de la tension de red, retire la clavija del cable de alimentacion de la base de enchufe.
Ajustar la hora
Mantenga pulsada la tecla TIME SET ②, cuando, con las teclas HOUR/MIN ①, introduce las horas y horas de la hora actual. Puede pulsar varias vezes la tecla HOUR/MIN ② o mantenerla pulsada.
A continuación, vuelve a soltar la tecla TIME SET 23. Ahora la hora está memorizada y se做不到 en la pantalla incluo con el aparato apagado.
Seleccionar la fuente de programa
Puede escoger entre las siguientes fuentes de programa:
- CD/MP3 - reproducción de CDs de audio o CDs de MP3
- RADIO - reproduccion de emisoras de radio
- AUX - reproduccion de un dispositivo connectado a la entrada AUX 24
Paraarlopongael interruptorFUNCTION enla posicion deseada.
Ajustar el volumen
Para subir el volumen pulse repetidamente la tecla VOL + o mantengala presionada hasta que el aparato alcance el volumen deseado.
Para bajar el volumen pulse repetidamente la tecla VOL- o mantengala presionada hasta que el aparato alcance el volumen deseado.
Utilizar auriculares
Con la microcadena puede utiliser auriculares con una clavija de 3,5 mm (no incluida en el volumen de suministro). La hembrilla de auriculares se encontrar en el lado izquierdo de la microcadena. Una vez que haya connectado los auriculares, los altavoces se apagarán y sólo podrá oir el sonido a工程技术 de los auriculares.
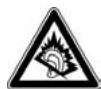
jATENCION! Escuchar música durante mucho tiempo a工程技术 de los auriculares con el volumen alto puede provocar problemas de audicion!
Manejo de la radio
Este aparato recibe emisoras de radio en las bandas de fecuencia de onda ultracorta (UKW o en ingl. FM) y onda media (MW o en ingl. AM).
Para disponible de una buena recepción FM con la microcadena, despliegue totalmente la antenna flexible en la parte posterior del aparato.
Si la Reception es insuficiente, cambie la posicón de la antenna flexible 29. Fije la antenna flexible 29 si es Neededo con cinta adhesiva.
Para la recepción de emisoras AM, el aparato está equipado con una antenna de ferrito. Si la recepción AM es insufiente, gire el aparato a una posición más adecuada.
Paraactivarlafunciendaredadio,pongaelinterruptordefuncion en la posición"RADIO".
Selección ahora con el interruptor de banda de radio ② la banda de Frequencias deseada, FM o AM,dependiendo de la banda en la que紊 see oir las emisoras. Si el interruptor está en la posición FM ST.,el aparato reproducirá solo emisoras FM,que emitan su programa en estéreo.
Con laapia del regulator TUNING 3, seleccione ahora la emisora. Gire para ello el regulador en sentido horario para selectionaruna emisora conuna Frequencia de emision menor a laactualmente mostrada en la pantalla 16.
Gire el regulador TUNING 3 en sentido antihorario para seleccionar una emisora con una fecuencia de emisión mayor a laactualmente mostrada en la pantalla 16.
Cuando el aparato recibe emisiones FM en estereo, se ilumina el indicator "FM.ST" 14.
Si la Reception estéreo no fuese nítida, ponga el interruptor de banda de radio en la posición FM MO y cambie a Mono.
Manejo del reproductor de CD
El aparato reproduce CDs de audio (CD-A) y CDs de MP3. Se soportan tanto los CDs estampados, como los CDs virgenes "quemados" en el ordinador con el formatting CD-R y CD-RW. Debido a losVRTestips de CDs virgenes, tips de ordinadores, sistemas operativos, programas y procesos de grabacion, no peux garantizar que todos los discos grabados se pueda reproducircorrectamente.
Introducir un CD
Ponga el interruptor de referencia 1 en la posicion CD/MP3.
ParaAbrir la bandeja del CD 5, levante con cuidado la tapa a la izquierda del punto identificado con OPEN/CLOSE.
Coloque el CD con la parte impresa hacía arriba sobre el eje del Plato del CD en la bandeja del CD ⑤.
Presione el CD ligeramente sobre el eje, hasta que encaje con firmeza sobre el.
Para cerrar la bandeja del CD ⑤, bajo la tapa con cuidado con la mano.
Ahora el aparato leera el CD. A continuacion comenzara la reproduccion de la prima pista. La pantalla 16 le做不到 a la derecha, bajo a la hora, el numero de la pista que se reproduceactualmente, asi como el symbolo de reproduction
Pausar/continuar la reproduccion
Pulse durante la reproduccion la tecla II 1 en el aparato o la tecla PLAY/PAUSE en el mando a distancia para paugar la reproduccion. Con la reproduccion del CD en pausa, parpadea el symbolo de reproduccion en la pantalla 6.
Para reanudar la reproduccion, pulse de nuevo la tecla II o bien PLAY/PAUSE 37.
Inicio de la reproduccion
Con el disco en pausa o detenido, pulse la tecla II 1 en el aparato o bien la tecla PLAY/PAUSE 37 en el mando a distancia.
Saltar pista hacía delante y hacía atrás
Para reproducir lasuma pista de un CD, pulse la tecla F.FWD en el aparato o bien la tecla F.FWD en el mando a distancia.
Para volver a起初ar la reproduccion de la pista de un CD que acaba de sonar, pulse una vez la tecla REW en el aparato o bien la tecla REW en el mando a distancia.
Para reproducir la pista anterior de un CD, pulse dos vezes consecutivas la tecla REW en el aparato o bien la tecla REW en el mando a distancia.
Búsqueda hacía delante y hacía atrás
Puede activar la búsueda para localizar determinados fragmentos en una pista.
Paraarlo mantenga pulsada durante la reproduccion la tecla F.FWD 已 o bien F.FWD (hacia delante) o la tecla REW 已 o bien REW (hacia atras) hasta alcantar el punto deseado en la pista.
Detencion de la reproduccion
Pulse la tecla STOP en el aparato o bien en el mando a distancia ②.
La pantalla 16 le muestra ahora a la derecha,CTLa hora, lacantidad total de pistas en el CD.
Extracción del CD
ParaAbrir la bandeja del CD 5, levante con cuidado la tapa a la izquierda del punto identificado con OPEN/CLOSE.
Extraiga el CD.
Para cerrar la bandeja del CD ⑤, bajo la tapa con cuidado con la mano.
Activar la función de repetition y reproduccion aleatoria Con la funciona de repetition可以选择 repetir la reproduccion de pistas individuales o de todas las pistas de un CD. Con la funciona de reproduccion aleatoria, las pistas del disco se reproduce enorden aleatorio.
Para repetir unaunda pista, pulse antes o durante la reproduccion la tecla REPEAT en el aparato o bien REP./RAND en el mando a distancia.
La pantalla 16 muestra "REP".
Para repetir todas las pistas de un CD, pulse dos vezes la tecla REPEAT ① en el aparato o bien REP./RAND ④ en el mando a distancia.
La pantalla 16 muestra "ALL REP".
Para repetir las pistas de un CD enorden aleatorio, pulse tres vezes la tecla REPEAT en el aparato o bien REP./RAND en el mando a distancia.
La pantalla 16 muestra "RAND".
Para finalizar la repetition de reproduccion o la reproduccion aleatoria, pulse la tecla REPEAT en el aparato o bien REP./RAND en el mando a distancia, hasta que se apague el indicator REP / ALL / RAND.
Programación delists de reproducción
Usted pueda programar elorden en el que se producirán las pistas de un CD. Paraarlo existen a disposicion 20 posiciones de memoria. La programacionsoleosposible si la reproduccionestadetenida.
Pulse la tecla PROG 6 en el aparato o bien en el mando a distancia 39.
En la pantalla 16 parpadea la posicion de memoria 1 (P0 1) de la pista que se debe reproducir en primer lugar durante la reproduccion programada. Internacional parpadea el indicator PROG en la pantalla 16.
Si no realizaacularmente en el plazo de un minuto, el aparato abandona el modo programa.
Selectione con las teclas REW F.FWD 8/9 en el aparato o bien REW/F.FWD 43/68 en el mando a distancia, la pista deseada para la posicion de memoria我妈. En lugar del indicator de posicion de memoria, la pantalla 16 muestra ahora las pistas disponibles en el CD para su seleccion.
Para memorizar la pista seleccionada, pulse la tecla PROG 6 o bien 9.
Para programar más pistas, repita los pasos anteriores.
Iniciar la suscripción de pistas programada
Si ha programado todas las pistas deseadas, inicia la reproduccion pulsando la tecla II 1 en el aparato o bien PLAY/PAUSE en el mando a distancia.
Si pulsa la tecla STOP en el aparato o bien en el mando a distancia, finalizará la reproducción, si bien el aparato permanecerá en el modo programa.
Si pulsa dos veces la tecla STOP en el aparato o bien en el mando a distancia, bórraré el programa y el aparato abandonará el modo programa.
Tambien borra el programa si usted abre la bandeja del CD ⑤, cambia a另一边 fuente de programa o apaga la microcadena. Entonces el indicator PROGRAM se apagará.
Funciones MP3
"MP3" se refiere a un procedimiento o formatting para la comprisión de datos de audio desarrollado por el Fraunhofer Institut. Las piezas musicales compridas en formatting MP3 oculan una fracción de su時間 original, con lo cual se pueda almacenar mucha más música por exemple en los CD-R/CD-RW que en los CD de audio tradiciones en los que se guardan los datos en formatting CDA. Sin embargo, con ellos no se reduce la calidad del sonido.
Reproducir pistas de MP3
Introduzca un CD con archivos MP3 en la bandeja del CD ⑤.
Ponga el interruptor de referencia ① en la posicion "CD/MP3". Ahora el aparato leera el CD de MP3. A continuacion comenzará la reproduccion de la prima pista. La pantalla ⑥ le做不到 a la derecha, jusqu a la hora, el numero de la pista que se reproduceactualmente, el indicator "MP3", como como el symbolo de reproduccion .
Pausar/continuar la reproduccion
Pulse durante la reproduccion la tecla II 1 en el aparato o la tecla PLAY/PAUSE en el mando a distancia para paasar la reproduccion. Con la reproduccion del CD de MP3 en停下a, parpadea el symbolo de reproduccion en la pantalla 16.
Para reanudar la reproduccion, pulse de nuevo la tecla II o bien PLAY/PAUSE 37.
Inicio de la reproduccion
Con el CD de MP3 en pausa o detenido, pulse la tecla II en el aparato o bien la tecla PLAY/PAUSE en el mando a distancia.
Si el CD de MP3 contiene varias carpetas, proceda de la?siguementeforma:
Para selecciónar una carpeta antes del inizio de la reproducción, pulse varias vezes si es Neededo la tecla FOLDER UP en el aparato o en el mando a distancia 40.
En la pantalla se做不到arán los númeroos de carpetas, a su izquierda pueda ver el indicator "ALB" (= album). El aparato trata el directorio raíz como carpeta "001".
Pulse en un plano de aprox. 3segundos la tecla II 1 en el aparato o bien PLAY/PAUSE en el mando a distancia, para起初ar la reproduccion con los ARCHivos de esta carpeta. Una vez transcurrido el tiempo, la pantalla decidecular a la indicacion de la cantidad total de pistas. Tras la reproduccion de los archivos de esta carpeta, el aparato cambiará a lasuma carpeta enorden alfabetico.
Pulse una vez la tecla FOLDER UP en el aparato o en el mando a distancia, de modo que parpadee durante aprox. 3segundos la indicacion del numero de carpeta actual.
Pulse durante la reproduccion repetidamente la tecla FOLDER UP en el aparato o en el mando a distancia, de modo que cambie la reproduccion inmediamente a la primera pista de la carpeta seleccionada.
Detencion de la reproduccion
Pulse la tecla STOP en el aparato o bien en el mando a distancia.
La pantalla 16 le muestra ahora a la derecha,+junto a la hora, lacantidad total de pistas en el CD de MP3.
Saltar pista hacía delante y hacía atrás
Para reproducir lasuma pista de un CD de MP3, pulse la tecla F.FWD en el aparato o bien la tecla F.FWD en el mando a distancia.
Para volver a起初ar la reproduccion de la pista de un CD de MP3 que acaba de sonar, pulse una vez la tecla REW 山 en el aparato o bien la tecla REW en el mando a distancia.
Para reproducir la pista anterior de un CD, pulse dos vezes consecutivas la tecla REW en el aparato o bien la tecla REW en el mando a distancia.
Búsqueda hacía delante y hacía atrás
Puede activar la búsqueda, para localizar determinados fragmentos en una pista MP3.
Paraarlo mantenga pulsada durante la reproduccion la tecla F.FWD o bien F.FWD (hacia delante) o la tecla REW o bien REW (hacia atras) hasta alcantar el punto deseado en la pista.
Programación de listas de reproducción
Usted pueda programar elorden en el que se reproduciran las pistas de un CD. Paraarlo exista disposicion 20 posiciones de memoria. La programacion solo es possible si la reproduccion está detenida.
Pulse la tecla PROG 6 en el aparato o bien en el mando a distancia 39.
En la pantalla 16 parpadea la posicion de memoria 1 (P0 1) de la pista que se debe reproducir en primer lugar durante la reproduccion programada. Internacional parpadea el indicator PROG en la pantalla 16.
Si no realizaaculars en el plazo de un minuto, el aparato abandonana el modo programa.
Selección con las teclas REW F.FWD en el aparato o bien REW/F.FWD en el mando a distancia, la pista deseada para la posición de memoriahoastrada.
En lugar del indicator de posicion de memoria, la pantalla
muestra ahora las pistas disponibles en el CD para su
seclusion.
Para poder acceder a pistas ubicadas en othera carpeta en el CD de MP3, pulse la tecla FOLDER UP en el aparato o bien en el mando a distancia 40, hasta que se muestre en la pantalla 16 el numero de carpeta deseado.
Pulse la tecla PROG ⑥ o bien 39 para confirmar la seleccion de la carpeta. A continuacion seleccione la pista deseada en la carpeta.
Para memorizar la pista seleccionada, pulse la tecla PROG 6 o bien 39.
Para programar más pistas, repita los pasos anteriores.
Iniciar la suscesión de pistas programada
Si ha programado todas las pistas deseadas, inicia la reproduccion pulsando la tecla II 1 en el aparato o bien PLAY/PAUSE 37 en el mando a distancia.
Si pulsa la tecla STOP en el aparato o bien en el mando a distancia, finalizará la reproducción, si bien el aparato permanecerá en el modo programa.
Si pulsa dos veces la tecla STOP en el aparato o bien en el mando a distancia, borrará el programa y el aparato abandonará el modo programa.
Tambien borra el programa si usted abre la bandeja del CD ⑤, cambia a另一边 fuente de programa o apaga la microcadena. Entonces el indicator PROGRAM se apagará.
Activar la funciona de repetition y reproduccion aleatoria de MP3
Con la funciona de repetition你可以 repetir la reproduccion de pistas MP3 individuales, el contenido de una carpeta o todas las pistas de un CD de MP3. Con la funciona de reproduccion aleatoria, las pistas del disco se reproduce enorden aleatorio.
Para repetir unaunda pista, pulse antes o durante la reproduccion la tecla REPEAT ±b en el aparato o bien REP./RAND ±b en el mando a distancia.
La pantalla 6 muestra "REP".
Para repetir todas las pistas de una carpeta de un CD de MP3, pulse dos vezes la tecla REPEAT ⑦ en el aparato o bien REP./RAND ④ en el mando a distancia.
La pantalla 6 muestra "REP" y el número de carpeta parpadea.
Selezione con la tecla FOLDER UP en el aparato 12 o bien en el mando a distancia 40 la carpeta deseada.
Alternández con el número de pista, la pantalla 6 muestra el número de la carpeta, desde la queactualmente se realiza la reproduccion (p.ej.F02 como 2^a carpeta enorden alfabetico).
Para repetir todas las pistas de un CD, pulse tres vezes la tecla REPEAT ① en el aparato o bien REP./RAND ④ en el mando a distancia.
La pantalla 16 muestra "ALL REP".
Para repetir las pistas de un CD de MP3 enorden aleatorio, pulse cuando veces la tecla REPEAT ① en el aparato o bien REP./RAND ① en el mando a distancia.
La planta 16 muestra "RAND".
Para finalizar la repetition de reproduccion o la reproduccion aleatoria, pulse la tecla REPEAT 7 en el aparato o bien REP./RAND 41 en el mando a distancia, hasta que se apague el indicator REP / ALL / RAND.
Funcionamento AUX
Puede reproducir a工程技术 del aparato senales de audio deanother dispositivo compatible (reproductor MP3, etc.).
Paraarlo,conecte la salute de audio delOtro dispositivo mediatingune cable con conector jack de 3,5mm (nosuministrado)alconectar hembraAUX24de la microcadena.
Ponga el interruptor de referencia ① en la posicion AUX.
Inicie la reproduccion del other disposito.
Funcionamento del temporizador
Puede hacer que el aparato se encienda o apague automatically a una hora determinada. En primer lugar asegúrese de que la hora está correctamente ajustada.
Encendido automatico
Mantenga pulsada la tecla AL. SET 9, cuando, con la tecla HOUR/MIN 21, introduce las horas y horas de la hora de encendido deseada. Puede pulsar varias vezes la tecla HOUR/MIN 2 o mantenerla pulsada.
A continuación, suele la tecla AL. SET 19. La hora de encendido ha;queado ahora memorizada.
Pulse la tecla AL. ON/OFF 2 para activar el encendido automatico. En la pantalla 16 aparece el símbolo de la campana .
Seleccione con el interruptor de funcion 1 la direccion del aparato que este debe executar al encenderse. Si el aparato debe emitir a la hora indicada tonos de aviso, seleccione "BUZZ".
Ajuste el volumen desrado.
Pulse la tecla POWER para apagar el aparato. El aparato se encendera a la hora indicada.
Si ha seleccionado la referencia de tono de avis, pulse la tecla AL. ON/OFF 2 para desactivar el aparato afterwards del encendido automatico. Si ha seleccionado la referencia de radio o CD, pulse la tecla POWER 2 para desactivar el aparato afterwards del encendido automatico. La hora de encendido permanece memorizada y el aparato volverá a encenderse al día singular.
Para desactivar el encendido automatico, pulse la tecla AL. ON/OFF 2. El的概率 de la campana se apaga.
Apagado automático
Encienda el aparato y seleccione la funciona deseada.
Mantenga pulsada la tecla AL. SET ①,@m间隙as, con la tecla HOUR/MIN ②,introduce las horas yminutes de la hora de apagado眼看ada. Puede pulsar varias vezes la tecla HOUR/MIN ③ omantenerla pulsada.
A continuación, suele la tecla AL. SET 19. La hora de apagado ha quedado ahora memorizada.
Pulse la tecla AL. ON/OFF 2 para activar el apagado automatico. En la pantalla 16 aparece el símbolo de la campana . Para volver a desactivar esta funciona, pulse de nuevo la tecla AL. ON/OFF 2.
El的概率 de la campana se apaga.
El aparato se apagará a la hora indicada.
Mantenga pulsada la tecla AL. SET 9 para que se muestre en la pantalla 15 la hora de encendido o apagadoactualmente programada.
Peligro de muerte por descarga electrica:
- No abra la carcasa del aparato bajo ninguna circunstancia.
No existen elementos de mando dentro. - jNosumerjuncaLoscomponentedesaparatoanagua niotirosliquidos!
- No permitted que ningún liquido penetre en la carcaja.
Limpieza de la carcasa:
Extraiga previamente la clavija de red de la base de enchufe.
Limpie la superficie de la carcasa con un pañoligeramente humedecido. jNo utilise nunca gasolina,disolventa o produits de limpieza que atacan elplástico!
Limpieza del Láser CD
- Limpie periodicamente el láser.
- Para la limpieza del láser utilise un CD de limpiezacomings.
Solutcionar anomalias de funcion
No hayreichión de radio o es mala
Si la Reception am es insuficiente, compruebe si el aparato está bien orientado, o bien, en caso de Reception FM insuficiente, si la antenna FM flexible 29 está estirada y correctamente orientada.
En caso de Reception FM estéreo poco nitida, cambie con el interruptor de banda de radio a Mono (posición FM MO).
El aparato no emite ningún sonido
La clavija del cable de red esta firmamente introducida en la base de enchufe?
ṡHay una clavija introducida en la calidad para auriculares 25? Este provocaria la desconexión de los altavoces.
Evacuación
En ningún caso deben tirar el aparato a la basura domestica. Este producto está sujeto a la directiva europea 2002/96/EC.
Microcadeny altavoces
- Evacue la microcadena o partes de ella por medio de una Empresa de evacuación de residuos autorizada o a工程技术 de las instalaciones de evacuación de residuos municipales.
- Preste atencion a las normas en vigor. En caso de dudas póngase en contacto con su centro de evacuacion.
Pilas/baterías
Las pilas/baterias no peuvent ser desechadas con la basura domestica.
- Las pilas peuvent tener sustancias tóxicas perjudiciales para el medio ambiente. Porarlo, evacue las pilas/baterías de acuerdo con las dispositions oficiales vigentes.
- Cada consumidor está obligado legalmente aentargar las pilas/baterias en un punto de recogida de residuos de su municipio, barrio o en un establecimiento. Con esta obligation se consigue que las pilas / baterías se desechen de forma respetuosa con el medio ambiente.
- Devuelva las pilas/acumuladores en estado descargado.

Evacue todos los materiales de embalaje Respectando el medio ambiente.
Declaración de conformidad CE
Este aparato ha sido comprobado y autorizzato bajo consideración del cumplimiento de los requisitos.baidu y el resto de disponeciones relevantes de la directiva EMC 2004/108/EC y la directiva de baja tensión 2006/95/EC.
Importador
KOMPERNASS GMBH
BURGSTRASSE 21
44867 BOCHUM, GERMANY
www.kompernass.com
Observaciones importantes sobre la garantía
Este aparato tiene 3 años de garantía desde la Fecha de compra. Si a pesar de nuestros altos estandares de calidad encontrar algo'n motivo de queja Respecto a este aparato, le rogamos que se ponga en contacto con nuestra linea directa de asistencia. Si no pueda SOLUTIONNarse Telefonicallye su problema, en este número de téléphone se le dará
- un número de procesamiento (número RMA) como
- una direcciondondeustedpodrámandar el producto para hacer efectiva la garantía.
En caso de enviarnos el producto le rogamos que adjunte una copia del ticket de compra o factura. El aparato debe está bien empaquetado para ser transporte y el número RMA debe estar visible. Los envíos que no vayanacompañados del número RMA no podrán ser procesados.
① Indicación: La prestación de garantía se limita a los fallos de material o de fabricación.
La prestación de garantía no rige para
piezas de desgaste
- daños en piezas delicadas como interruptores o baterías.
Este producto ha sido Diseñado exclusivamente para el uso particular y no para el uso industrial. En caso de Manipulación indefinida e Incorrecta, uso de la fuerza y en caso de abrir el aparato personas extrañas a nuestros centros de asistencia技术水平a autorizados, la garantía pierde su validez.Esta garantía no reduce sus derechos de garantía legales prescritos.
ES Kompernass Service Espana
Tel.: 902/884663
e-mail: support.es@kompernass.com
Uso conforme 10
Volume della fornitura 10
Dati tecnici 10
Avvertenze di sicurezza 10
Installazione dell'apparecchio 11
Elementi di commando 11
12
Uso del telecomando 12
Connessione dei componenti 12
Accensione e spegnimento dell'apparecchio 12
Impostazione dell'ora 12
Selezione della sorgente di programma 12
Impostazione del volume 12
Uso delle cuffie 12
Comandi della radio 12
Comandi dell'unità CD 13
Funzioni MP3 14
Modalità AUX 15
Modalità Timer 15
Pulizia e cura 16
Eliminazione dei malfunzionamenti 16
Smaltimento 16
Conformità CE 16
Importatore 16
16
Leggere attendamente le istruzioni per l'uso prima del primo utilizzato e conservare per il successivo impiego. In caso di cessione dell'apparecchio a terzi, consegnare ancche le istruzioni per l'uso.
Uso conforme
Il presente microimpianto stereo è destinato esclusivamente alla riproduzione di CD audio, CD MP3, CD-R, CD-RW e per la ricezione di programmi radiofonici. Il microimpianto stereo non è previsto per l'uso in ambienti commerciali o industriali. Non si assume alcuna responsabilità per i dati derivanti da un uso non conforme dell'apparecchio!
Volume della fornitura
1 microimpianto stereo
2 altoparlanti
1 telecomando (incl. 2 pile)
1 manuale di istruzioni per l'uso
Dati tecnici
| Tensione nominale: | 230 V~, 50 Hz |
| Potenza assorbita: | |
| In standby: | 3 Watt |
| In funzione: | 14 Watt |
| Gamma di frequence radio: | Onde medie (AM): 526,5 - 1606,5 kHz VHF (FM): 87,5 - 108 MHz |
| Dimensioni (L x P x A) | |
| Apparecchio principale: | 25 x 18 x 6,2 cm |
| Ogni altoparlante: | 11 x 18 x 6,2 cm |
| Peso | |
| Apparecchio principale: | ca. 1008 g |
| Ogni altoparlante: | ca. 280 g |
| Potenza di uscita: | 2 x 1,2 Watt RMS |
| Ingresso AUX: | spinotto jack da 3,5 mm |
| Uscita cuffie: | spinotto jack da 3,5 mm |
| Tensione massima in uscita dall'uscita cuffie: | 60 mV |
| Laser CD: | Laser di classe 1 |
| Temperatura di esercizio: | 5° - 40° C |
| Temperatura di conservazione: | -20° - 60°C |
| Classe di protezione: | Il ☑ |
| Pile: | |
| Telecomando: | 2x 1,5 V, (tippo AAA, LRO3) micro |
| Mantenimento della memoria: | 2 x 1,5 V, (tipo AA, LR6) mignon |
Le caratteristiche tecniche dell'apparecchio consentono un Campo di frequenze regolabili da MW (AM) 525-1635 kHz, o FM (onde ultracorte) 87,2-108,6 MHz. A seconda delle nazioni potrebbero esistere regolamenti differenti in relazione ai campi di frequenza radiofonici attribuiti. Ricordare che è vietato utilizzato, inoltrare a terzi o abusare delle informazioni ottentate al di fuori delle frequenze radiofoniche assegnate.
Avverenze di sicurezza
- Non lasciare gli elettrodomestici incustoditi in presenza di bambini, i quali non sempre sono in grado di valutare i possibili rischi di lesioni a essere collegati.
- Per evitare un'accensione indesiderata, staccare la presa alla spina dopo agli uso e prima di agli operazione di pulizia.
- Controllare che l'apparecchio e tutte le sue parti non presentino danni visibili. La sicurezza dell'apparecchio è garantita solo in concomitanza alla sua totale integrità.

Pericolo di esplosione!
Non gettarelepilenelfuoco.
Non ricaricare le pile.
- Non aprire, saldare o sciogliere le pile. Pericolo di esplosione e lesioni!
- Controllare regolarmente le pile. Le pile deteriorate posso n o danneggiare il telecomando o l'apparechio.
- Se non si utilizza l'apparecchio per lungo tempo, rimuovere le pile.
- In caso di fuoriuscita di acidi dalle pile, indossare quanti protettivi e ripulire il vano pile e i contatti delle pile con un panno asciutto.

Pericolo di scossa elettrica!
- Collegare l'apparecchio a una presa di rete con tensione di 230V /50Hz
Non utilizzato l'apparecchio in presenza di danni al cavo di connessiono o alla spina di rete. - Fare immediatamente riparare o sostituire dal servizio di assistenza i cavi o gli appearechi non perfettamente funzionanti o danneggiati.
Non immergere mai l'apparecchio in acqua. Ripulirlo simplicamente con un panno leggermente inumidito. - Non esporre l'apparecchio alla pioggia e non utilizzato in ambienti umidi o bagnati.
- Impedire che il cavo di connessione alla rete elettrica si bagni o inumidisca durante l'uso.
- Non è consentito aprire o riparare l'alloggiamento dell'apparecchio. All'interno dell'apparecchio è presente un'emissione invisibile di raggi laser ( „laser di classe 1“). Inoltre, in tal caso la sicurezza non è garantita e la garanzia decade.
Non collocare oggetti pieni di liquidi, come ad es. vasi, su o accanto all'apparecchio. - Avviso relativo alla disconnessione elettrica Per scollegare completamente l'apparecchio alla rete elettrica, è necessario staccare la spina alla presa. Collocare pertanto l'apparecchio in modo che sua garantito un accesso libero alla presa di rete in qualsiasi momento, per poter staccare la spina immediatamente in caso di emergenza. Per escludere il pericolo di incendio, staccare la spina alla presa in caso di prolongato inutilizzo dell'apparecchio, ad esempio durante le vacanze.
- Afferrare il cavo di rete sempre dalla spina. Non tirare mai dal cavo e non toccare mai il cavo con le mani umide, poiché ciò potrebbe dare luogo a cortocircuito o scossa elettrica. Non collocare l'apparecchio, mobili o altri oggetti sul cavo di rete e impedirne lo schiacciamento. Non annodare il cavo di rete e non collegarlo ad altri cavi. Collocare il cavo di rete in modo tale che non sia di intralcio. Un cavo di rete danneggiato può provocare un incendio o una scosa elettrica. Controllare periodicamente l'integrità del cavo di rete. In presenza di dati, rivolgersi al centro di assistenza autorizzato più vicino o al rivenditore, per fare sostituire il cavo.

Pericolo d'incendio!
- Non utilizzato l'apparecchio nelle vicinanze di superfici surriscaldate.
-
Non esporre l'apparecchio all'irradiazione solare diretta o a sorgenti di illuminazione artificiale intensa. In caso contrario,esso potrebbe surriscaldarsi e danneggiarsi irreparabilmente.
Non lasciare mai l'apparecchio incustodito durante l'uso. -
Non coprir mai le aperture di aerazione dell'apparecchio acceso.
- Non collocare fiamme libere, come ad es. candele, sull'apparecchio.
- Prima di una tempesta e/o temporale con pericolò di fulmini, staccare l'apparecchio alla rete elettrica.
Pericolo di lesions!
- Tenere i bambini lontano dal cavo di connessione e dall'apparecchio. I bambini spesso sottovalutano i rischi collegati all'uso di apparecchi elettrici.
- Provedere a un posizionamento stabile dell'apparecchio.
- Se l'apparecchio avesse subito cadute o danni, non dev'essere piùMESSO in funzione. L'apparecchio dev'essere sopposto a controllo da parte di personale specializzato e all'occorrenza riparato.
- Impedire ai bambini di entrare in possesso dellepile. I bambini potrebbero mettere in bocca lepile e ingoiarle. In caso di ingestione di una pila, consultare immediata-mente un medico.
- Questo prodotto non è indicato per l'uso da parte di persona (inclusi bambini) con limitate capacità fisiche, sensoriali o mentali o prive dell'esperienza e/o della conoscenza necessaria, a meno che tali persone non vengano sorvegliate da un responsable per la sicurezza o abbiano ricevuto indicatori sull'impiego dell'apparecchio. Sorvegliare i bambini per assicurarsi che non giochino con l'apparecchio.
Pericolo di lesioni oculari!
- L'apparecchio è provvisto di un "laser di classe 1". Non aprire mai l'apparecchio e non tentare mai di ripararlo. Il raggio laser invisibile potrebbe provocare danni alla vista.
Attenzione!
Indicazioni sulle tensioni a impulsi (EFT / transitori elettrici veloci) e scariche elettrostatiche:
in caso di malfunzionamento a causa di transitori elettrici (tensione d'urto) o scariche elettrostatiche, il prodotto devesserere impostato (se possibile, staccare la spina alla presa di rete e ricollegarla), per ripristinarne il normale funzionamento.
Avvertenza: un caso di scarica elettrostatica si manifesta quando si cammina con scarpe con suole sintetiche su un tappeto in fibra sintetica. L'attrito fra la sua e il tappeto crea una carica elettrostatica nel corpo, che si scarica non appena si viene in contatto con un oggetto conduittivo elettricamente, come ad es. la maniglia di una porta o la carrozzeria di un'automobile. In tal caso è sufficiente ante avvincarsi a una distance di pochi centimetri dall'oggetto conduittivo. Perché la scarica si manifesti non è necessario un contatto diretto. La carica può scaricarsiancheattraverso un arco voltaico. La scarica quando è possibileancheattraverso parti di alloggiamento in plastica.
Installazione dell'apparecchio
Prelevare il microimpianto stereo e gli accessori alla confezione.
Rimuovere tutti i materiali di protezione per il trasporto, i nastri adesivi e le pellicole.
Collocare il microimpianto stereo su una superficie piana e orizzontale. A tale scopo, aprire il dispositivo di appoggio situato sul retro dell'apparecchio e degli altoparlanti. Posizione are il microimpianto stereo in modo tale da consentire la completeness per la sportello del vano CD 5.
Posizione are gli altoparlanti a destra e a sinistra del microimpianto stereo.
Gli altoparlanti 3 possono essere ancche fissati all'apparecchio. Estrarre completamente (ca. 3,5mm ) i supporti degli altoparlanti a destra e a sinistra dell'apparecchio principale e spingere l'altoparlante destro e sinistro con le relative guide sul rispettovso supporto 4, fino a collegare il lato inferiore dell'altoparlante e dell'apparecchio principale.
In alternatively è possible fissare l'apparecchio principale e/o gli altoparlanti a una parete, tramite i dispositivi di sospensione 23 presenti sul retro. I distanziatori 34 posti sul retro degli altoparlanti provvedono alla loro stabilità.
Elementi di lavoro
Sull'apparechio:
1 Interrupttore di funzione
FM ST-FM MO-AM-Selettore di banda radio
3 Manopola TUNING - sintonizzazione dell'emittente
Supporti altoparlanti
Vano CD
PROG -per memorizzare programmi CD
REPEAT -per attivare la funzione di ripetizione e la riproduzione casuale
REW -per saltare brani sul CD a ritroso
9 F.FWD - per saltare brani su CD in avanti
STOP -perarrestarela riproduzione CD
1 Ⅱ
12 FOLDER UP
B REMOTE SENSOR
14 FM.ST
15 POWER
16 Display
17 VOL+
18 VOL-
19 AL. SET
POWERS
2 HOUR/MIN
AL.ON/OFF
23 TIME SET
24 AUX
25
SPR
SPL
28Occhiello di sospensione per il montaggio a parete
Antenna lineare FM (onde ultracorte)
30 Cavo di rete
Vano pile (mantenimento memoria)
Supporto apparecchio
33 Altoparlanti
Diatanziatori per il montaggio a parete
Cavo altoparlante
Guide per il supporto altoparlanti
Sul telecomando:
37 PLAY/PAUSE - avvio/arresto della riproduzione CD
F.FWD -per saltareibrani su CD in avanti
PROG -per memorizzare i programmi CD
40 FOLDER UP - per selezionare la cartella in modalità MP3-CD
REP./RAND
-per attivare la funzione di ripetizione e la riproduzione casuale
STOP
- per arrestare la riproduzione CD
4 REW
- per saltare i brani su CD a ritroso
44 Vano pile (retro)
Inserimento dellepile
Il microimpianto può essere provvisto di 2 pile da 1,5V tipo AA per consentire il mantenimento dell'orario e delle informazioni di timer salvate in caso di interruzione di corrente. Il telecomando necessita di 2 pile da 1,5V tipo AAA.
Le pile per il mantenimento dei dati in caso di interruzione di corrente non sono incluse nella fornitura.
Aprire il vano pile sul retro dell'apparecchio 3 e quello sul retro del telecomando 44.
Inserire le pile rispettando la giusta polarità, casi come indica tata nei vani pile.
Richiudere accuramente i rispetti coperchi dei vani pile, fino all'insertimento.
Se l'apparecchio non reagisce più in modo affidabile ai segnali del telecomando, significa che le pile sono scariche. Sostituire con altre pile nuove dello stesso tipo.
Uso del telecomando
Dirigere il telecomando verso l'apparecchio nelle azionano i tasti. Il telecomando funziona a una distanza di ca. 5 m e a un angolo minimo di 60^ dall'apparecchio. Per consentire la trasmissione dei segnali non devono essere presenti oggetti fra l'apparecchio e il telecomando.
Connessione dei componenti
Altoparlanti
Connetterilecavodell'altoparlante destrocon il connettore dell'altoparlante destro,SPR"6sull'apparecchio.
Connette il cavo dell'altoparlante sinistro con il connettore dell'altoparlante sinistro „SP L“ sull'apparechio.
Alimentazione
Connettere la spina di rete del cavo di rete a una presa di rete da 230V /50Hz , installata a norma.
Accensione e spegnimento dell'apparecchio
Per accendere l'apparecchio, spostare l'interruttore di funzione 1 in posizione CD/MP3, RADIO o AUX e premere il tasto POWER 20. Il microimpianto stereo è quindi in funzione e si accende la spia rossa POWER 15 nonché la retroilluminazione blu del display 16.
Per spegnere l'apparecchio, spostare l'interruttore di funzione 1 in posizione BUZZ, oppure premere il tasto POWER 20.
Per scollegare l'apparecchio alla tensione di rete, staccare la spina del cavo di rete 30 alla presa di rete.
Impostazione dell'ora
Tenere premuto il tasto TIME SET 23 perché con i tasti HOUR-/MIN 24 si inserisceono le ore e i minuti correnti. Per
compiere tale operazione, si può tenere premuto il tasto HOUR-/MIN ② oppure lo si può ripetutamente.
Infine, rilasciare nuovamente il tasto TIME SET 23. L'orario è statoosi memorizzato e verrà visualizzato nel display ancche ad appearecchio spento.
Selezione della sorgente di programma
É possibile selezionare fra le seguenti sorgenti di programmi:
- CD/MP3 - riproduzione di CD audio o CD MP3
- RADIO - riproduzione di emittenti radiofoniche
- AUX - riproduzione di un apparecchio connesso a un ingresso AUX 24
A tale scopo, spostare l'interruttore FUNCTION ① nella posizione desiderata.
Impostazione del volume
Per aumento il volume, premere ripetutamente il tasting VOL + o tenerlo premuto quando l'apparecchio non raggiunge il volume desiderato.
Per diminuire il volume, premere ripeturamente il tasto VOL - o tenerlo premuto fino a quando l'apparecchio non raggiunge il volume desiderato.
Uso delle cuffie
All'apparecchio è possibile collegare una cuffia con spinotto jack da 3,5 mm (non inclusa). L'ingresso per la cuffia si trova sul lato sinistro del microimpianto stereo. Una volta collegata la cuffia, gli altoparlanti verranno disattivati e il suono si udrà soloattraverso la cuffia.

ATTENZIONE! L'ascolto di musica con le cuffie per periodi troppo lunghi e ad alto volume più causare danni all'udito!
Comandi della radio
Questo apparecchio riceve i segnali delle emittenti radio sulle bande di frequenza a onde ultracorte (FM) e medie (AM).
Per ottener una buona riscione delle onde ultracorte, svolgere complemente l'antenna lineare sul retro dell'apparecchio.
Se la ricezione è insufficiente, modificare la posizione dell'antenna lineare 29. Fissare eventualmente l'antenna lineare 29 con nastro adesivo.
L'apparecchio dispone di un'antenna incorpora in ferrite per la riscione di emittenti a onde medie. In caso di riscizione insufficiente delle onde medie, ruotare l'apparecchio in una posizione più favorevole.
Per attivare la funzione radio, spostare l'interruttore FUNCTION ① in posizione „RADIO".
Con il selettore di banda radio ② selezionare la banda di frequenza FM o AM desiderata, in base a cui che si desidera ascoltare. Se l'interrottore si trovato in posizione FM ST., l'apparecchio riprodurrà solo le emittenti a once ultracorte che trasmettono programmi in stereo. ③
Selezionare l'emittente con l'ausilio del regolatore TUNING ③. A tale scopo ruotare il regolatore in senso orario, per selezionare l'emittente con una frequenza di trasmissione più bassa di quella appena visualizzata nel display ⑥.
Ruotare il regolatore TUNING in senso antiorario, per selezionare l'emittente con una frequenza di trasmissione più alta di quella appena visualizzata nel display 16.
Quando l'apparecchio riceve programmi FM in stereo, la spia „FM.ST" 14 si accende.
Se la riscione in stereo fosse disturbata, spostare il selettore di banda radio 2 in posizione FM MO, passandoosi alla modalitàmono.
Comandi dell'unità CD
L'apparecchio riproduce CD audio (CD-A) e CD MP3. Vengono supportati i formati dei CD-R e CD-RW stampati e masterizzati con il computer. A causa dell'esistenza di vari tipi di CD, di computer, di sistemi operativi, software e procedimenti di masterizzazione, non è possibile tuttavia garantire la perfetta coproduzione di tutti i dischi "masterizzati".
Instrimento di un CD
Spostare l'interruttre di funzione 1 in posizione CD/MP3.
Per aprire il vano CD ⑤, sollevare cautamente il coperchio a sinistra dal punto contrassegnato con OPEN/CLOSE.
Collocare il CD con il lato stampato rivolto versusl'alto sull'asse del piatto CD nel vano CD 5.
Premere leggermente il CD sull'asse, fino al completo inserti-mentationo nell'asse.
Per chiudere il vano CD ⑤, guidare cautamente il coper-chio con la mano.
L'apparecchio leggerà il CD. Infine comincera la riproduzione del primo brano. Il display ⑥在哪,或者其他 all'orario, il numero del brano correntemente riprodotto,或者其他 simbolo di riproduzione .
Arresto/proseguito della riproduzione
Durante la riproduzione, premere il tasting II ① sull'apparecchio o il tasting PLAY/PAUSE ⑦ sul telecomando, per arrestare la riproduzione. In caso di arresto della riproduzione del CD, nel display ⑥ lampeggia il symbolo di riproduzione .
Per proseguire la riproduzione, premere nuovamente il tasting II 1 o PLAY/PAUSE 37.
Avvio della riproduzione
In caso di disco fermo o arrestato, premere il tasto II 10 sull'apparecchio o il tasto PLAY/PAUSE 37 sul telecomando.
Passaggio a un brano precedente o seguente
Per riproduire il brano successivo di un CD, premere il tasto F.FWD 9 sull'apparecchio o il tasto F.FWD ③ sul telemando.
Per riavviare la riproduzione di un brano appena riprodotto da un CD, premere una volta il tasto REW sull'apparecchio o il tasto REW sul telecomando.
Per riproduire il brano precedente di un CD, premere due volte brevamente di seguito il tasto REW 14 sull'apparecchio o il tasto REW 45 sul telecomando.
Ricerca in avanti e a nitroso
É possible attivare una ricerca per trovare determinati passaggi all'interno di un brano.
Durante la riproduzione tenere premuto il tasto F.FWD o F.FWD (in avanti) o il tasto REW o REW (a ritroso) fino a ottener il passaggio desiderato del brano.
Arresto della riproduzione
Premere il tasto STOP sull'apparecchio overo sul telecomando.
Il display ⑥ alla ora a destra, accanto all'orario, il numero complessivo dei brani sul CD.
Estrazione del CD
Per apriré il vano CD ⑤, sollevare cautamente il coperchio a sinistra dal punto contrassegnato con OPEN/CLOSE.
Prelevare il CD.
Per chiudere il vano CD ⑤, guidare cautamente il coper-chio con la mano.
Attivazione della funzione di ripetizione e di riproduzione casuale
Con la funzione di ripetizione, è possibile riproduire ripetuamente singoli brani o tutti i brani di un CD. Con la funzione di riproduzione casuale, i brani del disco vengono riprodotti in sequenza casuale.
Per riproduire un singolo brano, prima o durante la riproduzione premere il tasto REPEAT ⑦ sull'apparecchio o REP./RAND ⑧ sul telecomando.
ll display 6这其中"REP".
Per ripetere tutti i brani di un CD, premere due volte il tasto REPEAT ① sull'apparecchio overo REP./RAND ④ sul telecomando.
ll display 16 mostra „ALL REP".
Per riproduire i brani di un CD in sequenza casuale, pre-mere tre volte il tasto REPEAT ① sull'apparecchio o REP./RAND ④ sul telecomando.
ll display 16 mostra ,RAND".
Per terminare la riproduzione ripetuta o casuale, premere il tasto REPEAT ⑦ sull'apparecchio ovvero REP./RAND ① sul telecomando, fino a ottenere la scomparsa del messaggio REP/ALL/RAND.
Programmazione della sequenza dei brani
É possibile programmare la sequenza dei brani di un CD da riproduire. Sono a disposizione 20 posizioni di programma. La programmazione è possibile solo a riproduzione ferma.
Premere il tasting PROG ⑥ sull'apparecchio ovvero ⑨ sul telecomando.
Nel display ⑥ lampeggia la posizione di programma 1 (PQ 1) del brano che dev'essere riproduotto per primo. Analogamente, nel display ⑤ lampeggia il messaggio PROG. Se non si effettua alcuna immissione entro un minuto, l'apparecchio esce alla modalità di programmazione.
Con i tasti REW F.FWD sull'apparecchio o REW/F.FWD sul telecomando, selezionare il brano desiderato per la posizione di programma visualizzata. Al除去 mi problanti del CD disponibili per la scelta.
Per memorizzare il brano selezionato, premere il tasto PROG 6 o 39.
Per programmare ulteriori brani, ripetere i passaggi precedentamente descritti.
Avvio della sequenza di brani programmati
Se sono stati programmati tutti i brani desiderati, avviare la
riproduzione, premendo il tasto II ① sull'apparecchio o PLAY/PAUSE ⑦ sul telecomando.
Premendo il tasto STOP 10 sull'apparecchio o 42 sul telegomando, si termina la riproduzione, ma l'apparecchio resta nella modalità di programmazione.
Premendo due volte il tasto STOP ⑩ sull'apparecchio o ⑫ sul telecomando, si cancella il programma e l'apparecchio esce alla modalità di programmazione.
Il programma viene cancellatoanche aprendo lo sportello del CD ⑤ , passando a un'altra sorgente di programmi o spegnendo il microimpianto stereo. In tal caso il messaggio PROG scompare.
Funzioni MP3
"MP3" definisce un procedimento ovvero formato di file dato a punto dal Fraunhofer Institut per la compressione dei dati audio. I brani musicali compressi in formato MP3 conservano solo una frazione delle loro dimensioni originali, casa che permette di salvare una quantità molto maggiore di musica su CD-R/CD-RW di quello sia possibile sui normali CD audio, i cui dati audio sono salvati in formato CDA. Tuttavia, la qualità audio dei file resta quasi completeness intatta.
Riproduzione di brani MP3
Inserire un CD con i file MP3 nel vano CD ⑤.
Spostare l'interruttore di funzione ① in posizione „CD/MP3". L'apparecchio leggerà il CD MP3. Infine comincera la riproduzione del primo brano. Il display ⑥在哪,或者其他 all'orario, il numero del brano currentemente riproduotto, il messaggio „MP3"或者其他 simbolo di riproduzione .
Arresto/prosecuzione della riproduzione
Durante la riproduzione, premere il tastingo II 10 sull'apparecchio o il tastingo PLAY/PAUSE 37 sul telecomando, perarrestare la riproduzione. In caso di arresto della riproduzione del CD MP3, nel display 16 lampeggia il symbolo di riproduzione .
Per proseguire la riproduzione, premere nuovamente il tasto II 1 o PLAY/PAUSE 37.
Avvio della riproduzione
In caso di CD MP3 fermo o arrestato, premere il tasto II ① sull'apparecchio o il tasto PLAY/PAUSE ⑦ sul telecomando.
Se il CD MP3 contiene più cartelle, procedere come segue:
Per selezionare una cartella prima dell'inizio della riproduzione, premere eventualmente più volte il tasto FOLDER UP sull'apparecchio o sul telecomando ①.
Nel display vengono visualizzati i numero delle cartelle, a sinistra viene visualizzato il messaggio „ALB“ (= album). La directory di sistema viene considerata dall'apparecchio come cartella „001".
Premere entro ca. 3 secondi il tasto II sull'apparecchio o il tasto PLAY/PAUSE sul telecomando, per avviare la riproduzione dei file di tale cartella. Trascorso tale periodo di tempo, il display ritorna a visualizzare il numero complessivo dei brani. Dop la riproduzione dei file di tale cartella, l'apparecchio passa alla cartella successiva in ordine alfabetico.
Premendo una volta il tasto FOLDER UP 12 sull'apparecchio o sul telecomando 40, per ca. 3 secondi lampeggerà il messaggio relativo al numero della cartella corrente.
Premendo più volte durante la riproduzione il tasto FOLDER UP sull'apparecchio o sul telecomando, la riproduzione passera istantaneamente al primo brano della cartella selezionata.
Arresto della riproduzione
Premere il tasting STOP sull'apparecchio overo sul telecomando.
Il display ⑥ alla ora a destra, accanto all'orario, il numero complessivo dei brani sul CD MP3.
Passaggio a un brano precedente o seguente
Per riproduire il brano successivo di un CD MP3, premere il tasto F.FWD sull'apparecchio o il tasto F.FWD sul telecomando.
Per riavviare la riproduzione di un brano appena riprodotto da un CD MP3, premere una volta il tasto REW sull'apparecchio o il tasto REW sul telecomando.
Per riproduire il brano precedente di un CD, premere due volte brevamente di seguito il tasto REW ③ sull'apparecchio o il tasto REW ③ sul telecomando.
Ricerca in avanti e a nitroso
É possible attivare una ricerca per trovare determinati passaggi all'interno di un brano MP3.
Durante la riproduzione tenere premuto il tasto F.FWD o F.FWD (in avanti) o il tasto REW o REW (a ritroso) fino a ottenerile passaggio desiderato del brano.
Programmazione della sequenza dei brani
É possibile programmare la sequenza dei brani di un CD da riproduire. Sono a disposizione 20 posizioni di programma. La programmazione è possibile solo a riproduzione ferma.
Premere il tasting PROG ⑥ sull'apparecchio ovvero ⑨ sul telecomando.
Nel display 16 lampeggia la posizione di programma 1 (P0 1) del brano che dev'essere riproduotto per primo. Analogamente, nel display 16 lampeggia il messaggio PROG.
Se non si effettua alcuna immissione entro un minuto, l'apparecchio esce alla modalità di programmazione.
Con i tasti REW F.FWD 8/9 sull'apparecchio o REW/F.FWD 45/88 sul telecomando, selezionare il brano desiderato per la posizione di programma visualizzata. Alippo del messaggio della posizione di programma, il display 16 mystra i brani del CD disponibili per la scelta.
Per accedere ai brani in un'altra cartella del CD MP3, pre-mere il tasto FOLDER UP sull'apparecchio 12 nonché sul telecomando 40, fino a quando il display 16 non migliorare il numero d'ordine desiderato.
Premere il tasto PROG o 39, per confermare la selezione della cartella. Selezionare quando il brano desiderato nella cartella.
Per memorizzare il brano selezionato, premere il tasto PROG 6 o 39.
Per programma ulteriori brani, ripetere i passaggi precedentamente descritti.
Avvio della sequenza di brani programmati
Se sono stati programmati tutti i brani desiderati, avviare la riproduzione, premendo il tasting II sull'apparecchio o PLAY/PAUSE sul telecomando.
Premendo il tasto STOP sull'apparecchio o sul telemando, si termina la riproduzione, ma l'apparecchio resta nella modalità di programmazione.
Premendo due volte il tasto STOP 10 sull'apparecchio o 42 sul telecomando, si cancella il programma e l'apparecchio esce alla modalità di programmazione.
Il programma viene cancellatoancheaprenderlo sportello del CD ⑤ ,passandoa un'altra sorgente di programmi o spegnendo il microimpianto stereo.In tal caso il messaggio PROG scompare.
Attivazione della funzione di ripetizione e di riproduzione casuale MP3
Con la funzione di ripetizione è possibile riproduire ripetuamente singoli brani MP3, il contentuto di una cartella o tutti i brani di un CD MP3. Con la funzione di riproduzione casuale, i brani del disco vengono riprodotti in sequenza casuale.
Per riproduire un singolo brano, prima o durante la riproduzione premere il tasting REPEAT sull'apparecchio o REP./RAND sul telecomando.
II display 16这其中 "REP".
Per ripetere tutti i brani in una cartella del CD MP3, pre-mere due volte il tasto REPEAT ⑦ sull'apparecchio overo REP./RAND ① sul telecomando.
Il display 6 mia ril messaggio „REP" e il numero della cartella lampeggia.
Selezionare la cartella desiderata con il tasto FOLDER UP sull'apparecchio ⑫ nonché sul telecomando ⑩.
In alternatively, con il numero del brano, il display ⑥这其中 il numero della cartella del brano correntemente riprodotto (ad es. F02 come seconda cartella in ordine alfabetico).
Per ripetere tutti i brani di un CD, premere tre volte il tasto REPEAT ① sull'apparecchio ovvero REP./RAND ④ sul tele-comando.
ll display 16 mostra „ALL REP".
Per riproduire i brani di tutte le cartelle di un CD MP3, pre-mere quattro volte il tasto REPEAT ① sull'apparecchio o REP./RAND ④ sul telecomando.
ll display 16 mostra „RAND".
Per terminare la riproduzione ripetuta o casuale, premere il tasto REPEAT ⑦ sull'apparecchio ovvero REP./RAND ④ sul telecomando, fino a ottenere la scomparsa del messaggio REP/ALL/RAND.
Modalità AUX
Tramite l'apparecchio si possono riproduire i segnali audio di un altro apparecchio idoneo (lettore di MP3, ecc.).
Connette a tale scopo l'uscita audio dell'altro apparecchio tramite un cavo con spinotto jack da 3,5 mm (non incluso) alla presa AUX del microimpianto.
Spostare l'interruttore di funzione 1 in posizione AUX.
Avviare la riproduzione dell'altro appearecchio.
Modalità Timer
Si più impostare l'apparecchio per l'accensione e/o lo spegnimento automatico a una data ora. Assicurarsi prima di tutto che l'ora sia stata impostata correttamente sull'apparecchio.
Accensione automatica
Tenere premuto il tasting AL. SET 19, nella con il tasting HOUR-/MIN 2 si inserisce l'orario di accensione desiderato, espetto in ore e minuti. Per compiere tale operazione, si cui tenere premuto il tasting HOUR-/MIN 3 oppure lo si cui preme ripetutamente.
Infine, rilasciare nuovamente il tasto AL. SET 19. L'orario di accensione automatico è stato in tal modo salvato.
Premere il tasto AL.ON/OFF 2, per attivare l'accensione automatica. Nel display 16 comparirà il symbolo della campanella .
Con l'interruttore di funzione ① selezionare la funzione dell'apparecchio desiderata da attivare al momento dell'accensione. Se si desidera udire un segnale acustico all'ora di accensione, selezionare „BUZZ".
Impostare il volume desiderato.
Premere il tasto POWER per spegnere l'apparecchio. L'apparecchio si riaccenderà automaticamente all'orario impostato.
Se si è selezionata la funzione di segnale acustico, preme- re il tasto AL. ON/OFF 2, per disattivare l'apparecchio除去 l'accensione automatica. Se si eras selezionata la funzione radio o CD, premere il tasto POWER 20, per disattivare l'apparecchio除去 l'accensione automatica. L'orario di accensione automatica resta tuttavia memorizzato e l'apparecchio si riaccenderà automaticamente il giorno successivo.
Per disattivare l'accensione automatica, premere il tasto AL. ON/OFF 2. Il simbolo della campanella scompare.
Spegnimento automatico
Accendere l'apparecchio e selezionare la funzione desiderata.
Tenere premuto il tasto AL. SET 19, quando con il tasto HOUR-/MIN 2 si insertisce l'orario di spegnimento desiderato, espetto in ore e minuti. Per compiere tale operazione, si può tenere premuto il tasto HOUR-/MIN 3 oppure lo si può ripetutamente.
Infine, rilasciare nuovamente il tasto AL. SET 19. L'orario di spegnimento automatico è stato in tal modo salvato.
Premere il tasto AL. ON/OFF 2, per attivare lo spegnimento automatico. Nel display 16 comparirà il symbolo della campanella . Per disattivare tale funzione, premere nuovamente il tasto AL. ON/OFF 2. Il symbolo della campanella scompare.
L'apparecchio si spegnerà automaticamente all'orario impostato.
Tenere premuto in qualsiasi momento il tasto AL. SET 19, per visualizzare nel display 15 l'orario correntamente programmato di accensione o spegnimento automatico.
Pericolo di morte a causa di scossa elettrica:
Non apriere mai l'alloggiamo dell'apparecchio. Inesso non è presente alcun elemento di lavoro.
Non immergere mai l'apparecchio in acqua o altri liquidi!
- Impedire la penetrazione di liquidi nell'alloggiamento.
Pulizia dell'alloggiamento:
Staccare prima la spina alla presa di corrente.
Ripulire la superficie dell'alloggiamento con un panno leggermente inumidito. Non utilizzato mai sostanze come benzina, solventi o detergenti che attaccano la plastica!
Pulizia del laser CD
- Pulire periodicamente il laser.
- Per la pulizia del laser, è necessario utilizzato un apposto CD di pulizia disponibile in commercio.
Eliminazione dei malfunzionamenti
Ricezione assente o scarsa
In caso di ricezione insufficiente delle onde medie, controllare che l'apparecchio sia stato orientato in modo ottimale, nella in case di ricezione insufficiente delle onde ultracorte, controllare che l'antenna lineare per le onde ultracorte 念 sua stata svolta e orientata in modo ottimale.
In caso di ricezione in stereo disturbata, con il selettore di banda radio ② passare a mono (posizione FM MO).
L'apparecchio non emette alcun suono
La spina del cavo di rete 8 è stata saldamente inserita nella presa di rete?
Nell'uscita per la cuffia è stato inserto uno spinotto? Ciò disattiverebbe la riproduzione dei suoni tramite gli altoparlanti.
Smaltimento
Non gettare per alcun motivo l'apparecchio in-sieme ai normali rifiuti domestici. Questo prodotto è soggetti alla direttiva europea 2002/96/EC.
Microimpiano stereo e altoparlanti
- Smaltire il microimpianto stereo o parti diesso tramite un'azienda autorizzata di smaltimento o tramite l'ente municipale competente.
- Rispettare le prescrizioni attualmente in vigore. In caso di dubbi mettersi in contatto con l'ente di smaltimento competente.
Pile/accumulatori
- Pile e/o accumulatori non devono essere smaltiti insieme ai rifiuti domestici.
- Le pile possono contentere sostanze tossiche dannose per l'ambiente. Smaltire pertanto le pile/gli accumulatori unicatione in conformità alle leggi vigenti.
- Ogni utente è obbligato per legge a restituire le pile/gli accumulatori a un centro di raccolta comunale, locale o presso il rivenditore. Questo obbligo è finalizzato allo smaltimento ecologico dellepile e/o degli accumulatori.
- Restituire pile / accumulatori solo se completenesse scarichi.
Smaltire tutti i materiali dell'imballaggio in modo ecologicamente conforme.
Conformità CE
Questo appearecchio è stato collaudato e approvato in conformità ai requisiti fondamentali e alle altre norme rilevanti della direttiva EMV 2004/108/EC, nonché della direttiva bassa tensione 2006/95/EC.
Importatore
KOMPERNASS GMBH
BURGSTRASSE 21
44867 BOCHUM, GERMANY
www.kompernass.com
Importanti indicazioni di garanzia
Questo appearecchio è garantito per tre anni a partire nella data di acquisso. Qualora, nonostante i nostri elevati standardi sicurezza, si rilevasse un motivo di reclamo relativo al presente appearecchio, contattare la nostra hotline di assistenza. Qualora fosse impossibile elaborare la pratica di reclamo Telefonically, si riceverà
- un numero di pratica (Numero RMA) nonché
- un indirizzo al quale inviare il prodotto per il disbrigo delle pratiche di garanzia.
In caso di invio del prodotto, è necessario allegare una copia della prova di acquisto (scontrino). L'apparecchio dev'essere imballato in modo idoneo al trasporto, con il numero di RMA direttamente visibile. Gli invii privi di numero RMA non potranno essere elaborati.
Suggerimento: la garanzia copre solo difetti del materiale o di fabbricazione. La garanzia non è valida
per le parti saldate
- per i danni a componenti fragili, ad es. erruttori o accumulatori.
Il prodotto è destinato esclusivamente all'uso domestico e non a quello commerciale. La garanzia decade in caso di impiego improprio o manomissione, uso della forza e interventi non eseguita alla nostra filiale di assistenza autorizzata. I diritti del consumatore garantiti per legge non sono limitati alla presente garanzia.
IT Kompernass Service Italia
Tel.: 199400441 (0,12 EUR/Min.)
e-mail: support.it@kompernass.com
| Utilização correcta | 18 |
| Material fornecido | 18 |
| Dados téncicos | 18 |
| Indicações de segurança | 18 |
| Instalar o aparelho | 19 |
| Elementos de commando | 19 |
| Colocar as pilhas | 20 |
| Manuseamento do telecomando | 20 |
| Ligar os componentes | 20 |
| Ligar e desligar o aparelho | 20 |
| Ajustar as horas | 20 |
| Selección fonte de programa | 20 |
| Ajustar o volume | 20 |
| Utilizar os auscultadores | 20 |
| Funcionamento do rário | 20 |
| Funcionamento do leitor de CD | 21 |
| Funções MP3 | 22 |
| Funcionamento com temporizador | 23 |
| Limpeza e conservação | 24 |
| Eliminar avarias de funciona | 24 |
| Eliminação | 24 |
| Declaração de conformidade CE | 24 |
| Importador | 24 |
| Indicações de garantia importantes | 24 |
Leia atentamente o manual de instruções antes da primarya utilização e guarde-o para consulta futura. Ao entregar o aparecido a terreiros, entrega también o manual.
Utilização correcta
Esta micro-aparelhagem foi concebida exclusivamente para a reproducao de CDs audio, CDs de MP3, CD-R, CD-RW e para a transmissao de emissoras de radio. A micro-aparelhagem nao se destina a uma utilizacao para fins commerciais ou industriais. Não é assumida qualquer garantia por danos resultantes de uma utilizacao Incorrecta do aparelho!
Material fornecido
1 Micro-aparelhagem
2 Colunas
1 Telekomando (incl. 2 pilhas)
1 Manual de instruções
Dados技术和
| Tensão nominal: | 230 V~, 50 Hz |
| Consumo de energia : | |
| em stand-by | 3 watts |
| em funciona | 14 watts |
| Gama de frequências de rádio: | AM: 526,5 - 1606,5 kHzUHF (FM) : 87,5 - 108 MHz |
| Dimensoes (L x A x P) | |
| Aparelho principal: | 25 x 18 x 6,2 cm |
| cada coluna: | 11 x 18 x 6,2 cm |
| PesoAparelho principal: | aprox. 1008 g |
| cada coluna: | aprox. 280 g |
| Potência de saía.: | 2 x 1,2 Watts RMS |
| Entrada AUX: | conectar jack 3,5 mm |
| Saía para auscultadores: | conectar jack 3,5 mm |
| Tensão max. de saía | |
| dos auscultadores: | 60 mV |
| Laser do CD: | laser da classe 1 |
| Temperatura de service: | 5° - 40° C |
| Temperatura de armazenamento: | -20° - 60° C |
| Classe de proteção: | II ☑ |
| Pilhas: | |
| Telecomando: | 2 x 1,5 V, (AAA, LRO3) Micro |
| Função de memória: | 2 x 1,5 V, (AA, LR6) Mignon |
As caracteristicas sociales do aparelho permitem uma gama de frequências ajustavel de AM 525-1635 kHz, ou FM (UHF) 87,2-108,6 MHz. Noutros paises podem existir regulamentosnationais differsente relativamente as gamas de frequência de rádio mentionadas. Tenha em atençao que autilização,transmissao a terreiros ouutilização abusiva das informações recebidas fora da area de frequência de radiodifusão é expressamente proibida.
Indicações de segurarca
- Nunca permita que as crianças manuseiem aparelhos electricos sem vigilência - estas nem sempre tem capacidade para avaliar corretoamente o risco de ferimentos.
- Após cada utilizesçao e antes de cada limpeza, retire a ficha de rede para fazer uma conexão involuntária.
- Verifique o aparelho e todos os seuis componentes quando a danos visiveis. A segurarca do aparelho apenas pode ser garantida se este se encontrar em perfeitas condições.
Perigo de explosão!
- Não coloque as pilhas no fogo.
- Não recarregue as pilhas.
- Nunca abra, nem tente soldar as pilhas. Existe o perigo de explosão e de ferimentos!
- Verifique regularamente as pilhas. As pilhas que aparecem fugas de acido podem provocar danos no telecomando ou no aparecido.
- Caso não pretenda usar o aparecido por um periodo de tempo prolongado, retire as pilhas.
- Em caso de fuga de acido das pilhas, calce luvas de proteção e limpe o compartmento e os contactos das pilhas com um pano seco.
Perigo deCHOqueeléctrico!
- Ligue o aparelho a uma tomada com tensão de rede 230V /50Hz
- Não utilize o aparecido se o cabo de ligação ou a fcha estiverem danificados.
- Os cabos de ligaçao ou apareiros que nao funcionem correctamente ou que tenham sido danificados devem ser reparados ou substituicos apenas pelo service de apoio ao cliente.
- Nunca vergulhe o aparelho em agua. Limpe-o apenas com um pano ligeiramente humedecido.
- Não exponha o aparecido à chuva, nem o utilizes em ambientes humidos ou molhados.
- Certifique-se de que o cabo de ligação não entra em contacto com água ouhumidade durante ofunçamento.
- Não abra, nem, repare a caixa do aparheiro. No interior do aparheiro existe radiação laser invisível (" classe de laser 1"). Além disso, neste caso, a segança não é assegurada e a garantia é anulada.
- Não coloque quando quer objects com他们在ex. jarras, sobre ou nas proximas do aparelho.
- Indicação relativa à desconexão da rede Para desligar totalmente o aparecido da rede elétrica, deve triturar a ficha da tomada. Por isso, coloque o aparecido de modo a que a ficha se encontrar num local de fácilAceso, para que a possa triturar imeditamente da tomada em caso de emergência. Se não pretender utilizear o aparecido durante um longo periodo de tempo, por exemplo durante as ferias, retire a ficha da tomada para fazer perigo de incêndio.
- Secure sempre o cabo alimentação pela ficha. Nunca toque no cabo de alimentação com as mãos molhadas, uma vez que也是如此 pode provocar um curto-circuito ou如何去 escreçar algo. Não coloque o aparecido, mobiliário ou semelhantes sobre o cabo de alimentação, e certifique-se de que este não fica preso. Nunca faça eles no cabo de alimentação, nem o ligue a outras cabos. Disponha o cabo de alimentação de modo queinguém possa tropear nele. Um cabo de alimentação danificado pode provocar um incêndio ou um如何去 escreçar algo. Se esté estiver danificado, entre em contacto com o punto de assistência和技术a autorização mais proximo ou com o commerciente, para que o cabo sera subtituído.

Perigo de incendidio!
- Não utilize o aparecido nas proximidades de superficies quentes.
- Não coloque o aparecido em locais, nos quais fique exposto à radiação solar directa ou a fontes de luz artificial. Caso contrário, este pode sobraquecer e fazer irreparavelmente danificado.
- Nunca deixe o aparelho sem vigilência durante o funciona.
- Nunca cubra as ranhuras de ventilacao do aparelho quando thise se encontra ligado.
- Não coloque quando fontes de incério, como por ex. velas, sobre o aparelho.
- Antes de una tempestade e/ou temporal com risco de trovoada, desligue o aparelho.

Perigo de ferimentos!
- Mantenha as crianças afastadas do cabo de ligaçao e do aparelho. As crianças desconhecem frequently os perigos que os aparelhos electricos representam.
- Certifique-se de que o aparelho está colocado sobre uma base estavel.
- Se o aparelho tiver caido ou estiver danificado, não o coloque novamente em funcaoamento. O aparelho deve ser verificado por um technician especializzato e, caso necessario, reparado.
- Mantenha as pilhas fora do alcance de crianças. Estas podem colocar as pilhas na Boca e engoli-las. Em caso de ingestao de umailha, consulte imeditamente um medico.
- Este aparecido não deve ser realizado por pessoas (incluindo crianças) com capacidades fisicas, sensoriais ou mentalais limitadas ou falta de experiencia e/ou de conhecimiento, a não se que estas seam supervisionadas por uma pessoa responsavel pela sua segurarou que recebam esta instruções acerca do Functionamento do aparecido.
As crianças devem ser supervisionadas, de modo a garantir que não brincam com o aparelho.

Perigo de lesões oculares!
- O aparelho possui um "laser de classe 1". Nunca abra, nem tente reparar o aparelho. O raio laser invisível pode provocar lesões oculeares.

Cuidado!
Indicação sobre tensões de disruptions (EFT / transitorió electrolyico rápido) e descargas electrostáticas:
No caso de uma anomalia provocada por umprocesso transitório eletrico rápido (tensão de disruptions) ou descargas electrostáticas, as configurações originais do produits devem ser repostas (possivelmente sera necessário desligá-lo da corrente e voltar a ligá-lo), de forma a garantir novamente um funciona normal.
Nota: Uma descarga electrostatica ocorrê quando uma Pessoa se encontra calcada com sapatos de sola sintética, sobre um chão alcatifado ou um tapete que contenha partes em material sintétrico. Atrasçá da fricção da sola dos sapatos com o chão alcatifado/tapete, é criada uma carga no corpo que é descarregada assim que um objecto conductor eletrico for captado, como por ex. a maçaneta de uma porta ou a carroçaria de um automóvel. É suficiente uma aproximação de poucos centímetros ao objecto conductor. Como tal, não é necessário um contacto direto para que ocorrê uma descarga. A descarga pode也是非常 ser provocada por um arco voltaico.Esta forma, é igualmente possível uma descarga atraves das peças da estrutura em plástico.
Instalar o aparelho
Retire a micro-aparelhagem e os acessórios da embalagem.
Retire todas as proteções de transporte epeléculas/fitas adesivas.
Coloque a micro-aparelhagem sobre uma superficie plana e horizontal. Para tal, abra os dispositivos de bloqueio na parte traseira do aparelho principal e das colunas. Instale a micro-aparelhagem de forma a que sera possivel Abrir completeness a tampa do compartmento do CD 5.
Coloque as colunas do lado direito e esquerdo da microaparelhagem.
Tentamb podefixar as colunas ③ ao aparelho. Para tal, extraia as fixacoes das colunas 4 do lado direito e esquerdo no aparelho principal (aprox.3,5mm),e encaixe a coluna direita e esquerda nas calhas de guia 3 do respective suporte 4, até as partes inferiores da coluna e do aparelho principal ficarem unidas.
Em alternativa, pode fixar o aparelho principal e/ou as colunas a uma parede, atraves dos dispositivos de fixação 28 existentes nas partes Trudeauiras. O espaçador 34 na parte Trudeauira das colunas proporciona a estabilità de pretendia.
Elementos de commando
No aparelho:
1 In
FM ST - FM MO - AM - interruptor da frequência de rádio
Sintonizador
TUNING
- sintonizador de emissoras
Fixacoes das colunas
5 Compartimento do CD
6 PROG
- memorizar sequencias de faixas de CD
7 REPEAT
-activa a funcao de repeticao e reproducao aleatoria
REW
- retroceder faixa de CD
F.FWD
- avançar faixa de CD
STOP
- terminar a reproducao de CD
11
- iniciar/parar a reproducao de CD
12 FOLDER UP
- seleccionar pasta em funciona com CD de MP3
REMOTE SENSOR
- sensor de infravermelhos para os sinais do telecomando
14 FM.ST
- indentação estéreo UHF
15 POWER
- indentação de functiOnamento
16 Visor
VOL +
- augmentar o volume
13 VOL-
- reduzir o volume
19 AL. SET
- para a introdução e indicatoro dortempo de liação/desactivação
20 POWER
- interruptor para ligar/desligar
2 HOUR/MIN
- botões para introduzir a hora
2 AL. ON/OFF
-activa a ligaçao/desactivacao autom.
2 TIME SET
- para introduzir a hora
24 AUX
- entrada da ligação de aparelhos audio
25
-作为一种para auscultadores
26 SPR
- ligação da coluna "direita"
SPL
- ligação da coluna "esquerda"
Orificios para montagem na parede
Antena de fio FM (UHF)
30 Cabo de rede
31 Compartimento das pilhas (para função de memória)
Suporte do aparelho
Coluna
34 Separador para montagem na parede
Cabo da coluna
36 Calha de guia para o suporte da coluna
No telecomando:
7 PLAY/PAUSE - iniciar/pausar a reproducao de CD
F.FWD -avancar faixa de CD
PROG -para memorizar sequencias de faixas de CD
FOLDER UP -para seleccionar una pasta emfuncionamento com CD de MP3
REP./RAND -activafuncao de repeticaoereproducao aleatoria
STOP -terminar a reproducao de CD
REW - retroceder faixa de CD
44 Compartimento das pilhas ( parte traseira)
Colocar as pilhas
Pode colocar as 2 pilhas de 1,5 V, tipo AA na micro-aparelhagem, para que, no caso de uma falha de corrente, as informacoes da hora e do temporizador não sejam perdidas. O telecomando necessita de 2 pilhas de 1,5 V, tipo AAA.
As pilhas para a funcao de memorizacao de dados em caso de falha de corrente nao está incluidas no material fornecido.
Abra os compartmentos das pilhas na parte traseira do aparelho e na parte traseira do telecomando.
Coloque as pilhas tendo em atençao a polaridade indicada nos compartments das pilhas.
Volte a fechar cuidadosamente a respective tampa do compartmento das pilhas, até esta encaixar.
Caso o aparelho deixe de reagir aos sinais do telecomando, isto significa que as pilha está gastas. Substitua a pilha por uma nova do mesmo tipo.
Manuseamento do telecomando
Direcctiono o telecomando para o aparelho, ao premir os botoes. O telecomando funcaiona a um distancia de aprox. 5 m e num angulo de, pelo menos, 60^ em relaço ao aparelho. Para garantir a transferencia dos sinais, não pode encontrar-se quaisquer objectos entre o aparelho e o telecomando.
Ligar os componentes
Colunas
Ligue o cabo da coluna direita à ligação da coluna direita "SP R" no aparecido.
Ligue o cabo da coluna esquerda à ligação da coluna esquerda "SP L" no aparelho.
Alimentação de tensão
Ligue a ficha do cabo de rede 30 a uma tomada de 230V /50Hz correctamente instalada.
Ligar e desligar o aparelho
Para ligar o aparelho, colocque o interruptor de funcao 1 na posicao CD/MP3, RADIO ou AUX e prima o botao POWER 20. A micro-aparelhagem está agora em funcionamento, e o indicator POWER vermelho 15, bem como a iluminação de fundo azul do visor 16 acendem.
Para desligar o aparelho, colocque o interruptor de funcao 1 na posicao BUZZ, ou prima o botao POWER.
Para desligar o aparelho da corrente, retire a ficha do cabo de rede da tomada.
Ajustar as horas
Mantenha o botão TIME SET ② premido, quando introduz os minutos e a hora actuais com os botões HOUR/MIN ①. Para tal, pode premir repetidamente o botão HOUR/MIN ①, ou mantê-lo premido.
De seguida, solte o botão TIME SET 2. A hora é memor-rizada e está aparecido no visor quando o aparelho estiver desligado.
Seleccionar fonte de programa
Pode seleccionar entre as seguiñes fontes de programa:
- CD/MP3 - reprodução de CDs录音 ou CDs de MP3
- RADIO - reprodução de emissoras de rádio
- AUX - reprodução de um aparinho ligado ao aparheiro atraves da entrada AUX 24
Para tal,coloque o interruptor FUNCTION 1 na posicao pretendida.
Ajustar o volume
Paraacularo volume, prima repetidamente o botao VOL + 17, ou mantenha-o premido até que o aparecido alcance o volume pretendido.
Para reduzir o volume, prima repetidamente o botão VOL - 18 ou mantenha-o premido até o aparecido alcancar o volume pretendido.
Utilizar os auscultadores
Pode ligar à micro-aparelhagem uns auscultadores com conector jack de 3,5mm (não incluído). A tomada para os auscultadores @25 encontrar-se no lugar esquerdo da microaparelhagem. quando os auscultadores estiverem connectados, as colunas desligam-se e são possível ouvir o som atraves dos auscultadores.

Atença! Ouvir música com auscultadores durante um longo periodo de tempo e com o volume máximo pode provocar lesões auditivas!
Funcimiento do rádio
Este aparecido capta emissoras de rádio nas bandas de frequência Onda ultra-curta (UHF ou em ingês FM) e onda media (em ingês AM).
De forma a obter uma boa receção UHF,(desenrole completeness a antenna de fio da parte traseira do aparelho.
Caso a recepçao sera insufficiente, altere a posicao da antenna de fio 29. Se necessario, fixe a antenna de fio 29 com fita adesiva.
Para a captação de emissoras AM, o aparelho possui uma antenna de ferrite integra. Se a recepçao AM for insufficiente, mova o aparelho, orientando-o de forma mais favoravel a recepçao.
Para fazer a funcao de rado, colocque o interruptor de funcao 1 na posicao "RADIO".
Com o interruptor de banda de rádio 2 Seleção a banda de frequência FM ou AM pretendida, de acordo com a qual pretende ouvir emissoras. Se o interruptor se encontrar na posão FM ST., o aparelho apenas capta emissoras FM (UHF) que transmits os seu programas noprogramming estéreo.
SeLECTIONA emissora com o sintonizador TUNING 3. Para tal, rode o sintonizador no sentido dos ponteiros do relógio, a fim de selecionar emissoras com uma frequência superior à da emissora actualmente aparecada no visor 16.
Rode o sintonizador TUNING 3 no sentido oposto ao dos ponteiros do relógio, a fim de selecciónar emissorasURTCA.
cuja frequência sera inferior à da emissora actualmentepresentada no visor.
Se o aparelho receiveber emissoras na banda UHF, o indicator "FM.ST" 14 acende.
Em caso de interferências na receção estéreo, colocque o interruptor da banda de rádio 2 na posicao FM MO e mude para o modo mono.
Funcionamento do leitor de CD
O aparelho reproducz CDs录音 (CD-A) e CDs de MP3. Temém le CDs comprimidos e CDs gravados no PC, com os formatos CD-R e CD-RW. Devido à grande variedade de CD virgens, temas de computadores, sistemas operativos, softwares e procedimentos de gravação, não podemos, contudo, garantir que todos os discos gravados sejam reproduzidos correctamente.
Inserir um CD
Coloque o interruptor de funcao 1 na posicao CD/MP3.
ParaAbrir o compartmento do CD 5, levante cuidadosamente a tampa no lado esquerdo, a partir do local assinalado por OPEN/CLOSE.
Insira o CD no组成部分, com a parte impressa voltada para cima, no eixo do prato do CD ⑤.
Pressione ligeiramente o CD sobre o eixo, até encaixar bem.
Para fechar o compartmento do CD ⑤ colocque a tampa manualmente, procedendo com prudência.
O aparelho inicia ahora a leitura do CD. De seguida, a primeira faixa é reproduzida. O visor é indica o número da faixa que está a ser reproduzida, bem como o símbolo de reprodução.
no lado direito, muito à指示ação da hora.
Interromper/continuar reproducao
Durante a reproducao, prima o botao II 1 no aparelho, ou o botao PLAY/PAUSE 37 no telecomando, a fim de paugar a reproducao. Se a reproducao do CD tiver sido interrompida, o sintolo de reproducao pisca no visor 16.
Para Continuing a reproducao, prima novamente o botao II ou PLAY/PAUSE 7.
Iniciar a reproducao
→ Prima o botão > II ① no aparecido ou o botão PLAY/PAUSE ③7 no telegramando, se o disco estiver pausado ou parado.
Avanca re retroceder faixas
Para reproduzir a faixa segunte do CD, prima o botão F.FWD no aparecido, ou o botão F.FWD no telecomando.
Para,iniciar novamente a reproducao da faixa que está a ser reproduzida, prima uma vez o botao REW no aparelho, ou o botao REW no telecomando.
Para reproducir a faixa anterior do CD, prima das vezes, brevamente, o botão REW no aparecido, ou o botão REW no telecomando.
Avançare retroceder na mesma faixa
Pode activar um avanço ou retroprocesso na mesma faixa, a fim de procurar determinadas passagens dentro de uma faixa.
Para tal, mantenha premido o botão F.FWD ou F.FWD (avancar) ou o botão REW ou REW (retroceder) durante a reprodução, ante que seja alcancada a passagem pretendida dentro da faixa.
Parar a reproducao
→ Prima o botão STOP no(AParalho ou no telecomando
O visor 6 indica ahora o número total de faixas do CD no lado direito, jusqu'à indentação da hora.
Retirar o CD
Para Abrir o compartmento do CD 5, levante cuidadosamente a tampa no lado esquerdo, a partir do local assinalado por OPEN/CLOSE.
Retire o CD.
Para fechar o compartmento do CD colque a tampa manualmente, procedendo com prudencia.
Activar as funções de repetiçao e reproducao aleatoria
Com a função de repetuição pode reproducir faixas individuais ou todas as faixas de um CD repetidamente. A função de reprodução aleatoria permit e reprodução das faixas do CD numa sequência aleatoria.
Para repetir apenas uma faixa, prima o botão REPEAT ① no aparecido, ou o botão REP./RAND ④ no telecomando, antes ou durante a reprodução.
No visor 16 surge a indentacao "REP".
Para repetir todas as faixas do CD, prima vezes o botão REPEAT ① no aparecido, ou o botão REP./RAND ④ no telecomando.
No visor 16 surge "ALL REP".
Para reproduzir as faixas do CD numa sequência aleatoria, primaTRS vezes o botão REPEAT 7 no aparelho, ou o botão. REP./RAND 1 no telecomando.
No visor 16 surge a indentação "RAND".
Para terminar a reprodução repetida ou aleatoria, prima repetidamente o botão REPEAT 7 no aparecido, ou o botão REP./RAND 10 no telecomando, àsurgir a indicação REP / ALL / RAND.
Programar sequência das faixas
É possível programar a sequência na qual as faixas de CD seront reproduzidas. Para tal, está à sua disposicao 20 posições de programa. So é possível efectuar a programação quando a reprodução está parada.
Prima o botão PROG no aparecido ou no telecomando 39. No visor 16 piscá a posção de programa 1 (P0 1) da faixa que deve ser reproduzida primaryo, quando da reprodução do programa. A indicação PROG não piscá no visor 16. Se não tiver effectuado qualquer introdução durante um minuto, o aparecido abandona o modo de programação.
Com os botões REW F.FWD no aparecido, ou com os botões. REW/F.FWD no telecomando, seleção a faixa pretendida para a posicao de programa apareada. Em vez da indicação da posicao de programa, o visor apareça quando as faixas do CD disponíveis para seleção.
Para memorizar a faixa selecionada, prima o botão PROG 6 ou 9.
Para programar mais faixas, repita os passos anteriores.
Iniciar reprodução da sequência de faixas programada
Assim que tiver programado todas as faixas pretendedas, inicir a reproducao, premindo o botao II 1 no aparelho, ou o botao PLAY/PAUSE 7 no telecomando.
Se premir o botão STOP no aparecido, ou o botão no Telecomando, a reprodução é terminada, mas o aparecido permanece no modo de programação.
Se premir das vezes o botão STOP no aparecido, ou o botão. ② no telegramando, o programa é apagado e o aparecido abandona o modo de programação.
- programa é apagado, se abrir o compartmento do CD ⑤, se mudar para outra fonte de programa ou se desligar a microaparelhagem. A indicação PROG é apagada.
Funções MP3
"MP3" designa um processo desenvolvimento pelo Fraunhofer Institut, isto é, um这对于 to do a dados audio. As datas compactadas no formato MP3 tem apenas uma很小 parte do seu tamanho original e, sendo assim, é possivel memorizar muito mais música p. ex. em CDs-R/CDs-RW do que nos CDs录音 à vendas nas lojas, nos quais são memorizados dados audio no formato CDA. Àlem disso, a qualidação录音 quando não é afectada por esteprocesso.
Reproduzir faixas MP3
Insira um CD com ficheiros MP3 no compartmento do CD ⑤.
Coloque o interruptor de funcao 1 na posicao "CD/MP3". O aparelho inicia a leitura do CD de MP3. De seguida, a primeira faixa é reproduzida. O visor 16 indica o numero da faixa que está a ser reproduzida, a indentacao "MP3", bem como o sintobo de reproducao no lado direito, jusqu a indentacao da hora.
Interromper/continuar reproducao
Durante a reprodução, prima o botão II 1 no aparecido, ou o botão PLAY/PAUSE 7 no telegramando, a fim de pausar a reprodução. Se a reprodução do CD de MP3 estiver pausada, o símbolo de reprodução piscá no visor 16.
Para Continuing a reproducao, prima novamente o botao II ou PLAY/PAUSE 7.
Iniciar reproducao
Se a reproducao do CD de MP3 estiver pausada ou parada, prima o botao II 1 no aparelho, ou o botao PLAY/PAUSE 7 no telecomando. Se o CD de MP3 tiver varias pastas, proceda do segunte modo:
Para selecionar uma pasta antes do inicio da reproducao, prima o botao FOLDER UP 12 no aparelho ou no telecomando 0 as vezes necessarias.
No visor 6 sãopresentados os números das pastas, e a esquerda surge a indentação "ALB" (= album). O direção principal é designado pelo aparelho como pasta "001".
No esponc de 3 segundos, prima o botao II no aparelho, ou o botao PLAY/PAUSE no aparelho de comando, a fim de iniciar a reproducao dos ficheiros da pasta. Se o tempo passar, o visor volta a indicar o numero total de faixas. Após da reproducao dos ficheiros esta pasta, o aparelho muda para a pasta segunte, por ordem alfabetica.
Se premir uma vez o botão FOLDER UP 12 no aparecido ou no Telecomando 40, a indicação do número actual de pastas piscá durante aprox. 3 segundos.
Se, durante a reprodução, premir varías vezes o botão FOLDER UP 12 no aparecido ou no telecomando 40, a primaira faixa da pasta selecciónada é reproduzida imeditamente.
Parar a reprodução
Prima o botão STOP no aparecido ou no telegramando 42.
O visor é indica o número total de faixas do CD de MP3 não lado direito, jusqu'à indentação da hora.
Avanca re retroceder faixas
Para reproduzir a faixa segunte do CD de MP3, prima o botão F.FWD no aparecido, ou o botão F.FWD 串 no telecomando.
Para,iniciar novamente a reproducao da faixa do CD de MP3 que está a ser reproduzida, prima uma vez o botao REW no aparelho, ou o botao REW no telecomando.
Para reproducir a faixa anterior do CD, prima breve duas vezes consecutivas o botão REW no aparecido, ou o botão REW no telecomando.
Avanca r retroceder na.thisa faixa
Pode activar um avanço ou retroprocesso na mesma faixa, para procurar determinadas passagens dentro de uma faixa MP3.
Para tal, mantenha premido o botão F.FWD 9 ou F.FWD (avancar) ou o botão REW 8 ou REW (retr copoder) durante a reprodução, ate que seja alcancada a passagem pretendida dentro da faixa.
Programar sequência das faixas
É possível programar a sequência na qual as faixas de CD seront reproduzidas. Para tal, está à sua disposicao 20 posições de programa. So é possível efectuar a programação, quando a reprodução está parada.
→ Prima o botão PROG 6 no aparecido ou no telegramando 39. No visor 16 piscá a posicao de programa 1 (P0 1) da faixa que deve ser reproduzida primaryo, aquando da reprodução do programa. A indicação PROG也是非常 piscá no visor 16. Se não tiver effectuado qualquer introdução durante um minuto, o aparecido abandona o modo de programação.
Com os botões REW F.FWD no aparecido, ou com os botões. REW/F.FWD no telecomando, seleção a faixa pretendida para a posicao de programa apareada. Em vez da indicação da posicao de programa, o visor apareça quando as faixas do CD disponíveis para seleção.
Para poder aceder as faixas de outra pasta, prima o botão FOLDER UP no aparecido ou no telegramando 40 as vezes necessarias, até que o visor é presente o número da pasta pretendida.
Prima o botão PROG 6 ou 9 para confirmar a seleção da pasta. Seguidamente, seleção a faixa pretendida na pasta.
Para memorizar a faixa selecionada, prima o botão PROG 6 ou 9.
Para programar mais faixas, repita os passos anteriores.
Iniciar reprodução da sequência de faixas programada
Assim que tiver programado todas as faixas pretendedas, inicie a reproducao, premindo o botao II 1 no aparelho, ou o botao PLAY/PAUSE 7 no telecomando.
Se premir o botão STOP no aparecido, ou o botão no Telecomando, a reprodução é terminada, mas o aparecido permanece no modo de programação.
Se premir das vezes o botão STOP no aparecido, ou o botão. no telegramando, o programa é apagado e o aparecido abandona o modo de programação.
O programa é apagado, se abrir o compartmento do CD ⑤, se mudar para outra fonte de programa ou se deslugar a micro-aparelhagem. A indicação PROG é apagada.
Activar as funções de repetiçao e reproducao aleatoria de ficheiros MP3
Com a função de repetiçao pode reproducir repetidamente umaunjica faixa de um CD de MP3, o conteudo de uma pasta ou todas das faixas de um CD de MP3. A funcao de reproducao aleatoria permit a reproducao das faixas do CD numa sequencia aleatoria.
Para repetir abenas uma faixa, prima o botão REPEAT ① no aparecido, ou o botão REP./RAND ④ no telecomando. No visor ⑥ surge a indentação "REP".
Para repetir todas as faixas do CD, prima das vezes o botão REPEAT 7 no aparecido, ou o botão REP./RAND 4 no telecomando.
No visor 16 surge a indentacao "REP" e o numero da pasta pisca.
Selectione a pasta pretendida, premindo o botão FOLDER UP no aparecido ou no telecomando 40.
Alternadamente com o número da faixa, o visor 6 aplica o número da pasta, a partir da qual a faixa está actualmente a ser reproduzida (p. ex. F02 como 2.a pasta por ordem alfabetica).
Para repetir todas as faixas do CD, prima das vezes o botão REPEAT 7 no aparecido, ou o botão REP./RAND 4 no telecomando.
No visor 16 surge a indentacao "ALL REP".
Para reproducir todas as pastas de um CD de MP3 numa sequência aleatoria, prima quando às botão REPEAT 7 no aparecido, ou o botão REP./RAND 4 no telecomando. No visor 16 surge "RAND".
Para terminar a reprodução repetida ou aleatoria, prima repetidamente o botão REPEAT 7 no aparecido, ou o botão REP./RAND 1 no telecomando, àsurgir a indicação REP / ALL / RAND.
Modo AUX
Pode reproducir a partir de outras aparelho adequado (leitor de MP3, etc.) através dos sinais de audio do aparelho.
Para tal, ligue a saída录音 do outras aparecido à tomada AUX da micro-aparelhagem, atravesés de um cabo com um conector jack de 3,5mm (não incluído).
Coloque o interruptor de funcao 1 na posicao AUX.
Inicie a reproducao do除外 aparelho.
Funcimiento com temporizador
Pode programar a ligaçao ou desactivacao automatica do aparelho para uma hora determinada. Em primeiro lugar, certifique-se de que a hora está correctamente ajustada.
Ligação automática
Mantenha o botão AL. SET premido, quando introduz a hora e os minutos da hora de ligação pretendida, com o botão HOUR/MIN Para tal, pode premir repetidamente o botão HOUR/MIN ou mantê-lo premido.
De seguida, solte o botão AL. SET ⑨. A hora de ligação é memorizada.
→ Prima o botão AL. ON/OFF 2, para fazer a ligação automática. No visor 16 surge o símbolo de um sino
Com o interruptor de funcao 1, selecione a funcao do aparelho que pretende executar quando o aparelho ligar. Se o aparelho emitir um sinal sonoro na hora ajustada, selecione "BUZZ".
Ajuste o volume pretendedo.
Prima o botão POWER para desligar o aparelho. O aparelho é ligado na hora ajustada.
Caso tenha selecionado a funcao de sinal sonoro, prima o botao AL. ON/OFF 2 para desactivar o aparelho aposo a liação automatica. Se tiver selecionado a funcao de radio ou de CD, selecione o botao POWER 20, a fim de desactivar o aparelho aposo a liação automatica.
O tempo de ligação permanece memorizzato e o aparelho é novamente ligado no dia segunte.
Para desactivar a ligação automatica, prima o botão AL. ON/OFF 2. Surge o símbolo de um sino
Desactivação automática
Ligue o aparelho e seleciona a funcao pretendida.
Mantenha o botão AL. SET premido, quando introduz a hora e os minutos da hora de ligação pretendida, com o botão HOUR/MIN Para tal, pode premir repetidamente o botão HOUR/MIN , ou mantê-lo premido.
De seguida, solte o botão AL. SET 19. A hora de desactivação é memorizada.
→ Prima o botão AL. ON/OFF 2 para fazer a desactivação automática. No visor 16 surge o símbolo de um sino. Para voltar a desactivar esta funcao, prima novamente o botão AL. ON/OFF 27.
Surge o的概率 de um sino
O aparelho é desligado na hora ajustada.
Mantenha o botão AL. SET premido, para que as horas de ligação e desactivaçãoactualmente programadas sejampresentadas no visor 16.
Perigo de morte devido aCHOque electrico:
- Nunca abra a caixa do aparelho. Não se encontrar lá quaisquer elementos de commando.
- Nunca vergulhe as peças do aparecido em água ou outros liquidos!
- Evite a entrada de liquidos no aparecido.
Limpeza da parte exterior:
Retire previamente a ficha da tomada.
① Limpe a superficie da caixa com um pano ligeiramente humedecido. Nunca utilize benzina, solventes ou deterentes que possam danificar o plácico!
Limpeza do laser do CD
- Limpe o laser em intervalos regulares.
- Para limpar o laser, utilize um CD de limpeza comum.
Eliminar avarias de funciona
Semreichao ou com rececao fraça
Se a recepçao AM for insufficiente, verifique se o aparelho está correctamente direcionado ou, se recepçao UHF for fraça, verifique se a antenna de fio UHF é está desenrolada e bem alinhada.
Em caso de interFERências na receção UHF, mude para o modo mono (posão FM MO) com o interruptor de banda de rádio ②.
O aparelho não emite qualquer som
A ficha do cabo de alimentacao 30 está bem inserida na tomada?
→Esta insertida una ficha na tomada para auscultadores ⑤? Tal desliga as colunas.
Eliminação
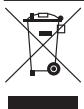
Nunca deposito o aparelho no lixo domestico comum. Este produit está sujeito à Direciva Europeia 2002/96/EC.
Micro-aparelhagem e colunas
- Elimine a micro-aparelhagem ou peças da mesma atraves de uma Empresa de eliminacao autorizada ou atraves da entidade de eliminacao da sua%cidade.
- Tenha atençao acos regulamentos actualmente em vigor. Em caso de duvida, entre em contacto com a entidade de eliminação de resíduos
Pilhas/baterias
- As pilhas/baterias não podem ser eliminadas juntamente com o lixo dométrico.
- As pilhas poder contersubstencias toxicas, que prejudicam o ambiente. Por isso, elimine as pilhas/pilhas recarregaveis de acordo com os regulamentos legais正当os.
- Os consumidos devem depositar as pilhas/baterias num ecoponto do seu[municipio ou num estabelecimentocomercial.Esta obrigacao tem como finalidade garantir uma eliminacao ecologica das pilhas/baterias.
- Entregue as pilhas/baterias openeras quando estiverem completeness de descarregadas.

Elimine todos os materiais da embalagem de modo ecologico.
Declaração de conformidade CE
Este aparelho foi testado e aprovado em conformidade com os requisitos basicsicos e outros regulamentos relevantes da Direciva CEM 2004/108/CE e da Direciva de Baixa Tensão 2006/95/EC.
Importador
KOMPERNASS GMBH
BURGSTRASSE 21
44867 BOCHUM, GERMANY
www.kompernass.com
Indicações de garantia importantes
Este aparecido tem 3 anos de garantía a partir da data de compra. Se, apesar donoxo elevado padrão de calidad, tiver algo motivo para reclamação relacionado com o aparecido, entre em contacto com a)nossa Assistência Tecnica, atraves da LINHA directa de Assistência Tecnica. Se o atendimento Telefonico não for suficientepara resolver a sua reclamação, irá obter durante o Telefonema
- um número de processamento (Número RMA) e
- uma morada para a qual deve enviar o seu produto, com a finalidade de executar o direito à garantia.
No caso de envio, não se esqueça de jintar uma cóρia do talão de compra. O aparecido tem de estar embalado de forma segura para transporte e o número RMA tem de estar bem visível. Os envíos sem número RMA não podem ser processados.
Nota: A garantia soit aplicá en caso de defeitos de material ou de fabrico.
A garantia não se aplicá a
- peças sujeitas a desgaste
- danos em peças frágeis, como interruptores ou baterias. O produit foi concebido apenas para uso privado e não para uso comercial. A garantia é anulada em caso de'utilização Incorrecta e inadeva, aplicação de但对于 excessiva e interveções não efectuadas pela)nossa filial de Assistência Tecnica autorizada. Os seu direitos de garantia legais não são limitados por esta garantia.
PT Kompernass Service Portugal
Tel.: 707 780 707 (0,12 EUR por minuto)
e-mail: support.pt@kompernass.com
| INDEX | PAGE |
| Intended Use | 26 |
| Items supplied | 26 |
| Technical data | 26 |
| Safety instructions | 26 |
| Positioning the device | 27 |
| The operating elements | 27 |
| Inserting the batteries | 28 |
| Becoming acquainted with the remote control | 28 |
| Connecting the components | 28 |
| Switching the device on and off | 28 |
| Setting the time | 28 |
| Selecting the programme source | 28 |
| Setting the sound volume levels | 28 |
| Using headphones | 28 |
| Operating the radio | 28 |
| Operating the CD player | 29 |
| MP3 functions | 30 |
| AUX operation | 31 |
| Timer operation | 31 |
| Cleaning and care | 31 |
| Troubleshooting | 31 |
| Disposal | 32 |
| CE Conformity | 32 |
| Importer | 32 |
| Important warranty information | 32 |
Read the operating instructions carefully before using the device for the first time and preserve this booklet for later reference. Pass this manual on to whoever might acquire the device at a future date.
Intended Use
This micro system is intended exclusively for the playback of audio CDs, MP3-CDs, CD-R, CD-RW, and for the playback of radio programmes. The micro system is not intended for use in commercial or industrial environments. No warranty claims will be granted for damage resulting from improper use!
Items supplied
1 Micro-system
2 Loudspeakers
1 Remote control (Inc. 2 batteries)
1 Operating instruction booklet
Technical data
| Rated voltage: | 230 V~, 50 Hz |
| Power consumption: | |
| in Standby: | 3 Watts |
| in Operation: | 14 Watts |
| Frequency range radio: | AM: 526.5 - 1606.5 kHzVHF (FM): 87.5 - 108 MHz |
| Measurements (W x H x D): | |
| Main device: | 25 x 18 x 6,2 cm |
| Each speaker: | 11 x 18 x 6,2 cm |
| Weight | |
| Main device: | 1008 g approx. |
| Each speaker: | 280 g approx. |
| Output power.: | 2 x 1.2 Watt RMS |
| AUX - Input | 3,5 mm Jackplug |
| Headphones output: | 3,5 mm Jackplug |
| Max. output voltageat the headphone socket: | 60 mV |
| CD Laser: | Laser class 1 |
| Operating temperature: | 5° - 40°C |
| Storage temperature : | -20° - 60°C |
| Protection class: | II ☑ |
| Batteries: | |
| Remote control: | 2 x 1,5 V, (AAA, LRO3) Micro |
| Battery backup: | 2 x 1,5 V, (AA, LR6) Mignon |
The technical details of the device allow for an adjustable frequency range of MW (AM) 525-1635 kHz, and/or FM (USW) 87,2-108,6 MHz. In some countries, different national regulations may apply to the assigned radio frequency ranges. Please note that information received outside of the assigned radio frequency ranges may not be used, passed on to third parties or otherwise misused.
Safety instructions
- Do not permit children to handle electrical devices without supervision, they cannot correctly assess the possible risks of injury.
- Unplug the power cord after every use and before cleaning, so as to prevent the device from switching on inadvertently.
- Check the device and all parts for visible damages. The safety concept can work only if the device is in a faultless condition.

Risk of explosion!
- Do not throw batteries into a fire.
- Do not recharge batteries.
- Never open batteries, never solder or weld batteries. The risk of explosions and injuries exists!
- Regularly check the condition of the batteries. Leaking batteries can cause damage to the remote control or to the device.
- If you do not intend to use the device for an extended period, remove the batteries.
- If the batteries have leaked put on protective gloves and clean the battery compartment and the battery contacts with a dry cloth.

Risk of electrical shocks.
- Connect the device to an electrical wall socket with a mains voltage of 230V / 50Hz .
- Do not operate the device if the connection cord or the power plug is damaged.
- The connection cord or device should be immediately repaired or exchanged by the customer service department if they fail to function faultlessly.
- Never submerge the device in water. Wipe it only with a slightly damp cloth.
- Do not expose the device to rain and never use it in a humid or wet environment.
- Make sure that the power cord does not become wet during operation.
- You must not open the device housing or attempt to repair the device yourself. There is invisible radiation inside the device (Class 1 Laser) Furthermore should you do so, the safety concept of the device may be compromised and the warranty becomes void.
- Do not place objects containing fluids, e.g. flower vases, on or near the device.
- Notice regarding power disconnection
- To completely disconnect the device from mains power, the plug MUST be removed from the power socket.
- For this reason the device should be placed in a position where unhindered access to the power socket is assured at all times, so that in an emergency the plug can be quickly removed. To eliminate the risk of fire you should completely disconnect the plug from the wall socket if the device is not going to be used for an extended period, for example, during holidays.
- Always take hold of the power cord by the plug. Do not pull on the cord itself and never touch the power cord with wet hands, this could result in either a short circuit or you receiving an electric shock. Do not place the device, furniture or anything else on the power cord and ensure that it does not become clamped. NEVER tie knots in the power cord and do not bind it with other cables. Place the power cord in a position where it cannot be trod on. A damaged power cord can cause a fire or an electrical shock. Check the power cord from time to time. Should it become damaged contact your nearest authorized customer service centre or dealer to have it replaced.

Risk of fire!
- Do not use the device near hot surfaces.
- Do not place the device in locations that are subject to direct sunlight or strong artificial light. Otherwise, it may overheat and become irreparably damaged.
- Never leave the device unattended while it is being used.
- Never cover the ventilation slots of the device while it is on.
- Do not place open fire sources, such as candles, on the device.
- When a storm and/or thunderstorm with the risk of lightening threatens please disconnect the device from the mains power.

Risk of personal injury!
- Keep the power cord and device away from children. Children frequently underestimate the dangers of electrical appliances.
- Provide a stable location for the device.
- Do not operate the device if it has sustained a fall or is damaged. Arrange for the device to be checked and, if necessary, repaired by qualified technicians.
- Keep batteries well away from children. Children can put batteries into their mouths and swallow them. If a battery is swallowed medical assistance must be sought immediately.
- This device is not intended for use by individuals (including children) with restricted physical, physiological or intellectual abilities or deficiencies in experience and/or knowledge unless they are supervised by a person responsible for their safety or receive from this person instruction in how the device is to be used. Children should be supervised to ensure that they do not play with the device.

Danger of eye injuries!
- The device is fitted with a "Class 1 Laser". Never open or attempt to repair the device yourself. The invisible laser beam could damage your eyes.

CAUTION!
Information on surge voltage (EFT / rapid electrical transition process) and Electrostatic discharge:
In the case of a malfunction due to rapid electrical transition (surge voltage) or electrostatic discharge the product must be reset (it may be necessary to disconnect the power source and then reconnect it) to restore normal operation.
Note: A case of electrostatic discharge occurs if one walks with plastic-soled shoes over a carpet that also contains elements of plastic. Through the friction of the shoe soles on the carpet a charge is created in the body which discharges itself as soon as one touches an electricity conducting object, such as for example a door knob or the bodywork of a motor vehicle. Thereby it is sufficient to approach the conductor to within only a few cm. Direct contact is not required to effect a discharge. The charge can also unload itself over an electrical arc. A discharge is thus also possible through plastic housing components.
Positioning the device
Remove the micro system and accessories from the packing.
Remove all transportation fasteners and tapes/foils.
Place the micro system on an even, level surface. Pull out the supports on the rear panel of the main device and on the speakers. Place the Micro system in a position that will allow the CD compartment cover to open completely.
Place the speakers to the right and left of the micro system.
You can also fasten the speakers to the device. For this pull the speaker holders on the right and left of the main device fully out (approx. 3.5mm ) and slide the right and left speakers with the guide rails onto the respective holder, until the underside of the speakers and main device lock together.
Alternatively you can secure the main device and/or the speakers to a wall by using the hangers ⑧ on the rear panel of the device and speakers. The spacers ④ on the rear panel of the speakers will provide the necessary stability.
The operating elements
On the device
1 Function switch
FM ST - FM MO - AM - Radio band switch
3 TUNING controller - tuning in of radio stations
Speaker fasteners
CD Compartment
6 PROG
7 REPEAT
8 REW
F.FWD
STOP
11
12 FOLDER UP
B REMOTE SENSOR
14 FM.ST
15 POWER
16 Display
VOL+
13 VOL-
19 AL. SET
20 POWER
2 HOUR / MIN
AL. ON/OFF
23 TIME SET
24 AUX

SPR
7 SPL
Suspension eyes for wall mounting
29 FM (USW) dipole antenna
Power cord
31 Battery compartment (Battery backup)
Device supports
Speaker
4 Spacer for wall mounting
Speaker cable
36 Guide rails for speaker fastening
On the remote control:
⑦ PLAY/PAUSE -CD playback start/stop
F.FWD -CD title skip forwards
PROG - for the storage of CD programmes
40 FOLDER UP - for folder selection in MP3-CD operation
REP./RAND -activates the repeat function and random playback
STOP -End CD playback
REW -CD title skip backwards
4 Battery compartment (rear panel)
Inserting the batteries
You can equip the micro system with 2 × 1,5V Type AA batteries so that in the event of a power failure the saved time and timer information will not be lost. The remote control requires 2 × 1,5V Type AAA batteries.
Batteries for the retention of data during a power failure are not supplied.
Open the battery compartment on the rear panel of the device 31 and on the underside of the remote control 46.
Insert the batteries, ensuring that you observe the polarity markings as indicated in the battery compartment.
Carefully close the corresponding battery compartment lid until it locks into place.
If the device no longer reacts reliably to the remote control signal, then the batteries are depleted. Change the batteries with fresh ones of the same type.
Becoming acquainted with the remote control
Point the remote control towards the device when you activate its buttons. The remote control functions at a distance of approx. 5m from the device and at an angle of at least 60^ . For transmission of the signal there must be no objects placed between the device and the remote control.
Connecting the components
Loudspeakers
Connect the speaker cable of the right speaker to the right speaker connection "SP R" 26 on the device.
Connect the speaker cable of the left speaker to the left speaker connection "SP L" ⑦ on the device.
Power supply
Connect the power plug of the power cord 30 to a properly connected 230V /50Hz power socket.
Switching the device on and off
To switch the device on move the function switch ① to the CD/MP3-, RADIO- or AUX position and press the POWER button ②. The Micro system is now operational and the red POWER indicator ⑤ as well as the blue background illumination of the display ⑥ light up.
To switch the device off either move the function switch ① to the BUZZ position or press the POWER button ②.
To disconnect the device from the mains power pull the power cord plug ⑤ 0 out of the mains socket.
Setting the time
Hold down the TIME SET 23 button while you enter, with the HOUR/MIN buttons 4, the current time in hours and minutes. For this you can either repeatedly press the HOUR/MIN button 4 or hold it down.
Ssequently release the TIME SET 23 button. The time of day is now saved and appears in the display even when the device is switched off.
Selecting the programme source
You can select between the following programme sources:
- CD/MP3 -Playback of audio CDs or MP3-CDs
- RADIO -Playback of radio stations
- AUX -Playback of a device connected to the AUX input 24
For this move the FUNCTION switch 1 to the desired position.
Setting the sound volume levels
To increase the volume, repeatedly press the VOL + button or hold the button down until the device has reached the desired volume level.
To decrease the volume, repeatedly press the VOL- 18 button or hold the button down until the device has reached the desired volume level.
Using headphones
You can connect headphones to the micro system with a 3.5mm jackplug (not supplied). The headphones socket is located on the left side of the micro system. When the headphones are connected, the loudspeakers are switched off and you will only hear sound via the headphones.
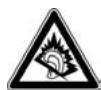
IMPORTANT! Listening to music with headphones over a long period of time and with full volume can result in loss of hearing!
Operating the radio
This device receives radio stations on the frequency bands, Ultra short wave (USW or engl. FM) and Medium wave (MW or engl. AM).
In order to receive a good USW reception with the micro system unwind the dipole antenna 29 on the rear panel of the device completely.
If the reception is insufficient change the position of the dipole antenna ②. Secure the dipole antenna ②, if necessary, with sticky tape.
The device has a built in ferrite antenna for reception of MW stations. When the MW reception is insufficient please turn the device in a more favourable direction.
To activate the radio function move the function switch ① to the "RADIO" position.
Now select with the Radio band switch ② the desired frequency band FM or AM depending on which band the station that you want to listen to is located. When the switch is in the FM ST. position the device only plays USW stations that transmit their programmes in stereo.
With the help of the TUNING controller 3 you can now select the station. For this turn the controller in a clockwise direction to select stations with a lower broadcast frequency than the one currently shown in the display 16.
Turn the TUNING controller 3 in a counter clockwise direction to select stations with a higher broadcast frequency than the one currently shown in the display 16.
If the device receives USW broadcasts in stereo the "FM. ST" indicator lights up.
If the stereo reception becomes noisy move the Radio band switch 2 to the FM MO position and thus switch to mono.
Operating the CD player
The device plays audio CDs (CD-A) and MP3-CDs. Both pressed and blank discs burnt on the computer of the format CD-R and CD-RW are supported. Because of the many different kinds of blank discs, computer types, operating systems, burning software and burning processes we are not able to guarantee that every "burnt" disc will playback faultlessly.
Inserting a CD
Move the function switch 1 to the CD/MP3 position.
To open the CD compartment carefully raise the cover at the location to the left of the OPEN/CLOSE indicator.
Place the CD with the marked side up pointing towards the arbor of the CD disc, into the CD compartment ⑤.
Press the CD lightly onto the arbor until it locks firmly into place.
To close the CD compartment ⑤ carefully lower the cover by hand.
The device will now read the CD. After which playback of the first title begins. The display 16 shows you, on the right next to the time of day, the number of the currently playing title as well as the playback symbol .
Playback stop/resume
During playback press the button II 1 on the device and/or the button PLAY/PAUSE 37 on the remote control to stop playback. When CD playback is stopped the playback symbol blinks in the display 16.
To resume playback press the button II 1 and/or PLAY/PAUSE again.
Starting playback
When the disc has been paused or stopped press the button II 1 on the device and/or the button PLAY/PAUSE on the remote control.
Next/previous title
To playback the next title from a CD press the button F.FWD 9 on the device and/or the F.FWD button 串 on the remote control.
To once more start playback of a CD title that has just played press once the button REW 1 on the device and/ or the REW button 3 on the remote control.
To playback the previous title of a CD briefly press twice successively the button REW 1 on the device and/or the REW button 3 on the remote control.
Search forward and backward
You can activate a search to find specific passages within a title.
For this, during playback, hold down the button F.FWD 9 and/or F.FWD (forwards) or the button REW and/ or REW (backwards) until the desired location in the title is reached.
Stopping the play function
Press the button STOP on the device and/or on the remote control.
The display now shows you, on the right next to the time of day, the total number of titles that are on the CD.
Removing the CD
To open the CD compartment ⑤ carefully raise the cover at the location to the left of the OPEN/CLOSE indicator.
Remove the CD.
To close the CD compartment ⑤ carefully lower the cover by hand.
To switch on the repeat and random functions.
With the repeat function you can repeat play individual titles or all the titles of a CD. The random function allows for playback of titles on the disc in random order.
To repeat an individual title, before or during playback, press the button REPEAT ⑦ on the device and/or REP./ RAND ④ on the remote control:
The display 16 shows "REP".
To repeat all the titles on a CD press twice the button REPEAT ① on the device and/or REP./RAND ④ on the remote control:
The display 16 shows "ALL REP".
To playback the titles on a CD in random order press three times the button REPEAT ⑦ on the device and/or REP./ RAND ④ on the remote control:
The display 16 shows "RAND".
To stop repeat and/or random playback press the button REPEAT ① on the device and/or REP./RAND ④ on the remote control repeatedly until the indicator REP / ALL / RAND disappears.
Programming the playing order
You can programme an order in which the titles of a CD are to be played. 20 program positions are available for this purpose. Programming is only possible when playback is stopped.
Press the button PROG 6 on the device and/or on the remote control 39.
In the display ⑥ blinks the programme position 1 (P0 1) of the title, which will be the first title played when programme playback begins. The PROG indicator also blinks in the display ⑥. If you do not make an entry within a minute the device again exits from the Programme-Mode.
Select with the REW F.FWD buttons on the device and/or REW/F.FWD on the remote control the desired title for the indicated programme position. In place of the programme position indicator the display now shows the CD titles available for selection.
To save the selected title press the button PROG 6 and/or 39.
To programme further titles, repeat the previously described steps.
Starting the programmed title list.
Once you have programmed all desired titles you can start playback by pressing the button on the device and/or PLAY/PAUSE on the remote control.
If you press the STOP button 10 on the device and/or or 42 on the remote control you will stop playback, however the device remains in the programme mode.
If you press the STOP button ⑩ on the device and/or ④ on the remote control twice you will clear the programme and the device exits the programme mode.
You will also clear the programme if you open the CD compartment ⑤, switch to another programme source or switch off the micro system. Then the PROG indicator goes out.
MP3 functions
"MP3" denotes a process and/or format developed by the Fraunhofer Institute for the compression of audio data. In the MP3 format compressed music pieces are only a fraction of their original size, which, for example, on CD-Rs/CD-RWs allows for storage of a considerably greater volume of music than on commercially available audio CDs, on which audio data is stored in the CDA format. Indeed the audio quality is scarcely reduced by the process.
Playing MP3 titles
Place a CD with MP3 files into the CD compartment 5.
Move the function switch 1 to the CD/MP3 position.
The device will now read the MP3-CD. After which playback of the first title begins. The display ⑥ shows you, on the right next to the time of day, the number of the currently playing title, the MP3 indicator as well as the playback symbol ▷.
Playback stop/resume
During playback press the button II 1 on the device and/or the button PLAY/PAUSE 7 on the remote control to stop playback. When MP3-CD playback is stopped the playback symbol blinks in the display 16.
To resume playback press the button II 1 and/or PLAY/PAUSE again.
Starting playback
When the MP3-CD has been paused or stopped press the button II 1 on the device and/or the button PLAY/PAUSE 37 on the remote control.
When the MP3-CD contains several folders proceed as follows:
To select a folder before the start of playback press, if necessary, several times the button FOLDER UP ⑫ on the device or on the remote control ⑩.
In the display is shown the folder number and to the left of it you will see the "ALB" indicator (= Album). The root directory will be treated by the device as folder "001".
Within aprox. 3 seconds press the button II on the device and/or PLAY/PAUSE on the remote control to begin playback of the files in this folder. If the time elapses the display returns to the indicator for the total title count. After the files from this folder have played back the device switches to the next alphabetical folder.
Press once the button FOLDER UP 12 on the device or on the remote control 40 and for approx. 3 seconds the indicator of the current folder number will blink.
Press during playback several times the button FOLDER UP ⑫ on the device or on the remote control ⑩ and playback will instantly switch to the first title of the selected folder.
Stopping the play function
Press the button STOP on the device and/or on the remote control.
The display now shows you, on the right next to the time of day, the total number of titles that are on the MP3-CD.
Next/previous title
To playback the next title from a MP3-CD press the button F.FWD 9 on the device and/or the F.FWD button ^出 on the remote control.
To start playback once more of a MP3-CD title that has just played press once the button REW on the device and/or the REW button on the remote control.
To playback the previous title of a CD briefly press twice successively the button REW on the device and/or the REW button on the remote control.
Search forward and backward
You can activate a search to find specific passages within an MP3 title.
For this, during playback, hold down the button F.FWD 9 and/or F.FWD (forwards) or the button REW and/or REW (backwards) until the desired location in the title is reached.
Programming the playing order
You can programme an order in which the titles of a CD are to be played. 20 program positions are available for this purpose. Programming is only possible when playback is stopped.
Press the button PROG 6 on the device and/or on the remote control 39.
In the display 16 blinks the programme position 1 (P0 1) of the title, which will be the first title played when programme playback begins. The PROG indicator also blinks in the display 16. If you do not make an entry within a minute the device again exits from the Programme-Mode.
Select with the REW F.FWD buttons 8/9 on the device and/or REW/F.FWD 13/33 on the remote control the desired title for the indicated programme position. In place of the programme position indicator the display 16 now shows the CD titles available for selection.
To access a title in another folder on the MP3-CD keep pressing the FOLDER UP button on the device 12 and/or on the remote control 40 until the display 16 shows the desired folder number.
Press the PROG button 6 and/or 9 to confirm the folder selection. Then select the desired title in the folder.
To save the selected title press the button PROG 6 and/or 9.
To programme further titles, repeat the previously described steps.
Starting the programmed title list.
Once you have programmed all desired titles you can start playback by pressing the button on the device and/or PLAY/PAUSE on the remote control.
If you press the STOP button ⑩ on the device and/or ④2 on the remote control you will stop playback, however the device remains in the programme mode.
If you press the STOP button 10 on the device and/or or 42 on the remote control twice you will clear the programme and the device exits the programme mode.
You will also clear the programme if you open the CD compartment 5, switch to another programme source or switch off the micro system. Then the PROG indicator goes out.
To switch on the MP3 repeat and random functions. With the repeat function you can repeat playback individual MP3 titles, the contents of a folder or all the titles on an MP3-CD. The random function allows for playback of titles on the disc in random order.
To repeat an individual title, before or during playback, press the button REPEAT ⑦ on the device and/or REP./ RAND ④ on the remote control: The display ⑥ shows "REP".
To repeat all titles in a folder on the MP3-CD press twice the button REPEAT 7 on the device and/or REP./RAND 41 on the remote control: The display 16 shows "REP" and the folder number blinks.
Select with the FOLDER UP button on the device 12 and/or on the remote control 40 the desired folder.
The display 16 shows, alternating with the title number, the number of the folder from which is currently being played back (i.e. F02 for folder 2 in alphabetical order).
To repeat all the titles on a CD press three times the button REPEAT ① on the device and/or REP./RAND ① on the remote control: The display ⑥ shows "ALL REP".
To playback the title of an MP3-CD folder accessed in random order press four times the button REPEAT ⑦ on the device and/or REP./RAND ④ on the remote control: The display ⑥ shows "RAND".
To stop repeat and/or random playback press the button REPEAT ⑦ on the device and/or REP./RAND ① on the remote control repeatedly until the indicator REP / ALL / RAND disappears.
AUX operation
With the device you can playback audio signals from another suitable device (MP3 player etc.).
For this connect the audio output of the other device via a cable with a 3.5mm jack plug (not supplied) to the AUX SOCKET of the micro system.
Move the function switch ① to the AUX setting.
Begin playback of the other device.
Timer operation
You can set the device to switch on or off automatically at a determined time of day. First make sure that the time of day has been correctly set.
Automatic switch on
Hold down the button AL. SET 19 while you enter, with the HOUR/MIN button 21, the hour and minutes of the desired switch on time. For this you can either repeatedly press the HOUR/MIN button 21 or hold it down.
Subsequently release the button AL. SET 9. The switch on time is now saved.
Press the AL. ON/OFF button ② to activate the automatic switch on. In the display ⑥ the bell symbol appears.
Select with the function switch ① the device function that
the device should operate on when switched on. If the device is to issue signal tones at the entered time select "BUZZ".
Set the desired volume.
Press the POWER button 20 to switch the device off. The device will switch itself on at the entered time.
If you have selected the signal tone function press the AL. ON/OFF button 2 to deactivate the device after the automatic switch on. If you had selected the radio or CD function press the POWER button 20 to deactivate the device after the automatic switch on. The switch on time remains, however saved and will again switch on the device on the following day.
To deactivate the automatic switch on press the AL. ON/OFF button ②. The bell symbol extinguishes.
Automatic switch off
Switch the device on and select the desired function.
Hold down the button AL. SET 19 while you enter, with the HOUR/MIN button 21, the hour and minutes of the desired switch off time. For this you can either repeatedly press the HOUR/MIN button 21 or hold it down.
Subsequently release the button AL. SET 19. The switch off time is now saved.
Press the AL. ON/OFF button 2 to activate the automatic switch off. In the display 16 the bell symbol appears. To again deactivate this function press the AL. ON/OFF button 2 once more. The bell symbol extinguishes.
The device will switch itself off at the entered time.
At any time hold down the AL. SET 19 to allow the display 16 to show the current switch on and off times.
Cleaning and care
Risk of potentially fatal electrical shock:
- Never open the device housing. There are no user-serviceable elements inside.
- Never submerge the device or its components in water or other fluids!
- Do not allow any liquids to penetrate the housing.
Cleaning the housing:
Remove the power plug from the power socket beforehand.
Clean the housing surface with a slightly damp cloth Never use petrol, solvents or detergents that can damage plastics!
Cleaning the CD-Laser
- Clean the laser at regular intervals.
- To clean the laser you should use a commercial cleaning CD.
Troubleshooting
No or poor radio reception
When the MW reception is insufficient check to see if the device is optimally aimed and/or with insufficient USW reception whether the USW dipole antenna 29 is unwound and optimally aimed.
With noisy USW stereo reception switch to the mono position (FM MO position) with the Radio band switch 2.
The device is not providing any sound
Is the plug of the power cord ⑥0 inserted firmly into the power socket?
Is there a plug inserted into the headphones output? This will switch off the speaker.
Disposal
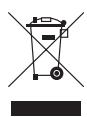
Do not dispose of the device in your normal domestic waste. This product is subject to the provisions of European Directive 2002/96/EC.
Micro system and speakers
- Have the micro-system or parts of it disposed of by a professional disposal company of by your communal disposal facility.
- Observe the currently applicable regulations. In case of doubt contact your disposal facility.
Batteries/rechargeable batteries
- Used batteries/rechargeable batteries may not be disposed of in household waste.
- Batteries can contain poisons which are damaging to the environment. Therefore, dispose of the batteries/rechargeable batteries in accordance with statutory regulations.
- Every consumer is legally obliged to surrender batteries/ rechargeable batteries to a community collection centre in their district or to a dealer. The purpose of this obligation is to ensure that batteries are disposed of in a non-polluting manner.
- Only dispose of batteries when they are fully discharged.

Dispose of packaging materials in an environmentally responsible manner.
CE Conformity
This device has been both examined and approved in regard to conformity with the fundamental requirements and other relevant regulations of the EMC Directive 2004/108/EC and the low voltage directive LVD 2006/95/EC.
Importer
KOMPERNASS GMBH
BURGSTRASSE 21
44867 BOCHUM, GERMANY
www.kompernass.com
Important warranty information
A 3-year warranty applies to this device, starting from the date of purchase. Should you, in spite of our high quality standards, have reasons for complaint please contact our Service Hotline.
In the event that processing of your complaint
is not possible by telephone here you will receive
- a processing number (RMA number) as well as
- an address to which you can send your device for repair under warranty.
In the case of a mail-in shipment please enclose a copy of the purchase receipt (sales slip). The device must be securely packed and the RMA number clearly visible. Products received without the RMA number cannot be processed.
Note: The warranty provisions cover only material or factory defects.
The warranty does not apply
to parts subject to wear and tear
- for damage to breakable parts, such as switches or rechargeable batteries.
This product is for private use only and is not intended for commercial applications. The warranty is void in the case of abusive and improper handling, use of force and internal tampering not carried out by our authorized service branch. Your statutory warranty claims are not restricted by this warranty.
GB DES Ltd
Tel.: 0870/787-6177
Fax: 0870/787-6168
e-mail: support.uk@kompernass.com
IE Kompernass Service Ireland
Tel: 1850 930 412 (0,082 EUR/Min.)
Standard call rates apply. Mobile operators may vary.
e-mail: support.ie@kompernass.com
Bestimmungsgemäß Gebrauch 34
Lieferumfang 34
Technische Daten 34
Sicherheitshinweise 34
Das Gerät aufstellen 35
Die Bedienelemente 35
Die Batterien einlagen 36
Zum Umgang mit der Fernbedienung 36
Die Komponenten anschließen 36
Das Gerät ein- und ausschalten 36
Die Uhrzeit einstellen 36
Die Programmquelle auswahlen 36
Die Lautstörke einstellen 36
Einen Kopfhörer verwenden 36
Das Radio bedieren 36
Das CD-Teil bedieten 37
MP3-Funktionen 38
AUX-Betrieb 39
Timer-Betrieb 39
Reinigen und Pflege 40
Funktionstörungen beheben 40
Entsorgen 40
CE-Konformität 40
Importeur 40
Wichtige Garantiehinweise 40
Bestimmungsgemäßer Gebrauch
These Mikroanlage ist ausschließlich zum Abspielen von Audio-CDs, MP3-CDs, CD-R, CD-RW und zum Wiedergeben von Radioprogrammen bestimmt. Die Mikroanlage ist nicht zur Verwendung in gewerblichen oder industriellen Bereichen vorgesehen. Für Schäden, die aus nicht bestimmungsgemäßem Gebrauch des Geräts resultieren, wird keine Gewährleistung übernommen!
Lieferumfang
1 Mikroanlage
2 Lautsprecher
1 Fernbedienung (inkl. 2 Batterien)
1 Bedienungsanleitung
Technische Daten
| Nennspannung: | 230 V~, 50 Hz |
| Leistungsaufnahme: | |
| in Standby | 3 Watt |
| im Betrieb | 14 Watt |
| Frequenzbereich Radio: | MW (AM): 526,5 - 1606,5 kHzUKW (FM): 87,5 - 108 MHz |
| Abmessungen (B x H x T) | |
| Hauptgerät: | 25 x 18 x 6,2 cm |
| je Box: | 11 x 18 x 6,2 cm |
| Gewicht | |
| Hauptgerät: | ca. 1008 g |
| je Box: | ca. 280 g |
| Ausgangsleistung.: | 2 x 1,2 Watt RMS |
| AUX-Eingang: | 3,5 mm Klinke |
| Kopfhörerausgang: | 3,5 mm Klinke |
| Max. Ausgangsspannung | |
| am Kopfhörerausgang: | 60 mV |
| CD-Laser: | Laser-Klasse 1 |
| Betriebstemperatur: | 5° - 40°C |
| Lagertemperatur: | -20° - 60°C |
| Schutzklasse: | II ☑ |
| Batterien: | |
| Fernbedienung: | 2 x 1,5 V, (AAA, LRO3) Micro |
| Speichererhalt: | 2 x 1,5 V, (AA, LR6) Mignon |
Die technischen Gegebenheiten des Gerätes ermögens einen einstellbaren Frequenzbereich von MW (AM) 525-1635 kHz, bzw. FM (UKW) 87,2-108,6 MHz. In verschiedene Ländern können abweichende nationale Regelungen zu den zugewiesenen Rundfunkfrequenzbereichen bestehen. Beachten Sie, dass Sie die außerhalb des zugewiesenen Rundfunkfrequenzbereiches empfangenden Informationen nicht verwerten, an Dritte weiterleiten oder zweckent fremdet missbrauchlich verwenden)dürfen.
Sicherheitshinweise
- Lassen Sie Kinder nicht unbeaufsichtig mit Elektrogeräten hantieren – weil diese mögliche Verletzungsgefahren nicht immer richtig einschädizen können.
- Um ein unbeabsichtigtes Einsatz zu vermeiden,ziehen Sie nach jedem Gebrauch und vor jeder Reinigung den Netzstecker.
- Prufen Sie das Gerät und alle Teile auf sichbare Schäden.
Nur in einwandfreiem Zustand kann das Sicherheitskonzept des Gerätes funktionieren.
Explosionsgefahr!
- Werfen Sie keine Batterien ins Feuer.
- Laden Sie Batterien nicht wieder auf.
- Öffnen Sie die Batterien niemals, loten oder schweiben Sie Batterien nie. Es besteht Explosions- und Verletzungsgefahr!
- Überprüfen Sie regelmäßige Batterien. Auslaufende Batterien können Beschäftigungen an der Fernbedienung oder am Gerät verursichen.
- Wenn Sie das Gerät langere Zeit nicht benutzen, entnehmer Sie die Batterien.
- Bei ausgelaufen Batterienziehen Sie Schutzhandschuhe an und reinigen das Batteriefach und die Batteriekontakte mit einem trockenen Tuch.
Gefahr durch elektrischen Schlag!
- Schlieben Sie das Gerät an eine Netzsteckdose mit einer Netzspannung von 230V /50Hz an.
- Betreiben Sie das Gerät nicht, wenn die Anschlussleitung oder der Netzstecker beschädigt ist.
- Lassen Sie Anschlussleitungen oder Geräte, die nicht einwandfrei Funktionieren oder beschädigt wurden, sofort vom Kundendienst reparieren oder austauschen.
- Tauchen Sie das Gerät niemals in Wasser ein. Wischen Sie es nur mit einem leicht feuchten Tuch ab.
- Setzen Sie das Gerät nicht dem Regen aus und benutzen Sie es auch niemals in feuchter oder nasser Umgebung.
- Achten Sie daraufuf, dass die Anschlussleitung während des Betriebs niemals Nass oder feucht wird.
- Sie dürfen das Gerätegehäuse nicht öffnen oder reparieren. Im Inneren des Gerätes liegt unsichtbare Laserstrahlung ("Laser-Klasse 1") vor. Darüberhinaus ist in thisem Falle die Sicherheit nicht gegeben und die Gewährleistung erlischt.
- Stellen Sie keine mit Flüssigkeiten gefüllten Gegenstände, wie z.B. Vasen, auf oder darüber das Gerät.
- Hinweis zur Netztrennung Um das Gerät vollständig vom Netz zu trennen, müssen Sie den Netzstecker aus der Netzsteckdoseziehen. Daher sollen den Sie das Gerät so aufstellen, dass stets ein unbehinderter Zugang zur Netzsteckdose gewährleistet ist, damit Sie den Netzstecker in einer Notsituation scoff abziehen können. Um Brandgefahr auszuschreiben, sollen den Sie den Netzstecker vor einem längerem Nichtgebrauch des Gerätes, beispielsweise während des Urlaubs, grundsätzlich von der Netzsteckdose trennen.
- Fassen Sie das Netzkabel immer am Stecker an. Ziehen Sie nicht am Kabel selbst, und fassen Sie das Netzkabel niemals mit nassen Händen an, da dies einen Kurzschluss oder elektrischen Schlag verursachen kann. Stellen Sie weder das Gerät, Möbelstücke o.ä. auf das Netzkabel und achtEN Sie daraufuf, dass es nicht eingeklemmt wird. Machen Sie niemals einen Knoten in das Netzkabel, und binden Sie es nicht mit anderen Kabeln. Legen Sie das Netzkabel so, dass niemand daraufuf tritt. Ein beschädigtes Netzkabel kann einen Brand oder elektrischen Schlag verursachen. Prufen Sie das Netzkabel von Zeit zu Zeit. Sollte es beschädigt sein, wenden Sie sich an ihre{nachste autorisierte Kundendienstelle oder ihren Handler, um es zu ersetzen.

Brandgefahr!
- Benutzen Sie das Gerät nicht in der Nähe vonHEYen Oberflächen.
- Stellen Sie das Gerät nicht an Orten auf, die direkter Sonnenstrahlung oder starken Kunstlichtquellen ausgesetzt sind. Andernfalls kann es überhitzen und irreparabel beschädigt werden.
- Lassen Sie das Gerät während des Betriebs niemals unbeaufsichtigt.
- Decken Sie niemals die Lüfungsschlitze des Gerätes ab, wenn es eingeschaltet ist.
- Stellen Sie keine offenen Brandquellen, wie z.B. Kerzen auf das Gerät.
- Vor einen Sturm und/oder Gewitter mit Blitzschlaggefahren trennen Sie das Gerätitte vom Stromnetz.

Verletzungsgefahr!
- Halten Sie Kinder von Anschlussleitung und Gerät fern. Kinder untersätzen früig die Gefahren von Elektrogeräten.
- Sorgen Sie für einen sicheren Stand des Gerätes.
- Falls das Gerät heruntergefallen oder beschädigt ist, darüber Sie es nicht mehr in Betriebnehmen. Lassen Sie das Gerät von qualifiziertem Fachpersonal überprüfen und gegeben falls reparieren.
- Batterien dürfen nicht in die Höhe von Kindern gelangen. Kinder konnten Batterien in den Mund behmen und verschlucken. Werde eine Batterie verschluckt, muss sofort medizinische Hilfe in Anspruch genommen werden.
- Dieses Produkt ist nicht damit, durch Personen (einschließlich Kinder) mit eingeschränkten physischen, sensörischen oder geistigen Fähigkeiten oder mangels Erfahrung und/oder mangels Wissen benutzt zu werden, es sei dessen werden durch eine für ihre Sicherheit zuständige Person beaufsichtigt oder erhielten von ihr Anweisungen, wie das Produkt zu benutzen ist. Kinder sollen den beaufsichtigt werden, um sicher zu stellen, dass sie nicht mit dem Produkt playen.

Gefahr von Augenverletzungen!
- Das Gerät verfügt über einen „Klasse 1 Laser". Öffnen Sie niemals das Gerät und versuchen Sie nicht, das Gerät zu reparieren. Der unsichtbare Laserstrahl könnte ihre Augen schädigen.

Vorsicht!
Hinweis zu Stoßspannungen (EFT / elektrischer Schneller Übergangsvorgang) und Elektrostatischen Entladungen:
Im Falle einer Fehlfunktion aufgrund elektrischer Schneller Übergangsvorgänge (Stoßspannung) oder elektrostatischer Entladungen muss das Produkt zurückgesetzt werden (möglicherweise muss die Stromversorgung getrennt und wieder neu angeschlossen werden), um den normalen Betrieb wieder herzustellen.
Hinweis: Ein Fall von Elektrostatischer Entladung tritt auf, wenn man mit Schuhen mit Kunststoffsohle über einen Teppichboden lauft, der ebenfalls Kunststoffe enthalt. Durch die Reibung der Schuhsohle am Teppichboden wird im Körper eine Ladung erzeugt, die sich entländt, sobald man einen elektrisch leitenden Gegenstand wie z. B. eine Türkinke oder die Karosserie eines Autos anfasst. Dabei genügt es, sich dem leitenden Gegenstand bis auf weniger cm zu nahern. Eine direkte Berührung ist zur Entladung bzw. nicht erforderlich. Die Ladung kann sich auch über einen Lichtbogen abbauen. Ein Ladungsabbau ist daher auch durch Kunststoffgehauseteile möglich.
Das Gerät aufstellen
Entnehmen Sie die Mikroanlage und das Zubehör aus der Verpackung.
Entfernen Sie alle Transportsicherungen und Klebebänder/Folien.
Stellen Sie die Mikroanlage auf eine ebene, waagerechte Fläche auf. Klappen Sie dazu die Stützen auf der Rückseite des Hauptgerätes und der Boxen aus. Stellen Sie die Mikroanlage so auf, dass sich die Abdeckung des CD-Fachs vollständig öffnen kann.
Stellen Sie die Laufsprecher rechts und links von der Mikroanlage auf.
Sie können die Boxen 33 auch am Gerät befestigen. Ziehen Sie dazu die Boxenhalterungen 4 rechts und links am Hauptgerät ganzhereaus (ca. 3,5mm )und schieren Sie die rechte und linke Box mit deren Führungsschiene 56 auf die jeweilige Halterung 4, bis die Unterheiten von Box und Hauptgerät miteinander abschieden.
Alternativ können Sie das Hauptgerät und/oder die Boxen über die auf den Rückseiten vorhandenen Aufhängungsmöglichkeiten 23 an einer Wand befestigen. Die Abstandshalter 44 auf der Rückseite der Boxen sorgen damit für deren Stabilität.
Die Bedienelemente
Am Gerät:
1 Funktionsschalter
FM ST - FM MO - AM - Radiobandschalter
3 TUNING-Regler -Senderabstimmung
Boxenhalterungen
CD-Fach
PROG -zum Speichern von CD-Programmen
7 REPEAT -aktiviert die Wiederholfkunft und Zufallswiedergabe
REW - CD-Titelsprung rückwärts
F.FWD -CD-Titelsprung vorwärts
STOP - CD-Wiedergabe beenden
11 II - CD-Wiedergabe starten/anhalten
FOLDER UP -zur Ordnerwahl im MP3-CD-Betrieb
REMOTE SENSOR -Infrarotssensor fur die Signale der Fernbedienung
FM.ST -UKW-Stereo-Anzeige
15 POWER - Betriebsanzeige
16 Display
17 VOL + - Lautstärke erhöhen
18 VOL - Lautstärke verringern
AL. SET - zur Eingabe und Anzeige der Ein-/Ausschaltzeit
20 POWER - Ein-/Ausschalter
2 HOUR / MIN -Tasten zur Eingabe der Uhrzeit
AL. ON/OFF - steuert das autom. Ein-/ Ausschalten
23 TIME SET -zurEingabe derUhrzeit
24 AUX -Eingang zum Anschluss von Audiogeräten
- Kopfhörerausgang
26 SP R -Lautsprecheranschluss „rechts"
27 SP L -Lautsprecheranschluss „links"
28 Aufhangeösen für Wandmontage
29 FM (UKW)-Wurfantenne
30 Netzkabel
31 Batteriefach (Speichererhalt)
Geratestützen
3 Laufsprecherbox
Abstandshalter für Wandmontage
Lautsprecherkabel
Führungsschiene für Boxenhalterung
Auf der Fernbedienung:
7 PLAY/PAUSE -CD-Wiedergabe starten/anhalten
F.FWD - CD-Titelsprung vorwärts
PROG -zum Speichern von CD-Programmen
40 FOLDER UP -zur Ordnerwahl im MP3-CD-Betrieb
REP./RAND -aktiviert die Wiederholffungtion und Zufallswiedergabe
STOP - CD-Wiedergabe beenden
REW - CD-Titelsprung rückwärts
4 Batteriefach (Rückseite)
Die Batterien einlagen
Sie können die Mikroanlage mit 2 × 1,5V Typ AA Batterien bestücken, damit im Falle eines Stromausfalls die gespeicherten Uhrzeit- und Timerinformationen nicht verloren gehen. Die Fernbedienung besteht 2 × 1,5V Typ AAA. Batterien zum Datenerhalt bei Stromausfall sind nicht im Lieferumfang enthalten.
Öffnen Sie das Batteriefach auf der Geräterückseite 3 und das auf der Rückseite der Fernbedienung 4.
Legen Sie die Batterien unter Beachtung der im Batteriefach abgebildeten Polarität in die Batteriefächer ein.
Schlieben Sie den jeweiligen Batteriefachdeckel wieder sorgfältig, bis der Deckel einrastet.
Reagiert das Gerät nicht mehr zuverlässig auf die Signale der Fernbedienung, sind deren Batterien erschöpf. Wechseln Sie sie gegen frische Batterien gleichen Typs aus.
Zum Umgang mit der Fernbedienung
Richten Sie die Fernbedienung auf das Gerät, wenn Sie deren Tasten betätigten. Die Fernbedienung Funktioniert in einem Abstand von ca. 5m und in einem Winkel von mind. 60^ vom Gerät. Zur Übertragung der Signale)dürfen sich keine Gegenstände zwischen Gerät und Fernbedienung befinden.
Die Komponenten anschließen
Lautsprecher
Verbinden Sie das Laufsprecherkabel des rechten Laufsprechers mit dem rechten Laufsprecheranschluss „SP R" am Gerät.
Verbinden Sie das Laufsprecherkabel des linken Laufsprechers mit dem linken Laufsprecheranschluss „SP L" am Gerät.
Stromversorgung
Verbinden Sie den Netzstecker des Netzkabels mit einer ordnungsgemäß angeschlossenen Netzsteckdose 230 V /50~Hz
Das Gerät ein- und ausschalten
Um das Gerät einzuschalten, bringen Sie den Funktionsschalter 1 in die CD/MP3-, RADIO- oder die AUX-Position und drücken Sie die POWER-Taste 20. Die Mikroanlage ist nun in Betrieb und die rote POWER-Anzeige 15 sowie die blaue Hintergrundbeleuchtung des Displays 16 leuchten.
Um das Gerät abzuschalten, bringen Sie entweder den Funktionsschalter 1 in die BUZZ-Position, oder drücken die POWER-Taste 20.
Um das Gerät von der Netzspannung zu trennen,ziehen Sie den Stecker des Netzkabels 30 aus der Steckdose.
Die Uhrzeit einstellen
Halten Sie die Taste TIME SET 23 gedrückt, während Sie mit den HOUR-/MIN-Tasten 24 die Stunden- und Minuten der aktuellen Uhrzeit eingeben. Dabei konnen Sie die HOUR-/ MIN-Taste 25 entweder wiederholt drücken, oder gedrückt halten.
Lassen Sie anschließend die Taste TIME SET ③ wieder los. Die Uhrzeit ist nur gespeichert und wird im Display auch bei ausgeschalteten Gerät angezeigt.
Die Programmquelle auswahlen
Sie können zwischen folgenden Programmquellen wahlen:
- CD/MP3 - Wiedergabe von Audio-CDs oder MP3-CDs
- RADIO - Wiedergabe von Radiosenden
- AUX - Wiedergabe eines am AUX-Eingang 24 angeschlossenen Gerätes
Bringen Sie dazu den FUNCTION-Schalter 1 in die gewünschte Position.
Die Lautstärke einstellen
Um die Lautstärke zu erhöhen, drücken Sie wiederholt die Taste VOL + ① oder halten diese solange gedrückt, bis das Gerät die gewünschte Lautstärke erreicht.
Um die Lautstärke zu verringn, drücken Sie wiederholt die Taste VOL - oder halten diese solange gedrückt, bis das Gerät die gewünschte Lautstärke erreicht.
Einen Kopfhörer verwenden
Sie können an die Mikroanlage einen Kopfhörer mit 3,5mm Klinkenstecker (nicht mitgeliefert) anschließen. Die Kopfhörerbuchse 25 befindet sich an der linken Seite der Mikroanlage. Wenn Sie den Kopfhörer angeschlossen haben, werden die Laufsprecher abgeschaltet und Sie horen den Ton nur noch über den Kopfhörer.

ACHTUNG! Das Musikhören mit Kopfhöern über einen längeren Zeitraum und mit voller Lautstärke kann zu Gehörschäden führen!
Das Radio bedieren
Dieses Gerät empfängt Radiosender auf den Frequenzbändern Ultrakurzwelle (UKW oder Engl. FM) und Mittelwelle (MW oder Engl. AM).
Damit Sie mit der Mikroanlage einen eigenen UKW-Empfang haben, wickeln Sie die Wurfantenne auf der Geräterück-nde ite ganz ab.
Wenn der Empfang unzureichend ist,ändern Sie die Position der Wurfantenne 29. Fixieren Sie die Wurfantenne 29 ggf. mit Klebeband.
Für den Empfang von MW-Senden besitzt das Geräte eine eingebaute Ferrit-Antenne. Bei unzureichendem MW-Empfang drehen Sieitte das Gerät in eine gänstigere Ausrichtung.
Um die Radiofungtion zu aktivieren,bringen Sie den Funktionsschalter 1 in die Position „RADIO".
Nun wahlen Sie mit dem Radiobandschalter ② das gewünschte Frequenzband FM oder AM aus, je nachdem, auf
welchem Band Sie Sender horen möchten. Steht der Schalter in der FM ST.-Position, gibt das Gerät nur UKW-Sender wieder, die ihr Programm in Stereo senden.
Mit Hilfe des Reglers TUNING ③ wahren Sie nun die Sonder aus. Drehen Sie dazu den Regler im Uhrzeigersinn, um Sender mit einer niedrigeren als der gerade im Display 16 angezeigten Sendefrequenz auszuwahlen.
Drehen Sie den TUNING-Regler ③ gegen den Uhrzeiger-sinn, um Sender auf einer höheren als der gerade im Display ⑥ angezeigten Sendefrequenz auszuwahlen.
Wenn das Gerät UKW-Sendungen in Stereo empfängt, leuchtet die „FM.ST“-Anzeige 14.
Sollte der Stereoempfang verraucht sein, bringen Sie den Radiobandschalter in die FM MO-Position und schalten so auf Mono um.
Das CD-Teil bedieren
Das Gerät spielt Audio-CDs (CD-A) und MP3-CDs ab. Sowohl gepresste als auch am Computer „gebrannte" Rohlinge der Formate CD-R und CD-RW werden unterszt. Aufgrund der verschiedene Systemen, Brennsoftware und -verfahren konnen wir aber nicht garantieren, dass jeder „gebrannte" Disc einwandfrei wiedergegeben wird.
Eine CD einlagen
Bringen Sie den Funktionsschalter ① in die CD/MP3-Position.
Um das CD-Fach ⑤ zu öffnen, haben Sie vorsichtig den Deckel links von der mit OPEN/CLOSE bezeichneten Stelle an.
Legen Sie die CD mit der bedruckten Seite nach oben zeigend auf die Achse des CD-Tellers im CD-Fach ⑤.
Drücken Sie die CD leicht auf die Achse, bis sie fest auf dieser einrastet.
Um das CD-Fach zu schreiben, führen Sie den Deckel vorsichtig mit der Hand herab.
Das Gerät liegt nun die CD ein. Anschließend beginnt die Wiedergabe des ersten Titels. Das Display 16 zeigt Ohnen rechts..., sie das Wiedergabesymbol an.
Wiedergabe anhalten/fortsetzen
Drücken Sie während der Wiedergabe die Taste II 1 am Gerät bzw. die Taste PLAY/PAUSE auf der Fernbedienung, um die Wiedergabe anzuhalten. Bei angehaltener CD-Wiedergabe blinkt das Wiedergabesymbol im Display 16.
Um die Wiedergabe fortzusetzen, drucken Sie die Taste II bzw. PLAY/PAUSE erneut.
Wiedergabe starten
Bei angehaltener oder gestoppter Disc drucken Sie die Taste II 1 am Gerät bzw. die Taste PLAY/PAUSE 7 auf der Fernbedienung.
Titel vor und darüber
Um den nachsten Titel einer CD wiederzugeben, drücken Sie die Taste F.FWD am Gerät bzw. die F.FWD Taste auf der Fernbedienung.
Um die Wiedergabe desGPCe gespieiten Titel einer CD noch einmal zu starten, drucken Sie einmal die Taste REW am Gerat bzw. die REW Taste auf der Fernbedienung.
Um den vorherigen Titel einer CD wiederzugegeben, drücken Sie zweimal kurz nacheinander die Taste REW am Gerät bzw. die REW Taste auf der Fernbedienung.
Suchlauf vor- und darüber
Sie können einen Suchlauf aktivieren, um bestimmte Passagen innerhalb eines Titels aufzufinden.
Halten Sie dazu während der Wiedergabe die Taste F.FWD ⑨ bzw. F.FWD ③ (vorwärts) oder die Taste REW ⑧ bzw. REW ③ (rückwärts) solange gedrückt, bis die gewünschte Stelle im Titel erreicht wurde.
Wiedergabe stoppen
Drücken Sie die Taste STOP am Gerät bzw. auf der Fernbedienung 12.
Das Display 16 zeigt Ohnen jetzt rechts besoin der Uhrzeit die Gesamtzahl der Titel auf der CD an.
CD herausnehmen
Um das CD-Fach ⑤ zu öffnen, haben Sie vorsichtig den Deckel links von der mit OPEN/CLOSE bezeichneten Stelle an.
Entnahmen Sie die CD.
Um das CD-Fach ⑤ zu schreiben, führen Sie den Deckel vorsichtig mit der Hand herab.
Die Wiederhol- und Zufallsfunktion einschalten
Mit der Wiederholfunktion konnen Sie einzeln Titel oder alle Titel einer CD wiederholt abspielen setzen. Die Zufallsfunktion lasst die Titel der Disc in zufälliger Reihenfolge abspielen.
Um einen einzelnen Titel zu wiederholen, drücken Sie vor oder während der Wiedergabe die Taste REPEAT ① am Gerät bzw. REP./RAND ④ auf der Fernbedienung.
Das Display 16 zeigt „REP" an.
Um alle Titel einer CD zu wiederholen, drücken Sie zwei mal die Taste REPEAT am Gerät bzw. REP./RAND auf der Fernbedienung.
Das Display 16 zeit „ALL REP" an.
Um die Titel einer CD in zufälliger Reihenfolge wiedergeben zu halten, drücken Sie dreimal die Taste REPEAT ⑦ am Gerät bzw. REP./RAND ① auf der Fernbedienung.
Das Display 15 zeitigt „RAND" an.
Um die wiederholte bzw. zufällige Wiedergabe zu been den, drücken Sie die Taste REPEAT ① am Gerät bzw. REP./ RAND ④ auf der Fernbedienung so oft, bis die Anzeige REP / ALL / RAND erlischt.
Titelfolge programmieren
Sie können die Reihenfolge programmieren, in der die Titel einer CD wiederergegeben werden. Dafür stehen Ohnen 20 Programplätze zur Verfügung. Die Programmierung ist nur möglich, wenn die Wiedergabe gestoppt ist.
Drücken Sie die Taste PROG 6 am Gerät bzw. auf der Fernbedienung 39.
Im Display ⑥ blinkt der Programplatz 1 (P0 1) des Titels, der bei der Programmwiedergabe als erster Titel abgespielt werden soll. Ebenso blinkt die PROG-Anzeige im Display ⑥.
Wenn Sie innerhalb einer Minute keine Eingabe machen, verlást das Gerät den Programm-Modus wieder.
Wahlen Sie mit den REW «/F.FWD « Tasten 8/9 am Gerät bzw. REW/F.FWD 3/8 auf der Fernbedienung den gewürschten Titel für den angezeigten Programmplatz. Anstelle der Programmplatzanzeige zeigt das Display 16 nun die verfügbar CD-Titel zur Auswahr.
Um den angewählten Titel zu speichern, drücken Sie die Taste PROG ⑥ bzw 39.
Um weitere Titel zu programmieren, wiederholen Sie die vorhergehenden Handlungsschritte.
Programmierte Titelfolge starten
Haben Sie alle gewündsten Titel programmiert, starten Sie die Wiedergabe, indem Sie die II Taste 1 am Gerät bzw. PLAY/PAUSE 3 auf der Fernbedienung drücken.
Wenn Sie die STOP Taste am Gerät bzw. auf der Fernbedienung drücken, beenden Sie die Wiedergabe, das Gerät bleibt aber im Programmmodus.
Wenn Sie die STOP Taste am Gerät bzw. auf der Fernbedienung zweimal drücken,löschen Sie das Programm und das Gerät verlässt den Programmmodus.
Sie löschen das Programm auch, wenn Sie das CD-Fach 5 öffnen, auf eine andere Programmquelle umschalten oder die Mikroanlage ausschalten. Die PROG-Anzeige erlischt dann.
MP3-Funktionen
"MP3" bezeichnet ein vom Fraunhofer Institut entwickeltes Verfahrens bzw. Format zur Kompression von Audiodaten. Im MP3-Format komprimierte Musikstücke haben nur noch einen Bruchteil ihrer ursprünglichen Groß, wodurch sich z. B. auf CD-Rs/CD-RWs welt aus mehr Musik speichern{lösst als auf handelsüblichen Audio-CDs, auf denen Audiodaten im CDA-Format gespeichert werden. Allerdings wird die Audioqualität dadurch kaum verringgert.
MP3-Titel wiedergeben
Legen Sie eine CD mit MP3-Dateien in das CD-Fach ⑤ ein.
Bringen Sie den Funktionsschalter ① in die Position „CD/MP3".
Das Gerät ließt nun die MP3-CD ein. Anschließend beginnnt die Wiedergabe des ersten Titels. Das Display 6 zeigt ihren rechts darüber der Uhrzeit die Nummer des garde gesplieten Titels, die „MP3“-Anzeige sowie das Wiedergabesymbol ▶ an.
Wiedergabe anhalten/fortsetzen
Drücken Sie während der Wiedergabe die Taste II ① am Gerät bzw. die Taste PLAY/PAUSE ⑦ auf der Fernbedienung, um die Wiedergabe anzuhalten. Bei angehaltener MP3-CD-Wiedergabe blinkt das Wiedergabesymbol im Display ⑥.
Um die Wiedergabe fortzusetzen, drucken Sie die Taste II bzw. PLAY/PAUSE 7 erneut.
Wiedergabe starten
Bei angehaltener oder gestoppter MP3-CD drücken Sie die Taste II 1 am Gerät bzw. die Taste PLAY/PAUSE 7 auf der Fernbedienung.
Wenn die MP3-CD mehrere Ordner enthalt, gehen Sie wie folgt vor:
Um einen Ordner vor Beginn der Wiedergabe auszuwahlen, drücken Sie ggf. mehrfach die Taste FOLDER UP 12 am Gerät oder auf der Fernbedienung 0.
Im Display ⑥ werden die Ordernummern angezeigt, links davon sehen Sie die „ALB“-Anzeige (= Album). Das Root-Verziehnis wird vom Gerät als Ordner „001" behandelt.
Drücken Sie innerhalb von ca. 3 Sekunden die Taste II am Gerät bzw. PLAY/PAUSE auf der Fernbedienung, um die Wiedergabe mit den Dateien theses Ordners zu beginnen. Verstreicht die Zeit, so kehrt das Display zur Anzeige der Gesamttitelzahl zurück. Nach dem Abspielen der Dateien theses Ordners wechselt das Gerät zum alphabetisch nachsten Ordner.
Drücken Sie einmal die Taste FOLDER UP 2 am Gerät oder auf der Fernbedienung 40, so blinkt für ca. 3 Sekunden die Anzeige der aktuellen Ordnernummer.
Drücken Sie während der Wiedergabe mehrfach die Taste FOLDER UP am Gerät oder auf der Fernbedienung, so wechselt die Wiedergabe augenblicklich zum ersten Teil des gewählten Ordners.
Wiedergabe stoppen
Drücken Sie die Taste STOP am Gerät bzw. auf der Fernbedienung 12.
Das Display 16 zeigt Ohnen jetzt rechts besoin der Uhrzeit die Gesamtzahl der Titel auf der MP3-CD an.
Titel vor und darüber
Um den nachsten Titel einer MP3-CD wiederzugeben, drucken Sie die Taste F.FWD am Gerät bzw. die F.FWD Taste auf der Fernbedienung.
Um die Wiedergabe desGPCade gespieiten Titel einer MP3-CD noch einmal zu starten, drucken Sie einmal die Taste REW am Gerät bzw. die REW Taste auf der Fernbedienung.
Um den vorherigen Titel einer CD wiederzugegeben, drücken Sie zweimal kurz nacheinander die Taste REW am Gerät bzw. die REW auf der Fernbedienung.
Suchlauf vor- und darüber
Sie können einen Suchlauf aktivieren, um bestimmte Passagen innerhalb eines MP3-Titels aufzufinden.
Halten Sie dazu während der Wiedergabe die Taste F.FWD 9 bzw. F.FWD 38 (vorwärts) oder die Taste REW 4 bzw. REW 43 (rückwärts) solange gedrückt, bis die gewünschte Stelle im Titel erreicht wurde.
Titelfolge programmieren
Sie können die Reihenfolge programmieren, in der die Titel einer CD wiedergegeben werden. Dafür stehen Ohnen 20 Pro-grammplätze zur Verfügung. Die Programmierung ist nur möglich, wenn die Wiedergabe gestoppt ist.
Drücken Sie die Taste PROG 6 am Gerät bzw. auf der Fernbedienung 39.
Im Display 16 blinkt der Programmplatz 1 (P0.1) des Titels, der bei der Programmwiedergabe als erster Titel abgeschpielt werden soll. Ebenso blinkt die PROG-Anzeige im Display 16. Wenn Sie innerhalb einer Minute keine Eingabe machen, verlässt das Gerät den Programm-Modus wieder.
Wahlen Sie mit den REW «/F.FWD « Tasten 3/9 am Gerät bzw. REW/F.FWD 3/8 auf der Fernbedienung den gewürschten Titel für den angezeigten Programmplatz. Anstelle der Programmplatzanzeige zeigt das Display 6 nun die verfügbar CD-Titel zur Auswahr.
Um auf Titel in einem anderen Ordner auf der MP3-CD zugreifen zu konnen, drücken Sie sooft die FOLDER UP-Taste am Gerät ① bzw. auf der Fernbedienung ④, bis das Display ⑥ die gewünschte Ordernummer anzeigt.
Drücken Sie die PROG-Taste ⑥ bzw 39, um die Ordnerwahl zu bestätigen. Dann wahlen Sie den gewünschten Titel in dem Ordner aus.
Um den angewählten Titel zu speichern, drücken Sie die Taste PROG ⑥ bzw ⑨.
Um weitere Titel zu programmieren, wiederholen Sie die vorhergehenden Handlungsschritte.
Programmierte Titelfolge starten
Haben Sie alle gewünschten Titel programmiert, starten Sie die Wiedergabe, indem Sie die II Taste 1 am Gerät bzw. PLAY/PAUSE 3 auf der Fernbedienung drücken.
Wenn Sie die STOP Taste am Gerät bzw. auf der Fernbedienung drücken, beenden Sie die Wiedergabe, das Gerät bleibt aber im Programmmodus.
Wenn Sie die STOP Taste 10 am Gerät bzw. 2 auf der Fernbedienung zweimal drücken, Löschen Sie das Programm und das Gerät verlässt den Programmmodus.
Sie löschen das Programm auch, wenn Sie das CD-Fach 5 öffnen, auf eine andere Programmquelle umschalten oder die Mikroanlage ausschalten. Die PROG-Anzeige erlischt dann.
Die MP3 Wiederhol- und Zufallsfunktion einschalten
Mit der Wiederholfunktion konnen Sie einzeln MP3-Titel, den Inhalt eines Ordners oder alle Titel einer MP3-CD wiederholt abspielen setzen. Die Zufallsfunktion lässt die Titel der Disc in zufälliger Reihenfolge abspielen.
Um einen einzelnen Titel zu wiederholen, drücken Sie vor oder während der Wiedergabe die Taste REPEAT ① am Gerät bzw. REP./RAND ① auf der Fernbedienung.
Das Display 16 zeigt „REP" an.
Um alle Titel in einem Ordner auf der MP3-CD zu wiederholen, drücken Sie zweimal die Taste REPEAT am Gerät bzw. REP./RAND auf der Fernbedienung.
Das Display 16 zeit „REP" an und die Ordnernummer blinkt.
Wahlen Sie mit der FOLDER UP-Taste am Gerät 已 bzw. auf der Fernbedienung den gewürschten Ordner aus.
Abwechselnd mit der Titelnummer zeigt das Display die Nummer des Ordners an, aus dem gerade abgeschpielt wird (z. B. F02 als 2. Ordner in alphabetischer Reihenfolge).
Um alle Titel einer CD zu wiederholen, drücken Sie dreimal die Taste REPEAT ① am Gerät bzw. REP./RAND ④ auf der Fernbedienung.
Das Display 16 zeigt, "ALL REP" an.
Um die Titel einer MP3-CD ordnerübergeifend in zufälliger Reihenfolge wiedergeben zu halten, drücken Sie viermal die Taste REPEAT am Gerät bzw. REP./RAND auf der Fernbedienung.
Das Display 16 zeit „RAND" an.
Um die wiederholte bzw. zufällige Wiedergabe zu beenden, drücken Sie die Taste REPEAT ① am Gerät bzw. REP./ RAND ④ auf der Fernbedienung so oft, bis die Anzeige REP / ALL / RAND erlischt.
AUX-Betrieb
Sie können über das Gerät Audiosignale eines anderen geeigneten Gerätes (MP3-Player etc.) wiedergeben halten.
Schlieben Sie dazu den Audioausgang des anderen Gerätes über ein Kabel mit 3,5mm Klinkenstecker (nicht mitgelie-fert) an die AUX-Buchse der Mikroanlage an.
Bringen Sie den Funktionsschalter 0 in die AUX-Stellung.
Starten Sie die Wiedergabe des anderen Gerätes.
Timer-Betrieb
Sie können das Gerät zu einer bestimmen Uhrzeit automatisch ein- oder ausschalten halten. Stellen Sie zunachst sicher, dass die Uhrzeit korrekt eingestellt ist.
Automatisches Einsatzen
Halten Sie die Taste AL. SET ⑨ gedrückt, während Sie mit der HOUR-/MIN-Taste ⑩ die Stunden- und Minuten der gewünschten Einschaltzeit eingeben. Dabei können Sie die HOUR-/MIN-Taste ⑪ entweder wiederholt drücken, oder gedrückt halten.
Lassen Sie anschließend die Taste AL. SET ⑲ wieder los. Die Einschaltzeit ist nun gespeichert.
Drücken Sie die AL. ON/OFF-Taste 2, um das automatisch Einschalten zu aktivieren. Im Display 6 entscheidt das Glockensymbol .
Wahlen Sie mit dem Funktionsschalter ① die Gerätefungtion, die das Gerät beim Einsatzalten ausführten soll. Soll das Gerät zur eingegebenen Zeit Signtöne abgeben, wahlen Sie „BUZZ" aus.
Stellen Sie die gewünschte Lautstärke ein.
Drücken Sie die POWER-Taste , um das Gerät abzuschalten. Das Gerät wird sich zur eingegebenen Zeit einschalten.
Wenn Sie die Signatlon-Funktion gewählt haben, drucken Sie die AL. ON/OFF-Taste 2, um das Gerät nach dem automatischen Einschalten zu deaktivieren. Hatten Sie die Radio- oder CD-Funktion ausgewählt, drucken Sie die POWER-Taste 20, um das Gerät nach dem automatischen Einschalten zu deaktivieren. Die Einschaltzeit bleibt aber gespeichert und wird das Gerät am folgenden Tag wieder einschalten halten.
Um das automatische Einschalten zu deaktivieren, drücken Sie die AL. ON/OFF-Taste ②. Das Glockensymbol erlisdicht.
Automatisches Ausschalten
Schalten Sie das Gerät ein und wahren Sie die gewünschte Funktion.
Halten Sie die Taste AL. SET 9 gedrückt, während Sie mit der HOUR-/MIN-Taste 2 die Stunden- und Minuten der gewünschten Ausschaltzeit eingeben. Dabei konnen Sie die HOUR-/MIN-Taste 1 entweder wiederholt drücken, oder gedrückt halten.
Lassen Sie anschließend die Taste AL. SET ⑲ wieder los. Die Ausschaltzeit ist nun gespeichert.
Drucken Sie die AL. ON/OFF-Taste 2, um das automatiti
sche Ausschalten zu aktivieren. Im Display 16 entscheidt das Glockensymbol . Um diese Funktion wieder zu deaktivieren, drücken Sie erneut die AL. ON/OFF-Taste 27. Das Glockensymbol erlischt.
Das Gerät wird sich zur eingegebenen Zeit ausschalten.
Halten Sie jederzeit die AL. SET ⑲ gedrückt, um das Display ⑥ die aktuell programmierte Ein- oder Ausschaltzeit angezeigen zu halten.
Reinigen und Pflege
Lebensgefahr durch elektrischen Schlag:
- Offnen Sie niemals das Gehäuse des Gerätes. Es befinden sich keinerlei Bedienelemente darin.
- Tauchen Sie die Geräteile niemals in Wasser oder andere Flüssigkeiten!
- Lassen Sie keine Flüssigkeiten in das Gehäuse dringen.
Reinigen des Gehäuses:
Ziehen Sie zuvor den Netzstecker aus der Steckdose.
① Reinigen Sie die Gehäuseoberfläche mit einem leicht angefeuchteten Tuch. Verwenden Sie niemals Benzin, Lösungsmittel oder Reiniger, die Kunststoff angreifen!
Reinigung des CD-Lasers
- Reinigen Sie in regelmäßigen Abständen den Laser.
- Zum Reinigen des Lasers sollen den Sie eine handelsübliche Reinigungs-CD verwenden.
Funktionstörungen beheben
Kein oder schlechter Radioempfang
Überprüfen Sie bei unzureichendem MW-Empfang, ob das Gerät optimal ausgerichtet ist, bzw. ob bei unzureichendem UKW-Empfang die UKW-Wurfantenne abgewickelt und optimal ausgerichtet ist.
Schalten Sie bei verrauschtem UKW-Stereoempfang mit dem Radiobandschalter auf Mono (Position FM MO) um.
Gerät gibt keinen Laut von sich
Steckt der Stecker des Netzkabels 30 fest in der Steckdose?
Steckt ein Stecker im Kopfhörerausgang 5? Dies wurde die Lautsprecher abschalten.
Entsorgen
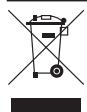
Werfen Sie das Gerät keinesfalls in den normalen Hausmüll. Dieses Produkt unterliegt der europäischen Richtlinie 2002/96/EC.
Mikroanlage und Laufsprecher
- Entsorgen Sie die Mikroanlage oder Teile davon über einen zugelassenen Entsorgungsbetrieb oder über ihreCOMMUNA- le Entsorgungseinrichtung.
- Beachten Sie die aktuell geltenden Vorschriften. Setzen Sie sich im Zweifelsfall mit ihrer Entsorgungseinrichtung in Verbindung
Batterien/Akkus
- Batterien/Akkus)durfenichtimHausmullentsorgtwerden.
-
Batterien können Giftstoffe enthalten, die die Umwelt schädigen. Entsorgen Sie die Batterien/Akkus deshalb unbedingt entsprechend der geltenden gesetzlichen Bestimmungen.
-
Jeder Verbraucher ist gesetzlich verpflichtet, Batterien/Akkus bei einer Sammelstelle seiner Gemeinde, seines Stadtteils oder im Handel abzugeben. Diese Verpflichtung dient dazu, dass Batterien/Akkus einer umweltschonenden Entsorgung zugeführrt werden können.
- Geben Sie Batterien/Akkus nur im entladenen Zustand darüber.

Führer Sie alle Verpackungsmaterialien einer umweltgerechten Entsorgung zu.
CE-Konformität
Dieses Gerät wurde hinsichtlich Übereinstimmung mit den grundlegenden Anforderungen und den anderen relevanten Vorschriften der EMV-Richtlinie 2004/108/EC und der Niederspannungsrichtlinie 2006/95/EC geprüft und genehmigt.
Importeur
KOMPERNASS GMBH
BURGSTRASSE 21
44867 BOCHUM, GERMANY
www.kompernass.com
Wichtige Garantiehinweise
Sie erhalten auf这点 Gerät 3 Jahre Garantie ab Kaufdatum. Sollten Sieriotz unserer hohen Qualitätsstandards einen Grund zur Beanstandung这点 Gerätes haben, so kontaktieren Sieitte unsere Service-Hotline. Falls eine Telefonische Bearbeitung ihrer Beanstandung nicht möglich ist, erhalten Sie Dort
- eine Bearbeitungsnummer (RMA-Nummer) sowie
- eine Adresse, an die Sie Ihr Produkt zur Garantieabwicklung einsenden können.
Bitte legen Sie im Falle einer Einsendung eine Kopie des Kaufbeleges (Kassenzettel) bei. Das Gerät muss transportsicher verpackt und die RMA-Nummer direkt ersichtlich sein. Einsendungen ohne RMA-Nummer können nicht beareritet werden.
① Hinweis: Die Garantieleistung gilt nur für Material- oder Fabrikationsfehler.
Die Garantieleistung gilt nicht
- für Verschleißteile
- für Beschädigungen an zerbrechlichen Teilen wie Schaltern oder Akkus.
Das Produkt ist lediglich für den privaten und nicht für den gewerblichen Gebrauch bestimmt. Bei missbrächlicher und unsachgemäßer Behandlung, Gewaltanwendung und bei Eingriffen, die nicht von unserer autorisierten Service-Niederlassung vorgenommen wurden, erlischt die Garantie. ihre gesetzlich festgelegten Gewährleistungsansprüche werden durch diese Garantie nicht eingeschränkt.
DE Schraven
Service- und Dienstleistungs GmbH
Tel.: +49 (0) 1805008107
(14 Ct/Min. aus dem dt. Festnetz ggf. abweichende Preis aus den Mobilfunknetzen)
Fax: +49 (0) 2832 3532
e-mail: support.de@kompernass.com
AT Kompernaß Service Österreich
Tel.: 0820 899 913 (0,20 EUR/Min.)
e-mail: support.at@kompernass.com
CH Kompernaß Service Switzerland
Tel.: 0848 000 525 (max. 0,0807 CHF/Min.)
e-mail: support.ch@kompernass.com
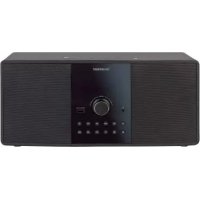
- Uso conforme al previsto
- Volumen de suministro
- Datasétécnicos
- Instrucciones de seguridad
- !Riesgo de explosión!
- ! Peligro de descarga electrica!
- jRiesgo de incendio!
- jPeligro de lesiones!
- jPeligro de lesiones en los ojos!
- jPrecaución!
- Indicaciones sobre impulsos de tension (EFT / transistorio electrico rápido) y cargas electrostáticas:
- Montaje del aparato
- Loselementosde mando
- En el aparato:
- En el mando a distancia:
- Colocar las pilas
- Manejo del mando a distancia
- Conectar los componentes
- Altavoces
- Alimentación de corriente
- Encender y apagar el aparato
- Ajustar la hora
- Seleccionar la fuente de programa
- Ajustar el volumen
- Utilizar auriculares
- Manejo de la radio
- Manejo del reproductor de CD
- Introducir un CD
- Pausar/continuar la reproduccion
- Inicio de la reproduccion
- Saltar pista hacía delante y hacía atrás
- Búsqueda hacía delante y hacía atrás
- Detencion de la reproduccion
- Extracción del CD
- Programación delists de reproducción
- Iniciar la suscripción de pistas programada
- Funciones MP3
- Reproducir pistas de MP3
- Programación de listas de reproducción
- Iniciar la suscesión de pistas programada
- Activar la funciona de repetition y reproduccion aleatoria de MP3
- Funcionamento AUX
- Funcionamento del temporizador
- Encendido automatico
- Apagado automático
- Peligro de muerte por descarga electrica:
- Limpieza de la carcasa:
- Limpieza del Láser CD
- Solutcionar anomalias de funcion
- No hayreichión de radio o es mala
- El aparato no emite ningún sonido
- Evacuación
- En ningún caso deben tirar el aparato a la basura domestica. Este producto está sujeto a la directiva europea 2002/96/EC.
- Microcadeny altavoces
- Pilas/baterías
- Declaración de conformidad CE
- Importador
- Observaciones importantes sobre la garantía
- Uso conforme
- Volume della fornitura
- Avverenze di sicurezza
- Pericolo di esplosione!
- Pericolo di scossa elettrica!
- Pericolo d'incendio!
- Pericolo di lesions!
- Pericolo di lesioni oculari!
- Attenzione!
- Indicazioni sulle tensioni a impulsi (EFT / transitori elettrici veloci) e scariche elettrostatiche:
- Installazione dell'apparecchio
- Elementi di lavoro
- Sull'apparechio:
- Sul telecomando:
- Inserimento dellepile
- Uso del telecomando
- Connessione dei componenti
- Altoparlanti
- Alimentazione
- Accensione e spegnimento dell'apparecchio
- Impostazione dell'ora
- Selezione della sorgente di programma
- Impostazione del volume
- Uso delle cuffie
- Comandi della radio
- Comandi dell'unità CD
- Instrimento di un CD
- Arresto/proseguito della riproduzione
- Avvio della riproduzione
- Passaggio a un brano precedente o seguente
- Ricerca in avanti e a nitroso
- Arresto della riproduzione
- Estrazione del CD
- Attivazione della funzione di ripetizione e di riproduzione casuale
- Programmazione della sequenza dei brani
- Avvio della sequenza di brani programmati
- Funzioni MP3
- Riproduzione di brani MP3
- Arresto/prosecuzione della riproduzione
- Attivazione della funzione di ripetizione e di riproduzione casuale MP3
- Modalità AUX
- Modalità Timer
- Accensione automatica
- Spegnimento automatico
- Pericolo di morte a causa di scossa elettrica:
- Pulizia dell'alloggiamento:
- Pulizia del laser CD
- Eliminazione dei malfunzionamenti
- Ricezione assente o scarsa
- L'apparecchio non emette alcun suono
- Smaltimento
- Microimpiano stereo e altoparlanti
- Pile/accumulatori
- Conformità CE
- Importatore
- Importanti indicazioni di garanzia
- Utilização correcta
- Material fornecido
- Dados技术和
- Indicações de segurarca
- Perigo de explosão!
- Perigo deCHOqueeléctrico!
- Perigo de incendidio!
- Perigo de ferimentos!
- Perigo de lesões oculares!
- Cuidado!
- Indicação sobre tensões de disruptions (EFT / transitorió electrolyico rápido) e descargas electrostáticas:
- Instalar o aparelho
- Elementos de commando
- No aparelho:
- No telecomando:
- Colocar as pilhas
- Manuseamento do telecomando
- Ligar os componentes
- Colunas
- Alimentação de tensão
- Ligar e desligar o aparelho
- Ajustar as horas
- Seleccionar fonte de programa
- Ajustar o volume
- Utilizar os auscultadores
- Funcimiento do rádio
- Funcionamento do leitor de CD
- Inserir um CD
- Interromper/continuar reproducao
- Iniciar a reproducao
- Avanca re retroceder faixas
- Avançare retroceder na mesma faixa
- Parar a reproducao
- Retirar o CD
- Activar as funções de repetiçao e reproducao aleatoria
- Programar sequência das faixas
- Iniciar reprodução da sequência de faixas programada
- Funções MP3
- Reproduzir faixas MP3
- Iniciar reproducao
- Parar a reprodução
- Avanca r retroceder na.thisa faixa
- Activar as funções de repetiçao e reproducao aleatoria de ficheiros MP3
- Modo AUX
- Funcimiento com temporizador
- Ligação automática
- Desactivação automática
- Perigo de morte devido aCHOque electrico:
- Limpeza da parte exterior:
- Limpeza do laser do CD
- Eliminar avarias de funciona
- Semreichao ou com rececao fraça
- O aparelho não emite qualquer som
- Eliminação
- Nunca deposito o aparelho no lixo domestico comum. Este produit está sujeito à Direciva Europeia 2002/96/EC.
- Micro-aparelhagem e colunas
- Pilhas/baterias
- Declaração de conformidade CE
- Indicações de garantia importantes
- Intended Use
- Items supplied
- Technical data
- Safety instructions
- Risk of explosion!
- Risk of electrical shocks.
- Risk of fire!
- Risk of personal injury!
- Danger of eye injuries!
- CAUTION!
- Information on surge voltage (EFT / rapid electrical transition process) and Electrostatic discharge:
- Positioning the device
- The operating elements
- On the device
- On the remote control:
- Inserting the batteries
- Becoming acquainted with the remote control
- Connecting the components
- Loudspeakers
- Power supply
- Switching the device on and off
- Setting the time
- Selecting the programme source
- Setting the sound volume levels
- Using headphones
- Operating the radio
- Operating the CD player
- Inserting a CD
- Playback stop/resume
- Starting playback
- Next/previous title
- Search forward and backward
- Stopping the play function
- Removing the CD
- To switch on the repeat and random functions.
- Programming the playing order
- Starting the programmed title list.
- MP3 functions
- Playing MP3 titles
- AUX operation
- Timer operation
- Automatic switch on
- Automatic switch off
- Cleaning and care
- Risk of potentially fatal electrical shock:
- Cleaning the housing:
- Cleaning the CD-Laser
- Troubleshooting
- No or poor radio reception
- The device is not providing any sound
- Disposal
- Do not dispose of the device in your normal domestic waste. This product is subject to the provisions of European Directive 2002/96/EC.
- Micro system and speakers
- Batteries/rechargeable batteries
- CE Conformity
- Importer
- Important warranty information
- GB DES Ltd
- IE Kompernass Service Ireland
- Bestimmungsgemäßer Gebrauch
- Lieferumfang
- Technische Daten
- Sicherheitshinweise
- Explosionsgefahr!
- Gefahr durch elektrischen Schlag!
- Brandgefahr!
- Verletzungsgefahr!
- Gefahr von Augenverletzungen!
- Vorsicht!
- Hinweis zu Stoßspannungen (EFT / elektrischer Schneller Übergangsvorgang) und Elektrostatischen Entladungen:
- Das Gerät aufstellen
- Die Bedienelemente
- Am Gerät:
- Auf der Fernbedienung:
- Die Batterien einlagen
- Zum Umgang mit der Fernbedienung
- Die Komponenten anschließen
- Lautsprecher
- Stromversorgung
- Das Gerät ein- und ausschalten
- Die Uhrzeit einstellen
- Die Programmquelle auswahlen
- Die Lautstärke einstellen
- Einen Kopfhörer verwenden
- Das Radio bedieren
- Das CD-Teil bedieren
- Eine CD einlagen
- Wiedergabe anhalten/fortsetzen
- Wiedergabe starten
- Titel vor und darüber
- Suchlauf vor- und darüber
- Wiedergabe stoppen
- CD herausnehmen
- Die Wiederhol- und Zufallsfunktion einschalten
- Titelfolge programmieren
- Programmierte Titelfolge starten
- MP3-Funktionen
- MP3-Titel wiedergeben
- Die MP3 Wiederhol- und Zufallsfunktion einschalten
- AUX-Betrieb
- Timer-Betrieb
- Automatisches Einsatzen
- Automatisches Ausschalten
- Reinigen und Pflege
- Lebensgefahr durch elektrischen Schlag:
- Reinigen des Gehäuses:
- ① Reinigen Sie die Gehäuseoberfläche mit einem leicht angefeuchteten Tuch. Verwenden Sie niemals Benzin, Lösungsmittel oder Reiniger, die Kunststoff angreifen!
- Reinigung des CD-Lasers
- Funktionstörungen beheben
- Kein oder schlechter Radioempfang
- Gerät gibt keinen Laut von sich
- Entsorgen
- Werfen Sie das Gerät keinesfalls in den normalen Hausmüll. Dieses Produkt unterliegt der europäischen Richtlinie 2002/96/EC.
- Mikroanlage und Laufsprecher
- Batterien/Akkus
- Führer Sie alle Verpackungsmaterialien einer umweltgerechten Entsorgung zu.
- CE-Konformität
- Importeur
- Wichtige Garantiehinweise
- ① Hinweis: Die Garantieleistung gilt nur für Material- oder Fabrikationsfehler.
Marque : SILVERCREST
Modèle : KH 2307
Catégorie : Chaîne Hi-Fi