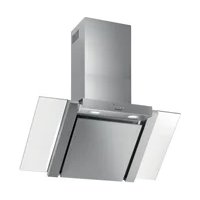
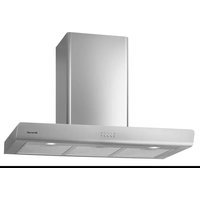
AD1578X - Range hood BRANDT - Free user manual and instructions
Find the device manual for free AD1578X BRANDT in PDF.


| Brand | Brandt |
| Model | AD1578X |
| Product Type | Range Hood |
| Installation Type | Wall-mounted with chimney |
| Dimensions (approx.) | 60 cm width, 50 cm depth, variable height |
| Weight (approx.) | 15 kg |
| Power Supply | 220-240 V, 50 Hz |
| Motor Speeds | 3 (Low, Medium, High) |
| Max Airflow (Q_max) | 585.7 m³/h |
| Max Airflow at Highest Speed | 556.8 m³/h |
| Airflow at Best Efficiency (Q_BEP) | 313.2 m³/h |
| Static Pressure at Best Efficiency (P_BEP) | 318 Pa |
| Power Consumption at Best Efficiency (W_BEP) | 173.9 W |
| Annual Energy Consumption (AEC) | 91.3 kWh/year |
| Sound Power at Highest Speed | 69 dB(LwA) |
| Sound Power at Lowest Speed | 64 dB(LwA) |
| Lighting System | LED, 1.0 W total |
| Average Illumination (E_middle) | 41 Lux/W |
| Grease Filter Type | Metal anti-grease filters, washable in dishwasher |
| Carbon Filter | Optional, replaceable every 4 months |
| Control Type | Push buttons |
| Installation Height Above Cooktop | 65-75 cm (26-30 inches) for gas, min 70 cm if gas |
| Safety Features | Auto-off when disconnected, thermal protection |
Frequently Asked Questions - AD1578X BRANDT
User questions about AD1578X BRANDT
0 question about this device. Answer the ones you know or ask your own.
Ask a new question about this device
Download the instructions for your Range hood in PDF format for free! Find your manual AD1578X - BRANDT and take your electronic device back in hand. On this page are published all the documents necessary for the use of your device. AD1578X by BRANDT.
USER MANUAL AD1578X BRANDT
natural_image
Black-and-white photo of a person's face with earphones, partially obscured by hands near a kitchen appliance control panel (no visible text or symbols)Brandt
ES 3
EN 19
FR 34
PT 49
DE 65
IT 81
HU 97
SK 112
CZ 127
PL 142
DK 158
NL 173
SV 189
PYC 204
ESÍ
natural_image
Pure technical line drawing of a mechanical component or bracket assembly without any text, numbers, or symbolsnatural_image
Illustration of a brick wall and a container with pipes, alongside a flat panel (no text or symbols)Imagen 4

natural_image
Architectural cross-section diagram of a brick wall with an open door and ventilation duct (no text or symbols)Imagen 5

Imagen 6
3 / USO DE SU APARATOES
• PARA USAR SU CAMPANA DE COCINA
natural_image
Four circular icons with abstract symbols: a fan, a three-petal flower, a four-petal flower, and a sun (no text or labels)LuzAltaMediaBaja
Imagen 7
4 / CUIDADO Y LIMPIEZA DE SU APARATO ES

- Safety recommendations 20
• Environmental protection 25
• Description of your appliance 26
2 / INSTALLING YOUR APPLIANCE
• Environmental protection 27
3 / USING YOUR APPLIANCE
• To use your cooker hood ____ 28
4 / CARING FOR AND CLEANING YOUR APPLIANCE
- Changing and cleaning the anti-grease filters 29
- Installing the carbon filter 29
- Changing the light bulb 29
• Install the T-Sharp outelt 30 - Maintaining your appliance 31
5 / TROUBLESHOOTING 32
6 / AFTER-SALES SERVICE 32
As part of our commitment to constantly improving our products, we reserve the right to make changes to them based on technical advances to their technical and functional features and appearance.

Warning :
Before installing and using your appliance, please carefully read this Guide to Installation and Use, which will allow you to quickly familiarise yourself with its operation.
EN
1 / NOTICES TO THE USER

Attention
Keep this user guide with your appliance. If the appliance is ever sold or transferred to another person, ensure that the new owner receives the user guide. Please become familiar with these recommendations before installing and using your appliance. They were written for your safety and the safety of others.
Safety and important precautions

These instructions are also available on the Brandt web site.
Please take heed of this advice when installing and using your appliance. These instructions are intended to protect your safety and the safety of others. Keep this manual with your appliance. If you sell or give the appliance to anyone else, make sure that you also give them this manual.
- In order to constantly improve our products, we reserve the right to to make changes to their technical, functional or aesthetic characteristics in line with technological progress.
- Make a note of the references of your appliance on the "Consumer Service" page so that you can readily find them in future.
1 / NOTICES TO THE USER EN
Important precautions
- This appliance is designed for use by consumers in the home. Do not use it for commercial or industrial purposes or for any other purpose for which it is not intended.
- Unpack the appliance as soon as you receive it. Check its general appearance. Make a note of any reservations on the delivery slip and keep a copy.
- This appliance can be used by children aged under 8 and by persons with diminished physical, sensory or mental capacities, or persons without any experience or knowledge, provided that they are properly attended to or are given the instructions on how to use the appliance in complete safety and that any potential risks are anticipated. Children must not play with this appliance. The appliance must not be cleaned and maintained by unattended children.
- Caution: The accessible parts of this appliance may become hot when used with cooking equipment.
Electrical risks
- All the power supply circuits must be disconnected before touching the connection terminals. If the power cord is damaged, it must be
1 / NOTICES TO THE USEREN
replaced by the manufacturer, its after-sales service or a similarly qualified person in order to avoid any danger.
- The appliance can be disconnected by using an accessible power outlet or by incorporating a switch in the fixed lines, in accordance with the installation rules.
- Do not change or attempt to change the characteristics of this appliance. Doing so can be dangerous.
- The appliance must only be repaired by an approved specialist.
• Always disconnect the hood before cleaning or maintaining it. - Never use steam or high-pressure tools to clean your appliance (for the purposes of electrical safety).
- The appliance can be disconnected by using an accessible power outlet or by incorporating a switch in the fixed lines, in accordance with the installation rules.
- Do not change or attempt to change the characteristics of this appliance. Doing so can be dangerous.
- The appliance must only be repaired by an approved specialist.
• Always disconnect the the hood before clean
1 / NOTICES TO THE USER EN
ing or maintaining it.
- Never use steam or high-pressure tools to clean your appliance (for the purposes of electrical safety).
Risk of asphyxiation
- The regulations applying to the evacuation of air must be obeyed. The air must not be sent into a duct used to evacuate fumes from appliances that use gas or other fuels (this does not apply to appliances that only emit air into the room).
- The room must be suitably ventilated when the range hood is used at the same time as appliances that use gas or other fuels (this does not apply to appliances that only emit air into the room).
Risk of fire
- It is forbidden to flambé food or to turn on gas rings that are not covered by a cooking recipient beneath the hood, as the flames may sucked in and damage the appliance.
- Keep a constant eye on fryers used beneath the hood. When heated to very high temperatures, oil and fat can catch fire.
- Clean the appliance and replace the filters at
1 / NOTICES TO THE USEREN
the recommended frequency. Accumulated deposits of grease can cause a fire.
- It is forbidden to use the hood above a fuel fire (wood, coal, etc.).
- If the hood is installed above a gas-fired appliance, leave at least 70 cm between the top of the range and the underside of the hood. If the instructions of the range installed under the hood specify a distance greater than 70 cm, then this distance must be respected.

Warning
In the case of a kitchen heated by a device connected to a chimney (a stove, for example) the "recycling" version of the hood should be installed. Do not use the hood without metal filters.
Suitable ventilation should be provided in the room when the hood is used at the same time as appliances operated by gas or another combustible fuel.
1 / NOTICES TO THE USER EN
• ENVIRONMENTAL PROTECTION
— This appliance's packaging material is recyclable. Help recycle it and protect the environment by dropping it off in the municipal receptacles provided for this purpose.
- Your appliance also contains a great amount of recyclable material. It is marked with this label to indicate the used appliances that should not be mixed with other waste. This way, the appliance recycling organised by your manufacturer will be done under the best possible conditions, in compliance with European Directive 2002/96/EC on Waste Electrical and Electronic Equipment. Contact your town hall or your retailer for the used appliance collection points closest to your home.
— We thank you doing your part to protect the environment.


Warning
Installation should only be performed by installers and qualified technicians.

Warning
Remove the protective fi lm from the cartridge fi Iter before use.
1 / NOTICES TO THE USEREN
• DESCRIPTION OF YOUR APPLIANCE

natural_image
Pure technical line drawing of a mechanical component or bracket assembly without any text, numbers, or symbols2 / INSTALLING YOUR APPLIANCE EN
• ENVIRONMENTAL PROTECTION
— The cooker hood should be placed at a distance of 65-75cm (26-30inch) from the cooking surface for the best effect. See Pic 1.
— Install the hook on a suitable place once the installation height is fi xed, and keep it in line. The fi xed position of the inside chimney bracket is the place of chimney. See Pic 2.
— Install the glass, and the extension tube. Then fi x the outside chimney bracket on the outside chimney, and be sure that the height of inside chimney can be adjusted in it freely as well as fi xing the extension tube. See Pic 3.
— Put the cooker hood on the hook. See Pic 4.
— Install the chimney, and adjust the height of the inside chimney to the position of the inside chimney bracket, then fi x on it by screw. See Pic 5.
Advice on how to save energy
To make optimal use of your appliance, keep the length of the duct and the number of bends in the duct to a strict minimum.

Note
— Any installation work must be carried out by a registered electrician or competent person.
— Do not connect the ducting system of the hood to any existing ventilation system which is being used for any other appliance, such as warmer tube, gas tube, hot wind tube.
— The angle of the bend of the ventilation pipe should not be less than 120^ ; you must direct the pipe horizontally, or, alternatively, the pipe should go up from the initial point and should be led to an outer wall.
— After the installation, make sure that the cooker hood is level to avoid grease collection at on end. See Pic. 6.

Pic 1

Pic 2

Pic 3

natural_image
Diagram of a brick wall and a container with pipes, showing structural components (no text or symbols)Pic 4

natural_image
Architectural cross-section diagram of a brick wall with an open door and window (no text or symbols)Pic 5

Pic 6
3 / USING YOUR APPLIANCEEN
• TO USE YOUR COOKER HOOD
How to use the control panel, see Pic. 7:
a. Press the button "Low", the inner indicator light of switch starts shining, the motor is running at low speed. Press the button again, the motor stop.
b. Press the button "Mid", the inner indicator light of switch starts shining, the motor is running at medium speed. Press the button again, the motor stop.
c. Press the button "High", the inner indicator light of switch starts shining, the motor is running at high speed. Press the button again, the motor stop.
d. Press the button "Light", both lights start shining. Press the button again, the lights are switched off then.

Advice on how to save energy
Adjust the speed to the cooking method and the number of pans in use. It is preferable to use the rings at the back of the range.

natural_image
Four circular icons with abstract symbols: a fan, a propeller, a sun, and a light bulb (no text or labels)LightHighMidLow
Pic 7
4 / CARING FOR AND CLEANING YOUR APPLIANCE EN
- CHANGING AND CLEANING THE ANTI-GREASE FILTERS
— Removing the filters as the instruction in Pic. 8;
— Open: Open the panel and drive up, push the middle of hinge (see point A) at the same time, the panel can be supported up.
— Close: Put up the panel a little (see point B) and then the panel can be closed.
— You can clean the fi Iter as below measure:
-
Soak them for about 3 minute in hot water (40-50 degrees) with a grease-loosening detergent then brush it gently with a soft brush. Please do not apply too much pressure, avoid damaging it.
-
It can be put into a dishwasher with detergent, set the temperature at around 60 degrees.
— Please do not use abrasive detergent for it will damage the hood;
— Make sure that the hood is shut off before cleaning.
• INSTALLING THE CARBON FILTER, SEE PIC. 9;
- Remove the filters.
— The charcoal fi Iters are located at either end of the motor. Turn the charcoal fi Iters anti-clockwise until they are unscrewed.
— Apply reverse procedure to uninstall the charcoal fi Iter.

Warning:
the charcoal cannot be washed or recycled. It should be changed at least every four months.
• CHANGING THE LIGHT BULB
Take the bracket and glass off and then take the broken light bulb off, See Pic 10.
Fix the new light bulb, glass and bracket on. Attention: Before changing the lights, ensure that the appliance is not live.


Pic 9

Pic 10
4 / CARING FOR AND CLEANING YOUR APPLIANCEEN
• INSTALL THE T-SHARP OUTELT
— Fix the air outlet on the T-sharp, see Pic 11.
— Fix the T-sharp outlet on the inside chimney, see Pic 12.

natural_image
Technical line drawing of a mechanical assembly with labeled component 'Pic 11' (no text or symbols on the diagram itself)Pic 12
4 / CARING FOR AND CLEANING YOUR APPLIANCE EN

Warning
Before carrying out any work, the power supply to the hood must be turned off, either by unplugging it or by using the circuit breaker switch.
• MAINTAINING YOUR APPLIANCE
| MAINTENANCE WHAT TO DO | PRODUCTS / ACCESSORIES TO USE | |
| Top surface and accessories | Never use metal scouring pads, abrasive products or excessively stiff brushes. | To clean the body and the lighting port, you should use only commercial household cleaning products diluted in water and then rinse using clean water, drying with a soft cloth. |
| Filter cartridge | This fi Iter traps fatty vapours and dust. This component plays an important role in ensuring the effectiveness of your hood. In the event of tough stains, use a non-abrasive cream, then rinse with clean water. | Use a commercial household cleaning product then rinse abundantly and dry. These fi Iters can be cleaned in a vertical position in your dishwasher.(Do not allow them to touch dirty dishes or silverware.) |
| Activated carbon fi Iter | This fi Iter traps odours and must be changed at least once a year depending on your level of use. You should order these fi Iters from your dealer (quoting the reference shown on the identifi cation plate located inside the hood) and note the date the fi Iter was changed. | |
To preserve your appliance, we recommend that you use Clearit cleaning products.

Professional expertise serving individuals
Clearit offers you professional products and solutions designed for the daily care of your household appliances and kitchens.
They are on sale at your regular retailer, along with a complete line of accessories and consumable products.
5 / TROUBLESHOOTINGEN
| SYMPTOMS | SOLUTIONS |
| The hood is not working... | Ensure that:• The power is not cut off.• A speed has been selected. |
| The hood is not operating effectively... | Ensure that:• The selected motor speed is suffi cient for the quantity of smoke and vapours to be cleared.• The kitchen is suffi ciently ventilated to allow for fresh air intake.• The carbon fi Iter is not worn (hood operating in recycling mode). |
| The hood stopped working | Ensure that:• The power is not cut off.• The single-pole cut-off device was not activated. |
6 / AFTER-SALES SERVICEEN
Any maintenance on your equipment should be undertaken by:
- either your dealer,
- or another qualified mechanic who is an authorized agent for the brand appliances.
When making an appointment, state the full reference of your equipment (model, type and serial number). This information appears on the manufacturer's nameplate attached to your equipment.
This device complies with the delegated regulations (EU) 65/2014 and 66/2014 of the European Commission on the eco design requirements and energy labeling of household hoods.
symbol Value Unit
| Brand | Brandt | ||
| Model number | AD1578X | ||
| Annual energy consumption | AEC | 91.3 | kWh/annum |
| Energy efficiency index | EEi | 81.9 | - |
| Fluid dynamic efficiency index | FDE | 15.9 | - |
| Lighting efficiency index | LE | 41.0 | - |
| Grease filtering efficiency | GFE | 64.7 | - |
| Time increase factor | f | 1.4 | - |
| Maximum volumetric airflow of the cooker hood | Q_max | 585.7 | m^3/h |
| Volumetric airflow at best efficiency point | Q_BEP | 313.2 | m^3/h |
| Static pressure at the best efficiency point | P_BEP | 318 | P |
| Power consumption at the best efficiency point | W_BEP | 173.9 | W |
| Nominal power consumption of lighting system | W_L | 1.0 | W |
| Average illumination of the lighting system | E_middle | 41 | Lux/W |
| Power consumption in off mode | P_o | -- | W |
| Power consumption in standby mode | P_s | 0.53 | W |
| Volumetric airflow at the highest speed setting in normal use | - | 556.8 | m^3/h |
| Volumetric airflow at the lowest speed setting in normal use | - | 370.2 | m^3/h |
| Volumetric airflow in intensive or boost mode | - | -- | m^3/h |
| Sound power emissions at the highest speed setting in normal use | - | 69 | dB(LwA) |
| Sound power emissions at the lowest speed setting in normal use | - | 64 | dB(LwA) |
| Sound power emissions in intensive / boost mode | - | -- | dB(LwA) |
FRS
1 / A L'ATTENTION DE L'UTILISATEUR
natural_image
Pure technical line drawing of a mechanical component or bracket assembly without any text, numbers, or symbols2 / INSTALLATION DE L'APPAREIL FR
• RESPECT DE L'ENVIRONNEMENT
natural_image
Illustration of a brick wall with pipes and a container, partially enclosed by a flat panel (no text or symbols)Image 4

natural_image
Architectural cross-section diagram of a brick wall with an open door and window (no text or symbols)Image 5

Image 6
3 / MODE D'EMPLOIFR
• UTILISATION DE LA HOTTE ASPIRANTE
natural_image
Four circular icons with abstract symbols: three fan-like and one sun-like, arranged horizontally (no text or labels)Petite
Moyenne
ÉclairageGrande
Image 7
4 / NETTOYAGE ET ENTRETIEN DE L'APPAREIL FR
- RETRAIT ET NETTOYAGE DES FILTRES À GRAISSE
Image 10
4 / NETTOYAGE ET ENTRETIEN DE L'APPAREILFR
• INSTALLATION DE LA T-SHARP
natural_image
Technical line drawing of a mechanical assembly with labeled components and arrows indicating motion (no text or symbols present)Image 12
4 / NETTOYAGE ET ENTRETIEN DE L'APPAREIL FR

Attention :
RELATIONS CONSOMMATEURS
natural_image
Pure technical line drawing of a mechanical component or bracket assembly without any text, numbers, or symbolsnatural_image
Illustration of a brick wall and a container with pipes, alongside a flat panel (no text or symbols)Imagem 4

natural_image
Architectural cross-section diagram of a brick wall with an open door and window (no text or symbols)Imagem 5

Imagem 6
Imagem 10
4 / CUIDADO E LIMPEZA DO SEU APARELHOPT
natural_image
Pure technical line drawing of a mechanical component or tool assembly (no text or symbols)2 / INSTALLATION DES GERÄTS DE
• UMWELTSCHUTZ
natural_image
Illustration of a brick wall and a container with pipes, alongside a flat panel (no text or symbols)Abbildung 4

natural_image
Architectural cross-section diagram of a brick wall with an open door and window (no text or symbols)Abbildung 5

natural_image
Four circular icons with abstract symbols: three with leaf-like shapes and one with sun-like symbol (no text or labels)Niedrig
Mittel
LichtHoch
Abbildung 7
Abbildung 8

Abbildung 10
natural_image
Pure technical line drawing of a mechanical component or tool assembly (no text or symbols)2 / INSTALLAZIONE DEL VOSTRO DISPOSITIVO IT
natural_image
Illustration of a brick wall and a container with curved lines, alongside a flat panel (no text or symbols)Immagine 4

natural_image
Architectural cross-section diagram of a brick wall with an open door and window (no text or symbols)Immagine 5

Immagine 6
3 / USO DEL VOSTRO DISPOSITIVOIT
• PER USARE LA VOSTRA CAPPA DA CUCINA
natural_image
Four circular icons with abstract symbols: three fan-like and one sun-like, arranged horizontally (no text or labels)Bassa
Media


LuceAlta
Immagine 7

Immagine 8

Immagine 10
4 / CURA E PULIZIA DEL VOSTRO DISPOSITIVOIT
• INSTALLAZIONE DELL'USCITA T-SHARP
natural_image
Simple line drawing of a cylindrical object mounted on a rectangular base with three vertical arrows pointing outward (no text or symbols)Immagine 11

natural_image
Technical line drawing of a mechanical assembly with no visible text or symbolsImmagine 12
natural_image
Pure technical line drawing of a mechanical component or tool assembly (no text or symbols)natural_image
Illustration of a brick wall and a container with pipes, no text or symbols present- Ábra

natural_image
Architectural cross-section diagram of a brick wall with an open door and ventilation duct (no text or symbols)- Ábra

natural_image
Four circular icons with abstract leaf-like symbols, no text or labels present- Ábra

- Ábra
natural_image
Pure technical line drawing of a mechanical component or tool assembly (no text or symbols)2 / NAINŠTALOVANIE VÁŠHO PRÍSTROJA
SK
• OCHRANA ŽIVOTNÉHO PROSTREDIA
natural_image
Illustration of a brick wall and a pipe system with a cylindrical object inside (no text or symbols)Obrázok 4

natural_image
Architectural cross-section diagram of a brick wall with an open door and ventilation duct (no text or symbols)Obrázok 5

natural_image
Two identical line drawings of a 3D object with internal compartments, shown from different angles (no text or symbols)Dobre
Zle
Obrázok 6
SK 3 / POUŽITIE VÁŠHO PRÍSTROJA
- POUŽITIE VÁŠHO KUCHYNSKÉHO ZVONA
natural_image
Four circular icons with abstract symbols: three fan-like and one sun-like, arranged horizontally (no text or labels)nízky
priemer


svetlovysoký
Obrázok 7

Ako šetriť energiu
Obrázok 8

- INŠTALÁCIA UHLÍKOVÉHO FILTRA, VID. OBRÁZOK 9;
— Odoberte fi ltre.
natural_image
Technical line drawing of a mechanical assembly with three views showing internal components (no text or symbols)Obrázok 10
SK 4 / ÚDRŽBA A ČISTENIE VÁŠHO PRÍSTROJA
• INŠTALÁCIA VÝVODU T-SHARP
natural_image
Simple line drawing of a cylindrical object mounted on a rectangular base with three vertical arrows pointing outward (no text or symbols)Obrázok 11

natural_image
Technical line drawing of a mechanical assembly with no visible text or symbolsObrázok 12
4 / ÚDRŽBA A ČISTENIE VÁŠHO PRÍSTROJA
SK

Varovanie
2 / INSTALACE VAŠEHO PŘÍSTROJE
natural_image
Pure technical line drawing of a mechanical component or bracket assembly without any text, numbers, or symbols2 / INSTALACE VAŠEHO PRÍSTROJE
CZ
• OCHRANA ŽIVOTNÍHO PROSTŘEDÍ
natural_image
Illustration of a brick wall and electrical panel installation (no text or symbols)Obrázek 4

natural_image
Architectural cross-section diagram of a brick wall with an open door and ventilation duct (no text or symbols)Obrázek 5

natural_image
Two identical line drawings of a mechanical or architectural component with no text, numbers, or symbols.natural_image
Four circular icons with abstract symbols: three fan-like and one sun-like, arranged horizontally (no text or labels)Nízká
Střední

natural_image
Simple line drawing of a cylindrical object mounted on a rectangular base with three vertical arrows pointing outward (no text or symbols)Obrázek 11

natural_image
Technical line drawing of a mechanical assembly with no visible text or symbolsObrázek 12
4 / ÚDRŽBA A ČIŠTĚNÍ VAŠEHO PŘÍSTROJE
CZ

Varování
natural_image
Pure technical line drawing of a mechanical component or bracket assembly without any text, numbers, or symbols2 / INSTALACJA URZĄDZENIA
PL
natural_image
Illustration of a brick wall and a container with pipes, alongside a flat panel (no text or symbols)Rys. 4

natural_image
Architectural cross-section diagram of a brick wall with an open door and window (no text or symbols)Rys. 5

natural_image
Four circular icons with abstract symbols: a fan, a propeller, a sun, and a light bulb (no text or labels)
natural_image
Technical line drawing of a mechanical assembly with three views showing internal components (no text or symbols)Rys. 10
PL 4 / KONSERWACJA I CZYSZCZENIE URZĄDZENIA
• INSTALACJA WYLOTU POWIETRZA
natural_image
Technical line drawing of a mechanical assembly with labeled component 'Rys. 11' (no readable text or symbols beyond label)Rys. 12
4 / KONSERWACJA I CZYSZCZENIE URZĄDZENIA
PL

Ostrzeżenie
2 / INSTALLATION AF APPARATET
- Miljøbeskyttelse 166
3 / BRUG AF APPARATET
natural_image
Pure technical line drawing of a mechanical component or bracket assembly without any text, numbers, or symbols2 / INSTALLATION AF APPARATET DK
• MILJ∅BESKYTTELSE
natural_image
Illustration of a brick wall and a pipe system with a cylindrical object (no text or symbols)Illustration 4

natural_image
Architectural line drawing of a brick wall with a cabinet and door (no text or symbols)Illustration 5

natural_image
Two identical line drawings of a 3D object with internal compartments, shown from different angles (no text or symbols)natural_image
Four circular icons with abstract leaf-like symbols, no text or labels presentLysHøjMiddelLav
Illustration 7

Gode råd om energibesparelse
4 / PLEJE OG RENG∅RING AF APPARATET DK
• UDSKIFTNING OG RENG∅RING AF ANTI-FEDT FILTRENE
Illustration 8

• INSTALLATION AF KULFILTRET, SE ILLUSTRATION 9;
— Afmonter fi Itrene.
Illustration 10
4 / PLEJE OG RENG∅RING AF APPARATETDK
• INSTALLATION AF T-SHARP UDTAGET
natural_image
Simple line drawing of a cylindrical object mounted on a rectangular base with three vertical arrows pointing outward (no text or symbols)Illustration 11

natural_image
Technical line drawing of a mechanical assembly with no visible text or symbolsIllustration 12
4 / PLEJE OG RENG∅RING AF APPARATET DK

Advarsel
natural_image
Pure technical line drawing of a mechanical component or tool assembly (no text or symbols)2 / HET INSTALLEREN VAN UW APPARAAT NL
• BESCHERMING VAN HET MILIEU
natural_image
Illustration of a brick wall and a container with pipes, alongside a flat panel (no text or symbols)Afb. 4

natural_image
Architectural cross-section diagram of a brick wall with an open door and ventilation duct (no text or symbols)Afb. 5

natural_image
Four circular icons with abstract symbols: three with leaf-like shapes and one with sun-like symbol (no text or labels)LichtHoogMidLaag
Afb. 7


• INSTALLATIE VAN HET KOOLSTOFFILTER, ZIE AFB. 9;
Afb. 10
4 / ONDERHOUD EN SCHOONMAKEN VAN UW APPARAAT NL
• INSTALLATIE VAN DE T-SHARP AFVOER
natural_image
Simple line drawing of a mechanical component with three vertical arrows pointing upward (no text or symbols)Afb. 11

natural_image
Technical line drawing of a mechanical assembly with no visible text or symbolsAfb. 12
4 / ONDERHOUD EN SCHOONMAKEN VAN UW APPARAAT NL

Waarschuwing
natural_image
Pure technical line drawing of a mechanical component or tool assembly (no text or symbols)2 / INSTALLATIONEN AV ER APPARAT SV
• SKYDD AV OMGIVNINGSMILJÖN
natural_image
Illustration of a brick wall and electrical panel installation (no text or symbols)Bild 4

natural_image
Architectural line drawing of a brick wall with a cabinet and door (no text or symbols)Bild 5

Bild 6
3 / ANVÄNDNING AV ER APPARATSV
natural_image
Four circular icons with abstract symbols: three fan-like and one sun-like, arranged horizontally (no text or labels)LjusHögMedelLåg
Bild 7

Energisparråd

Bild 10
4 / TILLSYN OCH RENGÖRING AV APPARATENSV
• INSTALLATION AV UTLOPPET T-SHARP
natural_image
Technical line drawing of a mechanical assembly with labeled components (no text or symbols beyond label)Bild 12

Energisparråd
natural_image
Pure technical line drawing of a mechanical component or tool assembly (no text or symbols)natural_image
Illustration of a brick wall and a container with pipes, alongside a flat panel (no text or symbols)Рис. 4

natural_image
Architectural cross-section diagram of a brick wall with an open door and window (no text or symbols)Рис. 5

natural_image
Four circular icons with abstract symbols: three with leaf-like shapes and one with sun-like symbol (no text or labels)
Рис. 10
natural_image
Simple line drawing of a mechanical component with three vertical arrows pointing upward (no text or symbols)Рис. 11

natural_image
Technical line drawing of a mechanical assembly with no visible text or symbolsРис. 12

- ESÍ
- / USO DE SU APARATOES
- • PARA USAR SU CAMPANA DE COCINA
- / CUIDADO Y LIMPIEZA DE SU APARATO ES
- / INSTALLING YOUR APPLIANCE
- / USING YOUR APPLIANCE
- / CARING FOR AND CLEANING YOUR APPLIANCE
- Warning :
- EN
- / NOTICES TO THE USER
- Attention
- Safety and important precautions
- / NOTICES TO THE USER EN
- Important precautions
- Electrical risks
- / NOTICES TO THE USEREN
- Risk of asphyxiation
- Risk of fire
- Warning
- • ENVIRONMENTAL PROTECTION
- / INSTALLING YOUR APPLIANCE EN
- Advice on how to save energy
- Note
- / USING YOUR APPLIANCEEN
- • TO USE YOUR COOKER HOOD
- / CARING FOR AND CLEANING YOUR APPLIANCE EN
- - CHANGING AND CLEANING THE ANTI-GREASE FILTERS
- • INSTALLING THE CARBON FILTER, SEE PIC. 9;
- Warning:
- • CHANGING THE LIGHT BULB
- / CARING FOR AND CLEANING YOUR APPLIANCEEN
- • INSTALL THE T-SHARP OUTELT
- Professional expertise serving individuals
- / AFTER-SALES SERVICEEN
- FRS
- / A L'ATTENTION DE L'UTILISATEUR
- / INSTALLATION DE L'APPAREIL FR
- • RESPECT DE L'ENVIRONNEMENT
- / MODE D'EMPLOIFR
- • UTILISATION DE LA HOTTE ASPIRANTE
- / NETTOYAGE ET ENTRETIEN DE L'APPAREIL FR
- - RETRAIT ET NETTOYAGE DES FILTRES À GRAISSE
- / NETTOYAGE ET ENTRETIEN DE L'APPAREILFR
- • INSTALLATION DE LA T-SHARP
- Attention :
- RELATIONS CONSOMMATEURS
- / CUIDADO E LIMPEZA DO SEU APARELHOPT
- / INSTALLATION DES GERÄTS DE
- • UMWELTSCHUTZ
- / INSTALLAZIONE DEL VOSTRO DISPOSITIVO IT
- / USO DEL VOSTRO DISPOSITIVOIT
- • PER USARE LA VOSTRA CAPPA DA CUCINA
- / CURA E PULIZIA DEL VOSTRO DISPOSITIVOIT
- • INSTALLAZIONE DELL'USCITA T-SHARP
- / NAINŠTALOVANIE VÁŠHO PRÍSTROJA
- • OCHRANA ŽIVOTNÉHO PROSTREDIA
- SK 3 / POUŽITIE VÁŠHO PRÍSTROJA
- - POUŽITIE VÁŠHO KUCHYNSKÉHO ZVONA
- Ako šetriť energiu
- - INŠTALÁCIA UHLÍKOVÉHO FILTRA, VID. OBRÁZOK 9;
- SK 4 / ÚDRŽBA A ČISTENIE VÁŠHO PRÍSTROJA
- • INŠTALÁCIA VÝVODU T-SHARP
- / ÚDRŽBA A ČISTENIE VÁŠHO PRÍSTROJA
- Varovanie
- / INSTALACE VAŠEHO PŘÍSTROJE
- / INSTALACE VAŠEHO PRÍSTROJE
- • OCHRANA ŽIVOTNÍHO PROSTŘEDÍ
- / ÚDRŽBA A ČIŠTĚNÍ VAŠEHO PŘÍSTROJE
- Varování
- / INSTALACJA URZĄDZENIA
- PL 4 / KONSERWACJA I CZYSZCZENIE URZĄDZENIA
- • INSTALACJA WYLOTU POWIETRZA
- / KONSERWACJA I CZYSZCZENIE URZĄDZENIA
- Ostrzeżenie
- / INSTALLATION AF APPARATET
- / BRUG AF APPARATET
- / INSTALLATION AF APPARATET DK
- • MILJ∅BESKYTTELSE
- Gode råd om energibesparelse
- / PLEJE OG RENG∅RING AF APPARATET DK
- • UDSKIFTNING OG RENG∅RING AF ANTI-FEDT FILTRENE
- • INSTALLATION AF KULFILTRET, SE ILLUSTRATION 9;
- / PLEJE OG RENG∅RING AF APPARATETDK
- • INSTALLATION AF T-SHARP UDTAGET
- Advarsel
- / HET INSTALLEREN VAN UW APPARAAT NL
- • BESCHERMING VAN HET MILIEU
- • INSTALLATIE VAN HET KOOLSTOFFILTER, ZIE AFB. 9;
- / ONDERHOUD EN SCHOONMAKEN VAN UW APPARAAT NL
- • INSTALLATIE VAN DE T-SHARP AFVOER
- Waarschuwing
- / INSTALLATIONEN AV ER APPARAT SV
- • SKYDD AV OMGIVNINGSMILJÖN
- / ANVÄNDNING AV ER APPARATSV
- Energisparråd
- / TILLSYN OCH RENGÖRING AV APPARATENSV
- • INSTALLATION AV UTLOPPET T-SHARP
Brand : BRANDT
Model : AD1578X
Category : Range hood