
NM 2255 Latte Art - Milk frother ECG - Free user manual and instructions
Find the device manual for free NM 2255 Latte Art ECG in PDF.


| Product Type | Milk Frother |
| Brand / Model | ECG NM 2255 Latte Art |
| Rated Voltage | 220-240 V~, 50/60 Hz |
| Rated Power | 550 W |
| Heating Capacity (Milk) | 300 ml (max) |
| Frothing Capacity (Hot/Cold) | 150 ml (max) |
| Functions | Hot frothing, Cold frothing, Milk heating, Hot chocolate preparation |
| Frothing Attachment | Spring whisk on holder |
| Stirring Attachment | Stirrer (used without frother for heating) |
| Chocolate Whisk | Beater for chocolate (used with stirrer) |
| Milk Temperature Range (Heating) | 55-75 °C (depending on function) |
| Frothing Time (Hot) | 150-290 seconds |
| Frothing Time (Cold) | 120 seconds |
| Heating Time (Milk) | 200-450 seconds |
| Control | Two buttons: hot (red indicator) / cold (blue indicator) |
| Safety Features | Auto shut-off when container lifted, overfill protection (max marks) |
| Housing Material | Plastic with stainless steel heating plate (base) |
| Cleaning | Hand washable container, lid, and attachments; wipe base with dry cloth |
| Dishwasher Safe | No |
| Accessories Included | Power base, bowl, lid with seal, whisk holder, frother, stirrer, chocolate beater |
| Manual Languages | English, German, Czech, Estonian, Croatian, Latvian, Lithuanian, Hungarian, Polish, Romanian, Slovak, Slovenian, Serbian |
| Weight (approximate) | 1.2 kg (estimated) |
| Dimensions (approx.) | 12 x 12 x 25 cm (base not included) |
Frequently Asked Questions - NM 2255 Latte Art ECG
User questions about NM 2255 Latte Art ECG
0 question about this device. Answer the ones you know or ask your own.
Ask a new question about this device
Download the instructions for your Milk frother in PDF format for free! Find your manual NM 2255 Latte Art - ECG and take your electronic device back in hand. On this page are published all the documents necessary for the use of your device. NM 2255 Latte Art by ECG.
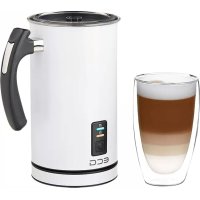
USER MANUAL NM 2255 Latte Art ECG
natural_image
Black and white photo of a black ECG water heater with lid and control knob (no visible text or symbols)NM 2255 Latte Art
MILK FROTHER
INSTRUCTION MANUAL
MILCHAUFSCHÄUMER
BEDIENUNGSANLEITUNG
NAPĚNOVAČ MLÉKA
NÁVOD K OBSLUZE
PIIMAVAHUSTAJA
KASUTUSJUHEND
PJENILO ZA MLIJEKO
UPUTE ZA UPORABU
PIENA PUTOTĀJS
ROKASGRÂMATA
PIENO PLAKTUVAS
INSTRUKCIJŲ VADOVAS
TEJHABOSÍTÓ
HASZNÁLATI ÚTMUTATÓ
SPIENIACZ DO MLEKA
INSTRUKCJA OBSŁUGI
APARAT PENTRU SPUMAREA LAPTELUI
INSTRUCTIUNI DE UTILIZARE
NAPEŇOVAČ MLIEKA
NÁVOD NA OBSLUHU
PENILNIK ZA MLEKO
NAVODILA
UREĐAJ ZA PRAVLJENJE MLEČNE PENE
UPUTSTVO ZA UPOTREBU
English
- Power base
- Hot milk frothing button
- Cold milk frothing button
- Lid
- Lid seal
- Bowl
- Mixer holder
- Chocolate beater
- Holder
- Stirrer
- Frother
- Whisk holder
Deutsch
Read carefully and save for future use!
Warning: The safety measures and instructions, contained in this manual, do not include all conditions and situations possible. The user must understand that common sense, caution and care are factors that cannot be integrated into any product. Therefore, these factors shall be ensured by the user/s using and operating this appliance. We are not liable for any damages caused during shipping, by incorrect use, voltage fluctuation or the modification or adjustment of any part of the appliance.
To protect against a risk of fire or electric shock, basic precautions shall be taken while using electrical appliances, including the following:
- Make sure the voltage in your outlet corresponds to the voltage provided on the appliance label and that the socket is properly grounded. The outlet must be installed in accordance with applicable electrical codes according to EN.
- Never use the appliance when the power cord is damaged. All repairs, including cord replacements, must be carried out at a professional service centre! Do not remove the protective covers from the appliance; there is a risk of electric shock!
- Protect the appliance from direct contact with water or other liquids to prevent possible electric shock.
- Do not use the appliance outside or in a wet environment. Do not touch the power cord or the appliance with wet hands. Risk of electric shock.
- Do not plug in the appliance or use the controls with wet hands.
-
We recommend that you do not leave the appliance unattended when the power cord is plugged in. Disconnect the cord from the electrical outlet prior to any maintenance. Do not remove the power cord from the outlet by yanking the cord. Unplug the power cord from the outlet by grasping the plug.
-
When disconnecting, first "switch off the appliance" and then disconnect the plug from the socket. Always unplug the device when not in use.
- Do not use the appliance for purposes other than those for which it was intended.
- Do not allow the power cord to touch hot surfaces or run the cord over sharp edges.
- Use original accessories only.
- The appliance should not be left unattended when in operation.
- Pay extra attention when using the appliance near children. Never allow children to use the appliance alone to protect them against the risk of electric shock. Place the frother only in a location where children would not have access. Do not let the cord hang over the edge of the table or worktop on which the appliance stands.
- Do not put the appliance on a hot surface and do not use it close to a heat source (e.g. stove).
- Use the appliance only according to the instructions in this manual. The manufacturer is not liable for any damage caused by the improper use of this appliance.
- The appliance is not suitable to put in the refrigerator or in the freezer and it cannot be washed in the dishwasher.
- Do not switch the frother on without milk inside.
- Do not touch the rotating parts, there is a risk of injury.
- Do not overfill, when exceeding the capacity the container of the frother could overflow.
- Use the frother only with the supplied base.
- Never use the frother on an uneven surface. Make sure that the appliance is placed on a horizontal, even and stable surface, do not use the product in sinks, on drip trays or on other uneven places.
- This appliance is intended for household use.
-
Do not place the appliance on the wall or on any other appliances. Leave at least 10 cm of free space on the back and on the side and 10 cm of free space above the appliance. Do not place any objects on the appliance.
-
This appliance is intended for use by children 8 years of age and older and persons with reduced physical or mental abilities or lack of experience and knowledge, provided they are supervised by an adult or have been instructed in the safe use of the appliance and understand the potential hazards. Children shall not play with the appliance. Cleaning and maintenance performed by the user should not be done by children unless they are older than 8 years and under supervision. Children under 8 years old must keep away from the appliance and its power supply.
Do not immerse in water!
USING THE APPLIANCE
Before first use
- Unpack the appliance and keep all the packing material and foils for future use.
- Check if the appliance is complete and undamaged.
- Wash the frother container and accessories prior to first use as describet in the chapter „Maintenance and cleaning“.
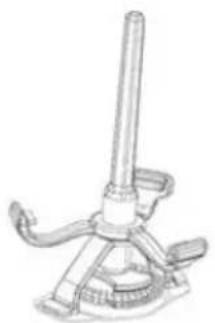
Selecting / installing correct attachment
natural_image
Technical line drawing of a mechanical device with a cylindrical shaft and base mount (no text or symbols)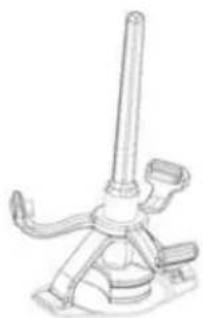
natural_image
Line drawing of a mechanical device with a central shaft and base mount (no text or symbols)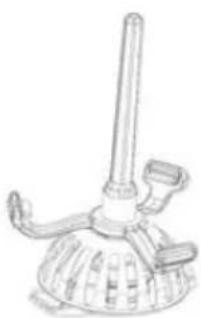
natural_image
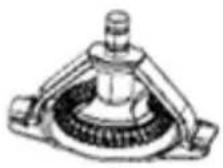
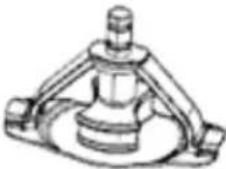
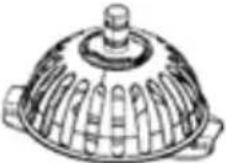
Line drawing of a laboratory alcohol lamp with a conical flask and tripod stand (no text or labels)Frothing or frothing and heating: Milk heating: stirrer without the frother without the chocolate whisk. chocolate whisk and frother.
Making hot chocolate: stirrer with chocolate whisk, without the frother
Function table
| Attachment Functions | Amount of milk Duration | Milk temperature | ||
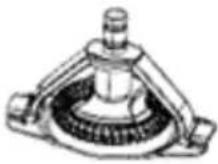 | Frothing and heating 150 ml | 150–290 s 60–75 °C | ||
| Frothing 150 ml 120 s | - | |||
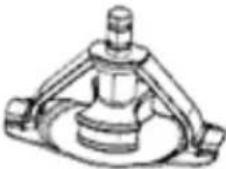 | Heating milk 300 ml 200–450 s 55–70 °C | |||
| Making hot chocolate from powder | 300 ml + 60 g of chocolate powder | 200–450 s 55 | -70 °C | |
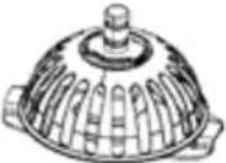 | Making hot chocolate from chocolate bar | 300 ml + 60 g of chocolate bar | 200–450 s 60 | -75 °C |
Depending on the initial temperature of the milk and froth, the length of time may vary. The above times were tested with milk temperature of 5–10 °C and room temperature about 25 °C.
Frothing and heating
-
Install the frother on the whisk holder.
-
Pour milk in the frother. Make sure the amount of milk does not exceed the mark of maximum capacity inside the container.
-
Press the hot milk frothing button until the red indicator lights up .
-
The stirrer in the container starts rotating and the heating plate heats up. Red indicator is on.
-
When the indicator starts flashing for 5 seconds, lift the container. The red indicator light goes out automatically and the frother finishes frothing the hot milk. You can then pour the frothed milk out of the container.
Frothing (without heating)
-
Install the frother on the whisk holder.
-
Pour milk in the frother. Make sure the amount of milk does not exceed the mark of maximum capacity inside the container.
-
Press the cold milk frothing button until the blue indicator lights up .
-
The whisk in the container starts rotating. Blue indicator is on.
-
When the indicator starts flashing for 5 seconds, lift the container. The blue indicator light goes out automatically and the frother finishes frothing the cold milk.
-
You can then pour the frothed milk out of the container.
Heating milk (without frothing)
-
Use the stirrer without the frother - it is necessary to remove the spring of the frother from its holder and insert the stirrer in its place.
-
Pour milk in the frother. Make sure the amount of milk does not exceed the mark of maximum capacity MAX inside the container.
-
Press the hot milk frothing button until the red indicator lights up .
-
At this point the stirrer in the container begins to rotate and the heating plate heats up. Red indicator is on.
-
When the indicator starts flashing lift the container. The red indicator goes out and the frother finishes stirring the heated milk.
-
You can then pour the heated milk out of the container.
Making hot chocolate
-
After using the chocolate whisk correctly according to the above instructions, put 300 ml of whole milk and 60 g of bar chocolate into the container.
-
Press and hold the hot milk frothing button until the red indicator lights up .
-
As soon as the whisk starts to spin, the heating panel starts to increase the temperature until the red indicator flashes.
-
The indicator will flash for 5 seconds. Then lift the container and the red indicator will go off. After you finish stirring, pour the hot chocolate into a cup.
Standby mode
If you press any button while removing the container from the base, the frother will remain in standby mode. The blue and red indicators will flash simultaneously for 5 seconds.
TIPS AND TRICKS
The following tips will help you make delicious milk froth.
- When the milk frother is operating, it is necessary to immediately prepare coffee or hot chocolate.
- For the production of milk froth is best to use whole milk (with a fat content higher than 3).
- This frother can make froth from cold milk. During operation, however, the appliance emits a small amount of heat, thanks to which the frothed milk will not be as cold as before.
• The milk can be heated to a maximum of 60-70°C, which is the ideal temperature range for making coffee. - The frother and its attachments are relatively small. Therefore, it is necessary to store the appliance in a safe place to prevent loss or endangerment of children's health.
- The frother must be cleaned right after each use. Use a dry cloth to wipe off the foam.
TROUBLESHOOTING
| Problem Cause Solution | ||
| The light is not on, the frother does not work | The power cord is not properly plugged in. | Plug the power cord in the outlet properly. |
| Poor contact between the frother and the base. | Attach the frother to the base properly. | |
| The electrical outlet is not under voltage. Try to use another outlet. | ||
| Appliance malfunction. Bring it to the service centre. | ||
| After starting the frother stopped working. | The frother is too hot. Rinse with cold water. | |
| The frother is damaged by immersion in water. | Bring it to the service centre. | |
| The motor does not work | The frother was not cleaned after use, the milk clogged the mechanism. | Clean and then move the drive shaft of the motor by hand. |
| Damaged motor. Bring it to the service centre. | ||
| Heating does not work | Appliance malfunction. Bring it to the service centre. | |
| Burnt milk Incorrect amount of milk Use the correct amount of milk | ||
| Clean after every use. | ||
MAINTENANCE AND CLEANING
Always unplug the power cord from the wall outlet before cleaning and let the appliance cool off thoroughly! Remove the frother from the base before cleaning. Never immerse the base in water!
- Frother container: Clean immediately after each use. Clean the walls with water with detergent and soft cloth. Then wipe it dry.
- Lid: Remove the lid and the silicon seal from the frother. Rinse it with water.
- Exterior surface: Clean with dry cloth. Never use aggressive cleaning agents, hard nylon or wire brushes that could scratch the surface. Never use any metal or sharp objects or abrasive powders for cleaning.
- Attachments: Remove from the frother and rinse with warm water. Dry them and store them in a safe place.
TECHNICAL DATA
Heating milk 300 ml
Frothing milk 150 ml
Nominal voltage: 220–240 V\~ 50/60 Hz
Nominal input power: 550 W
USE AND DISPOSAL OF WASTE
Wrapping paper and corrugated paperboard – deliver to scrapyard. Packing foil, PE bags, plastic elements – throw into plastic recycling containers.
DISPOSAL OF PRODUCTS AT THE END OF LIFETIME
Disposal of electric and electronic equipment (valid in EU member countries and other European countries with an implemented recycling system)
The represented symbol on the product or package means the product shall not be treated as domestic waste. Hand over the product to the specified location for recycling electric and electronic equipment. Prevent negative impacts on human health and the environment by properly recycling your product. Recycling contributes to preserving natural resources. For more information on the recycling of this product, refer to your local authority, domestic waste processing organization or store, where you purchased the product.
This product complies with the requirements of the EU directives on electromagnetic compatibility and electrical safety and the issue of heavy metals in electrical and electronic equipment. Furthermore, it meets the relevant energy intensity and hygienic requirements for direct contact with food.
The operating manual is available on internet at www.ecg -electro.eu.
Changes of text and technical parameters reserved.
08/05
SICHERHEITSHINWEISE
natural_image
Technical line drawing of a mechanical device with no visible text or symbolsnatural_image
Technical line drawing of a mechanical device with no visible text or symbolsnatural_image
Line drawing of a vintage oil lamp with spout and base (no text or symbols)Do not immerse in water! – Neponořovat do vody!
POKYNY K POUŽÍVÁNÍ
natural_image
Technical line drawing of a mechanical device with no visible text or symbolsnatural_image
Technical line drawing of a mechanical device with tripod base and tripod support (no text or symbols)natural_image
Line drawing of a vintage-style incandescent burner with a long spout and fluted base (no text or symbols)natural_image
Technical line drawing of a mechanical device with a cylindrical shaft and base mount (no text or symbols)natural_image
Technical line drawing of a mechanical device with a central shaft and base (no text or symbols)natural_image
Line drawing of a laboratory alcohol lamp with a conical tip and fluted base (no text or symbols)natural_image
Technical line drawing of a mechanical device with no visible text or symbolsnatural_image
Technical line drawing of a mechanical device with no visible text or symbolsnatural_image
Line drawing of a laboratory alcohol lamp with a spire and bulb (no text or labels)natural_image
Technical line drawing of a mechanical device with no visible text or symbolsnatural_image
Technical line drawing of a mechanical device with a central shaft and base (no text or symbols)natural_image
Line drawing of a laboratory alcohol lamp with a spire and bulb (no text or labels)natural_image
Technical line drawing of a mechanical device with a cylindrical shaft and base mount (no text or symbols)natural_image
Line drawing of a mechanical device with a tripod base and three legs (no text or symbols)natural_image
Line drawing of a vintage oil lamp with a spire and base (no text or symbols)natural_image
Technical line drawing of a mechanical device with a cylindrical shaft and curved arms (no text or symbols)natural_image
Line drawing of a mechanical device with a central shaft and base (no text or symbols)natural_image
Line drawing of a vintage oil lamp with spout and base (no text or symbols)natural_image
Technical line drawing of a mechanical device with no visible text or symbolsnatural_image
Line drawing of a mechanical device with a cylindrical shaft and base (no text or symbols)natural_image
Line drawing of a vintage oil lamp with spout and base (no text or symbols)natural_image
Technical line drawing of a mechanical device with a cylindrical shaft and base mount (no text or symbols)natural_image
Technical line drawing of a mechanical device with tripod base and cylindrical protrusions (no text or symbols)natural_image
Line drawing of a vintage alcohol lamp with a spire and base (no text or symbols)Do not immerse in water! – Neponárat do vody!
POKYNY NA POUŽÍVANIE
Pred prvým použitím
natural_image
Technical line drawing of a mechanical device with a cylindrical shaft and base mount (no text or symbols)natural_image
Technical line drawing of a mechanical device with a central shaft and four arms (no text or symbols)natural_image
Line drawing of a laboratory alcohol lamp with a spire and bulb (no text or labels)natural_image
Technical line drawing of a dome-shaped mechanical component with internal ribs (no text or symbols)natural_image
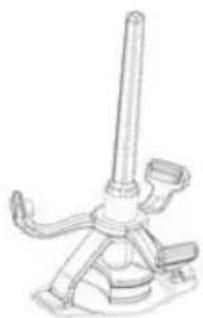
Technical line drawing of a mechanical device with a cylindrical shaft and base mount (no text or symbols)Penjenje ali penjenje in gretje: penilnik brez stepala čokolade.
natural_image
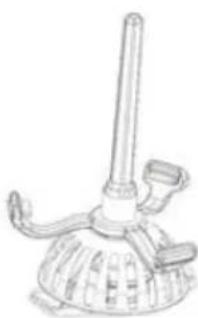
Line drawing of a mechanical device with a central shaft and base mount (no text or symbols)Gretje mleka: mešalo brez stepala čokolade in penilnika.
natural_image
Line drawing of a vintage oil lamp with a spire and base (no text or symbols)BEZBEDNOSNA UPUTSTVA
natural_image
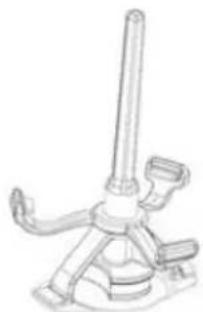
Technical line drawing of a mechanical device with no visible text or symbolsPenenje ili penjenje i zagrejavanje: uređaja za pravljenje pene bez miksera čokolade.
natural_image
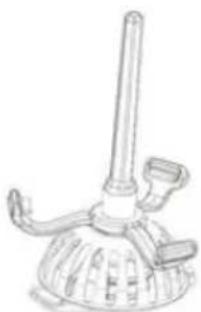
Line drawing of a mechanical device with a central shaft and four arms (no text or symbols)Grejanje mleka: mešalica bez miksera čokolade i uređaja za pravljenje pene.
natural_image
Line drawing of a laboratory alcohol lamp with a spout and bulb (no text or labels)Priprema gorke čokolade: mešalica sa mikserom čokolade, bez uređaja za pravljenje pene
Tabla funkcija
| Nastavak Funkcija Količina mleka Trajanje | Temperatura mleka | |||
 | Penenje i zagrejavanje 150 ml | 150–290 s 60–75 °C | ||
| Penjenje 150 ml 120 s | - | |||
 | Grejanje mleka 300 ml 200–450 s 55–70 °C | |||
| Priprema vruće čokolade iz praha | 300 ml + 60 g čokolade u prahu | 200–450 s 55–70 °C | ||
 | Priprema vruće čokolade iz čokolade u tabli | 300 ml + 60 g čokolade u tabli | 200–450 s 60–75 °C | |
Ovisno o početnoj temperaturi mleka i pene, trajanje može varirati. Gore navedena trajanja ispitivana su na temperaturi mleka od 5-10 °C i sobnoj temperaturi od oko 25 °C.
Penenje i zagrejavanje
-
Namestite uređaj za pravljenje pene na držač miksera.
-
Ulijte mleko u penjač. Pazite da sadržaj mleka ne prelazi granicu maksimalnog kapaciteta u posudi.
-
Pritisnite taster za penjenje vrućeg mleka , sve dok crveni indikator ne zasvetli .
-
Mešalica u posudi počinje da se okreće i vruća ploča se zagrejava. Svetli crveni indikator.
-
Kad indikator počne da trepće u trajanju 5 sekundi, podignite posudu. Crveno indikatorsko svetlo automatski se gasi, a uređaj za pravljenje pene završava penjenje vrućeg mleka. Zatim iz posude možete da izlijete napenjeno mleko.
Penenje (bez grejanja)
-
Namestite uređaj za pravljenje pene na držač miksera.
-
Ulijte mleko u penjač. Pazite da sadržaj mleka ne prelazi granicu maksimalnog kapaciteta u posudi.
-
Pritisnite taster za penjenje hladnog mleka , sve dok plavi indikator ne zasvetli .
-
Metlica u posudi počinje da se okreće. Svetli plavi indikator.
-
Kad indikator počne da trepće u trajanju 5 sekundi, podignite posudu. Plavo indikatorsko svetlo automatski se gasi, a uređaj za pravljenje pene završava penjenje hladnog mleka.
-
Zatim iz posude možete da izlijete napenjeno mleko.
natural_image
Technical line drawing of a mechanical device with no visible text or symbols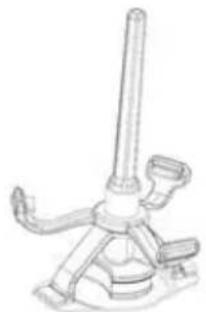
natural_image
Line drawing of a mechanical device with a cylindrical shaft and base mount (no text or symbols)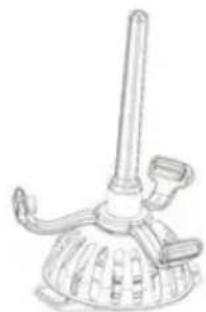
natural_image
Line drawing of a laboratory alcohol lamp with a spout and bulb (no text or labels)natural_image
Technical line drawing of a mechanical device with no visible text or symbolsnatural_image
Line drawing of a mechanical device with a central shaft and base mount (no text or symbols)natural_image
Line drawing of a laboratory alcohol lamp with a conical flask and spout (no text or labels)

- NM 2255 Latte Art
- English
- Deutsch
- Read carefully and save for future use!
- Do not immerse in water!
- USING THE APPLIANCE
- Before first use
- Selecting / installing correct attachment
- Function table
- Frothing and heating
- Frothing (without heating)
- Heating milk (without frothing)
- Making hot chocolate
- Standby mode
- TIPS AND TRICKS
- MAINTENANCE AND CLEANING
- TECHNICAL DATA
- USE AND DISPOSAL OF WASTE
- DISPOSAL OF PRODUCTS AT THE END OF LIFETIME
- SICHERHEITSHINWEISE
- Do not immerse in water! – Neponořovat do vody!
- POKYNY K POUŽÍVÁNÍ
- Do not immerse in water! – Neponárat do vody!
- POKYNY NA POUŽÍVANIE
- Pred prvým použitím
- BEZBEDNOSNA UPUTSTVA
- Penenje i zagrejavanje
- Penenje (bez grejanja)
Brand : ECG
Model : NM 2255 Latte Art
Category : Milk frother