
MultiSync BT421 - Screen NEC - Free user manual and instructions
Find the device manual for free MultiSync BT421 NEC in PDF.


| Product type | Professional flat panel |
| Brand | NEC |
| Model | MultiSync BT421 |
| Screen size | 42 inches (106.7 cm) |
| Resolution | Full HD (1920 x 1080) |
| Brightness | 500 cd/m² |
| Contrast ratio | 4000:1 |
| Power consumption | 95 W (typical) |
| Power supply | AC 100-240 V, 50/60 Hz |
| Weight | 15.5 kg |
| Dimensions (W x H x D) | 970 x 570 x 80 mm (without stand) |
| Main functions | Professional digital display, landscape/portrait mode, HDMI, DisplayPort, VGA, USB inputs |
| Maintenance and cleaning | Use a soft, dry cloth; do not use abrasive products |
| Safety | Adequate ventilation, do not block vents, use a suitable wall mount |
| Spare parts and repairability | Available through NEC customer service; 3-year warranty |
Frequently Asked Questions - MultiSync BT421 NEC
User questions about MultiSync BT421 NEC
0 question about this device. Answer the ones you know or ask your own.
Ask a new question about this device
Download the instructions for your Screen in PDF format for free! Find your manual MultiSync BT421 - NEC and take your electronic device back in hand. On this page are published all the documents necessary for the use of your device. MultiSync BT421 by NEC.
USER MANUAL MultiSync BT421 NEC
Large Format Display
For additional information or viewing User's manual, visit our website.
https://www.nec-display-solutions.com/
https://www.nec-display.com/dl/jp/dp/man_dim/index.html
Contents
Your new monitor box should contain the following:
- LCD monitor • Power cord • Video Signal Cable
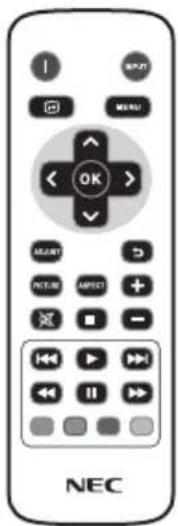
- Wireless Remote Control and AAA Batteries x 2
- Setup Manual
- Clamp
- Screw
LCD monitor
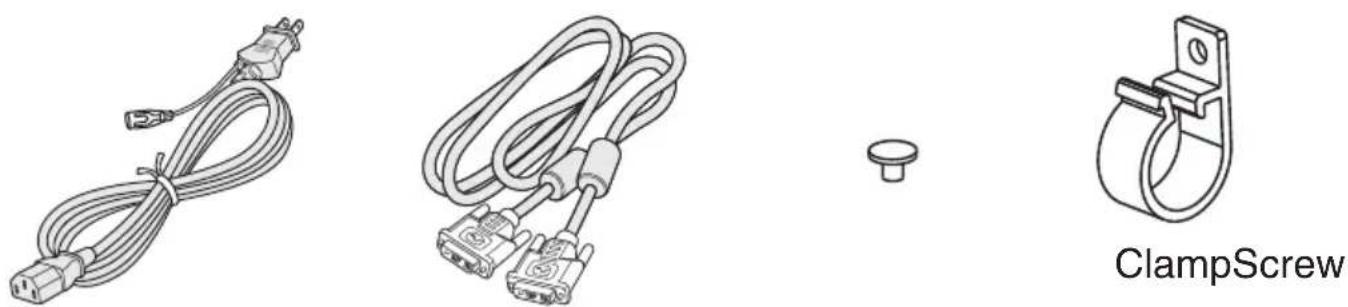
Video Signal CablePower Cord
Wireless Remote Control and AAA Batteries x 2
Setup Manual
Setup Manual
Ventilation Requirements
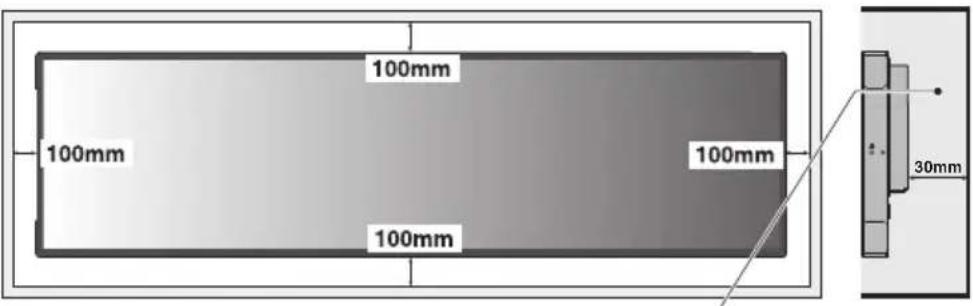
Must be under 50 Degree Celsius.
CAUTION: Please use the supplied cables. Use the shielded DVI cable with ferrite cable cores. Use shielded network cables. Using any other types of cables could cause interference to reception.
Connect cables
NOTE: Do not connect or disconnect cables when turning on the monitor's main power or other external equipment's power, as this may result in a loss of the monitor image.
Before making connections:
- First turn off the power of all the attached equipment and make connections.
- Refer to the user's manual included with each separate piece of equipment.
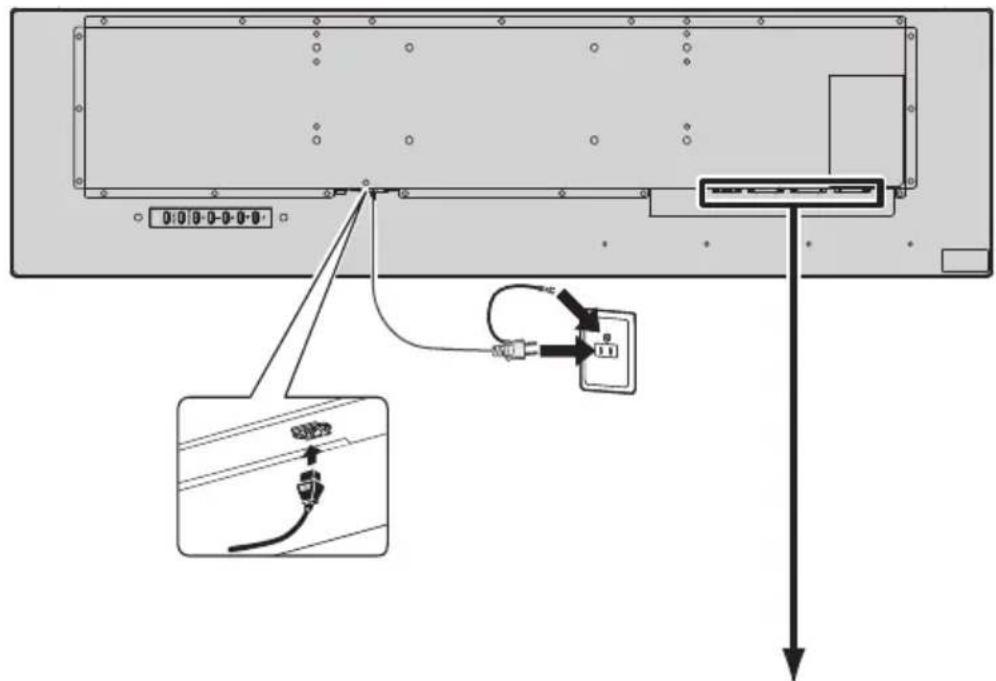
DVI OUT DVI1 DVI2
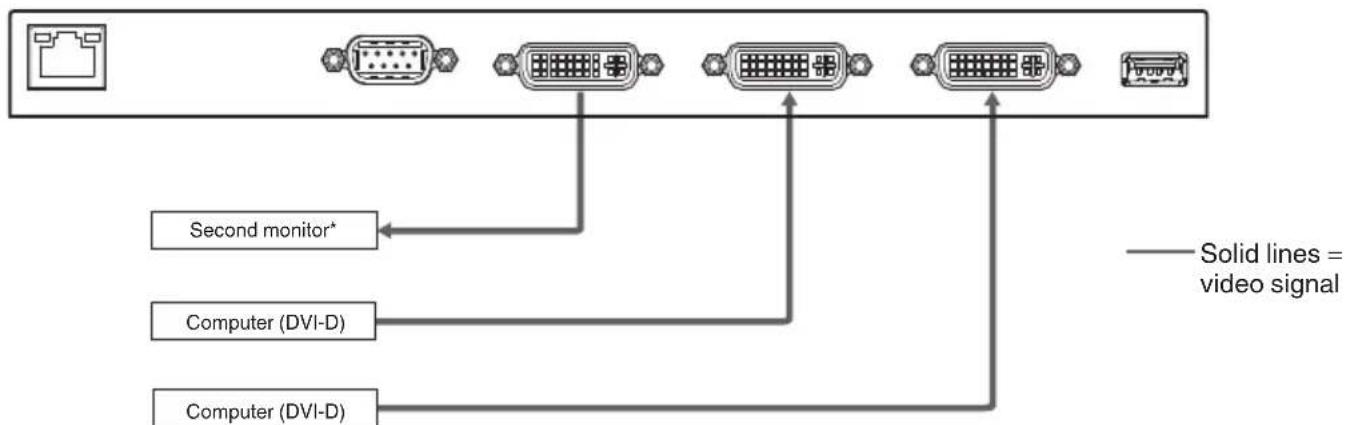
flowchart
graph TD
    A["Router"] --> B["First Monitor"]
    B --> C["Second Monitor*"]
    C --> D["Computer (DVI-D)"]
    D --> E["Computer (DVI-D)"]
    E --> F["First Monitor"]
    style A fill:#f9f,stroke:#333
    style F fill:#f9f,stroke:#333
    note right of F: Solid lines = video signal
*: Multiple monitors that are daisy-chained have a limit to the connectable monitors.
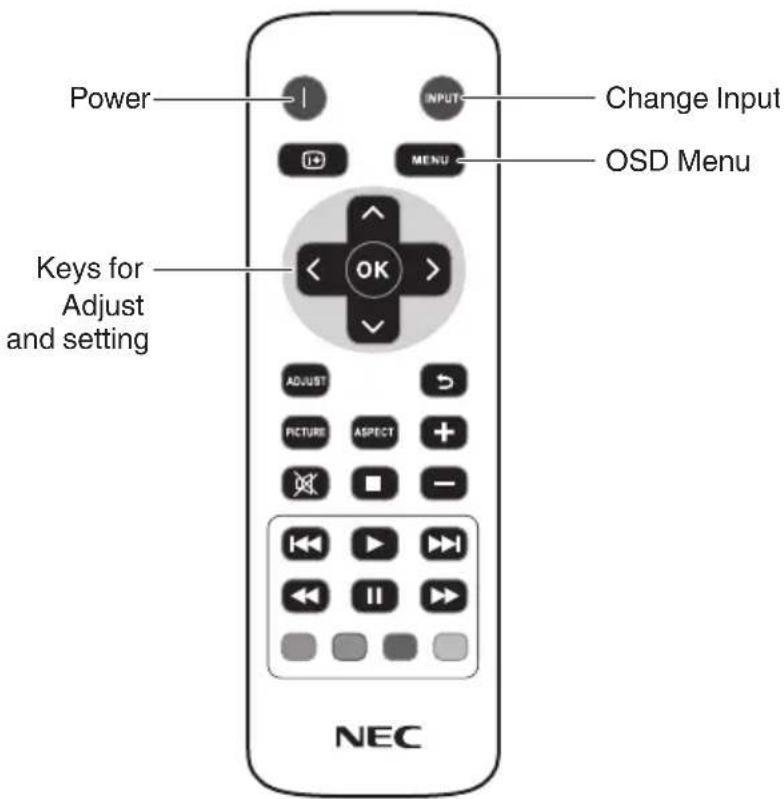
Wireless Remote Control
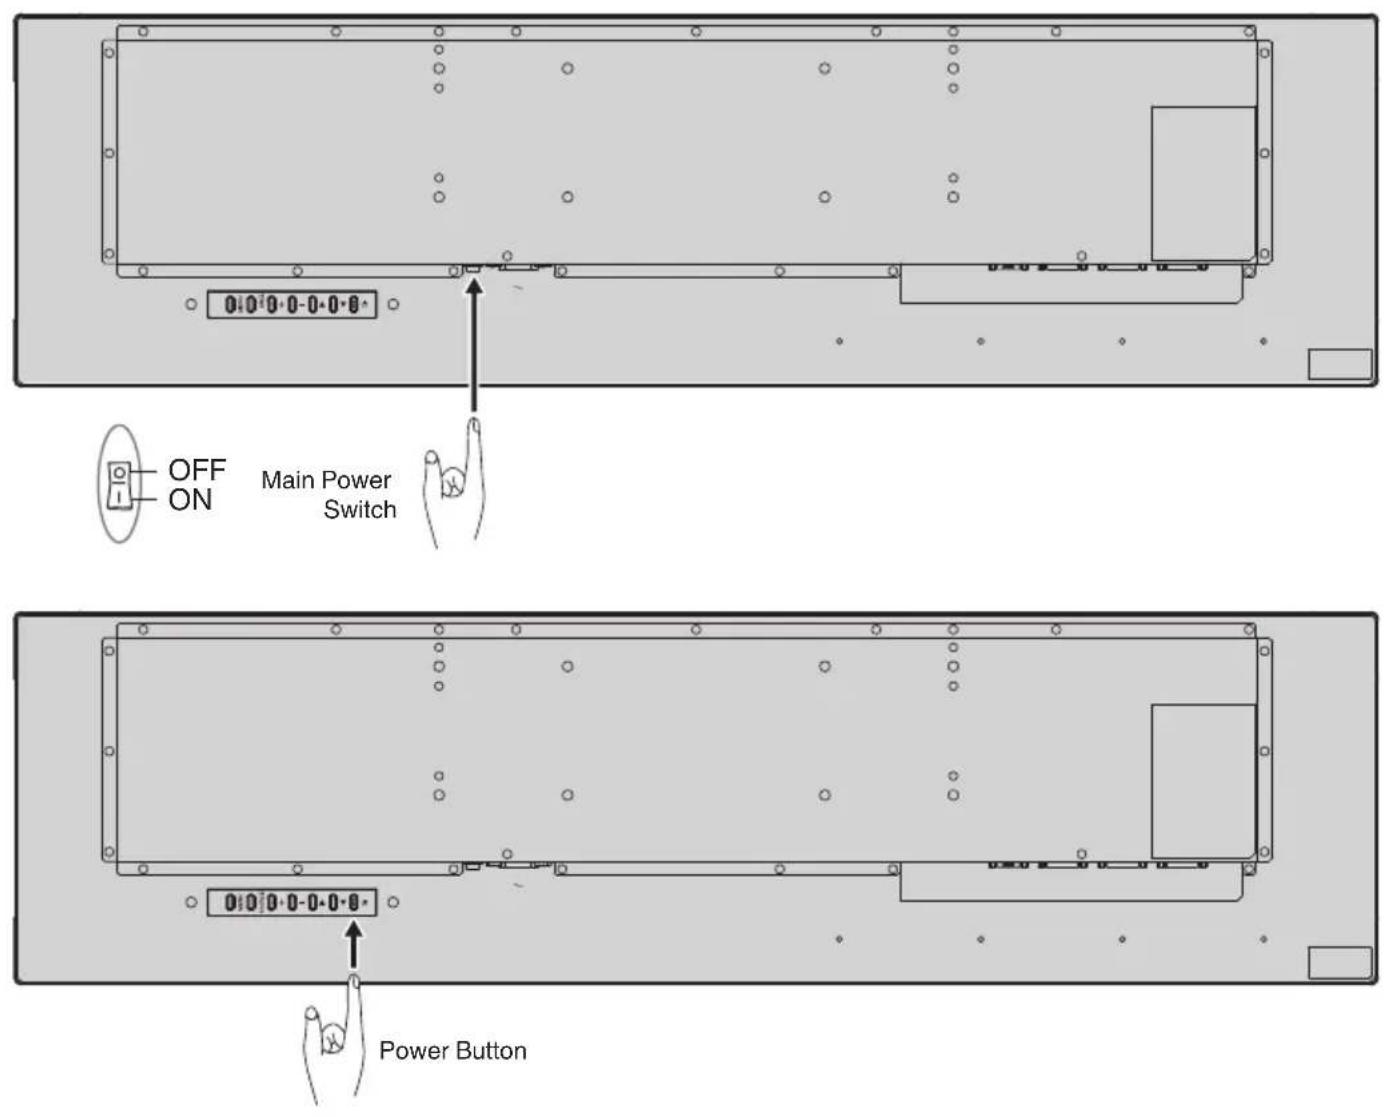
Main Power Switch/Power Button
Index
Important Information...... English-2
Safety Precautions, Maintenance .... English-4
Installation .... English-6
Mounting.... English-7
Important Information
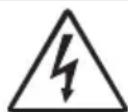
WARNING

TO PREVENT FIRE OR SHOCK HAZARDS, DO NOT EXPOSE THIS UNIT TO RAIN OR MOISTURE. ALSO, DO NOT USE THIS UNIT'S POLARIZED PLUG WITH AN EXTENSION CORD RECEPTACLE OR OTHER OUTLETS UNLESS THE PRONGS CAN BE FULLY INSERTED.
REFRAIN FROM OPENING THE CABINET AS THERE ARE HIGH VOLTAGE COMPONENTS INSIDE. REFER SERVICING TO QUALIFIED SERVICE PERSONNEL.
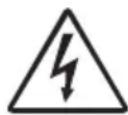
CAUTION
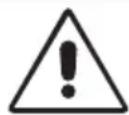
TO REDUCE THE RISK OF ELECTRIC SHOCK, MAKE SURE POWER CORD IS UNPLUGGED FROM WALL SOCKET. TO FULLY DISENGAGE THE POWER TO THE UNIT, PLEASE DISCONNECT THE POWER CORD FROM THE AC OUTLET. DO NOT REMOVE COVER (OR BACK). NO USER SERVICEABLE PARTS INSIDE. REFER SERVICING TO QUALIFIED SERVICE PERSONNEL.
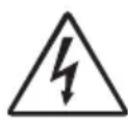
This symbol warns user that uninsulated voltage within the unit may have sufficient magnitude to cause electric shock. Therefore, it is dangerous to make any kind of contact with any part inside this unit.

This symbol alerts the user that important literature concerning the operation and maintenance of this unit has been included. Therefore, it should be read carefully in order to avoid any problems.

CAUTION: Please use the power cord provided with this display in accordance with the table below. If a power cord is not supplied with this equipment, please contact NEC. For all other cases, please use the power cord with the plug style that matches the power socket where the monitor is located. The compatible power cord corresponds to the AC voltage of the power outlet and has been approved by, and complies with, the safety standards in the country of purchase.
This equipment is designed to be used in the condition of the power cord connected to earth. If the power cord is not connected to the earth, it may cause electric shock. Please make sure the power cord is earthed properly.
| Plug Type | North America | European Continental | U.K. Chinese Japanese | |||
| Plug Shape | 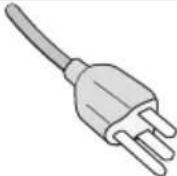 | 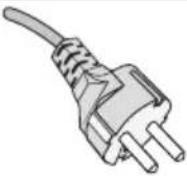 | 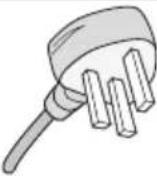 | 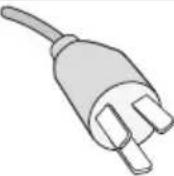 | 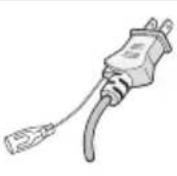 | |
| Region | U.S.A./Canada | Taiwan | EU U.K. China | China Japan | ||
| Voltage 1 | 20* 110 2 | 30 230 2 | 20 100 | |||
* When operating this monitor with its AC 125-240V power supply, use a power supply cord that matches the power supply voltage of the AC power outlet being used.
NOTE: This product can only be serviced in the country where it was purchased.
Use the power cord which has BSMI mark at both ends when you use this monitor in Taiwan.
CE
Safety Precautions, Maintenance
FOR OPTIMUM PERFORMANCE, PLEASE NOTE THE FOLLOWING WHEN SETTING UP AND USING THE MULTI-FUNCTION MONITOR:
- DO NOT OPEN THE MONITOR. There are no user serviceable parts inside and opening or removing covers may expose you to dangerous shock hazards or other risks. Refer all servicing to qualified service personnel.
- Do not bend, crimp or otherwise damage the power cord.
- Do not place any heavy objects on the power cord. Damage to the cord may cause shock or fire.
- Fasten the power cord to the monitor by attaching the screw and clamp to prevent loose connection. (Recommended Fasten Force: 139 - 189N•cm).
- Please make sure that enough power is supplied to the monitor. Please refer to the “Power Supply” in the specifications.
- The power supply cord you use must have been approved by and comply with the safety standards of your country. (e.g. Type H05VV-F 3G 0.75 mm ^2 should be used in Europe).
- In the UK use a BS-approved power cord with a molded plug having a black (5 A) fuse installed for use with this monitor.
- The power cable connector is the primary means of detaching the system from the power supply. The monitor should be installed close to a power outlet that is easily accessible.
- Do not spill any liquids into the cabinet or use your monitor near water.
- Do not insert objects of any kind into the cabinet slots, as they may touch dangerous voltage points, which can be harmful or fatal, or may cause electric shock, fire or equipment failure.
- Do not place this product on a sloping or unstable cart, stand or table, as the monitor may fall, causing serious damage to the monitor.
- Do not mount this product face up, face down, or upside down for an extended period of time as it may cause permanent damage to the screen.
- Do not use the monitor outdoors.
- If glass is broken, handle with care.
- This monitor is equipped with temperature control fans. For reliable performance and long life use of this product, it is required that the vents on the monitor are not covered.
- If the monitor or glass is broken, do not come in contact with the liquid crystal and handle with care.
- Allow adequate ventilation around the monitor, so that heat can properly dissipate.
- Do not put anything on top of the monitor.
- Handle with care when transporting. Save packaging for transporting.
- When running the cooling fan continuously, we recommend wiping clean the ventilation holes a minimum of once a month.
- To ensure the monitor's reliability, please clean the ventilation holes at the rear side of the cabinet at least once a year to remove dirt and dust.
- When using a LAN cable, do not connect to a peripheral device with wiring that might have excessive voltage.
- Do not use the monitor in high temperature, humid, dusty, or oily areas.
- Do not use the monitor under rapid changes in temperature and humidity, and avoid cold air directly from an air-conditioning vent. These conditions may shorten the life of the monitor or cause condensation. If water condensation has occurred, unplug the monitor and do not use the monitor until the condensation has evaporated.
CAUTION:
This device cannot be used or installed without mounting accessory for support. For proper installation it is strongly recommended to use a trained, NEC authorized service person. Failure to follow NEC standard mounting procedures could result in damage to the equipment or injury to the user or installer. Product warranty does not cover damage caused by improper installation. Failure to follow these recommendations could result in voiding the warranty.
DO NOT mount the monitor yourself. Please ask your supplier. For proper installation it is strongly recommended to use a trained, qualified technician. Please inspect the location where the unit is to be mounted. Mounting on wall or ceiling is the customer's responsibility. Not all walls or ceilings are capable of supporting the weight of the unit. Product warranty does not cover damage caused by improper installation, re-modeling, or natural disasters. Failure to comply with these recommendations could result in voiding the warranty.
For NEC Qualified Personnel:
To ensure safe installation, use two or more brackets to mount the unit. Mount the unit to at least two points on the installation location.
Please note the following when mounting on wall or ceiling
- NEC recommends mounting interfaces that comply with UL1678 standard in North America.
- NEC strongly recommends using size M6 screws (8-10 mm + thickness of bracket and washers in length). If using screws longer than 8-10 mm, check the depth of the hole. (Recommended Fasten Force: 470 - 635 N•cm). Bracket hole should be under φ 8.0 mm.
- Prior to mounting, inspect the installation location to ensure that it is strong enough to support the weight of the unit so that the unit will be safe from harm.
- For detailed information, refer to the instructions included with the mounting equipment.
- Make sure that there is no gap between the monitor and the bracket.
- When used in a video wall configuration for a longer time, slight expansion of the monitors may happen due to temperature changes. Due to this it is recommended that over one millimeter gap is kept between adjacent monitor edges.
- When installing, do not apply pressure to the screen or excessive force to any part of the monitor by pushing or leaning on it. This may cause the monitor to become distorted or damaged.
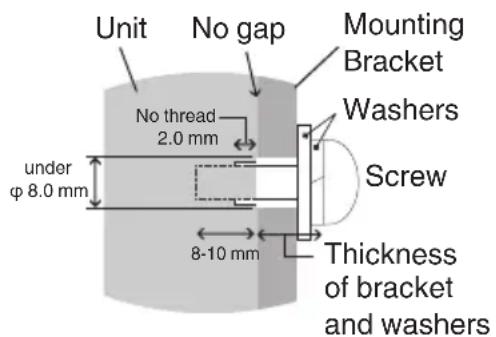
CAUTION
- The ceiling or wall must be strong enough to support the monitor and mounting accessories.
- DO NOT install in locations where a door or gate can hit the unit.
- DO NOT install in areas where the unit will be subjected to strong vibrations and dust.
- DO NOT install the monitor next to a location where the main power supply is fed into the building.
- DO NOT install the monitor in a location where people can easily grab and hang onto the unit or the mounting equipment.
NOTE: Allow for adequate ventilation or provide air conditioning around the monitor, so that heat can properly dissipate away from the monitor and from the mounting equipment.
Mounting on ceilings
- Ensure that the ceiling is sturdy enough to support the weight of the unit and the mounting equipment over time, against earthquakes, unexpected vibrations, and other external forces.
- Be sure the unit is mounted to a solid structure within the ceiling, such as a support beam. Secure the monitor using bolts, spring lock washers, washer and nut.
- DO NOT mount to areas that have no supporting internal structure. DO NOT use wood screws or anchor screws for mounting. DO NOT mount the unit to ceiling or to hanging fixtures.
Orientation
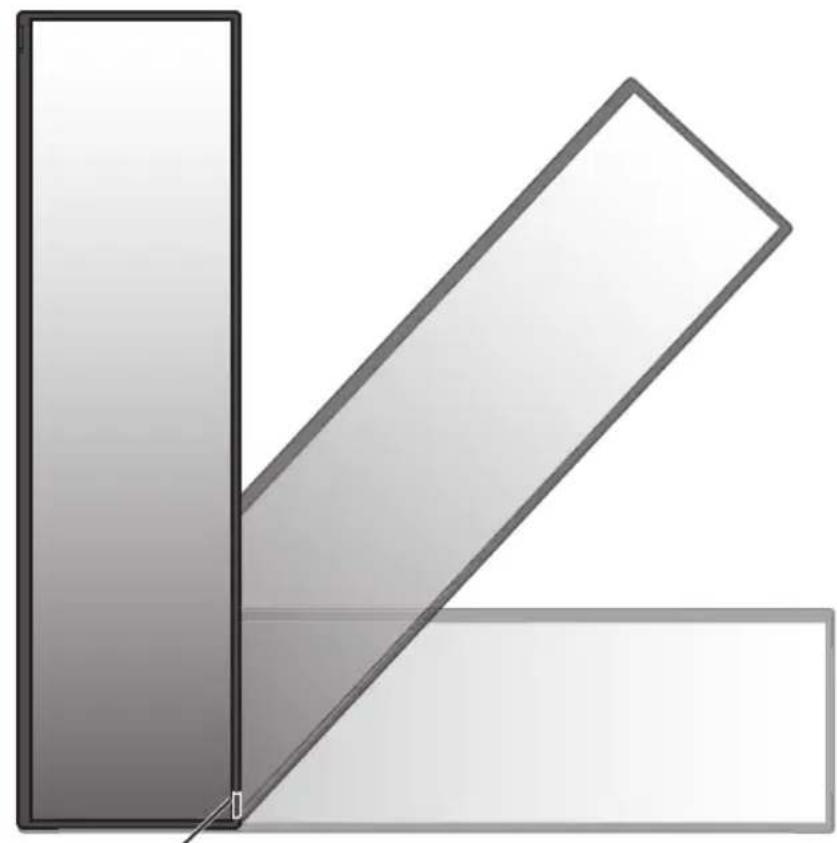
- When using the monitor in the portrait position, it should be rotated clockwise so that the right side is moved to the top, left side is moved to the bottom. This will allow for proper ventilation and will extend the lifetime of the monitor. Improper ventilation may shorten the lifetime of the monitor.
natural_image
Abstract geometric composition with overlapping rectangular shapes and a diagonal line (no text or symbols)Remote control sensor and Power Indicator
Install the remote control batteries
The remote control is powered by two 1.5V AAA batteries.
To install or replace batteries:
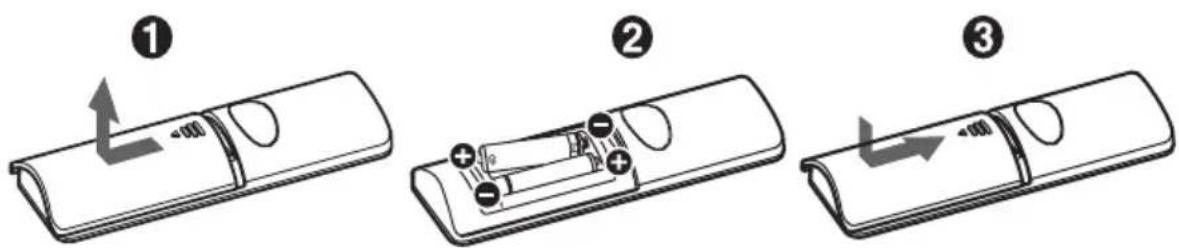
- Press and slide to open the cover.
- Align the batteries according to the (+) and (−) indications inside the case.
- Replace the cover.
NEC recommends the following battery use:
⚠️ CAUTION: Incorrect usage of batteries can result in leaks or bursting.
- Place “AAA” size batteries matching the (+) and (-) signs on each battery to the (+) and (-) signs of the battery compartment.
- Do not mix battery brands.
- Do not combine new and old batteries. This can shorten battery life or cause liquid leakage of batteries.
- Remove dead batteries immediately to prevent battery acid from leaking into the battery compartment.
- Do not touch exposed battery acid, it may injure your skin.
NOTE: If you do not intend to use the Remote Control for a long period of time, remove the batteries.
Inhaltsverzeichnis
natural_image
Abstract geometric shapes with gradient shading, no text or symbols presentnatural_image
Abstract geometric composition with overlapping rectangular shapes and diagonal lines (no text or symbols)natural_image
Abstract geometric composition with overlapping rectangular shapes and a diagonal line (no text or symbols)natural_image
Abstract geometric composition with overlapping rectangular shapes and diagonal lines (no text or symbols)natural_image
Abstract geometric composition with overlapping rectangular and diagonal gray shapes (no text or symbols)natural_image
Abstract geometric composition with overlapping rectangular shapes and diagonal lines (no text or symbols)natural_image
Abstract geometric composition with overlapping rectangular shapes and diagonal lines (no text or symbols)natural_image
Abstract geometric composition with overlapping rectangular shapes and diagonal lines (no text or symbols)natural_image
Abstract geometric composition with overlapping rectangular shapes and diagonal lines (no text or symbols)natural_image
Three identical line drawings of laboratory bottles with caps and tubes, no text or symbols present.ディスプレイの上手な使い方
natural_image
Diagram of a device with an arrow indicating left motion, no text or symbols present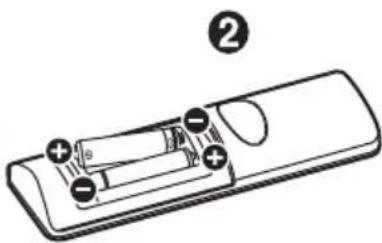
natural_image
Diagram of a remote control device with battery and two labeled terminals (no text or symbols beyond labels)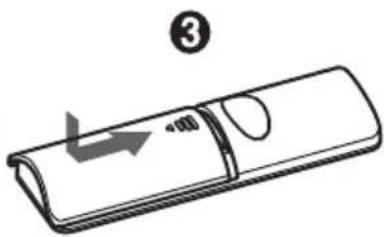
https://www.nec-display.com/jp/environment/recycle/display.html
natural_image
Abstract geometric composition with overlapping rectangular shapes and diagonal lines (no text or symbols)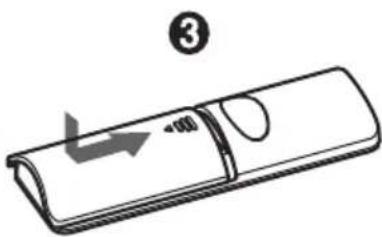
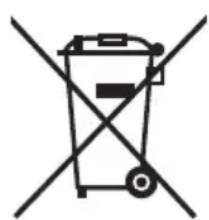
WEEE Mark (European Directive 2012/19/EU and amendments)

natural_image
Symbol of a trash bin crossed with a diagonal line, no text or numbers presentDisposing of your used product: In the European Union EU-wide legislation as implemented in each Member State requires that used electrical and electronic products carrying the mark (left) must be disposed of separately from normal household waste. This includes monitors and electrical accessories, such as signal cables or power cords. When you dispose of such products, please follow the guidance of your local authority or ask the shop where you purchased the product, or if applicable, follow applicable legislation or agreement you may have. The mark on electrical and electronic products may only apply to the current European Union Member States.
Outside the European Union
If you wish to dispose of used electrical and electronic products outside the European Union, please contact your local authority and ask for the correct method of disposal.
natural_image
Symbol of a trash bin crossed out by two diagonal lines (no text or numbers present)For EU: The crossed-out wheeled bin implies that used batteries should not be put to the general household waste! There is a separate collection system for used batteries, to allow proper treatment and recycling in accordance with legislation.
According to EU directive 2006/66/EC, the battery can't be disposed improperly. The battery shall be separated to collect by local service.
natural_image
Symbol of a trash bin crossed out by a diagonal line, with no text or numbers present.natural_image
Symbol of a trash bin crossed with a diagonal line, representing waste sorting or restriction (no text present)natural_image
Symbol of a trash bin crossed with a diagonal line and a horizontal bar below (no text or labels)natural_image
Symbol of a trash bin crossed out by two diagonal lines (no text or numbers present)natural_image
Symbol of a trash bin crossed with no text or numbers, representing waste sorting or disposal (no text present)natural_image
Symbol of a trash bin crossed out by a diagonal line, representing no waste or discharge (no text or numbers present)natural_image
Symbol of a trash bin crossed with a diagonal line, no text or numbers presentnatural_image
Symbol of a trash bin crossed with a diagonal line, representing no waste or discharge (no text or labels)natural_image
Symbol of a trash bin crossed with no text or numbers, representing waste sorting or disposal (no text present)natural_image
Symbol of a trash bin crossed out by two diagonal lines (no text or numbers present)natural_image
Symbol of a trash bin crossed with a diagonal line and a horizontal bar below (no text or labels)natural_image
Symbol of a trash bin crossed with a diagonal line, representing waste sorting or restriction (no text present)natural_image
Symbol of a trash bin crossed out by a diagonal line, with no text or labels present.natural_image
Symbol of a trash bin crossed with a diagonal line, representing waste sorting or disposal (no text or labels)natural_image
Symbol of a trash bin crossed with no text or numbers, representing waste sorting or restriction (no text present)natural_image
Symbol of a trash bin crossed out by two diagonal lines (no text or numbers present)natural_image
Symbol of a trash bin crossed out by two crossed lines, with no text or labels present.natural_image
Symbol of a trash bin crossed with a diagonal line, representing waste sorting or restriction (no text present)natural_image
Symbol of a trash bin crossed out by two diagonal lines (no text or numbers present)
وجود. لا تنطبق
الأوروي حاليا.
natural_image
Symbol of a trash bin crossed out by a diagonal line, representing no waste or discharge (no text or labels)- Contents
- Ventilation Requirements
- Connect cables
- Before making connections:
- Wireless Remote Control
- Main Power Switch/Power Button
- Index
- Important Information
- WARNING
- CAUTION
- Safety Precautions, Maintenance
- CAUTION:
- For NEC Qualified Personnel:
- Please note the following when mounting on wall or ceiling
- Mounting on ceilings
- Orientation
- Install the remote control batteries
- Inhaltsverzeichnis
- ディスプレイの上手な使い方
- WEEE Mark (European Directive 2012/19/EU and amendments)
- Outside the European Union
Brand : NEC
Model : MultiSync BT421
Category : Screen