
BBM1345 - Bread maker VOX - Free user manual and instructions
Find the device manual for free BBM1345 VOX in PDF.


| Product Type | Bread Maker |
| Dimensions (W x D x H) | 30 x 25 x 30 cm |
| Weight | 5 kg |
| Power Consumption | 650 W |
| Bread Loaf Capacity | 1.0 - 1.5 kg |
| Number of Programs | 12 |
| Crust Control Settings | Light, Medium, Dark |
| Delay Timer | Up to 13 hours |
| Keep Warm Function | Auto keep warm for 1 hour |
| Non-Stick Baking Pan | Yes |
| Viewing Window | Yes |
| Cooling Fan | Yes, for even browning |
| Power Cord Storage | Internal compartment |
| Cleaning and Care | Wipe outer surface with damp cloth; wash pan and kneading blade with warm soapy water |
| Safety Features | Automatic shut-off, overheat protection |
| Spare Parts Availability | Pan, kneading blade, measuring cup, spoon available via VOX service centers |
| Repairability | User-replaceable parts; service center for motor and electronics |
| General Information | White/Stainless steel finish, LED display, beep alert |
Frequently Asked Questions - BBM1345 VOX
User questions about BBM1345 VOX
0 question about this device. Answer the ones you know or ask your own.
Ask a new question about this device
Download the instructions for your Bread maker in PDF format for free! Find your manual BBM1345 - VOX and take your electronic device back in hand. On this page are published all the documents necessary for the use of your device. BBM1345 by VOX.
USER MANUAL BBM1345 VOX
natural_image
Abstract black and white geometric pattern with diagonal stripes (no text or symbols)VOX
ELECTRONICS
BBM - 1345
OPERATING INSTRUCTIONS BREAD MAKER
MANUALE DELL'UTENTE MACCHINA PER IL PANE
natural_image
Abstract black and white geometric pattern with diagonal stripes (no text or symbols)VOX
ELECTRONICS
GBR
BREAD MAKER
INSTRUCTION MANUAL
BBM - 1345
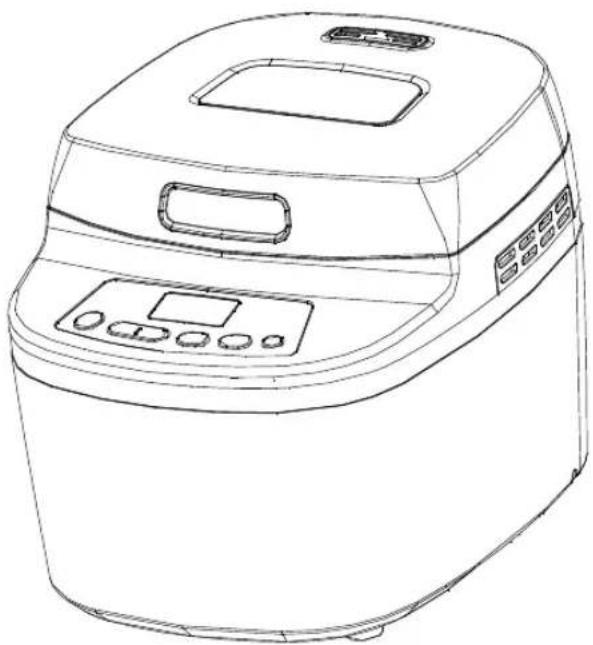
natural_image
Line drawing of a standard loaf of bread maker with control panel and digital display (no text or symbols)Read this manual thoroughly before using and save it for future reference
CONTENTS
IMPORTANT SAFEGUARDS
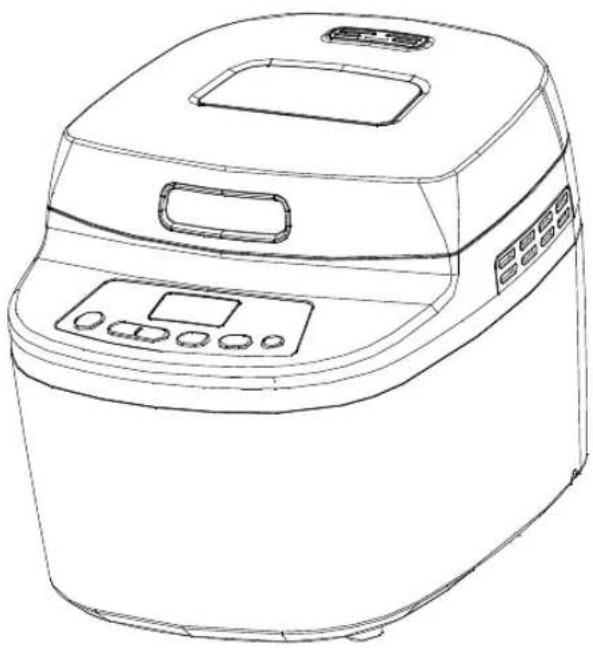
KNOW YOUR BREAD MAKER
INTRODUCTION OF CONTROL PANEL
DELAY FUNCTION (TIME)
KEEP WARM
MEMORY
ROOM TEMPERATURE
WARNING DISPLAY
FOR THE FIRST USE
USING YOUR BREAD MAKER
CLEANING AND MAINTENANCE
INTRODUCTION OF BREAD INGREDIENTS
INGREDIENTS MEASUREMENT
TROUBLESHOOTING GUIDE
ENVIRONMENTALLY FRIENDLY DISPOSAL
IMPORTANT SAFEGUARDS:
Before using the electrical appliance, the following basic precautions should always be followed:
- Read all instructions
- Before using check if the voltage of the wall outlet corresponds to that shown on the rating plate.
-
Do not operate the appliance with a damaged cord or plug or after the appliance malfunctions, or it has been dropped or damaged in any manner. Return the appliance to the manufacturer or the nearest authorized service agent for check, repair or electrical or mechanical adjustment.
-
Do not touch hot surfaces.
-
Do not immerse cord, plugs, or housing in water or other liquid in order to avoid electric shock.
-
Unplug from outlet when not in use, before putting on or taking off parts and before cleaning.
-
Do not let the cord hang over the edge of a table or any hot surface.
-
The use of accessory attachments not recommended by the appliance manufacturer may cause injuries.
-
Do not place on or near a hot gas or electric burner, or in a heated oven.
-
Do not touch any moving or spinning parts of the machine when baking.
-
The temperature of accessible surfaces may be high when the appliance is operating.
-
Never switch on the appliance without properly placed bread pan filled with ingredients.
-
Never beat the bread pan on the top or edge to remove the pan as this may damage the bread pan.
-
Metal foils or other materials must not be inserted into the bread maker due to the risk of fire or short circuit.
-
This appliance can be used by children aged from 8 years and above and persons with reduced physical, sensory or mental capabilities or lack of experience and knowledge if they have been given supervision or instruction concerning use of the appliance in a safe way and understand the hazards involved. Children shall not play with the appliance. Cleaning and user maintenance shall not be made by children unless they are older than 8 and supervised.
-
Keep the appliance and its cord out of reach of children younger than 8 years.
-
Never cover the bread maker with a towel or any other material because heat and steam must be able to escape freely. There is a danger of fire if it is covered by, or comes into contact with combustible material.
- Do not operate the appliance for other than its intended use.
- Always use the appliance on a secure, dry level surface.
- Do not use outdoors.
- This appliance has been incorporated with a grounded plug. Please ensure the wall outlet in your house is well earthed.
- This appliance is intended to be used in household and similar applications such as:
– Staff kitchen areas in shops, offices and other working environments;
- Farm houses;
– Hotels, motels and other residential type environments;
- Bed and breakfast type environments.
- The appliance is not intended to be operated by means of an external timer or separate remote-control system.
- Do not operate the unit without bread pan placed in the chamber to as this can damage the appliance.
- Save these instructions.
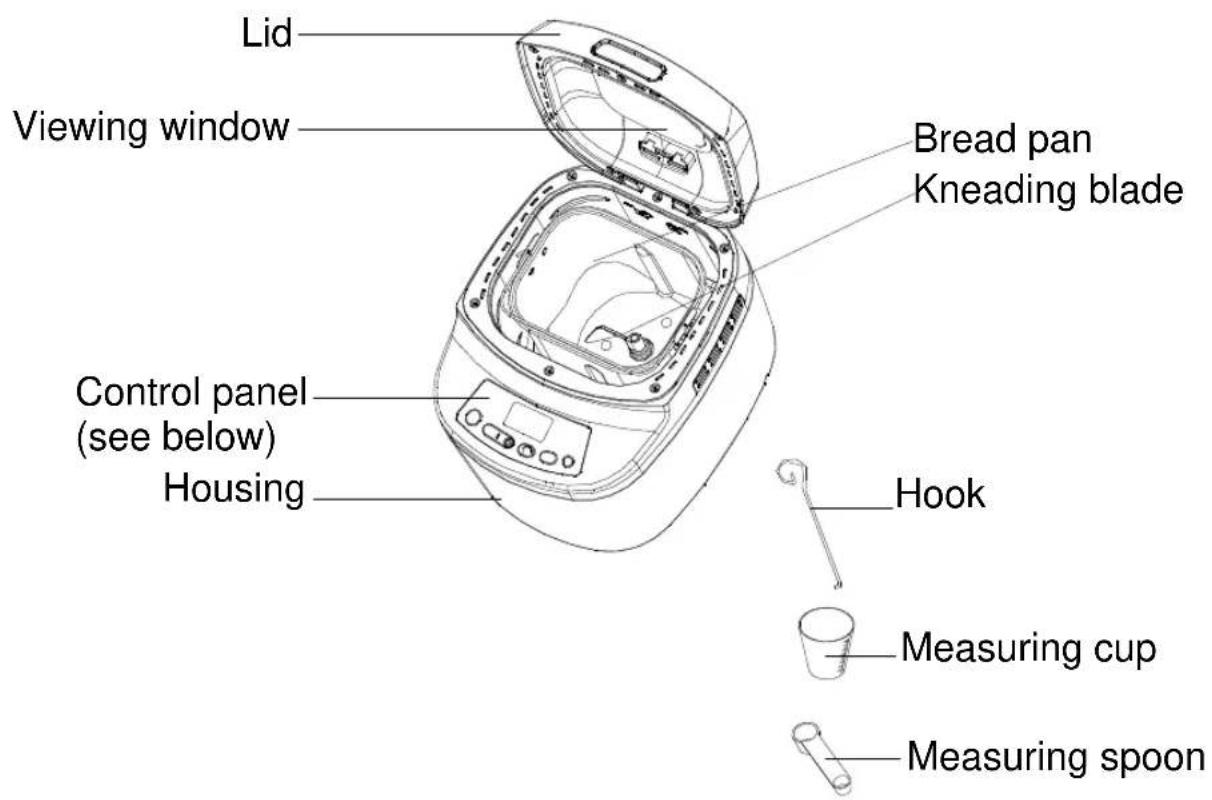
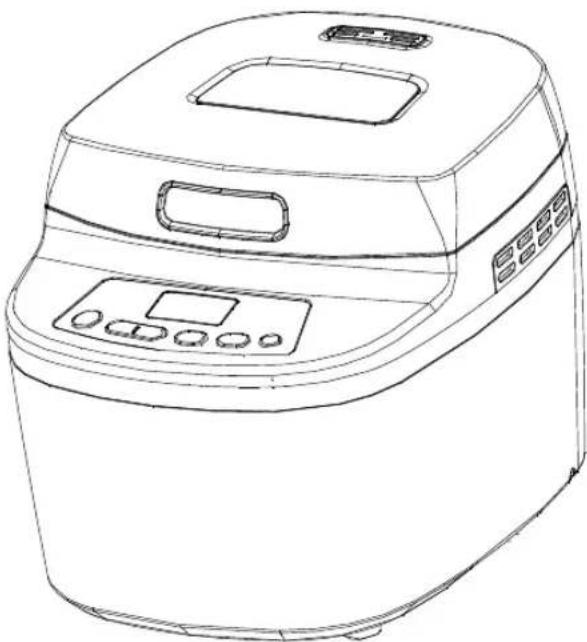
KNOW YOUR BREAD MAKER
(Product may be subject to change without prior notice)
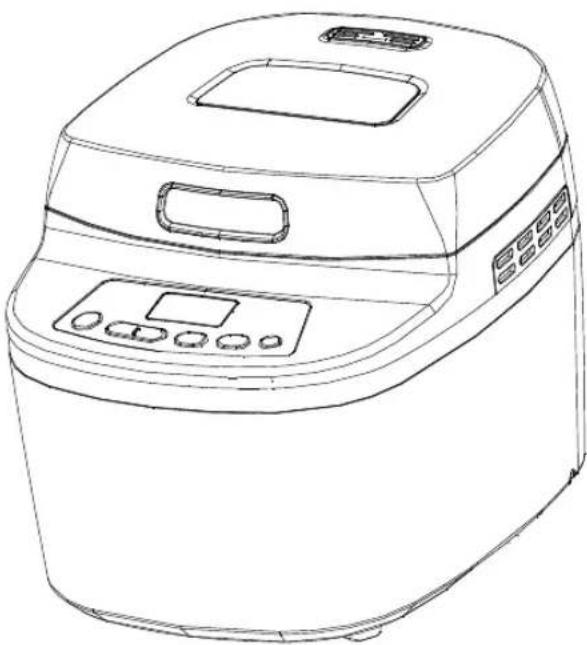
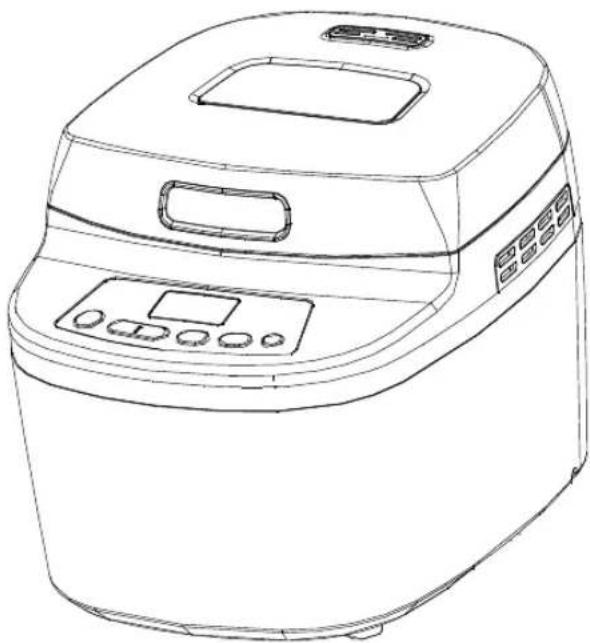
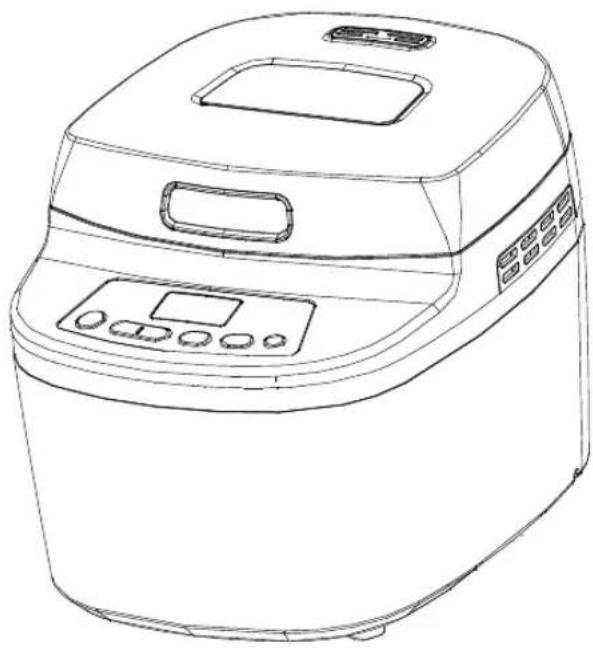
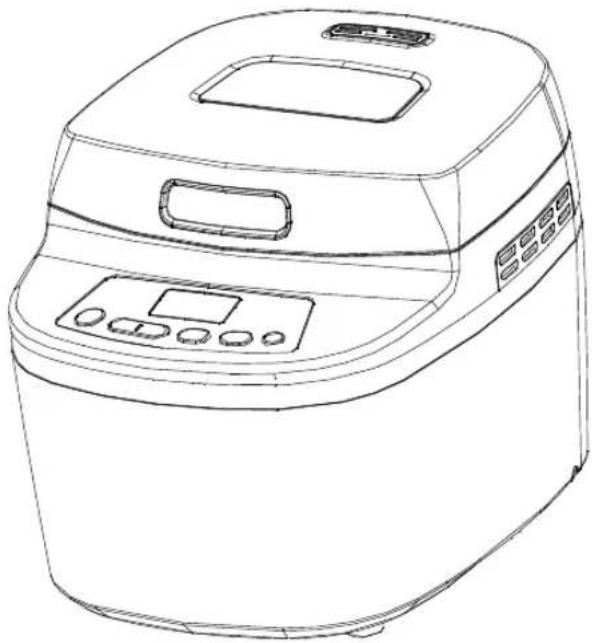
INTRODUCTION OF CONTROL PANEL
(The silkscreen may be subject to change without prior notice.)
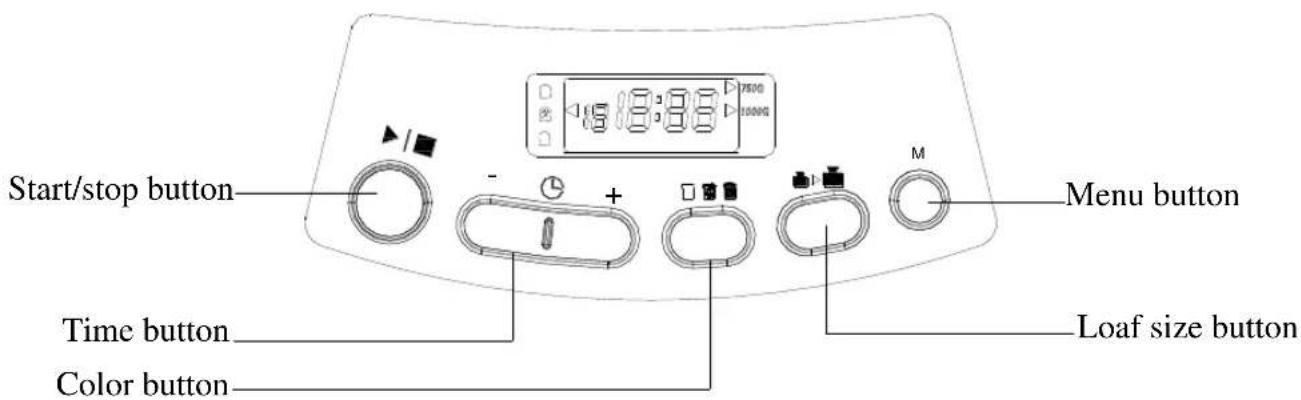
AFTER POWER-UP
As soon as the bread maker is plugged in, LCD will be illuminated on and a beep is heard, "13:00" appears in the LCD display screen. The arrow points to "1000g and Medium" (see control panel). It is the default setting.
START / STOP
For starting and stopping the selected program
To start a program, press the “START/STOP” button once. A short beep will be heard and the two dots in the time display begin to flash. The program starts. No other button is active except the button START/STOP after the program begins.
To stop the program, press and hold the “START/STOP” button for more than 2 seconds until you hear a long beep. The beep indicates that the program has been switched off.
MENU
The menu button is used to set your selected program. Each time you touch the button and hear a short beep, the program will change. Press the MENU button repeatedly to scroll through the menu- 12 programs will show in the LCD display accompanied by short beeps. When you see the program you require- stop pressing. The function of each of the 12 programs is explained below.
-
BASIC: kneading, rising and baking normal bread. Adding different ingredients changes the flavor.
-
FRENCH: kneading, rising and baking with a longer rise time. The bread baked in this program usually has a crisper crust and lighter texture.
-
WHOLE WHEAT: kneading, rising and baking of bread made with whole wheat flours. This setting has longer preheating time to allow the grain to soak up the water and rise. It is not advised to use the delay function as this leads to poor results.
-
QUICK: kneading, rising and baking loaf with baking soda or baking powder. Bread baked in this program is usually smaller and of a dense texture.
-
SWEET: kneading, rising and baking of sweet bread. Used for baking crispy and sweet bread.
-
Ultra-Fast: Kneading, rising and baking loafs in the shortest time. Bread made in this program is usually smaller and with a denser texture than bread made using the Quick program.
-
GLUTEN-FREE: For making bread of gluten-free flours and baking mixes. Gluten-free flours require longer time for soaking liquids and have different rising properties.
-
DOUGH: kneading and rising, but without baking. Remove the raw dough and shape it into bread rolls, pizza, steamed bread, etc.
- JAM: boiling jams and marmalades.
- CAKE: kneading, rising and baking. Rise with baking soda or baking powder.
- SANDWICH: Kneading, rising and baking light-textured bread with a thinner crust – ideal for making sandwiches.
- BAKE: only baking, no kneading or rising. It is also used to increase the baking time on selected settings.
COLOR
Press the COLOR button to select a LIGHT, MEDIUM or DARK colored crust. Please note that total operation time may vary with the different loaf sizes. This cannot be used with the DOUGH and JAM programs.
LOAF SIZE
Press this button to select the loaf size of bread 750g or 1000g. Please note that total operation time may vary with the different loaf size. This cannot be used for the QUICK, DOUGH, JAM, CAKE and BAKE programs.
DELAY FUNCTION (“+” or “-”)
In case you not want to start the appliance working immediately, set the delay time by this button.
Before pressing the button, determine when you want the bread ready. Please note that the delay time includes the baking time of your chosen program. That is, at the completion of delay time, the hot bread can be served.
First the program and the level of browning must be selected, then press “+” to increase the delay time at the increment of 10 minutes (accompanied by a short beep). Maximum delay time is 13 hours.
Example: It is 8:30 in the evening and you want your bread ready at 7:00 next morning - i.e. in 10 hours and 30 minutes. Select the menu for color, loaf size then touch the “+” to add the time until 10:30 appears on the LCD. Then touch the START/STOP button to activate the delay program. The dot on the LCD (refer to the CONTROL PANEL) will flash and the numbers will count down on the LCD display to show you the remaining
time. The fresh bread will be ready for you at 7:00 in the morning. If you do not take out the bread immediately, the KEEP WARM time in duration of 60 minutes will start.
NOTE: 1) Do not use delayed baking for easily perishable ingredients such as eggs, fresh milk, fruits, onions, etc.
2) It is not suitable for QUICK, ULTRA FAST and JAM programs.
3) With the program BAKE, only the baking time (10-60 minutes) can be adjusted, not the delay time. You can press TIME button to increase the baking time at the increment of 1 minute.
4) This delay function is not possible after the chosen program has started operating.
5) The time shown on the LCD display is the total amount of the basic time and delay time.
KEEP WARM
Bread can be automatically kept warm for 60 minutes after baking. If you want to take the bread out, switch the program off with the START/STOP button. Keep warm function is not possible for the programs of JAM &DOUGH.
MEMORY
If the power supply is interrupted during the course of bread making, the process of making bread will be continued automatically within 10 minutes, even without pressing “START/STOP” button. If the interruption time exceeds 10 minutes the memory cannot be kept and the bread maker must be restarted. It is suggested to place new ingredients again.
ROOM TEMPERATUE
The machine may work well in a wide range of temperature, but there could be a difference in loaf size between a very warm room and a very cold room. We suggest the room temperature should be between 15^ C and 34^ C.
WARNING DISPLAY
-
If the display screen shows “EE1” after you have pressed START/STOP button and the beeps are heard, it indicates that the temperature inside is still too high. Open the lid and let the machine cool down for 10 to 20 minutes.
-
If the display shows “EE2” after you have pressed START/STOP button and the beeps are heard, it indicates that the temperature inside is too low and the program will not be performed (Except the BAKE program). The bread maker shall be placed into environment of higher temperature for use.
- If the display shows “EE4” after you have pressed START/STOP button and the beeps are heard, it indicates that there is the temperature sensor open circuit. Press START/STOP button to stop beeps sound, but if the “EE4” on the LCD display continue flashing, please contact the Authorized Service to check the sensor carefully. If “EE3” is shown on the display, it means that there is the temperature sensor short circuit.
FOR THE FIRST USE
The appliance may emit a little smoke and a characteristic smell when first turned on. This is normal and will soon stop. Make sure the appliance has sufficient ventilation.
- Unpack all the parts and accessories and remove all flammable materials such as paper or froth which are used for packing.
- Please check if all parts and accessories are “complete and free of damage”.
- Clean all the parts according to the latter section "Cleaning and Maintenance".
- Set the bread maker in baking mode and operate empty for about 10 minutes. After the appliance is cooled, clean it once more.
- Dry all parts thoroughly and reassemble them and the appliance is ready for use.
USING YOUR BREAD MAKER
- Lay the appliance on the firm and flat surface.
- Before making bread, weigh the ingredients you need respectively with the scale.
- Place the pan in its position, turn it clockwise until it clicks into right position. Fix the kneading blade onto the drive shafts. It is recommended to fill holes with heat-resisting margarine prior to placing the kneaders, as this prevents the dough from sticking to the kneaders and helps with removing the kneaders from bread easily.
- Place ingredients into the bread pan. Usually the water or liquid substance should be put first, then add sugar, salt and flour, always add yeast or baking powder as the last ingredient. (See fig.4)
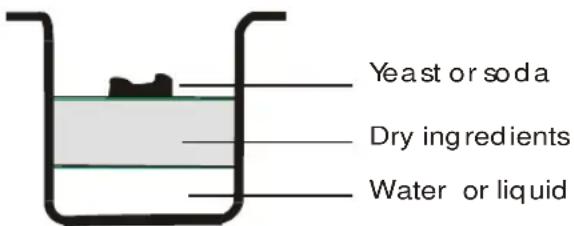
Note: When adding the ingredients, please follow the advice that the maximum amount of the flour is 600g (4 cups), and the maximum amount of the yeast is 6g (2 teaspoons).
- Make a small hole on one side of the flour with your fingers. Place yeast into the hole, ensure it does not come into contact with the liquid ingredients or salt. Close the lid gently.
- Plug the power cord into a wall outlet.
- Press the MENU button until your desired program is selected.
- Press the COLOR button to select the desired crust color. (if applicable).
- Press the LOAF SIZE button to select the desired size (750g or 1000g). (if applicable).
- Set the delay time by pressing TIME button. This step can be skipped if you want the bread maker to start operating immediately.
- Press the START/STOP button firmly for more than 2 seconds to start working. The colon will flash, and the letter of the corresponding phase on the LCD display, such as knead or rise, will be illuminated when the appliance is operating at that phase.
- During operating, beep sound will be heard to remind you to add fruit ingredients manually, only suitable for the BAKE, FRENCH, WHOLE WHEAT, QUICK, SWEET, ULTRA FAST, GLUTEN FREE, CAKE and SANDWICH programs.
NOTE: There is no instruction for the above mentioned programs when choosing the delay time function.
- For the programs which have the KEEP WARM function, when the process has been completed, 10 beeps will be heard. Then the appliance enters into keep warm mode, press START/STOP button for more than 3 seconds to stop the process; At the programs which do not have the keep warm function, one long beep will be heard. Unplug the power cord and take the bread out. Open the lid with oven mitts, turn the bread pan anti-clockwise to the unlock position, and then take it out from the bread maker.
NOTE: Before replacing the bread pan, let it cool completely.
- Use non-stick spatula to gently loosen the sides of the bread from the pan.
CAUTION: The Bread pan and bread can be very hot! Always handle with care and use oven mitts.
-
Turn bread pan upside down onto a clean countertop and gently shake the bread onto a rack.
-
Remove the bread carefully from the pan and cool for about 20 minutes before slicing.
- If you are out of the room or have not pressed START/STOP button at the end of operation, the bread will be kept warm automatically for 60 minutes (if applicable) and when keep warm is finished, the beeps will be heard.
- When the appliance is not in use or after it has completed the operation, unplug the power cord.
CAUTION: Before slicing the loaf, use the hook to remove the kneading blade hidden on the bottom of the loaf. Never use your hand for removing the kneading blade as the loaf is hot.
NOTE: If the bread has not been completely eaten, you should put it in a sealed plastic bag or a vessel. Bread can be kept for about three days at room temperature. If you want to keep the bread longer, pack it in a sealed plastic bag or vessel and put it in the refrigerator. The storage time is at most ten days.
CLEANING AND MAINTENANCE
Unplug the appliance and allow to cool completely before cleaning.
- Bread pan: Remove the bread pan by turning it in anti-clockwise, and then pull the handle to remove it. Wipe inside and outside of the pan with damp clothes. Do not use any sharp abrasive agents for the consideration of protecting the non-stick coating. The pan must be dried completely before installing.
NOTE: Insert the bread pan in the correct position and then press it down. If it cannot be inserted, adjust the pan lightly to find the correct position and then press it down.
-
Kneading blade: If the kneading blade is difficult to remove from the axle, you should fill the container with warm water and allow it to soak for approx.30minutes.The kneading blade can then be easily removed for cleaning. Also wipe the blade carefully with a damp cotton cloth. Please note that the bread pan, kneading blade and ingredient box are dishwashing safe components.
-
Lid and view window: Clean the lid inside and outside with a slightly damp cloth.
-
Housing: Gently wipe the outer surface of housing with a wet cloth. Do not use any abrasive cleaner to clean as this would degrade the high polish of the surface. Never immerse the housing into water for cleaning.
-
Before the bread maker is packed for storage, ensure that it completely cool, clean and dry. Put the spoon and the kneading blade in the pan, and close the lid.
A GUIDE TO INGREDIENTS
1. Bread flour
Bread flour has high content of high gluten (so it can be also called high-gluten flour which contains high protein). It has good elastic and can keep the size of the bread from collapsing after rise. As the gluten content is higher than in the common flour and is used for making large size bread with inner fiber. Bread flour is the most important ingredient in making bread.
2. Plain flour
Flour that contains no baking powder, it is applicable for making express bread.
3. Whole-wheat flour
Whole-wheat flour is ground grain. It contains wheat skin and gluten. Whole-wheat flour is heavier and more nutrient than common flour. The bread made of whole-wheat flour is usually small in size. Many recipes usually combine the whole -wheat flour and bread flour to achieve the best result.
4. Black wheat flour
Black wheat flour, also named as “rough flour”, it is a kind of high fiber flour and it is similar to whole-wheat flour. To obtain the large size after rising, it must be used in combination with high proportion of bread flour.
5. Self-rising flour
A type of flour that contains baking powder and which is specially used for making cakes.
6. Corn flour and oatmeal flour
Corn flour and oatmeal flour are ground from corn and oatmeal separately. They are additive ingredients in making rough bread, are used for enhancing the flavor and texture.
7. Sugar
Sugar is the important ingredient which increases sweet taste and color of bread. It is also considered as nourishment in the yeast bread. White sugar is largely used. Brown sugar, powder sugar or cotton sugar may be added as special requirement.
8. Yeast
After yeasting process, the yeast produces carbon dioxide. The carbon dioxide will expand bread and make the inner fiber soften. For fast yeasting carbohydrate in sugar and flour as nourishment are needed.
1 tsp. active dry yeast =3/4 tsp. instant yeast
1.5 tsp. active dry yeast = 1 tsp. instant yeast
2 tsp. active dry yeast = 1.5 tsp. instant yeast
Yeast must be kept in refrigerator, as the fungus in it is killed at high temperature. Before using, check the production date and storage life of your yeast. Put it back into the refrigerator as soon as possible after each use. Usually the failure of bread rising is caused by bad yeast.
This is the way to check whether your yeast is fresh and active:
(1) Pour 1/2 cup of warm water (45-50°C) into a measuring cup.
(2) Put 1 tsp. of white sugar into the cup and stir, then sprinkle 2 tsp. yeast over the water.
(3) Place the measuring cup in a warm place for about 10min. Do not stir the water.
(4) The froth should be up to 1 cup. Otherwise the yeast is dead or inactive.
9. Salt
Salt is necessary to improve bread flavor and crust color. But salt can also prevent yeast from rising. Never use too much salt in a recipe. Bread is larger if it is without salt.
10. Egg
Eggs can improve bread texture, make the bread more nourish and large in size. Eggs must be peeled and stirred evenly.
11. Fat, butter and vegetable oil
Fat makes bread soft and prolongs storage life. Butter should be melted or chopped to small particles before using.
12. Baking powder
Baking powder is used for rising the Ultra Fast bread and cake. As it does not need rise time and it can produce the air, the air will form bubble to soften the texture of bread utilizing chemical principle.
13. Soda
It is similar with baking powder. It can also be used in combination with baking powder.
14. Water and other liquid
Water is essential ingredient in bread making. Water temperature between 20 ^ and 25 ^ is the best. Water may be replaced with fresh milk or water mixed with 2% milk powder, which may enhance bread flavor and improve crust color. Some recipes need juice for the purpose of enhancing bread flavor, e.g. apple juice, orange juice, lemon juice and so on.
INGREDIENTS MEASUREMENT
One of important steps for making good bread is proper amount of ingredients. Always use measuring cup or measuring spoons to obtain accurate amount, otherwise the bread will be largely affected.
1. Weighing liquid ingredients
Water, fresh milk or milk powder solution should be measured with measuring cups. Look at the level of the measuring cup with your eyes horizontally. When you measure cooking oil or other ingredients, clean the measuring cup thoroughly without any other ingredients.
2. Dry measurements
Dry measuring must be done by gently spooning ingredients into the measuring cup and then once filled, level it off with a knife. This extra amount could affect the balance of the recipe. When measuring small amounts of dry ingredients, the measuring spoon must be used. Measurements must be level, not heaped as this small difference could ruin balance of the recipe.
3. Adding sequence
The sequence of adding ingredients should be abided and generally the sequence is: liquid ingredient, eggs, salt and milk powder etc. When adding the ingredient, the flour should not be completely wet with liquid. The yeast should only be put on dry flour. Yeast should not touch with salt. When you use the delay function for a long time, never add the perishable ingredients such as eggs, fruit ingredient.
TROUBLE SHOOTING GUIDE
| No. | Problem | Cause | Solution |
| 1 | Smoke from ventilation hole when baking | Some ingredients adhere to the heat element or nearby, for the first use, oil remained on the surface of heat element | Unplug the bread maker and clean the heat element, but be careful not to burn you, during the first use, dry operating and open the lid. |
| 2 | Bread bottom crust is too thick | Keep bread warm and leave bread in the bread pan for a long time so that water is losing too much | Take bread out soon without keeping it warm |
| 3 | It is very difficult to take bread out | Kneader adheres tightly to the shaft in bread pan | After taking bread out, put hot water into bread pan and immerge kneader for 10 minutes, then take it out and clean. |
| 4 | Stir ingredients not evenly and bake badly | 1.Selected program menu is improper | Select the proper program menu |
| 2.After operating, open cover several times and bread is dry, no brown crust color | Don’t open cover at the last rise | ||
| 3.Stir resistance is too large so that kneader almost cannot rotate and stir adequately | Check kneader hole, then take bread pan out and operate without load, not normal, contact with the authorized service facility. | ||
| 5 | Display “E01” after pressing “START/STOP” button | The temperature in bread maker is too high to make bread. | Press “START/STOP” button and unplug bread maker, then take bread pan out and open cover until the bread maker cools down |
| 6 | Hear the motor noises but dough isn’t stirred | Bread pan is fixed improperly or dough is too large to be stirred | Check whether bread pan is fixed properly and dough is made according to recipe and the ingredients is weighed accurately |
| 7 | Bread size is so large as to push cover | Yeast is too much or flour is excessive or water is too much or environment temperature is too high | Check the above factors, reduce properly the amount according to the true reasons |
| 8 | Bread size is too small or bread has no rise | No yeast or the amount of yeast is not enough, moreover, yeast may have a poor activity as water temperature is too high or yeast is mixed together with salt, or the environment temperature is lower. | Check the amount and performance of yeast, increase the environment temperature properly. |
| 9 | Dough is so large to overflow bread pan | The amount of liquids is so much as to make dough soft and yeast is also excessive. | Reduce the amount of liquids and improve dough rigidity |
| 10 | Bread collapses in the middle parts when baking dough | 1.Used flour is not strong powder and can’t make dough rise | Use bread flour or strong powder. |
| 2.Yeast rate is too rapid or yeast temperature is too high | Yeast is used under room temperature | ||
| 3. Excessive water makes dough too wet and soft. | According to the ability of absorbing water, adjust water on recipe | ||
| 11 | Bread weight is very large and organization construct is too dense | 1.Too much flour or short of water | Reduce flour or increase water |
| 2.Too many fruit ingredients or too much whole wheat flour | Reduce the amount of corresponding ingredients and increase yeast | ||
| 12 | Middle parts are hollow after cutting bread | 1. Excessive water or yeast or no salt | Reduce properly water or yeast and check salt |
| 2.Water temperature is too high | Check water temperature | ||
| 13 | Bread surface is adhered to dry powder | 1.There is strong glutinosity ingredients in bread such as butter and bananas etc. | Do not add strong glutinosity ingredients into bread. |
| 2.Stir inadequately for short of water | Check water and mechanical construct of bread maker | ||
| 14 | Crust is too thick and baking color is too dark when making cakes or food with excessive sugar | Different recipes or ingredients have great effect on making bread, baking color will become very dark because of much sugar | If baking color is too dark for the recipe with excessive sugar, press START/STOP to interrupt the program ahead 5-10min of intended finishing time. Before removing out the bread you should keep the bread or cake in bread pan for about 20 minutes with cover closed |
ENVIRONMENTAL FRIENDLY DISPOSAL

You can help protect the environment!
Please remember to respect the local regulations: hand in the non-working electrical equipment to an appropriate waste disposal centre.

natural_image
Abstract black and white geometric pattern with diagonal stripes (no text or symbols)VOX
ELECTRONICS
ITA
MACCHINA PER IL PANE
MANUALE DELL'UTENTE BM - 1345
natural_image
Line drawing of a standard loaf of bread maker with control panel and digital display (no text or symbols)MANTENERE CALDO - KEEP WARM
MEMORIA
AMBIENTE
DISPLAY DI AVVERTENZE
PER IL PRIMO UTILIZZO
FUNZIONAMENTO
natural_image
Symbol of a trash bin crossed with two diagonal lines, representing no waste or discharge (no text or labels)natural_image
Abstract black and white geometric pattern with diagonal stripes (no text or symbols)VOX
ELECTRONICS
DEU
BROTMASCHINE
BEDIENUNGSANLEITUNG
BBM - 1345
natural_image
Line drawing of a standard loaf of bread maker with control panel and digital display (no text or symbols)natural_image
Simple line drawing of a container with liquid inside, no text or symbols presentnatural_image
Symbol of a trash bin crossed with a diagonal line, representing no waste or discharge (no text or numbers present)natural_image
Abstract black and white geometric pattern with diagonal stripes (no text or symbols)VOX
ELECTRONICS
RUS
ХЛЕБОПЕЧКА
natural_image
Line drawing of a standard loaf of bread maker with control panel and display (no text or symbols)natural_image
Simple line drawing of a container with liquid inside, no text or symbols presentnatural_image
Symbol of a trash bin crossed with a diagonal line, representing no waste or discharge (no text or numbers present)natural_image
Abstract black and white geometric pattern with diagonal stripes (no text or symbols)VOX
ELECTRONICS
SRB
PEKACHLEBA
KORISNIČKO UPUTSTVO
BBM - 1345
natural_image
Line drawing of a standard loaf of bread maker with control panel and display (no text or symbols)Pažljivo pročitajte ovo uputstvo pre korišćenja i sačuvajte ga
za kasniju upotrebu
SADRŽAJ
VAŽNA BEZBEDNOSNA UPUTSTVA
UPOZNAJTE VAŠ APARAT
KONTROLNA TABLA
VAŽNA BEZBEDNOSNA UPUTSTVA:
natural_image
Simple line drawing of a container with liquid inside, no text or symbols presentKvasac ili soda bikarbona
Suvi sastojci
Voda ili tečnost
Slika 4
Napomena: Prilikom dodavanja sastojaka vodite računa o savetu da je maksimalna količina brašna 600 g (4 šolje), a maksimalna količina kvasca je 6 g (2 kašičice).
- Napravite prstima malu rupu na jednoj strani brašna. Stavite kvasac u rupu, vodite računa da tečni sastojci ili so ne dođu u dodir sa kvascem. Polako zatvorite poklopac.
- Uključite kabl za napajanje u utičnicu.
- Pritiskajte taster menija MENU dok ne izaberete željeni program.
- Pritisnite taster za boju COLOR radi odabira boje kore hleba (ako je moguće).
- Pritinite taster za veličinu vekne LOAF SIZE radi odabira željene veličine vekne hleba (750g or 1000g)(ako je moguće).
-
Postavite odlaganje početka rada pritiskom na taster za vreme TIME. Preskočite ovo, ukoliko želite da aparat odmah počne sa radom.
-
Pritisnite taster START / STOP i držite duže od 2 sekunde da bi aparat počeo da radi. Dve tačke počinju da trepere, a na LCD ekranu se pojavljuju osvetljena slova odgovarajućih faza, kao što su mešenje (knead) ili podizanje (rise) kada aparat obavlja funkciju te faze.
-
Tokom rada čuće se zvučni signal koji vas podseća da ručno dodate voćne sastojke, pogodne samo za programe PEČENJE, FRANCUSKI, CELO ZRNO, BRZO, SLATKO, ULTRA BRZO, BEZGLUTENSKI, TORTE i SENDVIČE.
NAPOMENA: Za navedene programe nema instrukcija za izbor funkcije odlaganja.
- Za programe koji imaju funkciju održavanja toplote- KEEP WARM, kada se proces završi, čuje se 10 zvučnih signala. Zatim aparat ulazi u topli režim rada, pritisnuti START / STOP taster više od 3 sekunde kako bi se proces zaustavio; Na programima koji nemaju funkciju toplote, čuje se jedan dugački zvučni signal. Isključite kabl za napajanje iz utičnice i izvadite hleb. Otvorite poklopac uz upotrebu rukavica za rernu, okrenite posudu za hleb u suprotnom smeru od smera kazaljke na satu do položaja za otključavanje, a zatim je izvadite iz aparata.
natural_image
Symbol of a trash bin crossed out by two diagonal lines (no text or numbers present)

natural_image
Abstract black and white geometric pattern with diagonal stripes (no text or symbols)VOX
ELECTRONICS
ESP
PANIFICADORA
natural_image
Line drawing of a standard bread maker with control panel and digital display (no text or symbols)natural_image
Simple line drawing of a container with liquid and a small object inside, no text or symbols presentLevadura o bicarbonato sódico
Ingredientes secos
Agua u otro líquido
Foto 4
natural_image
Abstract black and white geometric pattern with diagonal stripes (no text or symbols)VOX
ELECTRONICS
PRT
MÁQUINA DE PÃO
MANUAL DE INSTRUÇÕES
BBM - 1345
natural_image
Line drawing of a standard loaf of bread maker with control panel and display (no text or symbols)natural_image
Simple line drawing of a container with liquid and a small object inside, no text or symbols presentnatural_image
Symbol of a trash bin crossed with a diagonal line, representing no waste or discharge (no text or labels)natural_image
Abstract black and white geometric pattern with diagonal stripes (no text or symbols)VOX
ELECTRONICS
GRC
ΑΡΤΟΠΑΡΑΣΚΕΥΑΣΤΗΣ
ΟΔΗΓΙΕΣ ΧΡΗΣΗΣ
BBM - 1345
natural_image
Line drawing of a standard bread maker with control panel and display (no text or symbols)natural_image
Abstract black and white geometric pattern with diagonal stripes (no text or symbols)VOX
ELECTRONICS
SVN
PEKACKRUHA
NAVODILA ZA UPORABO
BBM - 1345
natural_image
Line drawing of a standard loaf of bread maker with control panel and display (no text or symbols)OHRANJANJE TOPLOTE - KEEP WARM
natural_image
Simple line drawing of a container with liquid inside, no text or symbols presentKvas ali soda bikarbona
Suhe sestavine
Voda ali tekočina
Slika 4
natural_image
Simple line drawing of a trash bin with crossed lines indicating no waste or discharge (no text or symbols)natural_image
Line drawing of a standard loaf of grain bread maker with control panel and display (no text or symbols)PRVA UPORABA APARATA
natural_image
Simple line drawing of a container with liquid inside, no text or symbols presentKvasac ili soda bikarbona
Suhi sastojci
Voda ili tekućina
Slika 4
Napomena: Prilikom dodavanja sastojaka vodite računa o savjetu da je maksimalna količina brašna 600 g (4 šolje), a maksimalna količina kvasca je 6 g (2 kašičice).
- Napravite prstima malu rupu na jednoj strani brašna. Stavite kvasac u rupu, vodite računa da tečni sastojci ili so ne dođu u dodir sa kvascem. Polako zatvorite poklopac.
- Uključite kabel za napajanje u utičnicu.
- Pritiskajte taster izbirnika MENU dok ne izaberete željeni program.
- Pritisnite taster za boju COLOR radi odabira boje kore kruha (ako je moguće).
- Pritinite taster za veličinu štruce LOAF SIZE radi odabira željene veličine štruce kruha (750g or 1000g) (ako je moguće).
-
Postavite odlaganje početka rada pritiskom na taster za vrijeme TIME. Preskočite ovo, ukoliko želite da aparat odmah počne sa radom.
-
Pritisnite taster START / STOP i držite duže od 2 sekunde da bi aparat počeo da radi. Dvije točke počinju da trepere, a na LCD ekranu se pojavljuju osvijetljena slova odgovarajućih faza, kao što su miješanje (knead) ili podizanje (rise) kada aparat obavlja funkciju te faze.
-
Tjekom rada čuće se zvučni signal koji vas podsjeća da ručno dodate voćne sastojke, pogodne samo za programe PEČENJE, FRANCUSKI, CIJELO ZRNO, BRZO, SLATKO, ULTRA BRZO, BEZGLUTENSKI, TORTE i SENDVIČI.
NAPOMENA: Za navedene programe nema instrukcija za izbor funkcije odlaganja.
- Za programe koji imaju funkciju održavanja topline- KEEP WARM, kada se proces završi, čuje se 10 zvučnih signala. Zatim aparat ulazi u topli način rada, pritisnuti START / STOP taster više od 3 sekunde kako bi se proces zaustavio; Na programima koji nemaju funkciju topline, čuje se jedan dugački zvučni signal. Isključite kabel za napajanje iz utičnice i izvadite kruh. Otvorite poklopac uz uporabu rukavica za pećnicu, okrenite posudu za kruh u suprotnom smjeru od smjera kazaljke na satu do položaja za otključavanje, a zatim je izvadite iz aparata.
NAPOMENA: Neka se posuda za kruh potpuno ohladi prije nego što je pomijerite.
- Za odvajanje kruha od strana posude za kruh koristite neljepljivu spatulu.
natural_image
Symbol of a trash bin crossed out by two diagonal lines (no text or numbers present)natural_image
Abstract black and white geometric pattern with diagonal stripes (no text or symbols)VOX
ELECTRONICS
BIH
MNE
PEKAČ HLJEBA
KORISNIČKO UPUTSTVO
BBM - 1345
natural_image
Line drawing of a standard loaf of grain bread maker with control panel and display (no text or symbols)Pažljivo pročitajte ovo uputstvo prije korišćenja i sačuvajte ga za kasniju upotrebu
SADRŽAJ
VAŽNA BEZBJEDNOSNA UPUTSTVA
UPOZNAJTE VAŠ APARAT
KONTROLNA TABLA
ODLOŽEN POČETAK RADA (VRIJEME)
ODRŽAVANJE TOPLOTE
MEMORIJA
SOBNA TEMPERATURA
UPOZORENJA NA EKRANU
PRVA UPOTREBA
KORIŠĆENJE APARATA ZA PEČENJE HLJEBA
ČIŠĆENJE I ODRŽAVANJE
UVOD U SASTOJKE
MJERENJE SASTOJAKA
RIJEŠAVANJE PROBLEMA
EKOLOŠKO ODLAGANJE
VAŽNA BEZBJEDNOSNA UPUTSTVA:
Prije korišćenja ovog uređaja trebalo bi ispuniti sljedeće osnovne bezbjednosne preduslove:
- Pročitajte cijelo uputstvo.
- Prije upotrebe provjerite da li napon u zidnoj utičnici odgovara naponu uređaja koji se može naći na natpisnoj tablici pri dnu uređaja
- Ne koristite uređaj sa oštećenim kablom, nakon kvara ili ako je oštećen na bilo koji način. Kontaktirajte proizvođača ili najbliži ovlašćeni servis radi provjere, popravke, ili električnih i mehaničkih podešavanja.
- Ne dodirujte vruće površine.
- Ne potapajte kabl, utikač, ili kućište u vodu ii druge tečnosti kako biste izbjegli opasnost od strujnog udara.
- Isključite uređaj iz utičnice kada ga ne koristite, kao i prije stavljanja ili skidanja dijelova i prije čišćenja.
- Ne ostavljajte kabl aparata da visi sa ivice stola, ili bilo kakve vruće površine.
- Upotreba bilo kakvih dodataka koji nisu preporučeni ili prodati od strane proizvođača može prouzrokovati povrede.
- Ne stavljajte uređaj na ili u blizini plinskog ili električnog šporeta, ili u zagrijanu rernu.
- Ne dodirujte pokretne ili okretne dijelove uređaja tokom rada.
- Temperatura dostupnih površina može biti velika kada uređaj radi.
- Nikada nemojte uključivati aparat bez pravilno postavljene posude za hljeb koja je ispunjena sastojcima.
- Prilikom sklanjanja posude, nemojte udarati posudu za hljeb po vrhu ili ivici kako ne biste oštetili posudu za hljeb.
- Metalne folije ili drugi materijali ne smiju se ubacivati u aparat zbog rizika od požara ili kratkog spoja.
- Ovaj aparat mogu koristiti djeca uzrasta od 8 godina i više jao i osobe s smanjenim fizičkim, senzornim ili mentalnim sposobnostima ili nedostatkom iskustva i znanja ako im je pružen nadzor ili uputstva u vezi sa upotrebom aparata na siguran način i razumiju moguće opasnosti. Djeca se ne smiju igrati sa aparatom. Čišćenje i korisničko održavanje ne smiju obavljati djeca, osim ako su stariji od 8 godina i pod nadzorom.
- Čuvajte aparat i kabl van domašaja djece mlađe od 8 godina.
- Nikada ne pokrivajte aparat za pečenje hljeba peškirom ili bilo kojim drugim
materijalom jer toplota i para moraju slobodno da se emituju. Postoji opasnost od požara ako je aparat pokriven ili dolazi u kontakt sa zapaljivim materijalom.
- Nemojte koristiti aparat u bilo koju svrhu osim onu za koju je namijenjen.
- Aparat uvijek koristite na sigurnim, suvim i ravnim površinama.
- Ne koristite aparat na otvorenom prostoru.
- Aparat ima utikač sa uzemljenjem. Vodite računa da je utičnica sa uzemljenjem.
- Uređaj je namijenjen za kućnu upotrebu i slične uslove, kao što su:
– Kuhinjske prostorije u prodavnicama, kancelarijama i drugim radnim okruženjima;
– Seoska domaćinstva;
– Hoteli, moteli i slični tipovi smještaja;
– Ostali pansioni za izdavanje na bazi noćenja sa doručkom.
- Nemojte upravljati uređajem pomoću spoljnog tajmera ili sistema za daljinsko upravljanje.
- Ne koristite aparat bez posude za hljeb koja je stavljena u komoru kako biste izbjegli oštećenje aparata.
- Sačuvajte ovo uputstvo za kasniju upotrebu.
UPOZNAJTE VAŠ PEKAČ HLJEBA
natural_image
Simple line drawing of a container with liquid inside, no text or symbols presentKvasac ili soda bikarbona
Suvi sastojci
Voda ili tečnost
Slika 4
Napomena: Prilikom dodavanja sastojaka vodite računa o savjetu da je maksimalna količina brašna 600 g (4 šolje), a maksimalna količina kvasca je 6 g (2 kašičice).
- Napravite prstima malu rupu na jednoj strani brašna. Stavite kvasac u rupu, vodite računa da tečni sastojci ili so ne dođu u dodir sa kvascem. Polako zatvorite poklopac.
- Uključite kabl za napajanje u utičnicu.
- Pritiskajte taster menija MENU dok ne izaberete željeni program.
- Pritisnite taster za boju COLOR radi odabira boje kore hljeba (ako je moguće).
- Pritinite taster za veličinu vekne LOAF SIZE radi odabira željene veličine vekne hleba (750g or 1000g) (ako je moguće).
-
Postavite odlaganje početka rada pritiskom na taster za vrijeme TIME. Preskočite ovo, ukoliko želite da aparat odmah počne sa radom.
-
Pritisnite taster START / STOP i držite duže od 2 sekunde da bi aparat počeo da radi. Dvije tačke počinju da trepere, a na LCD ekranu se pojavljuju osvijetljena slova odgovarajućih faza, kao što su mešenje (knead) ili podizanje (rise) kada aparat obavlja funkciju te faze.
-
Tokom rada čuće se zvučni signal koji vas podsjeća da ručno dodate voćne sastojke, pogodne samo za programe PEČENJE, FRANCUSKI, CIJELO ZRNO, BRZO, SLATKO, ULTRA BRZO, BEZGLUTENSKI, TORTE i SENDVIČI.
NAPOMENA: Za navedene programe nema instrukcija za izbor funkcije odlaganja..
- Za programe koji imaju funkciju održavanja toplote- KEEP WARM, kada se proces završi, čuje se 10 zvučnih signala. Zatim aparat ulazi u topli režim rada, pritisnuti START / STOP taster više od 3 sekunde kako bi se proces zaustavio; Na programima koji nemaju funkciju toplote, čuje se jedan dugački zvučni signal. Isključite kabl za napajanje iz utičnice i izvadite hljeb. Otvorite poklopac uz upotrebu rukavica za rernu, okrenite posudu za hljeb u suprotnom smjeru od smjera kazaljke na satu do položaja za otključavanje, a zatim je izvadite iz aparata.
NAPOMENA: Neka se posuda za hljeb potpuno ohladi prije nego što je pomijerite.
- Za odvajanje hljeba od strana posude za hljeb koristite neljepljivu špatulu.
natural_image
Symbol of a trash bin crossed out by two diagonal lines (no text or numbers present)natural_image
Abstract black and white geometric pattern with diagonal stripes (no text or symbols)VOX
ELECTRONICS
MKD
natural_image
Line drawing of a standard loaf of bread maker with control panel and digital display (no text or symbols)natural_image
Simple line drawing of a container with liquid and a small object inside, no text or symbols present.Квасец или сода бикарбона
Суви состојки
Вода или течност
Сл.4
natural_image
Symbol of a trash bin crossed with no text or numbers, representing environmental restriction (no text present)natural_image
Abstract black and white geometric pattern with diagonal stripes (no text or symbols)VOX
ELECTRONICS
ALB
APARAT PËR PJEKJEN E BUKËS
UDHËZIM PËR PËRDORIM
BBM - 1345
natural_image
Line drawing of a standard loaf of bread maker with control panel and display (no text or symbols)KOHA E SHTYER E PJEKJES (DELAY FUNCTION (“+” ose “-”)
natural_image
Simple line drawing of a container with liquid and a small object inside, no text or symbols presentnatural_image
Symbol of a trash bin crossed with diagonal lines, representing no waste or discharge (no text or labels)
- VOX
- ELECTRONICS
- BREAD MAKER
- INSTRUCTION MANUAL
- BBM - 1345
- CONTENTS
- IMPORTANT SAFEGUARDS:
- KNOW YOUR BREAD MAKER
- INTRODUCTION OF CONTROL PANEL
- AFTER POWER-UP
- START / STOP
- MENU
- COLOR
- LOAF SIZE
- DELAY FUNCTION (“+” or “-”)
- KEEP WARM
- MEMORY
- ROOM TEMPERATUE
- WARNING DISPLAY
- FOR THE FIRST USE
- USING YOUR BREAD MAKER
- CLEANING AND MAINTENANCE
- A GUIDE TO INGREDIENTS
- Bread flour
- Plain flour
- Whole-wheat flour
- Black wheat flour
- Self-rising flour
- Corn flour and oatmeal flour
- Sugar
- Yeast
- Salt
- Egg
- Fat, butter and vegetable oil
- Baking powder
- Soda
- Water and other liquid
- INGREDIENTS MEASUREMENT
- Weighing liquid ingredients
- Dry measurements
- Adding sequence
- ENVIRONMENTAL FRIENDLY DISPOSAL
- BROTMASCHINE
- BEDIENUNGSANLEITUNG
- SADRŽAJ
- VAŽNA BEZBEDNOSNA UPUTSTVA:
- PANIFICADORA
- OHRANJANJE TOPLOTE - KEEP WARM
- PRVA UPORABA APARATA
- PEKAČ HLJEBA
- KORISNIČKO UPUTSTVO
- VAŽNA BEZBJEDNOSNA UPUTSTVA:
- UPOZNAJTE VAŠ PEKAČ HLJEBA
- APARAT PËR PJEKJEN E BUKËS
- UDHËZIM PËR PËRDORIM
- KOHA E SHTYER E PJEKJES (DELAY FUNCTION (“+” ose “-”)
Brand : VOX
Model : BBM1345
Category : Bread maker