
TM1057 - Blender VOX - Free user manual and instructions
Find the device manual for free TM1057 VOX in PDF.


| Product Type | Blender |
| Brand | VOX |
| Model | TM1057 |
| Jar Capacity | 1.5 liters (maximum level) |
| Speed Settings | 3 speeds plus pulse (OFF, 1/4, 2/5, 3/6, P1/P2) |
| Pulse Function | Yes (HIGH PULSE position) |
| Dishwasher Safe Parts | Measure cup, lid, seal rings, jar, blade assembly (max 70°C) |
| Motor Unit Cleaning | Wipe with damp cloth; do not immerse in water |
| Maximum Continuous Operation | 2 minutes per cycle |
| Required Rest Time Between Cycles | 10 minutes |
| Blade Assembly | Removable, sharp, handle with care |
| Lid with Measuring Cup | Yes, included |
| Seal Rings | Two seal rings for jar and lid |
| Safety Features | Lid must be in place during operation; unplug before cleaning; keep away from children |
| Intended Use | Household use only |
| Ice Crushing Capability | Up to 6 ice cubes at a time |
| Food Preparation Recommendation | Cut hard fruits/vegetables into small pieces before blending |
Frequently Asked Questions - TM1057 VOX
User questions about TM1057 VOX
0 question about this device. Answer the ones you know or ask your own.
Ask a new question about this device
Download the instructions for your Blender in PDF format for free! Find your manual TM1057 - VOX and take your electronic device back in hand. On this page are published all the documents necessary for the use of your device. TM1057 by VOX.
USER MANUAL TM1057 VOX
natural_image
Abstract black-and-white geometric pattern with diagonal stripes (no text or symbols)VOX
ELECTRONICS
TM - 1057
OPERATING INSTRUCTIONS BLENDER MANUALE DELL'UTENTE FRULLATORE BEDIENUNGSANLEITUNG STANDMIXER ИНСТРУКЦИЯ ПО ЭКСПЛУАТАЦИИ БЛЕНДЕР UPUTSTVO ZA UPOTREBU BLENDER MANUAL DE USUARIO LICUADORA MANUAL DO USUÁRIO LIQUIDIFICADOR ЕГХЕІРІДІО ХРНЗТН МПЛЕНТЕР NAVODILA ZA UPORABO BLENDER UPUTE ZA UPORABU BLENDER UPUTSTVO ZA UPOTREBU BLENDER УПАТСТВА ЗА РАКУВАНЬЕ БЛЕНДЕР MANUALI I PERDORUESIT BLENDER

natural_image
Abstract black and white geometric pattern with diagonal stripes (no text or symbols)VOX
ELECTRONICS
GBR
INSTRUCTION MANUAL TM - 1057
Read this booklet thoroughly before using and save it for future reference
IMPORTANT SAFEGUARDS
When using this electrical appliance, basic safety precautions should always be followed, including the following:
- Read all instructions.
- Before using check that the voltage indicated on the product corresponds with the voltage of your electrical outlet.
-
Do not let cord hang on hot surface or over edge of table or counter.
-
Do not operate any appliance with a damaged cord or plug or after the appliance malfunction or has been damaged in any manner. Return the appliance to the nearest authorized service facility for examination, repair or adjustment.
-
If the supply cord is damaged, it must be replaced by the manufacturer or its service agent or a similarly qualified person in order to avoid a hazard.
-
Close supervision is necessary when any appliance is used by or near children.
-
Avoid contacting the moving parts.
-
Keep hands and utensils out of container while blending to reduce the risk of severe injury to persons or damage to the blender. A scraper may be used but must be used only when the blender is not running.
-
The use of attachments not recommended or sold by manufacturer may cause fire, electric shock or injury.
-
Unplug from outlet when not in use, before putting on or taking off parts, and before cleaning. To disconnect, turn any control to “off”, then remove plug from wall outlet by grasping the plug, not the cord.
-
To reduce the risk of injury, never place blade assembly on motor unit without the jar properly attached.
-
This appliance shall not be used by children. Keep the appliance and its cord out of reach of children.
-
Appliances can be used by persons with reduced physical, sensory or mental capabilities or lack of experience and knowledge if they have been given supervision or instruction concerning use of the appliance in a safe way and if they understand the hazards involved. Children shall not play with the appliance.
-
Do not leave the machine on unattended.
-
When removing the blender from the motor unit, wait until the blades have completely stopped.
-
Always operate blender with cover in place.
-
Always use the appliance on a secure, dry level surface.
-
Never place this appliance on or near a hot gas or an electric burner or where it could touch a heated appliance.
-
Do not use outdoors.
-
Do not use appliance for other than its intended use.
-
Do not operate without this cover in place;
-
Avoid any contact with blades or moveable parts.
-
Switch off the appliance and disconnect from supply before changing accessories or approaching parts that move in use.
-
Always disconnect the appliance from the supply if it is left unattended and before assembling, disassembling or cleaning.
-
This appliance is intended to be used in household and similar applications such as:
– staff kitchen areas in shops, offices and other working environments;
- farm houses;
– by clients in hotels, motels and other residential type environments;
- bed and breakfast type environments.
-
Care shall be taken when handling the sharp cutting blades, emptying the bowl and during cleaning.
-
Be careful if hot liquid is poured into the appliance as it can be ejected out of the appliance due to a sudden steaming.
HOUSEHOLD USE ONLY
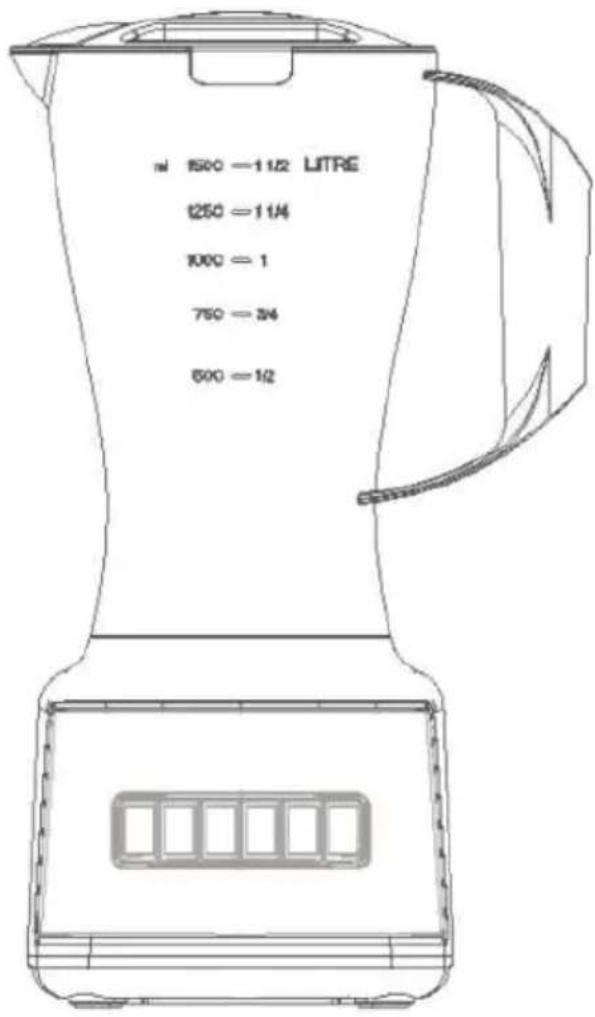
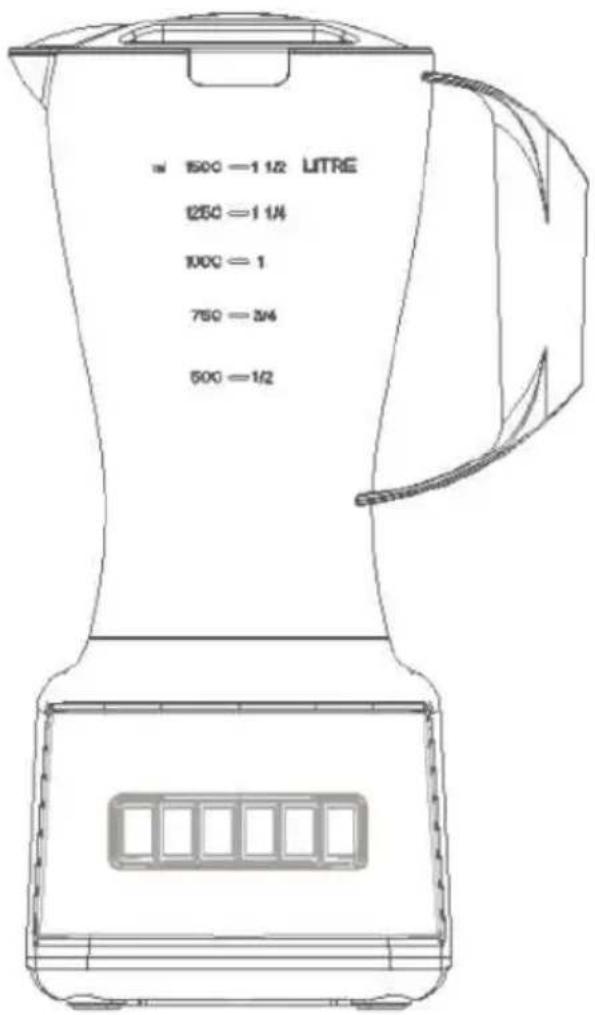
KNOW YOUR BLEANDER
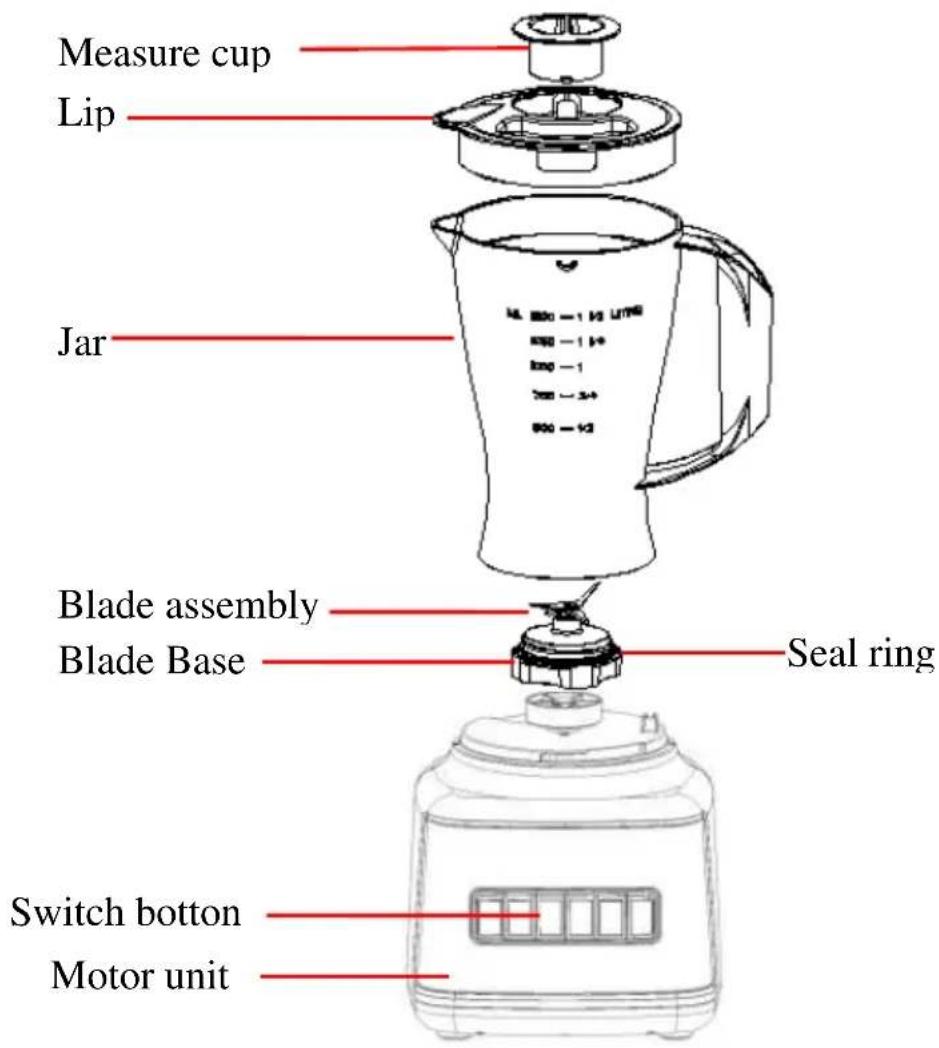
Fig.1
SWITCH BOTTON
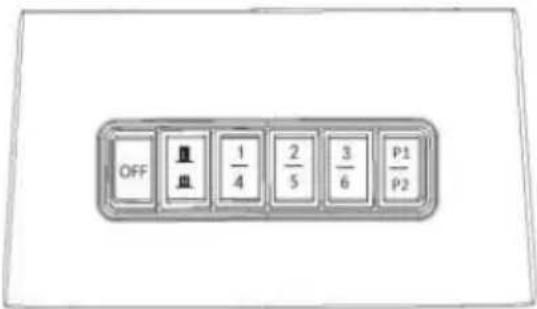
Fig.2
HOW TO USE
Before initial use
- Before first use, unpack the appliance and place all parts on a horizontal surface.
- The jar assembly (including the measure cup, lid, seal ring 1, jar, seal ring 2, blade assembly and jar base) has already been assembled into the motor unit. Disassemble to wash all detachable parts except the motor unit. Refer to the latter chapter CARE AND CLEANING.
- Once all pieces have been cleaned and dry thoroughly, reassemble.
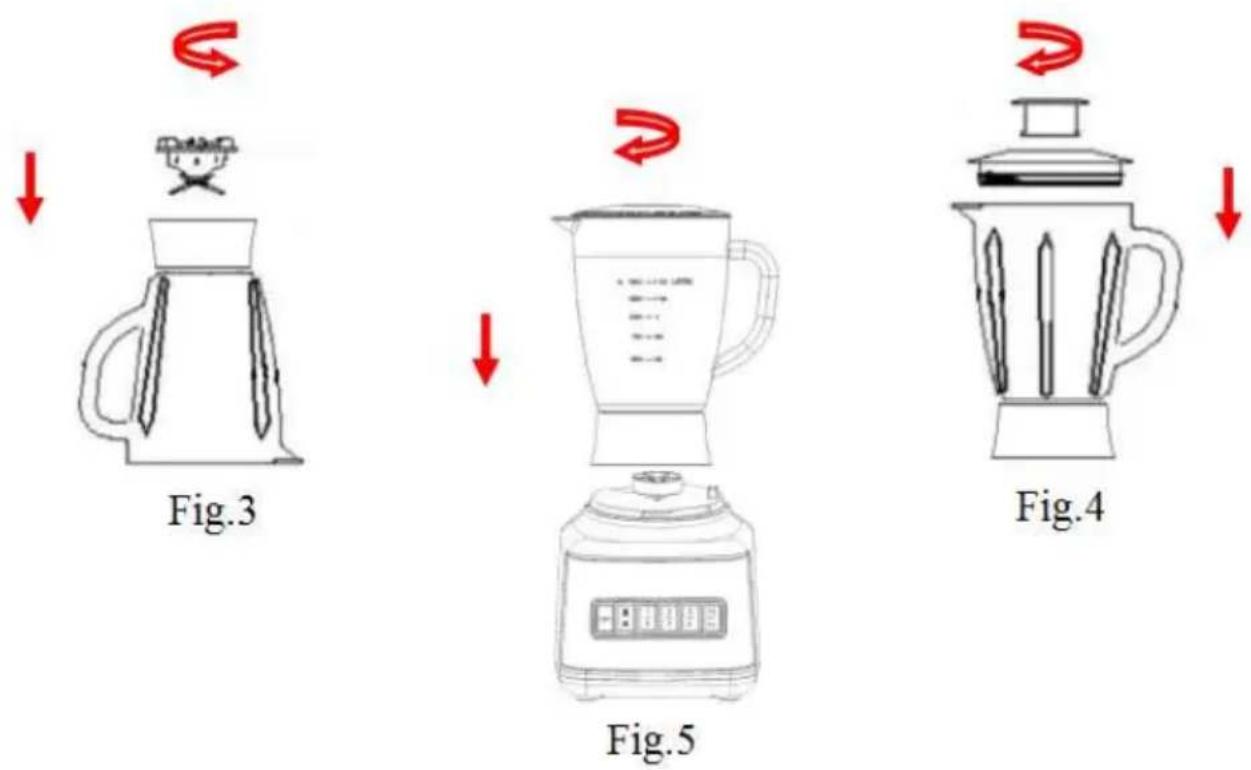
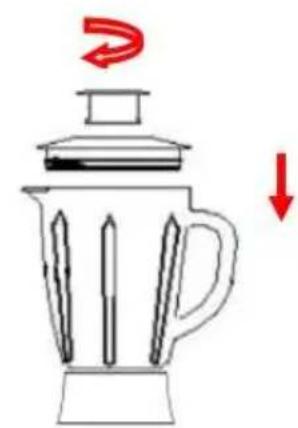
1) Invert the jar onto a level surface, holding the jar handle, put the seal ring 2 and blade assembly onto the jar base bottom and secure the blade assembly by turning it anti-clockwise until tight (See Fig.3)
2) Reposition the jar assembly with its opening upwards. Wrap the seal ring 1 around the lid bottom and put the lid onto the jar assembly. Place the measure cup exactly into the lid by fitting the small projection on the both sides of the cup into the slots of the lid and turning the cup clockwise until tight. (See Fig.4)
3) Finally, place the assembled jar onto the motor unit by aligning the strip on the assembled jar bottom. (See Fig.5)
CAUSION: Jar and jar base is now secure. Do not try to twist the jar and jar base onto motor unit
How to use
- Peeled or cored the fruit or vegetables and then cut it into small dices.
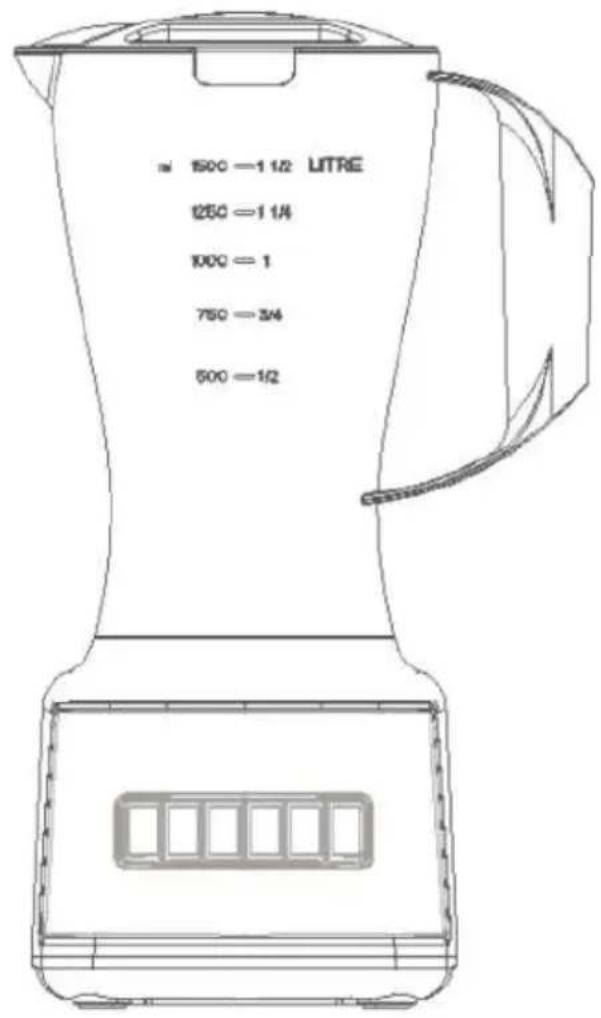
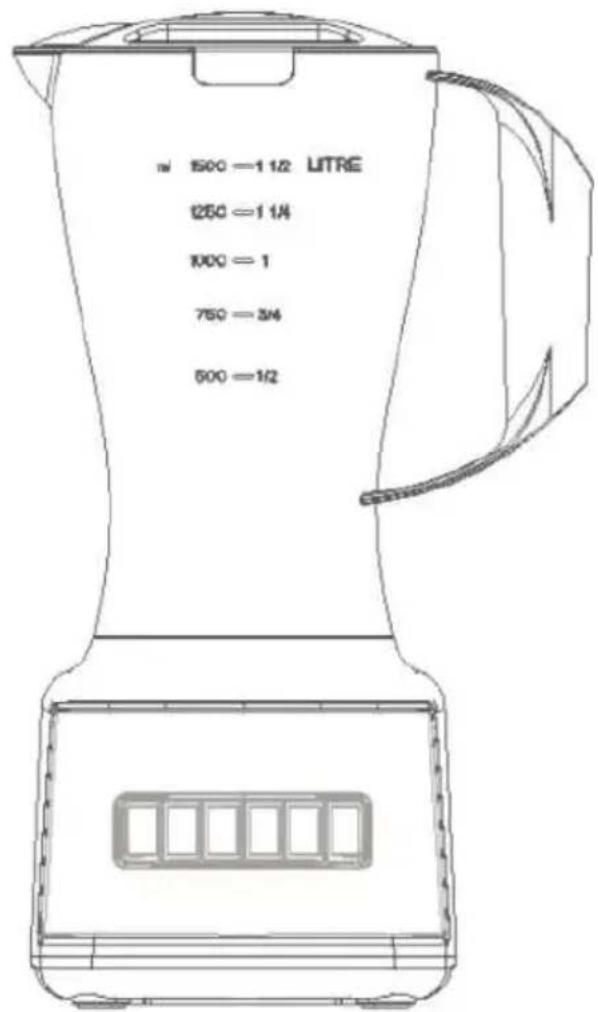
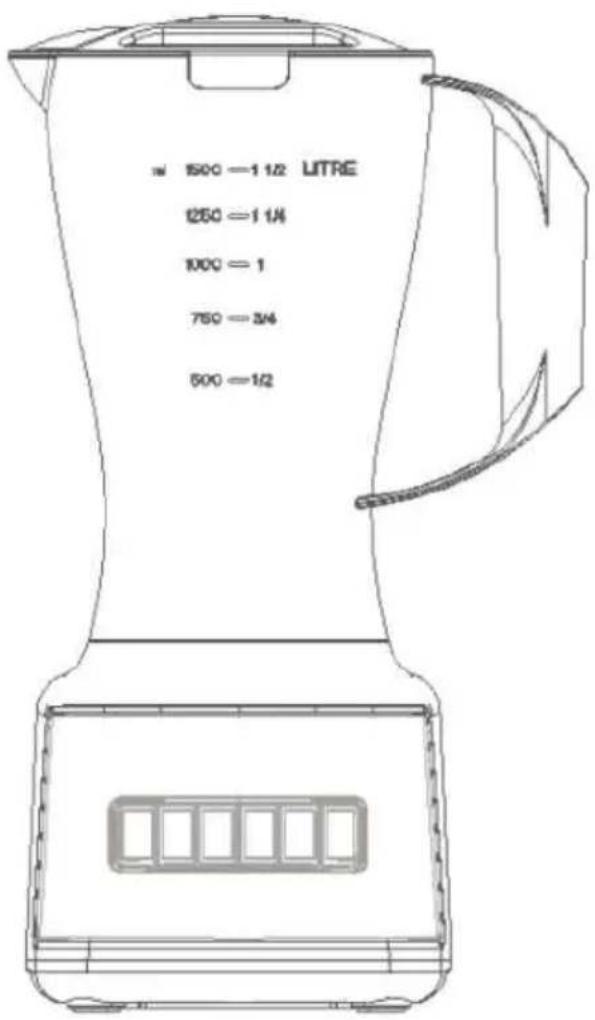
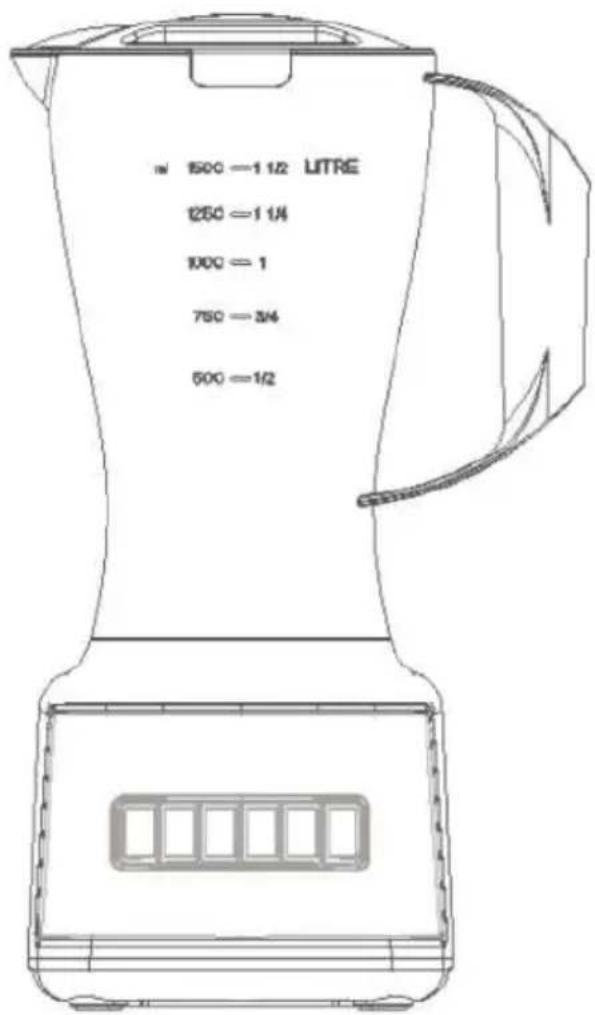
- Place the food to be blended into the jar (See Fig.6). Usually, certain amount of purified water has to be added to facilitate the smooth running of appliance. The proportion of the food and water is 2:3. The amount of mixture should not exceed the max level as indicated on the jar.
- WARNING: When attempting to blend hard fruit or hard vegetables, cut into small pieces before blending. Ensure that the dial is set to the highest Speed (Speed 6) before commencing. If the speed is set too low, the motor will get damaged due to insufficient torque (high speed rotation). When the motor speed is too slow for the product that it is attempting to blend, set it to a higher speed in order to increase the rotation speed or switch the unit off to prevent motor damage.
RECIPE
| FOOD TYPE | SPEC | WEIGHT | SPEED |
| Carrot (apple, pear etc.) | Cut into 15mm*15mm*15mmm | Carrot: 600gWater: 900g | High speed |
Note: never use boiling liquids or run the appliance empty.
- Put the lid on the jar. Be sure the measuring cup is in place.
- Plug the power cord into a standard wall outlet.
- Choose to the appropriate speed setting for your task. (Please stir food at the highest speed, not at low speed).
- For quick or delicate blending tasks, press the key to "HIGH PULSE" position and hold for a few seconds and then release, the key will reset to "OFF" position automatically. Operate several times until the consistence you want is obtained
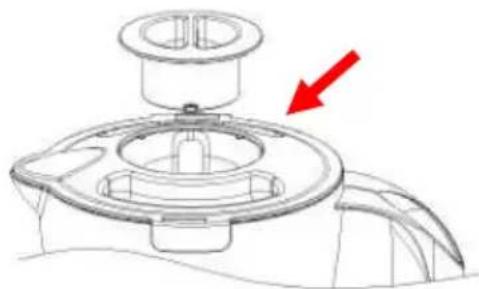
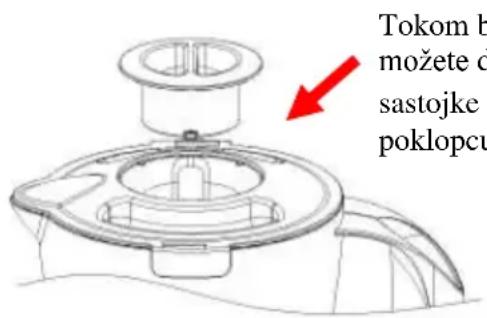
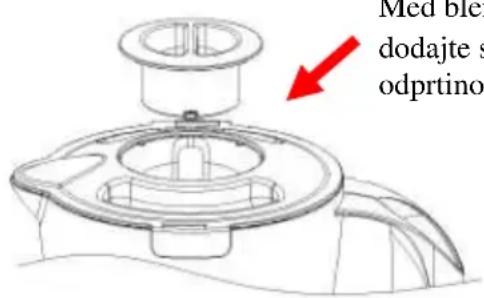
- If you want to add ingredients while the blender is working, remove the measuring cup and place through the lid opening. (See Fig.7)
- When crushing ice or hard food, keep one hand firmly on the lid.
- When the consistence you desire is obtained, press the key to "OFF" position.
Note: 1) For each use, the consecutive operation time should not exceed 2 minutes. at least 10 minutes rest time must be maintained between two continuous cycles, let the unit cool to room temperature before performing next operation cycle.
2) If you want to stop the machine during operation, press the key to "OFF" position anytime.
natural_image
Technical line drawing of a mechanical component with two views (top and side), no text or symbols present.Fig.6
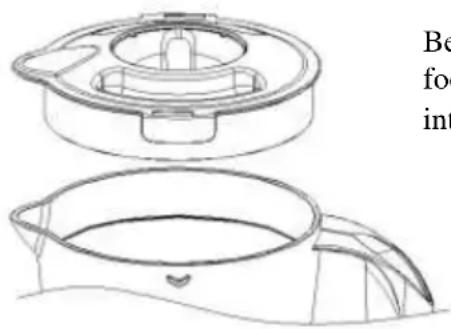
Before blending, add food to be blended into the jar.
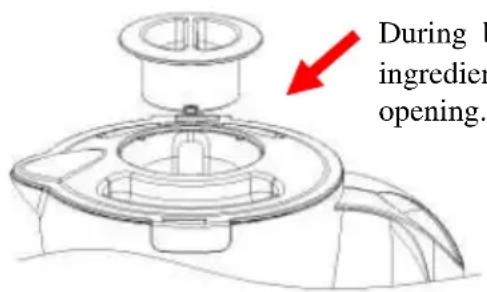
Fig.7
During blending, add the ingredient through the lid opening.
Important operating tips
- For best circulation of food that are to be blended with some liquid, pour the liquid into the jar first, then add solids.
- Some of the tasks that cannot be performed efficiently with a blender are: beating egg whites, whipping cream, mashing potatoes, grinding meat, mixing dough, extracting juice from fruit and
vegetable
- The following items should never be placed in the unit as they may cause damage: bones, large pieces of solid, frozen food, or tough foods such as turnips.
- To crush ice, add up to 6 ice cubes. If more ice is needed, remove the cup and add cubes one by one through the lid opening.
CARE AND CLEANING
This product contains no user serviceable parts. Refer service to qualified service personnel.
- Before cleaning, unplug the blender.
- Always wash immediately after use for easier cleaning. Don't let food dry on the jar assembly as this will make cleaning difficult.
- Pour a little warm soapy water into the jar and turn the knob to P position for a few seconds. And then empty the jar.
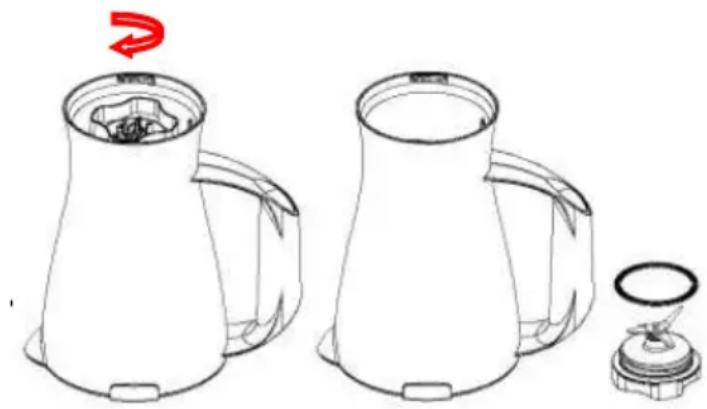
- Dismantle all detachable parts. Lift the jar assembly off the motor unit, To detach the blade assembly by turning it clockwise from the jar base bottom, and remove the seal ring 2 and blade assembly (see fig.8). In addition, detach the jar cover seal ring 1 from the jar cover.
natural_image
Line drawing of two identical kitchen pots with a lid, one showing a red arrow indicating rotation (no text or symbols)Fig.8
- Rinse the measure cup, lid, seal ring 1, jar, seal ring 2 and blade assembly by hands or in a dishwasher and then dry. They are dishwasher safe components, but the temperature setting shall not exceed 70^ C.
- Brush the blade clean using warm soapy water, then rinse thoroughly under the tap. Don't touch the sharp blades, handle carefully. Don't immerse the blade assembly in water. Leave to dry upside down away from children.
- Wipe the motor unit with a damp cloth and dry thoroughly. Remove the stubborn spots by rubbing with non-abrasive cleaner. If liquids spill into the motor unit; first unplug the unit, then wipe with a damp cloth and dry thoroughly.
CAUSION
1) Do not immerse the motor unit in liquid to prevent the risk of electric shock.
2) Do not use rough scouring pads or cleansers on parts or finish.
Correct Disposal of this product
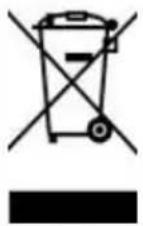
This marking indicates that this product should not be disposed with other household wastes throughout the EU. To prevent possible harm to the environment or human health from uncontrolled waste disposal, recycle it responsibly to promote the sustainable reuse of material resources. To return your used device, please use the return and collection systems or contact the retailer where the product was purchased. They can take this product for environmental safe recycling.

natural_image
Abstract black and white geometric pattern with diagonal stripes (no text or symbols)VOX
ELECTRONICS
ITA
MANUALE DELL'UTENTE
TM - 1057
natural_image
Technical line drawing of a two-part mechanical component with no visible text or symbolsFig.6
natural_image
Line drawing of two kitchen pots with a side view showing a lid and handle (no text or symbols)Fig.8
natural_image
Abstract black and white geometric pattern with diagonal stripes (no text or symbols)VOX
ELECTRONICS
DEU
natural_image
Line drawing of a kitchen appliance with a lid and side panel (no text or symbols)Fig.1
BEDIENFELD
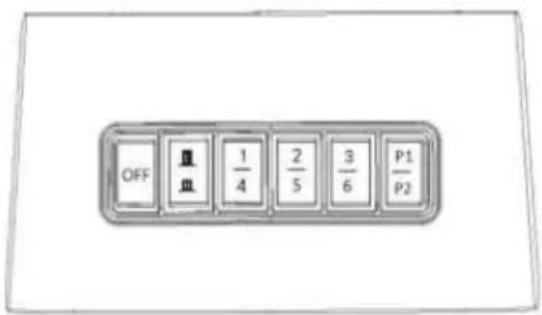
Fig.2
Inbetriebnahme
natural_image
Technical line drawing of a mechanical component with top and side views (no text or symbols)Fig.6
natural_image
Technical line drawing of a mechanical component with a red arrow indicating direction (no text or symbols)Fig.7
Wichtige Hinweise
natural_image
Line drawing of two kitchen utensils with a side view showing a filter (no text or symbols)Fig.8
natural_image
Abstract black-and-white geometric pattern with diagonal stripes (no text or symbols)VOX
ELECTRONICS
RUS
Fig.5
Работа блендера
natural_image
Technical line drawing of a mechanical component with two views (top and side), no text or symbols present.Рис.6
natural_image
Line drawing of two identical kitchen pots with a side view showing a lid and a red arrow indicating rotation (no text or symbols)Рис.8
natural_image
Abstract black-and-white geometric pattern with diagonal stripes (no text or symbols)VOX
ELECTRONICS
SRB
KORISNIČKO UPUTSTVO
TM - 1057
Pažljivo pročitajte ovo uputstvo pre korišćenja i sačuvajte ga za kasniju upotrebu
VAŽNA BEZBEDNOSNA UPUTSTVA
natural_image
Technical line drawing of a mechanical component with two views (top and side), no text or symbols present.Slika 6
Dodajte hranu koju želite da blendirate pre uključivanja uređaja.
natural_image
Line drawing of two kitchen mugs with a lid, one showing a red arrow indicating rotation (no text or symbols)Fig.8
- Isperite mericu, poklopac, zaptivni prsten 1, posudu, zaptivni prsten 2 i sečivo ručno ili u mašini za pranje posuđa, a zatim ih sve osušite. Delovi su perivi u mašini za pranje posuđa, ali temperatura ne bi smela da bude viša od 70°C
- Očistite sečivo koristeći toplu, sapunjavu vodu i temeljno isperite pod tekućom vodom. Ne dodirujte oštro sečivo i rukujte njime pažljivo. Ne potapajte sečivo u vodu. Okrenite ga nakon pranja naopačke i ostavite ga da se osuši, držeći ga podalje od dece.
- Obrišite motornu jedinicu vlažnom krpom i osušite temeljno. Uklonite tvrdokorne mrlje nekom neabrazivnom tečnošću. Ako se desi da se prospe tečnost na motornu jedinicu, prvo iskopčajte uređaj iz struje, a zatim prebrišite temeljno suvom krpom i ostavite da se osuši.
PAŽNJA
Ne potapajte motornu jedinicu u tečnost kako biste sprečili rizik od strujnog udara Ne koristite grube četke za čišćenje i jaka sredstva za čišćenje
Pravilno odlaganje ovog proizvoda
natural_image
Abstract black-and-white geometric pattern with diagonal stripes (no text or symbols)VOX
ELECTRONICS
ESP
Fig.5
Cómo utilizar
natural_image
Technical line drawing of a mechanical component with a red arrow pointing to a specific part (no text or symbols present)natural_image
Line drawing of two identical kitchen pots with a side view showing a lid and a red arrow indicating rotation (no text or symbols)Fig.8
natural_image
Abstract black and white geometric pattern with diagonal stripes (no text or symbols)VOX
ELECTRONICS
PRT
MANUAL DE INSTRUÇÕES TM - 1057
natural_image
Technical line drawing of a mechanical component with two views (top and side), no text or symbols present.Fig.6
natural_image
Line drawing of two identical kitchen pots with a lid and a small stand, no text or symbols present.Fig.8
natural_image
Abstract black and white geometric pattern with diagonal stripes (no text or symbols)VOX
ELECTRONICS
GRC
ΟΔΗΓΙΕΣ ΧΡΗΣΗΣ
TM - 1057
natural_image
Technical line drawing of a mechanical component with two views (top and side), no text or symbols present.Eik 6
natural_image
Line drawing of two identical kitchen pots with a side view showing a lid and handle (no text or symbols)Eik.8
natural_image
Abstract black and white geometric pattern with diagonal stripes (no text or symbols)VOX
ELECTRONICS
SVN
NAVODILA ZA UPORABO
TM - 1057
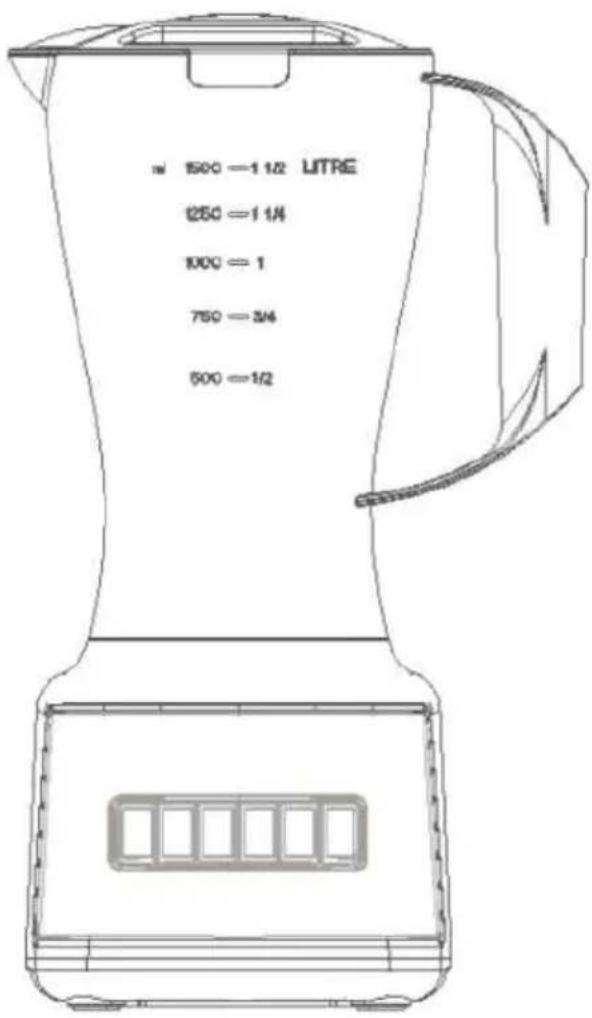
Fig.5
KAKO UPORABLJATI BLENDER
natural_image
Technical line drawing of a mechanical component with two views (top and side), no text or symbols present.Slika 6
Pred blendiranjem dodajte sestavine.
natural_image
Line drawing of two identical kitchen mugs with a side view showing a lid and a red arrow indicating rotation (no text or symbols)Slika 8
natural_image
Abstract black and white geometric pattern with diagonal stripes (no text or symbols)VOX
ELECTRONICS
HRV
KORISNIČKE UPUTE
TM - 1057
natural_image
Technical line drawing of a mechanical component with two views (top and side), no text or symbols present.Slika 6
natural_image
Line drawing of two kitchen pots with a side view showing a lid and handle (no text or symbols)Slika 8
- Isperite mjericu, poklopac, zaptivni prsten 1, posudu, zaptivni prsten 2 i sječivo ručno ili u perilici posuđa, a zatim ih sve osušite. Dijelovi su perivi u perilici posuđa, ali temperatura ne bi smjela da bude viša od 70°C
- Očistite sječivo koristeći toplu, sapunjavu vodu i temeljno isperite pod tekućom vodom. Ne dodirujte oštro sječivo i rukujte njime pažljivo. Ne potapajte sječivo u vodu. Okrenite ga nakon pranja naopačke i ostavite ga da se osuši, držeći ga podalje od djece.
- Obrišite motornu jedinicu vlažnom krpom i osušite temeljito. Uklonite tvrdokorne mrlje nekom neabrazivnom tekućinom. Ako se desi da se prospe tekućina na motornu jedinicu, prvo iskopčajte uređaj iz struje, a zatim prebrišite temeljno suhom krpom i ostavite da se osuši.
PAŽNJA
Pažljivo pročitajte ovo uputstvo prije korišćenja i sačuvajte ga za kasniju upotrebu
VAŽNA BEZBJEDNOSNA UPUTSTVA
Prije upotrebe ovog električnog uređaja trebalo bi uvijek ispuniti osnovne preduslove uključujući sljedeće:
- Pročitati sva uputstva.
- Prije upotrebe provjeriti da li napon u zidnoj utičnici odgovara naponu uređaja koji se može naći na natpisnoj tablici pri dnu uređaja.
- Pazite da kabl za napajanje tokom upotrebe ne visi sa ivice stola, radne površine ili blizu bilo kakvog grijnog tijela.
- Ne koristite uređaj sa oštećenim kablom za napajanje ili ako je uređaj prestao da radi ili se oštetio na bilo koji način. Vratite uređaj u najbliži ovlašćeni servis na pregled, popravku ili zamjenu.
- Ako se kabl za napajanje ošteti, može ga zamijeniti samo ovlašćeno lice u servisu ili neko drugo kvalifikovano lice, kako biste izbjegli povrede.
- Neophodan je nadzor ukoliko se uređaj koristi od strane djece ili u njihovoj blizini.
- Izbjegavajte kontakt sa dijelovima koji se pomijeraju.
- Ne stavljajte ruke ili kuhinjska pomagala u blender dok je u funkciji kako biste smanjili rizik od ozbiljnih povreda ili nanošenja štete blenderu. Strugač za hranu možete koristiti samo ukoliko uređaj nije u funkciji.
- Upotreba neoriginalnih nastavaka ili dijelova koje ne preporučuje proizvođač mogu izazvati požar, strujni udar i povrede.
- Isključite kabl za napajanje iz utičnice kad uređaj nije u upotrebi, prije čišćenja, skidanja ili stavljanja nastavaka. Uređaj isključujete okretanjem bilo koje kontrole u poziciju OFF, a zatim izvadite kabl za napajanje iz utičnice hvatanjem za gumeni utikač, a ne povlačenjem samog kabla.
- Da biste smanjili rizik od povrede, nikada ne postavljajte dio sa sječivima dok pravilno ne postavite posudu.
- Ovaj uređaj ne bi trebalo da se koristi od strane djece. Čuvajte uređaj i njegov kabl dalje od dohvata djece.
- Uređaje mogu koristiti osobe sa smanjenim fizičkim, senzornim ili mentalnim sposobnostima ili sa nedostatkom iskustva i znanja ukoliko su pod nadzorom ili su im date instrukcije u vezi sa upotrebom aparata na siguran način i ukoliko razumiju opasnosti do kojih može doći. Djeca se ne smiju igrati s uređajem.
- Nemojte ostavljati uređaj da radi bez nadzora.
- Kada sklanjate bledner sa motorne jedinice, sačekajte da se sječiva zaustave u potpunosti.
- Blender uvijek koristite sa postavljenim poklopcem.
- Uvijek koristite blender na sigurnoj, suvoj i ravnoj podlozi.
- Nikada ne stavljajte uređaj na ili u blizini vrućeg plina ili električnog gorionika ili tamo gdje može doći u dodir s vrućim uređajima.
- Nemojte koristiti na otvorenom.
- Koristite uređaj samo za predviđenu namjenu.
- Nemojte koristiti blender bez postavljenog poklopca.
-
Izbjegavajte bilo kakav kontakt sa sječivima ili pokretnim dijelovima.
-
Ugasite uređaj i isključite ga sa napajanja prije mijenjanja dijelova i prije rukovanja dijelovima koji se pokreću tokom upotrebe.
- Uvijek isključite uređaj sa napajanja ukoliko nije pod nadzorom kao i prije sastavljanja, rastavljanja dijelova ili čišćenja.
- Uređaj je namijenjen za kućnu upotrebu i slične uslove, kao što su:
- Kuhinjske prostorije u prodavnicama, kancelarijama i drugim radnim okruženjima;
- Seoska domaćinstva;
natural_image
Technical line drawing of a two-tiered mechanical component (no text or symbols)Slika 6
natural_image
Line drawing of two kitchen pots with a side view showing a lid and handle (no text or symbols)Slika 8
- Isperite mjericu, poklopac, zaptivni prsten 1, posudu, zaptivni prsten 2 i sječivo ručno ili u mašini za pranje posuđa, a zatim ih sve osušite. Dijelovi su perivi u mašini za pranje posuđa, ali temperatura ne bi smjela da bude viša od 70°C
- Očistite sječivo koristeći toplu, sapunjavu vodu i temeljno isperite pod tekućom vodom. Ne dodirujte oštro sječivo i rukujte njime pažljivo. Ne potapajte sječivo u vodu. Okrenite ga nakon pranja naopačke i ostavite ga da se osuši, držeći ga podalje od djece.
- Obrišite motornu jedinicu vlažnom krpom i osušite temeljno. Uklonite tvrdokorne mrlje nekom neabrazivnom tečnošću. Ako se desi da se prospe tečnost na motornu jedinicu, prvo iskopčajte uređaj iz struje, a zatim prebrišite temeljno suvom krpom i ostavite da se osuši.
PAŽNJA
natural_image
Abstract black-and-white geometric pattern with diagonal stripes (no text or symbols)VOX
ELECTRONICS
MKD
Fig.3
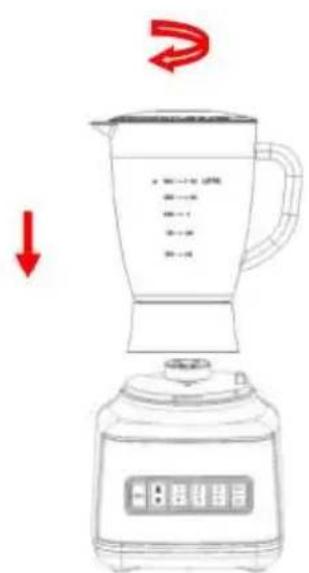
Fig.5
natural_image
Simple line drawing of a blender with red directional arrows indicating rotation and drop (no text or symbols)Fig.4
natural_image
Technical line drawing of a mechanical component with two views (top and side), no text or symbols present.Слика 6
natural_image
Line drawing of two kitchen utensils with a red arrow indicating rotation (no text or symbols)Слика 8
natural_image
Abstract black-and-white geometric pattern with diagonal stripes (no text or symbols)VOX
ELECTRONICS
ALB
UDHËZIM PËR PËRDORIM TM - 1057
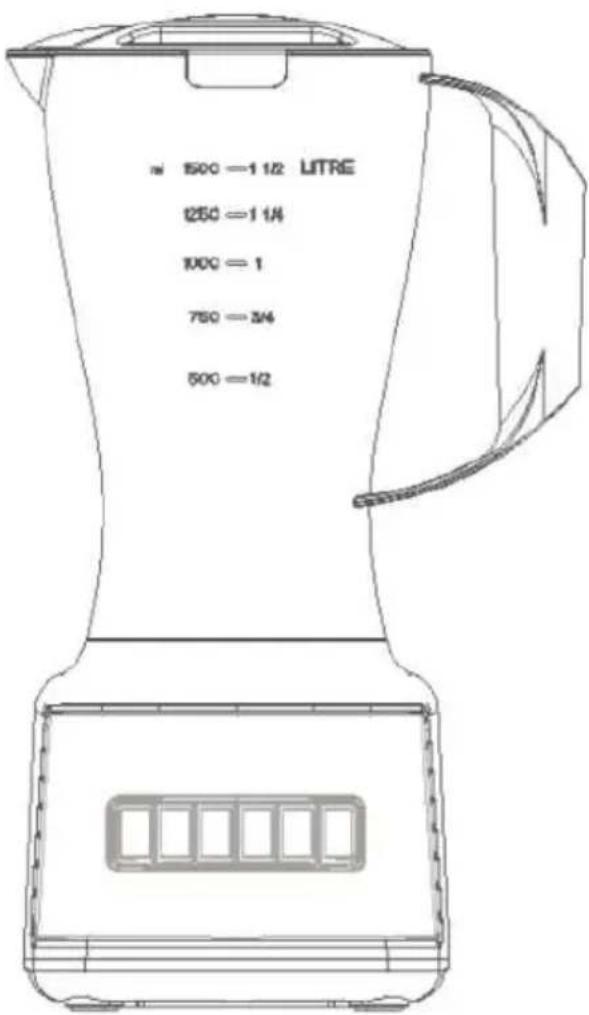
Fig.5
Përdorimi
natural_image
Technical line drawing of a mechanical component with two views (top and side), no text or symbols present.Foto 6
natural_image
Line drawing of two identical kitchen pots with a side view showing a lid and handle (no text or symbols)- VOX
- ELECTRONICS
- INSTRUCTION MANUAL TM - 1057
- IMPORTANT SAFEGUARDS
- HOUSEHOLD USE ONLY
- KNOW YOUR BLEANDER
- SWITCH BOTTON
- HOW TO USE
- Before initial use
- Note: never use boiling liquids or run the appliance empty.
- Important operating tips
- vegetable
- CARE AND CLEANING
- This product contains no user serviceable parts. Refer service to qualified service personnel.
- CAUSION
- Correct Disposal of this product
- MANUALE DELL'UTENTE
- TM - 1057
- BEDIENFELD
- Inbetriebnahme
- Wichtige Hinweise
- Работа блендера
- KORISNIČKO UPUTSTVO
- VAŽNA BEZBEDNOSNA UPUTSTVA
- PAŽNJA
- Pravilno odlaganje ovog proizvoda
- Cómo utilizar
- MANUAL DE INSTRUÇÕES TM - 1057
- ΟΔΗΓΙΕΣ ΧΡΗΣΗΣ
- NAVODILA ZA UPORABO
- KAKO UPORABLJATI BLENDER
- KORISNIČKE UPUTE
- VAŽNA BEZBJEDNOSNA UPUTSTVA
- UDHËZIM PËR PËRDORIM TM - 1057
- Përdorimi
Brand : VOX
Model : TM1057
Category : Blender