
RCS-3535C2 - Gardening Tools RYOBI - Free user manual and instructions
Find the device manual for free RCS-3535C2 RYOBI in PDF.

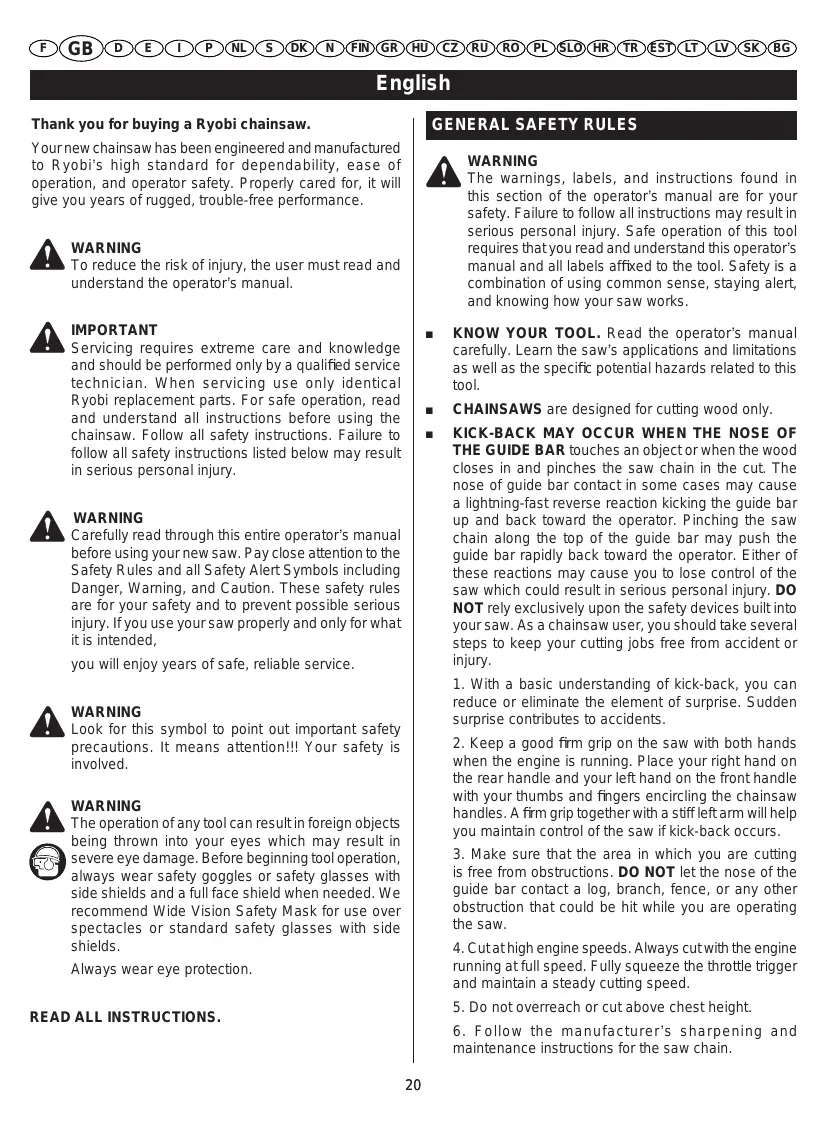


| Product type | Petrol chainsaw |
| Brand | RYOBI |
| Model | RCS-3535C2 |
| Category | Gardening tools |
| Displacement | 35 cm³ |
| Nominal power | 1.7 kW at 10,000 rpm |
| Weight (without guide bar, chain, fuel or oil) | 4.6 kg |
| Guide bar length | 35 cm |
| Cutting length | 320 mm |
| Chain pitch | 9.53 mm |
| Chain gauge | 1.27 mm |
| Guide bar type | Carlton 14-10-N1-MHC UNB |
| Chain type | Carlton N1C-BL-M-52E SK (low kickback) |
| Fuel tank capacity | 310 cm³ |
| Oil tank capacity | 210 cm³ |
| Fuel mixture | Unleaded 87 octane gasoline + synthetic 2-stroke oil, ratio 50:1 (2%) |
| Sound pressure level (ISO22868) | 103 dB(A) |
| Guaranteed sound power level | 113 dB(A) |
| Vibration front handle (ISO22867) | 6.4 m/s² |
| Vibration rear handle (ISO22867) | 7.0 m/s² |
| Chain brake | Yes, front hand guard |
| Applications | Pruning, felling, cross-cutting, root cutting |
| Warranty | 24 months |
Frequently Asked Questions - RCS-3535C2 RYOBI
User questions about RCS-3535C2 RYOBI
0 question about this device. Answer the ones you know or ask your own.
Ask a new question about this device
Download the instructions for your Gardening Tools in PDF format for free! Find your manual RCS-3535C2 - RYOBI and take your electronic device back in hand. On this page are published all the documents necessary for the use of your device. RCS-3535C2 by RYOBI.
USER MANUAL RCS-3535C2 RYOBI
CE

ДЛ02
| Attention ! | Il est indispensable que vous lisiez les instructions contenues dans ce manuel avant le montage et la mise en service de l'appareil. |
| Important! | It is essential that you read the instructions in this manual before mounting and operating this machine. |
| Achtung! | Bitte lesen Sie unbedingt vor Montage und Inbetriebnahme die Hinweise dieser Bedienungsanleitung. |
| ¡Atención! | Es imprescindible que lea las instrucciones de este manual antes del montaje y de la puesta en servicio. |
| Attenzione! | Prima di procedere al montaggio e alla messa in funzione, è indispensabile leggere attentamente le istruzioni del presente manuale. |
| Atenção! | É indispensável ler as instruções deste manual antes de montar e pôr em serviço. |
| Let op ! | Het is absoluut noodzakelijk vóór montage en inbedrijfstelling de aanwijzingen in deze handleiding te lezen. |
| Observera! | Det är nödvändigt att läsa instruktionerna i denna bruksanvisning före montering och driftsättning. |
| OBS! | Denne brugsanvisning skal læses igennem inden montering og ibrugtagning. |
| Advarse! | Vennligst les instruksjonene i denne bruksanvisningen før du monterer og tar i bruk maskinen. |
| Huomio! | On ehdottoman välttämätöntä lukea tässä käyttöohjeessa annetut ohjeet ennen asennusta ja käyttöönotoa. |
| Προσοχή! | Είναι απαραίτητο να διαβάσετε τις συστάσεις των οδηγιών αυτών πριν τη συναρμολόγηση και τη θέση σε λειτουργία |
| Figyelem! | Feltétlenül fontos, hogy a jelen használati útmutatóban foglalt előírásokat az összeszerelés és az üzembe helyezés ellőt elolvassa! |
| Dûležité upozornění! | Před montáží nářadí a uvedením do provozu je nutné si přečíst následující pokyny. |
| Внимание! | Перед сборкой и запуском инструмента необходимо прочесть инструкции из настоящего руководства. |
| Atentie! | Este indispensabil sā citiți instrucțiunile conținute în acest mod de utilizare înainte de montaj și de punerea în funcțiune. |
| Uwaga! | Przed montowaniem i uruchomieniem, koniecznie musicie się Państwo zapoznać z zaleceniami zawartymi w niniejszym sposobie użycia. |
| Pomembno! | Zelo pomembno je, da pred namestitvijo in prvo uporabo te naprave preberete navodila v tem priročniku. |
| Upozorenje! | Vaæno je da upute u ovom KorisniËkom priruËniku proËitate prije postavljanja i uporabe ovog alata. |
| Dikkat! | Montajdan ve aletin kullanımina başlamadan bu kilavuzda bulunan talimatları okumaniz gerekmektedir. |
| Tähtis! | Lugege enne seadme kokkupanekut ja kasutamist kindlasti läbi selles juhendis sisalduvad eeskirjad ja juhised! |
| Dèmesio! | Prieš surinkdami ir paleisdami aparatą į darbą, reikia, kad jūs perskaitytumète šiame vadove esančias instrukcijas. |
| Uzmanību! | Ir ľoti būtiski, lai jūs izlasītu norādījumus, kas sniegti šajā rokasgrāmatā, pirms ṁeraties pie ierīces montēšanas un iedarbināšanas! |
| Pozor! | Je nutné, aby ste si prečítali pokyny, ktoré sa nachádzajú v tejto príručke pred montážou a spustením prístroja. |
| Внимание! | Преди сглобяване и пускане на машината е важно да прочетете инструкциите в ръководството за употреба. |
Sous réserve de modifications techniques / Subject to technical modifications / Technische Änderungen vorbehalten / Bajo reserva de modificaciones técnicas / Con riserva di eventuali modifiche tecniche / Com reserva de modificações técnicas / Technische wijzigingen voorbehouden / Med förbehåll för tekniska ändringar / Med forbehold for tekniske ændringer / Med forbehold om tekniske endringer / Tekniset muutokset varataan / Υπό την επιφύλαξη τεχνικών τροποποιήσεων / A műszaki módosítás jogát fenntartjuk / Změny technických údajů vyhrazeny / Могут быть внесены технические изменения / Sub rezerva modificațiilor tehnice / Z zastrzeženiem modyfikacji technicznych / Tehnične spremembe dopuščene Podloæno tehniĚkim promjenama / Teknik düzeltmeler hakkı saklidır / Tehnilised muudatused võimalikud / Pasiliekant teisę daryti techninius pakeitimus / Paturam tiesības mainīt tehniskos raksturlielumus / Technické zmeny vyhradenė /
REMLISSAGE DU RÉSERVOIR DE CARBURANT (Fig. 2)
Thank you for buying a Ryobi chainsaw.
Your new chainsaw has been engineered and manufactured to Ryobi's high standard for dependability, ease of operation, and operator safety. Properly cared for, it will give you years of rugged, trouble-free performance.

WARNING
To reduce the risk of injury, the user must read and understand the operator's manual.

IMPORTANT
Servicing requires extreme care and knowledge and should be performed only by a qualified service technician. When servicing use only identical Ryobi replacement parts. For safe operation, read and understand all instructions before using the chainsaw. Follow all safety instructions. Failure to follow all safety instructions listed below may result in serious personal injury.

WARNING
Carefully read through this entire operator's manual before using your new saw. Pay close attention to the Safety Rules and all Safety Alert Symbols including Danger, Warning, and Caution. These safety rules are for your safety and to prevent possible serious injury. If you use your saw properly and only for what it is intended,
you will enjoy years of safe, reliable service.

WARNING
Look for this symbol to point out important safety precautions. It means attention!!! Your safety is involved.

WARNING
The operation of any tool can result in foreign objects being thrown into your eyes which may result in severe eye damage. Before beginning tool operation, always wear safety goggles or safety glasses with side shields and a full face shield when needed. We recommend Wide Vision Safety Mask for use over spectacles or standard safety glasses with side shields.
Always wear eye protection.
READ ALL INSTRUCTIONS.
GENERAL SAFETY RULES

WARNING
The warnings, labels, and instructions found in this section of the operator's manual are for your safety. Failure to follow all instructions may result in serious personal injury. Safe operation of this tool requires that you read and understand this operator's manual and all labels affixed to the tool. Safety is a combination of using common sense, staying alert, and knowing how your saw works.
-
KNOW YOUR TOOL. Read the operator's manual carefully. Learn the saw's applications and limitations as well as the specific potential hazards related to this tool.
■ CHAINSAWS are designed for cutting wood only.
KICK-BACK MAY OCCUR WHEN THE NOSE OF THE GUIDE BAR touches an object or when the wood closes in and pinches the saw chain in the cut. The nose of guide bar contact in some cases may cause a lightning-fast reverse reaction kicking the guide bar up and back toward the operator. Pinching the saw chain along the top of the guide bar may push the guide bar rapidly back toward the operator. Either of these reactions may cause you to lose control of the saw which could result in serious personal injury. DO NOT rely exclusively upon the safety devices built into your saw. As a chainsaw user, you should take several steps to keep your cutting jobs free from accident or injury. -
With a basic understanding of kick-back, you can reduce or eliminate the element of surprise. Sudden surprise contributes to accidents.
- Keep a good firm grip on the saw with both hands when the engine is running. Place your right hand on the rear handle and your left hand on the front handle with your thumbs and fingers encircling the chainsaw handles. A firm grip together with a stiff left arm will help you maintain control of the saw if kick-back occurs.
- Make sure that the area in which you are cutting is free from obstructions. DO NOT let the nose of the guide bar contact a log, branch, fence, or any other obstruction that could be hit while you are operating the saw.
- Cut at high engine speeds. Always cut with the engine running at full speed. Fully squeeze the throttle trigger and maintain a steady cutting speed.
- Do not overreach or cut above chest height.
- Follow the manufacturer's sharpening and maintenance instructions for the saw chain.
English
GENERAL SAFETY RULES
- Use only replacement bars and chains specified by the manufacturer or the equivalent.
■ DO NOT OPERATE A CHAINSAW WITH ONE HAND. Serious injury to the operator, helpers, and/or bystanders may result from one-handed operation. A chainsaw is intended for two-handed use.
■ DO NOT OPERATE A CHAINSAW WHEN YOU ARE FATIGUED. Never operate a chainsaw when you are tired or under the influence of medication, drugs, or alcohol.
■ USE SAFETY FOOTWEAR. Wear snug-fitting clothing, protective gloves, and eye, hearing, and head protection devices.
■ DO NOT STAND ON ANY UNSTABLE SURFACE while using your chainsaw: that includes ladders, scaffolds, trees, etc.
■ USE CAUTION WHEN HANDLING FUEL. Move the chainsaw at least 50 feet (15 m) from the refuelling point before starting the engine.
■ DO NOT ALLOW OTHER PERSONS to be near the chainsaw when starting or cutting with the chainsaw. Keep bystanders and animals out of the work area.
■ DO NOT START CUTTING until you have a clear work area, secure footing, and a planned retreat path from the falling tree.
- KEEP ALL PARTS OF YOUR BODY away from the saw chain when the engine is running.
■ ALWAYS CARRY THE CHAINSAW WITH THE ENGINE STOPPED AND THE BRAKE ENGAGED, the guide bar and saw chain to the rear, and the silencer away from your body. When transporting the chainsaw, use the appropriate guide bar scabbard.
■ DO NOT OPERATE A CHAINSAW THAT IS DAMAGED, improperly adjusted, or not completely and securely assembled. Be sure that the saw chain stops moving when the throttle control trigger is released.
■ TURN OFF THE ENGINE before putting the chainsaw down. DO NOT leave the engine running unattended. As an additional safety precaution, apply the chain brake before putting down the saw.
■ USE EXTREME CAUTION when cutting small-size brush and saplings because slender material may catch the saw chain and be whipped toward you or pull you off balance.
■ WHEN CUTTING A LIMB under tension, be alert for spring-back so that you will not be struck when the tension in the wood fibres is released.
- KEEP THE HANDLES dry, clean, and free of oil or fuel mixture.
■ OPERATE THE CHAINSAW ONLY in well-ventilated areas.
■ DO NOT OPERATE A CHAINSAW IN A TREE unless you have been specifically trained to do so.
■ ALWAYS HAVE A FIRE EXTINGUISHER AVAILABLE WHEN USING CHAIN SAW.
■ Use guide bar cover during transport and storage.
■ The chain saw should always be used with correctly mounted spiked bumper.
■ FOLLOW THE SHARPENING and maintenance instructions for the saw chain.
■ USE ONLY THE REPLACEMENT GUIDE BARS and low kick-back chains specified for your saw.
■ DO NOT adapt your powerhead to a bow guide or use it to power any attachments or devices not listed for your saw.
■ SAVE THESE INSTRUCTIONS. Refer to them frequently and use to instruct other users. If you lend someone this tool, lend them these instructions also.
SPECIFIC SAFETY RULES

WARNING
The warnings, labels, and instructions found in this section of the operator's manual are for your safety. Failure to follow all instructions may result in serious personal injury.
GENERAL PRECAUTIONS
■ DO NOT CUT VINES and/or small undergrowth (less than 76 mm (3 in.) in diameter).
■ MUFFLER SURFACES ARE VERY HOT during and after operation of the chainsaw; keep all body parts away from the muffler. Serious burns may occur if contact is made with the muffler.
■ ALWAYS HOLD THE CHAINSAW WITH BOTH HANDS when the engine is running. Use a firm grip with thumbs and fingers encircling the chainsaw handles.
■ NEVER LET ANYONE USE YOUR CHAINSAW who has not received adequate instructions in its proper use. This applies to rentals as well as privately owned saws.
■ BEFORE YOU START THE ENGINE, make sure the saw chain is not contacting any object.
■ OPERATE THE CHAINSAW only in well ventilated areas.
English
SPECIFIC SAFETY RULES
PROPER CLOTHING FOR SAFETY
■ Wear close-fitting clothing. Always wear heavy, long trousers, boots, and gloves. Do not wear jewellery, shorts, sandals, or go barefoot. Do not wear loose-fitting clothing, which could be drawn into the engine or catch the chain or undergrowth. Wear overalls, jeans, or leggings made of cut-resistant material or ones that contain cut-resistant inserts. Secure hair so that it is above shoulder level.
■ Wear non-slip safety footwear and heavy-duty gloves to improve your grip and to protect your hands.
■ Wear eye, hearing, and head protection when operating this equipment.
REFUELLING (DO NOT SMOKE!)
■ To reduce the risk of fire and burn injury, handle fuel with care. It is highly flammable.
■ Mix and store fuel in a container approved for petrol.
■ Mix fuel outdoors where there are no sparks or flames.
■ Select bare ground, stop the engine, and allow it to cool before refuelling.
■ Loosen the fuel cap slowly to release pressure and to keep fuel from escaping around the cap.
■ Tighten the fuel cap securely after refuelling.
■ Wipe spilled fuel from the unit. Move 15 m (50 ft.) away from refuelling site before starting engine.
■ Never attempt to burn off spilled fuel under any circumstances.
BASIC PRECAUTIONS IN THE CUTTING/ WORK AREA
■ Do not operate a chainsaw in a tree.
■ Do not cut from a ladder: this is extremely dangerous.
- Keep bystanders and animals out of the work area. Do not allow other persons to be nearby during starting or cutting with the chainsaw.
NOTE: The size of the work area depends on the job being performed as well as the size tree or workpiece involved. For example, felling a tree requires a larger work area than making other cuts, i.e. bucking cuts etc.
PUSH AND PULL
The reaction force is always opposite to the direction the chain is moving. Thus, the operator must be ready to control the PULL when cutting on the bottom edge of the bar and the PUSH when cutting along the top edge.
NOTE: Your chainsaw has been fully factory tested.
It is normal to find some slight oil residue on the saw.
MAINTENANCE PRECAUTIONS
Never operate a chainsaw that is damaged, improperly adjusted, or is not completely and securely assembled.
Be sure that the saw chain stops moving when the throttle control trigger is released. If the saw chain moves at idling speed, the carburettor may need adjusting. Refer to "Operation-Adjusting Idling Speed" later in this manual.
If the saw chain still moves at idling speed after adjustment has been made, contact a Ryobi service dealer for adjustment and discontinue use until the repair is made.

WARNING
All chainsaw service, other than items in the operator's manual maintenance instructions, should be performed by competent chainsaw service personnel. If improper tools are used to remove the flywheel or clutch, or if an improper tool is used to hold the flywheel in order to remove the clutch, structural damage to the flywheel could occur which could subsequently cause the flywheel to burst and serious injury could result.
KICK-BACK
Kick-back is a dangerous reaction that can lead to serious injury. Do not rely only on the safety devices provided with your saw. As a chainsaw user, you must take special safety precautions to help keep your cutting jobs free from accident or injury.
NOTE: Refer to “Operation” later in this manual for added information on kick-back and how to avoid serious personal injury.
SAVE THIS MANUAL FOR FUTURE REFERENCE.
English
SYMBOLS
Some of the following symbols may be used on this tool. Please study them and learn their meaning. Proper interpretation of these symbols will allow you to operate the tool better and safer.
| SYMBOL | NAME | DESIGNATION / EXPLANATION |
 | Safety Alert | Precautions that involve your safety. |
 | Read The Operator's Manual | To reduce the risk of injury, user must read and understand operator's manual before using this product. |
 | Wear Eye, Hearing, and Head Protection | Wear eye, hearing and head protection when operating this equipment. |
 | No Smoking | No smoking, sparks, or open flame. |
 | Operate With Two Hands | Hold and operate the saw properly with both hands. |
 | One Handed | Do not operate the saw using only one hand. |
 | Carbon Monoxide | Engines produce carbon monoxide which is an odorless, deadly poison. Do not operate in an enclosed area. |
 | Kickback | DANGER! Beware of kickback. |
 | Bar Nose Contact | Avoid bar nose contact. |
 | Wear Gloves | Wear non-slip, heavy-duty protective gloves when handling the chain saw. |
 | Petrol and Oil | Use unleaded petrol intended for motor vehicle use with an octane rating of 87 [(R + M)/2] or higher. This product is powered by 2-stroke cycle engine and requires pre-mixing petrol and 2-stroke oil. |
 | Keep Bystanders Away | Keep all bystanders and animals at least 15m away. |
English
SPECIFICATIONS
| RCS-3535C2 | RCS-4040C2 | RCS-4446C2 | |
| 35 cc | 40 cc | 44 cc | |
| Weight - No bar, chain, fuel or oil | 4.6 kg | 4.6 kg | 4.6 kg |
| Fuel tank capacity | 310 cm 3 | 310 cm 3 | 310 cm 3 |
| Oil tank capacity | 210 cm 3 | 210 cm 3 | 210 cm 3 |
| Bar lengths | 35 cm | 40 cm | 46 cm |
| Usable cutting lengths | 320 mm | 370 mm | 410 mm |
| Bar type | Carlton 14-10-N1-MHC UNB | Carlton 16-10-N1-MHC UNB | Carlton 18-10W-K1-HC-UNB |
| Chain pitch | 9.53 mm (0.375 inch) | 9.53 mm (0.375 inch) | 8.26 mm (0.325 inch) |
| Chain gauge | 1.27 mm (0.05 inch) | 1.27 mm (0.05 inch) | 1.27 mm (0.05 inch) |
| Chain type | Carlton N1C-BL-M-52E SK | Carlton N1C-BL-M-57E SK | Carlton K1L-BL-72E |
| Drive sprocket | 6-tooth | 6-tooth | 7-tooth |
| Engine displacement | 35 cm 3 | 40.1 cm 3 | 44 cm 3 |
| Maximum engine power (ISO7293) | 1.7 kW / 10000 min-1 | 1.8 kW / 10000 min-1 | 1.9 kW / 9500 min-1 |
| Maximum engine speed with attachment | 12000 min-1 | 12000 min-1 | 12000 min-1 |
| Idling engine speed | 2700 - 3100 min-1 | 2700 - 3100 min-1 | 2700 - 3100 min-1 |
| Specific fuel consumption at maximum engine power | 435g/kwh | 435g/kwh | 435g/kwh |
| Sound pressure level(ISO22868) | 103 dB(A) | 103 dB(A) | 103 dB(A) |
| Sound power level (ISO22868) | 113 dB(A) | 113 dB(A) | 113 dB(A) |
| Vibration (ISO22867) | |||
| - Front Handle | 6.4 m/s 2 | 6.4 m/s 2 | 6.4 m/s 2 |
| - Rear Handle | 7.0 m/s 2 | 7.0 m/s 2 | 7.0 m/s 2 |
DESCRIPTION (Fig. 1)
| 1. Front hand guard / Chain Brake | 10. Starter / fan housing |
| 2. Front handle | 11. Starter grip |
| 3. Cylinder cover | 12. Ignition switch |
| 4. Primer bulb | 13. Trigger release |
| 5. Choke knob | 14. Rear handle |
| 6. Clutch cover | 15. Throttle trigger |
| 7. Bar mounting nuts | 16. Chain oil cap |
| 8. Guide bar | 17. Fuel cap |
| 9. Low kickback saw chain | 18. Spiked bumper |
ASSEMBLY

WARNING
If any parts are damaged or missing do not operate this tool until the parts are replaced. Failure to heed this warning could result in serious personal injury.

WARNING
Do not attempt to modify this tool or create accessories not recommended for use with this tool. Any such alteration or modification is misuse and could result in a hazardous condition leading to possible serious personal injury.
NOTE: The chain saw has been fully factory tested. It is normal to find some slight oil residue on the saw. Read and remove all hang tags and store with the Operator's Manual.
See Figure 34-43.
Read the replacing the guide bar and chain section later in this manual.
English
OPERATION

WARNING
Do not allow familiarity with tools to make you careless. Remember that a careless fraction of a second is sufficient to inflict serious injury.

WARNING
Always wear safety goggles or safety glasses with side shields when operating this tool. Failure to do so could result in objects being thrown into your eyes resulting in possible serious injury.

WARNING
Do not use any attachments or accessories not recommended by the manufacturer of this tool. The use of attachments or accessories not recommended can result in serious personal injury.
APPLICATIONS
You may use this tool for the purposes listed below:
■ Basic limbing, felling, and woodcutting
■ Removing buttress roots
FUEL AND REFUELING
HANDLING THE FUEL SAFELY

WARNING
Always shut off engine before fueling. Never add fuel to a machine with a running or hot engine. Move at least 9 m. from refueling site before starting the engine. DO NOT SMOKE! Failure to heed this warning can result in possible personal injury.

WARNING
Check for fuel leaks. If any are found, correct them before using the saw to prevent fire or burn injury.
■ Always handle fuel with care; it is highly flammable.
■ Always refuel outdoors where there are no sparks and flames. Do not inhale fuel vapour.
■ Do not let petrol or oil come in contact with skin.
- Keep petrol and oil away from the eyes. If petrol or oil comes in contact with the eyes, wash them immediately with clean water. If irritation is still present, see a doctor immediately.
■ Clean up spilled fuel immediately.
MIXING THE FUEL
This product is powered by a 2-stroke engine and requires pre-mixing petrol and synthetic 2-stroke oil. Pre-mix unleaded petrol and synthetic 2-stroke engine oil in a clean container approved for petrol.
This engine is certified to operate on unleaded petrol intended for motor vehicle use with an octane rating of 87 [(R + M) / 2] or higher.
■ Do not use any type of pre-mixed petrol/oil from fuel service stations, This includes the pre-mixed petrol/oil intended for use in mopeds, motorcycles, etc.
■ Use synthetic 2-stroke oil only.
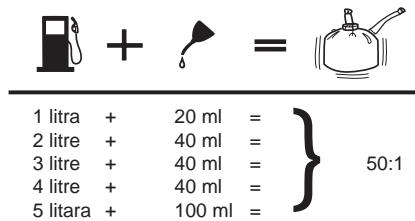
■ Mix 2% oil into the petrol. This is a 50:1 ratio.
■ Mix the fuel thoroughly and also each time before refueling.
■ Mix in small quantities. Do not mix quantities larger than usable in a 30 day period. A synthetic 2-stroke oil containing a fuel stabilizer is recommended.

FILLING THE FUEL TANK (Fig. 2)
■ Clean surface around fuel cap to prevent contamination.
■ Loosen the fuel cap slowly to release pressure and to keep fuel from escaping around the cap.
■ Carefully pour the fuel mixture into the tank. Avoid spillage.
■ Prior to replacing the fuel cap, clean and inspect the o-ring.
- Immediately replace the fuel cap and hand tighten. Wipe up any fuel spillage. Move 9 m (30 ft) away from refueling site before starting engine.
NOTE: It is normal for the engine to emit smoke during and after the first use.

ADDING BAR AND CHAIN OIL (Fig. 3)
Use Ryobi Bar and Chain Oil. It is designed for chains and chain oilers, and is formulated to perform over a wide temperature range with no dilution required. Chain saw should use approximately one tank of oil per tank of fuel.
NOTE: Do not use dirty, used, or otherwise contaminated oils. Damage may occur to the oil pump, bar, or chain.
■ Carefully pour the bar and chain oil into the oil tank.
■ Fill the oil tank every time you fuel the engine.
Check the operating condition of the chain brake prior to each use.
■ Using the back of your left hand, engage the chain brake by pushing the chain brake lever/hand guard toward the bar while the chain is rotating rapidly.
■ Reset the chain brake back into the RUN position by grasping the top of the chain brake lever/hand guard and pulling toward the front handle until you hear a click.

WARNING
If the chain brake does not stop the chain immediately, or if the chain brake will not stay in the run position without assistance, take the saw to an authorized service center for repair prior to use.
STARTING THE ENGINE (Fig. 6 - 10)
The starting method differs depending on whether the engine is cold or warm.

WARNING
Keep your body to the left of the chain line. Never straddle the saw or chain, or lean over past the chain line.
■ Place the chain saw on level ground and ensure that no objects or obstructions are in the immediate vicinity that could come in contact with the bar and chain. To prevent rapid dulling of the chain, do not allow the bar and chain to contact dirt on the ground.
■ Hold the front handle firmly with your left hand and put your right foot onto the base of the rear handle.
To Start a Cold Engine:
■ Set the ignition switch to the RUN (I) position.
■ Make sure the chain brake is in the run position by pulling back on the lever/hand guard.
■ Fully press and release the primer bulb 4 times.
■ Pull choke knob all the way out to FULL CHOKE ( | → | ) position.
■ Pull the starter grip until the engine attempts to start, but no more than 5 times.
■ Push choke knob to HALF CHOKE (|√|) position.
■ Pull starter grip until engine runs.
NOTE: Allow the saw to run in this position 15-30 seconds, depending upon the temperature.
■ Push the choke knob in to the RUN (✗) position.

CAUTION
Failure to release partial throttle when chain brake lever is in the brake position will result in serious damage to the unit. Never squeeze and hold the throttle trigger while the chain brake is in the brake position.
To Start a Warm Engine:
■ Set the ignition switch to the RUN (I) position.
■ Make sure the chain brake is in the run position by pulling back on the lever/hand guard.
■ Fully press and release the primer bulb 4 times.
■ Pull starter grip until engine runs.
STOPPING THE ENGINE ( FIG. 11 - 12)
Release the throttle trigger and let the engine return to idle. To stop the engine, move the ignition switch to the STOP ( MS ) position. Do not put the chain saw on the ground when the chain is still moving. For additional safety, set the chain brake when the saw is not in use.
In the event that the ignition switch will not stop the saw, pull the choke knob out to the fully extended position (FULL CHOKE/ |→| ) and engage chain brake to stop the engine. If the ignition switch will not stop the saw when set to the STOP position, have the ignition switch repaired before using the chain saw again to prevent unsafe conditions or serious injury.
NOTE: When you are finished using the saw, always relieve tank pressure by loosening, then retightening, the chain oil and fuel mix caps. Allow the engine to cool before storing.
English
OPERATION
ADJUSTING IDLE SPEED (Fig. 13)
If the engine starts, runs, and accelerates, but will not idle, turn the idle speed screw "T" clockwise to increase idle speed.
If the chain turns at idle, turn the idle speed screw "T" counterclockwise to reduce the idle RPM and stop the chain movement. If the saw chain still moves at idle speed, contact an authorized service center for adjustment and discontinue use until the repair is made.

WARNING
THE SAW CHAIN SHOULD NEVER TURN AT IDLE. Turn the idle speed screw “T” counterclockwise to reduce the idle RPM and stop the chain, or contact an authorized service center for adjustment and discontinue use until the repair is made. Serious personal injury may result from the saw chain turning at idle.
PULL AND PUSH (Fig. 14)
The reaction force of the saw is always opposite to the direction the chain is moving. Thus, the operator must be ready to control the PULL when cutting on the bottom edge of the bar and the PUSH when cutting along the top edge.
NOTE: The chain saw has been fully factory tested. It is normal to find some slight oil residue on the saw.
KICKBACK PRECAUTIONS (Fig. 15 - 16)

WARNING
KICKBACK occurs when the moving chain contacts an object at the upper portion of the tip of the guide bar or when the wood closes in and pinches the saw chain in the cut. Contact at the upper portion of the tip of the guide bar can cause the chain to dig into the object and stop the chain for an instant. The result is a lightning-fast reverse reaction which kicks the guide bar up and back toward the operator. If the saw chain is pinched along the top of the guide bar, the guide bar can be driven rapidly back toward the operator. Either of these reactions can cause loss of saw control, which can result in serious injury.
Do not rely exclusively upon the safety devices built into the saw. As a chain saw user, you should take steps to keep your cutting jobs free from accident or injury. See General Safety Rules for more details.
PREPARING FOR CUTTING
PROPER GRIP ON HANDLES (Fig. 17)

WARNING
Never use a left-handed (cross-handed) grip or any stance that would place your body or arm across the chain line.

WARNING
DO NOT operate the throttle trigger with your left hand and hold the front handle with your right hand. Never allow any part of your body to be in the chain line while operating a saw.
PROPER CUTTING STANCE (Fig. 18)
■ Balance your weight with both feet on solid ground.
- Keep left arm with elbow locked in a “straight arm” position to withstand any kickback force.
- Keep your body to the left of the chain line.
- Keep your thumb on underside of handlebar.
WORK AREA PRECAUTIONS (Fig. 19)
- Cut only wood or materials made from wood; no sheet metal, no plastics, no masonry, no non-wood building materials.
- Never allow children to operate the saw. Allow no person to use this chain saw who has not read this operator's manual or received adequate instructions for the safe and proper use of this chain saw.
- Keep everyone – helpers, bystanders, children, and animals, a SAFE DISTANCE from the cutting area. During felling operations, the safe distance should be a least twice the height of the largest trees in the felling area. During bucking operations, keep a minimum distance of 4.5 m between workers.
■ Always cut with both feet on solid ground to prevent being pulled off balance.
■ Do not cut above chest height as a saw held higher is difficult to control against kickback forces.
■ Do not fell trees near electrical wires or buildings. Leave this operation for professionals. - Cut only when visibility and light are adequate for you to see clearly.
English
OPERATION
BASIC OPERATING/CUTTING PROCEDURES
Practice cutting a few small logs using the following technique to get the “feel” of using the saw before you begin a major sawing operation.
■ Take the proper stance in front of the wood with the saw idling.
■ Accelerate the engine to full throttle just before entering the cut by squeezing the throttle trigger.
■ Begin cutting with the saw against the log.
- Keep the engine at full throttle the entire time you are cutting.
- Allow the chain to cut for you; exert only light downward pressure. Forcing the cut could result in damage to the bar, chain, or engine.
■ Release the throttle trigger as soon as the cut is completed allowing the engine to idle. Running the saw at full throttle without a cutting load can result in unnecessary wear to the chain, bar, and engine.
■ Do not put pressure on the saw at the end of the cut.
FELLING TREES – HAZARDOUS CONDITIONS (Fig. 20)

WARNING
Do not fell trees during periods of high wind or heavy precipitation. Wait until the hazardous weather has ended.
When felling a tree, it is important that you heed the following warnings to prevent possible serious injury.
■ Wear eye, hearing, and head protection (A) when operating this equipment.
■ Do not cut down trees having an extreme lean or large trees with rotten or dead limbs, loose bark, or hollow trunks. Have these trees pushed or dragged down with heavy equipment, then cut them up.
■ Consider the distribution and weight of heavy limbs (B).
■ Clear out the undergrowth around the tree to be felled (C).
■ Do not cut trees near electrical wires or buildings (D).
■ Consider the direction in which the tree leans (E).
- Check the tree for damaged or dead branches which could fall and hit you during felling (F).
■ Periodically glance at the top of the tree during the back-cut to assure the tree is going to fall in the desired direction.
- Keep all bystanders at a safe distance (G) (at least twice the height of the tree).
■ Prepare a path of safe retreat (H).
If the tree starts to fall in the wrong direction, or if the saw gets caught or hung up during the fall, leave the saw and save yourself!
■ Consider the wind direction before felling a tree.
■ Do not fell trees near power lines or near buildings which could be struck by falling limbs or the tree itself.
■ The chainsaw operator should keep on the uphill side of the terrain as the tree is likely to roll or slide downhill after it is felled.
■ Remove dirt, stones, loose bark, nails, staples, and wire from the tree where felling cuts are to be made.

WARNING
Do NOT fell trees near power lines or near buildings which could be struck by falling limbs or the tree itself.
PROPER PROCEDURE FOR TREE FELLING (Fig. 21 - 24)
- Pick your escape route (or routes in case the intended route is blocked). Clear the immediate area around the tree and make sure there are no obstructions in your planned path of retreat. Clear the path of safe retreat approximately 135° from the planned line of fall (A).
- Consider the force and direction of the wind, the lean and balance of the tree, and the location of large limbs. These things influence the direction in which the tree will fall. Do not try to fell a tree along a line different from its natural line of fall (B).
- Cut a notch about 1/3 the diameter of the trunk in the side of the tree (C). Make the notch cuts so they intersect at right angles to the line of fall. This notch should be cleaned out to leave a straight line.
To keep the weight of the wood off the saw, always make the lower cut of the notch before the upper cut. - Make the back-cut (D) level and horizontal, and at a minimum of 5 cm above the horizontal cut of the notch.
English
OPERATION
NOTE: Never cut through to the notch. Always leave a band of wood between the notch and back cut (approximately 5 cm or 1/10 the diameter of the tree). This is called a “hinge” or “hingewood” (E).
It controls the fall of the tree and prevents slipping or twisting or shoot-back of the tree off the stump.
On large diameter trees, stop the back cut before it is deep enough for the tree to either fall or settle back on the stump. Then insert soft wooden or plastic wedges (F) into the cut so they do not touch the chain. Drive wedges in, little by little, to help jack the tree over.
- As tree starts to fall, stop the chainsaw and put it down immediately. Retreat along the cleared path, but watch the action in case something falls your way.

WARNING
Never cut through to the notch when making a back cut. The hinge controls the fall of the tree: this is the section of wood between the notch and back-cut.
REMOVING BUTTRESS ROOTS (Fig. 25)
A buttress root is a large root extending from the trunk of the tree above the ground. Remove large buttress roots prior to felling. Make the horizontal cut (A) into the buttress first, followed by the vertical cut (B). Remove the resulting loose section (C) from the work area. Follow the correct tree felling procedure after you have removed the large buttress roots. Refer to “Operation – Proper Procedure for Tree Felling” earlier in this manual.
BUCKING (Fig. 26)
Bucking is the term used for cutting a fallen tree to the desired log length.
■ Cut only one log at a time.
■ Support small logs on a sawing stand or another log while bucking.
- Keep a clear cutting area. Make sure that no objects can contact the guide bar nose and chain during cutting: this can cause kick-back (A).
■ During bucking operations, stand on the uphill side so that the cut-off section of the log cannot roll over you.
■ Sometimes it is impossible to avoid pinching (with just standard cutting techniques) or difficult to predict which way a log will settle when cut.
BUCKING WITH A WEDGE (Fig. 27)
If the wood diameter is large enough for you to insert a soft bucking wedge (B) without touching the chain, you should use the wedge to hold the cut open to prevent pinching.
BUCKING LOGS UNDER STRESS (Fig. 28) (C) LOG SUPPORTED AT ONE END.
(D) LOG SUPPORTED AT BOTH ENDS.
Make the first bucking cut (E) 1/3 of the way through the log and finish with a 2/3 cut (F) on the opposite side.
As you cut the log, it will tend to bend. The saw can become pinched or hung in the log if you make the first cut deeper than 1/3 of the diameter of the log.
Give special attention to logs under stress (G) to prevent the bar and chain from pinching.
OVERBUCKING (Fig. 29)
Begin on the top side of the log with the bottom of the saw against the log; exert light pressure downward. Note that the saw will tend to pull away from you.
UNDERBUCKING (Fig. 30)
Begin on the under side of the log with the top of the saw against the log; exert light pressure upward.
During underbucking, the saw will tend to push back
at you. Be prepared for this reaction and hold the saw firmly to maintain control.
LIMBING AND PRUNING (Fig. 31 - 32)
■ Work slowly, keeping both hands on the saw with a firm grip. Maintain secure footing and balance.
- Keep the tree between you and the chain while limbing. Cut from the side of the tree opposite the branch you are cutting.
■ Do not cut from a ladder: this is extremely dangerous. Leave this operation for professionals.
■ Do not cut above chest height as a saw held higher is difficult to control against kick-back.

WARNING
Never climb into a tree to limb or prune. Do not stand on ladders, platforms, a log, or in any position which may cause you to lose your balance or control of the saw.
English
OPERATION
■ When pruning trees it is important not to make the flush cut next to the main limb or trunk until you have cut off the limb further out to reduce the weight.
This prevents stripping the bark from the main member.
- Underbuck the branch 1/3 through for your first cut (A).
- Overbuck the branch to drop it (B).
- Finish by cutting smoothly and neatly against the main member (C) so the bark will grow back to seal the wound.

WARNING
If the limbs to be pruned are above chest height, hire a professional to perform the pruning.
CUTTING SPRING POLES (Fig. 33)
A spring pole (A) is any log, branch, rooted stump, or sapling which is bent under tension by other wood so that it springs back if the wood holding it is cut or removed. On a fallen tree, a rooted stump has a high potential of springing back to the upright position during the bucking cut to separate the log from the stump.
Watch out for spring-poles; they are dangerous.

WARNING
Spring poles are dangerous and could strike the operator causing the operator to lose control of the chainsaw. This could result in severe or fatal injury to the operator.
MAINTENANCE

WARNING
When servicing, use only identical Ryobi replacement parts. Use of any other parts may create a hazard or cause product damage.

WARNING
Always wear safety goggles or safety glasses with side shields during power tool operation or when blowing dust. If operation is dusty, also wear a dust mask.
GENERAL MAINTENANCE
Avoid using solvents when cleaning plastic parts. Most plastics are susceptible to damage from various types of commercial solvents and may be damaged by their use. Use clean cloths to remove dirt, dust, oil, grease, etc.

WARNING
Do not at any time let brake fluids, petrol, petroleum-based products, penetrating oils, etc., come in contact with plastic parts. Chemicals can damage, weaken or destroy plastic which may result in serious personal injury.
LUBRICATION
All of the bearings in this tool are lubricated with a sufficient amount of high grade lubricant for the life of the unit under normal operating conditions. Therefore, no further lubrication is required.
REPLACING THE GUIDE BAR AND CHAIN (Fig. 34 - 43)

DANGER
Never start the engine before installing the guide bar, chain, drivecase cover, and clutch drum. Without all these parts in place, the clutch can fly off or explode, exposing the user to possible serious injury.

WARNING
To avoid serious personal injury, read and understand all the safety instructions in this section.
■ Always place the switch in the STOP “STOP” position before you work on the saw.
■ Make sure the chain brake is not set by pulling the chain brake lever/hand guard towards the front handle to the run position.
NOTE: When replacing the guide bar and chain, always use the specified bar and chain.
■ Wear gloves when handling the chain and bar. These components are sharp and may contain burrs.
■ Remove the bar mounting nuts using the combination wrench provided.
■ Remove the clutch cover.
■ Remove the bar and chain from the mounting surface.
■ Remove the old chain from the bar.
■ Lay out the new saw chain in a loop and straighten any kinks. The cutters (A) should face in the direction of chain rotation (B). If they face backwards, turn the loop over.
■ Place the chain drive links (C) into the bar groove (D) as shown.
English
MAINTENANCE
■ Position the chain so there is a loop at the back of the bar.
■ Hold the chain in position on the bar and place the loop around the sprocket (E).
■ Fit the bar flush against the mounting surface so that the bar studs are in the long slot of the bar.
NOTE: When placing the bar on the bar studs (F), ensure that the adjusting pin (G) is in the chain tension pin hole (H).
■ Replace the clutch cover (I) and bar mounting nuts (J).
■ Finger-tighten the bar mounting nuts. The bar must be free to move for tension adjustment.
■ Remove all slack from the chain by turning the chain tensioning screw (K) clockwise until the chain seats snugly against the bar with the drive links in the bar groove.
■ Lift the tip of the guide bar up to check for sag.
■ Release the tip of the guide bar and turn the chain tensioning screw 1/2 turn clockwise. Repeat this process until sag does not exist.
■ Hold the tip of the guide bar up and tighten the bar mounting nuts securely.
The chain is correctly tensioned when there is no sag on the underside of the guide bar, the chain is snug, but it can be turned by hand without binding. Ensure that the chain brake is not set.
NOTE: If chain is too tight, it will not rotate. Loosen the bar nuts slightly and turn the tension adjuster 1/4 turn counterclockwise. Lift the tip of the guide bar up and retighten the bar nuts securely. Ensure that the chain will rotate without binding.
ADJUSTING THE CHAIN TENSION (Fig. 44 - 46)

WARNING
Never touch or adjust the chain while the motor is running. The saw chain is very sharp. Always wear protective gloves when performing maintenance on the chain.
■ Stop the engine before setting the chain tension.
■ Make sure the bar mounting nuts are loosened to finger tight.
■ Turn the chain tensioning screw clockwise to tension the chain.
NOTE: A cold chain is correctly tensioned when there
is no slack on the underside of the guide bar, the chain is snug, and it can be turned by hand without binding.
■ Retension the chain whenever the flats on the drive links (A) hang out of the bar groove.
NOTE: During normal saw operation, the temperature of the chain increases. The drive links of a correctly tensioned warm chain will hang approximately 1.25 mm. out of the bar groove. The tip of the combination wrench can be used as a guide to help determine the correct warm chain tension.
NOTE: New chains tend to stretch; check the chain tension frequently and tension as required.

CAUTION
A chain tensioned while warm may be too tight upon cooling. Check the “cold tension” before next use.
CHAIN MAINTENANCE (Fig. 47 - 48)

CAUTION
Check that the switch is in the STOP "STOP" position before you work on the saw.
Use only a low-kickback chain on this saw. This fast-cutting chain provides kickback reduction when properly maintained.
For smooth and fast cutting, maintain the chain properly.
The chain requires sharpening when the wood chips are small and powdery, the chain must be forced through the wood during cutting, or the chain cuts to one side. During maintenance of the chain, consider the following:
■ Improper filing angle of the side plate can increase the risk of severe kickback.
■ Raker (depth gauge) clearance (A).
- Too low increases the potential for kickback.
- Not low enough decreases cutting ability.
If the cutter teeth hit hard objects such as nails and stones, or are abraded by mud or sand on the wood, have an authorized service center sharpen the chain.
NOTE: Inspect the drive sprocket (B) for wear or damage when replacing the chain. If signs of wear or damage are present in the areas indicated, have the drive sprocket replaced by an authorized service center.
NOTE: If you do not fully understand the correct procedure for sharpening the chain after reading the instructions that follow, have the saw chain sharpened by an authorized service center or replace with a recommended low-kickback chain.
English
MAINTENANCE
SHARPENING THE CUTTERS (Fig. 49 - 52)
Parts of a cutter:
(A) Cutting corner
(B) Side plate
(C) Depth gauge
(D) Toe
(E) Gullet
(F) Heel
(G) Rivet hole
(H) Top plate
Be careful to file all cutters to the specified angles and to the same length, as fast cutting can only be obtained when all cutters are uniform.

WARNING
The saw chain is very sharp. Always wear protective gloves when performing maintenance to the chain to prevent serious personal injury.
■ Tension the chain prior to sharpening. Refer to Adjusting The Chain Tension.
■ Use a 1.6 mm diameter round file and holder (not provided). Do all of your filing at the midpoint of the bar.
- Keep the file level with the top plate of the tooth. Do not let the file dip or rock.
■ Using light but firm pressure. Stroke towards the front corner of the tooth.
■ Lift the file away from the steel on each return stroke.
- Put a few firm strokes on every tooth. File all left hand cutters (A) in one direction. Then move to the other side and file the right hand cutters (B) in the opposite direction.
■ Remove filings from the file with a wire brush.

CAUTION
A dull or improperly sharpened chain can cause excessive engine speed during cutting, which may result in severe engine damage.

WARNING
Improper chain sharpening increases the potential of kickback.

WARNING
Failure to replace or repair a damaged chain can cause serious injury.
TOP PLATE FILING ANGLE (Fig. 53)
(A) CORRECT 30° – file holders are marked with guide marks to align file properly to produce correct top plate angle.
(B) LESS THAN 30° – for cross cutting.
(C) MORE THAN 30° – feathered edge dulls quickly.
SIDE PLATE ANGLE (Fig. 54)
(D) CORRECT 80° – Produced automatically if you use the correct diameter file in the file holder.
(E) HOOK – “Grabs” and dulls quickly; increases the potential of KICKBACK. Results from using a file with a diameter too small or a file held too low.
(F) BACKWARD SLOPE – Needs too much feed pressure; causes excessive wear to the bar and chain. Results from using a file with a diameter too large or file held too high.
MAINTAINING DEPTH GAUGE CLEARANCE (Fig. 55 - 57)
■ Maintain the depth gauge at a clearance of 0.6 mm. Use a depth gauge tool for checking the depth gauge clearances (A).
■ Every time the chain is filed, check the depth gauge clearance.
■ Use a flat file (B)(not provided) and a depth gauge jointer (C)(not provided) to lower all gauges uniformly. Use a 0.6 mm depth gauge jointer. After lowering each depth gauge, restore original shape by rounding the front. Be careful not to damage adjoining drive links with the edge of the file.
■ Depth gauges must be adjusted with the flat file in the same direction the adjoining cutter was filed with the round file. Use care not to contact cutter face with flat file when adjusting depth gauges.
MAINTAINING THE GUIDE BAR (Fig. 58)

CAUTION
Make sure the chain has stopped before you do any work on the saw.
Every week of use, reverse the guide bar on the saw to distribute the wear for maximum bar life. The bar should be cleaned every day of use and checked for wear and damage.
Feathering or burring of the bar rails is a normal process of bar wear. Such faults should be smoothed with a file as soon as they occur.
English
MAINTENANCE
A bar with any of the following faults should be replaced:
■ Wear inside the bar rails which permits the chain to lie over sideways;
■ Bent guide bar;
■ Cracked or broken rails;
- Spread rails.
In addition, lubricate guide bars (with a sprocket at their tip) weekly. Using a grease syringe, lubricate weekly in the lubricating hole. Turn the guide bar and check that the lubrication holes (A) and chain groove are free from impurities.
CLEANING THE AIR CLEANER (Fig. 59 - 60)

CAUTION
Make sure the air cleaner is correctly placed in the air filter cover before reassembly. Never run the engine without the air filter, serious damage could result.
ADJUSTING THE CARBURETOR (Fig. 61 - 63) Before adjusting the carburetor:
■ Use a brush or compressed air to clean the starter cover vents.
■ Clean the air cleaner (A). Refer to Cleaning the Air Cleaner in the Maintenance section of this manual.
- Allow the engine to warm up prior to adjustment of engine idle speed.

WARNING
Weather conditions and altitude may affect carburetion. Do not allow bystanders close to the chain saw while adjusting the carburetor.
Idle Speed Adjustment
The idle speed adjustment controls how much the throttle valve stays open when the throttle trigger is released. To adjust:
■ Turn idle speed screw “T” clockwise to increase idle speed.
■ Turn idle speed screw “T” counterclockwise to decrease idle speed.
■ Make a test cut, then adjust the H needle for best cutting power, not for maximum speed. The H needle is restricted to 1/4 turn.

WARNING
Serious personal injury may result from the saw chain turning at idle.
CLEANING THE STARTER UNIT (Fig. 62)
Use a brush or compressed air to keep the cooling vents (B) of the starter assembly free and clean of debris.
CARBURETOR ANTI-FREEZE MECHANISM (Fig. 64-65)
The chain saw is designed with a ventilation hatch on the right side of the cylinder cover which allows warm air to be supplied from the engine to the carburetor to help prevent icing under colder operating conditions. Operating the chain saw in temperatures from 32° F to 41° F ( 0° C to 5° C) at times of high humidity may result in ice forming within the carburetor. This can cause the output power of the engine to be reduced and/or the engine to fail to operate smoothly. When operating under these circumstances, the chain saw should be placed in anti-freeze mode before use.
To switch to anti-freeze mode:
■ Place the ignition switch in the OFF (STOP) position.
■ Remove the air cleaner cover (A).
■ Remove the air cleaner.
■ Lift choke knob (E) up to remove from the cylinder cover (C).
■ Loosen the five screws holding the cylinder cover in place. Remove the cylinder cover.
■ Remove the icing cap (D) located on the right-hand side of the cylinder cover by pressing down on it with your finger.
- Adjust the icing cap so that the “snow” mark faces upward, then return it to its original position in the cylinder cover.
- Replace the cylinder cover and reinstall screws to secure.
■ Replace choke knob, air cleaner, and air cleaner cover.

WARNING
Always return the unit to normal operating mode if there is no danger of icing occurring. Continuing to use the chain saw in anti-freeze mode when temperatures have risen and returned to normal may result in the engine failing to start properly or in the engine failing to operate at its normal speed.
English
MAINTENANCE
CLEANING THE ENGINE (Fig. 66-67)
Clean the cylinder fins (B) and flywheel fins (A) with compressed air or a brush periodically. Dangerous overheating of the engine may occur due to impurities on the cylinder.

WARNING
Never run the saw without all the parts, including the drivecase cover and starter housing, securely in place.
Because parts can fracture and pose a danger of thrown objects, leave repairs of the flywheel and clutch to factory trained authorized service center personnel.
NOTE: If you notice a power loss with the gas-powered tool, the exhaust port and muffler may be blocked with carbon deposits. These deposits may need to be removed to restore performance.
CHECKING THE FUEL FILTER (Fig. 68)
Check the fuel filter (B) periodically. Replace it if contaminated or damaged.
REPLACING THE SPARK PLUG (Fig. 69)
This engine uses a Champion RZ7C or NGK CMR7H spark plug with 0,64 mm electrode gap. Use an exact replacement and replace every 50 hours or more frequently, if necessary.
■ Loosen the spark plug by turning it counterclockwise with a wrench (A).
■ Remove the spark plug.
■ Hand thread the new spark plug, turning it clockwise. Tighten securely with wrench (B).
NOTE: Be careful not to cross-thread the spark plug. Cross-threading will seriously damage the cylinder.
INSPECTING/CLEANING THE SPARK ARRESTOR SCREEN AND MUFFLER EXHAUST PORT (Fig. 70)
The muffler is equipped with a spark arrestor screen. A faulty spark arrestor screen can create a fire hazard. Through normal use the screen can become dirty and should be inspected weekly and cleaned as required. Always keep the muffler and spark arrestor on the saw in good condition. The chain saw should always be used with correctly mounted spiked bumper.

WARNING
Muffler surfaces are very hot during and after operation of the chain saw. To avoid serious personal injury, keep all body parts away from the muffler.
■ Allow the muffler to cool.
■ Remove torx screw (E) and 8 mm. nuts (D) holding the muffler cover in place; remove muffler cover (C) and spark screen (A).
■ If dirty, clean the spark arrestor screen with a small wire brush. Replace the screen if it is cracked or otherwise deteriorated.
■ Remove the muffler (B).
■ Insert a flat blade screwdriver into the muffler exhaust vent to remove any carbon deposits.
■ Wipe away any carbon buildup on the muffler exhaust vent and the cylinder exhaust port at the same time.
■ Reinstall muffler, spark screen, and muffler cover.
■ Reinstall torx screw and nuts to secure.
INSPECTING AND CLEANING CHAIN BRAKE (Fig. 71-72)
■ Remove the clutch cover and clean the chain brake components (A). Check wear on the brake band (C) and replace if worn or deformed. The band thickness should not be less than 0.6 mm, or worn halfway through.
■ Always keep the chain brake mechanism clean and lightly lubricate the linkage (B).
■ Always test the chain brake performance after servicing or cleaning. Refer to Operating Chain Brake for additional information.
■ Check the chain catcher (D) and replace if damaged.

WARNING
Even with daily cleaning of the mechanism, the dependability of a chain brake to perform under field conditions cannot be certified. use proper cutting techniques.
STORING THE CHAIN SAW (1 MONTH OR LONGER)
- Drain all fuel from tank into a container approved for gasoline.
■ Run the engine until it stops. This will remove all fuel-oil mix that could become stale and leave varnish and gum in the fuel system.
■ Squeeze primer bulb several times to purge fuel from carburetor.
English
MAINTENANCE
- Drain all bar and chain oil from tank into a container approved for oil.
■ Clean all foreign material from the saw.
■ Store it in a well-ventilated place that is inaccessible to children.
NOTE: Keep away from corrosive agents such as garden chemicals and de-icing salts.
Abide by local regulations for the safe storage and handling of gasoline. Excess fuel should be used in other 2-cycle engine powered equipment.
TROUBLESHOOTING
| Problem | Possible Cause | Solution |
| Engine will not start. [Make sure ignition switch is in the RUN (1) position.] | No spark. | Check spark. Remove air filter cover. Remove spark plug from cylinder. Reattach the spark plug wire and lay spark plug on top of cylinder with the metal part of plug touching the cylinder. Pull the starter grip and watch for spark at spark plug tip. If there is no spark, repeat test with a new spark plug. |
| Engine is flooded. | With the ignition switch OFF, remove spark plug. Move choke knob to RUN position (pushed in completely) and pull starter grip 15 to 20 times. This will clear excess fuel from engine. Clean and reinstall spark plug. Set ignition switch to RUN (1) position. Push and fully release primer bulb 4 times. Pull starter three times with choke knob at RUN. If engine does not start, move choke knob to HALF CHOKE and repeat normal starting procedure. If engine still fails to start, repeat procedure with a new spark plug. | |
| Engine starts but will not accelerate properly. | Carburetor requires “L” (Low Jet) adjustment. | Contact an authorized service center for carburetor adjustment. |
| Engine starts, then dies. | Carburetor requires “L” (Low Jet) adjustment. | Contact an authorized service center for carburetor adjustment. |
| Engine starts but will not run properly at high speed. | Carburetor requires “H” (High Jet) adjustment. | Contact an authorized service center for carburetor adjustment. |
| Engine does not reach full speed and/or emits excessive smoke. | Oil/fuel mixture incorrect. Air filter is dirty. Spark arrestor screen is dirty. Carburetor requires “H” (High Jet) adjustment. | Use fresh fuel and the correct 2-stroke oil mix ratio. Clean air filter. Refer to Cleaning the Air Cleaner in the Maintenance section of this manual. Clean spark arrestor screen. Refer to Cleaning the Spark Arresting Screen in the Maintenance section of this manual. Contact an authorized service center for carburetor adjustment. |
English
TROUBLESHOOTING
| Problem | Possible Cause | Solution |
| Engine starts, runs, and accelerates but will not idle. | Carburetor requires adjustment to idle speed. | Turn idle speed screw “T” clockwise to increase idle speed. Refer toAdjusting the Carburetorin the Maintenancesection of this manual. |
| Chain turns at idle. | Carburetor requires adjustment to idle speed.Air leak in the intake system. | Turn idle speed screw “T” counterclockwise to decrease speed. Refer toAdjusting the Carburetorin the Maintenancesection of this manual.Contact an authorized service center for a rebuild kit. |
| Bar and chain running hot and smoking. | Chain oil tank empty.Chain tension is too tight.Oiler is not functioning.Clogged oil passages. | Oil tank should be filled every time fuel tank is filled.Tension chain per instructions inAdjusting the Chain Tensionin theMaintenancesection of this manual.Run at half throttle 30 to 45 seconds. Stop saw and check for oil dripping from guide bar. If oil is present, the chain may be dull or bar may be damaged.Remove the clutch cover and guide bar plate and clean oil passages with a stiff-bristle brush. |
| Engine starts and runs, but chain is not rotating. | Chain brake is engaged.Chain tension is too tight.Guide bar and chain assembled incorrectly.Guide bar and/or chain are damaged.Drive sprocket teeth damaged | Release chain brake. Refer toOperating the Chain Brakein theOperationsection of this manual.Tension chain per instructions inAdjusting the Chain Tensionin theMaintenancesection of this manual.Refer toReplacing the Guide Bar and Chainin the Maintenancesection of this manualInspect guide bar and chain for damage.Contact an authorized service center for drive sprocket replacement. |
Deutsch
FÜLLEN DES KRAFTSTOFFTANKS (Abb. 2)
MEZCLAR EL COMBUSTIBLE
LLENAR EL DEPÓSITO DE COMBUSTIBLE (Fig. 2)
RIEMPIMENTO DEL SERBATOIO DEL CARBURANTE (Fig. 2)
ENCHIMENTO DO DEPÓSITO (Fig. 2)
TANK MET BRANDSTOF VULLEN (afb. 2)
KETTING EN ZWAARD SMEREN (afb. 3)
PÄFYLLNING I BRÄNSLETANKEN (Fig. 2)
SMÖRJNING AV KEDJAN OCH SVÄRDET (Fig. 3)
GEM DENNE INSTRUKTIONSBOG TIL SENERE OPSLAG.
Dansk
SYMBOLER
BRÆNDSTOF OG OPTANKNING
SIKKER HÅNDTERING AF BRÆNDSTOF

ADVARSEL
PÄFYLDNING AF BRÆNDSTOFTANK (Fig. 2)
SM∅RING AF KÆDE OG SVÆRD (Fig. 3)
FORHOLDSREGLER FOR VEDLIKEHOLD
Bruk akdri en kjedesag som er skadet, dårlig innstilt eller ikke helt eller riktig montert.
| 1 liter | + | 20 ml | = |
| 2 liter | + | 40 ml | = |
| 3 liter | + | 60 ml | = |
| 4 liter | + | 80 ml | = |
| 5 liter | + | 100 ml | = |
Norsk
BETJENING
SM∅RING AV KJEDET OG SVERDET (Fig. 3)
KJEDET SKAL ALDRI GÅ RUNDT I TOMGANG.
VEDLIKEHOLD AV KJEDET (Fig. 47-48)

FORSIKTIGHETSREGEL
Suomi
KÄYTTÖ
TERÄKETJUN JA -LEVYN ASENTAMINEN (Kuva 3)
AZ ÜZEMANYAGTARTÁLY FELTÖLTÉSE (2. ábra).
MAZÁNÍ ŘETĚZU A VODÍCÍ LIŠTY (obr. 3)
CITIȚI TOATE INSTRUCTIUNILE.
MĂSURI DE SIGURANTĂ GENERALE

AVERTISMENT
UMPLEREA REZERVORULUI CU CARBURANT (Fig. 2)
TANKOWANIE (RYS. 2)
SMAROWANIE ŁAŃCUCHA I PROWADNICY ŁAŃCUCHA (Rys. 3)
POLNJENJE POSODE ZA GORIVO (SI. 2)
■ Očistite okolico pokrova posode za gorivo, da preprečite onesnaževanje.
■ Počasi zrahljajte pokrovček za gorivo, da sprostite pritisk in da preprečite uhajanje goriva okrog pokrovčka.
■ Previdno nalijte mešanico goriva v posodo. Pazite, da ne prelije.
■ Preden ponovno namestite pokrovček za gorivo, očistite in preglejte tesnilo.
■ Takoj ponovno namestite pokrovček za gorivo in ga ročno zategnite. Obrišite morebitno razlito gorivo. Pred zaganjanjem motorja se umaknite 9 m od mesta, kjer ste dolili gorivo.
DOLIVANJE OLJA ZA MEČ IN VERIGO (SI. 3)
PUNJENJE SPREMNIKA ZA GORIVO (slika 2)
■ OËistite spremnik oko Ėepa da se gorivo ni na koji naËin ne bi oneËistilo.
■ Lagano odvijte Ėep spremnika da bi se olabavio tlak i da se gorivo ne bi razasulo oko Ėepa.
■ Sipajte mješavinu goriva u spremnik s oprezom, da se ne bi razlijevalo.
- Prije no što ponovno zavijete Čep, oĚistite spoj i osigurajte se da je u dobrome stanju.
- Odmah ponovno postavite na mjesto ěep spremnika za gorivo i ěvrsto ga stegnite rukom. Pazite da obrišete svaki trag goriva koje se eventualno razlilo. Udaljite se najmanje 15 m od mjesta gdje ste punili spremnik gorivom prije no što pokrenete motor.
Napomena: normalno je da se iz motora ispušta dim tijekom i nakon prve uporabe.
PODMAZIVANJE LANCA I VOIDLICE LANCA (slika 3)
YAKIT DEPOSUNUN DOLDURULMASI (Şek. 2)
TANKIMINE (Joonis 2)
KARBURAATORI SEADISTAMINE (Joonised 61-63)
Enne karburaatori seadistamist:
DEGALU BAKO PRIPILDYMAS (2 pav.)
PJOVIMO GRANDINĖS IR JUOSTOS TEPIMAS (3 pav.)
Lietuviškai
NAUDOJIMAS
KĒDES APKOPE (47.-48. att.)

BRĪDINĀJUMS
KĒDES VADĪKLAS APKOPE (58. att.)

BRĪDINĀJUMS
PLNENIE PALIVOVEJ NÁDRŽE (obr. 2)
GARANTIE - CONDITIONS
All Ryobi products are guaranteed against manufacturing defects and defective parts for a period of twenty four (24) months from the date stated on the original invoice drawn up by the retailer and given to the end user.
Deterioration caused by normal wear and tear, unauthorised or improper use or maintenance, or overload are excluded from this guarantee as are accessories such as battery packs, light bulbs, blades, fittings, bags, etc. In the event of malfunction during the warranty period, please take the NON-DISMANTLED product, along with the proof of purchase, to your retailer or nearest Authorised Ryobi Service Centre.
This warranty in no way affects your legal rights concerning defective products.
The above warranty is valid in the UK, the European Union, and Australia only. Outside these regions, a different warranty may apply. Please see your local dealer for warranty details.
D
GARANTIE - BEDINGUNGEN
GARANTIJAS NOSACĪJUMI
CE DECLARATION OF CONFORMITY
We declare in sole responsibility that the product: - to which this certificate applies, conforms to the basic health and safety requirements of the Machinery Directive 98/37/EC and other relevant directives, like EMC Directive 89/336/EEC and Outdoor Directive 2000/14/EC and Gas Emission Directive 97/68/EC, 2002/88/EC and 2004/26/EC.
To effect correct application of the health and safety requirements stated in the EEC directives, the following European and/or national standards and/or technical specifications were consulted: DIN EN ISO 11681-1:2004 / ISO 22868:2005 / ISO 22867:2004 / EN 55012 : 2002
We declare this product complies to the requirements of the Out Door Directive. 2000/14/EC.
| 35 cc | 40 cc | 44 cc | |
| Measured Sound Power Level | 112 dB (A) | 112 dB (A) | 112 dB (A) |
| Guaranteed Sound Power Level | 113 dB (A) | 113 dB (A) | 113 dB (A) |
| Date of issuance | 1 / 2007 |
This product has been assessed to conform to the Outdoor Directive 2000/14/EC by means of unit verification by SLG PRUEF-UND ZERTIFIZIERUNGS GMBH. BURGSTAEDTER STRASSE 20, D-09232, HARTMANNSDORF, GERMANY.
| Type | Engineering type licence No.(Issued by Intertek Deutschland GmbH) |
| RCS-3535C2 | 07SHW0980-01 |
| RCS-4040C2 | 07SHW0984-01 |
| RCS-4446C2 | 07SHW1029-01 |
Technical documents are kept by Homelite Far East Co., Ltd. 24/F, 388 Castle Peak Road, Tsuen Wan, N.T., Hong Kong.
Declared in Sep 2006 by Homelite Far East Co., Ltd.
Name of company: Homelite Far East Co., Ltd.
Address: 24/F, CDW Building, 388 Castle Peak Road, Tsuen Wan Hong Kong.
Type: RCS-3535C2 / 4040C2 / 4446C2
Name/Title: Andrew Eyre Vice President, Engineering
Signature:
Aoy




- REMLISSAGE DU RÉSERVOIR DE CARBURANT (FIG. 2)
- THANK YOU FOR BUYING A RYOBI CHAINSAW
- WARNING
- IMPORTANT
- READ ALL INSTRUCTIONS
- GENERAL SAFETY RULES
- ENGLISH
- SPECIFIC SAFETY RULES
- GENERAL PRECAUTIONS
- PROPER CLOTHING FOR SAFETY
- REFUELLING (DO NOT SMOKE!)
- BASIC PRECAUTIONS IN THE CUTTING/ WORK AREA
- PUSH AND PULL
- MAINTENANCE PRECAUTIONS
- KICK-BACK
- SAVE THIS MANUAL FOR FUTURE REFERENCE
- SYMBOLS
- ASSEMBLY
- SEE FIGURE 34-43
- OPERATION
- APPLICATIONS
- FUEL AND REFUELING
- HANDLING THE FUEL SAFELY
- MIXING THE FUEL
- FILLING THE FUEL TANK (FIG. 2)
- ADDING BAR AND CHAIN OIL (FIG. 3)
- STARTING THE ENGINE (FIG. 6 - 10)
- TO START A COLD ENGINE
- CAUTION
- TO START A WARM ENGINE
- STOPPING THE ENGINE ( FIG. 11 - 12)
- ADJUSTING IDLE SPEED (FIG. 13)
- PULL AND PUSH (FIG. 14)
- KICKBACK PRECAUTIONS (FIG. 15 - 16)
- PREPARING FOR CUTTING
- PROPER GRIP ON HANDLES (FIG. 17)
- PROPER CUTTING STANCE (FIG. 18)
- WORK AREA PRECAUTIONS (FIG. 19)
- BASIC OPERATING/CUTTING PROCEDURES
- FELLING TREES – HAZARDOUS CONDITIONS (FIG. 20)
- PROPER PROCEDURE FOR TREE FELLING (FIG. 21 - 24)
- REMOVING BUTTRESS ROOTS (FIG. 25)
- BUCKING (FIG. 26)
- BUCKING WITH A WEDGE (FIG. 27)
- BUCKING LOGS UNDER STRESS (FIG. 28) (C) LOG SUPPORTED AT ONE END
- LOG SUPPORTED AT BOTH ENDS
- OVERBUCKING (FIG. 29)
- UNDERBUCKING (FIG. 30)
- LIMBING AND PRUNING (FIG. 31 - 32)
- CUTTING SPRING POLES (FIG. 33)
- MAINTENANCE
- GENERAL MAINTENANCE
- LUBRICATION
- REPLACING THE GUIDE BAR AND CHAIN (FIG. 34 - 43)
- DANGER
- ADJUSTING THE CHAIN TENSION (FIG. 44 - 46)
- CHAIN MAINTENANCE (FIG. 47 - 48)
- SHARPENING THE CUTTERS (FIG. 49 - 52)
- PARTS OF A CUTTER
- TOP PLATE FILING ANGLE (FIG. 53)
- SIDE PLATE ANGLE (FIG. 54)
- MAINTAINING DEPTH GAUGE CLEARANCE (FIG. 55 - 57)
- MAINTAINING THE GUIDE BAR (FIG. 58)
- CLEANING THE AIR CLEANER (FIG. 59 - 60)
- ADJUSTING THE CARBURETOR (FIG. 61 - 63) BEFORE ADJUSTING THE CARBURETOR
- IDLE SPEED ADJUSTMENT
- CLEANING THE STARTER UNIT (FIG. 62)
- CARBURETOR ANTI-FREEZE MECHANISM (FIG. 64-65)
- TO SWITCH TO ANTI-FREEZE MODE
- CLEANING THE ENGINE (FIG. 66-67)
- CHECKING THE FUEL FILTER (FIG. 68)
- REPLACING THE SPARK PLUG (FIG. 69)
- INSPECTING/CLEANING THE SPARK ARRESTOR SCREEN AND MUFFLER EXHAUST PORT (FIG. 70)
- INSPECTING AND CLEANING CHAIN BRAKE (FIG. 71-72)
- STORING THE CHAIN SAW (1 MONTH OR LONGER)
- DEUTSCH
- FÜLLEN DES KRAFTSTOFFTANKS (ABB. 2)
- MEZCLAR EL COMBUSTIBLE
- LLENAR EL DEPÓSITO DE COMBUSTIBLE (FIG. 2)
- RIEMPIMENTO DEL SERBATOIO DEL CARBURANTE (FIG. 2)
- ENCHIMENTO DO DEPÓSITO (FIG. 2)
- TANK MET BRANDSTOF VULLEN (AFB. 2)
- KETTING EN ZWAARD SMEREN (AFB. 3)
- PÄFYLLNING I BRÄNSLETANKEN (FIG. 2)
- SMÖRJNING AV KEDJAN OCH SVÄRDET (FIG. 3)
- GEM DENNE INSTRUKTIONSBOG TIL SENERE OPSLAG
- DANSK
- SYMBOLER
- BRÆNDSTOF OG OPTANKNING
- SIKKER HÅNDTERING AF BRÆNDSTOF
- ADVARSEL
- PÄFYLDNING AF BRÆNDSTOFTANK (FIG. 2)
- SM∅RING AF KÆDE OG SVÆRD (FIG. 3)
- FORHOLDSREGLER FOR VEDLIKEHOLD
- NORSK
- BETJENING
- SM∅RING AV KJEDET OG SVERDET (FIG. 3)
- VEDLIKEHOLD AV KJEDET (FIG. 47-48)
- FORSIKTIGHETSREGEL
- SUOMI
- KÄYTTÖ
- TERÄKETJUN JA -LEVYN ASENTAMINEN (KUVA 3)
- AZ ÜZEMANYAGTARTÁLY FELTÖLTÉSE (2. ÁBRA)
- MAZÁNÍ ŘETĚZU A VODÍCÍ LIŠTY (OBR. 3)
- MĂSURI DE SIGURANTĂ GENERALE
- AVERTISMENT
- UMPLEREA REZERVORULUI CU CARBURANT (FIG. 2)
- TANKOWANIE (RYS. 2)
- SMAROWANIE ŁAŃCUCHA I PROWADNICY ŁAŃCUCHA (RYS. 3)
- POLNJENJE POSODE ZA GORIVO (SI. 2)
- DOLIVANJE OLJA ZA MEČ IN VERIGO (SI. 3)
- PUNJENJE SPREMNIKA ZA GORIVO (SLIKA 2)
- PODMAZIVANJE LANCA I VOIDLICE LANCA (SLIKA 3)
- YAKIT DEPOSUNUN DOLDURULMASI (ŞEK. 2)
- TANKIMINE (JOONIS 2)
- KARBURAATORI SEADISTAMINE (JOONISED 61-63)
- ENNE KARBURAATORI SEADISTAMIST
- DEGALU BAKO PRIPILDYMAS (2 PAV.)
- LIETUVIŠKAI
- NAUDOJIMAS
- KĒDES APKOPE (47.-48. ATT.)
- BRĪDINĀJUMS
- KĒDES VADĪKLAS APKOPE (58. ATT.)
- PLNENIE PALIVOVEJ NÁDRŽE (OBR. 2)
- GARANTIE - CONDITIONS
- D
- GARANTIE - BEDINGUNGEN
- GARANTIJAS NOSACĪJUMI
- CE DECLARATION OF CONFORMITY
Brand : RYOBI
Model : RCS-3535C2
Category : Gardening Tools