
M02SMW09E - Stapler MATSUI - Free user manual and instructions
Find the device manual for free M02SMW09E MATSUI in PDF.


User questions about M02SMW09E MATSUI
0 question about this device. Answer the ones you know or ask your own.
Ask a new question about this device
Download the instructions for your Stapler in PDF format for free! Find your manual M02SMW09E - MATSUI and take your electronic device back in hand. On this page are published all the documents necessary for the use of your device. M02SMW09E by MATSUI.
USER MANUAL M02SMW09E MATSUI
natural_image
White square electronic device with a black handle and gray base, resembling a smart vacuum cleaner (no text or symbols visible)Contents
GB
Unpacking ....5
Product Overview ....5
First Time Use 6
Always watch your sandwich maker when in use. 6
Operation 7
Make sure the bread covers the cooking plates....7
Recipes For Sandwich Fillings 8
Never use raw meat as a sandwich filling. Do not reheat sandwiches that have a meat filling....8
Cleaning Your Sandwich Maker 9
Do not use harsh cleaners, solvents or scouring pads as they may damage the casing. 9
Specifications 9
Safety Warnings 45
Innhold
NO
Utpakking 11
Produktoversikt ....11
Førstegangsbruk 12
Congratulations on the purchase of your new Matsui Sandwich Maker. We recommend that you spend some time reading this instruction manual in order that you fully understand all the operational features it offers.
Read all the safety instructions carefully before use and keep this instruction manual for future reference.
GB
Unpacking
Remove all packaging from the sandwich maker. Retain the packaging. If you dispose of it please do so according to local regulations.
The following items are included:
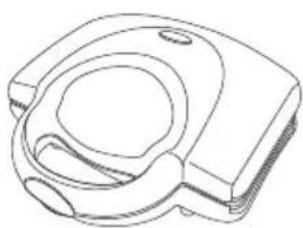
natural_image
Technical line drawing of a mechanical component with no visible text or symbols
The Main Unit Instruction Manual
(P.N.: 622CC-1982Y-2-N)
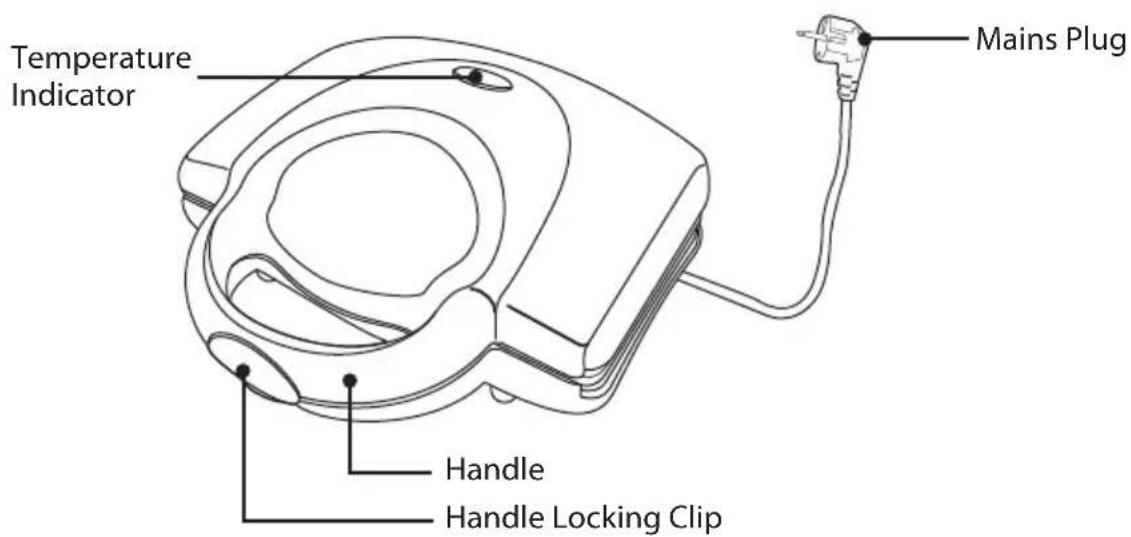
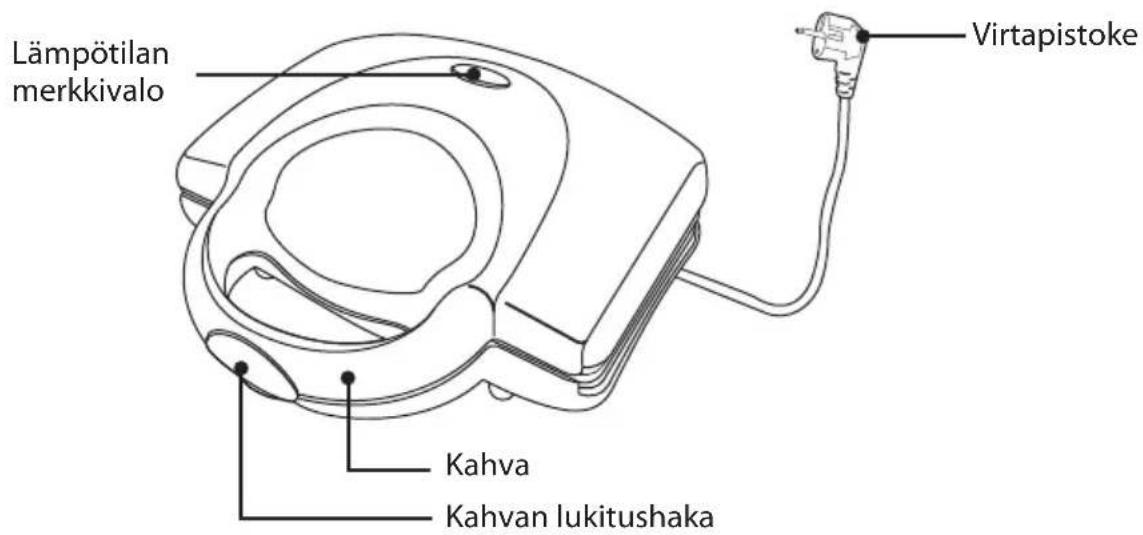
Product Overview
text_image
Temperature Indicator Mains Plug Handle Handle Locking ClipFirst Time Use
Always watch your sandwich maker when in use.
GB
①
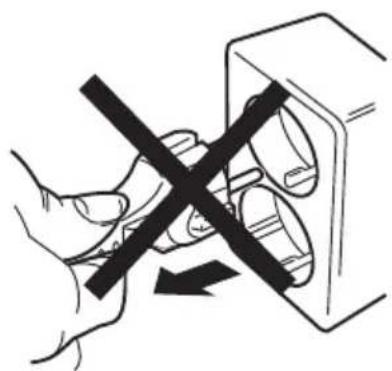
natural_image
Illustration of hands using a switch to adjust or install a component (no text or symbols present)Do not connect to the mains socket yet.
②
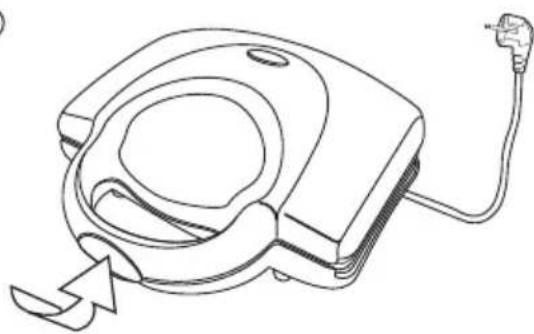
natural_image
Line drawing of a handheld device with a cable and plug, no text or symbols presentOpen up your sandwich maker by releasing the handle locking clip and lifting up the top half of the sandwich maker.
③
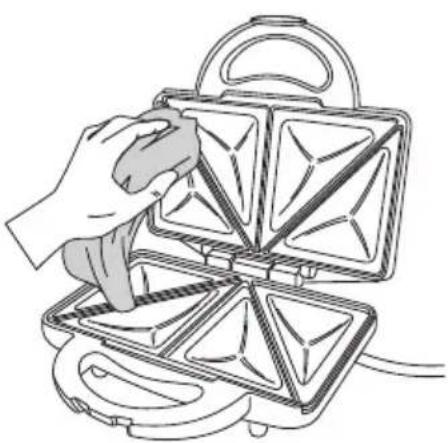
natural_image
Line drawing of a hand using a waffle to cut into a rectangular pan (no text or symbols)Clean the surface of the cooking plates with a damp cloth and wipe dry.
④
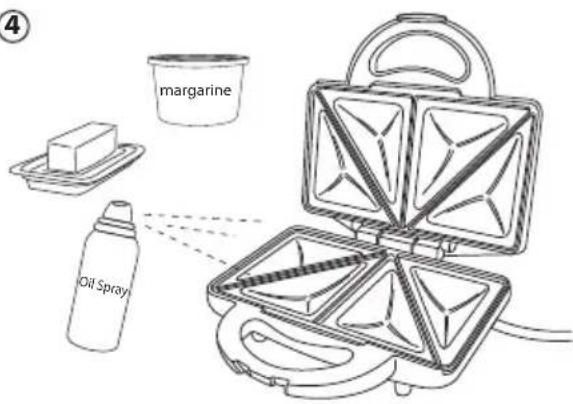
text_image
margarine Oil SpraySmear a layer of butter, margarine or cooking fat over the plates.
5
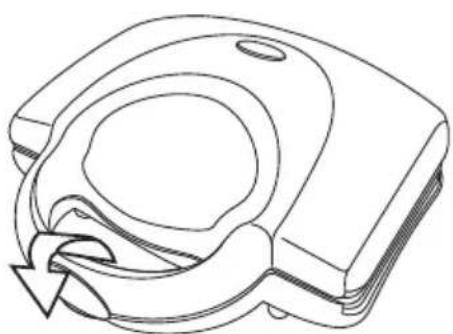
natural_image
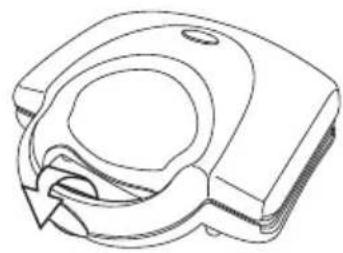
Technical line drawing of a mechanical component with curved surfaces and a central hole (no text or symbols)Gently squeeze the handles together and close the handle locking clip.
6
natural_image
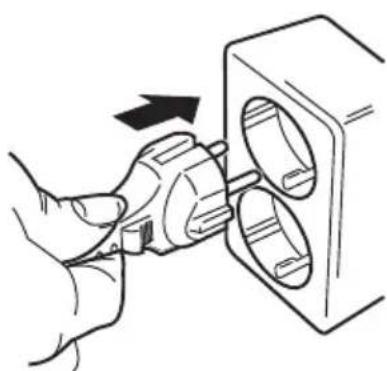
Hand inserting a plug into a housing component (no text or symbols visible)Connect the plug to the mains socket.
⑦
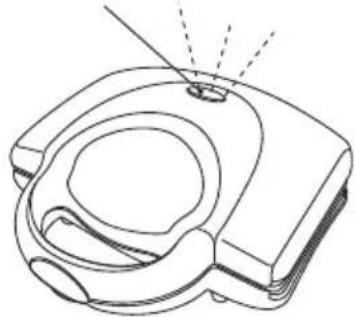
Temperature Indicator
natural_image
Technical line drawing of a mechanical component with concentric rings and a central hole (no text or symbols)Turn the power on at the mains socket. The temperature indicator will turn on.
⑧
natural_image
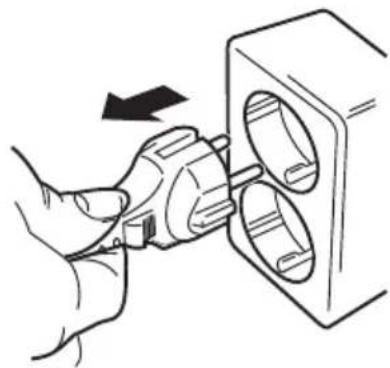
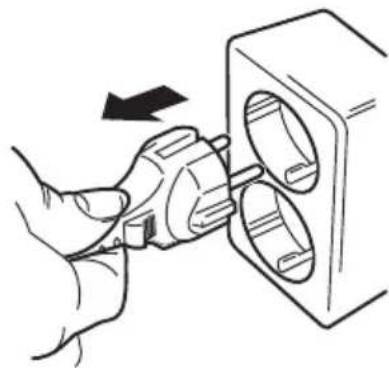
Hand inserting a plug into a socket (no text or symbols visible)When the temperature indicator turns off, then remove the mains plug from the mains socket.
GB
Operation
Make sure the bread covers the cooking plates.
①
natural_image
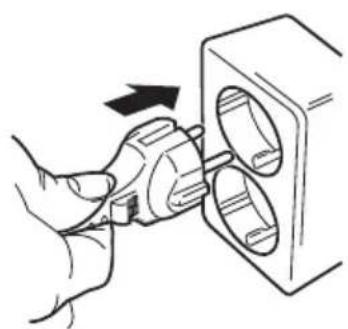
Hand inserting a plug into a component, showing mechanical parts (no text or symbols)Connect the plug to the mains socket and switch on.
②
natural_image
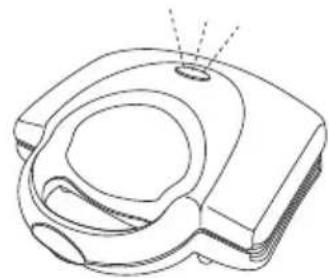
Technical line drawing of a mechanical component with concentric circles and a central hole (no text or symbols)The temperature indicator will illuminate and remain lit until the sandwich maker reaches the cooking temperature.
③
natural_image
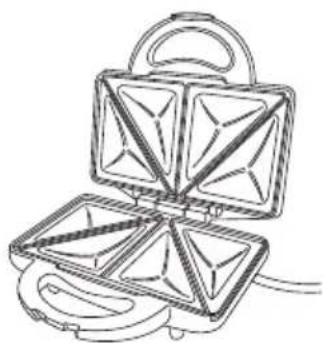
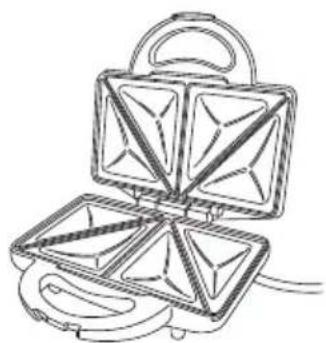
Line drawing of a square griddle with four panes and handles, no text or symbols presentWhen the temperature indicator goes off, open up your sandwich maker by releasing the handle locking clip and lifting up the top half of the sandwich maker.
④
natural_image
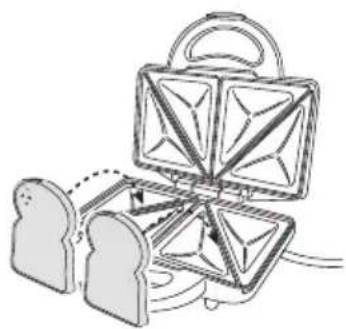
Illustration of a handbag with geometric patterns and two side cutouts (no text or symbols)Place your bread onto the lower half of the cooking plates with the buttered side facing down.
5
natural_image
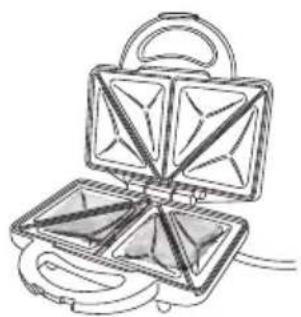
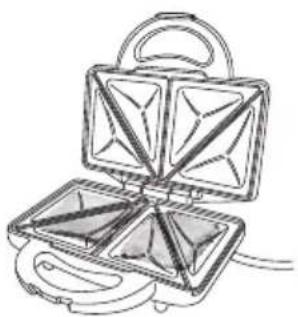
Line drawing of a square griddle with handles and internal compartments (no text or symbols)Add fillings to the surface of the bread and then place another slice of bread on top, with the buttered side facing up.
⑥
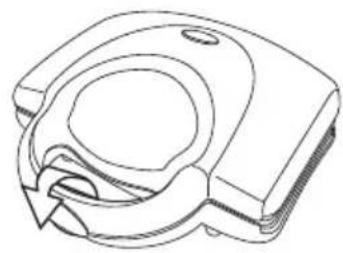
natural_image
Technical line drawing of a mechanical component with no visible text or symbolsGently squeeze the handles together and lock with the handle locking clip.
⑦
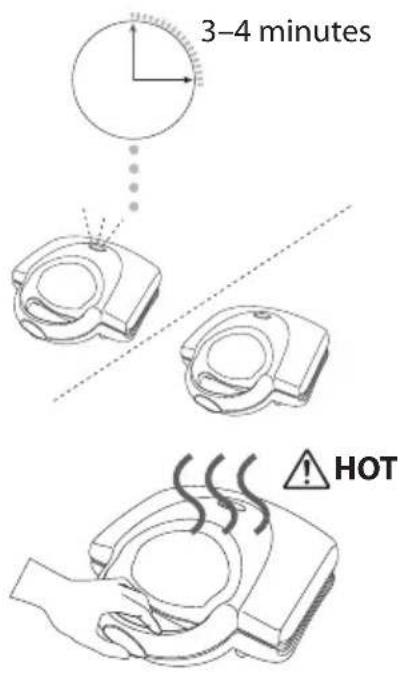
text_image
3-4 minutes HOTThe temperature indicator will turn on and off whilst the built-in thermostat maintains the cooking temperature.
NOTE: Never use a metal object to remove your toasted sandwich as it may damage the cooking plates.
Your sandwich should be ready in approximately 3-4 minutes. When the temperature indicator turns off, open up the sandwich maker with caution as it will be hot.
If you have finished, unplug the mains plug from the mains socket.
Recipes For Sandwich Fillings
Never use raw meat as a sandwich filling. Do not reheat sandwiches that have a meat filling.
Here are some recipe examples:
• Tuna mayonnaise and sweet corn • Cheese spread, ham and apple pieces
- Pizza toppings, ham and grated cheddar cheese
- Brie with walnuts and apple
• Avacado, crab and celery • Cheddar cheese and onion
Tip: Sweet sandwiches are very easy to prepare.
White bread is recommended. Try apple pie filling, sultana and cinnamon.
Cooking Hints:
Prepare the next sandwich whilst one is cooking.
When the temperature indicator turns on, it is the best time to cook the next sandwich. Always close the cooking plates to preserve the heat for the next sandwich.
Cleaning Your Sandwich Maker
Do not use harsh cleaners, solvents or scouring pads as they may damage the casing.
①

natural_image
Hand inserting a plug into a housing component (no text or symbols visible)Remove the plug from the mains socket.
②
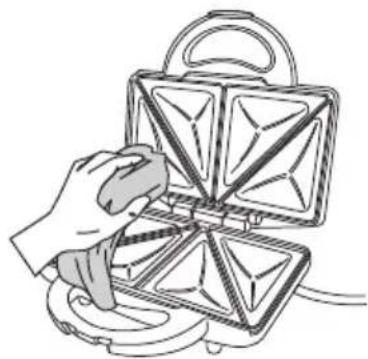
natural_image
Line drawing of a hand using a griddle to press or install a square griddle (no text or symbols)Clean the surface of the cooking plates with a damp cloth and wipe dry. Make sure you do not allow water to seep into the heating elements.
③
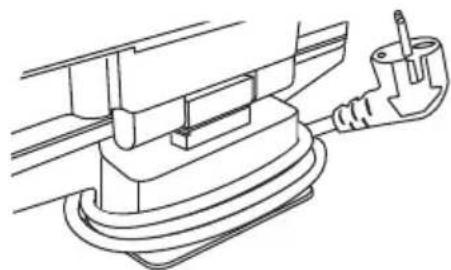
natural_image
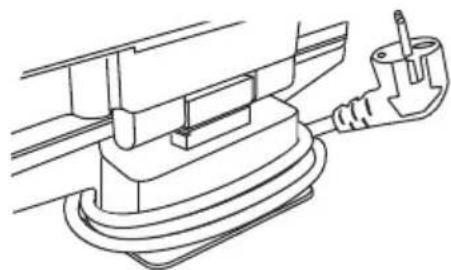
Technical line drawing of a mechanical assembly with a tool inserted (no text or symbols)Wait until the sandwich maker has cooled down, then wrap the mains cable around the mains cable wrap at the bottom of the sandwich maker for storage.
NOTE: Do not remove the cooking plates.
Specifications
Power supply: 230V \~ 50Hz
Power consumption: 700W
We continually strive to improve our products, specifications may change without prior notice.
natural_image
Technical line drawing of a mechanical component with no visible text or symbolsnatural_image
Illustration of hands using a tool to adjust or install a mechanical component (no text or symbols present)natural_image
Line drawing of a mechanical device with a cable and connector (no text or symbols)natural_image
Line drawing of a hand using a waffle to cut the griddle (no text or symbols)natural_image
Technical line drawing of a mechanical component with curved surfaces and a central circular feature (no text or symbols)natural_image
Illustration of a hand inserting a plug into a socket (no text or symbols)natural_image
Technical line drawing of a mechanical component with no visible text or symbolsNår strømmen er på, lyser temperaturindikatoren.
8
natural_image
Illustration of a hand inserting a plug into a socket (no text or symbols)natural_image
Illustration of hands using a tool to adjust or install a component, no text or symbols presentnatural_image
Technical line drawing of a mechanical component with no visible text or symbolsTemperaturindikatoren lyser, og fortsetter å lyse til sandwichmaskinen när steketemperatur.
③
natural_image
Line drawing of a square griddle with four panes and handles, no text or symbols presentnatural_image
Illustration of a mechanical device with triangular components and two separate cutting slices (no text or symbols)Plasser brødskivene på den nedre halvdelen av stekeplatene med de smurte sidene vendt ned.
5
natural_image
Line drawing of a square griddle with handles and internal compartments (no text or symbols)natural_image
Technical line drawing of a mechanical component with no visible text or symbolsnatural_image
Illustration of hands connecting a plug to a bracket (no text or symbols)natural_image
Line drawing of a hand using a griddle to press or install a waffle (no text or symbols)natural_image
Technical line drawing of a mechanical assembly with a tool inserted (no text or symbols)natural_image
Technical line drawing of a mechanical component with no visible text or symbolsnatural_image
Illustration of hands using a tool to tighten a black X symbol on a mechanical component (no text or symbols present)natural_image
Line drawing of a handheld device with a cable and plug, no text or symbols presentnatural_image
Line drawing of a hand using a griddle to cut into a waffle (no text or symbols)natural_image
Technical line drawing of a mechanical component with curved internal structure and arrow indicating rotation (no text or symbols)natural_image
Illustration of a hand inserting a plug into a housing component (no text or symbols)natural_image
Technical line drawing of a mechanical component with no visible text or symbolsnatural_image
Hand inserting a plug into a socket (no text or symbols visible)natural_image
Illustration of a hand using a tool to adjust or install a component, no text or symbols presentnatural_image
Technical line drawing of a mechanical component with no visible text or symbolsnatural_image
Line drawing of a square griddle with four panes and handles, no text or symbols presentnatural_image
Illustration of a handbag with geometric patterns and two side cutouts (no text or symbols)natural_image
Line drawing of a square griddle with handles and internal compartments (no text or symbols)natural_image
Technical line drawing of a mechanical component with no visible text or symbolsnatural_image
Hand inserting a plug into a component, showing a black arrow indicating direction (no text or symbols present)natural_image
Illustration of a hand using a waffle to switch a tray (no text or symbols)natural_image
Technical line drawing of a mechanical component with a pencil inserted (no text or symbols)natural_image
Technical line drawing of a mechanical component with no visible text or symbolsLaite Käyttöopas
(P.N.: 622CC-1982Y-2-N)
Tuotekuvaus
natural_image
Illustration of hands using a tool to adjust or install a mechanical component (no text or symbols present)natural_image
Line drawing of a mechanical device with a cable and connector (no text or symbols)natural_image
Line drawing of a hand using a griddle to clean or prepare it (no text or symbols)natural_image
Technical line drawing of a mechanical component with curved and straight sections (no text or symbols)natural_image
Hand inserting a plug into a socket (no text or symbols visible)natural_image
Technical line drawing of a mechanical component with no visible text or symbolsnatural_image
Hand inserting a plug into a socket (no text or symbols visible)natural_image
Technical line drawing of a mechanical component with no visible text or symbolsnatural_image
Line drawing of a square griddle with four panes and handles, no text or symbols presentnatural_image
Illustration of a mechanical device with triangular components and two separate cutting slices (no text or symbols)natural_image
Line drawing of a square griddle with handles and internal compartments (no text or symbols)natural_image
Technical line drawing of a mechanical component with no visible text or symbolsnatural_image
Illustration of hands connecting a plug to a component with an arrow indicating direction (no text or symbols)natural_image
Illustration of a hand using a power tool to switch a waffle-shaped appliance (no text or symbols present)natural_image
Technical line drawing of a mechanical assembly with a tool inserted (no text or symbols)natural_image
Technical line drawing of a mechanical component with no visible text or symbols
natural_image
Illustration of hands using a tool to cut a component (no text or symbols present)natural_image
Line drawing of a handheld device with a cable and plug, no text or symbols presentnatural_image
Line drawing of a hand using a griddle to cut into a waffle (no text or symbols)natural_image
Technical line drawing of a mechanical component with curved surfaces and a central circular feature (no text or symbols)natural_image
Illustration of a hand using a plug to adjust or install a component into a rectangular block (no text or symbols)natural_image
Technical line drawing of a mechanical component with concentric rings and a central hole (no text or symbols)natural_image
Hand inserting a plug into a socket (no text or symbols visible)natural_image
Illustration of a hand using a power plug to adjust or install a wall socket (no text or symbols visible)natural_image
Technical line drawing of a mechanical component with concentric circles and a central hole (no text or symbols)natural_image
Line drawing of a square griddle with four panes and handles, no text or symbols presentnatural_image
Illustration of a geometric kite with triangular panels and handle, connected to two flat plate plates (no text or symbols)natural_image
Line drawing of a square griddle with handles and internal compartments (no text or symbols)natural_image
Technical line drawing of a mechanical component with no visible text or symbolsnatural_image
Hand inserting a plug into a component (no text or symbols visible)natural_image
Illustration of a hand using a waffle to switch a tray (no text or symbols)natural_image
Technical line drawing of a mechanical assembly with a tool inserted (no text or symbols)natural_image
Technical line drawing of a mechanical component with no visible text or symbols
natural_image
Illustration of hands using a tool to adjust or install a component, with no visible text or symbols.natural_image
Line drawing of a mechanical device with a cable and connector (no text or symbols)natural_image
Line drawing of a hand using a waffle to cut the griddle (no text or symbols)natural_image
Technical line drawing of a mechanical component with curved and straight lines indicating internal structure (no text or symbols)natural_image
Hand inserting a plug into a socket (no text or symbols visible)natural_image
Technical line drawing of a mechanical component with no visible text or symbolsnatural_image
Hand inserting a plug into a socket (no text or symbols visible)natural_image
Illustration of a hand using a tool to adjust or install a component, with no visible text or symbols.natural_image
Technical line drawing of a mechanical component with concentric rings and a protruding rod (no text or symbols)natural_image
Line drawing of a square griddle with four panes and handles, no text or symbols presentnatural_image
Illustration of a mechanical device with triangular components and two separate cutting slices (no text or symbols)natural_image
Line drawing of a square griddle with handles and internal compartments (no text or symbols)natural_image
Technical line drawing of a mechanical component with no visible text or symbolsnatural_image
Hand inserting a plug into a component (no text or symbols visible)natural_image
Line drawing of a hand using a waffle to press or install a square (no text or symbols)natural_image
Technical line drawing of a mechanical assembly with a tool inserted (no text or symbols)natural_image
Technical line drawing of a mechanical component with no visible text or symbolsnatural_image
Illustration of hands using a tool to tighten a black X symbol on a mechanical component (no text or symbols present)natural_image
Line drawing of a handheld device with a cable and plug, no text or symbols presentnatural_image
Line drawing of a hand using a griddle to cut into a waffle (no text or symbols)natural_image
Technical line drawing of a mechanical component with curved surfaces and a central hole (no text or symbols)natural_image
Illustration of a hand using a plug to adjust or install a component, with no visible text or symbols.natural_image
Technical line drawing of a mechanical component with no visible text or symbolsnatural_image
Hand inserting a plug into a socket (no text or symbols visible)natural_image
Hand inserting a plug into a mechanical component (no text or symbols visible)natural_image
Technical line drawing of a mechanical component with concentric circles and a central hole (no text or symbols)natural_image
Line drawing of a square griddle with handles and internal compartments (no text or symbols)natural_image
Illustration of a decorative box with geometric patterns and handle, partially enclosed by two stylized cutouts (no text or symbols)natural_image
Line drawing of a square griddle with four panes and handle, no text or symbols presentNa povrch chleba uložte náplň a na vrch položte druhý plátok chleba tak, aby strana natretá maslom smerovala nahor.
⑥
natural_image
Technical line drawing of a mechanical component with no visible text or symbolsnatural_image
Hand inserting a plug into a socket (no text or symbols visible)natural_image
Line drawing of a hand using a power tool to switch a square griddle (no text or symbols)Navlhčenou tkaninou vyčistite povrch varných platní a utrite dosucha. Zabráňte vniknutiu vody do výhrevných prvkov.
③
natural_image
Technical line drawing of a mechanical component with a pull pointer (no text or symbols)natural_image
Technical line drawing of a mechanical component with no visible text or symbols
natural_image
Illustration of hands using a tool to adjust or install a mechanical component (no text or symbols present)natural_image
Line drawing of a mechanical device with a cable and connector (no text or symbols)natural_image
Line drawing of a hand using a griddle to cut into a waffle (no text or symbols)natural_image
Technical line drawing of a mechanical component with a circular feature and curved arrow indicating rotation (no text or symbols)natural_image
Illustration of a hand using a tool to adjust or install a component into a rectangular block (no text or symbols)natural_image
Technical line drawing of a mechanical component with no visible text or symbolsnatural_image
Hand inserting a plug into a socket (no text or symbols visible)natural_image
Technical line drawing of a mechanical component with no visible text or symbolsnatural_image
Line drawing of a square griddle with four panes and handles, no text or symbols presentnatural_image
Diagram of a mechanical device with triangular components and two separate cutting boards (no text or symbols)natural_image
Line drawing of a square griddle with handles and internal compartments (no text or symbols)natural_image
Technical line drawing of a mechanical component with no visible text or symbolsnatural_image
Hand inserting a plug into a component (no text or symbols visible)natural_image
Illustration of a hand using a power tool to switch a waffle (no text or symbols present)natural_image
Technical line drawing of a mechanical assembly with a tool inserted (no text or symbols)Your appliance should be used in such a way that it is protected from moisture. e.g. condensation, splashed water etc. Do not place or store your appliance where it can fall or be pulled into water or any other liquid. Do not reach for the appliance if it has fallen in any water or any other liquid. Unplug immediately. Stand your appliance on a stable, level surface during use. Do not allow your appliance to sit on top of the mains cable.
Make sure that children cannot touch the appliance when hot or pull the mains cable.
It is DANGEROUS to insert fingers or objects other than bread into the appliance.
Bread may burn. Your appliance must not be used near or below curtains or other combustible materials. It must be watched when in use. Do not leave your appliance unattended. Your appliance should be placed away from heat sources such as radiators, gas/electric fires and direct sunlight.
Keep the mains cable away from any heated surfaces.
Use the appliance only for its intended use, as described in this manual. Do not use outdoors.
Never use your appliance if it is damaged in any way. Do not remove any fixed covers. Never use this appliance if it is not working properly, or if it has been dropped or damaged.
If the mains cable is damaged it must be replaced by the manufacturer, its service agent, or similarly qualified persons in order to avoid a hazard.
This appliance is not intended for use by persons (including children) with reduced physical, sensory or mental capabilities, or lack of experience and knowledge, unless they have been given supervision or instruction concerning the use of the appliance by a person responsible for their safety.
Children should be supervised to ensure that they do not play with the appliance.
Sikkerhetsadvarsler
NO
This symbol on the product or in the instructions means that your electrical and electronic equipment should be disposed at the end of its life separately from your household waste. There are separate collection systems for recycling in the EU. For more information, please contact the local authority or your retailer where you purchased the product.