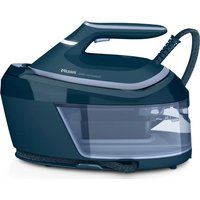
USER MANUAL PerfectCare 6000 Series PSG6023 PHILIPS
English 6
Azerbaijani 19
Indonesian 32
Malay 45
Czech 59
Danish 72
German 85
Estonian 99
Spanish 112
French 125
Croatian 138
Italian 151
Latvian 164
Lithuanian 177
Hungarian 190
Dutch 203
Norwegian 216
Uzbek 229
Polish 242
Portuguese 255
phosphorus phosphate 547
Simplified Chinese 561
Traditional Chinese 575
Korean 588
601 Arabic
614 Persian
Introduction
Congratulations on your purchase and welcome to Philips! To fully benefit from the support that Philips offers, register your product at www.philips.com/welcome. Read this user manual, the important information leaflet, and the quick start guide carefully before you use the appliance. Save them for future reference.
Product overview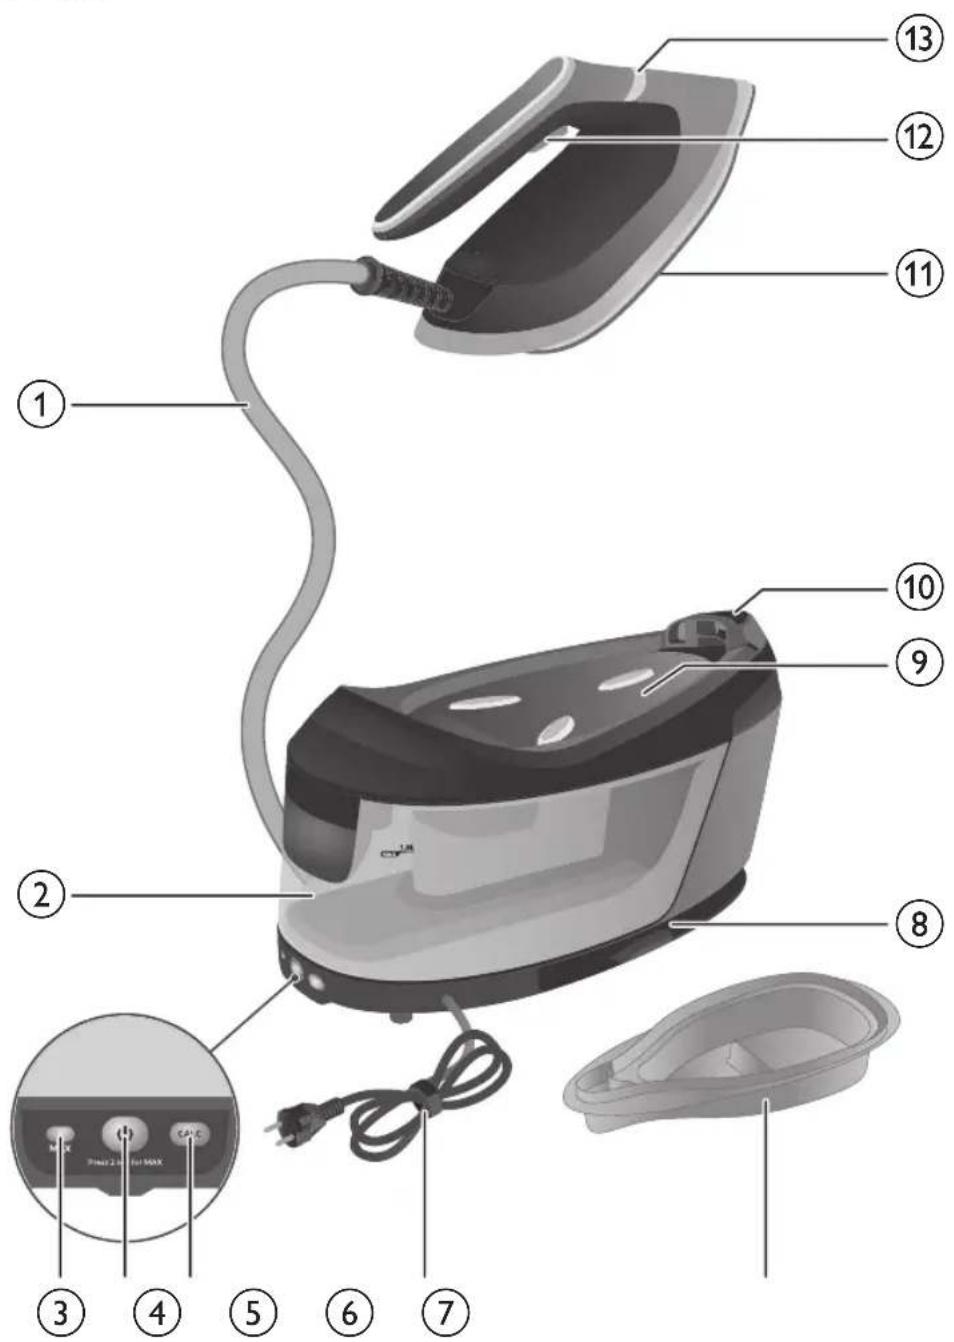
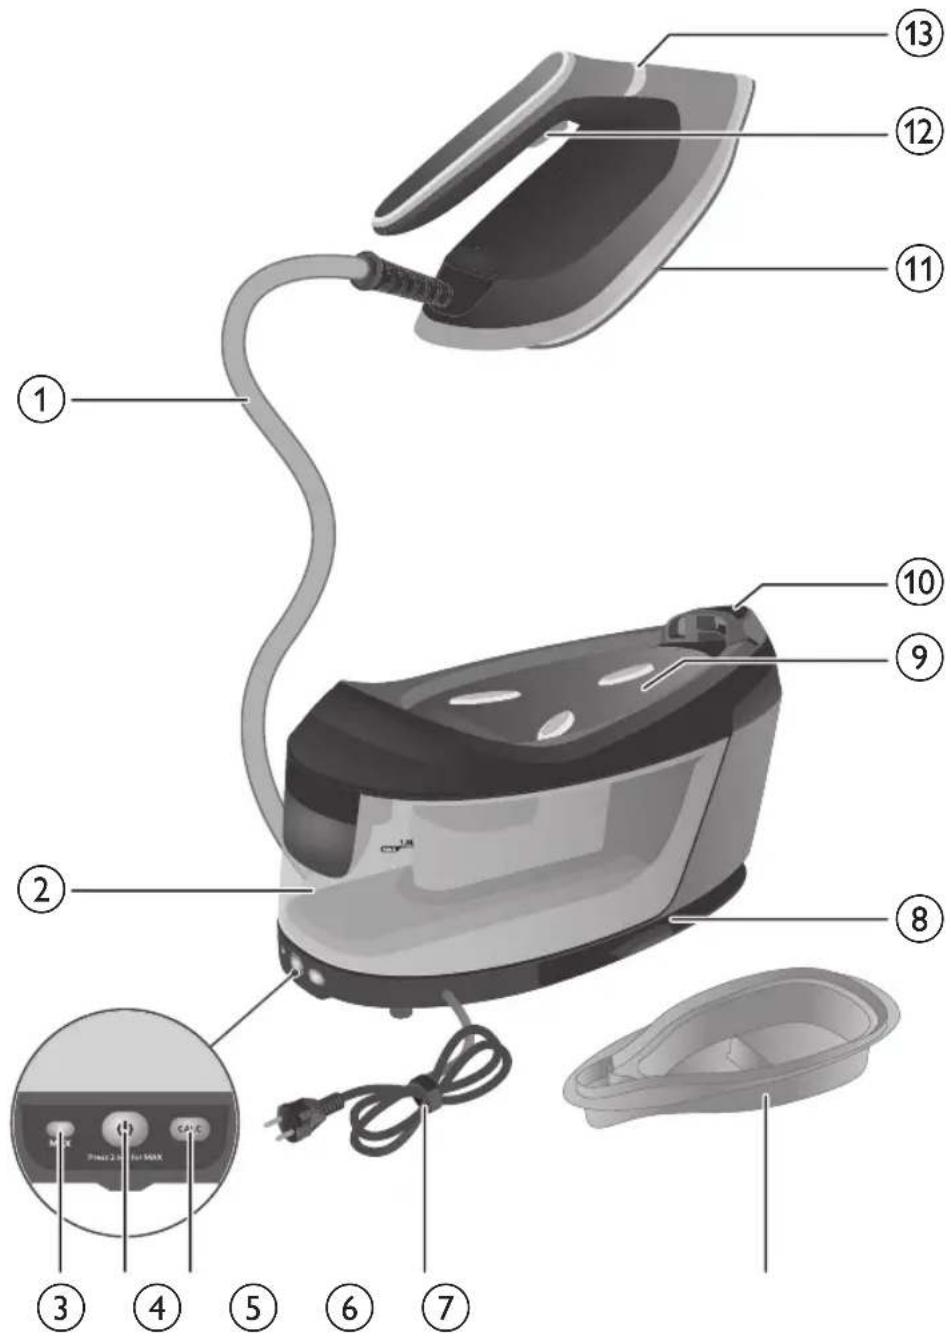
1 Water supply hose 2 Water tank 3 MAX setting light indicator 4 On/off button with light 5 CALC button with light 6 Mains cord with plug 7 Smart Calc-Clean container 8 Water supply hose storage compartment 9 Iron platform 10 Carry lock release button 11 Soleplate 12 Steam trigger 13 'Iron ready' light
Preparing for use
Warnings
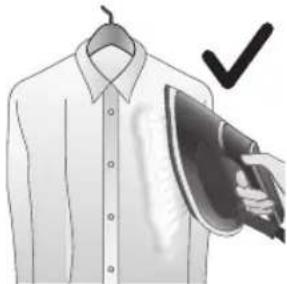
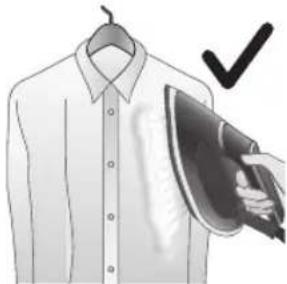
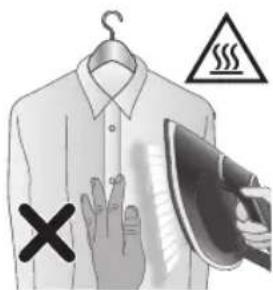
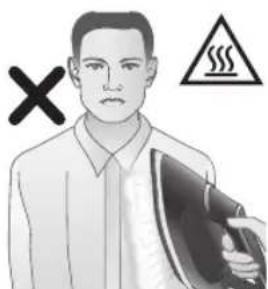
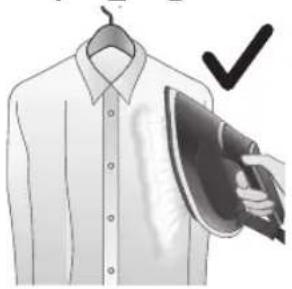
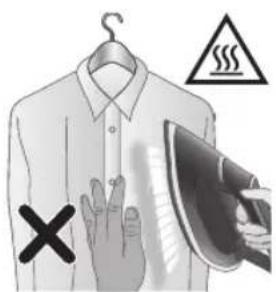
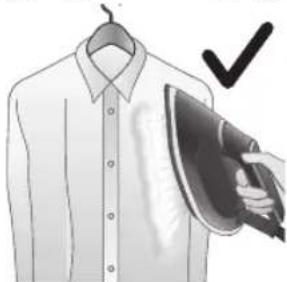
1 Steam the garment when it is on the hanger.
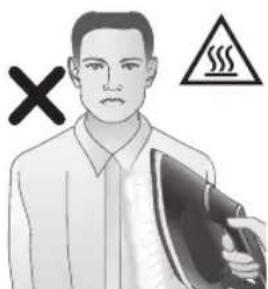
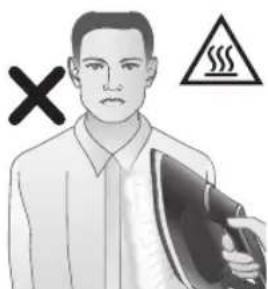
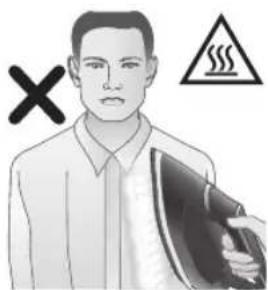
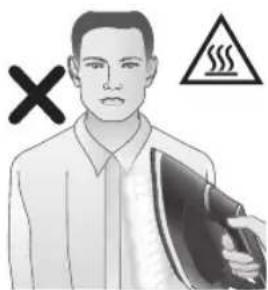
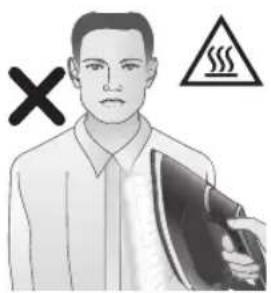
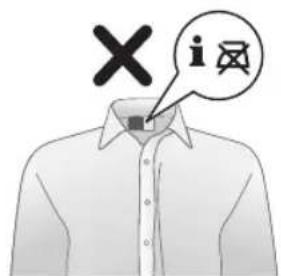
2 Hot steam is emitted from the iron. Never attempt to remove wrinkles from a garment while someone is wearing it.
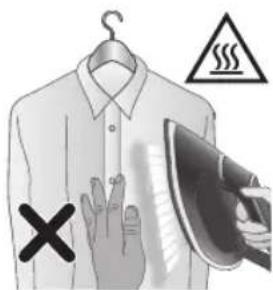
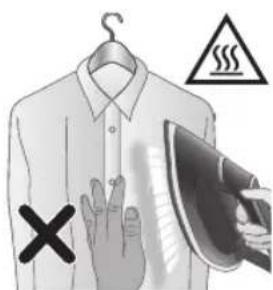
3 Do not use your bare hand as a supporting surface when you steam.
8 English
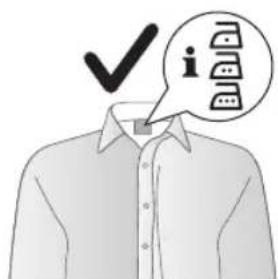
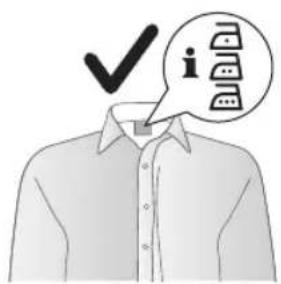
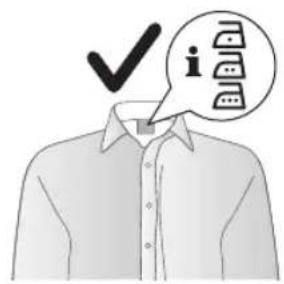
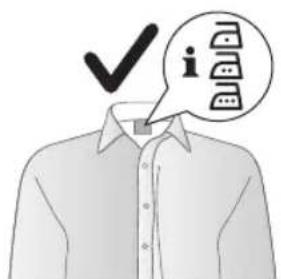
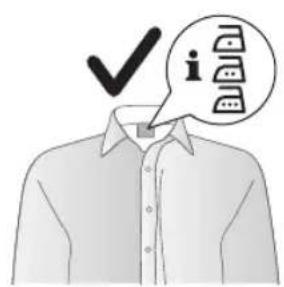
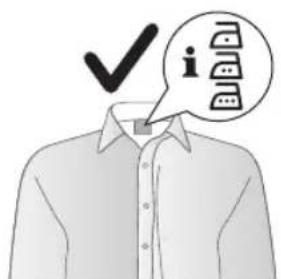
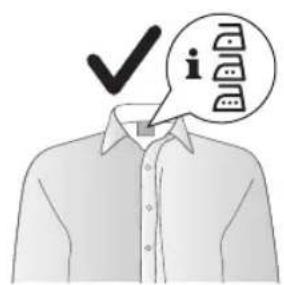
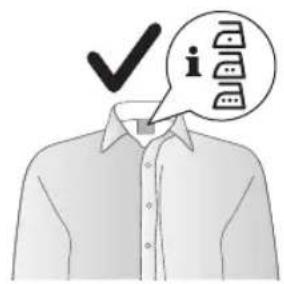
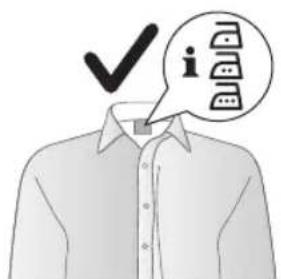
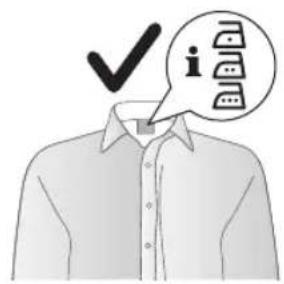
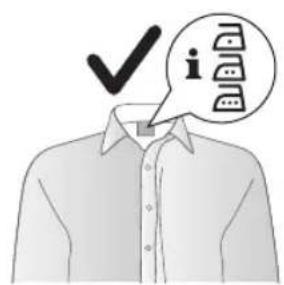
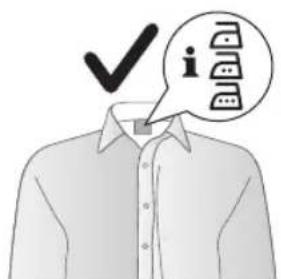
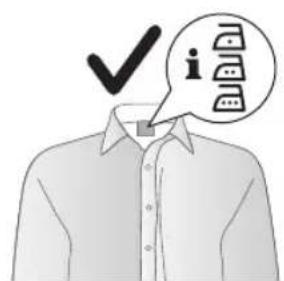
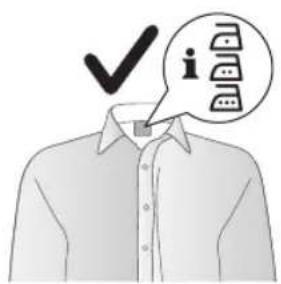
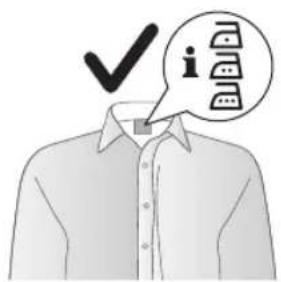
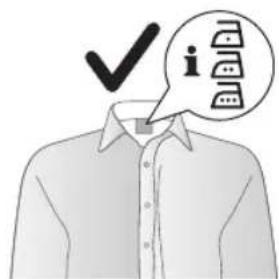
4 Fabrics with these symbols are ironable, for example linen, cotton, polyester, silk, wool, viscose and rayon.
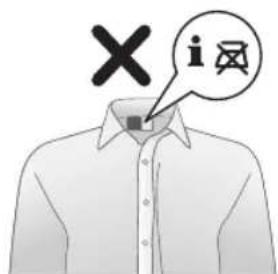
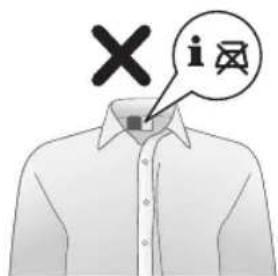
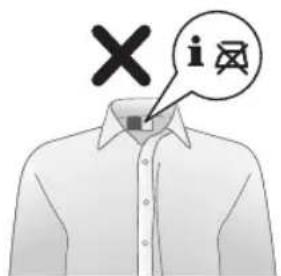
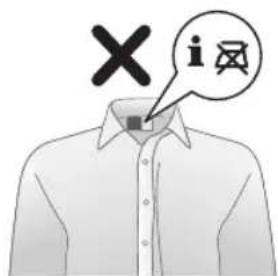
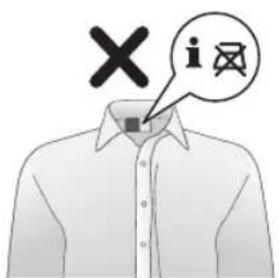
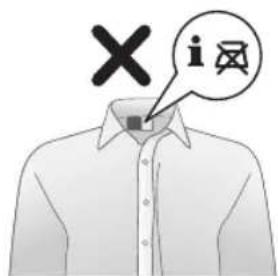
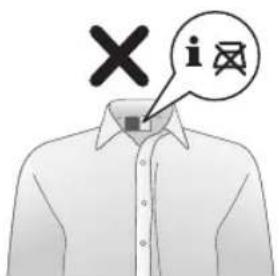
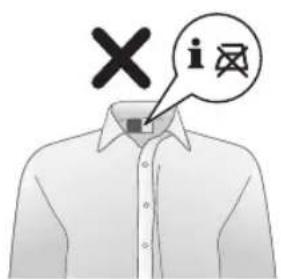
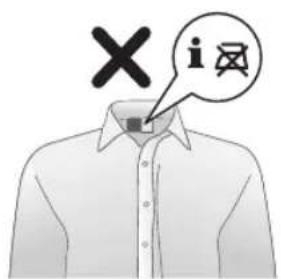
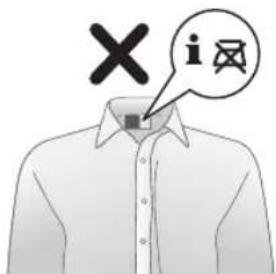
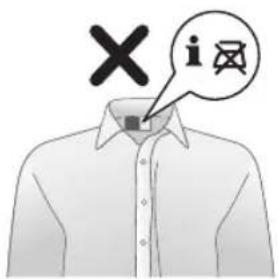
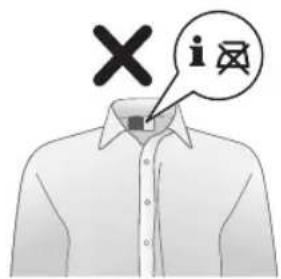
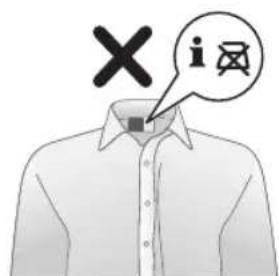
5 Fabrics with this symbol are not ironable. These fabrics include synthetic fabrics such as Spandex or elastane, Spandex-mixed fabrics and polyolefins (e.g. polypropylene), but also prints on garments.
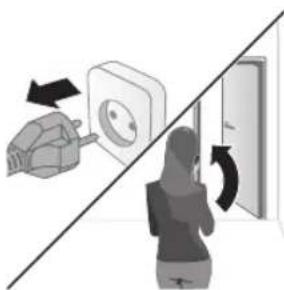
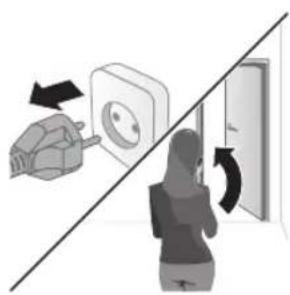
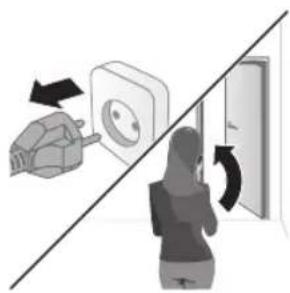
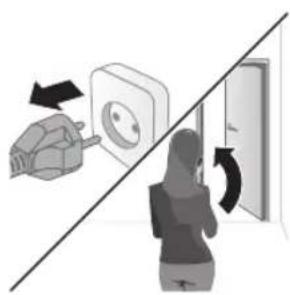
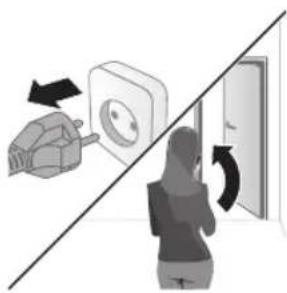
6 Unplug the appliance if it is left unattended for a period of time.
Type of water to use
The appliance is suitable to be used with tap water. However, if you live in an area with hard water, we recommend that you mix an equal amount of tap water with distilled or demineralized water. This will prevent fast scale build up and prolong the lifetime of the appliance.
Do not add perfume, water from the tumble dryer, vinegar, starch, descaling agents, ironing aids, chemically descaled water or other chemicals, as they may cause water spitting, brown staining or damage to your appliance
Filling the water tank
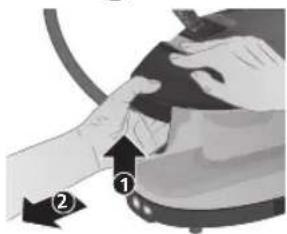
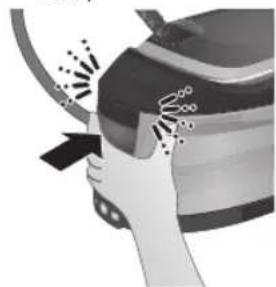
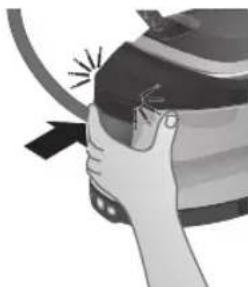
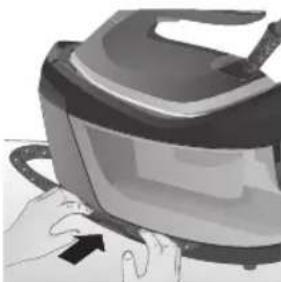
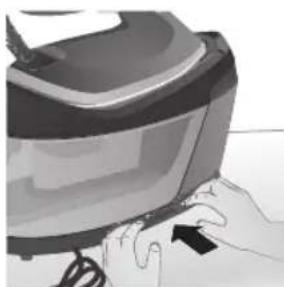
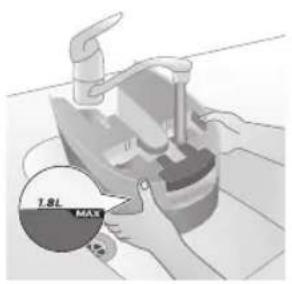
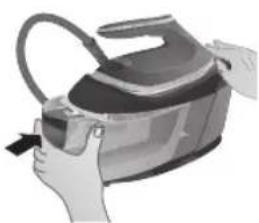
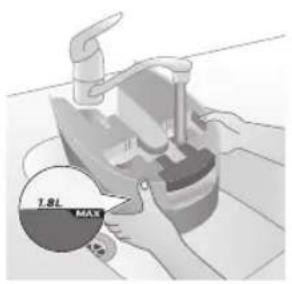
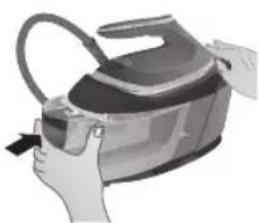
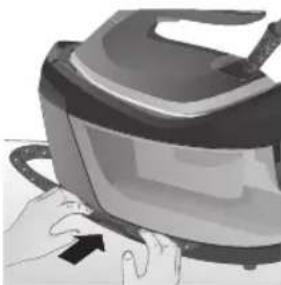
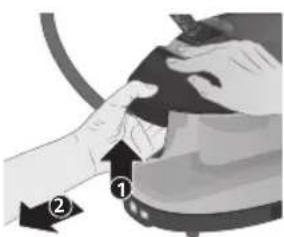
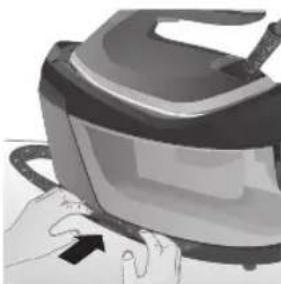
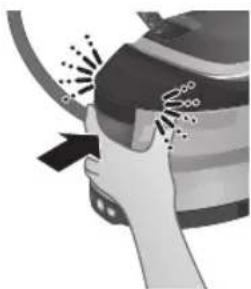
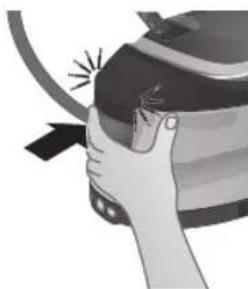
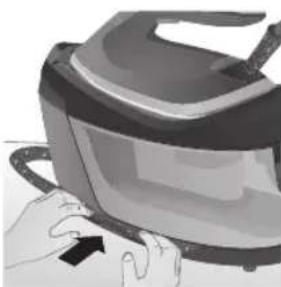
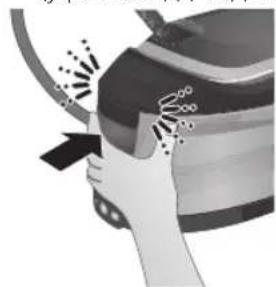
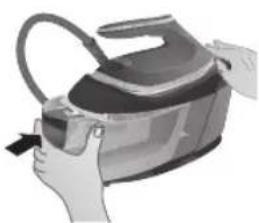
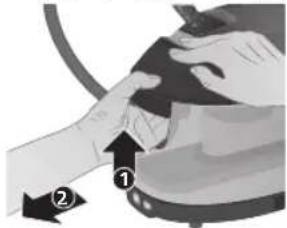
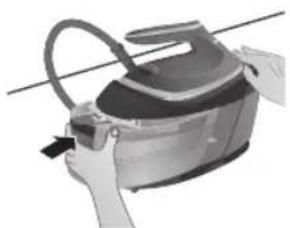
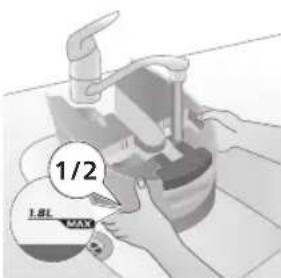
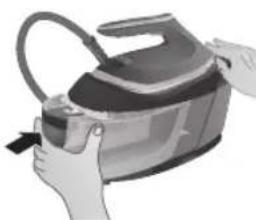
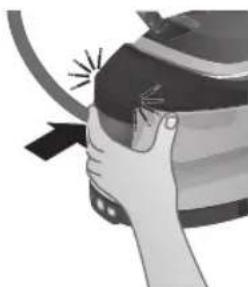
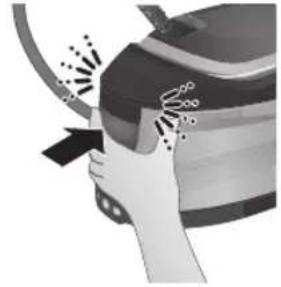
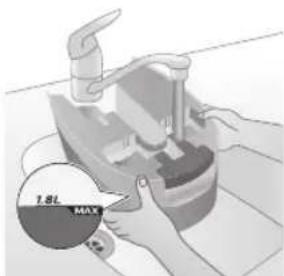
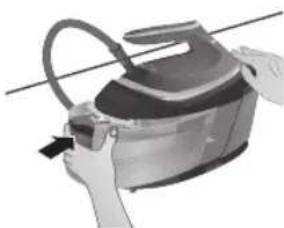
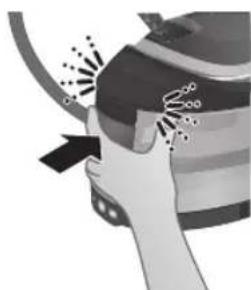
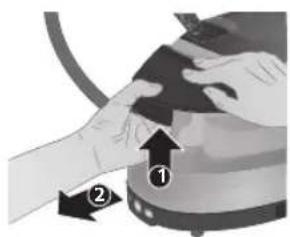
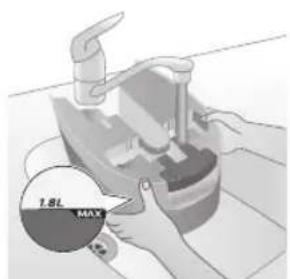
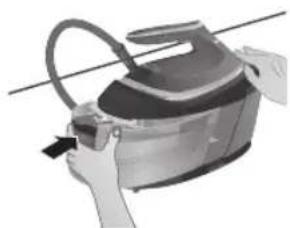
1 Press the lever in the water tank handle and remove the water tank from the base.
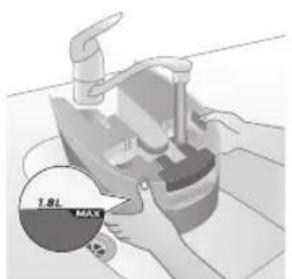
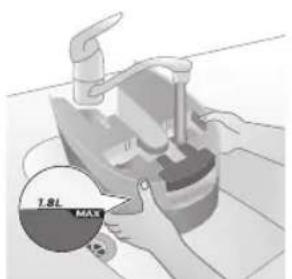
2 Fill the water tank up to the MAX indication.
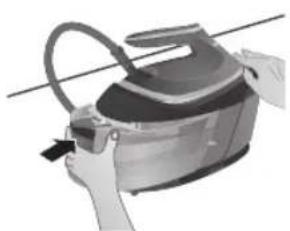
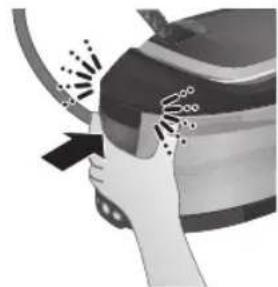
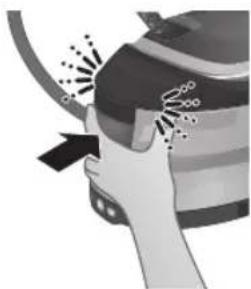
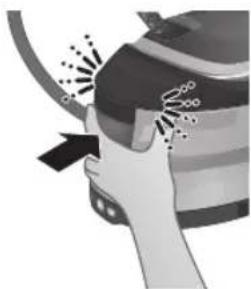
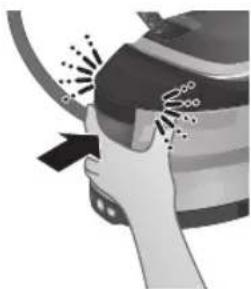
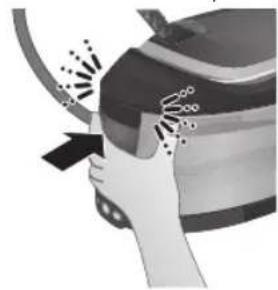
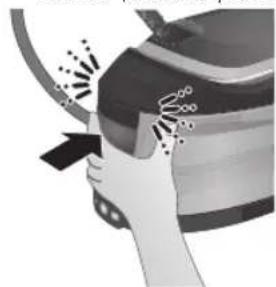
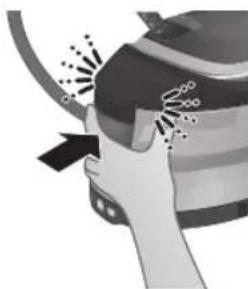
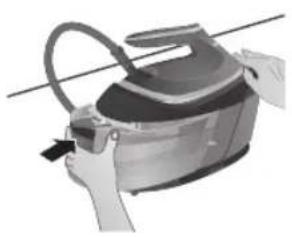
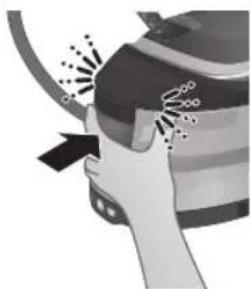
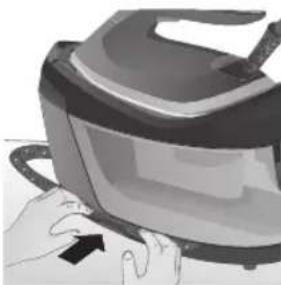
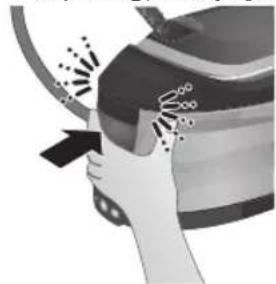
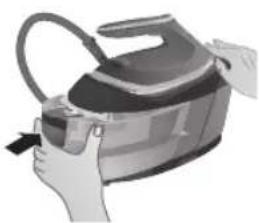
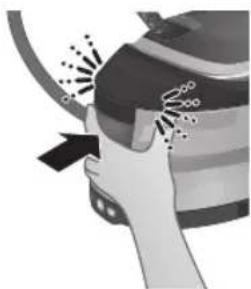
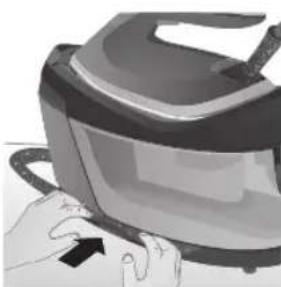
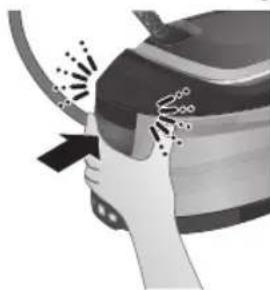
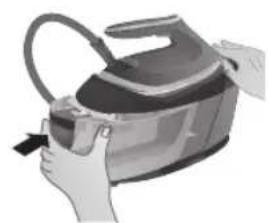
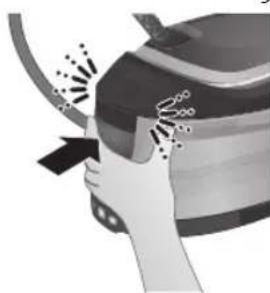
3 Push the water tank back into the appliance until it locks in place ('click').
Using your appliance
OptimalTEMP technology
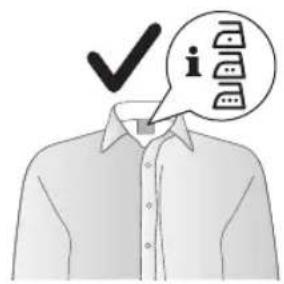
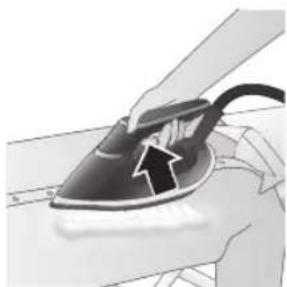
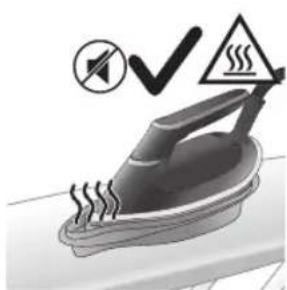
During ironing, you can place the iron either on the iron platform or horizontally on the ironing board. Thanks to the OptimalTEMP technology, the soleplate will not damage the ironing board cover.
The OptimalTEMP technology enables you to iron all types of ironable fabrics, in any order, without adjusting the iron temperature setting.
Fabrics with these symbols are ironable, for example linen, cotton, polyester, silk, wool, viscose and rayon.
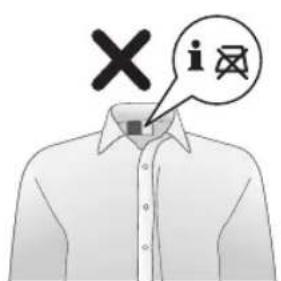
Fabrics with this symbol are not ironable. These fabrics include synthetic fabrics such as Spandex or elastane, Spandex-mixed fabrics and polyolefins (e.g. polypropylene), but also prints on garments.
English
Ironing

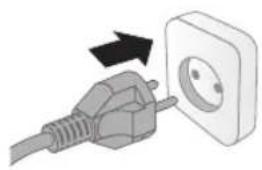
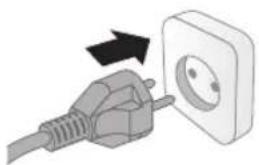
1 Put the mains plug in an earthed wall socket.
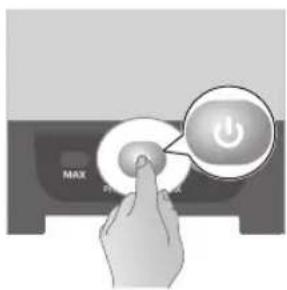
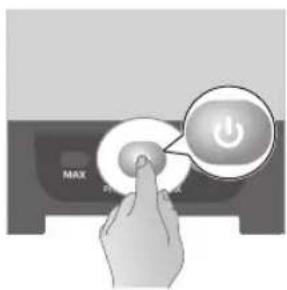
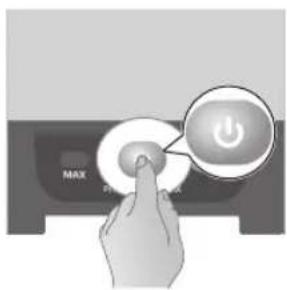
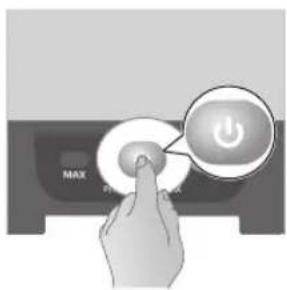
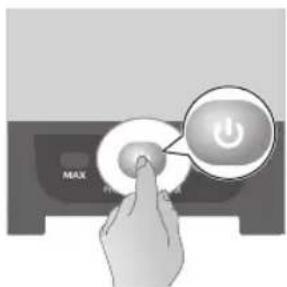
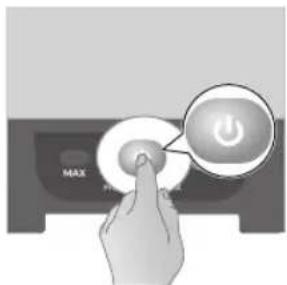
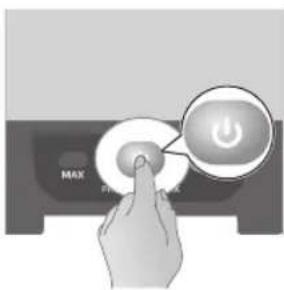
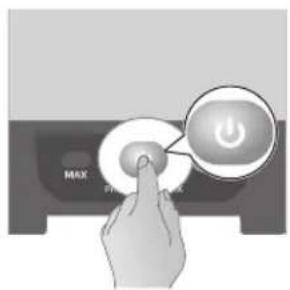
2 Press the on/off button to switch on the appliance.
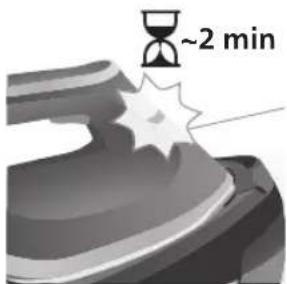
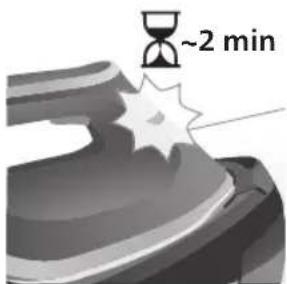
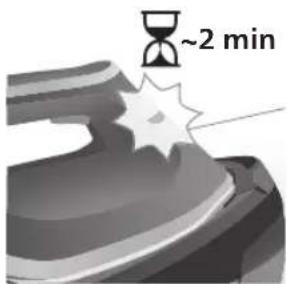
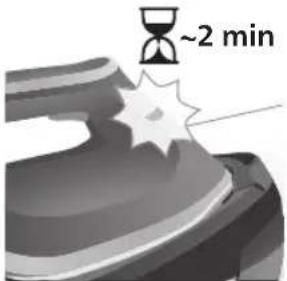
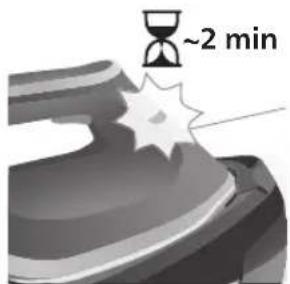
3 'Iron ready' light starts to flash to indicate that the appliance is heating up. It takes about 2 minutes.
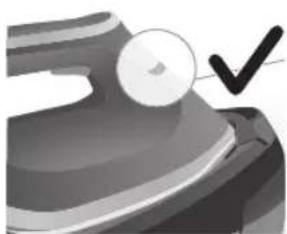
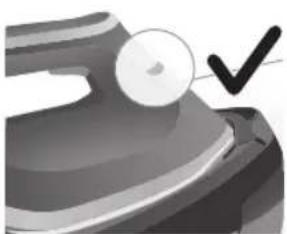
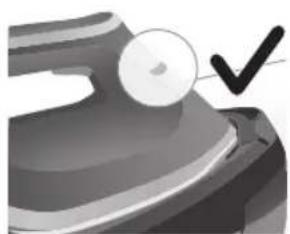
4 Wait until the 'iron ready' light lights up continuously.
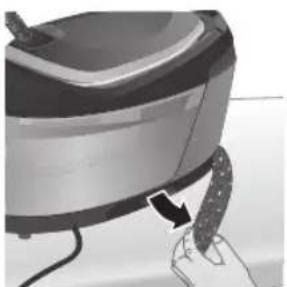
5 Remove the water supply hose from the storage compartment.
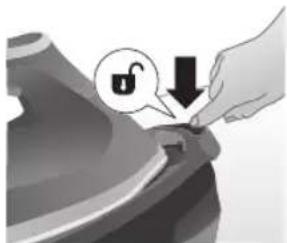
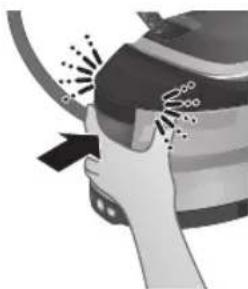
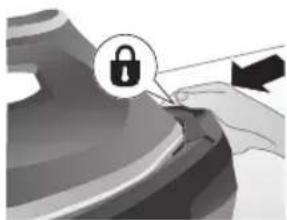
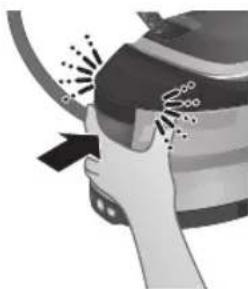
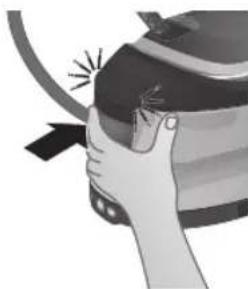
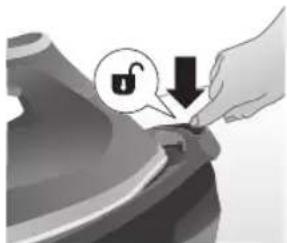
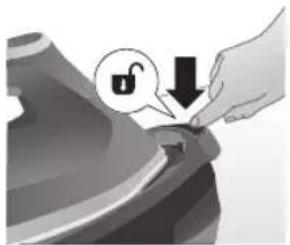
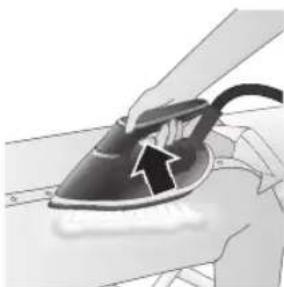
6 Press the carry lock release button to unlock the iron from the iron platform.
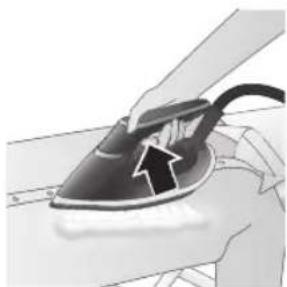
7 Press and hold the steam trigger to start ironing.
Note: Steam 30 seconds horizontally before ironing to prevent water leaking.
Note: There might be water spitting from the iron at the start of each session. Press steam trigger for 10 seconds before ironing to prevent water stains on garment.
Note: When you start your ironing session and especially during the first usage of steam trigger, it may take more than 30 seconds for steam to come out of the appliance.
Note: The pump is activated each time you press the steam trigger. It produces subtle rattling sound. When there is no water in the water tank, the pump sound is louder.
Warning: Never direct steam at people.
Vertical ironing
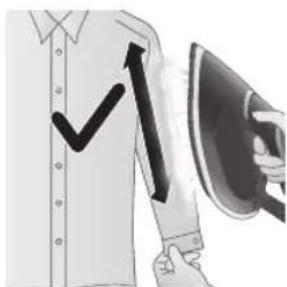
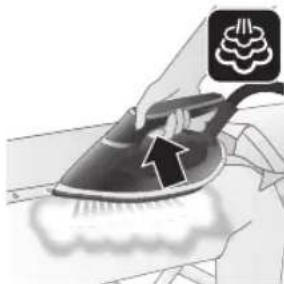
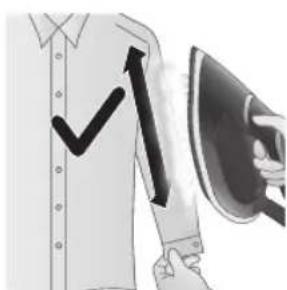
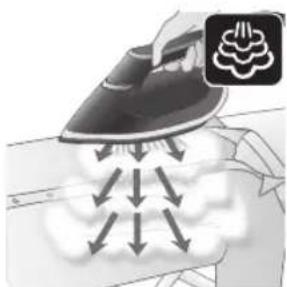
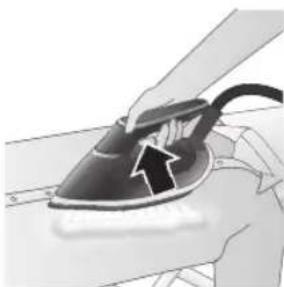
You can use the steam iron in vertical position to remove wrinkles from hanging fabrics.
1 Hold the iron in vertical position, press the steam trigger and touch the garment lightly with the soleplate and move the iron up and down.
MAX setting
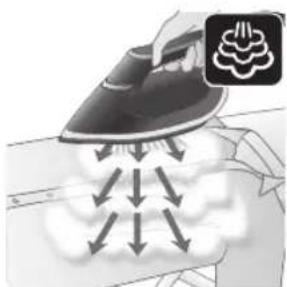
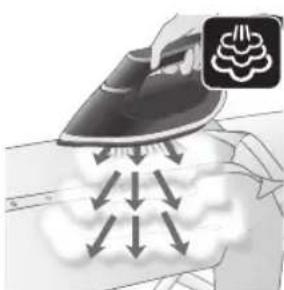
For faster ironing and a higher amount of steam, you can use MAX setting.
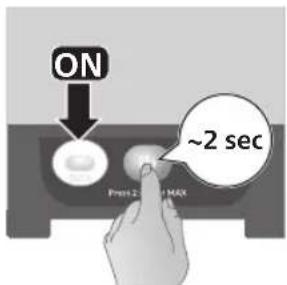
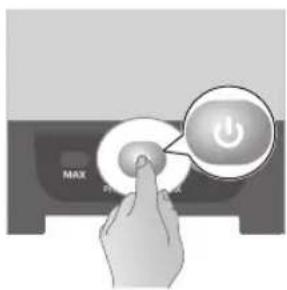
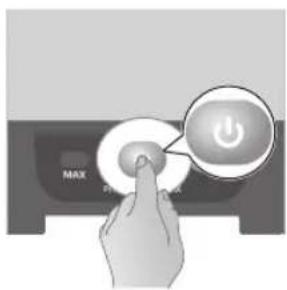
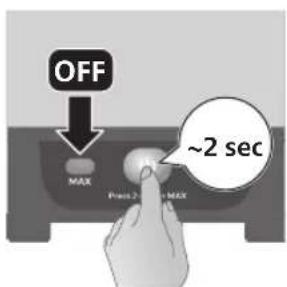
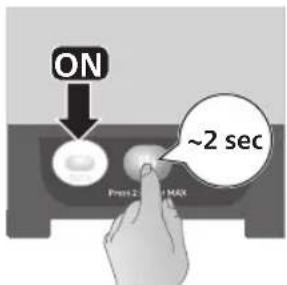
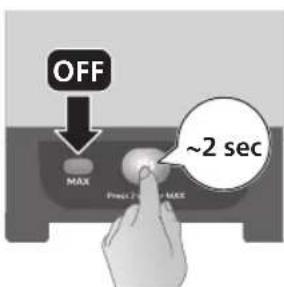
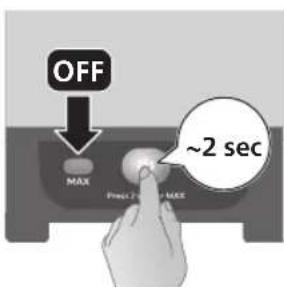
1 Press and hold the on/off button for 2 seconds until the light MAX indicator lights up.
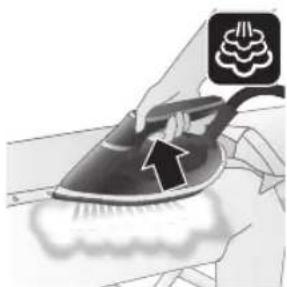
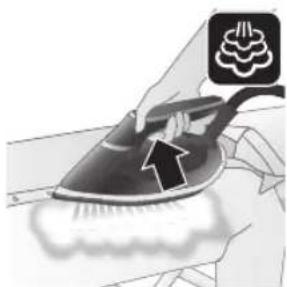
2 Then press steam trigger for MAX steam.
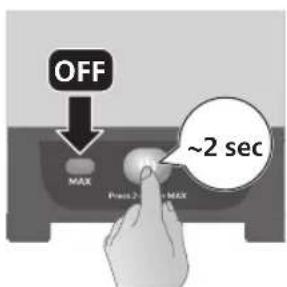
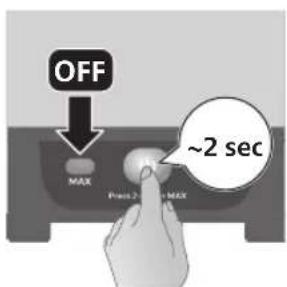
3 To deactivate MAX setting, press and hold the on/off button again for 2 seconds until the light MAX indicator goes off.
Steam boost
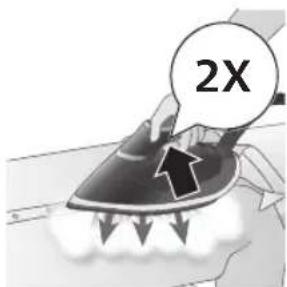
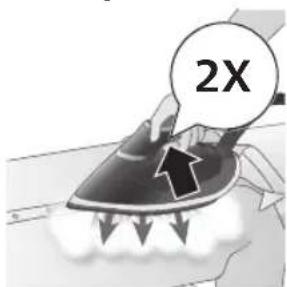
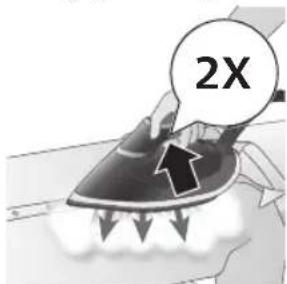
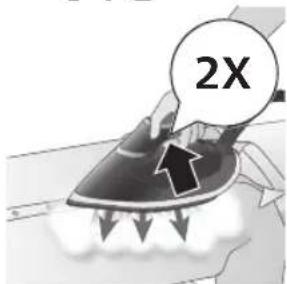
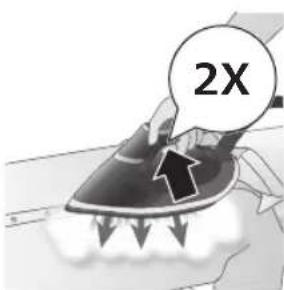
1 Press steam trigger twice quickly.
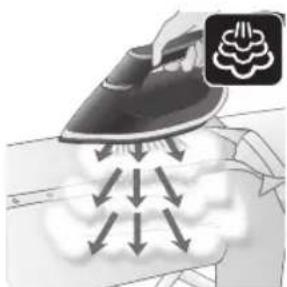
2 The appliance releases a powerful boost of steam for 3 seconds.
Auto shut-off
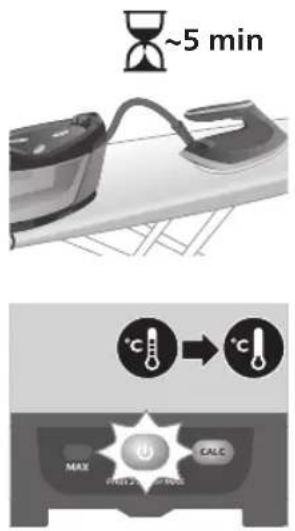
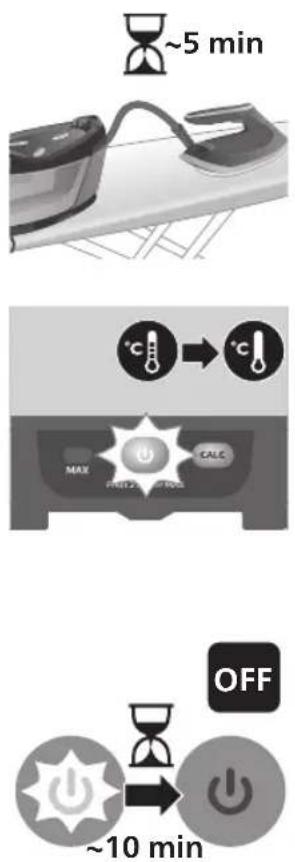
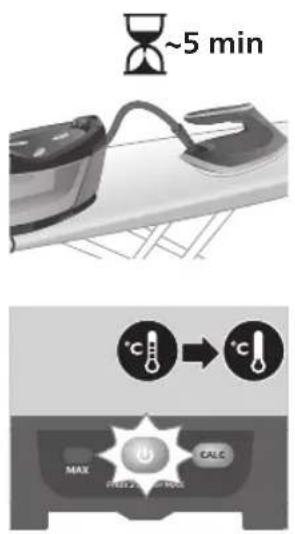
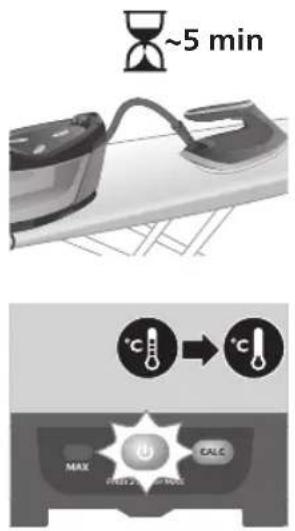
1 When the appliance is not in use for more than 15 minutes, the 'iron ready' light starts to flash and it starts to cool down.
![graph LR A["Power Input"] --> B["Hourglass"] B --> C["OFF"] D["~10 min"] --> E["Power"]](/content/2026/05/754547/images/6ea6d4b36c2bfecb802f2efa679b1ca19a0783ea5e091d18068646a08deb00ad.jpg)
2 Upon leaving the appliance untouched for the next 10 minutes, it will switch off automatically.
Warning: Never leave the appliance unattended when it is connected to the mains. Always unplug the appliance after use.
Cleaning and maintenance
Smart Calc-Clean System
Your appliance has been designed with a Smart Calc-Clean system to ensure that descaling and cleaning is done regularly. This helps to maintain a strong steam performance and prevents dirt and stains coming out of the soleplate over time. To ensure that the cleaning process is performed, the appliance gives regular reminders.
Warning: Do not leave the appliance unattended during the Calc-Clean process.
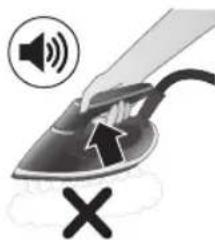
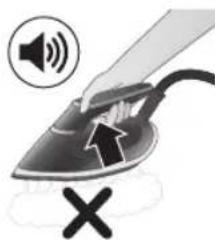
Caution: Always perform the Calc-Clean process with the Calc-Clean container. Do not interrupt the process by lifting the iron up from the Calc-Clean container, as hot water and steam will come out of the soleplate.
Note: Make sure that the appliance is plugged in and switched ON during the Calc-Clean process.
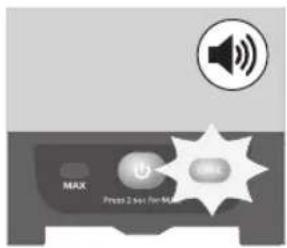
1 After 1 to 3 months of use, the Calc-Clean light starts flashing and the appliance starts beeping to indicate that you have to perform the Calc-Clean process.
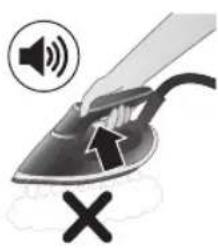
2 Besides that, a second defense step to protect the appliance from scale is integrated: the steam function gets disabled if descaling is not done. After descaling is done, the steam function will be restored. This takes place regardless of the type of water used.
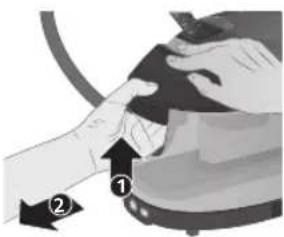
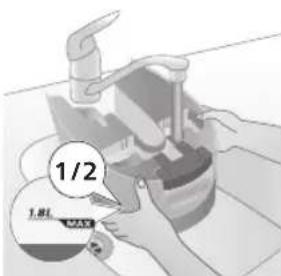
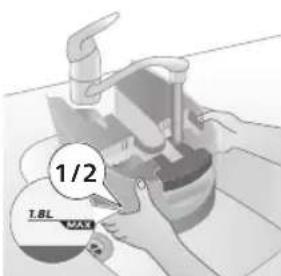
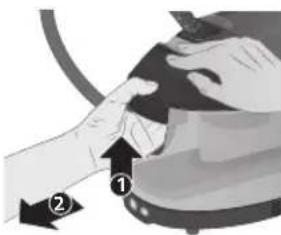
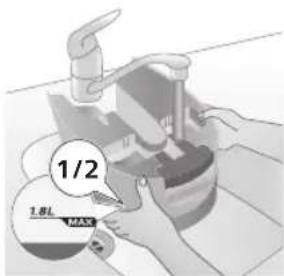
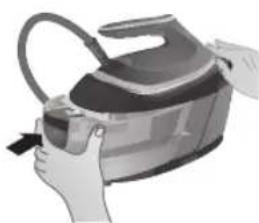
3 Press the lever in the water tank handle and remove the water tank from the base.
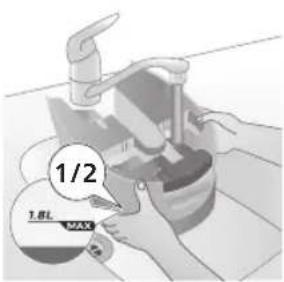
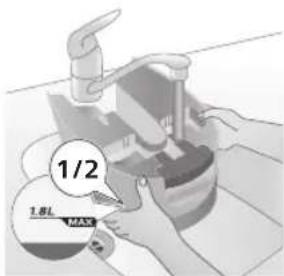
4 Fill up the water tank halfway.
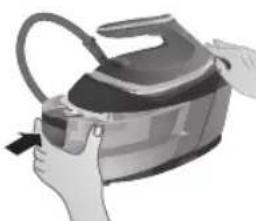
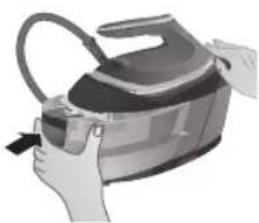
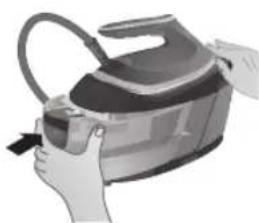
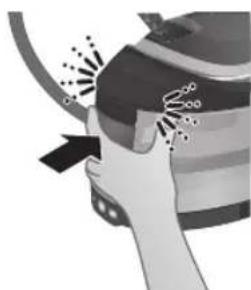
5 Push the water tank back into the appliance until it locks in place ('click').
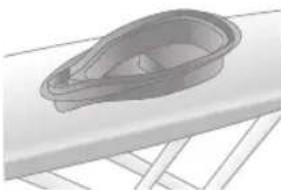
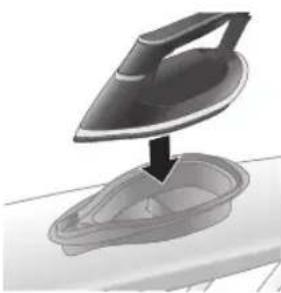
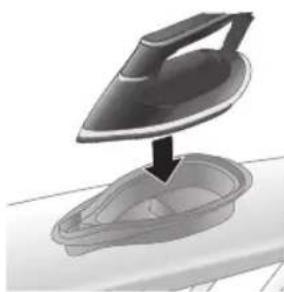
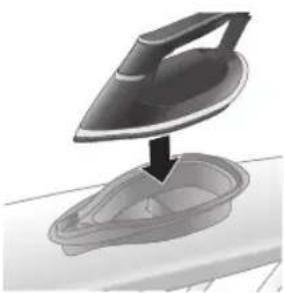
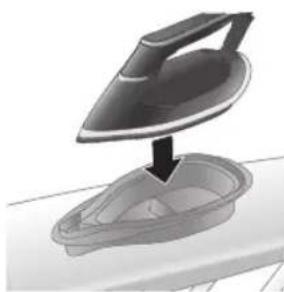
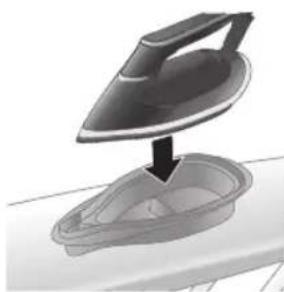
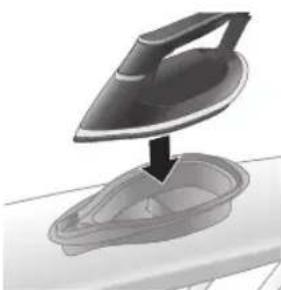
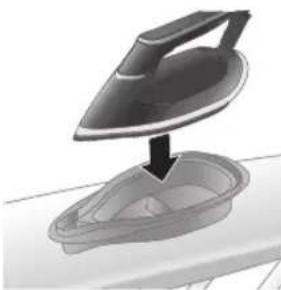
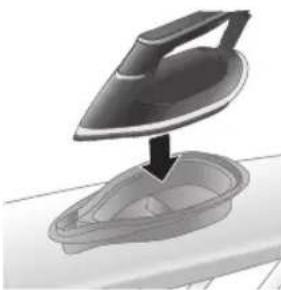
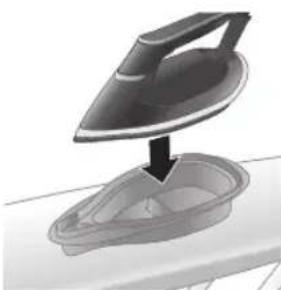
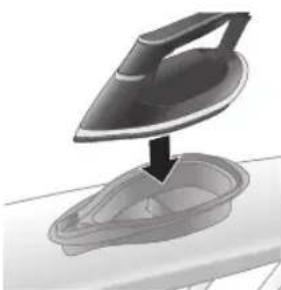
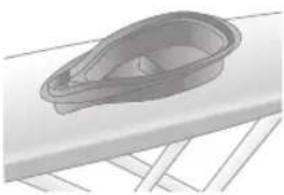
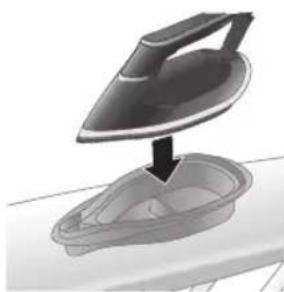
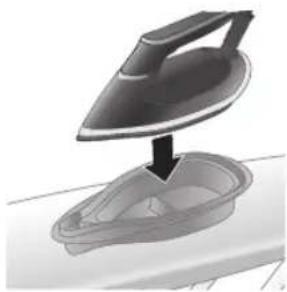
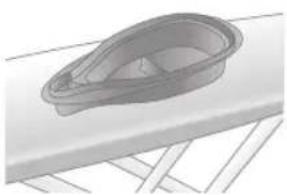
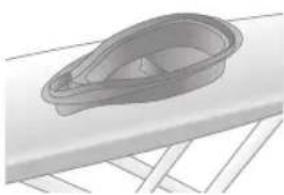
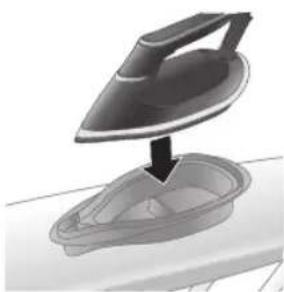
6 Place the Calc-Clean container on the ironing board or any other even, stable surface.
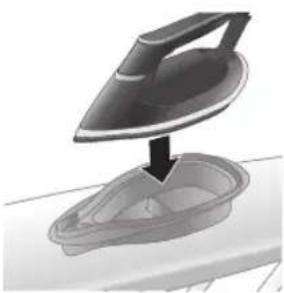
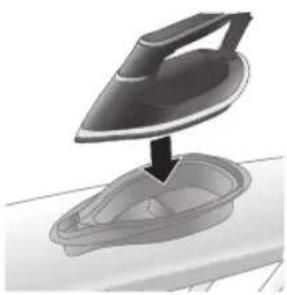
7 Place the iron stably on the Calc-Clean container.
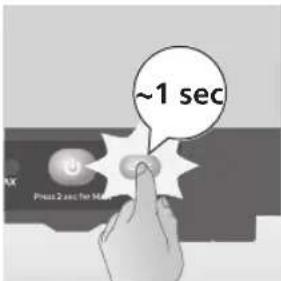
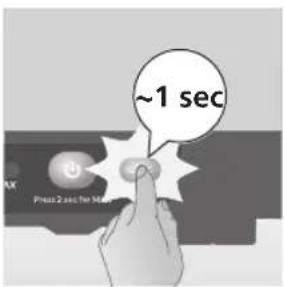
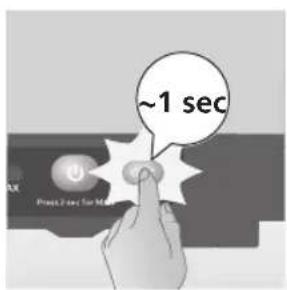
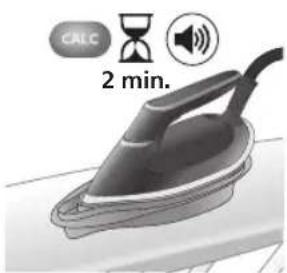
8 Press and hold the CALC-CLEAN button for 1 second until you hear short beeps.
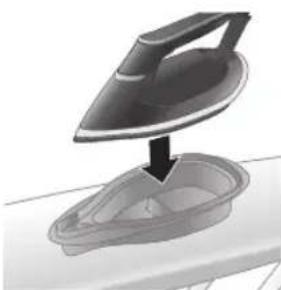
Note: The Calc-Clean container has been designed to collect scale particles and hot water during the Calc-Clean process. It is perfectly safe to rest the iron on this container during the entire process.
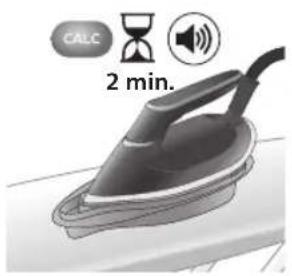
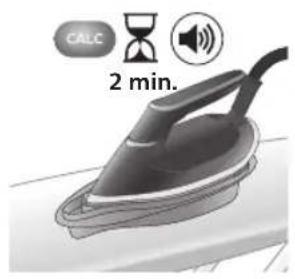
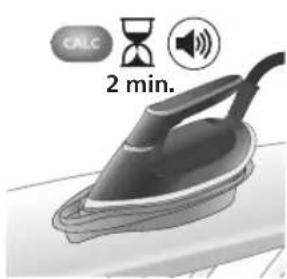
9 During the Calc-Clean process, you hear short beeps and a pumping sound. Wait approximately 2 minutes for the appliance to complete the process.
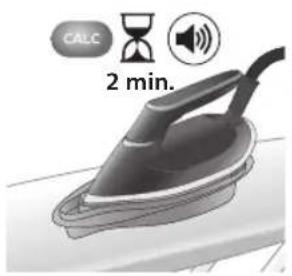
10 When the Calc-Clean process is completed, the iron stops beeping and the CALC-CLEAN light stops flashing.
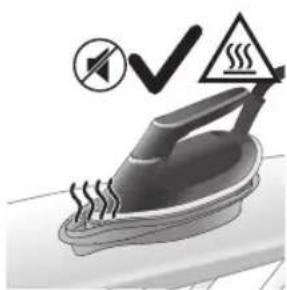
Caution: The iron is hot.
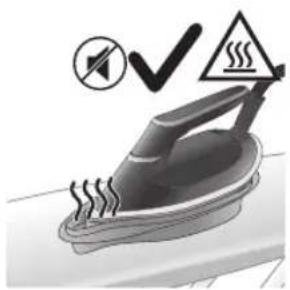
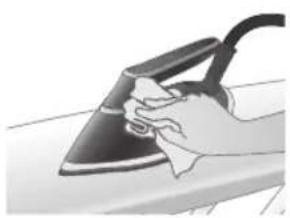
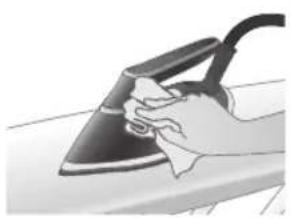
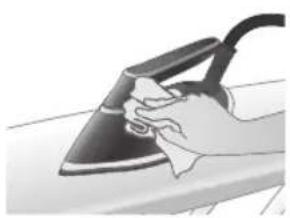
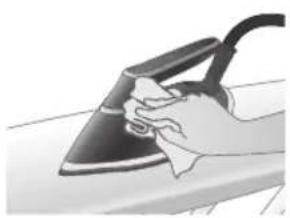
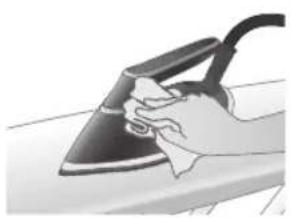
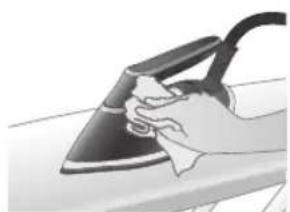
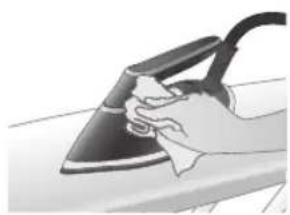
11 Wipe the iron with a piece of cloth and put it back on the base station.
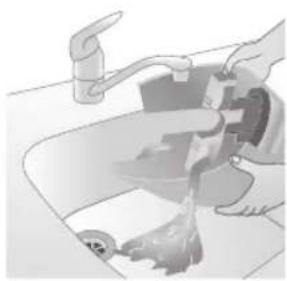
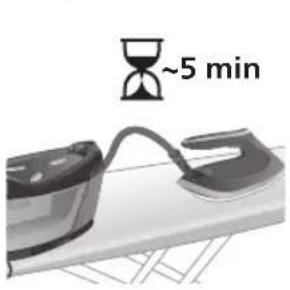
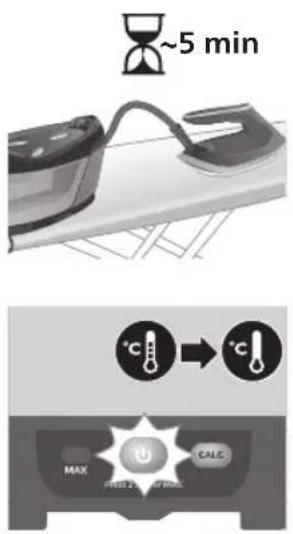
12 As the Calc-Clean container becomes hot during the Calc-Clean process, wait about 5 minutes before you touch it. Then carry the Calc-Clean container to the sink, empty it and store it for future use.
Note: During the Calc-Clean process, clean water may come out of the soleplate if no scale has accumulated inside the iron. This is normal.
Cleaning the soleplate
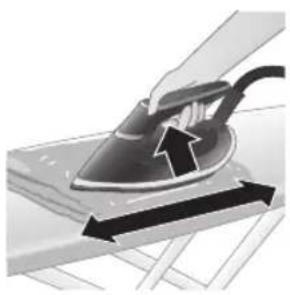
To properly maintain your appliance, clean it regularly.
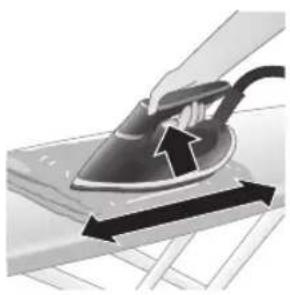
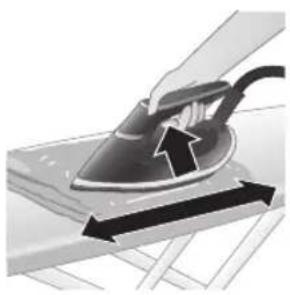
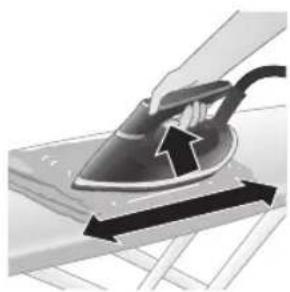
1 Clean the appliance with a moist cloth. To easily and effectively remove stains, let the soleplate heat up and move the iron over a moist cloth.
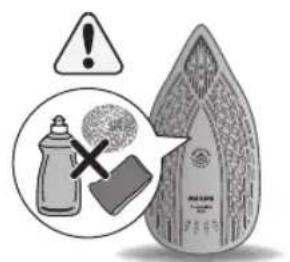
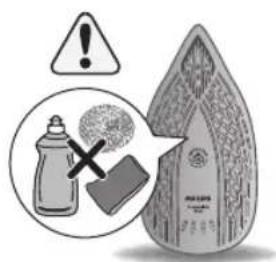
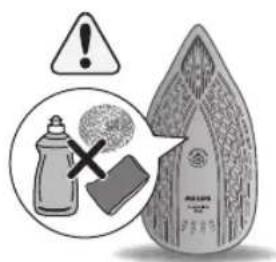
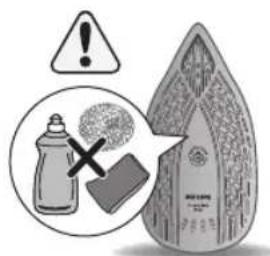
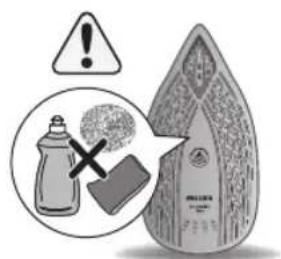
Note: Do not use soap or scrub the soleplate during cleaning.
Storage
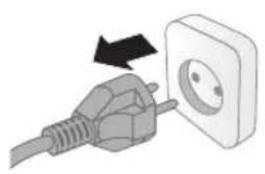
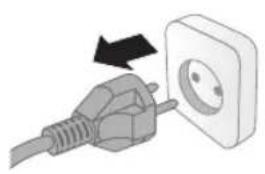
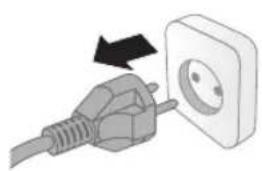
1 Switch off the appliance and unplug it.
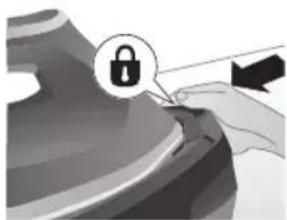
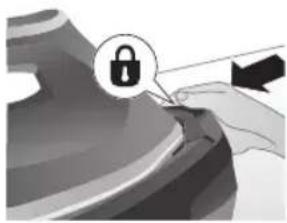
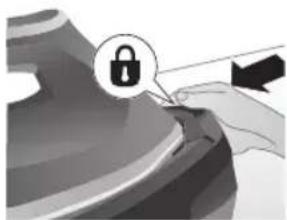
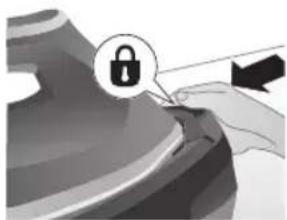
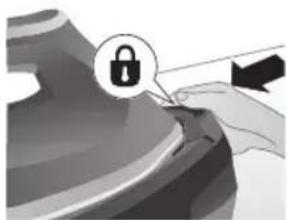
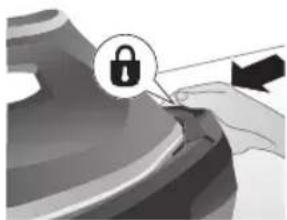
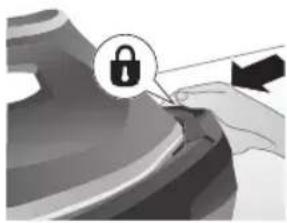
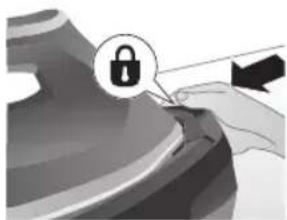
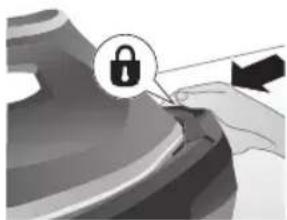
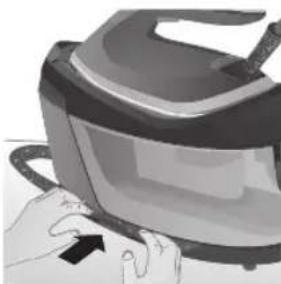
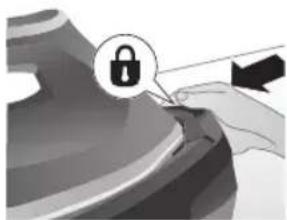
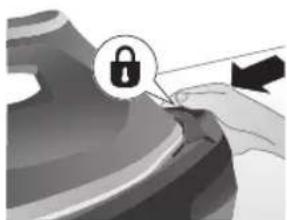
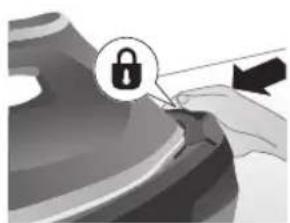
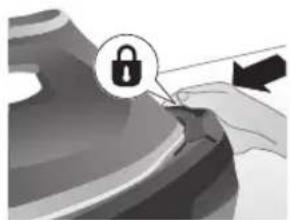
2 Place the iron on the iron platform and lock it by pushing the carry lock release button.
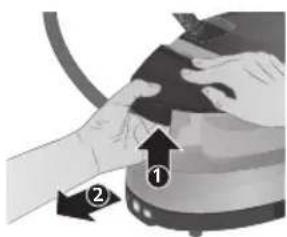
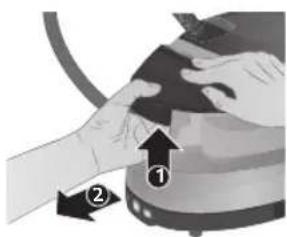
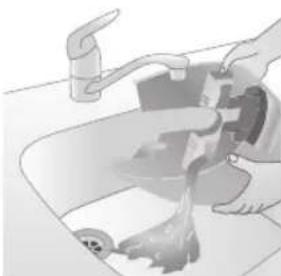
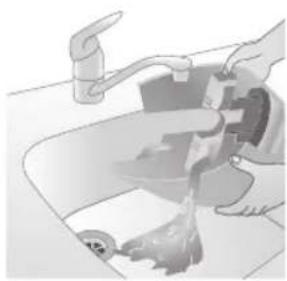
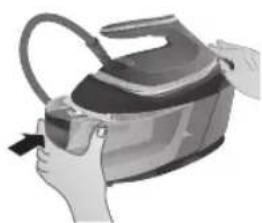
3 Press the lever in the water tank handle and remove the water tank from the base.
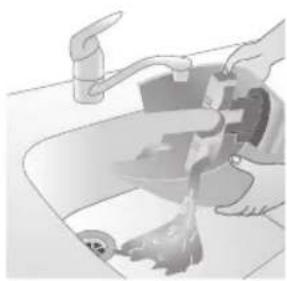
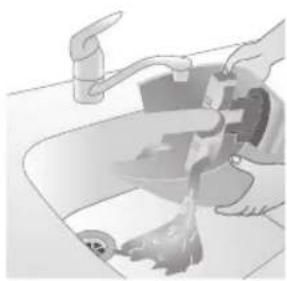
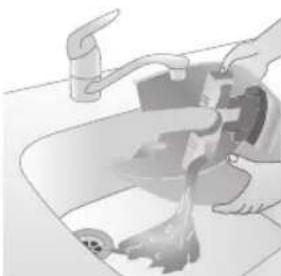
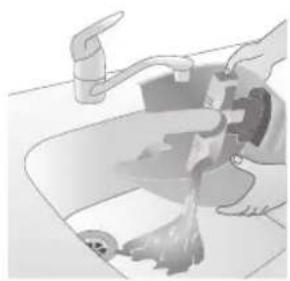
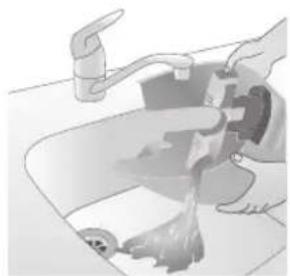
4 Pour the water out of the water tank into the sink.
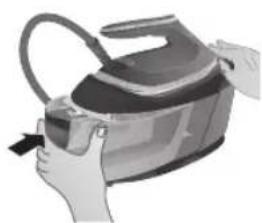
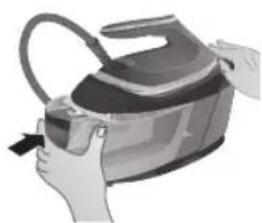
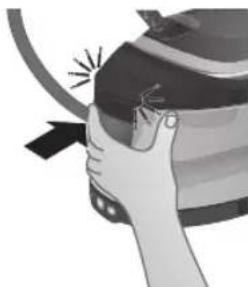
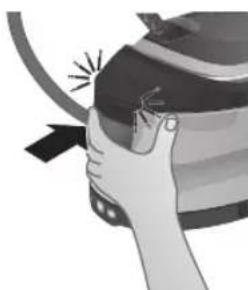
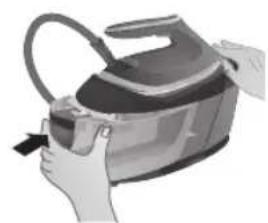
5 Push the water tank back into the appliance until it locks in place ('click').
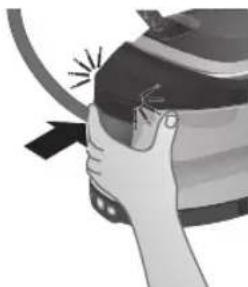
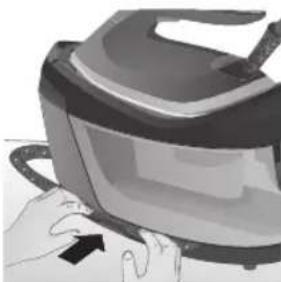
6 Fold the supply hose and wind the supply hose inside the supply hose storage compartment.
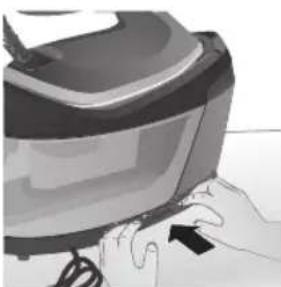
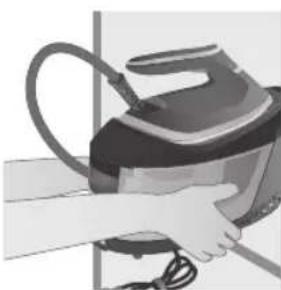
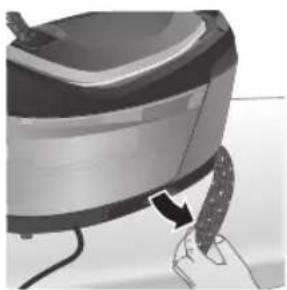
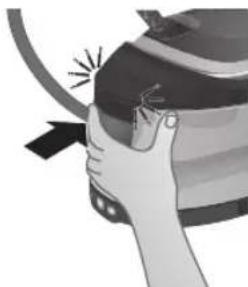
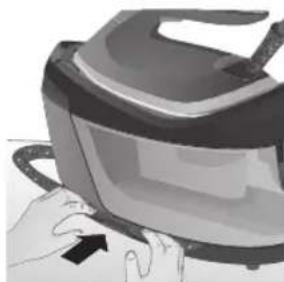
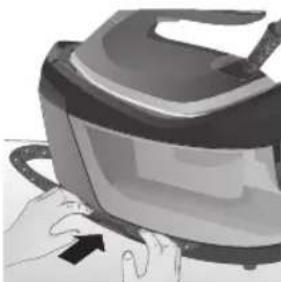
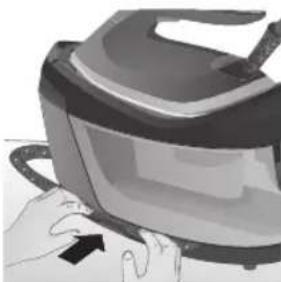
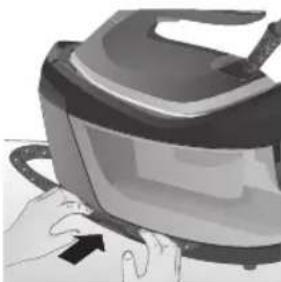
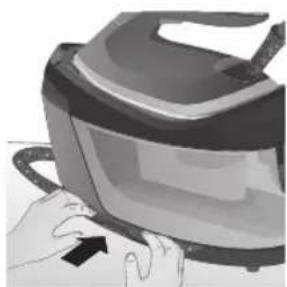
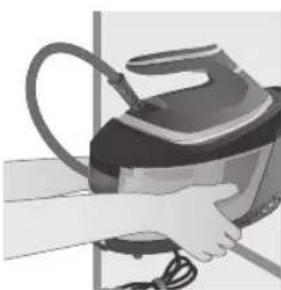
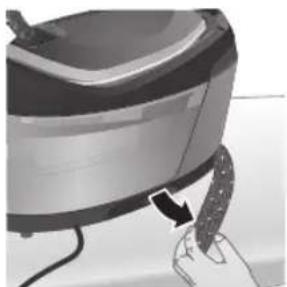
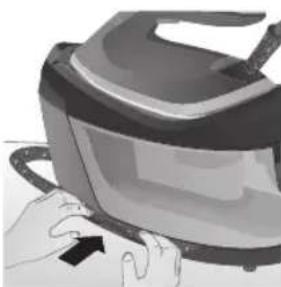
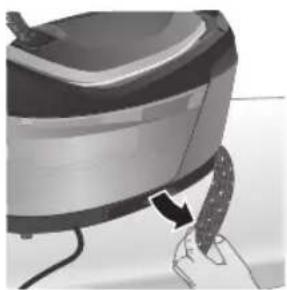
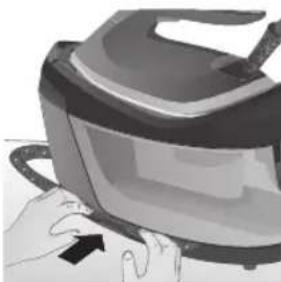
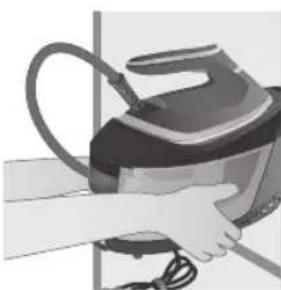
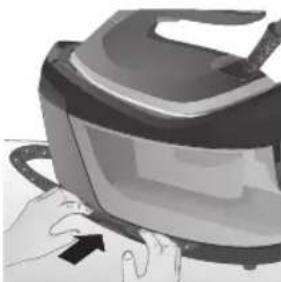
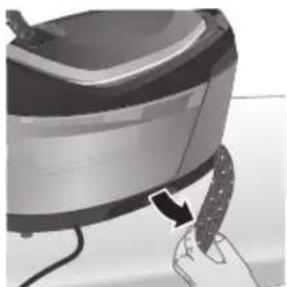
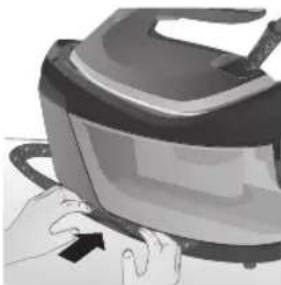
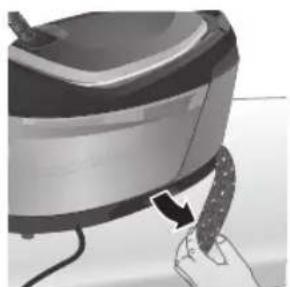
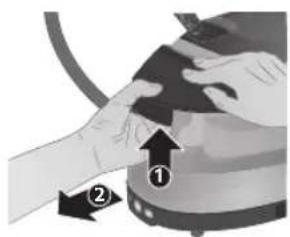
7 Fold the mains cord and fasten it with the Velcro strip. Then carry the base of the appliance with two hands.
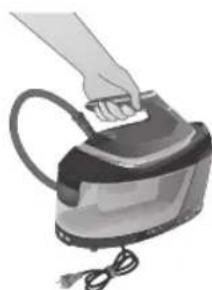
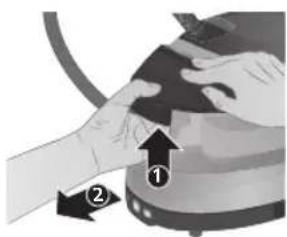
8 You can carry the appliance with one hand by the handle of the iron when the iron is locked on the iron platform or carry the base of the appliance with two hands.
1 Water supply hose 2 Water tank 3 MAX setting indicator light 4 Power button with light 5 CALC button with light 6 Mains cord with plug 7 Smart Calc-Clean container 8 Water supply hose storage compartment 9 Iron rest 10 Portable mode lock release button 11 Iron soleplate 12 Steam trigger 13 'Iron ready' light
1 Iron clothes while they are hanging.
3. Reinsert the water tank into the appliance until it locks (you will hear a 'click' sound).
5. Reinsert the water tank into the appliance until it locks into place (you will hear a 'click' sound).
6 Place the Calc-Clean container on an ironing board or a flat, stable surface.
5. Reinsert the water tank into the appliance until it locks (you will hear a 'click' sound).
Indonesian
Introduction
4 Fabrics with this symbol can be ironed, such as linen, cotton, polyester, silk, wool, viscose, and rayon.
6 Place the descaling container on an ironing board or another stable, flat surface.
8 Press and hold the CALC-CLEAN button for 1 second until you hear a short beep.
Introduction
Using the appliance
OptimalTEMP technology
4 Wait until the "iron ready" light indicator stays on continuously.
3 To deactivate the MAX setting, press the on/off button again for 2 seconds until the MAX indicator turns off.
Steam shot
2 Place the iron in the holder and lock it by pressing the transport lock release button.
Danish
6 Fold the steam hose and roll it up inside the steam hose storage compartment.
Introduction
Using your appliance
OptimalTEMP technology
Introduction
100 Eesti
Using the appliance
11 Dry the iron with a cloth and place it back on the base.
4 Pour the water from the water tank into the sink.

Using the appliance
2 The appliance emits a powerful jet of steam for 3 seconds.
1 Water supply hose 2 Water tank 3 MAX level indicator 4 On/off switch with indicator light 5 CALC button with indicator light 6 Power cord with plug 7 Advanced Calc-Clean tank 8 Storage compartment for water supply hose 9 Iron rest 10 Release button for safety lock 11 Soleplate 12 Steam trigger 13 Ready-to-iron indicator
Preparing for use
Warnings
2 Hot steam comes out of the iron. Never attempt to remove creases from a garment while it is being worn.
3 Do not support the garment with your bare hand when applying steam.
4 Fabrics with these symbols can be ironed, e.g. linen, cotton, polyester, silk, wool, viscose and artificial silk.
5 Fabrics with this symbol cannot be ironed. These include synthetic fabrics such as spandex or elastane, fabrics containing spandex, and polyolefins (e.g., polypropylene), as well as printed images on garments.
1 Press the handle on the water tank and detach the water tank from the base station.
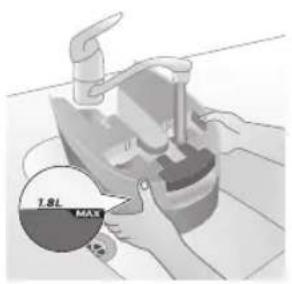
2 Fill the water tank up to the MAX mark.
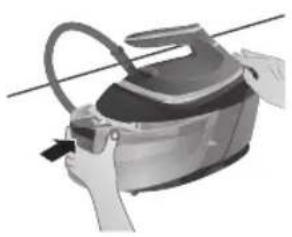
Using the appliance
OptimalTEMP technology
2 Then press the steam trigger to get maximum steam.
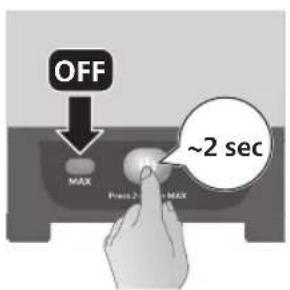
3 To deactivate the MAX setting, press the on/off button again and hold it for 2 seconds until the MAX indicator turns off.
2 The appliance emits powerful steam jets for 3 seconds.
2 In addition, a second system is integrated to protect the appliance from limescale buildup: the steam function will be disabled if descaling is not performed. After descaling is performed, the steam function will be restored. This happens regardless of the type of water used.
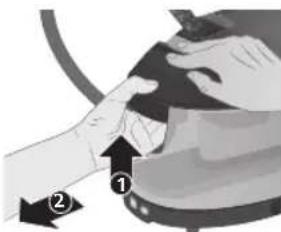
3 Press the handle on the water tank and detach the water tank from the base station.
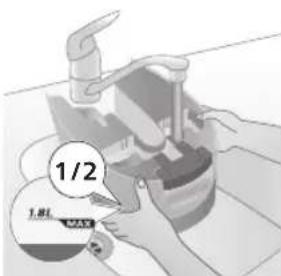
4 Fill the water tank halfway.

6 Place the Calc-Clean container on an ironing board or any flat, stable surface.
7 Place the iron securely on the Calc-Clean container.
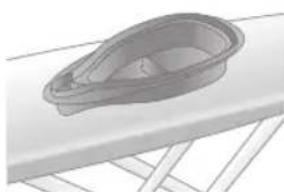
8 Press and hold the CALC-CLEAN button for 1 second until you hear short beeps.
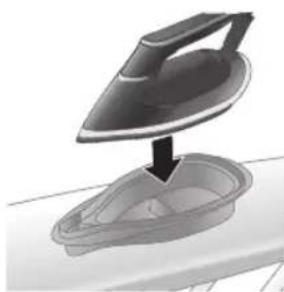
11 Wipe the iron with a cloth and return it to the base station.
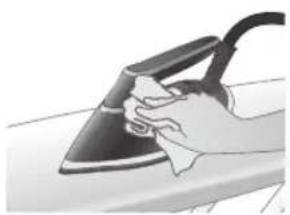
12 Since the Calc-Clean tank becomes hot during the Calc-Clean process, do not touch it for approximately 5 minutes. Take the Calc-Clean tank to the sink, empty it, and store it for future use.
Note: During the Calc-Clean process, clean water may come out of the soleplate if no scale has built up inside the iron. This is normal.
2 Place the iron on the base and fix it by pressing the release button for safe transport.
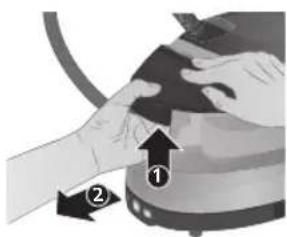
3 Press the lever on the handle of the water tank and detach the water tank from the base station.
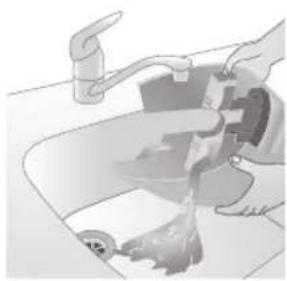
4 Pour the water out of the water tank into the sink.
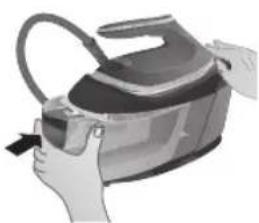
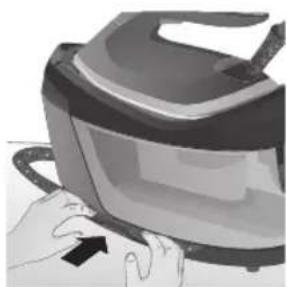
6 Bend the supply hose and wind it up in its storage compartment.
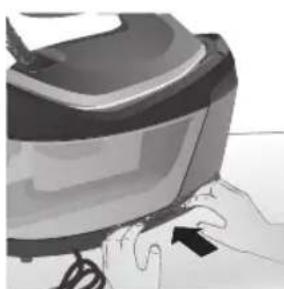
7 Fold the power cord and fasten it with the Velcro strap. Then carry the base station of the appliance with both hands.
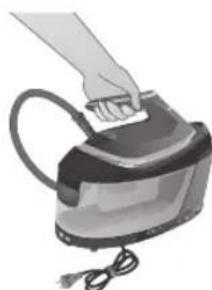
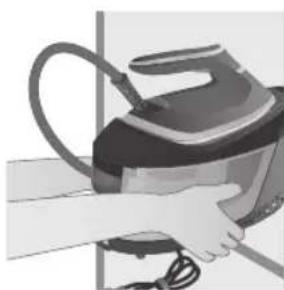
8 You can carry the appliance in one hand by holding the iron handle while it is fixed on the base, or carry the base of the appliance with both hands.
Introduction
152 Italian
1 Press the lever on the handle of the water tank and remove the water tank from the base.
Using the appliance
OptimalTEMP technology
3 Press the lever on the handle of the water tank and remove the water tank from the base.
8 Keep the CALC-CLEAN button pressed for 1 second until short beeps are heard.
3 Press the lever on the water tank handle and remove the water tank from the base.
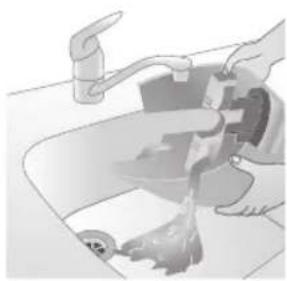
4 Pour the water out of the water tank into the sink.
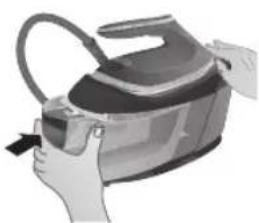
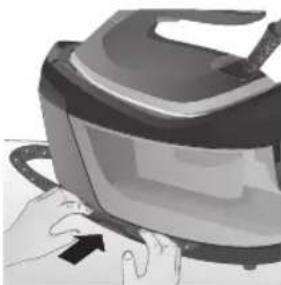
6 Fold the supply hose and coil it inside the supply hose storage compartment.
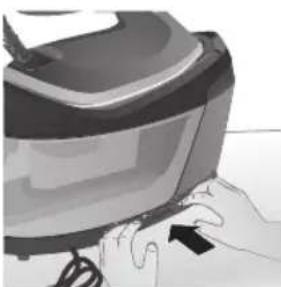
1 Iron garments on hangers lengthwise.
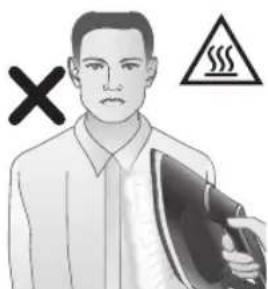
3 While ironing, do not hold with bare hands.
Introduction
1 Steam iron the garment while it is hanging on a clothes hanger.
Using the appliance
OptimalTEMP technology
2 The appliance emits a powerful steam burst for three seconds.
8 Press and hold the CALC-CLEAN button for one second until you hear short beeps.
9 You will hear short beeps and a pumping sound while the Calc-Clean process is running. It takes about two minutes for the appliance to complete the process.
4 Pour the water from the water tank into the sink.
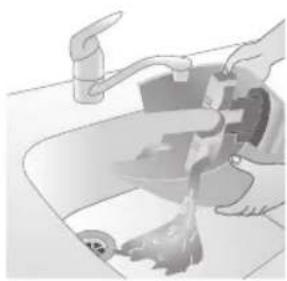
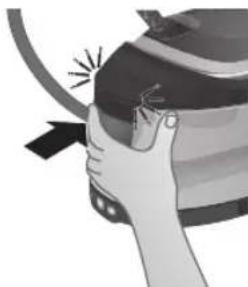
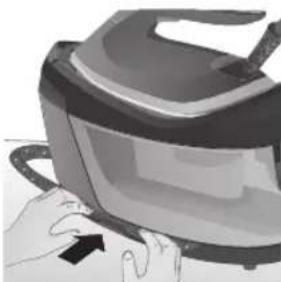
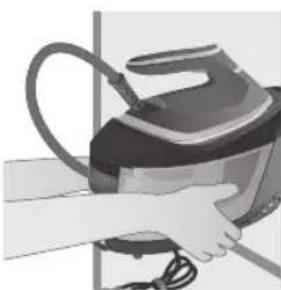
8 You can carry the appliance with one hand using the handle on the iron when it is locked onto the ironing platform, or carry the appliance's base with both hands.
Congratulations on your purchase and welcome to Philips! To take advantage of the support that Philips offers, register your product at
1 Water supply hose 2 Water tank 3 MAX setting indicator light 4 On/off switch with light 5 CALC button with light 6 Mains cord with plug 7 Smart cleaning container for scale 8 Storage compartment for water supply hose 9 Ironing platform 10 Anti-scale unlocking button 11 Base plate 12 Steam trigger 13 "Iron ready" light
1 Steam clothes while they are hanging on a hanger.
2 The iron releases hot steam. Never attempt to iron out wrinkles in clothes while someone is wearing them.
4 Fabrics with this symbol can be ironed, such as linen, cotton, polyester, silk, wool, viscose, and rayon.
5 Fabrics with this symbol cannot be ironed. These include fabrics such as spandex or elastane, fabrics blended with spandex, and polyolefin (e.g., olefin), as well as prints on clothing.
6 If the appliance is left unattended for a while, unplug it from the power outlet.
Type of water to use
You can use tap water in the appliance. However, if you live in an area with hard water, we recommend mixing it with an equal amount of distilled or demineralized water. This prevents rapid scale buildup and extends the appliance's service life.
Do not add perfumed water, dryer water, vinegar, starch, descaling agents, ironing aids, chemically descaled water, or other chemicals, as they may cause leaking, brown stains, or damage to your appliance.
Filling the water tank
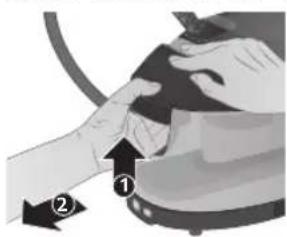
1 Press the release button on the water tank handle and detach the water tank from the base.
232 Uzbek
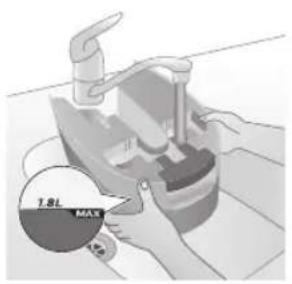
2 Fill the water tank up to the MAX mark.
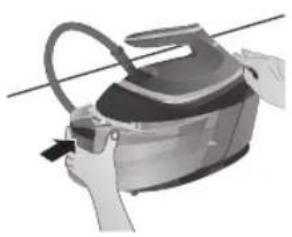
Using the appliance
OptimalTEMP technology
During ironing, place the iron on the iron platform or on the ironing board in a horizontal position. Thanks to OptimalTEMP technology, the soleplate will not damage the ironing board cover.
OptimalTEMP technology allows you to iron all types of ironable fabrics in any order without adjusting the iron temperature. You can iron fabrics with this label, such as linen, cotton, polyester, silk, wool, viscose, and rayon.
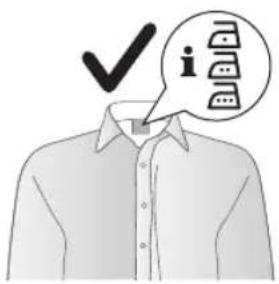
Fabrics with this label cannot be ironed. These include fabrics such as spandex or elastane, fabrics blended with spandex, and fabrics like polyolefin (e.g., polyolefin), as well as prints on clothing.
Ironing
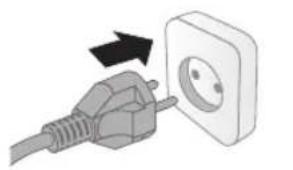
1 Reconnect the mains plug to a grounded wall socket.
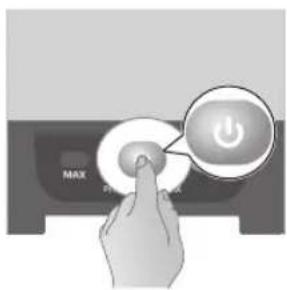
2 Press the on/off button to switch on the appliance.

4 Wait until the 'iron ready light' stays on continuously.
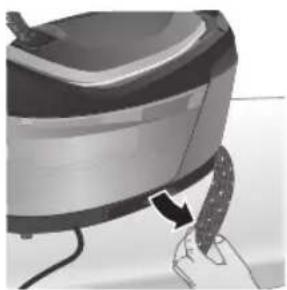
5 Remove the water supply hose from the storage compartment.
234 Uzbek
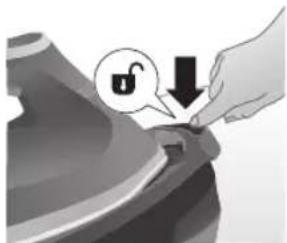
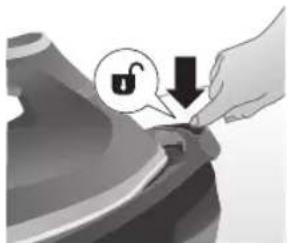
6 Press the anti-drip lock release button to remove the iron from the iron platform.
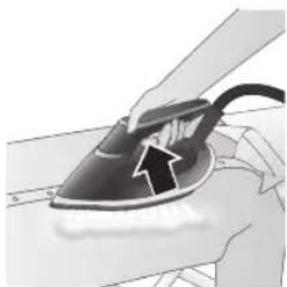
7 Press and hold the steam trigger to start ironing.
Note: To prevent water leakage, steam in a horizontal position for 30 seconds before ironing.
Note: Water may spray from the iron at the beginning of each seam. To prevent water stains on clothing, press and hold the steam trigger for 10 seconds before ironing.
Note: When you start an ironing session, and especially when using the steam trigger for the first time, it may take more than 30 seconds for steam to be emitted from the appliance.
Note: Each time you press the steam trigger, the pump activates. It makes a low-level noise. When there is no water left in the water tank, the pump sound becomes louder.
Warning: Never point the steam at people.
Vertical ironing
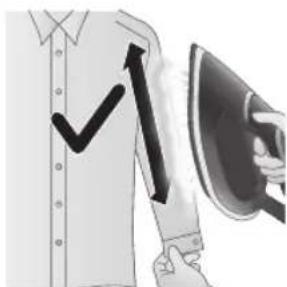
You can use the steam iron in a vertical position to smooth out wrinkles in hanging fabrics.
1 Hold the iron in a vertical position, press the steam trigger, and lightly touch the soleplate to the garment while moving the iron up and down.
MAX setting
For faster ironing and a higher amount of steam, you can use the MAX setting.
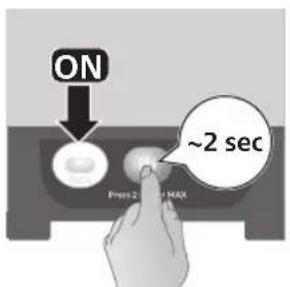
1 Press and hold the on/off button for 2 seconds until the MAX indicator light turns on.
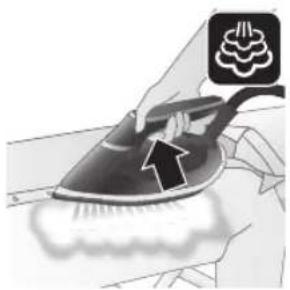
2 Then press the steam trigger for MAX steam.
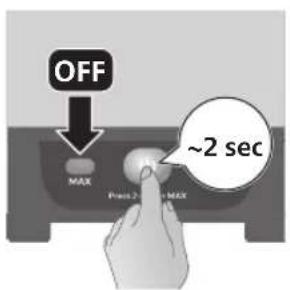
3 To turn off the MAX setting, press and hold the on/off button again for 2 seconds until the MAX indicator light turns off.
Steam shot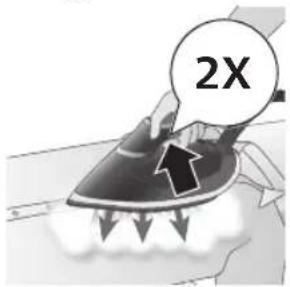
1 Press the steam trigger twice quickly.
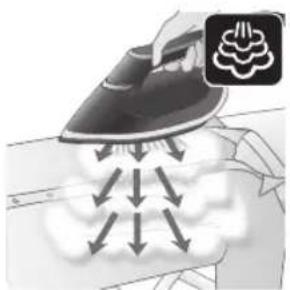
2 The appliance emits a strong steam burst for 3 seconds.
236 Uzbek
Automatic shut-off
1 If the appliance is not used for more than 15 minutes, the "iron ready" light starts blinking and the iron begins to cool down.
2 If the appliance is not touched for 10 minutes, it automatically turns off.
1 After using the appliance for 1 to 3 months, the descaling light starts blinking and the appliance beeps to indicate that you need to perform the descaling process.
3 Press the release button on the water tank handle and detach the water tank from the base.
4 Fill the water tank halfway.
6 Place the descaling container on the ironing board or any other flat, stable surface.
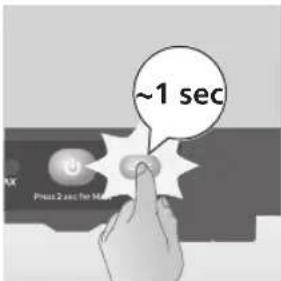
8 Press and hold the CALC-CLEAN button for 1 second until you hear short signals.
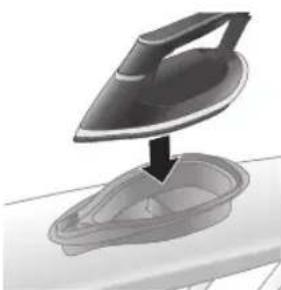
Note: The descaling container is designed to collect scale particles and hot water during the descaling process. It is completely safe to place the iron on this container throughout the entire process.
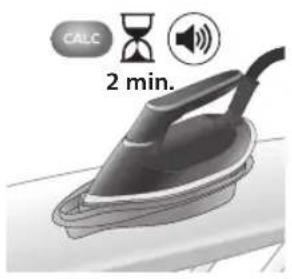
9 During the descaling process, you will hear short signals and the sound of the pump. Wait approximately 2 minutes for the appliance to complete the process.
10 When the descaling process is finished, the iron stops beeping and the CALC-CLEAN light stops blinking.
Caution: The iron is hot.
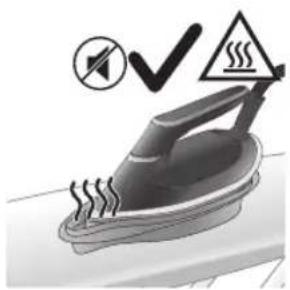
11 Wipe the iron with a piece of cloth and place it on the base platform.
During the descaling process, the descaling container will be hot, so wait about 5 minutes before touching it. Then, take the descaling container to the sink, empty it, and store it for future use.
Note: If no scale has accumulated inside the iron during the descaling process, clean water may come out of the soleplate. This is normal.
Cleaning the soleplate
To properly maintain your appliance, clean it regularly.
1 Clean the appliance with a damp cloth. To remove stains easily and effectively, heat the soleplate and glide the iron over a damp cloth.
Note: Do not use soap or scrub the soleplate during cleaning.
Storage
1 Turn off the appliance and unplug it.
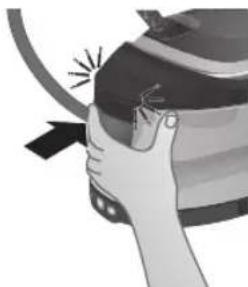
2 Place the iron on the iron platform and lock it by pressing the anti-lift lock.
3 Press the lever on the water tank handle and detach the water tank from the base.
4 Empty the water from the water tank into the sink through the filling hole.
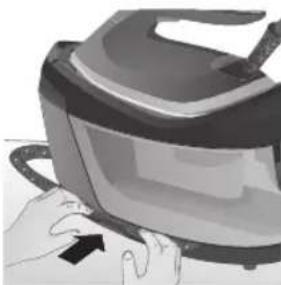

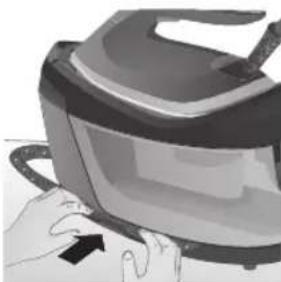
5 Pull the water tank out of the holder.
Introduction
4 Fabrics with this symbol are suitable for ironing, for example linen, cotton, polyester, silk, wool, viscose and artificial silk.
3 Push the water tank back into the appliance until it clicks into place ("click").
Using the appliance
OptimalTEMP technology
1 Press and hold the on/off button for 2 seconds until the MAX indicator light turns on.
5 Push the water tank back into the appliance until it clicks into place ("click").
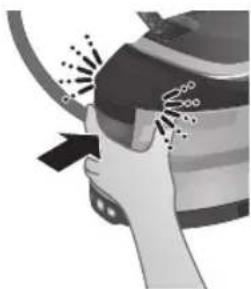
8 Hold the CALC-CLEAN button for 1 second until you hear short beeps.
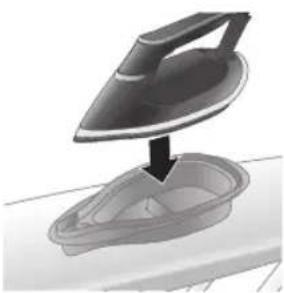
11 Wipe the iron with a cloth and place it back on the base unit.
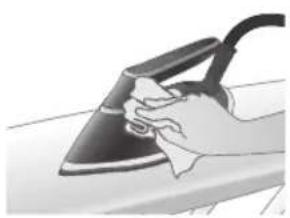
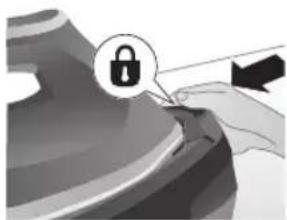
4 Drain the water from the tank into a sink.
5 Push the water tank back into the appliance until it clicks into place ("click").

6 Fold the supply hose and wind it in the storage compartment for the supply hose.
7 Fold the power cord and secure it with the Velcro strap. Then carry the appliance by holding the base with both hands.
3 When steaming, do not hold the garment with your bare hand.
322 Slovak
3 Push the water tank back into the appliance until it clicks into place (you will hear a click).
5 Push the water tank back into the appliance until it clicks into place (you will hear a click).
11 Wipe the iron with a piece of cloth and place it back on the base.
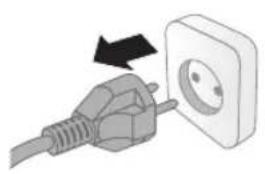
1 Switch off the appliance and unplug it.
5 Push the water tank back into the appliance until it clicks into place (you will hear a click).
332 Slovak
Introduction
Congratulations on your purchase and welcome to Philips! To get the most out of the support that Philips offers, register your product at
www.philips.com/welcome. Read this user manual, the important information brochure, and the quick start guide carefully before using the appliance. Keep them for future reference.
Product overview
334 Serbian
1 Water supply hose 2 Water tank 3 MAX setting light indicator 4 On/off button with indicator 5 CALC button with indicator 6 Power cord with plug 7 Container for the intelligent descaling system 8 Storage compartment for the water supply hose 9 Iron rest 10 Carry lock release button 11 Soleplate 12 Steam button 13 "Iron ready" indicator
Before use
Warnings
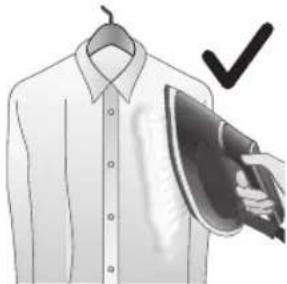
3 Do not use your bare hand as a support surface when applying steam.
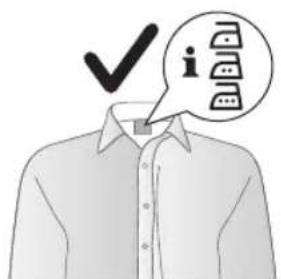
4 Fabrics with these symbols can be ironed, for example linen, cotton, polyester, silk, wool, viscose and artificial silk.
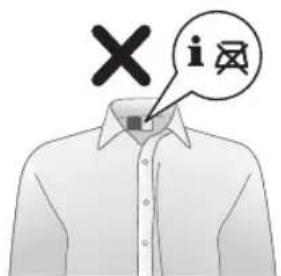
5 Fabrics with this symbol cannot be ironed. These fabrics include synthetic fabrics, such as spandex or elastane, fabrics containing spandex and polyolefin (e.g., polypropylene), as well as printed motifs on garments.
1 Press the handle on the water tank holder and remove the water tank from the base.
2 Fill the tank with water up to the MAX mark.
Using the appliance
OptimalTEMP technology
During ironing, you can place the iron on the base or horizontally on the ironing board. Thanks to OptimalTEMP technology, the soleplate will not damage the ironing board cover.
OptimalTEMP technology allows ironing all types of ironable fabrics in any order without adjusting the iron temperature.
Fabrics with these symbols can be ironed, for example linen, cotton, polyester, silk, wool, viscose and artificial silk.
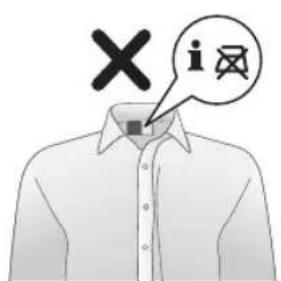
Fabrics with this symbol cannot be ironed. These fabrics include synthetic fabrics, such as spandex or elastane, fabrics containing spandex and polyolefin (e.g., polypropylene), as well as printed motifs on garments.
Ironing

1 Plug the plug into a grounded outlet.
6 Press the carry lock release button to release the iron from the base.
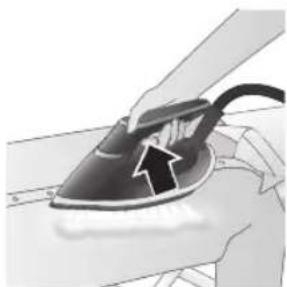
7 Press and hold the steam button to start ironing.
Note: Apply steam horizontally for 30 seconds before ironing to prevent water leakage.
1 Press the on/off button and hold it for 2 seconds until the MAX indicator lights up.
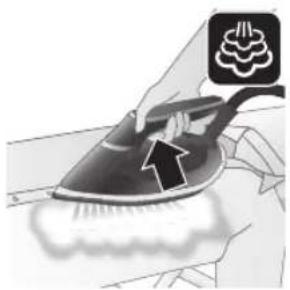
2 The appliance emits a powerful steam burst for 3 seconds.
2 In addition, a second step is built in to protect the appliance from scale: the steam function is disabled if descaling is not performed. The steam function becomes available again after you descale. This happens regardless of the type of water you use.
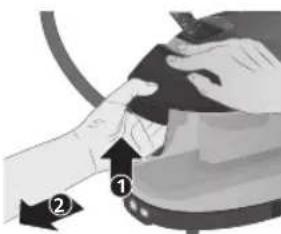
3 Press the lever on the water tank handle and remove the water tank from the base.
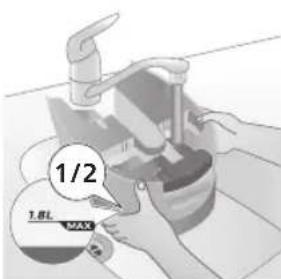
4 Fill the water tank halfway.

6 Place the descaling container on the ironing board or any other flat and stable surface.
7 Place the iron securely on the descaling container.
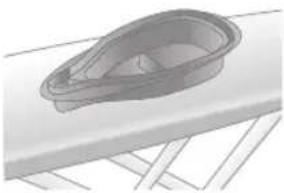
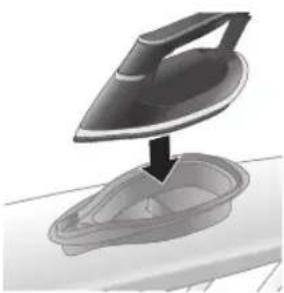
8 Press the CALC-CLEAN button and hold it for 1 second until you hear short beeps.
9 During the descaling process, short beeps and a pumping sound are heard. Wait about 2 minutes for the process to finish.
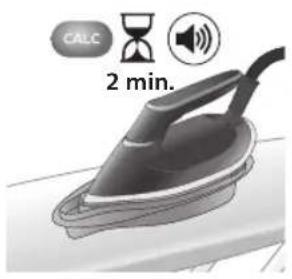
10 When the descaling process is finished, the iron stops beeping and the CALC-CLEAN indicator stops flashing.
11 Wipe the iron with a piece of cloth and return it to the base station.
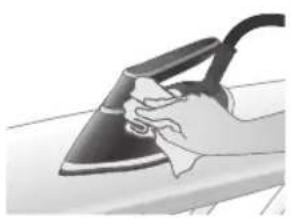
12 Since the descaling container becomes hot during the descaling process, wait approximately 5 minutes before touching it. Then take the descaling container to the sink, empty it, and store it for future use.
Note: During the descaling process, clean water may come out of the soleplate if no scale has accumulated inside the iron. This is normal.
Note: Do not use soap or scrub the soleplate during cleaning.
Disposal
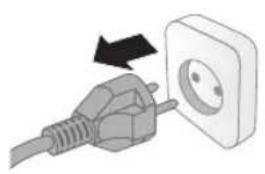
2 Place the iron on the base and secure it by pressing the release button for the carry lock.
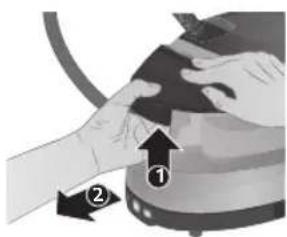
3 Press the handle on the water tank and remove the water tank from the base.
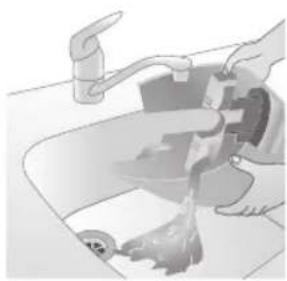
4 Pour the water from the water tank into the sink.
Introduction
Using the appliance
OptimalTEMP technology
Using the appliance
Introduction
Using the appliance
1 Water supply hose 2 Water tank 3 MAX setting indicator light 4 On/off button with light 5 CALC button with light 6 Power cord with plug 7 Smart Calc-Clean container 8 Water supply hose storage compartment 9 Iron platform 10 Carry lock release button 11 Iron soleplate 12 Steam release 13 Iron ready indicator light
Preparing for use
Warnings
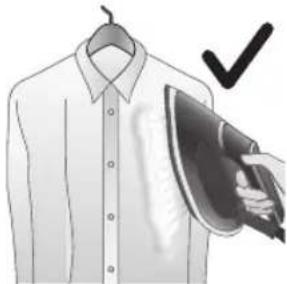
1 When the garment is hanging from the hanger, iron it with steam.

3 When using steam, do not touch the soleplate with your bare hands.
400 Turkmen
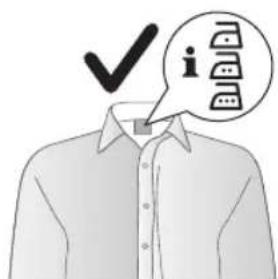
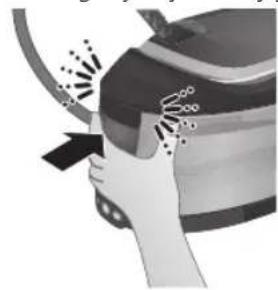
3 Push the water tank into the appliance until it clicks into place.
Using your appliance
6 To remove the iron from its platform, press the release button while lifting it.
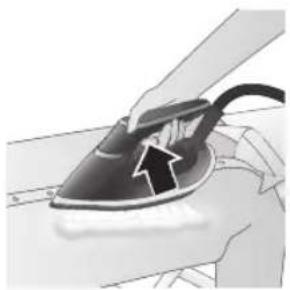
You can use the steam iron in a vertical position to remove wrinkles from hanging fabrics.
2 Then, press the steam trigger for MAX steam.
3 To turn off the MAX setting, press and hold the button again for 2 seconds until the MAX indicator light goes off.
Power steam
1 Press the steam trigger twice quickly.
2 The appliance emits powerful steam for 3 seconds.
Auto shut-off
1 If the appliance is not used for more than 15 minutes, the ready light starts blinking and the iron begins to cool down.
![graph LR A["Power Icon"] --> B["Hourglass"] B --> C["OFF Button"] style A fill:#f9f,stroke:#333 style C fill:#ccf,stroke:#333 note right of A: ~10 min](/content/2026/05/754547/images/d1f9776c6f9fd529d8dda8edc274db69e520e3ca880ff24aa4b706d31491a132.jpg)
If the appliance is not touched for 10 minutes after the last operation, it will turn off automatically.
Warning: Never leave the appliance unattended while it is connected to the power supply. Always unplug the appliance after use.
Cleaning and maintenance
Smart Calc-Clean system
In addition, there is a second protective step to protect the appliance from scale: if the descaling process is not performed, the steam function will not work. After the descaling process is performed, the steam function will start working again. This happens regardless of the type of water used.
5 Push the water tank into the appliance until it clicks into place.
7 Place the iron stably on the Calc-Clean container used for descaling.
8 Press and hold the CALC-CLEAN button for 1 second until you hear a short beep.
12 When the descaling process is performed, the container used for descaling becomes hot, so wait about 5 minutes before touching it. Then take the Calc-Clean container used for descaling to the sink, empty it, and keep it for future use.
To maintain your appliance properly, clean it regularly.
4 Pour the water from the water tank into the sink.
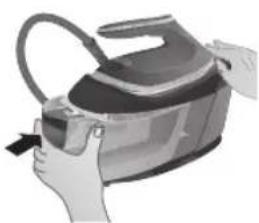
5 Push the water tank into the appliance until it clicks into place.
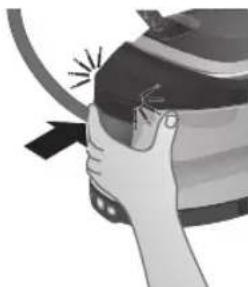
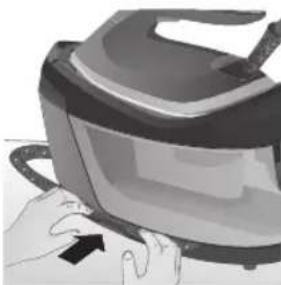
7 Fold the power cord and secure it with the Velcro strap. Then lift the base of the appliance with both hands.
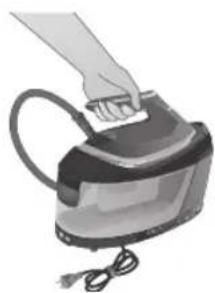
8 When the iron is secured on its platform, you can carry the appliance with one hand by holding the iron's handle, or lift the base of the appliance with both hands.
Introduction
Using the device

Introduction
Using the appliance
OptimalTEMP technology
Using the device
Introduction

Introduction
1 Press the release button on the water tank handle and remove the water tank from the base.
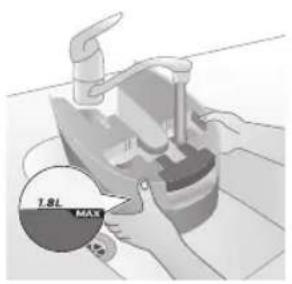
2 Fill the water tank up to the MAX indicator.
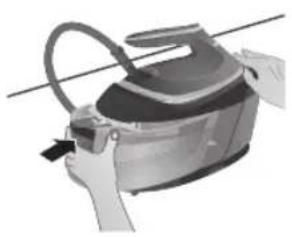
3 Push the water tank back into the appliance until it locks into place (you will hear a click).
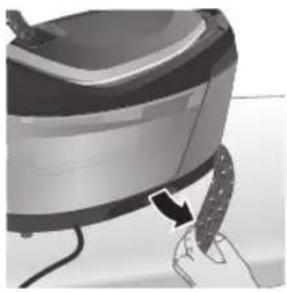
7 To start ironing, press and hold the steam trigger.
3 Press the release button on the water tank handle and remove the water tank from the base.
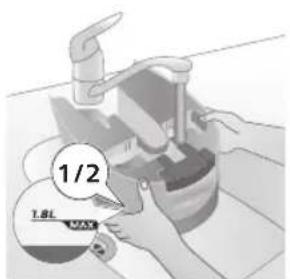
4 Fill the water tank halfway.
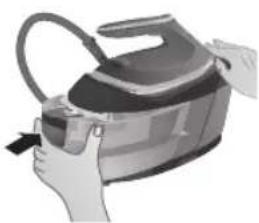
5 Push the water tank back into the appliance until it locks into place (you will hear a click).
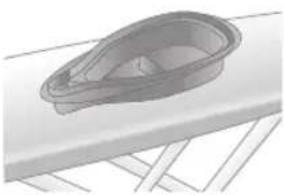
Place the Calc-Clean container on the ironing board or any other stable surface.
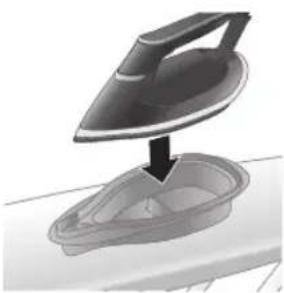
Place the iron firmly in the Calc-Clean container.
Press and hold the CALC-CLEAN button for 1 second until short beeps are heard.
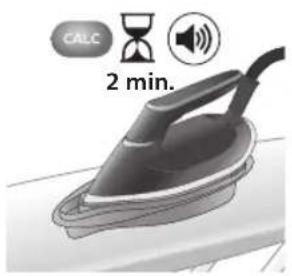
During the Calc-Clean process, you will hear short signals and the sound of the pump. Wait about 2 minutes for the appliance to finish the process.
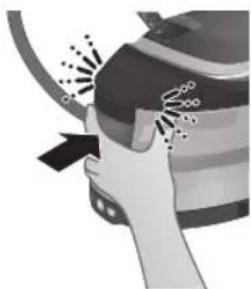
Clean the iron with a cloth and place it back on the base.
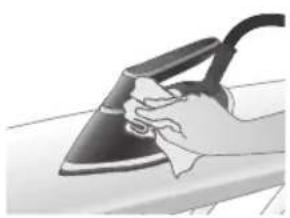
Note: Do not use soap during cleaning and do not scratch the soleplate.
Storage
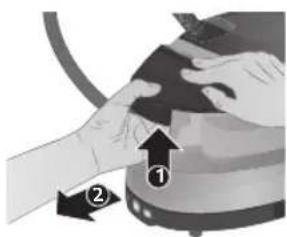
Place the iron on the ironing board and lock it by pressing the transport lock release button.
Press the release button on the water tank handle and remove the water tank from the base.
Slide the water tank back into the appliance until it locks into place (you will hear a click).

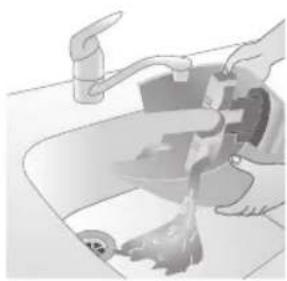
Empty the water from the water tank into the sink.
1. The device is intended for measuring and monitoring air parameters.
2. The device must be installed in a location that is easily accessible and protected from direct sunlight.
3. Do not use the device in environments with high humidity or in the presence of aggressive chemicals.
5.2.2 Operation
6. The device should be cleaned with a soft, dry cloth. Do not use solvents or abrasive cleaners.
The device must be stored in a dry place.
The device should be stored in its original packaging. If the device is not used for a long time, remove the batteries to prevent leakage. The manufacturer is not responsible for damage caused by improper use or storage.
The device is equipped with a digital display, which shows the measured values, such as temperature, humidity, and air pressure. The display is easy to read and provides accurate readings.
Battery replacement
1. Open the battery compartment on the back of the device.
2. Insert two new AAA batteries, observing the correct polarity.
3. Close the battery compartment cover until it clicks into place.
Device operation
The OptimalTEMP thermostat is designed to control the heating system in your home. The OptimalTEMP thermostat provides precise temperature control and energy efficiency. The OptimalTEMP thermostat is equipped with a user-friendly interface and advanced features for optimal comfort.
This device is intended for use in rooms up to 5 meters in height, including bathrooms, kitchens, bedrooms, living rooms, and other residential areas.
This device is not intended for use by children. The device may be used by children aged 8 and above, as well as by persons with reduced physical, sensory, or mental capabilities, or lack of experience and knowledge, if they have been given supervision or instruction concerning use of the appliance in a safe way and understand the hazards involved. Children shall not play with the device.
524 Ruijtntu
Unnlnyniup
1. Connect the device to the power supply using the provided cable.
2. Press and hold the power button for 3 seconds to turn on the device.
3. The display will show the current temperature. Use the up and down buttons to adjust the temperature to your desired setting.
4. Press the "Mode" button to switch between heating and cooling modes.
5. The device will automatically start operating according to the selected mode.
6. Use the timer function to set the device to turn on or off at specific times.
7. Press the fan speed button to adjust the fan speed to your preference.
Note: The device will automatically shut off after 30 minutes of continuous operation if no buttons are pressed.
Note: The device should be installed at least 10 cm away from walls and other objects to ensure proper air circulation. The device is designed for indoor use only.
U2niú. Unnniúwù uqqnú l huunlywwtu qninn2ni lynǎwlju wnwghù wùqwú oqunwqnnòtìhu uwnpn lywnn l ulutl qninn2h úwunwlywnwntí úhǔsì 30 uwjnljwiù niżwgniúnú:
L2niú. Πnúwù wúnhúwùniú t wúbù wùqwiú, tnp utnúniú tþ qninn2ni
ynǎwlyŋ: Πnúwḥ w₂huwunwùpǔ nǐngúglniú t pùnn2 àwjùnuː; tnp hughyḥ
gnínp utnówùniú t, ynúwḥ àwjùn ̓nwūniú t̓ wúbīh niðtín:
2qn12wgniu. 9n1nn2hù tnptp uh ninntp uwnnyuwug ynu:
Πιημωνων ωημηνων
Cnqtiwnnnlny lwwnn tip oqnwqqnnδtj ninnwhuwjwg nhnpnu' lwwuhzhg lwwuhw# hwqnwnh dwiptnü ninntini hwudwn:
1 Unnniuh ninnwhwjug nhpnyl wuhtp, utnútp qnnn2ni ynǎwyn l u wnnniuh unwuh hwnuwròn pāpəlwwyh nhwgntp hwqnwnhù, wuw wnnniuh utn ni ulwn unwntp:
MAX ntdhu
Uultih wnwq wnnnlytini u wultih ubd puuwlnyajwup qnnn2h wnawyltini hwuwn lwwnn tip oqnwqnnti MAX ntduhun:
Ruijtntu
1 Utnúbp l u wuhtp úhwguwù/wùgwunúwù lynǎwln 2 qwjnljwiù, úhùzì MAX iniuujhù gnighzn qwrzulh:
2 Ujunihtinlu, utnútap qninn2ni wpàwlyúwù lynǎwlyn' MAX ntdhúh qninn2nu wnnnilytini hwúwn:
3 MAX nbdhúu wujwwlyunhuŋwgútjni hwiúwn ñnphg utŋúbp u wjuhtp úhwguśwù/wǔgwünúwù lynǎwlyn 2 ülwjnlyjuwù, úhùzlu MAX gnighsù wǔgwünuh:
9n1nn2ni nidttnwgniu
1 tplyni wùqwiú wnpwq utnúbp qnlnn2ni úwwnwlywnwnúwú lynǎwlyn:
2 Uwnpn nidtn qnlnn2h 5 wnàwyniú 3 4wjnlyjwiùh núpəwgpniú:
Clean the unit, then rinse it thoroughly with clean water.
Note: Calc-Clean descaling is recommended every 5 uses.
1. Add 3 parts water to 1 part Calc-Clean solution, and let it sit for 5 minutes.
2. Then, pour the solution out and rinse the unit thoroughly with clean water. The solution is acidic, so do not leave it in the unit. Rinse with clean water to remove all traces of the solution. It is important to rinse well to avoid any residue.
3. Remove the water tank and empty it.
4. Empty the water tank completely.
5. Empty the water tank and rinse it with clean water, then dry it with a soft cloth.
6. Do not use any other cleaning agents or descaling products other than Calc-Clean.
7. Use only Calc-Clean for descaling.
8. Fill the water tank with 1 liter of Calc-Clean solution, then let it sit for 5 minutes.

Note: Calc-Clean descaling should be done every 5 uses to maintain performance and prevent limescale buildup. The descaling solution is acidic, so handle with care.
9. After descaling, rinse the water tank thoroughly with clean water and dry it. Repeat this process 2 times to ensure no residue remains.
Ruijtntu
11. Use a soft cloth to wipe the exterior and dry it with a clean cloth.
12 Push the Calc-Clean button and hold it for 5 seconds to activate the cleaning function. Then press the Calc-Clean button again and wait for the process to complete.
Note. Do not use the appliance without water, as this may damage the heating element. This is important.
Cleaning the heating element
After each use, empty the water tank and rinse it.
1 Empty the water tank completely. Use a soft cloth and mild detergent to wipe the inside, then rinse thoroughly and dry.
Note. Do not use abrasive cleaners or sharp objects to clean the tank.
1 Remove the water tank and empty it.
2 Fill the tank with water and add a little vinegar, then let it sit for a while.
3 Close the tank lid and shake it gently.
4 Pour out the vinegar solution and rinse the tank.
5 Repeat the process if necessary, then dry the tank with a soft cloth.
532 Result
8 The heating element should be cleaned regularly to prevent scale buildup, which can affect performance and lead to damage.
Basic Information
Using your machine
1 -by-mn b dmbqgdn b dngm 2 སྭྱུབྱི གྭྱུབྱི སྭྱུབྱི 3 MAX (∂υβυασμηφη) υπδυσμην 3μπδυφην ηβωηγμφη 4 RS#m#3s/zsd#m#m#n#y##m#zn zsb#ng#d#on 5 CALC ๓๐๓๘๖๙ ηδωηζυθμήση 6 7 Smart Calc-Clean-nu 3m6ФУн6УМн 8 6ymnu dnbmogdnl dncnnu dgbsbn z6bymgngdss 9 gmml d3gusqasdn 10 მელვირების ფიქსატორი 11 domo 12 m m ond m n n u z d m u s d z g o n y n m n z n 13 „γομμα υδυσμοχβιν” ηδρησφθη
zsdmlsygbdmsq dmddsggds
اللهاند
1 0656329000000000000000000000000000000000000000

sā lūnḍāmmmbl dājmbq jīmʒnæŋgànb φαγσιμgòs sāfīdsæŋɡmns. gā jīmʒnæŋgànd āmnǚzq bùnδοŋφηzgfi jīmʒnæŋgòb, fēnmgmñnqss lūsōgqglbn sō gēmsubhōbn, lūsōgqglbansb bsmgzn jīmʒnæŋgànd φω 3mæmnæŋgən6gàn (dōz., 3mæmnāfmānɡrbn), sūjg3g 3mibqgàn φυδυσθdʒm8g.
###
1 30000000000000000000000000000000000000000000000
###
30th of the government
yghm ubhsgn quyomgdnls qu mmonjmnly yghm qngon hsmqgbmdwnznl dgyndmnson zudmnygbm MAX 3smdgfm.
23 65015 2662537mm050n 3m6ym0n9mm05 26d9ngf0y0m m6m0j4m 26dmy03g0u.
పృరమందాధిని గురమణస
35076016000000: yom ybjnns.
12. Remove the water tank from the base and empty it. Clean the tank with Calc-Clean-nl solution, then rinse thoroughly with clean water. Do not use Calc-Clean-nl solution undiluted, as it may damage the tank.
1. Ensure the appliance is unplugged. Place the appliance on a stable surface and allow it to cool down completely.
4. Clean the soleplate with a soft cloth.
5. Use the measuring cup to fill the water tank with tap water (see "Water type").
1. Hang the garment on a hanger before ironing.
3. Do not use your hand as a support surface while ironing.
6. If the product is left unattended for a long time, unplug it.
Water type
Using your product
Smart temperature control technology
1. Plug the plug into a grounded power outlet.
2. Press the on/off button to start the product.
5. Remove the water supply hose from the storage compartment.
7. Press and hold the steam trigger to start ironing.
To maintain the product properly, clean it regularly.
1 Turn off the product and unplug it.
4 Pour the water from the water tank into the sink.

Introduction
1 Water hose
1 Steam ironing clothes hanging on a hanger.

Using your product
OptimalTEMP technology
1 Plug the power cord into a grounded outlet.
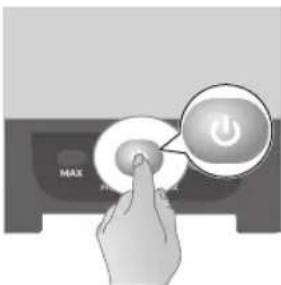
2 Press the power on/off button to turn on the product.
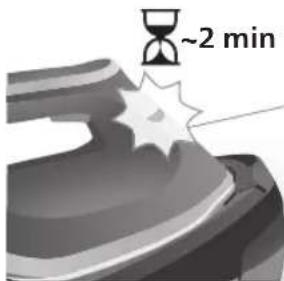
4 Wait until the 'iron ready' indicator light stays on.
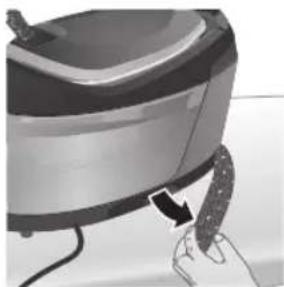
5 Remove the water hose from its storage compartment.
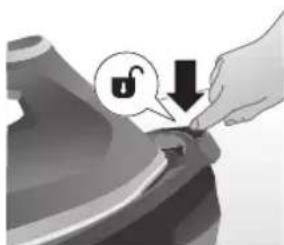
6 Press the safety lock release button to detach the iron from the base.
580 Traditional Chinese
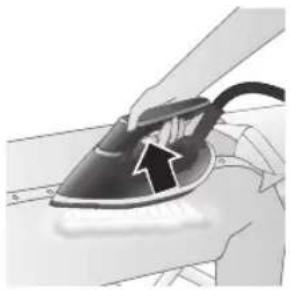
7 Press and hold the steam trigger to start ironing.
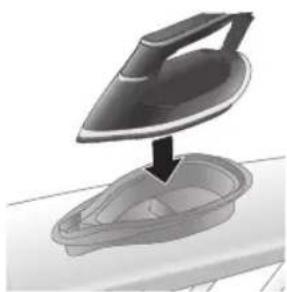
To properly maintain your product, clean it regularly.
Note: Do not use soap or scrub the base when cleaning.
Storage
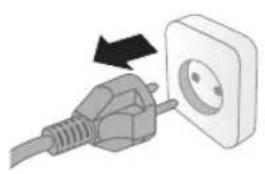
1 Turn off the product and unplug it.
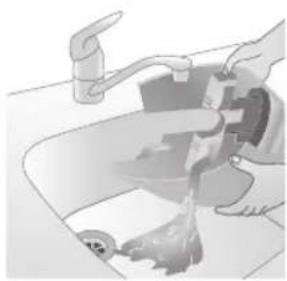
4 Pour the water from the tank into the sink.

Using the product
Automatic temperature setting technology
Introduction
It is hanging.
While wearing it.
Industrial maximum 5
Filling the water tank
Water from the base.
604 Arabic

Set the maximum.
3.(" tight" عوت
Using your device
OptimalTEMP technology
Turning on the device.
Remove from the platform.
Steam without the iron 7
Setting the maximum
Limit steam.2
Press the button for 3
For 3 seconds.2.
608 Arabic
![graph LR A["Power Input"] --> B["Hourglass"] B --> C["OFF"] style A fill:#99ccff,stroke:#333 style B fill:#ccc,stroke:#333 style C fill:#99ccff,stroke:#333 note right of A: ~10 min](/content/2026/05/754547/images/61120a918cc7c3d4265a4555f324771d7013eb77678550fd52e2c5d5a6c1b6e0.jpg)
Small and micro enterprises started issuing
By disabling 2
away from the base.3.
in the water tank 4.
5.("drop" sound
610
Arabic
. Level and stable.
Cleaning Thousands 7.
short beep.
until it completes 9
the device operation.

in the power source.
- under the locking latch
away from the base.3.
it in the sink.
5.("tight"
Arabic 613

Filling hose.6
Using your hands 7.
Or remove the base 8
the iron with your hands.
Introduction
Iron, polyester 4
cotton, viscose and rayon.
for example, 5
Filling the water tank
separate from the base.1
Using the appliance
OptimalTEMP technology
light turns on. 2.
MAX setting
Remove from the base. 3.
Fill halfway. 4.
Let it lock. 5.
Place elsewhere. 6.
Place elsewhere. 7.
Hear a short beep. 8.
Wait for the beep.
- Place the original.
Touch it for a minute. 12.
Cleaning the soleplate.
Flag the 10.
Remove from the base. 3.
Empty it. 4.
Do not let it lock. 5.

twist it into steam. 6.
carry it. 7.
PHILIPS and the Philips Shield Emblem are registered trademarks of Koninklijke Philips N.V. and are used under license.
This product has been manufactured by and is sold under the responsibility of Versuni Holding B.V., and Versuni Holding B.V. is the warrantor in relation to this product.
2024 © Versuni Holding B.V.
642001013747 (09/2024)