Profi Line 208953 - Coffee machine Hendi - Free user manual and instructions
Find the device manual for free Profi Line 208953 Hendi in PDF.

| Product type | Automatic coffee machine with grinder |
| Brand | Hendi |
| Model | Profi Line 208953 |
| Dimensions (W x D x H) | 302 x 450 x 590 mm |
| Net weight | 13 kg |
| Power supply | 230 V ~ 50/60 Hz, 1400 W |
| Pump pressure | 19 bar |
| Water tank capacity | 1.8 L |
| Bean hopper capacity | 750 g |
| Coffee grounds container capacity | 50 cups |
| Ground coffee dosage | 7 - 14 g |
| Adjustable nozzle height | 80 - 140 mm |
| Power cord length | 1.5 m |
| Main functions | Espresso, lungo, cappuccino, latte, hot water, hot/frothed milk |
| Grind adjustment | Rotary knob with continuous adjustment while grinding |
| Touchscreen | Yes, with icons and rotary selector |
| Auto shut-off | Adjustable from 15 min to 24 h (default 30 min) |
| Energy saving function | Yes, ECO mode |
| Cleaning and maintenance | Rinse cycle, coffee machine cleaning, milk unit cleaning, descaling |
| Safety | Burn protection, child safety (from age 8), auto shut-off, detailed safety instructions |
| Recommended spare parts | Cleaning tablets (art. 231319), professional descaling agent (art. 975008), milk unit cleaner (art. 231296) |
| Repairability | User intervention prohibited, contact an authorized service center |
| Included accessories | Cappuccinatore, milk hose, hot water nozzle, drip tray, coffee grounds container |
| Water line compatibility | Possible via optional kit (direct connection with filter) |
| Warranty | Standard according to Hendi conditions (damage from ignoring warnings voids warranty) |
Frequently Asked Questions - Profi Line 208953 Hendi
User questions about Profi Line 208953 Hendi
0 question about this device. Answer the ones you know or ask your own.
Ask a new question about this device
Download the instructions for your Coffee machine in PDF format for free! Find your manual Profi Line 208953 - Hendi and take your electronic device back in hand. On this page are published all the documents necessary for the use of your device. Profi Line 208953 by Hendi.
USER MANUAL Profi Line 208953 Hendi
natural_image
Exterior view of a modern white industrial water filtration machine with digital display and control panel (no visible text or symbols)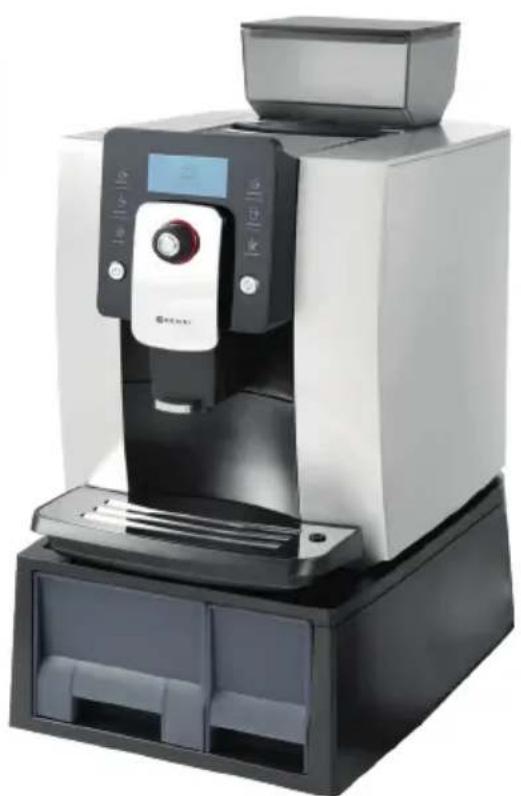
natural_image
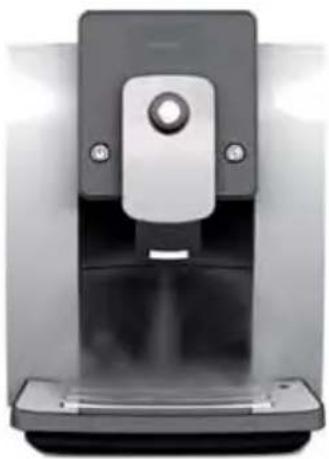
Exterior view of a modern industrial coffee machine with digital display and control panel (no visible text or symbols)User manual | Gebrauchsanweisung | Gebruiksaanwijzing | Instrukcja obstugi | Mode d'emploi Istruzioni per l'utente | Instructiunile utilizatorului
You should read this user manual carefully before using the appliance.
2 Water tank lid 10 Coffee spout
3 Water tank 11 Handle
4 Coffee grounds container 12 Milk pipe
5 Drip tray 13 Milk frother
6 Drip tray grid 14 Hot water spout
7 Powder container cover 15 Milk and cream spout
8 G rinding wheel 16 Power cord
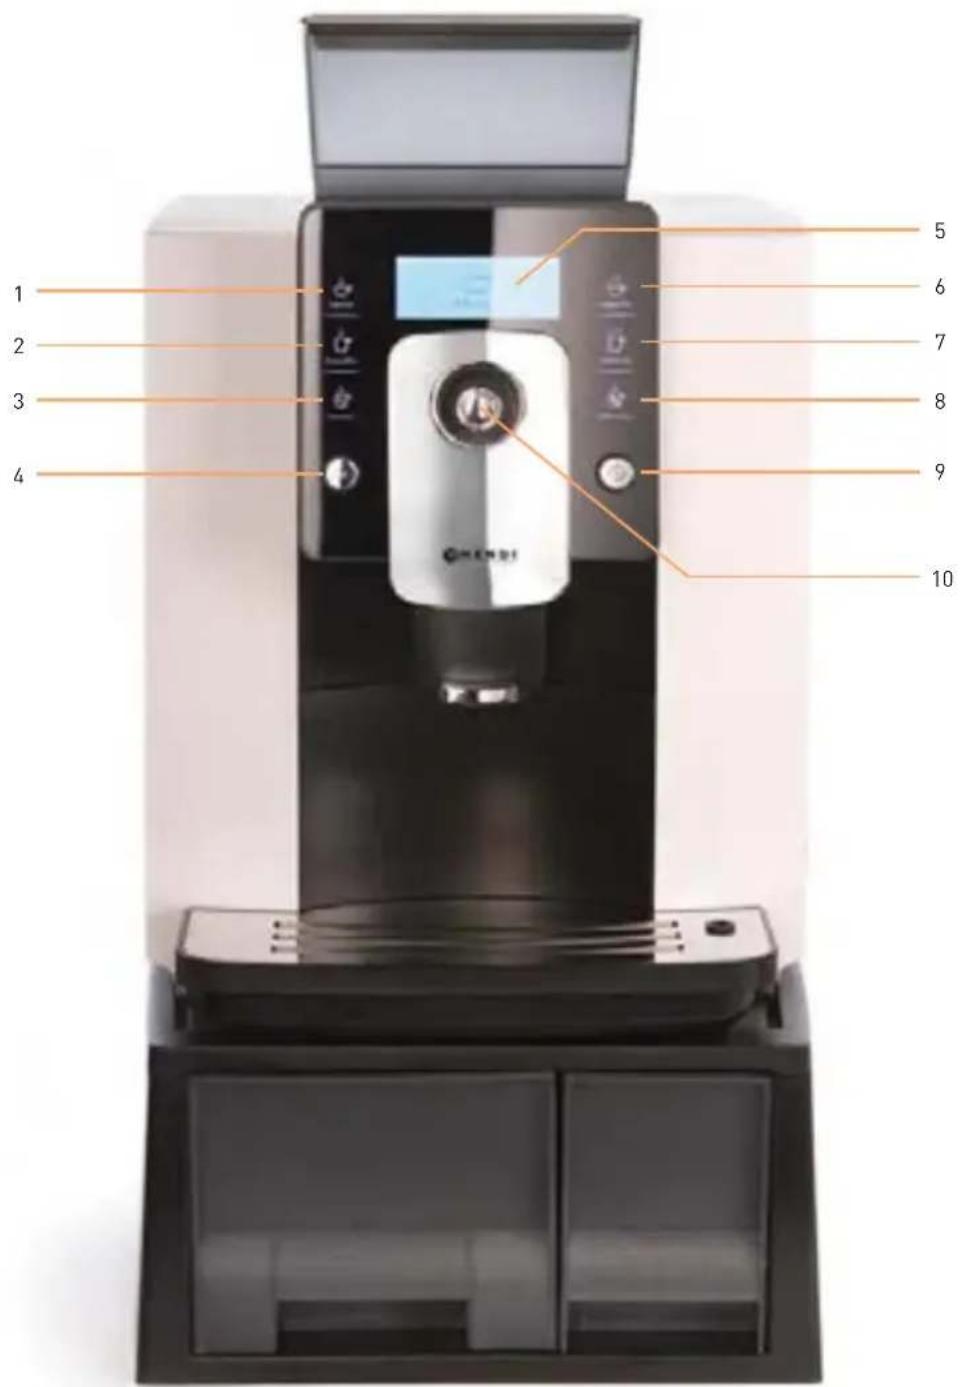
COFFEE MACHINE OPERATION INTERFACE INSTRUCTIONS (208984)
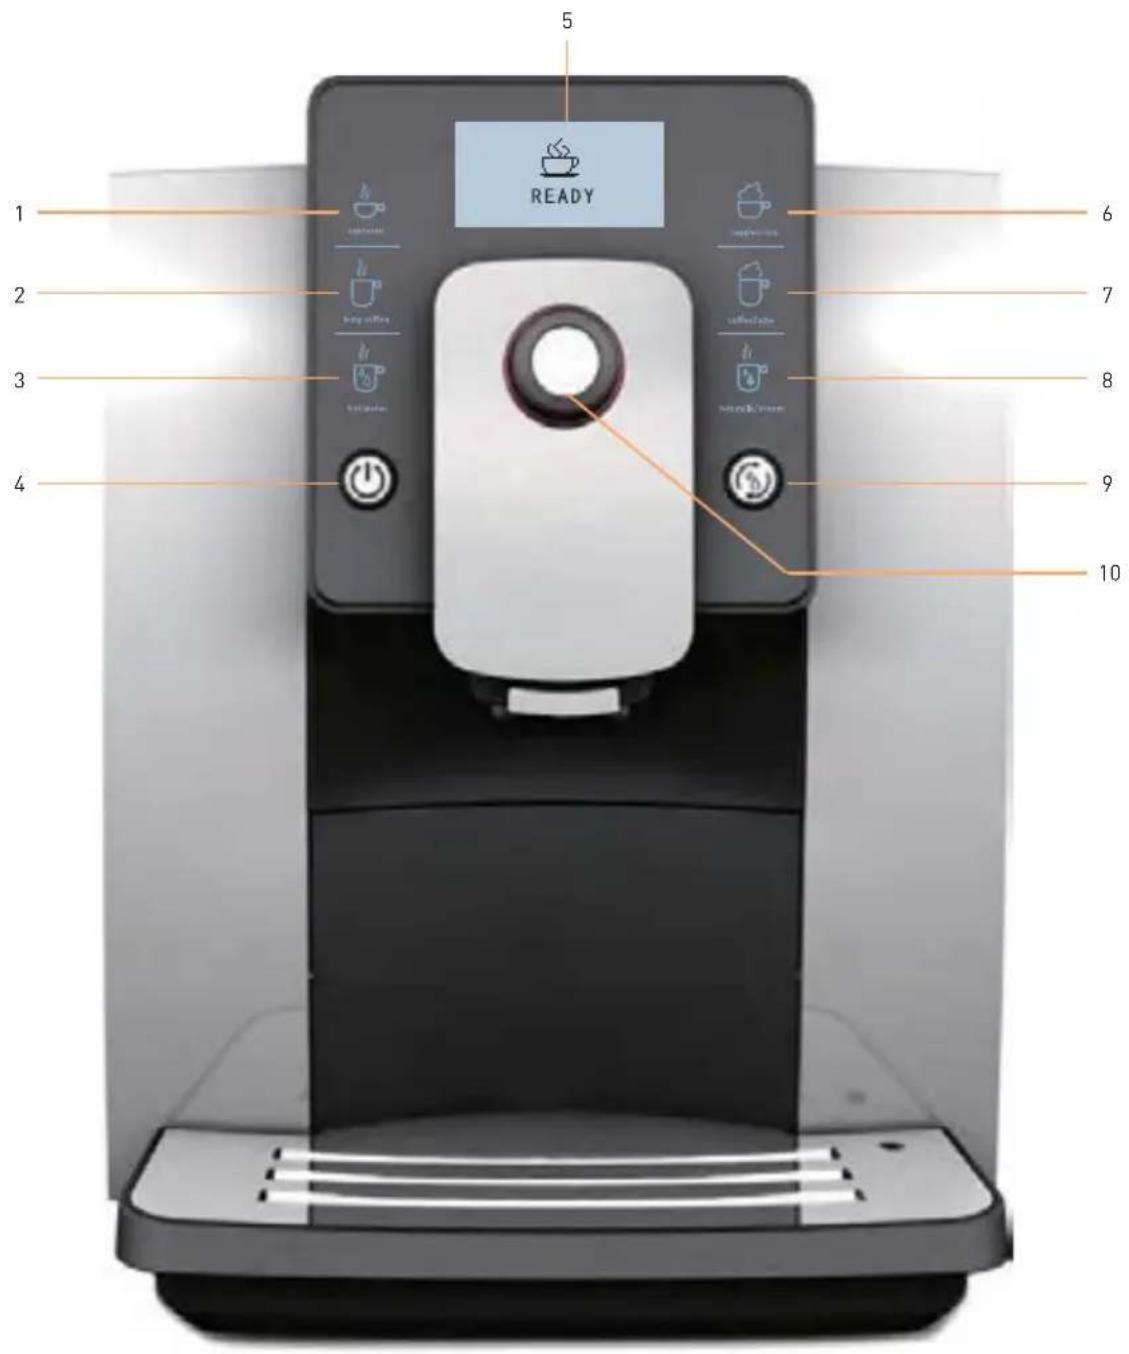
1 Espresso icon
2 Long coffee icon
3 Hot water icon
4 Power switch
5 Screen
6 C appuccino icon
7 Coffee Latte icon
8 Hot milk/cream icon
9 Cleaning button
10 Rotary button
INSTRUCTIONS OF COFFEE MACHINE PARTS (208953)

1 Bean container cover 9 Bean container 750 g
2 Water tank lid 10 Coffee spout
3 Water tank 11 Handle
4 Coffee grounds container 12 Milk pipe
5 Drip tray 13 Milk frother
6 Drip tray grid 14 Hot water spout
7 Powder container cover 15 Milk and cream spout
8 G rinding wheel 16 Power cord
1 Espresso icon
2 Long coffee icon
3 Hot water icon
4 Power switch
5 Screen
6 C appuccino icon
7 Coffee Latte icon
8 Hot milk/cream icon
9 Cleaning button
10 Rotary button
1. SAFETY INSTRUCTIONS
Please see specification label on the bottom of coffee machine or technical date indicated in instruction manual (P26).
PRECAUTIONS
- Please do not contact with heat parts of coffee machine to avoid scalding.
- To avoid operator's injury caused by burn, electric shock or other unexpected reasons, please do not contact the power cord, plug, and main body with water.
- This appliance can be used by children aged from 8 years and above if they have been given supervision or instruction concerning use of the appliance in a safe way and if they understand the hazards involved. Cleaning and user maintenance shall not be made by children unless they are older than 8 and supervised. Keep the appliance and its cord out of reach of children aged less than 8 years. Children shall not play with the appliance.
- Appliances can be used by persons with reduced physical, sensory or mental capabilities or lack of experience and knowledge if they have been given supervision or instruction concerning use of the appliance in a safe way and understand the hazards involved.
-
If the supply cord is damaged, it must be replaced by the manufacturer, its service agent or similar qualified persons in order to avoid a hazard.
-
Unplug from outlet when stop using and before cleaning. Allow to cool before disassembling and cleaning the coffee machine.
- Use of parts that are not explicitly recommended would result in a fire of coffee machine, electric shock, or injury to persons.
- Please do not use the machine outdoor.
- Please do not hang up the power cord to the edges of the table, for it might be abased to an electric leakage, and cause injury to operators.
- Please place the machine in a fixed and stable workbench, and keep far away from high temperature (e.g. gas stoves, electric cookers, induction cookers, etc).
- Power off the machine, until the cleaning program finished and no indication on screen, and then unplug the power.
- When using espresso, long coffee and hot water, liquid in high temperature will flow from coffee spout and hot water spout. Please do not touch it to avoid scalding.
- When using cappuccino, coffee latte, hot milk/cream, please confirm that the milk pipe has been connected from the milk frother to milk before making cappuccino, coffee latte, and hot milk/cream. Otherwise, high temperature steam may cause personal injury.
WARNINGS
Never disassemble and repair the machine without authorization. If there is any error, please send it to authorized service center for repairing
PROHIBITIONS
Except for cleaning and daily maintenance to coffee machine, if it fails to work please send it to authorized after-sale service center for repairing, or contact with customer service for after-sale services.
- Never immerse the machine into water, and do not put the machine near the water tap or water tank.
- Never disassemble coffee machine without authorization, for any maintenance needs disassembling the machine, please return it to Service Centre or contact after-sales service center.
- Never use an unmatched voltage to the electric specification of the machine; otherwise, the machine would be burnt.
- Only purified water in room temperature is allowed to be filled into the water tank. Never put warm water, hot water, milk or other liquid into it.
- Never carry or move the coffee machine while working. For moving or carrying the coffee machine, please switch it off and unplug the power cord firstly.
-
The machine may release heat. Therefore, when placing the machine in the workbench, at least 3 cm must be left against its surface, sides and wall side; at least 15 cm must be left against its top. Prohibit placing the machine into a narrow space. As for dimension of the machine, please look at the Technical Data of User Manual (Page 26).
-
Never use non-family usage detergent to wipe the machine, otherwise it may cause corrosion of coffee machine, and result in a risk of electric shock.
- Never use wet rag to wipe coffee machine, may result in a risk of electric shock.
- Never use hard edged tool or rough rag to clean the stain on the machine, it will damage the machine.
- Never put instant coffee powder or cocoa powder or other mixture powder into the bean container or powder container. It would cause coffee machine damaged.
- Never fill specially treated coffee bean (e.g. cocoa, sugar coated) into the bean container, it would cause coffee machine damaged.
- Only roasted coffee bean is allowed to put into the bean container. Rice, soybean, chocolate bean, nut, sugar, spice, etc., are prohibited. Otherwise it would cause coffee machine damaged.
- Never wash bean container or powder container with water, it will damage the machine.
- Never use coffee machine in the environment temperature below 0 °C. Water inside the machine will freeze and cause the coffee machine damaged.
- Never expose the machine in rainy, snowy, frosty environment. It would cause coffee machine damaged.

If the coffee machine is damaged because of the situation that has been warned above, it is not covered in the warranty!
2. PROPER OPERATION
To guarantee the coffee taste, make sure that temperature of the water filled into the water tank is at 25^ C or so. Coffee machine can only be used for preparing coffee, hot milk, milk foam, and hot water. Do not use it for any other intended use. We will not take any responsibility for the consequences of improper use. Please carefully read all the contents of this manual, so that you can know the coffee machine sufficiently.
Please keep this manual properly for looking up at any time.
SAFETY TIPS
Please notice the following tips to avoid personal injury from electric shock.
- Do not operate the coffee machine if the appliance or the power cord is damaged.
- When encountering breakdowns of the machine (if any burning smell or smoke), unplug the power cord immediately and contact with service center.
- If the power cord of the coffee machine is damaged, please contact with service center.
-
Place the coffee machine and the power cord far away from heat sources.
-
Please don't contact power cord with sharp tools.
- Do not repair the coffee machine without authorization or operate it in the way that was not mentioned in this manual, to avoid personal injury.
- Place the coffee machine out of the reach of children.
- When Coffee machine is unused for long periods, unplug the power cord and put it away, so that not to trip up people or damage to the power cord.
- Please don't use unoriginal parts, otherwise, it may cause the machine damaged.

3. INSTRUCTIONS FOR USE
Reading this manual will help you be familiar with the coffee machine, and use it properly.
"Instructions for first-time use" introduces the operation process of coffee machine step-by-step, for first time use. "failures handling" will provide information when encountering problems.
SYMBOL DESCRIPTION

Non-compliance with the operation, may cause electric shock, and threat to life.

Non-compliance with the operation may cause Coffee machine damaged, or personal injury.

Non-compliance with the operation, may cause scalded or burn injury.

This symbol, if prompted, please carefully read it.

This symbol, if prompted, represents recycle.
CATALOGUE
-
Safety Instructions....6
-
Proper operation....8
-
Instructions for use....8
Symbol description 8
- Instructions for first time use ....10
Power connection....10
Fill water tank....10
Fill beans....10
Grinding wheel....10
Power on 11
Power off....11
- Making beverages....12
Preparing coffee by touch icon 12
Single time setting of coffee parameters....13
Preparing coffee with coffee powder....14
- Program setting....14
Maintenance setting....14
Setting beverage parameters and range....15
Temperature setting 15
Hard water 15
Energy-saving setting....16
Automatic switch off 16
Reset 16
Information....16
Language....16
Exit....16
- Cleaning and maintenance....17
Cleaning the coffee machine before operation 17
Cleaning brewing unit....17
Rinse milk unit....16
Descaling the coffee machine....20
Cleaning coffee grounds container and drip tray 22
Cleaning water tank 23
Cleaning bean container 23
Disassembling and cleaning the milk frother 23
Installing milk pipe 23
Cleaning milk pipe 23
Cleaning coffee machine 24
-
Failures handling 24
-
Display information....25
-
Transport and recycle 26
-
Technical data ....26
4. INSTRUCTIONS FOR FIRST-TIME USE
This chapter will help you understand the basic operations and settings for your first time use.
POWER CONNECTION

- Place the coffee machine on a stable workbench that is not close to water.
- Keep the coffee machine far away from high temperature heat source.
- Be sure to use power supply that is in accordance with specification label.
- Put the power cable at a suitable place to avoid people tripping over.
FILL WATER TANK

- Only purified water at room temperature is allowed to fill in the water tank, never fill any other liquid (e.g. warm water, hot water, milk). It will damage coffee machine. In order to ensure the taste of coffee, it is recommended to use water at 25^ C or so. Low temperature water will not make a good taste.
- To ensure healthy and the taste of coffee, please change the water in the tank every day.
- The amount of water in the water tank cannot exceed the height of the MAX mark.
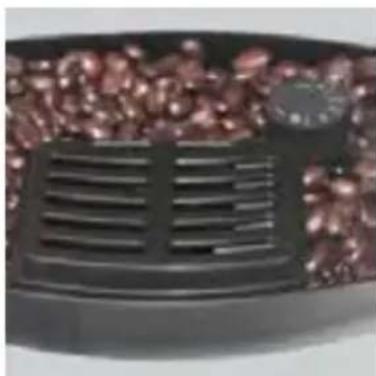
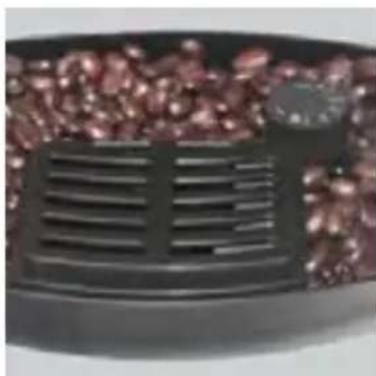
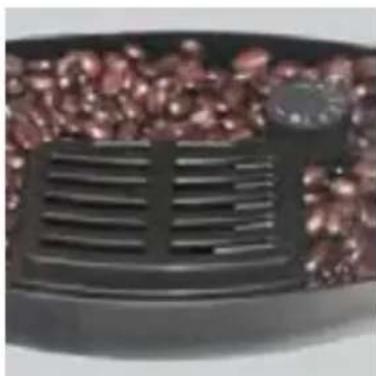
FILL BEANS

- Never put the coffee beans that have been specially treated (e.g. sugar, cocoa) into the bean container.
- Only roasted coffee beans can be put into the bean container, never put others like rice, soybeans, chocolate beans, nuts, sugar, and spices.
- Never put hard objects into the bean container, otherwise it will damage the grinder.
- The bean container cover playing a role as seal. It keeps the aroma of coffee beans maximally. Please do not lose the cover.
- Don't fill the liquid in the bean container.

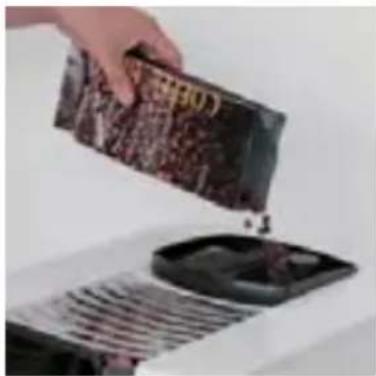
natural_image
Hand pouring dark granular substance from a container onto a griddle (no visible text or symbols)GRINDING WHEEL

- Please adjust the fineness of coffee bean powder according to the coffee beans.
- Please adjust the grinding wheel when the grinder is running, or the grinder will be damaged.
- If your coffee beans are in dark color, it is recommended to set to the rough mode.
- If your coffee beans are in light color, it is recommended to set to the fine mode.
- During making coffee, if the coffee outflows very slowly or completely does not outflow, please set it to the rough mode.
- If the coffee outflows very quickly and the color of crema on the top is very light, please set it to the fine mode.
- The adjustment of grinding wheel will be effective only after making two or more cups of coffee.

natural_image
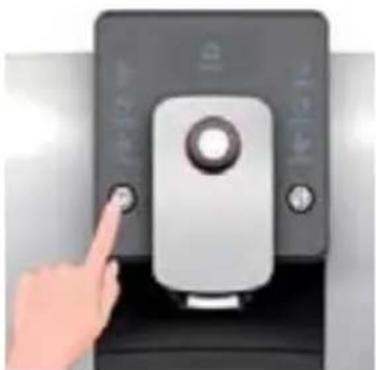
Close-up of a black grater with red granular contents, no visible text or symbolsPOWER ON

- As the machine has been tested at factory, there may be a little coffee powder left. We promise the machine is brand new.
- The coffee machine will start self-testing and cleaning at the first-time use, this helps the coffee machine achieve the best working condition, and this process cannot be skipped.
- Every time powering on the coffee machine, it will automatically complete heating and cleaning for one time, and the process cannot be stopped. The coffee machine can only be used after finished the above cycle process.
- During the cleaning process, some hot water may flow out of the coffee spout into the drip tray. Please avoid contacting the spilling hot water.
Please ensure the power is connected before pressing power button.

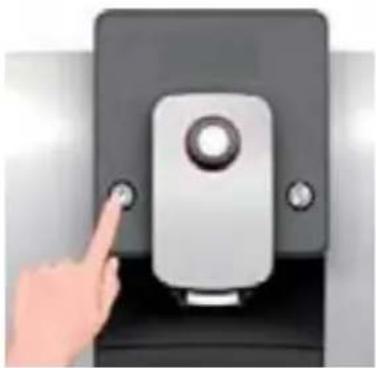
natural_image
Hand pointing at a black electronic device with a button (no text or symbols visible)POWER OFF

- Every time when powering off the coffee machine, it will automatically complete cleaning process for one time, and the process cannot be stopped. This operation is to clean up the coffee pipelines and remove the coffee grounds.
- During the cleaning process, some hot water will flow out of the coffee spout into the drip tray. Avoid touching spilt hot water, so as not to be burned.
- Only after using milk/cream/cappuccino/lattee, the Rinse Milk Unit function will be operated when power off.
When you press ⏻ power button, the machine will be power off after auto cleaning.
natural_image
Hand pointing at a black doorbell with buttons and a central knob (no visible text or symbols)EN
5. MAKING BEVERAGES

This chapter instructs you making various kinds of coffee, hot water, hot milk and milk foam by this coffee machine. Please read the following instructions carefully to help you make high-quality beverages.
The temperature of the hot water is high, please do not touch it to avoid being scalded.

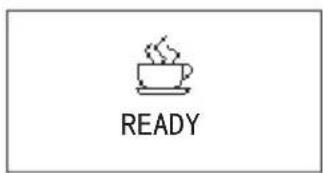
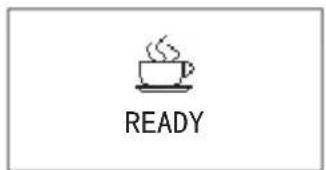
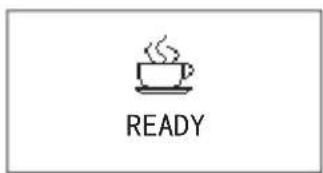
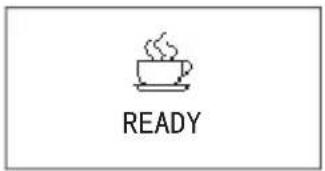
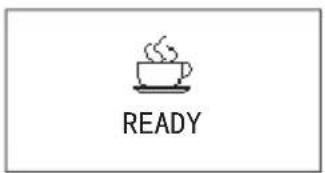
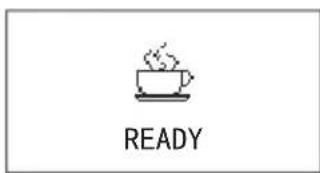
Before we make all kinds of coffee, please ensure "READY" is indicated on the display.
- Never use dark roasted coffee beans.
- The coffee beans should be put at dry place and avoid sunlight.
- Only purified water at normal temperature can be used. To make the coffee taste better, it is recommended to use water around 25°C.
• To ensure the quality of coffee, please change the water in water tank every day. - Please warm the coffee cup before making coffee for better taste.
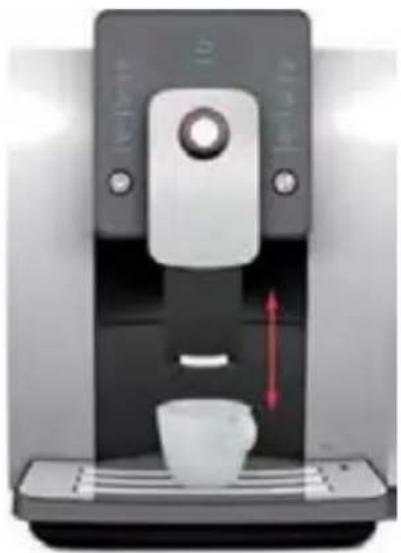
- Please adjust the height of the coffee spout according to the height of the cup in order to avoid coffee splashing.
- Adjustable height of coffee spout: 80-140 mm.
natural_image
Modern coffee machine with white cup and control panel, no visible text or symbolsPREPARING COFFEE BY TOUCH ICON
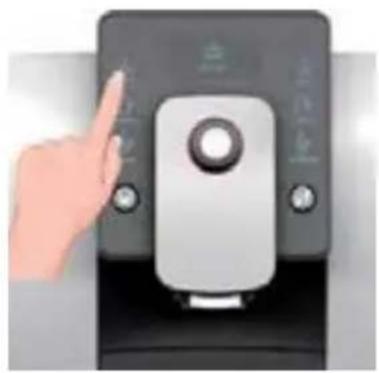
You can make 4 kinds of coffee by touch icons, when the screen shows "READY"
Take espresso for example to explain how to make coffee by touch icons.
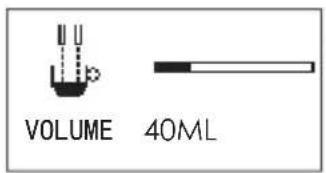
The volume of espresso is suggested between 30 to 50 ml.
Because of the small volume of espresso, please warm the coffee cup before making coffee.
natural_image
Hand pointing at a digital kitchen control panel (no visible text or symbols)

Touch the espresso icon for espresso function.

The grinder will begin to grind. At this time you can adjust the amount of coffee beans by rotating the rotary button.
Default amount of coffee beans for espresso:


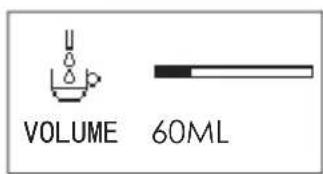
During making coffee, you can adjust the volume of coffee by rotating the rotary button.
Default volume of espresso: 50 ML
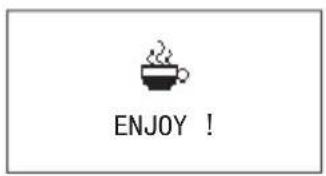
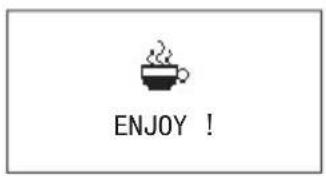
When the screen shows as the left picture, it means the espresso is ready, please enjoy it.
SINGLE TIME SETTING OF COFFEE PARAMETERS
8 items as bellow can be set at single time.
- Set the amount of coffee beans during grinding process.
- Set the volume of coffee when making coffee
- Set the making time of milk foam to control volume when making cappuccino
- Set the making time of milk to control volume when making latte
- Set the temperature of hot water before making hot water
- Set the hot water volume when making hot water
- Set the making time of hot milk to control volume when making hot milk
- Set the making time of hot cream when making hot cream
Detail instructions
You can set the fineness of coffee and the volume of beverage before or during making the beverage at single time, the setting will not be saved.
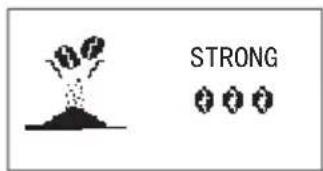

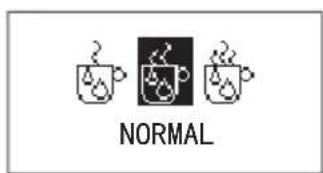
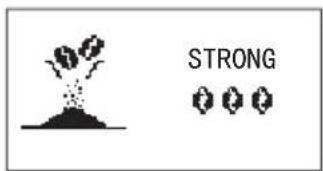
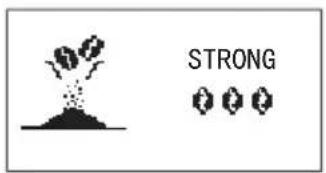
When grinding the coffee beans, you can rotate the rotary button to adjust the amount of coffee beans, to left is mild ⚙, and to right is strong ⚙ ⚙ ⚙. The default amount is normal ⚙ ⚙.
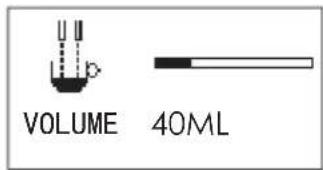

When making coffee, coffee volume can be adjusted by rotary button. For example, the current volume is 100 ml, 2 cells to left to reduce to 95 ml, and 2 cells to right to increase to 105 ml.
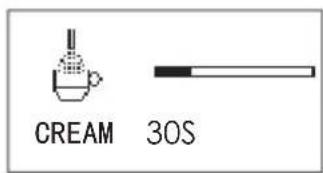

When making cappuccino, milk foam or coffee latte, cream making time can be adjusted by rotating the rotary button while milk foam outflows. For example, the current time is 20s, 2 cells to left to reduce to 19S, and 2 cells to right to increase to 21S.
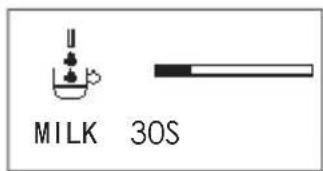

When making hot milk or coffee latte, milk making time can be adjusted by rotating the rotary button. For example, the current milk making time is 20S, 2 cells to left to reduce to 19S, and 2 cells to right to increase to 21S.

Before making hot water, the temperature can be adjusted by rotating the rotary button. To left is low, to right is high. The default temperature is normal.

When making hot water, the hot water volume can be adjusted by rotating the rotary button. For example, the current volume is 150ML, 2 cells to left to reduce to 145ML, and 2 cells to right to increase to 155ML.
PREPARING COFFEE WITH COFFEE POWDER
You can choose this function if you want to make coffee with coffee powder.

- Prohibit filling other mixtures such as instant coffee powder or cocoa powder in the powder container. Otherwise it will damage the machine.
- Do not fill the coffee powder into the coffee bean container, otherwise, it will damage the machine.
- Do not rinse the powder container with water, or it will result in operator's injury by electric shock.
- Please use proper grounded coffee powder for espresso.
- Only 7-14g coffee powder can be added. Machine will be damaged with more powder.
- The process of using coffee powder to make coffee only skips the process of grinding coffee beans, other operations are the same as making espresso, long coffee, cappuccino, and coffee latte. This chapter illustrates with espresso.


Long press rotary button to enter into setting when the coffee machine is "READY".


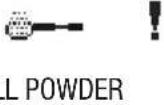
Display shows "USE POWDER" page after entered into setting. Press rotary button to make coffee.
Open powder container cover and fill the coffee powder, then close cover. Touch the beverage icon you need to make coffee. Press rotary button to cancel.

natural_image
Hand pouring a dark liquid into a black tray with a spatula (no text or symbols visible)6. PROGRAM SETTING

• This chapter will give instructions on program setting.
- Ensure the coffee machine shows "READY", long press the rotary button, then you can enter into the program setting menu.
MAINTENANCE SETTING
Please read the detailed instructions about rinsing the brewing unit and decalcifying on P17 and P20.
BEVERAGE SETTING
- This chapter will instruct you how to set beverages. The setting parameters include coffee strength, volume of coffee, temperature of hot water, volume of hot water, time of making hot milk, time of making hot cream.
-
The parameters accomplished by beverage setting will be the default values for each beverage.
-
Epresso setting
- Long coffee setting
- Hot water setting
- Cappuccino setting
- Coffee latte setting
- Hot milk setting
- Hot cream setting
SETTING BEVERAGE PARAMETERS AND RANGE
The parameters as strength, volume, temperature and time can be set for the beverages bellow.
- The strength and volume of espresso can be set
- The strength and volume of long coffee can be set
- The strength and volume of coffee part in cappuccino can be set. Milk foam making time can be set
- The strength and volume of coffee part in latte can be
set. Milk and milk foam making time can be set
- The temperature and the volume of hot water can be set
• Hot milk making time can be set
• Hot cream making time can be set
Please read the following table for the detail setting parameters and adjustment range
| Drinks | Strength | Volume |
| espresso | Mild: 📋 | Volume: 15 - 120ML |
| Normal: 📋 📋 | ||
| long coffee | Strong: 📋 📋 📋 | Volume: 15 - 240ML |
| cappuccino | Mild: 📋 | Volume: 15 - 240ML |
| Normal: 📋 📋 | Milk time: 3 - 120SEC | |
| coffee Latte | Strong: 📋 📋 📋 | Cream time: 3 - 120SEC |
| hot water | Volume: 25 -450ML | |
| hot milk | Milk time: 3 -120SEC | |
| hot cream | Cream time: 3 -120SEC |
TEMPERATURE SETTING
- The coffee temperature can be adjusted to meet your favor with the “Temperature setting” function and you can choose:
- Low
- Middle
- High
The default temperature is middle, and it's only workable for coffee not milk.
HARD WATER

After moving into the menu you can adjust the hardness of water by rotating the rotary button "10". You can choose one of the fourth options of hard water representing by the black drop where 1 black drop means soft water and 4 black drops mean hard water.

ENERGY-SAVING SETTING

- In the energy-saving mode, the machine needs 30 seconds to warm up and then to make Cappuccino, Coffee Latte, Hot milk and Cream. While for normal mode, making above beverages do not need waiting heat up. The normal mode is more energy consumption than the energy-saving mode.
- The factory default setting of the machine is normal mode.
- After entering the program setting, please turn the rotary button to "ECO SETTING" option, then press the rotary button, setting is finished.
AUTOMATIC SWITCH-OFF

- The machine's default switch off time is 30 minutes, which means the machine will automatically switch off after the last use on 30 minutes.
- The setting range of automatic switch-off is from 15 minutes to 24 hours.
- After entering the program setting, please turn the rotary button to the "Auto-off" option. Then press the rotary button, the setting is completed.
RESET

- This function will reset all the menu setting and default beverage parameters to the factory settings (except the language options). In addition, the information options will not be reset.
- After entering the program setting, please turn the rotary button to "RESET" option then press the rotary button to confirm, the setting is completed.
INFORMATION

- In this program you can view the information on numbers of produced each drinks, total drinks numbers, and maintenance times.
- Total numbers on produced drinks
- Numbers of produced espresso
- Numbers of produced long coffee
- Numbers of produced hot water
- Numbers of produced cappuccino
- Numbers of produced coffee Latte
-
Numbers of produced hot milk
-
Numbers of produced cream
- Numbers of rinsing operations
- Numbers of decalcifying operations
- Numbers of produced coffee by coffee powder
- Numbers of rinsing brewing unit operations
- Numbers of rinsing milk unit
- At the first-time use, there is already a number of produced beverages because each coffee machine has been tested before leaving factory.
LANGUAGE
- You can set your preferred language on the coffee machine.
• After entering the program setting, turn the rotary button
EXIT
- After entering the program setting, please turn the rotary button to the "EXIT" option. Then press the rotary button.
to the "CHOOSE LANGUAGE" option, then press the rotary button, rotate the rotary to choose the language, and press the rotary button, setting is completed.
After completing setting, the machine will return to "READY".
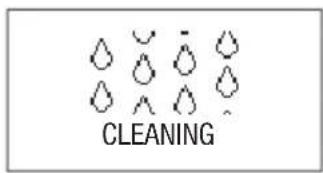
7. CLEANING AND MAINTENANCE

- This chapter will instruct you how to clean and maintain the coffee machine.
- Paying attention to daily maintenance of coffee machine, not only ensure the taste of each cup of coffee, but also extend the life of the coffee machine.
Recommended cleaning and maintenance supplies dedicated to Hendi's fully automatic coffee machines.
Intended use Cleaning brewing unit
Descaling Rinse milk unit
| Product name | Professional automatic coffee maker cleaning tablets | Professional coffee maker cleaner | Professional descaler for commercial appliances | Professional liquid milk frother cleaner |
Model 231319 231272 975008 231296
- This chapter will instruct you how to clean and maintain the coffee machine.
- Before making coffee, press the cleaning button before the cleaning light is on. It will pre-heat the brewing unit and inner pipeline, to improve the taste of the coffee next time.
- Cleaning function must be processed in "READY" status.

When the coffee machine is in "READY" status and the cleaning indicator light is not on, press the cleaning button to start cleaning the brewing unit and coffee spout.
The process of cleaning coffee machine cannot be interrupted, and it will automatically return to "READY" status after cleaning.

EN
CLEANING BREWING UNIT
- After a long-term use, there will be some coffee powder left on the brewing unit. Remove the powder by deeply cleaning brewing unit.
- The process of cleaning brewing unit takes about 20 minutes.
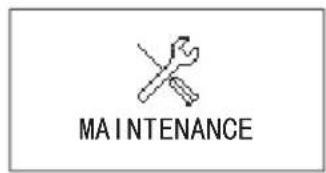
After entering the program settings, turn the rotary button to the "MAINTENANCE" option, and press the rotary button.
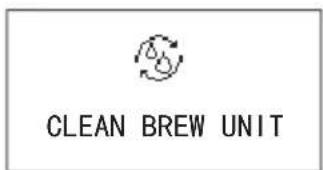

When the screen shows the picture as left, it indicates cleaning brewing unit program has been selected. Press the cleaning button to start cleaning brewing unit.
The brew unit is cleaning.
| OPEN COVER ADD CLEANING TABLET | Open the coffee powder container lid, add the clean- ing tablet. |
| CLOSE COVER PRESS RINSE | Close the coffee powder container lid, press the cleaning button to start it. |
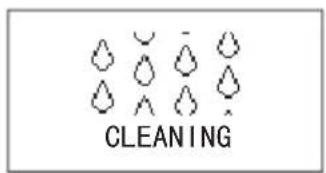
| CLEAN | When screen displays as the left picture, please press the cleaning button to clean the brew unit. |
| CLEANING | Brew unit is under cleaning. |
| READY | After cleaning finished, the machine enters into "READY" status. |
Please empty the drip tray after the cleaning program is completed.
RINSE MILK UNIT
- Prepare approx. 250 ml of liquid milk frother cleaner solution in coffee makers (recommended using of Hendi liquid – product code: 231296) according to the product label
- Put the milk pipe into a vessel with a solution then press "8" button milk/cream and set time of hot milk to approx. 30 seconds
- Prepare 500 ml of clean cold water then press "8" button milk/cream and set time of hot milk to approx. 60 seconds
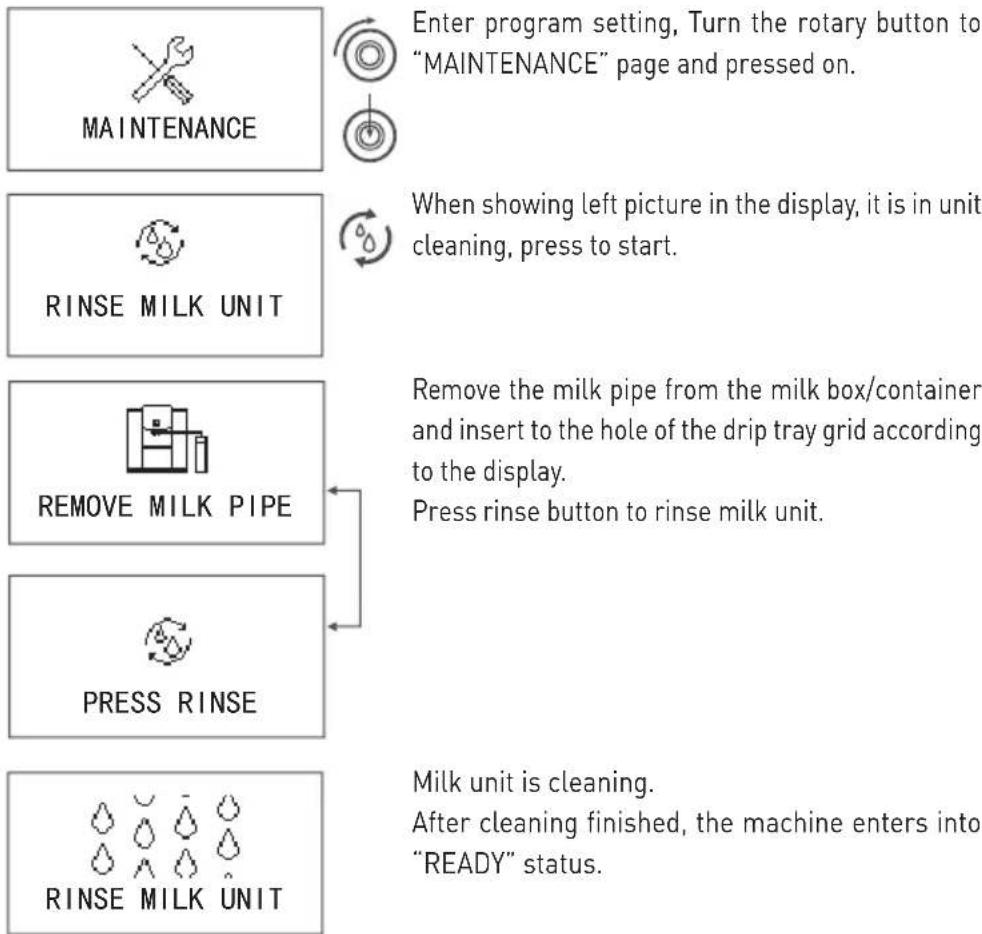
flowchart
graph TD
    A["MAINTENANCE"] --> B["Enter program setting, Turn the rotary button to "MAINTENANCE" page and pressed on."]
    C["RINSE MILK UNIT"] --> D["When showing left picture in the display, it is in unit cleaning, press to start."]
    E["REMOVE MILK PIPE"] --> F["Remove the milk pipe from the milk box/container and insert to the hole of the drip tray grid according to the display. Press rinse button to rinse milk unit."]
    G["PRESS RINSE"] --> H["Milk unit is cleaning. After cleaning finished, the machine enters into "READY" status."]
    I["RINSE MILK UNIT"] --> H
Please empty the drip tray after the cleaning program is completed.
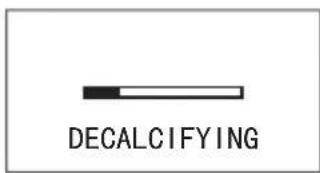
DESCALING THE COFFEE MACHINE

- The daily usage will cause calcareous deposited in coffee machine. The depositing rate varies with the local water hardness.
- Decalcifier contains acidic substances that would stimulate your eyes and skin, so you must strictly comply with the security warnings noted by manufacturer on the packaging. If you have contacted it with your eyes or skin by accident, please wash it with clean water immediately.

- Dissolve the decalcifier in clean water, and then put the mixed liquid into the water tank. Fully dissolve the decalcifier can descale the coffee machine more thoroughly.
• The whole descaling process takes about 30 minutes. - The termination during the descaling process will damage the coffee machine. So once you start the descaling process, please do not terminate it midway.


NEED DESCALE
PRESS RINSE

After a certain time use, if it reaches the degree of descaling, "NEEDS DESCALE" and "PRESS RINSE" will automatically display on the screen alternately. Now, press the cleaning button to enter the descaling program.
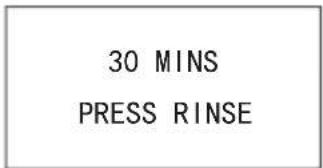
Turn the rotary button to maintenance setting option, press rotary button to enter.
MAINTENANCE


DESCALE


30 MINS PRESS RINSE

Turn the rotary button to descaling option, press rotary button to enter.
After entering the descaling program, press cleaning button to start the descaling program; it will take 30 minutes.
natural_image
Hand pouring liquid into a white refrigerator (no text or symbols visible)
natural_image
Close-up of hands placing a plastic bag onto a black plastic container with a red arrow indicating direction (no text or symbols visible)
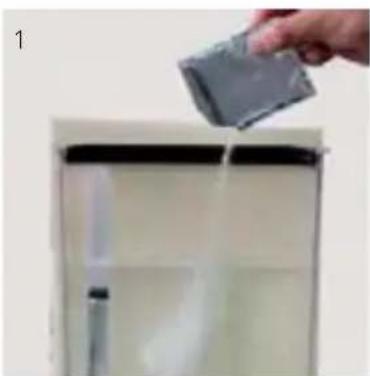
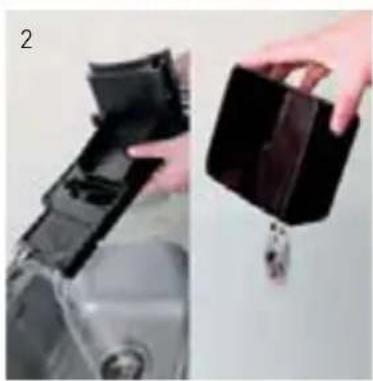
Take a bag of decalcifier and sufficiently dissolves it in clean water, then put this mixed liquid to the water tank, and reinstall the water tank to coffee machine.
natural_image
Exterior view of a modern stainless steel coffee maker with a metal cup (no text or symbols visible)

After adding decalcifier, press cleaning button to start descaling and cleaning.
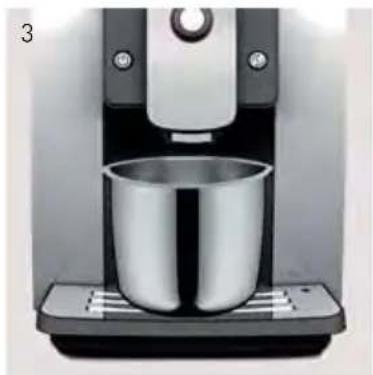
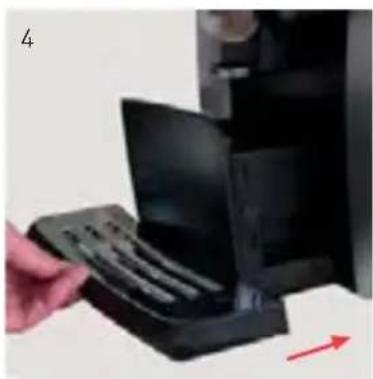
To start descaling and cleaning for the first time, put a container, of which the capacity is more than 1L, under the coffee spout.
natural_image
Hand inserting a black device into a desktop computer tower, with a red arrow indicating direction (no text or symbols visible)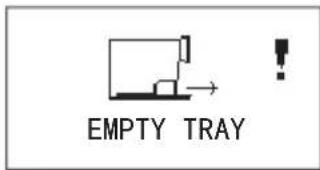
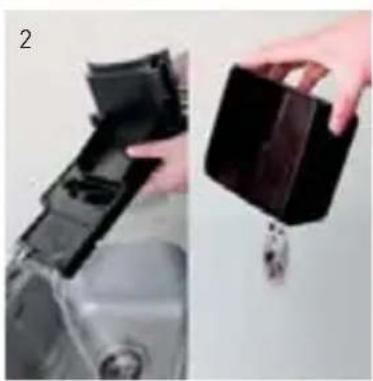
Empty tray.

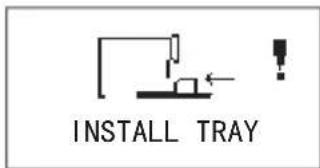
Install tray.

natural_image
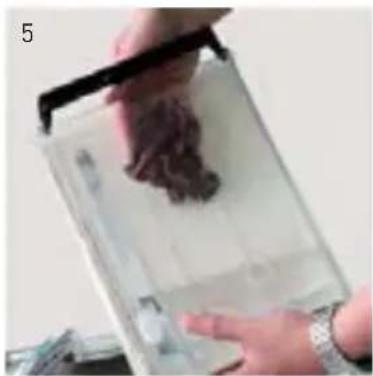
Close-up of hands holding a transparent container with a dark substance, no visible text or symbols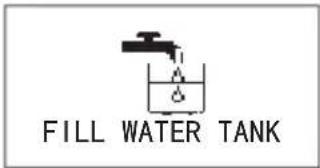
After descaling and cleaning for the first time, take the water tank out, empty the rest water and clean it. Add purified water again, and reinstall it to the coffee machine.
natural_image
Hand holding a black tool interacting with a transparent container (no visible text or symbols)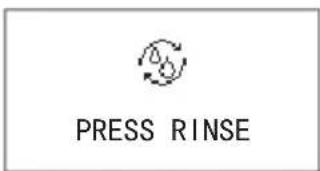

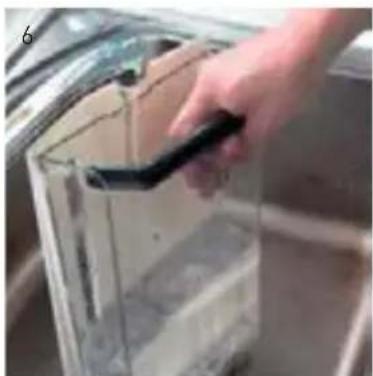
Press cleaning button to enter descaling and cleaning for the second time. To clean the residual decalcifier in water in pipes at this time. Put a container, of which the capacity is more than 1L, under the coffee spout.

natural_image
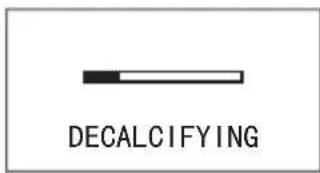
Two-panel image showing a hand holding a black plastic container and a small object, next to a mechanical component (no visible text or symbols)Decalcifying.
When the screen shows "READY", it indicates the descaling is completed; Now, you can continue to make coffee.

Please empty the drip tray after the cleaning program is completed.
natural_image
Close-up of hands operating a mechanical device with a red arrow indicating direction (no visible text or symbols)CLEANING COFFEE GROUNDS CONTAINER AND DRIP TRAY


- Do not use chemical solvents and erosive cleaner or alcohol to clean the coffee grounds container and drip tray.
- The drip tray and coffee grounds container cannot be cleaned in dishwasher.
- Do not use metal objects to clean dirt or coffee precipitate to avoid scraping the drip tray and coffee grounds container.
- When prompted to clean the coffee grounds, coffee grounds must be cleaned up, or it will cause the machine damaged.
natural_image
Close-up of a hand holding a black plastic container next to a mechanical component (no visible text or symbols)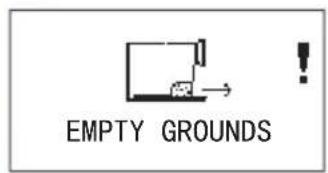

natural_image
Hand inserting a device into a black plastic tray, with a red arrow indicating direction (no text or symbols visible)
natural_image
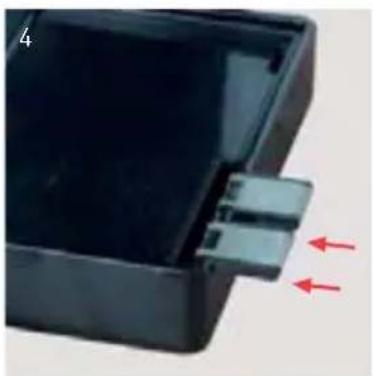
Close-up of a black plastic enclosure with a small connector and two red arrows indicating direction (no text or symbols)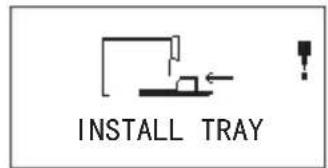
When it cumulates to 15 cups, it will automatically indicate "EMPTY GROUNDS".
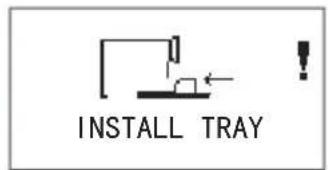
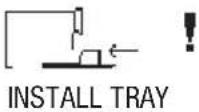
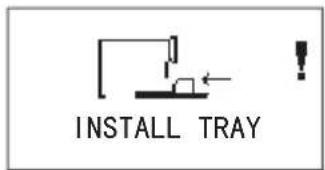
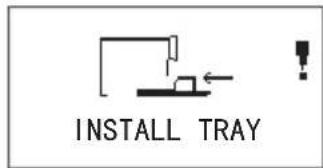
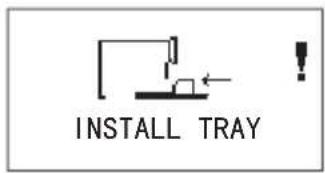
When it shows "INSTALL TRAY", please remove coffee grounds of the drip tray and coffee grounds container. This will take more than 3 seconds.
Reinstall the water drip tray to the machine, it returns to "READY" status. You can continue using the machine.
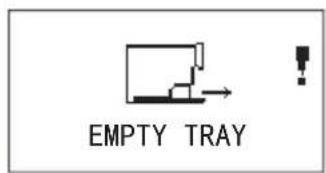
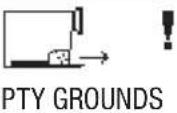
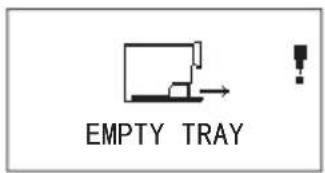
If the drip tray is full, the machine will automatically indicate "EMPTY TRAY". Take out the water drip tray and pour the waste water.
After clearing the waste water, reinstall the drip tray to the coffee machine, it returns to "READY" status. You can continue using the machine.

- Every time when cleaning coffee grounds and waste water in the drip tray, please empty the drip tray and coffee grounds container.
- Every time after cleaning coffee grounds and waste water in the drip tray, please firstly rinse the tray with clean water, and wipe dry the 2 steel plates at the end of drip tray, then reinstall the drip tray to the coffee machine.
CLEANING WATER TANK

- Suggested that, each time adding water, clean the tank thoroughly with running water first.
- Cleaning water tank regularly (about 1 time per month) it would be better to use wet rag and some mild cleaning fluid.
- Because the water tank is made from food-grade and environmental materials, it might be friable to crack. Please gently pick it up and put it down, and never let it fall down. If the water tank damaged, please contact with customer service center.
CLEANING BEAN CONTAINER

- Please do not use water to wash the beans container, it would cause the grinder damaged.
- Please use a dry rag or a paper towel to clean the residuary grease in the bean container.
- Because the bean container cover is made from food-grade and environmental materials, it might be friable to crack. Please gently pick it up and put it down, and never let it fall down. If the bean container lid damaged, please contact with customer sevice center.
natural_image
Close-up of hands holding a transparent plastic tray with a dark brown substance, no visible text or symbols
natural_image
Hand pressing down on a black square object with a circular button, no visible text or symbolsDISASSEMBLING AND CLEANING THE MILK FROTHER

In order to guarantee the fine and smooth milk foam, please clean the milk frother every day.
- Carefully take off the milk frother.
-
Disassemble each part of the milk frother thoroughly.
-
Wash the parts with running water.
- Reassemble the milk frother, and install it to the coffee machine. Then the milk frother cleaning is completed.
natural_image
Close-up of a hand holding a small object, possibly a device or tool, with no visible text or symbols.
natural_image
Three black plastic mechanical components with connectors, shown from different angles (no text or symbols visible)
natural_image
Close-up of hands cleaning a glass container with liquid (no text or symbols visible)
natural_image
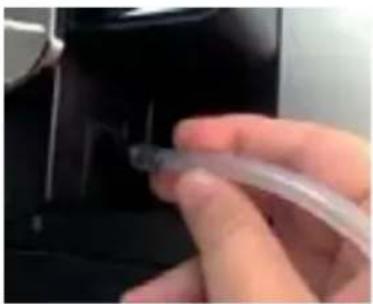
Close-up of a hand holding a small electronic component (no visible text or symbols)INSTALLING MILK PIPE
• Install the milk pipe to the milk frother inlet.
CLEANING MILK PIPE
In order to keep milk pipe clean, please clean it every day.
- Take off milk pipe carefully.
- Clean milk pipe in running water.
natural_image
Close-up of a hand holding a transparent plastic tube inserted into a black mechanical component (no visible text or symbols)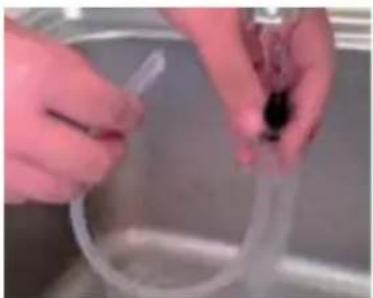
natural_image
Close-up of hands holding a transparent plastic tube in a kitchen sink (no visible text or symbols)
natural_image
Close-up of a hand holding a small red object next to a white device (no visible text or symbols)CLEANING COFFEE MACHINE

- Before cleaning the interior of the coffee machine, power it off, and pull out plug. Never immerse the coffee machine in water. There will be a risk of electric shock.
- Regularly check the coffee machine whether there is excessive coffee powder precipitate inside the machine. You can use a brush to remove the coffee precipitate.
- Use a dry and soft rag to wipe the touch panel of the machine. As the touch panel is made of glass, please do not hit it to avoid the risk of electric shock once the glass broken.
- Use a dry and soft rag to wipe the surface of the machine, and never use hard objects to clean coffee leftover on the surface, otherwise it would cause the surface damaged.
8. FAILURES HANDLING
- This chapter will instruct you some errors that may encounter and the solutions.
- If there are some failures cannot be resolved by the following methods, please contact with the customer service center.

| Problem | Cause | Solutions |
| The coffee temperature is too low. | The coffee cup was not pre-heated. | Wash the coffee cup with hot water before making coffee. |
| Several minutes have passed since the last time of coffee making, so the brewing unit and the internal pipes are already cold. | Make some more cups of coffee. | |
| Coffee only comes out from the coffee spout drop by drop. | Over fine coffee powder or coffee bean has been grounded too fine. | Adjust the grinding wheel to a rough state or use the suitable coffee powder. |
| Brewing unit filter was blocked. | Run the brewing unit washing program. | |
| Insufficient coffee oil. | Picked the wrong coffee bean type. | Use the suitable coffee beans. |
| The grinder arising noises. | There are foreign objects in the grinder. | Make coffee again, if it still failures, please contact with the customer sevice center. |
| The milk frother cannot make any milk foam. | The milk frother is blocked. | Cleaning the milk frother (refer to P23). |
| Milk sprays from the milk frother. | The milk frother was not assembled correctly. | Reassemble the milk frother. |
| Screen always indicates "EMPTY TRAY". | The sheetmetals at the end of the drip tray are dirty or wet. | Wipe the sheetmetals to dry (refer to P22). |
| Screen always indicates "INSTALL TRAY". | Coffee grounds in the bottom of the machine are not cleaned. | Clean the coffee grounds in the bottom. |
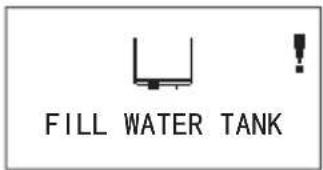
| Screen always indicates "FILL WATER TANK", but the water tank is full. | The water tank inductor is trapped. | Clean the water tank (refer to P23). |
| Screen always indicates "FILL BEANS", but the bean container is full. | The bean container is too oily and sticky for coffee beans. | 1. Stir coffee beans in bean container.2. Observe if the coffee beans are over roasted or charcoal roasted.3. Clean the beans container (refer to P23). |
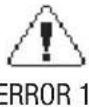
| "Errors 1 to 7" is displayed. | The coffee machine failures, cannot continue to be used. | 1. Restart coffee machine.2. If "errors" still exists, switch off the main power, and contact with the customer sevice center. |
9. DISPLAY INFORMATION

- This chapter will instruct you the information shows on the screen and the solutions.
 |
 EM EM |
 FILL FILL |
 F F |
 FIL FIL |
 |
 |
 |
 |
 I I |
 PRES PRES |
| VALVE RESETRESTART MACHINE |
Causes Solutions
| If the water drip tray is full, any function of making beverage will be out of service. | Take the drip tray out, empty the waste water in the drip tray and reinstall it to the machine. |
| If the coffee grounds container is full, any function of making beverage will be out of service. | Take the coffee grounds container out, empty the coffee grounds container and reinstall it. |
| If water in the water tank is used up, any function of making beverage will be out of service. | Fill the water tank with water. |
| If coffee beans in the bean container are used up, function of making coffee will be out of service. | Add beans into bean container, and press the rotary button to release. |
| There is not enough coffee powder in the powder container. | Next time when making coffee with coffee powder, please put a full spoon of powder. |
| The drip tray is not installed correctly; any function is out of service. | Install the drip tray correctly. |
| The water in the pipe inside the machine is not enough; any function is out of service. | Press the rotary button to release, to run the water replenishing system. |
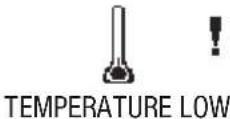
| Temperature of the machine is too high, the machine cannot be used. | Power off the main power, and use it 1 hour later. |
| Temperature of the machine is too low, the machine cannot be used. | Increase environmental temperature to above 10°C. |
| The coffee machine failures, may not be able to be used. | 1. Power off, restarting up; 2. If still unresolved, please pull out the plug. Contact with customer sevice center. |
| 1. Using dark roasted coffee beans or over fine coffee powder; 2. The filter of the brewer is clogged. | 1. Adjust grinder wheel to rougher; 2. Start brewer cleaning procedure (refer to P17). |
| Dispenser valve is blocked. | Restart coffee machine. |
10. TRANSPORT AND RECYCLE TRANSPORT

- Please save the packaging of the coffee machine for future transportation.
- Make sure to empty water inside the machine before transportation, otherwise, it will damage the machine.
- After emptying the waterway, please wipe the machine both inside and outside to dry.
- Once the empty waterway program was executed, the system will rerun to the program of "first-time use", when the coffee machine is used again. (refer to P10, First-time use).
- While emptying the waterway, there will be a high-temperature steam sprays from coffee spout. Please pay special attention to avoid being scalded.


natural_image
Solid gray image with no visible content, text, or symbols.The machine is on the status of "READY".
Take out the water tank, and the machine indicates "FILL WATER TANK".

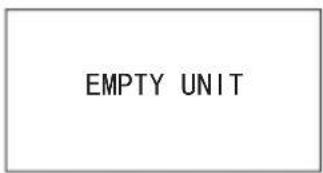
Long pressing the cleaning button until the screen shows "EMPTY UNIT", the machine begins to clean up the waterway automatically, and steam will spray from the coffee spout, please keep distance to avoid scalding.
After emptying the waterway, the machine will automatically power off. Take the drip tray out after the power is switched off, and clear the water in the drip tray.
natural_image
Close-up of a modern digital water dispenser device with a black handle and control panel (no visible text or symbols)
RECYCLE
When recycling the machine, some inner parts can be recycled to use again. Please pay attention to recycle them for environmental protection.

- TECHNICAL DATA
| Model | 208984 208953 | |
| Dimensions | 302x450x(H)370 mm | 302x450x(H)590 mm |
| Supply/Frequency 230 V ~50/60 Hz 230 V ~50/60 Hz | ||
| Power 1400 W 1400 W | ||
| Pump pressure | 19 bar | 19 bar |
| Capacity of water tank | 1,8 l | 1,8 l |
| Capacity of bean container | 250 g | 750 g |
| Capacity of coffee grounds container | 15 cakes | 50 cakes |
| Capacity of the brewing unit | 7-14 g | 7-14 g |
| Adjustable scope range | 80-140 mm | 80-140 mm |
| Length of power cord | 1,5 m | 1,5 m |
| Net weight | 11,5 kg 13 kg | |
PROGRAM SETTINGS FOR BASEMENT AND WATER INLET:
For first use, fill in water tank and put machine on basement, turn on the machine, when screen shows "Ready", turn off the machine. It means machine system has water now, please do following Program Settings:
1) Turn on the machine, when screen shows "Ready", long press the rotary button and choose "Program Setting"
2) Rotate the button to "Exit" on screen, then long press the rinse button for 5 seconds to enter engineer setting.
3) You can find "WATER UNIT" on screen, enter and choose "PIPE", then confirm it with rotary button, the screen shows "Confirmed".
※ With this setting, the water level sensor will not work and the machine will not remind "Fill in water".
4) Choose rotary button to find "WASTE UNIT" on screen, enter and choose "BASE", then confirm it with rotary button, the screen shows "Confirmed".
※ With this setting, the machine will not remind "Empty Tray".
5) After "Program Setting", rotate the button to "Exit", then it shows "Ready" on screen. Please turn off the machine and remove the basement before following "Assembly Guidance".


ASSEMBLY GUIDANCE ON WATER INLET GROUP:
Tool Name: T10 screw tool

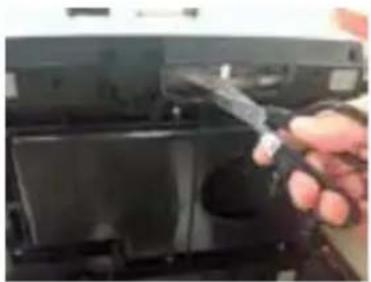
1) Take out the Drip Tray and the water tank, ensure no beans inside the bean container. Put the coffee machine aside down, cut off the original water hose by the scissor.
2) Take out the original water hose and put one side onto the water connector tube of water inlet group.
3) After connecting the water inlet group, put the machine onto the basement and ensure the silicon pipe is in the notch. Please do not let the machine press the water pipe.
4) Put the water pipe into the water barrel.
Special Instruction:
1) Using water inlet group, when turn on the machine, the screen shows "Unit Empty", it's normal, just follow instruction to fill in water into system.
2) The water tank cannot be used if the machine is equipped with the water inlet group, otherwise the machine will be damaged.
3) The filter inside the water inlet group cannot be taken out to avoid the blog by impurities in the water.
natural_image
Close-up of a hand holding a black tool interacting with a black electronic device (no visible text or symbols)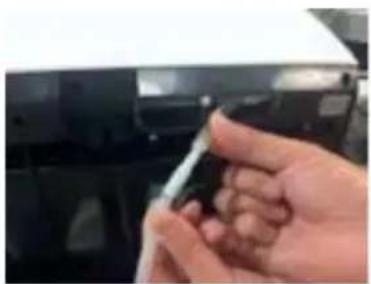
natural_image
Close-up of a hand holding a pen, partially visible against a dark background (no text or symbols)
natural_image
Close-up of a printer's internal circuit board with a white cable inserted, no visible text or symbols
natural_image
Blue water dispenser bottle placed on tiled floor against red background (no visible text or symbols)CAUTION AND PROBLEM SHOOTING:
- If screen shows "Unit Empty" during operation, please follow below steps:
1) Confirm if the water inside water barrel is used up.
2) Confirm if the water inlet group with filter side is inside the water.
3) Confirm if the water connection tube is well fitted with the original water pipe in the coffee machine.
- How to empty coffee grounds and waste water:
1) The sample machine with basement does not have the system reminder of "Empty Grounds". The capacity is 50 portions coffee grounds, so please empty the coffee grounds in time. For future production, we will add the system reminder of "Empty Grounds" for every 50 portions coffee grounds.
※ If the coffee grounds cannot be emptied on time, the coffee machine may be damaged.
2) The coffee machine with basement will not indicate "Empty Tray" because there is no water sensor on the basement. The capacity of waste water container is 2L, so please empty the container in time to avoid waste water leakage.
- How to use Water Inlet Group:
1) On one side of water pipe there is a filter, please do not take out the filter, otherwise the coffee machine internal pipe may be blogged by impurities in the water.
natural_image
Hand pouring dark granular substance from a container onto a surface (no visible text or symbols)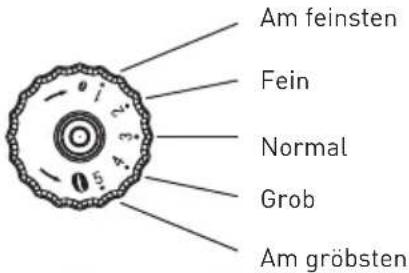
natural_image
Close-up of a black grater with red granular substance inside (no text or symbols visible)
EINSCHALTEN

natural_image
Hand pointing at a black electronic device with a button (no text or symbols visible)AUSSCHALTEN

natural_image
Hand pointing at a black doorbell with buttons (no visible text or symbols)DE
natural_image
Modern coffee machine with white cup and red directional arrow (no visible text or symbols)natural_image
Hand pointing at a digital kitchen control panel with buttons and a central knob (no visible text or symbols)


flowchart
graph TD
    A["FILL POWDER"] --> B["SELECT COFFEE ROTARY TO CANCEL"]
    B --> C["Target Icon"]
natural_image
Hand pouring a dark brown liquid into a black plastic container on a tray (no text or symbols visible)natural_image
Close-up of a hand pressing a button on a device panel (no visible text or symbols)DE

OPEN COVER ADD CLEANING TABLET
CLOSE COVER PRESS RINSE

CLEAN


natural_image
Hand pouring liquid into a refrigerator (no text or symbols visible)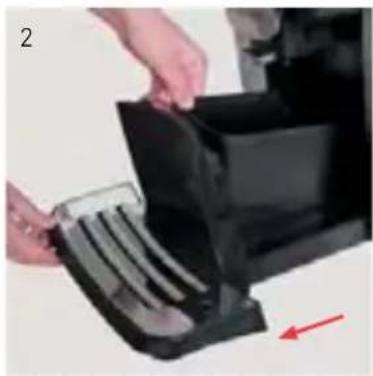
natural_image
Close-up of hands installing or adjusting a black plastic component with a red arrow indicating direction (no text or symbols visible)
natural_image
Exterior view of a modern stainless steel coffee maker with a metal cup (no text or symbols visible)

natural_image
Hand inserting a black device into a desktop computer tower, with a red arrow indicating direction (no text or symbols visible)
natural_image
Close-up of hands holding a transparent container with a dark substance, no visible text or symbols

natural_image
Hand holding a black tool interacting with a transparent container (no visible text or symbols)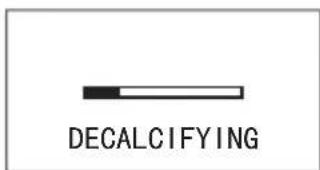
natural_image
Close-up of hands holding a black plastic container next to a mechanical component (no visible text or symbols)natural_image
Close-up of hands using a mechanical device to press or install a component, with a red arrow indicating motion (no visible text or symbols)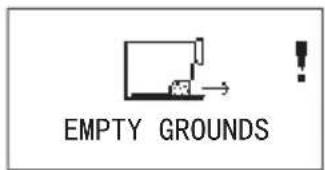
natural_image
Two-panel image showing a hand holding a black plastic container and a small object, both without any visible text or symbols.
natural_image
Hand inserting a flexible electronic device into a black case, with a red arrow indicating direction (no text or symbols visible)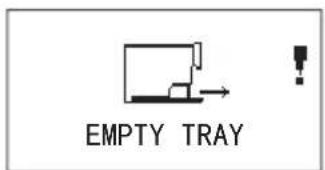
natural_image
Close-up of a black plastic enclosure with a small internal component and two red arrows pointing to it (no text or symbols visible)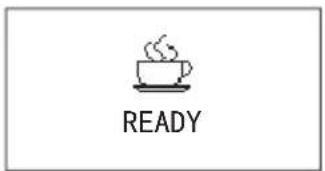

natural_image
Close-up of hands holding a transparent plastic tray with a chocolate chip, no visible text or symbols
natural_image
Hand pressing down on a black electronic device with a button (no visible text or symbols)natural_image
Close-up of a hand holding a small object, possibly a device or tool, with no visible text or symbols.
natural_image
Three black plastic mechanical components with threaded connectors, shown from different angles (no text or symbols visible)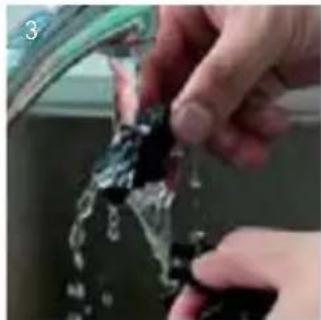
natural_image
Close-up of hands cleaning a car window with water droplets (no text or symbols visible)
natural_image
Close-up of a hand holding a small electronic component (no visible text or symbols)natural_image
Close-up of a hand holding a transparent plastic object, no visible text or symbols
natural_image
Close-up of hands holding a transparent plastic tube in a water tank (no visible text or symbols)
natural_image
Close-up of a hand holding a small object with a white device attached, next to a blurred background (no visible text or symbols)KAFFEEMASCHINE REINIGEN


natural_image
Solid gray image with no visible content, text, or symbols.natural_image
Exterior view of a modern stainless steel coffee maker (no visible text or symbols)
RECYCLING
natural_image
Close-up of a hand holding a black plastic clip attached to a black electronic device (no visible text or symbols)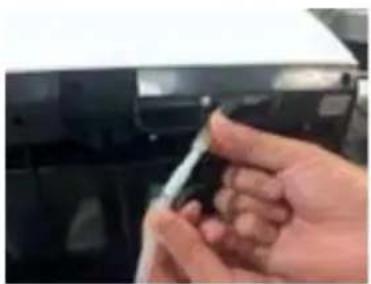
natural_image
Close-up of a hand holding a small object against a dark background (no visible text or symbols)
natural_image
Close-up of a hand holding a white cable inserted into a black electronic device (no visible text or symbols)
natural_image
Blue water dispenser bottle placed on tiled floor against red background (no visible text or symbols)natural_image
Hand pouring dark granular substance from a container onto a white surface (no text or symbols visible)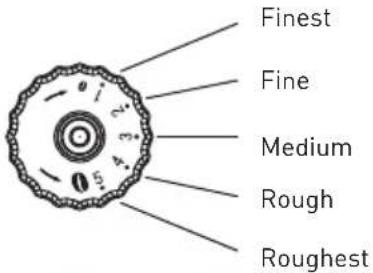
natural_image
Close-up of a black grater with red granular substance inside (no text or symbols visible)INSCHAKELEN
natural_image
Hand pointing at a wall-mounted device with a circular button (no text or symbols visible)

UITSCHAKELEN


natural_image
Hand pointing at a black doorbell with buttons and a central knob (no visible text or symbols)NL
5. BEREIDING VAN DRANKEN

natural_image
Modern coffee machine with white cup and red directional arrow (no visible text or symbols)KOFFIE BEREIDEN MET DE AANRAAKGEVOELIGE PICTOGRAMMEN
natural_image
Hand pressing a button on a digital device (no visible text or symbols)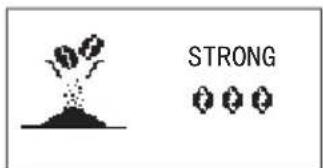


KOFFIE BEREIDEN MET KOFFIEPOEDER
natural_image
Close-up of a hand using a black spatula to remove a dark, glossy substance from a tray (no text or symbols visible)6. PROGRAMMA-INSTELLINGEN

natural_image
Hand pressing a button on a device panel (no visible text or symbols)NL
DE BROUWEENHEID REINIGEN

OPEN COVER ADD CLEANING TABLET
CLOSE COVER PRESS RINSE

CLEAN


natural_image
Hand pouring liquid into a refrigerator (no text or symbols visible)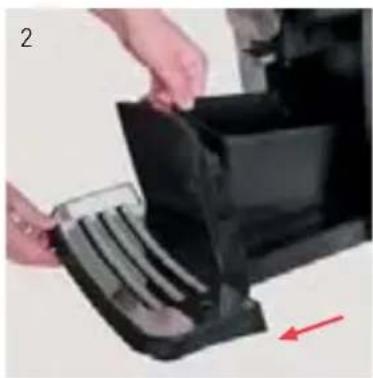
natural_image
Close-up of hands installing or adjusting a black plastic container with a red arrow indicating direction (no text or symbols visible)
natural_image
Exterior view of a modern stainless steel coffee maker with a metal cup (no text or symbols visible)

natural_image
Hand inserting a black device into a desktop computer tower, with a red arrow indicating direction (no text or symbols visible)
Leeg de lekbak.
Installeer de lekbak.

natural_image
Close-up of hands holding a transparent container with a dark substance, no visible text or symbols

natural_image
Hand holding a black tool interacting with a transparent container (no visible text or symbols)
Ontkalken.

natural_image
Close-up of hands holding a black plastic container next to a mechanical component (no visible text or symbols)natural_image
Close-up of hands using a device to press or install a transparent disc, with a red arrow indicating motion (no visible text or symbols)
natural_image
Two-panel image showing a hand holding a black plastic container and a small object, both without visible text or symbols.
natural_image
Hand placing a black plastic tray into a black rack, with a red arrow indicating direction (no text or symbols visible)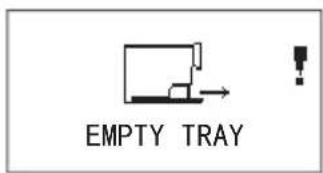
natural_image
Close-up of a black plastic enclosure with a small connector and two red arrows pointing to it (no text or symbols visible)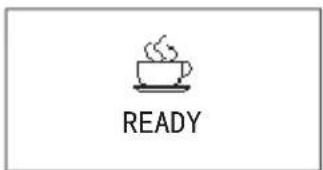

natural_image
Close-up of hands using a transparent plastic device to apply a brown substance (no visible text or symbols)HET KOFFIEBONENRESERVOIR REINIGEN

natural_image
Hand pressing down on a black electronic device with a button (no visible text or symbols)DE MELKOPSCHUIMER DEMONTEREN EN REINIGEN

natural_image
Close-up of a hand pressing a button on a black surface, no visible text or symbols
natural_image
Three black plastic mechanical components with no visible text or symbols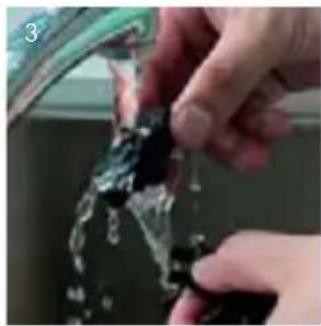
natural_image
Close-up of hands cleaning a glass bottle with water droplets (no text or symbols visible)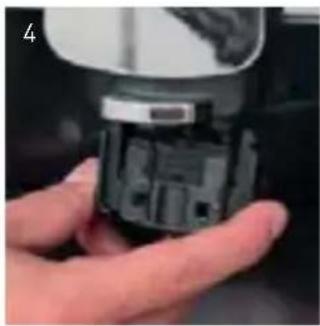
natural_image
Close-up of a hand holding a small mechanical component, possibly a device or tool, with no visible text or symbols.DE MELKSLANG INSTALLEREN
natural_image
Two hands performing a procedure: adding a plastic tube to a black container, with no visible text or symbols.HET KOFFIEZETAPPARAAT REINIGEN

natural_image
Close-up of a hand holding a small electronic device with a USB port, next to a blurred background (no visible text or symbols)8. STORINGEN VERHELPEN

natural_image
Solid gray image with no visible content, text, or symbols.natural_image
Exterior view of a modern office building (no signage)
RECYCLING
natural_image
Close-up of a hand using a tool to adjust or install electronic components (no visible text or symbols)
natural_image
Close-up of a hand holding a small object against a dark background (no visible text or symbols)
natural_image
Close-up of a hand holding a white cable inserted into a black electronic device (no visible text or symbols)
natural_image
Blue water dispenser bottle placed on tiled floor against red background (no visible text or symbols)PROBLEMEN OPLOSSEN:
natural_image
Hand pouring dark chocolate into a griddle on a white surface (no text or symbols visible)
natural_image
Close-up of a black grater with red granular substance inside (no text or symbols visible)WŁĄCZANIE

natural_image
Hand pointing at a black electronic device with a button (no text or symbols visible)WYŁĄCZANIE

natural_image
Hand pointing at a black doorbell with control buttons (no visible text or symbols)PL
5. PRZYGOTOWYWANIE NAPOJÓW

natural_image
Modern coffee machine with white cup and control panel (no visible text or symbols)PARZENIE KAWY ZA POMOCA IKONY DOTYKOWEJ
natural_image
Hand pressing a button on a digital kitchen appliance (no visible text or symbols)

natural_image
Hand pressing a button on a wall-mounted device (no visible text or symbols)
flowchart
graph TD
    A["NASYP K.MIELONEJ"] --> C["Target Icon"]
    B["WYBIERZ KAWĘ LUB ANULUJ"] --> C["Target Icon"]
natural_image
Hand pouring a dark liquid into a black tray with a spatula (no text or symbols visible)6. KONFIGURACJA USTAWIEN

natural_image
Close-up of a hand pressing a button on a device panel (no visible text or symbols)PL
CZYSZCZENIE ZAPARZACZA

natural_image
Hand pouring liquid into a refrigerator (no text or symbols visible)
natural_image
Close-up of hands installing or adjusting a black plastic bag with a red arrow indicating motion (no text or symbols visible)
natural_image
Exterior view of a modern stainless steel coffee maker with a metal cup (no text or symbols visible)

natural_image
Hand inserting a black device into a desktop computer tower, with a red arrow indicating direction (no text or symbols visible)
Opróżnić tackę.
Założyć tackę.
natural_image
Close-up of hands holding a transparent plastic tray with a dark brown substance, no visible text or symbols
natural_image
Hand holding a black tool interacting with a transparent container (no visible text or symbols)

natural_image
Close-up of hands holding a black plastic container next to a mechanical component (no visible text or symbols)natural_image
Close-up of hands using a mechanical device to adjust a transparent component (no visible text or symbols)
natural_image
Two-panel image showing a hand holding a black plastic container and a small object, both without any visible text or symbols.
natural_image
Hand inserting a black plastic device into a stack of plastic units, with a red arrow indicating direction (no text or symbols visible)
natural_image
Close-up of a black plastic electronic component with two red arrows pointing to its side (no text or symbols visible)
natural_image
Close-up of hands holding a transparent rectangular device with a dark brown object on top, no visible text or symbols
natural_image
Hand pressing down on a black electronic device with a button (no visible text or symbols)DEMONTAŻ I MYCIE SPIENIACZA MLEKA

natural_image
Close-up of a hand pressing a button on a black surface, no visible text or symbols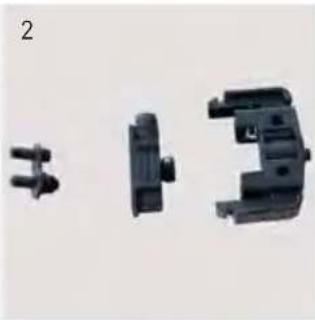
natural_image
Three black plastic mechanical components with threaded connectors, shown from different angles (no text or symbols visible)
natural_image
Close-up of hands cleaning a glass bottle with water droplets (no text or symbols visible)
natural_image
Close-up of a hand holding a small electronic device component (no visible text or symbols)INSTALOWANIE PRZEWODU MLEKA
natural_image
Close-up of a hand holding a transparent plastic tube inserted into a black electronic device (no visible text or symbols)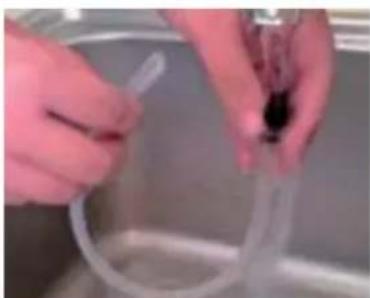
natural_image
Close-up of hands holding a transparent plastic tube in a kitchen setting (no visible text or symbols)CZYSZCZENIE EKSPRESU

natural_image
Close-up of a hand holding a small electronic device with a USB port, next to a blurred background (no visible text or symbols)

8. POSTEPOWANIE W PRZYPADKU AWARII
natural_image
Solid gray image with no visible content, text, or symbols.natural_image
Exterior view of a modern stainless steel water dispenser (no text or symbols visible)
RECYKLING
natural_image
Close-up of a hand holding a tool interacting with a black electronic device (no visible text or symbols)
natural_image
Close-up of a hand holding a small object against a dark background (no visible text or symbols)
natural_image
Close-up of a hand holding a white cable inserted into a black electronic device (no visible text or symbols)
natural_image
Blue water dispenser bottle with label, placed on tiled floor against red background (no readable text or symbols)ROZWIĄZYWANIE PROBLEMÓW:
natural_image
Hand pouring dark granular substance from a container onto a surface, with no visible text or symbols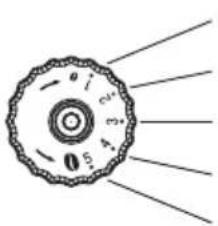
la plus fine
fine
moyenne
grosse
la plus grosse
natural_image
Close-up of a black metal grater with red granular contents, no visible text or symbols

DEMARRAGE

natural_image
Hand pointing at a black electronic device with a button (no text or symbols visible)
natural_image
Hand pressing a button on a device panel (no visible text or symbols)natural_image
Modern coffee machine with white cup and control panel, no visible text or symbolsPREPARATION DU CAFE A L'AIDE DE L'ICONE TACTILE
natural_image
Hand pressing a button on a black appliance panel (no visible text or symbols)


natural_image
Hand pouring a dark liquid into a black plastic container on a white surface (no text or symbols visible)6. CONFIGURATION DE PARAMETRES

natural_image
Close-up of a hand pressing a button on a device panel (no visible text or symbols)FR
NETTOYAGE DE LA CAFETIERE

natural_image
Hand pouring liquid into a refrigerator (no visible text or symbols)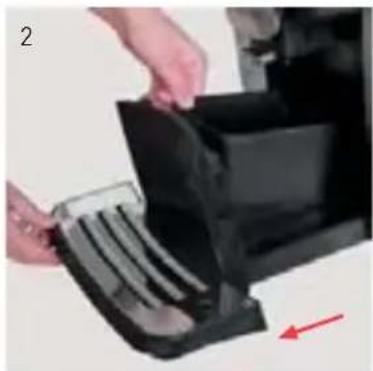
natural_image
Close-up of hands inserting a black plastic component into a machine (no visible text or symbols)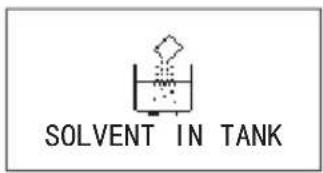
natural_image
Close-up of a modern stainless steel coffee maker with a metal cup and control panel (no visible text or symbols)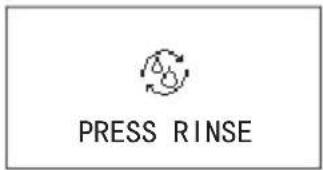

natural_image
Hand inserting a black plastic device into a black rack, with a red arrow indicating direction (no text or symbols visible)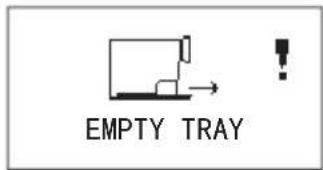
Videz l'égouttoir.

natural_image
Close-up of a hand holding a transparent rectangular device with a dark brown object on its surface (no visible text or symbols)

natural_image
Hand placing a black plastic clip into a cardboard box (no visible text or symbols)natural_image
Close-up of hands holding a black plastic container with a small object nearby (no visible text or symbols)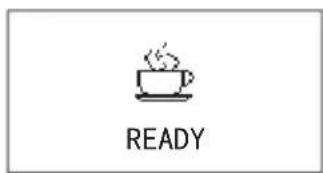
natural_image
Close-up of hands using a device to press or install a transparent disc, with a red arrow indicating motion (no visible text or symbols)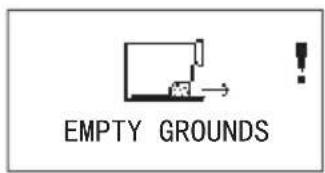


natural_image
Two-panel image showing a hand holding a black plastic container and a small object, next to a mechanical component (no visible text or symbols)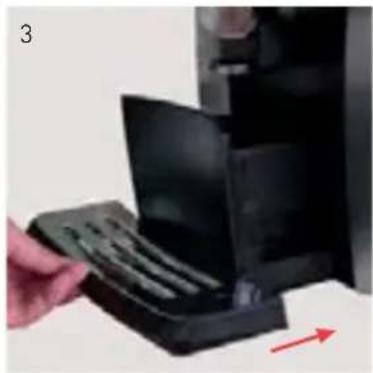
natural_image
Hand placing a black plastic tray into a black rack, with a red arrow indicating direction (no text or symbols visible)
natural_image
Close-up of a black plastic electronic component with two red arrows pointing to a small connector (no text or symbols visible)
natural_image
Close-up of hands holding a transparent plastic tray with a brown substance, no visible text or symbols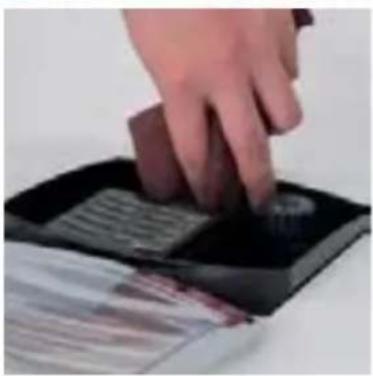
natural_image
Hand pressing down on a black electronic device with a button (no visible text or symbols)DEMONTAGE ET NETTOYAGE DU CAPPUCCINATORE

natural_image
Close-up of a hand pressing a button on a black surface (no visible text or symbols)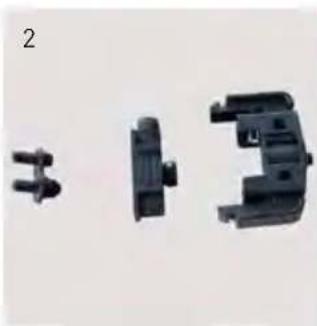
natural_image
Three black plastic mechanical components with no visible text or symbols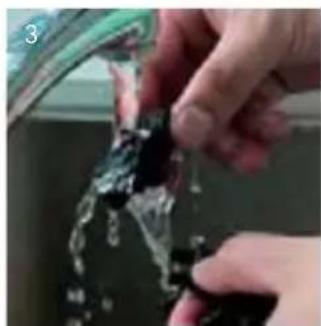
natural_image
Close-up of hands cleaning a car window with water spray (no visible text or symbols)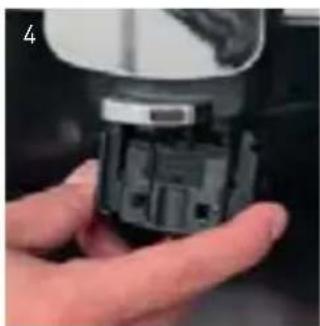
natural_image
Close-up of a hand holding a small mechanical component (no visible text or symbols)INSTALLATION DU TUYAU DE LAIT
natural_image
Close-up of a hand holding a transparent plastic tool near a black object (no visible text or symbols)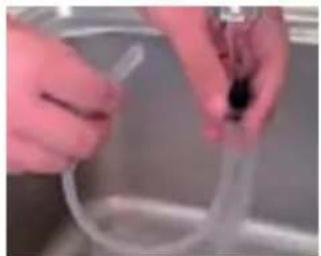
natural_image
Close-up of hands holding a transparent tube in a kitchen (no visible text or symbols)NETTOYAGE DE LA MACHINE

natural_image
Close-up of a hand holding a small electronic device with a USB port, next to a blurred background (no visible text or symbols)

8. PROCEDURE EN CAS DE DEFAILLANCE

natural_image
Solid gray image with no visible content, text, or symbols.natural_image
Close-up of a modern stainless steel coffee maker with a black lid and control panel (no visible text or symbols)
ELIMINATION
natural_image
Close-up of a hand holding a black plastic clip attached to a black electronic device (no visible text or symbols)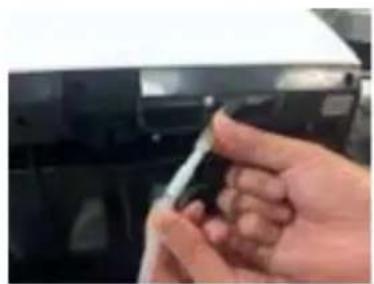
natural_image
Close-up of a hand holding a small object against a dark background (no visible text or symbols)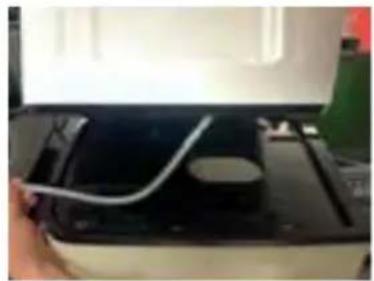
natural_image
Close-up of a hand holding a white cable inserted into a black electronic device (no visible text or symbols)
natural_image
Blue water dispenser bottle placed on tiled floor against red background (no visible text or symbols)natural_image
Hand pouring dark brown granular substance from a container onto a white surface (no text or symbols visible)
natural_image
Close-up of a black grater with red granular contents, no visible text or symbolsAVVIAMENTO

natural_image
Hand pointing at a black electronic device with a button (no text or symbols visible)
natural_image
Hand pressing a button on a black wall-mounted device (no visible text or symbols)IT
natural_image
Modern coffee maker with white cup and red directional arrow (no visible text or symbols)natural_image
Hand pressing a button on a digital device (no visible text or symbols)


natural_image
Hand pouring a brown liquid into a black plastic container on a surface (no text or symbols visible)natural_image
Hand pressing a button on a device panel (no visible text or symbols)IT
PULIZIA DELLA CAFFETTIERA

OPEN COVER ADD CLEANING TABLET
CLOSE COVER PRESS RINSE

CLEAN

natural_image
Hand pouring liquid into a refrigerator (no visible text or symbols)
natural_image
Close-up of hands inserting a plastic bag into a black plastic container (no text or symbols visible)
natural_image
Exterior view of a modern stainless steel coffee maker with a metal cup (no text or symbols visible)

natural_image
Hand inserting a black device into a desktop computer tower, with a red arrow indicating the next component (no text or symbols visible)
natural_image
Close-up of hands holding a transparent container with a dark substance, no visible text or symbols

natural_image
Hand holding a black tool interacting with a transparent container (no visible text or symbols)natural_image
Close-up of hands holding a black plastic container next to a metallic device (no visible text or symbols)
natural_image
Close-up of hands using a mechanical device to adjust a transparent component (no visible text or symbols)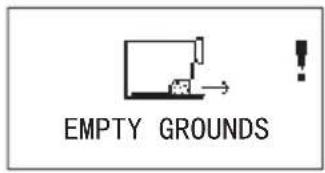

natural_image
Two-panel image showing a hand holding a black plastic container and a small object, both without any visible text or symbols.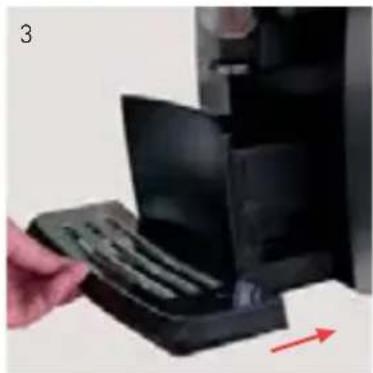
natural_image
Hand inserting a black plastic tray into a black rack, with a red arrow indicating direction (no text or symbols visible)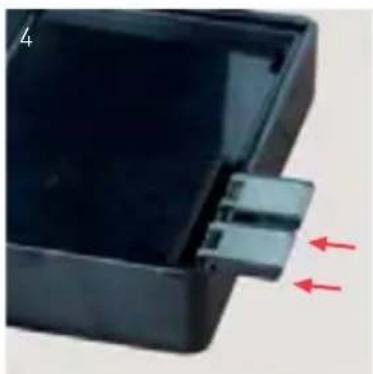
natural_image
Close-up of a black plastic enclosure with a small connector and two red arrows pointing to it (no text or symbols visible)
natural_image
Close-up of hands using a transparent device to apply a brown substance, with a red arrow pointing to the product (no visible text or symbols)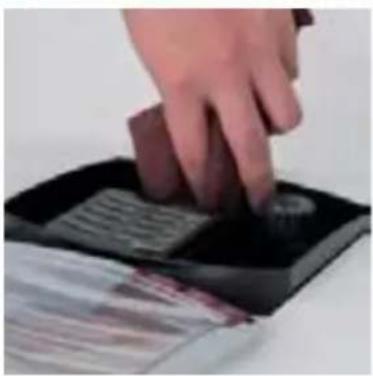
natural_image
Hand pressing down on a black electronic device with a button (no visible text or symbols)SMONTAGGIO E PULIZIA DEL CAPPUCCINATORE

natural_image
Close-up of a hand holding a small object, possibly a device or tool, with no visible text or symbols.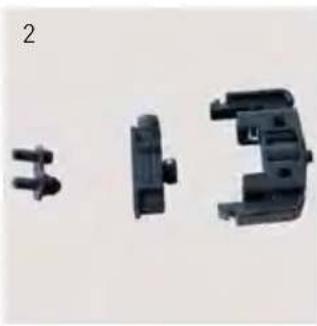
natural_image
Three black plastic mechanical components with no visible text or symbols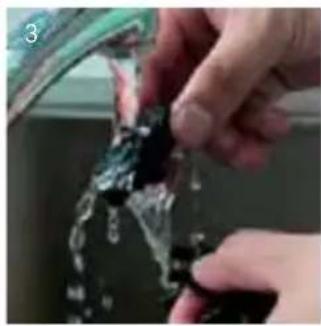
natural_image
Close-up of hands cleaning a glass container with black plastic (no text or symbols visible)
natural_image
Close-up of a hand holding a small electronic device component (no visible text or symbols)INSTALLAZIONE DEL TUBO DI LATTE
natural_image
Close-up of a hand holding a transparent plastic tube inserted into a black electronic device (no visible text or symbols)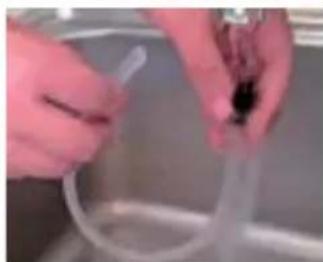
natural_image
Close-up of hands holding a transparent plastic tube in a kitchen setting (no visible text or symbols)PULIZIA DELLA MACCHINA DA CAFFÈ

natural_image
Solid gray image with no visible content, text, or symbols.natural_image
Close-up of a modern office appliance with a black front panel and metallic handle (no visible text or symbols)
RICICLAGGIO
natural_image
Close-up of a hand holding a tool interacting with a black electronic device (no visible text or symbols)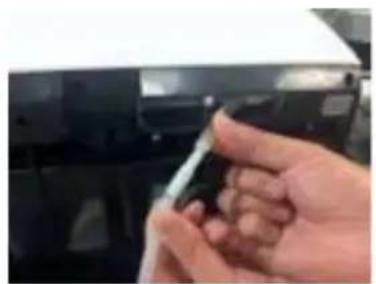
natural_image
Close-up of a hand holding a small object against a dark background (no visible text or symbols)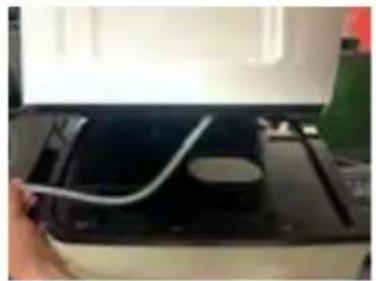
natural_image
Close-up of a hand holding a white cable inserted into a black electronic device (no visible text or symbols)
natural_image
Blue water dispenser bottle placed on tiled floor against red background (no visible text or symbols)PROBLEMI E RIMEDI
natural_image
Hand pouring dark granular substance from a container onto a textured surface (no visible text or symbols)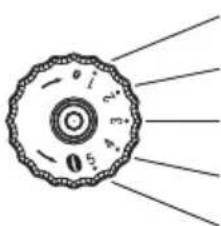
natural_image
Diagram of a circular mechanical component with radial lines indicating force or direction (no text or symbols)Cea mai fină
Fină
Medie
Grosieră
Cea mai grosieră

natural_image
Close-up of a black grater with red granular substance inside (no text or symbols visible)PORNIRE

natural_image
Hand pointing at a black doorbell with a circular button (no text or symbols visible)
natural_image
Hand pointing at a device button with 'ID' and 'PAGE' labels (no readable text beyond symbols)
natural_image
Modern coffee machine with white cup and control panel, no visible text or symbolsPREPARAREA CAFELEI CU AJUTORUL SIMBOLULUI TACTIL
natural_image
Hand pressing a button on a digital kitchen appliance (no visible text or symbols)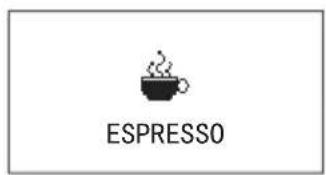


PREPARAREA CAFELEI DIN PRAF DE CAFEA
natural_image
Hand pouring liquid into a black tray with a spatula (no text or symbols visible)6. SETĂRILE PROGRAMULUI

OPEN COVER ADD CLEANING TABLET
CLOSE COVER PRESS RINSE

CLEAN


natural_image
Hand pouring liquid into a refrigerator (no visible text or symbols)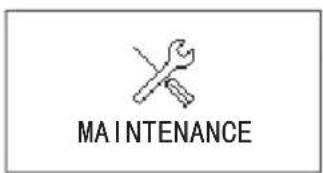


natural_image
Close-up of hands holding a black plastic bag with a red arrow pointing to it, no visible text or symbols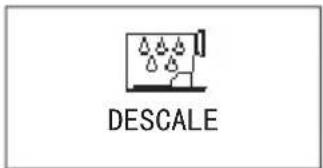


natural_image
Exterior view of a modern stainless steel coffee maker with a metal cup (no text or symbols visible)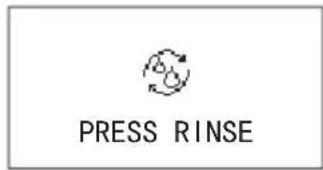

natural_image
Hand inserting a black device into a desktop computer tower, with a red arrow indicating the next component (no text or symbols visible)
Goliți tava.

Instalati tava.
natural_image
Close-up of hands holding a transparent container with a dark substance, no visible text or symbols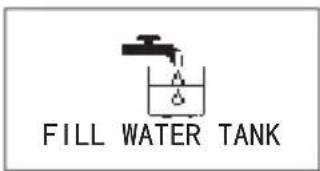

natural_image
Hand holding a black tool interacting with a transparent container (no visible text or symbols)
Decalcifiați.
natural_image
Close-up of hands holding a black plastic container next to a metallic device (no visible text or symbols)natural_image
Close-up of hands using a mechanical device to press or install a component, with a red arrow indicating motion (no visible text or symbols)
natural_image
Two-panel image showing a hand holding a black plastic container and a small object, both without any visible text or symbols.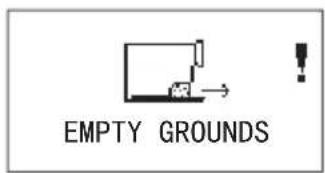
natural_image
Hand inserting a black plastic device into a stack of plastic sheets, with a red arrow indicating direction (no text or symbols visible)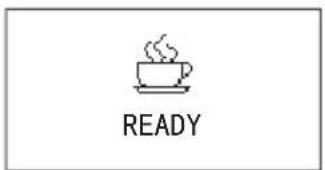
natural_image
Close-up of a black plastic enclosure with a small connector and two red arrows pointing to it (no text or symbols visible)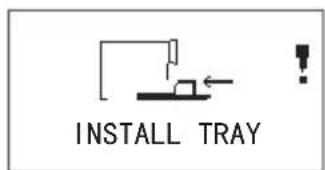
natural_image
Close-up of hands holding a transparent plastic tray with a brown substance, no visible text or symbolsCURĂȚAREA RECIPIENTULUI DE BOABE

natural_image
Hand pressing down on a black electronic device with a button (no visible text or symbols)DEZASAMBLAREA ȘI CURĂȚAREA APARATULUI PENTRU SPUMĂ DE LAPTE

natural_image
Close-up of a hand holding a small electronic device with a metallic sensor (no visible text or symbols)
natural_image
Three black plastic mechanical components with no visible text or symbols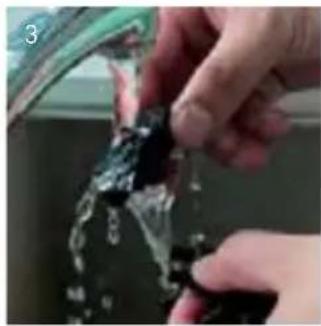
natural_image
Close-up of hands cleaning a glass surface with water droplets (no text or symbols visible)
natural_image
Close-up of a hand holding a small electronic component (no visible text or symbols)INSTALAREA TEVII DE LAPTE
natural_image
Two-step photo showing hands holding a transparent plastic tube and a coiled wire, no text or symbols visibleCURĂȚAREA MAȘINII DE CAFEA

natural_image
Close-up of a hand holding a small electronic device with a USB port, next to a blurred background (no visible text or symbols)8. GESTIONAREA ERORILOR


natural_image
Exterior view of a modern stainless steel water dispenser (no text or symbols visible)
RECICLARE
natural_image
Close-up of a hand holding a tool interacting with a black electronic device (no visible text or symbols)
natural_image
Close-up of a hand holding a small object against a dark background (no visible text or symbols)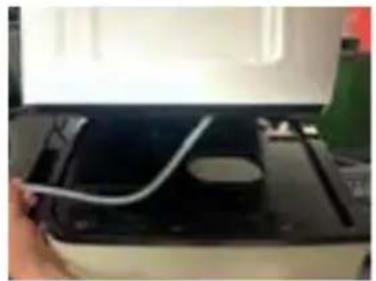
natural_image
Close-up of a printer's cable being inserted into a black tray (no visible text or symbols)
natural_image
Blue water dispenser bottle placed on tiled floor against red background (no visible text or symbols)ATENTIONĂRI ȘI DEPANARE:
62-023 Gądki, Poland
Tel: +48 61 6587000
Email: info@hendi.pl
Hendi Food Service Equipment GmbH
Central Barn, Hornby Road
Lancaster, LA2 9JX, United Kingdom
Tel: +44 [0]333 0143200
Email: sales@hendi.co.uk
Hendi Food Service Equipment Romania Srl
PKS Hendi South East Europe SA
5 Metsovou Str.
18346 Moschato, Athens, Greece
Tel: +30 210 4839700
Email: office.greece@hendi.eu
Hendi HK Ltd.
1208, 12/F Exchange Tower
33 Wang Chiu Road, Kowloon Bay, Hong Kong
Tel: +852 2154 2618
Email: info-hk@hendi.eu
Find Hendi on internet:
www.hendi.eu
www.facebook.com/HendiFoodServiceEquipment
www.linkedin.com/company/hendi-food-service-equipment-b.v.
www.youtube.com/HendiEquipment