
FlatPro 3400 - Microwave Oven CECOTEC - Free user manual and instructions
Find the device manual for free FlatPro 3400 CECOTEC in PDF.

| Product type | Microwave oven |
| Brand | Cecotec |
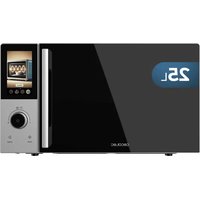
| Model | FlatPro 3400 |
| Approximate capacity | 25 liters (estimate) |
| Maximum power | 100% (varies by level) |
| Power levels | HIGH (100%), MED-HIGH (70%), MEDIUM (50%), DEFROST (20%), HOLD (0%) |
| Control type | Digital with keys and display |
| Main functions | Manual cooking, automatic, programming, double quantity, step cooking, defrost |
| Turntable | Ceramic base |
| Dimensions (W x D x H) approx. | 45 x 35 x 25 cm (estimate) |
| Approximate weight | 10 kg (estimate) |
| Power supply | 230 V, 50 Hz (standard) |
| Maintenance and cleaning | Clean with a damp cloth; do not immerse; use lemon or tea to remove odors |
| Safety | Safety lock, child lock, automatic shut-off at end of cooking |
| Spare parts and repairability | Official Cecotec technical service; parts like filter and oil lock are removable |
| General information | Manual available in PDF; user settings customizable |
Frequently Asked Questions - FlatPro 3400 CECOTEC
User questions about FlatPro 3400 CECOTEC
0 question about this device. Answer the ones you know or ask your own.
Ask a new question about this device
Download the instructions for your Microwave Oven in PDF format for free! Find your manual FlatPro 3400 - CECOTEC and take your electronic device back in hand. On this page are published all the documents necessary for the use of your device. FlatPro 3400 by CECOTEC.
USER MANUAL FlatPro 3400 CECOTEC
- Parts and components 19
2.Before use 19
3.Installation 20 - Operation 20
- Tips 28
- Cleaning and maintenance 29
7.Problem solving 31
8.Copyright 32 - EU Declaration of Conformity simplified 32
SOMMAIRE
EN · The coding in this manual is generic and applies to all code variants of the appliance.
- control Panel
- Safety lock
- Observation window
- Ceramic base
control Panel
Fig. 2
- Screen
- Power buttons
- Time button
- Button x2
- Stop/Reset button
- Home button
- Number buttons
NOTE:
The graphics in this manual are schematic representations and may not exactly match those on the product.
2. BEFORE USE
- This appliance comes in packaging designed to protect it during transport. Remove the appliance from its box and remove all packaging material. You may want to store the original box and other packaging items in a safe place to prevent damage to the appliance if you need to transport it in the future. If you wish to dispose of the original packaging, please be sure to recycle all items properly.
- Cecotec 's Official Technical Support Service immediately .
Box contents
- Microwave
- This instruction manual
- Do not remove the serial number from the product, so that your equipment can be properly traced in case you need assistance.
3. INSTALLATION
3.1.Preparing the space:
- Surface: Choose a level, stable surface that offers sufficient clearance around the microwave to ensure proper ventilation (see Figure 3).
- Clearance: Allow a minimum of 10cm (4 in) space between the back and right side of the microwave and the wall. Allow a 30cm (12 in) space above the microwave.
Precautions:
- Do not obstruct or block the ventilation grilles (air inlet and outlet).
- Do not remove the legs from the microwave.
- Make sure the left side of the microwave is clear.
Important warnings:
- Blocking the vents can damage the microwave.
- To avoid interference, place the microwave as far away as possible from radios and televisions.
- Connect the microwave to a standard household outlet that matches the voltage and frequency indicated on the appliance label.
- Do not place electrical outlets, electrical appliances, or other items sensitive to heat or moisture near the microwave vents.
3.2. Installation with overlay (optional):
- This microwave allows for stacking installation of up to two units (see Figure 4).
Steps for installation with overlay:
- Loosen the screw on the mounting plate, remove the plate, and retighten the screw in place.
- Remove the four screws from the back of the microwave, as shown in Figure 4.
- Place the mounting plate in the correct position and secure the plate with the four screws you removed in the previous step.
4. OPERATION
control Panel
Fig. 2
- Screen
- Power Buttons: Buttons to select the desired microwave power level.
- Time Entry Button: Button to start manual time entry for cooking.
- Button X2: Button to cook double the quantity.
- Stop/Reset Button: Button to stop the cooking process or reset the microwave.
ENGLISH
- Start Button: Button to start the cooking process.
- Number Buttons: Buttons to enter cooking time or select preset programs.
The following table shows the different powers available in this microwave.
| Level HIGH MED_HIGH MEDIUM | DEFROST HOLD | |||
| Power 100% 70% 50% 20% 0% | ||||
| Screen 10 70 50 20 | 0 |
Default cooking times
The microwave will be supplied with the following predefined cooking times:
| Number button | Screen (minutes:seconds) | Power (%) Cooking factor (%) | |
| 1 | 0:10 | 100 | 80 |
| 2 | 0:20 | 100 | 80 |
| 3 | 0:30 | 100 | 80 |
| 4 | 0:45 | 100 | 80 |
| 5 | 1:00 | 100 | 80 |
| 6 | 1:30 | 100 | 80 |
| 7 | 2:00 | 100 | 80 |
| 8 | 2:30 | 100 | 80 |
| 9 | 3:00 | 100 | 80 |
| 0 | 3:30 | 100 | 80 |
1. On
- When you plug the microwave into a power outlet for the first time, the display will show " - - - - - - - ". If you press the " " button, the microwave will go into standby mode.
NOTE: In idle mode, you cannot press any buttons.
2. Idle mode (standby)
-
The microwave will enter idle mode after a certain number of seconds have elapsed in Ready Mode without any key presses or door opening or closing. The number of seconds is determined by the Keypad Timeout, which is set using User Option 4.
-
During idle mode, the LED will be off and there will be no microwave activity.
- Opening and then closing the microwave door will take the microwave out of idle mode and into ready mode.
3. Ready mode
- When you open and close the door, the microwave is ready for use.
- The screen displays "READY".
- From this mode, you can access all the microwave functions.
4. Open door mode
- This mode is activated when the door is opened.
- The display shows "DOOR OPEN".
- When the door is closed, if User Option "OP:60" is selected and the microwave is running a manual or preset cooking cycle, the microwave will enter Pause Mode.
- In all other cases, the microwave will return to Open Door Mode with User Option "OP:61" selected, opening and closing the door will erase any information about a Manual or Preset Program that was running.
- In cooking state, open the microwave door, "DOOR OPEN" will be displayed once, and then the display will show the remaining time.
5. Pause mode
- If you open the door or press the " " button while the microwave is in operation, the microwave will pause.
- The display shows the remaining cooking time.
- If you leave the microwave paused for a while, it will return to Sleep Mode (the wait time can be adjusted in the settings).
- To cancel cooking, press the " " button. To continue, press the " " button.
6. Manual cooking mode
- This mode allows you to adjust the cooking time and power manually.
- In ready mode, press the " " button , the microwave will enter Manual Cooking Entry Mode and the display will show "00:00".
- Enter the desired cooking time using the number buttons (for example, "1:30" for one minute and thirty seconds).
- Select the desired power by pressing the power buttons: " ", 0%, " ", 20% 50% 70% Pressing the same power button twice will set the maximum power. If you don't select a power, the microwave will use maximum power.
- Press the " " button to start cooking.
- To return to Ready Mode, press the " " button.
ENGLISH
7. Automatic Cooking Mode
- This mode uses predefined programs to cook different types of food easily.
- Press the " " button to enter the automatic cooking mode.
- During this mode, the display will show the remaining cooking time.
- When cooking is complete, the microwave will enter end-of-cooking mode.
- To cancel cooking, press the " " button, the microwave will enter pause mode.
8. End of Cooking
- When the cooking time reaches zero, the microwave will stop and beep to alert you.
- The screen will display "End".
- The microwave will beep once (the type of beep can be adjusted in the settings). If the "OP:11" or "OP:12" setting is selected, the microwave will continue to beep until the user confirms it by opening and closing the door or pressing the "▶ button. If the "OP:10" option is selected, after the 3-second beep, the microwave will enter Ready Mode.
9. Cooking mode with preset programs
- This mode allows you to cook food at the touch of a button, using predefined cooking programs.
- In Pause Mode, press one of the number buttons to start the cooking program associated with that number (see the "Preset Cooking Times" table to see which program corresponds to each number).
- The microwave will begin cooking automatically, and the display will show the remaining cooking time. If the program has multiple stages, the total remaining time will be displayed, not the time for each individual stage.
- When the program is finished, the microwave will enter the "End of Cooking Mode".
- To pause or cancel cooking, press the " " button.
10. Quick cooking mode
- If the "Quick Cook" option is activated (see "User Options" section), you can start a predefined cooking program by pressing a number button while the microwave is cooking or paused.
- While the microwave is cooking or paused, press one of the number buttons (1-9) to start the program associated with that number.
- The display will show the remaining cooking time.
- When the program is finished, the microwave will enter the "End of Cooking Mode".
- To pause or cancel cooking, press the " " button.
11. Programming mode
-
This mode allows the user to assign cooking times and power levels to the number pads.
-
Open the door and press button "1" for 5 seconds. The buzzer will sound once and you will enter Programming Mode. "PROGRAM" will be displayed.
- Press one of the number buttons to change the time and power level, and the display will show the saved time.
- To change the cooking factor: If you press the " " button, the display will show " CF:XX ". The default factor is 80% . "CF:08" will be displayed. If you need to change the cooking factor, simply press one of the number buttons to set it. If you press "0", "CF:10" will be displayed. After setting, press the " " button to save, and "PROGRAM" will be displayed. If you do not need to change the cooking factor, skip this step.
- Press the number buttons to enter the desired cooking time.
- Press " ", "HOLD", "DEPOST", "MEDIUM", "MED_HIGH" to enter the power level, the display will show the corresponding power. Pressing the same button twice will change the power to 100%. If no power is selected, the default is "100%".
Note: First set the time, then choose the power.
- After setting the time and power, press the " " button, and the cooking program will be saved. When the program is saved, "PROGRAM" is displayed.
- If the cooking time exceeds the maximum time specified in User Option 7, when you press the " button to save the program, the buzzer will sound three times briefly to indicate that the time is invalid. The display will then return to "PROGRAM." The previously set time will not be changed.
-
Close the door and the microwave will return to Ready Mode.
-
If you press the " " button during the setup process, the microwave will enter Open Door Mode. Any unsaved program will be lost.
- If there is a program saved as a memory procedure, press the related number button and the saved program will start.
- If there is no program saved, the buzzer will sound when pressing the number button and it will not work.
- For example: Set the program to memory cooking. The power level is 70% , and the cooking time is 1 minute and 25 seconds.
Step 1: Open the door, press the number button "1" for 5 seconds, and "PROGRAM" will be displayed.
Step 2: Press the number button "3", the screen will display "P:03". After two seconds, the screen will display the related time ".30".
Step 3: Press the number buttons "1", "2" and "5" to enter the cooking time.
Step 4: Press the " Med -Hi 70% " button, "1:25 70" will be displayed. Setting completed.
Step 5: Press " " to save. When you use the program next time, just press "3", the related
ENGLISH
program will start.
Grades:
- If the power goes out, the saved program will not be lost.
- If the program needs to be reset, simply repeat the steps above.
- If you press the " " button in the last step, you will return to Open Door Mode. The setting will be invalid.
12. Double Batch Cooking Mode
-
This mode automatically adjusts the cooking time to cook twice the amount of food.
-
In Ready Mode, press the " " button and then press one of the number buttons (0-9) within 5 seconds to select a preset cooking program.
- The display will show "DOUBLE" and then the cooking time set for double the quantity. For example, if the preset program has a cooking time of 1 minute, pressing "x2will adjust the time to (1 + 0.8) = 1 minute and 48 seconds.
-
The microwave will automatically start cooking with the set time.
-
When the program is finished, the microwave will enter the End of Cooking Mode.
13. Stage cooking mode
-
This mode allows you to cook food using a combination of different power levels in several stages.
-
You can set up to three cooking stages. First, set the power and time for the first stage.
- Next, press the " " button to advance to the second stage. The display will show "STAGE-2." Set the power and time for the second stage.
- Repeat the previous step to set up a third stage (the display will show "STAGE-3").
-
Press the " " button to start cooking.
-
Example: To program stages: The first at medium power for 1 minute and 25 seconds, the second at low power for 5 minutes and 40 seconds:
-
In Ready Mode, press the number button "1" for 5 seconds to enter Programming Mode (the display will show "PROGRAM").
- Press the number button "3" to save the program to memory "3".
- Enter the time "1:25" by pressing the number buttons "1", "2" and "5".
- Press the "MED_HIGH" button (the display will show "1:25 70"). The first stage is set.
- Press the " " button. The display will show "STAGE-2".
- Enter the time "5:40" by pressing the number buttons "5", "4" and "0".
- Press the "MEDIUM" button (the display will show "5:40 50"). The second stage is set.
- Press the " " button to save the program.
14. User Options Mode
- This mode allows you to customize different microwave settings, such as beep volume.
ENGLISH
- Open the microwave door and press and hold the "2" button for 5 seconds. The microwave will beep and enter User Options Mode, with the display showing "OP: --".
- Press the number button corresponding to the option you wish to modify (see the "User Options" section).
For example, to adjust the beep volume, press button "2." The display will show the current setting (e.g., "OP:22" for medium volume).
- To change the setting, continue pressing the same number button. The display will cycle through the available settings (e.g., "OP:20" for off, "OP:21" for low, "OP:22" for medium, "OP:23" for high, and then back to "OP:20").
- Once you have selected the desired setting, press the " " button to save it. The display will return to "OP: - -".
- If you press the " " button during the setting process, the microwave will return to Door Open Mode. Closing the door will return it to Ready Mode, but the changes will not be saved.
- If you do not press the " " button to save the setting, the microwave will not save the changes and will keep the previous settings.
User Options
| Option Adjustment Description | ||
| 1. Type of sound OP:10 A | 3-second beep | |
| OP:11 A continuous beep | ||
| OP:12 5 rapid, repeating beeps | ||
| 2. Buzzer volume OP:20 | Buzzer deactivated (silent) | |
| OP:21 Low volume | ||
| OP:22 Average volume | ||
| OP:23 High volume | ||
| 3. Buzzer on/off | OP:30 Key beep disabled | |
| OP31 | Key beep activated | |
ENGLISH
| 4. Panel illumination time | OP:40 15 seconds | |
| OP:41 30 seconds | ||
| OP:42 60 seconds | ||
| OP:43 120 seconds | ||
| 5. On the fly OP:50 "On the Fly" function disabled (no changes can be made during operation) | ||
| OP:51 "On the Fly" function activated (changes can be made during operation) | ||
| 6. Reset by door OP:60 Door reset disabled (opening the door pauses, but does not reset) | ||
| OP:61 Door reset activated (opening the door stops and restarts the function) | ||
| 7. Maximum time OP:70 Maximum cooking time of 60 minutes | ||
| OP:71 Maximun cooking time of 10 minutes | ||
| 8. Manual programming | OP:80 Manua. programming disabled (only predefined programs can be used) | |
| OP:81 Manual programming enabled (can be programmed manually) | ||
| 9. Double digit OP:90 One-digit mode - 10 programs (programs 1 to 10 are selected with a single digit) | ||
| OP:91 Double Digit Mode - 100 programs (up to 100 programs can be selected using two digits) | ||
15. Factory Default Setting
- To restore the factory default settings, turn on the microwave and, in Ready Mode, press the "▶" button and the number button "0" at the same time, the buzzer will sound once and the display will show "CHECK".
- If it is in factory default setting, the display will show "11", after three seconds, the microwave will go into ready mode. If it is not in factory default setting, the display will show "00", press the "▶" button to factory default setting, and the display will show "
CLEAR ". The buzzer will sound once, after self-test, the display will show "11" or "00".
- If you do not press the " " button when the screen displays " 00 ", the setting will be canceled after 10 seconds.
Note: Please be careful in operation, as it restores all settings to factory default.
5. TIPS
- Place food carefully: Place the thickest parts of the food toward the edge of the turntable. Try to avoid overlapping the food.
- Monitor cooking time: Start by cooking food for the shortest possible time and add more time as needed. Overheating food can cause smoking or burning.
- Cover food while cooking: Covering food prevents splashing and helps it cook more evenly.
- Turn or stir food once during the cooking process.
- Respect the preheating time: do not exceed the time specified on the label of each food.
- It's important to use microwave-safe materials and containers. The following table shows which materials are suitable and which are not:
| Container material | Suitable Warnings |
| Browning dish Yeah | Follow the manufacturer's instructions. The base of the browning plate should be at least 5 mm above the turntable. Misuse could break the turntable. |
| Crockery Yeah Microwave-safe | only. Follow the manufacturer's instructions. Do not use cracked or chipped dishes. |
| Glass jugs Yeah Always remove | the lid. Use only for gently heating food. Most glass jars are not heat-resistant and can break. |
| Glass tableware Yeah Heat-resistant, microwave-safe glassware. Make sure there are no metallic decorative elements. Do not use cracked or chipped dishes or material. | |
| Microwave cooking bags. | Yeah Follow the manufacturer's instructions. Do not use metal fasteners. Make small cuts to allow steam to escape. |
| Kitchen paper Yeah Use it to cover food when reheating and to absorb grease. Use with supervision for short-term cooking or heating. | |
| Baking paper Yeah Use it to cover and prevent splashing, or for steaming. | |
ENGLISH
| Plastic Yeah Microwave | ave only. Fof | follow the manufacturer's instructions.Must be labeled "Microwave Safe." Some plastic containers soften when heated. Boil-in bags and sealed plastic bags should be cut or pierced slightly if indicated on the product. |
| Plastic wrap Yeah M | crowave-safe | only. Use to cover food and retain moisture. Do not allow plastic wrap to come into contact with food. |
| Thermometers Yeah | Microwave | only (meat and candy thermometer). |
| Aluminum tray No It | may warp. | Transfer the food to a microwave-safe plate or container. |
| Cardboard with metal handle | No It may | warp. Transfer the food to a microwave-safe plate or container. |
| Metal utensils or utensils with decorative metal elements | No Metal | reflects energy directed toward food. The metal trim could cause an electric arc. |
| Metal wire closures | No It may | warp. Transfer the food to a microwave-safe plate or container. |
| Paper bags No They | could cause | flames inside the microwave. |
| Plastic foam | No | The plastic foam could melt and contaminate the liquid inside when exposed to high temperatures. |
| Wood No The wood | could dry out | inside the microwave and crack. or crack. |
6. CLEANING AND MAINTENANCE
Note: The microwave should be cleaned regularly.
- Unplug the power cord from the outlet before cleaning the appliance. Do not immerse the appliance in water or any other liquid when cleaning it.
- If you don't clean your microwave regularly, its lifespan will be affected.
- Do not use abrasive cleaning products or scouring pads to clean the microwave.
- Do not remove the mica plate.
- When you're done using the microwave, wipe the surfaces that came into contact with food with a damp cloth to remove any residue, then dry them thoroughly. Accumulated
grease can overheat and catch fire.
- The exterior surface of the microwave can also be washed with a damp cloth.
- If you notice unpleasant odors coming from your microwave, try one of the three cleaning methods below:
A Place several lemon slices in a mug and then heat on high for 2-3 min.
B Place a cup of red tea and heat it on high power.
C Add some orange peels and heat on high for 1 minute.
- When not in use, store the microwave in a dry, well-ventilated area.
Removing and installing the filter:
- Turn the screws counterclockwise to loosen them. Fig. 5
- Remove the filter. Fig. 6
- To reinstall, align the motherboard mounting holes and turn the screws clockwise to tighten them. Fig. 7
Removing and installing the oil seal:
Warning: Before removing and installing the oil lock, be sure to unplug the appliance from the power source and avoid burns from high temperatures.
Disassembly:
- Hold the oil seal with your hands, press it in the direction of the arrow shown in Figure 8, push it back firmly, and then pull it down. The disassembly status is shown in Figure 9.
- Removing the oil lock from the appliance. Fig. 10
Facility:
- Hold the oil lock, after aligning the three oil lock cylinders, insert them into the three holes in the back plate. Fig. 11
- With your left hand, grasp the microwave, and with your right thumb, press in the direction of the arrows, forcing it to push backward. At the same time, with your left thumb, press firmly upward. Place the right oil lock into the buckle on the front plate. Fig. 12
- From right to left, install the oil lock. When finished, check to make sure the oil lock buckle is fully engaged. Fig. 13
ENGLISH
7. PROBLEM SOLVING
This table describes situations that may occur during normal microwave use and do not indicate a malfunction.
| The microwave interferes with TV reception. | Radio and television reception can be affected by microwave operation. This is similar to interference from small electrical appliances, such as blenders, vacuum cleaners, and electric fans. |
| Dim microwave light. When cooking | With low-power microwaves, the microwave light may become dim. |
| Steam build-up on the door, hot air escaping through the vents. | When cooking, steam may escape from food. Most of it will escape through the vents. But some steam may accumulate in a cool place, such as the microwave door. |
| Microwave accidentally turned on without food inside. | Never use the microwave without food inside. It's very dangerous. |
If you experience any of the following problems, refer to this table to identify the cause and find a possible solution.
| Problem Possible cause | Possible solution | |
| The microwave won't start | The power cord is not plugged in properly. | Unplug. Plug back in after 10 seconds. |
| The fuse has blown or the circuit breaker is tripped. | Replace the fuse or reset the circuit breaker, contact the official Cecotec Technical Support Service. | |
| Problem with the power outlet. Test the outlet with other electrical appliances. | ||
| The microwave does not heat. | The door is not closed properly. Close the door tightly. | |
8. COPYRIGHT
The intellectual property rights over the texts in this manual belong to CECOTEC INNOVACIONES, SL. All rights are reserved. The content of this publication may not, in whole or in part, be reproduced, stored in a retrieval system, transmitted or distributed by any means (electronic, mechanical, photocopying, recording or similar) without the prior authorization of CECOTEC INNOVACIONES, SL.
9. EU DECLARATION OF CONFORMITY SIMPLIFIED
CE Cecotec Innovaciones hereby declares that this product complies with the essential requirements and other relevant provisions of the regulations applicable in the European Union. This product has been designed, manufactured, and tested in compliance with the required safety and quality standards. The full text of the EU Declaration of Conformity can be found at the following web address: https://cecotec.es/es/information/ declaration-of-conformity
FRANÇAIS
1. PIECES ET COMPOSANTS
Img.1
2. INPIN ANO TH XPHSEH
- Autn n ouokun diaetie oukuaia oxiediaouevn va tnv npootateuei kat a n eataopap. Byalte tn ouokun atto kouti tsc kai apaipeote olo to uiko ouokuaiaac. Mtopeite va qualete to apxiko kouti kai alaa eifn ouokuaiaac oaoaafc mepoc yia va atopuyete Znmu otn ouokun eav xpeiaotei va tn metapepete oto mellov. Eav thetve atoppipetet Tnv apxikn ouokuaia, baiwte ot ixte avakukawoei ola ta avikejvea owotá.
- Bεβaiωθειte οTi oλa Ta εξαρτημata Kai Ta εξαρτημata περλαμβανovTai Kai Εε Kαλη Kατασταη. Eav λειπουν έδεν εival Εε Kαλη Kατασταη, εΤΙΚΟΙνωνηοτε αμέως ΜE Επισμο Tεχνικό Σερβις της Cecotec.
περιexóμενα koutiou
Jglll qal 1e Lglll lall 23 glll glll glll glll glll glll glll glll glll glll glll glll glll glll glll glll glll glll glll glll glll glll glll glll glll glll glll glll glll glll glll glll glll
43 = 23
()
( 4)
1
AilSo jIauaall bJr cI pia aill all Jy pa i aill gglgall Jaawll dai
. 2
aill aill jll jll gll aill gll aill aill gll aill gll
1
soill
YJ
左向右异
.
i j: i j
aeeaaeaaeaaeae aee
. 1234567890
a11 2j:011
a aal jll gall gll jj jj j
ysslll g o jgial lal s gall
| سوره | سوره | سوره | سوره | سوره | سوره |
| سوره | 100% | 70% | 50% | 20% | 0% |
| سوره | 10 | 70 | 50 | 20 | 0 |
aai jia jia jia jia jia jia jia jia jia jia jia jia jia jia jia jia jia jia jia jia jia jia jia jia jia jia jia jia jia jia jia jia jia jia jia jia jia jia jia jia jia jia jia jia jia jia jia jia jia jia j
aillll lssssssssssssssssssssssssssssssssssssssssss
Jgaii gaii jaiy jaii
j j jie bai all ika ? Jgai gao ? abgao
1
1
1234567890
jol jol jol jol jol jol
C
1
“一”
1000 1000
C
(7)OP" p#lll 1
1
1
afo
aalllgabllgabllgabllgabllgabllgabllgabllgabllgabllgabllgabllgabllgabllgabllgabllgabllgabllgabllgabllgabllgabllgabllgabllgabllgabllgabllgabllgabllgabllgabllgabllgabllgabllgab

a
al gaae aablln aaiia eilgai gai iiaa aaii
aiee aee
aal aai 5
alall goljll 111,000,000,000,000,000,000,000,000,000,000,000,000,000,000,000,000,000,000,
:
S OBC = S COD + S BOC
S OBC = S BOC + S CDF
a
1 2
P( x,y - 1) .P( y,z - 1)
1
- 1234567890
OJ 1
1=(,+1)cglbaxx“X2lc baiall jdaal gaoaogao
A
slll l
S OBC = S AOB + S BOC
S OBC = S COD + S BOC
17
Jolka
·s + 2^n - 1 + 1 = 2^n
yj.
gill gall bia " 4 aal yall aal jaaa ayll alal yall Jluiu D " TMEENTRY jiele bial p
ailll lall
.
"
a 0 0 0 0 0 0 0 0 0 0 0 0 0 0 0 0 0 0 0 0 0 0 0 0 0 0 0 0 0
aaiiie
.“PROGRAM”
4" 4"
( 10 + 1) + ·s + ( 201) + ( 201) + ( 201) ( 201) ( 201) ( 201) ( 201) ( 201) ( 201) ( 201) ( 201) ( 201) ( 201.
1 7
TIME
“.”g"g"o" 1j j j j j j j j j j j j j j j j j j j j j j j j j j
Aitlll lal ydi (o.o:ε. “Atilll jaiy) 50%
aannnll j
Aaill Ggssn Jia aalll ggygssall 12e) jaaaii gaii i
1
“-:OP”
| (“مُّزَنْلْدْهُ لَبِيرَ وَالَّهُ بَعْرْ وَفَسَنْبْ وَالَّهُ مَلْدْهُ لَبِيرَ وَالَّهُ مَلْدْهُ لَبِيرَ وَالَّهُ مَلْدْهُ لَبِيرَ وَالَّهُ مَلْدْهُ لَبِيرَ وَالَّهُ مَلْدْهُ لَبِيرَ وَالَّهُ مَلْdْهُ لَبِيرَ وَالَّهُ مَلْdْهُ لَبِيرَ وَالَّهُ مَلْdْهُ لَبِيرَ وَالَّهُ مَلْdْهُ لَبِيرَ وَالَّهُ مَلْdْهُ لَبِيرَ وَالَّهِ مَلْdْهُ لَبِيرَ وَالَّهِ مَلْdْهُ لَبِيرَ وَالَّهِ مَلْdْهُ لَبِيرَ وَالَّهِ مَلْdْهُ لَبِيرَ وَالَّهِ مَلْdْهُ لَبِيرَ و·OP |
| (الَّهُمُّلْدْهُ لَبِيرَ وَالَّهُمُّلْدْهُ لَبِيرَ وَالَّهُمُّلْدْهُ لَبِيرَ وَالَّهُمُّلْدْهُ لَبِيرَ وَالَّهُمُّلْdْهُ لَبِيرَ وَالَّهُمُّلْdْهُ لَبِيرَ و·OP |
| (الَّهُمُّلْدْهُ لَبِيرَ وَالَّهُمُّلْdْهُ لَبِيرَ وَالَّهُمُّلْdْهُ l - : OP) (OP) (OP) (OP) (OP) (OP) (OP) (OP) (OP) (OP) (OP) (OP) (OP) (OP) (OP) (OP) (OP) (OP) (OP) (OP) (OP) (OP) (OP) (OP) (OP) (OP) (OP) (OP) (OP) (OP) (OP) (OP) (OP) (OP) (OP) - : OP) (OP) (OP) (OP) (OP) (OP) (OP) (OP) (OP) (OP) (OP) (OP) (OP) (OP) (OP) (OP) (OP) (OP) (OP) (OP) (OP) (OP) (OP) (OP) (OP) (OP) (OP) (OP) (OP) (OP) (OP) (OP) (OP) - : : OP) (OP) (OP) (OP) (OP) (OP) (OP) (OP) (OP) (OP) (OP) (OP) (OP) (OP) (OP) (OP) (OP) (OP) (OP) (OP) (OP) (OP) (OP) (OP) (OP) (OP) (OP) (OP) (OP) (OP) (OP) (OP) (OP) |
".”g jzj 1000000000000000000000000000000000000000000000000000000000000000000000000000000
{
aalld aabj Jgl jgl. Jgall s glll alal bll no kss jy 1jz 1g:aylae plabll 0
oJr jy jy d, aagall lal y gl aag 12: gall 1
aJl jnl f bll 123456789
Jg jy Jkhy Aegb Ic xuag o jy 113456789: gall 123456789
gall aac cllg 123456789
plab Jc qalo lc nn all cagll jgljy : gall n nn nn nn nn nn nn nn nn nn nn nn nn nn nn nn nn nn nn nn nn nn nn nn nn nn nn nn nn nn nn nn nn nn nn nn nn nn nn nn nn nn nn nn nn nn nn nn nn nn nn nn nn nn nn nn nn nn nn nn nn nn nn nn nn nn nn nn nn nn nn nn nn nn nn nn nn
Cecotec Innovations 45
www.cecotec.es

- SOMMAIRE
- control Panel
- Fig. 2
- NOTE:
- BEFORE USE
- Box contents
- INSTALLATION
- 3.1.Preparing the space:
- Precautions:
- Important warnings:
- Installation with overlay (optional):
- Steps for installation with overlay:
- OPERATION
- ENGLISH
- On
- Idle mode (standby)
- Ready mode
- Open door mode
- Pause mode
- Manual cooking mode
- Automatic Cooking Mode
- End of Cooking
- Cooking mode with preset programs
- Quick cooking mode
- Programming mode
- Grades:
- Double Batch Cooking Mode
- Stage cooking mode
- User Options Mode
- Factory Default Setting
- TIPS
- CLEANING AND MAINTENANCE
- Removing and installing the filter:
- Removing and installing the oil seal:
- Disassembly:
- Facility:
- PROBLEM SOLVING
- COPYRIGHT
- EU DECLARATION OF CONFORMITY SIMPLIFIED
- FRANÇAIS
- PIECES ET COMPOSANTS
- INPIN ANO TH XPHSEH
- περιexóμενα koutiou
Brand : CECOTEC
Model : FlatPro 3400
Category : Microwave Oven