ProClean 5105 - Microwave Oven CECOTEC - Free user manual and instructions
Find the device manual for free ProClean 5105 CECOTEC in PDF.

User questions about ProClean 5105 CECOTEC
0 question about this device. Answer the ones you know or ask your own.
Ask a new question about this device
Download the instructions for your Microwave Oven in PDF format for free! Find your manual ProClean 5105 - CECOTEC and take your electronic device back in hand. On this page are published all the documents necessary for the use of your device. ProClean 5105 by CECOTEC.
USER MANUAL ProClean 5105 CECOTEC
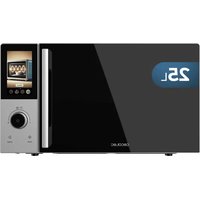
natural_image
Front view of a modern microwave oven with digital display showing 2:30, no visible text or symbols on the device body.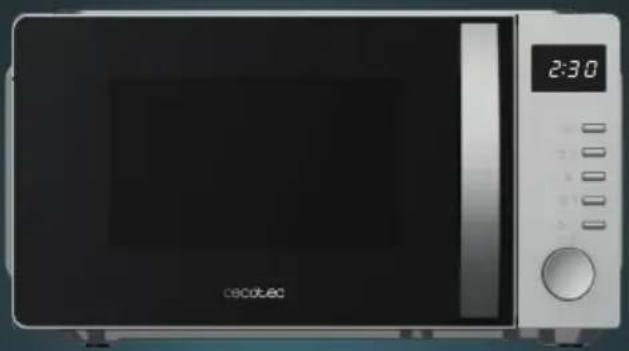
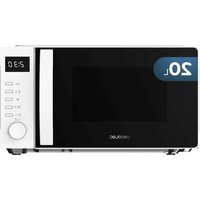
natural_image
Front view of a celoutec microwave oven with digital display showing 2:30 time (no text or symbols on device body)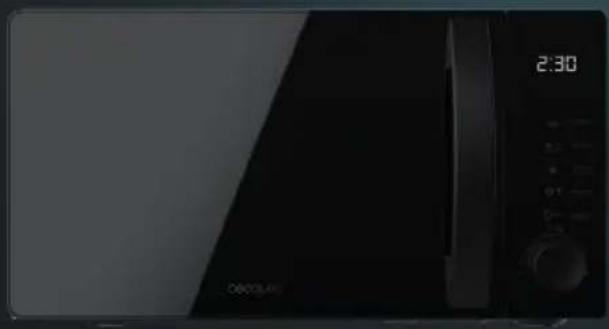
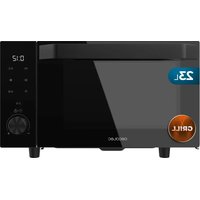
natural_image
Front view of a modern microwave oven with digital display showing 2:30 time (no visible text or symbols on the device body)| 1. Parts and components | 71 |
| 2. Before use | 71 |
| 3. Operation | 72 |
| 4. Tips | 76 |
| 5. Cleaning and maintenance | 79 |
| 6. Troubleshooting | 79 |
| 7. Recycling of electrical and electronic equipment | 60 |
| 8. Copyright | 60 |
| 9. Simplified FU Declaration of Conformity | 80 |
SOMMAIRE
EN • The coding in this manual is generic and applies to all code variants of the appliance.
Read the following instructions carefully before using the appliance. Keep this instruction manual for future reference or new users.
- Ensure that the mains voltage matches the voltage specified on the product rating label and that the plug is earthed.
- Do not use outdoors.
This appliance is intended for domestic use only and is not suitable for use in commercial establishments such as bars, restaurants, farms, hotels, motels, and offices.
- This symbol means: Caution, hot surface. Accessible
surfaces of the microwave may reach high temperatures during operation. Be careful not to burn yourself.
- WARNING: If the door or its gaskets are damaged, do not operate the appliance until it has been repaired by a qualified technician.
- WARNING: It is dangerous for anyone other than a qualified technician to perform maintenance or repair tasks involving the removal of a cover that provides protection against exposure to microwave energy.
- WARNING: Liquids and other foods should not be heated up in sealed containers, as they may explode.
- WARNING: When the appliance is operated in Combination mode, children should only use the microwave under adult supervision due to the temperatures generated.
-
Use this appliance only for its intended purpose, as described in this manual. Do not use corrosive chemicals or vapours in this appliance. It is not designed for industrial or laboratory use.
-
This appliance is intended for heating beverages and food. Drying food or clothing and heating pillows, shoes, sponges, wet clothes and similar items may involve risk of injury, ignition or fire.
- Heating up beverages may cause them to boil. For this reason, precautions must be taken when handling the container.
- Contents of baby bottles and baby food jars should be swirled or shaken, and the temperature should be checked before consumption to avoid burns.
- Eggs in their shell and whole hard-boiled eggs should not be heated in microwaves, since they may explode even after microwave heating has ended.
- Do not operate the microwave when empty.
- This microwave is not intended to be built-in or installed in furniture. It must be freely positioned ensuring the following clearances:
- Top: at least 20 cm apart.
- Between the appliance and any adjacent wall: at least 5 cm.
- Rear: leave a 10 cm gap.
- From the microwave to the ground: 85 cm.
- Check the power cord regularly for visible damage. If the cable is damaged, it must be replaced by the official Cecotec Technical Support Service or by similarly qualified personnel to avoid hazards or injuries.
- Do not operate the appliance if it has a faulty power cord or plug, or if it is not working properly. In case of malfunction or breakdown, please contact official Cecotec Technical Support Service.
- You must be careful to ensure that the turntable does not shift when the containers are removed from the appliance.
- Only use utensils that are suitable for microwave use. Make
sure cookware does not touch the interior walls during operation.
- Do not use the appliance for storage purposes.
- Do not attempt to fry food in the microwave.
- In order to reduce fire risk:
a. Do not overcook food.
b. Remove wire twist-ties from paper or plastic bags before placing them inside the microwave.
c. The microwave should be watched when heating food in plastic or paper containers.
- In case of smoke or fire inside the appliance, keep the door closed, turn the appliance off, and unplug it from the power supply.
- Do not place hot or frozen food or cookware on the turntable to prevent breakage.
- After operation, the container is likely to be very hot. Use gloves to avoid burns and injuries.
- The appliance must be cleaned regularly, removing any food remains. The door seals, cavities and adjacent parts of the microwave must be cleaned as described in the cleaning and maintenance section.
- Failure to keep the microwave clean could lead to deterioration of the surface and could adversely affect the shelf life of the appliance and cause hazards.
- This appliance can be used by children aged from 8 years and above and persons with reduced physical, sensory or mental capabilities or lack of experience and knowledge if they have been given supervision or instruction concerning use of the appliance in a safe way and understand the hazards involved. Children shall not play with the appliance. Cleaning and user maintenance should not be carried out by unsupervised children.
- This appliance is a Group 2 Class B ISM equipment. The definition of Group 2 which contains all ISM (Industrial, Scientific and Medical) equipment in which radio-frequency energy is intentionally generated and/or used in the form of electromagnetic radiation for the treatment of material, and spark erosion equipment. Class B equipment is suitable for domestic use and in establishments directly connected to a low voltage power supply network, which supplies buildings used for domestic purpose.
- Metal food and beverage containers must not be used for microwave cooking.
- The appliance is not intended to be operated by means of external timers or separate remote-control systems.
INSTRUCTIONS DE SÉCURITÉ
- Door lock
- Viewing window
- Turntable ring
- Rotating shaft
- Turntable
- Control panel
- Grill rack
- Mica plate
Note:
The graphics in this manual are schematic representations and may not exactly match the product.
2. BEFORE USE
- This appliance comes in a packaging designed to protect it during transport. Remove the appliance from its box. You can keep the original box and other packaging materials in a safe place to prevent damage to the appliance if you need to transport it in the future. If you wish to dispose of the original packaging, make sure all items are recycled properly.
- Check that all parts and components are included and in good condition. If any of them are missing or damaged, please contact Cecotec's Official Technical Support Service immediately.
Box content:
- Microwave
- Glass turntable
- Instruction manual
- Do not remove the product's serial number in order to keep proper traceability if technical assistance is required.
- Remove all packaging materials. If the microwave is protected with a protective film, remove it before use. Check if the microwave is damaged. If it is, please contact the official Cecotec Technical Support Service.
- Place the appliance on a flat, stable and dry place, away from any corrosive material, and avoid exposing it to heat or moisture.
- The appliance must be placed at least 5 m away from TVs, radios, or antennas.
- The appliance must be placed in such way that the plug is accessible, and the socket must be properly earthed to avoid electric shocks.
ENGLISHENGLISH
- Make sure to close the microwave door for proper operation.
In case there are any manufacturing remains in the microwave cavity or on the heating elements, leave the microwave open to ensure good ventilation. To eliminate this problem, it is advisable to heat a glass of water in the microwave several times at full power.
Do not place the microwave inside a cabinet. This appliance is not designed for built-in installation.
WARNING:
Do not try to remove the mica plate. This component is essential for the appliance to work properly. The mica plate must be clean to ensure proper operation.
3. OPERATION
For microwave assembly, place the turntable ring first, then fit the turntable plate onto the rotating shaft and ensure it is properly positioned.
Before cooking
The display lights up when the power supply is connected, then enters standby mode and shows 1:00.
MICROWAVE FUNCTION
- There are five microwave power levels: 100P, 80P, 50P, 30P and 10P, respectively.
- Press the button continuously to select the desired power.
- Turn the knob to select the cooking time, which can be set between 0:10 and 60:00.
- After selecting the cooking time, press the ▷ button to start.
- A buzzing sound will notify the completion of the operation.
| HIGH (high/maximum power) | 100% power | Suitable for fast and thorough cooking. |
| M. High (medium-high power) | 80% power | Suitable for medium express cooking. |
| Med (medium power) | 50% power | Suitable for steam cooking. |
| M. Low (medium-low power) | 30% power | Suitable for defrosting food. |
| LOW (low power) | 10% power | Suitable for keeping warm. |
CAUTION
a. The maximum time that can be set up is 60 minutes.
b. Never use the grill during microwave cooking.
c. Never operate the microwave empty.
d. At full microwave power, the appliance will automatically reduce power after a certain cooking time to extend its service life.
e. If you rotate the food during operation, press the ▷30° button once and the preset cooking procedure will continue.
f. If you wish to remove the food before the preset time, you must press the button once to clear the preset procedure and avoid an unwanted operation at the next use.
DEFROST/MENU/CLOCK
- Press this button to select two defrost functions and eight menu functions.
- Press this button continuously to select the function sequences: defrost by weight - defrost by time - A.1 - A.2 - A.3 - A.3 - A.4 - A.5 - A.6 - A.7 - A.8, and so on.
Defrost
- There are two defrost modes, dEF1 and dEF2, respectively.
o dEF1 for defrosting by weight.
o dEF2 for defrosting by time.
- Press the ⚠ button to select defrost by weight or by time, and the display will show "dEF1" or "dEF2".
- Turn the knob to select the food weight or defrost time.
- The weight range of dEF1 is from 100 to 1500 g, and the optional time range of dEF2 is from 0:10 to 60:00.
After selecting the defrost weight or time, press the ▷-30* button to start. - A buzzing sound will notify the completion of the operation.
- The defrost mode dEF1 by weight will have a sound to indicate that the food should be turned over during defrosting.
CAUTION
a. It is necessary to turn the food during operation to achieve a uniform cooking result.
b. Usually, defrosting will take longer than cooking the food.
c. If food can be cut by knife, the defrosting process is complete.
d. Microwaves penetrate about 4 cm into most food.
e. Defrosted food should be consumed as soon as possible. It is not advisable to refrigerate and refreeze it.
Menu
- There are eight automatic menus A.1-A.8: potato, pasta, pizza, popcorn, vegetables, drink, meat and fish, respectively.
- You must press the button continuously to select the desired menu, then turn the knob to choose the food portion size.
ENGLISHENGLISH
- After selecting the portion size, you must press the ▷ +30s button to start. - A buzzing sound will notify the completion of the operation.
| Display Type Method | ||
| A.1 Potato | Optional weights are 250 g, 500 g and 750 g. | |
| A.2 Pasta | Optional weights are 50 g, 100 g and 150 g. | |
| A.3 Pizza | Optional weights are 200 g and 400 g. | |
| A.4 Popcorn | Optional weight is 100 g. | |
| A.5 Vegetables | Optional weights are 200 g, 400 g and 600 g. | |
| A.6 | Drinks | The options are 1 cup, 2 cups or 3 cups, each of approximately 250 ml. |
| A.7 | Meat | Optional weights are 200 g, 400 g and 600 g. |
| A.8 | Fish | Optional weights are 200 g, 400 g and 600 g. |
CAUTION
a. Food should be at a temperature of 20-25°C before cooking, Higher or lower temperatures will require the cooking time to be increased or decreased accordingly. b. The temperature, weight and shape of the food will greatly influence the cooking result. If any deviation is detected in the factors indicated in the previous menu, the cooking time can be adjusted to obtain the best result.
Clock (24-hour format)
- To set the clock while the microwave is in standby mode, press and hold the button for more than 3 seconds.
- The display will start flashing showing the hours. Set the hour by turning the knob.
- Once the hour has been set, briefly press the ▷ +30 s button to confirm and move to the minute setting.
- Set the minutes by turning the knob.
- After setting the minutes, press the ▷30s button again to confirm and exit the setting mode.
GRILL FUNCTION
- There are three grill modes: G., C-1 and C-2. They are grill, combination 1 of grill and microwave cooking, and combination 2 of grill and microwave cooking.
- You must press the button continuously, select the desired mode and the display will show "G", "C-1" or "C-2".
- Then turn the knob to select the cooking time. The adjustable time range is from 0:10 to 60:00.
- After selecting the cooking time, you must press the ▷ +30 s button to start. - A buzzing sound will notify the completion of the operation.
| Mode | Description |
| G Grill: the | heating element will be activated during the entire operating time. It is applicable for thin meats or pork. sausages, chicken wings, as a good golden colour can be obtained. |
| C-1 Combination of grill and microwave cooking, 30% microwave and 70% grill. | |
| C-2 Combination of grill and microwave cooking, 55% microwave and 45% grill. | |
CAUTION
In grill mode, all parts of the appliance, as well as the wire rack and containers, can become very hot. Be careful when removing any items from the appliance. Use thick oven mitts or oven gloves to avoid burns.
PAUSE/LOCK

- To cancel the cooking setting and return to standby mode, press the button during the setting process.
- If the microwave is in operation, you can pause the operation by pressing the same button.
- In the paused state, press the button again to cancel the function and return to standby mode.
START/+30s ▷ +30 s
- Once the cooking time or food weight has been set, press this button to start operating the microwave immediately.
- During operation, you can add 30 seconds to the cooking time by pressing the same button.
- Please note that in the menu and defrost by weight modes, it is not possible to adjust the time.
- If the microwave is paused, press it to resume cooking.
EXPRESS
- In standby mode, after placing the food and closing the door, you must press the button to quickly start the microwave.
- The default operating time is 30 seconds.
- During operation, you can add an additional 30 seconds by pressing ▷ +30 s again.
- A buzzing sound will indicate that the operation is complete.
ENGLISHENGLISH
CHILD LOCK FUNCTION
- Use this function to lock the control panel when cleaning or to prevent children from using the appliance without supervision.
- All buttons (except) are imperative in this mode.
Activating the lock: In standby mode, press and hold the button for more than 3 seconds. The child lock function will be activated, and all buttons on the microwave will be inoperative except
Deactivating the lock: In the child lock state, press and hold the button for more than 3 seconds to cancel the lock function. All buttons on the microwave will return to normal operation.
4. TIPS
The following factors may affect the cooking result:
Food distribution
Place the thicker areas towards the outside of the dish and the thinner areas towards the centre, distributing them evenly. Do not overlap them if possible.
Setting the cooking time
Start cooking with a short time, evaluate later and adjust as necessary. Overcooking can cause smoke and burns.
Uniform cooking
Foods such as chicken, hamburgers or steak should be turned once during cooking. Depending on the type of food, if applicable, remove it from the outside to the centre of the dish once or twice during cooking.
Allow idle time
After the cooking time is over, leave the food in the microwave for an adequate time to complete its cooking cycle and cool gradually.
Check whether the food is ready
The colour and firmness of food help to determine whether it is properly cooked. This includes:
- Steam coming from all parts of the food, not only from the edges.
- Poultry joints move easily.
- Pigs or poultry show no signs of blood.
- Fish is opaque and can be easily cut with a fork.
Browning dish
When using a browning pan or self-heating pan, always place a heat-resistant insulator, such as a porcelain plate, underneath to prevent damage to the turntable and rotating ring.
Microwave-safe plastic film
When cooking foods with high fat content, do not allow plastic film to come into contact with the food, as it may melt.
Microwave-safe plastic utensils
Some microwave-safe plastic utensils may not be suitable for cooking foods with high fat and sugar content. Furthermore, the preheating time specified in the dish's instruction manual must not be exceeded.
MICROWAVE-SAFE CONTAINERS
It is strongly recommended to use suitable and safe containers for microwave cooking. In general, heat-resistant ceramic, glass or plastic containers are suitable for microwave cooking. Never use metal containers for microwave or combination mode cooking, as they may produce sparks.
You can refer to the table below for reference.
| Food container material | Microwave Grill | rack Combi Notes | ||
| Heatproof ceramics | Yes Yes Yes | Never use ceramics decorated with metallic or glazed edges. It is recommended to use ceramic, heat-resistant glass and plastic containers that withstand temperatures above 120°C. | ||
| Heatproof plastic | Yes | No | No | It cannot be used for microwave cooking for a long time. |
| Heat-resistant glass | Yes Yes Yes | |||
| Plastic film | Yes | No | No | Do not use when cooking meat or chops, as high temperatures may damage the film. |
ENGLISHENGLISH
| Grill No Yes | Yes The grill can | only be used in grill | and combination mode. |
| Metal container | No No No Not to be used In the microwave. | Microwaves cannot penetrate through metal. | |
| Lacquer No | No No Poor heat resistance. It cannot | be used for high temperature cooking. | |
| Bamboo wood and paper | No No No Poor heat resistance. It cannot | be used for high temperature cooking. | |
5. CLEANING AND MAINTENANCE
CAUTION
The microwave should be cleaned regularly, removing any food residues.
WARNINGS
a. Disconnect the power cord from the mains socket before cleaning. After cooling the products. Do not immerse the microwave in water or other liquids when cleaning.
b. Failure to keep the microwave clean could lead to surface deterioration, negatively affecting the life of the microwave and possibly resulting in a hazardous situation.
c. Never use harsh detergents, gasoline, abrasive powders or metal brushes to clean any part of the microwave.
d. Do not remove the mica plate.
e. When the microwave has been used for a long time, strange odours may appear. The following methods can remove them:
- Place several lemon slices in a cup and heat on high power for 2-3 minutes.
- Place a cup of red tea in the microwave and heat on high power.
- Place orange peels in the microwave and heat on high power for 1 minute.
f. When the microwave is not in use, it should be placed in dry, well-ventilated areas whenever possible.
WARNING
Details on how to clean food contact surfaces:
After use, you should clean the mica plate cover with a damp cloth, followed by a dry cloth to remove any food splashes and grease. Accumulated grease can overheat and start to smoke or catch fire.
Details for cleaning door seals, cavity and adjacent parts
Exterior
Clean the exterior with a soft damp cloth.
Door
- Use a soft damp cloth to clean the door and viewing window.
- Clean the door seals and adjacent parts to remove any spills or splashes.
- Clean the control panel with a soft, slightly damp cloth.
Inner walls
clean the inner surfaces with a soft, damp cloth.
- Clean the mica plate to remove any food residue.
6. TROUBLESHOOTING
If the appliance does not work (interior light does not switch on, turntable does not rotate, food does not heat up, etc.):
Make sure the appliance is securely plugged to the socket. If not, unplug it, wait 10 seconds, and properly re-plug it.
- Check that no fuse has blown and that no short circuit occurred. If not, test the socket with another appliance.
- Check that the door is properly closed and that the door locking system is properly engaged.
If none of the above options solve the problem, please contact the official Cecotec Technical Support Service. Do not try to repair the appliance by yourself.
If the appliance causes interference with radio, television, or other electrical appliances:
a. Clean the door and the sealing surface of the appliance.
b. Reorient the receiving antenna of the radio or television.
c. Move the microwave.
d. Place the microwave away from the receiver.
e. Plug the appliance into a different outlet so that it and the receiver are on different branch circuits.
7. RECYCLING OF ELECTRICAL AND ELECTRONIC EQUIPMENT

This symbol indicates that, according to the applicable regulations, the product and/or batteries must be disposed of separately from household waste. When this product reaches the end of its service life, you must remove the batteries/accumulators and take it to a collection point designated by local authorities.
For detailed information on how to properly dispose of electrical and electronic equipment and/or the corresponding batteries, consumers should contact their local authorities. Compliance with the above guidelines will help protecting the environment.
Information regarding national packaging recycling systems and their marking can be found on our website.
8. COPYRIGHT
The intellectual property rights over the texts in this manual belong to CECOTEC INNOVACIONES, S.L. All rights reserved. The content of this publication may not, either in part or in its entirety, be reproduced, stored in a retrieval system, transmitted or distributed by any means (electronic, mechanical, photocopying, recording or similar) without prior authorisation from CECOTEC INNOVACIONES, S.L.
9. SIMPLIFIED EU DECLARATION OF CONFORMITY
CE Cecotec Innovaciones hereby declares that this appliance complies with the essential requirements and other relevant provisions of the regulations applicable in the European Union. This appliance has been designed, manufactured and tested in compliance with required safety and quality standards. The full text of the EU Declaration of Conformity can be found on the following website: https://cecotec.es/es/information/declaration-of-conformity
FRANÇAISENGLISH
1. PIÈCES ET COMPOSANTS
Image 1
Démarrage/+30s ▷ +30 s
INICIAR/+30s ▷ +30 s
6. PROBLEEMOPLOSSING
"dEF٢" "dEF١" "dEF₁" "dEF₂" "dEF₃" "dEF₄" "dEF₅" "dEF₆" "dEF₇" "dEF₈" "dEF₉" "dEF₁₁" "dEF₂₁" "dEF₃₁" "dEF₄₁" "dEF₅₁" "dEF₆₁" "dEF₇₁" "dEF₈₁" "dEF₉₁" "dEF₁₂" "dEF₂₂" "dEF₃₂" "dEF₄₂" "dEF₅₂" "dEF₆₂" "dEF₇₂" "dEF₈₂" "dEF₉₂" "dEF₁₃" "dEF₂₃" "dEF₄₃" "dEF₅₃" "dEF₆₃" "dEF₇₃" "dEF₈₃" "dEF₉₃" "dEF₁₄" "dEF₂₄" "dEF₃₄" "dEF₄₄" "dEF₅₄" "dEF₆₄" "dEF₇₄" "dEF₈₄" "dEF₁₅" "dEF₂₅" "dEF₃₅" "dEF₄₅" "dEF₅₅" "dEF₆₅" "dEF₇₅" "dEF₈₅" "dEF₁₆" "dEF₂₆" "dEF₃₆" "dEF₄₆" "dEF₅₆" "dEF₆₇" "dEF₇₇" "dEF₈₇" "dEF₁₇", "dEF₁₀", "dEF₁₁", "dEF₁₂", "dEF₁₃", "dEF₁₄", "dEF₁₅", "dEF₁₆", "dEF₁₇", "dEF₁₈", "dEF₁₉", "dEF₂₀", "dEF₂₁", "dEF₂₂", "dEF₂₃", "dEF₂₄", "dEF₂₅", "dEF₂₆", "dEF₂₇", "dEF₂₊", "dEF₂₊₁", "dEF₂₊₂", "dEF₂₊₃", "dEF₂₊₄", "dEF₂₊₅", "dEF₂₊₆", "dEF₂₊₇", "dEF₂₊₁₀", "dEF₂₊₁₁", "dEF₂₊₁₂", "dEF₂₊₁₃", "dEF₂₊₁₄", "dEF₂₊₁₅", "dEF₂₊₁₆", "dEF₂₊₁₇", "dEF₂₊₁₋₀", "dEF₂₊₁₋₁₀", "dEF₂₊₁₋₁₁", "dEF₂₊₁₋₁₂", "dEF₂₊₁₋₁³", "dEF₂₊₁₋₁⁴", "dEF₂₊₁₋₁⁵", "dEF₂₊₁₋₁⁶", "dEF₂₊₁₋₁⁷", "dEF₂₊₁₋₁⁸", "dEF₂₊₁₋¹⁹", "dEF₂₊₁₋²⁰", "dEF₂₊₁₋²¹⁰", "dEF₂₊₁₋²¹ⁱ", "dEF₂₊₁₋²²ⁱ", "dEF₂₊₁₋²³¹", "dEF₂₊₁₋²⁴¹⁶¹⁶¹⁷¹⁸¹⁹¹⁰¹⁰¹¹⁰¹²¹¹⁴¹⁵¹⁶¹⁷¹⁸¹⁹¹⁰¹¹⁰¹²¹⁴¹⁵¹⁶¹⁷¹⁸¹⁹¹⁰¹¹⁰¹²¹⁴¹⁵¹⁶¹⁷¹⁸¹⁹¹⁰¹¹⁰¹²¹⁴¹⁵¹⁶¹⁷¹⁸¹⁹¹⁰¹¹⁰¹²¹⁴¹⁵¹⁶¹⁷¹⁸¹⁹1⁰¹²¹⁴¹⁵1⁶¹⁷1⁸1⁹1⁰1¹⁰1²¹⁴¹⁵1⁶1⁷1⁸1⁹1⁰1¹⁰1²¹⁴¹⁵1⁶1⁷1⁸1⁹1⁰1¹²1⁴¹⁵1⁶1⁷1⁸1⁹1⁰1¹³1⁴¹⁵1⁶1⁷1⁸1⁹1⁰1¹³1⁴¹⁵1⁶1⁷1⁸1⁹1⁰1¹³1⁴¹⁵1⁶1⁷1⁸1⁹1⁰1¹³1⁴¹⁵1⁶1⁷1⁸1⁹1⁰1¹³2 143 143 143 143 143 143 143 143 143 143 143 143 143 143 143 143 143 143 143 143 143 143 143 143 143 142