
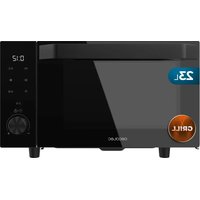
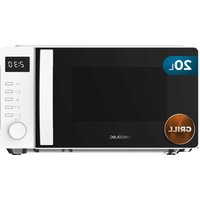
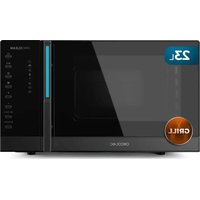
Convection 2500 Touch - Microwave Oven CECOTEC - Free user manual and instructions
Find the device manual for free Convection 2500 Touch CECOTEC in PDF.

| Brand | Cecotec |
| Model | Convection 2500 Touch |
| Product type | Microwave oven with grill and convection function |
| Display | TFT color touchscreen |
| Control panel | Touch + rotary selector + Start/Stop buttons |
| Main functions | Microwave, Defrost (weight/time), Beverages (1-3 cups), Popcorn, Quick recipes (potatoes, pasta, pizza, vegetables, meat, fish), Grill (3 modes), Convection (120-200 °C), Combi (2 modes), Timer, Keep warm, Cleaning |
| Turntable | Yes, with ring and rotating shaft |
| Grill rack | Included |
| Child lock | Yes (long press Stop) |
| Timer | Up to 59 min 59 sec |
| Microwave power | 5 levels (10%, 30%, 50%, 80%, 100%) |
| Grill function | 3 modes: Grill only 100%, Microwave 30% + Grill 70%, Microwave 55% + Grill 45% |
| Convection function | Temperature range: 120 °C to 200 °C |
| Combi function | 2 modes: Microwave 30% + Convection 70%, Microwave 55% + Convection 45% |
| Defrost | By weight (100 g - 1500 g) or by time (up to 59:59 min) |
| Cleaning | Lemon steam function (5 min); manual wiping |
| Safety | Automatic stop if door open, door lock, hot surface, surge protection |
| Power supply | 230 V ~ 50 Hz (standard estimate) |
| Box contents | Microwave oven, turntable, grill rack, instruction manual |
| Warranty | Official Cecotec after-sales service |
Frequently Asked Questions - Convection 2500 Touch CECOTEC
User questions about Convection 2500 Touch CECOTEC
0 question about this device. Answer the ones you know or ask your own.
Ask a new question about this device
Download the instructions for your Microwave Oven in PDF format for free! Find your manual Convection 2500 Touch - CECOTEC and take your electronic device back in hand. On this page are published all the documents necessary for the use of your device. Convection 2500 Touch by CECOTEC.
USER MANUAL Convection 2500 Touch CECOTEC
natural_image
Exterior view of a ceotec microwave oven with control panel and display screen (no text or symbols on main body)Safety instructions 9
-
Parts and components 70
-
Before use 70
-
Operation 71
-
Tips 78
-
Cleaning and maintenance 80
-
Troubleshooting 80
-
Disposal of old electrical and electronic appliances 81
-
Copyright 81
-
Simplified EU Declaration of Conformity 81
SOMMAIRE
EU01_109732 Convection 2500 Touch
EN · The coding in this manual is generic and applies to all code variants of the appliance.
- Read the following instructions carefully before using the appliance. Keep this instruction manual for future reference or new users.
- Make sure that the mains voltage matches the voltage stated on the appliance marking and that the wall outlet is earthed.
- Do not use outdoors.
- This appliance is intended for domestic use only and is not suitable for use in commercial establishments such as bars, restaurants, farms, hotels, motels, and offices.
- This symbol means: Caution, hot surface. Accessible

surfaces of the microwave may reach high eratures during operation. Be careful not to burn self.
- WARNING: If the door or its gaskets are damaged, do not operate the appliance until it has been repaired by a qualified technician.
- WARNING: It is dangerous for anyone other than a qualified technician to perform maintenance or repair tasks involving the removal of a cover that provides protection against exposure to microwave energy.
- WARNING: Liquids and other foods should not be heated up in sealed containers, as they may explode.
- WARNING: When the appliance is operated in Combination mode, children should only use the microwave under adult supervision due to the temperatures generated.
-
Use this appliance only for its intended purpose, as described in this manual. Do not use corrosive chemicals or vapours in this appliance. It is not designed for industrial or laboratory use.
-
This appliance is intended for heating beverages and food. Drying food or clothing and heating pillows, shoes, sponges, wet clothes and similar items may involve risk of injury, ignition or fire.
- Heating up beverages may cause them to boil. For this reason, precautions must be taken when handling the container.
- Contents of baby bottles and baby food jars should be swirled or shaken and the temperature should be checked before consumption to avoid burns.
- Eggs in their shell and whole hard-boiled eggs should not be heated in microwaves, since they may explode even after microwave heating has ended.
- Do not operate the microwave when empty.
- This microwave is not intended to be built-in or installed in furniture. It must be freely positioned ensuring the following clearances:
o Top: at least 20 cm apart.
- Between the appliance and any adjacent wall: at least 5 cm.
- Rear: leave a 10 cm gap.
- Check the power cord regularly for visible damage. If the cord is damaged, it must be replaced by Cecotec's Official Technical Support Service to avoid any hazard.
- Do not operate the appliance if it has a faulty power cord or plug, or if it is not working properly. In case of malfunction or breakdown, please contact Cecotec's Official Technical Support Service.
- You must be careful to ensure that the turntable does not shift when the containers are removed from the appliance.
- Only use utensils that are suitable for microwave use. Make sure cookware does not touch the interior walls during operation.
- Do not use the appliance for storage purposes.
- Do not attempt to fry food in the microwave.
- In order to reduce fire risk:
A. Do not overcook food.
B. Remove wire twist-ties from paper or plastic bags before placing them inside the microwave.
C. The microwave should be watched when heating food in plastic or paper containers.
- In case of smoke or fire inside the appliance, keep the door closed, turn the appliance off, and unplug it from the power supply.
- Do not place hot or frozen food or cookware on the turntable to prevent breakage.
- After operation, the container is likely to be very hot. Use gloves to avoid burns and injuries.
- The appliance must be cleaned regularly and you must remove any food remains. The door seals, cavities and adjacent parts of the microwave must be cleaned as described in the cleaning and maintenance section.
- The appliance cannot be cleaned with steam.
- Failure to keep the microwave clean could lead to deterioration of the surface and could adversely affect the shelf life of the appliance and cause hazards.
- This appliance can be used by children aged from 8 years and above and persons with reduced physical, sensory or mental capabilities or lack of experience and knowledge if they have been given supervision or instruction concerning use of the appliance in a safe way and understand the hazards involved. Do not let children play with the appliance. Cleaning and user maintenance should not be carried out by children unless they are over 8 years of age and under supervision. Keep this appliance and its power cord out of reach of children under the age of 8.
- This appliance is a Group 2 Class B ISM equipment. The definition of Group 2 which contains all ISM (Industrial, Scientific and Medical) equipment in which radio-frequency energy is intentionally generated and/or used in the form of electromagnetic radiation for the treatment of material, and spark erosion equipment. Class B equipment is suitable for domestic use and in establishments directly connected to a low voltage power supply network, which supplies buildings used for domestic purpose.
- Metal food and beverage containers must not be used for microwave cooking.
- The appliance is not intended to be operated by means of external timers or separate remote-control systems.
INSTRUCTIONS DE SÉCURITÉ
- Door safety lock system
- Viewing window
- Turntable ring assembly
- Turntable shaft
- Glass turntable
- TFT display
- Grill rack
Fig. 2
Control panel. Fig. 2
- Knob
- STOP button
- START button
NOTE:
The graphics in this manual are schematic representations and may not exactly match the product.
2. BEFORE USE
- This appliance comes in a packaging designed to protect it during transport. Take the appliance out of its box and remove all packaging materials. You can keep the original box and other packaging materials in a safe place to prevent damage to the appliance if you need to transport it in the future. If you wish to dispose of the original packaging, make sure all items are recycled properly.
- Check that all parts and components are included and in good condition. If any of them are missing or damaged, please contact Cecotec's Official Technical Support Service immediately.
Box content
- Microwave
- Instruction manual
- Grill accessory
- Warning: Do not remove the mica plate.
- Do not remove the product's serial number in order to keep proper traceability if technical assistance is required.
3. OPERATION
- Connecting the microwave to the mains
When you connect the microwave to the mains power, the display will illuminate.
-
Microwave function
-
The first screen will display the Micro function (Fig. 3). Touch the display or press the knob to confirm function selection.
- Next, slide the display or turn the knob to adjust the cooking time (Fig. 4). The selectable time range is from 0:10 min to 59:59 min.
- Then select the power level. Choose from the following modes:
| High 100 % power output This power level is suitable for heating food quickly. | ||
| Medium-high 80% power output | This power level is suitable for heating food quickly but without using the maximum power. | |
| Medium 50% power output This power level is suitable for steam heating. | ||
| Medium-low 30% power output This power level is suitable for defrosting food. | ||
| Low 10% power output This power level is suitable for keeping food warm. | ||
-
Once you have chosen the desired power and time, press the START icon to begin operation. When the time is up, the microwave will beep once.
-
To select other functions, slide the screen left or right, or turn the knob.
Notes:
- The maximum programmable time is 59 minutes and 59 seconds.
- Do not operate the microwave if it is empty.
- If operating at maximum power, the microwave will automatically reduce power after a certain time to extend the appliance's service life.
- If you turn food over and open the microwave door during cooking, you must press the CONTINUE touch icon after closing the door to resume cooking.
- To remove food before the programmed time ends, press the CANCEL touch icon to end the programme.
-
To return to the previous screen, press the back touch icon.
-
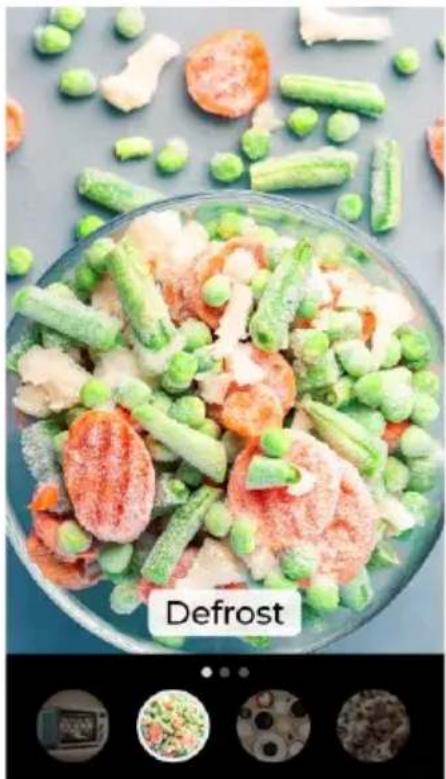
Defrost function
-
The second screen will display the Defrost function (Fig. 5). Touch the screen or press the knob to confirm function selection.
ENGLISH
-
This microwave offers two methods for setting the Defrost function:
-
Mode 1, for defrosting by weight.
- Mode 2, for defrosting by time.
- If selecting Mode 1, slide the screen or turn the knob to adjust the weight of food to be defrosted (Fig. 6). The selectable weight range is from 100 grams to 1500 grams. The cooking time will be displayed and will increase gradually according to the defrost weight setting.
- If selecting Mode 2, slide the screen or turn the knob to adjust the cooking time (Fig. 7). The selectable time range is from 0:10 min to 59:59 min.
- After setting the Defrost function, press the START touch icon (on screen) or START button (on control panel) to begin operation.
- When the time is up, the microwave will beep once.
- To select other functions, slide the screen left or right, or turn the knob.
Notes:
- It is recommended to turn food over halfway through the defrosting process.
- Defrosting normally takes longer than cooking food.
- When the food can be easily cut with a knife, it means that it is completely defrosted.
- Microwaves penetrate about 4 cm into most foods.
- Defrosted food should be consumed as soon as possible. It is not recommended to put them back in the fridge and freeze them again.
- If you turn food over and open the microwave door during cooking, you must press the CONTINUE touch icon after closing the door to resume cooking.
- To remove food before the programmed time ends, press the CANCEL touch icon (on screen) or STOP button (on control panel) to end the programme.
- To return to the previous screen, press the back touch icon.
4. Drinks function
- The third screen will display the Drinks function (Fig. 8). Touch the screen or press the knob to confirm function selection.
- Next, turn the knob to choose the number of beverages to heat and press the knob when you have selected the desired quantity. You may also directly touch the icon for the number of cups you wish to heat. The selectable range is 1 to 3 cups, with a maximum quantity of 250 ml per cup. (Fig. 9).
| Drinks | 1 cup (approximately 250 mL) 1:40 min | |
| 2 cups (approximately 500 mL) 2:10 min | ||
| 3 cups (approximately 750 mL) 3:40 min |
-
The preset time will then be displayed on screen. (Fig. 10)
-
After this step, press START (on screen) or the START button (on control panel) to begin operation. When the time is up, the microwave will beep once.
Notes:
- If you open the microwave door during operation, press the CONTINUE touch icon after closing to resume heating.
- To remove food before the programmed time ends, press the CANCEL touch icon (on screen) or STOP button (on control panel) to end the programme.
- To return to the previous screen, press the back touch icon.
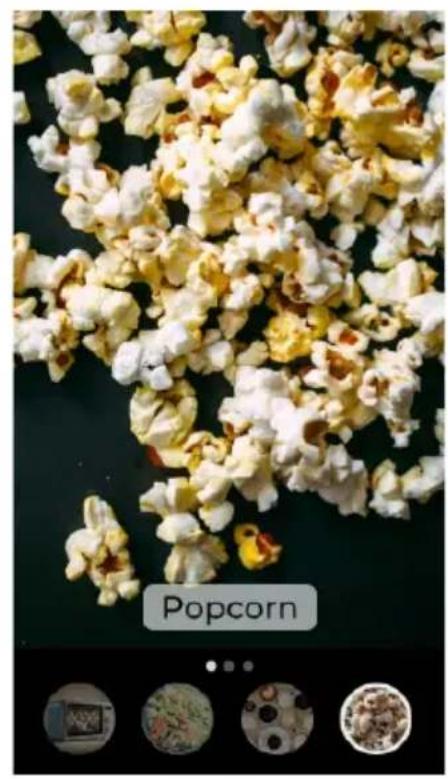
5. Popcorn function
- The fourth screen will display the Popcorn function (Fig. 11). Touch the screen or press the knob to confirm function selection.
- The preset time will then be displayed on screen. In this case, the time is 3:00 min (Fig. 12).
- After this step, press START (on screen) or the START button (on control panel) to begin operation. When the time is up, the microwave will beep once.
Notes:
- If you open the microwave door during operation, press the CONTINUE touch icon after closing to resume heating.
- To remove food before the programmed time ends, press the CANCEL touch icon (on screen) or STOP button (on control panel) to end the programme.
- To return to the previous screen, press the back touch icon.
6. Quick Cook functions
- The fifth screen will display the Quick Recipe function (Fig. 13). Touch the screen or press the knob to confirm function selection.
- Next, turn the knob to select the recipe you wish to prepare and press the knob when you have selected it (Fig. 14). You may also directly touch the icon of the recipe you wish to cook.
The quick recipes, along with selectable weights and notes, are shown below:
| Quick recipes Available weight Note: | ||
| French fries | 250 g | |
| 500 g | ||
| 750 g | ||
ENGLISH
| Quick recipes Available weight Note: | ||
| Pasta | 50 g | |
| 100 g | ||
| 150 g | ||
| Pizza | 200 g | Use grill for best results. |
| 400 g | ||
| Vegetables | 250 g | |
| 400 g | ||
| 600 g | ||
| Meat | 250 g | Use grill for best results.400 g |
| 600 g | ||
| Fish | 250 g | Use grill for best results.400 g |
| 600 g | ||
- Once the recipe is selected, you can adjust the weight of the food to be placed in the microwave by sliding and touching the screen (Fig. 15). The preset time will be displayed according to the selected weight.
- Press START (on screen) or the START button (on control panel) to begin operation. When the time is up, the microwave will beep once.
Notes:
- If you open the microwave door during operation, press the CONTINUE touch icon after closing to resume heating.
- To remove food before the programmed time ends, press the CANCEL touch icon (on screen) or STOP button (on control panel) to end the programme.
- The temperature of the food before cooking should be between 20 and 25 °C. If it is lower or higher than these values, you will have to increase or decrease the cooking time.
- The temperature, weight, and shape of the food will strongly influence the microwave effect on the cooking process. If the characteristics of the food do not completely match those described, adjust the cooking time for best results.
- To return to the previous screen, press the back touch icon.
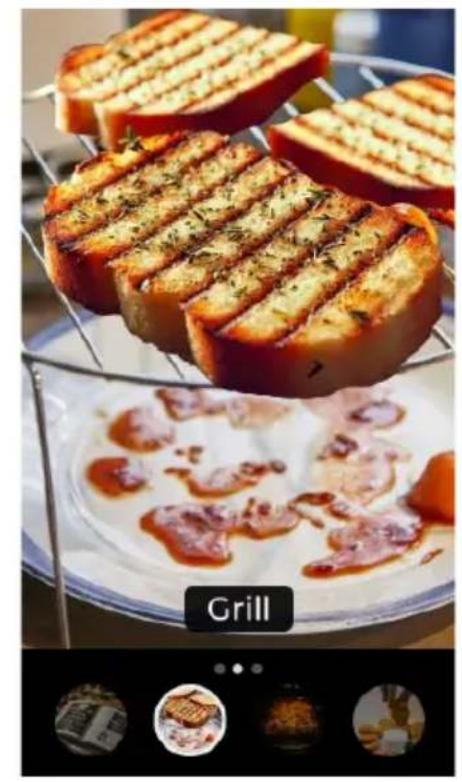
7. Grill function
-
The sixth screen will display the Grill function (Fig. 16). Touch the screen or press the knob to confirm function selection.
-
This function has three Grill mode settings (Fig. 17):
-
Grill 1: Grill function at 100% power. Suitable for achieving a gratin and toasted effect.
- Grill 2: Microwave function at 30% power and Grill function at 70% power. Suitable for achieving a crispy effect.
-
Grill 3: Microwave function at 55% power and Grill function at 45% power. Suitable for achieving a less crispy and more thoroughly cooked effect.
-
Next, turn the knob to choose the Grill mode and press when you have selected the desired mode. You may also directly touch the icon of the Grill mode you wish to use.
-
Next, slide the display or turn the knob to adjust the cooking time (Fig. 18). The selectable time range is from 0:10 min to 59:59 min.
-
Press START (on screen) or the START button (on control panel) to begin operation. When the time is up, the microwave will beep once.
Warning:
- When the Grill function is on, all internal parts of the microwave, as well as the grill rack and the cooking containers, reach high temperatures. Be careful when removing any item from the microwave. To avoid burns, use thick cloths or oven oven mitts.
Notes:
- If you open the microwave door during operation, press the CONTINUE touch icon after closing to resume heating.
- To remove food before the programmed time ends, press the CANCEL touch icon (on screen) or STOP button (on control panel) to end the programme.
- For best results with cooked food, it is recommended to use the grill.
-
To return to the previous screen, press the back touch icon.
-
Convection function
-
The seventh screen will display the Convection function (Fig. 19). Touch the screen or press the knob to confirm function selection.
- Select the NEXT touch icon (Fig. 20).
- Then, slide the screen to adjust the cooking time and temperature (Fig. 21). The selectable time range is from 0:10 min to 59:59 min. The selectable temperature range is from 120°C to 200°C.
- Next, press START (on screen) or the START button (on control panel) to begin operation.
- When the time is up, the microwave will beep once.
Warning:
- When the Convection function is on, all internal parts of the microwave, as well as the grill rack and cooking containers, reach high temperatures. Be careful when removing any item from the microwave. To avoid burns, use thick cloths or oven oven mitts.
ENGLISH
Notes:
- If you open the microwave door during operation, press the CONTINUE touch icon after closing to resume heating.
- To remove food before the programmed time ends, press the CANCEL touch icon (on screen) or STOP button (on control panel) to end the programme.
- To return to the previous screen, press the back touch icon.
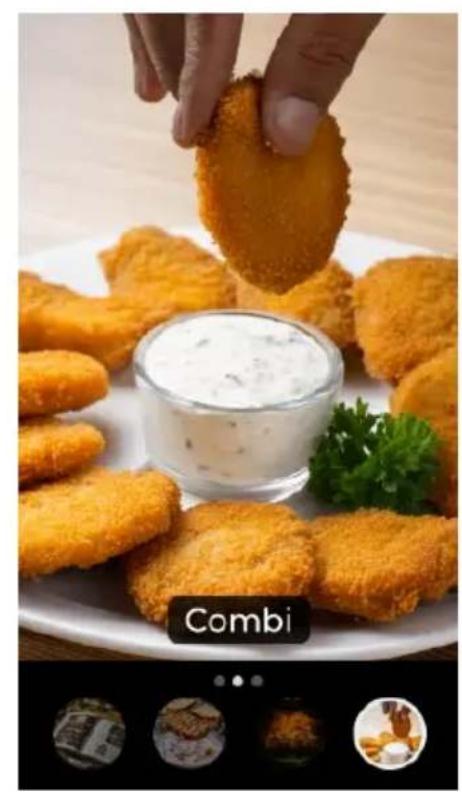
9. Combination function
- The eighth screen will display the Combi function (Fig. 22). Touch the screen or press the knob to confirm function selection.
-
This function has two Combi mode settings (Fig. 23):
-
Mode 1: Microwave function at 30% power and Convection function at 70% power. Suitable for achieving a more tender and juicy effect.
-
Mode 2: Microwave function at 55% power and Convection function at 45% power. Suitable for achieving a crispier effect.
-
Next, turn the knob to choose the Combi mode and press when you have selected the desired mode. You may also directly touch the icon of the Combi mode you wish to use.
- Next, slide the display or turn the knob to adjust the cooking time (Fig. 24). The selectable time range is from 0:10 min to 59:59 min.
- Press START (on screen) or the START button (on control panel) to begin operation. When the time is up, the microwave will beep once.
Warning:
- When the Combi function is on, all internal parts of the microwave, as well as the grill rack and cooking containers, reach high temperatures. Be careful when removing any item from the microwave. To avoid burns, use thick cloths or oven oven mitts.
Notes:
- If you open the microwave door during operation, press the CONTINUE touch icon after closing to resume cooking.
- To remove food before the programmed time ends, press the CANCEL touch icon (on screen) or STOP button (on control panel) to end the programme.
- For best results with cooked food, it is recommended to use the grill.
- To return to the previous screen, press the back touch icon.
10. Timer
- The ninth screen will display the Timer function (Fig. 25). Touch the screen or press the knob to confirm function selection.
- Then, slide the screen or turn the knob to adjust the timer duration. The selectable time range is from 0:10 min to 59:59 min.
- Press START (on screen) or the START button (on control panel) to begin countdown. When the time is up, the microwave will beep once.
Notes:
- Even if you open the microwave door whilst the timer is running, the function will not stop; the time will continue counting down.
-
To return to the previous screen, press the back touch icon.
-
Keep Warm function
-
The tenth screen will display the Keep Warm function (Fig. 26). Touch the screen or press the knob to confirm function selection.
- Then, slide the screen or turn the knob to adjust the cooking time. The selectable time range is from 0:10 min to 59:59 min.
- Press START (on screen) or the START button (on control panel) to begin operation. When the time is up, the microwave will beep once.
Notes:
- If you open the microwave door during operation, press the CONTINUE touch icon after closing to resume heating.
- To remove food before the programmed time ends, press the CANCEL touch icon (on screen) or STOP button (on control panel) to end the programme.
-
To return to the previous screen, press the back touch icon.
-
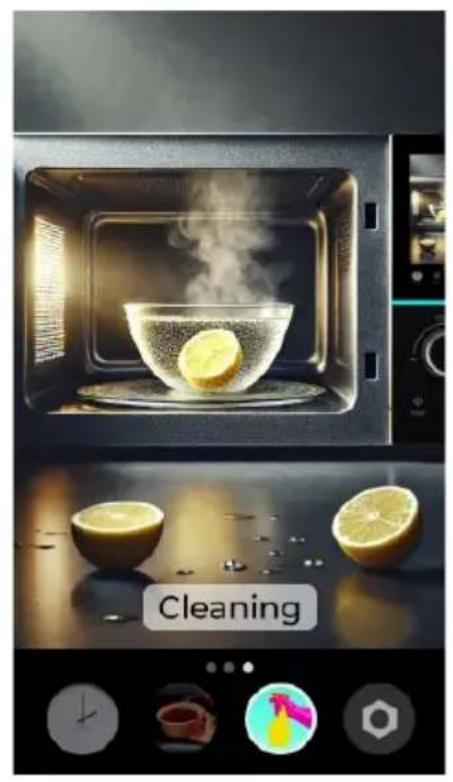
Cleaning function
-
The eleventh screen will display the Cleaning function (Fig. 27). Touch the screen or press the knob to confirm function selection.
- Slice a lemon and place one slice in a container with 250 ml of clean water. Select the NEXT touch icon.
- Place the bowl in the microwave and select the START touch icon (on screen) or START button (on control panel).
- The preset time of 05:00 min will be displayed on screen. When the time is up, the microwave will beep once.
- After using the Cleaning function, when the microwave has cooled down completely, you can clean the inside of the appliance with a damp cloth.
Notes:
- If you open the microwave door during operation, press the CONTINUE touch icon after closing to resume the cleaning function.
- If you wish to stop cleaning before the programmed time ends, press the CANCEL touch icon (on screen) or STOP button (on control panel) to end the programme.
- To return to the previous screen, press the back touch icon.
ENGLISH
13. Settings
-
The twelfth screen will display the Settings menu (Fig. 28). Touch the screen or press the knob to confirm function selection.
-
From this screen you can:
-
Select the microwave language.
- Deactivate sound.
- Select weight and temperature units.
- Adjust screen brightness.
- Access additional display information.
- Access system information.
Notes:
- To return to the previous screen, press the back touch icon.
14. Screen lock
Use this function to lock the screen during cleaning or to prevent children from using the microwave without supervision. This renders the screen inoperative:
- Screen lock: Press and hold the STOP touch icon (located on the control panel) for more than 3 seconds to activate the child lock. The microwave buttons will become inoperative.
- Screen unlock: Press and hold the STOP touch icon (located on the control panel) for more than 3 seconds to deactivate it.
4. TIPS
- Food arrangement: place the thickest food parts towards the edge of the turntable. If possible, do not overlap food.
- Watch the cooking time: cook for the shortest amount of time at first, and add more minutes if necessary. Over-cooking may result in smoke and burns.
- Cover food while cooking: covering the food you are going to cook avoids spattering and allows for a more even cooking.
- Flip or stir food once during the cooking process.
- Follow the recommended pre-heating time. Pre-heating time specified on the food label must not be exceeded.
- It is important to use materials and containers which are suitable and safe for microwave cooking. The table below shows which materials are suitable and which are not:
| Food container material | Suitable | WARNINGS: |
| Browning dish Yes | Follow the manufacturer's instructions. The bottom of the browning dish must be at least 5 mm above the turntable. A misuse may break the turntable. | |
| Cookware Yes | Suitable for microwaves only. Follow the manufacturer's instructions. Do not use cracked or chipped dishes. | |
| Glass jars Yes | Always remove the lid. Use them only to heat food slightly. Most glass jars are not heat resistant and may break. | |
| Glassware Yes | Heat-resistant microwave glassware only. Make sure there is no metallic trim. Do not use cracked or chipped dishes. | |
| Microwave cooking bags | Yes | Follow the manufacturer's instructions. Do not use metal zips. Make slits to allow steam to escape. |
| Paper towels Yes | Use to cover food for reheating and absorbing fat. Use with care for short-term cooking/warming only. | |
| Baking paper Yes | Use as a co | Cover to prevent splattering or a wrap for steaming. |
| Plastic Yes | Microwave-safe only. Follow the manufacturer's instructions. It must be labelled as "microwave safe". Some plastic containers soften, as the food inside gets hot. Boil-in bags and closed plastic bags should be cut or punctured slightly if indicated on the appliance. | |
| Plastic wrap Yes | Microwave-safe only. Use it to cover food during cooking and retain moisture. Do not allow plastic wrap to touch food. | |
| Thermometers | Yes | Microwave-safe only (meat and candy thermometers). |
| Aluminium tray No | May cause arcing. Move food into a microwave-safe dish or container. | |
| Food carton with metal handle | No | May cause arcing. Move food into a microwave-safe dish or container. |
| Metal or metal-trimmed cookware | No | The metal diverts energy away from the food. The metal trim could cause an electric arc. |
| Metal twist ties No | May cause arcing. Move food into a microwave-safe dish or container. |
ENGLISH
| Food container material | Suitable | WARNINGS: |
| Paper bags No May cause a fire in the microwave. | ||
| Plastic foam No | Plastic foam may melt or contaminate the liquid inside when exposed to high temperature. | |
| Wood No | Wood may dry out inside the microwave and may split or crack. | |
5. CLEANING AND MAINTENANCE
Note: The appliance, as well as food remains, must be cleaned and removed regularly.
- Disconnect the power cable from the socket before cleaning the appliance. Do not immerse the device in appliance or any other liquid when cleaning.
- If you do not clean the microwave regularly, its service life will be affected.
- Do not use abrasive cleaning products or scouring pads to clean the microwave.
- Do not remove the mica plate.
- When you have finished using the microwave, wipe surfaces that have come into contact with food with a damp cloth to remove any residue and then dry them thoroughly. Accumulated grease can overheat and start to smoke or catch fire.
- Also clean the exterior, door, seals, viewing window and adjacent parts.
- If you notice that the microwave gives off unpleasant odours, section 12. Cleaning function.
6. TROUBLESHOOTING
To check that the microwave is working properly, carry out the following checks:
- Fill a cup with approximately 150 ml of water and close the door. The interior light should switch off if the door is properly closed. Turn the microwave on for one minute.
- Does the light switch on?
- Does the cooling fan work? To check this, place your hand over the rear ventilation openings.
- Does the turntable rotate? The turntable can rotate clockwise or counterclockwise. This is normal.
- Has the water warmed up?
If the answer to any of the above questions is "No", check the socket and fuse. If both the socket and the fuse are not working properly, please contact the Cecotec's Official Technical Support Service.
7. DISPOSAL OF OLD ELECTRICAL AND ELECTRONIC APPLIANCES
This symbol indicates that, according to the applicable regulations, the product and/or batteries must be disposed of separately from household waste. When this product reaches the end of its service life, you must remove the batteries/accumulators and take it to a collection point designated by local authorities. For detailed information on how to properly dispose of electrical and electronic equipment and/or the corresponding batteries, consumers should contact their local authorities.
Compliance with the above guidelines will help to protect the environment.
8. COPYRIGHT
The intellectual property rights over the texts in this manual belong to CECOTEC INNOVACIONES, S.L. All rights reserved. The content of this publication may not, either in part or in its entirety, be reproduced, stored in a retrieval system, transmitted or distributed by any means (electronic, mechanical, photocopying, recording or similar) without prior authorisation from CECOTEC INNOVACIONES, S.L.
9. SIMPLIFIED EU DECLARATION OF CONFORMITY
CE Cecotec Innovaciones hereby declares that this product complies with the essential requirements and other relevant provisions of the regulations applicable in the European Union. This product has been designed, manufactured and tested in compliance with the required safety and quality standards. The full text of the EU Declaration of Conformity can be found on the following website: https://cecotec.es/es/information/declaration-of-conformity
FRANÇAIS
1. PIÈCES ET COMPOSANTS
Img. 1
6. PROBLEEMOPLOSSING
natural_image
Modern microwave oven with illuminated wavy glass pattern and a bowl of food inside (no visible text or symbols)Fig./Img./Abb./Afb./Rys. 3
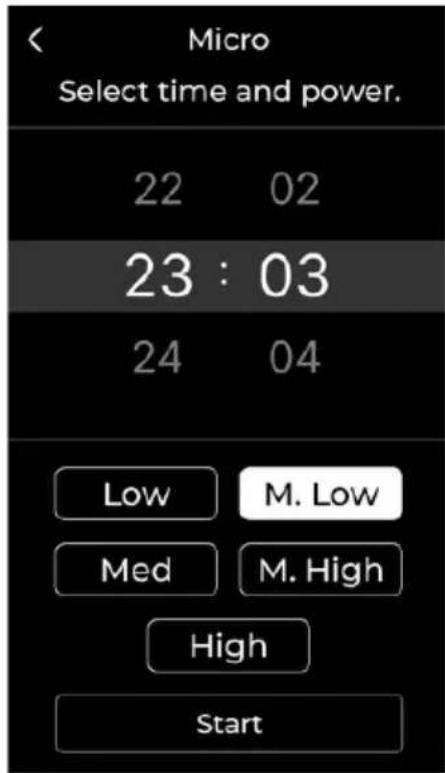
Fig./Img./Abb./Afb./Rys. 4
natural_image
Close-up of a glass bowl filled with mixed vegetables including carrots, peas, and cucumbers, with scattered food items in the background (no text or symbols on the main subject)Fig./Img./Abb./Afb./Rys. 5
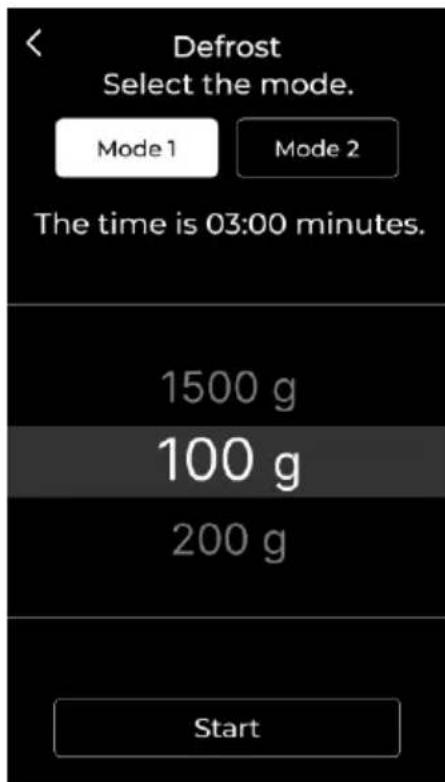
Fig./Img./Abb./Afb./Rys. 6
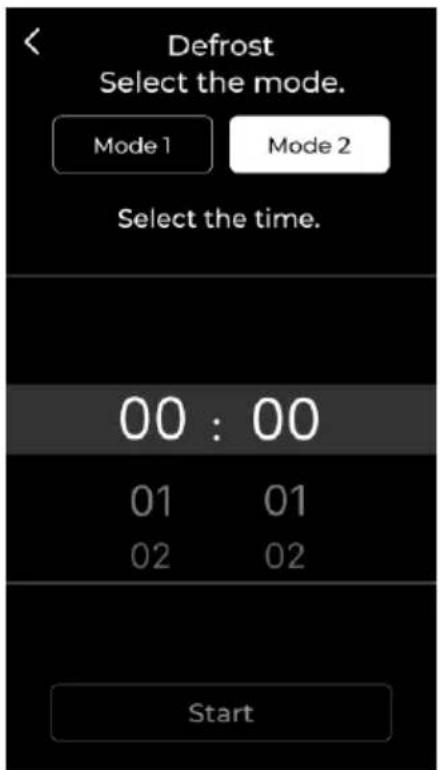
Fig./Img./Abb./Afb./Rys. 7

natural_image
Top-down view of various coffee cups on a wooden table, with a 'Drinks' button and small inset photos showing food items (no readable text or symbols)Fig./Img./Abb./Afb./Rys. 8

Fig./Img./Abb./Afb./Rys. 9

Fig./Img./Abb./Afb./Rys. 10
natural_image
Close-up of popcorn pieces on a dark surface, no text or symbols visible in the image itselfFig./Img./Abb./Afb./Rys. 11
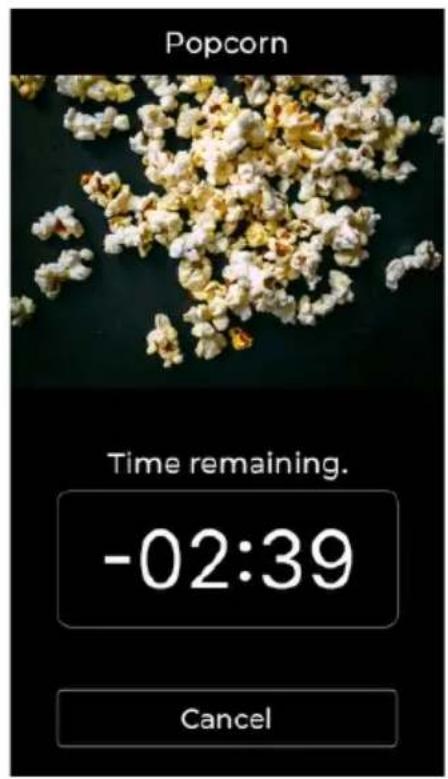
Fig./Img./Abb./Afb./Rys. 12
Fig./Img./Abb./Afb./Rys. 13
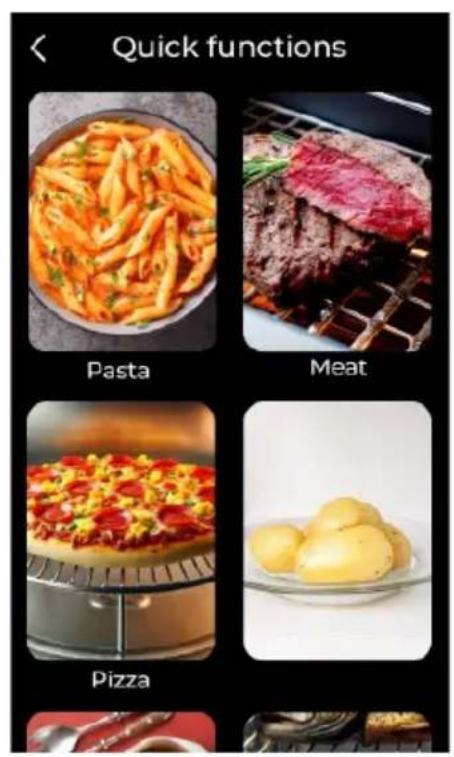
Fig./Img./Abb./Afb./Rys. 14
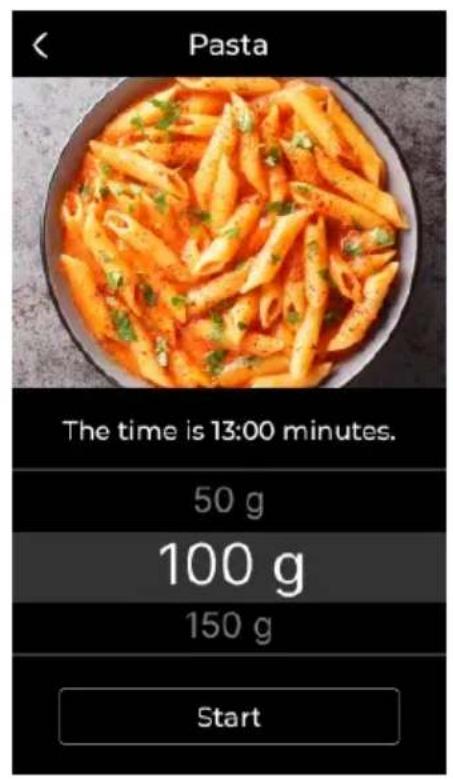
Fig./Img./Abb./Afb./Rys. 15
natural_image
Grilled sandwich with sauté topping and side dishes of meat and sauce (no visible text or symbols)Fig./Img./Abb./Afb./Rys. 16
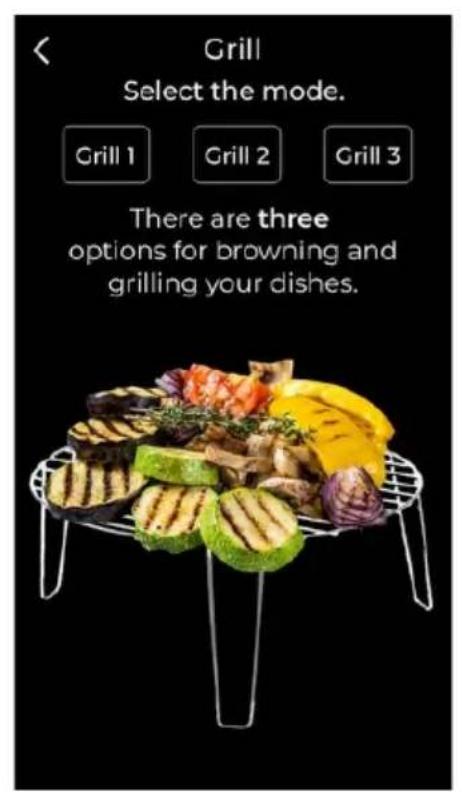
Fig./Img./Abb./Afb./Rys. 17
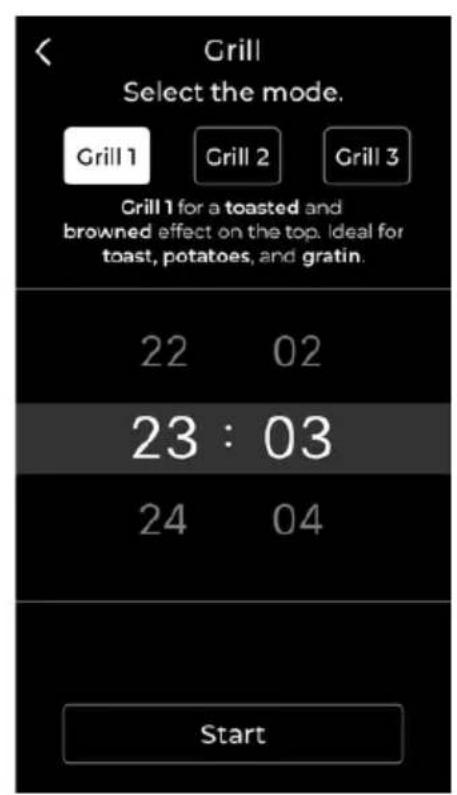
Fig./Img./Abb./Afb./Rys. 18
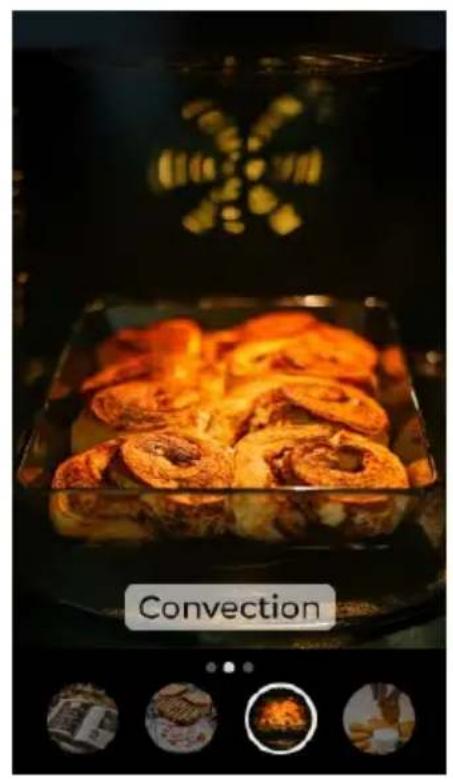
Fig./Img./Abb./Afb./Rys. 19
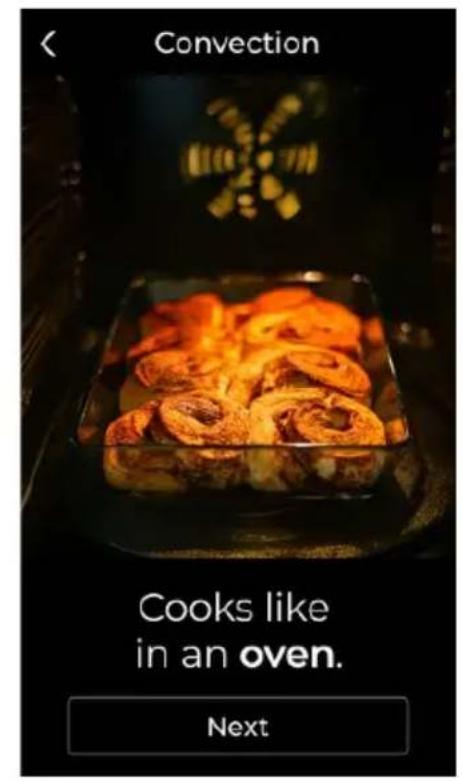
Fig./Img./Abb./Afb./Rys. 20
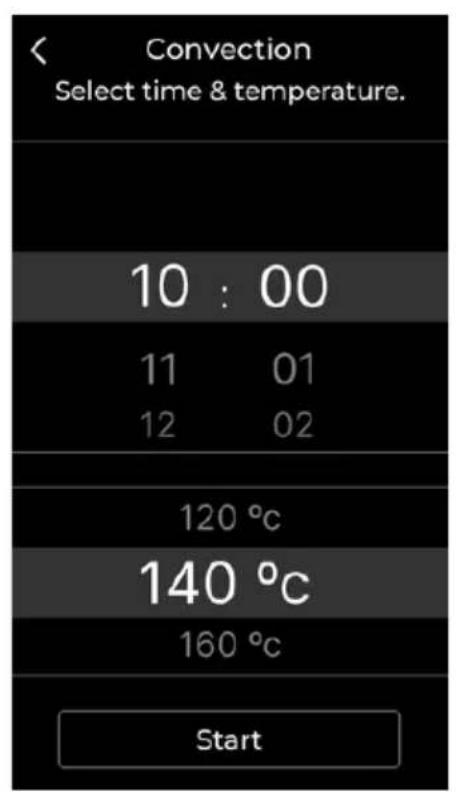
Fig./Img./Abb./Afb./Rys. 21
natural_image
Close-up of golden fried food items on a plate, one being picked up with a bowl of creamy sauce, no visible text or symbols.Fig./Img./Abb./Afb./Rys. 22
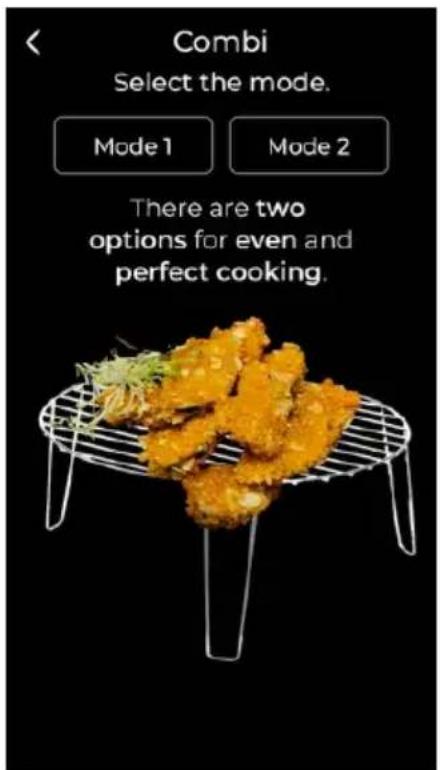
Fig./Img./Abb./Afb./Rys. 23
Fig./Img./Abb./Afb./Rys. 24
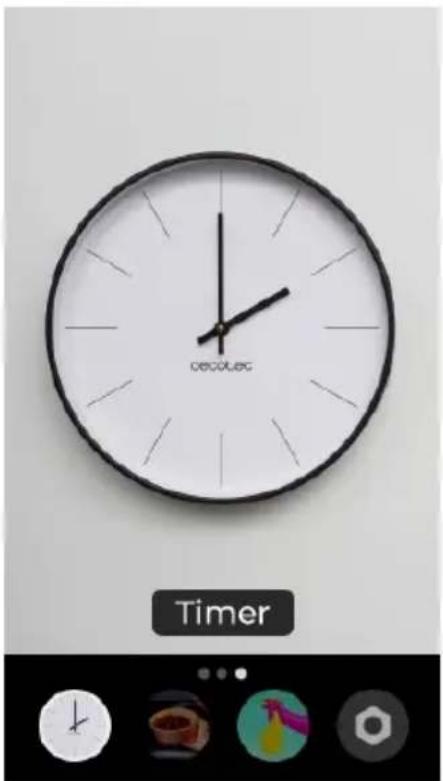
Fig./Img./Abb./Afb./Rys. 25
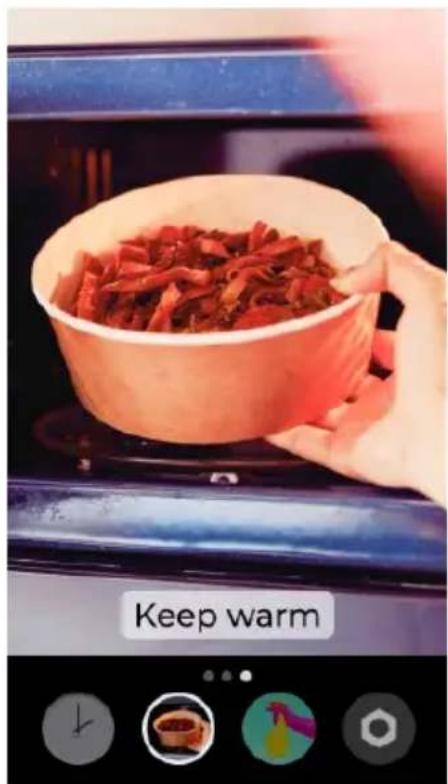
Fig./Img./Abb./Afb./Rys. 26
natural_image
Interior view of a microwave oven with lime being heated, showing three halves of lemon slices and a steaming cup (no text or symbols on main objects)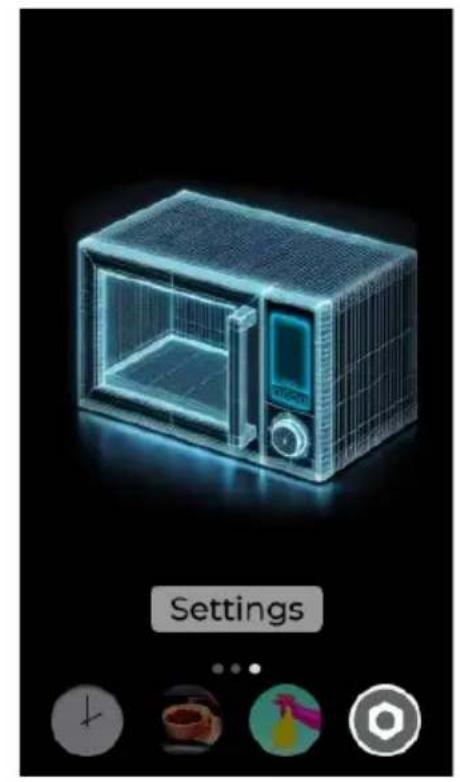
natural_image
3D wireframe model of a microwave oven with control panel, shown in a UI setting (no text or symbols on the device itself)Fig./Img./Abb./Afb./Rys. 27 Fig./Img./Abb./Afb./Rys. 28
www.cecotec.es

- SOMMAIRE
- INSTRUCTIONS DE SÉCURITÉ
- Fig. 2
- NOTE:
- BEFORE USE
- Box content
- OPERATION
- Notes:
- ENGLISH
- Drinks function
- Popcorn function
- Quick Cook functions
- Grill function
- Warning:
- Combination function
- Timer
- Settings
- Screen lock
- TIPS
- CLEANING AND MAINTENANCE
- TROUBLESHOOTING
- DISPOSAL OF OLD ELECTRICAL AND ELECTRONIC APPLIANCES
- COPYRIGHT
- SIMPLIFIED EU DECLARATION OF CONFORMITY
- FRANÇAIS
- PIÈCES ET COMPOSANTS
- Img. 1
- PROBLEEMOPLOSSING
Brand : CECOTEC
Model : Convection 2500 Touch
Category : Microwave Oven