
Electrolux ergo essence 4590 - Vacuum Cleaner AEG - Free user manual and instructions
Find the device manual for free Electrolux ergo essence 4590 AEG in PDF.

| Type of product | Canister vacuum cleaner |
| Brand | AEG (Electrolux) |
| Model | Ergo Essence 4590 |
| Type of suction | Dry only |
| Filtration system | Washable motor protection filter and microfiber filter or HEPA filter (depending on version) |
| Tank capacity | Disposable dust bag (ref. GR28) |
| Variable power | Electronic speed control and control on handle |
| Fill indicator | Yes, mechanical (turns red) |
| Cable rewinder | Yes, automatic |
| Parking | Horizontal and vertical integrated |
| Included accessories | Combined rug/hard floor nozzle, crevice tool, furniture brush, telescopic tube, flexible hose |
| Options | Turbo brush, special hard floor nozzle (depending on model) |
| Safety | Double insulation, stops in case of serious blockage |
| Maintenance | Clean motor protection filter with water, change bag every 5 bags for microfiber/HEPA |
| Spare parts | Original dust bags ref. GR28 or Menalux 1000 |
| Country of manufacture | China (Suzhou Kingclean Floorcare Co. Ltd.) |
| Standards | CE, low voltage, EMC |
Frequently Asked Questions - Electrolux ergo essence 4590 AEG
User questions about Electrolux ergo essence 4590 AEG
0 question about this device. Answer the ones you know or ask your own.
Ask a new question about this device
Download the instructions for your Vacuum Cleaner in PDF format for free! Find your manual Electrolux ergo essence 4590 - AEG and take your electronic device back in hand. On this page are published all the documents necessary for the use of your device. Electrolux ergo essence 4590 by AEG.
USER MANUAL Electrolux ergo essence 4590 AEG
Operating Instructions
M ode d'em pl oi
^8 Copyright by Electrol ux
4506 02 06 14
Thinking of you
Electrolux
Si are more of our thinking at
www.eletrolux.com
natural_image
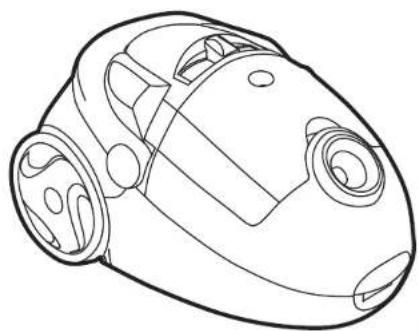
Line drawing of a vacuum cleaner device (no text or symbols)PERFEKT IN FORM UND FUNKTION
AEG
Electrolux
AE4550 AE4565 AE4580 AE4582 AE4585 AE4586 AE4588
AE4588T rioAE4588S AE4589 AE45F 0 AE45F 4 AE45F 8 AE2000 AE2000T rio
We recommend the dust bag is changed ....13 Al su de st of zak wil t verw issel en .....22
Dust bag saf et y dev ice......W.ij 3·raden u aan om de st of zak
Changing the fil ters....v.ervängen....22
To clean Motor Protection filter....De 1f31 ters vervangen....23
To change H EPA- fil ter....H.et.m3otorbesch erm fil ter schoonmak en.....23
Troubl es h ooting....P. robl. 14 en opl ossen....23
V ot re ergo essence posséde l es Est im ado cl iente .....24
natural_image
Collection of mechanical components including a hose, valve, and brush (no text or symbols visible)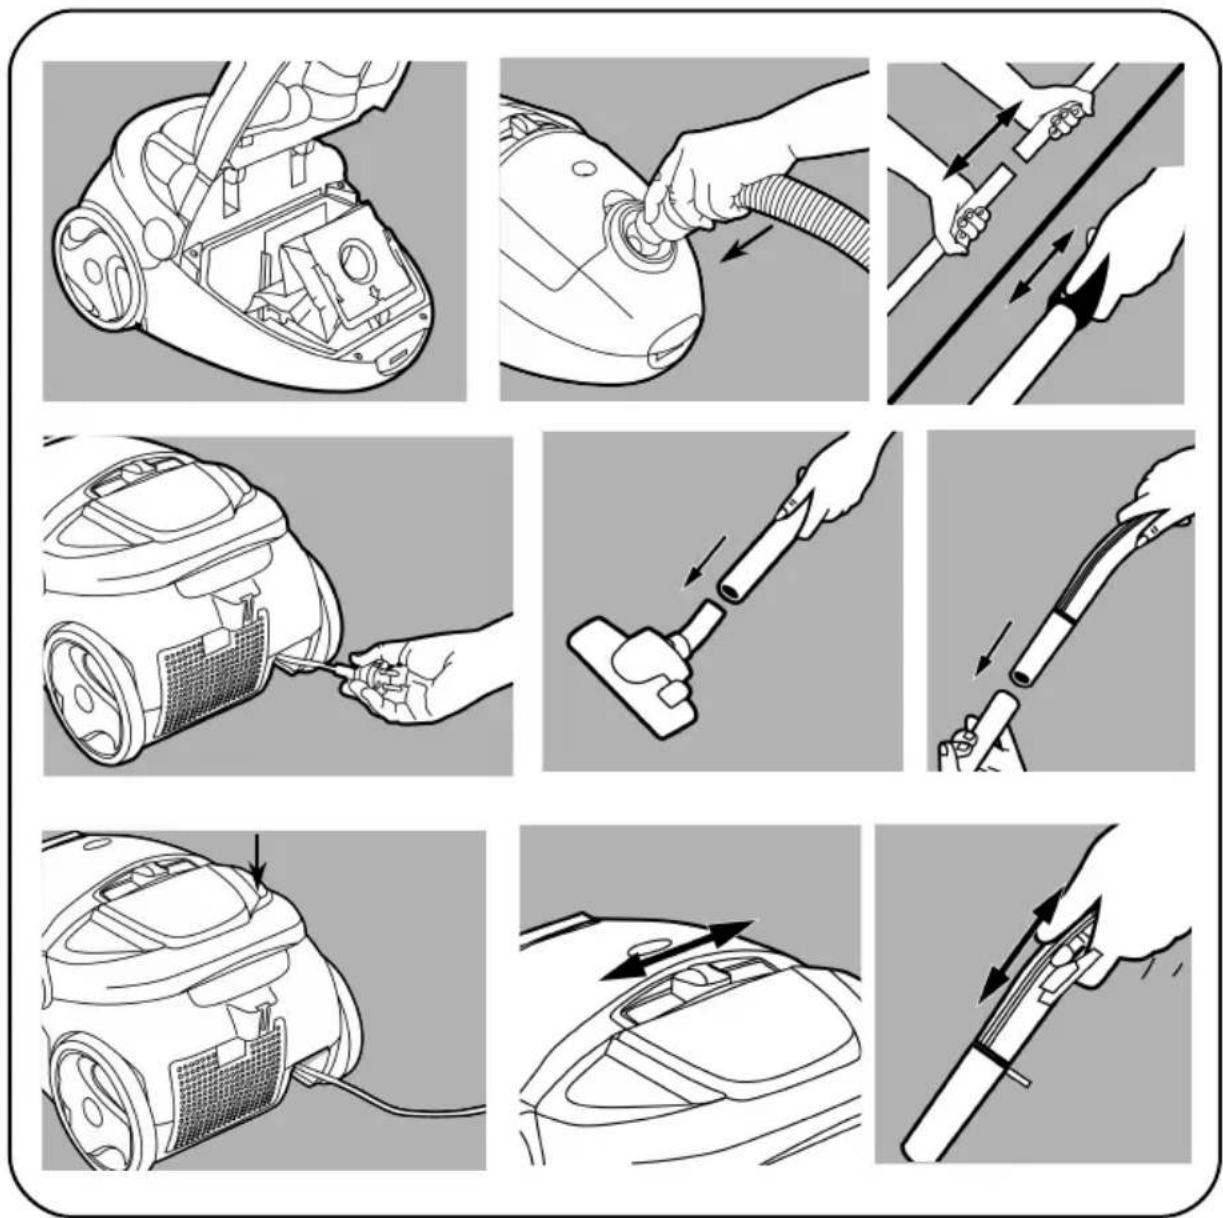

natural_image
Line drawing of a cable connector with a black rectangular component inserted (no text or symbols)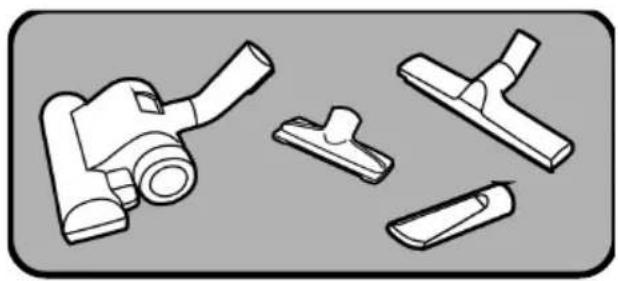
natural_image
Illustration of various mechanical components including a tool, bracket, and clip (no text or symbols)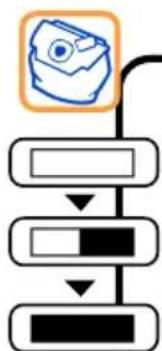
flowchart
graph TD
    A["Top Node"] --> B["Step 1"]
    B --> C["Step 2"]
    C --> D["Step 3"]
natural_image
Technical line drawing of a mechanical assembly with no visible text or symbols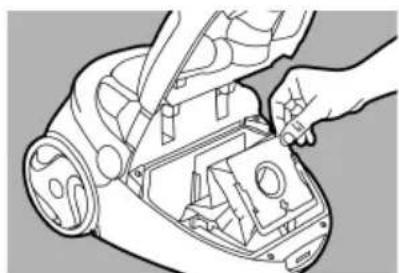
natural_image
Line drawing of a hand using a tool to adjust or install electronic components on a device (no text or symbols visible)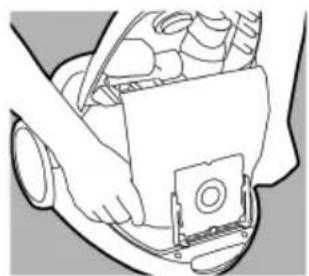
natural_image
Line drawing of a hand holding a mechanical component with no visible text or symbols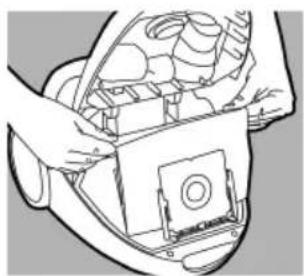
natural_image
Line drawing of a car interior showing hand positioning and mechanical components (no text or symbols)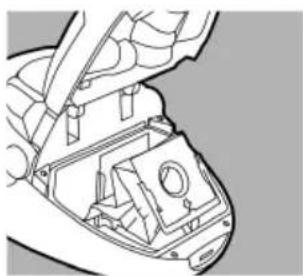
natural_image
Technical line drawing of a mechanical assembly with no visible text or symbols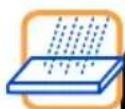
natural_image
Illustration of hands installing or adjusting a mechanical component inside a vehicle (no text or symbols visible)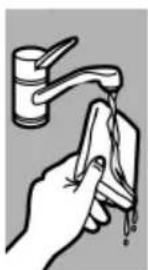
natural_image
Illustration of a hand washing a faucet with liquid dripping (no text or symbols)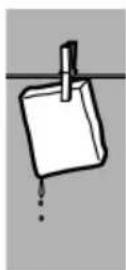
natural_image
Line drawing of a hand installing or adjusting components on a vehicle head panel (no text or symbols visible)
natural_image
Diagram of a hand inserting a component into a car wheel (no text or symbols visible)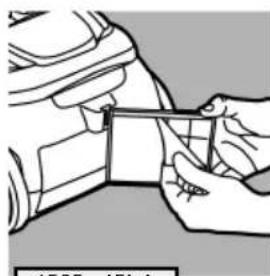
natural_image
Illustration of hands using a tool to measure a small object (no text or symbols visible)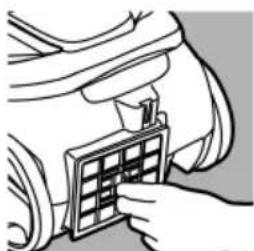
natural_image
Illustration of a hand inserting a grid into a car seat (no text or symbols)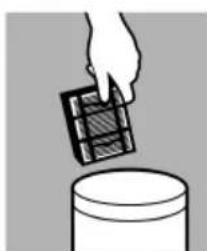
natural_image
Hand placing a small grid object onto a cylindrical container (no text or symbols visible)4550, 4580, 4581, 4582, 4585, 4586, 4588, 4588S, 4589, 4590
4550, 4580, 4581, 4582, 4585, 4586, 4588, 4588S, 4589, 4590
Seh r geeh rte Kundin,
Thank you for choosing an AEG-El ectrol ux cleaner. To ensure total satisfaction, read this Instruction book carefully.
Features (see page 6)
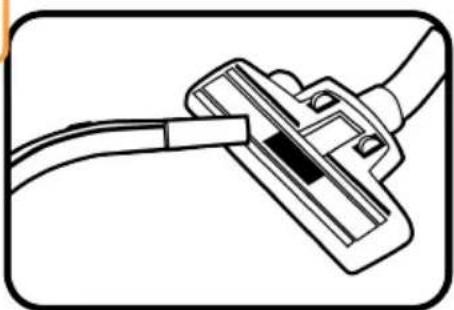
A M ains cabl e
B Cablerew ind button
C On/off button
D Suction control
E Cover release catch for dust bag compartment
F Dust bag indicator
G Hose connection
H Carrying H andl e
I Storage slot for floor nozzle and extension tubes when not in use
J Storage slot for floor nozzle and extension tubes when in use
K Accessory h ol der

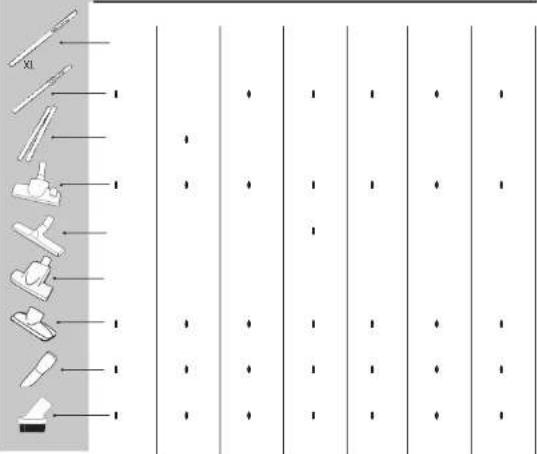
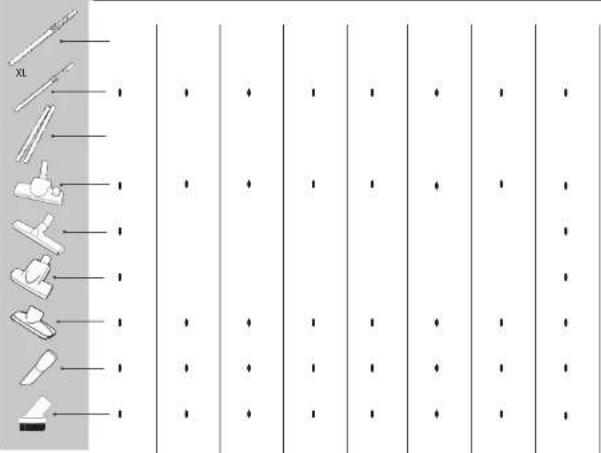
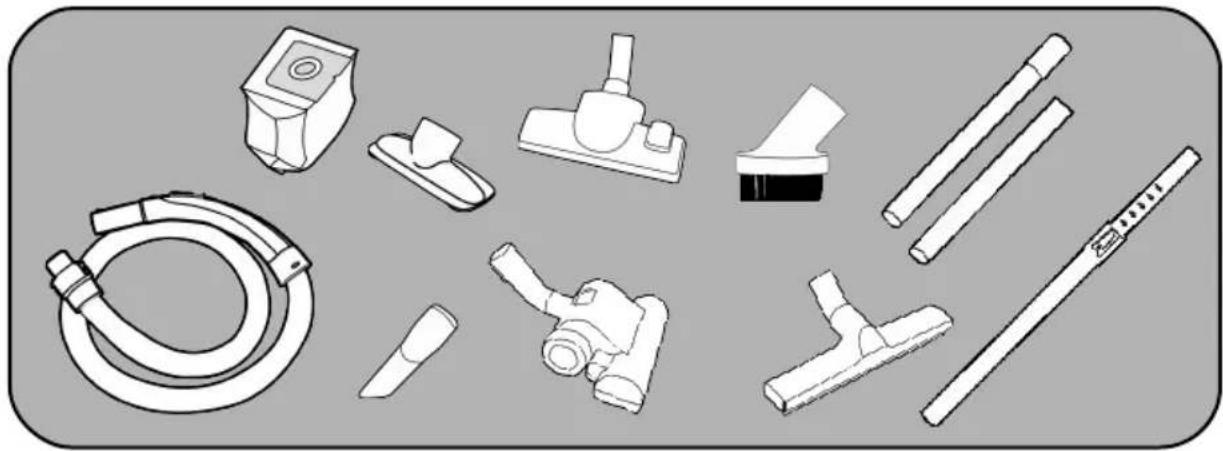
Accessories (see page 7)
- Dust bag
- Tel escopic tube *
• Metal extension tube (x2) * - Swivel h ose and handle with manual suction control
• Combination carpet/h ard floor nozzle - Hard floor nozzle *
- Turbo nozzl e*
- Narrow crevice nozzle
- Upholstery nozzle
- Dusting brush

Safety instructions
The cleaner is for domestic use only and has been designed to ensure maximum safety and performance. Please follow these simple precautions:
- The cleaner is double-insulated so it must not be earthed.
- The cleaner is only to be used by adults. Young children or infirm persons should be supervised to ensure that they do not play with the appliance.
• Always store in a dry place. - Do not use to pick up liquids.
- Avoid sharp objects.
-
Do not pick up hot cinder or lighted cigarette ends.
-
Do not vacuum up very fine dust from plaster, cement, cold cinders, flour or ash.
- Do not use near flammable gases.
- These materials can cause serious damage to the motor - a damage which is not covered by the warranty.
- Avoid tugging on them ains cable and check cable regularly for dam age.
- WARNING: Do not pull the appliance by the cord. Do not unplug by pulling on the cord. Do not use the cleaner with a damaged cable. If the cable damaged, it should be replaced at a service center. This is not covered by the warranty.
- The plug must be removed from the socket-outlet before cleaning or maintaining the appliance.
- All service and repairs must be carried out by authorised AEG-Electrolux service staff.

Getting Started (see page 7)
Check the dust container is in place.
Insert the hose until the catches click to engage. (Press catches in- wards to release).
Attach the tube to the hose handle and floor nozzle by pushing and twisting together. (Twist and pull apart to dismantle).
Extend the cable and connect to mains. The cleaner is fitted with cable rewind, ensure cable is not twisted before use. (Press foot pedal to rewind. Note: Please hold the plug to prevent it striking you or the machine).
Press the On/Off button to activate the cleaner.
By moving the linear suction control, the suction power can be adjusted. Suction can also be regulated on the hose handle by opening/closing the aperture.

Getting the best results (see page 8)
- Carpets: Use the floor nozzle with the ever in horizontal position.
- Hard floors: Use the floor nozzle with the ever in vertical position.
- Loose rugs / curtains / light tweight fabrics: Reduce the suction power. Use the floor nozzle for loose rugs and the upholstery nozzle for curtains, cushions etc.
- Confined areas: Use the crevice nozzle for crevices, corners and radiators.
- Hard floor / parquetry: use the hard floor nozzle to avoid scratch ing *.
- Lamps, pictures and bookshelves: Use the dusting brush.
- For the perfect care of your carpets: use the turbo nozzle. The rotary motion of its brush gently loosens short-pile carpets where the dirt has been trodden in. It removes stubborn fluff and pet hairs.*

Dust bag indicator and changing the dust bag (see page 8)
For peak performance the dustbag must be changed when full. If the dustbag should accidentally get broken in the cleaner, take the cleaner to an AEG-Electrolux Service Centre for cleaning. Check the dustbag regularly and replace when necessary. The dustbag indicator window will gradually turn red when filling and completely red when full. To check the dustbag, the cleaner must be switched on, with all attachments connected and off the floor.
The dust bag ful l indicator m ay signify th at the bag is blocked (occasionally caused by very fine dust) wh ich w ill cause l oss of suction and m ay resul t in overh eating. If th is occurs ch ange the dust bag even if it is not ful l .
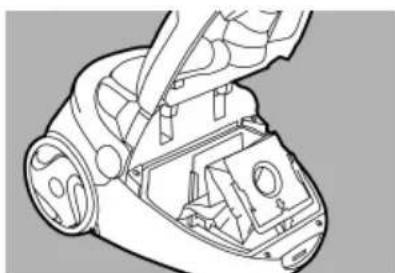
To change the dust bag
Rel ease catch and swing back lid before removing the dust bag.
Rem ove the dust bag.
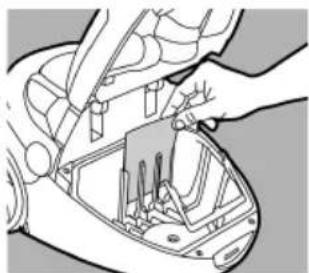
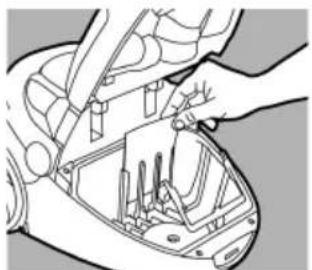
Insert new dust bag by fitting the bag slots over holders.
Adjust the bottom corners of the dustbag into the dustbag compartment.
Adjust the upper part of the dust bag into the dust bag compartment.
Close the dustbag compartment and continue cleaning.
We recommend the dustbag is changed
• after using a carpet cleaning powder
- if there is a bad smell from the cleaner, then you should also change the filter
- Note: Use only AEG-Electrolux original dust bags and fil ters (ref GR28) or Menal ux 1000 fil ters.
Dust bag safety device:
To avoid damaging the cleaner do not use it with out a dustbag. A safety device is fitted which prevents the cover closing with out a dust bag. Do not attempt to force cover shut.

Changing the filters (see page 8)
There are two filters inside your cleaner. Never use the cleaner with out the filters in place.
To clean Motor Protection filter
The Motor Protection filter should be cleaned when dirty.
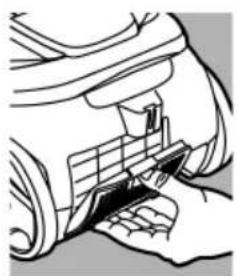
Release catch, remove the lid and the filter.
Wash the filter in warm water.
Allow to dry and re-insert the clear filter. Close the lid.
To change micro filter \*
Rel ease catch, open the filter cover.
Take the filter out of the cleaner.
Insert new filter and close the cover.
To change H EPA filter \*
Rel ease catch, open the filter cover.
Take the filter out of the cleaner.
Insert new filter and close the cover.
* Depending on the model
Troubl esh ooting
- Power: If the electric power does not come on, disconnect from mains and check plugs, cable and fuses where appropriate.
- Bl ock ages/dirty fil ters: The cleaner may switch its self off in the event of a severe block age or excessive y dirty filter(s). In such cases, disconnect from mains and all ow to cool for 20-30 minutes. Clear block age and/or replace filter(s) and restart. The clearing of blocked hoses is not covered by the guarantee.
- Please also see AEG-Electrolux additional information in the separate AEG-Electrolux Warranty Book1 et.
- Water: If water is sucked into the cleaner the motor must be changed at an AEG-Electrolux Service Centre.
CE This appliance conforms with the following EC Directives:
• Low Voltage Directive 2006/9 5/EC
- EMC Directive 89/336/EEC with am endments 92/31/EEC and 93/68/EEC

The symbol on the product or on its packaging indicates that this product may not be treated as household waste. Instead it shall be handed over to the applicable collection point for the recycling of electrical and electronic equipment. By ensuring this product is disposed of correctly, you will help prevent potential negative consequences for the environment and human health, which could otherwise be caused by inappropriate waste handling of this product. For more detailed information about recycling of this product, please contact your local city office, your household waste disposal service or the shop where you purchased the product.
Ch ére Cl iente, Ch er Cl ient,
St øv sugerens features (se side 6)
A Strøm førende ledning
B Pedal till edningsoprul ning
C Tæ nd-/sluk-kontakt
D Regul ering af sugeev ne
E L å gå bner til poserum
F Indik at or for fyldt pose
G Sl angens til k obl ingssted
H Bæ reh å ndt ag
I Opbevaringssted til mundstykke og rør, nä r disse ik ke er i brug
J Opbevaringssted til mundstykke og rør, nå r disse er i brug
K Opbev aringssted for til beh ør

F Indik at or for full st øv pose
G Slangeforbindel se
H Bæ reh å ndt ak
B But on rul are cabl u
C But on Pornit / Oprit
D Control aspirare