
NA565 - Deep fryer PHILIPS - Free user manual and instructions
Find the device manual for free NA565 PHILIPS in PDF.
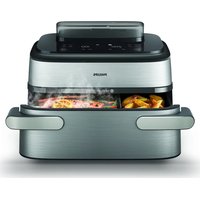


| Product type | Multi-function air fryer (Airfryer) |
| Brand | Philips |
| Model | NA565 |
| Dimensions (W x D x H) | Approx. 43 x 33 x 33 cm |
| Net weight | Approx. 8 kg |
| Voltage | 220-240 V ~ 50/60 Hz |
| Power | 2750 W (2200-2300 W variant possible) |
| Left basket capacity | Up to 300 g of fries (air frying) |
| Right basket capacity | Up to 800 g of fries (air frying) |
| XXL basket capacity | Up to 1100-1300 g of fries depending on mode |
| Cooking modes | Air, Steam+Air, Steam |
| Number of baskets | 2 (left and right) + XXL basket with divider |
| Automatic presets | Fries, vegetables, drumsticks, oven dishes, fish, ravioli, reheating |
| Synchronization function | Yes, to finish cooking at the same time |
| Favorite function | Yes, saves custom settings |
| Steam cleaning | Yes, automatic 20-minute program |
| Descaling | Yes, automatic program (use Philips CA6700 descaler) |
| Auto shut-off | Yes, after 20 minutes of inactivity |
| Basket material | Non-stick coating |
| Included accessories | Divider, 2 bases, water tank, kitchen tongs (depending on model) |
| Warranty | 2 years |
Frequently Asked Questions - NA565 PHILIPS
User questions about NA565 PHILIPS
0 question about this device. Answer the ones you know or ask your own.
Ask a new question about this device
Download the instructions for your Deep fryer in PDF format for free! Find your manual NA565 - PHILIPS and take your electronic device back in hand. On this page are published all the documents necessary for the use of your device. NA565 by PHILIPS.
USER MANUAL NA565 PHILIPS
Portuguese 832
Romanian 888
Albanian 943
Slovenian 998
Slovak 1050
Serbian 1104
Finnish 1157
Swedish 1212
Turkish 1264
Greek 1318
Bulgarian 1377
Macedonian 1436
Russian 1496
Ukrainian 1556
Kazakh 1614
Contents
Important safety instruction 4
Danger 4
Warning 4
Caution 6
Electromagnetic fields (EMF) 7
Automatic shut-off 7
Recycling 7
Warranty and support 7
EcoDesign information 7
Introduction 8
General description 9
Product overview 9
Control panel overview 10
Before first use 14
Preparations before use 14
Using the pan divider 15
Left pan [1] 15
Right pan [2] 16
XXL pan/Megabasket 18
Dual pan mode 19
Cooking modes 21
Cooking with manual settings 21
Airfry mode 21
Steamfry mode 26
Steam mode 30
Cooking with preset programs 34
Preset table XXL pan (2750W) 37
Preset table XXL pan (2200W-2300W) 37
Preset table for Right pan (2750W) 38
Preset table for Right pan (2200W-2300) 38
Preset table for Left pan (2750W) 39
Preset table for Left pan (2200W-2300W) 39
Time function (synchronize) 39
Favorite function 40
Shaking food 40
When to shake 40
What to shake 41
How to shake 41
Cleaning 41
Routine cleaning 41
Steam cleaning 43
Descaling 46
Storage 50
Important safety instruction
Read this important information carefully before you use the appliance and save it for future reference.
Danger
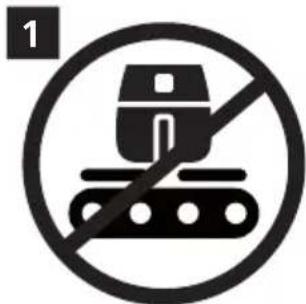
- Do not place the appliance on or near a hot gas stove or all kinds of electric stove and electric cooking plates, or in a heated oven (fig. 1).
- Never immerse the appliance in water nor rinse it under the tap.
- Do not let any water or other liquid enter the appliance to prevent electric shock.
- Always put the ingredients to be fried in the pan, to prevent them from coming into contact with the heating elements.
- Do not cover the air inlet and the air outlet openings while the appliance is operating.
- Do not fill the pan with oil as this may cause a fire hazard.
- Do not use the appliance, if the plug, the mains cord or the appliance itself is damaged.
- Never touch the inside of the appliance while it is operating.
- Never put any amount of food that exceeds the maximum level indicated in the pan.
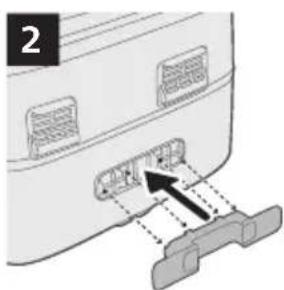
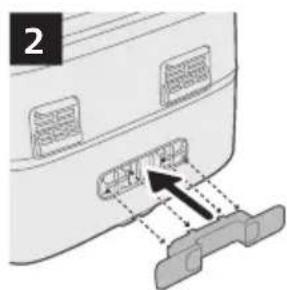
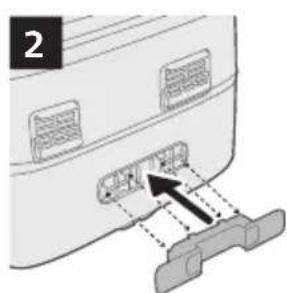
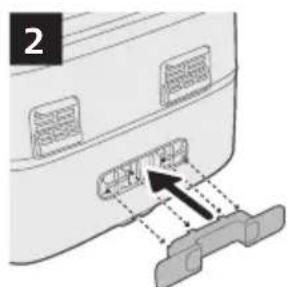
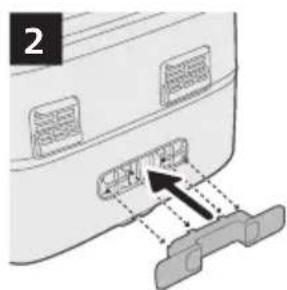
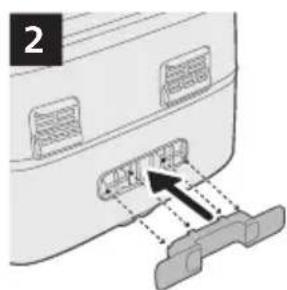
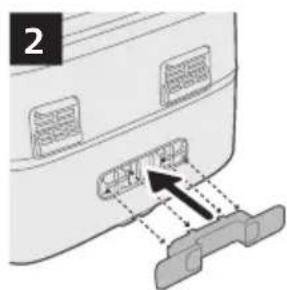
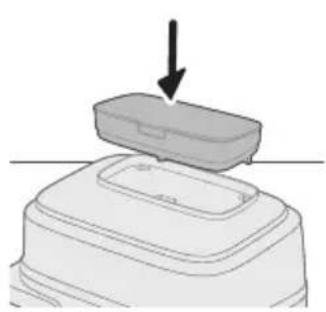
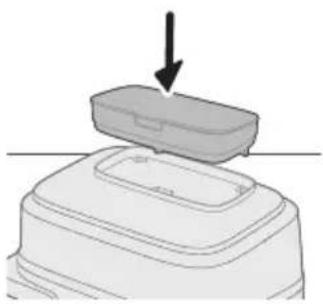
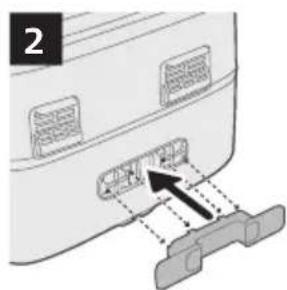
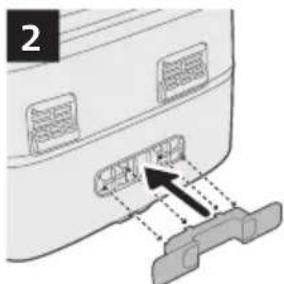
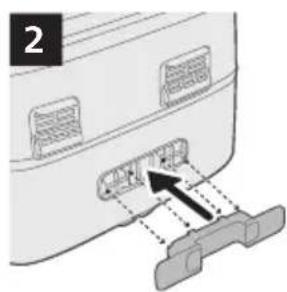
- Always make sure heater is free and no food stuck in heater. Before first use, the cord storage must be assembled onto the device (fig. 2). Do not remove the cord storage at any time.
- Do not move the device by holding the handle on both sides.
Warning
- If the supply cord is damaged, it must be replaced by Philips, its service agent or similarly qualified persons in order to avoid a hazard.
- Only connect the appliance to an earthed wall socket, protected by an earth leakage circuit breaker.
- Always make sure that the plug is inserted into the wall socket properly.
- This appliance is not intended to be operated by means of an external timer or a separate remote control system.
- This appliance can be used by children aged from 8 years and above and persons with reduced physical, sensory or mental capabilities or lack of experience and knowledge if they have been given supervision or instruction concerning use of the appliance in a safe way and understand the hazards involved.
- Children shall not play with the appliance.
- Cleaning and user maintenance shall not be made by children unless they are older than 8 and supervised.
- Keep the appliance and its cord out of reach of children less than 8 years.
- Do not place the appliance against a wall or against other appliances. Leave at least 20 cm free space at the back, on both sides and above the appliance. Do not place anything on top of the appliance.
- During hot air frying, hot steam is released through the air outlet openings. Keep your hands and face at a safe distance from the steam and from the air outlet openings. Also, be careful of hot steam and air when you remove the pan from the appliance.
- Never use light ingredients or baking paper in the appliance.
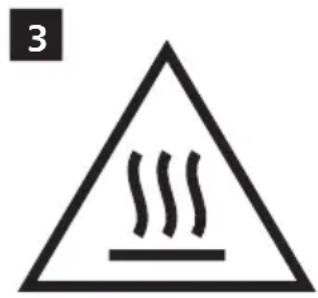
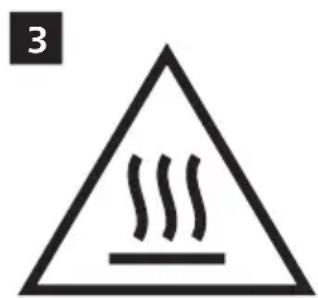
- Accessible surfaces may become hot during use (Fig. 3).
- Storage of potatoes: The temperature shall be appropriate to the potato variety stored and it shall be above 6°C to minimize the risk of acrylamide exposure in the prepared foodstuff.
- Since this Airfryer has two cooking chambers, its electric power is large. Do not operate other powerful appliances on the same circuit at the same time (e.g., kettles, electric grills, and the like). Else, it can happen that the circuit breaker in your house installation responds and the power at this socket fails.
- This appliance is designed to be used at ambient temperatures between 5°C and 40°C.
- Check if the voltage indicated on the appliance corresponds to the local mains voltage before you connect the appliance.
- Keep the mains cord away from hot surfaces.
- Do not place the appliance on or near combustible materials such as a tablecloth or curtain.
- Do not use the appliance for any other purpose than described in this manual and use only original Philips accessories.
- Do not let the appliance operate unattended.
- The pan and accessories placed inside the cooking chamber become hot during and after use of the appliance, always handle carefully.
- Thoroughly clean the parts that come into contact with food before you use the appliance for the first time. Refer to the instructions in the manual.
- When steaming food, be careful when opening the lid to avoid burns from rushing steam.
- The idle compartment is always hot even if the other one is in operation.
- Unused appliance compartment / cavity can become hot when the other compartment / cavity is in use and that it is advised to keep all baskets in place even when a single compartment / cavity is in use, and only to open / remove when this is needed for filling of the basket.
- Do not place the appliance steam window against the socket.
- The heating element surface is subject to residual heat after use.
- Always use heat-resistant glass bowls, metal utensils, or aluminum foil pans that are safe for high-temperature use in the airfryer. Avoid plastic, paper, or non-oven-safe containers, as they may melt or release harmful substances.
Caution
- This appliance is intended for normal household use only. It is not intended for use in environments such as staff kitchens of shops, offices, farms or other work environments. Nor is it intended to be used by clients in hotels, motels, bed and breakfasts and other residential environments.
- Always disconnect the appliance from the supply if it is left unattended and before you assemble, disassemble, store or clean it.
- Place the appliance on a horizontal, even and stable surface.
- If the appliance is used improperly or for professional or semi-professional purposes or if it is not used according to the instructions in the user manual, the guarantee becomes invalid and Philips refuses any liability for damage caused.
- Always return the appliance to a service center authorized by Philips for examination or repair. Do not attempt to repair the appliance yourself, otherwise the guarantee becomes invalid.
- Do not unplug the device right after the cooking process is finished.
- Let the appliance cool down for approximately 30 minutes before you handle or clean it.
- Make sure the ingredients prepared in this appliance come out golden yellow instead of dark or brown.
- Remove burnt remnants. Do not fry fresh potatoes at a temperature above 180°C (to minimize the production of acrylamide).
- Be careful when cleaning the upper area of the cooking chamber: Hot heating element, edge of metal parts, and splatter shield.
- Always make sure that the food is fully cooked in the Airfryer.
- Be cautious when cooking easy perishable food with the sync finish function (bacteria may breed).
- Be careful when pouring out the cooked food and be careful not to let the accessories fall out.
- The cord holder also serves as a spacer, by creating distance between the device and the wall to prevent heat accumulation (Fig. 3). Never remove this spacer.
- When the descaling icon lights up, proceed with the descaling process.
- Place the device 20 cm away from the wall, and do not position the air outlet directly in front of the socket. Do not place the Airfryer next to another cooking appliance, close to the kitchen wall, or beneath a kitchen cupboard, as hot steam may condense and run down the surfaces.
- In normal use, good ventilation must be ensured around the product.
- If steam accumulates inside or around the surface of the steam vent, wipe with a soft dry cloth.
- If there is condensation water on a vacant socket, it is recommended to adjust the position of the device or use the socket dust cover to avoid condensation accumulating in vacant sockets.
- To prevent damage to the appliance, do not use alkaline cleaning agents when cleaning. Use a soft cloth and a mild detergent.
- Although this appliance can operate continuously for up to 24 hours, it is important to allow the appliance to cool down periodically. Continuous operation without cooling may cause overheating and reduce product lifespan. For safe use, switch off the appliance and let it cool before restarting after extended cooking sessions.
Electromagnetic fields (EMF)
This appliance complies with the applicable standards and regulations regarding exposure to electromagnetic fields.
Automatic shut-off
- This appliance is equipped with an automatic shut-off function. If you do not press a button within 20 minutes, the appliance switches off automatically. To switch off the appliance manually, press the power On/off button.
Recycling
- This symbol means that electrical products shall not be disposed of with normal household waste.
- Follow your country's rules for the separate collection of electrical products.
Warranty and support
Versuni offers a two-year warranty after purchase on this product. This warranty is not valid if a defect is due to incorrect use or poor maintenance. Our warranty does not affect your rights under law as a consumer. For more information or for invoking the warranty, please visit our website www.home.id/warranty.
EcoDesign information
EcoDesign information for Model identifier(s): NA565
| Description Symbol Value Unit | |||
| Off-mode power consumption P | off | 0.2 W | |
| Standby mode power consumption P | sb | / | W |
| Period before automatic switches into standby mode T | sb | 20 Min | |
| Measurement standard for service value EN 50564:2011 | |||
Contact details for obtaining more information DAP B.V.
Tussendiepen 4a, 9206AD Drachten, The Netherlands
The appliance complies with the ecodesign requirements of COMMISSION REGULATION (EU) 2023/826.
Introduction
Congratulations on your purchase and welcome to Philips!
To fully benefit from the support that we offer, register your product at www.home.id.
General description
Product overview
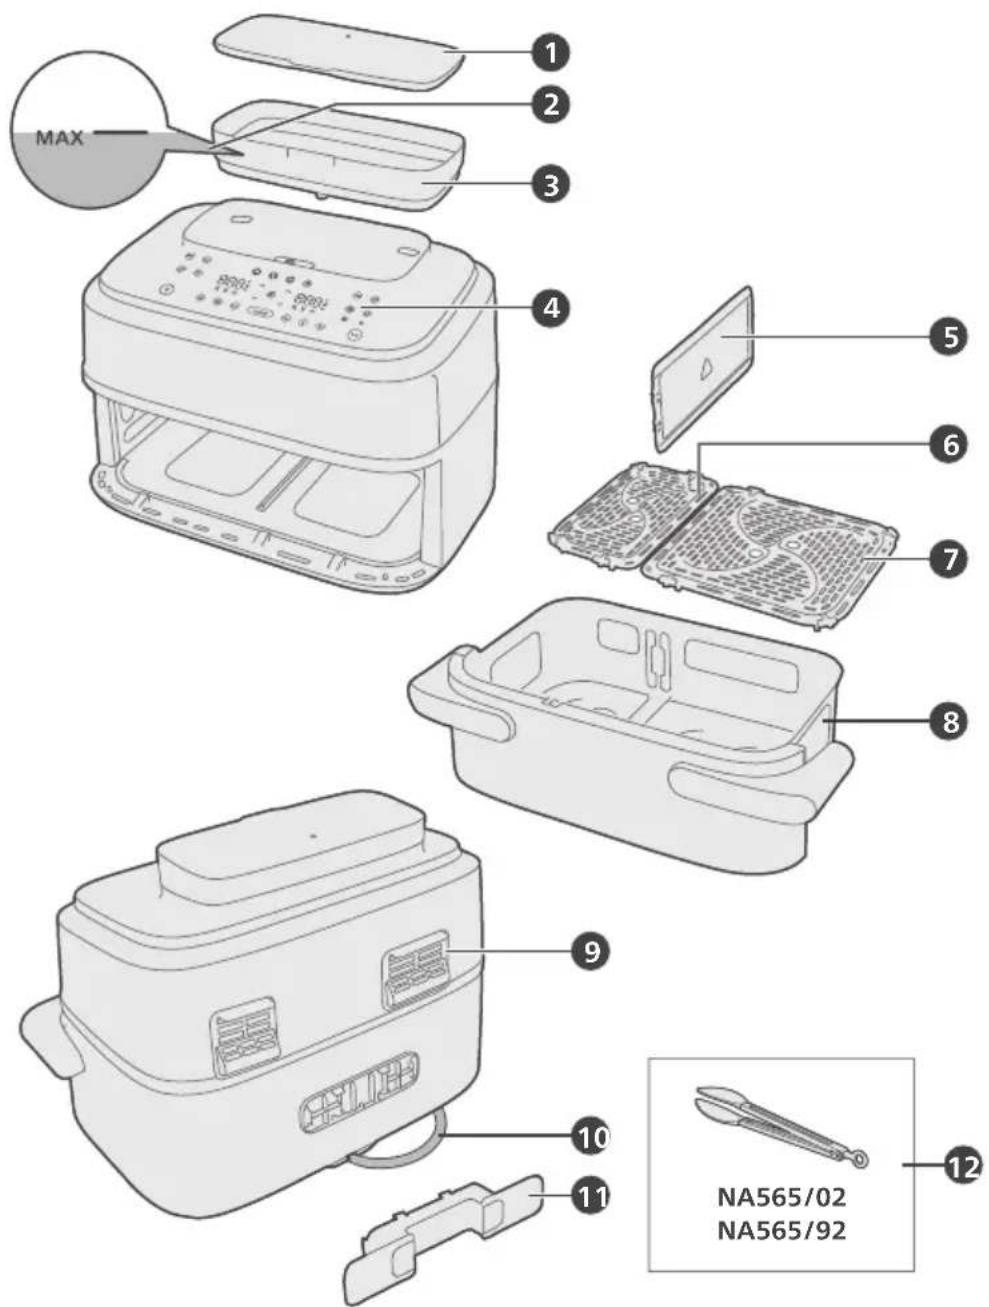
1 Water tank lid 2 MAX water level indication 3 Water tank 4 Control panel 5 Pan divider 6 Bottom plate for left pan 7 Bottom plate for right pan
8 XXL pan/Megabasket
9 Air outlets
10 Power cord
11 Cord holder
12 Kitchen tongs (NA565/02, NA565/92 only)
Control panel overview
Power and basic operations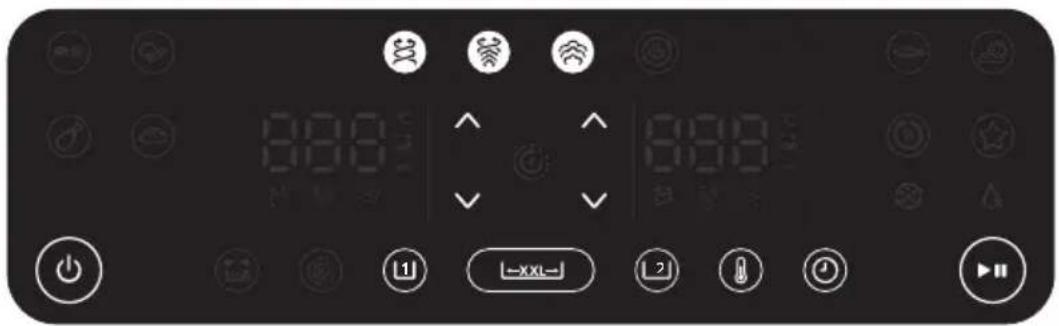

On/off button
Tap to power the Airfryer on or off.

Start/pause button
Tap to begin or pause the cooking process.

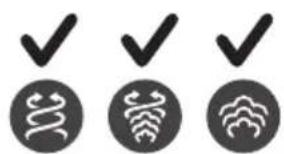
Airfry button
Tap to start airfrying with hot air circulation for crispy results.

Steamfry button
Tap to start the combination of steam and airfry for moist interiors and crispy exteriors.

Steam button
Tap to cook food using steam for gentle and even heating.

Left pan button
Tap to select the left pan

Right pan button
Tap to select the right pan

XXL pan/Megabasket button
Tap to select the XXL pan/Megabasket
^
Increase/decrease buttons
Tap to increase or decrease the cooking temperature and time.

Temperature adjustment button
Tap to enter temperature adjusting mode.

Time adjustment button
Tap to enter time adjusting mode.
Preset programs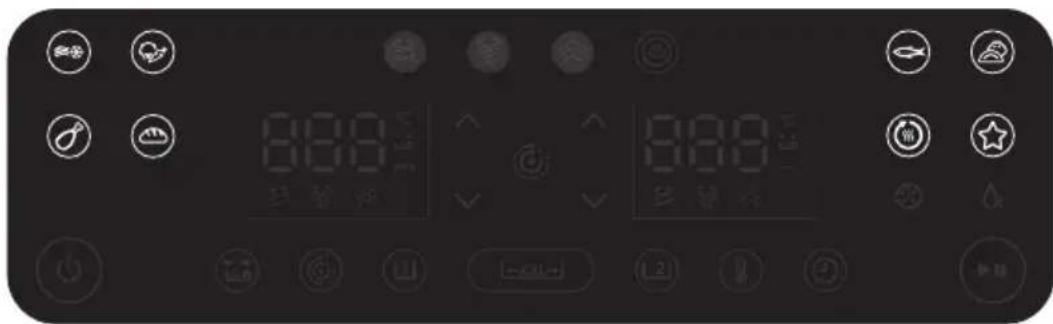

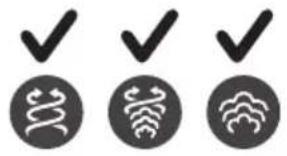
Frozen fries
Use this preset to cook frozen fries, wedges, or hash browns to a crispy golden finish.

Mixed vegetables
Use this preset to roast or crisp vegetables evenly with minimal oil.

Chicken drumsticks
Use this preset to cook chicken drumsticks thoroughly with a crispy skin.

Tray bakes
Use this preset for baked dishes with even heat distribution and golden, crisp results.

Fish
Use this preset to gently cook fish fillets or seafood while keeping them moist and flaky.

Dumplings
Use this preset to cook dumplings evenly with a crisp exterior and tender filling.

Reheat
The Reheat function quickly warms up cooked food, restoring its original taste and texture without overcooking.

Favorite
Your Airfryer includes a save favorite feature to save your preferred time and temperature for quick and consistent use for the next time (see 'Favorite function').
Additional functions
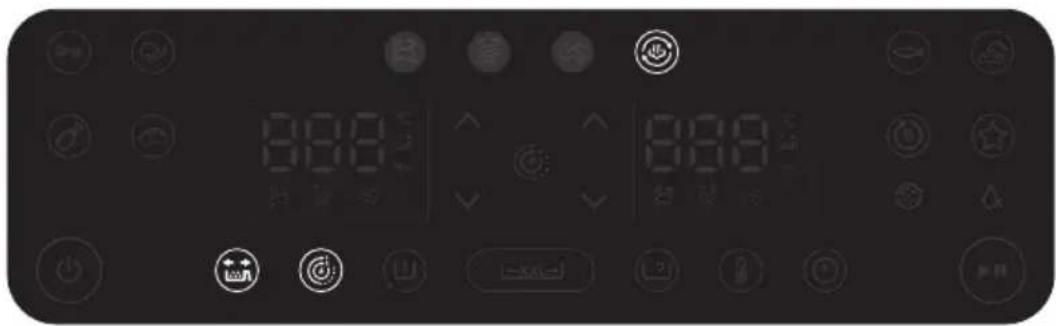

Shake reminder
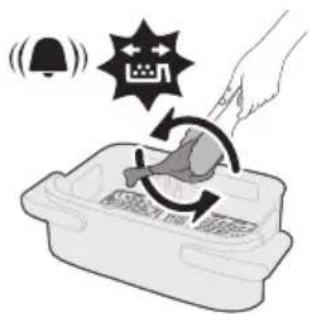
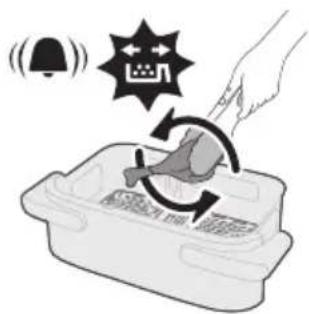
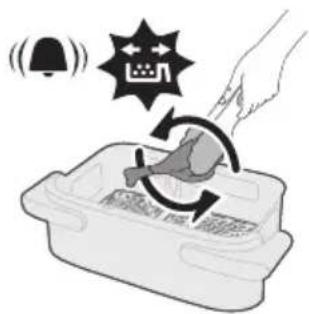
This model features a shake reminder. For optimal results, shake or turn the food promptly when the reminder alarm sounds (see 'Shaking food').
Press the Shake Reminder button to turn alerts on or off. When enabled, you'll hear a beep and see the button flash—reminding you to shake or turn your food during cooking for more even results.

Steam cleaning
Effectively dissolves greasy residue and provides a deep clean for the pan (see 'Steam cleaning').

Time function (synchronize)
Automatically syncs the cook time to ensure both pans finish cooking at the same time, even if there are different cook times (see 'Time function (synchronize)').
Display
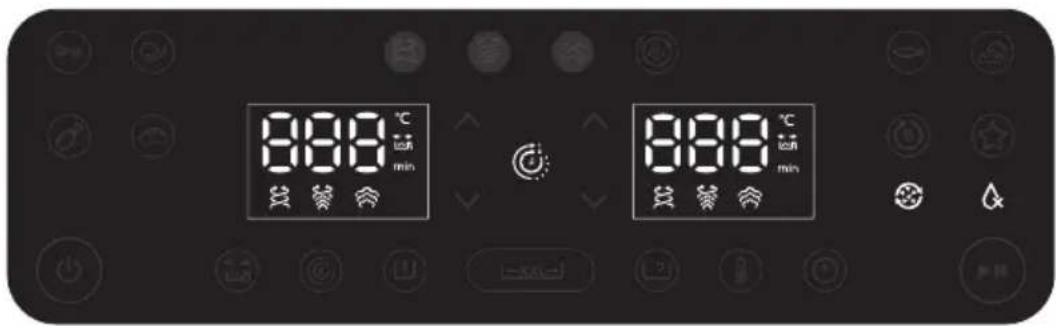
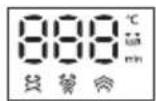
Display
Displays cooking time, temperature, cooking mode, and shake reminder.

Time function indication
Lights up when time function is activated.

No-water reminder
Lights up when there is not enough water in the water tank.

Descaling reminder
Every 10 hours of using steam enabled functions, a descaling reminder will automatically appear and blink on the display.
Before first use
Important: During the first time use, the airfryer may produce some smoke and odor. This is normal and should dissipate in a few minutes.
Caution: This is an Airfryer that works on hot air. Do not fill the pan with oil, frying fat, or any other liquid.
Caution: Do not touch hot surfaces. Handle the hot pan with oven-safe gloves.
Caution: This appliance is for household use only.
Note: Preheating of the appliance is not necessary.
1. Remove all packing material. 2. Remove any stickers or labels (if applicable) from the appliance. 3. Thoroughly clean the appliance before first use.
Preparations before use
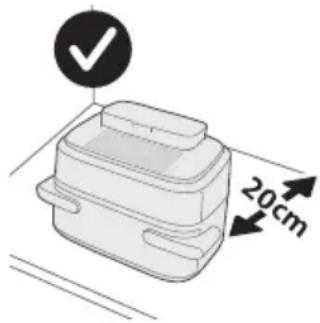
1. Place the appliance on a stable, level and heat-resistant surface. Make sure there is enough space on the table for the extended rail after the pan is pulled out. 2. Leave at least 20 cm free space at the back of the appliance.
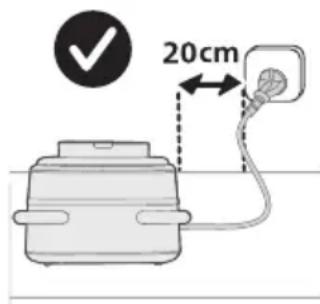
Note: During use, hot steam is released through the air outlets. Keep your hands and face safely away from the steam and outlets. Place the appliance at least 20 cm away from the wall, and do not position the air outlets directly in front of the socket.
Note: Do not put anything on top or on the sides of the appliance. This could disrupt the airflow and affect the frying result.
Note: Do not place the Airfryer next to another cooking appliance, close to the kitchen wall, or beneath a kitchen cupboard, as hot steam may condense and run down the surfaces.
Using the pan divider
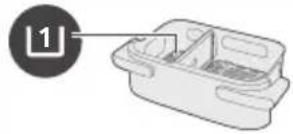
Your airfryer comes with an XXL Pan/Megabasket and a detachable divider, giving you flexibility to cook in different ways.
- Left pan [1]: applicable for Airfry only
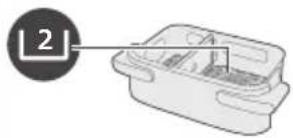
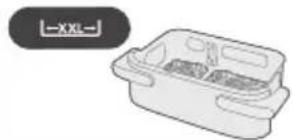
- Right pan [2], Megabasket [XXL]: applicable for Airfry, Steamfry, Steam, Steam cleaning, and Descaling
 |  | ||||
 |  |  |  |  | |
 |  |  |  |  |  |
 |  |  |  |  |  |
 |  |  |  |  |  |
Left pan [1]
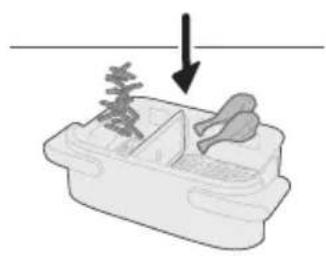
The Left Pan is ideal for smaller portions or side dishes.
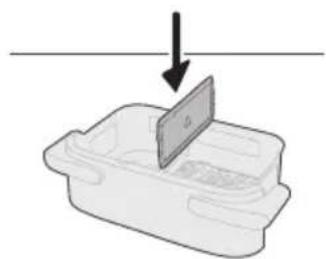
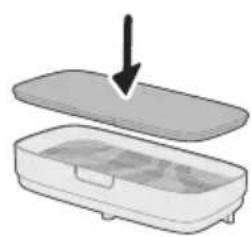
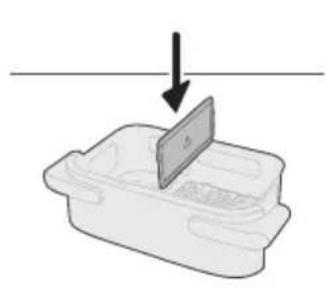
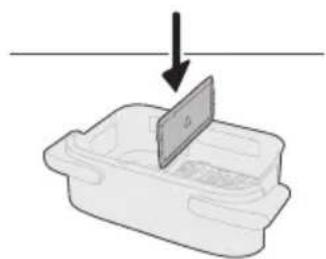
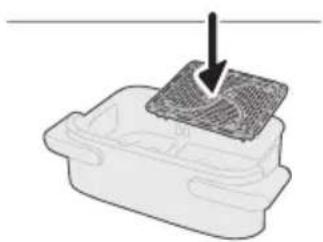
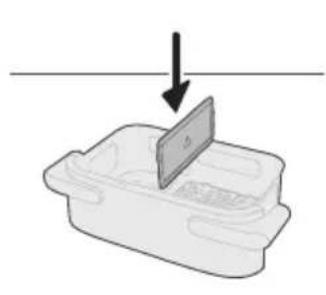
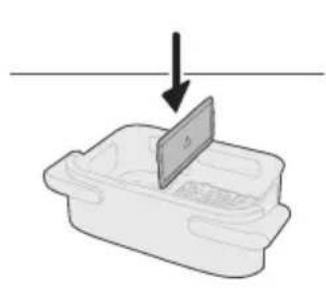
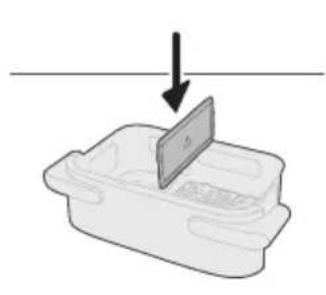
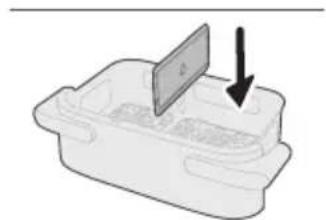
1. Place the bottom plate into the Left Pan.
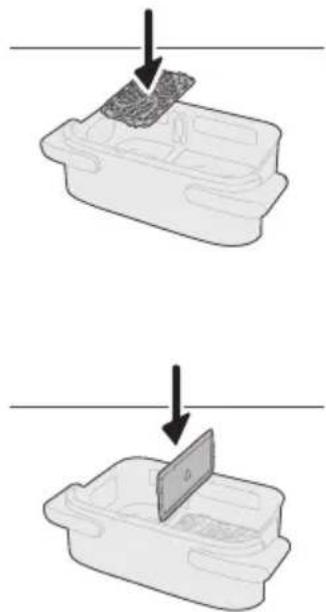
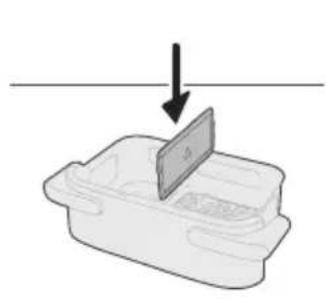
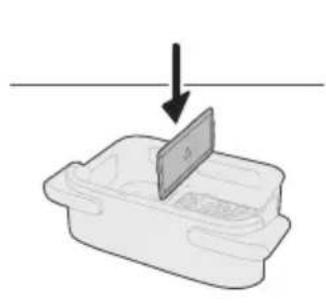
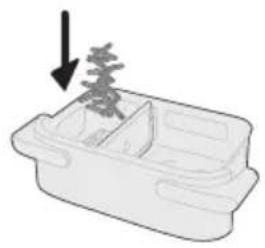
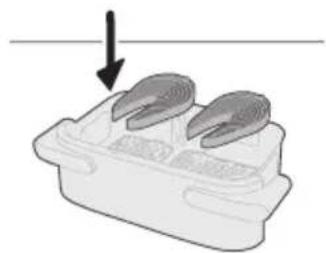
2. Insert the pan divider securely.
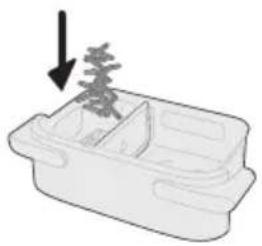
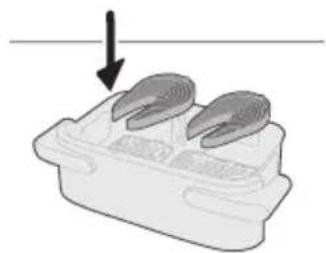
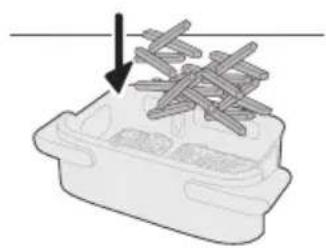
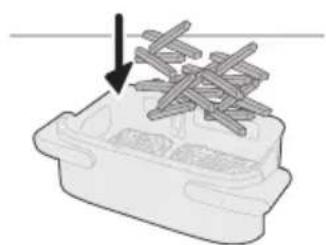
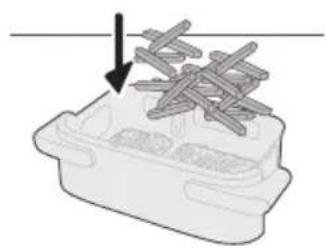
3. Add your ingredients to the Left Pan.
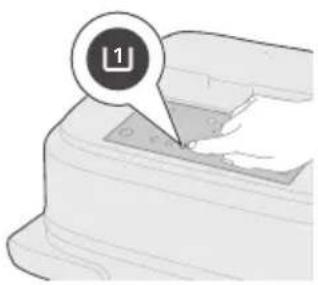
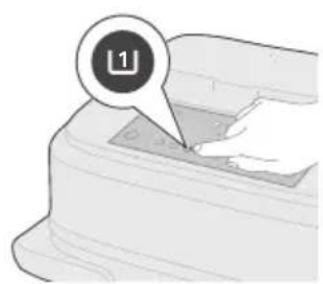
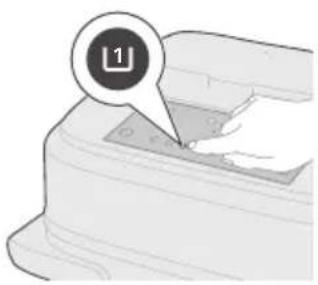
4. Tap Left Pan [1] on the control panel.
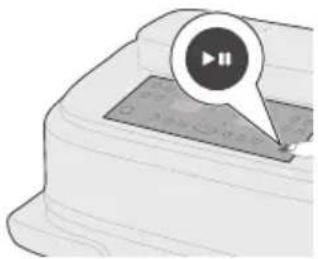
5. Set the cooking parameters and start cooking.

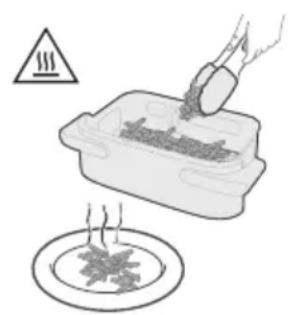
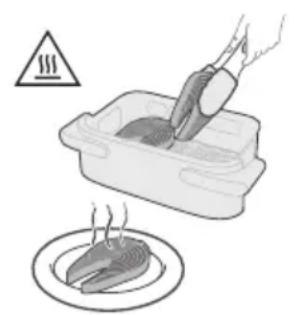
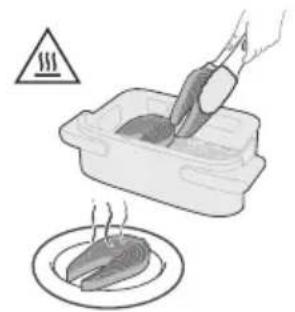
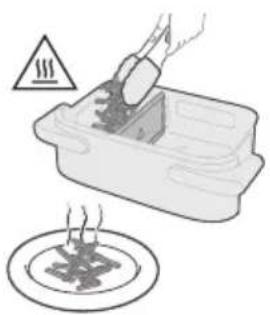
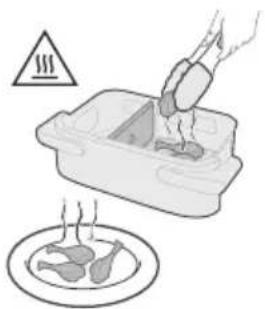
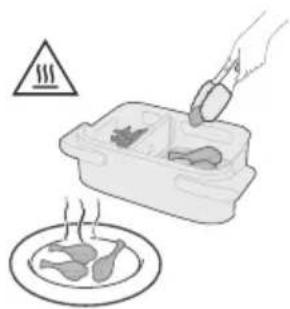
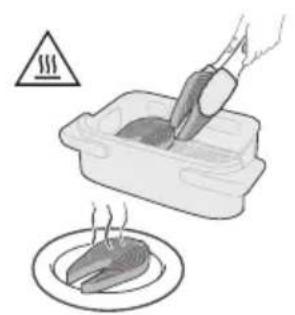
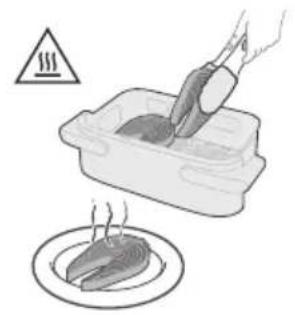
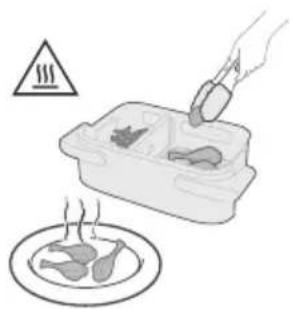
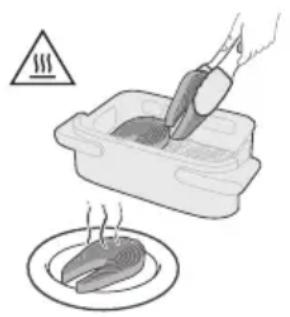
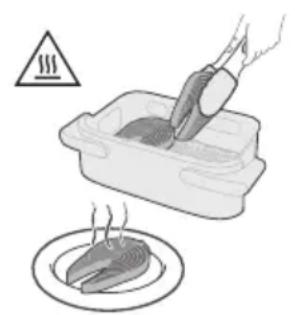
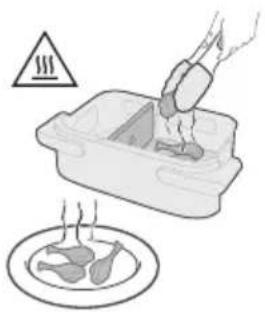
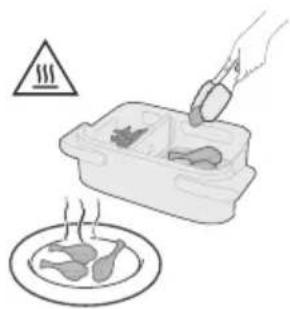
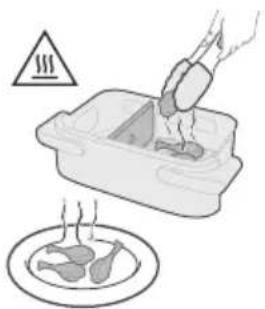
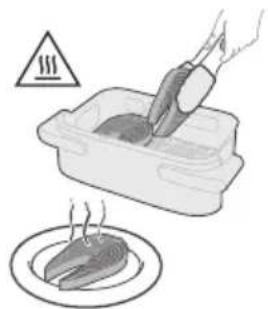
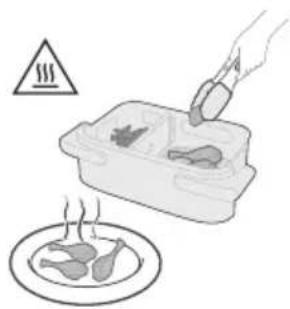
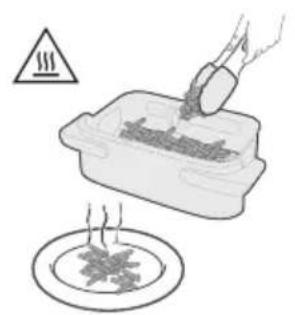
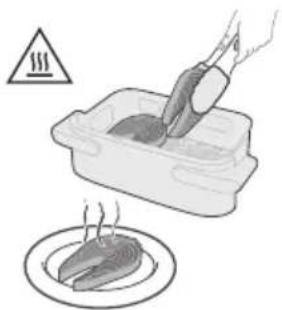
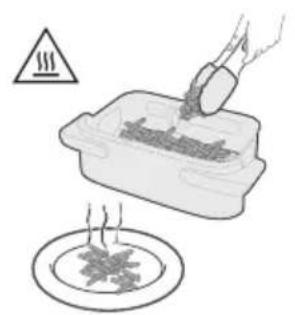
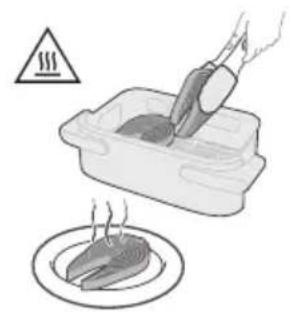
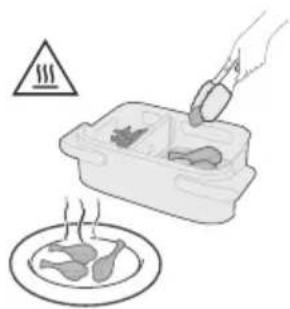
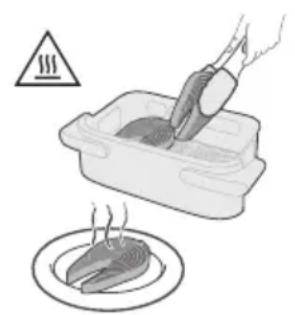
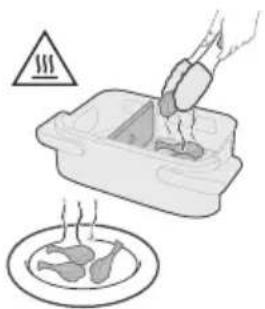
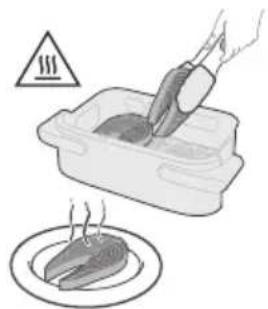
6. Use kitchen tongs to remove cooked food from the pan when cooking is finished.
Note: Models NA565/02 and NA565/92 include kitchen tongs in the package. For other models, tongs are sold separately.
Right pan [2]
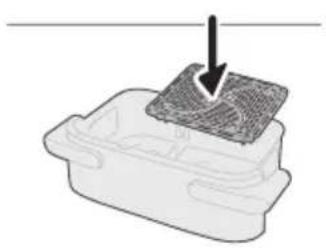
The Right Pan [2] is ideal for larger portions or main dishes.
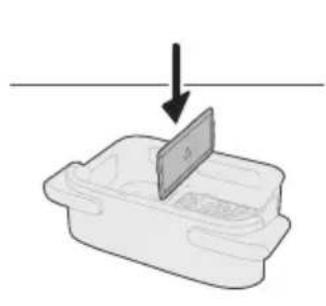
1. Place the bottom plate into the Right Pan.
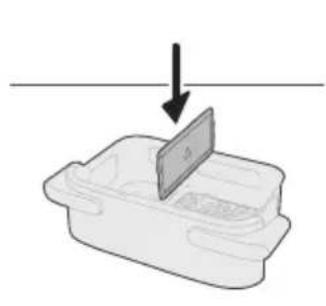
2. Insert the pan divider securely.
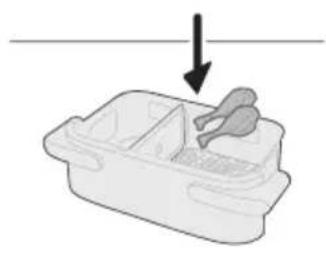
3. Add your ingredients to the Right Pan.
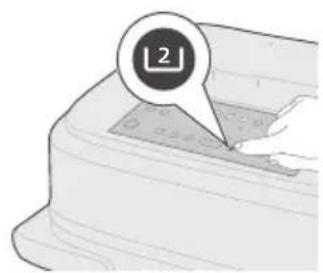
4. Tap Right Pan [2] on the control panel.
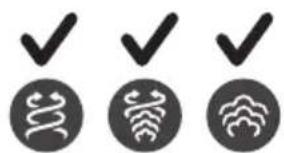
5 Select Airfry, Steamfry, or Steam mode.
6 Set the cooking parameters and start cooking.
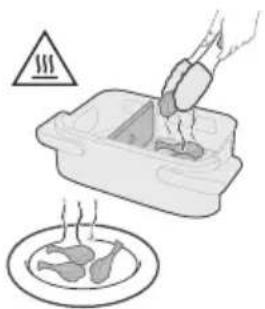
7 Use kitchen tongs to remove cooked food from the pan when cooking is finished.
Note: Models NA565/02 and NA565/92 include kitchen tongs in the package. For other models, tongs are sold separately.
XXL pan/Megabasket
The XXL pan/Megabasket is ideal for cooking large portions or whole family meals in one pan.
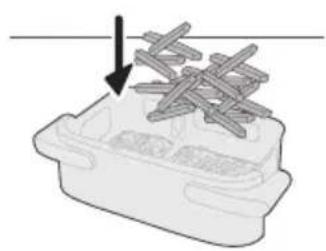
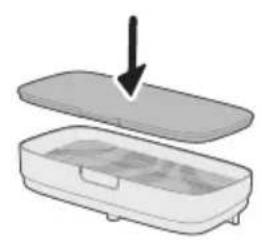
1 Place both bottom plate into the pan.
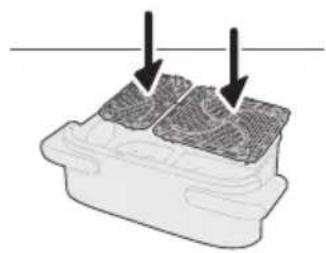
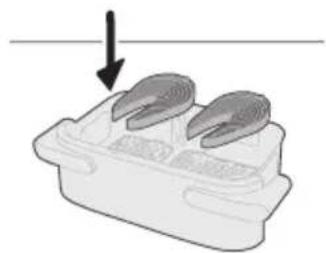
2 Add your ingredients to the pan.
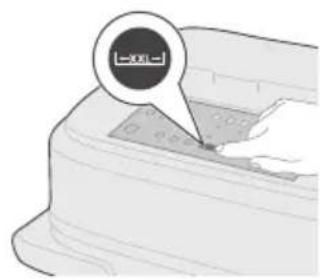
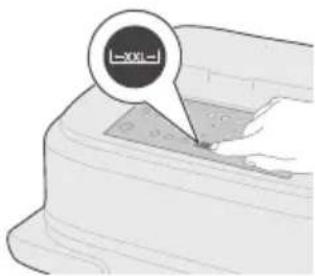
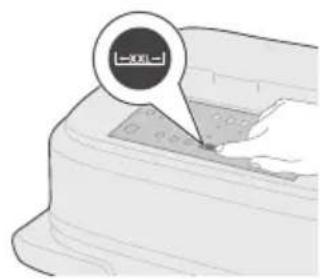
3 Tap XXL pan on the control panel.
4 Select Airfry, Steamfry, or Steam mode.
5 Set the cooking parameters and start cooking.

6 Use kitchen tongs to remove cooked food from the pan when cooking is finished.
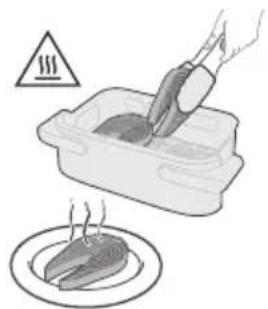
Note: Models NA565/02 and NA565/92 include kitchen tongs in the package. For other models, tongs are sold separately.
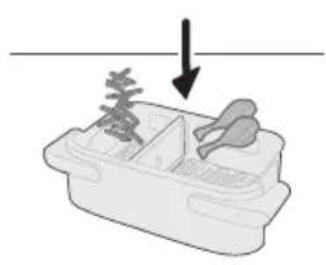
Dual pan mode
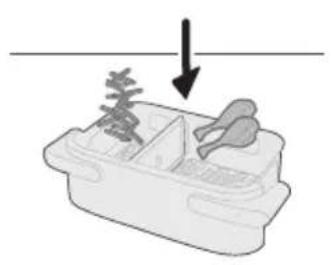
Ideal for cooking two different foods at the same time without mixing flavors.
1 Place both bottom plates into the pan.
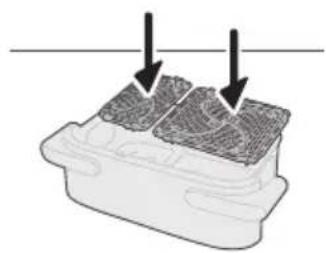
2 Insert the pan divider securely.
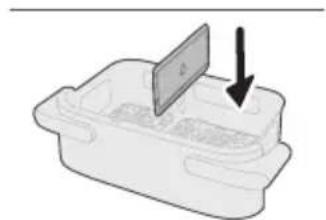
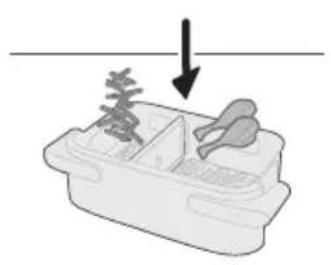
3 Add your ingredients to both pans.
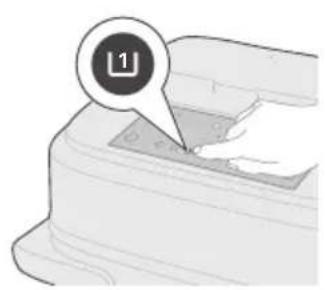
4 Tap Left Pan [1] on the control panel.
5 Set the cooking parameters for the left pan.
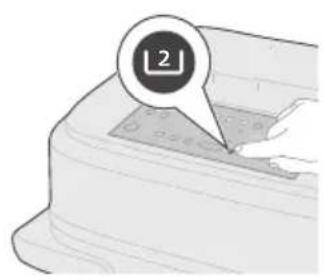
6 Tap Right Pan [2] on the control panel.
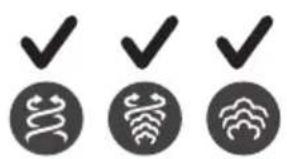
7 Select Airfry, Steamfry, or Steam mode.
8 Set the cooking parameters and start cooking.
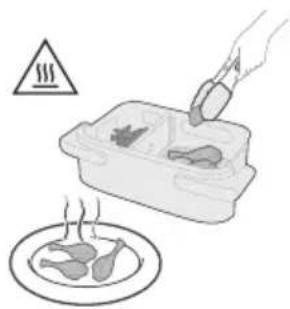
9 Use kitchen tongs to remove cooked food from the pan when cooking is finished.
Note: Models NA565/02 and NA565/92 include kitchen tongs in the package. For other models, tongs are sold separately.
Cooking modes
This appliance with steam function offers three versatile cooking modes designed to suit a wide range of cooking needs.
Airfry Mode delivers crispy results with minimal oil, perfect for snacks and fried favorites.
Steamfry Mode combines hot air and steam to lock in moisture while achieving a golden finish—ideal for delicate foods like homemade bread, homemade pizza, and fish.
Steam Mode uses pure steam to gently cook ingredients, preserving nutrients and texture, making it perfect for vegetables and seafood.
Cooking with manual settings
Airfry mode
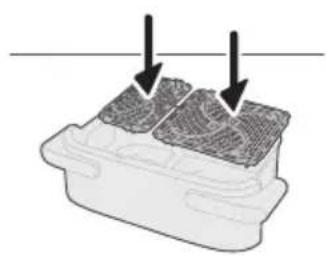
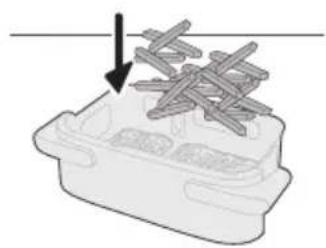
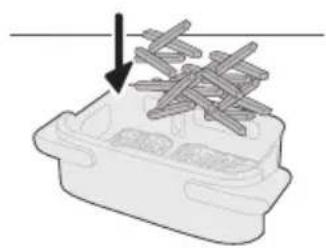
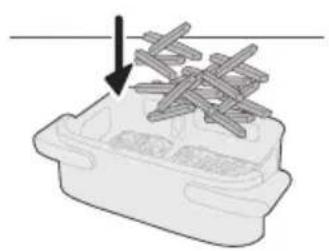
1 Insert both bottom plates into the pan.
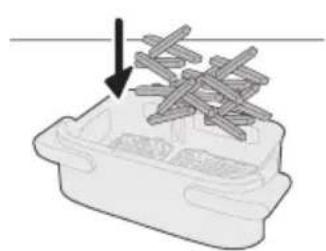
2 Add ingredients to the pan.
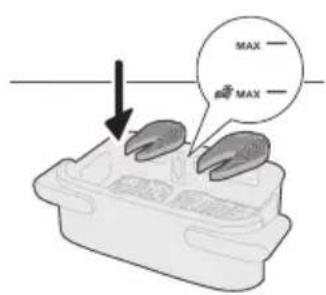
Note: The Airfryer is suitable for preparing a wide variety of ingredients. For best results, refer to the "Food table" for recommended quantities and cooking times.
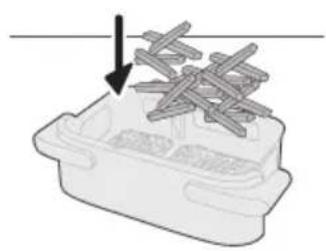
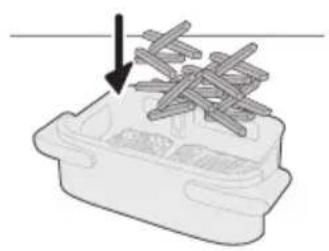
Note: Avoid exceeding the suggested amounts or filling the pan beyond the "MAX" line, as this may impact cooking performance.
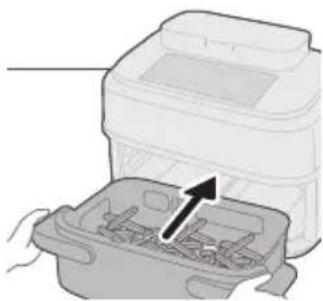
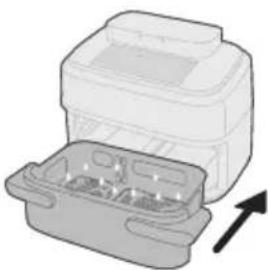
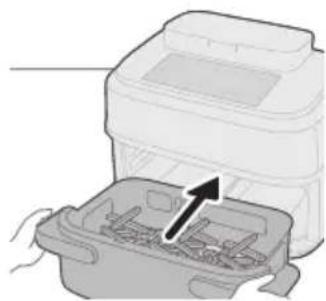
3 Place the pan back into the appliance.
Note: Firmly push the pan back into the appliance until it locks securely into place.
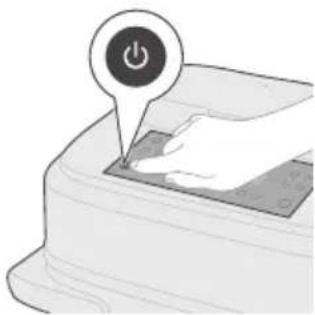
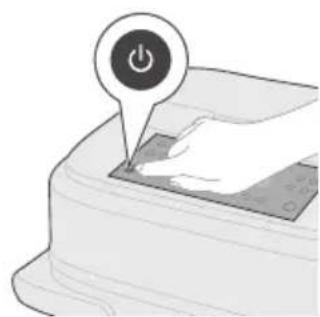
4 Tap the On/off button to switch on the appliance.
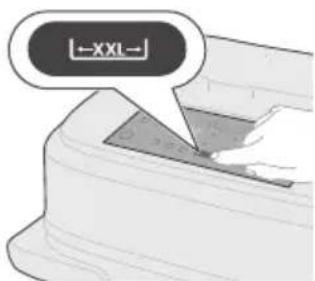
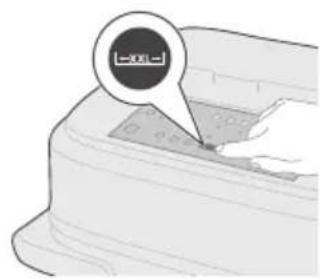
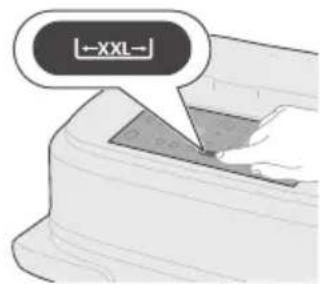
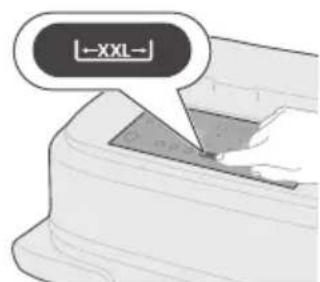
5 Tap the XXL button.
Note: Tap the correct pan button according to the pan you are using.
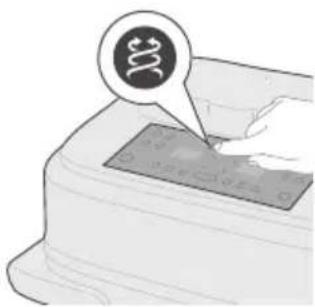
6 Tap the Airfry button to enter Airfry mode.
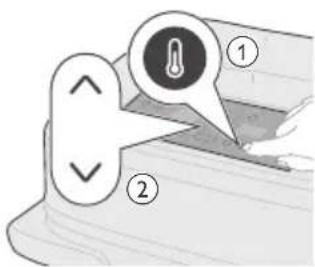
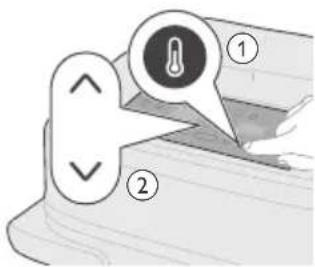
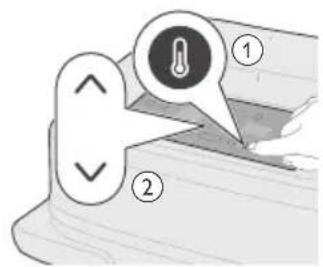
7 Tap the Temperature button and then tap the Increase or Decrease button to select the desired cooking temperature.
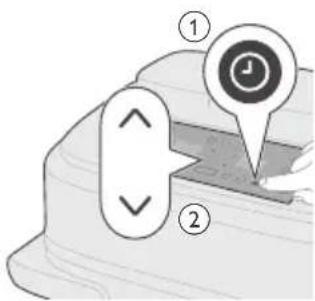
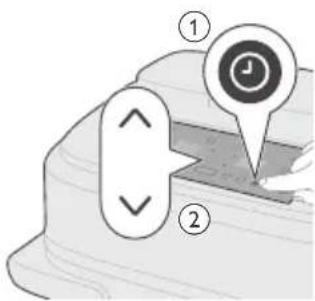
8 Tap the Time button and then tap the Increase or Decrease button to select the desired cooking time.
Note: In addition to manually selecting the cooking temperature and time, you can also choose from a variety of preset programs designed for convenience and optimal results.
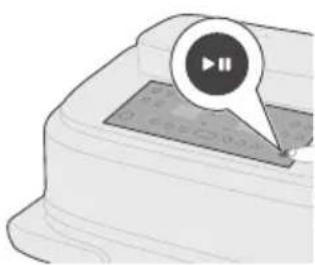
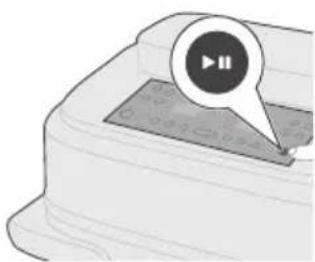
9 Tap the Start/pause button to start cooking.
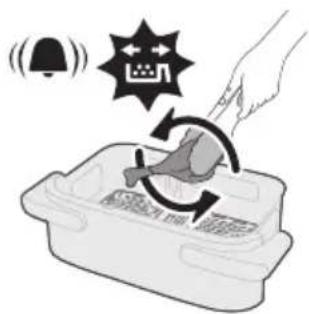
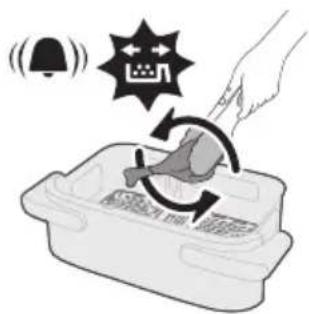
Note: Some ingredients require shaking or turning halfway through the cooking time (see "Food table"). To do this:
- Gently pull out the pan.
- Shake or turn the ingredients over a heat-resistant surface.
- Place the pan back to continue cooking.
Note: To pause the cooking process, press the Start/pause button. Press the same button again to resume.
Note: The appliance will automatically pause when the pan is removed. Cooking will automatically resume once the pan is placed back into the appliance.
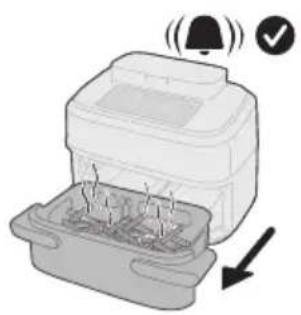
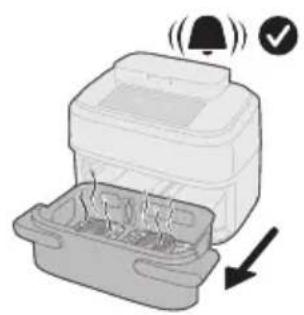
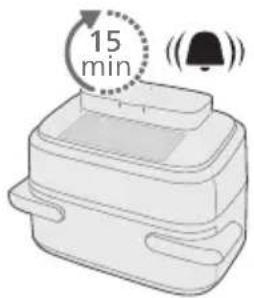
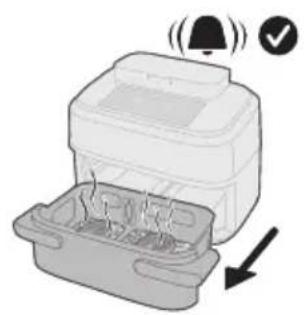
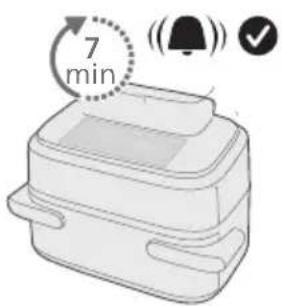
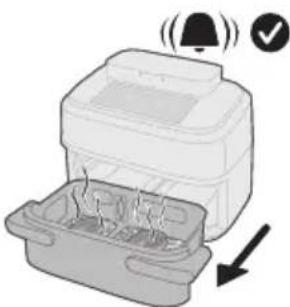
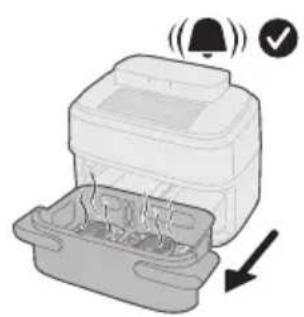
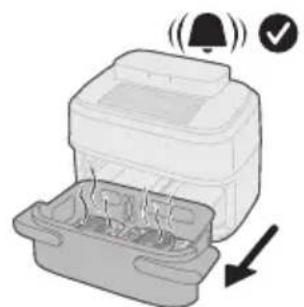
10 Once cooking is complete, a timer bell will sound. Carefully pull out the pan.
Caution: After the cooking process, the pan, the interior housing and the ingredients will be hot. Always place the pan on a heat resistant surface (e.g. trivet or silicone mat) when you remove them from the appliance. Depending on the type of food, hot steam may escape from the pan.
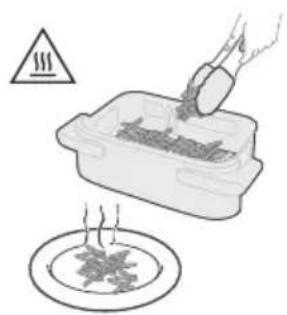
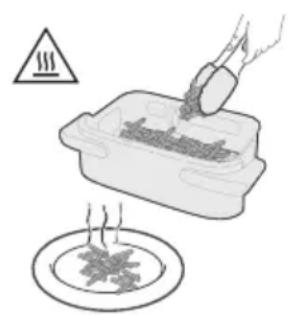
11 Remove cooked food from the pan.
Note: Excess oil or rendered fat from the ingredients will collect at the bottom of the pan.
Note: Depending on the type of food being cooked, you may wish to pour off the excess oil or fat between batches or before shaking the contents. To do this safely, place the pan on a heat-resistant surface and wear oven-safe gloves. Carefully pour out the oil or fat.
Food table for Airfry mode
The table below provides recommended base settings for preparing various food types.
Note
- The settings listed are intended as guidelines. Due to variations in ingredient origin, size, shape, and brand, optimal results cannot be guaranteed for all ingredients.
- When cooking larger quantities (e.g., fries, prawns, drumsticks, frozen snacks), shake, turn, or stir the ingredients 2–3 times during the cooking process to ensure consistent texture and doneness.
- Cooking results vary by ingredient size or volume for each dish. To achieve perfect results, tailor the cooking presets to your specific ingredients. The Home ID Recipe Book provides a complete guide for customization based on ingredient size and volume.
| Ingredients Pan Food | Amount | Tempera-ture | Time (min) Note |
| Thin frozen fries (7x7 mm / 0,3x0,3 in) | Right 800 g / 28 oz 200 °C 20 - 30 min Shake 2 times in between | ||
| Left 300 g / 11 oz 200 °C 22- 28 min Shake 2-3 times in between | |||
| XXL 1100 g / 38 oz | 200 °C 23 - 28 min Shake 2 times in between | ||
| Homemade fries (10x10 mm/0.4x0.4 in thick) | Right 800 g / 28 oz 180 °C 29 - 31 min Shake 2-3 times in between | ||
| Left 300 g / 11 oz 180 °C 36 - 38 min Shake 2-3 times in between | |||
| XXL 1100 g / 38 oz | 180 °C 30-32 min Shake 2-3 times in between | ||
| Frozen chicken nuggets | Right 600 g/ 21 oz 180 °C 10 - 16 min Shake or turn | halfway | |
| Left 300 g / 11 oz 180 °C 13 - 18 min Shake halfway | |||
| XXL 900 g/32 oz 180 °C 11 - 15 min Shake or turn | halfway | ||
| Frozen spring rolls | Right 600 g/ 21 oz 180 °C 12 - 18 min Shake or turn | halfway | |
| Left 300 g / 11 oz 180 °C 12 - 18 min Shake halfway | |||
| XXL 900 g/32 oz 180 °C 13 - 19 min Shake or turn | halfway | ||
| Hamburger (around 150 g/5 oz/piece) | Right 4 patties 200 °C 10 - 16 min Turn halfway | ||
| Left 2 patties 200 °C 10 - 16 min Turn halfway | |||
| XXL 6 pieces 200 °C 10 - 16 min Turn halfway | |||
| Meat loaf Right 1200 g / 42 | 150 °C 55 - 60 min Use the baking | ||
| oz | accessory | ||
| Meat chops without bone (around 150 g/5 oz) | Right 4 pieces 200 °C 10 - 15 min Turn halfway | ||
| Left 2 pieces 200 °C 12 - 17 min Turn halfway | |||
| XXL 8 pieces 200 °C 12 - 18 min Turn halfway | |||
| Thin sausages (around 50 g/1.8 oz/piece) | Right 10 pieces 200 °C 8 - 13 min Turn halfway | ||
| Left 5 pieces 200 °C 10 - 14 min Turn halfway | |||
| XXL 14 pieces 200 °C 9 - 14 min Turn halfway | |||
| Chicken drumsticks (around 125 g/4 oz/piece) | Right 10 pieces 190 °C 20 - 25 min Turn halfway | ||
| Left 4 pieces 190 °C 26 - 32 min Turn halfway | |||
| XXL 15 pieces 190 °C 28 - 34 min Turn halfway | |||
| Chicken breast (around 200 g/7oz/piece) | Right 4 pieces 180 °C 15 - 25 min Turn halfway | ||
| Left 3 pieces 180 °C 20 - 25 min Turn halfway | |||
| XXL 10 pieces 180 °C 22 - 25 min Turn halfway | |||
| Whole chicken Right 1200 g / 42 oz | 180 °C 45 - 60 min n/a | ||
| Whole fish (around 300-400 g/11-14 oz/piece) | Right 3 pieces 200 °C 15 - 20 min Turn halfway | ||
| Left 1 piece 200 °C 16 - 20 min n/a | |||
| XXL 4 pieces 200 °C 18 - 25 min n/a | |||
| Fish filet (around 200 g/7 oz) | Right 4 pieces 160 °C 10 - 14 min n/a | ||
| Left 2 pieces 160 °C 16 - 22 min n/a | |||
| XXL 8 pieces 160 °C 16 - 21 min n/a | |||
| Mixed vegetables (roughly chopped) | Right 1000 g/35 oz 200 °C 20 - 25 min Shake halfway | ||
| Left 400 g/14 oz 200 °C 20 - 30 min Shake halfway | |||
| XXL 1200 g/42 oz 200 °C 22 - 32 min Shake halfway | |||
| Muffins (around 50 g/1.8 oz/cup) | Right 9 pieces 150 °C 13 - 15 min Use the Muffin cups | ||
| Left 6 pieces 160 °C 19 - 25 min Use the Muffin cups | |||
| XXL 10 pieces 160 °C 19 - 25 min Use the Muffin cups | |||
| Cake Right 500 g/18 oz 150 °C 30 - 35 min Use the baking accessory | |||
| Pre-baked bread/rolls (around 60 g/ 2 oz/piece) | Right 6 pieces 180 °C 6 - 8 min Turn halfway | ||
| Left 3 pieces 180 °C 4 - 6 min Turn halfway | |||
| XXL 6 pieces 180 °C 6 - 8 min Turn halfway | |||
| Vegan (fresh convenience vegan snacks such as falafel) | Right 12 pieces 180 °C 12 - 15 min Shake, turn or stir | 2-3 times in between | |
| Left 12 pieces 190 °C 15 - 18 min Shake 2 times in | between | ||
| XXL 20 pieces 190 °C 15 - 20 min Shake 2 times in | between | ||
| Homemade bread Right 550 g / 19 oz 150 °C 30 - 40 min Use the baking | accessory. Don't use baking paper. | ||
Steamfry mode

1 Insert both bottom plates into the pan.
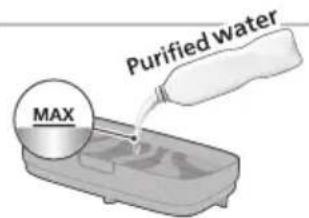
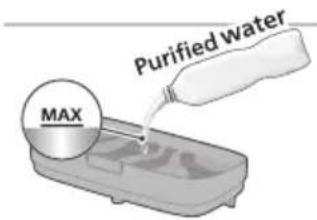
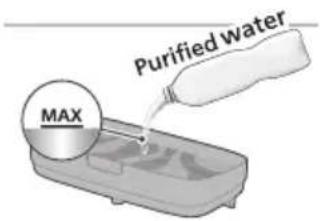
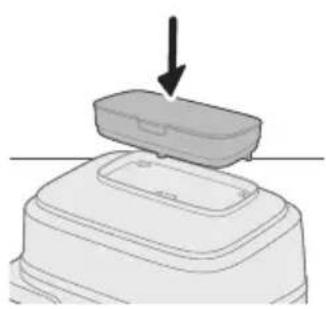
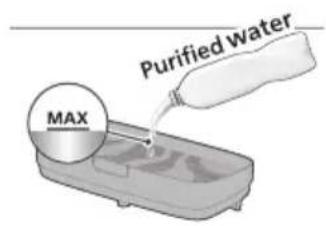
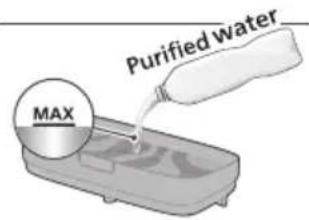
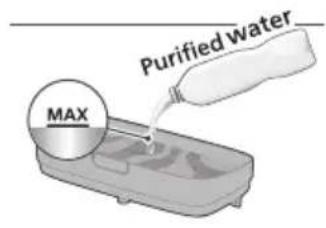
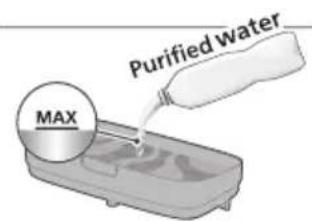
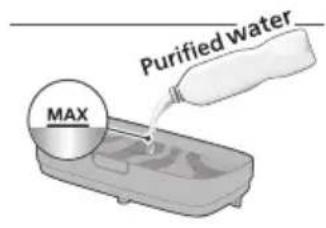
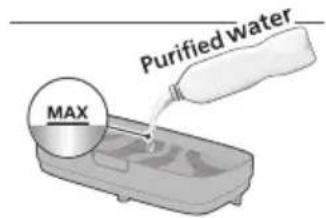
2 Fill the water tank with purified water up to the MAX water level.
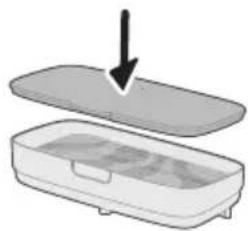
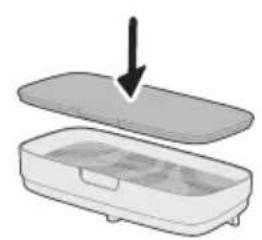
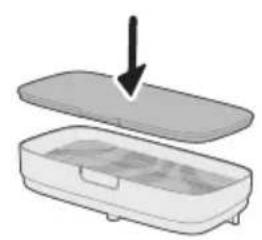
3 Secure the lid on the water tank.
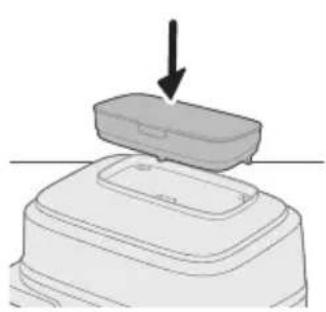
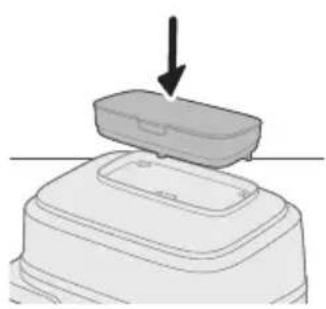
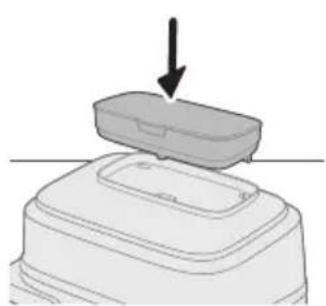
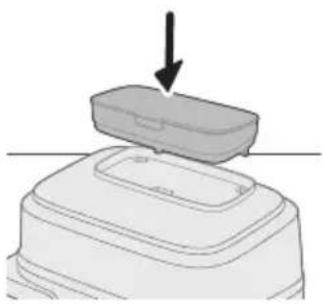
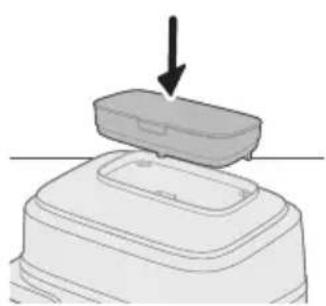
4 Align the water tank with the groove on top of the appliance and press down firmly until it locks into place.
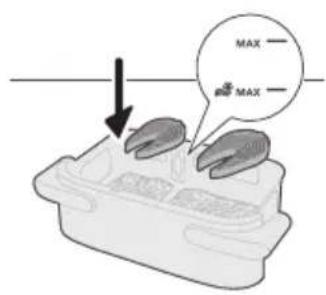
5 Add ingredients to the pan.
Note: The Airfryer is suitable for preparing a wide variety of ingredients. For best results, refer to the "Food table" for recommended quantities and cooking times.
Note: Avoid exceeding the suggested amounts or filling the pan beyond the "MAX" line, as this may impact cooking performance.
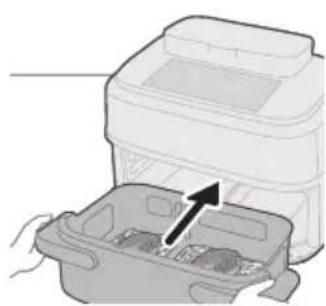
6 Place the pan back into the appliance.
Note: Firmly push the pan back into the appliance until it locks securely into place.
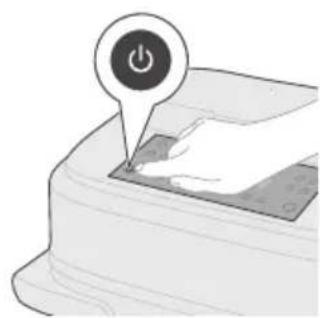
7 Tap the On/off button to switch on the appliance.
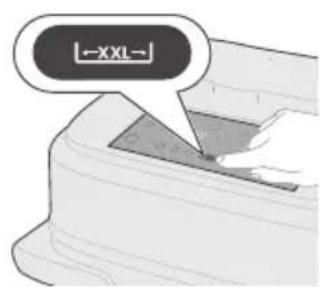
8 Tap the XXL button.
Note: Tap the correct pan button according to the pan you are using.
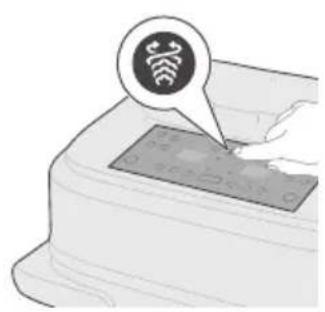
9 Tap the Steamfry button to enter Steamfry mode.
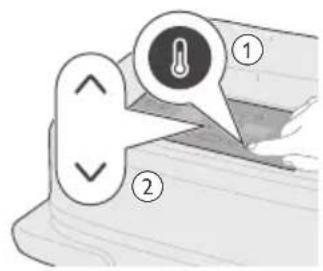
10 Tap the Temperature button and then tap the Increase or Decrease button to select the desired cooking temperature.
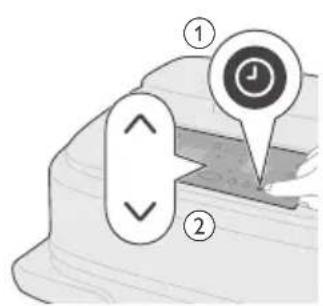
11 Tap the Time button and then tap the Increase or Decrease button to select the desired cooking time.
Note: In addition to manually selecting the cooking temperature and time, you can also choose from a variety of preset programs designed for convenience and optimal results.
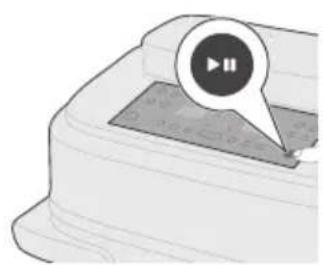
12 Tap the Start/pause button to start cooking.
Note: Some ingredients require shaking or turning halfway through the cooking time (see "Food table"). To do this:
- Gently pull out the pan.
- Shake or turn the contents over a heat-resistant surface.
- Place the pan back to continue cooking.
Note: To pause the cooking process, press the Start/pause button. Press the same button again to resume.
Note: The appliance will automatically pause when the pan is removed. Cooking will automatically resume once the pan is placed back into the appliance.
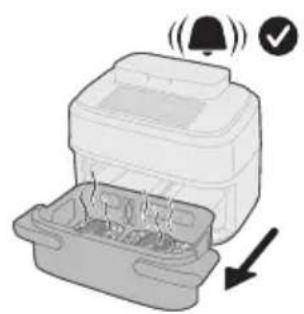
13 Once cooking is complete, a timer bell will sound. Carefully pull out the pan.
Caution: After the cooking process, the pan, the interior housing and the ingredients will be hot. Always place the pan on a heat resistant surface (e.g. trivet or silicone mat) when you remove the pan. Depending on the type of food, hot steam may escape from the pan.
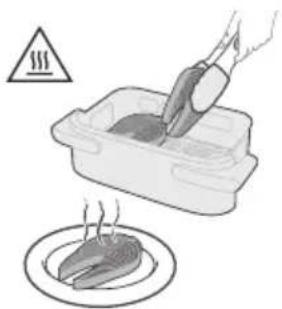
14 Remove the cooked food from the pan.
Note: Excess oil or rendered fat from the ingredients will collect at the bottom of the pan.
Note: Depending on the type of food being cooked, you may wish to pour off the excess oil or fat between batches or before shaking the contents. To do this safely, place the pan on a heat-resistant surface and wear oven-safe gloves. Carefully pour out the oil or fat.
Food table for Steamfry mode
The table below provides recommended base settings for preparing various food types.
Note
- The settings listed are intended as guidelines. Due to variations in ingredient origin, size, shape, and brand, optimal results cannot be guaranteed for all ingredients.
- When cooking larger quantities (e.g., fries, prawns, drumsticks, frozen snacks), shake, turn, or stir the ingredients 2–3 times during the cooking process to ensure consistent texture and doneness.
- Cooking results vary by ingredient size or volume for each dish. To achieve perfect results, tailor the cooking presets to your specific ingredients. The Home ID Recipe Book provides a complete guide for customization based on ingredient size and volume.
Ingredients Pan Food Amount Temperature Time (min) Note
| Fresh potato cubes | Right 800 g / 28 oz 180 °C 26 - 35 min Shake 2 times in between | |
| XXL 1200 g / 42 oz | 180 °C 26 - 35 min Shake 2 times in between | |
| Chicken drumsticks (around 125 g/4 oz/piece) | Right 10 pieces 200 °C 22 - 27 min Turn halfway | |
| XXL 15 pieces 200 °C 23 - 28 min Turn halfway | ||
| Chicken breast (around 200 g/7 oz/piece) | Right 4 pieces 180 °C 18 - 22 min Turn halfway | |
| XXL 12 pieces 180 °C 18 - 23 min Turn halfway | ||
| Whole fish (around 300-400 g/11-14 oz/piece) | Right 3 pieces 200 °C 15 - 20 min n/a | |
| XXL 5 pieces 200 °C 15 - 20 min n/a | ||
| Fish filet (around 200 g/7 oz) | Right 4 pieces 160 °C 12 - 16 min n/a | |
| XXL 8 pieces 160 °C 15 - 20 min n/a | ||
| Mixed vegetables Right 1000 g/35 oz 200 °C 20 - 25 min Shake halfway | ||
| Ingredients Pan Food | Amount | Tempera-ture | Time (min) Note |
| Cauliflower | Right 600 g / 21 oz 150 °C 19 - 21 min Shake or turn | halfway | |
| XXL 1400 g / 49 oz | 150 °C 19 - 23 min Shake or turn | halfway | |
| Carrots | Right 600 g / 21 oz 150 °C 20 - 24 min Shake or turn | halfway | |
| XXL 1200 g / 42 oz | 150 °C 20 - 25 min Shake or turn | halfway | |
| Homemade bread | Right 550 g / 19 oz 180 °C 30 - 35 min Use the baking | accessory. Don't use baking paper. | |
| XXL 1200 g / 42 oz | 180 °C 40 - 45 min Use any suitable baking tray. Make sure that the bread loaf is as flat as possible or divide the bread in two smaller loafs. Don't use baking paper. | ||
| Dumplings | Right 400 g / 14 oz 170 °C 15 - 20 n/a | ||
| XXL 700 g / 25 oz 170 °C 17 - 22 min n/a | |||
| Whole chicken | Right 1200 g / 42 oz | 190 °C 45 - 55 min n/a | |
| XXL 2 x 1200 g / 42 oz | 190 °C 50 - 60 min n/a | ||
Steam mode
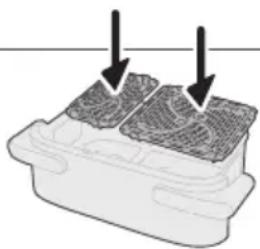
1 Insert both bottom plates into the pan.
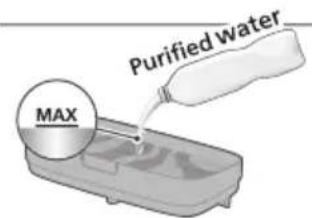
2 Fill the water tank with purified water up to the MAX water level.
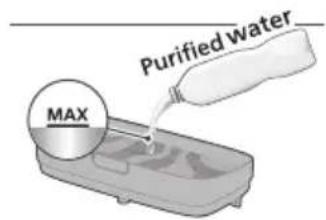
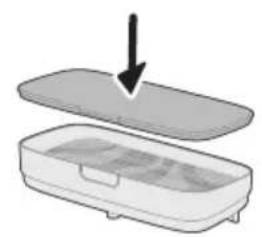
3 Secure the lid on the water tank.
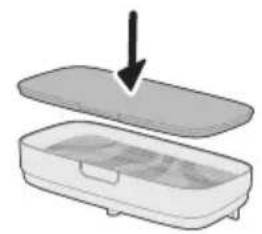
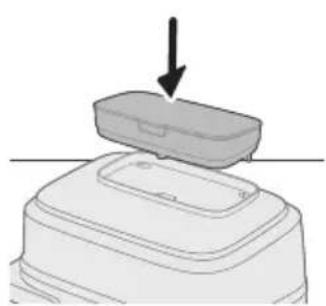
4 Align the water tank with the groove on top of the appliance and press down firmly until it locks into place.
5 Add ingredients to the pan.
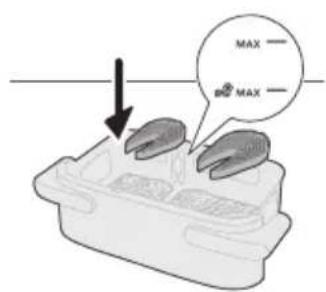
Note: The Airfryer is suitable for preparing a wide variety of ingredients. For best results, refer to the "Food table" for recommended quantities and cooking times.
Note: Avoid exceeding the suggested amounts or filling the pan beyond the "MAX" line, as this may impact cooking performance.
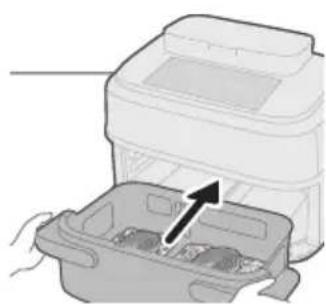
6 Place the pan back into the appliance.
Note: Firmly push the pan back into the appliance until it locks securely into place.
7 Tap the On/off button to switch on the appliance.
8 Tap the XXL button.
Note: Tap the correct pan button according to the pan you are using.
9 Tap the Steam button to enter Steam mode.
10 Tap the Time button and then tap the Increase or Decrease button to select the desired cooking time.
Note: Temperature adjustment is disabled for Steaming.
Note: In addition to manually selecting the cooking time, you can also choose from a variety of preset programs designed for convenience and optimal results.
11 Tap the Start/pause button to start cooking.
Note: Some ingredients require shaking or turning halfway through the cooking time (see "Food table"). To do this:
- Gently pull out the pan.
- Shake or turn the contents over a heat-resistant surface.
- Place the pan back to continue cooking.
Note: To pause the cooking process, press the Start/pause button. Press the same button again to resume.
Note: The appliance will automatically pause when the pan is removed. Cooking will automatically resume once the pan is placed back into the appliance.
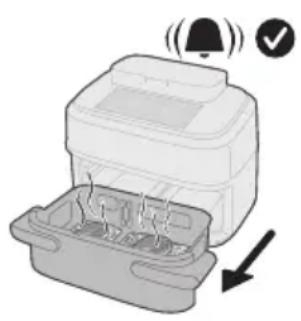
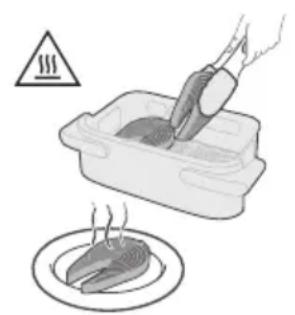
12 Once cooking is complete, a timer bell will sound. Carefully pull out the pan.
Caution: After the cooking process, the pan, the interior housing and the ingredients will be hot. Always place the pan on a heat resistant surface (e.g. trivet or silicone mat) when you remove the pan. Depending on the type of food, hot steam may escape from the pan.
13 Remove the cooked food from the pan.
Note: Excess oil or rendered fat from the ingredients will collect at the bottom of the pan.
Note: Depending on the type of food being cooked, you may wish to pour off the excess oil or fat between batches or before shaking the contents. To do this safely, place the pan on a heat-resistant surface and wear oven-safe gloves. Carefully pour out the oil or fat.
Food table for Steam mode
The table below provides recommended base settings for preparing various food types.
Note
- The settings listed are intended as guidelines. Due to variations in ingredient origin, size, shape, and brand, optimal results cannot be guaranteed for all ingredients.
- When cooking larger quantities (e.g., fries, prawns, drumsticks, frozen snacks), shake, turn, or stir the ingredients 2–3 times during the cooking process to ensure consistent texture and doneness.
- Cooking results vary by ingredient size or volume for each dish. To achieve perfect results, tailor the cooking presets to your specific ingredients. The Home ID Recipe Book provides a complete guide for customization based on ingredient size and volume.
Ingredients Pan Food
| Ingredients Pan Food | Amount | Tempera-ture | Time (min) Note |
| Fresh potato cubes | Right 800 g / 28 oz 100 °C 28 - 35 min n/a | ||
| XXL 1200 g / 42 oz | 100 °C 30 - 35 min n/a | ||
| Whole potato (around 250-300g / 9-11 oz /piece) | Right 4 pieces 100 °C 45 - 55 min n/a | ||
| XXL 10 pieces 100 °C 40 - 50 min n/a | |||
| Chicken drumsticks (around 125 g/4 oz/piece) | Right 10 pieces 100 °C 30 - 40 min n/a | ||
| XXL 15 pieces 100 °C 30 - 40 min n/a | |||
| Chicken breast (around 200 g/7oz/piece) | Right 4 pieces 100 °C 20 - 25 min n/a | ||
| XXL 12 pieces 100 °C 30 - 40 min n/a | |||
| Whole fish (around 300-400 g/11-14 oz/piece) | Right 3 pieces 100 °C 15 - 20 min n/a | ||
| XXL 8 pieces 100 °C 25 - 30 min n/a | |||
| Hard vegetables | Right 600 g / 21 oz 100 °C 12 - 16 min n/a | ||
| XXL 1300 g / 45 oz | 100 °C 20 - 28 min n/a | ||
| Dumplings | Right 400 g/14 oz 100 °C 15 - 20 min n/a | ||
| XXL 800 g/28 oz 100 °C 20 - 25 min n/a | |||
| Pork ribs | Right 300 g/11 oz 100 °C 30 - 35 min Use plate of certain size | ||
| XXL 1000 g/35 oz 100 °C 40-45 min n/a | |||
| Rice | Right 320 g /11 oz 100 °C 25 - 30 min Using cooking pot,like baking pot,silicon tray etc. Add 320 ml water in pot,rice/water ratio is 1:1.25. | ||
| XXL 640 g /22 oz 100 °C 25 - 30 min Use any suitablebaking tray. Add 600 ml water in pot,rice/water ratio is 1:1.25. | |||
| Yam/Sweet potato(around 100g/4 oz/piece) | Right 8 pieces 100 °C 45 - 60 min n/a | ||
| XXL 12 pieces 100 °C 45 - 60 min n/a | |||
Cooking with preset programs
This appliance comes with a variety of preset cooking programs designed to simplify meal preparation. Each preset is optimized for a specific type of food, automatically setting the ideal temperature and cooking time to deliver delicious results with minimal effort.
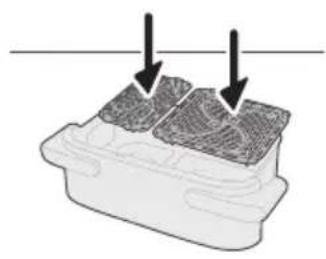
1 Insert both bottom plates into the pan.
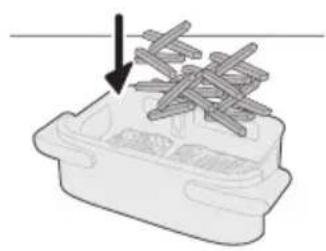
2 Add ingredients to the pan.
Note: Avoid exceeding the suggested amounts or filling the pan beyond the "MAX" line, as this may impact cooking performance.
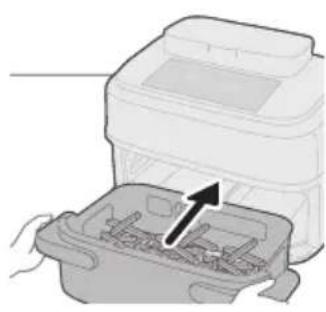
3 Place the pan back into the appliance.
Note: Firmly push the pan back into the appliance until it locks securely into place.
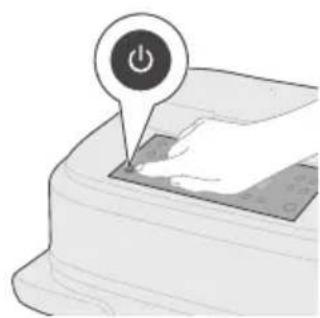
4 Tap the On/off button to switch on the appliance.
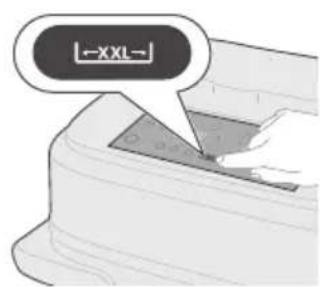
5 Tap the XXL button.
Note: Tap the correct pan button according to the pan you are using.
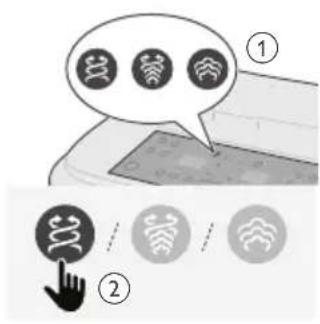
6 Tap the Airfry, Steamfry, or Steam button to enter one of the cooking modes.
Note: Make sure to have the filled water tank in place when you are using the Steamfry or Steam cooking modes.
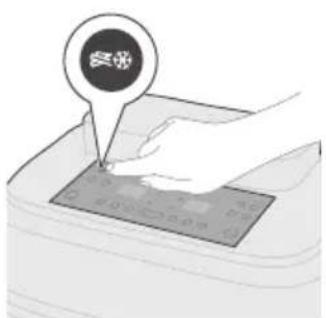
7 Choose one of the preset programs according to the food you are cooking.
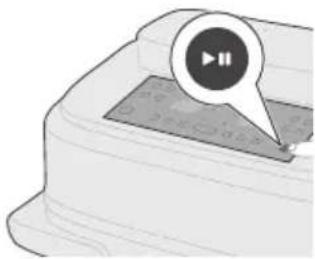
8 Tap the Start/pause button to start cooking.
Note: Some ingredients require shaking or turning halfway through the cooking time (see "Food table"). To do this:
- Gently pull out the pan.
- Shake or turn the ingredients over a heat-resistant surface.
- Place the pan back to continue cooking.
Note: To pause the cooking process, press the Start/pause button. Press the same button again to resume.
Note: The appliance will automatically pause when the pan is removed. Cooking will automatically resume once the pan is placed back into the appliance.
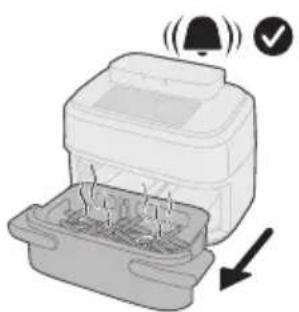
9 Once cooking is complete, a timer bell will sound. Carefully pull out the pan.
Caution: After the cooking process, the pan, the interior housing and the ingredients will be hot. Always place the pan on a heat resistant surface (e.g. trivet or silicone mat) when you remove them from the appliance. Depending on the type of food, hot steam may escape from the pan.
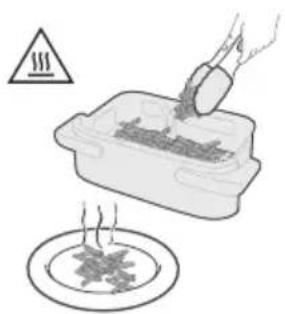
10 Remove cooked food from the pan.
Note: Excess oil or rendered fat from the ingredients will collect at the bottom of the pan.
Note: Depending on the type of food being cooked, you may wish to pour off the excess oil or fat between batches or before shaking the contents. To do this safely, place the pan on a heat-resistant surface and wear oven-safe gloves. Carefully pour out the oil or fat.
Preset table XXL pan (2750W)
| mended weight | Airfry Steamfry SteamPreset Recom- | ||||
| Time Temperature | Time Temperature | Time Temperature | |||
 | Frozen Fries | 1300 g 26 min 200 °C ---- | |||
 | Veggie 1200 g 24 min 200 °C 20 min 160 °C 20 min 100 °C | ||||
 | Chicken drum-sticks | 1875 g 30 min 190 °C 32 min 200 °C 40 min 100 °C | |||
 | Tray Bakes 1500 g 25 min 180 °C 27 min 180 °C -- | ||||
 | Fish 2200 g 18 min 200 °C 20 min 200 °C 22 min 100 °C | ||||
 | Dumpling 800 g -- 22 min 160 °C 22 min 100 °C | ||||
 | Re-heat 850 g 6 min 180 °C 22 min 160 °C 16 min 100 °C | ||||
Preset table XXL pan (2200W-2300W)
| mended weight | Airfry Steamfry SteamPreset Recom- | ||||
| Time Temperature | Time Temperature | Time Temperature | |||
 | Frozen Fries | 1300 g 29 min 200 °C ---- | |||
 | Veggie 1200 g 25 min 200 °C 21 min 160 °C 20 min 100 °C | ||||
 | Chicken drum-sticks | 1875 g 32 min 190 °C 35 min 200 °C 40 min 100 °C | |||
 | Tray Bakes 1500 g 28 min 180 °C 30 min 180 °C -- | ||||
 | Fish 2200 g 20 min 200 °C 21 min 200 °C 22 min 100 °C | ||||
 | Dumpling 800 g -- 25 min 160 °C 22 min 100 °C | ||||
 | Re-heat 850 g 6 min 180 °C 22 min 160 °C 16 min 100 °C | ||||
Preset table for Right pan (2750W)
| mended weight | Airfry Steamfry SteamPreset Recom- | ||||
| Time Temperature | Time Temperature | Time Temperature | |||
| Frozen Fries | 800 g 24 min 200 °C ---- | |||
| Veggie 700 g 17 min 200 °C 15 min 160 °C 14 min 100 °C | ||||
| Chicken drum-sticks | 1200 g 22 min 190 °C 24 min 200 °C 27 min 100 °C | |||
| Tray Bakes 700 g 19 min 180 °C 23 min 160 °C -- | ||||
| Fish 600 g 13 min 190 °C 15 min 200 °C 16 min 100 °C | ||||
| Dumpling 400 g -- 18 min 160 °C 20 min 100 °C | ||||
| Re-heat 500 g 7 min 180 °C 18 min 160 °C 13 min 100 °C | ||||
Preset table for Right pan (2200W-2300)
| mended weight | Airfry Steamfry SteamPreset Recom- | ||||
| Time Temperature | Time Temperature | Time Temperature | |||
| Frozen Fries | 800 g 28 min 200 °C ---- | |||
| Veggie 700 g 18 min 200 °C 16 min 160 °C 14 min 100 °C | ||||
| Chicken drum-sticks | 1200 g 25 min 190 °C 27 min 200 °C 27 min 100 °C | |||
| Tray Bakes 700 g 22 min 180 °C 26 min 160 °C -- | ||||
| Fish 600 g 16 min 190 °C 18 min 200 °C 16 min 100 °C | ||||
| Dumpling 400 g -- 21 min 160 °C 20 min 100 °C | ||||
| Re-heat 500 g 7 min 180 °C 18 min 160 °C 13 min 100 °C | ||||
Preset table for Left pan (2750W)
| weight | AirfryPreset Recommended | |
| Time Temperature | ||
| Frozen Fries 300 g 25 min 200 °C | ||
| Veggie 400 g 30 min 200 °C | ||
| Chicken drumsticks 625 g 27 min 190 °C | ||
| Tray Bakes 450 g 20 min 190 °C | ||
| Fish 400 g 19 min 200 °C | ||
| Re-heat 140 g 5 min 160 °C |
Preset table for Left pan (2200W-2300W)
| weight | AirfryPreset Recommended | |
| Time Temperature | ||
| Frozen Fries 300 g 28 min 200 °C | ||
| Veggie 400 g 32 min 200 °C | ||
| Chicken drumsticks 625 g 30 min 190 °C | ||
| Tray Bakes 450 g 25 min 190 °C | ||
| Fish 400 g 22 min 200 °C | ||
| Re-heat 140 g 5 min 160 °C |
Time function (synchronize)
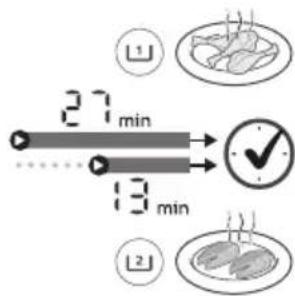
Use the time function to automatically sync cooking times in 2 pans for your meals to be ready at the same time.
1. Set the cooking time for both pans.
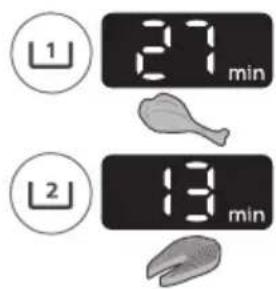
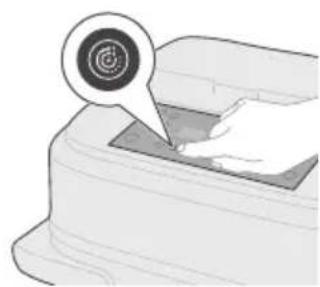
2. Press the Time function button.
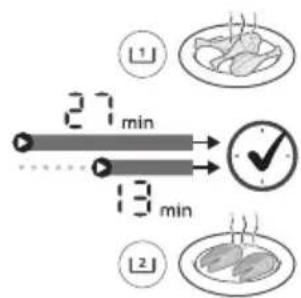
3. Each pan will start cooking at different times but finish at the same time.
Favorite function
The Favorite function allows you to save your preferred cooking settings for quick and consistent use.
Pan: Select the pan you want to use – Left pan, right pan or Megabasket (XXL pan)
Mode: After selecting a pan, choose your cooking mode: Airfry, Steamfry or Steam. Note: Steam and Steamfry modes are only available in the Megabasket (XXL pan) or right pan.
Time: Set the cooking duration according to your recipe.
Temperature: Set the temperature to achieve your desired cooking results.
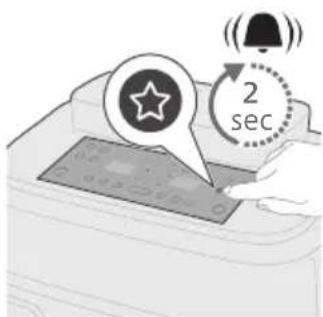
Save: Once you have customized your settings for the left pan, right pan, or Megabasket (XXL pan), press and hold the Favorite button for 2 seconds to save the settings as the favorite preset. Next time, simply select the basket, cooking mode, and saved favorite preset to start cooking instantly without re-entering the settings.
Shaking food
When to shake
- Shake or flip food 2–3 times halfway through cooking, or more if desired. - Some presets include a built-in shaking reminder feature.
What to shake
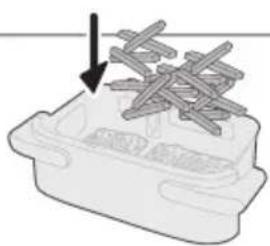
- Small items like fries or nuggets that are stacked during cooking typically require shaking to ensure even crispness and consistent cooking.
- If you do not shake these foods, they might cook unevenly or stay undercooked in some areas.
- For thicker items like steak, flipping halfway through cooking helps achieve uniform browning on all sides.
How to shake
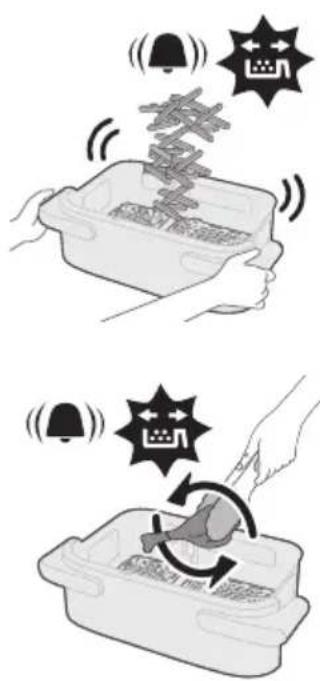
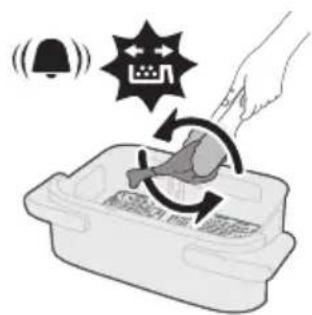
During cooking, remove the pan from the Airfryer to shake, mix, or flip the food.
To shake food safely:
1 Hold the basket above a heat-resistant surface. 2 Gently shake the basket and assure the hot air has a chance to reach all the food surfaces.
If the basket is too heavy to shake:
1 Place the basket on a heat-resistant surface.
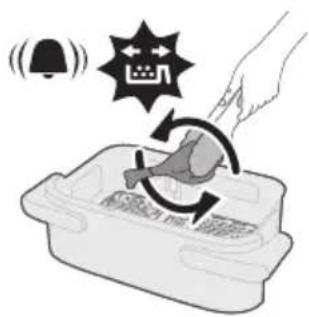
2 Use silicone-tipped tongs or utensils to toss or flip the ingredients. Reinsert the basket and resume cooking.
Note: The Airfryer will pause automatically when the basket is removed. The display will remain frozen until the basket is replaced.
Note: Cooking resumes automatically once the basket is reinserted.
Note: Avoid prolonged basket removal (over 30 seconds), as this may cause the appliance to cool down.
Cleaning
Routine cleaning
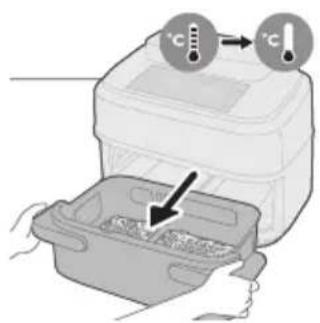
Warning: Let the pan and inside of the appliance cool down completely before you start cleaning.
Warning: the pan has a non-stick coating. Do not use metal kitchen utensils or abrasive cleaning materials as this may damage the non-stick coating.
Clean the appliance after every use. Remove oil and fat from the bottom of the pan after every use.

1 Press the power On/Off button to switch off the appliance, and remove the plug from the wall outlet and let the appliance cool down. 2 Dispose of rendered fat or oil from the bottom of the pan.
3 If the steam enabled function has been used, remove the water tank and empty any remaining water.
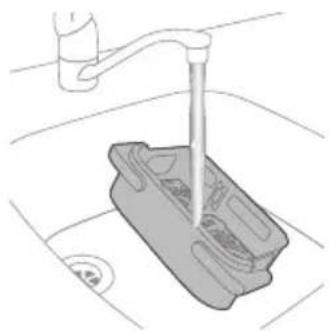
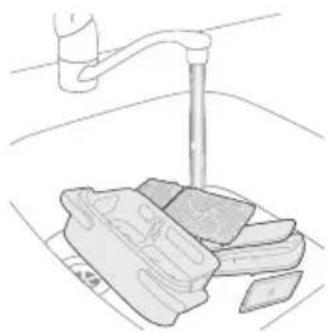
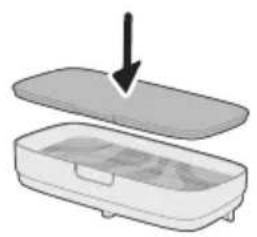
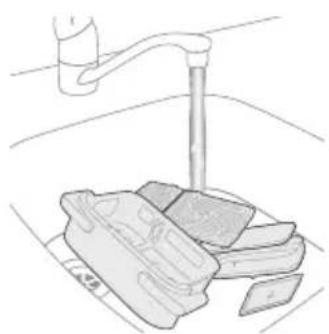
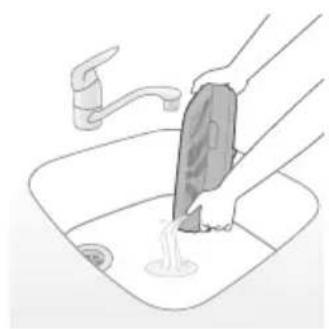
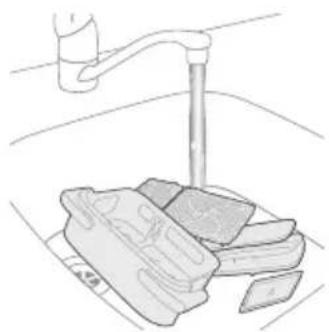
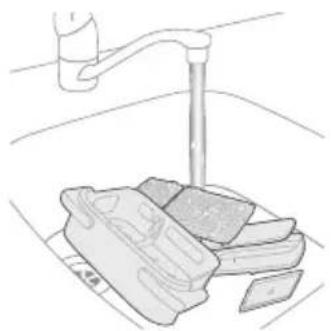
4 Clean the pan, pan divider, bottom plates, and water tank under the tap, if necessary with warm water, dishwashing liquid and a non-abrasive sponge (see "cleaning table").
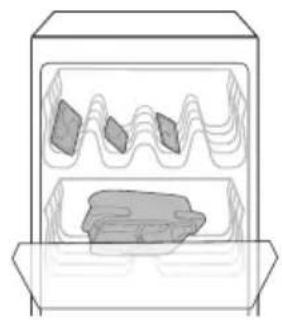
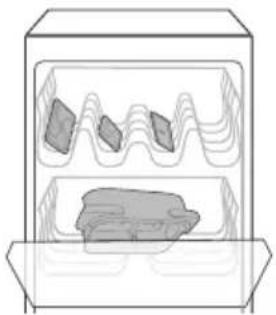
Tip: You can also clean the pan, pan divider, and bottom plates in the dishwasher.
Tip: If food residues stuck to the pan, you can soak them in hot water and dishwashing liquid for 10–15 minutes. Soaking loosens the food residues and makes it easier to remove. Make sure you use a dishwashing liquid that can dissolve oil and grease. If there are grease stains on the pan and you have not been able to remove them with hot water and dishwashing liquid, use a liquid degreaser.
Tip: If necessary, food residues stuck to the heating element can be removed with a soft to medium bristle brush. Do not use a steel wire brush or a hard bristle brush, as this might damage the coating on the heating element.
5 To prevent scratches, gently wipe the outside and inside of the appliance with an unwrinkled, clean, and soft cloth. Begin with a slightly moistened cloth and follow up with a dry one, if necessary.
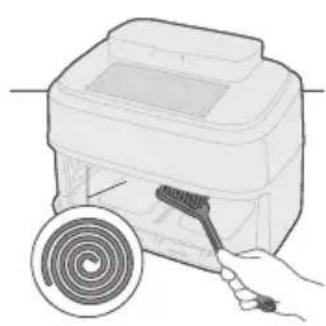
6 Clean the heating element with a cleaning brush to remove any food residues.
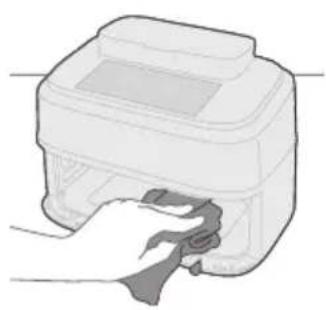
7 Clean the inside of the appliance with a slightly moistened soft cloth and follow up with a dry one, if necessary.
Steam cleaning
The steam cleaning function effectively dissolves greasy residue and provides a deep clean for the pan.
The program runs for 20 minutes, consisting of:
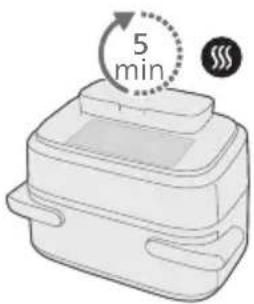
- 15 minutes of steam cleaning to dissolve buildup.
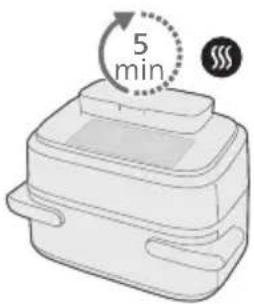
- 5 minutes of drying to ensure the pan is ready for use.
Note: When starting the steam cleaning program, the appliance may release more vapor from the back than during regular steam mode. This is normal and may result in increased condensation on nearby walls.
Before starting, please ensure the following:
- Air outlet is not directly facing any power socket.
- Do not place other kitchen appliances next to the appliance.
- Keep at least 20 cm of space between the appliance and the wall to minimize condensation buildup.
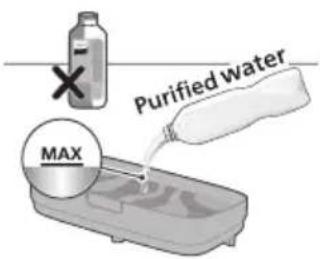
1 Fill the water tank with purified water up to the MAX water level.
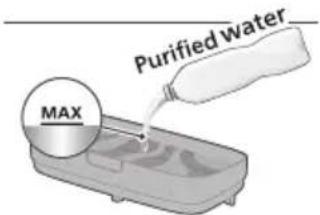

2 Secure the lid on the water tank.
3 Align the water tank with the groove on top of the appliance and press down firmly until it locks into place.
4 Tap the On/off button to switch on the appliance.
5 Tap the XXL button.
6 Tap the Steam Clean button.
7 Press the Start/pause button to start the steam cleaning process.
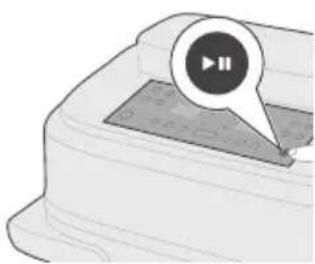
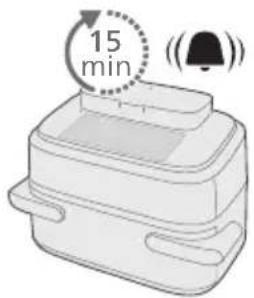
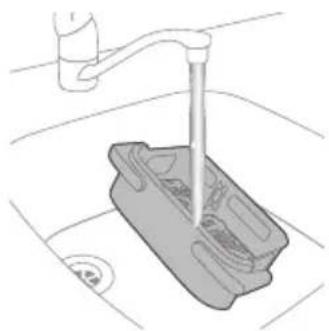
8 After 15 minutes, the appliance will beep continuously and the steam clean icon will start flashing.
9 Pull out and clean the pan.
Caution: Always wear heat-resistant gloves to handle the hot pan.
Note: If grease remains in the pan, clean them with soapy water or detergent using a sponge, then rinse again.
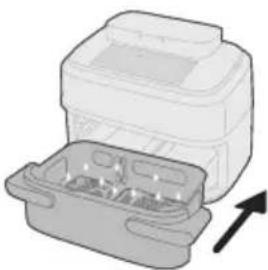
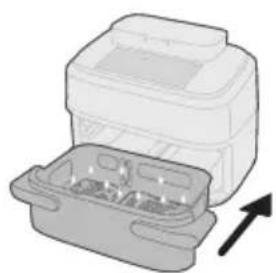
10 Place the pan back into the appliance.
Note: Firmly push the pan back into the appliance until it locks securely into place.
11 The 5-minute drying process starts automatically after the pan is placed back.
Descaling
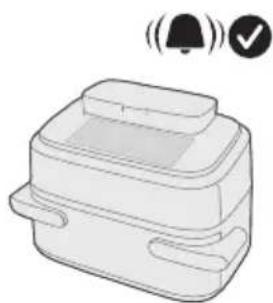
12 After 5 minutes, a beep sound indicates that drying is complete.
Tip: Before first use or if not used for a long time, we suggest using the "Steam cleaning" function to thoroughly clean the water circle and cooking chamber.
Every 10 hours of using steam enabled functions, a descaling reminder will automatically appear and blink on the display—this means it is time to run the descaling program. The descaling program cleans limescale buildup from the airfryer's water system, helping to extend its lifespan.
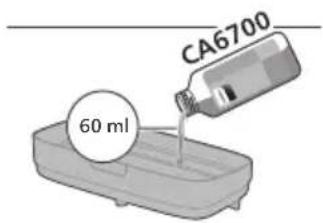
1 Fill the water tank with 60 ml of Philips Descaler CA6700.
Note: Philips Descaler CA6700 is not included in the box. Purchase separately for best descaling results.
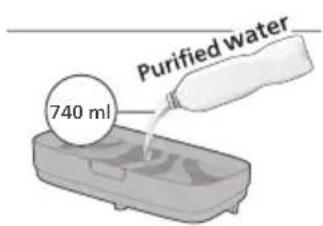
2 Fill the water tank with 740 ml of purified water.
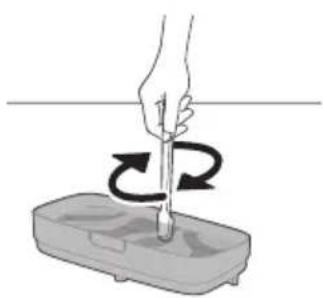
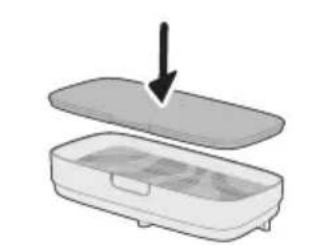
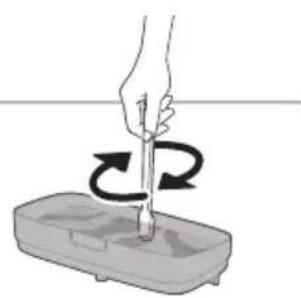
3 Mix the water and descaler evenly in the water tank.

4 Secure the lid on the water tank.
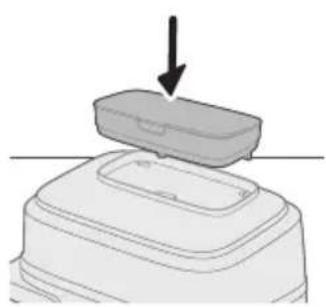
5 Align the water tank with the groove on top of the appliance and press down firmly until it locks into place.
6 Tap the On/off button to switch on the appliance.
7 Tap the XXL button.
8 Tap and hold the Steam cleaning button for 3 seconds.
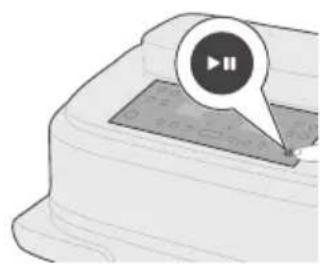
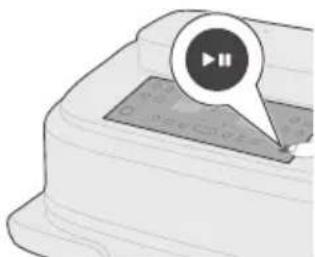
9 Tap the Start/pause button to start descaling.
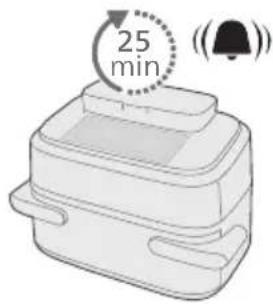
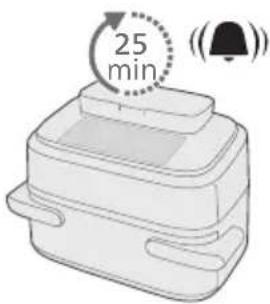
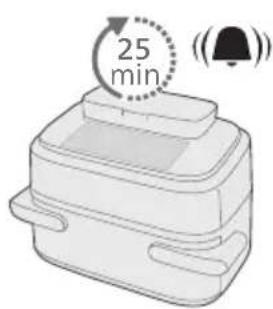
10 After 25 minutes of descaling, the appliance will beep and remind you to pull out the pan.
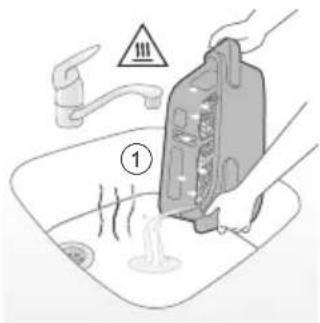
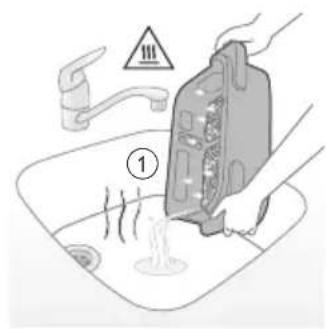
11 Pull out the pan and pour off any remaining water in the pan.
Caution: Be careful when you handle the hot pan.
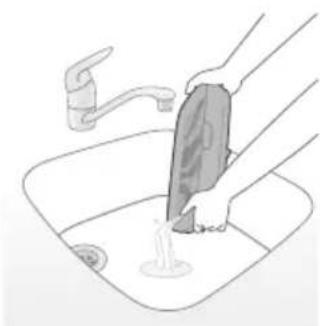
12 Pour off any remaining descaler solution in the water tank.
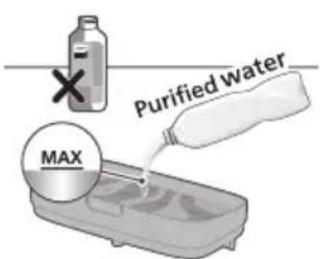
13 Refill the water tank with purified water only.
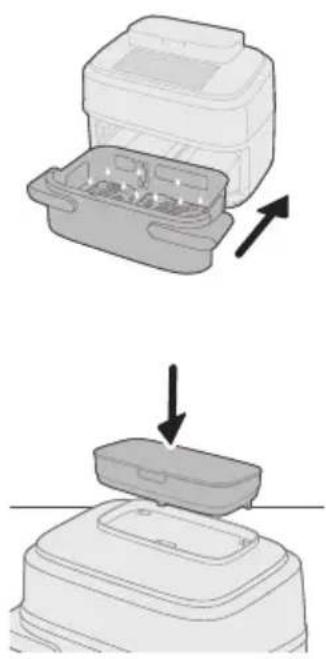
14 Place the pan back to the appliance.
Note: Firmly push the pan back into the appliance until it locks securely into place.
15 Align the water tank with the groove on top of the appliance and press down firmly until it locks into place.
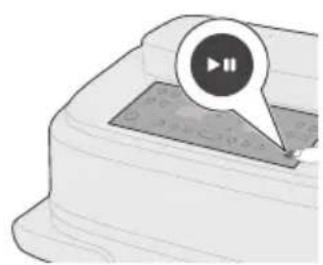
16 Press the Start/pause button to continue descaling.
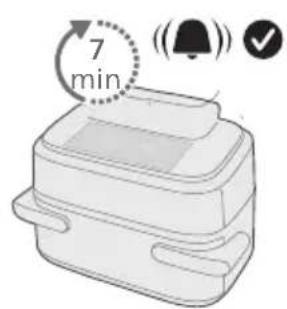
17 The descaling process lasts for another 7 minutes and ends when you hear the appliance beep again.
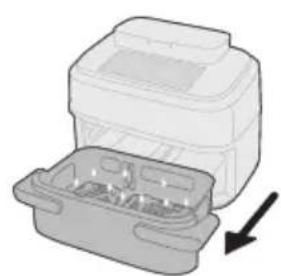
18 Pull out the pan.
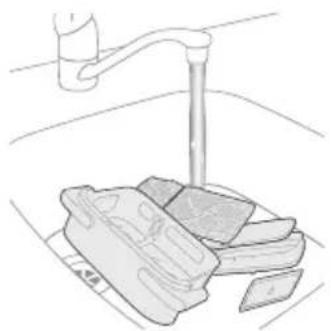
19 Clean the pan, pan divider, bottom plates, and water tank under the tap, if necessary with warm water, dishwashing liquid and a non-abrasive sponge (see "cleaning table").
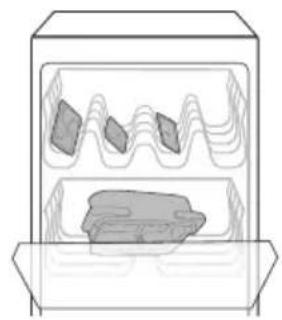
Tip: You can also clean the pan, pan divider, and bottom plates in the dishwasher.
Important: Under no circumstances should you use a descaling liquid based on sulfuric acid, hydrochloric acid, sulfamic or acetic acid (vinegar) as this may damage the water system in your appliance and not dissolve the limescale properly.
Note: If you often use hard water in your area, you may need to descale the device more frequently.
Storage
1 Unplug the appliance and let it cool down.
2 Make sure all parts are clean and dry before storing.
Note
- When carrying the Airfryer, hold it horizontally and support the pan at the front to prevent any accidental tilting and potential damage to the parts.
- Always make sure that the removable parts of the Airfryer are fixed before you carry and/or store it.
Troubleshooting
This chapter summarizes the most common problems you could encounter with the appliance. If you are unable to solve the problem with the information below, visit www.home.id/support for a list of frequently asked questions or contact the Consumer Care Center in your country.
| The outside of the appliance becomes hot during use. | The heat inside radiates to the outside walls. | This is normal. All areas that you need to touch during use stay cool enough to touch. |
| The pan and the inside of the appliance always become hot when the appliance is switched on to ensure the food is properly cooked. These parts are always too hot to touch. |
If you leave the appliance switched on for a longer time, some areas get too hot to touch. These areas are marked on the appliance with the following icon: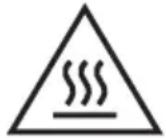 | ||
| As long as you are aware of the hot areas and avoid touching them, the appliance is safe to use. | ||
| My home-made fries do not turn out as I expected. | You did not use the right potato type. | To get the best results, use fresh floury potatoes. If you need to store the potatoes, do not store them in a cold environment like in a fridge. Choose potatoes whose package states that they are suitable for frying. |
| The amount of ingredients in the pan is too large. | Follow the instructions in this user manual to prepare home-made fries. | |
| Certain types of ingredients need to be shaken halfway through the cooking time. | Follow the instructions in this user manual to prepare home-made fries. | |
| The Airfryer does not switch on. The appliance is not plugged in. Check if the plug is inserted in the wall outlet properly. | ||
| Several appliances are connected to one outlet. | The Airfryer has a high wattage. Try a different outlet and check the fuses. | |
| You did not tap the On/off button. | Tap the On/off button to switch on the appliance. | |
| I see some peeling off spots inside my Airfryer. | Some small spots can appear inside the pan of the Airfryer due to the incidental touching or scratching of the coating (e.g. during cleaning with harsh cleaning tools and/or while inserting the bottom plate). | You can prevent damage by lowering the bottom plate into the pan properly. If you insert the plate at an angle, its side may knock against the wall of the pan, causing small pieces of coating to chip off. If this occurs, please be informed that this is not harmful as the materials used are food-safe. |
| White smoke comes out of the appliance. | You are cooking fatty ingredients. | Carefully pour off any excess oil or fat from the pan and then continue cooking. |
| The pan still contains greasy residues from previous use. | White smoke is caused by greasy residues heating up in the pan. Always clean the pan thoroughly after every use. | |
| Breading or coating did not adhere properly to the food. | Tiny pieces of airborne breading can cause white smoke. Firmly press breading or coating to food to ensure it sticks. | |
| Marinade, liquid or meat juices are splattering in the rendered fat or grease. | Pat food dry before placing it in the pan. | |
| The screen on the Airfryer shows "E01". | Your Airfryer might be stored in a place where it is too cold. | If your device was stored at a low ambient temperature, let it warm up to room temperature for at least 15 minutes before you plug it in again.If your display still shows "E01", call the service hot line or contact the Consumer Care Center in your country. |
| The screen on the Airfryer shows "E04", "E05", "E09", or "E12". | The device might have a malfunction. | Try to unplug and plug in the device again.If this does not help please call the service hot line or contact the Consumer Care Center in your country. |
| I hear some strange noise coming from the inside of the appliance. | This appliance is equipped with a fan to circulate heat and a water pump to enable the steaming function.During operation, you may hear sounds from these components. | This is normal and expected.If the noise becomes noticeably louder or changes in character, please contact the Consumer Care Center for further assistance. |
| There is water in the cooking chamber after use. | After cooking, you may notice water remaining in the cooking chamber.This is due to the steam generated during operation, which condenses on the food and the inner walls of the chamber. | A small amount of condensation is normal.Simply wipe it away using a soft, damp, non-abrasive cloth. |
| is flashing. No water in water tank. Add purified water to the water tank. | ||
| Water tank is not placed properly. Press the water tank to secure it in place. | ||
| The internal water tube is blocked. Perform the descaling process. If this does not help please call the service hot line or contact the Consumer Care Center in your country. | ||
| is flashing. This is the descaling reminder. Perform the descaling process. See chapter "Descaling". | ||
| There is condensation on the wall during steaming, steam cleaning, or descaling. | It is normal. The appliance may release increased vapor from the air outlet. This vapor can be pushed toward nearby surfaces by the internal fan, leading to visible condensation on walls. | To ensure safe and optimal use:- Place the appliance at least 20 cm away from the wall to reduce condensation buildup.- Ensure the air outlet is not directly facing any power socket to avoid electrical hazards.- Do not place other kitchen appliances close to the unit during operation.- Use a mop or soft cloth to dry any condensation that forms on surrounding surfaces. |
| There is water leakage from the Airfryer. | Internal Leakage (e.g., water tube or internal components). | Contact the Consumer Care Center in your country for further assistance. |
| Cracks or Damage from External Force.If the appliance has been dropped or deformed, it may cause structural damage leading to leaks. | ||
| The water tank may not be properly installed or could be damaged. | Remove the water tank and reinstall it securely.Check for any visible cracks or damage.If damage is found, contact the Consumer Care Center for further assistance. | |
| The Airfryer is not producing enough steam. | Insufficient water in the water tank. | Check the water tank to ensure there is enough water. |
| The water tank is not properly inserted. | Press the water tank to secure it in place. | |
| The water inlet is dirty or clogged. Clean and rinse thoroughly to remove any blockages. | |
| There is steam generator clogging or pipeline leakage. If the appliance has been used for an extended period, the steam generator may require maintenance.Run the descaling program to clean the steam system.If the issue persists after descaling, please contact the Consumer Care Center in your country for further assistance. |
Contents

Power button

Frozen fries


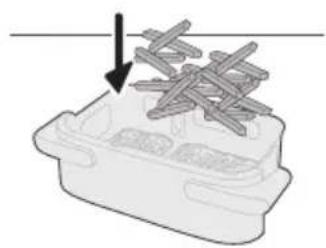
3 Place the ingredients into both containers.




Power button

Frozen fries
Use this preset to cook golden frozen fries, potato wedges, or hash browns.

Mixed vegetables

Shake reminder
This model has a shake reminder. For optimal results, shake or turn the food as soon as the reminder alarm sounds (see "Shaking food").
3 Put the ingredients in the left container.
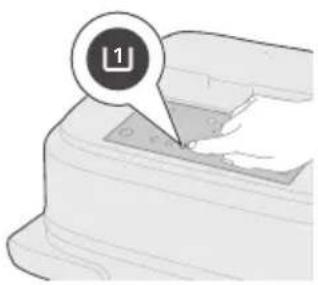
4 Press Left container [1] on the control panel.
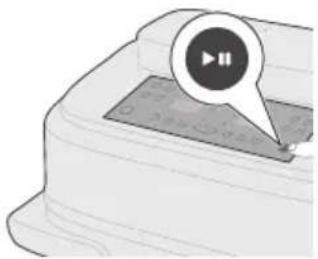
5 Set the cooking parameters and start cooking.
5 Select the Airfry, Steamfry, or Steam mode.
6 Set the cooking parameters and start cooking.
XXL container/large basket
2 Put the ingredients in the container.
3 Press XXL container.
4 Select the Airfry, Steamfry, or Steam mode.
5 Set the cooking parameters and start cooking.
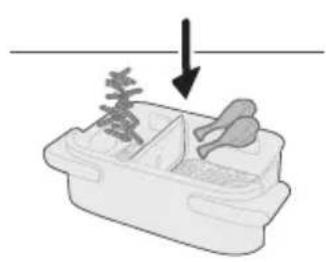
3 Put the ingredients in both containers.
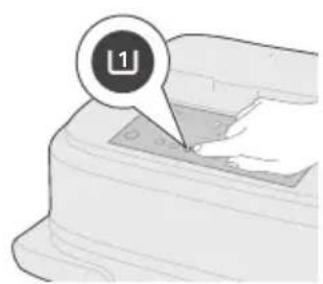
4 Press Left container [1] on the control panel.
5 Set the cooking parameters for the left container.
7 Select the Airfry, Steamfry, or Steam mode.

8 Set the cooking parameters and start cooking.
1 Place both base plates in the container.
2 Add the ingredients to the container.
9 Press the Start/Pause button to start cooking.
1 Place both base plates in the container.

12 Press the Start/Pause button to start cooking.
1 Place both base plates in the container.

11 Press the Start/Pause button to start cooking.
2 Add the ingredients to the container.
5 Press the XXL button.
8 Press the Start/Pause button to start cooking.
6 Press the Steam Clean button.
9 Press the Start/Pause button to start descaling.
12 Empty the tank of any remaining descaler.




Memory function
Important safety instructions 222
Danger 222
Warning 222
Caution 224
Ecodesign information 225
Introduction 226
Important safety instructions


Power button


Left pot [1]
3 Add ingredients to the left pot.
2 Add ingredients to the pot.
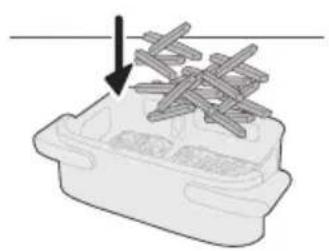
3 Place the pot back into the appliance.
5 Add ingredients to the pot.

6 Place the pot back into the appliance.

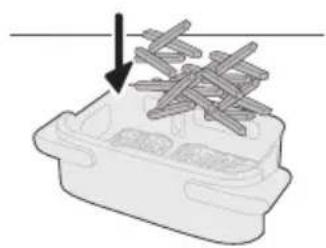
2 Add the ingredients to the pot.
3 Place the pot back into the appliance.
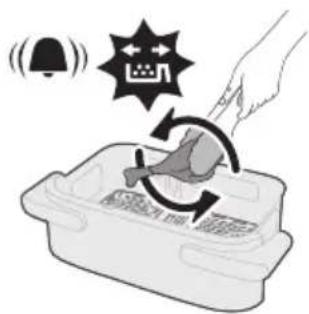
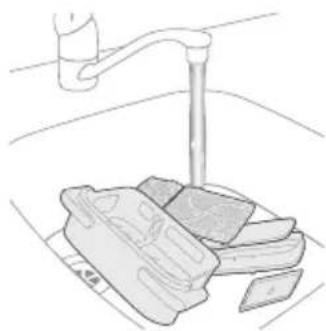
10 Place the pot back into the appliance.
14 Place the pot back into the appliance.
- This symbol means that electrical products shall not be disposed of with normal household waste.
- Follow your country's regulations regarding the collection of electrical products.
![PHILIPS NA565 - Left pot [1] - 13](/content/2026/05/750380/images/1e5271e87ba54d1e58f4970b7222d0490708013338b16dd490775f3ae56dfae2.jpg)
Power button
Touch to turn the Airfryer on or off.


Frozen fries

The XXL/Megacesta container is ideal for cooking large portions or complete family meals in a single container.
4 Select the Airfry, Steamfry, or Steam mode.
7 Select the Airfry, Steamfry, or Steam mode.
6 Touch the Airfry button to access the Airfry mode.
9 Remove and clean the container.
18 Remove the container.

Frozen fries

Shake reminder

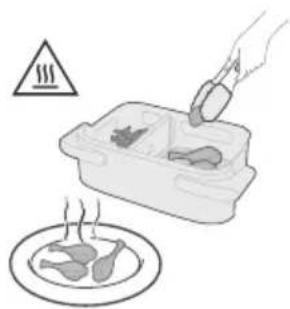
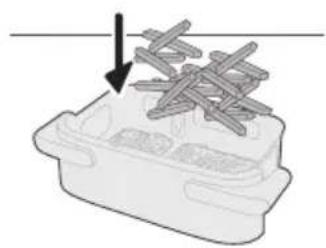
11 Remove the cooked food from the tank.

14 Remove the cooked food from the tank.

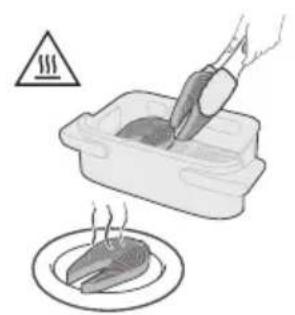
10 Remove the cooked food from the tank.
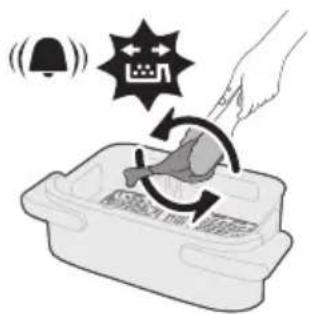
18 Take out the tank.
- Do not place the appliance on or near a hot gas stove, any type of electric stove, or electric hotplates, nor in a heated oven (fig. 1).
- Never immerse the appliance in water or rinse it under running water.
- To prevent electric shock, make sure that water or other liquid does not get into the appliance.
- Always place the ingredients for frying in the basket so that they do not come into contact with the heating elements.
- Do not cover the air inlet and outlet openings while the appliance is operating.
- Do not fill the basket with oil, as this may cause a fire.
- Do not use the appliance if the plug, power cord, or the appliance itself is damaged.
- Never touch the inside of the appliance while it is operating.
- Never exceed the maximum food level indicated on the basket.
- Always check that the fryer is free and make sure there is no food stuck in it.
- Before first use, the cord storage compartment must be attached to the appliance (fig. 2). Never detach the cord storage compartment.
- Do not move the appliance by holding the handle on both sides.
Warning
- If the power cord is damaged, it must be replaced by Philips, a service center authorized by the manufacturer, or similarly qualified persons in order to avoid hazards.
- Connect the appliance only to a grounded wall outlet, protected by a residual current device (RCD) that prevents earth leakage.
- Always check that the plug is properly inserted into the wall outlet.
- This appliance is not intended to be used with an external timer or a separate remote control system.
- This appliance can be used by children aged 8 years and above and persons with reduced physical, sensory or mental capabilities or lack of experience and knowledge if they have been given supervision or instruction concerning use of the appliance in a safe way and understand the hazards involved.
- Children shall not play with the appliance.
- Cleaning and user maintenance shall not be made by children unless they are older than 8 and supervised.
- Keep the appliance and its cord out of reach of children aged less than 8 years.
- Do not place the appliance against a wall or against other appliances. Leave at least 20 cm of free space behind, above, and on both sides of the appliance. Do not place anything on top of the appliance.
- During frying, hot steam is released through the air vents. Keep your hands and face at a safe distance from the steam and air vents. Be especially careful with hot steam and air when removing the pan from the appliance.
- Never put light ingredients or baking paper in the appliance.
- Accessible surfaces may become hot during use (fig. 3).
- Storing potatoes: The temperature should match the potato variety, and in any case be higher than 6 °C to reduce the risk of exposure to acrylamides in prepared food.
- Since this Airfryer has two cooking chambers, its electrical power is high. Do not operate other high-power appliances on the same electrical circuit at the same time (e.g., kettles, electric grills, and similar appliances). If you do, the safety circuit breaker in your home's installation may trip, causing a power outage at this outlet.
- The appliance is designed for use at ambient temperatures between 5 °C and 40 °C.
- Before plugging in the appliance, check that the mains voltage indicated on the appliance matches the local mains voltage.
- Keep the power cord away from hot surfaces.
- Do not place the appliance on or near flammable materials such as a tablecloth or curtain.
- Use the appliance only for the purposes described in this manual and use only original Philips accessories.
- Do not leave the appliance running unattended.
- The pan and additional accessories inside the cooking chamber become hot during and after use of the appliance, so always handle them with care.
- Before first use, thoroughly wash the parts that will come into contact with food. See the instructions in the user manual.
- When steaming food, open the lid carefully to avoid being scalded by steam that escapes suddenly from the appliance.
- The compartment that is not in use is always hot, even when the other is in use.
- The unused compartment/recess of the appliance may become hot when the other compartment/recess is in use, so it is recommended that all baskets remain in place even when only one compartment/recess is used, and that they be opened/removed only when they need to be filled.
- Do not place the steam vent of the appliance near an electrical outlet.
- The surface of the heating element may remain hot for some time after use.
- Always use glass bowls, metal kitchen utensils, or heat-resistant aluminum foil containers that are safe for use at high temperatures in the Airfryer. Avoid plastic and paper containers or containers that are not oven-safe, as they may melt or release harmful substances.
Caution
- This appliance is intended for normal household use only. It is not intended for use in environments such as staff kitchens in shops, offices, farms, or other work environments. It is not intended for use by guests in hotels, motels, bed and breakfasts, or other types of accommodation.
- Always unplug the appliance from the power supply if you leave it unattended and before assembling, disassembling, storing, or cleaning it.
- This symbol indicates that electrical products should not be disposed of with regular household waste.
- Follow your country's regulations for the separate collection of electrical products.
Warranty and support


Frozen fries
Use this preset to prepare crispy golden frozen fries, wedges, or baked potatoes.

Mixed vegetables

Shake reminder
This model has a shake reminder. To achieve optimal results, shake or turn the food immediately when the reminder alarm sounds (see "Shaking food").
5 Set the cooking parameters and start cooking.
Note: Models NA565/02 and NA565/92 come with kitchen tongs included in the package. For other models, tongs are sold separately.
Right pan [2]
The right pan [2] is ideal for larger portions or main dishes.
1 Place the bottom plate in the right pan.
5 Select the hot air frying, steam frying, or steaming mode.
6 Set the cooking parameters and start cooking.
3 On the control panel, touch XXL.

4 Select the hot air frying, steam frying, or steaming mode.
5 Set the cooking parameters and start cooking.
3 Add the ingredients to both pans.
6 On the control panel, touch Right pan [2].
7 Select the hot air frying, steam frying, or steaming mode.
8 Set the cooking parameters and start cooking.
3 Return the pan to the appliance.
7 Touch the temperature button, then touch the increase or decrease button to select the desired cooking temperature.
8 Touch the time button, then touch the increase or decrease button to select the desired cooking time.
Note: In addition to manually selecting the cooking temperature and time, you can also choose from various preset programs designed for convenient preparation and optimal results.

2 Fill the water tank with purified water up to the MAX mark.
3 Attach the lid to the water tank.
6 Return the bowl to the appliance.
9 Touch the steam fry button to activate the steam fry mode.
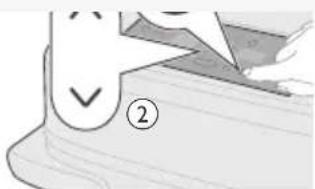
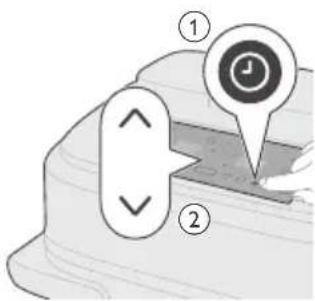
11 Touch the time button, then touch the increase or decrease button to select the desired cooking time.
Note: In addition to manually selecting the cooking temperature and time, you can also choose from various preset programs designed for convenient preparation and optimal results.
2 Fill the water tank with purified water up to the MAX mark.
![PHILIPS NA565 - Right pan [2] - 23](/content/2026/05/750380/images/62742dd4f9497184cafe30f0b2d947ad657d9aaead22e5fc3ff5f09010c44b6c.jpg)
3 Attach the lid to the water tank.
9 Touch the steam button to activate the steam cooking mode.
10 Touch the time button, then touch the increase or decrease button to select the desired cooking time.
Note: Temperature adjustment is disabled in steam mode.
Note: In addition to manually selecting the cooking time, you can also choose from various preset programs designed for convenient preparation and optimal results.
3 Return the bowl to the appliance.
6 Touch the hot air frying, steam frying, or steaming button to activate one of the cooking modes.
Note: Make sure the water tank is filled and placed in the correct position when using the steam frying or steaming modes.
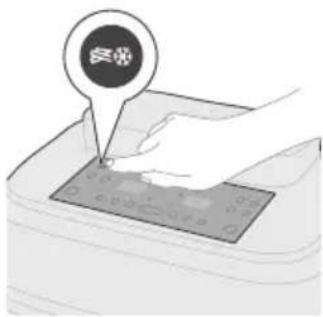
7 Select one of the preset programs according to the type of food you are preparing.
2 Press the time function button.
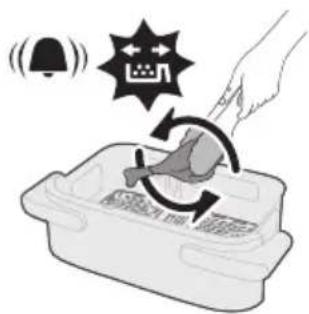
2 Use silicone tongs or utensils to turn the ingredients. Return the basket and continue cooking.
Note: The airfryer will automatically pause when you remove the basket. The screen will remain frozen until the basket is returned.
Note: Cooking automatically resumes when the basket is returned.
Note: Avoid removing the basket for extended periods (over 30 seconds) as the appliance may cool down.
Cleaning
Regular cleaning
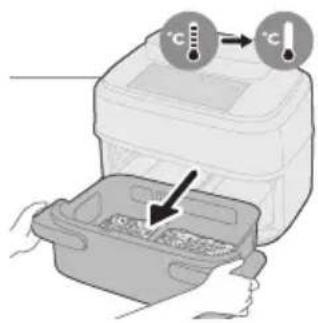
Warning: Before cleaning, allow the pan and the inside of the appliance to cool completely.
3 If a steam-enabled function was used, remove the water tank and empty any remaining water.
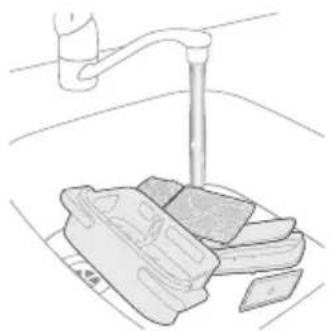
4 Clean the pan, pan divider, bottom plates, and water tank under tap water, using warm water, dish soap, and a non-abrasive sponge if necessary (see "Cleaning table").
6 Clean the heating elements with a cleaning brush to remove food residue.
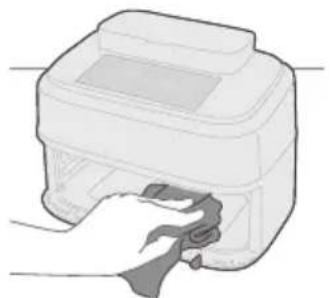
7 Clean the inside of the appliance with a slightly damp soft cloth, and then use a dry one if needed.
Steam cleaning
2 Attach the lid to the water tank.
6 Touch the steam cleaning button.
9 Remove and clean the container.
Caution: Always wear heat-resistant gloves when handling the hot container.
Note: If there is grease left on the container, clean it with soapy water or detergent and a sponge, then rinse again.
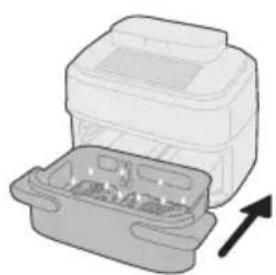
10 Put the container back into the appliance.
12 After 5 minutes, a beep will sound, indicating that the drying process is complete.
2 Fill the water tank with 740 ml of purified water.
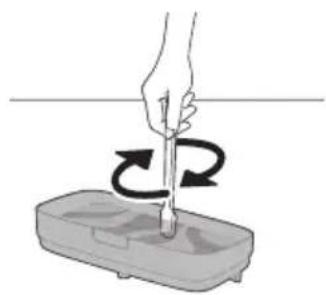
3 Pour an equal amount of water and descaling agent into the water tank.
4 Attach the lid to the water tank.
9 Touch the start/pause button to start the descaling process.
10 After 25 minutes of descaling, the appliance will beep and remind you to remove the container.
11 Remove the container and pour out the remaining water from it.
Caution: Be careful when handling the hot container.
13 Refill the water tank with purified water only.
14 Put the container back into the appliance.
18 Pull out the container.
19 Clean the container, the container distributor, the lower plates, and the water tank under tap water, using warm water, dishwashing liquid, and a non-abrasive sponge if necessary (see "Cleaning table").

On/off button

Frozen fries







9 Remove and clean the pan.
Descaling
2 Pour 740 ml of purified water into the water tank.


On/off button

Frozen fries

2 Fill the water tank with purified water up to the MAX water level.
2 Fill the water tank with purified water up to the MAX water level.

2 Put the ingredients into the pan.

On/off button


Shake reminder


On/off button

Frozen fries

Shake reminder
5 Select the Airfry, Steamfry, or Steam mode.
4 Select the Airfry, Steamfry, or Steam mode.
7 Select the Airfry, Steamfry, or Steam mode.
1 Place both base plates in the pan.
6 Press the Airfry button to activate the Airfry mode.
1 Place both base plates in the pan.
1 Place both base plates in the pan.
Tip: You can also clean the pan, divider, and base plates in the dishwasher.
9 Pull out the pan and clean it.
Remove the pan.
Tip: You can also clean the pan, pan divider, and bottom plates in the dishwasher.

On/Off button

Frozen French fries

2 Insert the pan divider properly.
3 Add the ingredients to the left pan.
5 Set cooking parameters and start cooking.
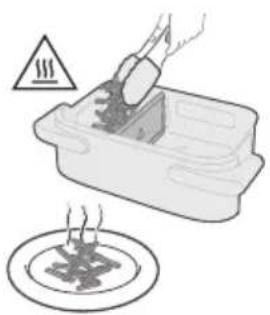
6 Use kitchen tongs to remove the cooked food from the pan when cooking is complete.
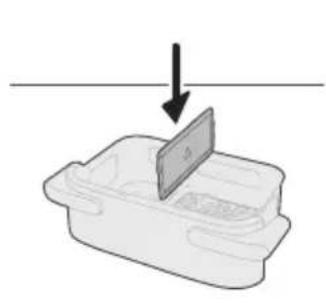
2 Insert the pan divider properly.
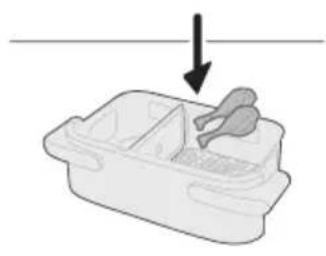
5 Select Airfry, Steamfry, or Steam mode.
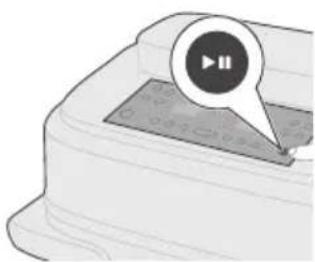
6 Set cooking parameters and start cooking.
7 Use kitchen tongs to remove the cooked food from the pan when cooking is complete.
2 Add the ingredients to the pan.
3 Press XXL pan on the control panel.
4 Select Airfry, Steamfry, or Steam mode.
5 Set cooking parameters and start cooking.
6 Use kitchen tongs to remove the cooked food from the pan when cooking is complete.
2 Insert the divider securely.
3 Add the ingredients to both pans.
7 Select Airfry, Steamfry, or Steam mode.
8 Set cooking parameters and start cooking.
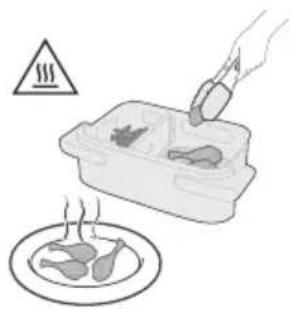
9 Use kitchen tongs to remove the cooked food from the pan when cooking is complete.
1 Place both base plates into the pan.
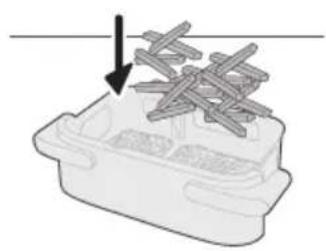
2 Add the ingredients to the pan.
3 Place the pan back into the appliance.
10 When cooking is finished, you will hear a timer bell. Gently pull the pan out.
Warning: After the cooking process, the pan, the inside, and the ingredients are hot. Always place the pan on a heat-resistant surface (e.g., a trivet or a silicone mat) when removing them. Steam may come from the pan, depending on the type of food.
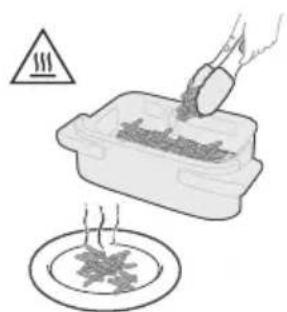
11 Remove the cooked food from the pan.
Note: Excess oil or fat residue from the ingredients collects at the bottom of the pan.
Food table for Airfry mode
5 Add the ingredients to the pan.
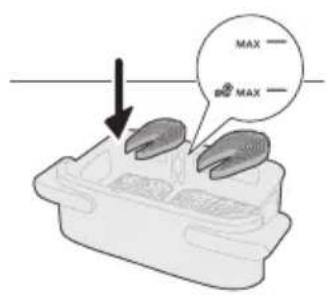
6 Place the pan back into the appliance.
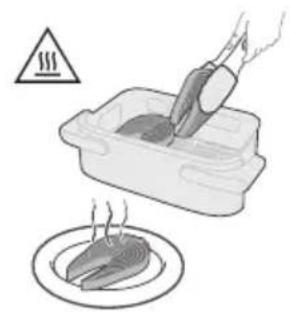
1 Place both base plates into the pan.
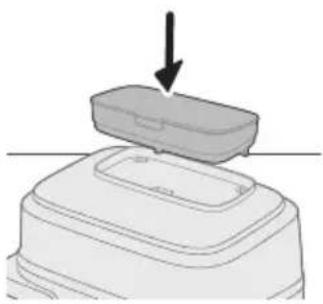
6 Place the pan back into the appliance.
Warning: After the cooking process, the pan, the inside, and the ingredients are hot. Always place the pan on a heat-resistant surface (e.g., a trivet or a silicone mat) when removing it. Steam may come from the pan, depending on the type of food.
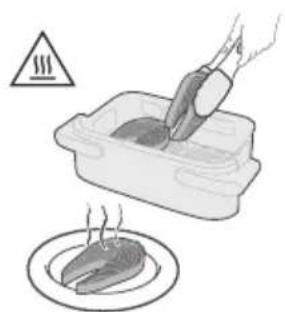
13 Remove the cooked food from the pan.
Note: Excess oil or fat residue from the ingredients collects at the bottom of the pan.
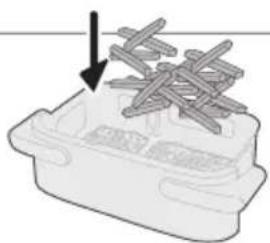
2 Add the ingredients to the pan.
3 Place the pan back into the appliance.
7 Select one of the preset programs according to the food you are cooking.
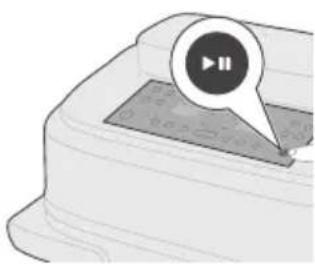
9 When cooking is finished, you will hear a timer bell. Carefully pull the pan out.
Warning: After the cooking process, the pan, the inside, and the ingredients are hot. Always place the pan on a heat-resistant surface (e.g., a trivet or a silicone mat) when removing them. Steam may come from the pan, depending on the type of food.
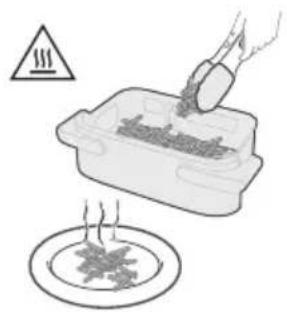
10 Remove the cooked food from the pan.
Note: Excess oil or fat residue from the ingredients collects at the bottom of the pan.
Shaking the food
When should you shake
- Shake or turn the food 2-3 times halfway through the cooking time, or more if desired.
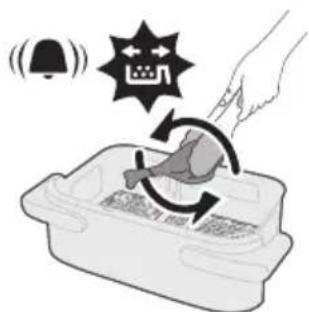
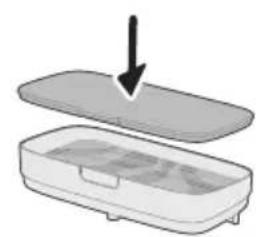
10 Place the pan back in the appliance.
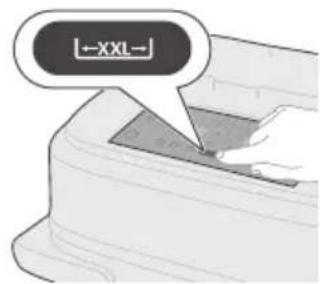
12 Pour out excess descaling solution from the water tank.
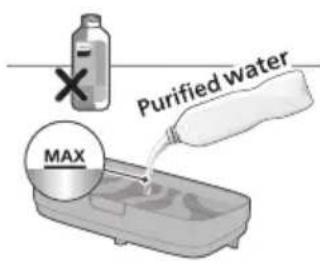
13 Fill the water tank only with purified water.
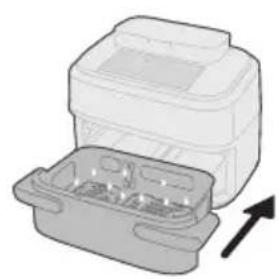
18 Pull out the pan.
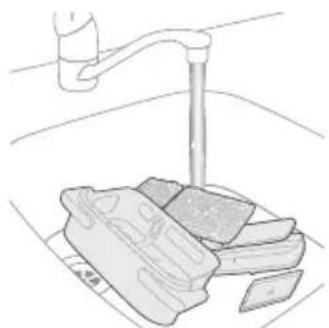
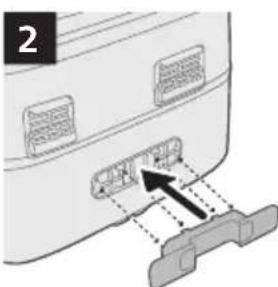

Frozen fries

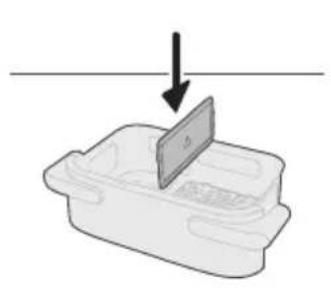
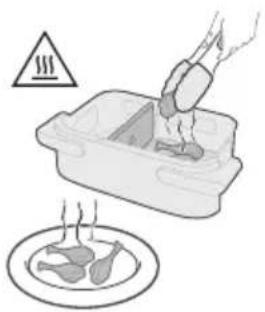
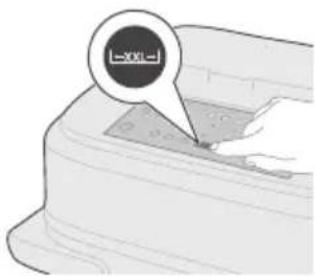
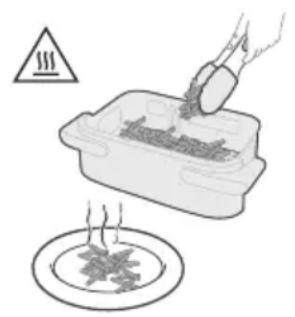
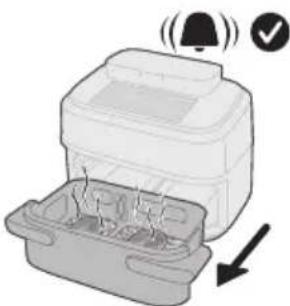
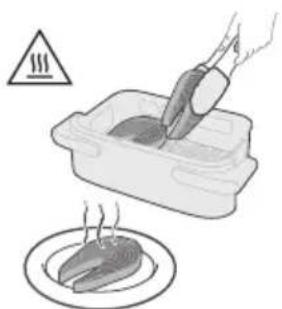

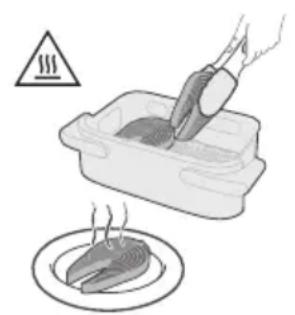
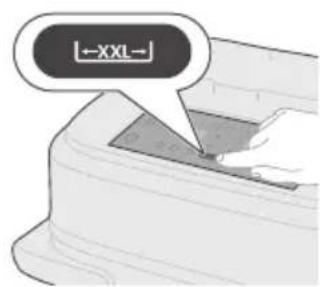



Frozen potatoes


2 Insert the fryer divider securely.
2 Insert the fryer divider securely.
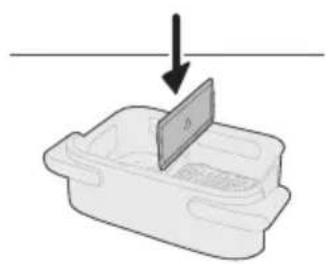
5 Select the air fry, steam fry, or steam mode.
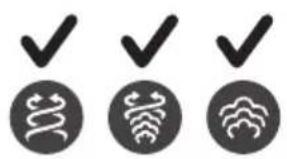
4 Select the air fry, steam fry, or steam mode.
1 Place both lower plates in the containers.
2 Insert the fryer divider securely.
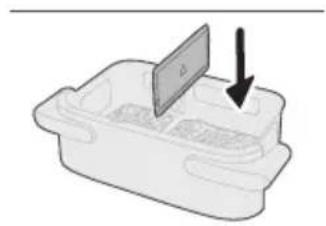
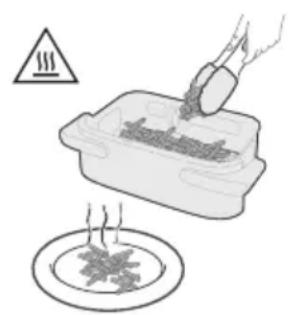
1 Place both lower plates in the containers.
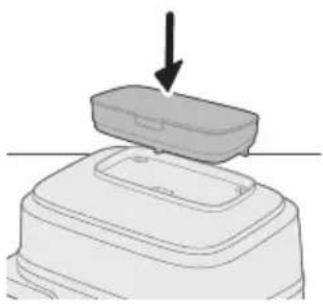
9 Touch the steam fry button to enter steam fry mode.
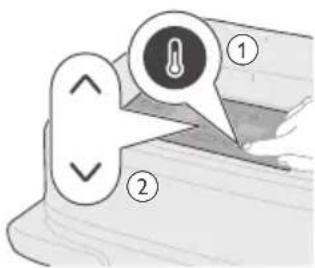
1 Place both lower plates in the containers.
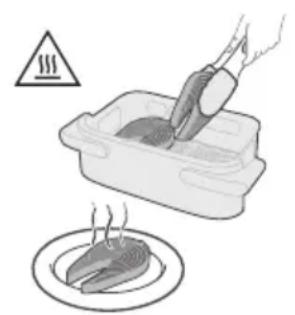
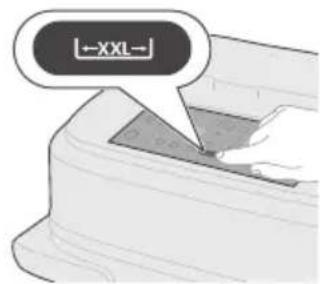
6 Touch the steam clean button.
9 Remove and clean the container.
![[--XXL-]](/content/2026/05/750380/images/de3ec7fa8a32f5b088887bd691c547787bedb09454ecf8b2d9eb8fcd54e6c775.jpg)
18 Remove the container.
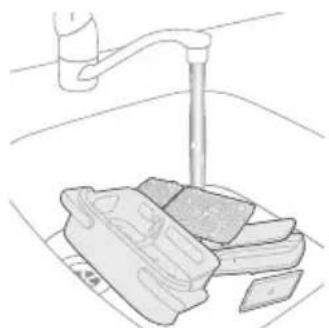
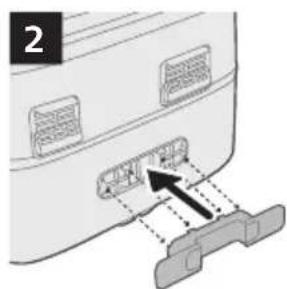


Frozen chips

Stirring reminder
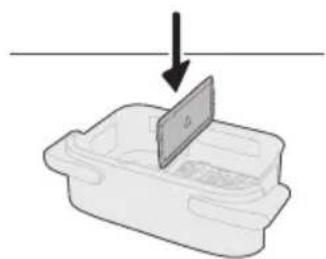
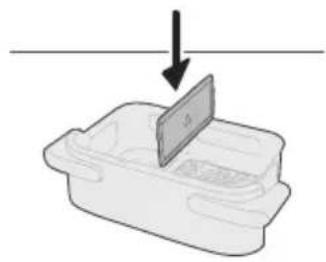
3 Touch the XXL tray on the control panel.
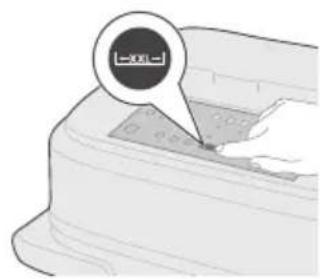
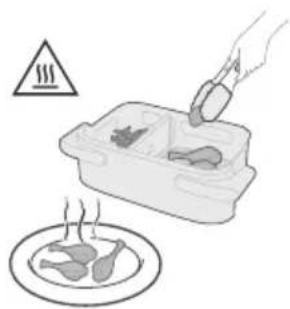
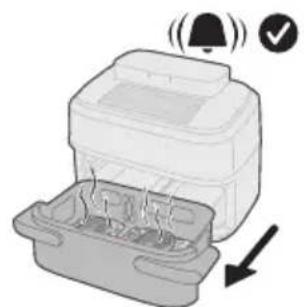
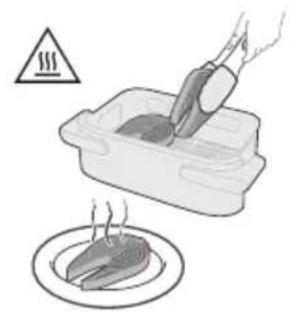

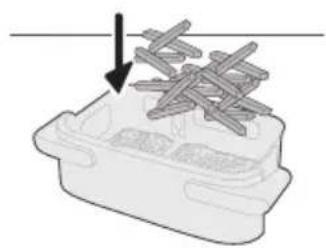
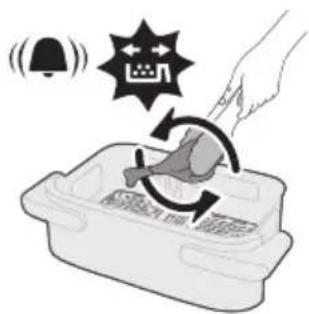
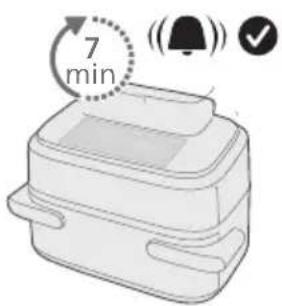
18 Remove the tray.
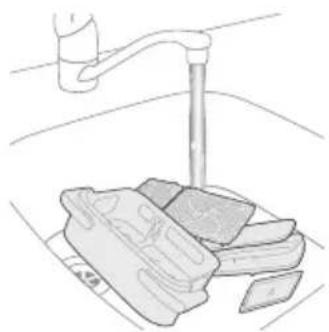
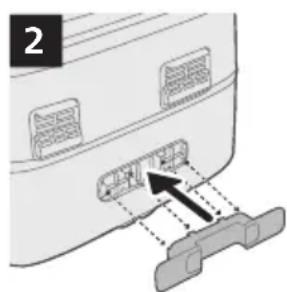


Frozen potatoes

5 Select Airfry, Steamfry, or Steam mode.
4 Select Airfry, Steamfry, or Steam mode.
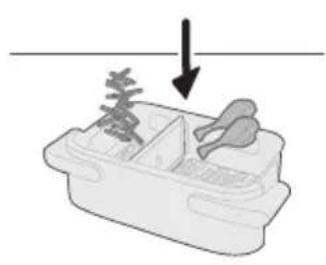
7 Select Airfry, Steamfry, or Steam mode.

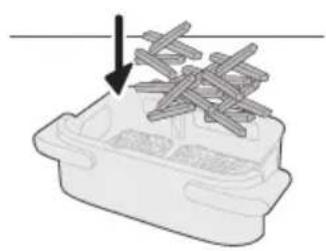

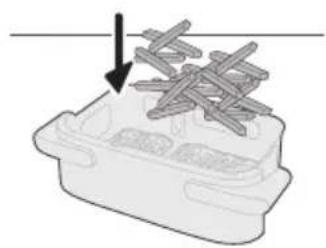
2 Press the Time function button.
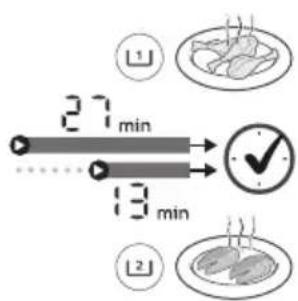
6 Press the Steam Clean button.
18 Remove the tray.
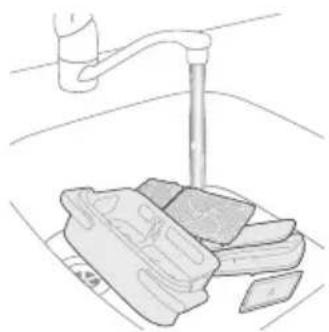
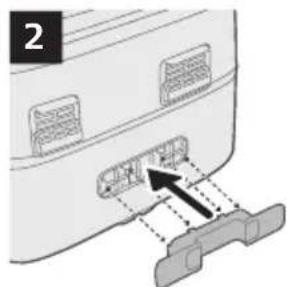


- CONTENTS
- IMPORTANT SAFETY INSTRUCTION
- RECYCLING
- WARRANTY AND SUPPORT
- ECODESIGN INFORMATION
- INTRODUCTION
- GENERAL DESCRIPTION
- BEFORE FIRST USE
- PREPARATIONS BEFORE USE
- USING THE PAN DIVIDER
- COOKING MODES
- COOKING WITH MANUAL SETTINGS
- COOKING WITH PRESET PROGRAMS
- TIME FUNCTION (SYNCHRONIZE)
- FAVORITE FUNCTION
- SHAKING FOOD
- CLEANING
- STORAGE
- DANGER
- WARNING
- CAUTION
- ELECTROMAGNETIC FIELDS (EMF)
- AUTOMATIC SHUT-OFF
- PRODUCT OVERVIEW
- CONTROL PANEL OVERVIEW
- ON/OFF BUTTON
- START/PAUSE BUTTON
- AIRFRY BUTTON
- STEAMFRY BUTTON
- STEAM BUTTON
- LEFT PAN BUTTON
- RIGHT PAN BUTTON
- XXL PAN/MEGABASKET BUTTON
- INCREASE/DECREASE BUTTONS
- TEMPERATURE ADJUSTMENT BUTTON
- TIME ADJUSTMENT BUTTON
- FROZEN FRIES
- MIXED VEGETABLES
- CHICKEN DRUMSTICKS
- TRAY BAKES
- FISH
- DUMPLINGS
- REHEAT
- FAVORITE
- ADDITIONAL FUNCTIONS
- SHAKE REMINDER
- STEAM CLEANING
- DISPLAY
- TIME FUNCTION INDICATION
- NO-WATER REMINDER
- DESCALING REMINDER
- LEFT PAN [1]
- RIGHT PAN [2]
- XXL PAN/MEGABASKET
- DUAL PAN MODE
- AIRFRY MODE
- FOOD TABLE FOR AIRFRY MODE
- NOTE
- STEAMFRY MODE
- FOOD TABLE FOR STEAMFRY MODE
- STEAM MODE
- FOOD TABLE FOR STEAM MODE
- WHEN TO SHAKE
- WHAT TO SHAKE
- HOW TO SHAKE
- TO SHAKE FOOD SAFELY
- IF THE BASKET IS TOO HEAVY TO SHAKE
- ROUTINE CLEANING
- DESCALING
- TROUBLESHOOTING
- POWER BUTTON
- XXL CONTAINER/LARGE BASKET
- MEMORY FUNCTION
- IMPORTANT SAFETY INSTRUCTIONS
- LEFT POT [1]
- REGULAR CLEANING
- FROZEN FRENCH FRIES
- SHAKING THE FOOD
- WHEN SHOULD YOU SHAKE
- FROZEN POTATOES
- FROZEN CHIPS
- STIRRING REMINDER
Brand : PHILIPS
Model : NA565
Category : Deep fryer