AP72UB21ES - Broom AEG - Free user manual and instructions
Find the device manual for free AP72UB21ES AEG in PDF.

| Product type | Cordless stick vacuum with wet cleaning function |
| Brand | AEG |
| Model | AP72UB21ES |
| Dimensions (approx.) | 120 cm height, 30 cm width (base) |
| Weight (approx.) | 3 kg |
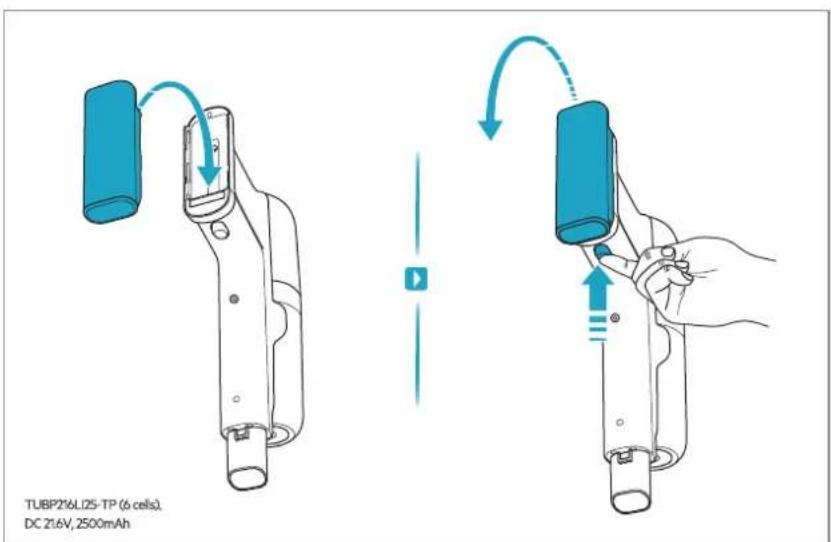
| Power supply | Rechargeable lithium-ion battery, mains charger (100-240 V) |
| Runtime (approx.) | Up to 45 minutes in standard mode |
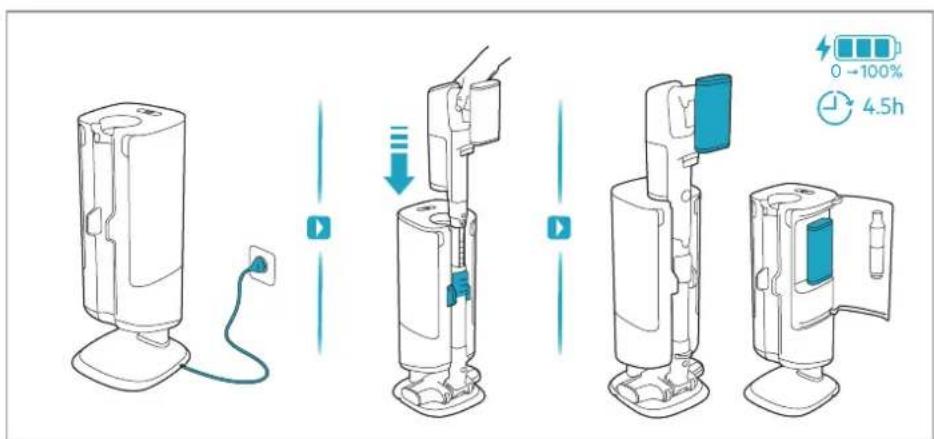
| Charging time | Approximately 4.5 hours (full) |
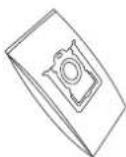
| Dust container capacity | Dust bin + S-bag (disposable bag) |
| Water tank capacity | Approximately 200 ml (for wet cleaning) |
| Floor types | Hard floors, carpets (with suitable nozzle) |
| Main functions | Suction, wet cleaning with spray, automatic emptying in station |
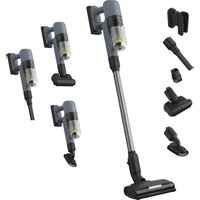
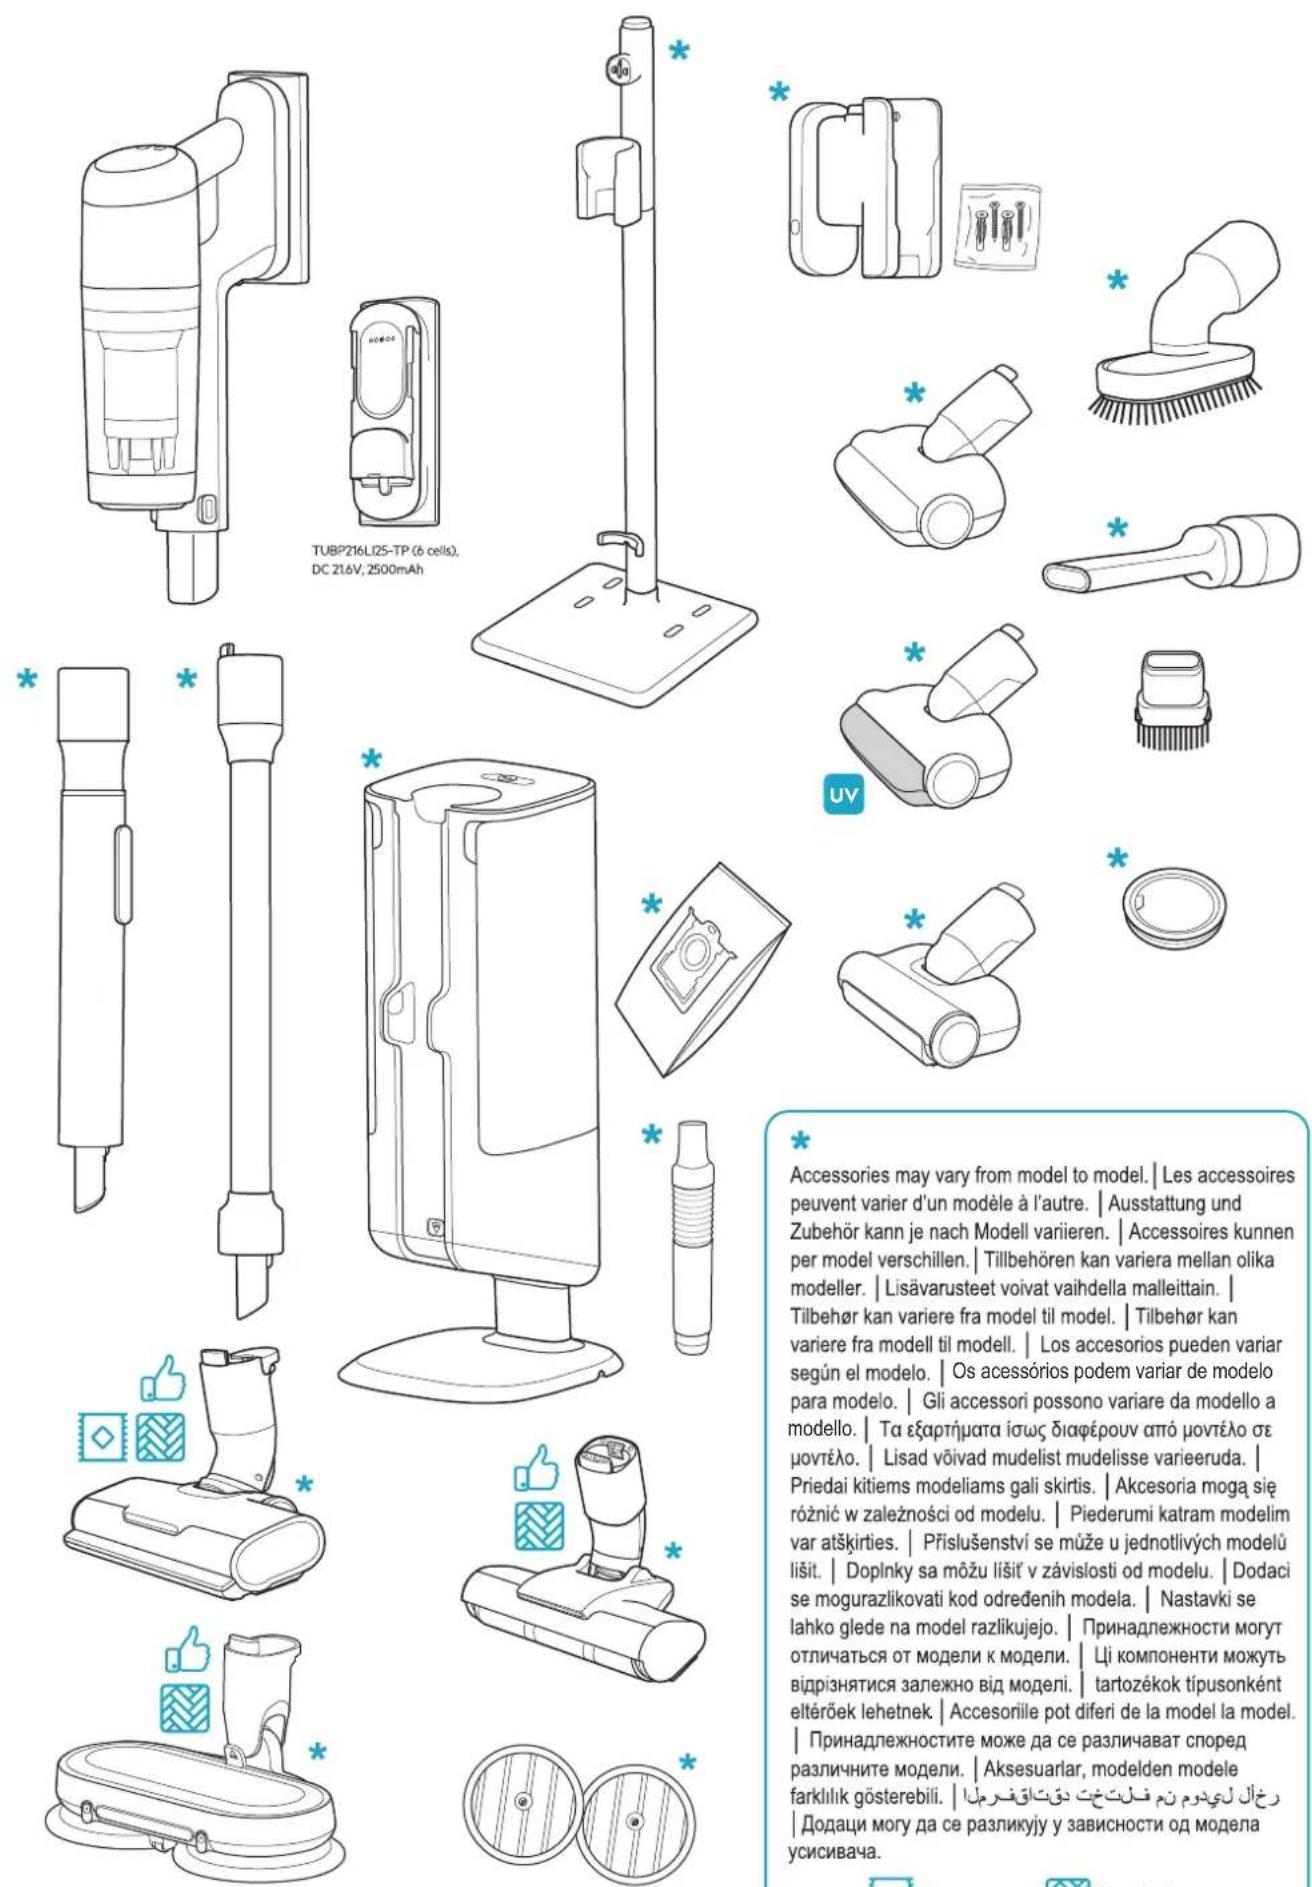
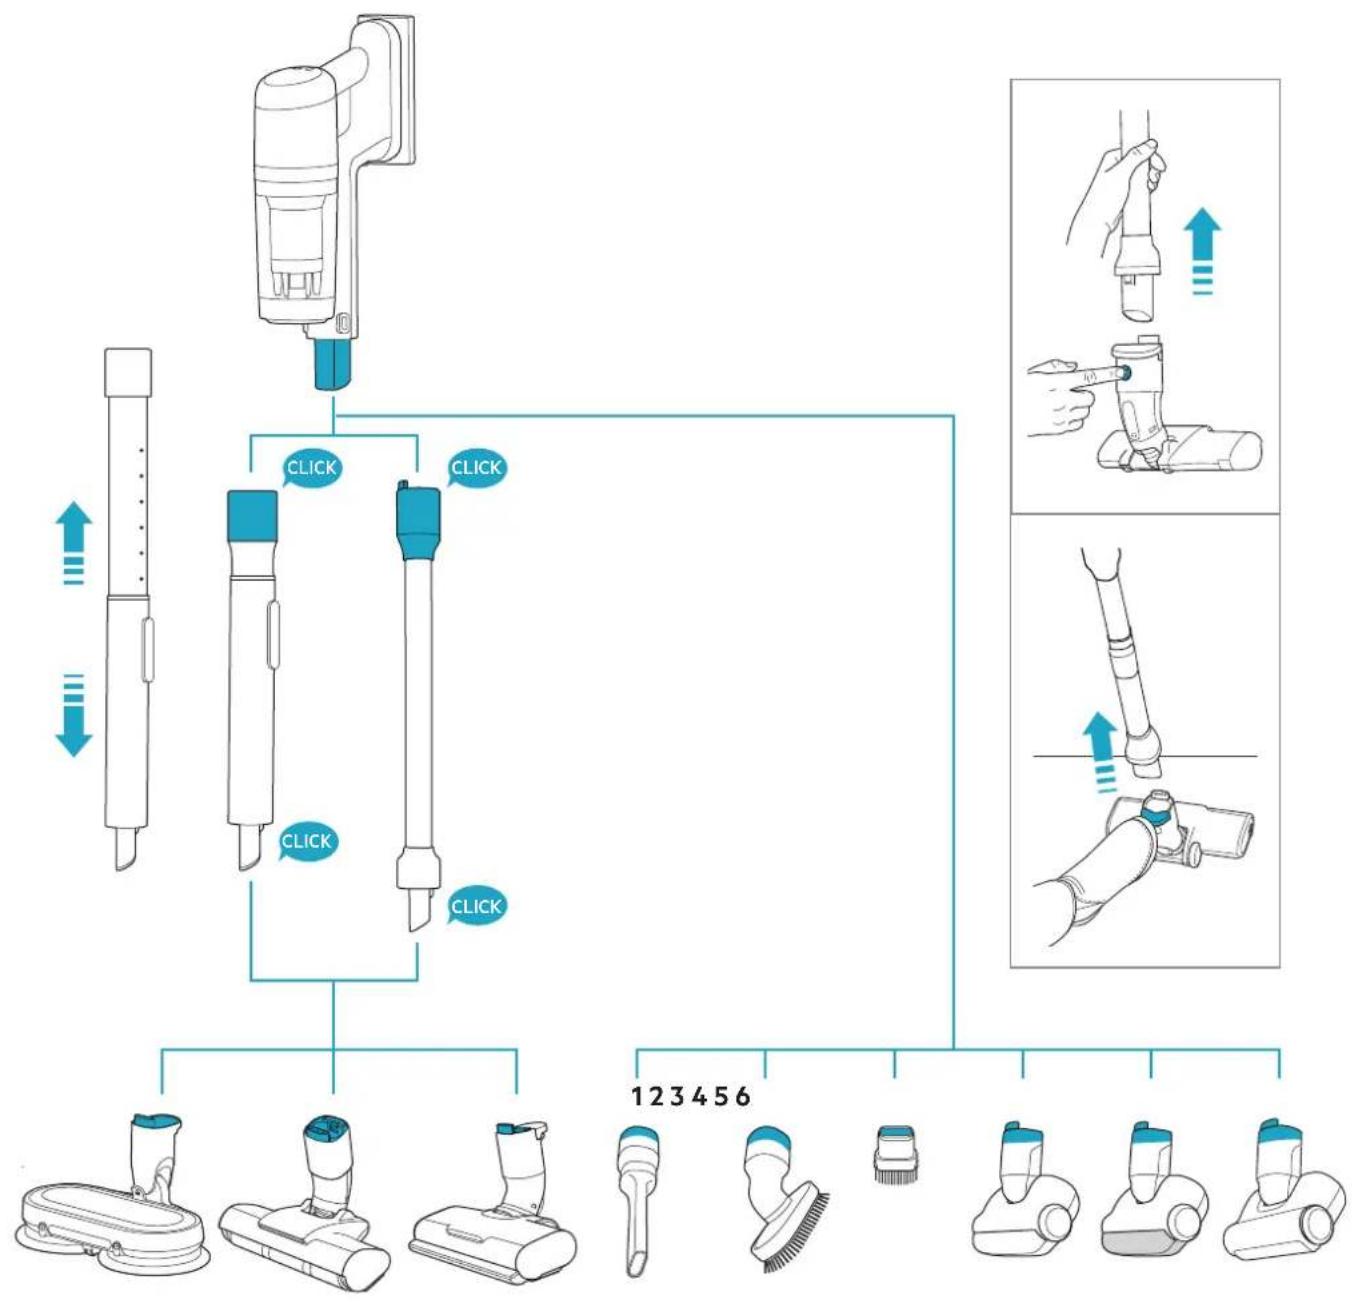
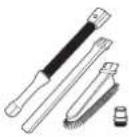
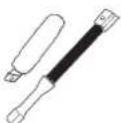
| Included nozzles | Multi-surface nozzle, hard floor nozzle, wet nozzle with rotating pads |
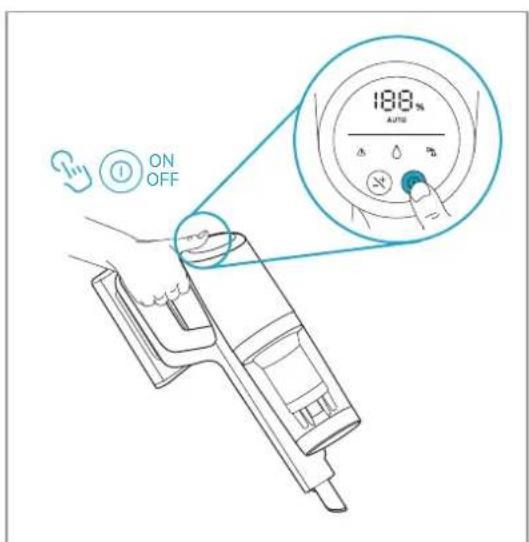
| Indicators | LED display: battery level, blockage indicator, warning |
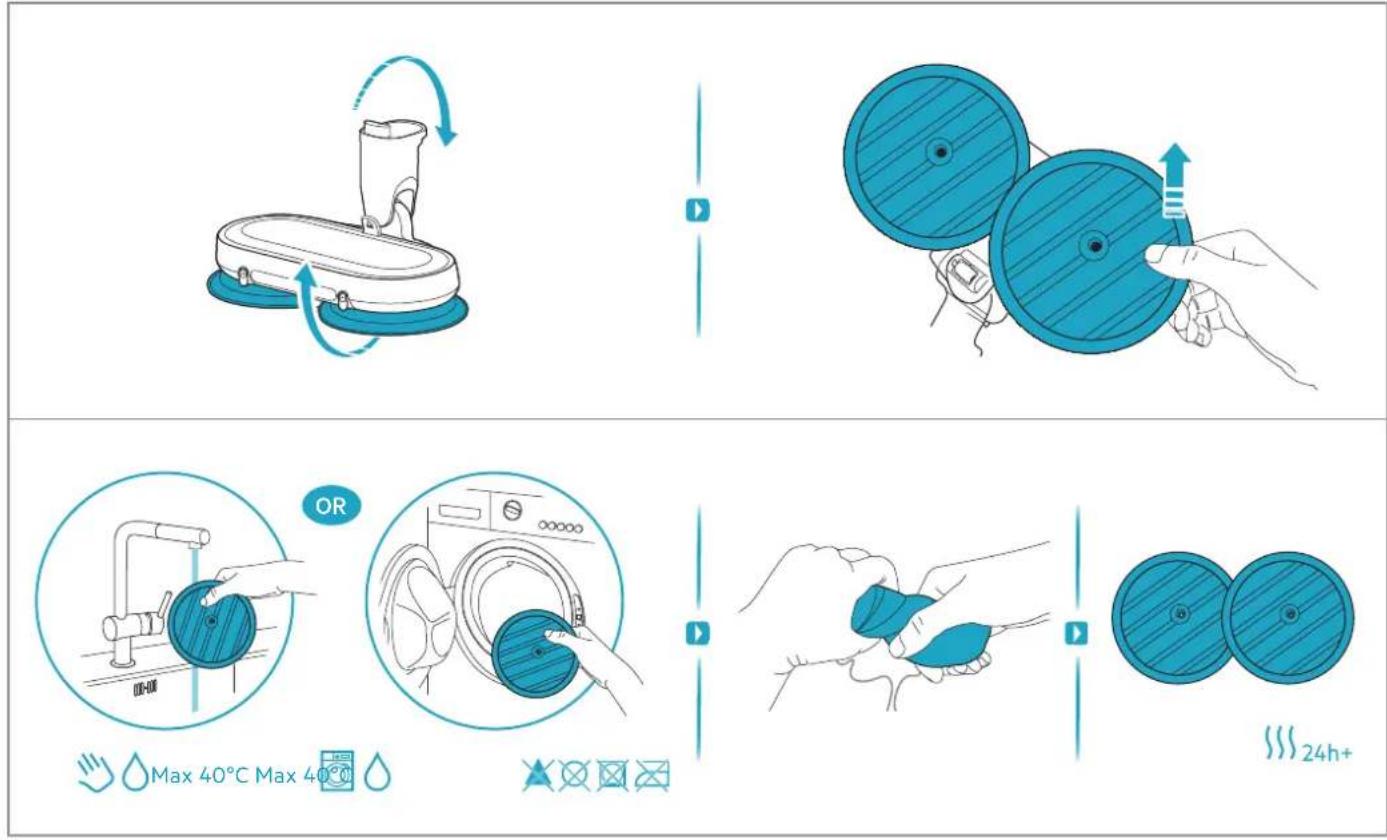
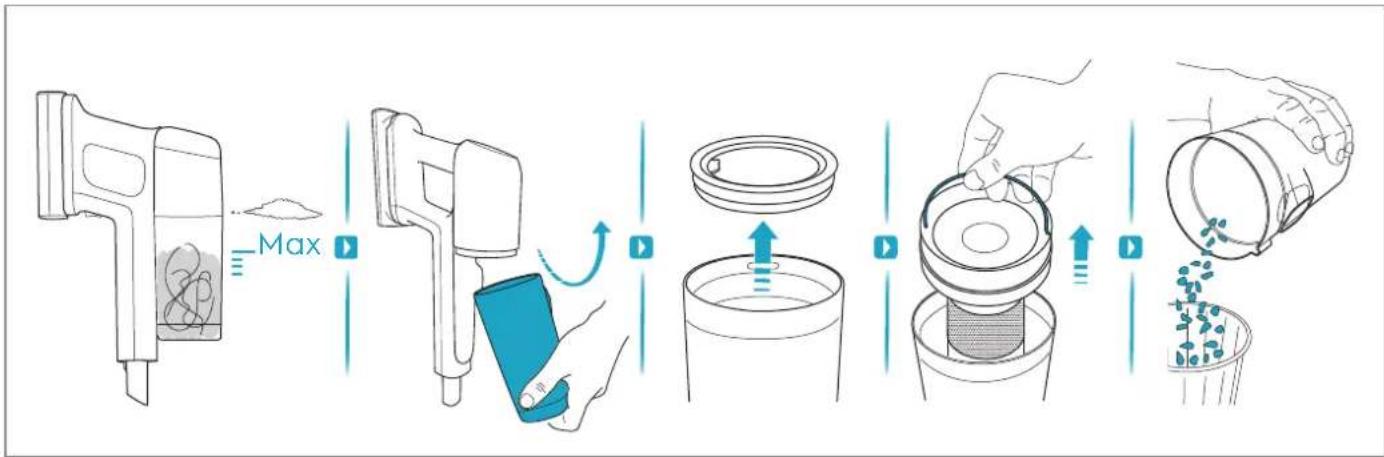
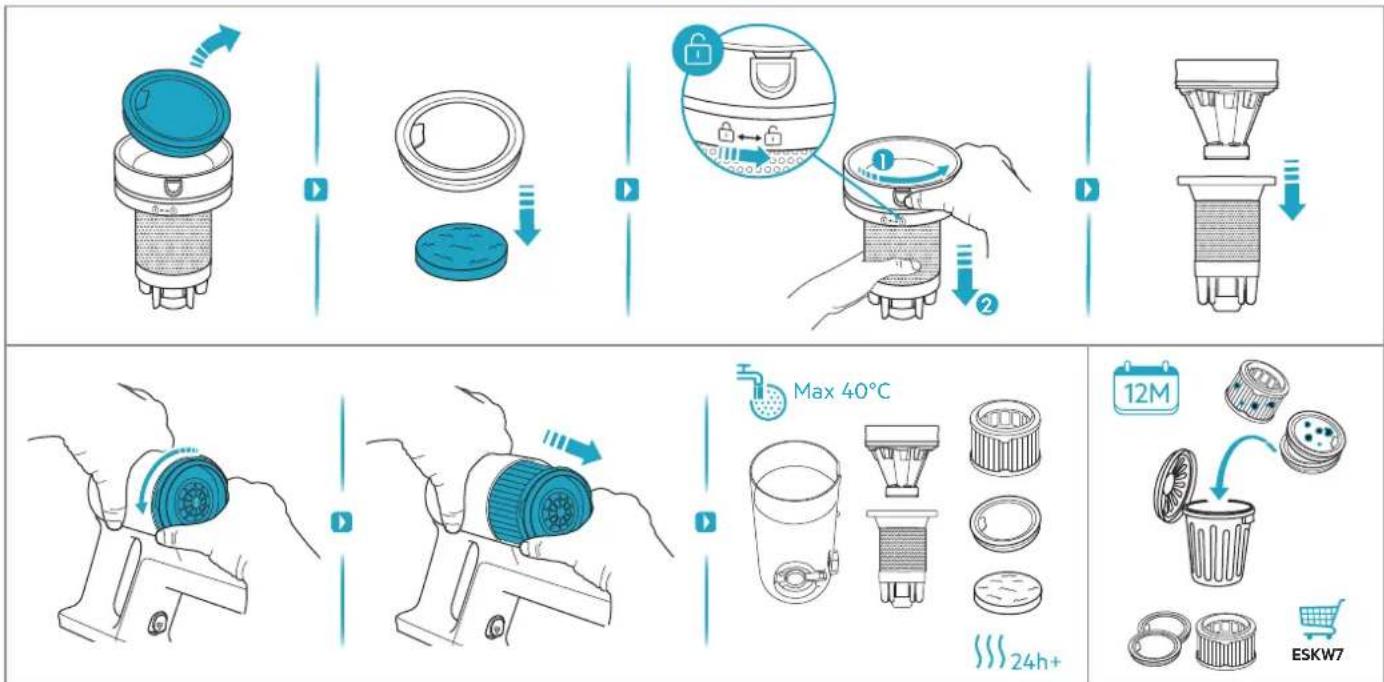
| Maintenance and cleaning | Regular cleaning of the bin, filters and metal mesh; replacement of S-bag; washing pads |
| Safety | Overheat and overcurrent protection; automatic stop in case of blockage |
| Spare parts and repairability | S-bag, filters, battery, nozzles available; Electrolux authorized service center |
| General information | Product designed for household use; end-of-life recycling via SENS (Switzerland) or collection points |
Frequently Asked Questions - AP72UB21ES AEG
User questions about AP72UB21ES AEG
0 question about this device. Answer the ones you know or ask your own.
Ask a new question about this device
Download the instructions for your Broom in PDF format for free! Find your manual AP72UB21ES - AEG and take your electronic device back in hand. On this page are published all the documents necessary for the use of your device. AP72UB21ES by AEG.
USER MANUAL AP72UB21ES AEG
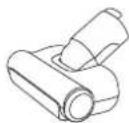
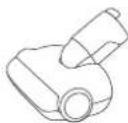
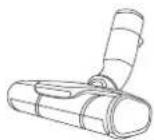
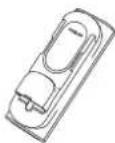
natural_image
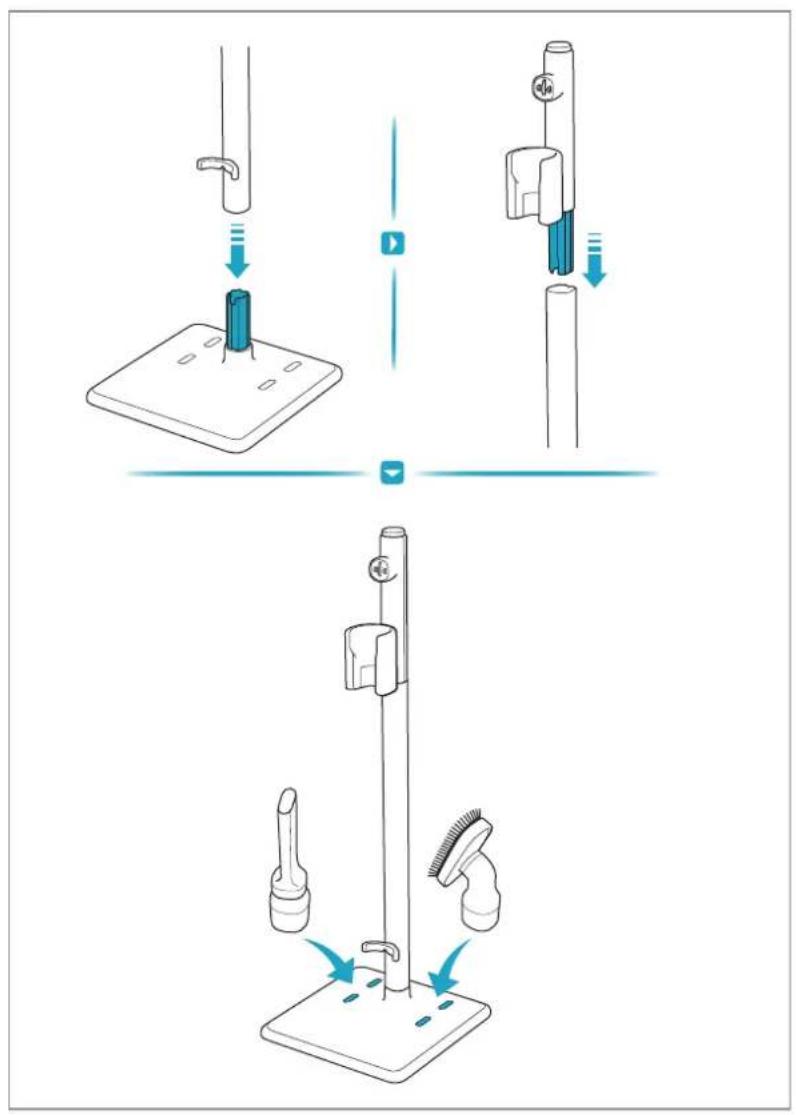
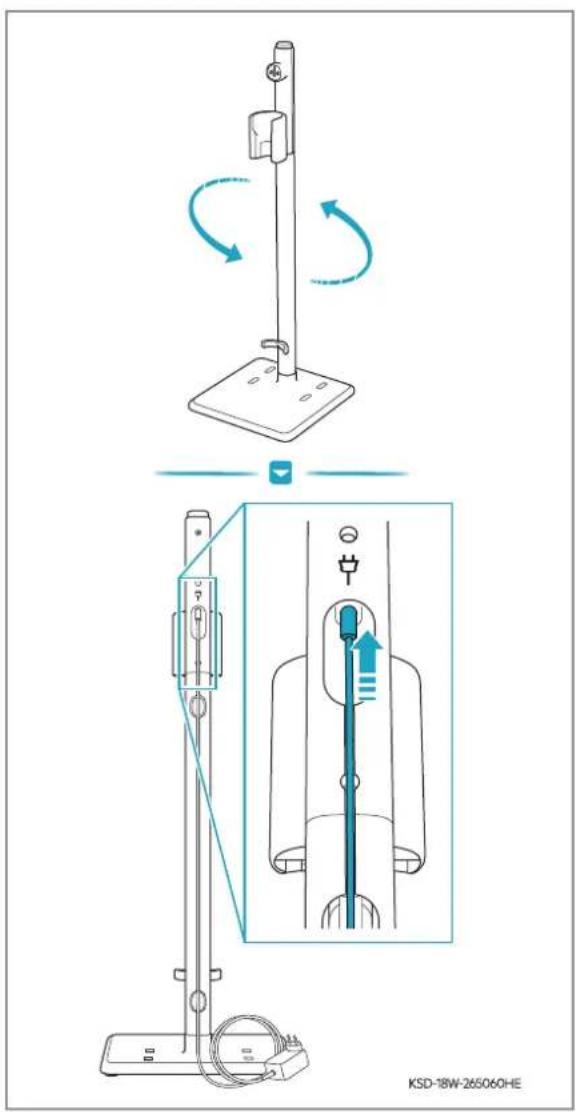
Line drawing of a vacuum cleaner with handle and base (no text or symbols)*Actual product may differ from illustration.

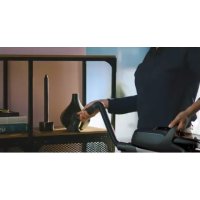
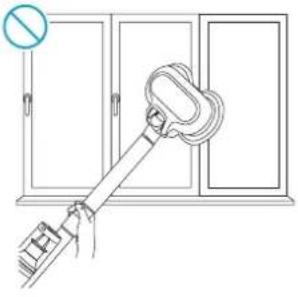
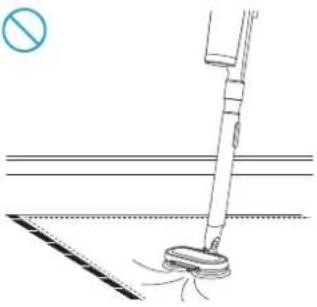
For indoor use only.
Note: This instruction book should be read together with safety precaution booklet.

Carpet

Hard Floor

support.emea.aeg.com
www.a@com

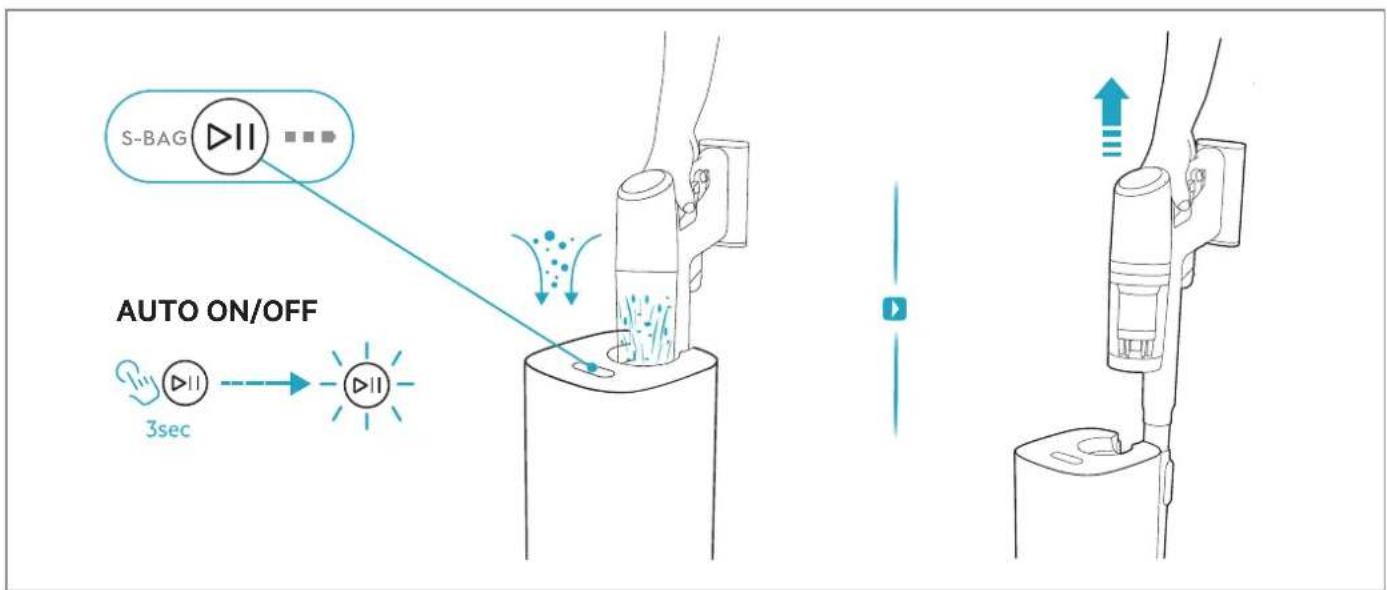
flowchart
graph TD
    A["S-BAG"] --> B["3sec"]
    B --> C["AUTO ON/OFF"]
    C --> D["Device with motion indicators"]
    D --> E["Device with ↑/↓ arrows indicating motion"]
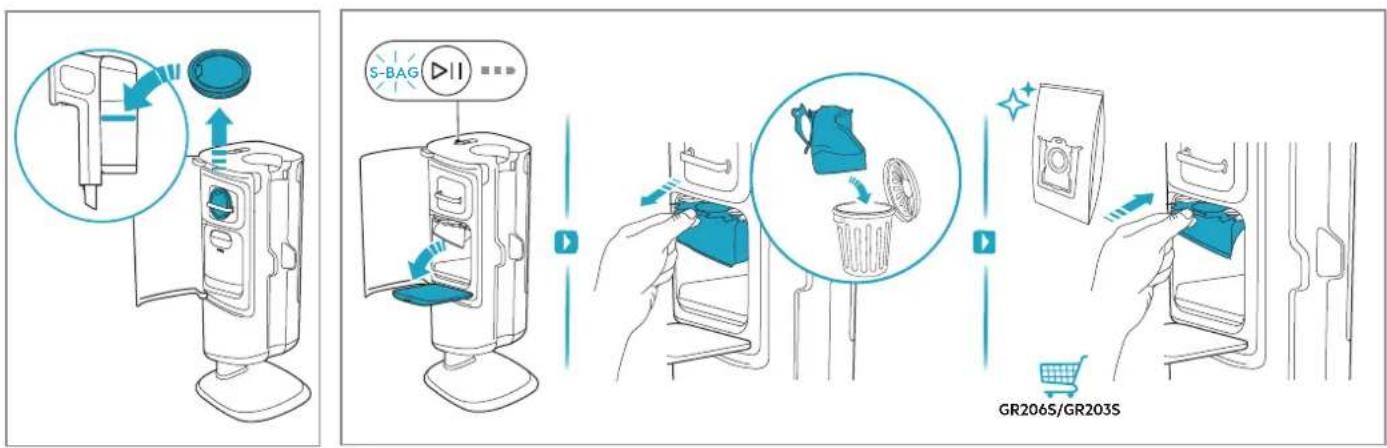
flowchart
graph LR
    A["Device Insert"] --> B["Add Bag"]
    B --> C{Balance Check}
    C -->|Yes| D["Product Package"]
    C -->|No| E["Product Package with Plastic Bag"]
    D --> F["Recycle with Bag"]
    E --> G["Product Package with Plastic Bag"]
    F --> H["Product Package with Plastic Bag"]
    G --> I["Product Package with Plastic Bag"]
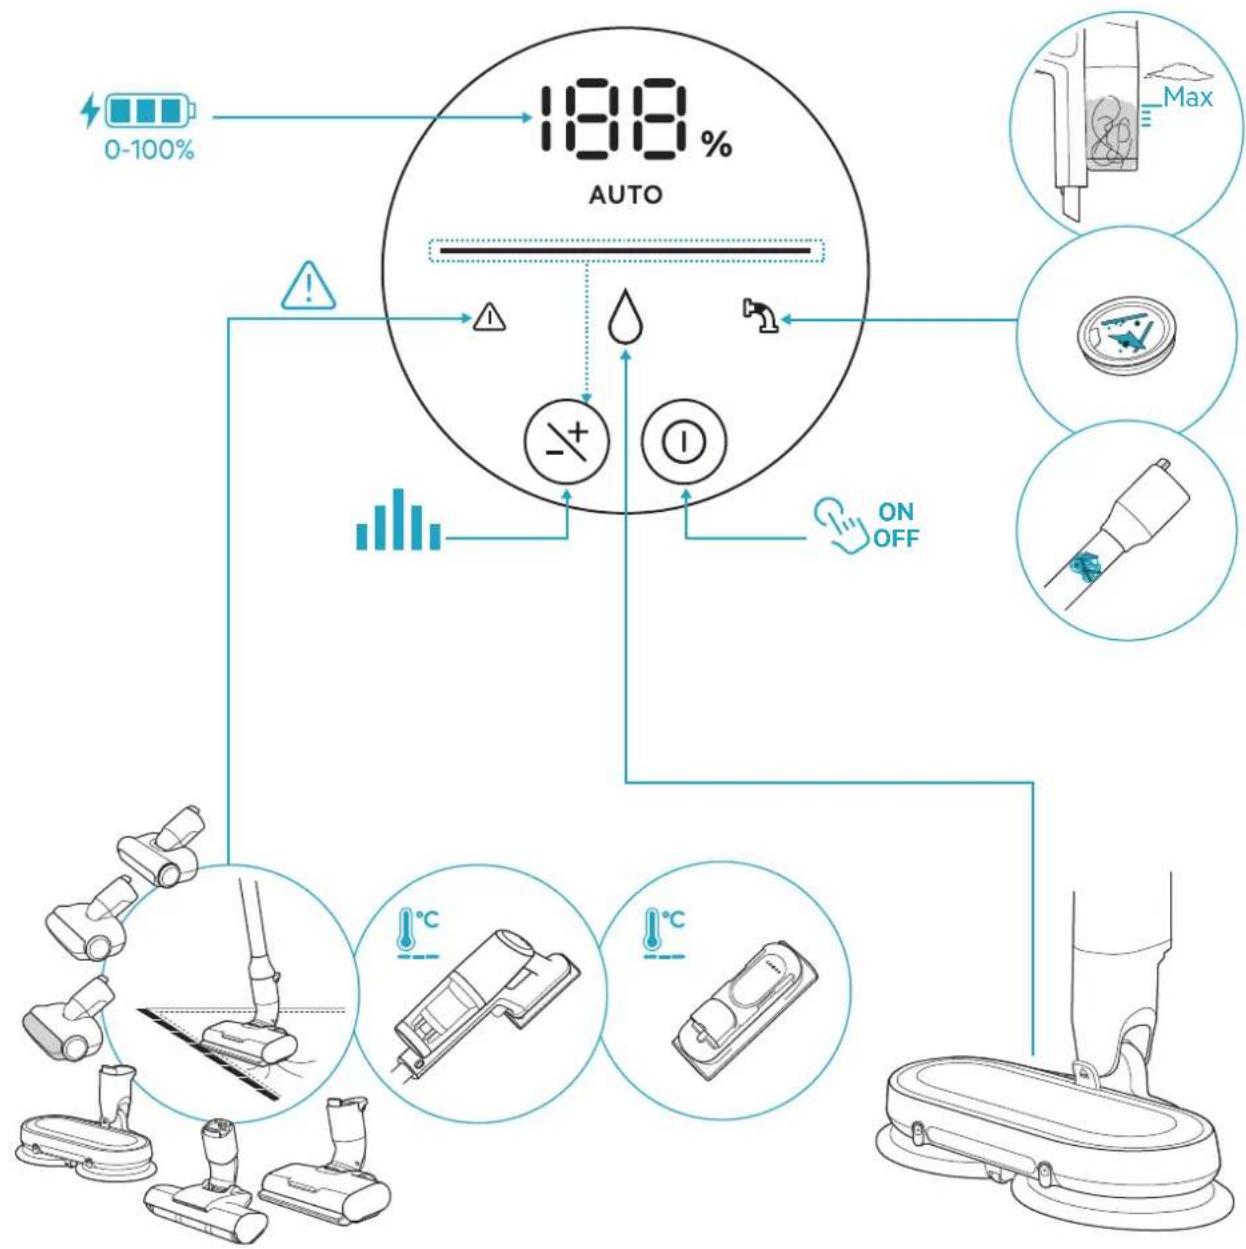
flowchart
graph TD
    A["0-100%"] --> B["100%"]
    B --> C["Auto"]
    C --> D["Max"]
    C --> E["ON/OFF"]
    C --> F["-/+"]
    F --> G["Warning: 100%"]
    G --> H["Control buttons: 100% / Max / On/OFF"]
    H --> I["Lightbulb with brush icon"]
    I --> J["Lightbulb with flame icon"]
    J --> K["Lightbulb with drop icon"]
    K --> L["Lightbulb with flame icon"]
    L --> M["Lightbulb with flame icon"]
    M --> N["Lightbulb with flame icon"]
    N --> O["Lightbulb with flame icon"]
    O --> P["Lightbulb with flame icon"]
    P --> Q["Lightbulb with flame icon"]
    Q --> R["Lightbulb with flame icon"]
    R --> S["Lightbulb with flame icon"]
    S --> T["Lightbulb with flame icon"]
    T --> U["Lightbulb with flame icon"]
    U --> V["Lightbulb with flame icon"]
    V --> W["Lightbulb with flame icon"]
    W --> X["Lightbulb with flame icon"]
    X --> Y["Lightbulb with flame icon"]
    Y --> Z["Lightbulb with flame icon"]
flowchart
graph TD
    A["Tool 1"] --> B["Check Button"]
    B --> C{Check}
    C -->|Yes| D["Adjustment to Hand"]
    C -->|No| E["Adjustment to Cover"]
    D --> F["Check Point"]
    E --> G["Check Point"]
    F --> H["Final Setup"]
    G --> H
    style A fill:#f9f,stroke:#333
    style H fill:#ccf,stroke:#333
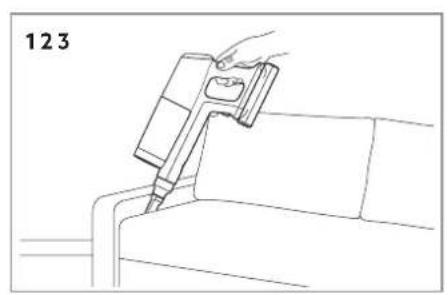
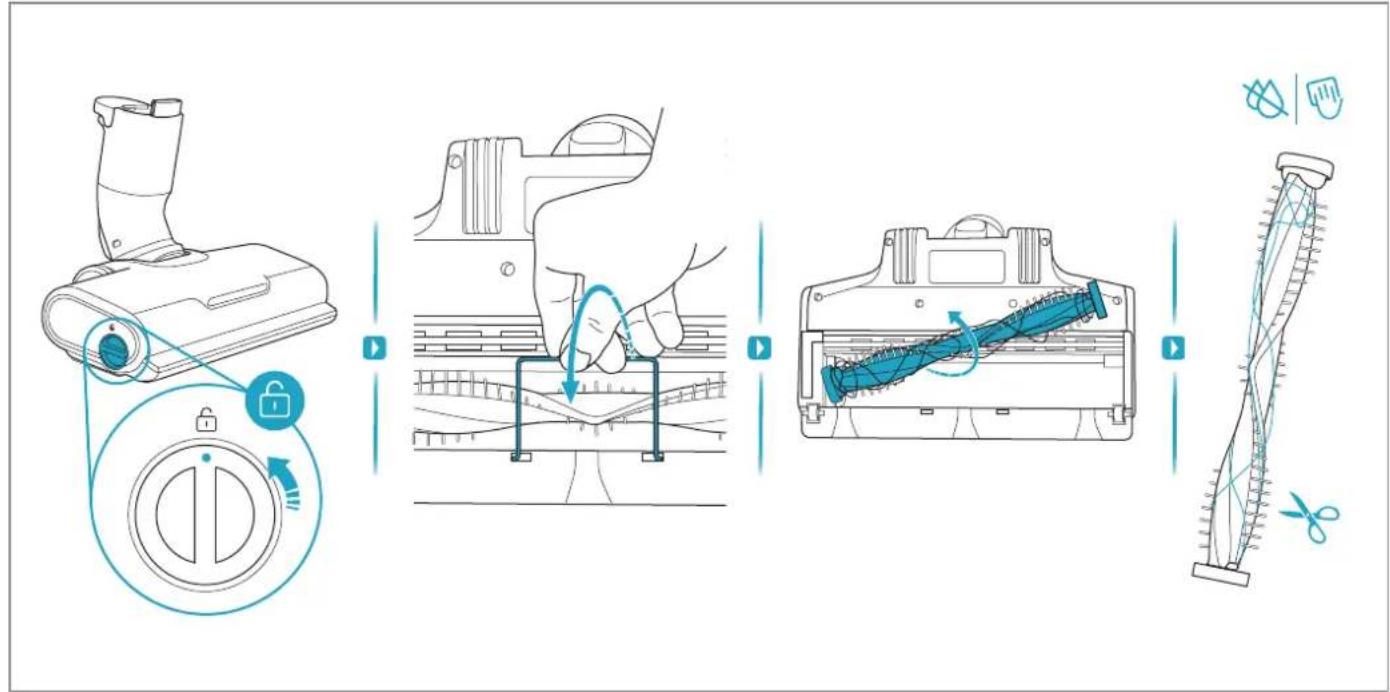
natural_image
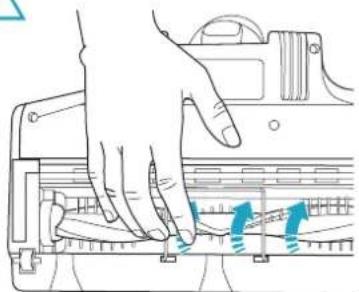
Line drawing of a hand using a tool to lift a component on a sofa (no text or symbols)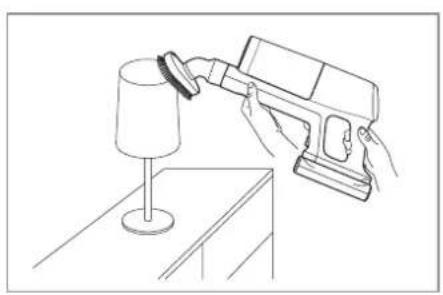
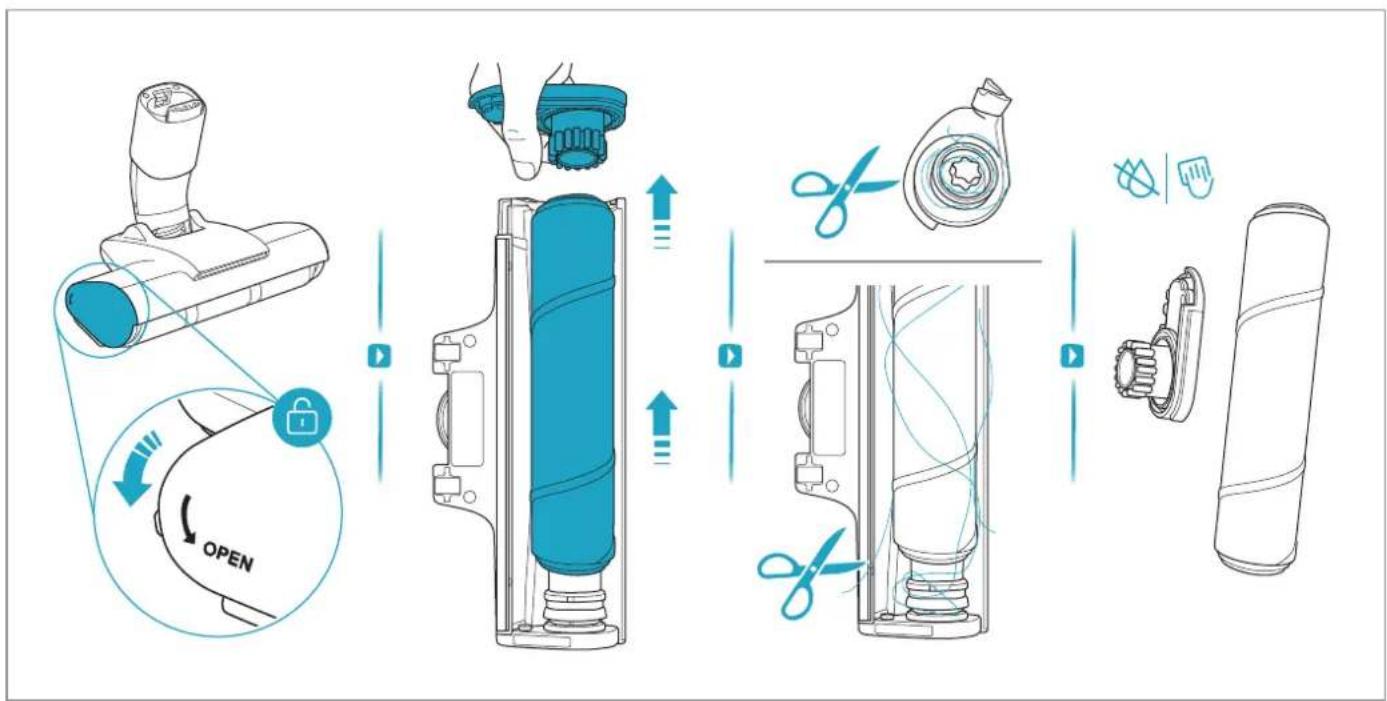
natural_image
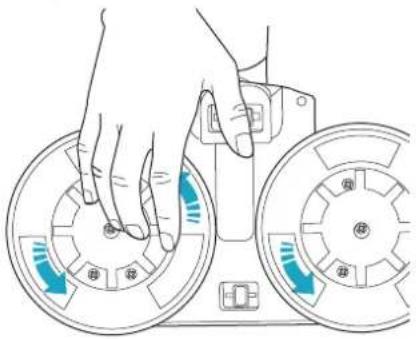
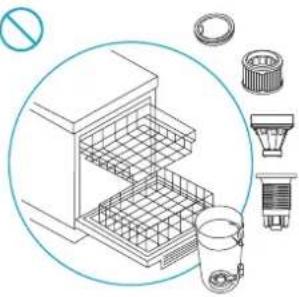
Line drawing of a hand using a tool to lift a glass on a table (no text or symbols)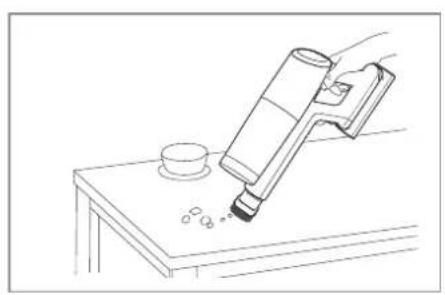
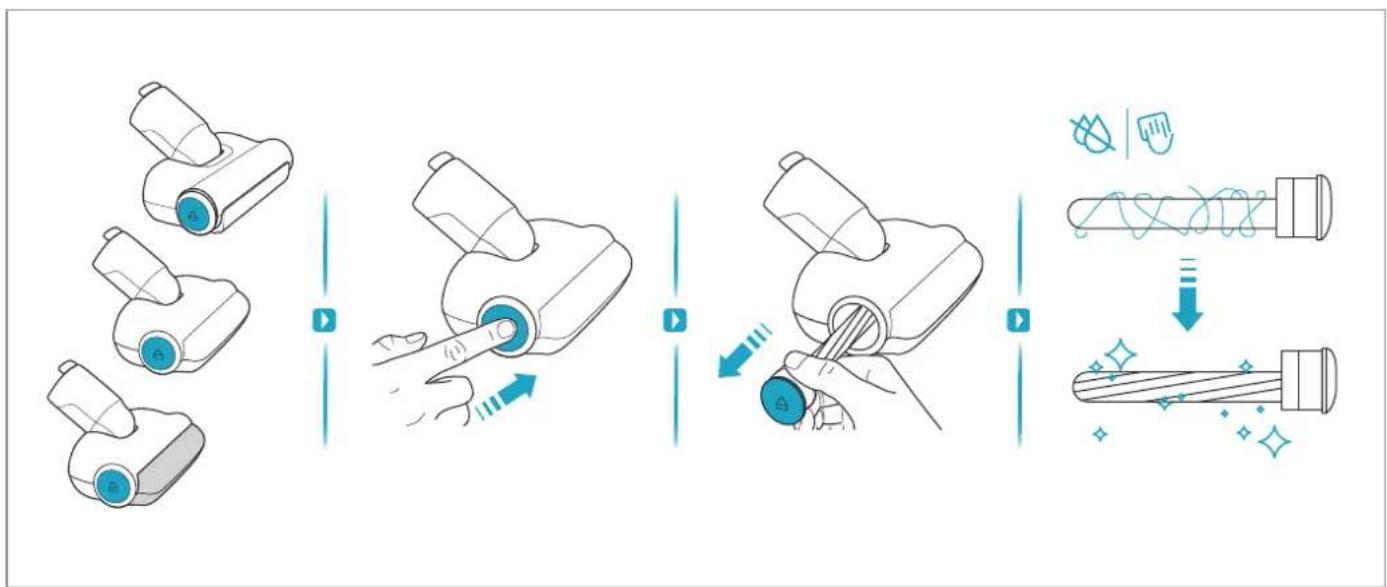
natural_image
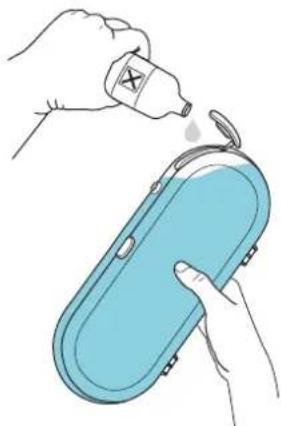
Line drawing of a hand pouring liquid from a cylindrical container onto a small table with a cup (no text or symbols)
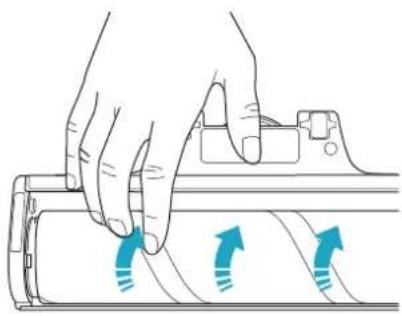
natural_image
Line drawing of a cat sitting on an armchair next to a vacuum cleaner (no text or symbols)

flowchart
graph LR
    A["Feeder with Max powder"] --> B["Add granular substance"]
    B --> C["Transfer to jar with lid"]
    C --> D["Close-up of jar with lid"]
    D --> E["Shipped into container with granular material"]
flowchart
graph TD
    A["Top View"] --> B["Top View: Top Cover, Top Cover with lid"]
    B --> C["Top View: Top Cover with lock, Top Cover with handle, Top Cover with handle"]
    C --> D["Top View: Top Cover with funnel, Top Cover with handle, Top Cover with handle"]
    D --> E["Top View: Top Cover with filter, Top Cover with handle, Top Cover with handle"]
    E --> F["Top View: Top Cover with fan, Top Cover with handle, Top Cover with handle"]
    F --> G["Top View: Top Cover with timer, Top Cover with handle, Top Cover with handle"]
    G --> H["Top View: Top Cover with 24h+ timer, 12M timer, 24h+ shopping cart, ESKW7"]
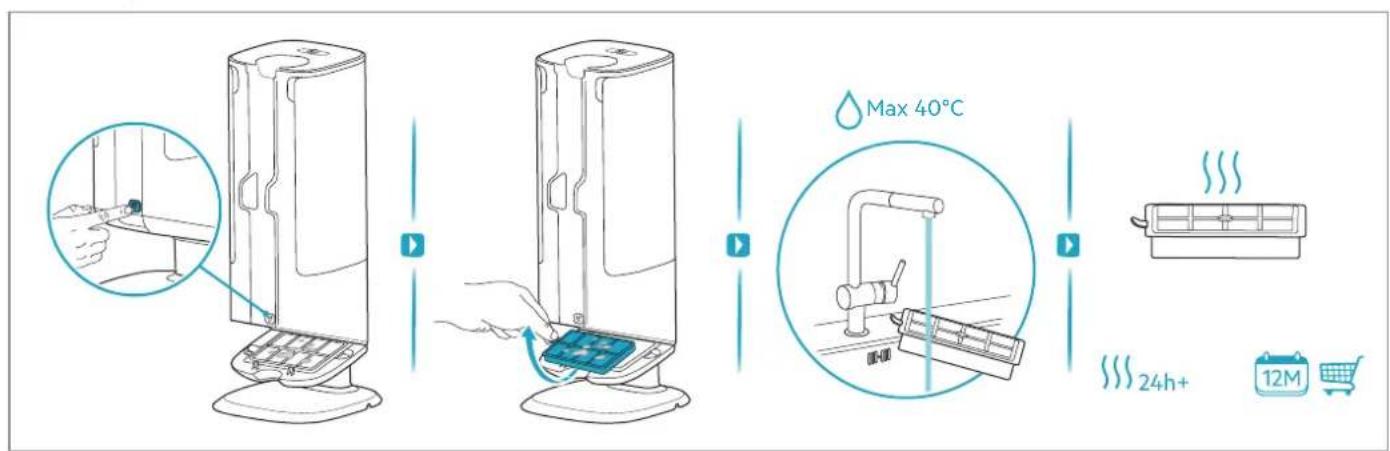
flowchart
graph TD
    A["Initial Washer"] --> B["Close-up of Washer"]
    B --> C["Close-up of Washer with a blue cap"]
    C --> D["Close-up of Washer with a blue cap and arrow indicating fastening"]
    D --> E["Close-up of Washer with a blue cap and arrow indicating fastening"]
    E --> F["Final Washer with a coiled spring and sparkles"]
 |  |  | ||
  |  | |||
 |  |  |  | |
 |  |  |  | |
 |  |  |  | |

www.aeg.com

ESKW7
900 923 814
Performance Kit
AZE155
900 923 388
PetPro+
AZE149
900 923 389
BedProPower+
AZE156
900 923 391
PowerPro
Hard Floor Nozzle
ZE194
900 923 815
Extra Battery
AKIT23
900 923 392
Home and Car Kit
AKIT22
900 923 360
Duster Kit

ZE177
900 923 744
PowerProMop+ Nozzle
AZE158
900 923 441
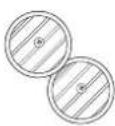
Standard Pads
GR206S
900 168 476
S-bag® Hygiene Anti-Allergy
for Emptying Station
GR203S FLD1
900 168 475
S-bag® Anti-Odour
for Emptying Station
*Accessories may vary by market.
900 923 782
Detergent
Troubleshooting
| Problem Cause Solution | ||
| The S-bag icon appears on the display and emptying function doesn't work after the main unit is inserted into emptying station, even when the Start button is pressed | The S-bag is full | Replace it with a new S-bag |
| The S-bag or the door of S-bag cabin is not in place | Ensure that the S-bag is properly positioned and that the door is closed properly. | |
| The station does not start emptying automatically when the cleaner is inserted | The station is in manual mode | Press and hold the Start/Pause button on the station until it starts blinking to switch between manual and auto mode. |
| The duration for which the cleaner was lifted was too short; it's likely unnecessary to empty it | If emptying is necessary, press the Start/Pause button on the station, or wait more than 15 seconds before returning the cleaner to the station | |
| The battery within the station appears to be unable to charge | The station gives priority to charging the battery on the cleaner | Wait until the battery on the cleaner is fully charged; afterward, the station will commence charging. |
| Exchange the batteries to prioritize the alternate one. | ||
| Stick unit cannot be charged on Empty station | Stick unit was not placed back to Empty station properly, female and male contact plate didn't touch with each other | Push the stick unit downward with some extra force, rotate the unit a little bit unit you see charging indication on HU display pops out |
| The mop is not sufficiently humid to effectively remove stains or dirt | Water dripping is insufficient to effectively remove stains or dirt | Use the spray function to directly apply water to the stain. Press and hold the speed button to activate the spray for maximum 5 seconds |
| No water is dripping from the wet nozzle | The water tank is empty | Add water in the water tank |
| The water inlet is obstructed by large articles | Examine the water inlet and ensure that only clean water is being loaded into the water tank | |
| There is air in the inner hose | Use the spray function at the beginning. Press and hold the speed button to activate the spray for maximum 5 seconds | |
| Water is leaking from the wet nozzle tank after it has been installed onto the nozzle | The water tank is not completely sealed | Ensure the inlet is properly sealed before reinstalling it onto the wet nozzle |
| Performance degradation | After multiple cycles of cleaning long hair, hair became tangled around the metal mesh inside the dust bin. | Remove the metal mesh and manually clear any hair tangled around it. |
| After prolonged use, hair and debris accumulated around the dust bin inlet, while the filters became clogged with fine dust. | Remove the hair/rubbish manually and clean or replace the filters as instructed. Use a new S-bag if it is close to full. | |
| Dust/hair inside dust bin cannot be thoroughly cleaned | The S-bag is full, or the dust bin is overloaded, with contents reaching or exceeding the maximum indicated level | Clean the dust bin more frequently and clean dustbin with the hose. Regular cleaning before the bin is full enhances the overall performance.If the S-bag is nearly full, replace it with a new one to maintain optimal functionality.Clean or replace the disaster filter (located below S-bag) to ensure effective cleaning. |
| The lower lid of dust bin failed to open or close properly. | Small metal chips got stuck around the magnet.The main unit had been lifted up from emptying station before emptying cycle finished. | Remove the metal chips around the magnet and clean that area thoroughly Ensure the main unit to be lifted up from emptying station after emptying cycle has finished. |
| Long hair is caught between the bottom lid and the skirt of the dust bin | Long hair is tangled around the metal mesh inside dust bin | Cut the stuck hair or remove tangled hair manually |
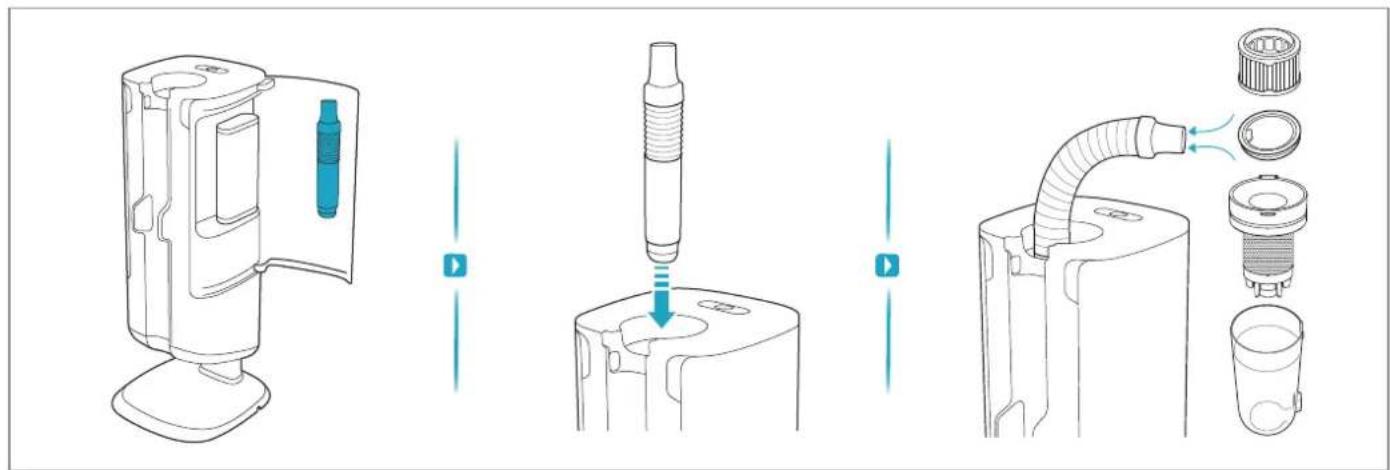
| The elastic hose in the emptying station disconnects from the suction port during vacuum cleaning | The hose was not properly inserted in the suction port. | Insert the hose firmly until it securely connects with the suction port. |
| Nozzle stops automatically (mainly on carpet) | Over current/temperature protection Was triggered (especially after running on carpet for some minutes) was triggered | 1. Rest for some minutes, allow nozzle motor to cool down2. Carpet is too thick or with too long hair, try lower down speed setting |
| Hard to detach skirt from metal mesh inside dust bin | Metal mesh and lower skirt part was locked firmly with snap hook to Achieve better performance | Pull out skirt a little bit, bent it sideways and then pull it out |
| The product stops or doesn't start | The battery is empty | Charge the cleaner |
| Water/Liquid has been sucked into the product | Stop use of product and take out filters and let it dry for 48h. Do not put the product in the charging stand. If the product is still not working after 48h contact authorized Electrolux service center. Note: Damage to the motor caused by water or liquids is not covered by the warranty. | |
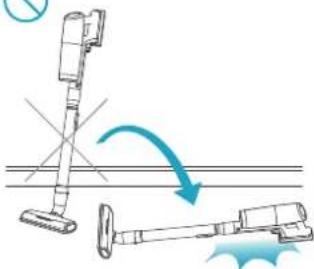
| Cleaner has fallen onto the floor unintentionally (Do note there is no self stand function for the product). | 1. to hold hand unit firmly while using the appliance2. to lay the unit on wall or any other holding shelf firmly, before releasing it from Hand3. to place the appliance back to charging stand always while it is not running. | |
| Loss of suction power | Nozzle does not pick up dust or dirt as aspected | Make sure to use a correct nozzle for each floor type. Some models may contain the PowerPro Multi-surface nozzle and/or the PowerPro Hard Floor nozzle. The PowerPro Hard Floor nozzle is not recommended for thick carpets, but it is ideal for hard floors. The PowerPro Multi-surface nozzle is suitable for all floors. |
| Nozzle brush or fluffy roll is blocked with hair and dirt. | Remove floor nozzle and clean brush roll according to instruction manual | |
| Tube and/or nozzle neck is blocked. | Check if any clogging happened in nozzle/tube | |
| Pre-filter and/or fine dust filter have been clogged or are dirty. Dust bin is full. | Empty dust bin and wash filters according to instruction manual. If need to replace and buy new filters at (www.electrolux-com) | |
| Brush roll doesn't rotate | Brush roll stops when user detaches the previous nozzle & changes to another nozzle while the vacuum cleaner is still on. This is a protection mode. | Turn off cleaner and re-start "ON" button to activate the brushroll spinning. |
| Product is not charging/No charging indication on hand unit display | Product is not placed correctly in the charging stand. | Make sure that the contact plates on the back side of vacuum cleaner are in contact with contact plates on charging stand. |
| Charger plug is not plugged in | Make sure the adaptor plug is connected to the charging stand socket and the charging adaptor is plugged into a wall socket. | |
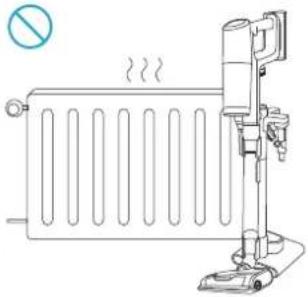
| Charging will not occur if room temperature is below 5°C or over 35°C to protect battery and electronics | Store/charge the product indoor and in room temperature between 5-35°C | |
| Hand unit display is dark and all LED are off after battery pack is fully charged | Take out cleaner from charging stand, press the on/off button or +/- speed button to view battery level indication. Put cleaner back in charging stand. | |
| Battery Pack temperature is too high (-45°C)/low (-5°C),charging not yet startedHand unit battery pack is not fully charged and will not start charging extra battery pack on charging stand until hand unit battery pack is fully charged (up to 2.5 hours) | Put appliance at ambient temperature condition, wait until temperature cool down/ raised upThis can only happen to products with possible to charge in the base plate of charging stand.Battery pack on hand unit will always start charging first and then charging will start for the battery pack in charging stand base and the LED indication should start to light up. | |
| No charging indication on charge stand | Battery pack not fully inserted | Take out battery pack and insert again |
| Battery Pack temperature is too high (~45°C)/low (~5°C), charging not yet started | Put appliance at ambient temperature condition, wait until temperature cool down/ raised up. | |
| Battery pack is broken, need to be replaced. | Contact Electrolux service center. If need to replace and buy new battery pack (www.electrolux.com) | |
| Wrong battery pack is being used for this product. | Make sure correct battery pack is being used. | |
| Clogging indication appear on hand unit display | Clogging indication that filters needs to be cleaned | Clean filters according to instruction manual. |
| Warning triangle appear on hand unit display | The product may be overheated in motor or battery pack | Let product rest and cool down |
| Nozzle or tube can be clogged | Check if any clogging happened in nozzle/tube | |
| Wet nozzle is wobbling/jump-ing on floor | Mopping pads are not attached in the center of rotation discs. | Re-attach the pads in the center of rotation discs. |
| Charging is taking more than longer than 4.5 hours | Room temperture is over 35°C | Charging time will be longer if temperature is high, which is normal, Store/charge product in a normal room temperature. |
| Headlights on floor nozzle do not work | Brush roll is jammed Remove brush roll and clean brush roll from hair and fibers. | |
ENVIRONMENTAL CONCERNS
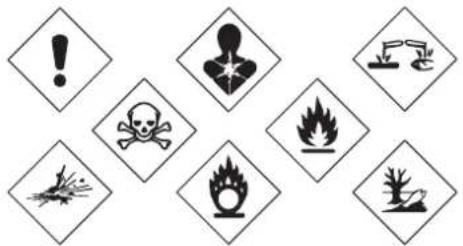
Recycle materials with the symbol 📋. Put the packaging in relevant containers to recycle it. Help protect the environment and human health by recycling waste of electrical and electronic appliances.
Do not dispose appliances marked with the symbol facility or contact your municipal office. ✉ with the household waste. Return the product to your local recycling
① For Switzerland:
Where should you take your old equipment?
Anywhere that sells new equipment or hand it in to official SENS collection points or official SENS recycling firms.
The list of official SENS collection points can be found at www.erecycling.chseconds
ELECTROLUX APPLIANCES AB
BUSINESS SECTOR EMA-EMEA (SEE)
ST GÖRANSGATAN 143
SE-105 45 STOCKHOLM SWEDEN
TEL: +46 (8) 738 60 00
FAX: +46 (8) 738 63 35
www.electrolux.com
ithalatci:
Electrolux Dayanıklı Tüketim
Mamulleri San. ve Tic. AŞ.
TR-34435 Taksim-Beyoğlu-İstanbul