UMK 10 E4 - Compressor ULTIMATE SPEED - Free user manual and instructions
Find the device manual for free UMK 10 E4 ULTIMATE SPEED in PDF.

| Product Type | Mini compressor for tires and inflatable items |
| Brand | Ultimate Speed |
| Model | UMK 10 E4 |
| Power Supply | 12 V (cigarette lighter socket), DC current |
| Maximum Pressure | 10.3 bar |
| Air Flow | Approx. 22 l/min |
| Maximum Continuous Operation | 60 minutes, then 15 minutes cool down |
| Integrated LED Light | Yes, separate switch |
| Pressure Gauge | Yes, uncalibrated (pressure indication) |
| Fuse | 10 A glass fuse in cigarette lighter plug |
| Noise Level (guaranteed) | 90 dB(A) |
| Supplied Accessories | 3 valve adapters (balloon, Dunlop, inflatable item) |
| Cable Length | Approx. 1.8 m (reasonable estimate) |
| Operating Temperature | 5 °C to 40 °C |
| Protection Rating | IP20 |
| Maintenance | Clean with a damp cloth, no solvents |
| Storage | In a dry place, out of reach of children |
| Warranty | 3 years |
| Intended Use | Inflation of car/bicycle tires, balloons, small inflatable items |
| Commercial Use | Not authorized, warranty void |
Frequently Asked Questions - UMK 10 E4 ULTIMATE SPEED
User questions about UMK 10 E4 ULTIMATE SPEED
0 question about this device. Answer the ones you know or ask your own.
Ask a new question about this device
Download the instructions for your Compressor in PDF format for free! Find your manual UMK 10 E4 - ULTIMATE SPEED and take your electronic device back in hand. On this page are published all the documents necessary for the use of your device. UMK 10 E4 by ULTIMATE SPEED.
USER MANUAL UMK 10 E4 ULTIMATE SPEED
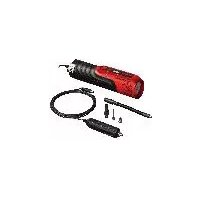
natural_image
Black portable air pressure relief device with attached cable and connector (no visible text or symbols)
MINI-COMPRESSOR UMK 10 E4 MINI-KOMPRESSOR UMK 10 E4 MINI COMPRESSEUR UMK 10 E4
GB IE NI CY MT
MINI-COMPRESSOR
Operation and Safety Notes Translation of the original instructions
FR BE CH
MINI COMPRESSEUR
Before reading, unfold the page containing the illustrations and familiarise yourself with all functions of the device.
DE AT CH
GB/IE/NI/CY/MT Operation and Safety Notes Page 5
natural_image
Close-up of a hand using a tool to lift a soccer ball (no text or symbols visible)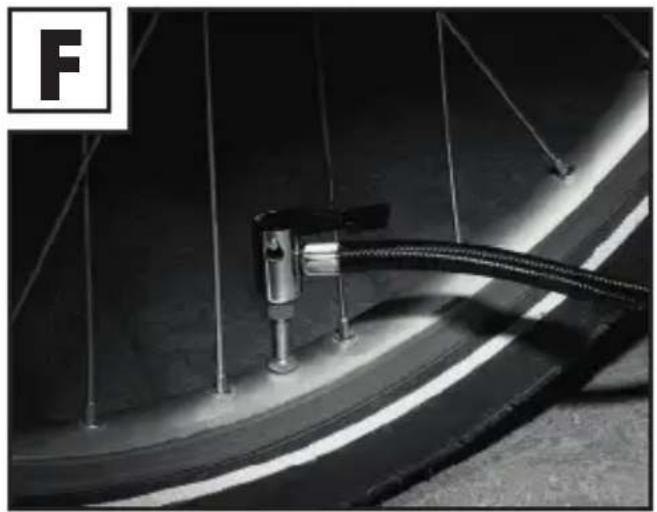
natural_image
Close-up of a bicycle tire mounted on a curved track, with visible wiring and suspension (no text or symbols)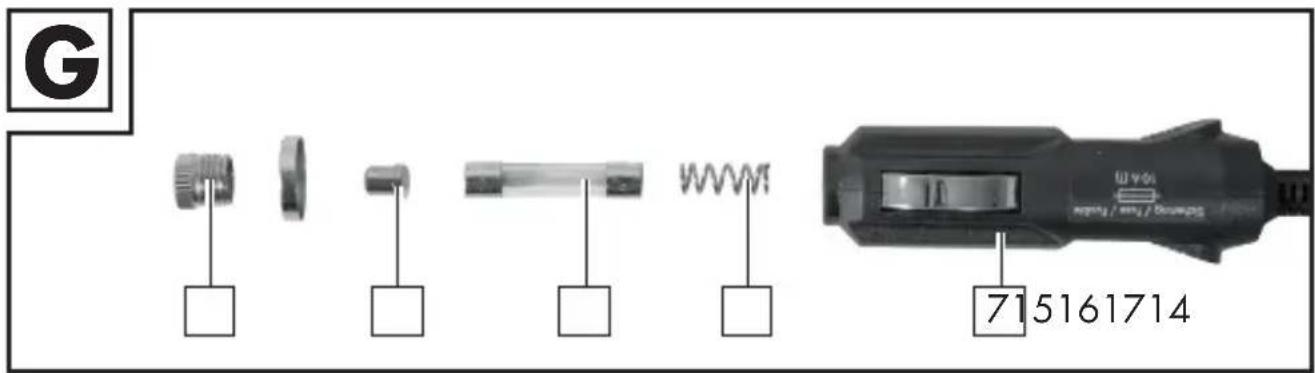
natural_image
Close-up of a black cylindrical device with internal components and a cable, no visible text or symbolsTable of pictograms used.... Page 5
Introduction Page 6
Intended use Page 7
Scope of delivery.... Page 7
Equipment Page 7
Technical Specifications Page 8
Safety instructions Page 9
Specific safety instructions....Page 13
Using the device.... Page 14
Using the Mini-Compressor Page 15
Replacing the fuse ...... Page 17
Switch on lighting....Page 18
Troubleshooting Page 18
Cleaning Page 18
Storage Page 18
Information about recycling and disposal...... Page 18
Original EC Declaration of Conformity....Page 19
Warranty and service information...... Page 21
Warranty conditions...... Page 21
Warranty period and statutory claims for defects...... Page 21
Extent of warranty....Page 22
Processing of warranty claims ...... Page 22
Service...... Page 23
| ● Table of pictograms used | |||
 | Read the operating instructions! |  | Use hearing protection! |
 | The device is only suitable for indoor operation. |  | Warning: Risk of electric shock! Danger to life! |
 | Observe warnings and safety instructions! |  | Do not expose the device to rain! |
 | The LED bulb is not suitable for domestic room lighting. |  | Don't throw away – recycle! |
 | Guaranteed sound power level of 90 decibels |   | Dispose of the device and packaging in an environmentally friendly manner! |
 | Appliance class III | IP20 | Protection class |
 | Warning: Compressor system can start without warning. |  | You are legally obliged to place devices marked as such in a collection which is separate from unsorted municipal waste. Disposal through household waste is prohibited. |
 | Direct current Attention! Hot |  | |
 | Please note |  | Packaging material made from corrugated paper |
 | Made from recycled material. | ||
Mini-Compressor UMK 10 E4
- Introduction


Congratulations! You have purchased one of our high-quality products. Please familiarise yourself with the product before using it
for the first time. To do this, please read through the following operating and safety instructions carefully.
KEEP OUT OF THE REACH OF CHILDREN!
- Intendeduse
The Mini-Compressor is designed to adjust the pressure in tyres (e.g. vehicle and bicycle tyres), and for the generation of pressure for balls and other small-scale inflatable articles. This Mini-Compressor is not designed for continuous operation to generate pressure for longer than 60 minutes at a time.
Keep these instructions in a safe place. Ensure you hand over all documentation when passing the product on to anyone else. Any use that differs to the intended use as stated above is prohibited and potentially dangerous. Damage or injury caused by misuse and disregarding the above warning is not covered by the warranty or any liability on the part of the manufacturer. The device is not intended for commercial use. Commercial use will void the warranty. The product must only be started up initially by people who have been trained to do so.

PLEASE NOTE: The pressure gauge is not trade-approved.
The LED bulb is not suitable for domestic room lighting.
- Scope of delivery
1 Compressor
1 set of operating instructions
Accessories:
3 valve adapters
Equipment

PLEASE NOTE: After unpacking the product, please check that all of package contents are present and that the Mini-Compressor is in perfect edition. Do not use the device if it is defective.
| 1 | Mini-Compressor |
| 2 | Pressure gauge with pressure display (not trade-approved) |
| 3 | LED light |
| 4 | Connecting valve |
| 5 | Clamp lever |
| 6 | Cable |
| 7 | Cigarette lighter plug |
| 8 | Compressed air hose |
| 9 | LED switch"I" means switched on“O" means switched off |
| 10 | On/Off switch for the compressor."I" means switched on“O" means switched off |
| 11 | Valve adapter for inflatable items |
| 12 | Valve adapter for balls (ball needle) |
| 13 | Dunlop valve for bicycle tyres |
| 14 | Spring |
| 15 | 10 A glass fuse |
| 16 | Contact pin |
| 17 | Fuse screw plug |
PLEASE NOTE: The use of the term 'product' or 'device' in the following text refers to the Mini-Compressor described in these operating instructions.
• Technical Specifications
| Model: UMK 10 E4 | |
| Operating temperature: 5 °C – 40 °C | |
| Speed of the compressor: max. 16500 min | -1 |
| Voltage: 12 V | --- |
| Max. voltage: 14.8 V | --- |
| Nominal input current: max. 10 A | |
| Maximum achievable pressure: 10.3 bar | |
| Continuous operation: max. 60 min* | |
| Air flow rate: max. 22 l/min | |
| Glass fuse in the 12 V motor vehicle cigarette lighter plug: | 10 A glass fuse |
| Guaranteed sound power level (LWA): 90 dB(A) | |
| Measured sound power level (LWA): 83.57 dB(A) | |
| Measuring uncertainty (KWA): 3 dB(A) | |
| Sound pressure level (LPA): 72.1 dB(A) | |
| Measuring uncertainty (KPA): 3 dB(A) |

PLEASE NOTE: The noise emission values were determined in accordance with ISO 3744:1995.
* Continuous operation: Do not operate the integrated compressor unit for more than 60 minutes without interruption. Following this, there must be a rest period of 15 minutes.
Changes to technical and visual aspects of the product may be made as part of future developments without notice. Accordingly, no warranty is offered for the physical dimensions, information and specifications in these operating instructions. The operating instructions cannot therefore be used as the basis for asserting a legal claim.
- Safety instructions

PLEASE READ THROUGH THE OPERATING INSTRUCTIONS CAREFULLY BEFORE USE. THESE FORM PART OF THE PRODUCT AND MUST BE AVAILABLE AT ALL TIMES! KEEP OUT OF THE REACH OF CHILDREN!
This section covers the basic safety regulations applicable when working with the device.
Personal safety:
■ This device may be used by children aged 16 years and older, and by persons with reduced physical,
sensory or mental capacities, or a lack of experience and knowledge, if they are supervised or have been instructed in how to use the device safely and understand the dangers that may arise when using it. Do not allow children to play with the device.
■ Children must be supervised to ensure that they do not play with the device.
- Keep the device away from people – especially children – and household pets.
■ Within the working area, the user is responsible for any damage or injury to third parties that was caused by the use of the device.
■ During operation, never point the device at yourself or other individuals, and keep the device well way from your ears and eyes. There is a risk of injury!
- Do not leave the device unsupervised while running. Comply with the filling instructions for the inflatable item. The inflatable item could burst and cause serious injuries.
- Keep the device in a dry location and out of the reach of children.

This helps prevent device damage and possible personal injuries that could result from it:
Risk of electric shock!
■ Only connect the device to a 12 V on-board voltage. Connecting to a 24 V voltage can damage the device.
- When connecting the device make sure that the polarity of the vehicle cigarette lighter plug matches the polarity of the socket for the electrical system. The socket for the electrical system must have an internal positive terminal, i.e. the positive terminal
of a vehicle battery must not be connected to the chassis of the vehicle.
■ Before connecting the device, check that the socket for the electrical system is sufficiently fused. This fuse protection must not be bypassed or altered, under any circumstances.
■ Only use the connection cable delivered with the product.
■ You must not open or repair the device housing. In this case safety is no longer assured and the warranty is no longer valid.
■ The device is only suitable for use indoors.
Working with the device:
■ Before setup or first use, check the device for any damage and do not use unless in perfect working order.
- Do not expose the device to rain or wet weather. Do not let the device come into contact with water. Do not immerse the device in water. There is a risk of electric shock!
- Keep all openings of the device free during operation. Do not block the openings with your hands or fingers, and do not cover the device. There is a risk of overheating!
In hot weather, do not leave the device in the car. This could permanently damage the device.
■ The device will become warm during use. There is a risk of burn injuries from touching the hot surfaces.
■ Take care to ensure that sand, dust and other small foreign objects cannot enter the air inlet or air outlet openings.
■ Do not operate the device near to flammable liquids or gases. Do not use the device to draw in
hot fumes. Failure to comply risks causing a fire or explosion!
■ Switch the device off and disconnect the device from the voltage supply:
-if you are not using the device;
-if you are leaving the device unsupervised;
-if you are doing cleaning work;
-if the connection cable is damaged;
-if foreign objects have got into the device or you notice unusual noises.
■ Only use the accessories supplied and recommended by the manufacturer.
- Do not disassemble or modify the device. This device must only be repaired by a maintenance technician.
- Do not use the device in areas with a risk of explosion, e.g. near flammable liquids, gases or powders.
■ Do not expose the device to any source of heat.
■ Do not store in places where the temperature can exceed 60 °C.
■ Only use in an ambient temperature between 5 °C and 40 °C.
■ Do not use the device while driving the vehicle.
■ Only connect the connection cable to the vehicle cigarette lighter.
- Observe your vehicle manufacturer's instructions for the use of the cigarette lighter.
■ The connection cable of this device cannot be replaced. Dispose of the device if the cable is damaged.

This helps prevent device damage and possible personal injuries that could result from it:

CAUTION! How to avoid accidents and injuries
resulting from electric shock:
Electrical safety:
- Do not use the device if the switch cannot be switched on and off. Arrange for damaged switches to be replaced.
- Do not carry the device by the cable. Do not unplug the plug from the socket by pulling on the cable. Protect the cable from heat, oil and sharp edges.
■ If the cable is damaged, unplug the plug immediately from the socket.
- Specific safety instructions
■ Protect the Mini-Compressor from moisture and high temperatures, including fires.
■ Store the device in a dry place and protect the device from moisture and corrosion.
■ Do not drop the device while it is being used.
■ The device is designed for use with car tyres. It is not designed for use with large tyres like tractor or truck tyres.
■ A slightly higher operating temperature is absolutely normal and not a malfunction.
■ When used for a long period of time, the compressed air hose and device may become noticeably warm. There is a risk of burn injuries!
PLEASE NOTE: The pressure gauge with pressure display of the device is not trade-approved. After pumping up inflatable items where the wrong pressure could be dangerous (e.g. car tyres after a breakdown), always check the pressure at a service point
with a trade-approved device. Check the pressure of the inflatable item there.
■ During inflation, high temperatures can be produced at the air outlet. There is a risk of burn injuries!
Fire hazard!
- Do not use the device near hot surfaces.
- Do not position the device in areas which are exposed to direct sunlight. Otherwise it could overheat and be damaged beyond repair.
- Do not use the device in a vehicle which is parked in the sun.
■ Never leave the device unattended when it is being used. - Do not cover the ventilation slots of the fan when the device is switched on.
■ Due to the high transfer resistances, using the cable with 12 V motor vehicle cigarette lighter plug can lead to the plug connection heating up.
Notes on disconnecting from the power supply!
The On/Off switch of this device does not completely disconnect the device from the electrical system. When the motor vehicle cigarette lighter plug is connected, the device takes power. In order to disconnect the device completely from the car's electrical system, the 12 V motor vehicle cigarette lighter plug must be unplugged from the socket of the electrical system.
- Using the device
Take all parts from the packaging and check whether the device or parts show any damage. If this is the case, do not use the device. Contact the manufacturer via the indicated service address. Remove all protective films and other transport packaging. Check that the delivery is complete.
For the device to operate properly, the socket for the electrical system must have a voltage between 10.5 V and 14.8 V. Before connecting the device, check whether the voltage supply provides sufficient power for operation.
• Using the Mini-Compressor
-
Place the product on a level and non-flammable surface.
■ Do not cover the ventilation openings. -
Do not operate the device in a dusty environment. This is a fire risk and the device could be damaged.
A gap of at least 50 cm must be maintained behind the ventilation slots of the compressor.
■ Make sure that the product is switched off.
■ Connect the cigarette lighter pluto the 12 V socket of the cigarette lighter.
PLEASE NOTE: You can use the connecting valve ^4 directly or together with the valve adapters 11, 12, 13 supplied.
Connecting the compressed air hose without a valve adapter.
■ Undo the connecting value by pushing the clamp lever 5 upwards (see Fig. C for position).
Now push the connecting valve over the valve of the inflatable item (remove valve cap on the inflatable item first if necessary).
■ Then push the clamp le5eback down (see Fig. D for position) while holding the valve firmly.
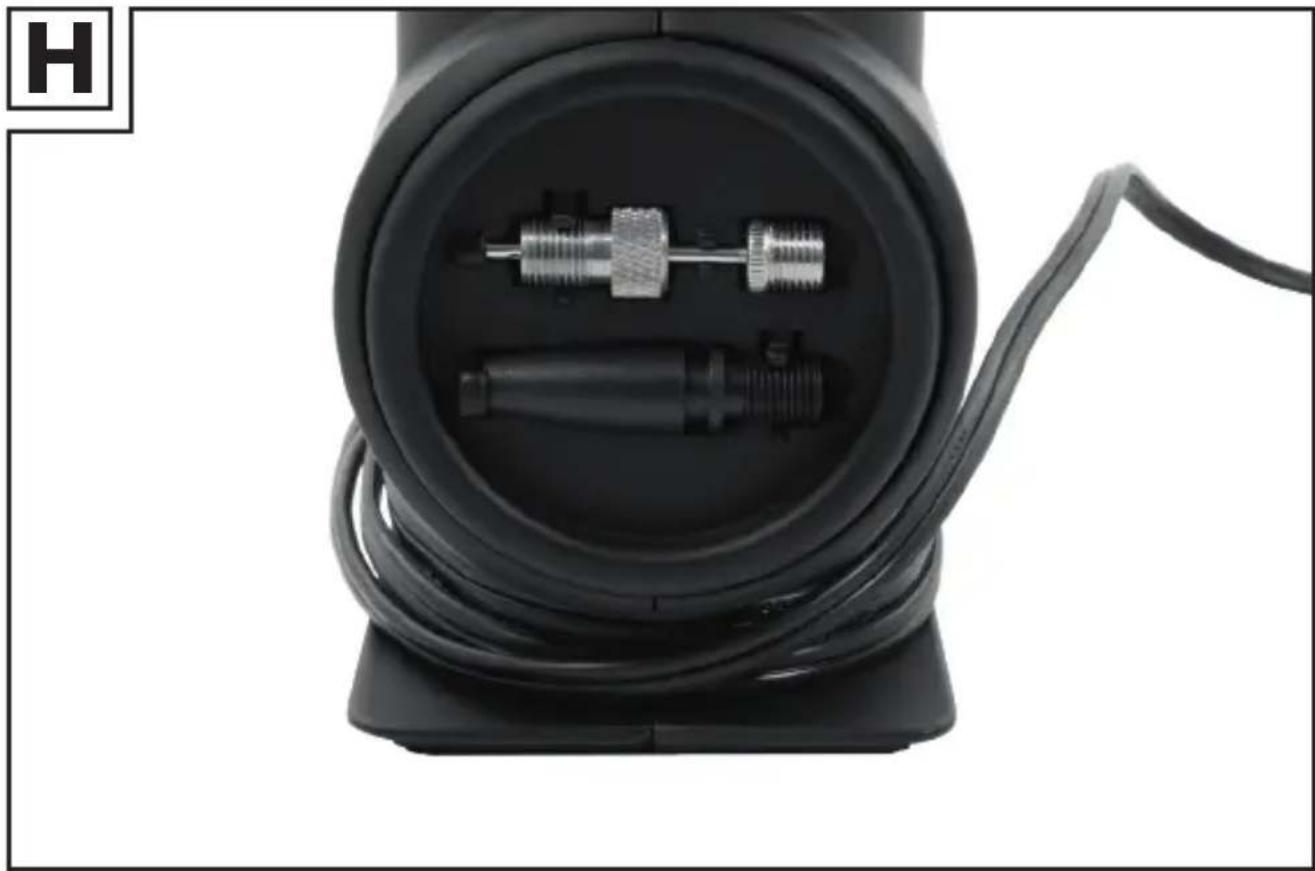
Connecting the compressed air hose with a valve adapter
The valve adapters 12 and 13 are located on the side of the device. See Fig. H.
■ First fit the required valve adapter 12 or 13 onto the connecting valve 4.
■ Push the clamp leverdownwards to fix the valve adapter in place (Fig. D).
■ Connect the valve adapter 12 or 13 to the connecting valve on the inflatable item (remove valve cap on the inflatable item first if necessary).
Removing the compressed air hose
■ Connecting without the valve adapters 12 or 13: Move the clamp lever 5 to an open position (Fig. C) and pull the connecting valve 4 off the inflatable item.
■ Connecting with the valve adapters 12 or 13: First undo the valve adapter from the connecting valve of the inflatable item. Move the clamp lever 5 to
an open position and pull the connecting valve 4 off the valve adapter (refit the valve cap onto the inflatable item if necessary).
PLEASE NOTE: When disconnecting the connecting valve 4, air can escape from the valve on the inflatable item. Ensure that you remove the connecting valve 4 as quickly as possible.
Pumping up the inflatable item
PLEASE NOTE: When the Mini-Compressor is used for a long period of time, the vehicle engine must be kept running in order to prevent the vehicle battery from being drained meaning that the vehicle will no longer start.
■ Connect the connecting value of the Mini-Compressor 1 to the inflatable item which you want to inflate. To do so, please proceed as described in the previous section.
- Switch the integrated compressor unit on by pressing the On/Off switch for the compressor 10.
■ The compressor will start and pump up the inflatable item.
- You can switch off the compressor at any time by pressing the On/Off switch for the compressor 10 again.
- Disconnect the inflatable item from the connecting valves as described in the previous section.
ATTENTION: During operation, the compressed air connections and the hose will become hot. Make sure that you do not come into contact with it during operation to avoid suffering burns. At the end of the job, wait for at least 10 minutes before you touch the compressed air hose.
PLEASE NOTE: The pressure gauge with pressure display 2 of the Mini-Compressor 1 is not trade-approved. After pumping up inflatable items where the wrong pressure could be dangerous (e.g. bicycle tyres), always check the pressure at a service point with a trade-approved device. Check the pressure of the inflatable item there.
Tips for use
The device is not intended for continuous operation. The device was designed to create air pressure – not an air flow. Please do not use the device for more than 60 minutes at a time, to avoid overheating and damage to the device. Then let the device cool down for at least 15 minutes. We recommend first filling a large-volume item with air, in order to then generate the required pressure with the device.
Checking the air pressure with the Mini-Compressor

PLEASE NOTE: The pressure gauge with pressure display ^2 of the
Mini-Compressor 1 is not trade-approved.
■ Connect the inflatable item to the connecting valve of the Mini-Compressor 1, whose pressure you want to check. To do so, please proceed as described in the section "Connecting the compressed air hose with a valve adapter" or "Connecting the compressed air hose without a valve adapter".
The pressure gauge with pressure display shows the pressure of the inflatable item connected.
■ Disconnect the inflatable item from the connecting value of the Mini-Compressor 1. To do so, please proceed as described in the section "Removing the compressed air hose".

PLEASE NOTE: When disconnecting the connecting valve 4, air can come from the valve on the inflatable item. Ensure that you remove the connecting valve 4 as quickly as possible.
- Replacing the fuse

Never use a fuse with a higher release current strength. There is a risk of fire!

ATTENTION: You must not use a fuse with a different release current length compared with the pre-installed fuse! Before switching the device back ascertain why the fuse tripped.
In order to replace the 10 A glass fuse 15 in the cigarette lighter plug 7 , proceed as follows:
■ Unscrew the fuse screw plug The fuse is located below this plug. See Fig. G.
When doing this, make sure you do not lose the loosely inserted contact pin 16 and spring 14.
■ Remove the defective 10 A glass fuse
- Put the spring(if it has been removed) back into the 12 V cigarette lighter plug 7. Then insert a new 10 A glass fuse of equal value.
Now insert the contact 16 into the fuse screw plug 17 and screw the fuse screw plug 17 back onto the 12 V cigarette lighter plug 7.
- Switch on lighting
Light mode
■ To switch on the LED light press the LED switch 9.
CAUTION! Do not look directly at the LED light 3 as this can damage your eyes.
- Troubleshooting
● = problem
● = cause
○ = remedy
No reaction when pressing the On/Off switch ^10 and the LED switch ^9 .
- There is no power supply to the device.
○ Make sure that the device is properly connected to the cigarette lighter socket of the vehicle.
- Cleaning
! ATTENTION: The device must not come into contact with water or be placed in water. There is a risk of injury due to electric shock if moisture enters the device.
- Do not use cleaners or solvents. These could damage the device beyond repair.
- Keep the housing and device accessories clean.
■ Use a damp cloth or a soft brush to clean the device and the accessories.
- Storage
- Keep the device in a dry location and out of the reach of children.
To avoid damage, take care to ensure that the compressed air hose 8 does not become kinked.
● Information about recycling and disposal


DO NOT DISPOSE OF ELECTRICAL TOOLS IN HOUSEHOLD WASTE! DON'T THROW AWAY – RECYCLE!
According to European Directive 2012/19/EU, used electrical devices must be collected separately for environmentally compatible recycling or recovery.
The symbol of the crossed out dustbin means that this device must not be disposed of in household waste at the end of its service life. The device must be handed in at established collection points, recycling centres or waste management depots. The disposal of defective devices which you have sent in will be carried out free of charge. In addition, distributors of electrical and electronic equipment as well as food distributors are obliged to accept returned waste. Lidl provides you with return options directly in its branches and shops. Return and disposal is free of charge for you. When buying a new device you have the right to return an equivalent old device at no charge. In addition you have the option, regardless of whether you are buying a new device, to hand in (up to three) old devices at no charge, as long as the device is no larger than 25 cm in any dimension. Before returning the device please delete all personal information. Before returning, please remove batteries or rechargeable battery packs which are not enclosed by the old device, as well as bulbs, which can be removed without destroying the product and take these to a separate collection point.
Batteries containing harmful substances are labelled with the adjacent symbol, which indicates the prohibition on disposal in household waste.
The abbreviations for the relevant heavy metals are:
Cd = cadmium, Hg = mercury, Pb = lead.
Take used batteries to a waste management company in your city or community or return them to your dealer. This satisfies your legal obligations while also making an important contribution to protecting the environment.
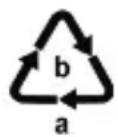
Please note the marking on the different packaging materials and separate them as necessary. The packaging materials are marked with abbreviations (a) and digits (b) with the following definitions:
1–7: Plastics, 20–22: Paper and cardboard, 80–98: Composite materials.
• Original EC Declaration of Conformity
We,
C. M. C. GmbH Holding
Responsible for documentation:
Joachim Bettinger
Katharina-Loth-Str. 15
66386 St. Ingbert
Germany
hereby take sole responsibility for declaring that the product
Mini-Compressor
IAN: 482992_2501
Item no.: 2863
Year of manufacture: 2025/41
Model: UMK 10 E4
meets the basic safety requirements as specified in the European Directives
Electromagnetic Compatibility:
(2014/30/EU)
RoHS Directive:
(2011/65/EU)
Machinery Directive:
(2006/42/EC)
Outdoor directive:
(2000/14/EC)
Guaranteed sound power level LWA: 90 dB(A)
Measured sound power level LWA: 83.57 dB(A)
and the amendments to these Directives.
The object of the declaration described above meets the requirements of Directive 2011/65/EU of the European Parliament and of the Council of 8 June 2011 on the restriction of the use of certain hazardous substances in electrical and electronic equipment.
This conformity assessment is based on the following harmonised standards:
EN 50498:2010
EN 60204-1:2018
EN 62471:2008
EN 60335-1:2012+A11:2014+A13:2017+A1:2019+A14:2019+A2:
2019+A15:2021
EN 1012-1:2010
St. Ingbert, 01 December 2024
C.M.C. GmbH Holding Katharina-Loth-Straße 15 66386 St.Ingbert Tel. +49 6894 99897-50 Fax +49 6894 99897-29 i, A. J.
Joachim Bettinger – Quality Assurance –
- Warranty and service information
Warranty from C. M. C. GmbH Holding
Dear Customer,
The warranty for this equipment is 3 years from the date of purchase. In the event of product defects, you have legal rights against the retailer of this product. Your statutory rights are not affected in any way by our warranty conditions, which are described below.
- Warranty conditions
The warranty period begins on the date of purchase. Please retain the original sales receipt. This document is required as your proof of purchase.
Should this product show any defect in materials or manufacture within 3 years from the date of purchase, we will repair or replace it – at our discretion – free of charge. This warranty service requires that you retain proof of purchase (sales receipt) for the defective device for the three year period and that you briefly explain in writing what the fault entails and when it occurred.
If the defect is covered by our warranty, we will repair and return your product or send you a replacement. The original warranty period is not extended when a device is repair or replaced.
- Warranty period and statutory claims for defects
The warranty period is not extended by the guarantee. This also applies to replaced and repaired parts. Any damages or defects detected at the time of purchase must be reported immediately after unpacking. Any incidental repairs after the warranty period are subject to a fee.
• Extent of warranty
This device has been manufactured according to strict quality guidelines and carefully inspected before delivery.
The warranty applies to material and manufacturing defects only. This warranty does not extend to product parts, which are subject to normal wear and tear and can thus be regarded as consumable parts, or for damages to fragile parts, e.g. switches or parts made from glass.
This warranty is voided if the product becomes damaged or is improperly used or maintained. For proper use of the product, all of the instructions given in the operating instructions must be followed precisely. If the operating instructions advise you or warn you against certain uses or actions, these must be avoided in all circumstances.
The product is for consumer use only and is not intended for commercial or trade use. The warranty becomes void in the event of misuse and improper use, use of force, and any work on the device that has not been carried out by our authorised service branch.
- Processing of warranty claims
To ensure prompt processing of your claim, please follow the instructions given below.
Please retain proof of purchase and the article number (e.g. IAN) for all inquiries. The product number can be found on the type plate, an engraving, the cover page of your instructions (bottom left), or the sticker on the back or underside of the device.
In the event of malfunctions or other defects, please first contact our service department below by phone or email. If your product is found to be defective, you can then send your product with proof of purchase (till receipt) and a statement describing what the fault involves and when it occurred free of charge to the service address given.

PLEASE NOTE: You can download this handbook and many more, as well as product videos and software at www.lidl-service.com.
With this QR code you can gain immediate access to the Lidl Service page (www.lidl-service.com) and you can open your operating instructions by entering the article number (IAN) 482992_2501.
- Service
How to contact us:
GB, IE, NI, CY, MT
Name: C. M. C. GmbH Holding Website: www.cmc-creative.de E-mail: service.gb@cmc-creative.de Phone: 0-808-189-0652 Registered office: Germany
IAN 482992\_2501
Please note that the following address is not a service address. Please first contact the service point given above.
Address:
C. M. C. GmbH Holding
Katharina-Loth-Str. 15
66386 St. Ingbert
Germany
Ordering spare parts:
● = Problem
= Ursache
○ = Behebung
E-Mail: service.de@cmc-creative.de service.at@cmc-creative.de service.ch@cmc-creative.de
Telefon: +49 (0) 6894/ 9989750
natural_image
Three black-and-white icons representing waste sorting, recycling, and recycling (no text or symbols)NE JETEZ PAS LES OUTILS ÉLECTRONIQUES AVEC LES ORDURES MÉNAGÈRES ! RÉCUPÉRER LES MATIÈRES PREMIÈRES PLUTÔT QUE D'ÉLIMINER LES DÉCHETS !
Uitrusting....Pagina 67
Technische gegevens....Pagina 68
Veiligheidsvoorschriften....Pagina 69
natural_image
Three black-and-white icons representing waste sorting, recycling, and recycling (no text or symbols)URZĄDZEŃ ELEKTRYCZNYCH NIE WOLNO WYRZUCAĆ WRAZ Z INNYMI ODPADAMI! SUROWCE WTÓRNE NALEŻY ODZYSKIWAĆ, A NIE UTYLIZOWAĆ!
natural_image
Three black-and-white icons representing waste sorting, recycling, and recycling (no text or symbols)EL-REDSKABER MÅ IKKE SMIDES UD SAMMEN MED ALMINDELIGT HUSHOLDNINGSAFFALD! GENVINDING AF RÅSTOFFER I STEDET FOR BORTSKAFFELSE AF AFFALD!
natural_image
Three black-and-white icons representing waste sorting, recycling, and recycling (no text or symbols)NON GETTARE GLI UTENSILI ELETTRICI TRA I RIFIUTI DOMESTICI! RECUPERO DELLE MATERIE PRIME ANZICHÉ SMALTIMENTO DEI RIFIUTI!
natural_image
Three black-and-white icons representing waste sorting, recycling, and recycling (no text or symbols)ELEKTROMOS SZERSZÁMOKAT NE DOBJON A HÁZTARTÁSI HULLADÉKBA! NYERSANYAGOK VISSZANYERÉSE A HULLADÉKOK ÁRTALMATLANÍTÁSA HELYETT!
Cd = kadmium, Hg = higany, Pb = ólom.