PLW A6 - Measuring equipment PARKSIDE - Free user manual and instructions
Find the device manual for free PLW A6 PARKSIDE in PDF.

User questions about PLW A6 PARKSIDE
0 question about this device. Answer the ones you know or ask your own.
Ask a new question about this device
Download the instructions for your Measuring equipment in PDF format for free! Find your manual PLW A6 - PARKSIDE and take your electronic device back in hand. On this page are published all the documents necessary for the use of your device. PLW A6 by PARKSIDE.
USER MANUAL PLW A6 PARKSIDE
natural_image
Black-and-white photo of a Parkside camera mounted on a tripod, no visible text or symbols on the device itself.LASER-WASSERWAAGE/LASER SPIRIT LEVEL/NIVEAU À BULLE LASER PLW A6
DE AT CH
LASER-WASSERWAAGE
Operation and safety notes
NL BE
LASER WATERPAS
GB/IE Operation and safety notes Page 24
natural_image
Completely black image with no visible content or text.

Sicherheitshinweise
List of pictograms used ...... Page 25
Introduction......Page 26
Proper use......Page 27
Description of parts ...... Page 27
Includes......Page 28
Technical information......Page 28
General safety instructions ...... Page 28
Warning! Risk of injury from laser beams!......Page 30
Safety instructions for batteries/rechargeable batteries ...... Page 31
Preparing for first use......Page 33
Inserting/replacing batteries......Page 33
Setting up the product......Page 33
Operation......Page 34
Use with the tripod......Page 34
Use without a tripod......Page 35
Maintenance, cleaning and care ...... Page 35
Disposal Page 36
Warranty Page 37
Warranty claim procedure......Page 38
Service......Page 39
| List of pictograms used | |
 | Read the instructions! |
 | Observe the warnings and safety instructions! |
 | Incl. Batteries |
 | Direct current/voltage |
 ON/OFF ON/OFF | Illumination ON/OFF |
 | Laser beam ON/OFF |
 | Illumination indicator (LED, cannot be replaced.) |
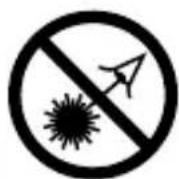
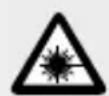
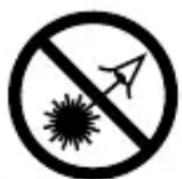
 | Protect yourself from laser radiation! |
 | Never look into the laser beam! |
 | Safety informationInstructions for use |
  | Keep out of reach of children |
 | Do not dispose of in fire |
 | Do not insert incorrectly |
 | Do not deform/damage |
 | Do not open/dismantle |
 | Do not mix different types or brands |
 | Do not mix new and used |
 | Do not charge |
 | Keep away from water and excessive moisture |
 | Do not short circuit |
 | Insert correctly |
 | CE mark indicates conformity with relevant EU directives applicable for this product. |
Laser spirit level
- Introduction
We congratulate you on the purchase of your new product. You have chosen a high quality product. The instructions for use are part of the product. They contain important information concerning safety, use and disposal. Before using the product, please familiarise yourself with all of the safety information and instructions for use. Only use the
product as described and for the specified applications. If you pass the product on to anyone else, please ensure that you also pass on all the documentation with it.
- Proper use
The product level is a measuring device and is intended for use in aligning objects horizontally and vertically, e.g. pictures or furniture. Measurements are performed using the laser beam and the spirit levels. The product is intended for use indoors at normal room temperatures only. The product is not intended for commercial use.
• Description of parts
1 Bubble level
2 Batterycompartment
2a Battery compartment cover
3 Tripod with ball and socket head
3a Threaded screw
4 Clamping screw
5 Bubble level
6 Laser beam apertures
7 Laser beam On/Off switch
8 Illumination On/Off switch
9 Positions of magnets
10 Threaded hole
11 Switch for selecting laser form (cross-hatch
"CROSS"/line "LINE")
Includes
1 x Laser spirit level
1 x Tripod
2 x Batteries 1.5V=, AAA/LR03
1 x Instructions for use
• Technical information
Laser class: 2
Accuracy: +/- 1 mm/m
Power supply: 2 x battery 1.5V AAA/LR03
Altitude: up to 2000m
Ambient temperature: -5^-40^
Humidity up to 80%
Working area: up to 2m
Max. height of
laser projection
(including tripod): 31.5cm

natural_image
Completely black image with no visible content or text.
General safety instructions
KEEP ALL THE SAFETY ADVICE AND INSTRUCTIONS IN A SAFE PLACE FOR FUTURE REFERENCE!

Always keep children away from the packaging material. This is not a toy.
This product can be used by children aged from 8 years and above and persons with reduced physical, sensory or mental capabilities or lack of experience and knowledge if they have been given supervision or instruction concerning use of the product in a safe way and understand the hazards involved. Children shall not play with the product. Cleaning and user maintenance shall not be made by children without supervision.
CAUTION! RISK OF INJURY! Please do not use this product if you find that it is damaged in any way.
- Check whether all of the parts are correctly fitted. If the product is not correctly assembled there is a danger of injury.
- Do not expose the product to: - extreme temperatures, - strong vibrations, - high mechanical loads, - direct solar radiation, - moisture. Failure to observe this advice may result in damage to the product.
■ Remove the batteries if the product breaks down or is defective. Otherwise there is the danger that the laser may be inadvertently switched on. This could lead to permanent eye damage.
WARNING! Never open the product housing. This could result in personal injury or damage to the product. Always have any repairs carried out at the service centre or by an electrical equipment repair specialist.
- Do not use the product in places where there is a danger of fire or explosion, for example near inflammable liquids or gases.
■ Any adjustment to increase the power of the laser is not permitted.
If a bubble level is damaged, avoid contact of any kind with the fluid contained in the bubble. However, should contact occur it is essential that the following advice is observed. First aid measures on:
SKIN CONTACT: Clean the affected area immediately for at least 15 minutes with plenty of soap and water. Contact a doctor if you suffer lasting skin irritation.
EYE CONTACT: Flush the affected eye immediately for at least 15 minutes with plenty of water. When doing this, hold the eye open with a thumb and index finger. Contact a doctor immediately.
INHALATION: Ensure immediately that there is an adequate supply of fresh air. Introduce pure oxygen if breathing problems are experienced.
CONTACT WITH THE INSIDE OF THE
MOUTH: If the victim is conscious, flush out the inside of the mouth immediately with plenty of water. Contact a doctor immediately.
Warning!
Risk of injury from laser beams!

WARNING! Do not look directly into the laser beam or into the laser aperture. This can result in permanent eye damage if the eye's natural reflex to close does not take place.
■ Never direct the laser beam directly on to the eyes of people or animals.
If the laser beam strikes your eyes, close them immediately and turn your head out of the beam.
- Keep the product safely in a place inaccessible to children. Children often underestimate the possible dangers associated with these products.
■ Never direct the laser beam on to objects that can reflect light. Even looking briefly into the beam can result in eye damage.
■ Always switch off the laser beam if you leave the product unattended.
Safety instructions for batteries/rechargeable batteries
■ DANGER TO LIFE! Keep batteries/rechargeable batteries out of reach of children. If accidentally swallowed seek immediate medical attention.
■ Swallowing may lead to burns, perforation of soft tissue, and death. Severe burns can occur within 2 hours of ingestion.
DANGER OF EXPLOSION! Never
recharge non-rechargeable batteries.
Do not short-circuit batteries/recharge-
able batteries and/or open them. Overheating, fire or bursting can be the result.
■ Never throw batteries/rechargeable batteries into fire or water.
Do not exert mechanical loads to batteries/rechargeable batteries.
Risk of leakage of batteries/rechargeable batteries
- Avoid extreme environmental conditions and temperatures, which could affect batteries/rechargeable batteries, e.g. radiators/direct sunlight.
If batteries/rechargeable batteries have leaked, avoid contact with skin, eyes and mucous membranes with the chemicals! Flush immediately the affected areas with fresh water and seek medical attention!
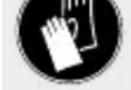
WEAR PROTECTIVE GLOVES!
Leaked or damaged batteries/recharge-able batteries can cause burns on contact with the skin. Wear suitable protective gloves at all times if such an event occurs.
In the event of a leakage of batteries/rechargeable batteries, immediately remove it from the product to prevent damage.
Only use the same type of batteries/rechargeable batteries. Do not mix used and new batteries/rechargeable batteries.
■ Remove the batteries/rechargeable batteries if the product will not be used for a longer period.
Risk of damage of the product
■ Only use the specified type of battery/recharge-able battery!
- Insert batteries/rechargeable batteries according to polarity marks (+) and (-) on the battery/rechargeable battery and the product.
■ Use a dry lint-free cloth or cotton swab to clean the contacts on the battery/rechargeable battery and in the battery compartment before inserting!
■ Remove exhausted batteries/rechargeable batteries from the product immediately.
● Preparing for first use
- Inserting/replacing batteries (see Fig. A)
Switch off the product.
Open the battery compartment cover 2a.
☐ Insert 2 batteries type 1.5V, AAA or replace the used batteries with new ones. Insert the batteries with correct polarity (+/-) in accordance with the polarity mention on the battery compartment cover 2a.
☐ Reclose the battery compartment cover.
Note: If the laser beam is too weak or no longer visible, it is time to replace the batteries.
- Setting up the product
You can use the product with or without a tripod. Follow the steps below to attach and align the product on the tripod:
Turn the tripod 3 with the threaded screw 3a completely into the threaded hole 10 on the underside of the housing. Make sure that the screw is tightened firmly and securely.
☐ Fold out the legs of the tripod 3.
☐ Set the product on the tripod down on the desired surface and align it.
☐ To align the product, first release the clamping screw 4 on the tripod 3 by screwing it anticlockwise.
Now turn and tilt the housing until the air bubbles in the bubble levels 1 and 5 are centrally positioned between the two line markings (see figure B).
Note: If the lighting conditions are inadequate, switch on the illumination for the bubbles using the illumination On/Off switch 8.
☐ Then fix the position of the housing by tightening the clamping screw 4 on the tripod clockwise.
Note: If the position of the product has to be changed, you need to check whether the product requires to be aligned again.
☐ The tripod is not made for carrying loads. For that reason do not load anything onto the product when it is attached to the tripod.
Make sure not to bend the tripod's legs.
Operation
WARNING! Do not look directly into the laser beam or into the laser beam apertures 6. This can result in permanent eye damage if the eye's natural reflex to close does not take place. If the laser beam strikes your eyes, close them immediately and turn your head out of the beam.
Use with the tripod
Set the product on the tripod down in the desired place and align it as described in the section “Setting up the product”.
☐ Switch on the product with the laser beam On/Off switch 7. The product projects two laser beams that intersect one another at right angles on to a wall.
Note: You may change the laser to a line format ("LINE") or to cross-hatch format ("CROSS") by sliding the switch 11 (see figure C).
☐ If the laser beam is not exactly at the required height, you can use a ruler or another suitable measuring product to mark vertical and horizontal points on the wall. To do this, remark the desired position on the wall at the calculated distance from the laser beam. Ensure that the measuring aid is absolutely vertical and use a spirit level if necessary.
- Use without a tripod
Hold the product with the wide side to a wall.
☐ Switch on the product by pressing the laser beam On/Off switch 7.
Note: If the lighting conditions are inadequate, switch on the illumination for the bubbles using the illumination On/Off switch 8.
☐ Align the product so that the air bubbles in the bubble levels 1 and 5 are centrally positioned between the two line markings (see figure B).
☐ A second person can now mark the desired points.
Note: The product has two magnets 9. They allow you to attach the product to surfaces that attract magnetic objects, e.g. steel shelves.
Note: Electrostatic discharge could lead to functional errors. If such functional errors occur, remove the battery briefly and replace it again.
● Maintenance, cleaning and care
Apart from replacing the batteries, the product is maintenance-free.
- Clean the outside of the product only with a soft, slightly moist cloth. Never use liquids or cleaning agents, as they may damage the product.
□ Clean the laser optics with a soft, narrow paint brush.
Store the product in as dry and dust-free conditions as possible.
☐ If the product is not to be used for a prolonged period, remove the batteries and store them separately.
●Disposal
The packaging is made entirely of recyclable materials, which you may dispose of at local recycling facilities.
Observe the marking of the packaging materials for waste separation, which are marked with abbreviations (a) and numbers (b) with following meaning: 1–7: plastics/20–22: paper and fibre-board/80–98: composite materials.

Contact your local refuse disposal au- thority for more details of how to dispose of your worn-out product.
To help protect the environment, please dispose of the product properly when it has reached the end of its useful life and not in the household waste. Information on collection points and their opening hours can be obtained from your local authority.
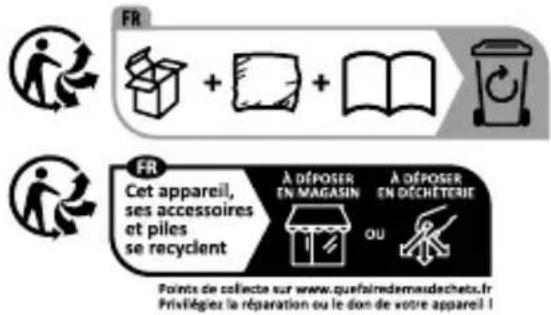
The product incl. accessories, manual and packaging materials are recyclable and are subject to extended producer responsibility. Dispose them separately, following the illustrated Info-tri (sorting information), for better waste treatment.
Faulty or used batteries/rechargeable batteries must be recycled. Return the batteries/rechargeable batteries and the product to the available collection points.
Environmental damage through incorrect disposal of the batteries/rechargeable batteries!
Batteries/rechargeable batteries may not be disposed of with the usual domestic waste. They may contain toxic heavy metals and are subject to hazardous waste treatment rules and regulations. The chemical symbols for heavy metals are as follows: Cd = cadmium, Hg = mercury, Pb = lead. That is why you should dispose of used batteries/rechargeable batteries at a local collection point.
- Warranty
The product has been manufactured to strict quality guidelines and meticulously examined before delivery. In the event of material or manufacturing defects you have legal rights against the retailer of this product. Your legal rights are not limited in any way by our warranty detailed below.
The warranty for this product is 3 years from the date of purchase. The warranty period begins on the date of purchase. Keep the original sales receipt in a safe location as this document is required as proof of purchase.
Any damage or defects already present at the time of purchase must be reported without delay after unpacking the product.
Should the product show any fault in materials or manufacture within 3 years from the date of purchase, we will repair or replace it – at our choice – free of charge to you. The warranty period is not extended as a result of a claim being granted. This also applies to replaced and repaired parts.
This warranty becomes void if the product has been damaged, or used or maintained improperly.
The warranty covers material or manufacturing defects. This warranty does not cover product parts subject to normal wear and tear, thus considered consumables (e.g. batteries, rechargeable batteries, tubes, cartridges), nor damage to fragile parts, e.g. switches or glass parts.
- Warranty claim procedure
So that your request can be processed quickly, please observe the following instructions:
o For all inquiries, please have the receipt and item number (IAN 479085_2410) ready as proof of purchase.
o The article number can be taken from the identification label on the product, engraving on the product, the front cover of your
manual (at the bottom left), or the sticker on the back or bottom of the product.
o If malfunctions or other defects arise, first contact the service department indicated below by phone or email.
- You can then send a product recorded as defective to the communicated service address postage-free, making sure to enclose proof of purchase (receipt) and information on the details of the defect and when it occurred.
O
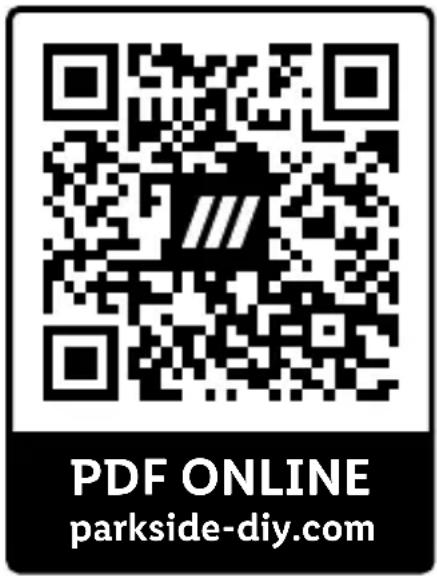
You can download and view this and numerous other manuals at parkside-diy.com. This QR code takes you directly to parkside-diy.com. Choose your country and use the search screen to search for the operating instruc-
tions. Entering the item number (IAN) 479085_2410 takes you to the operating instructions for your item.
Service
GB Service Great Britain
Tel.: 08000569216
E-Mail:owim@lidl.co.uk
IE Service Ireland
Tel.:1800200736
E-Mail:owim@lidl.ie

natural_image
Completely black image with no visible content or text.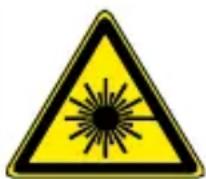

natural_image
Completely black image with no visible content or text.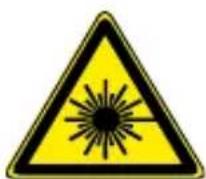

natural_image
Completely black image with no visible content or text.

natural_image
Completely black image with no visible content or text.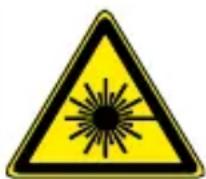


Bezpečnostní pokyny
USCHOVEJTE BEZPEČNOSTNÍ POKYNY A NÁVODY PRO BUDOUCNOST!
NOSTE OCHRANNÉ RUKAVICE!
natural_image
Completely black image with no visible content or text.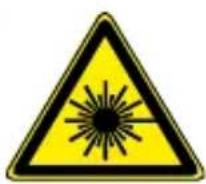


Bezpečnostné pokyny
VŠETKY BEZPEČNOSTNÉ A OSTATNÉ POKYNY SI USCHOVAJTE PRE PRÍPAD POTREBY V BUDÚCNOSTI!
NOSTE OCHRANNÉ RUKAVICE!
natural_image
Completely black image with no visible content or text.


natural_image
Completely black image with no visible content or text.


Sikkerhedsregler
ALLE SIKKERHEDSANVISNINGER OG ANDRE DOKUMENTER B∅R OPBEVARES TIL FREMTIDIG BRUG!
natural_image
Completely black image with no visible content or text.


natural_image
Completely black image with no visible content or text.