PBCM B1 - Irrigation timer PARKSIDE - Free user manual and instructions
Find the device manual for free PBCM B1 PARKSIDE in PDF.

User questions about PBCM B1 PARKSIDE
0 question about this device. Answer the ones you know or ask your own.
Ask a new question about this device
Download the instructions for your Irrigation timer in PDF format for free! Find your manual PBCM B1 - PARKSIDE and take your electronic device back in hand. On this page are published all the documents necessary for the use of your device. PBCM B1 by PARKSIDE.
USER MANUAL PBCM B1 PARKSIDE
BEWÄSSERUNGSCOMPUTER/PROGRAMMABLE WATERING TIMER/PROGRAMMATEUR D'ARROSAGE PBCM B1
DE AT CH
Operation and safety notes
NL BE
BESPROEIINGS COMPUTER
GB/IE Operation and safety notes Page 51
Scope of delivery ...... Page 58
Technical data...... Page 58
Parts description...... Page 59
Display indicators...... Page 60
Safety Page 61
Safety instructions ...... Page 61
Safety instructions for batteries/rechargeable batteries .... Page 65
Inserting/replacing batteries ...... Page 69
Initial use ...... Page 69
Operation...... Page 71
Putting the product into operation...... Page 72
Setting language, day of week and current time ...... Page 72
New programming for automatic watering ...... Page 73
Manual operation for watering ...... Page 76
Read/modify watering programmes...... Page 77
Reset...... Page 79
Key lock Page 79
Power off.... Page 79
Battery status display ...... Page 79
Troubleshooting...... Page 81
Cleaning and Care...... Page 83
Cleaning the filter.... Page 83
Storage Page 84
Disposal Page 84
Warranty...... Page 86
Warranty claim procedure...... Page 88
Service Page 89
| List of pictograms used | |
 | Direct current/voltage |
| Volt | |
 | Caution! Explosion hazard! |
 | Observe caution and safety notes! |
 | DANGER! This symbol in combination with the signal word “Danger” marks a high-risk hazard that if not prevented could result in death or serious injury. |
 | CAUTION! This symbol in combination with the signal word “Caution” marks a low-risk hazard that if not prevented could result in minor or moderate injury. |
 | WARNING! This symbol in combination with the signal word “Warning” marks a medium-risk hazard that if not prevented could result in death or serious injury. |
 | ATTENTION! This symbol with the signal word “Attention” indicates a possible property damage. |
 | Never leave children unattended with packaging materials or the product. |
 | Protects from splashing water and dust. |
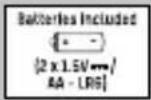 | Alkaline-batteries are included in product. |
 | Product meets the applicable European productspecific directives |
 | Before using for the first time, pls read the instruction carefully. |
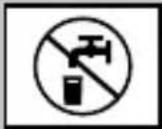 | Do not use the product for drinks! |
54 GB/IE
| List of pictograms used | |
 | Dispose of the packaging and product in an environmentally-friendly manner! |
| [xwcr] | Safety informationInstructions for use |
 | Keep out of reach of children |
 | Do not dispose of in fire |
 | Do not insert incorrectly |
 | Do not deform/damage |
 | Do not open/dismantle |
 | Do not mix different types or brands |
 | Do not mix new and used |
 | Do not charge |
 | Keep away from water and excessive moisture |
 | Do not short circuit |
 | Insert correctly |
Programmable watering timer PBCM B1
- Introduction
We congratulate you on the purchase of your new product. You have chosen a high quality product. The instructions for use are part of the product. They contain important information concerning safety, use and disposal. Before using the product, please familiarise yourself with all of the safety information and instructions for use. Only use the product as described and for the specified applications. If you pass the product on to anyone else, please ensure that you also pass on all the documentation with it.
Intendeduse
This product is designed to control sprinklers and sprinkler and irrigation systems. It facilitates the automatic irrigation of outdoor areas at a programmed time and for a programmed duration. The product may save up to 10 programmes for automatic irrigation. The product may only be used outdoors. Any other use or modification to the product constitutes improper use. The manufacturer
assumes no liability for damages due to improper use. This product is not intended for commercial use.
- Scope of delivery
1 Programmable watering timer
1 Tap connector
1 Adapter 33.3mm to 26.5mm (G1 to G ^3/4 )
1 Filter
2 Batteries 1.5V Type AA
1 Instructions for use
- Technical data
Model No.: HG09708
Max. working pressure: 4 bar
Max. water temperature: 40°C
Power supply: 2 x 1.5V --- batteries type AA
Flow rate (at approx.
4 bar water pressure): approx. 50 l/min
Programmable Irrigation time: max. 09:59 h
Manual Irrigation time: max. 09:59 h
Water connection: 26.5 mm (G ^3/4 ) or 33.3 mm (G 1")
Protection class: IP65 (splash and dust proof)
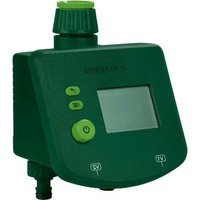
Parts description (Fig. A)
1 Adapter 33.3 mm to 26.5 mm (G1" to G ^3/4 ")
2 Filter
3 Union nut - 33.3mm (G1")
4 Button
5 Rotary control
6 Button
7 Display
8 Adapter (for coupling the hose)
9 Screw (battery compartment)
10Batterycompartment
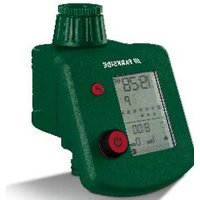
• Display indicators (Fig. B)
| Display | Meaning |
| 11 | Battery status |
| 12 | Current weekday |
| 13 | Current time |
| 14 | Menu |
| 15 | Program |
| 16 | Program on/off |
| 17 | Interval/Pause |
| 18 | Watering cycle: 24h/2nd/3rd/4th/5th/6th/7thcorrespond to every 24 hours/every 2/3/4/5/6/7 days |
| 19 | Programmed watering weekdays |
| 20 | Watering days setting |
| 21 | Program start time |
| 22 | Run time - watering duration |
| Display Meaning | |
| 23 | Seasonal duration |
| 24 | Irrigation start indicator |

Safety
●Safetyinstructions
Damage due to failure to comply with these operating instructions will void the warranty! We assume no liability for consequential damages! We assume no liability for property damage or personal injury due to improper handling or failure to observe the safety instructions!
KEEP ALL THE SAFETY ADVICE AND INST- RUCTIONS IN A SAFE PLACE FOR FUTURE REFERENCE!
DANGERNOGIFE
AND RISK OF ACCIDENT FOR
INFANTS AND CHILDREN! Never leave children unsupervised with the packaging materials. The packaging material poses a suffocation hazard. Keep this product well away from children. This product is not a toy.
This product may be used by children age 8 years and up, as well as by persons with reduced physical, sensory or mental
capacities, or lack ing experience and/or knowl edge, so long as they are supervised or instructed in the safe use of the product and un derstand the associated risks.
Children should not be allowed to play with the product. Cleaning and user maintenance should not be performed by children without supervision.
■ Any repairs during the warranty period must be performed by a manufacturer authorised service centre, or the warranty will be void if subsequent damages occur.
■ Always replace defective parts with genuine spare parts. Only by using these parts will
you ensure that the safety requirements are met.
- Avoid direct sunlight.
■ Always shut off the tap if you no longer use the product. - Do not operate the product near open flames.
- Check the product and its supply lines at regular intervals to ensure that they are impermeable and that they function perfectly.
- Do not aim the water jet at electrical equipment!
RISK OF DEATH/ ELECTRIC SHOCK! Do not aim the water jet at persons or animals!
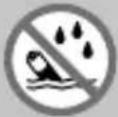
■ The product is not suitable for supplying drinking water.

Safety instructions for batteries/rechargeable batteries
■ DANGER TO LIFE! Keep batteries/recharge-able batteries out of reach of children. If accidentally swallowed, seek immediate medical attention.
■ Swallowing may lead to burns, perforation of soft tissue and death. Severe burns can occur within 2 hours of ingestion.
DANGER OF EXPLOSION! Never recharge non-rechargeable batteries.
Do not short-circuit batteries/rechargeable batteries and/or open them. Overheating, fire or bursting can be the result.
■ Never throw batteries/rechargeable batteries into fire or water.
- Do not exert mechanical loads to batteries/rechargeable batteries.
Risk of leakage of batteries/rechargeable batteries
- Avoid extreme environmental conditions and temperatures, which could affect batteries/rechargeable batteries, e.g. radiators/direct sunlight.
If batteries/rechargeable batteries have leaked, avoid contact with skin, eyes and mucous membranes with the chemicals!
Flush immediately the affected areas with fresh water and seek medical attention!
WEAR PROTECTIVE GLOVES! Leaked or damaged batteries/rechargeable batteries can cause burns on contact with the skin. Wear suitable protective gloves at all times if such an event occurs.
In the event of a leakage of batteries/recharge-able batteries, immediately remove them from the product to prevent damage.
- Only use the same type of batteries/rechargeable batteries. Do not mix used and new batteries/rechargeable batteries.
■ Remove batteries/rechargeable batteries if the product will not be used for a longer period.
Risk of damage of the product
■ Only use the specified type of battery/rechargeable battery!
- Insert batteries/rechargeable batteries according to polarity marks (+) and (-) on the battery/rechargeable battery and the product.
Use a dry, lint-free cloth or cotton swab to clean the contacts on the battery/recharge-able battery and in the battery compartment before inserting!
■ Remove exhausted batteries/rechargeable batteries from the product immediately.
- Inserting/replacing batteries (see Fig. C)
☐ Untighten the screw 9 of the battery compartment 10 cover, remove the cover.
☐ Insert 2 AA batteries (LR06/Mignon) into the battery compartment 10. Observe correct polarity.
Remark: The display will show the Setting language, day of week and current time section.
☐ Close the cover and tighten the screw 9.
- Initialuse
The site where the product will be installed must meet the following requirements for safe and trouble-free operation:
The maximum temperature of the flowing water is 40^ C.
The minimum operating temperature is +5°C.
The maximum temperature of the environment is +50°C.
Only use clear freshwater.
Only connect the product vertically with the adapter pointed downwards to prevent water from entering the battery compartment 10.
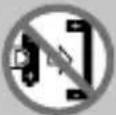
ATTENTION! The irrigation controller may only be connected to a drinking water abstraction point with a safety device which corresponds to TYPE HD at the very least according to EN 1717 (backflow preventer with tube ventilation).
Remark: Such mains adapters are available from speciality retailers.
☐ Check the water connection type available. The product is fitted with a union nut 3 for a tap with a 33.3mm thread (G 1"). For a tap with a 26.5mm thread (G 34 ) use the adapter 1 supplied.
☐ Insert the filter 2 into the union nut 3 as depicted in Figure A.
☐ For a 26.5 mm thread (G ^3/4 ): Screw the adapter ☐ onto the tap. Do not use any tools for this purpose.
☐ Screw the union nut 3 onto the thread of the tap or the adapter. Do not use any tools for this purpose.
☐ Screw the adapter 8 onto the hose connection. You can then connect a hose to the adapter 8.
Open the tap.
ATTENTION! If defects/leaks arise when using the adapter1, the thread of the tap must be wrapped using sealing tape.
Programme irrigation as described in the chapter "Operation".
Operation
Irrigation can be fully automated at any time of the day using the irrigation controller. A sprinkler, sprinkler system or drip irrigation system may be connected.
The irrigation controller automatically carries out irrigation at the respective programmed start time and for the programmed duration.
Take the season and time of the day into consideration when programming. Evaporation and water consumption is lowest early in the morning or late in the evening.
- Putting the product into operation
- Insert batteries as described in the chapter "Inserting/replacing batteries".
- Connect the watering timer to water tap (see Fig. D).
- Setting language, day of week and current time
- In normal mode, turn the rotary control 5 to Menu 14 (not necessary if you just insert batteries) and press the ⏻ button 6.
- Setting language
Turn the rotary control 5 to Language and press the button 6.
Turn the rotary control 5 to set the desired language, press the ⏻ button 6 to confirm.
- Setting day of week
☐ Turn the rotary control 5 to Day and press the ⏻ button 6.
☐ Turn the rotary control 5 to set the day of week, press the ⏻ button 6 to confirm.
- Setting time
☐ Turn the rotary control 5 to Time and press the ⏻ button 6.
☐ Turn the rotary control 5 to set 12/24 hrs and the clock, press the ⏻ button 6 to confirm.
- New programming for automatic watering
- Turn the rotary control 5 to + and press the ⏻ button 6.
- The start time displayed, turn the rotary control 5 to set and press the ⏻ button 6 to confirm.
- Therun time displayed, turn the rotary control 5 to set and press the ⏻ button 6 to confirm.
- Thewatering interval displayed, turn the rotary control 5 to set and press the ⏻ button 6 to confirm.
- The watering pause time displayed, turn the rotary control 5 to set and press the ⏻ button 6 to confirm.
Remark: For example, if the start time is 6:20 am, total watering time 1 hr 5 mins, watering interval 18 mins, pause time 17 mins, when the time reaches 6:20 pm, the product will start watering for 18 mins, then pause for 17 mins, then restart for 18 mins, and then pause for 12 mins (normally it should pause for 17 mins in the program, but since adding a pause of 12 mins makes the total time reach 1 hrs 5 mins, the program will be ended). If you do not want to set the interval time and pause time, just set both to 0 min.
- The Select by day of week or Select by day interval displayed, turn the rotary control 5 to select and press the ⏻ button 6 to confirm. The watering frequency can be selected by: day of week (see step 7) or day interval (see step 8).
- Select by day of week: Turn the rotary control 5 to the desired watering days and press the ⏻ button 6 to select/deselect. Turn the rotary control 5 to OK and press the ⏻ button 6 to confirm.
- Select by day interval: Turn the rotary control ^5 to the desired day interval 24 hr/2 days/3 days/4 days/5 days/6 days/7 days and press the ⏻ button ^6 to confirm.
- Setting is completed and your program is displayed on the screen.
Seasonal duration
- You can reduce the durations set for all schedules at once in 10% increments. Less watering is required in the spring and autumn than in summer.
-
On the main interface, turn the rotary control 5 to Menu, press the ⏻ button 6 to enter the setting.
-
Turn the rotary control ^5 to Seasonal duration, press the button ^6 to enter.
- Turn the rotary control 5 to set 10% - 100% (10% increments), press the ⏻ button 6 to enter.
Remark: When the duration is altered (100%) the sun symbol for seasonal duration 23 is displayed. When the duration is adjusted (10% - 90%), the cloud symbol 🙏 for seasonal duration 23 is displayed.
Pause watering by days
- Pause all watering operations without changing the set schedules. You can select to pause in 1 to 9 days. At the end of pause, all schedules are reactivated.
- On the main interface, turn the rotary control 5 to Menu, press the ⏻ button 6 to enter the setting.
- SelectPause watering, press the ⏻ button 6 to enter.
- Turn the rotary control 5 to OFF or 1 to 9 days, press the button 6 to confirm, the watering programs will be paused.
- RESUME PROGRAM displayed. If you want to resume the program, press the ⏻ button 6 to resume the programs.
Delete program
- On the main interface, turn the rotary control 5 to Menu, press the ⏻ button 6 to enter the setting.
- Turn the rotary control 5 to Delete program, press the ⏻ button 6 to enter.
- Select the program you want to delete, press the ⏻ button 6 to confirm.
- The corresponding program has been deleted.
- Manual operation for watering
The valve can be opened or closed manually at any time. A program-controlled open valve can be closed early without changing the program data (watering start time, run time and frequency).
- Press and hold the button 4 for 2 seconds, the irrigation start indicator 24 flashes.
- The device will start watering and the time displays in a count-down manner.
-
Press the ⏻ button 6 to set the manual watering time. It can be set from 1 minute to 9 hours and 59 minutes.
-
Press and hold the button 4 for 2 seconds to stop the manual watering, and the display returns to normal.
- The default of manual watering time is 59 minutes.
Remark: When the scheduled start time is being executed, there is a manual watering, the scheduled program is invalid this time, and it will not be executed until the next scheduled cycle.
- Read/modify watering programmes
- Turn the rotary control5 to switch between P1 to P10 to read data.
- Press the ⏻ button 6 to enter the edit mode.
- Turn the rotary control 5 to ON/OFF position and press the button 6 to confirm.
- Set the start time
Turn the rotary control 5 to the program START TIME 21 and press the ⏻ button 6 to enter the start time setting.
☐ The start time displayed, turn the rotary control ☐ 5 to set and press the ⏻ button ☐ 6 to confirm.
- Set the run time
Turn the rotary control 5 to the RUN TIME ✗ 22 and press the ⏻ button 6 to enter the run time setting.
☐ The run time displayed, turn the rotary control 5 to set and press the ⏻ button 6 to confirm.
6. Set the interval/pause
Turn the rotary control 5 to the Interval | Pause position and press the ⏻ button 6 to enter the setting.
☐ Follow step 4 and step 5 in the section “New programming for automatic watering”.
7. Set the day setting
Turn the rotary control 5 to the Day setting and press the button 6 to enter the day setting.
☐ Follow step 6 to step 8 in the section “New programming for automatic watering”.
8. After finishing all editing, turn the rotary control 5 to OK and press the ⏻ button 6 to confirm.
Reset
Press the button 4 and ⏻ button 6 for 5 seconds at the same time, the system will restart. All the programmed data will be erased and restored to factory setting. The Enter the language setting mode will be activated again (same as the first power-on).
Key lock
☐ Press and hold the ⏻ button 6 for 5 seconds to lock the keys.
☐ Press and hold the ⏻ button 6 for 5 seconds again to unlock, and the device can operate normally.
Power off
When no key is pressed for 5 minutes, all displays will be turned off, all schedules and times will continue to run. Press any key to wake up the display and exit the power off mode.
- Battery status display
Battery is full.
Battery is approx. half full.
Battery is low.
☐ : Batter is extremely low, cannot operate the valve in this condition! User should replace the batteries as soon as possible.
Remark: During replacing the batteries, all program data will be saved and the time will remain at the time before the batteries were removed. If the water gate is open before removing batteries, it will automatically turn off the water gate when the batteries are inserted again.
●Troubleshooting
| Fault Possible | Cause Solution | |
| No display appears. | Battery inserted incorrectly. | Check polarity markings match. |
| Battery is flat [icon] | Insert new battery. | |
| Temperature on the display is higher than 60°C. | Display will appear after temperature has dropped. | |
| The device is in power off mode. | Press any key to exit the power off mode. | |
| Manual watering is not possible using the (Man) button. | Battery is flat [icon]. | Insert new battery. |
| Tap turned off. Turn tap on. | ||
| Watering program is not being undertaken (no watering). | Watering program has not been entered completely. | Read the watering pro-gram data and modify if necessary. |
| Programs deactivated (Prog OFF). | Activate program (Prog ON). | |
| Valve was opened manually previously. | Avoid possible program overlaps. | |
| Tap turned off. Turn tap on. | ||
| Program overlap (1st watering start time has priority). | Enter new watering program without over-laps. | |
| Battery is flat (flashing). | Insert new battery. | |
- Cleaning and Care
ATTENTION! Potential damage to the product. Moisture entering the product may result in damage. Ensure no moisture enters the battery compartment 10 during cleaning to prevent damaging the product beyond repair.
☐ Only clean the housing with a slightly damp cloth and mild washing-up liquid.
■ Never use petrol, alcohol or other aggressive cleaning agents to clean the housing.
- Cleaning the filter
☐ The filter 2 must be regularly checked and cleaned if necessary.
□ Close the tap.
☐ Allow the product to run dry by manual irrigation.
☐ Unscrew the union nut 3 from the tap or adapter thread.
☐ Remove the conical filter from the water inlet in the union nut.
□ Clean the filter.
□ Reinsert the filter.
☐ Screw the union nut onto the thread of the tap or adapter.
Open the tap.
- Storage
□ Close the tap.
☐ Loosen the hose from the adapter 8.
☐ Allow the product to run dry by manual irrigation.
☐ Loosen the union nut 3.
□ Remove the batteries.
Store the product in a dry and frost-free environment.
- Disposal
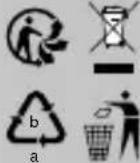
The packaging is made entirely of recyclable materials, which you may dispose of at local recycling facilities.
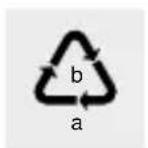
Observe the marking of the packaging materials for waste separation, which are marked with abbreviations (a) and numbers (b) with following meaning: 1–7: plastics/20–22: paper and fibreboard/80–98: composite materials.

Contact your local refuse disposal authority for more details of how to dispose of your worn-out product.

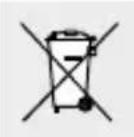
To help protect the environment, please dispose of the product properly when it has reached the end of its useful life and not in the household waste. Information on collection points and their opening hours can be obtained from your local authority.
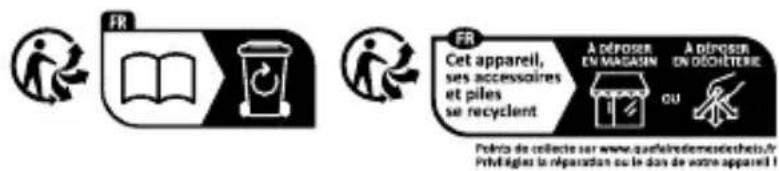
The product incl. accessories, manual and packaging materials are recyclable and are subject to extended producer responsibility. Dispose them separately, following the illustrated Info-tri (sorting information), for better waste treatment.
Faulty or used batteries/rechargeable batteries must be recycled. Return the batteries/rechargeable batteries and the product to the available collection points.
Environmental damage through incorrect disposal of the batteries/rechargeable batteries!
Batteries/rechargeable batteries may not be disposed of with the usual domestic waste. They may contain toxic heavy metals and are subject to hazardous waste treatment rules and regulations. The chemical symbols for heavy metals are as follows: Cd = cadmium, Hg = mercury, Pb = lead. That is why you should dispose of used batteries/rechargeable batteries at a local collection point.
- Warranty
The product has been manufactured to strict quality guidelines and meticulously examined before delivery. In the event of material or manufacturing defects you have legal rights against the retailer of this product. Your legal rights are not limited in any way by our warranty detailed below.
The warranty for this product is 3 years from the date of purchase. The warranty period begins on the date of purchase. Keep the
original sales receipt in a safe location as this document is required as proof of purchase.
Any damage or defects already present at the time of purchase must be reported without delay after unpacking the product.
Should the product show any fault in materials or manufacture within 3 years from the date of purchase, we will repair or replace it – at our choice – free of charge to you. The warranty period is not extended as a result of a claim being granted. This also applies to replaced and repaired parts.
This warranty becomes void if the product has been damaged, or used or maintained improperly.
The warranty covers material or manufacturing defects. This warranty does not cover product parts subject to normal wear and tear, thus considered consumables (e.g. batteries, tubes, cartridges), nor damage to fragile parts, e.g. switches or glass parts.
- Warranty claim procedure
So that your request can be processed quickly, please observe the following instructions:
o For all inquiries, please have the receipt and item number (IAN 466696_2404) ready as proof of purchase.
o The article number can be taken from the identification label on the product, engraving on the product, the front cover of your manual (at the bottom left), or the sticker on the back or bottom of the product.
o If malfunctions or other defects arise, first contact the service department indicated below by phone or email.
o You can then send a product recorded as defective to the communicated service address postage-free, making sure to enclose proof of purchase (receipt) and information on the details of the defect and when it occurred.
O

You can download and view this and numerous other manuals at parkside-diy.com. This QR code takes you directly to parkside-diy.com. Choose your country and use the search screen to search for the operating instructions. Entering the item number (IAN) 466696_2404 takes you to the operating instructions for your item.
Service
GB Service Great Britain
Tel.: 0800 0569216
E-Mail: owim@lidl.co.uk
IE Service Ireland
Tel.:1800200736
E-Mail: owim@lidl.ie
CE IP65
89 GB/IE
--- batterijen type AA
PDF ONLINE
parkside-diy.com
NOSTE OCHRANNÉ RUKAVICE!