PRT 300 C3 - Lawn mower PARKSIDE - Free user manual and instructions
Find the device manual for free PRT 300 C3 PARKSIDE in PDF.

| Product type | Corded electric grass trimmer |
| Brand | Parkside |
| Model | PRT 300 C3 |
| Rated input voltage | 230-240 V~, 50 Hz |
| Power consumption | 300 W |
| No-load speed | 12,500 min⁻¹ |
| Cutting diameter | 230 mm |
| Line thickness | 1.6 mm |
| Line length | 4 m |
| Weight | Approx. 1.55 kg |
| Protection class | II (double insulation) |
| Sound pressure level (LpA) | 86.5 dB; KpA = 3 dB |
| Guaranteed sound power level (LWA) | 95 dB |
| Vibration (ah) | < 2.5 m/s²; K = 1.5 m/s² |
| Protection type | IPX0 |
| Power supply | Mains, extension cable H05VV-F max. 75 m |
| Intended use | Cutting grass in gardens and along flower beds |
| Line feeding | Automatic bump-feed system |
| Safety | On/Off switch, protective guard, line cutter |
| Maintenance | Regular cleaning of ventilation slots and housing, replacement of spool |
| Warranty | 3 years (France and Belgium) |
Frequently Asked Questions - PRT 300 C3 PARKSIDE
User questions about PRT 300 C3 PARKSIDE
0 question about this device. Answer the ones you know or ask your own.
Ask a new question about this device
Download the instructions for your Lawn mower in PDF format for free! Find your manual PRT 300 C3 - PARKSIDE and take your electronic device back in hand. On this page are published all the documents necessary for the use of your device. PRT 300 C3 by PARKSIDE.
USER MANUAL PRT 300 C3 PARKSIDE
natural_image
Black handheld tool with handle and lever, isolated on white background (no text or symbols)

Translation of the original instructions
NL BE
Before reading, unfold the page containing the illustrations and familiarise yourself with all functions of the device.
FR BE
Service-Center....18
Importeur 18
natural_image
Illustration of a person using a tool to measure a cylindrical object (no text or symbols present)Intended purpose......20
General description......21
Extent of the delivery.... 21
Overview 21
Functional description 21
Technical data 21
Symbols and icons ......22
Safety instructions......23
Safety information for the lawn trimmer 23
Residual risks 25
Assembling instructions......26
Operation 26
Turning on and off 26
Trimmer settings......27
Manner of operation......27
Cutting grass.... 27
Cleaning and maintenance......27
Cleaning 28
General maintenance....28
Replacing the spool......28
Replacing the spool cap 28
Replacing the spool 28
Winding up the spare thread ..... 29
Transport 29
Storage....29
Disposal and protection of the environment ....30
Guarantee 30
Repair Service....31
Service-Center....31
Importer 31
Trouble shooting 32
Replacement parts/Accessories ..32
Translation of the original EC declaration of conformity ....233
Exploded Drawing ......249
Introduction
Congratulations on the purchase of your new device. With it, you have chosen a high quality product.
During production, this equipment has been checked for quality and subjected to a final inspection. The functionality of your equipment is therefore guaranteed.

The operating instructions constitute part of this product. They contain important information on safety, use and disposal. Before using the product, familiarise yourself with all of the operating and safety instructions. Use the product only as described and for the applications specified. Keep this manual safely and in the event that the product is passed on, hand over all documents to the third party.
Intended purpose
The appliance is solely intended for cutting grass and weeds in the garden and for edge trimming. Any other use that is not specifically approved in these Instructions can result in damage to the trimmer and give rise to serious danger for the user.
Do not use the appliance to trim hedges or bushes. The appliance must only be used by adults. Young people aged 16 and over may only use the trimmer under adult supervision.
The user or operator is responsible for accidents causing injury to other people or damage to property.
The manufacturer cannot be held liable for damage when the trimmer is not used in conformity with its intended purpose or due to incorrect operation.
This equipment is not suitable for commercial use. Commercial use will invalidate the guarantee.
General description

The illustration of the most important functional components
can be found on the fold-out pages.
Extent of the delivery
Carefully unpack the trimmer and check that it is complete:
- Grass Trimmer
- Protective cover with two screws
- Spool (already fitted)
- Phillips screws
- Auxiliary handle
- Instruction Manual
Overview

1 On/off switch
2 Upper handgrip
4 Power cable
5 Handle
6 Centre piece
7 Motor head
8 Protective cover
9 Cutting head
10 Auxiliary handle
11.1 Phillips screwdriver (large)
11.2 Phillips screwdriver (small)

12 Nut
13 Handle screw
14 Handle unit

15 Spool cover
15a Triangle marking
15b Line outlet loop, spool cover
16 Line spool
16a Line outlet loop, ring
17 Spring
18 Spool cap
19 Line cutter
20 Ring
21 Opening, spool
Functional description
The hand-held, portable electric lawn trimmer uses a fully automatic string spool for cutting.
A hood covering the cutting device protects the user.
Refer to the following descriptions for a functional description of the controls.
Technical data
Electric Lawn Trimmer ...PRT 300 C3
Nominal input voltage
U 230 - 240V\~ (Alternating current), 50 Hz
Power consumption ....300 W
Idling speed 12500 min ^-1 (rpm)
Protection Class ......II回
Protection category.....IPXO
Cutting circle 230 mm
Thread length 4 m
Thread thickness 1.6 mm
Weight .....approx. 1,55 kg
Sound pressure level (L_pA) 86.5 dB, K_pA = 3 dB
Sound power level ( L_WA )
guaranteed 95 dB
measured....93.3 dB; K_WA = 2.07 dB
Vibration ( q_h ) ..... < 2.5 m/s², K = 1.5 m/s^2
Noise and vibration values have been determined according to the standards and regulations mentioned in the declaration of conformity.
The stated vibration emission value was measured in accordance with a standard testing procedure and may be used to compare one power tool to another. The stated vibration emission value may also be used for a preliminary exposure assessment.
GB MT

Warning: The vibration emission value may differ during actual use of the power tool from the stated value depending on the manner in which the power tool is used.
Try to keep the exposure to vibrations as low as possible. Examples of measures to reduce vibration exposure are the wearing of gloves when using the tool and limiting the working hours. For this purpose all parts of the operating cycle have to be considered (for example, times when the electric tool is switched off and times when it is switched on but running without any load).
Symbols and icons
Symbols on the trimmer

WARNING!

Carefully read these Operating Instructions.

Wear goggles and ear defenders.
111111111111

The cutting device will keep rotating for a few seconds after the device has been switched off.
Keep hands and feet at a safe distance.

Do not expose the trimmer to moisture. Do not work when it is raining and do not cut wet grass.
Keep by-standers well away. They could be
injured by flung out objects.

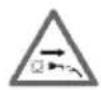
Danger due to materials blown out of machine!

Remove persons in the vicinity from the danger area.
Unplug the connector immediately if the connection cable is damaged.

Always remove the mains plug during maintenance work.

Guaranteed sound power level L_WA indicated in dB
Electrical appliances must not be disposed of with the domestic waste.

Protection class (able insulation)

Cutting circle
23cm
Cutting circle

Direction of line rotation
Loosening the spool cover

Fixing the spool cover
Symbols in the manual

Warning symbols with information on damage and injury prevention.

Warning symbols with in- formation on the prevention of personal injury caused by electric shock.

Instruction symbols with information on preventing damage.

Carefully read through the user manual

Help symbols with information on improving tool handling.
Safety instructions
Ensure that the safety instructions are observed when operating the trimmer.
Safety information for the lawn trimmer
TRAINING
- This machine is not intended for use by children, individuals with limited physical, sensory or mental capabilities, those with insufficient experience or knowledge or individuals who are not familiar with the instructions. Children should be supervised to ensure that they do not play with the machine. Cleaning and maintenance must not be carried out by children.
- If the power cord of this device is damaged, it must be replaced by the manufacturer or the latter's customer service or by a similarly qualified person in order to avoid hazards.
- The device must not be used at altitudes over 2000 m.
- Local regulations or bylaws may determine the minimum age for using the device.
- The operator or user is responsible for accidents or damage to other persons or their property.
- Never allow people who are not familiar with the instructions or children to use the machine. Local regulations may specify an age limit for the user.
- Read the instructions carefully.
- Familiarise yourself with the controls and how to use the machine correctly.
PREPARATION
- Before each use, carry out a visual inspection on missing or wrongly mounted protective devices or parts of the cutting device.
- Before commissioning and after any impacts, check for signs of wear and damages, and have any necessary repairs performed.
- Use only approved extension cables (H05VV-F) that are not more than 75 m long and designed for outdoor use. Always roll out the cable drum completely before use. Check the cable for damage and ageing.
- Do not connect a damaged cable to the power supply. Do not touch a damaged cable before it has been disconnected from the power supply, as you could come into contact with live parts.
- Prior to use, check the connecting cable and extension cable for signs of damage or ageing. If the cable is damaged during use, disconnect it from the mains immediately. DO NOT TOUCH THE CABLE BEFORE IT HAS BEEN DISCONNECTED FROM THE POWER SUPPLY. Do
not use the machine if the cable is damaged or worn.
To unplug the cable from the socket, always pull on the plug, and never on the cable.
OPERATION
- Wear safety goggles, stable shoes and long trousers over the entire period of use of the machine.
- The use of the machine under bad weather conditions, especially in case of lightning risk, must be avoided.
- Warning! Do not touch any of the dangerous moving parts before you have unplugged the device from the mains supply and the moving parts have come to a complete standstill.
- Caution, risk of injury from cuts on hands and feet.
- Stop using the machine when persons, above all children, and house pets are in the vicinity.
- Use the machine only in daylight or with good artificial lighting.
- Always keep your hands and feet away from the cutting equipment, above all when you switch the motor on.
- Always disconnect the machine from the power supply (i.e. unplug the machine from the mains),
- whenever leaving the machine unattended;
- before removing blockages;
- before checking, cleaning or modifying the machine;
- after contact with a foreign object;
- if the machine begins to vibrate in an unusual way.
Never use the machine with damaged or missing protective equipment.
- Avoid an abnormal body posture. Ensure secure footing at all times to maintain balance when working on slopes.
- Go slowly. Do not walk with the device in your hand.
• Always wear sturdy shoes and long trousers during operation of the machine.
- In the case of an accident or malfunction during operation, the device must be switched off immediately. Injuries must be properly treated or medical assistance sought. Read the „Trouble shooting” section to correct any malfunctions or contact our Service Centre.
- Extension cables must be kept away from dangerous moving parts to prevent damages to cables that can lead to contact with live parts.
- Do not connect a damaged cable to the power supply or touch a damaged cable before it has been disconnected from the power supply since damaged cables pose the risk of coming into contact with live parts.
- If the cable/extension cable gets damaged or becomes tangled during use, immediately turn off the mains and unplug the mains cable to disconnect the device from the mains supply.
- Use a circuit breaker device with an operating current of 30 mA or less.
- Keep connection and extension cables away from the cutting equipment.
• Make sure to keep the ventilation openings free of foreign objects.
- Disconnect the mains plug/remove the rechargeable battery from the device
- at all times when the user is not in the vicinity of the machine,
- before the rémoval of blockages,
- before checking, cleaning or working on the machine,
- after touching a foreign body in order to check the machine for damage,
- for an immediate check if the machine begins to vibrate excessively.
- if the machine starts to vibrate abnormally, an immediate check must be carried out,
- search for signs of damage;
- perform any necessary repairs to damaged parts;
- examine for loose parts and tighten these.
- Never replace the non-metallic cutting device with a metallic cutting device.
MAINTENANCE AND STORAGE
- Disconnect the mains before servicing or cleaning.
- Use only spare parts and accessories supplied and recommended by the manufacturer.
- The machine must be checked regularly and maintained. Have the machine repaired in a licensed workshop.
- When the machine is not being used, store it out of the reach of children.
• Make sure that the air vents are free of dirt.
Residual risks
Even if properly operating and handling this electric tool, some residual risks will remain. Due to its construction and build, this electric tool may present the following hazards:
a) Cuts
b) Ear damage if working without ear protection.
c) Damage to your health caused by swinging your hands and arms when operating the appliance for longer periods of time or if the unit is not held or maintained properly.

Warning! During operation, this electric tool generates an electromagnetic field which, under certain circumstances, may impair the functionality of active or passive medical implants. To reduce the risk of serious or lethal injuries, we recommend that persons with medical implants consult their doctor and the manufacturer of their medical implant before operating the machine.
Assembling instructions
Fitting the centre piece:
-
Insert the centre piece (6) on to the motor head (7).
-
Insert the handle (5) on to the centre piece (6).
- Screw in the centre piece (6) using the 4 long Phillips screws (11.1).
Mounting the protective cover:
- Place the protective cover (8) on the motor head (7).
- Screw it in using the two short Phillips screws (11.2).
Mounting the auxiliary handle:
-
Unscrew and remove the pre-assembled nut (12) and bolt (13) of the auxiliary handle (10).
-
Pull the ends of the auxiliary handle (10) apart and slide them over the handle unit (14).
-
Screw on the auxiliary handle (10) with the handwheel bolt (13) and nut (12).
Operation

Caution: risk of injury! Do not operate the appliance without the protective cover. To operate the appliance, wear suitable clothing, eye and ear protection. Prior to every use, check that the appliance is operative. Do not lock the On/Off button in place. After releasing the On/Off button, the motor must switch off. Stop using the device if the On/Off button is damaged.
Please observe local regulations concerning noise protection.
Turning on and off
For transport safety during delivery, the cutting line is knotted at the end. The end with the knot is cut by the line cutter (19) the first time the cutting line is extended.
Maintain a firm stand and hold the appliance well with both hands and at some distance away from your body. Before turning on the appliance, check that it will not touch any objects.
E 1. Connect the machine to the mains voltage supply.
-
Ensure your stance is stable and hold the appliance tightly with both hands. Do not allow the spool cap to hit the floor.
-
To switch the device on, press the On/Off button (1). To switch it off, release the On/Off button (1).
The device cannot be switched to continuous operation.
After the device has been switched off, the blade continues moving for some time. Allow the spool to come to a complete stop. Keep hands and feet at a safe distance! Risk of injury!
Remove grass cuttings regularly from the spool to make sure that cutting is not impaired.
F Trimmer settings
To adjust the auxiliary handle:
The auxiliary handle can be set to various positions. Adjust the handle so that the spool cap is tilted slightly forward as you work
Loosen the nut (12) and adjust the auxiliary handle (10) to the desired position. Re-tighten the nut.
Extend the cutting line:
Your device is equipped with an auto-tap feed, i.e. the two lines are extended when you tap the cutting head on the ground. If the line is initially longer than the cutting circle, it is automatically shortened to the right length by line cutter.
Caution: Free the line cutter of any grass cuttings regularly so as not to impair the cutting effect.

Check the nylon line regularly for damage and make sure the cutting line still has the length specified by the thread cutter.
- If no line ends are visible: Replace the spool (G 16) (see "Cleaning and Maintenance").
- Setting the line length manually:
Unplug the mains plug! Pull on the line end and press on the cutting head (A 9) repeatedly until the line end protrudes approx. 1 cm beyond the line cutter (G 19).
Manner of operation

WARNING. Danger of injury!
- Do not cut moist or wet grass.
- Before starting the unit, make sure that the spool is not touching any stones, scree, or other foreign objects.
- Switch on the trimmer before you approach the grass that is to be cut.
- Do not overload the trimmer during operation.
- Avoid contact with obstacles (stones, walls, fences, etc.). The spool would wear out quickly.
- Avoid using the device in bad weather, especially if there is a danger of lightning!
- Do not select a position for the additional handle (A 10) that is too close to the upper handle (A 2). This way you can control the device poorly.
- The protective cover (A 8) must always face the operator!
Cutting grass
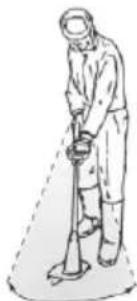
natural_image
Line drawing of a person using a tool to clean or inspect the surface (no text or symbols)Cut the grass by swaying the trimmer sideways to the right and left. Cut slowly and hold the device with the cutting circle parallel to the ground when cutting. Cut tall grass by a series of levels from top to bottom.
Cleaning and maintenance

Warning! Risk of injury from moving dangerous parts!

Contact our Service Centre about repairs and servicing not described in this manual. Only use OEM parts. Risk of injury!
GB MT

Switch off the device and unplug the mains plug.
The following cleaning and servicing should be done regularly. This will ensure a long and reliable service life.
Cleaning

Do not spray the appliance with water and do not immerse it in water. Electric shock hazard!
- Keep clean the ventilation slots, motor housing and handles of the appliance. Use a damp cloth or a brush. Do not use cleaning agents or solvents. You may otherwise irreparably damage the appliance.
• After every trimming session, remove grass and soil from the protective cover and the trimming assembly. - Be careful with the line cutter. It can cause serious lacerations.
General maintenance
- Prior to every use, check the appliance for obvious defects such as loose, worn or damaged parts.
- Check covers and safety devices for damages and correct installation. Replace as necessary.

Replacing the spool
You can replace the complete spool cap, or you can replace only the spool (16). Please refer to the relevant chapters.

Check the line cutter (21). Never use the device without a string cutter or defective string cutter. If the
line cutter is damaged, be sure to contact one of our customer service centres.

Standard strings available from DIY stores can also be used, allowing you to re-use empty spools (see "Technical data"). The winding direction is indicated on the spool (16).
Replacing the spool cap
- Unplug the mains plug.
- Hold the spool cap (18) firmly with one hand and turn the spool cover (15) in the direction.
- Remove the spool cover (15) together with the spool (16).
- Place the new spool cover (15) with spool (16) on the spool cap (18). Make sure that the triangular markings (15a) on the spool cover (15) and the spool cap (18) line up. Hold the spool cap (18) firmly with one hand. Screw on the spool cover (15) by turning it in the direction.
- Pull on the line end and press on the cutting head (A 9) repeatedly until the line end protrudes approx. 1 cm beyond the line cutter (19).
Replacing the spool
- Unplug the mains plug.
- Open the spool cap (18) by holding the spool cap (18) firmly with one hand and turning the spool cover (15) in the direction.
- Remove the spool cover (15) from the spool cap and take out the spool (16). Make sure not to lose the springs (17).
-
Loosen the screw on the top of the spool (16) and remove the metal ring.
-
Press the line end of the new spool out of the spool slot.
- Thread the end of the line through the line outlet loop (15b) in the spool cover (15).
- Insert the new spool into the spool cap (18). The side of the spool on which the winding direction is indicated by an arrow must be visible after insertion.
- Put the spool cover (15) back on the spool cap (18). Make sure that the triangle markings (15a) on the spool cover (15) and the spool cap (18) line up.
- Screw on the spool cover (15) by turning it in the direction. Hold the spool cap (18) firmly with one hand.
- Now fix the metal ring (see point 4) to the top of the new spool (16) with the screw.
- Pull on the line end and press on the cutting head (A 9) repeatedly until the line end protrudes approx. 1 cm beyond the line cutter (19).

Winding up the spare thread

The correct winding direction of the spool is indicated on the spool itself.
- Remove the empty spool, see section "Replacing the spool" points 1-3.
- Take the ring (20) upwards away from the spool.
- Thread an end of the spare thread through the opening (21) of the spool (16).
- Wind the thread onto the spool (16). The winding direction is indicated on the top side of the spool (16).
-
Thread the end of the line through the line outlet loop (16a) in the ring (20).
-
Place the ring (20) onto the spool (16).
- Thread the end of the line through the line outlet loop (15b) in the spool cover (15).
- Insert the new spool into the spool cap (18). The side of the spool on which the winding direction is indicated by an arrow must be visible after insertion.
- Put the spool cover (15) back on the spool cap (18). Make sure that the triangle markings (15a) on the spool cover (15) and the spool cap (18) line up.
- Screw on the spool cover (15) by turning it in the direction. Hold the spool cap (18) firmly with one hand.
- Pull on the line end and press on the cutting head (A 9) repeatedly until the line end protrudes approx. 1 cm beyond the line cutter (19).
Transport
Carry the device (switched off) with one hand at the upper handle (A 2) and one hand at the additional handle (A 10).
Face the cutting unit towards the ground. This prevents any contact with the cutting unit during transport.
Storage
- Store the trimmer in a dry place well out of reach of children.
- Do not stand the trimmer on its protective cover. Suspend it by its upper handle in such a manner that the protective cover does not come into contact with other objects. This is because the protective cover could become deformed, thereby changing its dimensions and its safety properties.
Disposal and protection of the environment
The appliance, accessories and packaging should be properly recycled.
Machines do not belong with domestic waste.
Directive 2012/19/EU on waste electrical and electronic equipment: Consumers are legally obliged to recycle electrical and electronic equipment in an environmentally sound manner at the end of its life. In this way, environmentally friendly and resource-saving recycling is ensured. Depending on implementation in national law, you may have the following options:
- Return to a shop,
- Hand over to an official collection point,
- Return to the manufacturer/distributor. This does not affect accessories enclosed with the old devices or tools without any electrical components.
- Throw the cut grass on the compost. Do not throw it in the normal household waste.
Guarantee
Dear Customer,
This equipment is provided with a 3-year guarantee from the date of purchase. In case of defects, you have statutory rights against the seller of the product. These statutory rights are not restricted by our guarantee presented below.
Terms of Guarantee
The term of the guarantee begins on the date of purchase. Please retain the original receipt. This document is required as proof of purchase.
If a material or manufacturing defect occurs within three years of the date of purchase of this product, we will repair or replace – at our choice – the product for you free of charge. This guarantee requires the defective equipment and proof of purchase to be presented within the three-year period with a brief written description of what constitutes the defect and when it occurred.
If the defect is covered by our guarantee, you will receive either the repaired product or a new product. No new guarantee period begins on repair or replacement of the product.
Guarantee Period and Statutory Claims for Defects
The guarantee period is not extended by the guarantee service. This also applies for replaced or repaired parts. Any damages and defects already present at the time of purchase must be reported immediately after unpacking. Repairs arising after expiry of the guarantee period are chargeable.
Guarantee Cover
The equipment has been carefully produced in accordance with strict quality guidelines and conscientiously checked prior to delivery.
The guarantee applies for all material and manufacturing defects. This guarantee does not extend to cover product parts that are subject to normal wear and may therefore be considered as wearing parts (e.g. Spool) or to cover damage to breakable parts (e.g. battery, charger, cutting plate, protective housing, switches).
This guarantee shall be invalid if the product has been damaged, used incorrectly or not maintained. Precise adherence to all of
the instructions specified in the operating manual is required for proper use of the product. Intended uses and actions against which the operating manual advises or warns must be categorically avoided. The product is designed only for private and not commercial use. The guarantee will be invalidated in case of misuse or improper handling, use of force, or interventions not undertaken by our authorised service branch.
Processing in Case of Guarantee
To ensure quick handling of you issue, please follow the following directions:
- Please have the receipt and item number (IAN 420332_2207) ready as proof of purchase for all enquiries.
- Please find the item number on the rating plate.
- Should functional errors or other defects occur, please initially contact the service department specified below by telephone or by e-mail. You will then receive further information on the processing of your complaint.
- After consultation with our customer service, a product recorded as defective can be sent postage paid to the service address communicated to you, with the proof of purchase (receipt) and specification of what constitutes the defect and when it occurred. In order to avoid acceptance problems and additional costs, please be sure to use only the address communicated to you. Ensure that the consignment is not sent carriage forward or by bulky goods, express or other special freight. Please send the equipment inc. all accessories supplied at the time of purchase and ensure adequate, safe transport packaging.
Repair Service
For a charge, repairs not covered by the guarantee can be carried out by our service branch, which will be happy to issue a cost estimate for you.
We can handle only equipment that has been sent with adequate packaging and postage.
Attention: Please send your equipment to our service branch in clean condition and with an indication of the defect.
Equipment sent carriage forward or by bulky goods, express or other special freight will not be accepted.
We will dispose of your defective devices free of charge when you send them to us.
Service-Center
GB Service Great Britain
Tel.: 0800 404 7657
E-Mail: grizzly@lidl.co.uk
IAN 420332_2207
MT Service Malta Tel: 80062230
E-Mail: grizzly@lidl.com.mt
IAN 420332_2207
Importer
Please note that the following address is not a service address. Please initially contact the service centre specified above.
In the event of an accident or malfunction, disconnect the mains plug immediately! Failure to comply may result in injuries from cuts.
| Problem Possible cause Corrective action | ||
| Appliance won't start | On/Off switch (A 1) defective | Send in to Service Centre for repair |
| Motor defective | ||
| Intermittent operation | Internal loose contact | Send in to Service Centre for repair |
| On/Off switch (A 1) defective | ||
| Much vibration Loud noise | Trimming assembly dirty Clean trimming assembly(see „Cleaning and maintenance”) | |
| Motor defective Send in to Service Centre for repair | ||
| Bad trim | The line spool (D 16) does not have enough cutting line | If necessary, extend the cutting line (see chapter “Device adjustments”)Replace the spool (D 16) (see “Cleaning and Maintenance”). |
| Cutting line is not led out of the spool cover (G 15) | Remove the spool cover (G 15) and feed the cutting line through the openings to the outside, then reinstall the spool. | |
Replacement parts/Accessories
Spare parts and accessories can be obtained at www.grizzlytools.shop
If you have issues ordering, please use the contact form. If you have any other questions, contact the "Service-Center" (see page 31).
G 16 Line spool ....13800032
G 17 Spring....91105867
Sommaire
Introduction ......33
natural_image
Illustration of a person in protective suit using a handheld device (no text or symbols)G 17 Ressort....91105867
Inhoud
Inleiding 50
Gebruik 50
Service-Center......62
Importeur 62
Reserveonderdelen/Accessoires .63
Foutmeldingen 63
U .... 230 - 240V\~ (wisselstroom), 50 Hz
natural_image
Line drawing of a person in protective gear using a tool (no text or symbols)G 17 Veer....91105867
Foutmeldingen

Service-Center....77
Importer 77
natural_image
Line drawing of a person using a tool on a platform (no text or symbols)Service-Center....90
Dovozce....90
natural_image
Illustration of a person in protective gear using a tool (no text or symbols)Service-Center....103
Dovozca....103
natural_image
Line drawing of a person in protective gear using a tool (no text or symbols)Service-Center....116
Importør 116
11.1 Stjerneskrue (stor)
11.2 Stjerneskrue (lille)
D 12 Møtrik
natural_image
Line drawing of a person in protective gear using a tool (no text or symbols)Service-Center....130
Importador 130
natural_image
Line drawing of a person in protective suit using a handheld device (no text or symbols)Service-Center....144
Importatore ....144
natural_image
Line drawing of a person using a walking stick with a cane (no text or symbols)natural_image
Line drawing of a person in protective gear using a tool on a platform (no text or symbols)natural_image
Line drawing of a person using a walking stick (no text or symbols)Kosite travo tako, da orodje pre-mikate levo in desno. Režite po-časi in pri rezanju napravo držite tako, da bo krog rezanja vzpore-den s tlemi. Visoko travo kosite postopoma od zgoraj navzdol.
Pooblaščeni serviser:
Tel.: 080 080917
E-Mail: grizzly@lidl.si
(Birotehnika, Hodošček Renata s.p., Lendavska ULICA 23, 9000 Murska Sobota)
Garancijski list
Razina snage zvuka (L _WA )
Zajamčeni....95 dB
Izmjereni....93,3 dB; K_WA=2,07 dB
Vibracija ( q_h ) ..... < 2,5 m/s ^2 , K= 1,5 m/s ^2
natural_image
Line drawing of a person in protective gear using a tool, no text or symbols presentRežite travu, tako što uređaj zakrećete udesno ili ulijevo. Režite polako i držite prilikom rezanja uređaj s krugom rezanja paralelno u odnosu na pod. Dugu travu režite po slojevima odozgo prema dolje.
natural_image
Line drawing of a person in protective gear using a tool on a platform (no text or symbols)natural_image
Line drawing of a person in protective suit using a tool on a flat surface (no text or symbols)natural_image
Line drawing of a person using a tool on a platform (no text or symbols)| Translation of the originalEC declaration of conformity | |
| We hereby confirm that theElectric Lawn TrimmerPRT 300 C3 seriesSerial number000001 - 065000conforms with the following applicable relevant version of the EU guidelines: | |
| 2006/42/EC • 2014/30/EU • 2000/14/EC & 2005/88/EC2011/65/EU* & (EU) 2015/863 | |
| In order to guarantee consistency, the following harmonised standards as well asnational standards and stipulations have been applied: | |
| EN 60335-1:2012/A15:2021 • EN 50636-2-91:2014 • EN IEC 63000:2018EN 55014-1:2017/A11:2020 • EN IEC 55014-1:2021EN 55014-2:1997/A2:2008 • EN IEC 55014-2:2021EN 61000-3-2:2014 • EN IEC 61000-3-2:2019/A1:2021EN 61000-3-3:2013 • EN 61000-3-3:2013/A2:2021 | |
| We additionally confirm the following in accordance with the 2000/14/EC emissions guideline: Guaranteed sound power level: 95 dBMeasured sound power level: 93,3 dBCompliance evaluation process carried out in accordance with Appendix VI,2000/14/ECRegistered Office: NB 0036, TÜV SÜD Industrie Service GmbH, Westendstrasse 199,80686 München, Germany | |
| This declaration of conformity is issued under the sole responsibility of the manufacturer: | |
 Grizzly Tools GmbH & Co. KGStockstädter Straße 2063762 Großostheim,Germany, 05.12.2022 Grizzly Tools GmbH & Co. KGStockstädter Straße 2063762 Großostheim,Germany, 05.12.2022 |  Christian FrankDocumentation Representative Christian FrankDocumentation Representative |
* The object of the declaration described above satisfies the provisions of Directive 2011/65/EU of the European Parliament and the Council of 8 June 2011 on limiting the use of certain harmful substances in electrical and electronic appliances.