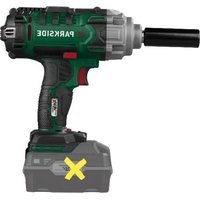
PASSK 20-Li C4 - Screwdriver PARKSIDE - Free user manual and instructions
Find the device manual for free PASSK 20-Li C4 PARKSIDE in PDF.


| Product type | Cordless impact wrench |
| Brand | Parkside |
| Model | PASSK 20-Li C4 |
| Rated voltage | 20 V === |
| No-load speed | 0 - 2,300 min-1 |
| Max torque | 400 Nm (clockwise and counterclockwise) |
| Tool holder | 1/2" square |
| Battery type | Lithium-ion |
| Battery capacity | 4 Ah |
| Battery energy | 80 Wh |
| Number of cells | 10 |
| Charger included | Yes, fast charger PLG 20 C3 |
| Charger input voltage | 230-240 V~, 50 Hz |
| Charging current | 4.5 A |
| Sound pressure level | 85.8 dB (K=3 dB) |
| Sound power level | 93.8 dB (K=3 dB) |
| Vibration value (ah) | 4.066 m/s² (K=1.5 m/s²) |
| Package contents | Impact wrench, 4 sockets (17, 19, 21, 23 mm), belt clip, storage case, instruction manual |
| Functions | Reversible rotation direction, torque adjustment, speed regulator, LED light, belt clip |
| Protection | Protection class II (double insulation) |
| Intended use | Tightening and loosening screws, bolts and nuts |
| Warranty | 3 years |
| Maintenance | Clean with a dry cloth, keep ventilation slots free |
| Repairability | No user-serviceable parts, contact customer service |
Frequently Asked Questions - PASSK 20-Li C4 PARKSIDE
User questions about PASSK 20-Li C4 PARKSIDE
0 question about this device. Answer the ones you know or ask your own.
Ask a new question about this device
Download the instructions for your Screwdriver in PDF format for free! Find your manual PASSK 20-Li C4 - PARKSIDE and take your electronic device back in hand. On this page are published all the documents necessary for the use of your device. PASSK 20-Li C4 by PARKSIDE.
USER MANUAL PASSK 20-Li C4 PARKSIDE
natural_image
Exterior view of a black Parkside electric drill press (no text or symbols visible on the device body)20 V AKKU-DREHSCHLAGSCHRAUBER/ 20V CORDLESS IMPACT WRENCH/ 20 V VISSEUSE À CHOCS SANS FIL PASSK 20-Li C4
DE AT CH
20 V AKKU-
DREHSCHLAGSCHRAUBER
Bedienungsanleitung
Translation of the original instructions
FR BE
20 V VISSEUSE À CHOCS SANS FIL
Mode d'emploi
NOTE: The actual charging time may be slightly different from the above stated depending on the ambient temperature and the condition of the battery pack. The information is subject to change without prior notice.
20 V AKKU-DREHSCHLAG- SCHRAUBER
Einleitung
List of pictograms used ...... Page 27
Introduction Page 28
Intended use.... Page 28
Scope of delivery Page 28
Parts list Page 28
Technical data.... Page 29
General safety instructions.... Page 30
General power tool safety warnings.... Page 30
Safety instructions for vehicle impact wrenches ...... Page 33
Vibration and noise reduction.... Page 33
Behaviour in emergency situations. Page 34
Residual risks Page 34
Battery charger safety warnings.... Page 34
Before first use.... Page 35
Unpacking the product.... Page 35
Accessories Page 36
Charging the battery pack Page 36
Inserting/removing the battery pack.... Page 37
Checking the battery pack's charging level . . . . . . . . . . . . . . . . . . . . . . . . . . . . . . . . . . . . . . . . . . . . . . . . . . . . . . . . . . . . . . . . . . . . . . . . Page 37
Operation.... Page 37
Inserting/removing the tool.... Page 37
Setting the direction of rotation ...... Page 37
Adjusting the torque.... Page 38
Switching on/off Page 38
Speed control.... Page 38
LED work light Page 38
Belt clip.... Page 38
Working instructions.... Page 38
Differences between screwdrivers and impact wrenches ..... Page 39
Cleaning and care ...... Page 39
Maintenance Page 40
Repair Page 40
Storage Page 40
Transportation.... Page 40
Disposal Page 40
Warranty.... Page 41
Warranty claim procedure.... Page 41
Service Page 42
EU declaration of conformity.... Page 43
| List of pictograms used | |||
 | This symbol means that the operating instructions must be observed when using the product. |  | Switch the product off and remove the battery pack before replacing attachments, cleaning and when not in use. |
 | |||
 | WARNING! – Designating a hazard with moderate risk, which can result in death or severe injury if not avoided (e.g. risk of electric shock) |  | Protect the battery pack against heat and continuous intense sunlight. |
 | CAUTION! – Designating a hazard with low risk, which could result in minor or moderate injury if not avoided (e.g. risk of scalding) |  | Protect the battery pack against water and moisture. |
 | NOTICE! – Warns of possible damage to property/the product if not avoided (e.g. risk of short circuit) |  | Protect the battery pack from fire. |
 | Warning – hot surface! |  | Protection class II (double insulation) |
 | Alternating current/voltage Fuse |  | |
 | Direct current/voltage |  | Wear hearing protection! |
 | CE mark indicates conformity with relevant EU directives applicable for this product. | ### | Safety information Instructions for use |
20V CORDLESS IMPACT WRENCH
Introduction
We congratulate you on the purchase of your new product. You have chosen a high quality product. The instructions for use are part of the product. They contain important information concerning safety, use and disposal. Before using the product, please familiarise yourself with all of the safety information and instructions for use. Only use the product as described and for the specified applications. If you pass the product on to anyone else, please ensure that you also pass on all the documentation with it.
Intended use
☐ This cordless impact wrench (hereinafter “product” or “power tool”) is designed for fastening and removing screws, bolts and nuts using an impact socket.
☐ The product is intended to be used only by adults who have read and understood the instructions and warnings in this user manual. The users are responsible for their actions.
☐ Any other use or modification of the product are considered improper use and can result in hazards such as death, life-threatening injuries and damage.
☐ The manufacturer is not liable for any damages caused by improper use.
☐ The product is not intended for commercial use or for any other use.
- Scope of delivery
WARNING!
The product and the packaging are not children's toys! Children must not play with plastic bags, sheets and small parts! There is a danger of choking and suffocation!
1 20V Cordless impact wrench
4 Sockets (17 mm, 19 mm, 21 mm, 23 mm)
1 Belt clip (pre-installed)
1 Storage case
1 User manual
Parts list
(Fig. A)
1 Tool holder
2 Housing
3 Vents
4 Rotational direction switch
5 LED work light
6 Torque button
7 Handle
7a Belt clip
8 On/off switch
(Fig. B)
9 Battery pack *
10 button (charging level)
11 Charging level LEDs (red/orange/green)
12 Release button for battery pack
(Fig. C)
13 Mains cord with mains plug
14 Battery charger * (rapid battery charger)
15 Charging control LED - Red
16 Charging control LED – Green
(Fig. D)
| 17 | Storage case |
| 18 | Socket, 23 mm |
| 19 | Socket, 21 mm |
| 20 | Socket, 19 mm |
| 21 | Socket, 17 mm |
- Technical data
| 20V Cordless impact wrench | PASSK 20-Li C4 |
| Model number: HG11293 | |
| Rated voltage: 20 V | --- |
| Idling speed n0: 0–2,300 min -1 | |
| Max. torque:-Clockwise rotation: 400 N m-Counter-clockwise rotation: 400 N m | |
| Tool holder: 1⁄2" Square | |
| Battery pack * PAP 20 B3 | |
| Model number: HG08981 | |
| Type: Lithium-Ion | |
| Rated voltage: 20 V | --- |
| Capacity: | 4 Ah |
| Energy value: | 80 Wh |
| Number of cells: | 10 |
| Rapid battery charger * | PLG 20 C3 |
| Model number: | |
| - VDE plug: | HG08983 |
| - BS plug: | HG08983-BS |
| Input: | |
| Rated voltage: 230–240 V~ | |
| Rated frequency: | 50 Hz |
| Rated power: | 120 W |
| Output: | |
| Rated voltage: 21.5 V | --- |
| Charging current: | 4.5 A |
| Protection class: | II/☐ |
| Fuse (internal): | 3.15 A/T3.15A |
Recommended ambient temperature
| While charging: | +4 °C to +40 °C |
| During operation: | -20 °C to +50 °C |
| During storage: | 0 °C to +45 °C |
Noise emission value
Noise measurement value determined in accordance with EN 62841. The A-rated noise level of the power tool at the working location is typically as follows:
| Sound pressure level L_pA : | 85.8 dB |
| Uncertainty K_pA : | 3 dB |
| Sound power level L_WA : | 93.8 dB |
| Uncertainty K_WA : | 3 dB |
Vibration emission value
Total vibration values (vector total of three directions) determined in accordance with EN 62841:
| Impact tightening a_h : | 4.066 m/s ^2 |
| Uncertainty K: | 1.5 m/s ^2 |

WARNING!

Wear hearing protection!
NOTE
The vibration emission values and the noise emission values given in these instructions have been measured in accordance with a standardised test procedure and can be used for comparison of the power tool with another tool.
The specified total vibration values and the noise emission values can also be used to make a provisional load estimate.

WARNING!
Depending on the manner in which the power tool is being used and, in particular, the kind of workpiece being worked, the vibration and noise emission values can deviate from the values given in these instructions during actual use of the power tool.
Try to minimise exposure to vibration and noise. Examples of measures to reduce vibration include wearing gloves when using the tool and limiting working time. All parts of the operating cycle must be taken into account (e.g. times when the power tool is switched off and when it is running idle in addition to the trigger time).

General safety instructions
● General power tool safety warnings

WARNING!

Read all safety warnings, instructions, illustrations and specifications provided with this power tool. Failure to follow all instructions listed below may result in electric shock, fire and/or serious injury.
Save all warnings and instructions for future reference.
The term “power tool” in the warnings refers to your mains-operated (corded) power tool or battery-operated (cordless) power tool.
Work area safety
a) Keep work area clean and well lit. Cluttered or dark areas invite accidents.
b) Do not operate power tools in explosive atmospheres, such as in the presence of flammable liquids, gases or dust. Power tools create sparks which may ignite the dust or fumes.
c) Keep children and bystanders away while operating a power tool. Distractions can cause you to lose control.
Electrical safety
a) Power tool plugs must match the outlet. Never modify the plug in any way. Do not use any adapter plugs with earthed (grounded) power tools. Unmodified plugs and matching outlets will reduce risk of electric shock.
b) Avoid body contact with earthed or grounded surfaces, such as pipes, radiators, ranges and refrigerators. There is an increased risk of electric shock if your body is earthed or grounded.
c) Do not expose power tools to rain or wet conditions. Water entering a power tool will increase the risk of electric shock.
d) Do not abuse the cord. Never use the cord for carrying, pulling or unplugging the power tool. Keep cord away from heat, oil, sharp edges or moving parts. Damaged or entangled cords increase the risk of electric shock.
e) When operating a power tool outdoors, use an extension cord suitable for outdoor use. Use of a cord suitable for outdoor use reduces the risk of electric shock.
f) If operating a power tool in a damp location is unavoidable, use a residual current device (RCD) protected supply. Use of an RCD reduces the risk of electric shock.
Personal safety
a) Stay alert, watch what you are doing and use common sense when operating a power tool. Do not use a power tool while you are tired or under the influence of drugs, alcohol or medication. A moment of inattention while operating power tools may result in serious personal injury.
b) Use personal protective equipment. Always wear eye protection. Protective equipment such as dust mask, non-skid safety shoes, hard hat, or hearing protection used for appropriate conditions will reduce personal injuries.
c) Prevent unintentional starting. Ensure the switch is in the off-position before connecting to power source and/or battery pack, picking up or carrying the tool. Carrying power tools with your finger on the switch or energising power tools that have the switch on invites accidents.
d) Remove any adjusting key or wrench before turning the power tool on. A wrench or a key left attached to a rotating part of the power tool may result in personal injury.
e) Do not overreach. Keep proper footing and balance at all times.
This enables better control of the power tool in unexpected situations.
f) Dress properly. Do not wear loose clothing or jewellery. Keep your hair, clothing and gloves away from moving parts. Loose clothes, jewellery or long hair can be caught in moving parts.
g) If devices are provided for the connection of dust extraction and collection facilities, ensure these are connected and properly used. Use of dust collection can reduce dust-related hazards.
h) Do not let familiarity gained from frequent use of tools allow you to become complacent and ignore tool safety principles. A careless action can cause severe injury within a fraction of a second.
Power tool use and care
a) Do not force the power tool. Use the correct power tool for your application. The correct power tool will do the job better and safer at the rate for which it was designed.
b) Do not use the power tool if the switch does not turn it on and off. Any power tool that cannot be controlled with the switch is dangerous and must be repaired.
c) Disconnect the plug from the power source and/or the battery pack, if detachable, from the power tool before making any adjustments, changing accessories, or storing power tools. Such preventive safety measures reduce the risk of starting the power tool accidentally.
d) Store idle power tools out of the reach of children and do not allow persons unfamiliar with the power tool or these instructions to operate the power tool. Power tools are dangerous in the hands of untrained users.
e) Maintain power tools and accessories. Check for misalignment or binding of moving parts, breakage of parts and any other condition that may affect the power tool's operation. If damaged, have the power tool repaired before use. Many accidents are caused by poorly maintained power tools.
f) Keep cutting tools sharp and clean. Properly maintained cutting tools with sharp cutting edges are less likely to bind and are easier to control.
g) Use the power tool, accessories and tool bits etc. in accordance with these instructions, taking into account the working conditions and the work to be performed.
Use of the power tool for operations different from those intended could result in a hazardous situation.
h) Keep handles and grasping surfaces dry, clean and free from oil and grease. Slippery handles and grasping surfaces do not allow for safe handling and control of the tool in unexpected situations.
Battery tool use and care
a) Recharge only with the charger specified by the manufacturer. A charger that is suitable for one type of battery pack may create a risk of fire when used with another battery pack.
b) Use power tools only with specifically designated battery packs. Use of any other battery packs may create a risk of injury and fire.
c) When battery pack is not in use, keep it away from other metal objects, like paper clips, coins, keys, nails, screws or other small metal objects, that can make a connection from one terminal to another. Shorting the battery terminals together may cause burns or a fire.
d) Under abusive conditions, liquid may be ejected from the battery; avoid contact. If contact accidentally occurs, flush with water. If liquid contacts eyes, additionally seek medical help. Liquid ejected from the battery may cause irritation or burns.
e) Do not use a battery pack for tool that is damaged or modified. Damaged or modified batteries exhibit unpredictable behaviour resulting in fire, explosion or risk of injury.
f) Do not expose a battery pack or tool to fire or excessive temperature. Exposure to fire or temperature above +130 °C may cause explosion.
g) Follow all charging instructions and do not charge the battery pack or tool outside the temperature range specified in the instructions. Charging improperly or at temperatures outside the specified range may damage the battery and increase the risk of the fire.
 | CAUTION! RISK OF EXPLOSION! Never charge non-rechargeable batteries! |
 | Protect the rechargeable battery from heat, for example from continuous exposure to sunlight, fire, water and moisture. There is a risk of explosion. |
 | |
 |
Service
a) Have your power tool serviced by a qualified repair person using only identical replacement parts. This will ensure that the safety of the power tool is maintained.
b) Never service damaged battery packs. Service of battery packs should be only be performed by the manufactured or authorized service providers.
● Safety instructions for vehicle impact wrenches
a) Hold the power tool by insulated gripping surfaces, when performing an operation where the fastener may contact hidden wiring or its own cord. Fasteners contacting a “live” wire may make exposed metal parts of the power tool “live” and could give the operator an electric shock.
b) Keep hands away from rotating parts. Wait until the power tool has stopped before placing it down.
Risk of injury!
c) Avoid contact with the tool insert or the component part immediately after processing. The parts may be hot and cause burn injuries.
d) Immediately switch off the power tool if the tool insert is blocked due to overloading or tilting of the component part. The loss of control can result in injuries.
e) Secure the workpiece. A workpiece that is retained with clamping appliances or a vice is held more securely than with your hand.
f) In case of soft materials such as aluminium or similar, using the impact wrench can damage the thread or screw seat if screwed too tight.
g) Protect yourself and others, including people in the immediate vicinity, with the necessary safety measures or precautions to prevent damage to health.
h) Do not use any accessories that are not recommended by PARKSIDE. This can result in electric shock or fire.
● Vibration and noise reduction
To reduce the impact of noise and vibration emission, limit the time of operation, use low-vibration and low-noise operating modes as well as wear personal protective equipment.
Take the following points into account to minimise the vibration and noise exposure risks:
■ Only use the product as intended by its design and these instructions.
■ Ensure that the product is in good condition and well maintained.
- Keep tight grip on the handles/grip surface.
- Maintain this product in accordance with these instructions and keep it well lubricated (where appropriate).
Plan your work schedule to spread any high vibration tool use across a longer period of time.
● Behaviour in emergency situations
Familiarise yourself with the use of this product by means of this instruction manual. Memorise the safety warnings and follow them to the letter. This will help to prevent risks and hazards.
■ Always be alert when using this product, so that you can recognise and handle risks early. Fast intervention can prevent serious injury and damage to property.
■ Switch the product off and remove the battery pack if there are malfunctions. Have the product checked by a qualified professional and repaired, if necessary, before you operate it again.
Residual risks
Even if you are operating this product in accordance with all the safety requirements, potential risks of injury and damage remain. The following dangers can arise in connection with the structure and design of this product:
■ Injuries caused by moving parts or hot surfaces.
- Ear damage if working without ear protection.
■ Damage to your health caused by swinging your hands and arms when operating the appliance for longer periods of time or if the unit is not held or maintained properly.
NOTE
This product produces an electromagnetic field during operation! This field may under some circumstances interfere with active or passive medical implants!
To reduce the risk of serious or fatal injury, we recommend persons with medical implants to consult their doctor and the medical implant manufacturer before operating this product!
● Battery charger safety warnings
This appliance can be used by children aged from 8 years and above and persons with reduced physical, sensory or mental capabilities or lack of experience and knowledge if they have been given supervision or instruction concerning use of the appliance in a safe way and understand the hazards involved.
Children shall not play with the appliance.
Cleaning and user maintenance shall not be made by children without supervision.
■ Do not charge non-rechargeable batteries. Disregarding this instruction is hazardous.
If the supply cord is damaged, it must be replaced by the manufacturer, its service agent or similarly qualified persons in order to avoid a hazard.
■ Protect the electrical parts against moisture. Do not immerse such parts in water or other liquids to avoid electrical shock. Never hold the appliance under running water. Pay attention to the instructions provided for cleaning, maintenance and repair.

The appliance is suitable for indoor use only.
⚠ NOTICE! This charger is only designed for charging the following battery pack types:
| /// PARKSIDE® 20 Vbattery pack | ||
| PAP 20 B1 2 | Ah 5 cells | |
| PAP 20 B3 4 | Ah 10 cells | |
| PAPS 204 A1 | 4 Ah | 5 cells |
| PAPS 208 A1 | 8 Ah | 10 cells |
Suitable battery packs and chargers
| Battery pack: | X/20 V/Team |
| Charger: X 20 | V/TEEKSIDE |
Customers can obtain compatible replacement batteries and chargers via www.optimex-shop.com.
Before first use
● Unpacking the product
- Take the product out of the packaging and remove all packaging materials and plastic wrappings.
- Check to make sure that all listed parts are included (see "Scope of delivery").
- Check whether the product and all parts are in good condition, if any damage or defect is detected, do not use the product, but follow the procedure described in chapter "Warranty".
Accessories
NOTE
This user manual contains information and suggestions for accessories and their uses. The accessories depicted are not included in the shipment, but are meant to indicate additional possibilities for using this product.
☐ To operate this product safely and correctly, we recommend the following accessories:
| Accessories | Function |
| Impact sockets | □ Specifically designed to handle the high torque produced by the product.□ Get a set of sockets in various sizes to cover different bolt and nut sizes. |
| Socket extensions | Useful for reaching bolts that are deeply recessed or in hard-to-reach areas. |
| Universal joints | Allows flexibility in positioning the product. This enables reaching bolts at various angles. |
| Protective gear | □ Safety glasses and ear protection are essential when using any power tools.□ The high torque can generate a lot of noise, and there may be debris or oil splatter. |
| Torque sticks/wrench | For tasks that require specific torque settings, torque sticks/wrench can help to achieve accurate and consistent results. |
□ Accessories are available through your speciality retailer. When buying always consider the technical requirements of this product (see "Technical data").
☐ If you are not certain, ask a qualified specialist and get advice from your trusted dealer.
● Charging the battery pack (Fig. C)
NOTE
The battery pack 9 may be charged at any time without reducing its life.
Interrupting the charging process does not damage the battery pack 9.
Before operation: Charge the battery pack 9 when it is at medium or low charging level (see “Checking the battery pack’s charging level”).
☐ The charging control LEDs (red 15 and green 16) indicate the status of the charger 14 and the battery pack 9.
| LED Status | |
| Red LED lights up | Battery pack charges |
| Green LED lights up | Battery pack fully charged |
| Green LED and red LED flashing | Battery pack defective |
| Red LED flashing | Battery pack too cold or too warm |
| Green LED lights up (without battery pack) Charger ready |
- Insert the battery pack 9 into the battery charger 14.
-
Connect the mains plug of the charger 13 to a mains outlet.
-
When the battery pack 9 is fully charged:
-
Disconnect the mains plug of the charger 13 from the mains outlet.
- Remove the battery pack 9 from the battery charger 14.
- Inserting/removing the battery pack
Inserting the battery pack
- Push the battery pack 9 into the handle 7.
- Ensure the battery pack 9 clicks audibly in place.
Removing the battery pack
- Press the release button 12 on the battery pack 9.
- Pull the battery pack 9 from the handle 7.
- Checking the battery pack’s charging level
(Fig. B)
☐ Check battery pack's charging level: Press the button 10. The charging level LEDs 11 show the charging level as follows:
| Charging level LEDs | Charging level |
| Red/orange/green Maximum | Maximum |
| Red/orange Medium | |
| Red Low |

Operation
⚠ WARNING! Risk of injury!

Always switch the product off and remove the battery pack 9 before making any adjustments.
- Inserting/removing the tool
Inserting the tool
-
Select the desired socket:
-
Socket, 17 mm 21
- Socket, 19 mm 20
- Socket, 21 mm 19
-
Socket, 23 mm 18
-
Push the socket 18/19/20/21 into the tool holder 1.
Removing the tool
☐ Pull the socket 18/19/20/21 from the tool holder 1.
NOTE
The tool holder 1 features a hole. This allows inserting a detent pin (not included) to lock an impact socket (not included) with holes in the corresponding positions of the square connection.
- Setting the direction of rotation
(Fig. E)
NOTE
Operating the rotational direction switch 4: The product must be switched off and come to a standstill.
☐ Set the rotational direction switch 4 to one of the 3 positions:
| Position of the rotational direction switch 4 | Rotational direction |
| Left | Clockwise |
| Middle | On/off switch 8 locked |
| Right | Counter-clockwise |
- Adjusting the torque
NOTE
The product uses the previously used torque setting when it is switched on.
☐ Read the current torque: Press the torque button 6 briefly once.
□ Adjust the set torque: Press the torque button 6 repeatedly until the desired torque setting is selected.
- Switching on/off
Switching on
☐ Press and hold the on/off switch 8. The inserted socket 18/19/20/21 starts rotating.
Switching off
☐ Release the on/off switch 8.
Speed control
☐ Progressively controlling the speed: Apply gentle or stronger pressure on the on/off switch 8.
| Pressure Speed | |
| Gentle Low | |
| Strong High |
LED work light
NOTE
▶ Improve visibility in poorly lit areas: This product is equipped with a LED work light 5 to illuminate the immediate working area.
After switching off the product: The LED work light 5 stays on for approx. another 10 seconds.
☐ As soon as the product is switched on: The LED work light 5 switches on immediately.
Belt clip
(Fig. A)
⚠️ CAUTION! Risk of injury!
Before hanging the product on a belt: Push the rotational direction switch 4 to the centre position (lock). This prevents the product from being switched on accidentally.
☐ Hanging the product on a belt: Use the belt clip 7a.
- Working instructions
NOTE
The tightening torque depends on:
– the selected torque setting
- the speed
- the screw or nut type
– the base material to be fastened
– the impacting duration
The product may only be used to tighten bolts and nuts for pre-assembly work. It is not the product that achieves the desired target torque of the screw or nut, but a torque wrench that is set to the target torque.
▶ Check the tightening torque actually achieved with a torque wrench.
When using the product for longer periods of time: Allow the product to run for about 10 seconds without load. The ventilation of the motor blows air to the front driving mechanism to cool it down.
In order to achieve optimum impact force, do not exert any pressure against the screw/nut.
NOTE
Processing assembly operations: Always follow the manufacturer's instructions or guidelines for screws, bolts, nuts and specific fasteners.
NOTE
After changing a vehicle's wheel(s): Inspect the wheel bolts or nuts as requested in the manufacturer's instructions or guidelines. Tighten the wheel bolts or nuts with a torque wrench after approx. 50 to 100km .
● Differences between screwdrivers and impact wrenches
To facilitate the selection of the appropriate tool, the following table illustrates the differences between screwdrivers and impact wrenches.
| Screwdriver Impact wrench | ||
| Purpose: Driving and loosening screws in various materials. | Fastening and unfastening nuts and bolts, especially for tasks with automotive vehicles. | |
| Torque: Moderate torque for versatile applications. | High torque for heavy-duty applications. | |
| Chuck type: Accommodates various screwdriver bits. | Square drive for attaching sockets directly. | |
| Impact mechanism: | Standard rotating mechanism. | Employs rapid bursts of torque for quick fastening and loosening. |
| Versatility: Suitable for light-duty fastening. | Specialized for heavy-duty fastening tasks. | |
● Cleaning and care

WARNING! Risk of injury!

Always switch the product off and remove the battery pack 9 before making any adjustments.
NOTE
Do not use chemical, alkaline, abrasive or other aggressive detergents or disinfectants to clean this product as they might be harmful to its surfaces.
■ Never allow fluids to get into the product.
□ Always keep the product clean, dry and free from oil or grease.
□ After each use and before storage: Remove debris from the product.
☐ Regular and proper cleaning helps to ensure safe use and prolongs the life of the product.
□ Clean the product with a dry cloth.
□ Use a soft brush for areas that are hard to reach.
☐ In particular, clean the vents 3 after every use with a cloth and soft brush. The vents must always be clear.
Maintenance
Before and after each use: Check the product and accessories for wear and damage. If required, replace worn or damaged accessories. Observe the technical requirements (see “Technical data”).
Repair
☐ This product does not contain any parts that can be repaired by the user.
☐ Contact an authorised service centre or a similarly qualified person to have the product checked and repaired.
Storage
□ Clean the product as described above.
□ Store the product and its accessories in a dark, dry, frost-free, well-ventilated place.
□ Always store the product in a place that is inaccessible to children.
☐ The ideal temperature for a long term storage (longer than 3 months) is between +20 and +26 °C.
□ Store the product in its storage case 17.
Battery pack
☐ Before storing for extended periods: Only store the battery pack 9 partially charged. The battery pack should be charged at 40 to 60 % (red and orange charging level LEDs 11 light up).
☐ When storing for extended periods: Check the charging level of the battery pack 9 about every 3 months. Recharge the battery pack, if necessary.
- Transportation
□ Transport the product in its storage case 17.
□ Protect the product from any heavy impact or strong vibrations which may occur during transportation in vehicles.
☐ Secure the product to prevent it from slipping or falling over.
- Disposal
The packaging is made entirely of recyclable materials, which you may dispose of at local recycling facilities.
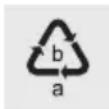
Observe the marking of the packaging materials for waste separation, which are marked with abbreviations (a) and numbers (b) with following meaning: 1–7: plastics/20–22: paper and fibreboard/80–98: composite materials.
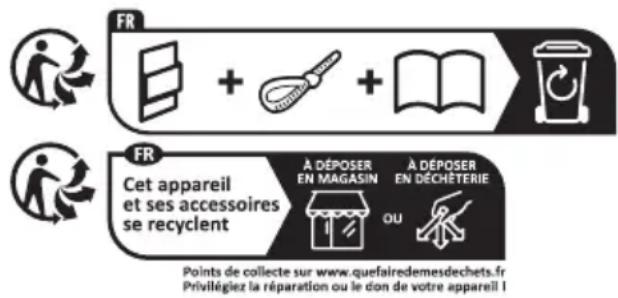
Product:
flowchart
graph LR
    A["Recycling"] --> B["+"]
    B --> C["+"]
    C --> D["Recycling"]
    E["Appareil"] --> F["Cet appareil et ses accessoires se recyclent"]
    F --> G["A DÉPOSER EN MAGASIN"]
    F --> H["A DÉPOSER EN DÉCHÉTERIE"]
    G --> I["OU"]
    H --> J["OU"]
The product incl. accessories and packaging materials are recyclable and are subject to extended producer responsibility.
Dispose them separately, following the illustrated Info-tri (sorting information), for better waste treatment.
The Triman logo is valid in France only.

Contact your local refuse disposal authority for more details of how to dispose of your worn-out product.
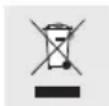
To help protect the environment, please dispose of the product properly when it has reached the end of its useful life and not in the household waste. Information on collection points and their opening hours can be obtained from your local authority.
Faulty or used batteries/rechargeable batteries must be recycled. Return the batteries/rechargeable batteries and/or the product to the available collection points.
Environmental damage through incorrect disposal of the batteries/rechargeable batteries!
Remove the batteries/battery pack from the product before disposal.
Batteries/rechargeable batteries may not be disposed of with the usual domestic waste. They may contain toxic heavy metals and are subject to hazardous waste treatment rules and regulations. The chemical symbols for heavy metals are as follows: Cd = cadmium, Hg = mercury, Pb = lead. That is why you should dispose of used batteries/rechargeable batteries at a local collection point.
Warranty
The product has been manufactured to strict quality guidelines and meticulously examined before delivery. In the event of material or manufacturing defects you have legal rights against the retailer of this product. Your legal rights are not limited in any way by our warranty detailed below.
The warranty for this product is 3 years from the date of purchase. The warranty period begins on the date of purchase. Keep the original sales receipt in a safe location as this document is required as proof of purchase.
Any damage or defects already present at the time of purchase must be reported without delay after unpacking the product.
Should the product show any fault in materials or manufacture within 3 years from the date of purchase, we will repair or replace it – at our choice – free of charge to you. The warranty period is not extended as a result of a claim being granted. This also applies to replaced and repaired parts.
This warranty becomes void if the product has been damaged, or used or maintained improperly.
The warranty covers material or manufacturing defects. This warranty does not cover product parts subject to normal wear and tear, thus considered consumables (e.g. batteries, rechargeable batteries, tubes, cartridges), nor damage to fragile parts, e.g. switches or glass parts.
● Warranty claim procedure
So that your request can be processed quickly, please observe the following instructions:
For all inquiries, please have the receipt and item number (IAN 465707_2404) ready as proof of purchase.
The article number can be taken from the identification label on the product, engraving on the product, the front cover of your manual (at the bottom left), or the sticker on the back or bottom of the product.
If malfunctions or other defects arise, first contact the service department indicated below by phone or email.
You can then send a product recorded as defective to the communicated service address postage-free, making sure to enclose proof of purchase (receipt) and information on the details of the defect and when it occurred.
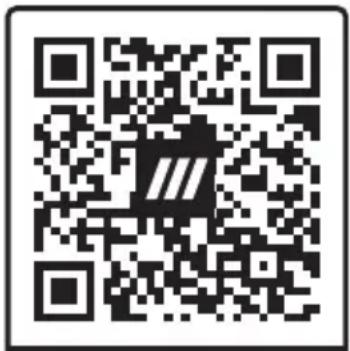
PDF ONLINE
parkside-diy.com
You can download and view this and numerous other manuals at parkside-diy.com. This QR code takes you directly to parkside-diy.com. Choose your country and use the search screen to search for the operating instructions. Entering the item number (IAN) 465707_2404 takes you to the operating instructions for your item.

Service

Service Great Britain
Tel.:0800 0569216
E-Mail: owim@lidl.co.uk

Service Ireland
Tel.:1800 200736
E-Mail: owim@lidl.ie
● EU declaration of conformity
EU DECLARATION OF CONFORMITY (No. 465707\_2404)
IAN:
465707_2404
Product identification:
"PARKSIDE" Cordless Impact Wrench
Model Number:
HG11293
The object of the declaration described above is in conformity with the relevant Union harmonisation legislation:
| Directive 2006/42/EC |
| Directive 2014/30/EU |
| Directive 2011/65/EU and all related amendments |
References to the relevant harmonised standards used or references to the other technical specifications in relation to which conformity is declared:
| N° / Parts |
| Directive 2006/42/EC |
| EN 62841-1:2015/A11:2022 |
| EN 62841-2-2:2014 |
| Directive 2014/30/EU |
| EN IEC 55014-1:2021 |
| EN IEC 55014-2:2021 |
The object of the declaration described above is in conformity with Directive 2011/65/EU of the European Parliament and of the Council of 8 June 2011 on the restriction of the use of certain hazardous substances in electrical and electronic equipment:
| N° / Parts |
| EN IEC 63000:2018 |
Keeper of the technical documentation: OWIM GmbH & Co.KG
Signed for and on behalf of:
This declaration of conformity is issued under the sole responsibility of the manufacturer.
Translation of the original declaration of conformity
Neckarsulm
19.07.2024
Place
Date
EN



- V AKKU-DREHSCHLAGSCHRAUBER/ 20V CORDLESS IMPACT WRENCH/ 20 V VISSEUSE À CHOCS SANS FIL PASSK 20-Li C4
- V AKKU-DREHSCHLAG- SCHRAUBER
- Einleitung
- List of pictograms used ...... Page 27
- Introduction Page 28
- General safety instructions.... Page 30
- Before first use.... Page 35
- Operation.... Page 37
- Cleaning and care ...... Page 39
- Disposal Page 40
- Warranty.... Page 41
- Service Page 42
- EU declaration of conformity.... Page 43
- 20V CORDLESS IMPACT WRENCH
- Introduction
- Intended use
- - Scope of delivery
- WARNING!
- Parts list
- Noise emission value
- Vibration emission value
- NOTE
- General safety instructions
- Save all warnings and instructions for future reference.
- Work area safety
- Electrical safety
- Personal safety
- Power tool use and care
- Battery tool use and care
- Service
- ● Vibration and noise reduction
- ● Behaviour in emergency situations
- Residual risks
- ● Battery charger safety warnings
- Before first use
- ● Unpacking the product
- Accessories
- - Inserting/removing the battery pack
- Inserting the battery pack
- Removing the battery pack
- - Checking the battery pack’s charging level
- Operation
- ⚠ WARNING! Risk of injury!
- - Inserting/removing the tool
- Inserting the tool
- Removing the tool
- - Setting the direction of rotation
- - Adjusting the torque
- - Switching on/off
- Switching on
- Switching off
- Speed control
- LED work light
- Belt clip
- ⚠️ CAUTION! Risk of injury!
- - Working instructions
- ● Differences between screwdrivers and impact wrenches
- ● Cleaning and care
- WARNING! Risk of injury!
- Maintenance
- Repair
- Storage
- Battery pack
- - Transportation
- - Disposal
- Product:
- Environmental damage through incorrect disposal of the batteries/rechargeable batteries!
- Warranty
- ● Warranty claim procedure
- ● EU declaration of conformity
- EU DECLARATION OF CONFORMITY (No. 465707\_2404)
Brand : PARKSIDE
Model : PASSK 20-Li C4
Category : Screwdriver