
SMZA 12 A1 - Slicer SILVERCREST - Free user manual and instructions
Find the device manual for free SMZA 12 A1 SILVERCREST in PDF.

| Product Type | Multi-function food processor (chopper, whisk, emulsifier) |
| Brand | SilverCrest |
| Model | SMZA 12 A1 |
| Power Supply | 12 V lithium-ion battery (Parkside X 12 V TEAM series, 2 Ah or 2.5 Ah, not included) |
| Power Consumption | 150 W |
| Bowl Capacity (Solid Food) | 300 ml max |
| Bowl Capacity (Liquids) | 200 ml max |
| Short Operating Time (Knife Insert) | 30 seconds |
| Short Operating Time (Emulsifier Disc) | 2 minutes |
| Main Functions | Chopping, whipping cream, emulsifying |
| Speeds | 2 levels (I and II) + pulse |
| Bowl Material | Plastic (dishwasher safe) |
| Dishwasher Safe Parts | Knife insert, emulsifier disc, lid |
| Motor Block Cleaning | Damp cloth, do not immerse |
| Safety | Sharp blade (caution), stop on release of START button, thermal protection with limited runtime |
| Included Accessories | Motor block, bowl with graduated lid, knife insert, emulsifier disc, drive shaft, short user manual |
| Battery and Charger | Not included (Parkside X 12 V TEAM series) |
| Warranty | 3 years |
| Manufacturer | TARGA GmbH, Coesterweg 45, 59494 Soest, Germany |
| Usage | Household only, no bones or frozen food (except ice cubes and frozen berries) |
Frequently Asked Questions - SMZA 12 A1 SILVERCREST
User questions about SMZA 12 A1 SILVERCREST
0 question about this device. Answer the ones you know or ask your own.
Ask a new question about this device
Download the instructions for your Slicer in PDF format for free! Find your manual SMZA 12 A1 - SILVERCREST and take your electronic device back in hand. On this page are published all the documents necessary for the use of your device. SMZA 12 A1 by SILVERCREST.
USER MANUAL SMZA 12 A1 SILVERCREST
Last Information Update
Deutsch....2
English 18
Français 33
Nederlands....52
Polski....68
Česky 85
Slovenčina 101
Español....117
Dansk 133
Italiano....149
Magyar 166
Inhaltsverzeichnis
https://www.targa.gmbh/downloads/conformity/488567_2407.pdf
- Intended use 19
- Package contents.... 19
- Technical Data.... 20
3.1 Short operating time 20 - Safety instructions.... 20
- Copyright 24
- Before initial use 25
6.1 Inserting/removing the rechargeable battery 25 - Initial use 25
7.1 Processing foodstuff 25
7.2 Whipping cream 27 - Cleaning...... 27
- Storing the device when not in use.... 28
- Troubleshooting 28
- Environmental and waste disposal information 29
- Marks of conformity 30
- Warranty information.... 31
Congratulations!
By purchasing this cordless mini chopper, hereinafter referred to as mini chopper, you have opted for a high-quality product.
Familiarise yourself with the mini chopper before using it for the first time and read these operating instructions carefully. Observe the safety instructions and only use the mini chopper in the manner described in these operating instructions and for the indicated fields of application.
Keep these operating instructions in a safe place. Hand over all documents in the event that you pass on the mini chopper to a third party.
1. Intended use
This mini chopper is a household device and is only intended for chopping small quantities of boneless foodstuffs, for whipping cream and for emulsifying liquids. It must not be used outside of closed rooms or in regions with a tropical climate. The mini chopper is not intended for business or commercial use. Use the mini chopper solely for private purposes in living areas; any other use is deemed improper. Always ensure that the mini chopper is firmly positioned on the surface. This mini chopper meets the requirements of all relevant standards related to CE conformity. Compliance with these standards is no longer guaranteed if a change is made to the mini chopper without the authorisation of the manufacturer. The manufacturer shall not be liable for any damages or faults arising as a result. Only use the accessories provided by the manufacturer.
Please observe the national regulations and/or laws of the country in which the device is used.
2. Package contents
Unpack the mini chopper and all of the accessories. Remove all packaging materials and check all of the components for completeness and signs of damage. If any parts are missing or damaged, please contact the manufacturer.
- Motor block
- Bowl with lid
- Blade insert with blade
- Whisk attachment
- Drive shaft
- Quick start guide (the complete operating manual is available online)

The package contents do not include a rechargeable battery or charger.
Due to its design, this device can only be operated with a 2-Ah or 2.5-Ah rechargeable battery from the X 12 V TEAM (Parkside) series.

Observe the safety instructions and notes on charging and correct use given in the user manual for your X 12 V TEAM (Parkside) series battery and charger. You can find a detailed description of the charging process as well as further information in this separate operating manual.
The inside of the cover provides a schematic of the mini chopper and all controls. The numbers identify the following parts/functions:
| 1 | START button | 6 | Bowl |
| 2 | Lid | 7 | LED (in use; battery charge level) |
| 3 | Whisk attachment | 8 | Switch (OFF; speed level) |
| 4 | Blade insert | 9 | Motor block |
| 5 | Drive shaft | 10 | Battery compartment cover (on the ottom) |
3. Technical Data
| Manufacturer TARGA GmbH | |
| Designation SilverCrest SMZA 12 A1 | |
| Power supply 12 V |  Not included in the package contents:2-Ah or 2.5-Ah X 12 V TEAM (Parkside) series battery Not included in the package contents:2-Ah or 2.5-Ah X 12 V TEAM (Parkside) series battery |
| Power consumption 150 | W |
| CO time (continuous operation time) | with blade insert (4): 30 secondswith whisk attachment (3): 2 minutes |
| Maximum fill capacity for foodstuffs | no further than the 300-ml mark |
| Maximum fill capacity for liquids | no further than the 200-ml mark |
The specifications and design are subject to change without notice.
3.1 Short operating time
The CO time (continuous operation time) specifies how long the mini chopper can be operated before the motor overheats and causes damage. After this amount of time, the mini chopper must remain out of use until the motor has cooled down.
4. Safety instructions
Before using the device for the first time, please read the following instructions carefully and observe all warnings, even if you are familiar with using electronic and household devices. Keep this operating manual in a safe place for future reference. If you give the device away or sell it, please ensure that you also pass on this operating manual. It is part of the device.
Key to symbols

DANGER! This signal word indicates a hazard involving a high level of risk, which if not avoided, may result in severe injury or death.

WARNING This signal word indicates danger involving medium level of risk, which if not avoided, may result in severe injury or even death.
DANGER! This symbol indicates hazards to health and/or property posed by an electric shock, potentially including risk of death.

Fire hazard! This symbol is a warning that fires may occur if instructions are not followed.

This symbol indicates that the motor block (9) must not be rinsed under running water or immersed in water or other liquids under any circumstances.

This symbol indicates products whose physical and chemical composition have been tested and found to be safe for use in contact with foodstuffs in accordance with Regulation EC 1935/2004.

This symbol indicates further information on the topic.

The device is part of the X 12 V TEAM (Parkside) series.

DC voltage

This symbol indicates parts that are dishwasher-safe.

Manufacturer's address
Foreseeable misuse
- The mini chopper must not be used to chop or mince hot foodstuffs or those which are still cooking.
- The mini chopper must not be used to chop bones or frozen foodstuffs (exceptions: ice cubes and frozen berries).
- No other materials than foodstuffs may be processed.
- The mini chopper may only be operated with a 2-Ah or 2.5-Ah battery and charger from the X 12 V TEAM (Parkside) series.

DANGER! Observe the safety instructions and notes on charging and correct use given in the user manual for your X 12 V TEAM (Parkside) series battery and charger. You can find a detailed description of the charging process as well as further information in this separate operating manual.
Personal safety
- This device must not be used by children. The mini chopper and its rechargeable battery are to be kept away from children. Ensure that children are supervised and do not play with this device. In particular, keep the blade insert (4) with blade away from children to ensure they do not injure themselves with it. Therefore, the device should be immediately re-assembled after cleaning and the blade insert (4) should be stored in the bowl (6).

DANGER! The packaging material is not a toy. Children must not play with plastic bags. There is a risk of suffocation.
Store the device out of reach of children.
- This device can be used by people with reduced physical, sensory or mental abilities or who lack experience and knowledge, provided they are supervised or have been instructed in the safe use of the device and understand the resulting dangers.
• Children must not play with the device.

DANGER! Risk of injury
- Take great care when replacing the blade insert (4) or the whisk attachment (3). There is a risk of injury!
- Do not remove the motor block (9) until the blade insert (4) has stopped. Never reach into the rotating blade. There is a risk of injury!
- Take care when emptying the bowl (6). The blade is very sharp! Never attempt to remove food from the bowl (6) when the blade insert (4) is still in motion. There is a risk of injury!
- Take care when cleaning the mini chopper. The blade is very sharp! There is a risk of injury!
- Clean device parts that come into contact with foodstuffs using hot water, washing-up liquid and a soft cloth or the fine side of a washing-up sponge. You can also clean the canister using a soft washing-up brush. Then rinse the parts thoroughly with clean water to fully remove any detergent residue.

DANGER of electric shock
- Never open the housing of the motor block (9) since this does not contain any parts to be maintained. If the housing is open, there is a risk of electric shock.
- If you notice any smoke, unusual noises or smells, remove the rechargeable battery immediately. If this happens, you must stop using the mini chopper until it has been checked by a specialist. If the device catches fire, do not inhale any resulting smoke. If you do inhale any smoke, seek medical attention. Inhaling smoke can be harmful to your health.

Under no circumstances may the motor block (9) be immersed in water, and no liquids must ingress into the housing of the motor block (9).
- Should liquids ingress into the housing of the motor block (9), immediately remove the rechargeable battery and contact the service department.

RISK of fire
Note the short operating time! Do not operate the mini chopper for longer than 30 seconds with the blade insert (4) or 2 minutes with the whisk attachment (3). Wait until it has cooled down.
5. Copyright
All contents of this operating manual are subject to copyright law and are provided to the user solely as a source of information. Any form of copying or reproduction of data and information without the express written permission of the author is prohibited. This also concerns commercial use of the content and data. The text and illustrations correspond to the technical standards at the time of printing. Subject to alterations.
6. Before initial use
Remove the mini chopper and all accessories from the packaging and check the completeness of the delivery. Remove the packaging material and keep it away from children. Dispose of it in an environmentally-friendly manner.
Prior to using it for the first time, the mini chopper must be cleaned as described in the "Cleaning" section.
6.1 Inserting/removing the rechargeable battery
To insert or remove the battery, please proceed as follows:
- First remove the battery compartment cover (10) to access the battery compartment. To do so, first push the battery compartment cover (10) in the direction of the arrow and then remove it.
Inserting the rechargeable battery
- Insert the battery into the battery compartment until it audibly clicks into place.
Removing the rechargeable battery
- Release the battery by pressing and holding the two red latches on the battery while pulling the battery out of the battery compartment.
- Place the cover (10) back onto the battery compartment. First insert the guide lug into the corresponding recess. Then press the battery compartment cover (10) against the direction of the arrow until it audibly clicks into place.
Battery charge level
• The LED (7) indicates the current battery charge level while the device is in operation:
| The LED (7) lights up continuously | Charge level: good |
| LED (7) flashes Charge level: low | >>> Charge battery |
7. Initial use
7.1 Processing foodstuff
Place the bowl (6) with the drive shaft (5) inserted onto the motor block (9) so that the arrow marking (▼) on the bowl (6) points towards the opened padlock 6 on the motor block (9).
Now rotate the bowl (6) as far as it will go in the direction of the closed padlock symbol ☐ so that the arrow marking (▼) points towards the closed padlock ☐ on the motor block (9). Ensure that the bowl (6) audibly and perceptibly clicks into place and the drive shaft (5) lies flat on the base. If this is not the case, turn the drive shaft (5) clockwise until it rests on the base.
◆ Position the blade insert (4) on the drive shaft (5). Ensure the correct assembly positioning.
Prepare the food to be chopped. Remove hard shells or skins, e.g. from nuts, take meat of the bone and remove any stringy pieces. Cut large pieces into smaller ones so that they do not become stuck in the bowl (6). The edge length should not exceed 2 to 3 cm.
◆ Place the prepared food in the bowl (6).
Place the lid (2) onto the bowl (6) so that the arrow marking (▼) on the lid (2) points towards the opened padlock on the bowl (6).
Now turn the lid (2) anti-clockwise as far as it will go.
✿ Familiarise yourself with the following food processing table. The processing times specified are guidelines only and may vary depending on the state of the food.
| Foodstuffs Capacity Speed | Processing time | ||
| Onions/garlic | 100 g | Level II | ➢ coarse: 1 x 5 sec.➢ medium: 3 x 5 seconds➢ fine: 5 x 5 sec. |
| Almonds/hazelnuts | 200 g | Level II | ➢ coarse: 1 x 10 seconds➢ medium: 2 x 10 seconds➢ fine: 3 x 10 seconds |
| Cheese (Gouda, mild) * 150 g | Level II | approx. 2 x 10 sec. | |
| Eggs (hard boiled) 3 pieces (approx. 150 g) | Level II | 2 x 4 seconds | |
| Meat (diced approx. 2x2 cm) 200 g | Level II | approx. 6 x 5 sec. | |
| Ice cubes Maximum 100 g | Level II | Pulsating➢ coarse: 10 x 1 sec.➢ fine: 20 x 1 sec. |
*: fridge temperature, cut into pieces approx. 2 x 2 cm
Use the switch (8) to select the desired speed level I or II.
✿ Press the START button (1) on the lid (2) to start the chopping process at the desired speed. The blade insert (4) rotates as long as the START button (1) is pressed. As soon as you let it go, the motor stops.

- Should larger pieces of the foodstuff collect on the side of the bowl and not be fully chopped, lift the bowl (6) from the motor block (9). Shake the bowl (6) vigorously and then continue with the chopping.
- In the case of processing hard foods, such as hard cheese or ice cubes, pulsating is recommended. To do so, briefly press the respective START button (1) on the lid (2) several times.
Once the food has been chopped accordingly, release the START button (1) on the lid (2). Wait until the blade insert (4) stops rotating!
Use the switch (8) to select level 0 to switch off the mini chopper.

Risk of injury! Take care when emptying the bowl (6). The blade is very sharp! Never attempt to remove food from the bowl (6) when the blade insert (4) is still in motion. There is a risk of injury! Food spraying out could also contaminate the area.
Remove the bowl (6) from the motor block (9) by turning it in the direction of the opened padlock symbol until the arrow marking (▼) on the bowl (6) points towards the opened padlock on the motor block (9).
Now remove the lid (2) by turning it clockwise until the arrow mark (▼) on the lid (2) points to the open lock on the bowl (6).

Risk of injury! Take care when removing the blade insert (4). The blade is extremely sharp!
◆ Remove the blade insert (4) and the drive shaft (5).
◆ Remove the chopped contents.
7.2 Whipping cream
You can also use the mini chopper to whip cream (min. 100 ml, max. 200 ml). For this purpose, you need the whisk attachment (3) provided.
Proceed as described in the previous section; however, instead of the blade insert (4), use the whisk attachment (3) for whipping cream.
- Pour the desired amount of cream in (maximum of 200 ml).
| Foodstuffs Capacity | Speed Processing | time | |
| Cream * 200 ml | Level II | Approx. 30 seconds |
*: with the whisk attachment (3)

- To whip cream optimally, it should be sufficiently cooled (fridge temperature).
- The whipping time varies based on the quantity of whipping cream. Make sure to adjust the whipping time accordingly. The times may vary greatly however depending on the temperature of the cream, the outdoor temperature or the fat content of the cream. Keep an eye on the cream whilst whipping it and adjust the processing time to the conditions and your requirements.
8. Cleaning
Risk of electric shock! Under no circumstances may the motor block (9) be cleaned in the dishwasher, immersed in water or held under running water.

Otherwise, there is a risk of electric shock and a fire hazard due to short circuits.

Risk of injury! Take care when cleaning the blade insert (4). The blade is extremely sharp!

Warning of damage to property! Do not use any scratching or abrasive cleaning agents or abrasive objects (such as a metal scourer) for cleaning purposes. Otherwise the mini chopper may be damaged.
◆ Take the mini chopper apart to clean it.
◆ Separate the bowl (6) from the motor block (9).
Remove the lid (2) from the bowl (6). The lid (2) is not designed to be taken apart.
Remove the blade insert (4) or whisk attachment (3) and drive shaft (5).
- Clean the motor block (9) with a damp cloth or a well squeezed out sponge. Use some washing up-liquid, if necessary. Then dry the motor block (9) well.
The remaining parts can be cleaned in a rinsing bath. After cleaning, rinse all the parts with plenty of clean water to remove any detergent residue. Dry all the parts well.

Alternatively, the following parts can also be cleaned in the dishwasher:
- Blade insert (4) with blade
- Whisk attachment (3)
- Lid (2)
Now reassemble the mini chopper completely. This prevents the risk of injury from the exposed blade.
9. Storing the device when not in use
If the mini chopper will not be used for a longer period of time, remove the rechargeable battery and store the mini chopper in a clean and dry place, out of reach of children.
10. Troubleshooting
If your mini chopper does not work accordingly, first of all use the following instructions to try and solve the problem. If working through the following tips does not eliminate the fault, please contact our hotline.
The mini chopper is not working
- Is the battery charged? If necessary, charge the battery and try again.
- Is the battery inserted correctly? Remove the battery and insert it correctly.
The blade insert (4) does not rotate
- The blade insert (4) is blocked as too much food is in the bowl (6). Reduce the amount of food.
- The blade insert (4) is blocked, as the pieces of food in the bowl (6) are too large. Only add food with a maximum edge length of 2 to 3 cm.
11. Environmental and waste disposal information
 | Devices marked with this symbol are subject to the European Union Directive 2012/19/EU. Electrical and electronic devices may not be put in the household waste, but must be disposed of via designated public disposal centres. By properly disposing of the old device, you can avoid environmental damage and hazards to health. Further information regarding proper disposal of the old device can be obtained from your local authority or the shop where you purchased the device. |
 | The crossed-out bin symbol on batteries indicates that they are not permitted to be disposed of with household waste, rather they must be collected separately.With batteries that contain harmful substances, you will also find the chemical symbol of the harmful substance under the crossed-out bin symbol. These symbols mean the following:- Pb: Battery contains lead- Cd: Battery contains cadmium- Hg: Battery contains mercuryYou are legally obligated to return disposable and rechargeable batteries. Old batteries may contain harmful substances that can be harmful to your health or the environment when stored or disposed of improperly. Batteries also contain important raw materials, such as iron, zinc, manganese or nickel.You can return old batteries to us or at collection points in your immediate vicinity (for example, at shops or municipal collection points) Please note that you should only dispose of batteries in collection containers for old batteries when they are fully discharged. If the batteries are not completely dead, you need to take precautionary measures before disposal to prevent short circuits. |
 | Make sure that the packaging is disposed of in an environmentally friendly manner. Cardboard packaging can be put out for waste-paper collection or taken to public collection points for recycling. The plastic packaging used for your device will be collected by your local waste management company and disposed of in an environmentally friendly manner. |
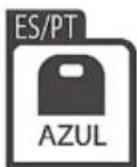
 ES/PT ES/PT |
Relevant for France only:


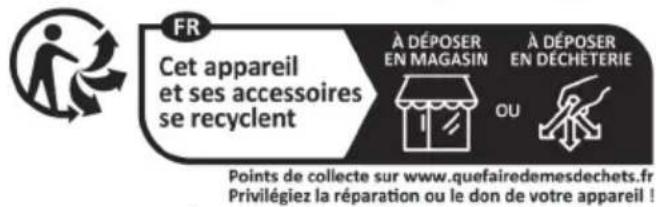
'Sorting made easier'
This product, including all accessories, its printed material and packaging components, can be recycled. They are subject to an extended producer responsibility and are sorted and collected separately.
Relevant for Spain and Portugal only:
Please separate the packaging material and dispose of it in the relevant collection containers in accordance with the symbols on the packaging:


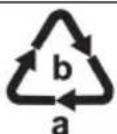
Please pay attention to the labels on packaging materials when you separate waste; these are marked with abbreviations (a) and numbers (b) that mean the following:
1-7: Plastics/20-22: Paper and cardboard/80-98: Composite materials.
Symbol Material This product contains the following packaging components


12. Marks of conformity

This product meets the requirements specified in the applicable European and national policies. This product's conformity has been verified. The declarations and documents are stored with the manufacturer.
You can download the full EU declaration of conformity and any other relevant declarations of conformity under the following link:
https://www.targa.gmbh/downloads/conformity/488567_2407.pdf
Contact address according to the Product Safety Regulation (EU) 2023/988: ce@targa.de
13. Warranty information
Warranty of TARGA GmbH
Dear Customer,
This device is sold with three years warranty from the date of purchase. In the event of product defects, you have legal rights towards the seller. These statutory rights are not restricted by our warranty as described below.
Warranty conditions
The warranty period commences upon the date of purchase. Please keep the original receipt in a safe place as it is required as proof of purchase. If any material or manufacturing faults occur within three years of purchase of this product, we will repair or replace the product free of charge as we deem appropriate.
Warranty period and legal warranty rights
The warranty period is not extended in the event of a warranty claim. This also applies to replaced and repaired parts. Any damage or defects discovered upon purchase must be reported immediately when the product has been unpacked. Any repairs required after the warranty period will be subject to charge.
Scope of warranty
The device was carefully manufactured in compliance with stringent quality guidelines and subjected to thorough testing before it left the works. The warranty applies to material and manufacturing faults. This warranty does not cover product components which are subject to normal wear and which can therefore be regarded as wearing parts, or damage to fragile components such as switches, rechargeable batteries or components made of glass. This warranty is void if the product is damaged, incorrectly used or serviced. To ensure correct use of the product, always comply fully with all instructions contained in the user manual. The warnings and recommendations in the user manual regarding correct and incorrect use and handling of the product must always be observed and complied with. The product is solely designed for private use and is not suitable for commercial applications. The warranty is rendered void in the event of incorrect handling and misuse, if it is subjected to force, and also if any person other than our authorised service technicians interfere with the device. No new warranty period commences if the product is repaired or replaced.
Submitting warranty claims
To ensure speedy handling of your complaint, please note the following:
Before using your product for the first time, please read the enclosed documentation carefully. Should any problems arise which cannot be solved in this way, please call our hotline.
- Always have your receipt, the product article number as well as the serial number (if available) to hand as proof of purchase.
- If it is not possible to solve the problem on the phone, our hotline support staff will initiate further servicing procedures depending on the fault.
- You can find this and many more manuals, product videos and installation software available for download at www.lidl-service.com. This QR code takes you directly to the LIDL service page (www.lidl-service.com). There, you can enter the item number (IAN) to access your operating manual.


Service

Phone: 0800 404 7657
E-Mail: targa@lidl.co.uk

Phone: 1800
101010
E-Mail: targa@lidl.ie

Phone: 800
62230
E-Mail: targa@lidl.com.mt

Phone: 8009
4241
E-Mail: targa@lidl.com.cy
IAN: 488567_2407

Manufacturer
Please note that the following address is not a service address. First contact the service point stated above.
TARGA
GmbH
Coesterweg 45
59494 Soest
GERMANY
Table des matières
https://www.targa.gmbh/downloads/conformity/488567_2407.pdf
Cher client, chère cliente,
Cher client, chère cliente,
Low-density polyethyleen
https://www.targa.gmbh/downloads/conformity/488567_2407.pdf
Contactadres volgens 2023/988 Verordening Productveiligheid: ce@targa.de
13. Garantiebepalingen
https://www.targa.gmbh/downloads/conformity/488567_2407.pdf
https://www.targa.gmbh/downloads/conformity/488567_2407.pdf
https://www.targa.gmbh/downloads/conformity/488567_2407.pdf
https://www.targa.gmbh/downloads/conformity/488567_2407.pdf
https://www.targa.gmbh/downloads/conformity/488567_2407.pdf
https://www.targa.gmbh/downloads/conformity/488567_2407.pdf
https://www.targa.gmbh/downloads/conformity/488567_2407.pdf

- Inhaltsverzeichnis
- Congratulations!
- Intended use
- Package contents
- Technical Data
- Short operating time
- Safety instructions
- Key to symbols
- Foreseeable misuse
- Personal safety
- DANGER! Risk of injury
- DANGER of electric shock
- RISK of fire
- Copyright
- Before initial use
- Inserting/removing the rechargeable battery
- Inserting the rechargeable battery
- Removing the rechargeable battery
- Battery charge level
- Initial use
- Processing foodstuff
- Whipping cream
- Cleaning
- Storing the device when not in use
- Troubleshooting
- The mini chopper is not working
- The blade insert (4) does not rotate
- Environmental and waste disposal information
- 'Sorting made easier'
- Relevant for Spain and Portugal only:
- Symbol Material This product contains the following packaging components
- Marks of conformity
- Warranty information
- Warranty of TARGA GmbH
- Warranty conditions
- Warranty period and legal warranty rights
- Scope of warranty
- Submitting warranty claims
- Service
- Manufacturer
- Table des matières
- Garantiebepalingen
Brand : SILVERCREST
Model : SMZA 12 A1
Category : Slicer