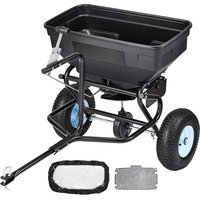
TC2034B - Agricultural spreader Vevor - Free user manual and instructions
Find the device manual for free TC2034B Vevor in PDF.

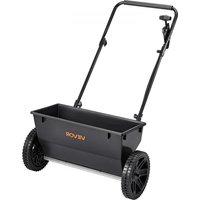
| Product type | Push Agricultural Spreader |
| Brand | Vevor |
| Model | TC2034B |
| Color | Black |
| Maximum load capacity | 45.2 kg (100 lb) |
| Spreading width | 0 to 3 m (0 to 9.8 ft) |
| Recommended tire pressure | 25 PSI |
| Main material | Steel with enamel paint |
| Power source | Manual (push) |
| Number of wheels | 2 |
| Wheel type | Pneumatic |
| Device weight (estimate) | Approx. 13 kg |
| Main functions | Flow adjustment lever, shut-off plate, filtration grid |
| Maintenance | Clean after each use, annual lubrication, dry storage |
| Safety | Wear protective equipment (ANSI glasses, gloves), do not use if parts damaged, do not exceed load |
| Spare parts | Available via Vevor customer service |
| Repairability | Replaceable parts, contact after-sales for assistance |
| Manufacturer | Shanghai Muxin Muyeyouxian Gongsi |
| Importer Australia | SIHAO PTY LTD, 1 ROKEVA STREET, ASTWOOD NSW 2122 |
| Importer USA | Sanven Technology Ltd, Suite 250, 9166 Anaheim Place, Rancho Cucamonga, CA 91730 |
| Included accessories | Screws M6x40, M6x50, M3x30, M6x16, nuts, washers, pins, sleeves, rotary head, positioning parts |
Frequently Asked Questions - TC2034B Vevor
User questions about TC2034B Vevor
0 question about this device. Answer the ones you know or ask your own.
Ask a new question about this device
Download the instructions for your Agricultural spreader in PDF format for free! Find your manual TC2034B - Vevor and take your electronic device back in hand. On this page are published all the documents necessary for the use of your device. TC2034B by Vevor.
USER MANUAL TC2034B Vevor
Affordable. Reliable. Home Improvement.
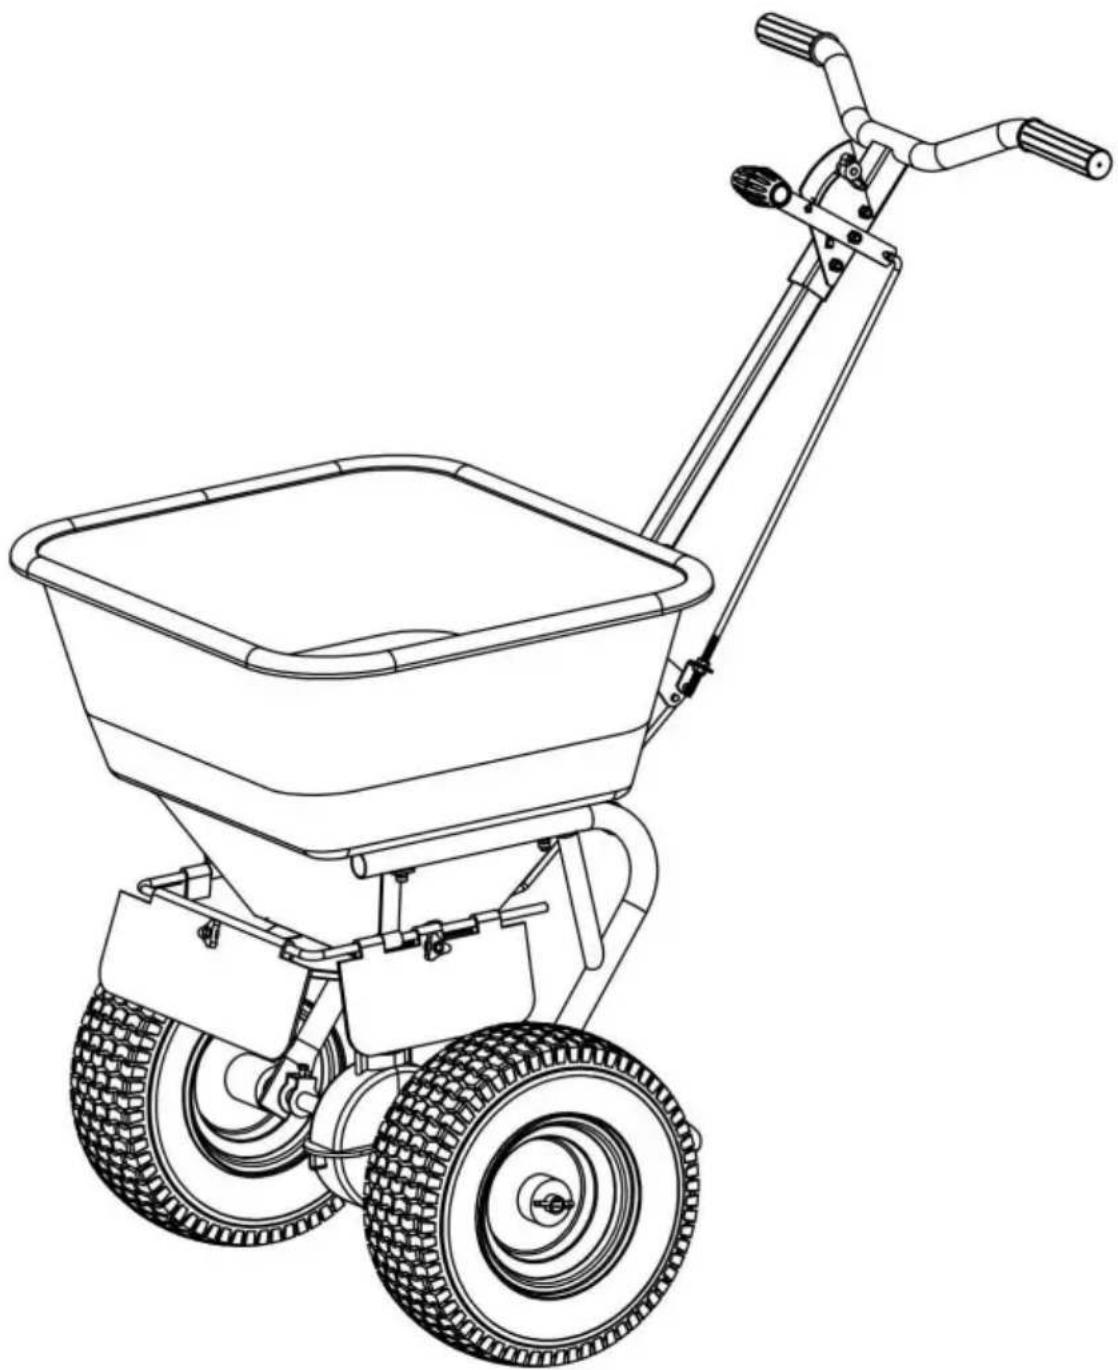
BEHIND SPREADER
MODEL:TC2034B
VEVOR
Affordable. Reliable. Home Improvement.
BEHIND SPREADER
MODEL:TC2034B
natural_image
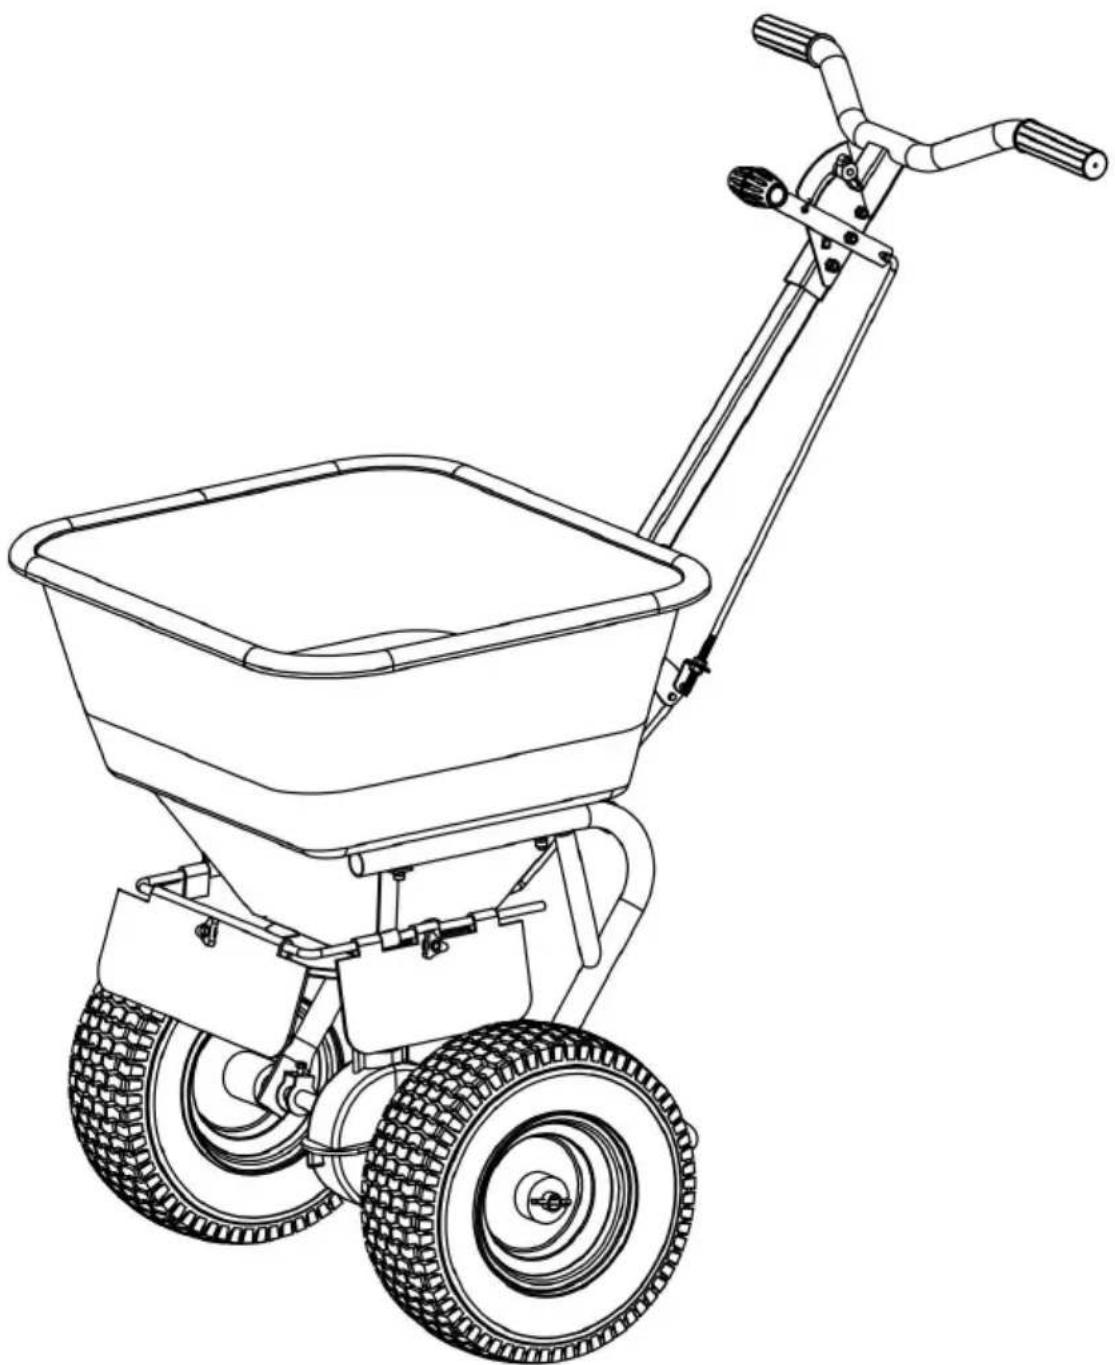
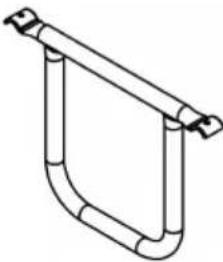
Line drawing of a two-wheeled pushewer with wheels and handle (no text or symbols)This is the original instruction, please read all manual instructions care before operating. VEVOR reserves a clear interpretation of our user manual. The appearance of the product shall be subject to the product received. Please forgive us that we won't inform you again if there a technology or software updates on our product.
WARNING:
Read this material before using this product. Failure to do so ca result in serious injury.
Assembly precautions
- Assemble only according to these instructions. Improper assembly c create hazards.
- Wear ANSI-approved safety goggles and heavy-duty work gloves during assembly.
- Keep the assembly area clean and well-lit.
- Keep bystanders out of the area during assembly.
- Do not assemble if tired or when under the influence of alcohol, or medication.
- The product capabilities apply to properly and completely assembled products only.
- Assemble on a flat, level, hard and smooth surface capable of sa supporting the Behind Spreader.
- For additional information regarding the parts listed in the following pages, please refer to the Assembly Diagram of this manual. Unw and separate all parts in a clean work area.
Use precautions
- DO NOT SIT OR STAND ON THIS ITEM.
- This product is not a toy. Do not allow children to play with or item.
- Do not exceed specified weight capacities.
- Use as intended only.
- Inspect before every use; do not use if parts are loose or damage
SAVE THIS MANUAL
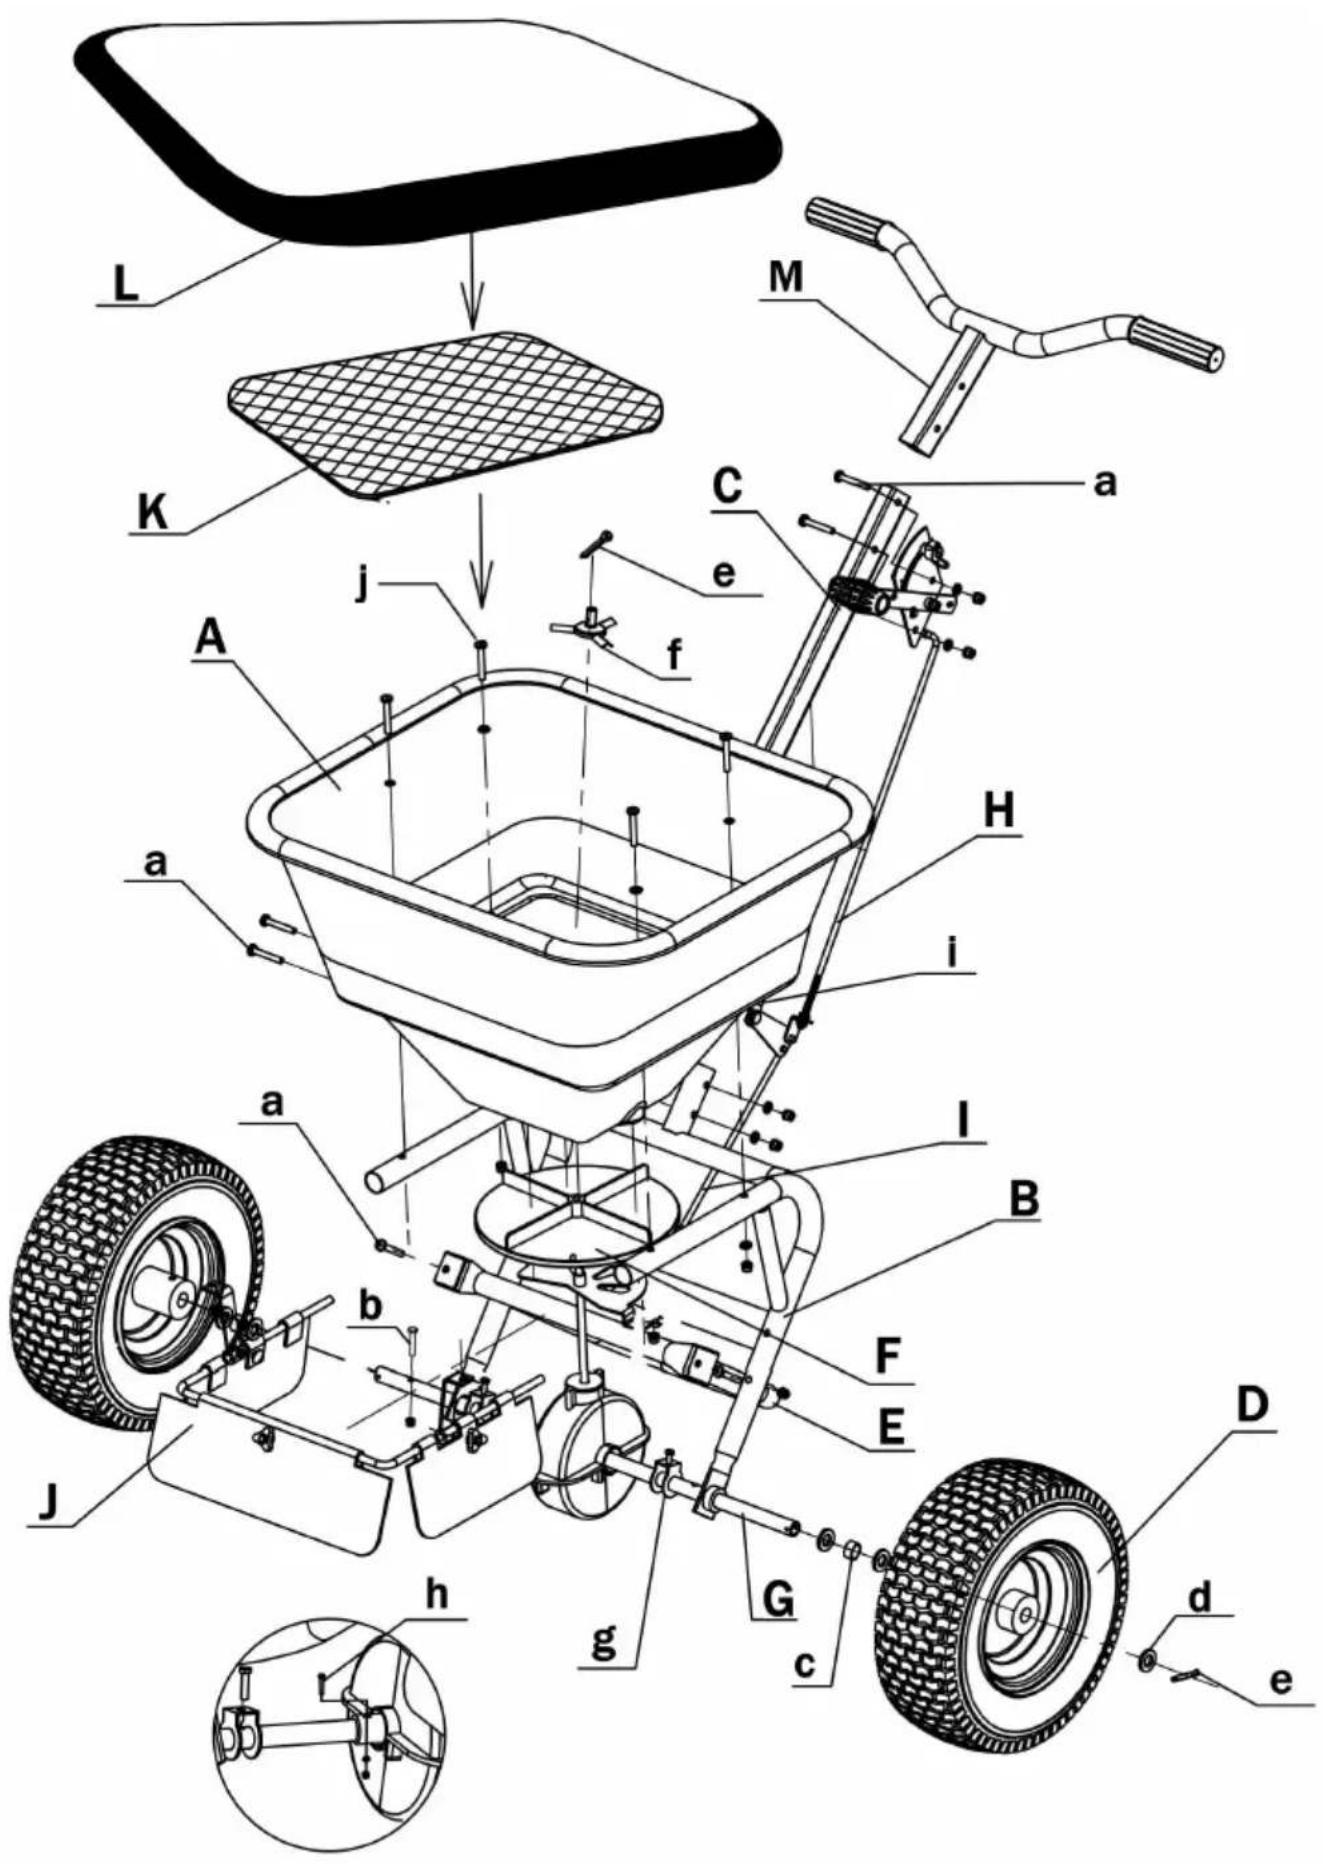
PARTS LIST
| A | 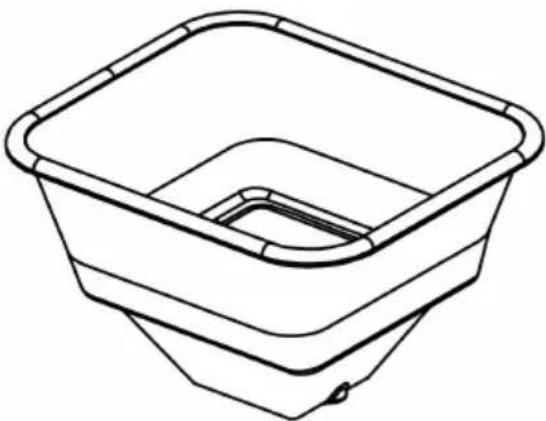 Hopper x1 Hopper x1 | B | 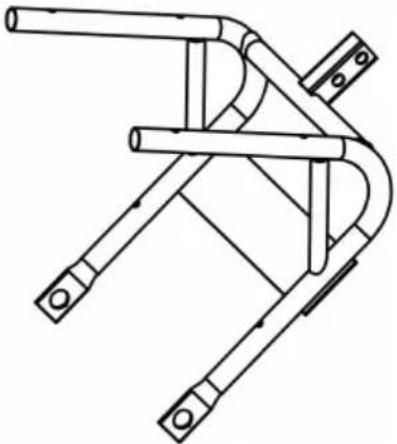 Bracket x1 Bracket x1 |
| C |  Square tube x1 Square tube x1 | D |  Wheel x2 Wheel x2 |
| E | 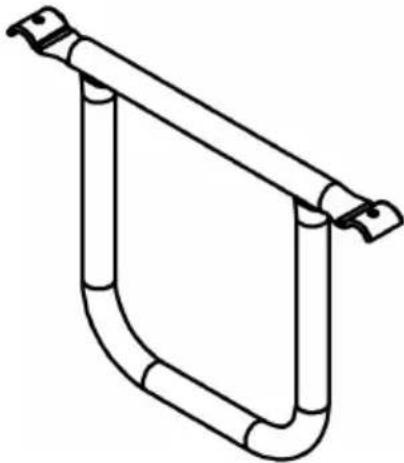 Support frame x1 Support frame x1 | F | 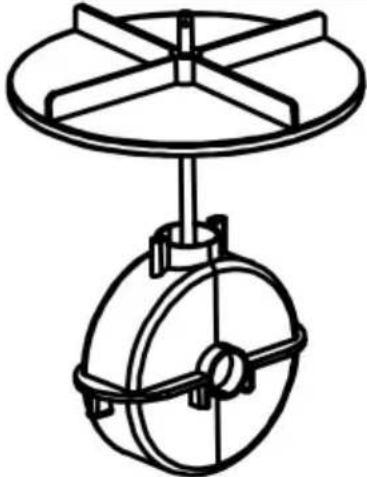 Gearbox x1 Gearbox x1 |
| G | 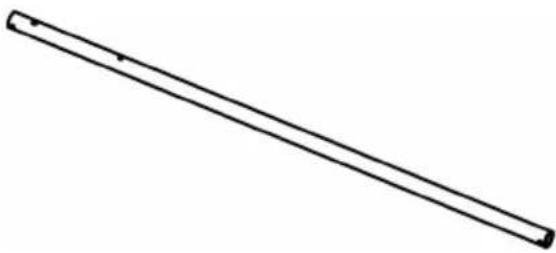 Axis x1 Axis x1 | H |  Gear position adjuster x1 Gear position adjuster x1 |
| I |  Gear position adjuster connectir rod x1 Gear position adjuster connectir rod x1 | J | 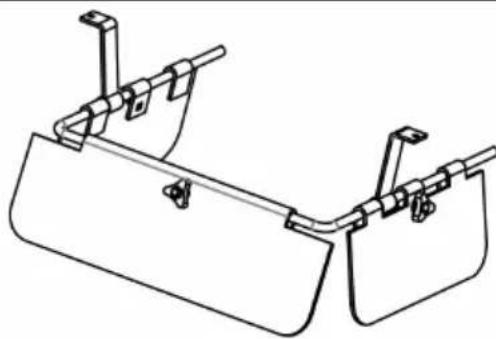 Blocking plate x1 Blocking plate x1 |
| K | 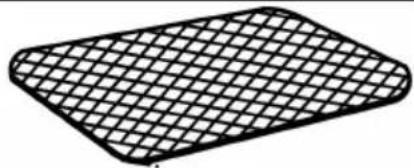 Screen mesh x1 Screen mesh x1 | L | 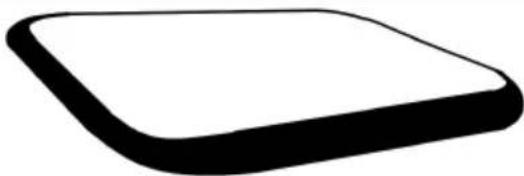 Transparent cover x1 Transparent cover x1 |
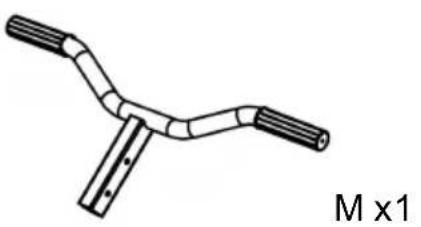
| M | 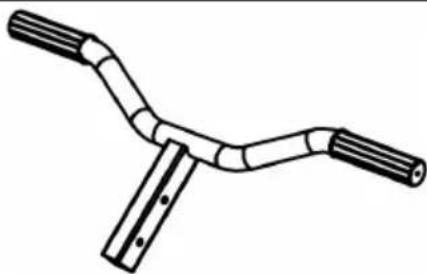 Handle x1 Handle x1 | ||
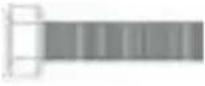
| a | 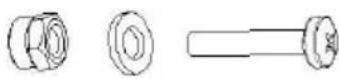 Screw M6*40 x6 Screw M6*40 x6 | b |  Screw M6*50 x1 Screw M6*50 x1 |
| c |  Sleeve x2 Sleeve x2 | d |  Large washer x5 Large washer x5 |
| e | 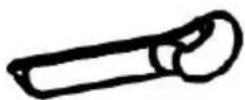 Pin x2 Pin x2 | f | 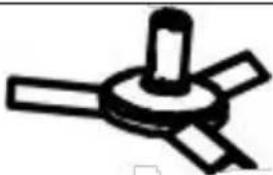 Rotating head x1 Rotating head x1 |
| g |  Positioning part x2 Positioning part x2 | h |  Screw M3*30 x1 Screw M3*30 x1 |
| i |  Screw M6*16 x2 Screw M6*16 x2 | j | 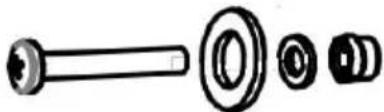 Screw M6*40 x4 Screw M6*40 x4 |
ASSEMBLY STEP
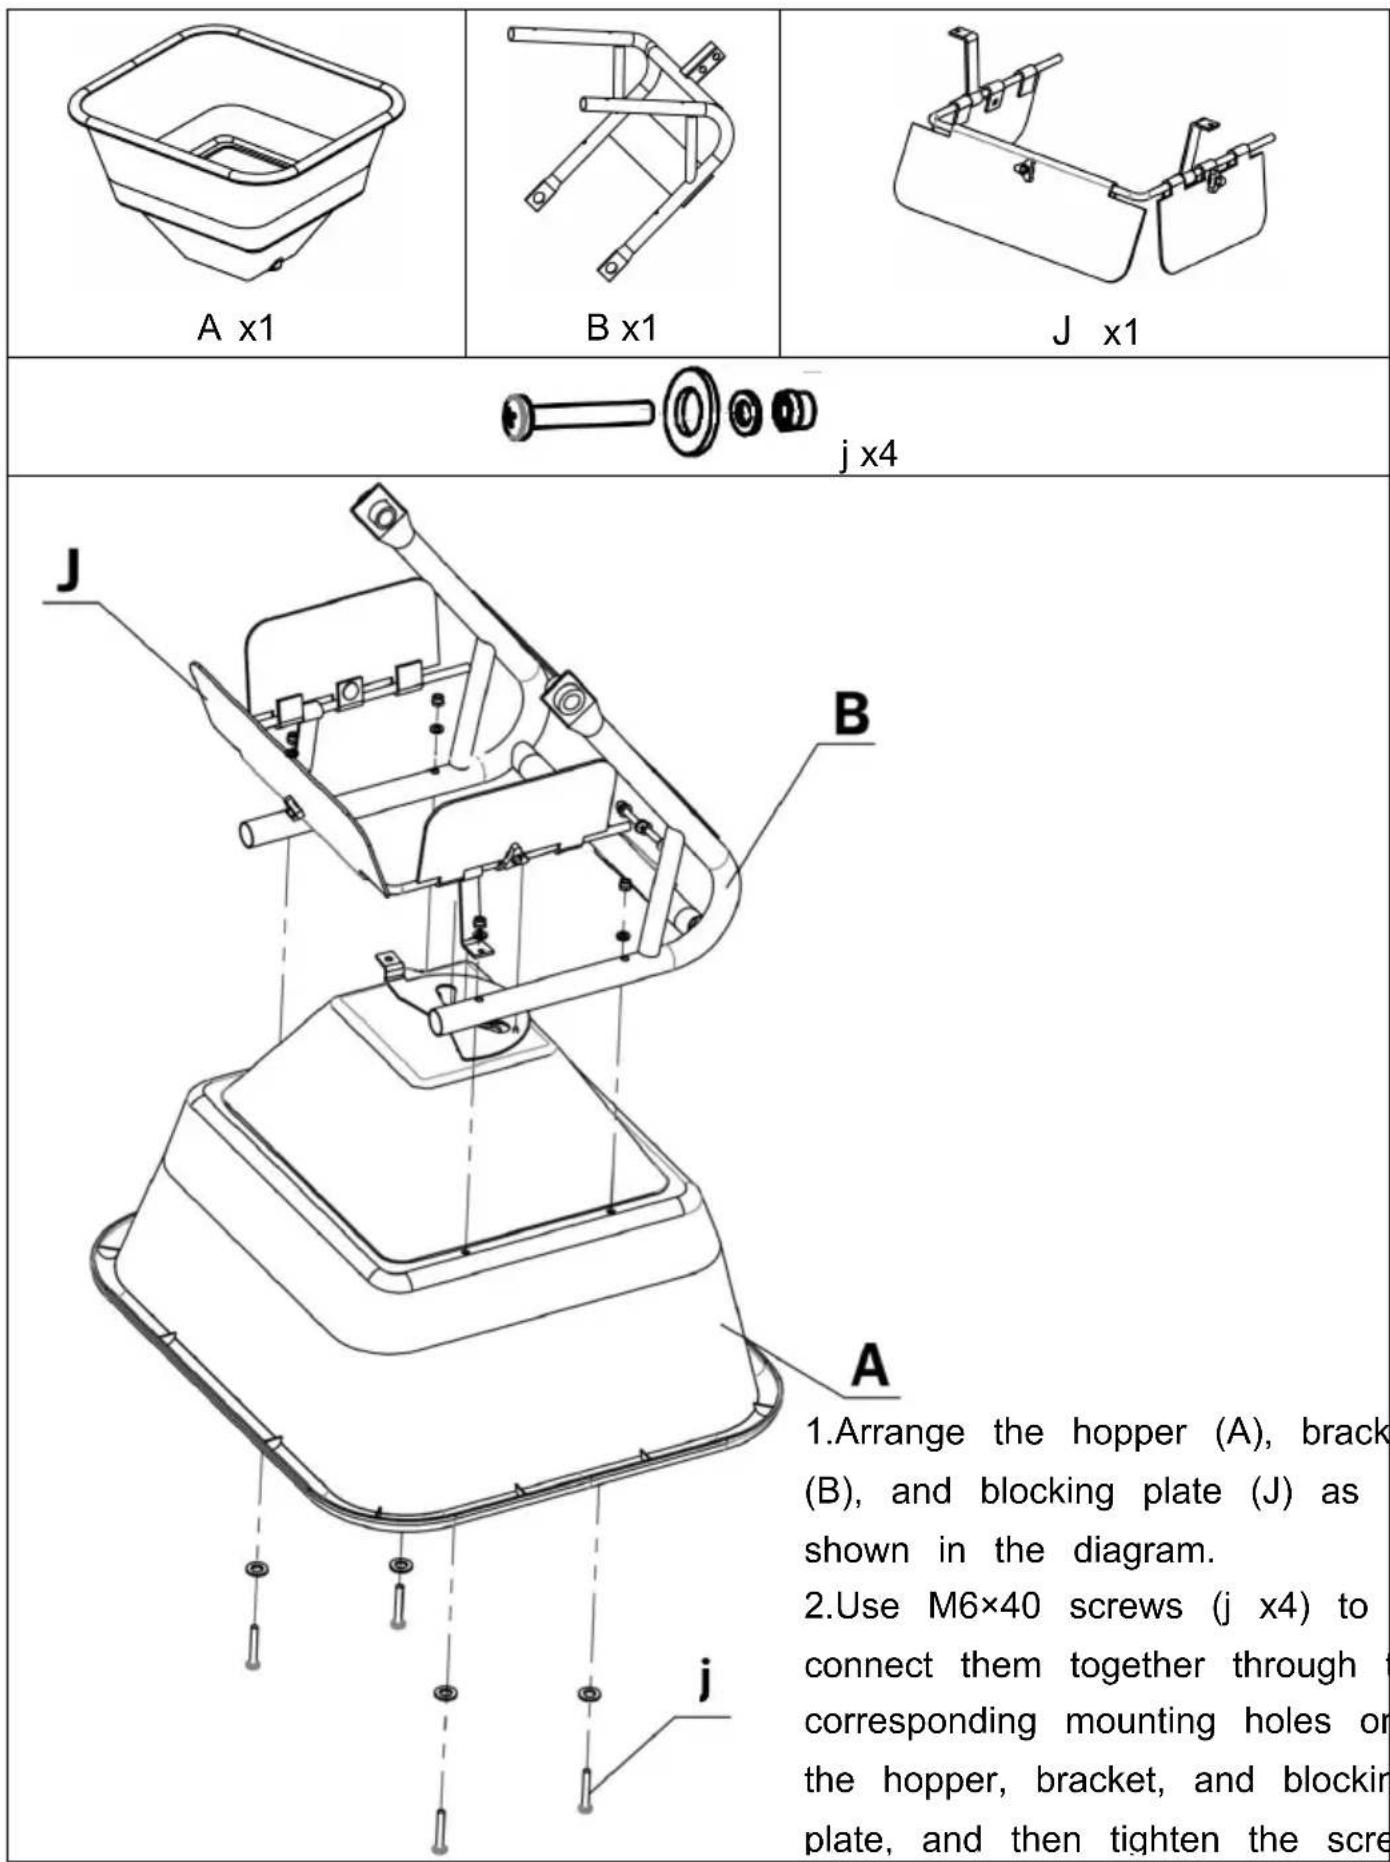
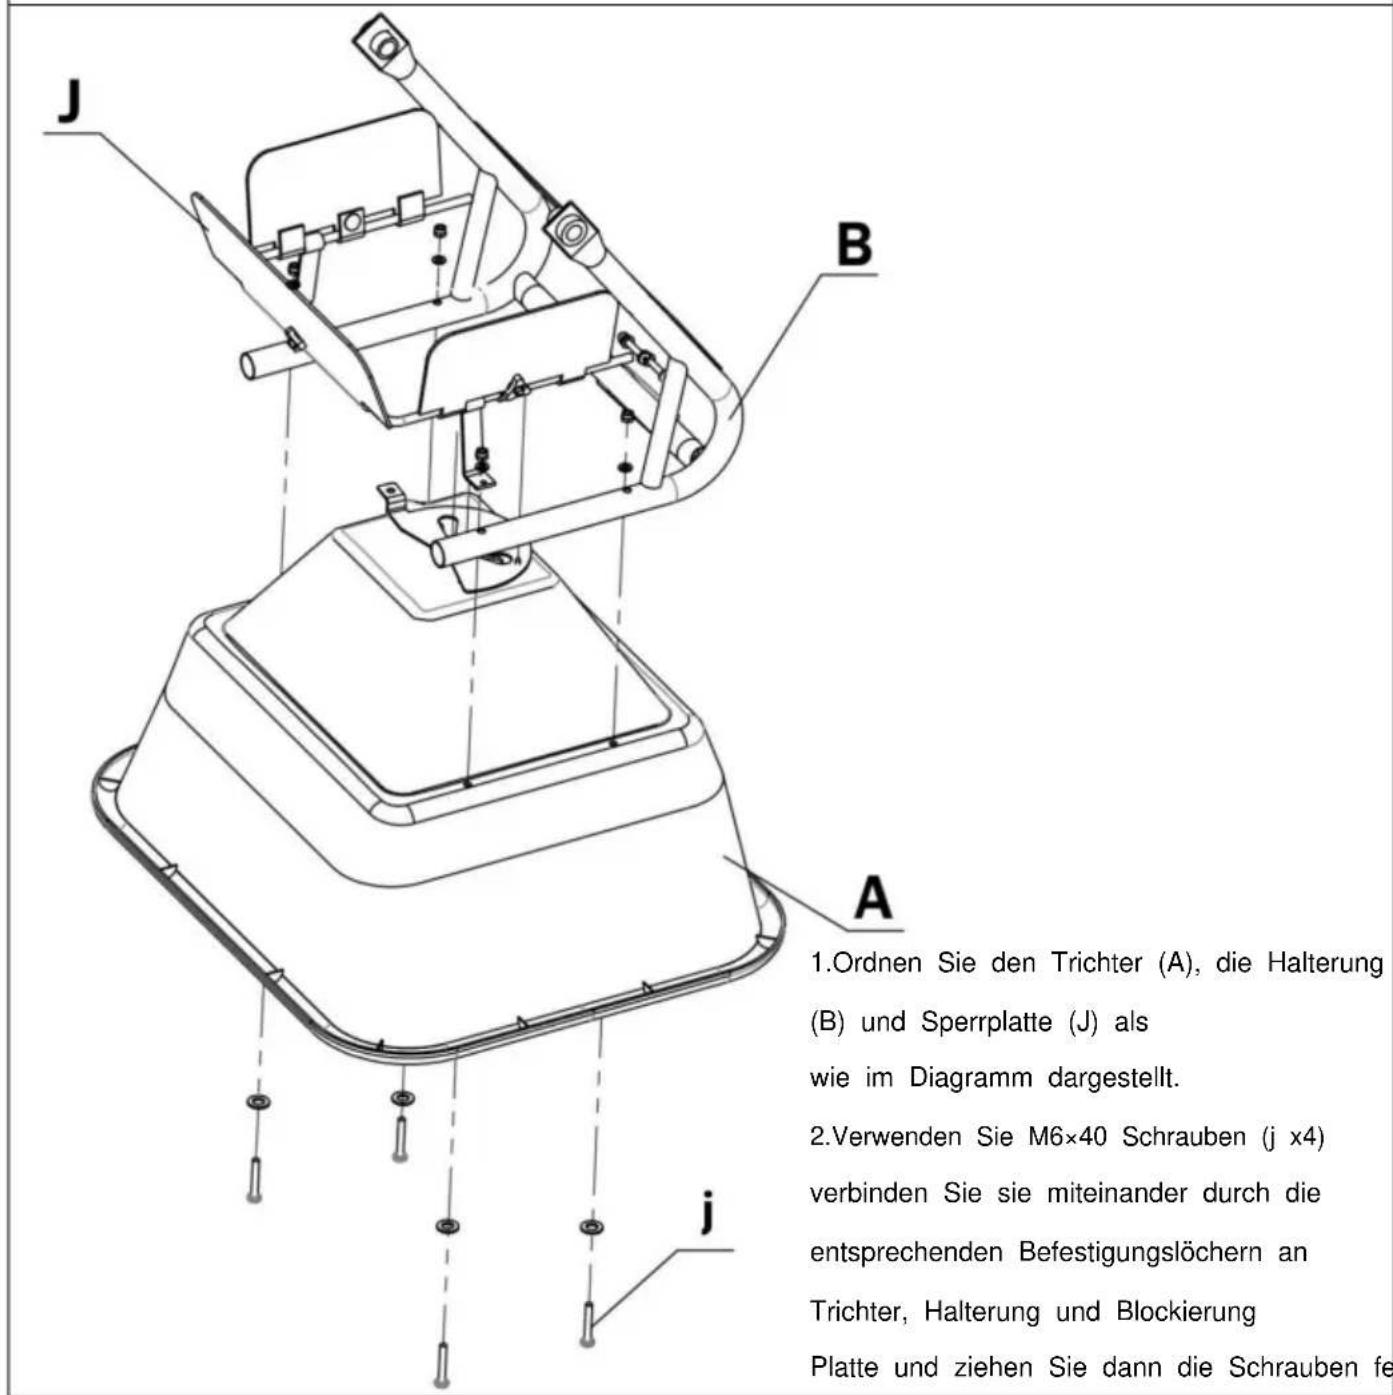
A
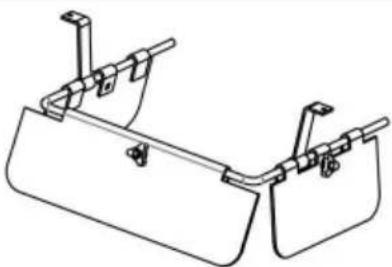
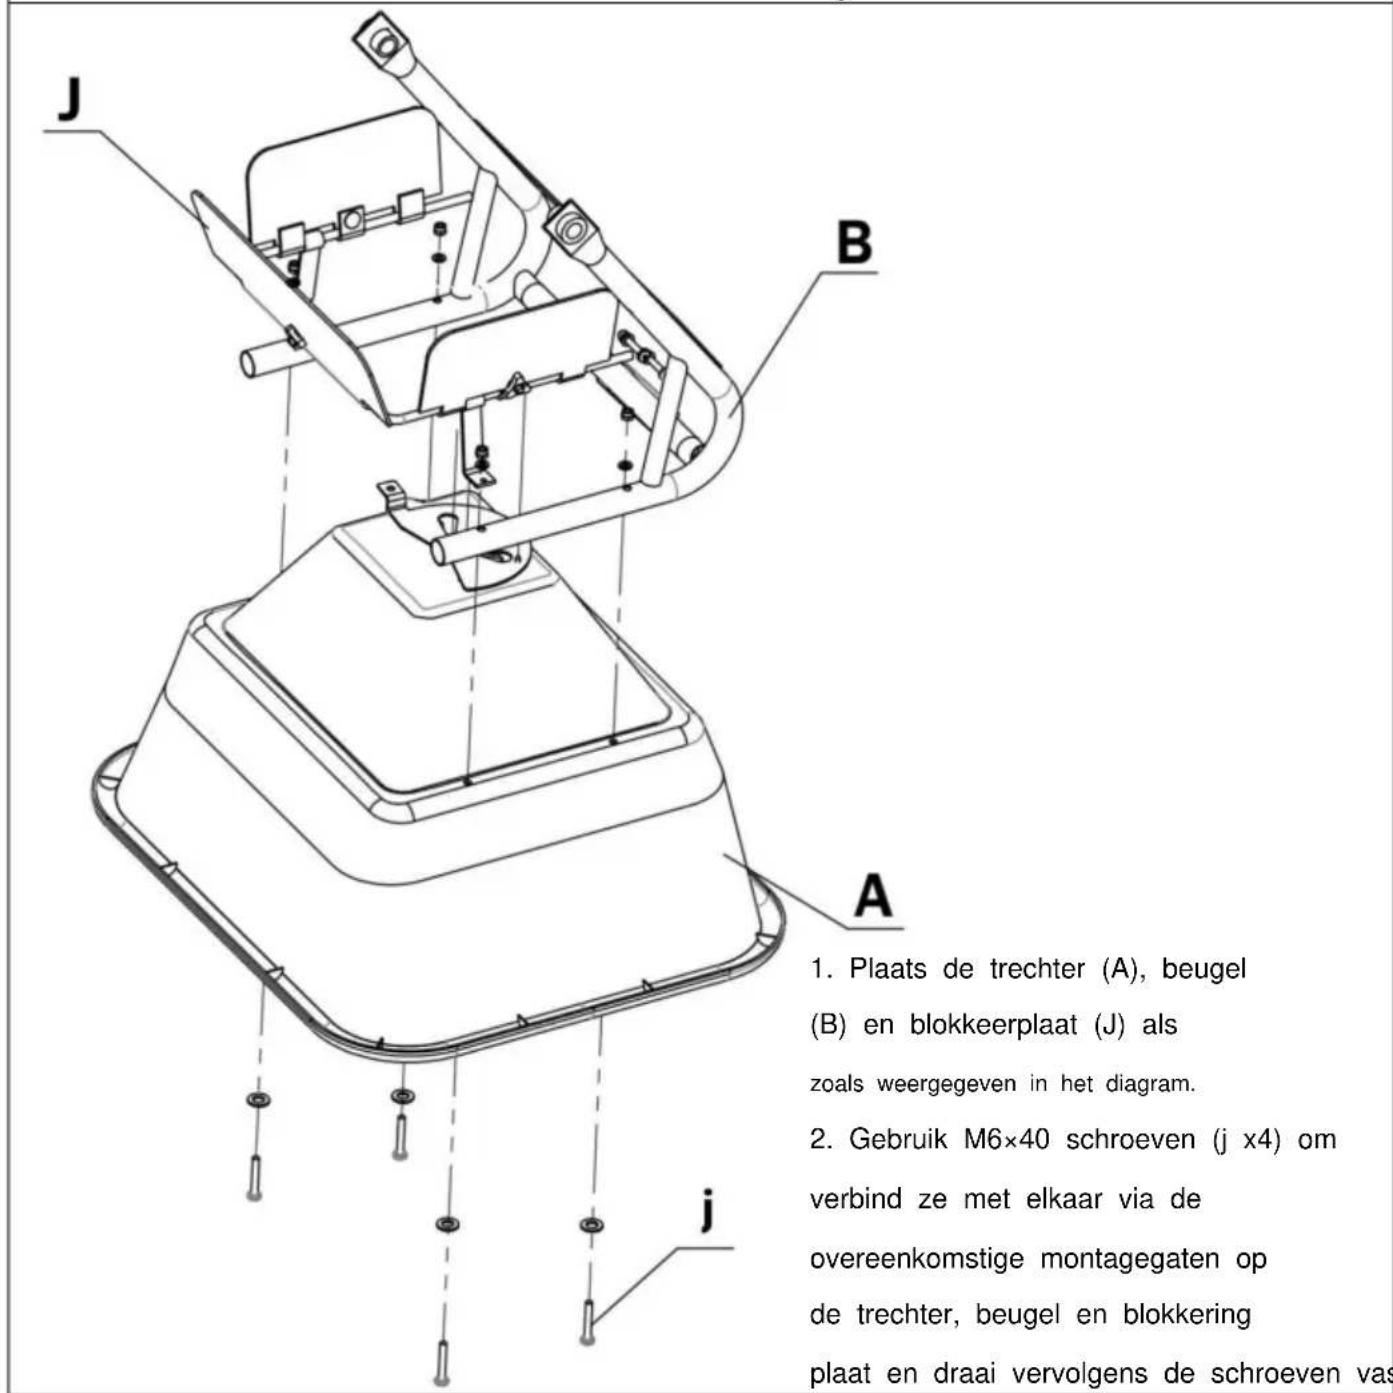
- Arrange the hopper (A), bracket (B), and blocking plate (J) as shown in the diagram.
- Use M6×40 screws (j x4) to connect them together through the corresponding mounting holes on the hopper, bracket, and blocking plate, and then tighten the screw
 E x1 E x1 | [85x8]  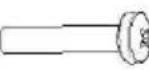 a x2 a x2 |
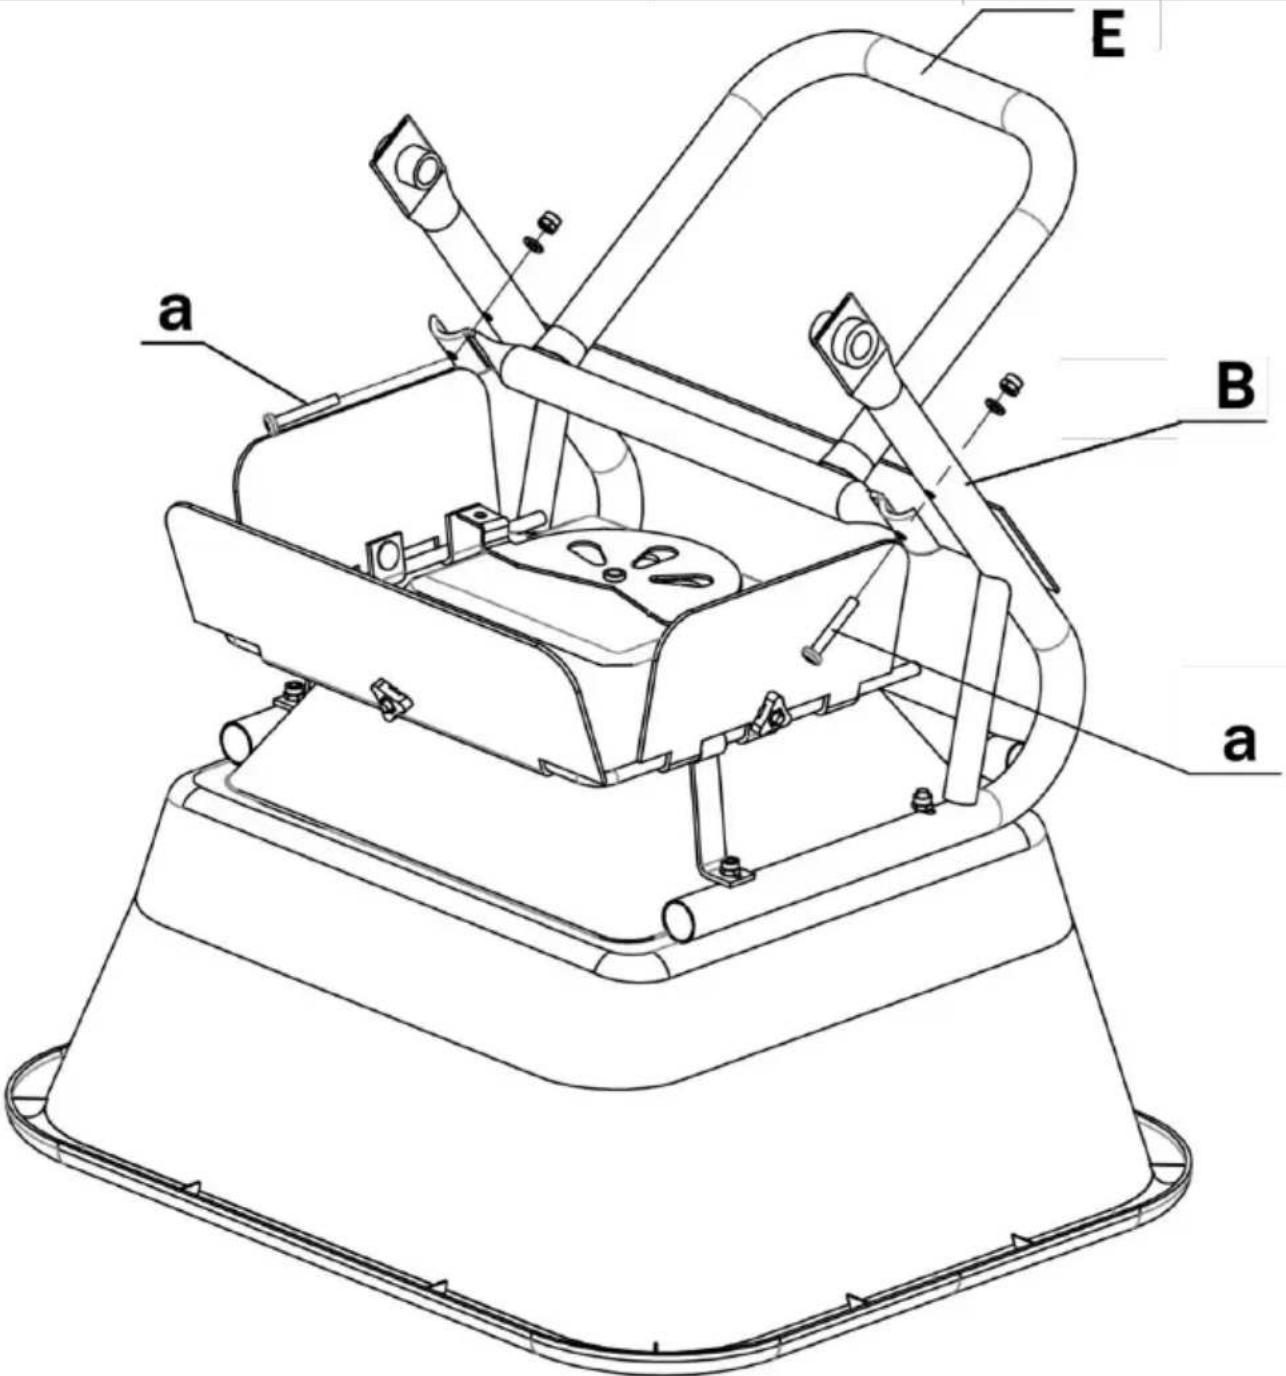 | |
| 1. Obtain the support frame (E) and find the installation position that ma bracket (B).2. Use screws (a x2) of M6×40. Pass them through the corresponding h support frame and the already - installed components, and then tighten t screws. | |
 g x2 g x2 | 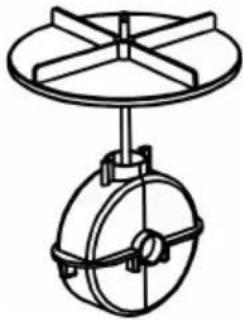 F x1 F x1 | 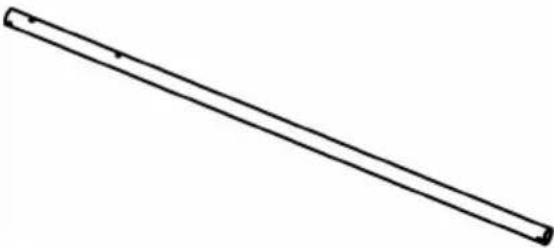 G x1 G x1 |
  h x1 h x1 | ||
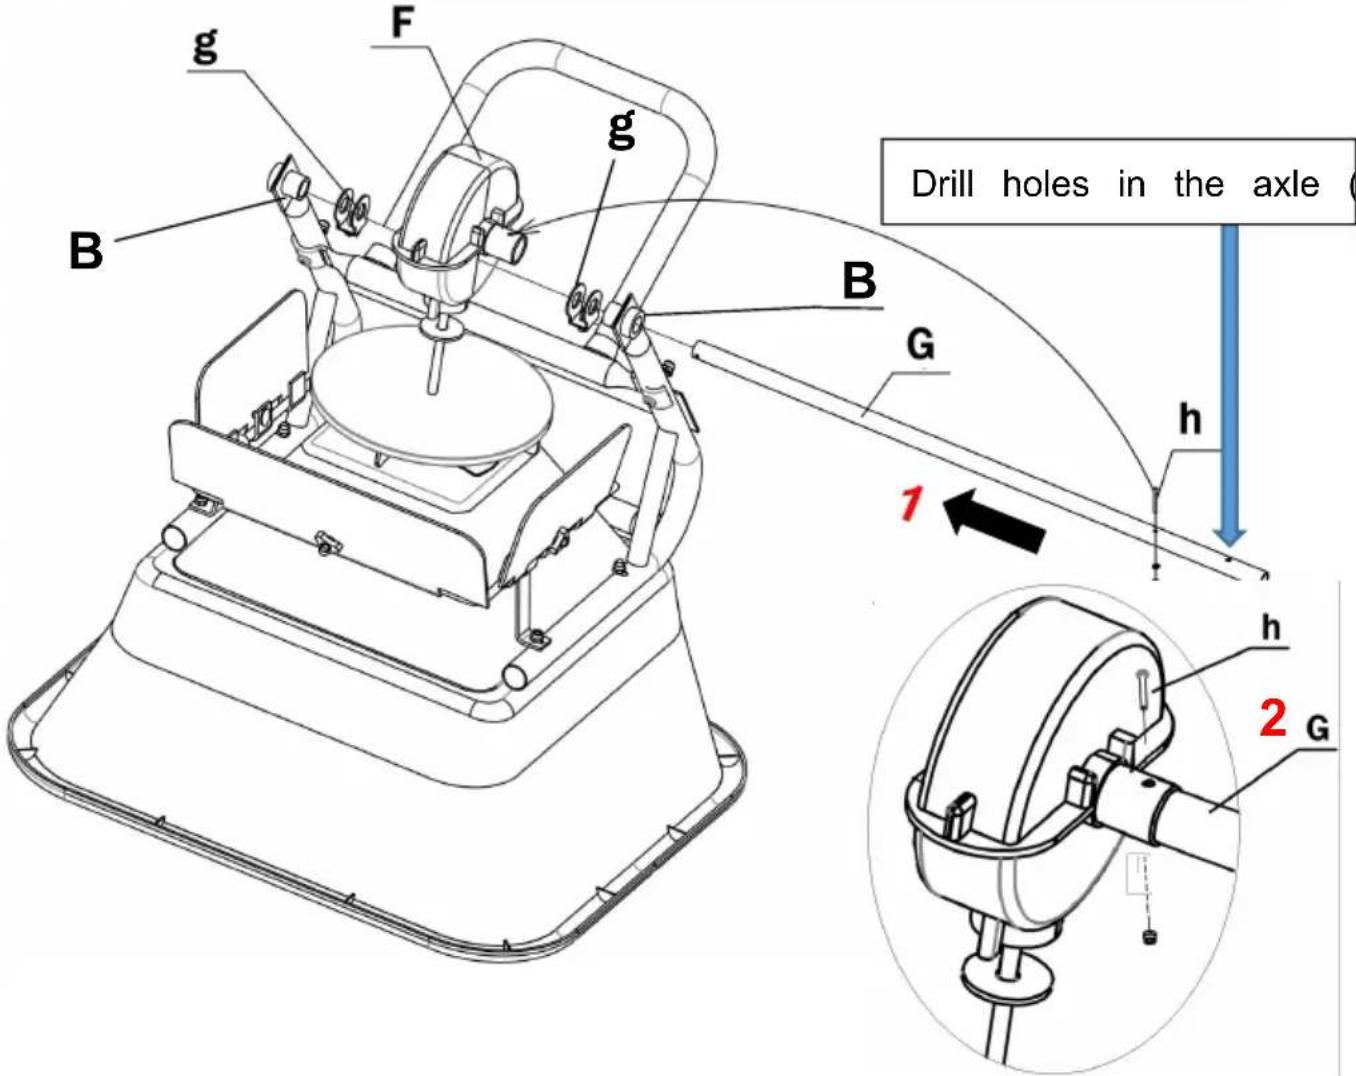 | ||
| 1. Determine the orientation of the axle(G) according to the marked hole in the above picture. Then, pass the axle(G) through the bracket(B) in t of the arrow. Next, install the positioning part(g) and the gearbox(F), and install another positioning part(g) and the bracket(B) onto the axle.2. Secure the axle(G) and the gearbox(F) with an M3×30 screw(h) as s detailed drawing. | ||
- Determine the orientation of the axle(G) according to the marked hole in the above picture. Then, pass the axle(G) through the bracket(B) in t of the arrow. Next, install the positioning part(g) and the gearbox(F), and install another positioning part(g) and the bracket(B) onto the axle.
- Secure the axle(G) and the gearbox(F) with an M3×30 screw(h) as detailed drawing.
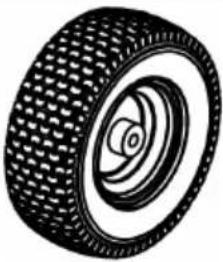 D x2 D x2 |  B x1 B x1 | 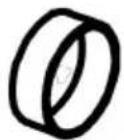 c x2 c x2 | |
 d x5 d x5 | 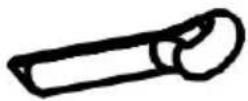 e x1 e x1 | ||
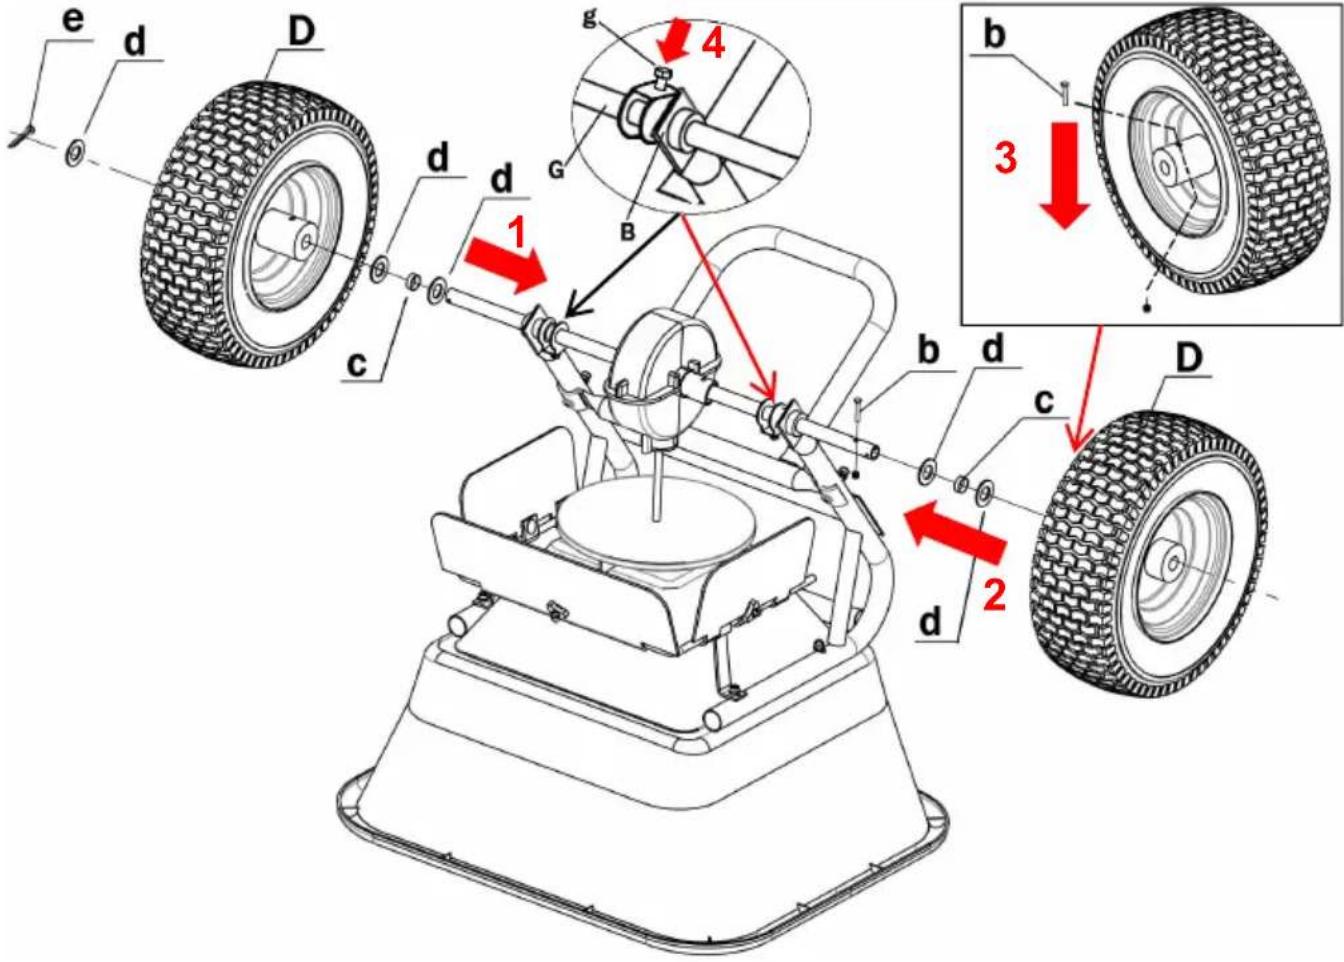 1. Insert the large washer (d), sleeve (c), large washer (d), wheel (D), washer (d) on the left side onto the axle (G) in sequence. Then, insert into the small hole at the outermost end of the axle (G) and bend it f2. Insert the large washer (d), sleeve (c), large washer (d), and wheel right side onto the axle (G) in sequence.3. Pass the screw (b) through the wheel (D) and the axle (G) and lock fixation.4. Tighten the screw on the positioning part (g x2). Note that the function positioning part (g x2) is to prevent the legs of the bracket (B) from m 1. Insert the large washer (d), sleeve (c), large washer (d), wheel (D), washer (d) on the left side onto the axle (G) in sequence. Then, insert into the small hole at the outermost end of the axle (G) and bend it f2. Insert the large washer (d), sleeve (c), large washer (d), and wheel right side onto the axle (G) in sequence.3. Pass the screw (b) through the wheel (D) and the axle (G) and lock fixation.4. Tighten the screw on the positioning part (g x2). Note that the function positioning part (g x2) is to prevent the legs of the bracket (B) from m | |||
- Insert the large washer (d), sleeve (c), large washer (d), wheel (D), washer (d) on the left side onto the axle (G) in sequence. Then, insert into the small hole at the outermost end of the axle (G) and bend it for
- Insert the large washer (d), sleeve (c), large washer (d), and wheel right side onto the axle (G) in sequence.
- Pass the screw (b) through the wheel (D) and the axle (G) and lock fixation.
- Tighten the screw on the positioning part (g x2). Note that the function positioning part (g x2) is to prevent the legs of the bracket (B) from m
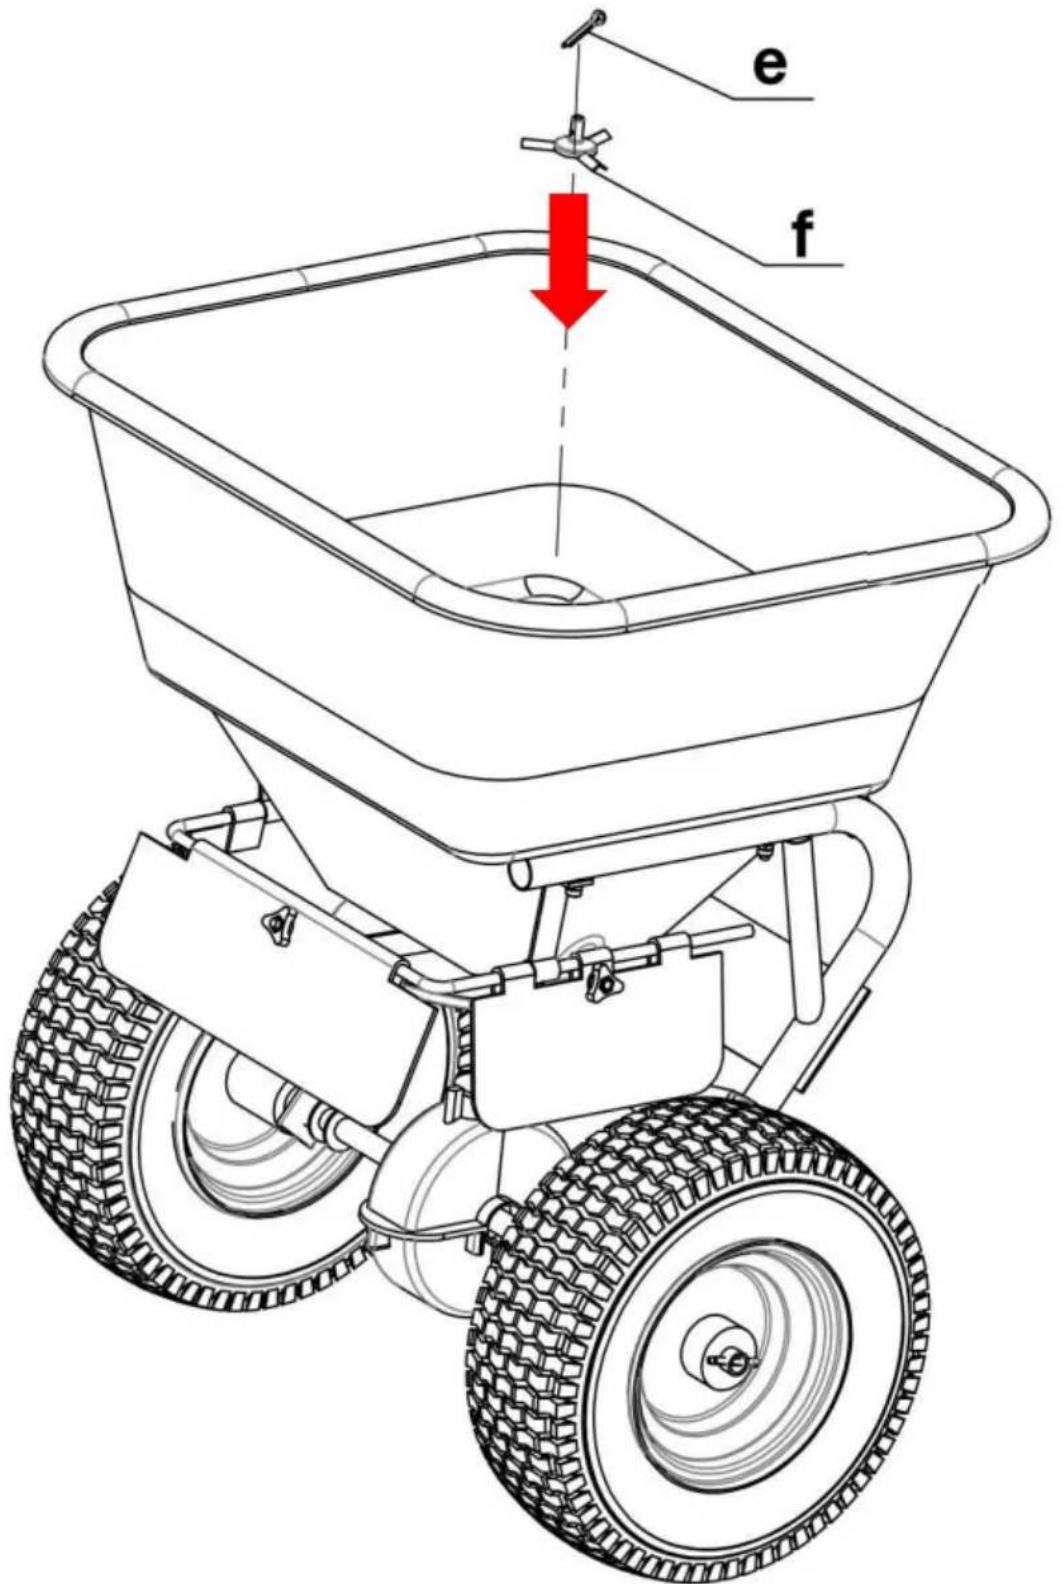
e x1
natural_image
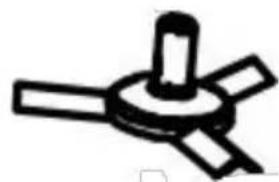
Simple line drawing of a three-bladed mechanical component (no text or symbols)f x1
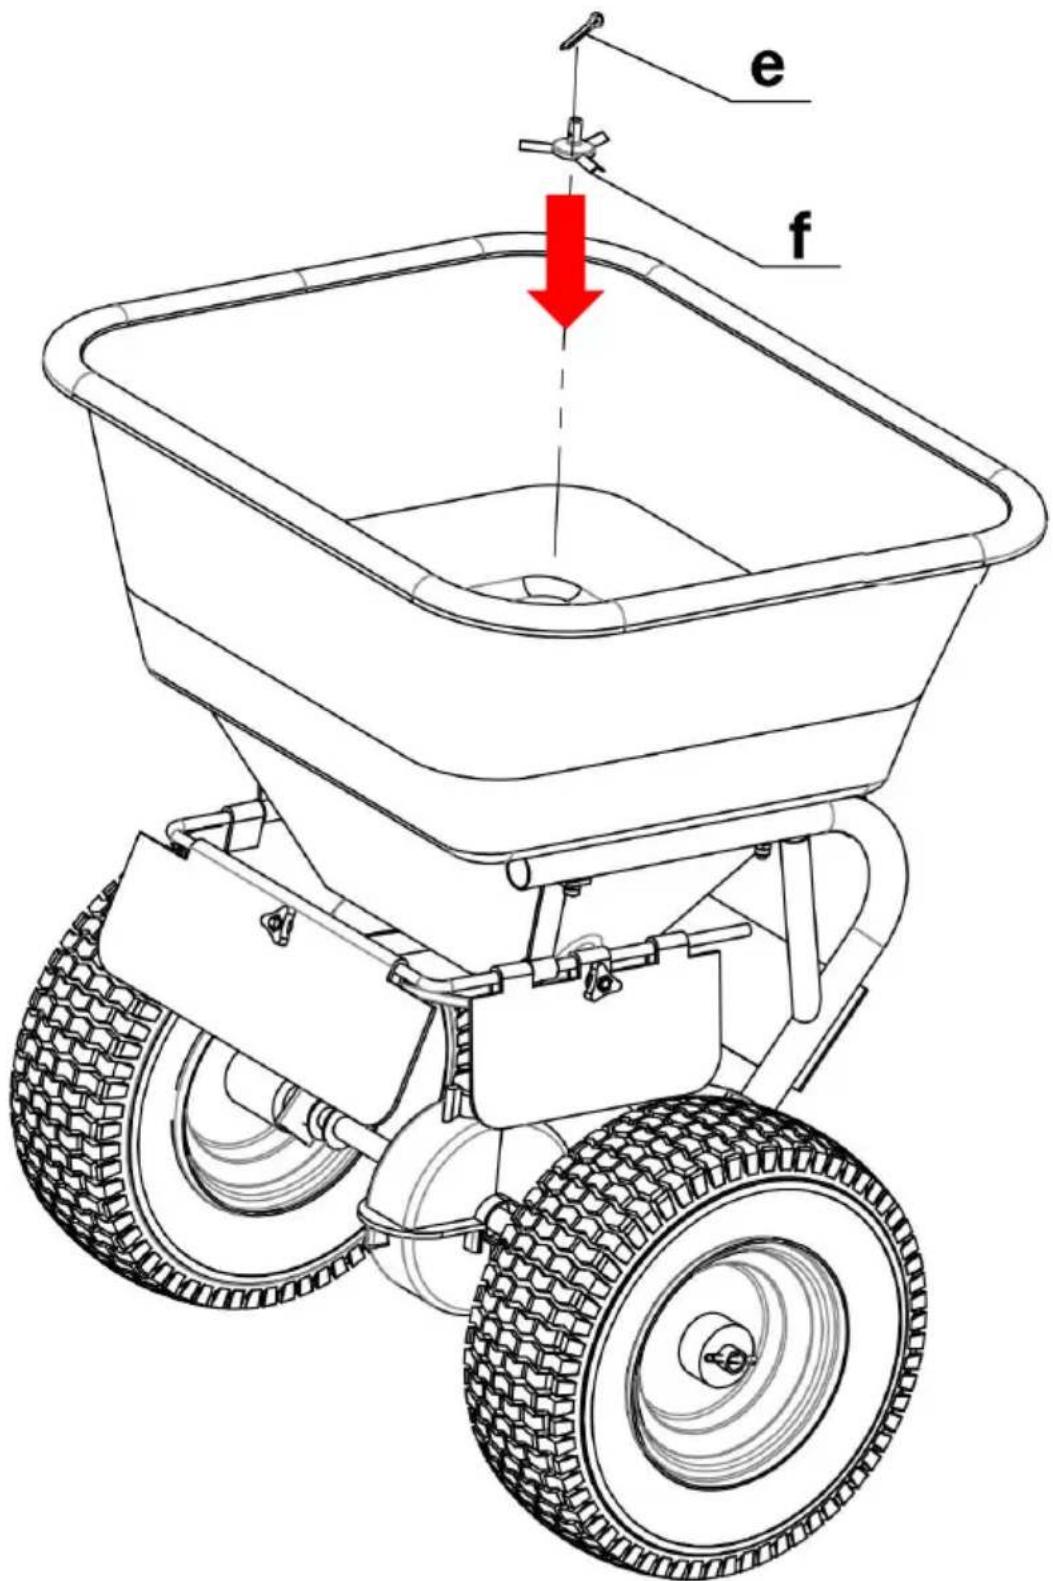
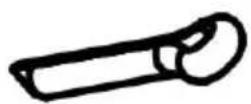
First, insert the Rotating head (f) into the shaft at the center of the ho then fix it with a pin (e).
 C x1 C x1 |  a x2 a x2 |
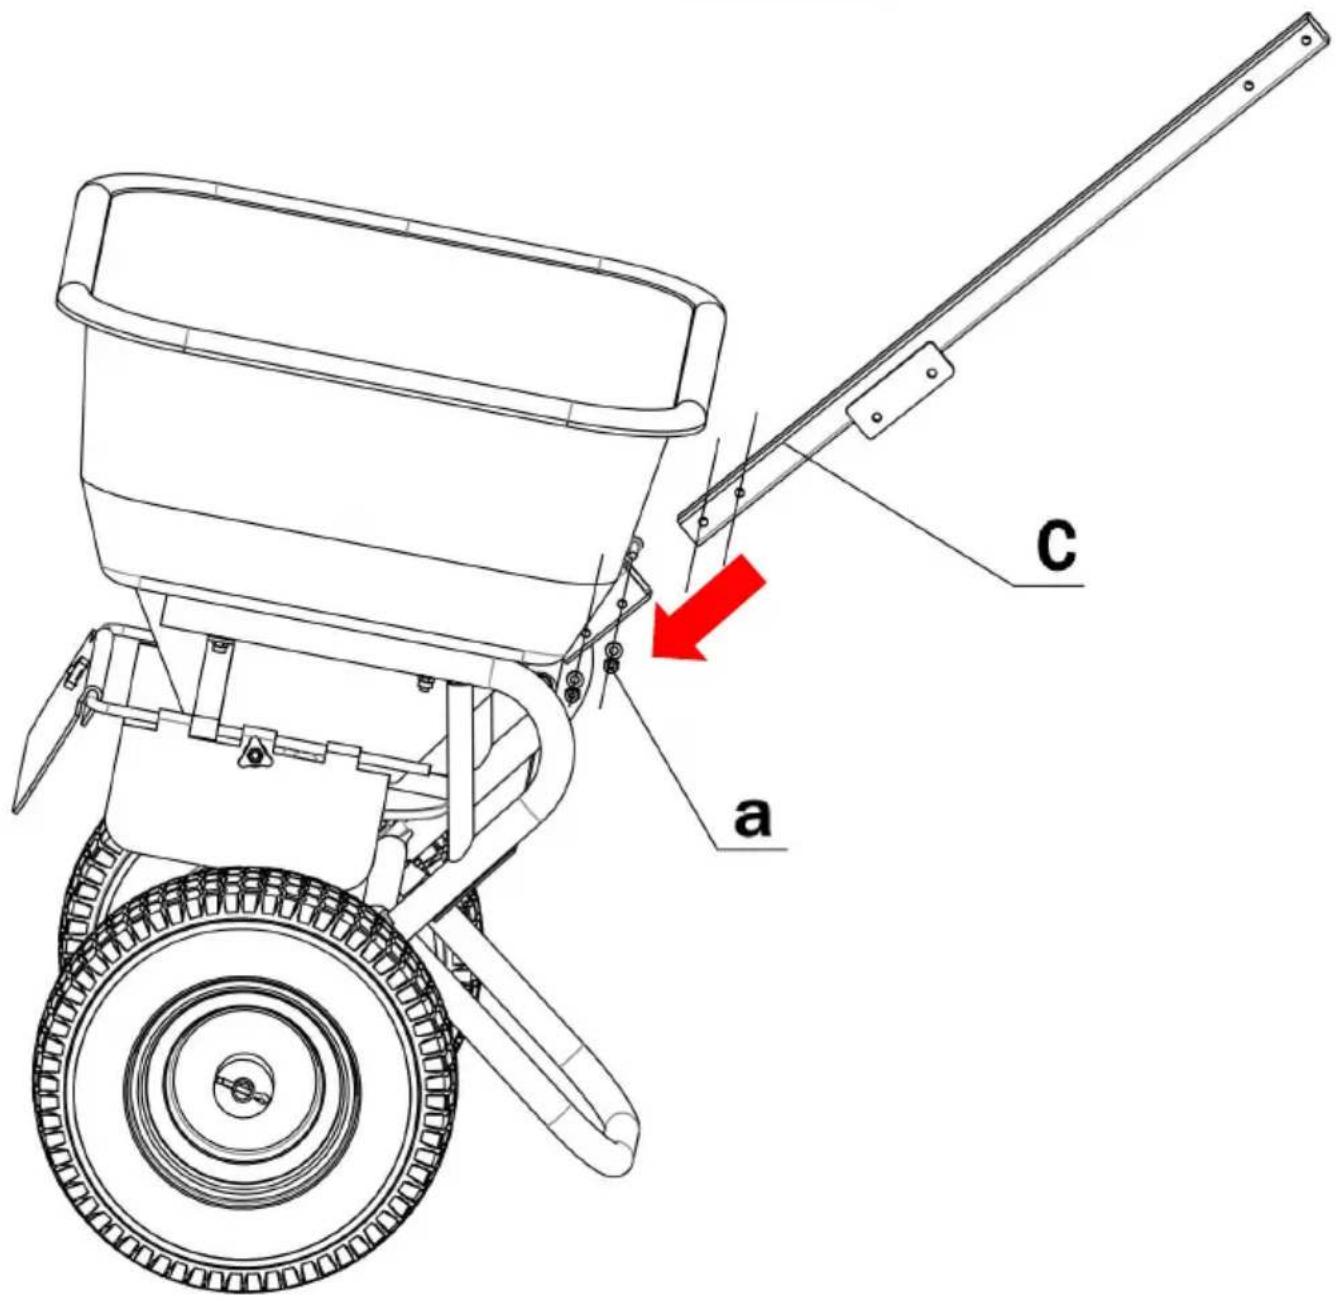
- Insert the square tube (C) into the bracket (B).
- Use M6×40 screws (a x2) to connect them through the corresponding holes, and then tighten the screws.
Pay attention to the insertion direction of the square tube (C).
 | 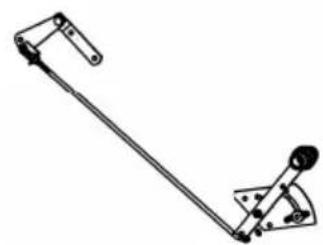 H x1 H x1 | 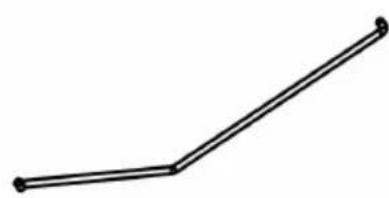 I x1 I x1 | ||
| ax2 | 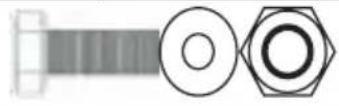 | i x2 | ||
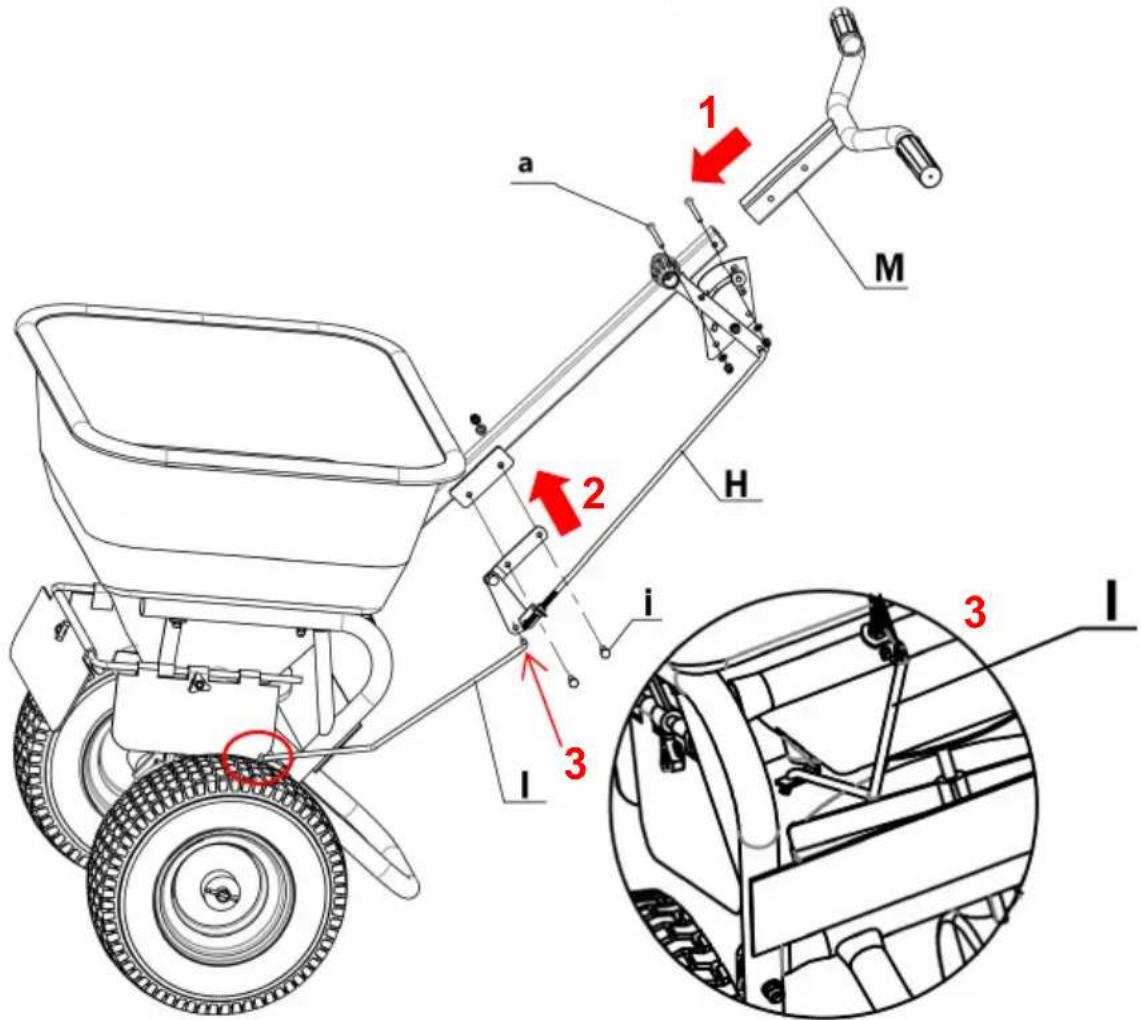 1. Insert the handle (M) into the square tube (C), and install the gear adjuster (H) on the side. Fix them with 2 M6×40 screws (a).2. Install the lower part of the gear position adjuster (H) on the square and fix it with M6×16 screws (i x2).3. Connect the upper part of the gear position adjuster connecting rod ( gear position adjuster (H), and the lower part to the hopper (A).4. Adjust the handle of the gear position adjuster (H) for testing, and c whether the material leakage port opens and closes with the adjustment adjuster. 1. Insert the handle (M) into the square tube (C), and install the gear adjuster (H) on the side. Fix them with 2 M6×40 screws (a).2. Install the lower part of the gear position adjuster (H) on the square and fix it with M6×16 screws (i x2).3. Connect the upper part of the gear position adjuster connecting rod ( gear position adjuster (H), and the lower part to the hopper (A).4. Adjust the handle of the gear position adjuster (H) for testing, and c whether the material leakage port opens and closes with the adjustment adjuster. | ||||
- Insert the handle (M) into the square tube (C), and install the gear adjuster (H) on the side. Fix them with 2 M6×40 screws (a).
- Install the lower part of the gear position adjuster (H) on the square and fix it with M6×16 screws (i x2).
- Connect the upper part of the gear position adjuster connecting rod (gear position adjuster (H), and the lower part to the hopper (A).
- Adjust the handle of the gear position adjuster (H) for testing, and c whether the material leakage port opens and closes with the adjustment adjuster.

natural_image
Two 3D geometric shapes: a grid-patterned square labeled K×1 and a rounded rectangular shape labeled L×1, both without any text or symbols.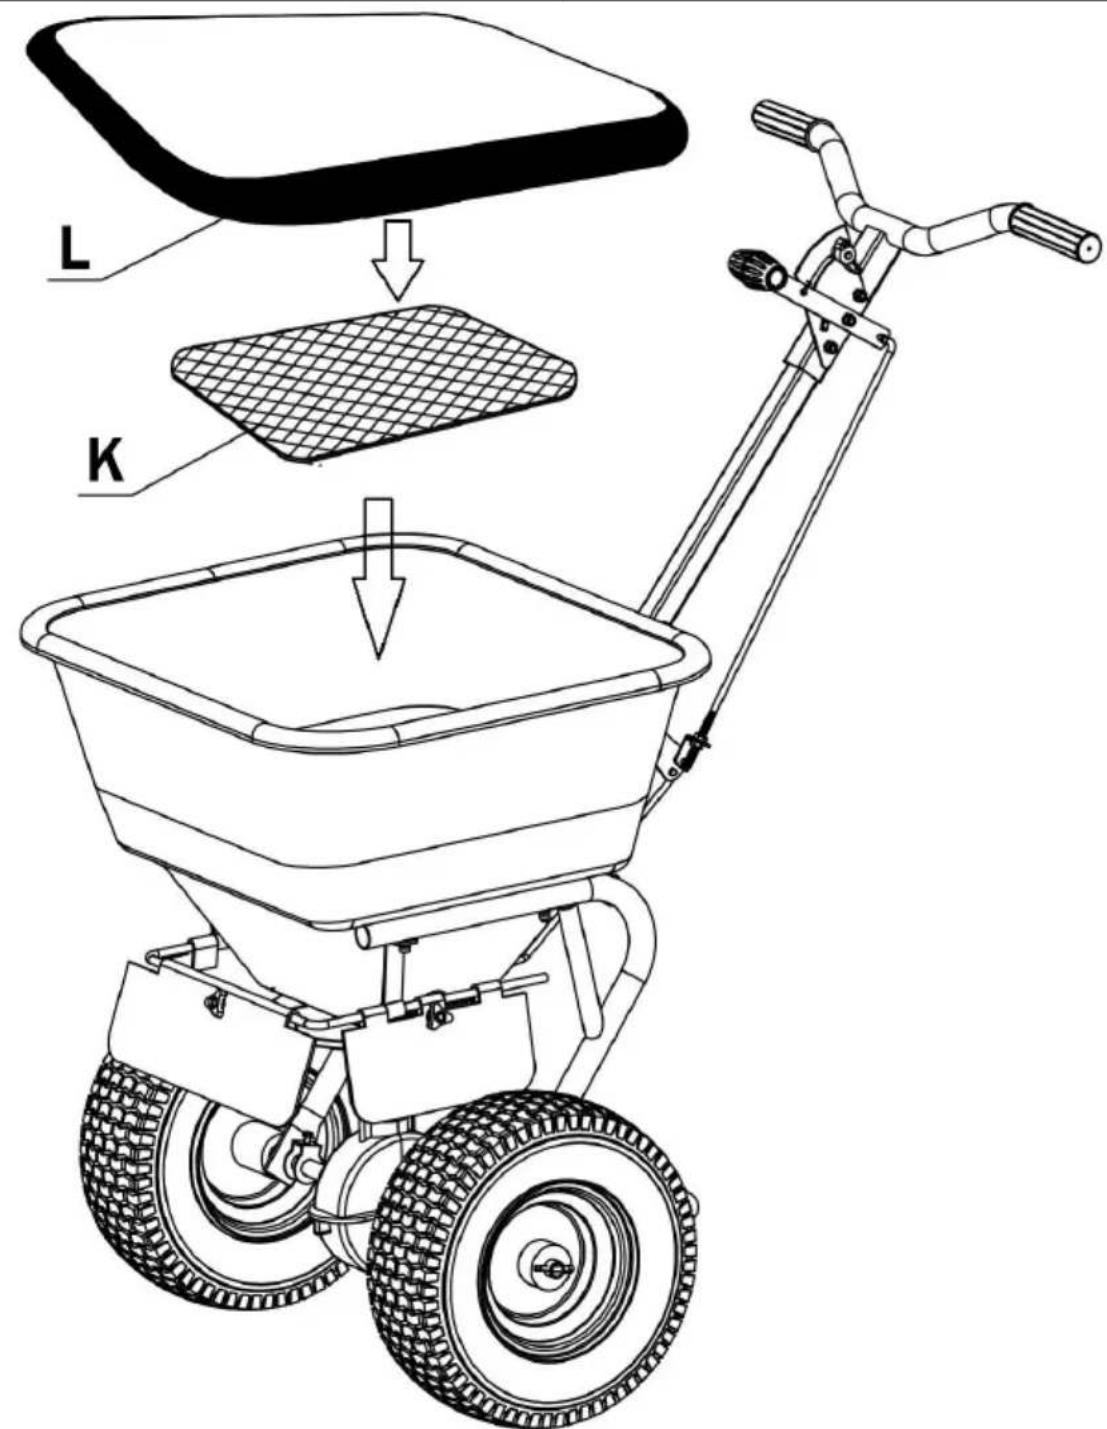
Install the screen mesh (K) and the transparent cover (L) to their respective positions on the spreader. The screen mesh is used to filter the material are any materials larger than the mesh of the screen, please remove the size of the material leakage hole is limited, and only materials smaller than hole are allowed to be spread.

HOW TO USE THE SPREADER TROLLEY
TO OPEN- Push the Control Level forward until it stops against TO CLOSE- Pull the control Lever fully back toward Operator.
Follow the instructions provided by the manufacturer of the spread material.
NOTE: Make sure that the spreading material is evenly distributed spreading material must be dry.
-
Before feeding in the spreading material, set the dispensing le OFF position (dispensing flap closed).
-
Fill the spreader trolley hopper.
-
To adjust the volume of spread, set the dispensing lever to the position.
-
In order to spread or scatter the material, drive the spreader even speed (the higher the speed, the greater the scattering distance).
-
Close the dispensing flap as soon as you stop the spreader (dispensing lever in OFF position).
USING YOUR SPREADER
- Determine approximate square footage of area to be covered and estimate amount of material required.
- Before filling the hopper, make sure the flow control arm is in the off po and the closure plate is shut.
- Break up any lumpy fertilizer as you fill the hopper.
- Set the adjustable stop with the flow control arm still in the off position. the application chart on this page and to the instructions on the fertilizer bag select the proper flow rate setting.
- The application chart is calculated for light to heavy application at a vehicle speed of 3 mph, or 100 ft. in 23 seconds. A variation in speed will require adjustment of the flow rate to maintain the same coverage. The faster you do the wider the broadcast width.
- Make sure the drive pin is in stalled in the axle before starting the spread
- Always start the spreader in motion before opening closure plate.
- Always shut the closure plate before turning or stopping the spreader.
- If fertilizer is accidentally deposited too heavily in a small area, soak the thoroughly with a garden hose or sprinkler to prevent burning of the lawn.
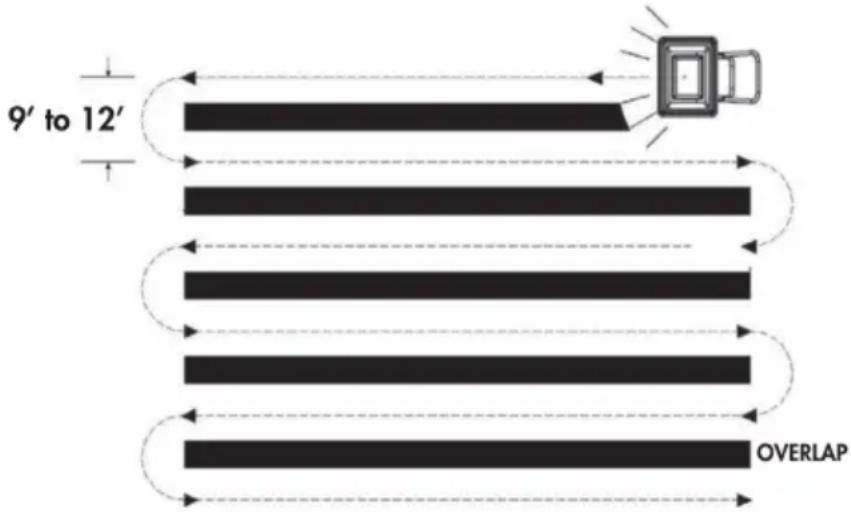
- To insure uniform coverage, make each pass so that the broadcast pattern slightly overlaps the pattern from the previous pass as shown in figure below approximate broadcast widths for different materials are shown in the application chart on this page.
- When broadcasting weed control fertilizers, make sure the broadcast pattern does not hit evergreen trees, flowers or shrubs.
flowchart
graph TD
    A["9' to 12'"] --> B["Device Icon"]
    B --> C["Overlap"]
    C --> D["Layer 1"]
    C --> E["Layer 2"]
    C --> F["Layer 3"]
    C --> G["Layer 4"]
PRODUCT SPREADER SETTINGS
CAUTION
These are approximate settings and are intended as a guide only. Variations in materials, walking speed, terrain, weather conditions, condition of spreader, etc. can affect setting. If unsure, start at a setting and increase if necessary. Always calibrate your spreader using.
| GRASS SEEDS | OVERSEEDING | NEW LAWNS |
| Black Beauty (Original) | 14 | Apply a |
| Black Beauty Ultra | 13 | second |
| Dense Shade | 14 | |
| Fall Magic | 14 | time to the |
| Fast Grow | 13 | |
| Full Sun (Sunny) | 12 | same area |
| Heavy Traffic | 13 | using the |
| Quik-Start | 12 | |
| Shady Nooks | 14 | rates listed |
| Sun & Shade | 12 | on left. |
| Sod Maker | 9 | |
| Touch-Up | 14 |  |
SOIL FOODS
| Love Your Soil | 12 |
| MAG-I-CAL - Acidic (silver) | 12 |
| MAG-I-CAL - Alkaline (blue) | 14 |
ORGANICS
| Organic Lawn Food | 17 |
| Organic Weed Preventer | 12 |
| Organic Insect Control | 10 |
LAWN FOODS
| Green-Up with Crabgrass Preventer | 15 |
| Green-Up Weed & Feed | 14 |
| Summer Survival Lawn Food | 14 |
| Winter Survival Fall Lawn Food | 12 |
| Crabgrass Preventer plus New Seeding | 12 |
| Green-Up Lawn Food | 15 |
| Green-Up Lawn Foodfor Seeding and Sodding | 12 |
LAWN CONTROLS
| Crabgrass & Weed Preventer | 11 |
| Grub & Insect Control | 10 |
| Lawn Fungus Control | 10 |
| Lawn Moss Control | 13 |
| Lawn Weed Control | 11 |
USAGE TIPS
For rectangular lawns
Apply two header strips across each end for a turning area. Then apply back and forth in the longest direction.
For irregular-shaped lawns
Apply a header strip around the entire lawn for a turning area, then apply back and forth.
Note:
Each pass should be within 5 feet of each other to ensure an overlap.
natural_image
Diagram showing a tree with directional arrows indicating movement or flow, enclosed in a dashed rectangular boundary (no text or symbols)
natural_image
Abstract diagram of a gray irregular shape with dashed white arrows indicating flow or movement, no text or symbols present.- Do not leave spreader open when making turns.
- For best results, do not apply on a windy day.
- Swath will vary due to conditions. (see above caution)
- To determine how much coverage you need, multiply the length of your lawn by its width. This equals your total square footage. Deduct any non-lawn areas (house, gardens, walkways, etc.).
Length (Feet)
X____ Width (Feet)
=____ Total Square Feet
- Non-Lawn Areas (Feet)
=____ Total Square Feet coverage you need
natural_image
Abstract geometric pattern with black shapes on a grid background (no text or symbols)Maintenance
- After each use clean material out of hopper.
- Rinse/dry inside and outside of the spreader after each use.
- Before operating make sure the tires have the RECOMMENDED TIRE PRESSURE 25 PSI.
- Periodically check all fasteners for tightness.
- Annually clean and lightly lubricate parts.
- Use a glossy enamel spray paint to touch up scratched or worn painted surfaces.
- Never exceed load capacity rating, it will damage the spreader.
Important
The warnings, cautions, and instructions outlined in this instruction manual can cover all possible conditions or situations that may occur. It must be understood the operator that common sense and caution are factors which cannot be but this product and must be supplied by the operator.
Storage
- Never allow material to remain in the hopper for extended periods of time.
- Before storing make sure the spreader is clean and dry for years of trouble service.
- Store indoors or protected area during severe weather and winter months.
PRODUCT PARAMETER
| Model | TC2034B |
| Safe Loading Weight | 100lbs (45.2kg) |
| Colour | Black |
| Spreading width | 0-3m/0-9.8ft |
ASSEMBLY PROBLEMS
(I) Missing or Damaged Parts
Problem Description: After opening the parts packaging, it is found that quantity of some parts is insufficient or there are obvious damages.
Solution: Immediately conduct a careful check against the parts list to o missing or damaged parts. Contact the VEVOR customer service, provide product model TC2029A and relevant part information, and apply for the replacement or reissue of the parts. During the waiting period for the ne not attempt to assemble with incomplete or damaged parts to avoid affected product performance and safety.
(II) Assembly Difficulties
Problem Description: When operating according to the assembly steps in instruction manual, situations such as difficult alignment of parts and inab screw in screws smoothly occur.
Solution: Check again whether the installation direction of the parts is or refer to the illustrations in the instruction manual, and ensure that each installed in the correct position. For the situation where it is difficult to screw, check whether there are foreign objects blocking the threads. A be used to clean the threads. If the threads are damaged, contact the service in a timely manner to replace the corresponding parts. If it is align due to part size deviation, do not force the assembly, but commun the customer service to obtain further guidance or replacement of parts. prepare installation videos. Please contact VEVOR customer service if you them.
USAGE PROBLEMS
(I) Uneven Spreading
Problem Description: When using the spreader, the materials are uneven distributed on the ground, with some areas having more and some areas less.
Solution: Check whether there is any caking phenomenon of the material hopper. If so, the caked materials need to be broken up before use. C whether the walking speed of the spreader is uniform. Try to keep a un speed, as changes in speed may affect the spreading effect. Check whe setting of the flow control arm of the spreader is appropriate. According of materials and the usage scenario, refer to the recommended values in spreading setting precautions of the product, and readjust the position of control arm.
(II) Spreading Width Does Not Meet Expectations
Problem Description: The actual spreading width does not conform to the specified in the instruction manual, being either too wide or too narrow.
Solution: Check the driving speed of the spreader. The faster the speed the spreading width. Adjust the driving speed to an appropriate range as Confirm whether the setting of the flow control arm is correct. An inapp setting may indirectly affect the spreading width. Readjust it according to correct setting method. If the components of the spreader are loose or may affect the spreading width. Carefully check each component of the Tighten any loose parts in a timely manner, and contact the customer s replace any damaged parts.
(III) The Spreader is Jammed or Cannot Be Pushed
Problem Description: During the use process, the spreader is jammed, push, or even cannot be pushed normally.
Solution: Check whether the tire pressure reaches the recommended value. PSI. Insufficient air pressure will increase the pushing resistance. Inflate in standard air pressure in a timely manner. Check whether there are foreign wrapped around the wheels. If so, clean up the sundries wrapped around wheels. Check whether there is material accumulation inside the spreader blocking the components. Clean up the accumulated materials in the hop, other components. If the problem still exists, it may be a mechanical component failure, such as a damaged bearing, etc. Contact a professional maintenance personnel or VEVOR customer service for maintenance.
Manufacturer: Shanghaimuxinmuyeyouxiangongsi
Address: Shuangchenglu 803nong11hao1602A-1609shi, baoshanqu, shanghai 200000 CN.
Imported to AUS: SIHAO PTY LTD. 1 ROKEVA STREETEASTWOOD NSW 2122 Australia
Imported to USA: Sanven Technology Ltd. Suite 250, 9166 Anaheim Place, Rancho Cucamonga, CA 91730
| UK | REP |
YH CONSULTING LIMITED. C/O YH Consultin Limited Office 147, Centurion House, London Road, Staines-upon-Thames, Surrey, TW18 4A>
| EC | REP |
Affordable. Reliable. Home Improvement.
Affordable. Reliable. Home Improvement.
natural_image
Line drawing of a two-wheeled pushewer with wheels and handle (no text or symbols)KROK MONTAŻU
natural_image
Simple line drawing of a three-bladed mechanical component (no text or symbols)p x1

natural_image
Two 3D geometric shapes: a grid-patterned square labeled K1 and a rounded rectangular shape labeled L×1, both without any text or symbols.
OSTROŻNOŚĆ
| GRASS SEEDS | OVERSEEDING | NEW LAWNS | ORGANICS |
| Black Beauty (Original) | 14 | Apply a | Organic Lawn Food 17 |
| Black Beauty Ultra | 13 | second | Organic Weed Preventer 12 |
| Dense Shade | 14 | Organic Insect Control 10 | |
| Fall Magic | 14 | time to the | LAWN FOODS |
| Fast Grow | 13 | Green-Up with Crabgrass Preventer 15 | |
| Full Sun (Sunny) | 12 | same area | Green-Up Weed & Feed 14 |
| Heavy Traffic | 13 | using the | Summer Survival Lawn Food 14 |
| Quik-Start | 12 | Winter Survival Fall Lawn Food 12 | |
| Shady Nooks | 14 | rates listed | Crabgrass Preventer plus New Seeding 12 |
| Sun & Shade | 12 | on left. | Green-Up Lawn Food 15 |
| Sod Maker | 9 | Green-Up Lawn Food for Seeding and Sodding 12 | |
| Touch-Up | 14 | LAWN CONTROLS | |
| SOIL FOODS | Crabgrass & Weed Preventer 11 | ||
| Love Your Soil | 12 | Grub & Insect Control 10 | |
| MAG-I-CAL - Acidic (silver) | 12 | Lawn Fungus Control 10 | |
| MAG-I-CAL - Alkaline (blue) | 14 | Lawn Moss Control 13 | |
| Lawn Weed Control 11 | |||
USAGE TIPS
For rectangular lawns
Apply two header strips across each end for a turning area. Then apply back and forth in the longest direction.
For irregular-shaped lawns
Apply a header strip around the entire lawn for a turning area, then apply back and forth.
Note:
Each pass should be within 5 feet of each other to ensure an overlap.

natural_image
Diagram showing a tree with directional arrows indicating movement or flow, enclosed in dashed rectangular boundaries (no text or symbols)
natural_image
Abstract diagram of a gray irregular shape with dashed white arrows indicating flow or movement, no text or symbols present.- Do not leave spreader open when making turns.
- For best results, do not apply on a windy day.
- Swath will vary due to conditions. (see above caution)
- To determine how much coverage you need, multiply the length of your lawn by its width. This equals your total square footage. Deduct any non-lawn areas (house, gardens, walkways, etc.).
Length (Feet)
X____ Width (Feet)
=____ Total Square Feet
- ____ Non-Lawn Areas (Feet)
=____ Total Square Feet coverage you need

natural_image
Abstract geometric pattern with black shapes on a grid background (no text or symbols)Konserwacja
YH CONSULTING LIMITED. C/O YH Consulting Limited Biuro 147, Centurion House, London Road, Staines-upon-Thames, Surrey, TW18 4AX
E-CrossStu GmbH Mainzer Landstr.69, 60329 Frankfurt nad Menem.

VEVOR
Affordable. Reliable. Home Improvement.
DIETRO LOSPREADER
MODELLO:TC2034B
MODELLO:TC2034B

natural_image
Line drawing of a two-wheeled pushewer with wheels and handle (no text or symbols)FASE DIMONTAGGIO
natural_image
Simple line drawing of a three-bladed mechanical component (no text or symbols)f x1

COME UTILIZZARE IL CARRELLO DIFFUSORE
ATTENZIONE
| GRASS SEEDS | OVERSEEDING | NEW LAWNS | ORGANICS |
| Black Beauty (Original) | 14 | Apply a | Organic Lawn Food 17 |
| Black Beauty Ultra | 13 | Organic Weed Preventer 12 | |
| Dense Shade | 14 | second | Organic Insect Control 10 |
| Fall Magic | 14 | time to the | LAWN FOODS |
| Fast Grow | 13 | Green-Up with Crabgrass Preventer 15 | |
| Full Sun (Sunny) | 12 | same area | Green-Up Weed & Feed 14 |
| Heavy Traffic | 13 | using the | Summer Survival Lawn Food 14 |
| Quik-Start | 12 | Winter Survival Fall Lawn Food 12 | |
| Shady Nooks | 14 | rates listed | Crabgrass Preventer plus New Seeding 12 |
| Sun & Shade | 12 | Green-Up Lawn Food 15 | |
| Sod Maker | 9 | on left. | Green-Up Lawn Food for Seeding and Sodding 12 |
| Touch-Up | 14 | LAWN CONTROLS | |
| SOIL FOODS | Crabgrass & Weed Preventer 11 | ||
| Love Your Soil | 12 | Grub & Insect Control 10 | |
| MAG-I-CAL - Acidic (silver) | 12 | Lawn Fungus Control 10 | |
| MAG-I-CAL - Alkaline (blue) | 14 | Lawn Moss Control 13 | |
| Lawn Weed Control 11 | |||
USAGE TIPS
For rectangular lawns
Apply two header strips across each end for a turning area. Then apply back and forth in the longest direction.
For irregular-shaped lawns
Apply a header strip around the entire lawn for a turning area, then apply back and forth.
Note:
Each pass should be within 5 feet of each other to ensure an overlap.

natural_image
Diagram showing a tree with directional arrows indicating movement or flow, enclosed in dashed rectangular boundaries (no text or symbols)
natural_image
Abstract diagram of a curved, irregular shape with dashed and solid lines indicating directional flow (no text or symbols)- Do not leave spreader open when making turns.
- For best results, do not apply on a windy day.
- Swath will vary due to conditions. (see above caution)
- To determine how much coverage you need, multiply the length of your lawn by its width. This equals your total square footage. Deduct any non-lawn areas (house, gardens, walkways, etc.).
Length (Feet)
X____ Width (Feet)
=____ Total Square Feet
- ____ Non-Lawn Areas (Feet)
=____ Total Square Feet coverage you need

natural_image
Abstract geometric pattern with black shapes on a gray grid background (no text or symbols)Manutenzione
Importato in AUS: SIHAO PTY LTD. 1 ROKEVA STREETEASTWOOD NSW 2122 Australia
Importato negli USA: Sanven Technology Ltd. Suite 250, 9166 Anaheim Place, Rancho Cucamonga, CA91730

YH CONSULTING LIMITED. C/O YH Consulting Limited Ufficio 147, Centurion House, London Road, Staines-upon-Thames, Surrey, TW18 4AX

Affordable. Reliable. Home Improvement.
DETRÁS DEL ESPARCIDOR
MODELO:TC2034B
VEVOR
Affordable. Reliable. Home Improvement.
DETRÁS DELESPARCIDOR
MODELO:TC2034B

natural_image
Line drawing of a two-wheeled pushewer with wheels and handle (no text or symbols)PASO DEMONTAJE
natural_image
Simple line drawing of a three-bladed mechanical component (no text or symbols)fx1


PRECAUCIÓN
| GRASS SEEDS | OVERSEEDING | NEW LAWNS | ORGANICS |
| Black Beauty (Original) | 14 | Apply a | Organic Lawn Food 17 |
| Black Beauty Ultra | 13 | Organic Weed Preventer 12 | |
| Dense Shade | 14 | second | Organic Insect Control 10 |
| Fall Magic | 14 | time to the | LAWN FOODS |
| Fast Grow | 13 | Green-Up with Crabgrass Preventer 15 | |
| Full Sun (Sunny) | 12 | same area | Green-Up Weed & Feed 14 |
| Heavy Traffic | 13 | using the | Summer Survival Lawn Food 14 |
| Quik-Start | 12 | Winter Survival Fall Lawn Food 12 | |
| Shady Nooks | 14 | rates listed | Crabgrass Preventer plus New Seeding 12 |
| Sun & Shade | 12 | Green-Up Lawn Food 15 | |
| Sod Maker | 9 | on left. | Green-Up Lawn Food for Seeding and Sodding 12 |
| Touch-Up | 14 | LAWN CONTROLS | |
| SOIL FOODS | Crabgrass & Weed Preventer 11 | ||
| Love Your Soil | 12 | Grub & Insect Control 10 | |
| MAG-I-CAL - Acidic (silver) | 12 | Lawn Fungus Control 10 | |
| MAG-I-CAL - Alkaline (blue) | 14 | Lawn Moss Control 13 | |
| Lawn Weed Control 11 | |||
USAGE TIPS
For rectangular lawns
Apply two header strips across each end for a turning area. Then apply back and forth in the longest direction.
For irregular-shaped lawns
Apply a header strip around the entire lawn for a turning area, then apply back and forth.
Note:
Each pass should be within 5 feet of each other to ensure an overlap.

natural_image
Diagram showing a tree with directional arrows indicating movement or flow, enclosed in dashed rectangular boundaries (no text or symbols)
natural_image
Abstract diagram of a gray irregular shape with dashed white arrows indicating flow or movement, no text or symbols present.- Do not leave spreader open when making turns.
- For best results, do not apply on a windy day.
- Swath will vary due to conditions. (see above caution)
- To determine how much coverage you need, multiply the length of your lawn by its width. This equals your total square footage. Deduct any non-lawn areas (house, gardens, walkways, etc.).
Length (Feet)
X____ Width (Feet)
=____ Total Square Feet
- ____ Non-Lawn Areas (Feet)
=____ Total Square Feet coverage you need
natural_image
Abstract geometric pattern with black shapes on a gray grid background (no text or symbols)Mantenimiento
YH CONSULTING LIMITADA. A/C YH Consulting Limited Oficina 147, Centurion House, London Road, Staines-upon-Thames, Surrey, TW18 4AX
Affordable. Reliable. Home Improvement.
BAKOM SPRIDARE
MODELL: TC2034B
VEVOR
Affordable. Reliable. Home Improvement.
BAKOM SPRIDARE
MODELL: TC2034B

natural_image
Line drawing of a two-wheeled pushewer with wheels and handle (no text or symbols)MONTERINGSSTEG
natural_image
Simple line drawing of a three-bladed mechanical component (no text or symbols)f x1

natural_image
Two 3D geometric shapes: a grid-patterned square labeled 'K x1' and a rounded rectangular shape labeled 'L x1', both without any text or symbols.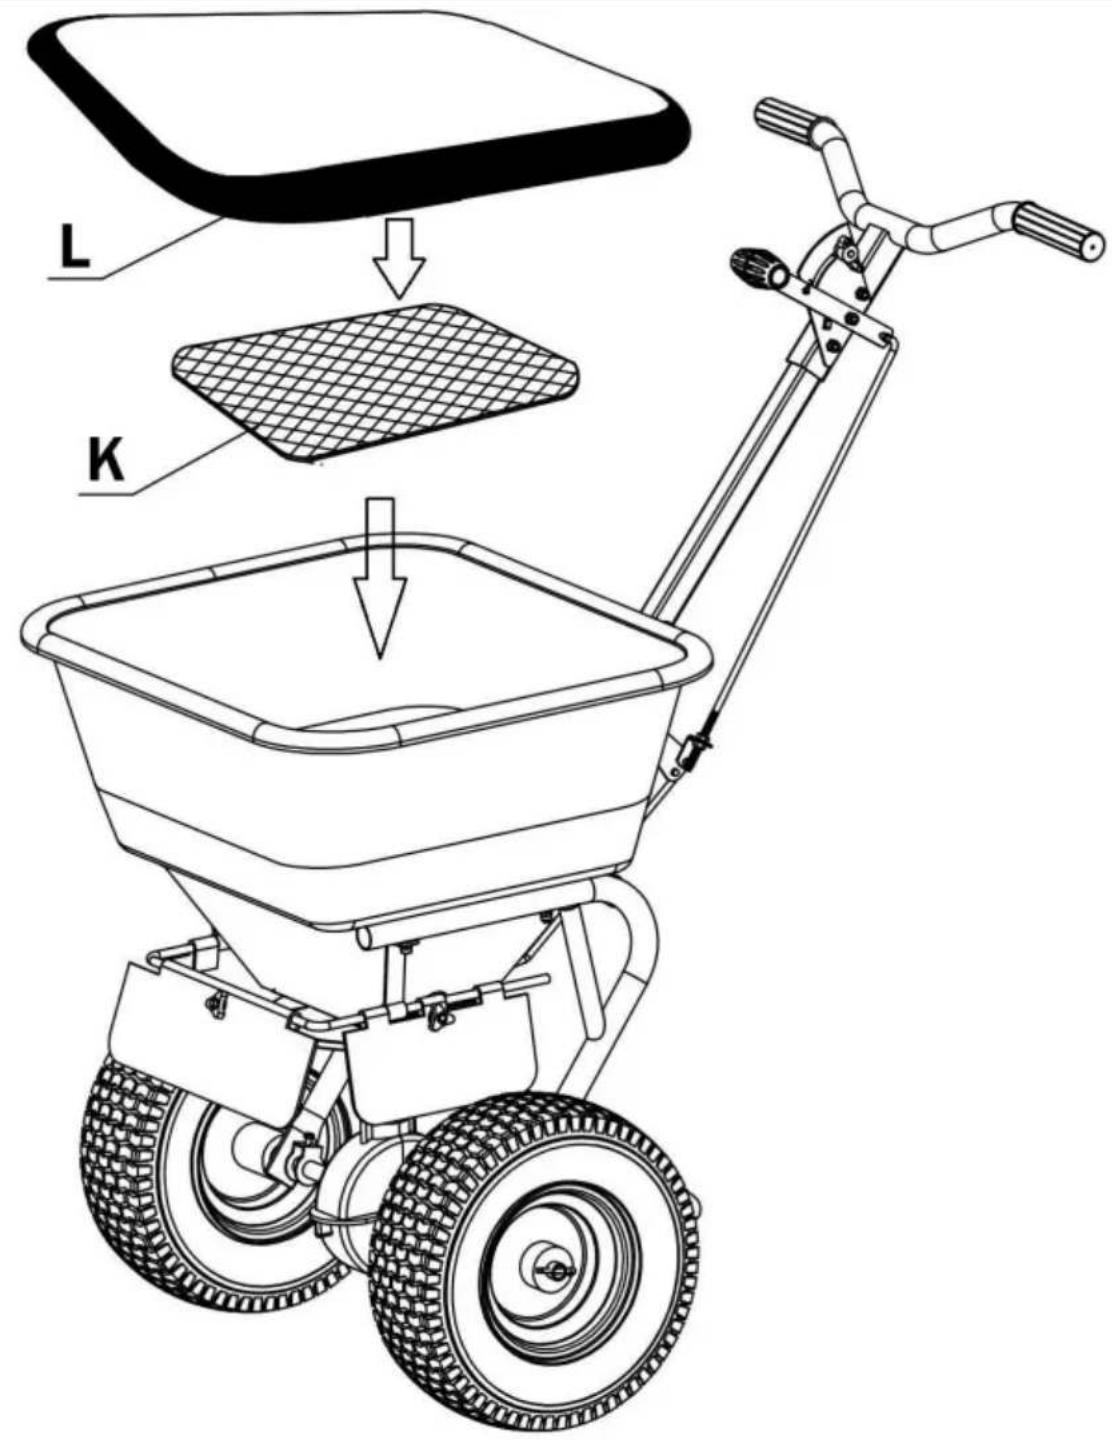
INSTÄLLNINGAR FÖRPRODUKTSPRIDARE
FÖRSIKTIGHET
| GRASS SEEDS | OVERSEEDING | NEW LAWNS | ORGANICS |
| Black Beauty (Original) | 14 | Apply a | Organic Lawn Food 17 |
| Black Beauty Ultra | 13 | Organic Weed Preventer 12 | |
| Dense Shade | 14 | second | Organic Insect Control 10 |
| Fall Magic | 14 | time to the | LAWN FOODS |
| Fast Grow | 13 | Green-Up with Crabgrass Preventer 15 | |
| Full Sun (Sunny) | 12 | same area | Green-Up Weed & Feed 14 |
| Heavy Traffic | 13 | using the | Summer Survival Lawn Food 14 |
| Quik-Start | 12 | Winter Survival Fall Lawn Food 12 | |
| Shady Nooks | 14 | rates listed | Crabgrass Preventer plus New Seeding 12 |
| Sun & Shade | 12 | Green-Up Lawn Food 15 | |
| Sod Maker | 9 | on left. | Green-Up Lawn Food for Seeding and Sodding 12 |
| Touch-Up | 14 | LAWN CONTROLS | |
| SOIL FOODS | Crabgrass & Weed Preventer 11 | ||
| Love Your Soil | 12 | Grub & Insect Control 10 | |
| MAG-I-CAL - Acidic (silver) | 12 | Lawn Fungus Control 10 | |
| MAG-I-CAL - Alkaline (blue) | 14 | Lawn Moss Control 13 | |
| Lawn Weed Control 11 | |||
USAGE TIPS
For rectangular lawns
Apply two header strips across each end for a turning area. Then apply back and forth in the longest direction.
For irregular-shaped lawns
Apply a header strip around the entire lawn for a turning area, then apply back and forth.
Note:
Each pass should be within 5 feet of each other to ensure an overlap.

natural_image
Diagram showing a tree with directional arrows indicating movement or flow, enclosed in dashed rectangular boundaries (no text or symbols)
natural_image
Abstract diagram of a curved, irregular shape with dashed and solid lines indicating directional flow (no text or symbols)- Do not leave spreader open when making turns.
- For best results, do not apply on a windy day.
- Swath will vary due to conditions. (see above caution)
- To determine how much coverage you need, multiply the length of your lawn by its width. This equals your total square footage. Deduct any non-lawn areas (house, gardens, walkways, etc.).
Length (Feet)
X____ Width (Feet)
=____ Total Square Feet
- ____ Non-Lawn Areas (Feet)
=____ Total Square Feet coverage you need

natural_image
Abstract geometric pattern with black shapes on a gray grid background (no text or symbols)Underhåll
YH CONSULTING LIMITED. C/O YH Consulting Limited Kontor 147, Centurion House, London Road, Staines- upon-Thames, Surrey, TW18 4AX

Affordable. Reliable. Home Improvement.
ACHTER VERSPREIDER
MODEL:TC2034B
VEVOR
Affordable. Reliable. Home Improvement.
ACHTER VERSPREIDER
MODEL:TC2034B

natural_image
Line drawing of a two-wheeled pushewer with wheels and handle (no text or symbols)MONTAGESTAP
 |  |  |
| B x1Een x1 | J x1 |
j x4
natural_image
Simple line drawing of a three-bladed mechanical component (no text or symbols)f x1


PRODUCTVERSPREIDERINSTELLINGEN
VOORZICHTIGHEID
| GRASS SEEDS | OVERSEEDING | NEW LAWNS | ORGANICS |
| Black Beauty (Original) | 14 | Apply a | Organic Lawn Food 17 |
| Black Beauty Ultra | 13 | Organic Weed Preventer 12 | |
| Dense Shade | 14 | second | Organic Insect Control 10 |
| Fall Magic | 14 | time to the | LAWN FOODS |
| Fast Grow | 13 | Green-Up with Crabgrass Preventer 15 | |
| Full Sun (Sunny) | 12 | same area | Green-Up Weed & Feed 14 |
| Heavy Traffic | 13 | using the | Summer Survival Lawn Food 14 |
| Quik-Start | 12 | Winter Survival Fall Lawn Food 12 | |
| Shady Nooks | 14 | rates listed | Crabgrass Preventer plus New Seeding 12 |
| Sun & Shade | 12 | Green-Up Lawn Food 15 | |
| Sod Maker | 9 | on left. | Green-Up Lawn Food for Seeding and Sodding 12 |
| Touch-Up | 14 | LAWN CONTROLS | |
| SOIL FOODS | Crabgrass & Weed Preventer 11 | ||
| Love Your Soil | 12 | Grub & Insect Control 10 | |
| MAG-I-CAL - Acidic (silver) | 12 | Lawn Fungus Control 10 | |
| MAG-I-CAL - Alkaline (blue) | 14 | Lawn Moss Control 13 | |
| Lawn Weed Control 11 | |||
USAGE TIPS
For rectangular lawns
Apply two header strips across each end for a turning area. Then apply back and forth in the longest direction.
For irregular-shaped lawns
Apply a header strip around the entire lawn for a turning area, then apply back and forth.
Note:
Each pass should be within 5 feet of each other to ensure an overlap.

natural_image
Diagram showing a tree with directional arrows indicating movement or flow, enclosed in dashed rectangular boundaries (no text or symbols)
natural_image
Abstract diagram of a gray irregular shape with dashed white arrows indicating flow or movement, no text or symbols present.- Do not leave spreader open when making turns.
- For best results, do not apply on a windy day.
- Swath will vary due to conditions. (see above caution)
- To determine how much coverage you need, multiply the length of your lawn by its width. This equals your total square footage. Deduct any non-lawn areas (house, gardens, walkways, etc.).
Length (Feet)
X____ Width (Feet)
=____ Total Square Feet
- ____ Non-Lawn Areas (Feet)
=____ Total Square Feet coverage you need

natural_image
Abstract geometric pattern with black shapes on a gray grid background (no text or symbols)Onderhoud
YH CONSULTING LIMITED. T.a.v. YH Consulting Limited Kantoor 147, Centurion House, London Road, Staines- upon-Thames, Surrey, TW18 4AX
| EC | REP |
Affordable. Reliable. Home Improvement.
DERRIÈRE L'ÉPANDEUR
MODÈLE : TC2034B
VEVOR
Affordable. Reliable. Home Improvement.
DERRIÈRE L'ÉPANDEUR
MODÈLE : TC2034B

natural_image
Line drawing of a two-wheeled pushewer with wheels and handle (no text or symbols)ÉTAPE D'ASSEMBLAGE
natural_image
Simple line drawing of a three-bladed mechanical component (no text or symbols)f x1

natural_image
Two 3D geometric shapes: a grid-patterned square labeled 'K x1' and a rounded rectangular shape labeled 'L x1', both without any text or symbols.
PRUDENCE
| GRASS SEEDS | OVERSEEDING | NEW LAWNS | ORGANICS |
| Black Beauty (Original) | 14 | Apply a | Organic Lawn Food 17 |
| Black Beauty Ultra | 13 | Organic Weed Preventer 12 | |
| Dense Shade | 14 | second | Organic Insect Control 10 |
| Fall Magic | 14 | time to the | LAWN FOODS |
| Fast Grow | 13 | Green-Up with Crabgrass Preventer 15 | |
| Full Sun (Sunny) | 12 | same area | Green-Up Weed & Feed 14 |
| Heavy Traffic | 13 | using the | Summer Survival Lawn Food 14 |
| Quik-Start | 12 | Winter Survival Fall Lawn Food 12 | |
| Shady Nooks | 14 | rates listed | Crabgrass Preventer plus New Seeding 12 |
| Sun & Shade | 12 | Green-Up Lawn Food 15 | |
| Sod Maker | 9 | on left. | Green-Up Lawn Food for Seeding and Sodding 12 |
| Touch-Up | 14 | LAWN CONTROLS | |
| SOIL FOODS | Crabgrass & Weed Preventer 11 | ||
| Love Your Soil | 12 | Grub & Insect Control 10 | |
| MAG-I-CAL - Acidic (silver) | 12 | Lawn Fungus Control 10 | |
| MAG-I-CAL - Alkaline (blue) | 14 | Lawn Moss Control 13 | |
| Lawn Weed Control 11 | |||
USAGE TIPS
For rectangular lawns
Apply two header strips across each end for a turning area. Then apply back and forth in the longest direction.
For irregular-shaped lawns
Apply a header strip around the entire lawn for a turning area, then apply back and forth.
Note:
Each pass should be within 5 feet of each other to ensure an overlap.

natural_image
Diagram showing a tree with directional arrows indicating movement or flow, enclosed in dashed rectangular boundaries (no text or symbols)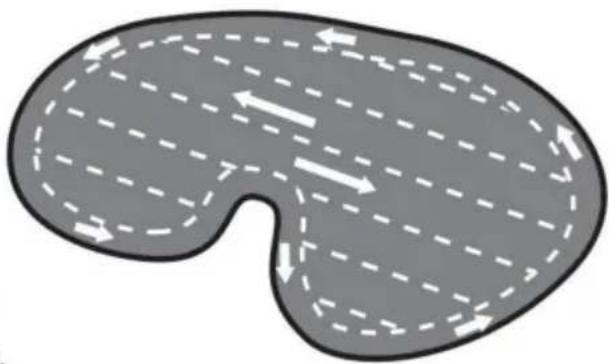
natural_image
Abstract diagram of a gray irregular shape with dashed white arrows indicating flow or movement, no text or symbols present.- Do not leave spreader open when making turns.
- For best results, do not apply on a windy day.
- Swath will vary due to conditions. (see above caution)
- To determine how much coverage you need, multiply the length of your lawn by its width. This equals your total square footage. Deduct any non-lawn areas (house, gardens, walkways, etc.).
Length (Feet)
X____ Width (Feet)
=____ Total Square Feet
- ____ Non-Lawn Areas (Feet)
=____ Total Square Feet coverage you need

natural_image
Abstract geometric pattern with black shapes on a grid background (no text or symbols)Entretien
YH CONSULTING LIMITED. A/S YH Consulting Limited, bureau 147, Centurion House, London Road, Staines-upon-Thames, Surrey, TW18 4AX
| REPRÉSENTANT DE LA CE |
E-CrossStu GmbH Mainzer Landstr.69, 60329 Francfort-sur-le-Main.

VEVOR
Affordable. Reliable. Home Improvement.
Hinterstreuer
MODELL: TC2034B
VEVOR
Affordable. Reliable. Home Improvement.
Hinterstreuer
MODELL: TC2034B
natural_image
Line drawing of a two-wheeled pushewer with wheels and handle (no text or symbols)MONTAGESTRITT
| Ein xB | x1 | J x1 |

j x4
natural_image
Simple line drawing of a three-bladed mechanical component (no text or symbols)f x1

| GRASS SEEDS | OVERSEEDING | NEW LAWNS | ORGANICS |
| Black Beauty (Original) | 14 | Apply a | Organic Lawn Food 17 |
| Black Beauty Ultra | 13 | Organic Weed Preventer 12 | |
| Dense Shade | 14 | second | Organic Insect Control 10 |
| Fall Magic | 14 | time to the | LAWN FOODS |
| Fast Grow | 13 | Green-Up with Crabgrass Preventer 15 | |
| Full Sun (Sunny) | 12 | same area | Green-Up Weed & Feed 14 |
| Heavy Traffic | 13 | using the | Summer Survival Lawn Food 14 |
| Quik-Start | 12 | Winter Survival Fall Lawn Food 12 | |
| Shady Nooks | 14 | rates listed | Crabgrass Preventer plus New Seeding 12 |
| Sun & Shade | 12 | Green-Up Lawn Food 15 | |
| Sod Maker | 9 | on left. | Green-Up Lawn Food for Seeding and Sodding 12 |
| Touch-Up | 14 | LAWN CONTROLS | |
| SOIL FOODS | Crabgrass & Weed Preventer 11 | ||
| Love Your Soil | 12 | Grub & Insect Control 10 | |
| MAG-I-CAL - Acidic (silver) | 12 | Lawn Fungus Control 10 | |
| MAG-I-CAL - Alkaline (blue) | 14 | Lawn Moss Control 13 | |
| Lawn Weed Control 11 | |||
USAGE TIPS
For rectangular lawns
Apply two header strips across each end for a turning area. Then apply back and forth in the longest direction.
For irregular-shaped lawns
Apply a header strip around the entire lawn for a turning area, then apply back and forth.
Note:
Each pass should be within 5 feet of each other to ensure an overlap.

natural_image
Diagram showing a tree with directional arrows indicating movement or flow, enclosed in dashed rectangular boundaries (no text or symbols)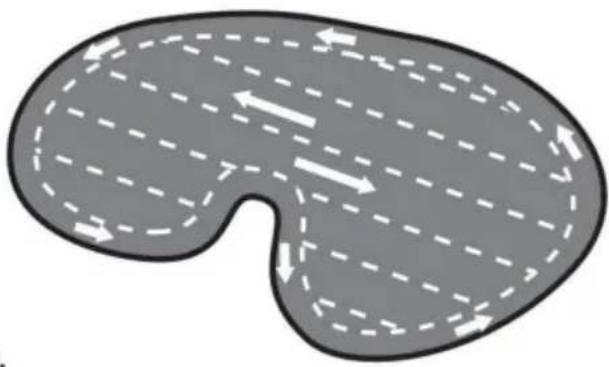
natural_image
Abstract diagram of a curved, irregular shape with dashed and solid lines indicating directional flow (no text or symbols)- Do not leave spreader open when making turns.
- For best results, do not apply on a windy day.
- Swath will vary due to conditions. (see above caution)
- To determine how much coverage you need, multiply the length of your lawn by its width. This equals your total square footage. Deduct any non-lawn areas (house, gardens, walkways, etc.).
Length (Feet)
X____ Width (Feet)
=____ Total Square Feet
- ____ Non-Lawn Areas (Feet)
=____ Total Square Feet coverage you need

natural_image
Abstract geometric pattern with black shapes on a gray grid background (no text or symbols)Wartung
YH CONSULTING LIMITED. C/O YH Consulting Limited, Büro 147, Centurion House, London Road, Stained-Thames, Surrey, TW18 4AX
| EG-Vertreter |