SJ706 - Fitness Equipment Vevor - Free user manual and instructions
Find the device manual for free SJ706 Vevor in PDF.


User questions about SJ706 Vevor
0 question about this device. Answer the ones you know or ask your own.
Ask a new question about this device
Download the instructions for your Fitness Equipment in PDF format for free! Find your manual SJ706 - Vevor and take your electronic device back in hand. On this page are published all the documents necessary for the use of your device. SJ706 by Vevor.
USER MANUAL SJ706 Vevor
Technical Support and E-Warranty Certificate www.vevor.com/support
WEIGHT BENCH
MODEL: SJ706
We continue to be committed to provide you tools with competitive price. "Save Half", "Half Price" or any other similar expressions used by us only represents an estimate of savings you might benefit from buying certain tools with us compared to the major top brands and does not necessarily mean to co all categories of tools offered by us. You are kindly reminded to verify carefully when you are placing an order with us if you are actually Saving Half in comparison with the top major brands.
MODEL:SJ706
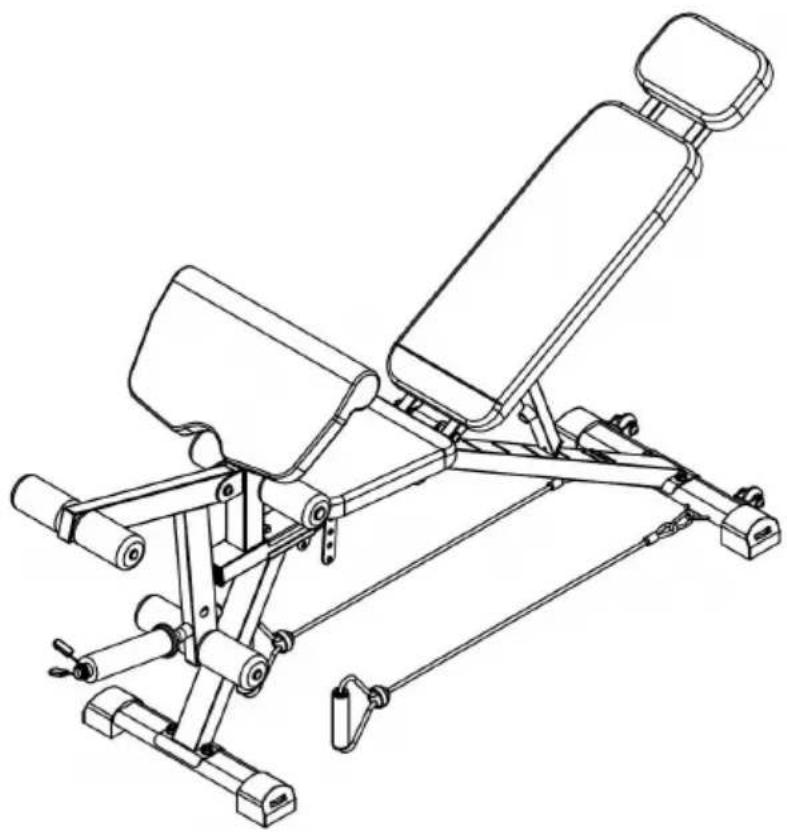
natural_image
Line drawing of a mechanical exercise machine with adjustable arms and legs (no text or symbols)NEED HELP? CONTACT US!
Have product questions? Need technical support? Please feel free to contact us:
Technical Support and E-Warranty Certificate www.vevor.com/support
This is the original instruction, please read all manual instructions carefully before operating. VEVOR reserves a clear interpretation of o user manual. The appearance of the product shall be subject to the product you received. Please forgive us that we won't inform you ag there are any technology or software updates on our product.
INSTRUCTIONS
Safety Precautions
Before you undertake any exercise program, please be sure to consult with your doctor.
Frequent strenuous exercise should be approved by your doctor and proper use of your product is essential.
Excessive or incorrect training may result to health injuries.
Please read this manual carefully before commencing the assembly of your product or starting to exercise.
- Please keep all children away from this item when in use. Do no children to climb or play on this item when it is not in use.
● Supervise teenagers while they use this unit. - For your own safety, always ensure that there is at least 3 feet space in all directions around your product while you are exercising.
- Regularly check to see that all nuts, bolts and fittings are securely tightened. Periodically check all moving parts for obvious signs of we damage.
- Any adjustment devices that could interfere with the user's movement on this unit should not be left projecting.
- Clean only with a damp cloth, do not use solvent cleaners.
If you are in any doubt, do not use your product; contact CUSTOM SUPPORT.
● Before use, always ensure that your product is positioned on a s
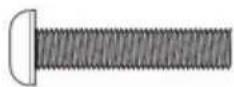
hard-flat surface.
● Always wear appropriate clothing and footwear such as training sh when exercising. Do not wear loose clothing that could become caug moving parts during exercise.
- Do not use this unit if it is not functioning properly or if it is not assembled.
- Do not use this unit for commercial purposes. This unit is for ho only.
- Before use, you must read and understand all instructions & warn stated in this OwnerManual as well as posted on the equipment.
- It is the facility owner responsibility to properly instruct users on the proper operation of the equipment and to warn them of the potential hazards.
- If at any time during exercise you feel faint, dizzy or experience stop and consult your physician.
● Make sure all nuts, bolts, and screws are tightened prior to use.
- Be sure that all adjustment locking devices and safety devices are properly engaged prior to use!
- Never over-tighten the above-mentioned devices and parts to avoid damage to the unit.
- Check for loose parts and components and make proper adjustme prior to use.
- Check to see if there are any tears or bends in the welding or prior to use. If tears or bends are found, DO NOT use the unit and our CUSTOMER SUPPORT.
- Extreme care must be taken to not allow your feet, fingers, hair, and/or any loose items to be snagged into any portion of the unit v unit is in use. Failure to follow these instructions could result in ser injury.
WARNING: Before starting any exercise program, you should always consult your physician.
This is especially important for people who are over 35 years old or have pre-existing health problems. Read all instructions before using a fitness equipment.
- Take a few minutes to familiarize yourself with the parts and har included with your product.
- Assembly may require two people.
- Check the frame for any damage and check any wiring (if preser rips or tears. If you detect damage, rips, or tears, please contact our Customer Support Team before beginning any assembly.
- Make sure all the hardware needed is included.
- It is very important to follow the assembly instructions correctly and make sure all parts are attached correctly and firmly tightened when assembly process is complete.
- Parts that are not tightened correctly will seem loose and can ca irritating noises and will cause damage to the equipment.
PLEASE NOTE: Some of the parts and hardwares listed on the par may already pre-assembled or installed on the unit.
Read all instructions carefully before operating this product. Retail this Users Manual for future reference.
PARTS LITS
| Parts list | |||||
| No. | Description | Qty | No. | Description | Qty |
| 01 | Main Frame | 1 | 21 | P Pull Pin | 1 |
| 02 | Seat Frame | 1 | 22 | Pop Pin | 1 |
| 03 | Seat Adjustment Frame | 1 | 23 | Plastic Bushing | 1 |
| 04 | Leg Developer | 1 | 24 | Spring Clip | 1 |
| 05 | Front Support | 1 | 25 | Bumper | 1 |
| 06 | Arm Curl Frame | 1 | 26 | Flat Washer M8 | 12 |
| 07 | Backrest Support | 2 | 27 | Flat Washer M10 | 22 |
| 08 | Rear Stabilizer | 1 | 28 | Big Washer M10 | 2 |
| 09 | Backrest Adjustment Frame | 1 | 29 | Nylon Nut M10 | 13 |
| 10 | Rear Support | 1 | 30 | Allen Bolt M8x40mm | 6 |
| 11 | Front Stabilizer | 1 | 31 | Allen Bolt M8x35mm | 4 |
| 12 | Headrest Cushion | 1 | 32 | Allen Bolt M8x15mm | 2 |
| 13 | Seat Cushion | 1 | 33 | Allen Bolt M10x155mm | 2 |
| 14 | Backrest Cushion | 1 | 34 | Allen Bolt M10x150mm | 1 |
| 15 | Arm Curl Cushion | 1 | 35 | Allen Bolt M10x85mm | 3 |
| 16 | 25mm Foam Roll | 2 | 36 | Allen Bolt M10x60mm | 3 |
| 17 | 19mm Foam Roll | 4 | 37 | Allen Bolt M10x50mm | 2 |
| 18 | 25mm Foam Tube | 1 | 38 | Carriage Bolt M10x45mm | 4 |
| 19 | 19mm Foam Tube | 2 | 39 | Rope | 2 |
| 20 | Sleeve | 1 | 40 | Support Plate | 1 |
EXPLODED DIAGRAM
Please note that notall of the parts and hardware you see here will while you are assembling the machine because some of these are all pre-installed.
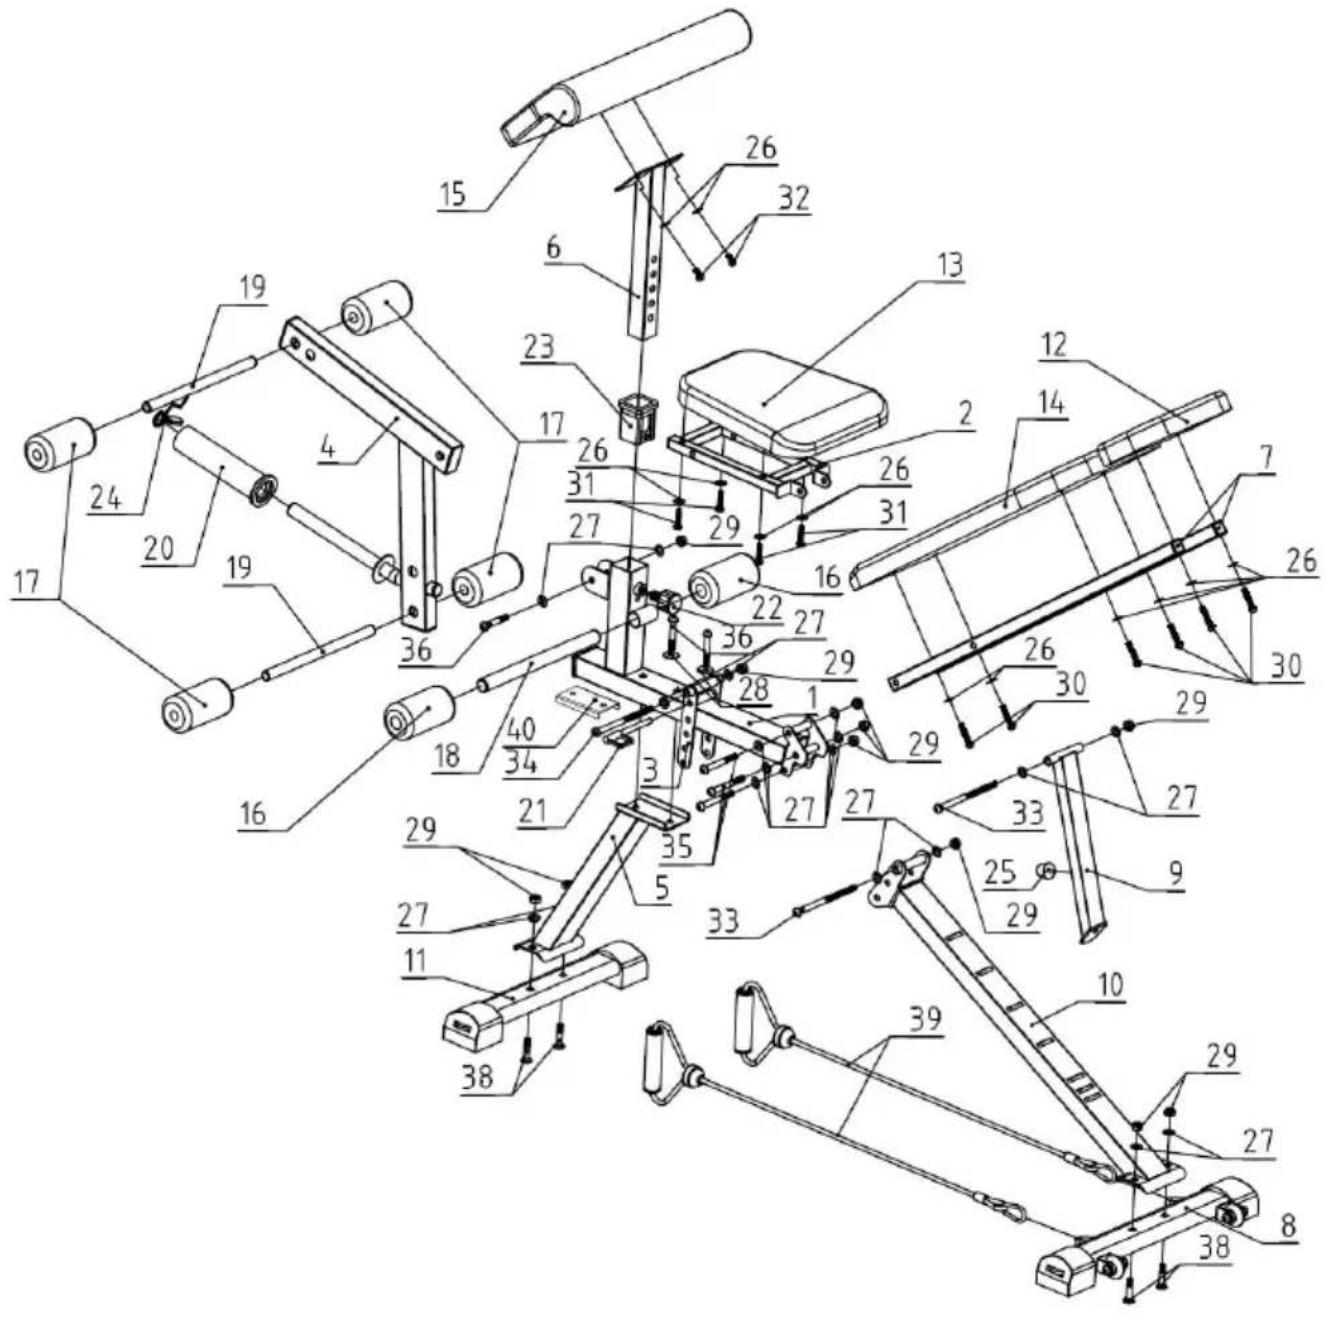
text_image
Technical diagram of a mechanical assembly with numbered components for identificationHARDWARE AND TOOL LIST
Bolts
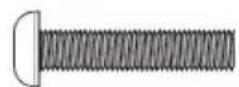
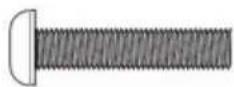
30. Allen Bolt (M8x40mm) [6 pcs]
![Vevor SJ706 - Allen Bolt (M8x40mm) [6 pcs] - 1](/content/2026/04/736408/images/7690ec528fa37a4f5491e6da6a3f9268aa61c74320150709a8dd8700ec5188c5.jpg)
31.Allen Bolt (M8x35mm) [4 pcs]
![Vevor SJ706 - 31.Allen Bolt (M8x35mm) [4 pcs] - 1](/content/2026/04/736408/images/48d914ef13d96defcbd1e48e773db66df3f5df941336c6ed858bbaabb99809e2.jpg)
32.Allen Bolt (M8x15mm) [2 pcs]
![Vevor SJ706 - 32.Allen Bolt (M8x15mm) [2 pcs] - 1](/content/2026/04/736408/images/17f0b297269cb0575bee34566a94316b915a47e19632790f722ad4ac6ab2329b.jpg)
33. Allen Bolt (M10x155mm) [2 pcs]
![Vevor SJ706 - Allen Bolt (M10x155mm) [2 pcs] - 1](/content/2026/04/736408/images/136348dc91424a4bc2ed2f20208d44d9940ea592b32baad22fd1bff93da6ea5a.jpg)
34. Allen Bolt (M10x150mm) [1 pc]
![Vevor SJ706 - Allen Bolt (M10x150mm) [1 pc] - 1](/content/2026/04/736408/images/3fb6218aef6863e6680d21c28b02ec8a1b93717b5f94035ab18d7f2cc00445f9.jpg)
35. Allen Bolt (M10x85mm) [3 pcs]
![Vevor SJ706 - Allen Bolt (M10x85mm) [3 pcs] - 1](/content/2026/04/736408/images/5db04fedd3221777a152f6ecf73eee997f773069229fd4e807b73b86454fd044.jpg)
36. Allen Bolt (M10x60mm) [3 pcs]
![Vevor SJ706 - Allen Bolt (M10x60mm) [3 pcs] - 1](/content/2026/04/736408/images/76171fbc0622d4a7ee0e43729537335d3efacf233fccf4fd18db868fa19495c0.jpg)
38. Carriage Bolt (M10x45mm) [4 pcs]
Washers

26. Flat Washer (M8) [12 pcs]
![Vevor SJ706 - Flat Washer (M8) [12 pcs] - 1](/content/2026/04/736408/images/dc0ac2efda8be5182e83faf05681fc4f0b2d5058422266b0119005064f59a091.jpg)
27. Flat Washer (M10) [18 pcs]
![Vevor SJ706 - Flat Washer (M10) [18 pcs] - 1](/content/2026/04/736408/images/88553fe54657a03c6338c90e1d40d5fb25c68c0d315a815ddb7405b03a72aa94.jpg)
28. Big Washer (M10) [2 pcs]
Nuts

29. Nylon Nut (M10)
[11 pcs]
Others
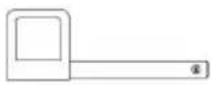
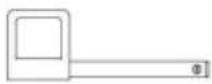
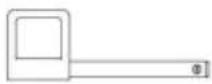
21.P Pull Pin [1 pc]
![Vevor SJ706 - 21.P Pull Pin [1 pc] - 1](/content/2026/04/736408/images/543f634a702e1d39a51b4613c474720ab739e62b5ebf74f128b1ee82e2bb0301.jpg)
22. Pop Pin [1pc]
![Vevor SJ706 - Pop Pin [1pc] - 1](/content/2026/04/736408/images/818bd15605d6807fdca46d721cf76982cc8f9259844529a02ec12b420166213b.jpg)
24. Spring Clip [1 pc]
![Vevor SJ706 - Spring Clip [1 pc] - 1](/content/2026/04/736408/images/b33d31a74b5290ecd87285f5a6b667eff63b4f73cab3df032028c6adb7bccd5d.jpg)
Tool1 [1 pc]
![Vevor SJ706 - Spring Clip [1 pc] - 2](/content/2026/04/736408/images/38953d0f8b37df7434919088cffe1abfa3770f49ea97c6f90016de59e35291e1.jpg)
Tool2 [1 pc]
![Vevor SJ706 - Spring Clip [1 pc] - 3](/content/2026/04/736408/images/3f0b8c92123723df763bfe142a0a9b2a0468615ef8a65ff2acb239dc0db92322.jpg)
natural_image
Simple line drawing of a double-ended wrench (no text or symbols)Tool3 [1 pc]
NOTE:
To avoid misalignment due to over-tightening, please do not use a w at this time.
Hand-tightening for now will help ensure easy assembly.
Wrench-tightening should be performed after all parts are assembled to ensure all nuts, bolts, and parts are tightly secured before use.
With the help of an assistant.
Step 1
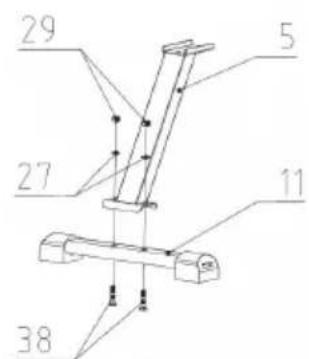
A: Attach the Front Support (#5) to Front Stabilizer (#11) by two Car Bolts (#38), two Flat Washers (#27) and two Nylon Nuts (#29).
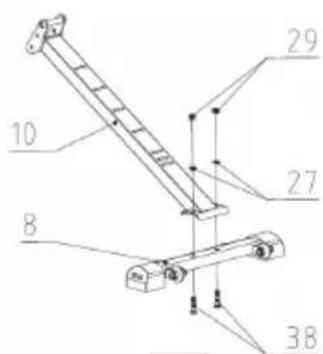
B: Attach the Rear Support (#10) to Rear Stabilizer (#8) by two Carr Bolts (#38), two Flat Washers (#27)
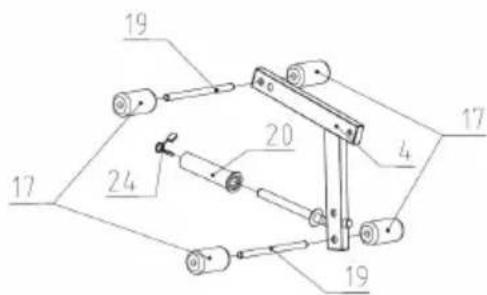
C: Insert the 19mm Foam Tubes (#19) to each holes of Leg Develop then slide the four 19mm Foam.Rolls (#17) to each side of the Foam Slide the Sleeve (#20) to the weight tube of Leg Developer (#4) and the Spring Clip (#24).
text_image
29 5 27 11 38A
text_image
10 B 27 29 38B
text_image
19 20 4 17 24 19C
Step 2
Attach the Main Frame (#1) to Front Support and Rear Support asse secure with Support Plate (40).using two Allen Bolts (#36) and two B Washers (#28) to Front Support assembled, secure two Allen Bolts(#35) four Flat Washers(#27)and two Nylon Nuts(29)to Rear Support assembl
Attach Leg Developer assembled to the Main Frame (#1) using one Bolt (#36), two Flat Washers (27) and one Nylon Nut (#29).
Insert the 25mm Foam Tube (#18) to the welded tube on Main Fram then slide the two 25mm Foam Rolls (#16) to each side of the Foam

Step 3
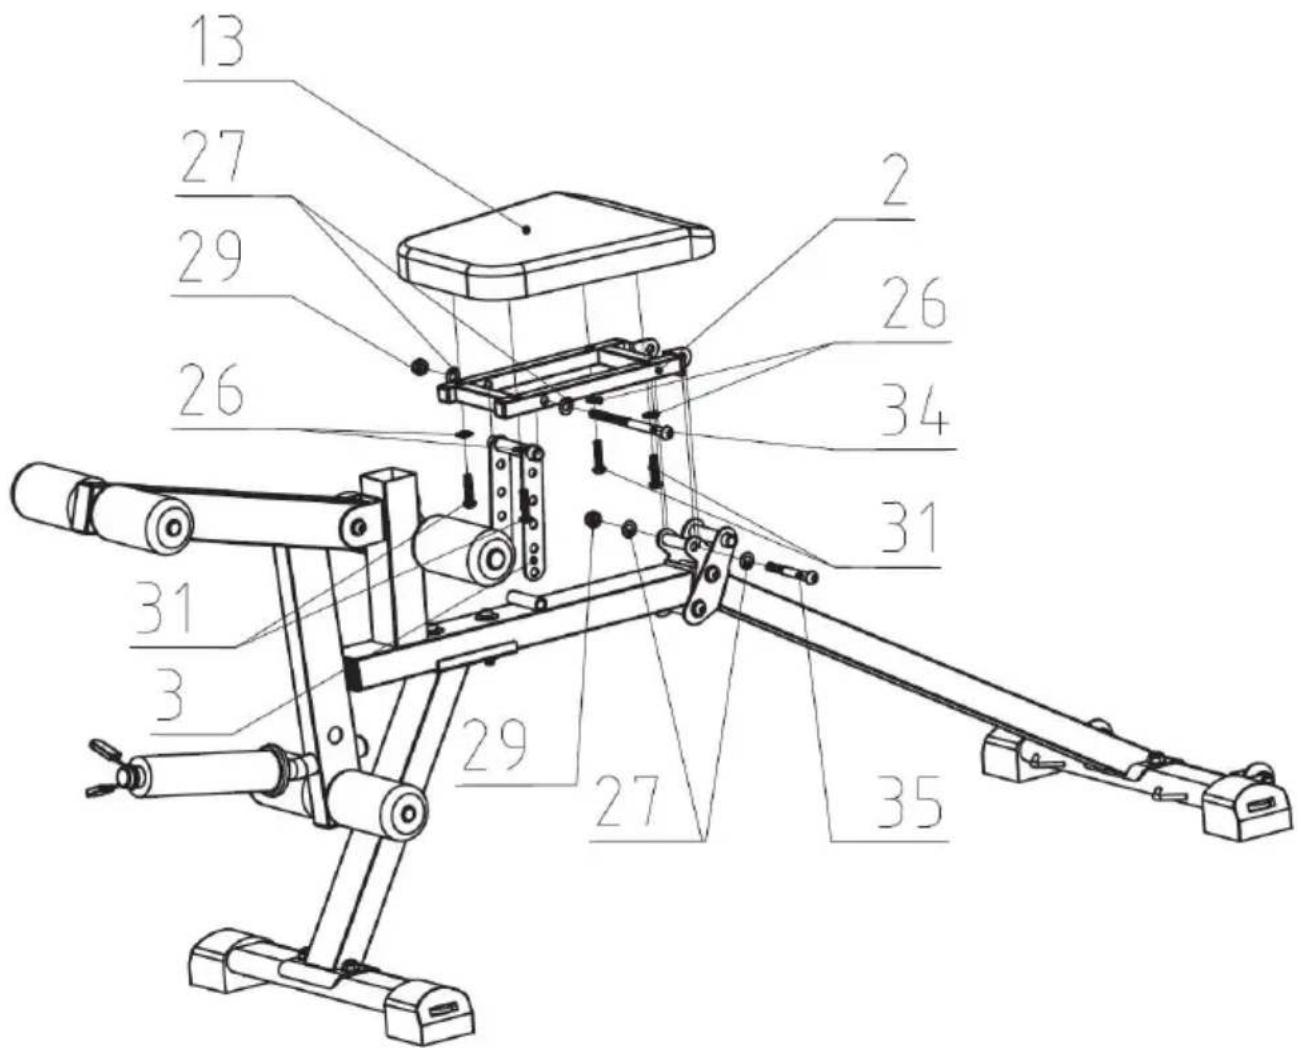
Attach the Seat Frame (#2) to the welded part on Main Frame (#1) one Allen Bolt (#35), two Flat Washers (#27) and one Nylon Nut (#2
Attach the Seat Adjustment Frame (#3) to Seat Frame (#2) using one Bolt (#34), two Flat Washers (#27) and one Nylon Nut (#29)
Attach the Seat Cushion (#13) to Seat Frame (#2), by four Allen Bol and four Flat Washers (#26).
text_image
13 27 29 26 2 26 34 31 31 3 29 27 35Step 4
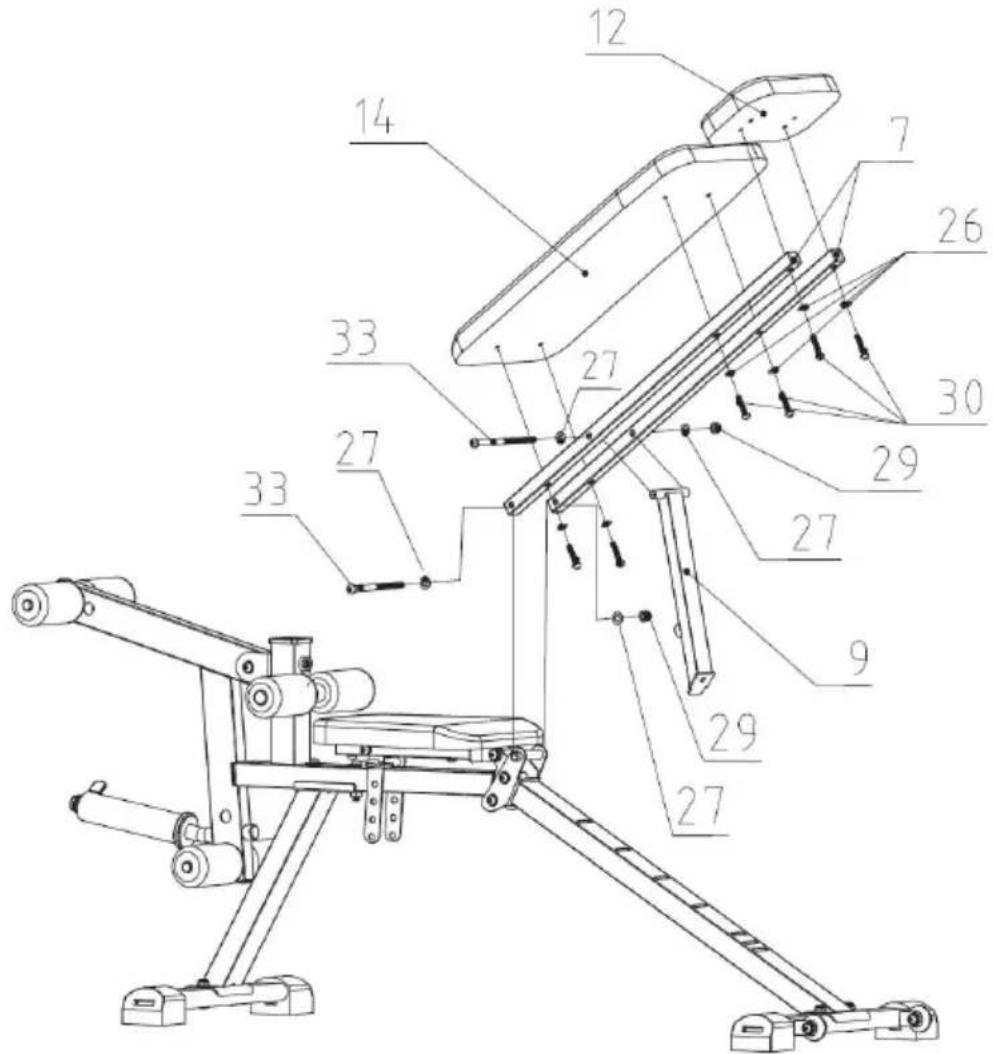
Attach the Backrest Support (#7) to the welded parts of Rear Support using one Allen Bolt (#33), two Flat Washers (27) and one Nylon Nu
At the same time attach the Backrest Adjustment Frame (#9) to the of the Backrest Support (#7) using one Allen Bolt (#33), two Flat Wa (#27) and one Nylon Nut (#29).
Attach the Headrest Cushion (#12) and Backrest Cushion (14) to BacI Support (#7) then secure by using six Allen Bolts (#30) and six Flat Washers (#26).
text_image
Technical diagram of a mechanical device with numbered components for identificationStep 5
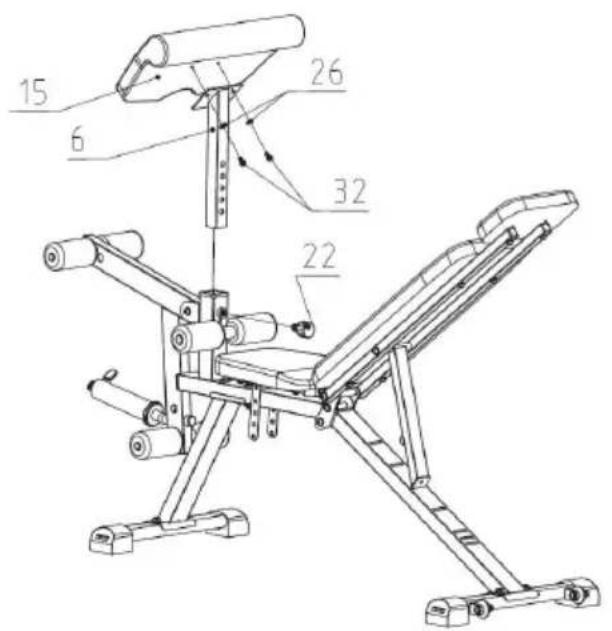
Attach the Arm Curl Frame (#6) to Main Frame (#01) with the Pop (#22).Then attach the Arm Curl Cushion (#15) to Arm Curl Frame (#6) using two Allen Bolts (#32) and two Flat Washers (#26).
Attach two Ropes (#39) to the Rear Stabilizer (#9).Insert the P Pull (#21) to the hole of Seat Adjustment Frame (#3)
text_image
15 6 26 32 22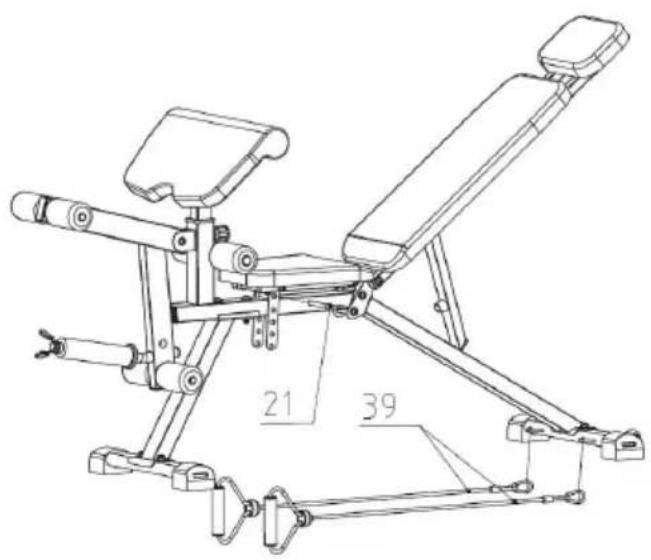
text_image
21 39WARM-UP INSTRUCTIONS
Before use, you must read and understand all instructions & warnings stated in this Owner's Manual as well as posted on the equipment. I beginning any exercise program including the following flexibility exercises please consult with your physician.
The following flexibility exercises are provided to you as a means to prevent injury while you are exercising. A proper warm-up routine decreases the chance of injuring your muscles while you are exercisir. Please take the time to do these flexibility exercises before and after time you exercise.
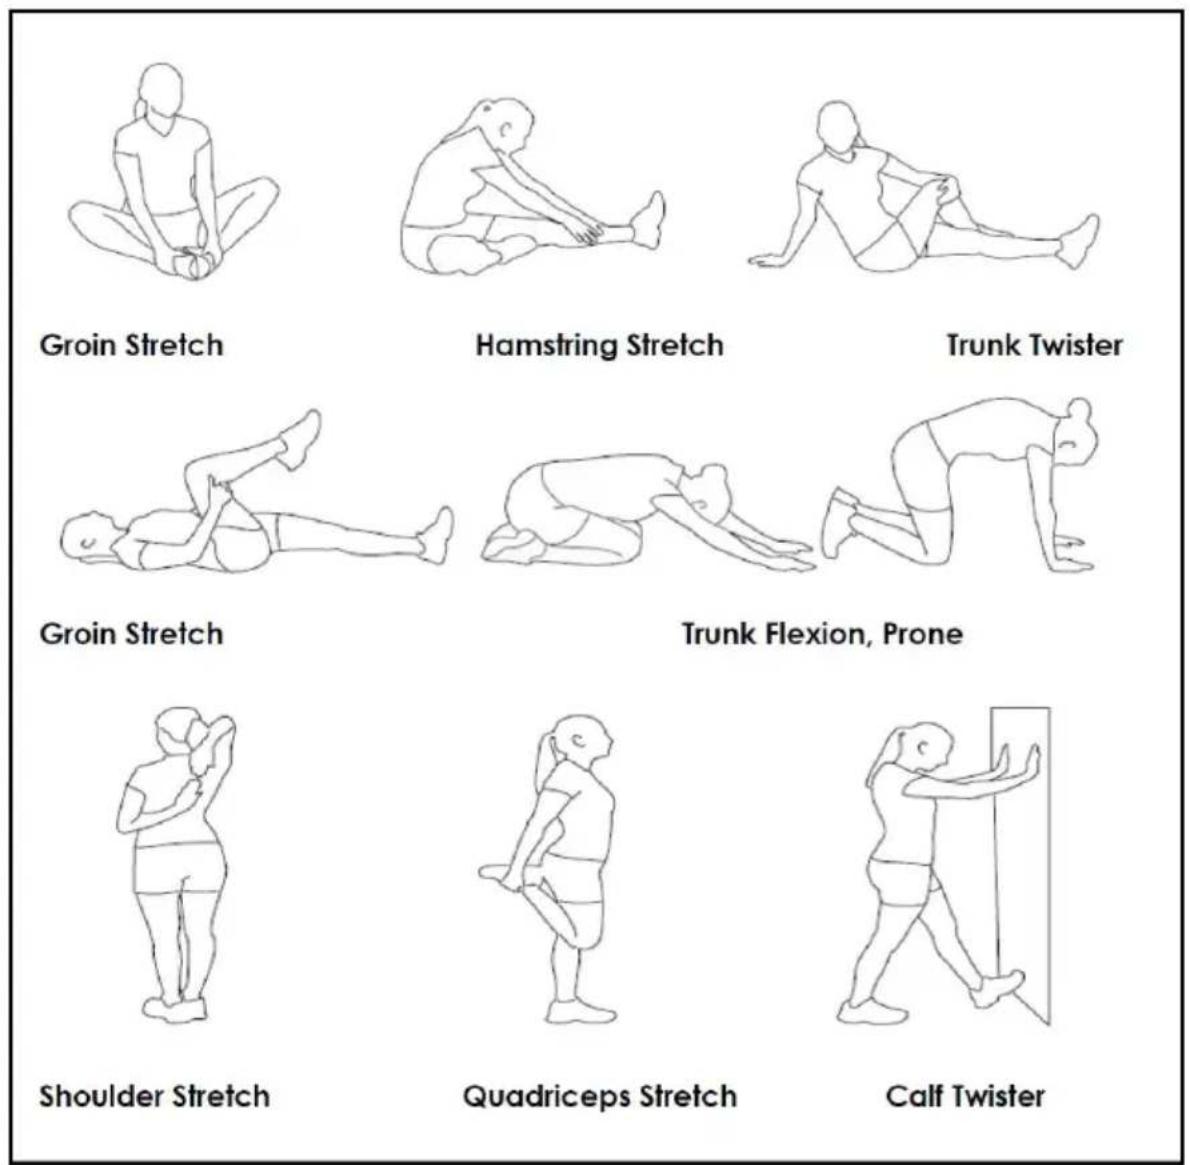
Groin Stretch
- Sit with your knees flexed and soles of feet together.
- Hold your ankles and bend at your hips (keep your back straight) press your knees toward the floor with your elbows.
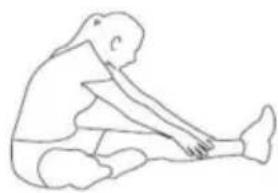
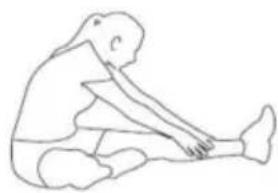
Hamstring Stretch
- Sit with your left leg extended and bend your right leg at the kn place the sole of your right foot against the inner thigh of your exte leg.
- Flex the foot of your extended leg (toes pointed toward ceiling) are gently bend forward from your hips; keep your back straight.
- Reach your hands on your extended leg as far as possible and switch legs and repeat
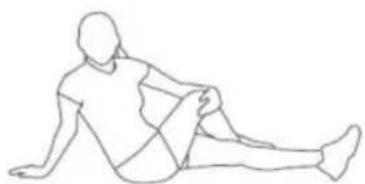
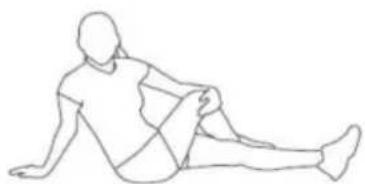
Trunk Twister
- Sit with your leg extended and bend your right knee as you cross right leg over your left leg. Your right foot of your extended leg foot be flat on the floor alongside your left knee.
- Place your left arm on the outside of your right leg and pull again leg while twisting your trunk as far as possible to the right. Place you hand on the floor behind your buttocks. Reverse leg positions and
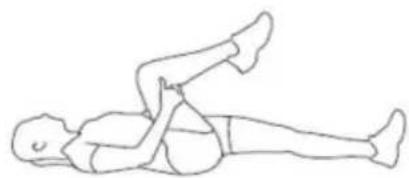
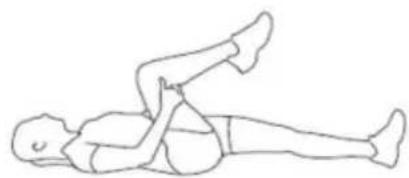
Groin Stretch
- Lie on your back and raise your right leg as you clasp both han the back of the knee. Keep your left leg straight.
- Gently pull your right leg toward your trunk without raising your up body. Switch leg positions and repeat.
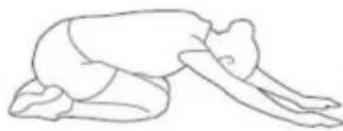
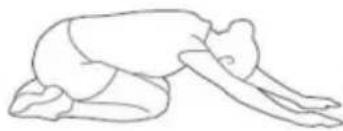
Trunk Flexion, Prone
- Assume the depicted position on your hands and knees. Stretch you hands out in front of you and then slowly start to pull them back in your body as you tuck your chin and arch your back upward.
- Return to the starting position slowly.
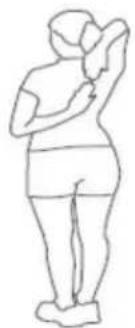
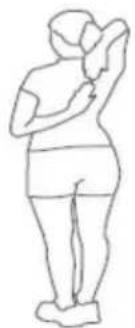
Shoulder Stretch
- Bring your right hand over your right shoulder to the upper back bring your left hand under your left shoulder to the upper back.
- Try to reach your fingertips. If you are not able to reach your fin use a towel as an extension of your hands and gently pull one han the other.
Reverse arm positions and
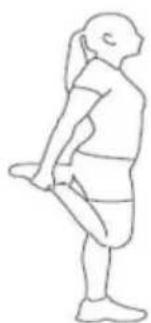
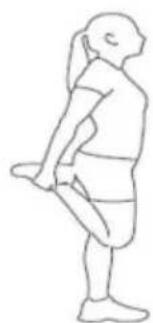
Quadriceps Stretch
- Stand on your left leg and hold onto a support with your left hand
- Flex your right leg behind you, grasp your ankle or foot with your hand and pull your foot toward your buttocks. Keep your back straight right knee pointed down. Repeat on the other leg.
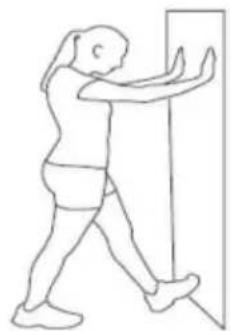
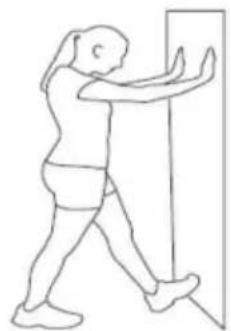
Calf Twister
-
Place both hands against a wall to aid your balance. Press the b your left foot against the wall and keep the heel of the same foot n the floor (make sure your left knee is bent).
-
Slowly start to straighten your left knee and you will feel the mus your left calf stretch.
Switch leg positions and repeat.
Manufacturer: Shanghaimuxinmuyeyouxiangongsi
Address: Shuangchenglu 803nong11hao1602A-1609shi, baoshanqu, shanghai 200000 CN.
Imported to AUS: SIHAO PTY LTD. 1 ROKEVA STREETEASTWOOD NSW 2122 Australia
Imported to USA: Sanven Technology Ltd. Suite 250, 9166 Anaheim Place, Rancho Cucamonga, CA 91730
| UK | REP |
YH CONSULTING LIMITED. C/O YH Consultin Limited Office 147, Centurion House, London Road, Staines-upon-Thames, Surrey, TW18 4A>
| EC | REP |
Technical Support and E-Warranty Certificate
www.vevor.com/support
VEVOR®
TOUGH TOOLS, HALF PRICE
natural_image
Line drawing of a gym rehabilitation machine with adjustable arms and legs (no text or symbols)BESOIN D'AIDE? CONTACTEZ-NOUS!
| Parts list | |||||
| No. | Description | Qty | No. | Description | Qty |
| 01 | Main Frame | 1 | 21 | P Pull Pin | 1 |
| 02 | Seat Frame | 1 | 22 | Pop Pin | 1 |
| 03 | Seat Adjustment Frame | 1 | 23 | Plastic Bushing | 1 |
| 04 | Leg Developer | 1 | 24 | Spring Clip | 1 |
| 05 | Front Support | 1 | 25 | Bumper | 1 |
| 06 | Arm Curl Frame | 1 | 26 | Flat Washer M8 | 12 |
| 07 | Backrest Support | 2 | 27 | Flat Washer M10 | 22 |
| 08 | Rear Stabilizer | 1 | 28 | Big Washer M10 | 2 |
| 09 | Backrest Adjustment Frame | 1 | 29 | Nylon Nut M10 | 13 |
| 10 | Rear Support | 1 | 30 | Allen Bolt M8x40mm | 6 |
| 11 | Front Stabilizer | 1 | 31 | Allen Bolt M8x35mm | 4 |
| 12 | Headrest Cushion | 1 | 32 | Allen Bolt M8x15mm | 2 |
| 13 | Seat Cushion | 1 | 33 | Allen Bolt M10x155mm | 2 |
| 14 | Backrest Cushion | 1 | 34 | Allen Bolt M10x150mm | 1 |
| 15 | Arm Curl Cushion | 1 | 35 | Allen Bolt M10x85mm | 3 |
| 16 | 25mm Foam Roll | 2 | 36 | Allen Bolt M10x60mm | 3 |
| 17 | 19mm Foam Roll | 4 | 37 | Allen Bolt M10x50mm | 2 |
| 18 | 25mm Foam Tube | 1 | 38 | Carriage Bolt M10x45mm | 4 |
| 19 | 19mm Foam Tube | 2 | 39 | Rope | 2 |
| 20 | Sleeve | 1 | 40 | Support Plate | 1 |
SCHÉMA ÉCLATÉ
text_image
Technical diagram of a mechanical assembly with numbered components for identification and assembly reference.natural_image
Simple line drawing of a double-ended wrench (no text or symbols)Tool3 [1 pc]
NOTE:
text_image
Technical diagram of a mechanical device with numbered components for identificationÉtape
natural_image
Line drawing of a seated person in meditation posture (no text or symbols)Groin Stretch
natural_image
Line drawing of a seated human figure in a relaxed posture (no text or symbols)Hamstring Stretch
natural_image
Line drawing of a person sitting with hands on knees (no text or symbols)Trunk Twister
natural_image
Line drawing of a person performing a leg raise exercise (no text or symbols)Groin Stretch
natural_image
Line drawing of a person in a kneeling forward bend yoga pose (no text or symbols)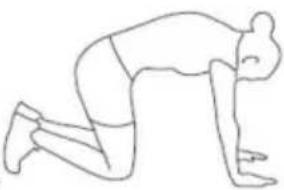
natural_image
Line drawing of a person in a kneeling forward bend (no text or symbols)Trunk Flexion, Prone
natural_image
Simple line drawing of a human figure in profile view, no text or symbols presentShoulder Stretch
natural_image
Line drawing of a person performing a stretching or stretching pose (no text or symbols)Quadriceps Stretch
natural_image
Line drawing of a person pushing a door (no text or symbols)Calf Twister
Étirement de l'aine
YH CONSULTING LIMITED. C/O YH Consulting Limited Bureau 147, Centurion House, London Road, Staines-upon-Thames, Surrey, TW18 4AX
| REPRÉSENTANT DE LA CE |
E-CrossStu GmbH
Mainzer Landstr.69,
www.vevor.com/support
Hantelbank
MODELL:SJ706
natural_image
Line drawing of a gym rehabilitation machine with adjustable arms and legs (no text or symbols)| Parts list | |||||
| No. | Description | Qty | No. | Description | Qty |
| 01 | Main Frame | 1 | 21 | P Pull Pin | 1 |
| 02 | Seat Frame | 1 | 22 | Pop Pin | 1 |
| 03 | Seat Adjustment Frame | 1 | 23 | Plastic Bushing | 1 |
| 04 | Leg Developer | 1 | 24 | Spring Clip | 1 |
| 05 | Front Support | 1 | 25 | Bumper | 1 |
| 06 | Arm Curl Frame | 1 | 26 | Flat Washer M8 | 12 |
| 07 | Backrest Support | 2 | 27 | Flat Washer M10 | 22 |
| 08 | Rear Stabilizer | 1 | 28 | Big Washer M10 | 2 |
| 09 | Backrest Adjustment Frame | 1 | 29 | Nylon Nut M10 | 13 |
| 10 | Rear Support | 1 | 30 | Allen Bolt M8x40mm | 6 |
| 11 | Front Stabilizer | 1 | 31 | Allen Bolt M8x35mm | 4 |
| 12 | Headrest Cushion | 1 | 32 | Allen Bolt M8x15mm | 2 |
| 13 | Seat Cushion | 1 | 33 | Allen Bolt M10x155mm | 2 |
| 14 | Backrest Cushion | 1 | 34 | Allen Bolt M10x150mm | 1 |
| 15 | Arm Curl Cushion | 1 | 35 | Allen Bolt M10x85mm | 3 |
| 16 | 25mm Foam Roll | 2 | 36 | Allen Bolt M10x60mm | 3 |
| 17 | 19mm Foam Roll | 4 | 37 | Allen Bolt M10x50mm | 2 |
| 18 | 25mm Foam Tube | 1 | 38 | Carriage Bolt M10x45mm | 4 |
| 19 | 19mm Foam Tube | 2 | 39 | Rope | 2 |
| 20 | Sleeve | 1 | 40 | Support Plate | 1 |
EXPLOSIONSZEICHNUNG
text_image
Technical diagram of a mechanical assembly with numbered components for identificationHARDWARE- UND WERKZEUGLISTE
Bolzen
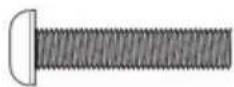
30. Allen Bolt (M8x40mm) [6 pcs]
![Vevor SJ706 - Allen Bolt (M8x40mm) [6 pcs] - 1](/content/2026/04/736408/images/4e384cb5bbdafa2418b3b5b414282a916975e6ccf1abdd1e837bcdbadd7a62e6.jpg)
31.Allen Bolt (M8x35mm) [4 pcs]
![Vevor SJ706 - 31.Allen Bolt (M8x35mm) [4 pcs] - 1](/content/2026/04/736408/images/97a059b8b008185df9d660124ed5cec9b14a4c798b849b1ac8b5d5667abe9ad3.jpg)
32.Allen Bolt (M8x15mm) [2 pcs]
![Vevor SJ706 - 32.Allen Bolt (M8x15mm) [2 pcs] - 1](/content/2026/04/736408/images/b7383ffa186fa7b0fddd5a6ad29b889ff7056014aec8844196545dc1fd4fdc9b.jpg)
33. Allen Bolt (M10x155mm) [2 pcs]
![Vevor SJ706 - Allen Bolt (M10x155mm) [2 pcs] - 1](/content/2026/04/736408/images/d22c5d84ca32aaae7977b43a25b5e11c332e65709a52fdf43da68b244bf8c7d1.jpg)
34. Allen Bolt (M10x150mm) [1 pc]
![Vevor SJ706 - Allen Bolt (M10x150mm) [1 pc] - 1](/content/2026/04/736408/images/58477090faa69f3f0fd6d289193a790d68cd509e3db78930e9c4cb986d0065ae.jpg)
35. Allen Bolt (M10x85mm) [3 pcs]
![Vevor SJ706 - Allen Bolt (M10x85mm) [3 pcs] - 1](/content/2026/04/736408/images/b379b10503e18be421a2d298b8e4d14ee1ec0572d9e598987f17681332641bcc.jpg)
36. Allen Bolt (M10x60mm) [3 pcs]
![Vevor SJ706 - Allen Bolt (M10x60mm) [3 pcs] - 1](/content/2026/04/736408/images/9dfedb5ae56532276d95343f2cffe0cc305ed468874a6e8d59e786b4e9ef1096.jpg)
38. Carriage Bolt (M10x45mm) [4 pcs]
Unterlegscheiben

26. Flat Washer (M8) [12 pcs]
![Vevor SJ706 - Flat Washer (M8) [12 pcs] - 1](/content/2026/04/736408/images/46aea00cf7ddb1497d1f8a4de1ba316c0911d2dbcba05cd3cdf313c37dafcd57.jpg)
27. Flat Washer (M10) [18 pcs]
![Vevor SJ706 - Flat Washer (M10) [18 pcs] - 1](/content/2026/04/736408/images/5fd0b02b6625573d68b0a6944c9534e3c6c116ab5bae37b77960aae29736e226.jpg)
28. Big Washer (M10) [2 pcs]
Nüsse

29. Nylon Nut (M10)
[11 pcs]
Sonstiges
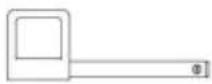
21.P Pull Pin [1 pc]
![Vevor SJ706 - 21.P Pull Pin [1 pc] - 1](/content/2026/04/736408/images/0371d78f57e8d7531d2e5e2af65f69a7ced73254b3e86d5057bf4f86cb473af7.jpg)
22. Pop Pin [1pc]
![Vevor SJ706 - Pop Pin [1pc] - 1](/content/2026/04/736408/images/33a0f5ed24e1f4ab646669a2d6c049d4d63a126eb948279faf682d5c2e2df1df.jpg)
24. Spring Clip [1 pc]
![Vevor SJ706 - Spring Clip [1 pc] - 1](/content/2026/04/736408/images/4fa8eff7936ae1ed7552c157dfa17094930a5d4769ffe9ec88789dfe96934adb.jpg)
Tool1 [1 pc]
![Vevor SJ706 - Spring Clip [1 pc] - 2](/content/2026/04/736408/images/374565453ada1dd3c27b2bf39ff01d7dab1e48cd4a8222ecd238d5ee64ec4df8.jpg)
Tool2 [1 pc]
![Vevor SJ706 - Spring Clip [1 pc] - 3](/content/2026/04/736408/images/c678b5e20c8470b7fff60dc02673a649193eef2d666e9c6cabc02793c3a06aa8.jpg)
natural_image
Simple line drawing of a double-ended wrench (no text or symbols)Tool3 [1 pc]
NOTIZ:
text_image
Technical diagram of a mechanical device with numbered components for identificationSchritt
natural_image
Line drawing of a seated person in meditation posture (no text or symbols)Groin Stretch
natural_image
Line drawing of a seated human figure in a relaxed posture (no text or symbols)Hamstring Stretch
natural_image
Line drawing of a person sitting with hands on knees (no text or symbols)Trunk Twister
natural_image
Line drawing of a person performing a leg raise exercise (no text or symbols)Groin Stretch
natural_image
Line drawing of a person in a kneeling forward bend yoga pose (no text or symbols)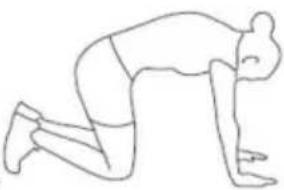
natural_image
Line drawing of a person in a kneeling forward bend (no text or symbols)Trunk Flexion, Prone
natural_image
Simple line drawing of a human figure in profile view, no text or symbols presentShoulder Stretch
natural_image
Line drawing of a person performing a stretching or stretching pose (no text or symbols)Quadriceps Stretch
natural_image
Line drawing of a person pushing a door (no text or symbols)Calf Twister
Leistendehnung
YH CONSULTING LIMITED. C/O YH Consulting Limited Office 147, Centurion House, London Road, Staines-upon-Thames, Surrey, TW18 4AX
text_image
Vertreter der ECelettronica www.vevor.com/support
PANCA PESI
MODELLO:SJ706
natural_image
Line drawing of a gym rehabilitation machine with adjustable arms and legs (no text or symbols)| Parts list | |||||
| No. | Description | Qty | No. | Description | Qty |
| 01 | Main Frame | 1 | 21 | P Pull Pin | 1 |
| 02 | Seat Frame | 1 | 22 | Pop Pin | 1 |
| 03 | Seat Adjustment Frame | 1 | 23 | Plastic Bushing | 1 |
| 04 | Leg Developer | 1 | 24 | Spring Clip | 1 |
| 05 | Front Support | 1 | 25 | Bumper | 1 |
| 06 | Arm Curl Frame | 1 | 26 | Flat Washer M8 | 12 |
| 07 | Backrest Support | 2 | 27 | Flat Washer M10 | 22 |
| 08 | Rear Stabilizer | 1 | 28 | Big Washer M10 | 2 |
| 09 | Backrest Adjustment Frame | 1 | 29 | Nylon Nut M10 | 13 |
| 10 | Rear Support | 1 | 30 | Allen Bolt M8x40mm | 6 |
| 11 | Front Stabilizer | 1 | 31 | Allen Bolt M8x35mm | 4 |
| 12 | Headrest Cushion | 1 | 32 | Allen Bolt M8x15mm | 2 |
| 13 | Seat Cushion | 1 | 33 | Allen Bolt M10x155mm | 2 |
| 14 | Backrest Cushion | 1 | 34 | Allen Bolt M10x150mm | 1 |
| 15 | Arm Curl Cushion | 1 | 35 | Allen Bolt M10x85mm | 3 |
| 16 | 25mm Foam Roll | 2 | 36 | Allen Bolt M10x60mm | 3 |
| 17 | 19mm Foam Roll | 4 | 37 | Allen Bolt M10x50mm | 2 |
| 18 | 25mm Foam Tube | 1 | 38 | Carriage Bolt M10x45mm | 4 |
| 19 | 19mm Foam Tube | 2 | 39 | Rope | 2 |
| 20 | Sleeve | 1 | 40 | Support Plate | 1 |
SCHEMA ESPLOSO
text_image
Technical diagram of a mechanical assembly with numbered components for identificationELENCO HARDWARE E UTENSILI
Bulloni
30. Allen Bolt (M8x40mm) [6 pcs]
![Vevor SJ706 - Allen Bolt (M8x40mm) [6 pcs] - 1](/content/2026/04/736408/images/54a639c0b12cc6a81446f7bac464246a826db453aa0605096c2027d6003bba75.jpg)
31.Allen Bolt (M8x35mm) [4 pcs]
![Vevor SJ706 - 31.Allen Bolt (M8x35mm) [4 pcs] - 1](/content/2026/04/736408/images/d1faeb2312408b70f65ccb0fc40cb0c6fde2afb274c89d0bed393a9905237c5f.jpg)
32.Allen Bolt (M8x15mm) [2 pcs]
![Vevor SJ706 - 32.Allen Bolt (M8x15mm) [2 pcs] - 1](/content/2026/04/736408/images/5460f8545dd9a8af130b3332700ab2a20e96a63b3238a706b58e62370b6b1c88.jpg)
33. Allen Bolt (M10x155mm) [2 pcs]
![Vevor SJ706 - Allen Bolt (M10x155mm) [2 pcs] - 1](/content/2026/04/736408/images/e68ede63a9150479ca859a170be6a5981dcdf9985ea0e5ef6d07e7abf16b11b6.jpg)
34. Allen Bolt (M10x150mm) [1 pc]
![Vevor SJ706 - Allen Bolt (M10x150mm) [1 pc] - 1](/content/2026/04/736408/images/f3c7a0345c2579431b882b7049dbd4dcdd7364191003e946f87e7a02933abfef.jpg)
35. Allen Bolt (M10x85mm) [3 pcs]
![Vevor SJ706 - Allen Bolt (M10x85mm) [3 pcs] - 1](/content/2026/04/736408/images/f49b3e3d0ead6296fc6962e4887d34e80e8ce11a0467b3adee3e5dbea59a1185.jpg)
36. Allen Bolt (M10x60mm) [3 pcs]
![Vevor SJ706 - Allen Bolt (M10x60mm) [3 pcs] - 1](/content/2026/04/736408/images/32671b6347701ca28019a66ca67e1b62ce2beaaa36b538f63e60429b19665e96.jpg)
38. Carriage Bolt (M10x45mm) [4 pcs]
Rondelle

26. Flat Washer (M8) [12 pcs]
![Vevor SJ706 - Flat Washer (M8) [12 pcs] - 1](/content/2026/04/736408/images/ce69f4e208a9241c4ad4e0dd8f9c3d7bb43576965bd3a9252591779db856b42a.jpg)
27. Flat Washer (M10) [18 pcs]
![Vevor SJ706 - Flat Washer (M10) [18 pcs] - 1](/content/2026/04/736408/images/af4b55ba152c15a1d2e33c726c871a056f4b0f340b27eb78cb7186dd6d2435a0.jpg)
28. Big Washer (M10) [2 pcs]
Noci

29. Nylon Nut (M10)
[11 pcs]
Altri
21.P Pull Pin [1 pc]
![Vevor SJ706 - 21.P Pull Pin [1 pc] - 1](/content/2026/04/736408/images/622021c9b3d2f8447a6fee26833bca8254c3bda6904b1d2dc8cd4466b76368d0.jpg)
22. Pop Pin [1pc]
![Vevor SJ706 - Pop Pin [1pc] - 1](/content/2026/04/736408/images/135d627b0092c6aa7b714d66025a5372ee9640a9641dd7e4cb0e26a782877b73.jpg)
24. Spring Clip [1 pc]
![Vevor SJ706 - Spring Clip [1 pc] - 1](/content/2026/04/736408/images/900eeec8dba87dfa548698a58340697fb0c0bddf051b3280e0089704e968461e.jpg)
Tool1 [1 pc]
![Vevor SJ706 - Spring Clip [1 pc] - 2](/content/2026/04/736408/images/be1ac5a3cfd512dd788021e0cf091ab51452551a574271beff9ef162e5924d41.jpg)
Tool2 [1 pc]
![Vevor SJ706 - Spring Clip [1 pc] - 3](/content/2026/04/736408/images/233bd45d6696cfdb79d49855a77a207290c076e5bb06160c3c2ba818f44cc77a.jpg)
natural_image
Simple line drawing of a double-ended wrench (no text or symbols)Tool3 [1 pc]
NOTA:
text_image
Technical diagram of a mechanical device with numbered components for identificationFase 5:
Importato in AUS: SIHAO PTY LTD. 1 ROKEVA STREETEASTWOOD NSW 2122 Australia
Importato negli USA: Sanven Technology Ltd. Suite 250, 9166 Anaheim Place, Rancho Cucamonga, CA 91730
text_image
RAPPRESENTANZA DEL REGNO UNITOYH CONSULTING LIMITED. C/O YH Consulting Limited Ufficio 147, Centurion House, London Road, Staines- upon-Thames, Surrey, TW18 4AX
natural_image
Line drawing of a gym rehabilitation machine with adjustable arms and legs (no text or symbols)| Parts list | |||||
| No. | Description | Qty | No. | Description | Qty |
| 01 | Main Frame | 1 | 21 | P Pull Pin | 1 |
| 02 | Seat Frame | 1 | 22 | Pop Pin | 1 |
| 03 | Seat Adjustment Frame | 1 | 23 | Plastic Bushing | 1 |
| 04 | Leg Developer | 1 | 24 | Spring Clip | 1 |
| 05 | Front Support | 1 | 25 | Bumper | 1 |
| 06 | Arm Curl Frame | 1 | 26 | Flat Washer M8 | 12 |
| 07 | Backrest Support | 2 | 27 | Flat Washer M10 | 22 |
| 08 | Rear Stabilizer | 1 | 28 | Big Washer M10 | 2 |
| 09 | Backrest Adjustment Frame | 1 | 29 | Nylon Nut M10 | 13 |
| 10 | Rear Support | 1 | 30 | Allen Bolt M8x40mm | 6 |
| 11 | Front Stabilizer | 1 | 31 | Allen Bolt M8x35mm | 4 |
| 12 | Headrest Cushion | 1 | 32 | Allen Bolt M8x15mm | 2 |
| 13 | Seat Cushion | 1 | 33 | Allen Bolt M10x155mm | 2 |
| 14 | Backrest Cushion | 1 | 34 | Allen Bolt M10x150mm | 1 |
| 15 | Arm Curl Cushion | 1 | 35 | Allen Bolt M10x85mm | 3 |
| 16 | 25mm Foam Roll | 2 | 36 | Allen Bolt M10x60mm | 3 |
| 17 | 19mm Foam Roll | 4 | 37 | Allen Bolt M10x50mm | 2 |
| 18 | 25mm Foam Tube | 1 | 38 | Carriage Bolt M10x45mm | 4 |
| 19 | 19mm Foam Tube | 2 | 39 | Rope | 2 |
| 20 | Sleeve | 1 | 40 | Support Plate | 1 |
DIAGRAMA EXPLOTADO
text_image
Technical diagram of a mechanical assembly with numbered components for identificationnatural_image
Simple line drawing of a double-ended wrench (no text or symbols)Tool3 [1 pc]
NOTA:
text_image
Technical diagram of a mechanical device with numbered components for identificationPaso 5
Road, Staines-upon-Thames, Surrey, TW18 4AX
text_image
REPRESENTANTE CEE-CrossStu GmbH
Mainzer Landstr.69,
natural_image
Line drawing of a gym rehabilitation machine with adjustable arms and legs (no text or symbols)POTRZEBUJESZ POMOCY? SKONTAKTUJ SIĘ Z NAMI!
| Parts list | |||||
| No. | Description | Qty | No. | Description | Qty |
| 01 | Main Frame | 1 | 21 | P Pull Pin | 1 |
| 02 | Seat Frame | 1 | 22 | Pop Pin | 1 |
| 03 | Seat Adjustment Frame | 1 | 23 | Plastic Bushing | 1 |
| 04 | Leg Developer | 1 | 24 | Spring Clip | 1 |
| 05 | Front Support | 1 | 25 | Bumper | 1 |
| 06 | Arm Curl Frame | 1 | 26 | Flat Washer M8 | 12 |
| 07 | Backrest Support | 2 | 27 | Flat Washer M10 | 22 |
| 08 | Rear Stabilizer | 1 | 28 | Big Washer M10 | 2 |
| 09 | Backrest Adjustment Frame | 1 | 29 | Nylon Nut M10 | 13 |
| 10 | Rear Support | 1 | 30 | Allen Bolt M8x40mm | 6 |
| 11 | Front Stabilizer | 1 | 31 | Allen Bolt M8x35mm | 4 |
| 12 | Headrest Cushion | 1 | 32 | Allen Bolt M8x15mm | 2 |
| 13 | Seat Cushion | 1 | 33 | Allen Bolt M10x155mm | 2 |
| 14 | Backrest Cushion | 1 | 34 | Allen Bolt M10x150mm | 1 |
| 15 | Arm Curl Cushion | 1 | 35 | Allen Bolt M10x85mm | 3 |
| 16 | 25mm Foam Roll | 2 | 36 | Allen Bolt M10x60mm | 3 |
| 17 | 19mm Foam Roll | 4 | 37 | Allen Bolt M10x50mm | 2 |
| 18 | 25mm Foam Tube | 1 | 38 | Carriage Bolt M10x45mm | 4 |
| 19 | 19mm Foam Tube | 2 | 39 | Rope | 2 |
| 20 | Sleeve | 1 | 40 | Support Plate | 1 |
SCHEMAT ROZŁOŻONY
text_image
Technical diagram of a mechanical assembly with numbered components for identificationnatural_image
Simple line drawing of a double-ended wrench (no text or symbols)Tool3 [1 pc]
NOTATKA:
text_image
Technical diagram of a mechanical device with numbered components for identificationKrok 5
YH CONSULTING LIMITED. C/O YH Consulting Limited Biuro 147, Centurion House, London Road, Staines-upon-Thames, Surrey, TW18 4AX
| Przedstaw ciel UE |
E-CrossStu GmbH
Mainzer Landstr.69,
60329 Frankfurt nad Menem.
VEVOR®
TOUGH TOOLS, HALF PRICE
natural_image
Line drawing of a gym rehabilitation machine with adjustable arms and legs (no text or symbols)HULP NODIG? NEEM CONTACT MET ONS OP!
| Parts list | |||||
| No. | Description | Qty | No. | Description | Qty |
| 01 | Main Frame | 1 | 21 | P Pull Pin | 1 |
| 02 | Seat Frame | 1 | 22 | Pop Pin | 1 |
| 03 | Seat Adjustment Frame | 1 | 23 | Plastic Bushing | 1 |
| 04 | Leg Developer | 1 | 24 | Spring Clip | 1 |
| 05 | Front Support | 1 | 25 | Bumper | 1 |
| 06 | Arm Curl Frame | 1 | 26 | Flat Washer M8 | 12 |
| 07 | Backrest Support | 2 | 27 | Flat Washer M10 | 22 |
| 08 | Rear Stabilizer | 1 | 28 | Big Washer M10 | 2 |
| 09 | Backrest Adjustment Frame | 1 | 29 | Nylon Nut M10 | 13 |
| 10 | Rear Support | 1 | 30 | Allen Bolt M8x40mm | 6 |
| 11 | Front Stabilizer | 1 | 31 | Allen Bolt M8x35mm | 4 |
| 12 | Headrest Cushion | 1 | 32 | Allen Bolt M8x15mm | 2 |
| 13 | Seat Cushion | 1 | 33 | Allen Bolt M10x155mm | 2 |
| 14 | Backrest Cushion | 1 | 34 | Allen Bolt M10x150mm | 1 |
| 15 | Arm Curl Cushion | 1 | 35 | Allen Bolt M10x85mm | 3 |
| 16 | 25mm Foam Roll | 2 | 36 | Allen Bolt M10x60mm | 3 |
| 17 | 19mm Foam Roll | 4 | 37 | Allen Bolt M10x50mm | 2 |
| 18 | 25mm Foam Tube | 1 | 38 | Carriage Bolt M10x45mm | 4 |
| 19 | 19mm Foam Tube | 2 | 39 | Rope | 2 |
| 20 | Sleeve | 1 | 40 | Support Plate | 1 |
EXPLODEDDIAGRAM
text_image
Technical diagram of a mechanical assembly with numbered components for identificationLIJST MET HARDWARE EN GEREEDSCHAP
Bouten
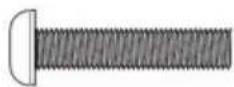
30. Allen Bolt (M8x40mm) [6 pcs]
![Vevor SJ706 - Allen Bolt (M8x40mm) [6 pcs] - 1](/content/2026/04/736408/images/46f4a108342b0bc5686271518d0dcf723525d026bcfda7bc71ae78ce67e0205b.jpg)
31.Allen Bolt (M8x35mm) [4 pcs]
![Vevor SJ706 - 31.Allen Bolt (M8x35mm) [4 pcs] - 1](/content/2026/04/736408/images/531b17e76c186becc0361d6e9297700cb55333ceb2b9f6971bcf36b6bbe19247.jpg)
32.Allen Bolt (M8x15mm) [2 pcs]
![Vevor SJ706 - 32.Allen Bolt (M8x15mm) [2 pcs] - 1](/content/2026/04/736408/images/93aa922fa9e7c36bb41e5a8b8855cb6eea96b1cc617dd7a2f64bfd0607e72f84.jpg)
33. Allen Bolt (M10x155mm) [2 pcs]
![Vevor SJ706 - Allen Bolt (M10x155mm) [2 pcs] - 1](/content/2026/04/736408/images/a0b9c4f2965f398deab8296e6ee264a1ca3ac43a3b130cd080495242f4753729.jpg)
34. Allen Bolt (M10x150mm) [1 pc]
![Vevor SJ706 - Allen Bolt (M10x150mm) [1 pc] - 1](/content/2026/04/736408/images/1de832ffdb3d8f96c6ab1c6b494c50fd266edf58bbade8d3d5305b143ba21645.jpg)
35. Allen Bolt (M10x85mm) [3 pcs]
![Vevor SJ706 - Allen Bolt (M10x85mm) [3 pcs] - 1](/content/2026/04/736408/images/9d036c39a771fbdfe2e3686076f5c7cd0845c2ec9d43bc234f992ebe4e8f8de1.jpg)
36. Allen Bolt (M10x60mm) [3 pcs]
![Vevor SJ706 - Allen Bolt (M10x60mm) [3 pcs] - 1](/content/2026/04/736408/images/fc7a5d980b549f97720bc309ff07a544274d411d08a3e6dffedb013db0d4ef9d.jpg)
38. Carriage Bolt (M10x45mm) [4 pcs]
Ringen

26. Flat Washer (M8) [12 pcs]
![Vevor SJ706 - Flat Washer (M8) [12 pcs] - 1](/content/2026/04/736408/images/dd2645eb98969b4851377bf30d9d6e8def7a13e77bf0530cb672b341dee77c01.jpg)
27. Flat Washer (M10) [18 pcs]
![Vevor SJ706 - Flat Washer (M10) [18 pcs] - 1](/content/2026/04/736408/images/8c3237c596056c63082c9cf1a2fcca3b52aff282dc99477910d541b1593a39dd.jpg)
28. Big Washer (M10) [2 pcs]
Noten

29. Nylon Nut (M10)
[11 pcs]
Anderen
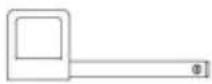
21.P Pull Pin [1 pc]
![Vevor SJ706 - 21.P Pull Pin [1 pc] - 1](/content/2026/04/736408/images/603c8aca9193719207b2c27597e87e8197428f6a36f5efe93b339cd19fb25763.jpg)
22. Pop Pin [1pc]
![Vevor SJ706 - Pop Pin [1pc] - 1](/content/2026/04/736408/images/41dc8a38d60e7225d599977c66ef55918064432b280c54c5158d1788169c38e9.jpg)
24. Spring Clip [1 pc]
![Vevor SJ706 - Spring Clip [1 pc] - 1](/content/2026/04/736408/images/91732b6033ae69bcf68405405c344a4dc9fd8a2703f1f841898c4b43a35519a3.jpg)
Tool1 [1 pc]
![Vevor SJ706 - Spring Clip [1 pc] - 2](/content/2026/04/736408/images/d4f57f3b3070b2c8249dcd0ee23ef1aab6880222929bd7d5f8c8b57cee667131.jpg)
Tool2 [1 pc]
![Vevor SJ706 - Spring Clip [1 pc] - 3](/content/2026/04/736408/images/a63f6f2594ddaab443aa5e29b10cd1557b4ff89506a1e17afe12c258d00aa244.jpg)
natural_image
Simple line drawing of a double-ended wrench (no text or symbols)Tool3 [1 pc]
OPMERKING:
text_image
Technical diagram of a mechanical assembly with numbered components for identificationStap 5
YH CONSULTING LIMITED. C/O YH Consulting Limited Kantoor 147, Centurion House, London Road, Staines- upon-Thames, Surrey, TW18 4AX
text_image
EC-REPgarantiecertificaat www.vevor.com/support
VEVOR®
TOUGH TOOLS, HALF PRICE
www.vevor.com/support
VIKTBÄNK
MODELL: SJ706
natural_image
Line drawing of a gym rehabilitation machine with adjustable arms and legs (no text or symbols)BEHÖVER HJÄLP? KONTAKTA OSS!
| Parts list | |||||
| No. | Description | Qty | No. | Description | Qty |
| 01 | Main Frame | 1 | 21 | P Pull Pin | 1 |
| 02 | Seat Frame | 1 | 22 | Pop Pin | 1 |
| 03 | Seat Adjustment Frame | 1 | 23 | Plastic Bushing | 1 |
| 04 | Leg Developer | 1 | 24 | Spring Clip | 1 |
| 05 | Front Support | 1 | 25 | Bumper | 1 |
| 06 | Arm Curl Frame | 1 | 26 | Flat Washer M8 | 12 |
| 07 | Backrest Support | 2 | 27 | Flat Washer M10 | 22 |
| 08 | Rear Stabilizer | 1 | 28 | Big Washer M10 | 2 |
| 09 | Backrest Adjustment Frame | 1 | 29 | Nylon Nut M10 | 13 |
| 10 | Rear Support | 1 | 30 | Allen Bolt M8x40mm | 6 |
| 11 | Front Stabilizer | 1 | 31 | Allen Bolt M8x35mm | 4 |
| 12 | Headrest Cushion | 1 | 32 | Allen Bolt M8x15mm | 2 |
| 13 | Seat Cushion | 1 | 33 | Allen Bolt M10x155mm | 2 |
| 14 | Backrest Cushion | 1 | 34 | Allen Bolt M10x150mm | 1 |
| 15 | Arm Curl Cushion | 1 | 35 | Allen Bolt M10x85mm | 3 |
| 16 | 25mm Foam Roll | 2 | 36 | Allen Bolt M10x60mm | 3 |
| 17 | 19mm Foam Roll | 4 | 37 | Allen Bolt M10x50mm | 2 |
| 18 | 25mm Foam Tube | 1 | 38 | Carriage Bolt M10x45mm | 4 |
| 19 | 19mm Foam Tube | 2 | 39 | Rope | 2 |
| 20 | Sleeve | 1 | 40 | Support Plate | 1 |
EXPLODERAD DIAGRAM
text_image
Technical diagram of a mechanical assembly with numbered components for identificationHÅRDVAROR OCH VERKTYGSLISTA
Bultar
30. Allen Bolt (M8x40mm) [6 pcs]
![Vevor SJ706 - Allen Bolt (M8x40mm) [6 pcs] - 1](/content/2026/04/736408/images/f3f2f42e3cfc70eea04e59c0d8f21a2d403503e8465b08867b76e2ccb8902b65.jpg)
31.Allen Bolt (M8x35mm) [4 pcs]
![Vevor SJ706 - 31.Allen Bolt (M8x35mm) [4 pcs] - 1](/content/2026/04/736408/images/c9df956d28dcac4fe4d2d1217b1f62d9f0cc98da1489714b6c6574903a602fe2.jpg)
32.Allen Bolt (M8x15mm) [2 pcs]
![Vevor SJ706 - 32.Allen Bolt (M8x15mm) [2 pcs] - 1](/content/2026/04/736408/images/443fbfe471fd434d9a7bfda090cbba243c11e6a5d748ec5b40fd0dcdeef9c23a.jpg)
33. Allen Bolt (M10x155mm) [2 pcs]
![Vevor SJ706 - Allen Bolt (M10x155mm) [2 pcs] - 1](/content/2026/04/736408/images/3213f3215ab4ee2ab7e7765ebb567e27316387c44fbf40c02254e07d6fe184f3.jpg)
34. Allen Bolt (M10x150mm) [1 pc]
![Vevor SJ706 - Allen Bolt (M10x150mm) [1 pc] - 1](/content/2026/04/736408/images/fcfb52d23ce8bb5079e16bcdb2fbc159e74e4e86b05ab786a87d07cac9266307.jpg)
35. Allen Bolt (M10x85mm) [3 pcs]
![Vevor SJ706 - Allen Bolt (M10x85mm) [3 pcs] - 1](/content/2026/04/736408/images/0a1101f363ce6c2d2fe2518753bec4b6a5f08ec009508ab30ff07d5b0258ba3f.jpg)
36. Allen Bolt (M10x60mm) [3 pcs]
![Vevor SJ706 - Allen Bolt (M10x60mm) [3 pcs] - 1](/content/2026/04/736408/images/078a6d8480794e3529626f75bfabc997a9786c178543d7faf65f2228f769b9c5.jpg)
38. Carriage Bolt (M10x45mm) [4 pcs]
Brickor

26. Flat Washer (M8) [12 pcs]
![Vevor SJ706 - Flat Washer (M8) [12 pcs] - 1](/content/2026/04/736408/images/fb8f5f9b5deb2d1328a1700993ee7c7361758cc5badf3ed3987e8dc637acfdd4.jpg)
27. Flat Washer (M10) [18 pcs]
![Vevor SJ706 - Flat Washer (M10) [18 pcs] - 1](/content/2026/04/736408/images/6d3e481640f09f9fdb734fa252ecd5c03ac40e5f1533f3fe370be18b80463e5e.jpg)
28. Big Washer (M10) [2 pcs]
Nötter

29. Nylon Nut (M10)
[11 pcs]
Andra
21.P Pull Pin [1 pc]
![Vevor SJ706 - 21.P Pull Pin [1 pc] - 1](/content/2026/04/736408/images/c29a4e302eed9527e441a740a50504a77e41e2cbd0b42b8196d20e7c748ed34c.jpg)
22. Pop Pin [1pc]
![Vevor SJ706 - Pop Pin [1pc] - 1](/content/2026/04/736408/images/cc85dca733953a2263945afc756e8455b1fadad6a35ad21d6bf5e16669bf80e3.jpg)
24. Spring Clip [1 pc]
![Vevor SJ706 - Spring Clip [1 pc] - 1](/content/2026/04/736408/images/c448448328b2f15a3065de90e8c02f70b7921b0dae121e1e7f32f1566149789f.jpg)
Tool1 [1 pc]
![Vevor SJ706 - Spring Clip [1 pc] - 2](/content/2026/04/736408/images/85b6bfe08b648c50b5a257545397de730f78a248195a79b8236c39c17f3dcfd0.jpg)
Tool2 [1 pc]
![Vevor SJ706 - Spring Clip [1 pc] - 3](/content/2026/04/736408/images/e9ce175b25478219ac5f0e7c87124aa190131cd45e7f25c747edcdd1f53306e8.jpg)
natural_image
Simple line drawing of a double-ended wrench (no text or symbols)Tool3 [1 pc]
NOTERA:
text_image
Technical diagram of a mechanical assembly with numbered components for identificationSteg
YH CONSULTING LIMITED. C/O YH Consulting Limited Office 147, Centurion House, London Road, Staines-upon-Thames, Surrey, TW18 4AX
| EC | REP |
www.vevor.com/support