R20TSR - Jack Vevor - Free user manual and instructions
Find the device manual for free R20TSR Vevor in PDF.

| Product Type | Weld-On Trailer Jack (Tube Mount) |
| Brand | Vevor |
| Model | R20TSR |
| Lifting Capacity | 2000 lb (907 kg) |
| Mounting Type | Tube Mount Bracket (3/16" fillet weld) |
| Crank Type | Top Wind |
| Height Range | 11.1 - 21 inches (28.2 - 53.3 cm) |
| Screw Stroke | 10 inches (25.4 cm) |
| Foot Size | 7 x 3.93 inches (rectangular) |
| Product Height (without handle) | 16.5 inches (41.9 cm) |
| Main Material | Steel |
| Power Source | Manual (Crank) |
| Main Function | Lift and lower the trailer for hitching |
| Safety | Wear safety glasses; do not exceed capacity; use on flat, hard surface; never place body parts under load |
| Maintenance | Regularly check screws; inspect tubes before each use |
| Cleaning | Mild soap and water |
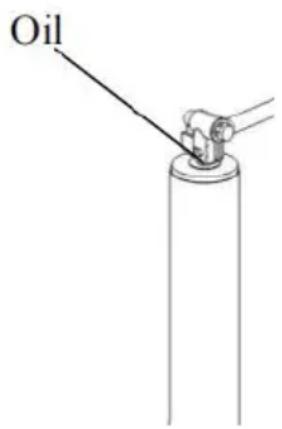
| Lubrication | Light oil on pivot points and screw shaft (at least once a year) |
| Spare Parts and Repairability | Contact VEVOR support at www.vevor.com/support |
| Warranty | Technical support and electronic warranty certificate (see VEVOR website) |
Frequently Asked Questions - R20TSR Vevor
User questions about R20TSR Vevor
0 question about this device. Answer the ones you know or ask your own.
Ask a new question about this device
Download the instructions for your Jack in PDF format for free! Find your manual R20TSR - Vevor and take your electronic device back in hand. On this page are published all the documents necessary for the use of your device. R20TSR by Vevor.
USER MANUAL R20TSR Vevor
Technical Support and E-Warranty Certificate
www.vevor.com/support
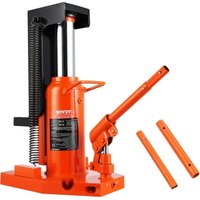
TUBE MOUNT WELD-ON JACK
MODEL: R20TSR
We continue to be committed to provide you tools with competitive price. "Save Half", "Half Price" or any other similar expressions used by us only represent of savings you might benefit from buying certain tools with us compared top brands and does not necessarily mean to cover all categories of tools offered are kindly reminded to verify carefully when you are placing an order with us actually saving half in comparison with the top major brands.
VEVOR®
TOUGH TOOLS, HALF PRICE
TUBE MOUNT WELD-ON JACK
MODEL:R20TSR
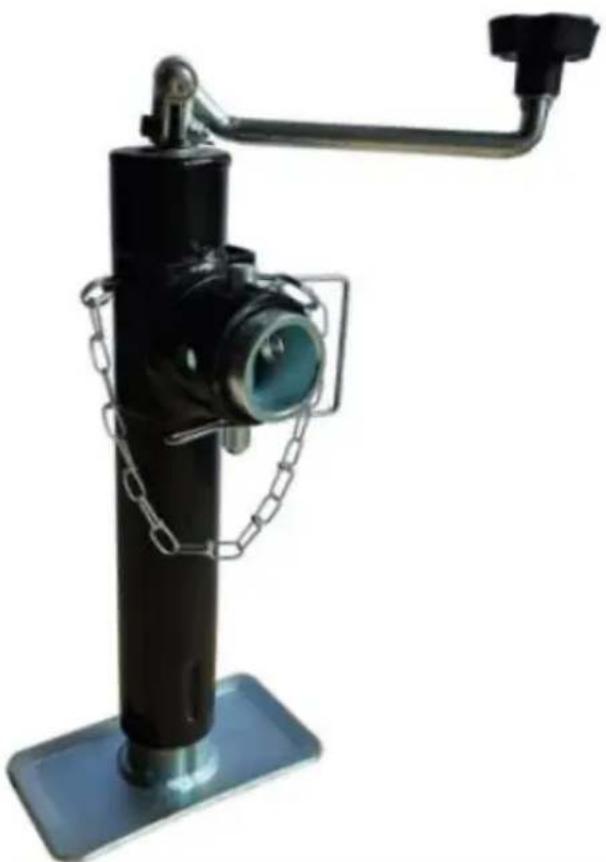
natural_image
Black cylindrical device with attached mechanical lever and chain frame (no visible text or symbols)NEED HELP? CONTACT US!
Have product questions? Need technical support? Please feel from contact us:
Technical Support and E-Warranty Certificate www.vevor.com/support
This is the original instruction, please read all manual instruction carefully before operating. VEVOR reserves a clear interpretation user manual. The appearance of the product shall be subject to product you received. Please forgive us that we won't inform you there are any technology or software updates on our product.
SAFETY INSTRUCTIONS
WARNING
-
The “WARNING” symbol above is a sign that a service or mainten procedure involves a safety risk involved and may cause death or serious injury if not performed safely and within the parameters so forth in this manual.
-
Always wear eye protection when performing service or maintenance to the vehicle. Other safety equipment to consider would be hearing protection, gloves and possibly a full face shield, depending on the nature of the service.
-
Never allow anyone unfamiliar with this product to install, operate or service this product.
-
Never lift or level the trailer without a properly installed footpad.
-
Never crank the jack or couple the trailer without preventing the train from rolling.
-
Never exert excessive side forces on the trailer jack.
-
Never allow anyone, including the operator, to put any body parts under the trailer jack or the supported load during jack operation.
-
Never exceed the load capacity!
-
Never use a trailer jack to lift the trailer for service or tire chang
-
Never move the trailer before the trailer jack is fully retracted.
-
Keep children and bystanders away from the work area while operating the tool. Do not allow children to handle the jack.
-
Do not use the jack where there is a risk of causing a fire or explosion; e.g., in the presence of flammable liquids, gases, or dust. The jack can create sparks, which may ignite the flammable liquid gases, or dust.
-
It is for use on flat, level, hard surfaces capable of supporting lo
-
Do not use blocks for additional ground clearance.
-
When using the drop foot or drop leg, make certain the supplied fully inserted through both sides of the inner tube and the drop before using the jack.
-
If the trailer jack has a drop leg, never attempt to adjust the dr when there is any load on the jack.
Note:
- The jack is only designed for vertical movement of the trailer.
- Rapid and continuous lifting is not recommended to avoid gear heat and reduce service life.
- Before welding, polish the galvanized layer or rust layer to avoid 'welding.
MODEL AND PARAMETERS
| Model | R20TSR |
| Capacity | 2000 lbs |
| Mounting Bracket Type | Tube Mount Weld-on |
| Crank Type | Top-Wind |
| Range | 11.1-21inch |
| Screw Travel | 10inch |
| Foot Size | 7x3.93" (Rectangle) |
| Product Height | 16.5"(Handle not included) |
STRUCTURE DIAGRAM
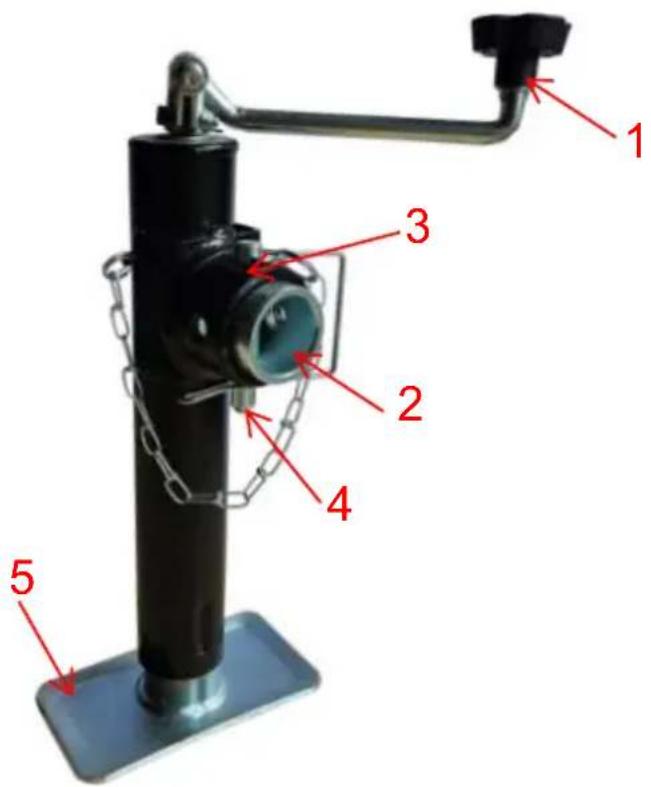
- Handle
- Male Tube
-
Female Tube
-
Pull Pin
- Foot Plate
COMPONENTS
| No. | Picture | Name | Qty |
| 1 | 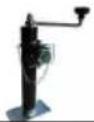 | Jack(Including the male tube) | 1 |
| 2 |  | User Manual | 1 |
ASSEMBLY
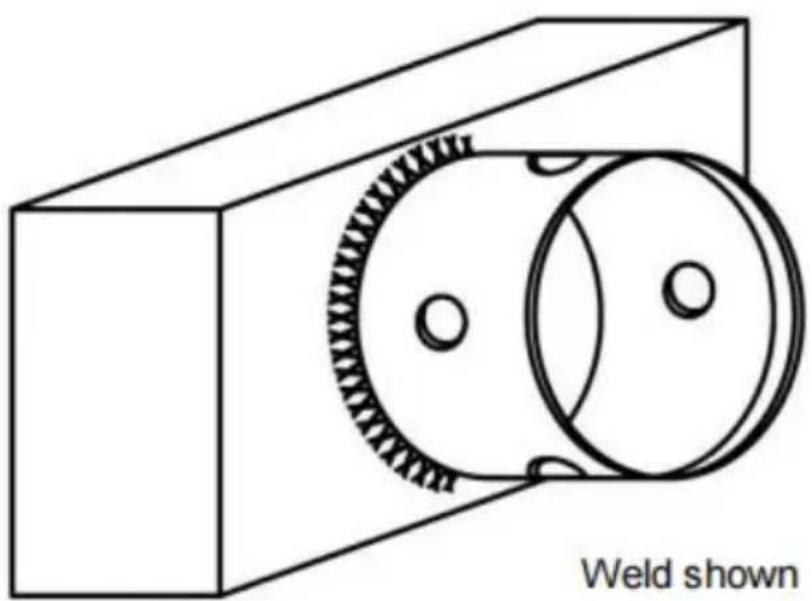
natural_image
Technical line drawing of a mechanical assembly with two gears and a rectangular block, labeled 'Weld shown' (no other text or symbols)- When mounting the trailer jack, it is best to hook it up to the to to make sure the trailer is secure.
- Mount jack based on drawing shown above. All welding must be performed by a certified welder.
- Place male tube mount so one of the four pin holes are facing up perpendicular to the trailer frame.
- Weld on entire surface where male tube meets trailer frame with a fillet weld.
- After jack is mounted to trailer, attach the handle assembly to jac bolt fastener provided.
OPERATION
-
Turn handle clockwise to raise.
-
Turn handle counterclockwise to lower.
-
Turn handle clockwise to raise.
- Turn handle counterclockwise to lower.
Note: Remember that the jack must not interfere with the vehicle or when turning or passing over speed bumps, boat ramps, etc.
MAINTENANCE
- Occasional cleaning with mild soap and water, along with light oil lubrication of pivot points, will prolong peak performance and appearance.
- Periodically check whether the screws are loose.
- Before each use, inspect jack tubes and replace them if bent or damaged.
- The following procedures should be performed at least annually. Apply a lightweight oil to the screw stem. If this product is used marine environment, flush the jack assembly and bushings with fresh water, and apply fresh lubricant.
VEVOR®
TOUGH TOOLS, HALF PRICE
Technical Support and E-Warranty Certificate www.vevor.com/support
VEVOR®
TOUGH TOOLS, HALF PRICE
natural_image
Black cylindrical mechanical device with attached lever and chain frame (no visible text or symbols)BESOIN D'AIDE? CONTACTEZ-NOUS!
natural_image
Technical line drawing of a mechanical assembly with two gears and a rectangular block (no text or symbols)www.vevor.com/support
natural_image
Black cylindrical mechanical device with attached lever and chain frame (no visible text or symbols)natural_image
Technical line drawing of a mechanical assembly with two gears and a rectangular block (no text or symbols)elettronica www.vevor.com/support
JACK A SALDARE CON MONTAGGIO SU TUBO
MODELLO: R20TSR
natural_image
Black cylindrical mechanical device with attached lever and chain frame (no visible text or symbols)natural_image
Technical line drawing of a mechanical assembly with two gears and a rectangular block (no text or symbols)natural_image
Black cylindrical mechanical device with attached lever and chain frame (no visible text or symbols)natural_image
Technical line drawing of a mechanical assembly with two gears and a rectangular block (no text or symbols)natural_image
Black cylindrical mechanical device with attached lever and chain frame (no visible text or symbols)POTRZEBUJESZ POMOCY? SKONTAKTUJ SIĘ Z NAMI!
natural_image
Technical line drawing of a mechanical assembly with two gears and a rectangular block (no text or symbols)www.vevor.com/support
BUIS MONTAGE LAS-AAN KRIK
MODEL: R20TSR
natural_image
Black cylindrical mechanical device with attached lever and chain frame (no visible text or symbols)HULP NODIG? NEEM CONTACT MET ONS OP!
natural_image
Technical line drawing of a mechanical assembly with two gears and a rectangular block (no text or symbols)www.vevor.com/support
RÖRMONTERADE SVETS-ON JACK
MODELL: R20TSR