MMA-205 - Welding machine Vevor - Free user manual and instructions
Find the device manual for free MMA-205 Vevor in PDF.

| Product Type | TIG/MMA Welding Machine |
| Brand | Vevor |
| Model | MMA-205 (TIG/MMA-205) |
| Power Supply | 110/220 V AC, single-phase, 50/60 Hz, 50 A circuit breaker |
| MMA Welding Current (110 V) | 20 - 130 A |
| MMA Welding Current (220 V) | 20 - 180 A |
| TIG Welding Current (110 V) | 10 - 145 A |
| TIG Welding Current (220 V) | 10 - 205 A |
| Welding Modes | MMA (Stick), TIG Lift, TIG HF, Spot, Pulse |
| Duty Cycle | Not specified, built-in thermal protection |
| Special Functions | Hot start, Arc force, 2T/4T, current adjustment |
| Display | Digital screen for current and voltage, preset parameters |
| Dimensions (approx.) | 35 x 20 x 25 cm |
| Weight (approx.) | 10 kg |
| Package Contents | Welding machine, TIG torch WP-17 (3 m), ground clamp (2.2 m), electrode holder (2 m), welding brush, US plug adapter |
| Safety | Thermal protection, automatic shutdown on overheating, cooling fan |
| Maintenance and Cleaning | Unplug before maintenance, clean with dry cloth, avoid moisture |
| Spare Parts | Available on manufacturer's website (www.vevor.com/support) |
| Repairability | Online technical support, electronic warranty |
| Standards | CE, compliant with WEEE directive 2012/19/EU |
Frequently Asked Questions - MMA-205 Vevor
User questions about MMA-205 Vevor
0 question about this device. Answer the ones you know or ask your own.
Ask a new question about this device
Download the instructions for your Welding machine in PDF format for free! Find your manual MMA-205 - Vevor and take your electronic device back in hand. On this page are published all the documents necessary for the use of your device. MMA-205 by Vevor.
USER MANUAL MMA-205 Vevor
Technical Support and E-Warranty Certificate
www.vevor.com/support
TIG Welder
Model:TIG/MMA-205
We continue to be committed to provide you tools with competitive price. "Save Half", "Half Price" or any other similar expressions used by us only represents an estimate of savings you might benefit from buying certain tools with us compared to the major top brands and does not necessarily mean to cover all categories of tools offered by us. You are kindly reminded to verify carefully when you are placing an order with us if you are actually saving half in comparison with the top major brands.
Model:TIG/MMA-205
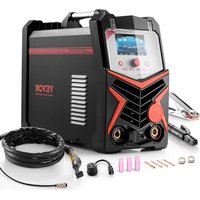
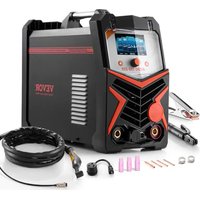
natural_image
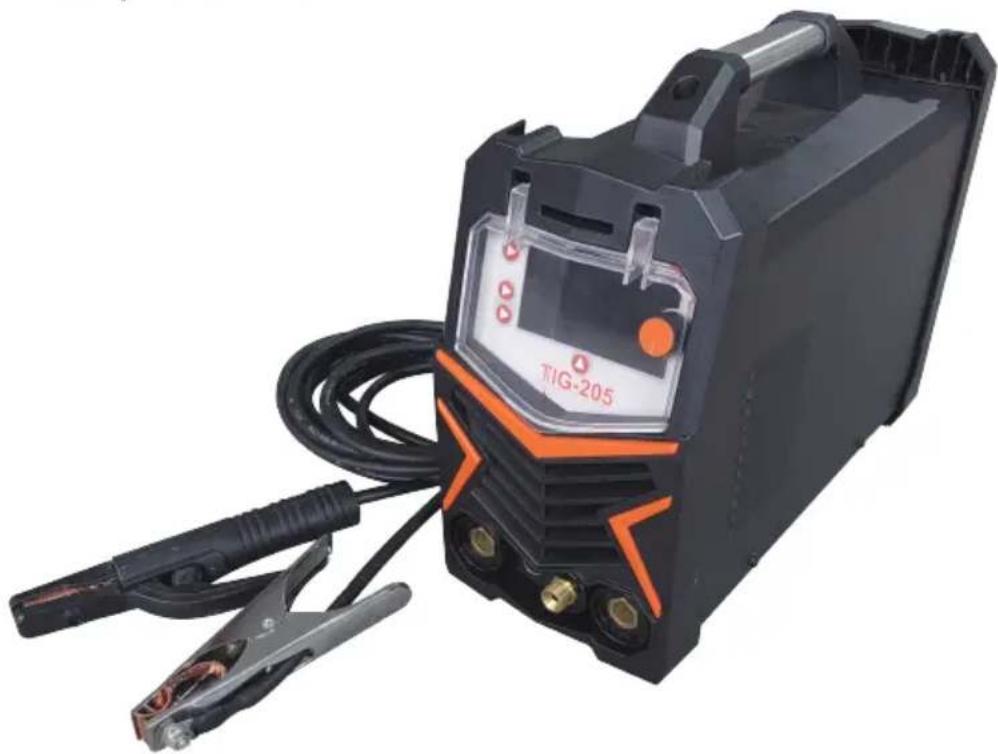
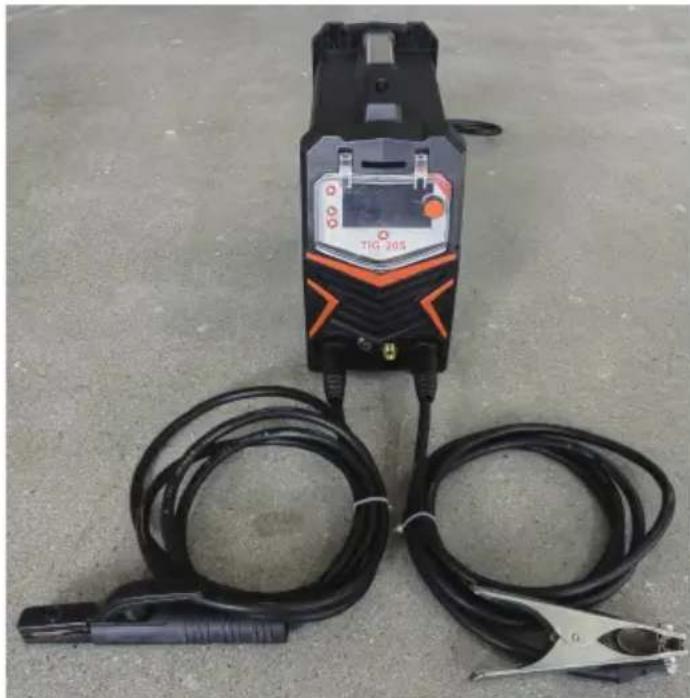
Exterior view of a TIG-205 electric welding torch kit with attached clamp and cable (no text or symbols visible on main body)Note: The product picture is for reference, the actual details shall prevail
NEED HELP? CONTACT US!
Have product questions? Need technical support? Please feel free to contact us:
Technical Support and E-Warranty Certificate www.vevor.com/support
This is the original instruction, please read all manual instructions carefully before operating. VEVOR reserves a clear interpretation of our user manual. The appearance of the product shall be subject to the product you received. Please forgive us that we won't inform you again if there are any technology or software updates on our product.
 | Warning-Toreducetheriskofinjury,usermustreadinstructionsmanualcarefully. |
 | CORRECTDISPOSALforDisplayThisproductissubjecttotheprovisionofeuropeanDirective2012/19/EU.ThesymbolshowingawheeliebincrossedthroughindicatesthattheproductrequiresseparaterefusecollectionintheEuropeanUnion.Thisappliestotheproductandallaccessoriesmarkedwiththissymbol.Productsmarkedassuchmaynotbediscardedwithnormaldomesticwaste,butmustbetakentoacollectionpointforrecyclingelectricalandelectronicdevices . |
 | ComplianceisaECsecuritycertification. |
The TIG/MMA-205 provides a convenient method of performing "stick" welding carbon steel. Inverter technology provides the capability of welding thin or heavy gauge steel with precision and ease. When adding the optional lift TIG torch (not included), gas regulator, and a cylinder of shielding gas, the TIG/MMA-205 becomes a TIG welder.
SPECIFICATIONS
| OutputCurrent Range: | Input Current | Input Voltage | RatedDuty Cycle | Rod Diameter | Rod Material |
| 20~~205A | I1 max 45A (110V)I1 eff 34.8A (110V)I1 max 34A (220V)I1 eff 26.3A (220V) | 110Vor220V | 20%@205A | 1/16~6/311.6~5.0mm | E6010 E6011E6013 E7014E7018Stainless Steel |
DUTY CYCLE
The rated duty cycle refers to the amount of welding that can be done within an amount of time. The TIG/MMA-205 has a duty cycle of 60% at 195A. It is easiest to look at your welding time in blocks of 10 minutes and the duty cycle being a percentage of that 10 minutes. If welding at 195A with a 60% duty cycle, within a 10 minute block of time you can weld for 6 minutes with 4 minutes of cooling for the welder. If the duty cycle is exceeded, the welder will automatically shut off, however the fan will continue running to cool the overheated components. When a safe temperature has been reached, the welder will automatically switch the welder output back on. To increase the duty cycle you can turn down the amperage output control.
READ AND UNDERSTAND ALL INSTRUCTIONS AND PRECAUTIONS BEFORE PROCEEDING.
This unit emits a powerful high voltage and extreme heat which can cause severe burns, dismemberment, electrical shock and death. VEVOR shall not be held liable for consequences due to deliberate or unintentional misuse of this product.
SAFETY INFORMATION
The following explanations are displayed in this manual, on the labeling, and on all other information provided with this product:
DANGER
DANGER indicates a hazardous situation which, if not avoided, will result in death or serious injury.
WARNING
WARNING indicates a hazardous situation which, if not avoided, could result in death or serious injury.
CAUTION
CAUTION used with the safety alert symbol, indicates a hazardous situation which, if not avoided, could result in minor or moderate injury.
A NOTICE
NOTICE is used to address practices not related to personal injury.
▲ READ INSTRUCTIONS
Thoroughly read and understand this manual before using the welder. Save for future reference.

▲ DANGER ELECTRIC SHOCK CAN KILL!
- Improper use of an electric welder can cause electric shock, injury and death! Read all precautions described in the Welder Manual to reduce the possibility of electric shock.
- Disconnect welder from power supply before assembly, disassembly or maintenance of the torch, contact tip and when installing or removing nozzles.
• Always wear dry, protective clothing and leather welding gloves and insulated footwear. Use suitable clothing made from durableflame-resistant material to protect your skin. - If other persons or pets are in the area of welding, use welding screens to protect bystanders from sparks.
• Always operate the welder in a clean, dry, well ventilated area. Do not operate the welder in humid, wet, rainy or poorly ventilated areas. - The electrode and work (or ground) circuits are electrically "hot" when the welder is on. Do not allow these "hot" parts to come in contact with your bare skin or wet clothing.
- Separate yourself from the welding circuit by using insulating mats to prevent contact from the work surface.
- Be sure that the work piece is properly supported and grounded prior to beginning an electric welding operation.
• Always attach the ground clamp to the piece to be welded and as close to the weld area as possible. This will give the least resistance and best weld.
▲ DANGER WELDING SPARKS CAN CAUSE FIRE OR EXPLOSION!
- Electric welding produces sparks which can be discharged considerable distances at high velocity igniting flammable or exploding vapors and materials.
- Do not operate electric arc welder in areas where flammable or explosive vapors are present.
- Do not use near combustible surfaces. Remove all flammable items within 35 feet of the welding area.
• Always keep a fire extinguisher nearby while welding. - Use welding blankets to protect painted and or flammable surfaces; rubber weather-stripping, dash boards, engines, etc.
- Ensure power supply has properly rated wiring to handle power usage.

WARNING ELECTROMAGNETIC FIELDS CAN BE A HEALTH HAZARD!
- The electromagnetic field that is generated during arc welding may interfere with various electrical and electronic devices such as cardiac pacemakers. Anyone using such devices should consult with their physician prior to performing any electric welding operations.
- Exposure to electromagnetic fields while welding may have other health effects which are not known.
WARNING ARC RAYS CAN BURN!
- Arc rays produce intense ultraviolet radiation which can burn exposed skin and cause eye damage. Use a shield with the proper filter (a minimum of #11) to protect your eyes from sparks and the rays of the arc when welding or when observing open arc welding (see ANSI Z49.1 and Z87.1 for safety standards).
- Use suitable clothing made from durable flame-resistant material to protect your skin.
- If other persons or pets are in the area of welding, use welding screens to protect bystanders from sparks and arc rays.
▲WARNING FUMES AND WELDING GASES CAN BE A HEALTH HAZARD!
- Fumes and gasses released during welding are hazardous. Do not breathe fumes that are produced by the welding operation. Wear an OSHA-approved respirator when welding.
• Always work in a properly ventilated area. - Never weld coated materials including but not limited to: cadmium plated, galvanized, lead based paints.
⚠️ CAUTION HOT METAL AND TOOLS WILL BURN!
• Electric welding heats metal and tools to temperatures that will cause severe burns!
- Use protective, heat resistant gloves and clothing when using Eastwood or any other welding equipment. Never touch welded work surface, torch tip or nozzle until they have completely cooled.

CAUTION FLYING METAL CHIPS CAN CAUSE INJURY!
- Grinding and sanding will eject metal chips, dust, debris and sparks at high velocity. To prevent eye injury wear approved safety glasses.
- Wear an OSHA-approved respirator when grinding or sanding.
- Read all manuals included with specific grinders, sanders or other power tools used before and after the welding process. Be aware of all power tool safety warnings.
REQUIRED ITEMS
Before you begin using the TIG/MMA 205 STICK WELDER, make sure you have the following:
• A properly grounded 1Phase 110/220 Volt AC, 50/60Hz, 50A circuit breaker.
NOTE: Unit must be grounded to work properly and safely!
- A clean, safe, well-lit, dry and well-ventilated work area.
• A non-flammable, long sleeve shirt or WELDING Jacket
• Heavy Duty Welding Gloves
- Auto-Darkening Welding Helmet to provide eye protection during welding operations. Note: MUST be a #11 lens or darker.
• Dedicated stainless steel wire welding brushes for each material to be welded.
CONTENTS
Remove all items from the box. Compare with list below to make sure unit is complete.
1.TIG/MMA-205
2.2m 25mm ^4 Ground cable pliers 1 set
3.1 set of 2m 25mm ^4 welding holder
4.3m WP-17 13mm ^2 tig welding gun 1 set
5.welding brush *1
6. the United States plug dual voltage converter plug (dual power machine)
CONTROL AND DISPLAY PANEL

A:2T/4T Select button B:DC/SPOT/PULSE Select button
C: Manual welding mode D: Welding mode button
E: LIFTIG argon arc welding F: High frequency argon arc welding
G: Current display H: Input voltage display
I: current adjusting knob J: Built-in parameter display
K: Built-in function select button
Click the button to select the function to be steady on In-screen alarm such as thermal protection
| Welding Mode | Current(A) | Welding Param | |||
| 110V | 220V | VRD | ARC Force | Hot Start | |
| Stick | 20~130A | 20~180A | ON/OFF | 0~10 | 0~10 |
| Lift TIG | 10~145A | 10~205A | / | / | / |
Thermal protection LED illuminates when the unit has reached the maximum internal component temperature. This occurs when the duty cycle has been exceeded.
The Welder will automatically shut off however the fan will continue running to cool the overheated components. When a safe temperature has been reached, the protective circuit will automatically switch the welder output back on.

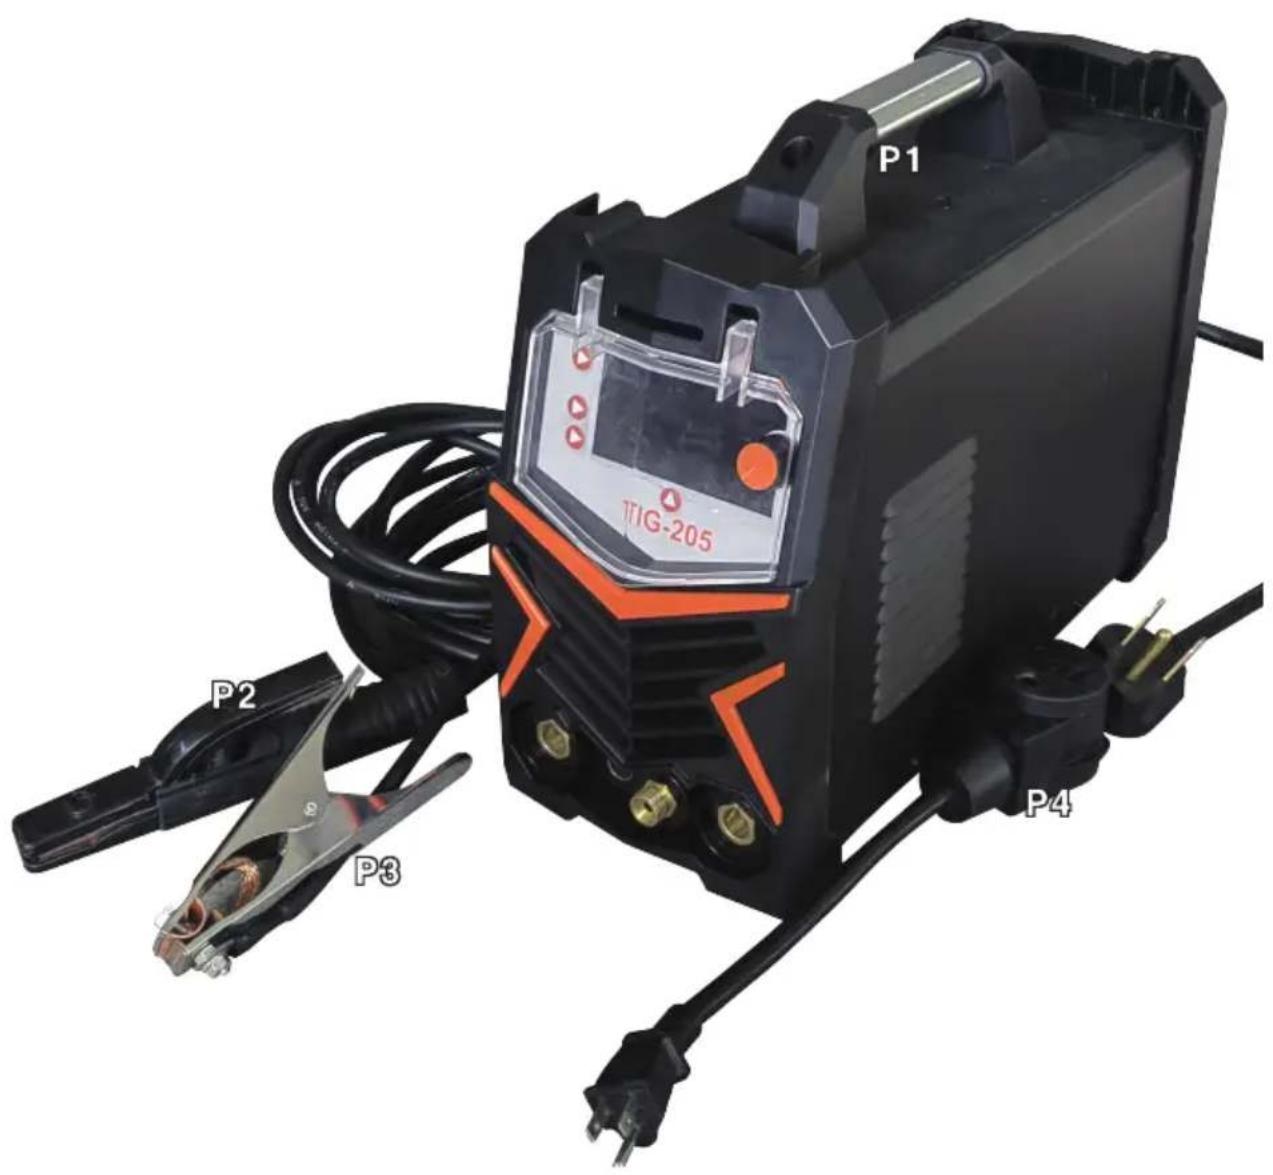
A: positive output interface B: Gun switch interface
C: gas-electric interface E: Power cord
F: Power switch G:TIG gas interface
MANUAL WELDING DEBUGGING AND OPERATION
natural_image
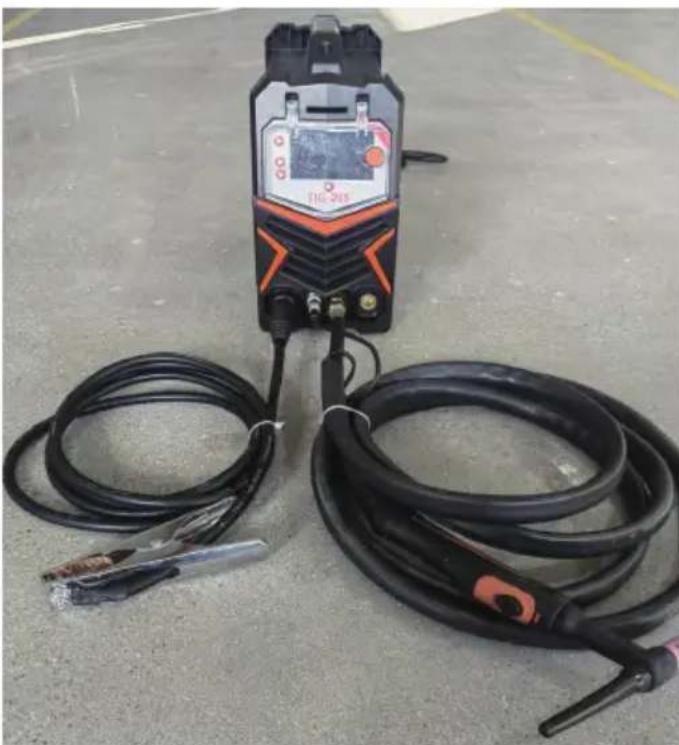
Close-up of a TIG-205 electric welding torch with coiled black cables and metal clamp (no visible text or symbols)- Connect the power plug and turn on the power switch.
- Connect the welding pliers to the positive output port, and connect the ground clamp to the negative output port.
- Hold the workpiece with a ground clamp.
- Press the welding mode button to switch to manual welding mode.
- Adjust the current knob to adjust the current to the appropriate range.
- Touch the electrode and the workpiece with the welding pliers, and start the arc welding.
ARGON ARC WELDING DEBUGGING AND OPERATION
natural_image
Exterior view of a welding torch device with black hoses and a digital display (no visible text or symbols)- Power on and turn on the power switch.
- Connect the argon arc welding gun to the gas-electric interface of the welding machine and tighten it clockwise.
- Insert the two-core plug of the torch into the switch port of the torch.
- Connect the ground clamp quick connector to the positive output end of the welder and hold the workpiece with the ground clamp.
- Press the welding mode button to switch to argon arc welding mode.
- Connect the gas cylinder gas pipe to the argon arc welding gas port on the rear panel and tighten it with the throat band.
- Turn the cylinder valve to reach the appropriate welding pressure.
- According to the thickness of the plate, turn the current adjustment knob to achieve the appropriate welding current.
- Touch the tungsten electrode of the welding torch to the workpiece, press the gun switch on the handle, and welding begins.
PREPARING TO "STICK" WELDING
- Plug the power cord into a properly grounded, 1Phase 110/220 Volt AC, 50/60Hz, 50A circuit breaker.
- Make sure the electrode or "Stick" is not making contact with the grounded workpiece.
- Switch the Power Switch to "ON".
DANGER
ELECTRIC SHOCK CAN CAUSE INJURY OR DEATH!
The electrode and work (or ground) circuits are electrically "hot" when the welder is on. Do not allow these "hot" parts to come in contact with your bare skin or wet clothing. Always wear dry, protective clothing and leather welding gloves and insulated footwear.
WARNING
ARC RAYS CAN BURN!
Arc rays produce intense ultraviolet radiation which can burn exposed skin and cause eye damage. Use a shield with the proper filter (a minimum of #11) to protect your eyes from sparks and the rays of the arc when welding or when observing open arc welding (see ANSI Z49.1 and Z87.1 for safety standards).
DANGER
WELDING SPARKS CAN CAUSE FIRE OR EXPLOSION!
Electric welding produces sparks which can be discharged considerable distances at high velocity igniting flammable or exploding vapors and materials. Remove all flammable items within 35 feet of the welding area. Always keep a fire extinguisher nearby while welding.
WARNING
FUMES AND WELDING GASES CAN BE A HEALTH HAZARD!
Fumes and gasses released during welding are hazardous. Do not breathe fumes that are produced by the welding operation. Wear an OSHAapproved respirator when welding. Always work in a properly ventilated area.
CAUTION
HOT METAL AND TOOLS WILL BURN!
Electric welding heats metal and tools to temperatures that will cause severe burns! Use protective, heat resistant gloves and clothing.
- While wearing a properly functioning Auto Darkening Welding Helmet, lightly drag the tip of the Welding Rod along the workpiece surface to start an arc.
- Feed the Welding Rod into the workpiece joint at a 15° angle.
- Lift rod from workpiece when weld bead is completed.
- Turn off Welder power switch.
- Set the Electrode or "Stick" Holder on a safe, non-flammable, surface.
TROUBLESHOOTING
| PROBLEM | CAUSE | CORRECTION |
| Contamination in weld bead | Contaminated Electrode Rod | Make sure that Electrodes are clean and dry before use. |
| Contaminated Base Metal | Clean base metal of any oil, debris, coatings, or moisture. If base metal is cold rolled steel make sure to remove any mill scale. | |
| Poor Weld Appearance | Incorrect positioning | The angle of the electrode should be at 45° and drug away from the weld arc. Failing to do so may cause poor weld appearance. |
| Weld Bead is Cracking | Too much heat in material | Reduce heat & allow more time between passes. |
| Base Metal is absorbing too much heat | Preheat base metal (consult welding codes for requirements) | |
| Incorrect Filler Wire | Use correct filler wire type & diameter for the joint being welded. | |
| Material is Warping | Insufficient Clamping | Clamp work piece tightly & weld while cIA are in place. |
| Insufficient Tack Welds | Add more tack welds until rigidity and stiffness is developed. | |
| Too Much Heat in Material | To reduce heat it is best to spread the welding out around the area. This can be done by using stitch welding techniques, alternating sides, and/or taking your time and allowing the pieces to cool between passes. | |
| Porosity in weld bead | Contaminated Electrode Rod | Make sure that Electrodes are clean and dry before use. |
| Contaminated base metal | Clean base metal making sure to remove any oil, debris, coatings, or moisture. | |
| Difficulty Starting Arc | Incomplete Circuit | Check Ground connection. Make sure that the ground is on a freshly cleaned surface and close to the welding area. It is suggested to weld toward the ground connection |
| Amperage Too Low | Based on the material welding & size/material of the electrode, pick an appropriate amperage to perform the desired weld. | |
| Contaminated Base Metal | Clean base metal of any oil, debris, coatings, or moisture. If base metal is cold rolled steel make sure to remove any mill scale. | |
| Arc Wander | Electrode too far from welding surface | Move electrode so that it is contacting the weld puddle and feed rod into the puddle as needed. |
| Difficulty Holding Arc | Amperage Too Low | Based on the material welding and size/material of the electrode, pick an appropriate amperage to perform the desired weld. |
| Electrode too far from welding surface | Move electrode so that it is contacting the weld puddle and feed rod into the puddle as needed. | |
| Incomplete Circuit | Check Ground connection. Make sure that the ground is on a freshly cleaned surface and close to the welding area. It is suggested to weld toward the ground connection. | |
| Contaminated Electrode Rod | Make sure that Electrodes are clean and dry before use. | |
| Contaminated Base Metal | Clean base metal of any oil, debris, coatings, or moisture. |
Manufacturer: Zhejiang Xingyi Ventilator Electrical Appliance Co., Ltd. Address: Danya Industrial Park, Zeguo Town, WENLING Zhejiang 317523 Imported to AUS: SIHAO PTY LTD. 1 ROKEVA STREETEASTWOOD NSW 2122 Australia Imported to USA: Sanven Technology Ltd. Suite 250, 9166 Anaheim Place, Rancho Cucamonga, CA 91730
| REPU |
YHCONSULTINGLIMITED.C/OYHConsulting
KimitedOffice147,CenturionHouse,London
Road, Staines-upon-Thames, Surrey, TW184AX
| REPE |
E-CrossStuGmbH
69MainzerLandstr.,
60329FrankfurtamMain.
VEVOR®
TOUGH TOOLS, HALF PRICE
Technical Support and E-Warranty Certificate
www.vevor.com/support
VEVOR®
TOUGH TOOLS, HALF PRICE
natural_image
Exterior view of a TIG-205 welding torch kit with attached clamp and cable (no visible text or symbols)The TIG/MMA-205 provides a convenient method of performing "stick" welding carbon steel. Inverter technology provides the capability of welding thin or heavy gauge steel with precision and ease. When adding the optional lift TIG torch (not included), gas regulator, and a cylinder of shielding gas, the TIG/MMA-205 becomes a TIG welder.
SPECIFICATIONS
| OutputCurrent Range: | Input Current | Input Voltage | RatedDuty Cycle | Rod Diameter | Rod Material |
| 20~~205A | I1 max 45A (110V)I1 eff 34,8 A (110 V)I1 max 34A (220V)I1 eff 26,3 A (220 V) | 110V ou 220V | 20%@205A | 16/01~31/061,6 à 5,0 mm | E6010 E6011E6013 E7014E7018SAcier inoxydable |
DUTY CYCLE
The rated duty cycle refers to the amount of welding that can be done within an amount of time. The TIG/MMA-205 has a duty cycle of 60% at 195A. It is easiest to look at your welding time in blocks of 10 minutes and the duty cycle being a percentage of that 10 minutes. If welding at 195A with a 60% duty cycle, within a 10 minute block of time you can weld for 6 minutes with 4 minutes of cooling for the welder. If the duty cycle is exceeded, the welder will automatically shut off, however the fan will continue running to cool the overheated components. When a safe temperature has been reached, the welder will automatically switch the welder output back on. To increase the duty cycle you can turn down the amperage output control.
READ AND UNDERSTAND ALL INSTRUCTIONS AND PRECAUTIONS BEFORE PROCEEDING.
This unit emits a powerful high voltage and extreme heat which can cause severe burns, dismemberment, electrical shock and death. VEVOR shall not be held liable for consequences due to deliberate or unintentional misuse of this product.
SAFETY INFORMATION
The following explanations are displayed in this manual, on the labeling, and on all other information provided with this product:
DANGER
DANGER indicates a hazardous situation which, if not avoided, will result in death or serious injury.
WARNING
WARNING indicates a hazardous situation which, if not avoided, could result in death or serious injury.
CAUTION
CAUTION used with the safety alert symbol, indicates a hazardous situation which, if not avoided, could result in minor or moderate injury.
NOTICE
NOTICE is used to address practices not related to personal injury.


LISEZ LES INSTRUCTIONS
natural_image
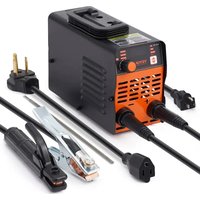
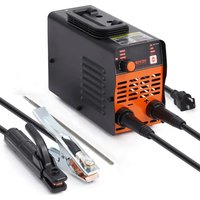
Exterior view of a black and white industrial welding torch (T30-205) with coiled black cables and clamp, placed on a concrete floor (no visible text or symbols)natural_image
Exterior view of a welding torch device with black and orange cables, no visible text or symbols on the main subject.PREPARING TO "STICK" WELDING
- Plug the power cord into a properly grounded, 1Phase 110/220 Volt AC, 50/60Hz, 50A circuit breaker.
- Make sure the electrode or "Stick" is not making contact with the grounded workpiece.
- Switch the Power Switch to "ON".
DANGER
ELECTRIC SHOCK CAN CAUSE INJURY OR DEATH!
The electrode and work (or ground) circuits are electrically "hot" when the welder is on. Do not allow these "hot" parts to come in contact with your bare skin or wet clothing. Always wear dry, protective clothing and leather welding gloves and insulated footwear.
WARNING
ARC RAYS CAN BURN!
Arc rays produce intense ultraviolet radiation which can burn exposed skin and cause eye damage. Use a shield with the proper filter (a minimum of #11) to protect your eyes from sparks and the rays of the arc when welding or when observing open arc welding (see ANSI Z49.1 and Z87.1 for safety standards).
DANGER
WELDING SPARKS CAN CAUSE FIRE OR EXPLOSION!
Electric welding produces sparks which can be discharged considerable distances at high velocity igniting flammable or exploding vapors and materials. Remove all flammable items within 35 feet of the welding area. Always keep a fire extinguisher nearby while welding.
WARNING
FUMES AND WELDING GASES CAN BE A HEALTH HAZARD!
Fumes and gasses released during welding are hazardous. Do not breathe fumes that are produced by the welding operation. Wear an OSHAapproved respirator when welding. Always work in a properly ventilated area.
CAUTION
HOT METAL AND TOOLS WILL BURN!
Electric welding heats metal and tools to temperatures that will cause severe burns! Use protective, heat resistant gloves and clothing.
- While wearing a properly functioning Auto Darkening Welding Helmet, lightlydrag the tip of the Welding Rod along the workpiece surface to start an arc.
- Feed the Welding Rod into the workpiece joint at a 15° angle.
- Lift rod from workpiece when weld bead is completed.
- Turn off Welder power switch.
- Set the Electrode or "Stick" Holder on a safe, non-flammable, surface.
TROUBLESHOOTING
| PROBLEM | CAUSE | CORRECTION |
| Contamination in weld bead | Contaminated Electrode Rod | Make sure that Electrodes are clean and dry before use. |
| Contaminated Base Metal | Clean base metal of any oil, debris, coatings, or moisture. If base metal is cold rolled steel make sure to remove any mill scale. | |
| Poor Weld Appearance | Incorrect positioning | The angle of the electrode should be at 45° and drug away from the weld arc. Failing to do so may cause poor weld appearance. |
| Weld Bead is Cracking | Too much heat in material | Reduce heat & allow more time between passes. |
| Base Metal is absorbing too much heat | Preheat base metal (consult welding codes for requirements) | |
| Incorrect Filler Wire | Use correct filler wire type & diameter for the joint being welded. | |
| Material is Warping | Insufficient Clamping | Clamp work piece tightly & weld while clA are in place. |
| Insufficient Tack Welds | Add more tack welds until rigidity and stiffness is developed. | |
| Too Much Heat in Material | To reduce heat it is best to spread the welding out around the area. This can be done by using stitch welding techniques, alternating sides, and/or taking your time and allowing the pieces to cool between passes. | |
| Porosity in weld bead | Contaminated Electrode Rod | Make sure that Electrodes are clean and dry before use. |
| Contaminated base metal | Clean base metal making sure to remove any oil, debris, coatings, or moisture. | |
| Difficulty Starting Arc | Incomplete Circuit | Check Ground connection. Make sure that the ground is on a freshly cleaned surface and close to the welding area. It is suggested to weld toward the ground connection |
| Amperage Too Low | Based on the material welding & size/material of the electrode, pick an appropriate amperage to perform the desired weld. | |
| Contaminated Base Metal | Clean base metal of any oil, debris, coatings, or moisture. If base metal is cold rolled steel make sure to remove any mill scale. | |
| Arc Wander | Electrode too far from welding surface | Move electrode so that it is contacting the weld puddle and feed rod into the puddle as needed. |
| Difficulty Holding Arc | Amperage Too Low | Based on the material welding and size/material of the electrode, pick an appropriate amperage to perform the desired weld. |
| Electrode too far from welding surface | Move electrode so that it is contacting the weld puddle and feed rod into the puddle as needed. | |
| Incomplete Circuit | Check Ground connection. Make sure that the ground is on a freshly cleaned surface and close to the welding area. It is suggested to weld toward the ground connection. | |
| Contaminated Electrode Rod | Make sure that Electrodes are clean and dry before use. | |
| Contaminated Base Metal | Clean base metal of any oil, debris, coatings, or moisture. |
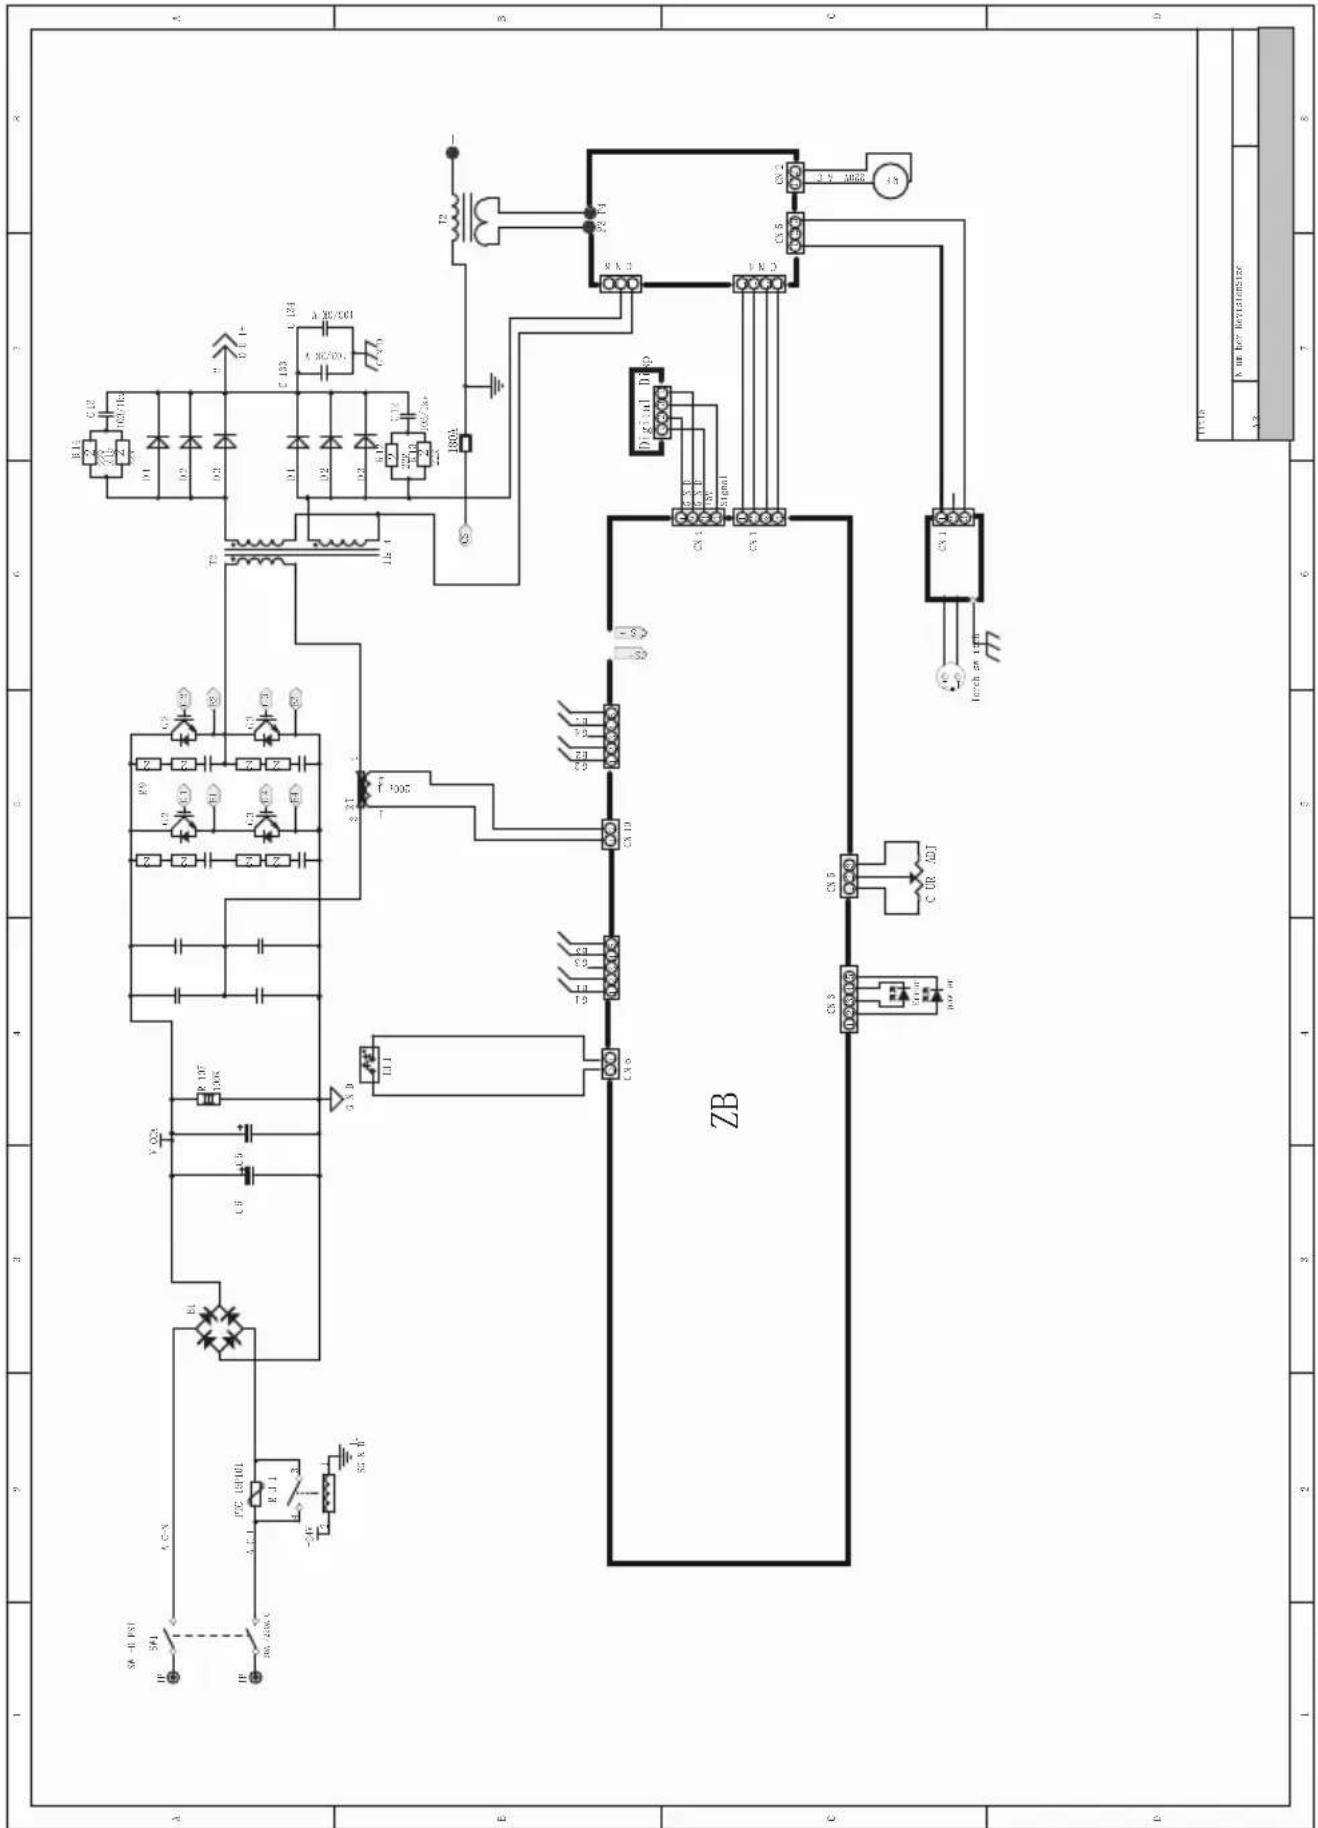
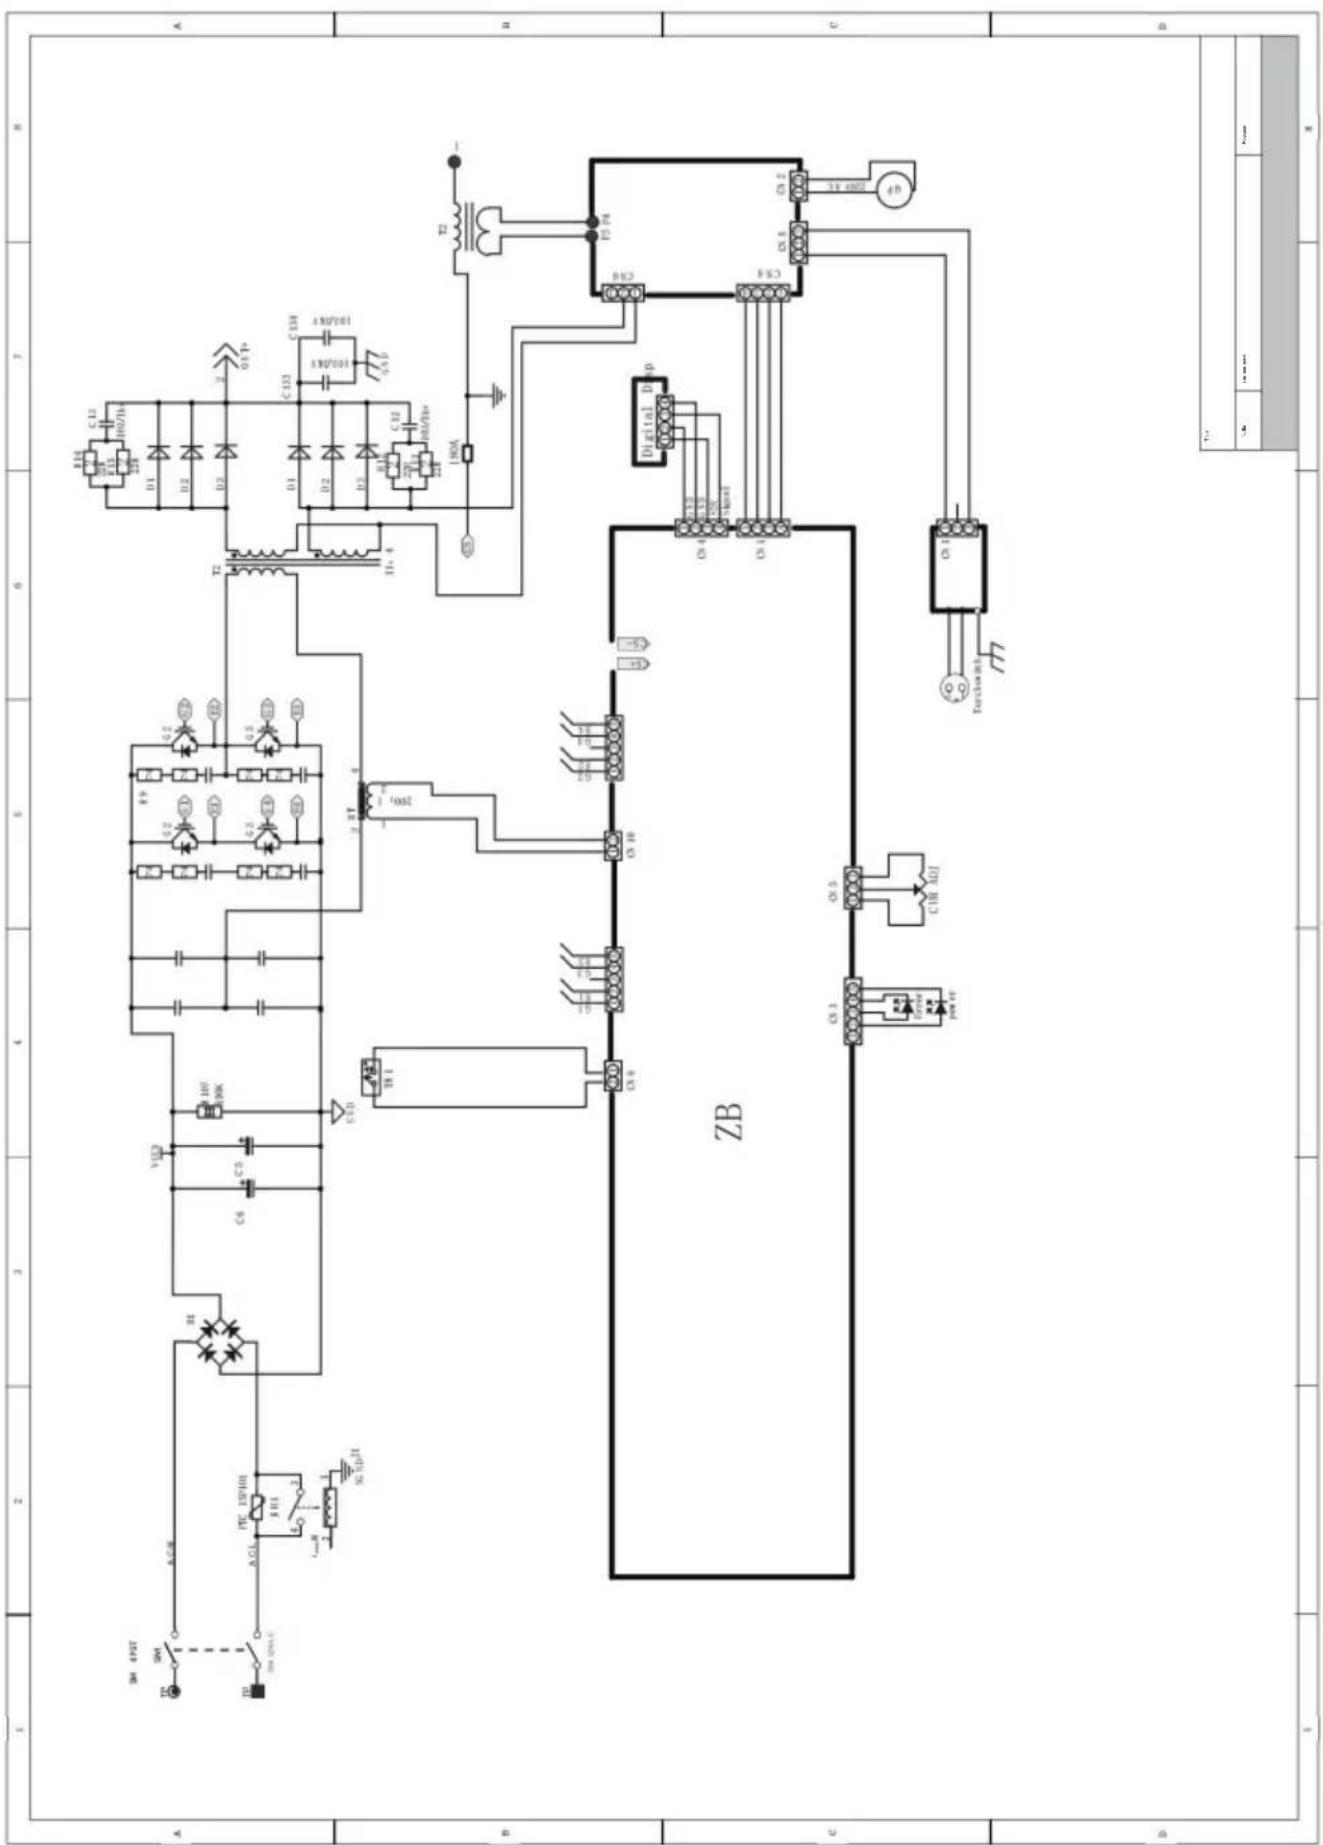
WIRING DIAGRAM
Fabricant : Zhejiang Xingyi Ventilator Electrical Appliance Co., Ltd.
Technology Ltd. Suite 250, 9166 Anaheim Place, Rancho Cucamonga, CA 91730
YH CONSULTING LIMITED. C/OYH Consulting Limited Office 147, Centurion House, London Road, Staines-upon-Thames, Surrey, TW18 4AX
E-CrossStu GmbH
Mainzer Landstr.69,
natural_image
Exterior view of a black TIG-205 welding torch kit with attached clamp and cable (no visible text or symbols on main body)Machine Translated by Google
The WIG/MMA-205 provides a convenient method of performing "stick" welding carbon steel. Inverter technology provides the capability of welding thin or heavy gauge steel with precision and ease. When adding the optional lift TIG torch (not included), gas regulator, and a cylinder of shielding gas, the WIG/MMA-205 becomes a TIG welder.
SPECIFICATIONS
| OutputCurrent Range: | Input Current | Input Voltage | RatedDuty Cycle | Rod Diameter | Rod Material |
| 20 bis 205 | I1 max. 45 A (110 V)I1 eff 34,8 A (110 V)I1 max. 34 A (220 V)I1 eff 26,3A (220V) | 110VVor220V | 20%@205A | 16.1. bis 31.6.1,6 bis 5,0 mm | E6010 E6011E6013 E7014E7018SEdelstahl |
DUTY CYCLE
The rated duty cycle refers to the amount of welding that can be done within an amount of time. The WIG/MMA-205 has a duty cycle of 60% at 195A. It is easiest to look at your welding time in blocks of 10 minutes and the duty cycle being a percentage of that 10 minutes. If welding at 195A with a 60% duty cycle, within a 10 minute block of time you can weld for 6 minutes with 4 minutes of cooling for the welder. If the duty cycle is exceeded, the welder will automatically shut off, however the fan will continue running to cool the overheated components. When a safe temperature has been reached, the welder will automatically switch the welder output back on. To increase the duty cycle you can turn down the amperage output control.
READ AND UNDERSTAND ALL INSTRUCTIONS AND PRECAUTIONS BEFORE PROCEEDING.
This unit emits a powerful high voltage and extreme heat which can cause severe burns, dismemberment, electrical shock and death. VEVOR shall not be held liable for consequences due to deliberate or unintentional misuse of this product.
SAFETY INFORMATION
The following explanations are displayed in this manual, on the labeling, and on all other information provided with this product:
DANGER
DANGER indicates a hazardous situation which, if not avoided, will result in death or serious injury.
WARNING
WARNING indicates a hazardous situation which, if not avoided, could result in death or serious injury.
CAUTION
CAUTION used with the safety alert symbol, indicates a hazardous situation which, if not avoided, could result in minor or moderate injury.
NOTICE
NOTICE is used to address practices not related to personal injury.

ANLEITUNG LESEN
natural_image
Exterior view of a black and orange welding torch device with coiled black cables and clamp (no visible text or symbols)natural_image
Exterior view of a welding torch device with black and orange cables, no visible text or symbols on the main subject.PREPARING TO "STICK" WELDING
- Plug the power cord into a properly grounded, 1Phase 110/220 Volt AC, 50/60Hz, 50A circuit breaker.
- Make sure the electrode or "Stick" is not making contact with the grounded workpiece.
- Switch the Power Switch to "ON".
DANGER
ELECTRIC SHOCK CAN CAUSE INJURY OR DEATH!
The electrode and work (or ground) circuits are electrically "hot" when the welder is on. Do not allow these "hot" parts to come in contact with your bare skin or wet clothing. Always wear dry, protective clothing and leather welding gloves and insulated footwear.
WARNING
ARC RAYS CAN BURN!
Arc rays produce intense ultraviolet radiation which can burn exposed skin and cause eye damage. Use a shield with the proper filter (a minimum of #11) to protect your eyes from sparks and the rays of the arc when welding or when observing open arc welding (see ANSI Z49.1 and Z87.1 for safety standards).
DANGER
WELDING SPARKS CAN CAUSE FIRE OR EXPLOSION!
Electric welding produces sparks which can be discharged considerable distances at high velocity igniting flammable or exploding vapors and materials. Remove all flammable items within 35 feet of the welding area. Always keep a fire extinguisher nearby while welding.
WARNING
FUMES AND WELDING GASES CAN BE A HEALTH HAZARD!
Fumes and gasses released during welding are hazardous. Do not breathe fumes that are produced by the welding operation. Wear an OSHAapproved respirator when welding. Always work in a properly ventilated area.
CAUTION
HOT METAL AND TOOLS WILL BURN!
Electric welding heats metal and tools to temperatures that will cause severe burns! Use protective, heat resistant gloves and clothing.
- While wearing a properly functioning Auto Darkening Welding Helmet, lightlydrag the tip of the Welding Rod along the workpiece surface to start an arc.
- Feed the Welding Rod into the workpiece joint at a 15° angle.
- Lift rod from workpiece when weld bead is completed.
- Turn off Welder power switch.
- Set the Electrode or "Stick" Holder on a safe, non-flammable, surface.
TROUBLESHOOTING
| PROBLEM | CAUSE | CORRECTION |
| Contamination in weld bead | Contaminated Electrode Rod | Make sure that Electrodes are clean and dry before use. |
| Contaminated Base Metal | Clean base metal of any oil, debris, coatings, or moisture. If base metal is cold rolled steel make sure to remove any mill scale. | |
| Poor Weld Appearance | Incorrect positioning | The angle of the electrode should be at 45° and drug away from the weld arc. Failing to do so may cause poor weld appearance. |
| Weld Bead is Cracking | Too much heat in material | Reduce heat & allow more time between passes. |
| Base Metal is absorbing too much heat | Preheat base metal (consult welding codes for requirements) | |
| Incorrect Filler Wire | Use correct filler wire type & diameter for the joint being welded. | |
| Material is Warping | Insufficient Clamping | Clamp work piece tightly & weld while clA are in place. |
| Insufficient Tack Welds | Add more tack welds until rigidity and stiffness is developed. | |
| Too Much Heat in Material | To reduce heat it is best to spread the welding out around the area. This can be done by using stitch welding techniques, alternating sides, and/or taking your time and allowing the pieces to cool between passes. | |
| Porosity in weld bead | Contaminated Electrode Rod | Make sure that Electrodes are clean and dry before use. |
| Contaminated base metal | Clean base metal making sure to remove any oil, debris, coatings, or moisture. | |
| Difficulty Starting Arc | Incomplete Circuit | Check Ground connection. Make sure that the ground is on a freshly cleaned surface and close to the welding area. It is suggested to weld toward the ground connection |
| Amperage Too Low | Based on the material welding & size/material of the electrode, pick an appropriate amperage to perform the desired weld. | |
| Contaminated Base Metal | Clean base metal of any oil, debris, coatings, or moisture. If base metal is cold rolled steel make sure to remove any mill scale. | |
| Arc Wander | Electrode too far from welding surface | Move electrode so that it is contacting the weld puddle and feed rod into the puddle as needed. |
| Difficulty Holding Arc | Amperage Too Low | Based on the material welding and size/material of the electrode, pick an appropriate amperage to perform the desired weld. |
| Electrode too far from welding surface | Move electrode so that it is contacting the weld puddle and feed rod into the puddle as needed. | |
| Incomplete Circuit | Check Ground connection. Make sure that the ground is on a freshly cleaned surface and close to the welding area. It is suggested to weld toward the ground connection. | |
| Contaminated Electrode Rod | Make sure that Electrodes are clean and dry before use. | |
| Contaminated Base Metal | Clean base metal of any oil, debris, coatings, or moisture. |
WIRING DIAGRAM

Hersteller: Zhejiang Xingyi Ventilator Electrical Appliance Co., Ltd.
Adresse: Danya Industrial Park, Zeguo Town, WENLING Zhejiang 317523. Importiert nach Australien: SIHAO PTY LTD. 1 ROKEVA STREETEASTWOOD NSW2122Australien.
Importiert in die USA: Sanven Technology Ltd. Suite 250, 9166 Anaheim Place, Rancho Cucamonga, CA 91730.
| UK REP |
YH CONSULTING LIMITED. C/OYH Consulting Limited Büro 147, Centurion House, London Road, Staines- upon-Thames, Surrey, TW18 4AX
www.vevor.com/support
VEVOR®
TOUGH TOOLS, HALF PRICE
natural_image
Exterior view of a black TIG-205 welding torch kit with attached clamp and cable (no visible text or symbols on main body)The TIG/MMA-205 provides a convenient method of performing "stick" welding carbon steel. Inverter technology provides the capability of welding thin or heavy gauge steel with precision and ease. When adding the optional lift TIG torch (not included), gas regulator, and a cylinder of shielding gas, the TIG/MMA-205 becomes a TIG welder.
SPECIFICATIONS
| OutputCurrent Range: | Input Current | Input Voltage | RatedDuty Cycle | Rod Diameter | Rod Material |
| 20~~205A | I1 massimo 45A (110V)I1 eff 34,8A (110V)I1 max 34A (220V)I1 eff 26,3A (220V) | 110V o 220V | 20%@205A | 16/01~31/061.6~5.0mm | E6010 E6011E6013 E7014E7018Sacciaio inossidabile |
DUTY CYCLE
The rated duty cycle refers to the amount of welding that can be done within an amount of time. The TIG/MMA-205 has a duty cycle of 60% at 195A. It is easiest to look at your welding time in blocks of 10 minutes and the duty cycle being a percentage of that 10 minutes. If welding at 195A with a 60% duty cycle, within a 10 minute block of time you can weld for 6 minutes with 4 minutes of cooling for the welder. If the duty cycle is exceeded, the welder will automatically shut off, however the fan will continue running to cool the overheated components. When a safe temperature has been reached, the welder will automatically switch the welder output back on. To increase the duty cycle you can turn down the amperage output control.
READ AND UNDERSTAND ALL INSTRUCTIONS AND PRECAUTIONS BEFORE PROCEEDING.
This unit emits a powerful high voltage and extreme heat which can cause severe burns, dismemberment, electrical shock and death. VEVORE shall not be held liable for consequences due to deliberate or unintentional misuse of this product.
SAFETY INFORMATION
The following explanations are displayed in this manual, on the labeling, and on all other information provided with this product:
DANGER
DANGER indicates a hazardous situation which, if not avoided, will result in death or serious injury.
WARNING
WARNING indicates a hazardous situation which, if not avoided, could result in death or serious injury.
CAUTION
CAUTION used with the safety alert symbol, indicates a hazardous situation which, if not avoided, could result in minor or moderate injury.
NOTICE
NOTICE is used to address practices not related to personal injury.

LEGGI LE ISTRUZIONI
natural_image
Exterior view of a black and orange welding torch device with coiled black cables and clamp (no visible text or symbols)natural_image
Exterior view of a welding torch device with black and orange cables, no visible text or symbolsPREPARING TO "STICK" WELDING
- Plug the power cord into a properly grounded, 1Phase 110/220 Volt AC, 50/60Hz, 50A circuit breaker.
- Make sure the electrode or "Stick" is not making contact with the grounded workpiece.
- Switch the Power Switch to "ON".
DANGER
ELECTRIC SHOCK CAN CAUSE INJURY OR DEATH!
The electrode and work (or ground) circuits are electrically "hot" when the welder is on. Do not allow these "hot" parts to come in contact with your bare skin or wet clothing. Always wear dry, protective clothing and leather welding gloves and insulated footwear.
WARNING
ARC RAYS CAN BURN!
Arc rays produce intense ultraviolet radiation which can burn exposed skin and cause eye damage. Use a shield with the proper filter (a minimum of #11) to protect your eyes from sparks and the rays of the arc when welding or when observing open arc welding (see ANSI Z49.1 and Z87.1 for safety standards).
DANGER
WELDING SPARKS CAN CAUSE FIRE OR EXPLOSION!
Electric welding produces sparks which can be discharged considerable distances at high velocity igniting flammable or exploding vapors and materials. Remove all flammable items within 35 feet of the welding area. Always keep a fire extinguisher nearby while welding.
WARNING
FUMES AND WELDING GASES CAN BE A HEALTH HAZARD!
Fumes and gasses released during welding are hazardous. Do not breathe fumes that are produced by the welding operation. Wear an OSHAapproved respirator when welding. Always work in a properly ventilated area.
CAUTION
HOT METAL AND TOOLS WILL BURN!
Electric welding heats metal and tools to temperatures that will cause severe burns! Use protective, heat resistant gloves and clothing.
- While wearing a properly functioning Auto Darkening Welding Helmet, lightlydrag the tip of the Welding Rod along the workpiece surface to start an arc.
- Feed the Welding Rod into the workpiece joint at a 15° angle.
- Lift rod from workpiece when weld bead is completed.
- Turn off Welder power switch.
- Set the Electrode or "Stick" Holder on a safe, non-flammable, surface.
TROUBLESHOOTING
| PROBLEM | CAUSE | CORRECTION |
| Contamination in weld bead | Contaminated Electrode Rod | Make sure that Electrodes are clean and dry before use. |
| Contaminated Base Metal | Clean base metal of any oil, debris, coatings, or moisture. If base metal is cold rolled steel make sure to remove any mill scale. | |
| Poor Weld Appearance | Incorrect positioning | The angle of the electrode should be at 45° and drug away from the weld arc. Failing to do so may cause poor weld appearance. |
| Weld Bead is Cracking | Too much heat in material | Reduce heat & allow more time between passes. |
| Base Metal is absorbing too much heat | Preheat base metal (consult welding codes for requirements) | |
| Incorrect Filler Wire | Use correct filler wire type & diameter for the joint being welded. | |
| Material is Warping | Insufficient Clamping | Clamp work piece tightly & weld while clA are in place. |
| Insufficient Tack Welds | Add more tack welds until rigidity and stiffness is developed. | |
| Too Much Heat in Material | To reduce heat it is best to spread the welding out around the area. This can be done by using stitch welding techniques, alternating sides, and/or taking your time and allowing the pieces to cool between passes. | |
| Porosity in weld bead | Contaminated Electrode Rod | Make sure that Electrodes are clean and dry before use. |
| Contaminated base metal | Clean base metal making sure to remove any oil, debris, coatings, or moisture. | |
| Difficulty Starting Arc | Incomplete Circuit | Check Ground connection. Make sure that the ground is on a freshly cleaned surface and close to the welding area. It is suggested to weld toward the ground connection |
| Amperage Too Low | Based on the material welding & size/material of the electrode, pick an appropriate amperage to perform the desired weld. | |
| Contaminated Base Metal | Clean base metal of any oil, debris, coatings, or moisture. If base metal is cold rolled steel make sure to remove any mill scale. | |
| Arc Wander | Electrode too far from welding surface | Move electrode so that it is contacting the weld puddle and feed rod into the puddle as needed. |
| Difficulty Holding Arc | Amperage Too Low | Based on the material welding and size/material of the electrode, pick an appropriate amperage to perform the desired weld. |
| Electrode too far from welding surface | Move electrode so that it is contacting the weld puddle and feed rod into the puddle as needed. | |
| Incomplete Circuit | Check Ground connection. Make sure that the ground is on a freshly cleaned surface and close to the welding area. It is suggested to weld toward the ground connection. | |
| Contaminated Electrode Rod | Make sure that Electrodes are clean and dry before use. | |
| Contaminated Base Metal | Clean base metal of any oil, debris, coatings, or moisture. |
WIRING DIAGRAM

Produttore: Zhejiang Xingyi Ventilator Electrical Appliance Co., Ltd.
Indirizzo: Danya Industrial Park, Zeguo Town, WENLING Zhejiang 317523 Importato in AUS: SIHAO PTY LTD. 1 ROKEVA STREETEASTWOOD NSW2122 Australia Importato
negli USA: Sanven Technology Ltd. Suite 250, 9166 Anaheim Place, Rancho Cucamonga, CA 91730
YH CONSULTING LIMITED. C/OYH Consulting Limited Ufficio 147, Centurion House, London Road, Staines-upon-Thames, Surrey, TW18 4AX
elettronica www.vevor.com/support
VEVOR®
TOUGH TOOLS, HALF PRICE
natural_image
Exterior view of a TIG-205 welding torch kit with attached clamp and cable (no visible text or symbols)The TIG/MMA-205 provides a convenient method of performing "stick" welding carbon steel. Inverter technology provides the capability of welding thin or heavy gauge steel with precision and ease. When adding the optional lift TIG torch (not included), gas regulator, and a cylinder of shielding gas, the TIG/MMA-205 becomes a TIG welder.
SPECIFICATIONS
| OutputCurrent Range: | Input Current | Input Voltage | RatedDuty Cycle | Rod Diameter | Rod Material |
| 20~~205A | I1 máx. 45 A (110 V)I1 ef 34,8 A (110 V)I1 máx. 34 A (220 V)I1 ef 26,3 A (220 V) | 110V o 220V | 20%@205A | 16/1 ~ 31/61,6 ~ 5,0 mm | E6010 E6011E6013 E7014E7018Sacero inoxidable |
DUTY CYCLE
The rated duty cycle refers to the amount of welding that can be done within an amount of time. The TIG/MMA-205 has a duty cycle of 60% at 195A. It is easiest to look at your welding time in blocks of 10 minutes and the duty cycle being a percentage of that 10 minutes. If welding at 195A with a 60% duty cycle, within a 10 minute block of time you can weld for 6 minutes with 4 minutes of cooling for the welder. If the duty cycle is exceeded, the welder will automatically shut off, however the fan will continue running to cool the overheated components. When a safe temperature has been reached, the welder will automatically switch the welder output back on. To increase the duty cycle you can turn down the amperage output control.
READ AND UNDERSTAND ALL INSTRUCTIONS AND PRECAUTIONS BEFORE PROCEEDING.
This unit emits a powerful high voltage and extreme heat which can cause severe burns, dismemberment, electrical shock and death. VEVOR shall not be held liable for consequences due to deliberate or unintentional misuse of this product.
SAFETY INFORMATION
The following explanations are displayed in this manual, on the labeling, and on all other information provided with this product:
DANGER
DANGER indicates a hazardous situation which, if not avoided, will result in death or serious injury.
WARNING
WARNING indicates a hazardous situation which, if not avoided, could result in death or serious injury.
CAUTION
CAUTION used with the safety alert symbol, indicates a hazardous situation which, if not avoided, could result in minor or moderate injury.
NOTICE
NOTICE is used to address practices not related to personal injury.


LEER INSTRUCCIONES
natural_image
Exterior view of a black and white industrial welding torch (T30-205) with coiled black cables and clamp, placed on a concrete surface (no text or symbols visible)natural_image
Exterior view of a welding torch device with black and orange cables, no visible text or symbols on the main subject.PREPARING TO "STICK" WELDING
- Plug the power cord into a properly grounded, 1Phase 110/220 Volt AC, 50/60Hz, 50A circuit breaker.
- Make sure the electrode or "Stick" is not making contact with the grounded workpiece.
- Switch the Power Switch to "ON".
DANGER
ELECTRIC SHOCK CAN CAUSE INJURY OR DEATH!
The electrode and work (or ground) circuits are electrically "hot" when the welder is on. Do not allow these "hot" parts to come in contact with your bare skin or wet clothing. Always wear dry, protective clothing and leather welding gloves and insulated footwear.
WARNING
ARC RAYS CAN BURN!
Arc rays produce intense ultraviolet radiation which can burn exposed skin and cause eye damage. Use a shield with the proper filter (a minimum of #11) to protect your eyes from sparks and the rays of the arc when welding or when observing open arc welding (see ANSI Z49.1 and Z87.1 for safety standards).
DANGER
WELDING SPARKS CAN CAUSE FIRE OR EXPLOSION!
Electric welding produces sparks which can be discharged considerable distances at high velocity igniting flammable or exploding vapors and materials. Remove all flammable items within 35 feet of the welding area. Always keep a fire extinguisher nearby while welding.
WARNING
FUMES AND WELDING GASES CAN BE A HEALTH HAZARD!
Fumes and gasses released during welding are hazardous. Do not breathe fumes that are produced by the welding operation. Wear an OSHAapproved respirator when welding. Always work in a properly ventilated area.
CAUTION
HOT METAL AND TOOLS WILL BURN!
Electric welding heats metal and tools to temperatures that will cause severe burns! Use protective, heat resistant gloves and clothing.
- While wearing a properly functioning Auto Darkening Welding Helmet, lightlydrag the tip of the Welding Rod along the workpiece surface to start an arc.
- Feed the Welding Rod into the workpiece joint at a 15° angle.
- Lift rod from workpiece when weld bead is completed.
- Turn off Welder power switch.
- Set the Electrode or "Stick" Holder on a safe, non-flammable, surface.
TROUBLESHOOTING
| PROBLEM | CAUSE | CORRECTION |
| Contamination in weld bead | Contaminated Electrode Rod | Make sure that Electrodes are clean and dry before use. |
| Contaminated Base Metal | Clean base metal of any oil, debris, coatings, or moisture. If base metal is cold rolled steel make sure to remove any mill scale. | |
| Poor Weld Appearance | Incorrect positioning | The angle of the electrode should be at 45° and drug away from the weld arc. Failing to do so may cause poor weld appearance. |
| Weld Bead is Cracking | Too much heat in material | Reduce heat & allow more time between passes. |
| Base Metal is absorbing too much heat | Preheat base metal (consult welding codes for requirements) | |
| Incorrect Filler Wire | Use correct filler wire type & diameter for the joint being welded. | |
| Material is Warping | Insufficient Clamping | Clamp work piece tightly & weld while clA are in place. |
| Insufficient Tack Welds | Add more tack welds until rigidity and stiffness is developed. | |
| Too Much Heat in Material | To reduce heat it is best to spread the welding out around the area. This can be done by using stitch welding techniques, alternating sides, and/or taking your time and allowing the pieces to cool between passes. | |
| Porosity in weld bead | Contaminated Electrode Rod | Make sure that Electrodes are clean and dry before use. |
| Contaminated base metal | Clean base metal making sure to remove any oil, debris, coatings, or moisture. | |
| Difficulty Starting Arc | Incomplete Circuit | Check Ground connection. Make sure that the ground is on a freshly cleaned surface and close to the welding area. It is suggested to weld toward the ground connection |
| Amperage Too Low | Based on the material welding & size/material of the electrode, pick an appropriate amperage to perform the desired weld. | |
| Contaminated Base Metal | Clean base metal of any oil, debris, coatings, or moisture. If base metal is cold rolled steel make sure to remove any mill scale. | |
| Arc Wander | Electrode too far from welding surface | Move electrode so that it is contacting the weld puddle and feed rod into the puddle as needed. |
| Difficulty Holding Arc | Amperage Too Low | Based on the material welding and size/material of the electrode, pick an appropriate amperage to perform the desired weld. |
| Electrode too far from welding surface | Move electrode so that it is contacting the weld puddle and feed rod into the puddle as needed. | |
| Incomplete Circuit | Check Ground connection. Make sure that the ground is on a freshly cleaned surface and close to the welding area. It is suggested to weld toward the ground connection. | |
| Contaminated Electrode Rod | Make sure that Electrodes are clean and dry before use. | |
| Contaminated Base Metal | Clean base metal of any oil, debris, coatings, or moisture. |
WIRING DIAGRAM

Fabricante: Zhejiang Xingyi Ventilator Electrical Appliance Co., Ltd.
Dirección: Danya Industrial Park, Zeguo Town, WENLING Zhejiang 317523 Importado a Australia: SIHAO PTY LTD. 1 ROKEVA STREET EASTWOOD NSW2122 Australia Importado a
los EE. UU.: Sanven Technology Ltd. Suite 250, 9166 Anaheim Place, Rancho Cucamonga, CA 91730
YH CONSULTING LIMITED. C/OYH Consulting Limited
Oficina 147, Centurion House, London Road,
Staines-upon-Thames, Surrey, TW18 4AX
| REPRESENTANTE CE |
E-CrossStu GmbH
Mainzer Landstr.69,
natural_image
Exterior view of a TIG-205 welding torch kit with attached clamp and cable (no visible text or symbols)Machine Translated by Google
The TIG/MMA-205 provides a convenient method of performing "stick" welding carbon steel. Inverter technology provides the capability of welding thin or heavy gauge steel with precision and ease. When adding the optional lift TIG torch (not included), gas regulator, and a cylinder of shielding gas, the TIG/MMA-205 becomes a TIG welder.
SPECIFICATIONS
| OutputCurrent Range: | Input Current | Input Voltage | RatedDuty Cycle | Rod Diameter | Rod Material |
| 20~~205A | I1 maks. 45A (110V)I1 skuteczność 34,8A (110V)I1 maks. 34A (220V)I1 skuteczne 26,3A (220V) | 110V lub 220V | 20%@205A | 1/16~6/311,6~5,0 mm | E6010 E6011E6013 E7014E7018SStal nierdzewna |
DUTY CYCLE
The rated duty cycle refers to the amount of welding that can be done within an amount of time. The TIG/MMA-205 has a duty cycle of 60% at 195A. It is easiest to look at your welding time in blocks of 10 minutes and the duty cycle being a percentage of that 10 minutes. If welding at 195A with a 60% duty cycle, within a 10 minute block of time you can weld for 6 minutes with 4 minutes of cooling for the welder. If the duty cycle is exceeded, the welder will automatically shut off, however the fan will continue running to cool the overheated components. When a safe temperature has been reached, the welder will automatically switch the welder output back on. To increase the duty cycle you can turn down the amperage output control.
READ AND UNDERSTAND ALL INSTRUCTIONS AND PRECAUTIONS BEFORE PROCEEDING.
This unit emits a powerful high voltage and extreme heat which can cause severe burns, dismemberment, electrical shock and death. VEVOR shall not be held liable for consequences due to deliberate or unintentional misuse of this product.
SAFETY INFORMATION
The following explanations are displayed in this manual, on the labeling, and on all other information provided with this product:
DANGER
DANGER indicates a hazardous situation which, if not avoided, will result in death or serious injury.
WARNING
WARNING indicates a hazardous situation which, if not avoided, could result in death or serious injury.
CAUTION
CAUTION used with the safety alert symbol, indicates a hazardous situation which, if not avoided, could result in minor or moderate injury.
NOTICE
NOTICE is used to address practices not related to personal injury.


PRZECZYTAJ INSTRUKCJE

natural_image
Exterior view of a black T10-205 electric welding torch with coiled black cables (no visible text or symbols)natural_image
Exterior view of a welding torch device with black and orange cables, no visible text or symbolsPREPARING TO "STICK" WELDING
- Plug the power cord into a properly grounded, 1Phase 110/220 Volt AC, 50/60Hz, 50A circuit breaker.
- Make sure the electrode or "Stick" is not making contact with the grounded workpiece.
- Switch the Power Switch to "ON".
DANGER
ELECTRIC SHOCK CAN CAUSE INJURY OR DEATH!
The electrode and work (or ground) circuits are electrically "hot" when the welder is on. Do not allow these "hot" parts to come in contact with your bare skin or wet clothing. Always wear dry, protective clothing and leather welding gloves and insulated footwear.
WARNING
ARC RAYS CAN BURN!
Arc rays produce intense ultraviolet radiation which can burn exposed skin and cause eye damage. Use a shield with the proper filter (a minimum of #11) to protect your eyes from sparks and the rays of the arc when welding or when observing open arc welding (see ANSI Z49.1 and Z87.1 for safety standards).
DANGER
WELDING SPARKS CAN CAUSE FIRE OR EXPLOSION!
Electric welding produces sparks which can be discharged considerable distances at high velocity igniting flammable or exploding vapors and materials. Remove all flammable items within 35 feet of the welding area. Always keep a fire extinguisher nearby while welding.
WARNING
FUMES AND WELDING GASES CAN BE A HEALTH HAZARD!
Fumes and gasses released during welding are hazardous. Do not breathe fumes that are produced by the welding operation. Wear an OSHAapproved respirator when welding. Always work in a properly ventilated area.
CAUTION
HOT METAL AND TOOLS WILL BURN!
Electric welding heats metal and tools to temperatures that will cause severe burns! Use protective, heat resistant gloves and clothing.
- While wearing a properly functioning Auto Darkening Welding Helmet, lightlydrag the tip of the Welding Rod along the workpiece surface to start an arc.
- Feed the Welding Rod into the workpiece joint at a 15° angle.
- Lift rod from workpiece when weld bead is completed.
- Turn off Welder power switch.
- Set the Electrode or "Stick" Holder on a safe, non-flammable, surface.
TROUBLESHOOTING
| PROBLEM | CAUSE | CORRECTION |
| Contamination in weld bead | Contaminated Electrode Rod | Make sure that Electrodes are clean and dry before use. |
| Contaminated Base Metal | Clean base metal of any oil, debris, coatings, or moisture. If base metal is cold rolled steel make sure to remove any mill scale. | |
| Poor Weld Appearance | Incorrect positioning | The angle of the electrode should be at 45° and drug away from the weld arc. Failing to do so may cause poor weld appearance. |
| Weld Bead is Cracking | Too much heat in material | Reduce heat & allow more time between passes. |
| Base Metal is absorbing too much heat | Preheat base metal (consult welding codes for requirements) | |
| Incorrect Filler Wire | Use correct filler wire type & diameter for the joint being welded. | |
| Material is Warping | Insufficient Clamping | Clamp work piece tightly & weld while clA are in place. |
| Insufficient Tack Welds | Add more tack welds until rigidity and stiffness is developed. | |
| Too Much Heat in Material | To reduce heat it is best to spread the welding out around the area. This can be done by using stitch welding techniques, alternating sides, and/or taking your time and allowing the pieces to cool between passes. | |
| Porosity in weld bead | Contaminated Electrode Rod | Make sure that Electrodes are clean and dry before use. |
| Contaminated base metal | Clean base metal making sure to remove any oil, debris, coatings, or moisture. | |
| Difficulty Starting Arc | Incomplete Circuit | Check Ground connection. Make sure that the ground is on a freshly cleaned surface and close to the welding area. It is suggested to weld toward the ground connection |
| Amperage Too Low | Based on the material welding & size/material of the electrode, pick an appropriate amperage to perform the desired weld. | |
| Contaminated Base Metal | Clean base metal of any oil, debris, coatings, or moisture. If base metal is cold rolled steel make sure to remove any mill scale. | |
| Arc Wander | Electrode too far from welding surface | Move electrode so that it is contacting the weld puddle and feed rod into the puddle as needed. |
| Difficulty Holding Arc | Amperage Too Low | Based on the material welding and size/material of the electrode, pick an appropriate amperage to perform the desired weld. |
| Electrode too far from welding surface | Move electrode so that it is contacting the weld puddle and feed rod into the puddle as needed. | |
| Incomplete Circuit | Check Ground connection. Make sure that the ground is on a freshly cleaned surface and close to the welding area. It is suggested to weld toward the ground connection. | |
| Contaminated Electrode Rod | Make sure that Electrodes are clean and dry before use. | |
| Contaminated Base Metal | Clean base metal of any oil, debris, coatings, or moisture. |
WIRING DIAGRAM

Producent: Zhejiang Xingyi Ventilator Electrical Appliance Co., Ltd.
Adres: Danya Industrial Park, Zeguo Town, WENLING Zhejiang 317523 Importowane doAUS: SIHAO PTY LTD. 1 ROKEVA STREETEASTWOOD NSW2122Australia Importowane do USA:
Sanven Technology Ltd. Suite 250, 9166 Anaheim Place, Rancho Cucamonga, CA 91730
| REP WIELKIEJ BRYTANII |
YH CONSULTING LIMITED. Biuro C/OYH Consulting
Limited 147, Centurion House, London Road, Staines-upon-Thames, Surrey, TW18 4AX
| Przedstawiciel UE |
E-CrossStu GmbH
Mainzer Landstr.69,
60329 Frankfurt nad Menem.
VEVOR®
TOUGH TOOLS, HALF PRICE
natural_image
Exterior view of a black TIG-205 welding torch kit with orange clamps and wiring (no readable text or symbols)HULP NODIG? NEEM CONTACT MET ONS OP!
The TIG/MMA-205 provides a convenient method of performing "stick" welding carbon steel. Inverter technology provides the capability of welding thin or heavy gauge steel with precision and ease. When adding the optional lift TIG torch (not included), gas regulator, and a cylinder of shielding gas, the TIG/MMA-205 becomes a TIG welder.
SPECIFICATIONS
| OutputCurrent Range: | Input Current | Input Voltage | RatedDuty Cycle | Rod Diameter | Rod Material |
| 20~~205A | I1 maximaal 45A (110V)I1 effectief 34,8A (110V)I1 maximaal 34A (220V)I1 effectief 26,3A (220V) | 110V of 220V | 20%@205A | 1/16~6/311,6~5,0 mm | E6010 E6011E6013 E7014E7018Sroestvrij staal |
DUTY CYCLE
The rated duty cycle refers to the amount of welding that can be done within an amount of time. The TIG/MMA-205 has a duty cycle of 60% at 195A. It is easiest to look at your welding time in blocks of 10 minutes and the duty cycle being a percentage of that 10 minutes. If welding at 195A with a 60% duty cycle, within a 10 minute block of time you can weld for 6 minutes with 4 minutes of cooling for the welder. If the duty cycle is exceeded, the welder will automatically shut off, however the fan will continue running to cool the overheated components. When a safe temperature has been reached, the welder will automatically switch the welder output back on. To increase the duty cycle you can turn down the amperage output control.
READ AND UNDERSTAND ALL INSTRUCTIONS AND PRECAUTIONS BEFORE PROCEEDING.
This unit emits a powerful high voltage and extreme heat which can cause severe burns, dismemberment, electrical shock and death. VEVOR shall not be held liable for consequences due to deliberate or unintentional misuse of this product.
SAFETY INFORMATION
The following explanations are displayed in this manual, on the labeling, and on all other information provided with this product:
DANGER
DANGER indicates a hazardous situation which, if not avoided, will result in death or serious injury.
WARNING
WARNING indicates a hazardous situation which, if not avoided, could result in death or serious injury.
CAUTION
CAUTION used with the safety alert symbol, indicates a hazardous situation which, if not avoided, could result in minor or moderate injury.
NOTICE
NOTICE is used to address practices not related to personal injury.

A LEES INSTRUCTIES
natural_image
Exterior view of a black T10-205 electric welding torch with coiled black cables and clamp (no visible text or symbols)natural_image
Exterior view of a welding torch device with black and orange cables, no visible text or symbolsPREPARING TO "STICK" WELDING
- Plug the power cord into a properly grounded, 1Phase 110/220 Volt AC, 50/60Hz, 50A circuit breaker.
- Make sure the electrode or "Stick" is not making contact with the grounded workpiece.
- Switch the Power Switch to "ON".
DANGER
ELECTRIC SHOCK CAN CAUSE INJURY OR DEATH!
The electrode and work (or ground) circuits are electrically "hot" when the welder is on. Do not allow these "hot" parts to come in contact with your bare skin or wet clothing. Always wear dry, protective clothing and leather welding gloves and insulated footwear.
WARNING
ARC RAYS CAN BURN!
Arc rays produce intense ultraviolet radiation which can burn exposed skin and cause eye damage. Use a shield with the proper filter (a minimum of #11) to protect your eyes from sparks and the rays of the arc when welding or when observing open arc welding (see ANSI Z49.1 and Z87.1 for safety standards).
DANGER
WELDING SPARKS CAN CAUSE FIRE OR EXPLOSION!
Electric welding produces sparks which can be discharged considerable distances at high velocity igniting flammable or exploding vapors and materials. Remove all flammable items within 35 feet of the welding area. Always keep a fire extinguisher nearby while welding.
WARNING
FUMES AND WELDING GASES CAN BE A HEALTH HAZARD!
Fumes and gasses released during welding are hazardous. Do not breathe fumes that are produced by the welding operation. Wear an OSHAapproved respirator when welding. Always work in a properly ventilated area.
CAUTION
HOT METAL AND TOOLS WILL BURN!
Electric welding heats metal and tools to temperatures that will cause severe burns! Use protective, heat resistant gloves and clothing.
- While wearing a properly functioning Auto Darkening Welding Helmet, lightlydrag the tip of the Welding Rod along the workpiece surface to start an arc.
- Feed the Welding Rod into the workpiece joint at a 15° angle.
- Lift rod from workpiece when weld bead is completed.
- Turn off Welder power switch.
- Set the Electrode or "Stick" Holder on a safe, non-flammable, surface.
TROUBLESHOOTING
| PROBLEM | CAUSE | CORRECTION |
| Contamination in weld bead | Contaminated Electrode Rod | Make sure that Electrodes are clean and dry before use. |
| Contaminated Base Metal | Clean base metal of any oil, debris, coatings, or moisture. If base metal is cold rolled steel make sure to remove any mill scale. | |
| Poor Weld Appearance | Incorrect positioning | The angle of the electrode should be at 45° and drug away from the weld arc. Failing to do so may cause poor weld appearance. |
| Weld Bead is Cracking | Too much heat in material | Reduce heat & allow more time between passes. |
| Base Metal is absorbing too much heat | Preheat base metal (consult welding codes for requirements) | |
| Incorrect Filler Wire | Use correct filler wire type & diameter for the joint being welded. | |
| Material is Warping | Insufficient Clamping | Clamp work piece tightly & weld while clA are in place. |
| Insufficient Tack Welds | Add more tack welds until rigidity and stiffness is developed. | |
| Too Much Heat in Material | To reduce heat it is best to spread the welding out around the area. This can be done by using stitch welding techniques, alternating sides, and/or taking your time and allowing the pieces to cool between passes. | |
| Porosity in weld bead | Contaminated Electrode Rod | Make sure that Electrodes are clean and dry before use. |
| Contaminated base metal | Clean base metal making sure to remove any oil, debris, coatings, or moisture. | |
| Difficulty Starting Arc | Incomplete Circuit | Check Ground connection. Make sure that the ground is on a freshly cleaned surface and close to the welding area. It is suggested to weld toward the ground connection |
| Amperage Too Low | Based on the material welding & size/material of the electrode, pick an appropriate amperage to perform the desired weld. | |
| Contaminated Base Metal | Clean base metal of any oil, debris, coatings, or moisture. If base metal is cold rolled steel make sure to remove any mill scale. | |
| Arc Wander | Electrode too far from welding surface | Move electrode so that it is contacting the weld puddle and feed rod into the puddle as needed. |
| Difficulty Holding Arc | Amperage Too Low | Based on the material welding and size/material of the electrode, pick an appropriate amperage to perform the desired weld. |
| Electrode too far from welding surface | Move electrode so that it is contacting the weld puddle and feed rod into the puddle as needed. | |
| Incomplete Circuit | Check Ground connection. Make sure that the ground is on a freshly cleaned surface and close to the welding area. It is suggested to weld toward the ground connection. | |
| Contaminated Electrode Rod | Make sure that Electrodes are clean and dry before use. | |
| Contaminated Base Metal | Clean base metal of any oil, debris, coatings, or moisture. |
WIRING DIAGRAM

Fabrikant: Zhejiang Xingyi Ventilator Electrical Appliance Co., Ltd.
Adres: Danya Industrial Park, Zeguo Town, WENLING Zhejiang 317523 Geïmporteerd naar AU: SIHAO PTY LTD. 1 ROKEVA STREETEASTWOOD NSW2122
YH CONSULTING LIMITED. C/OYH Consulting Limited
Kantoor 147, Centurion House, London Road,
Staines-upon-Thames, Surrey, TW18 4AX
E-CrossStu GmbH
Mainzer Landstr.69,
60329 Frankfurt am Main.
VEVOR®
TOUGH TOOLS, HALF PRICE
www.vevor.com/support
VEVOR®
TOUGH TOOLS, HALF PRICE
www.vevor.com/support
TIG svetsare
Modell: TIG/MMA-205
natural_image
Exterior view of a black TIG-205 welding torch kit with orange clamps and wiring (no readable text or symbols)The TIG/MMA-205 provides a convenient method of performing "stick" welding carbon steel. Inverter technology provides the capability of welding thin or heavy gauge steel with precision and ease. When adding the optional lift TIG torch (not included), gas regulator, and a cylinder of shielding gas, the TIG/MMA-205 becomes a TIG welder.
SPECIFICATIONS
| OutputCurrent Range: | Input Current | Input Voltage | RatedDuty Cycle | Rod Diameter | Rod Material |
| 20~~205A | I1 max 45A (110V)I1 eff 34,8A (110V)I1 max 34A (220V)I1 eff 26,3A (220V) | 110V eller 220V | 20%@205A | 1/16~6/311,6~5,0 mm | E6010 E6011E6013 E7014E7018Srostfritt stål |
DUTY CYCLE
The rated duty cycle refers to the amount of welding that can be done within an amount of time. The TIG/MMA-205 has a duty cycle of 60% at 195A. It is easiest to look at your welding time in blocks of 10 minutes and the duty cycle being a percentage of that 10 minutes. If welding at 195A with a 60% duty cycle, within a 10 minute block of time you can weld for 6 minutes with 4 minutes of cooling for the welder. If the duty cycle is exceeded, the welder will automatically shut off, however the fan will continue running to cool the overheated components. When a safe temperature has been reached, the welder will automatically switch the welder output back on. To increase the duty cycle you can turn down the amperage output control.
READ AND UNDERSTAND ALL INSTRUCTIONS AND PRECAUTIONS BEFORE PROCEEDING.
This unit emits a powerful high voltage and extreme heat which can cause severe burns, dismemberment, electrical shock and death. VEVOR shall not be held liable for consequences due to deliberate or unintentional misuse of this product.
SAFETY INFORMATION
The following explanations are displayed in this manual, on the labeling, and on all other information provided with this product:
DANGER
DANGER indicates a hazardous situation which, if not avoided, will result in death or serious injury.
WARNING
WARNING indicates a hazardous situation which, if not avoided, could result in death or serious injury.
CAUTION
CAUTION used with the safety alert symbol, indicates a hazardous situation which, if not avoided, could result in minor or moderate injury.
NOTICE
NOTICE is used to address practices not related to personal injury.


LÄS INSTRUKTIONER
A:2T/4T Välj knapp B:DC/SPOT/PULSE Välj knapp
natural_image
Exterior view of a black T10-205 electric welding torch with coiled black cables and clamp (no visible text or symbols)natural_image
Exterior view of a welding torch device with black and orange cables, placed on a concrete floor (no visible text or symbols)PREPARING TO "STICK" WELDING
- Plug the power cord into a properly grounded, 1Phase 110/220 Volt AC, 50/60Hz, 50A circuit breaker.
- Make sure the electrode or "Stick" is not making contact with the grounded workpiece.
- Switch the Power Switch to "ON".
DANGER
ELECTRIC SHOCK CAN CAUSE INJURY OR DEATH!
The electrode and work (or ground) circuits are electrically "hot" when the welder is on. Do not allow these "hot" parts to come in contact with your bare skin or wet clothing. Always wear dry, protective clothing and leather welding gloves and insulated footwear.
WARNING
ARC RAYS CAN BURN!
Arc rays produce intense ultraviolet radiation which can burn exposed skin and cause eye damage. Use a shield with the proper filter (a minimum of #11) to protect your eyes from sparks and the rays of the arc when welding or when observing open arc welding (see ANSI Z49.1 and Z87.1 for safety standards).
DANGER
WELDING SPARKS CAN CAUSE FIRE OR EXPLOSION!
Electric welding produces sparks which can be discharged considerable distances at high velocity igniting flammable or exploding vapors and materials. Remove all flammable items within 35 feet of the welding area. Always keep a fire extinguisher nearby while welding.
WARNING
FUMES AND WELDING GASES CAN BE A HEALTH HAZARD!
Fumes and gasses released during welding are hazardous. Do not breathe fumes that are produced by the welding operation. Wear an OSHAapproved respirator when welding. Always work in a properly ventilated area.
CAUTION
HOT METAL AND TOOLS WILL BURN!
Electric welding heats metal and tools to temperatures that will cause severe burns! Use protective, heat resistant gloves and clothing.
- While wearing a properly functioning Auto Darkening Welding Helmet, lightlydrag the tip of the Welding Rod along the workpiece surface to start an arc.
- Feed the Welding Rod into the workpiece joint at a 15° angle.
- Lift rod from workpiece when weld bead is completed.
- Turn off Welder power switch.
- Set the Electrode or "Stick" Holder on a safe, non-flammable, surface.
TROUBLESHOOTING
| PROBLEM | CAUSE | CORRECTION |
| Contamination in weld bead | Contaminated Electrode Rod | Make sure that Electrodes are clean and dry before use. |
| Contaminated Base Metal | Clean base metal of any oil, debris, coatings, or moisture. If base metal is cold rolled steel make sure to remove any mill scale. | |
| Poor Weld Appearance | Incorrect positioning | The angle of the electrode should be at 45° and drug away from the weld arc. Failing to do so may cause poor weld appearance. |
| Weld Bead is Cracking | Too much heat in material | Reduce heat & allow more time between passes. |
| Base Metal is absorbing too much heat | Preheat base metal (consult welding codes for requirements) | |
| Incorrect Filler Wire | Use correct filler wire type & diameter for the joint being welded. | |
| Material is Warping | Insufficient Clamping | Clamp work piece tightly & weld while clA are in place. |
| Insufficient Tack Welds | Add more tack welds until rigidity and stiffness is developed. | |
| Too Much Heat in Material | To reduce heat it is best to spread the welding out around the area. This can be done by using stitch welding techniques, alternating sides, and/or taking your time and allowing the pieces to cool between passes. | |
| Porosity in weld bead | Contaminated Electrode Rod | Make sure that Electrodes are clean and dry before use. |
| Contaminated base metal | Clean base metal making sure to remove any oil, debris, coatings, or moisture. | |
| Difficulty Starting Arc | Incomplete Circuit | Check Ground connection. Make sure that the ground is on a freshly cleaned surface and close to the welding area. It is suggested to weld toward the ground connection |
| Amperage Too Low | Based on the material welding & size/material of the electrode, pick an appropriate amperage to perform the desired weld. | |
| Contaminated Base Metal | Clean base metal of any oil, debris, coatings, or moisture. If base metal is cold rolled steel make sure to remove any mill scale. | |
| Arc Wander | Electrode too far from welding surface | Move electrode so that it is contacting the weld puddle and feed rod into the puddle as needed. |
| Difficulty Holding Arc | Amperage Too Low | Based on the material welding and size/material of the electrode, pick an appropriate amperage to perform the desired weld. |
| Electrode too far from welding surface | Move electrode so that it is contacting the weld puddle and feed rod into the puddle as needed. | |
| Incomplete Circuit | Check Ground connection. Make sure that the ground is on a freshly cleaned surface and close to the welding area. It is suggested to weld toward the ground connection. | |
| Contaminated Electrode Rod | Make sure that Electrodes are clean and dry before use. | |
| Contaminated Base Metal | Clean base metal of any oil, debris, coatings, or moisture. |
WIRING DIAGRAM

Tillverkare: Zhejiang Xingyi Ventilator Electrical Appliance Co., Ltd.
Adress: Danya Industrial Park, Zeguo Town, WENLING Zhejiang 317523 Importerad till AUS:SIHAO PTY LTD. 1 ROKEVA STREETEASTWOOD NSW2122Australien Importerad till USA:
Sanven Technology Ltd. Suite 250, 9166 Anaheim Place, Rancho Cucamonga, CA 91730
| UK | REP |
YH CONSULTING LIMITED. C/OYH Consulting Limited Office 147, Centurion House, London Road, Staines-upon-Thames, Surrey, TW18 4AX
| EC | REP |
E-CrossStu GmbH
Mainzer Landstr.69,
60329 Frankfurt am Main.
VEVOR®
TOUGH TOOLS, HALF PRICE
www.vevor.com/support