CB-108A - Vacuum Cleaner Vevor - Free user manual and instructions
Find the device manual for free CB-108A Vevor in PDF.

| Product Type | Steam Cleaner |
| Brand | Vevor |
| Model | CB-108A |
| Rated voltage | 120 V ~ 60 Hz / 220-240 V ~ 50-60 Hz |
| Power | 1500 W (120 V) / 2000 W (220-240 V) |
| Water tank capacity | 2.5 L |
| Power cord length | 5 m |
| Boiler material | Super thick die-cast aluminum |
| Heating time | About 2 minutes |
| Safety | Automatic shut-off in case of water shortage, pressure relief valve, child lock |
| Functions | High temperature steam cleaning, adjustable steam flow, continuous steam lock |
| Included accessories | Flexible hose, extension tube, ironing brush, glass brush, large nozzle, hair brush (x2), straight nozzle, floor brush, carpet glide, round brushes (stainless steel and nylon), towel, funnel, measuring cup, squeegee, bag |
| Recommended use | Household, for floors, windows, air conditioners, ovens, etc. |
| Maintenance and cleaning | Drain water after each use, clean with a dry cloth, do not immerse |
| Warranty | Electronic certificate at www.vevor.com/support |
Frequently Asked Questions - CB-108A Vevor
User questions about CB-108A Vevor
0 question about this device. Answer the ones you know or ask your own.
Ask a new question about this device
Download the instructions for your Vacuum Cleaner in PDF format for free! Find your manual CB-108A - Vevor and take your electronic device back in hand. On this page are published all the documents necessary for the use of your device. CB-108A by Vevor.
USER MANUAL CB-108A Vevor
Support and E-Warranty Certificate https://www.vevor.com/support
STEAM CLEANER
USR MANUAL
CB-108A
We continue to be committed to provide you tools with competitive price. "Save Half", "Half Price" or any other similar expressions used by us only represents an estimate of savings you might benefit from buying certain tools with us compared to the major top brands and does not necessarily mean to co all categories of tools offered by us. You are kindly reminded to verify carefully when you are placing an order with us if you are actually Saving Half in comparison with the top major brands.
VEVOR®
TOUGH TOOLS, HALF PRICE
Steam Cleaner
CB-108A
natural_image
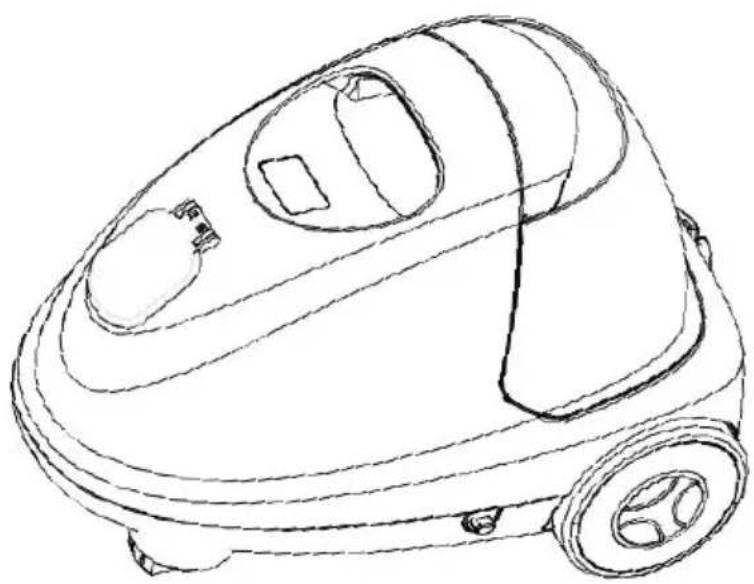
Line drawing of a vacuum cleaner with wheels and control panel (no text or symbols)NEED HELP? CONTACT US!
Have product questions? Need technical support? Please feel free to contact us:
Technical Support and E-Warranty Certificate
www.vevor.com/support
This is the original instruction, please read all manual instructions carefully before operating. VEVOR reserves a clear interpretation of o user manual. The appearance of the product shall be subject to the product you received. Please forgive us that we won't inform you ag there are any technology or software updates on our product.
 | Warning-To reduce the risk of injury, user must read instructions manual carefully. |
 | Compliance is a CE security certification. |
 | This product is subject to the provision of European Directive 2012/19/EC. The symbol showing a wheelie bin crossed through indicates that the product requires separate refuse collection in European Union. This applies to the product and all accessor marked with this symbol. Products marked as such may not discarded with normal domestic waste, but must be taken to collection point for recycling electrical and electronic devices |
Product Features
- Advantage
With Unique patented technology by using high temperature and steam pressure to clean floors, Windows, lampblack machines, air conditioners and microwave ovens. No chemical reagent, almost zero injuries of cleaning items.
- Safety
The high sensitivity of the temperature and pressure control system can provide 135^ C steam.
Automatic power off when water is used up.
With the function of the automatic pressure relief valve, if steam pres in the boiler is too high, it will be released directly.
- Durable
Super thick aluminum boiler with die-casting design can make quick heating up time and long life usage.
- Energy saving
Special heating pipe with the boiler integration design make it complete heating with high efficiency & energy conservation.
Safety Guards
The below notice is to prevent harm and damage to the user and c [Forbidden] & [Attention].
 Forbidden Forbidden | |
 Please do not use a we hand to pull out the plug Please do not use a we hand to pull out the plug | Please do not put heavy weight on power cord |
 Do not unplug the power plug if the power is on Do not unplug the power plug if the power is on | Do not touch steam with 20cm of gun |
 Do not open the pressur relief valve when using. Must it off and wait until cooling Do not open the pressur relief valve when using. Must it off and wait until cooling | Don't damage the power cord. Do not use broken pow cord or switch |
 Do not pour any other I except clean water Do not pour any other I except clean water | Please do not let childre play. |
 Do not put machine on smooth & heated surface Do not put machine on smooth & heated surface | Do not use water to rins put it in a damp place |
 Do not use when there no water. Red light will on Do not use when there no water. Red light will on | Do not dump when pow is on in case of burns |
 Attention Attention | |
 Turn off the power: Pov failure, machine failure Turn off the power: Pov failure, machine failure |  Please use the machine in ventilated room Please use the machine in ventilated room |
 This product is suitable family, do not use it for indus purposes This product is suitable family, do not use it for indus purposes |  please be sure to lock children's lock when stopped using please be sure to lock children's lock when stopped using |
 please check whether damaged before use or stoppe when finding abnormal please check whether damaged before use or stoppe when finding abnormal |  The steam will be ready after 1-2mins.Green light show on The steam will be ready after 1-2mins.Green light show on |
 There may some water i the steam for first usage. There may some water i the steam for first usage. |  Do not change, replace or remove any parts until the machin cool down Do not change, replace or remove any parts until the machin cool down |
 If temperature is lower th 0 °C, please do not clean wir If temperature is lower th 0 °C, please do not clean wir |  Do not spray the steam to glass in the same position for mo than 2 seconds Do not spray the steam to glass in the same position for mo than 2 seconds |
 Please make sure the pl on the socket on its Please make sure the pl on the socket on its |  When not in use or leave, off the power When not in use or leave, off the power |
 Any failure must send to professional service centre Any failure must send to professional service centre |  Please pour out the water when finished using every time Please pour out the water when finished using every time |
Unit and Accessory
| Unit x1 | 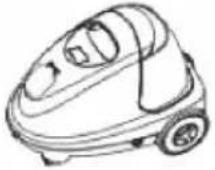 | Cord rewinder x1 | 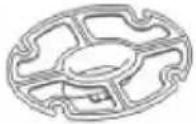 |
| Extension tube x2 | 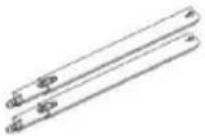 | Ironing brush x1 |  |
| Glass brush x1 | 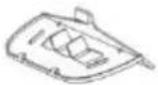 | Big nozzle x1 | 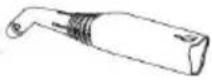 |
| Hair brushx2 | 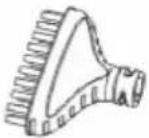 | Straight nozzle x1 | 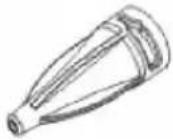 |
| Floor brush x1 | 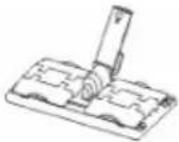 | Carpet glider x1 |  |
| Round brush×2 (Stainless) | 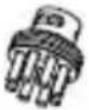 | Round brush×3 (Nylon) | 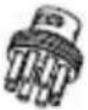 |
| Towel of floor brush x2 | 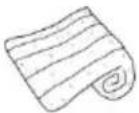 | Ironing towel x1 |  |
| Funnel x1 | 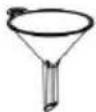 | Measuring cup×1 |  |
| Wiper x1 |  | Bagx1 |  |
Structure of Unit
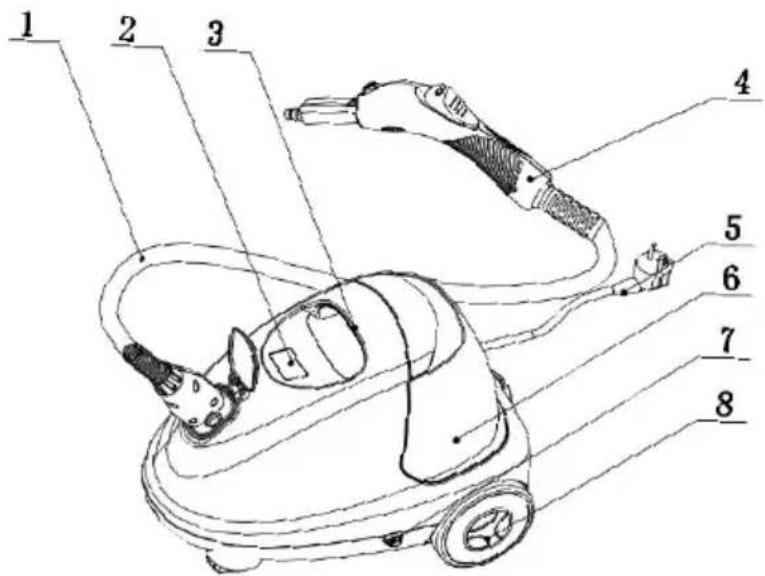
| No. | Name | Function |
| 1 | Soft pipe | Deliver the steam |
| 2 | Led light | Display the steam states |
| 3 | Handle of unit | Pick by hand |
| 4 | Steam gun | Control steam on/off |
| 5 | Power plug | Connect with electricity |
| 6 | Water tank | Storage of water |
| 7 | Power switch | Power on /off |
| 8 | Wheel | Easy for moving |
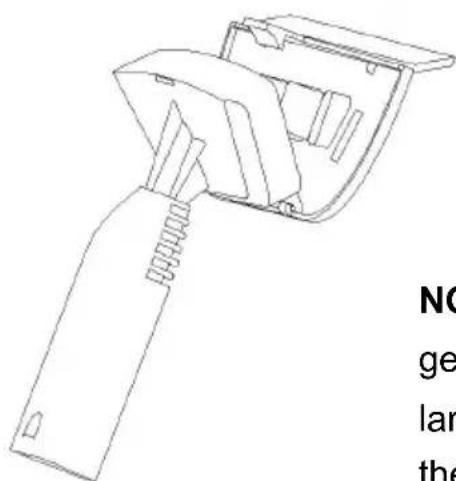
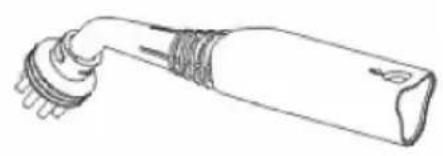
Structure of Steam Gun
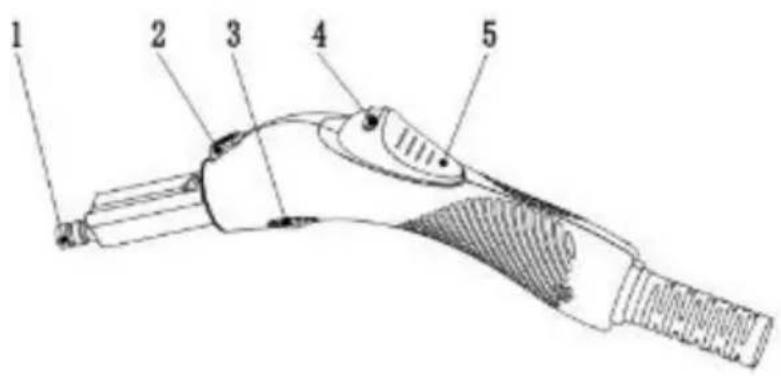
| No. | Name | Function |
| 1 | Steam nozzle | Output of steam |
| 2 | Accessory lock | Fixed when connected with accessoriesRemove the accessories when pressed down |
| 3 | Adjustable button | Adjustable the steam amount |
| 4 | Steam lock | Lock steam/ Auto steam |
| 5 | Steam trigger | Control the steam on/off. |
Operation Instruction
1. Fill the water
Please take out the water tank to fill water before using. Water can up to 2.5L.
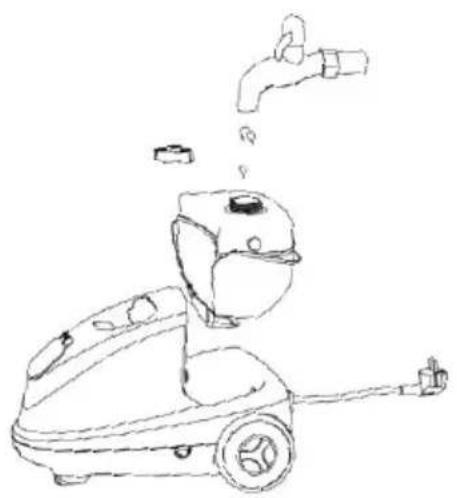
natural_image
Line drawing of a person using a cleaning robot with a faucet above (no text or symbols)Remark:
★ please make sure that no residual water in the water tank after every time. This can make sure all water in the boiler will be very

Do not inject any liquid except clean water
2. Power on
Put the plug into socket and open the power switch. If the power is red light will on.

Do not use a wet hand to touch the power

Do not use any power cord, power socket in broken status.
3. Operation
If a green light show on the first time means steam is ready.
Hold on to the steam gun by hand and move the steam trigger ahe Steam will come out directly.
If you need automatic steam without hand, just turn the steam lock to right side when in use.
There will be some water in the steam first. Do not use to clean ca ironing clothes etc. Suggest you can spray to some container. It will normal after 2-3 seconds.
Here is steam adjustable button in the gun. Please kindly adjust the amount accordingly to actually situation. For a long-time use, you can
the steam lock to the right side and then steam come out without the hand touch. For stopping, just turn the steam lock to the left side
Any temporary leave ( get a call), please stop the steam and turn the steam lock to the ri side, and than you can not trigger the steam anymore.
★ Please choose the appropriate accessories according to the actual situation. Details please refer to the accessories instructions.

If the user left for a long time, please shut off the power.
★There is a buzzing when short of water.
If you want to continue to use it , just add water in the tank direct
★Some noise is the sound of a working water pump.
4. Storage & Cleaning
Please turn the power off when finish using.
If the steam has not been fully released, please keep your thumb or steam button until no steam can be released.
★ If there is dirt on the surface of body, please use dry dishcloth water to wipe gently.

Do not use water to spray the machine.

Don't place it under damp which may cause short circuit.
You can install the cord rewinder on the back of unit and assemble power cord on it.
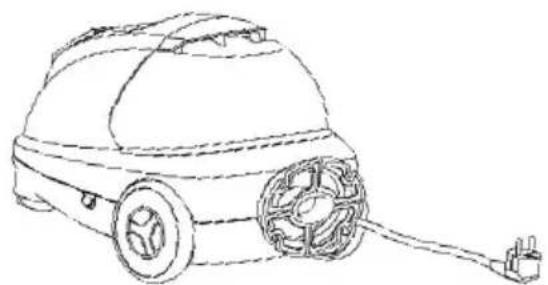
natural_image
Line drawing of a portable vacuum cleaner with attached power plug (no text or symbols)The steam gun can be put on the handle directly. After cleaning please keep it in a dark and dry place.
Instruction on Using Accessories
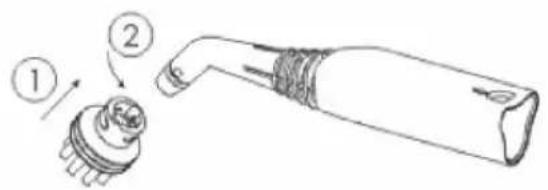
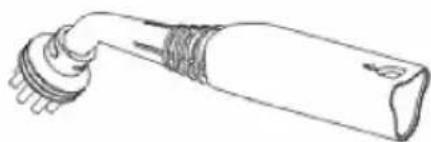
1. Extension tube
Mount the extension tube, use the steam cleaner to clean the floor, windows or inaccessible areas. Place the open end of tube on the s gun until the steam gun release button clicks in the place. Use one extension tube, as necessary. To remove the extension, press the rel e button and pull the tubes apart with a downward motion.
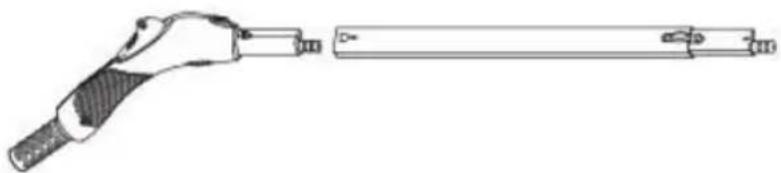
natural_image
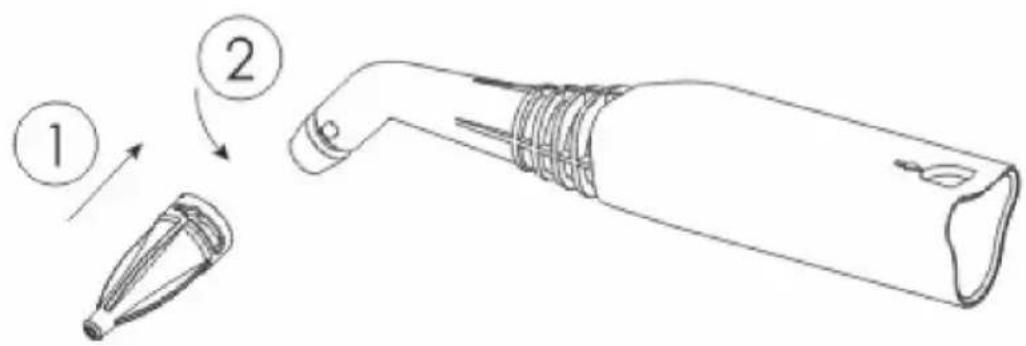
Line drawing of a welding torch and its extension (no text or symbols)2. Big nozzle
This nozzle makes it perform a deep cleaning and easily reach place as corners, junctions or bathrooms. Simply push the nozzle firmly and adjust the gun directly.
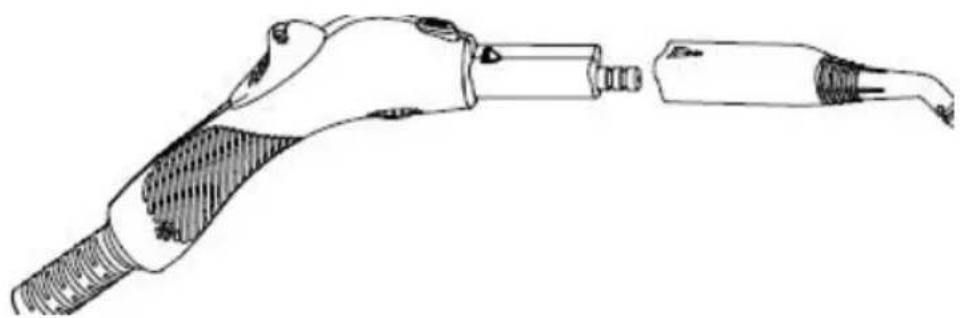
natural_image
Line drawing of a welding torch and its connector (no text or symbols)3. Round brush
Round nylon and metal brushes are inserted firmly into big nozzle. Y even eliminate stubborn dirt from blinds, radiators, etc. Use the small brush. The nylon brush is suitable for heavier stains on less sensitive materials such as stainless steel. To remove it, you just have to pus down and remove it directly.
natural_image
Line drawing of a cable or connector with threaded ends and a curved shaft (no text or symbols)4. Straight nozzle
The Straight nozzle is inserted firmly into big nozzle and focuses the flow. To remove it, you just have to push it down and remove it dire
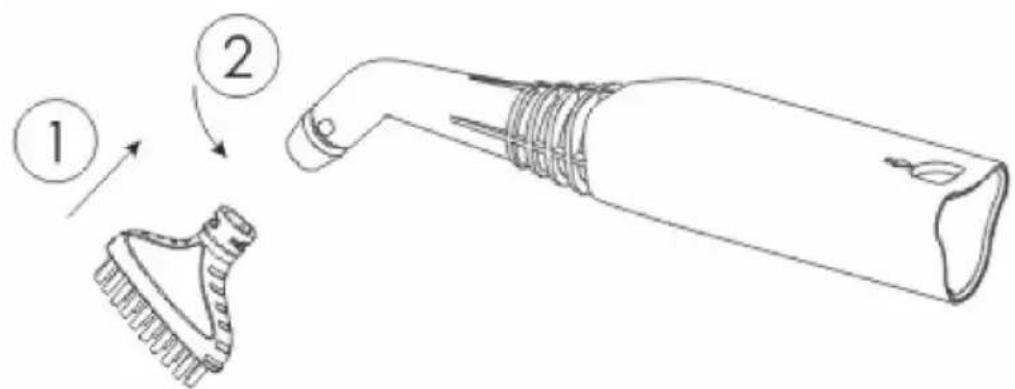
5. Hair brush
The Hair brush is inserted firmly into big nozzle and is designed to the gap of tiles, floors, windows and etc. To remove it, you just have it down and remove it directly.
6. Ironing brush
To iron a chair, sofa, bed, etc, place the white ironing towel on ironing brush and connect with the steam gun.
In addition, you can adjust the extension tube in the middle of unit. You can put the clothes on it directly.
We suggest you using a small amount of steam when using this fun
natural_image
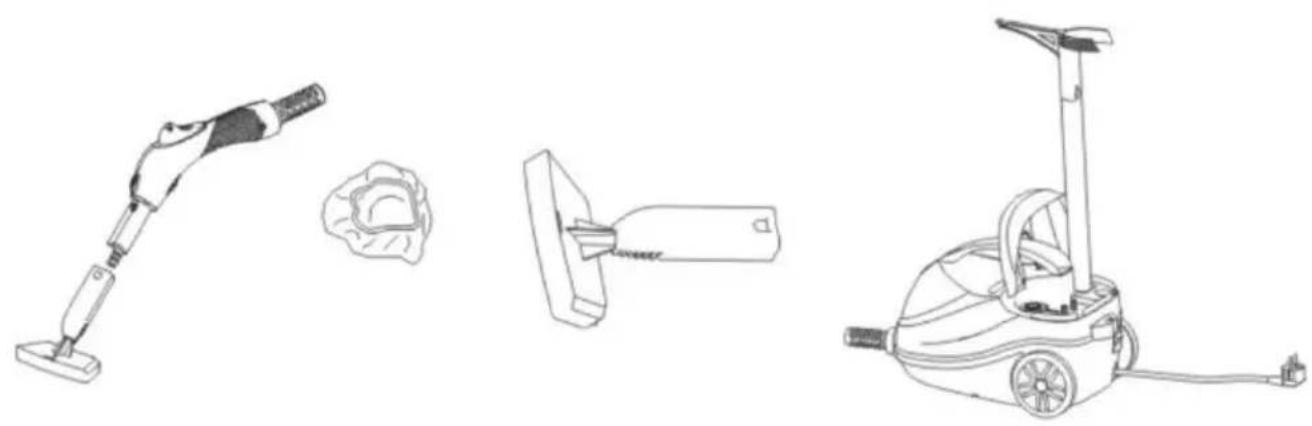
Line drawings of four different household appliances: a vacuum cleaner, a cleaning device, a hand cleaner, and a portable air purifier (no text or symbols present)7. Window brush
To clean window, mirrors, or tiles or objects with smooth surface, use window brush, which has a rubber for cleaning. When installed, set in two prominent parts of the hook scraper; then place the glass brush for iroing; an audible click will sound, and the installation is complete.
NOTE: It is recommended to use the lowest gear, because when the amount of steam large, it is easy to produce water droplets the glass is cold.
If temperature is lower than 0 °C, please do not use this price to clean glass
Do not place it in the same position more than 2 seconds
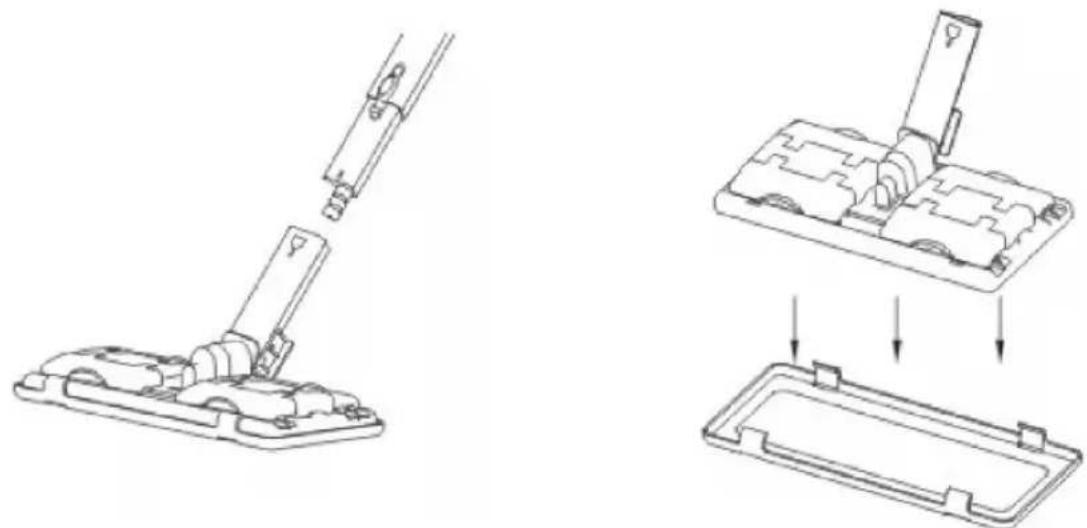
8. Floor brush
Connect the nozzle on the floor brush to the end of extension tube. sure that the nozzle fits properly in place. The floor brush is ideal for cleaning washable walls and floor coverings. It can be used with or the mop. Press on the inside of the handle, open the latches to attach mop.
As for towel, please first fold in half, and than clamp in the brush of Add the carpet glider if you need to clean the carpet. Open the clips to hold the towel.
natural_image
Technical line drawing showing a vacuum cleaner's assembly and mounting process (no text or symbols)9. Funnel Measuring cup
The Funnel and the Measuring cup are provided to assist in easily a consistently filling the Boiler with the optimum amount of water.
10. Wiper
The wiper is used to clean the glass or windows.
Trouble shooting
| Situation | Please check to the followi points | Solution |
| No spray steam | Plug not insert to the pow socket tightly | Insert again or change the socket |
| Switch indicator light off | Turn on the switch | |
| No water | Fill with water | |
| Can not press the steam button | Press on children's lock | |
| Other questions | Ask for professional service | |
| Water is flowing from nozzle | There may some water in steam for first usage or stopped for a while. | normal phenomenon. It will disappear quickly |
| Influence the normal use | Ask for professional service | |
| Others | Steam comes out besides nozzle | Ask for professional service |
| Plastic deformation and softening phenomenon | ||
| Other electric equipment cannot be used |
Product Specifications
| MODEL | CB-108A | |
| RATED VOLTAGE | 120V~ 60Hz | 220-240V~50-60Hz |
| POWER | 1500W | 2000W |
| CAPACITY | 2.5L | |
| POWERCORD LINGTH | 5m | |
Manufacturer: Ningbo rongyida electric appliance co.,Ltd
Add: 62 Lixin road, xinjie village zonghan cixi ningbo China
VEVOR®
TOUGH TOOLS, HALF PRICE
Support and E-Warranty Certificate
https://www.vevor.com/support
VEVOR®
TOUGH TOOLS, HALF PRICE
natural_image
Line drawing of a vacuum cleaner with visible wheels and control panel (no text or symbols)BESOIN D'AIDE? CONTACTEZ-NOUS!
natural_image
Line drawing of a robotic vacuum cleaner with water spray and mechanical components (no text or symbols)Remarque:
natural_image
Line drawing of a portable vacuum cleaner with attached power plug (no text or symbols)natural_image
Technical line drawing of a handheld tool with a separate cylindrical component (no text or symbols)12. Buse grande
natural_image
Line drawing of a welding torch and its connector (no text or symbols)13. Brosse ronde
14. Buse droite
natural_image
Line drawings of four different household appliances: a vacuum cleaner, a cloth cover, a hand cleaner, and a portable air purifier (no text or symbols present)17. Brosse à vitres
NOTE: It is recommended to use the lowest gear, because when the amount of steam large, it is easy to produce water droplets the glass is cold.

natural_image
Technical line drawing showing a vacuum cleaner's assembly and mounting process (no text or symbols)Ajouter : 62 route de Lixin, village de Xinjie zonghan cixi ningbo Chi
VEVOR®
TOUGH TOOLS, HALF PRICE
https://www.vevor.com/support
VEVOR®
TOUGH TOOLS, HALF PRICE
natural_image
Line drawing of a vacuum cleaner with visible wheels and control panel (no text or symbols)www.vevor.com/support
natural_image
Line drawing of a person using a vacuum cleaner with a hand reaching out (no text or symbols)Bemerkung:
natural_image
Line drawing of a portable vacuum cleaner with attached power plug (no text or symbols)natural_image
Technical line drawing of a handheld tool with a separate cylindrical component (no text or symbols)22. Große Düse
natural_image
Line drawing of a handheld electric shaver with a separate tip and handle (no text or symbols)23. Rundbürste
24. Gerade Düse
25. Haarbürste
26. Bügelbürste
natural_image
Line drawings of four different household appliances: a vacuum cleaner, a washing machine, a flat bulb, and a compact air purifier (no text or symbols present)27. Fensterbürste
NOTE: It is recommended to use the lowest gear, because when the amount of steam large, it is easy to produce water droplets the glass is cold.

natural_image
Technical line drawing showing a vacuum cleaner's assembly process, including disassembly and mounting steps (no text or symbols)https://www.vevor.com/support
VEVOR®
TOUGH TOOLS, HALF PRICE
natural_image
Line drawing of a vacuum cleaner with visible wheels and control panel (no text or symbols)natural_image
Line drawing of a cleaning robot with water spray and mechanical components (no text or symbols)Nota:
natural_image
Line drawing of a small wheeled robot with attached power plug (no text or symbols)natural_image
Technical line drawing of a welding torch and rod assembly (no text or symbols)32. Ugello grande
natural_image
Line drawing of a welding torch with a separate clamped tool (no text or symbols)33. Spazzola rotonda
natural_image
Line drawing of a handheld electrical plug with threaded end and bulb (no text or symbols)34. Ugello dritto
36. Spazzola da stiro
natural_image
Line drawings of three different household appliances: a vacuum cleaner, a cleaning tool, and a portable air purifier (no text or symbols present)NOTE: It is recommended to use the lowest gear, because when the amount of steam large, it is easy to produce water droplets the glass is cold.
natural_image
Technical line drawing showing a vacuum cleaner's assembly and mounting process (no text or symbols)39. Imbuto Misurino
https://www.vevor.com/support
VEVOR®
TOUGH TOOLS, HALF PRICE
natural_image
Line drawing of a vacuum cleaner with visible wheels and control panel (no text or symbols)natural_image
Line drawing of a robotic vacuum cleaner with water spray and mechanical components (no text or symbols)Observación:
natural_image
Line drawing of a portable vacuum cleaner with attached power plug (no text or symbols)natural_image
Technical line drawing of a handheld tool with a separate cylindrical component (no text or symbols)42. Boquilla grande
natural_image
Line drawing of a handheld electric shaver with a separate tip and handle (no text or symbols)43. Cepillo redondo
natural_image
Line drawing of a handheld electric shaver with a bulb and mounting base (no text or symbols)44. Boquilla recta
46. Cepillo para planchar
Para planchar una silla, sofá, cama, etc., coloque la toalla de plancha blanca sobre
natural_image
Line drawings of four different household appliances: a vacuum cleaner, a washing machine, a flat bulb, and a compact air purifier (no text or symbols present)NOTE: It is recommended to use the lowest gear, because when the amount of steam large, it is easy to produce water droplets the glass is cold.

natural_image
Technical line drawing showing a vacuum cleaner's assembly process, including mounting bracket and internal component disassembly (no text or symbols)49. Embudo taza medidora
https://www.vevor.com/support
VEVOR®
TOUGH TOOLS, HALF PRICE
natural_image
Line drawing of a vacuum cleaner with visible wheels and control panel (no text or symbols)POTRZEBUJESZ POMOCY? SKONTAKTUJ SIE Z NAMI!
natural_image
Line drawing of a robotic vacuum cleaner with water spray and mechanical components (no text or symbols)Uwaga:
natural_image
Line drawing of a portable vacuum cleaner with attached power plug (no text or symbols)natural_image
Technical line drawing of a handheld tool with a separate cylindrical component (no text or symbols)52. Duża dysza
natural_image
Line drawing of a handheld electric shaver with a separate tip and handle (no text or symbols)53. Pędzel okrągły
54. Dysza prosta
natural_image
Line drawings of three different household appliances: a vacuum cleaner, a cleaning tool, and a portable air purifier (no text or symbols present)57. Szczotka do okien
NOTE: It is recommended to use the lowest gear, because when the amount of steam large, it is easy to produce water droplets the glass is cold.
natural_image
Technical line drawing showing a vacuum cleaner's assembly and mounting process (no text or symbols)59. Lejek Miarka
https://www.vevor.com/support
VEVOR®
TOUGH TOOLS, HALF PRICE
Ondersteuning en E-garantiecertificaat https://www.vevor.com/support
STOOMREINIGER
USR-HANDLEIDING
CB-108A
natural_image
Line drawing of a vacuum cleaner with visible wheels and control panel (no text or symbols)HULP NODIG? NEEM CONTACT MET ONS OP!
www.vevor.com/support
Stroomstoring, machinestoring

natural_image
Line drawing of a person using a small vacuum cleaner with liquid dropping from above (no text or symbols)Opmerking:
natural_image
Line drawing of a small wheeled robot with wheels and attached plug (no text or symbols)natural_image
Technical line drawing of a welding torch and rod assembly (no text or symbols)62. Grote spuitmond
natural_image
Line drawing of a welding torch with a separate clamped tool (no text or symbols)63. Ronde borstel

natural_image
Line drawing of a handheld electrical plug with threaded end and bulb (no text or symbols)64. Rechte spuitmond
65. Haarborstel
66. Strijkborstel
natural_image
Line drawings of three different household appliances: a vacuum cleaner, a compact device, and a portable air purifier (no text or symbols present)67. Raamborstel
NOTE: It is recommended to use the lowest gear, because when the amount of steam large, it is easy to produce water droplets the glass is cold.
natural_image
Technical line drawing showing a vacuum cleaner's assembly process, including mounting bracket and internal component (no text or symbols)69. Trechter Maatbeker
https://www.vevor.com/support
VEVOR®
TOUGH TOOLS, HALF PRICE
natural_image
Line drawing of a vacuum cleaner with visible wheels and control panel (no text or symbols)BEHÖVER HJÄLP? KONTAKTA OSS!
www.vevor.com/support
natural_image
Line drawing of a robotic vacuum cleaner with water spray and control panel (no text or symbols)Anmärkning:
natural_image
Line drawing of a small industrial vacuum cleaner with a power outlet (no text or symbols)natural_image
Technical line drawing of a welding torch and rod assembly (no text or symbols)72. Stort munstycke
natural_image
Line drawing of a welding torch and its connector (no text or symbols)73. Rund borste
74. Rak munstycke
75. Hårborste
76. Strykborste
natural_image
Line drawings of four different household appliances: a vacuum cleaner, a flower-shaped object, a hand tool, and a compact vacuum cleaner (no text or symbols present)77. Fönsterborste
NOTE: It is recommended to use the lowest gear, because when the amount of steam large, it is easy to produce water droplets the glass is cold.

natural_image
Technical line drawing showing a vacuum cleaner's assembly and its internal components (no text or symbols)79. Tratt Mätkopp
Lägg till: 62 Lixin road, xinjie village zonghan cixi ningbo Kina
VEVOR®
TOUGH TOOLS, HALF PRICE
https://www.vevor.com/support