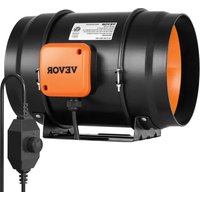
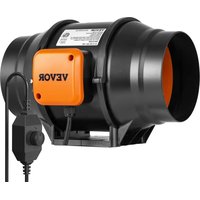
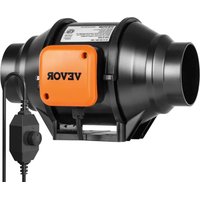
JBSF-320E - Fan Vevor - Free user manual and instructions
Find the device manual for free JBSF-320E Vevor in PDF.

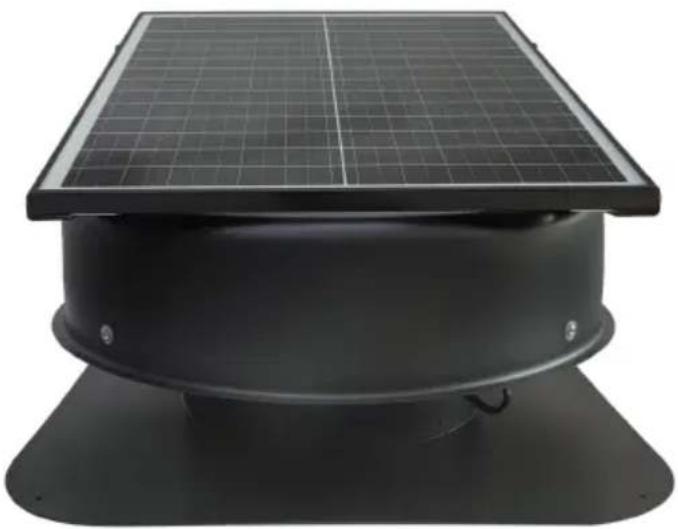
| Product type | Solar roof fan |
| Brand | Vevor |
| Model | JBSF-320E |
| Power supply | Solar panel 35 W, 15 VDC; AC adapter 100-240 V AC |
| Motor | DC 15 V, 35 W, brushless |
| Airflow | ~2200 m³/h |
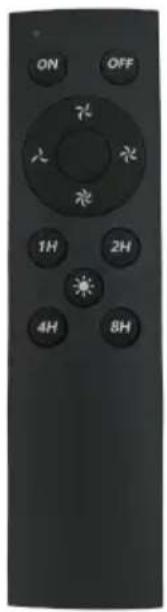
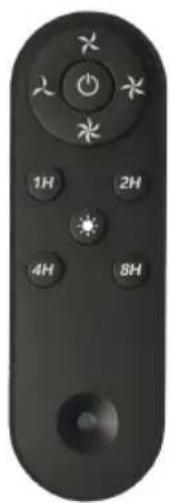
| Control | Remote control with on/off, 3 speeds (soft, low, medium, high), timer (1/2/4/8 h), forced start |
| Built-in thermostat | Turn on ≥26 °C, turn off <26 °C; disconnects for continuous operation |
| Installation type | On roof (tiles, metal, flat) |
| Material | Aluminum alloy base plate, corrosion-resistant |
| Solar panel angle | Adjustable (2 arms) |
| Panel dimensions | Not specified in the manual |
| Weight | Not specified in the manual |
| Warranty | Electronic warranty via www.vevor.com/support |
| Safety | Disconnect before cleaning; do not insert objects; do not use if anomaly (smoke, odor) |
| Maintenance | Clean the grilles; store the remote control away from sunlight |
| Standards | Complies with FCC Part 15B (Class B); European directive 2014/30/EU |
| Included accessories | 1 remote control, 1 AC adapter, 6 technical screws, 2 rafters/battens, flashing |
Frequently Asked Questions - JBSF-320E Vevor
User questions about JBSF-320E Vevor
0 question about this device. Answer the ones you know or ask your own.
Ask a new question about this device
Download the instructions for your Fan in PDF format for free! Find your manual JBSF-320E - Vevor and take your electronic device back in hand. On this page are published all the documents necessary for the use of your device. JBSF-320E by Vevor.
USER MANUAL JBSF-320E Vevor
Technical Support and E-Warranty Certificate www.vevor.com/support
Roof vent
Model: JBSF-350F/JBSF-320G/JBSF-320E
We continue to be committed to provide you tools with competitive price. "Save Half", "Half Price" or any other similar expressions used by us only represents an estimate of savings you might benefit from buying certain tools with us compared to the major top brands and does not necessarily mean to co all categories of tools offered by us. You are kindly reminded to verify carefully when you are placing an order with us if you are actually Saving Half in comparison with the top major brands.
Model: JBSF-350F/JBSF-320G/JBSF-320E
natural_image
Exterior view of a black cylindrical solar panel mounted on a circular base (no text or symbols visible)NEED HELP? CONTACT US!
Have product questions? Need technical support? Please feel free to contact us:
Technical Support and E-Warranty Certificate www.vevor.com/support
This is the original instruction, please read all manual instructions carefully before operating. VEVOR reserves a clear interpretation of user manual. The appearance of the product shall be subject to product you received. Please forgive us that we won't inform you and there are any technology or software updates on our product.
IMPORTANT SAFEGUARDS

WARNING:
Read and understand this entire manual before operating or servicing product. Failure to follow these warnings and instructions can cause personal injury or damage to valuable property. Avoid children using t product. And this product is not a toy. Do not allow children to play
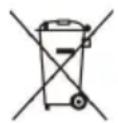

CORRECT DISPOSAL:
This product is subject to the provision of European Directive 2014/30. The symbol showing a wheelie bin crossed through indicates that the product requires separate refuse collection in the European Union. This applies to the product and all accessories marked with this symbol. Products marked as such may not be discarded with normal domestic waste, but must be taken to a collection point for recycling electrical electronic devices.
FCC INFORMATION
CAUTION:
Changes or modifications not expressly approved by the party responses for compliance could void the user's authority to operate the equipment. This device complies with Part 15B of the FCC Rules. Operation is to the following two conditions:
1) This product may cause harmful interference.
2) This product must accept any interference received, including interference that may cause undesired operation.
WARNING:
Changes or modifications to this product not expressly approved by the party.responsible for compliance could void the user's authority to operate the product.
Note: This product has been tested and found to comply with the limi
Class B digital device pursuant to Part 15B of the FCC Rules, These are designed to provide reasonable protection against harmful interferes in a residential installation.
This product generates, uses and can radiate radio frequency energy, if not installed and used in accordance with the instructions, may cause harmful interference to radio communications. However, there is no guarantee that interference will not occur in a particular installation. If this product does cause harmful interference to radio or television reception, which can be determined by turning the product off and on, user is encouraged to try to correct the interference by one or more following measures.
- Reorient or relocate the receiving antenna.
- Increase the distance between the product and receiver.
- Connect the product to an outlet on a circuit different from that to the receiver is connected.
- Consult the dealer or an experienced radio/TV technician for assista
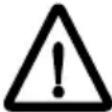 WARNING WARNING | Indicates a hazardous situation that, if not avoide could result in death or serious injury. |
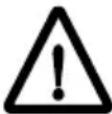 DANGER DANGER | Indicates a hazardous situation that, if not avoide result in death or serious injury. |
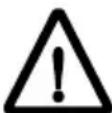 AUTION AUTION | Indicates a hazardous situation which, if not avoicould result in minor or moderate injury. |
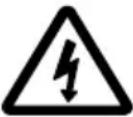 ATTENTION ATTENTION | The symbol indicates that the user should pay gattention to the drawing to show the situation tonoted. And the left figure shows, "Be careful ofshock." |
 CERTIFICATE CERTIFICATE | This device complies with Part 15 of the FCC F Operation is subject to two conditions: (1) This device may not cause harmful interference (2) This device must accept any interference receive including interference that may cause undesired operation. |
WARNING:
Read all safety warnings, instructions, illustrations and specifications provided with this electrical appliances. Failure to follow all instructions below may result in electric shock, fire and/or serious injury. Save all warnings and instructions for future reference.

WARNING:
Improper operation may cause personal injury. Improper operation may cause damage to the machine. Improper operation may cause other damage.

DANGER:
Do not use a power supply that does not meet the rated voltage. T non-compliant power supplies can cause fire or electric shock.
CAUTION:
- Disconnect the fan when moving from one location to another.
- If the machine emits smoke, odor, motor noise and other abnormal conditions, please do not use it. It may cause fire or electric shock.
- Do not disassemble, repair or rectify the machine during use. Doing may result in fire or electric shock and personal injury.
-
If the machine is not used for a long time, please unplug the adapter the socket.
-
Never insert fingers, pencils, or any other object through the guard fan is running.
-
This appliance can be used by children aged 8 years and above a person with reduced physical, sensory or mental capabilities or lack of experience and knowledge if they have been given supervision or instruction concerning the use of the appliance in a safe way and understand the hazards involved. Children shall not play with the appliance. Cleaning and user maintenance shall not be done by children without supervision.
-
Disconnect the fan when removing grills for cleaning. Do not leave fan running unattended.
II. Product Description
Please check whether the product appears damaged or missing accessories.
1.JBSF-350F
①
natural_image
Exterior view of a black cylindrical solar panel mounted on a base (no text or symbols visible)1 x Solar Fan
②
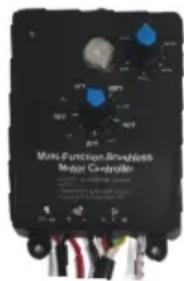
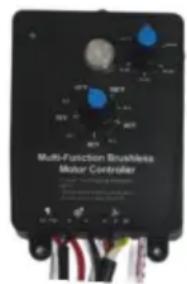
1 x Controller
Temperature control value and humidity control value can be adjusted, indoor temperature and humidity of any one value over t set value that is to open the far Indicator Light:
- Whether solar or adapter power the LED green light is on for a time;
| 2.When the indoor smoke makes smoke sensor alarm, the LED gr light flashes and the motor is for to stop.3.Neither the solar energy nor the adapter is powered, and the LED are off; | |
3 1 x Remote Control1 x Power Adapter 1 x Remote Control1 x Power Adapter | 4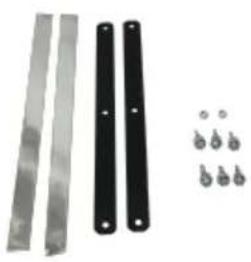 6 x Tech Screws2 x Rafter/Batten 6 x Tech Screws2 x Rafter/Batten |
2.JBSF-320G
①
natural_image
Exterior view of a black industrial fan or vent with a solar panel mounted on top (no text or symbols visible)1 x Solar Fan
②

natural_image
Two electronic devices: a black remote control and a black charging plug (no visible text or symbols)1 x Remote Control
1 x Power Adapte
③
natural_image
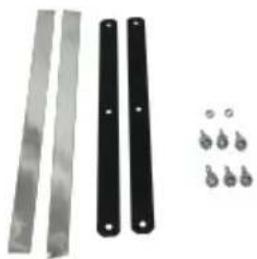
Product photo showing three metallic strips and four small droplets arranged on a white background (no text or symbols)6 x Tech Screws
2 x Rafter/Batten
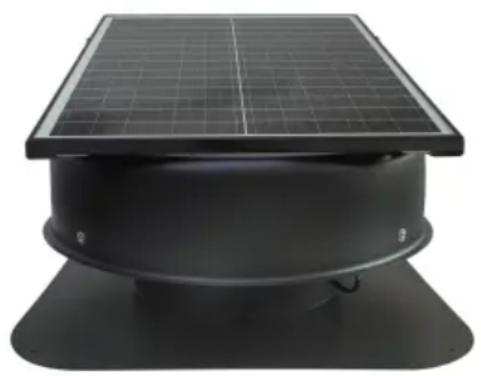
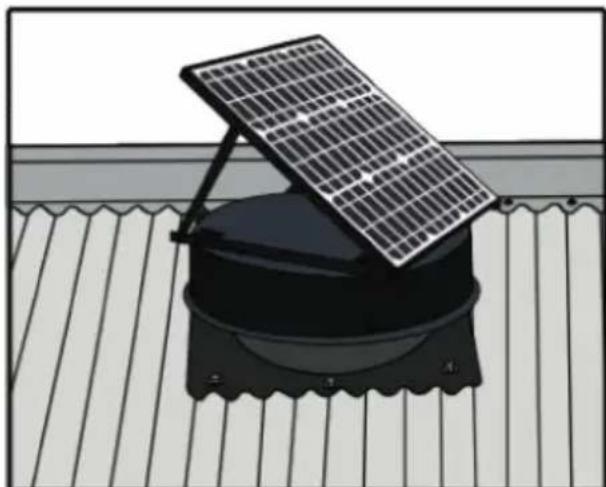
3.JBSF-320E
①

natural_image
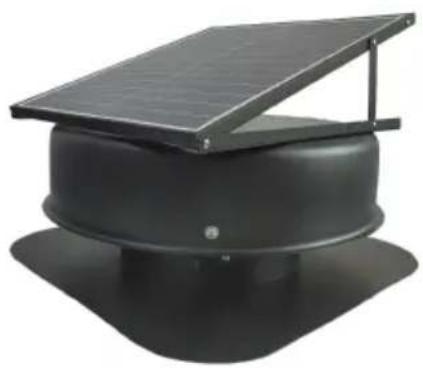
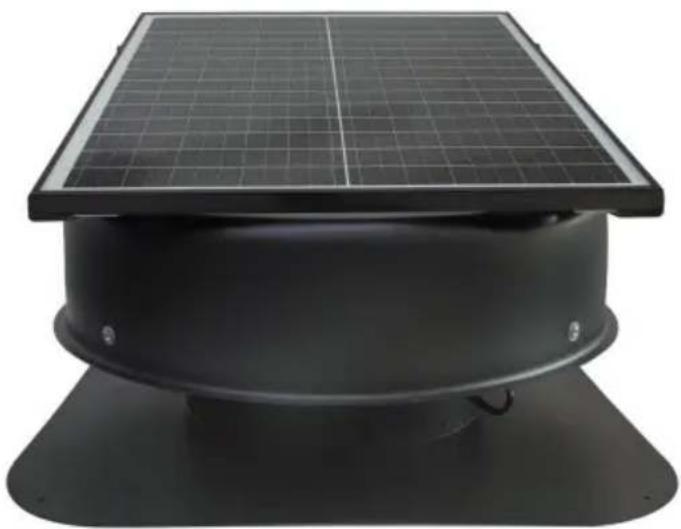
Exterior view of a black rectangular solar panel mounted on a circular base (no text or symbols visible)1 x Solar Fan
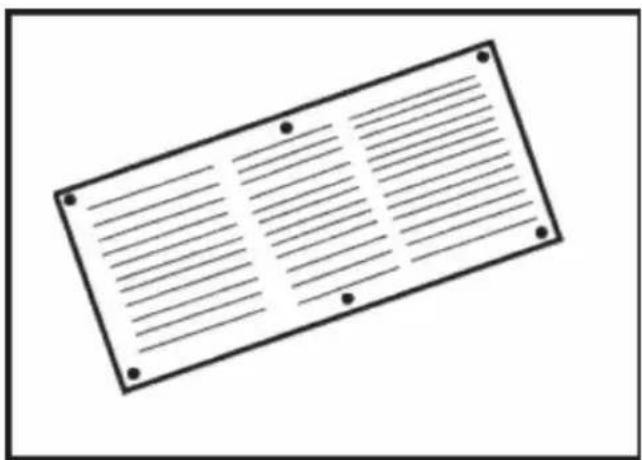
②
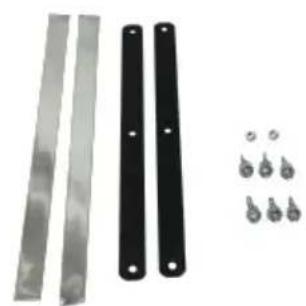
natural_image
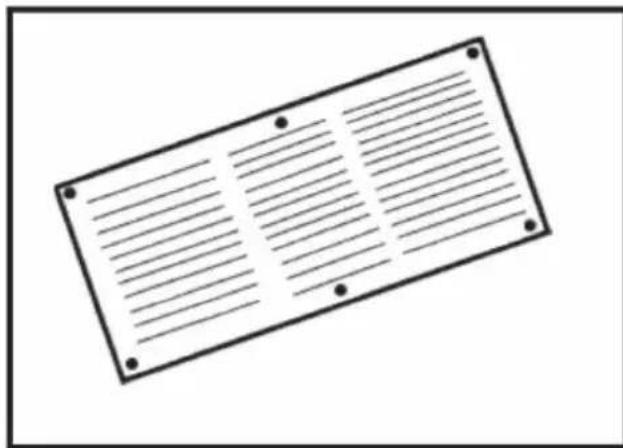
Product photo showing three black metal strips with mounting holes and four small metallic components (no text or symbols visible)6 x Tech Screws
2 x Rafter/Batten
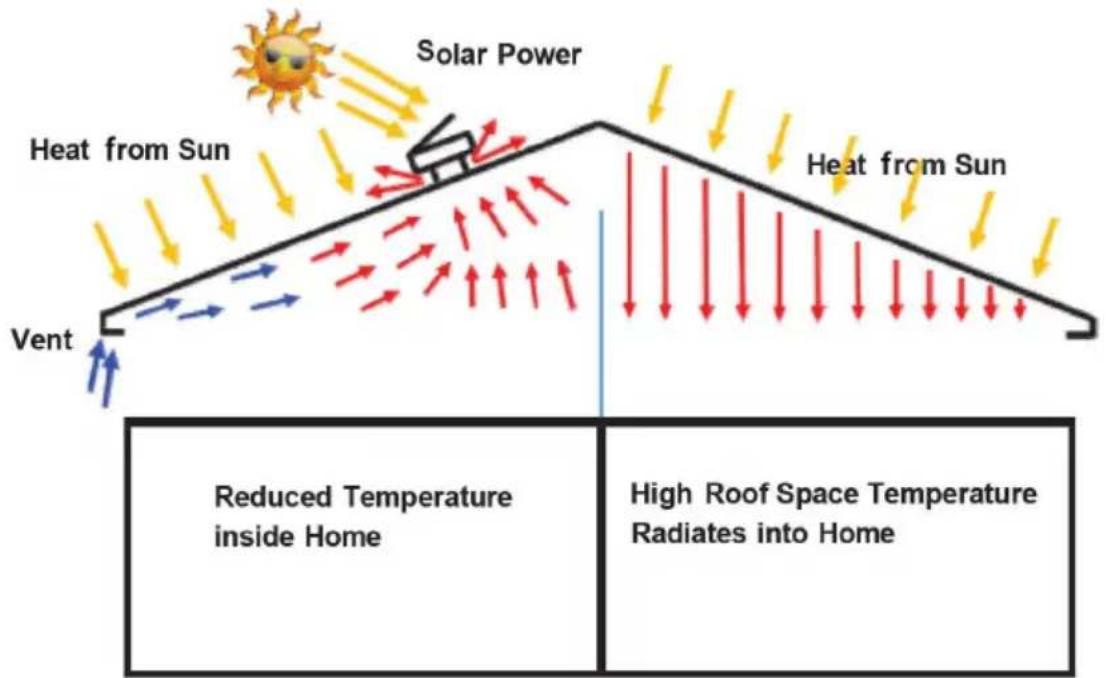
Solar roof exhaust fan functions in several ways to keep your place and comfortable.
Its design includes the following features:
- It keeps your home cooler in the summer by extracting 20 times r than a Whirly Bird.
- It is solar-powered, so there is no running cost.
- It reduces the need for air-conditioning, reducing energy bills.
- It is easy to install and is compatible with tile, metal and flat roofs
- It reduces humidity and promotes airflow, which can lower temperature up to 30^ F .
- It reduces condensation build-up in your roof.
- It has a brushless DC motor for quiet operation.
• High-quality material is used for each part to ensure long service li
- In the cooler months, the thermostat control prevents heat loss and the place warm.
• The fan is corrosion resistant and suitable for coastal regions.
Product Specifications
★ Model I
| Model | JBSF-350F | 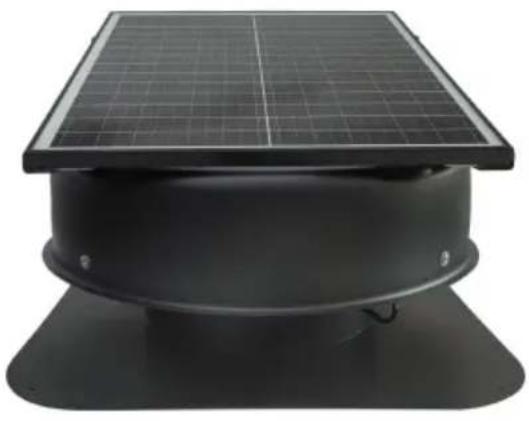 |
| Motor | DC 15V 50W | |
| Solar Panel Output | 50Watts, 15 VDC | |
| Exhaust Air Volume | ~3500 m3/h | |
| Inverter Voltage | AC 100~240V 50 60Hz |
★ Model II
| Model | JBSF-320G |  |
| Motor | DC 15V 35W | |
| Solar Panel Output | 42Watts, 15 VDC | |
| Exhaust Air Volume | ~3000 m3/h | |
| Inverter Voltage | AC 100~240V 50 60Hz |

Model III
| Model | JBSF-320E | 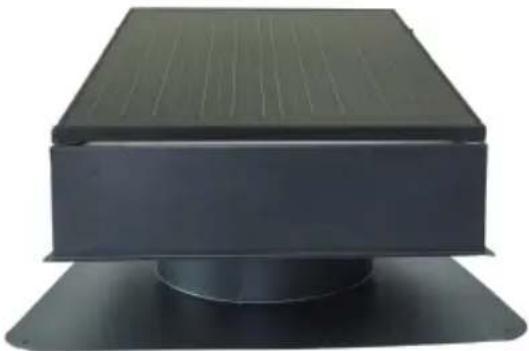 |
| Motor | DC 15V 35W | |
| Solar Panel Output | 35Watts, 15 VD | |
| Exhaust Air Volume | ~2200 m3/h |
natural_image
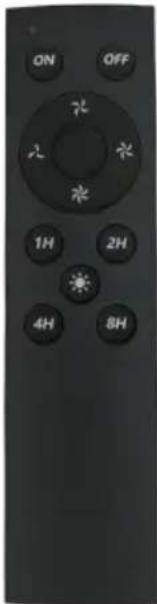
Black remote control with labeled buttons (1H, 2H, 4H, 8H) and starburst icons on the right (no text or symbols beyond labels)< Remote Control Model 1 > < Remote Control Model 2 >
Note: The fan has temperature control. It turns on when the tempera ≥ 26^ and turns off when the temperature is ≤ 26^ .
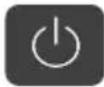 | ON / OFF To power on/off the device, high-end is default. |
 | SOFT |
 | LOW |
 | MEDIUM |
 | HIGHT |
 | " FORCE START " Press this button to start a temperature. |
Timer Buttons:
 | Pressing 1H will power off the device in 1 ho |
 | Pressing 2H will power off the device in 2 ho |
 | Pressing 4H will power off the device in 4 ho |
 | Pressing 8H will power off the device in 8 ho |
Note:
- Store the remote out of direct sunlight..
- Remember to remove the blocking film to use the remote.
- When pairing, press and hold any button for 10 seconds.
III. Installation Guide
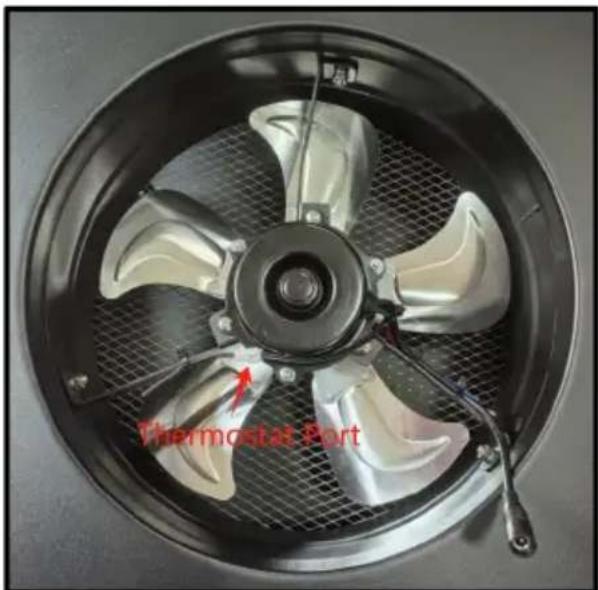
JBSF-320E
- The fan runs when the room temperature is above 78.8^ / 26^ and when it is below 78.8^ / 26^ . Make sure the thermostat is connected before installation.
- The white one is the port of the thermostat. If you want it to oper 78.8^ / 26^ , you need to disconnect it.
Please read this installation guide carefully to install the solar roof ex fan. Depending on the roof type, you may follow installation steps for best result. Aluminum alloy base plate, soft, can be shaped according different roof shapes for waterproofing work. Please make sure the wo area is dry before installing. Do not install during or after rain.

natural_image
Close-up of vertical metallic bars with serrated edges, no text or symbols visibleI. Metal Roof
natural_image
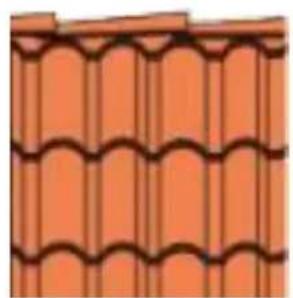
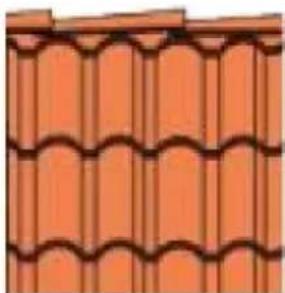
Close-up of a red-tiled roof tiles with wavy black lines (no text or symbols)II. Tile Roof
I.METAL ROOF INSTALLATION
STEP 1
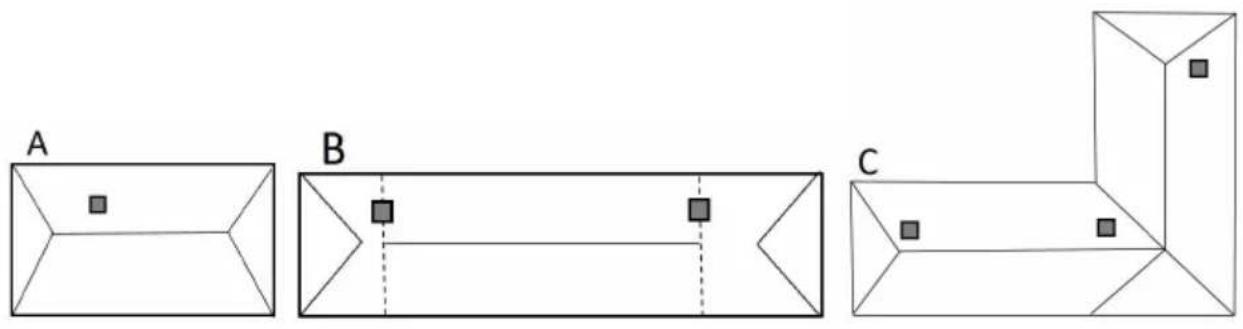
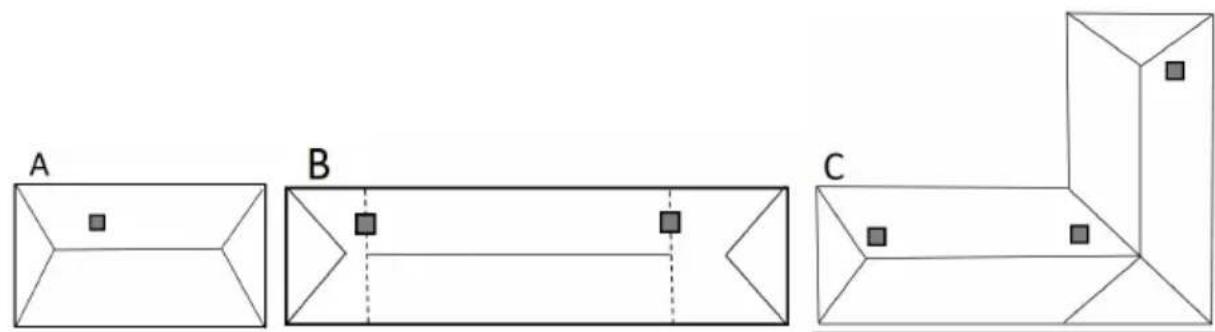
Study the figure to assess how many solar roof exhaust fans you need to install them for your home or business. To work out where position the fan, you need to consider any afternoon shade on the roof during the warmer months. A well-positioned fan should allow the solar panel to receive sun from the south (north for the southern hemisphere and west during the warmer months.
natural_image
Three geometric shapes labeled A, B, and C with internal square markers, no text or symbols present.A - 1x solar fan up to 1,000 sqft place
B - 2x solar fans up to 2,000 sqft place
C - 3x solar fans up to 3,000 sqft place
Note: Shade will affect the fan performance. Number of fans needed vary depending on the situation.
STEP 2
Remove 2 ridge capping screws and slide the top edge of the flashi under it as shown in the figure. It is important to position the lashin does not cover any roofing screws. The roofing screws running from top to the bottom of the roof are where the rafters are located. Onc positioned, mark a circle on the inside edge of the flashing.
natural_image
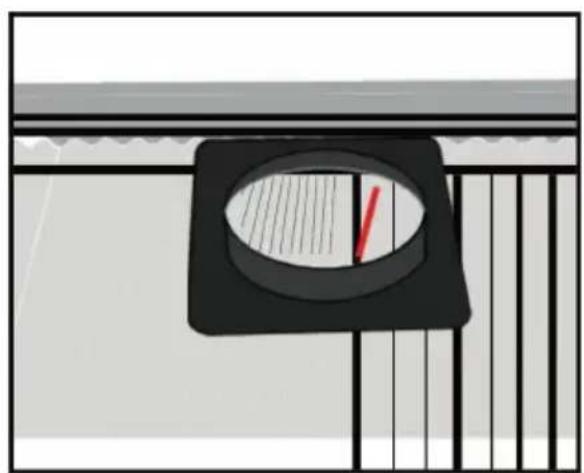
Diagram of a mechanical or electrical component with a circular dial and red pointer, no visible text or symbolsSTEP 3
Following the circle marked on the roof cut an opening in the roof a using a metal blade saw or tin snips. If there is any foil under the sheets, cut a cross in the foil and fold back the corners.
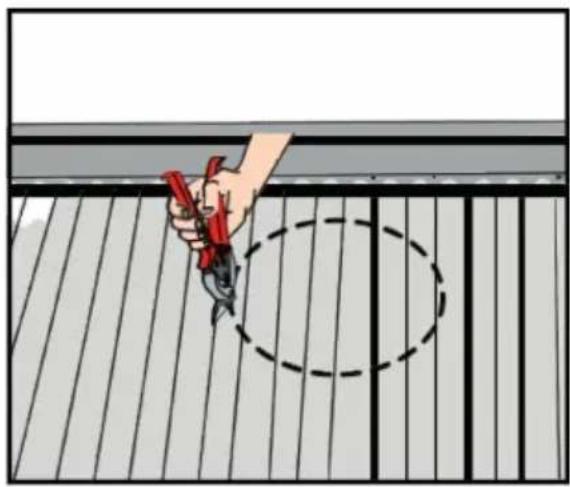
natural_image
Illustration of a hand using red pliers to cut or trim on a metal surface, with a dashed oval highlighting the area (no text or symbols)Note: Take care not to cut into any battens/rafters under the roof sh when cutting.
STEP 4
Slide the flashing back up under the roof capping, refit the 2 ridge screws through the flashing, and bend the edges of the flashing down the left and right sides to create a tight fit with the roof. Next , use to cut notches in the flashing's bottom to suit the corrugations of the and bend the notches down. Next, apply silicone bonded to the edge underside and outside. After this, use silicone bonded to the underside outside of the bottom section of the flashing.
natural_image
Pure diagram of a circular object with vertical lines and a small figure, no text or symbols presentNote: Don't apply silicone to the valleys at the bottom of the flashing
STEP 5
As shown in the figure here, use a minimum of 8 and a maximum tech or roof screws with rubber seals along the left, right, and bottor flashing to secure the roof.

natural_image
Illustration of a person standing near a metal grate with a circular opening, against a striped background (no text or symbols)Note : Tech screws and roofing screws are not included.
STEP 6
Place the main body of the fan over the flashing as shown below. I main body of the fan left or right to suit the direction required for the panel.
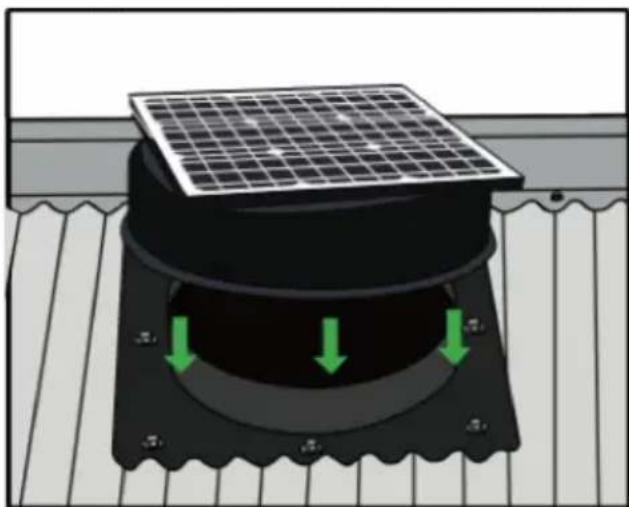
natural_image
Diagram of a solar panel mounted on a base with green arrows indicating downward motion (no text or symbols)Tip: Position the solar panel between the south (north for the southern hemisphere) and west to best suit the sun in warmer months.
STEP 7
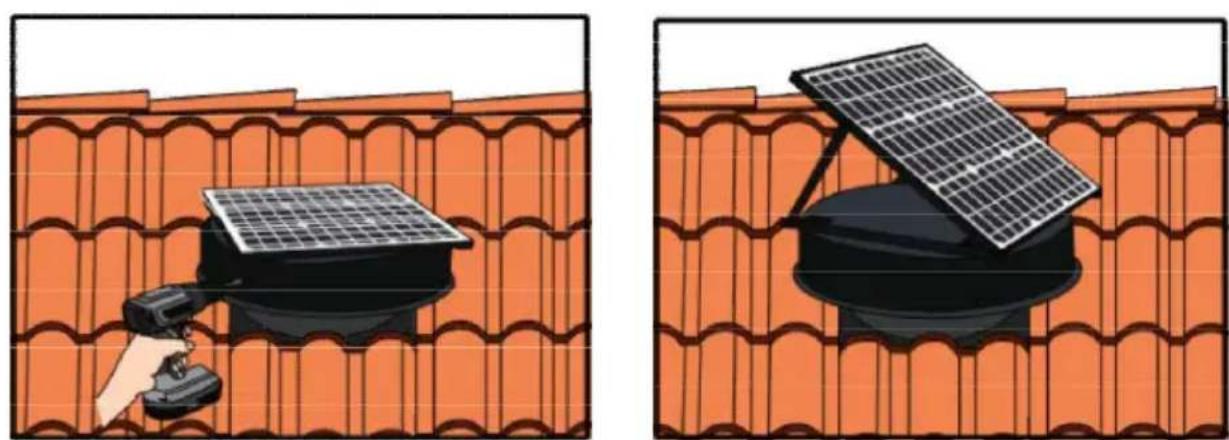
Using a powered screwdriver, screw at least 4 small tech screws through the pre-drilled holes in the fan's main body into the flashing, as shown below.
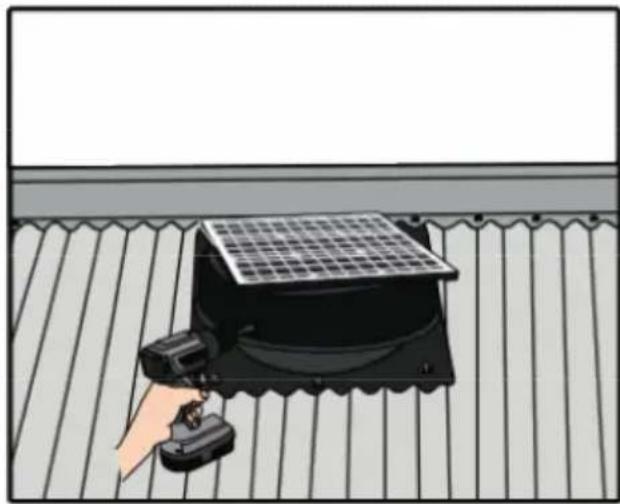
natural_image
Illustration of a hand holding a small electronic device next to a solar panel mounted on a black base, placed on a striped surface (no text or symbols visible)Tip: You may not get the top tech screw in place, as the roof angle prevent this. In this case, you can screw the tech screw into another section where the main body is over the flashing.
STEP 8
You can now adjust the angle of the solar panel to receive maximum especially during the midday of the warmer months as shown in the As the pitch of many roofs is already at a good angle for the sumr you may just be able to leave the panel in the down position as it supplied from the factory, without doing anything.
natural_image
Illustration of a solar panel mounted on a circular base with a mesh roof (no text or symbols)To adjust the angle of the solar panels up, just adjust the 2 arms 1 correct angle and tighten the screws.
Note:
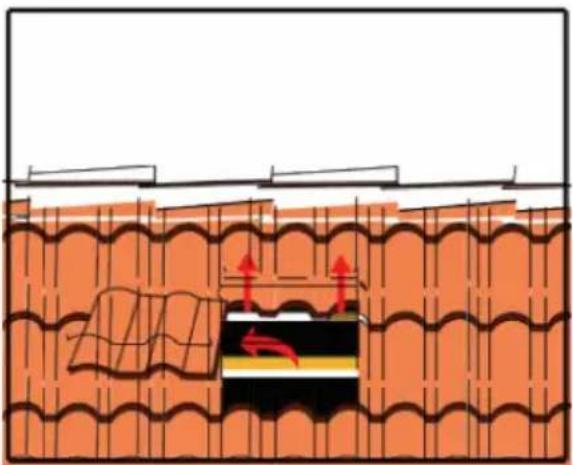
An installation option is to fit the fan under the eave vents to the house that is cool in the afternoon. This will allow the cooler outside be drawn into the roof space. These are especially required when the has foil under the tiles, but regardless eave vents will improve airflow
II.TILE ROOF INSTALLATION
STEP 1
Study the figure to assess how many solar roof exhaust fans you need to install them for your home or business. To work out where position the fan, you need to consider any afternoon shade on the red during the warmer months. A well-positioned fan should allow the solar panel to receive sun from the south (north for the southern hemisphere and west during the warmer months.
natural_image
Three geometric diagrams labeled A, B, and C showing 3D shapes with small squares inside, connected by dashed lines (no text or symbols)A - 1x solar fan up to 1,000 sqft place
B - 2x solar fans up to 2,000 sqft place
C - 3x solar fans up to 3,000 sqft place
Note: Shade will affect the fan performance. Number of fans needed vary depending on the situation.
STEP 2
Remove the third tile counting down from the ridge capping (top of t as shown in the figure. Remove one complete tile from the roof. You also push the tile directly above the removed tile slightly up to make opening larger if necessary.
natural_image
Diagram of a roof drainage system with red-tiled bricks and a black-and-white striped component, showing airflow direction (no text or symbols)Ensure you discard this removed tile. Do not leave it on the roof.
STEP 3
Lift the tiles above the tile opening, slide the flashing into place as here, and then push the tiles back down. This will mold the flashing tiles.
natural_image
Illustration of a tiled roof with a black oval opening and yellow stripe inside, no text or symbols present.STEP 4
Fit a minimum of one rafter/batten strap (2 are supplied) as shown. strap folds over the circular ridge on the flashing and it can either be screwed or nailed through the rafter/batten strap into the rafter or bat
natural_image
Illustration of a person using a device to clean or inspecting a tiled roof structure (no text or symbols visible)Note: Rafters run from the top of the roof down to the facial and b run across the roof directly under the tiles.
STEP 5
Once the flashing fitting is complete, run a bead of clear silicone alo top of the flashing that joins with the upper tiles.
natural_image
Illustration of a hand using a glue gun to clean a wall-mounted black object, mounted on an orange-tiled roof (no text or symbols visible)STEP 6
Place the main body of the fan over the flashing as shown below. I main body of the fan left or right to suit the direction required for the panel.
natural_image
Illustration of a solar panel mounted on a roof structure with green arrows indicating airflow or ventilation direction (no text or symbols)Tip: Position the solar panel between the south (north for the southeast hemisphere) and west to best suit the sun in warmer months.
STEP 7
As shown in the figure, using a powered screw-driver, screw at least small tech screws through the pre-drilled holes in the fan's main body through into the flashing.
natural_image
Two-panel illustration showing a solar panel installation on a tiled roof, one with a sensor and the other with a mounted device (no text or symbols)Tip: You may not get the top tech screw in place as the angle of may prevent this. In this case, you can simply screw the tech screw another section where the main body is over the flashing.
STEP 8
You can now adjust the angle of the solar panel to receive maximumespecially during the midday of the warmer months as shown in theAs the pitch of many roofs is already at a good angle for the sumr
you may just be able to leave the panel in the down position as it supplied from the factory, without doing anything. To adjust the angle of solar panels up, just adjust the 2 arms to the correct angle and tight screws.
STEP 9
Now that the primary installation is complete, you can mold the flexib flashing to suit your tiles and bend the bottom section down to allow to run off onto the tiles below. Then run a bead of silicone along the right sides of the flashing and your job is complete.
Note:
An installation option is to fit the fan under the eave vents to the house which is cool in the afternoon. This will allow the cooler outside be drawn into the roof space. These are especially required when the has foil under the tiles, but regardless eave vents will improve airflow
Manufacturer: Shanghaimuxinmuyeyouxiangongsi
Address: Shuangchenglu 803nong11hao1602A-1609shi, baoshanqu, shanghai 200000 CN.
Imported to AUS: SIHAO PTY LTD. 1 ROKEVA STREETEASTWOOD NSW 2122 Australia
Imported to USA: Sanven Technology Ltd. Suite 250, 9166 Anaheim Place, Rancho Cucamonga, CA 91730
| UK | REP |
YH CONSULTING LIMITED. C/O YH Consulting
Limited Office 147, Centurion House, London
Road, Staines-upon-Thames, Surrey, TW18 4AX
| EC | REP |
E-CrossStu GmbH
Mainzer Landstr.69,
60329 Frankfurt am Main.
VEVOR®
TOUGH TOOLS, HALF PRICE
Technical Support and E-Warranty Certificate
www.vevor.com/support
VEVOR®
TOUGH TOOLS, HALF PRICE
natural_image
Exterior view of a solar panel mounted on a cylindrical base (no text or symbols visible)natural_image
Exterior view of a black cylindrical solar panel mounted on a circular base (no text or symbols visible)1 x contrôleur
natural_image
Exterior view of a black rectangular electronic component with a circular base and flat top (no text or symbols visible)natural_image
Product display of metal strips and four small metallic components (no text or symbols visible)6 x vis techniques
2 x chevrons/lattes
natural_image
Black remote control with numeric keypad and function buttons (no text or symbols beyond control icons)natural_image
Close-up of vertical metallic bars with serrated edges, no text or symbols visiblenatural_image
Illustration of a red-tiled roof tiles with wavy black lines (no text or symbols)II. Toiture en tuiles
I. INSTALLATION DE TOITURE METALLIQUE
ÉTAPE 1
natural_image
Three geometric diagrams labeled A, B, and C showing 3D shapes with internal squares and dashed lines (no text or symbols)natural_image
Pure diagram of a mechanical or electrical component with no visible text, numbers, or symbolsÉTAPE 3
natural_image
Illustration of a hand using red pliers to cut or mark a metal surface with a dashed oval outline (no text or symbols)natural_image
Pure diagram of a mechanical or electrical component with vertical lines and a central circular element, no text or symbols present.natural_image
Illustration of a mechanical device mounted on a metal railing with a circular component inserted (no text or symbols visible)natural_image
Diagram of a solar panel mounted on a base with green arrows indicating downward motion (no text or symbols)natural_image
Illustration of a hand operating a small electronic device mounted on a grid-patterned surface (no text or symbols visible)natural_image
Illustration of a solar panel mounted on a circular base with a mesh roof, no text or symbols present.II. INSTALLATION DE TOITURES EN TUILES
ÉTAPE 1
natural_image
Three geometric shapes labeled A, B, and C with internal square markers, no text or symbols present.natural_image
Diagram of a roof drainage system with red-tiled walls and directional arrows indicating flow or movement (no text or symbols)natural_image
Illustration of a red-tiled roof with a black oval opening and a yellow stripe inside, no text or symbols present.ÉTAPE 4
natural_image
Illustration of a person installing or cleaning a tiled roof with a black-and-white emblem (no text or symbols)natural_image
Illustration of a hand using a glue gun to clean a tiled roof with a black vent and yellow stripe (no text or symbols)ÉTAPE 6
natural_image
Illustration of a solar panel mounted on a tiled roof, with green arrows indicating airflow or ventilation direction (no text or symbols)natural_image
Illustration of a hand holding a camera on a roof-mounted solar panel mounted on a wall (no text or symbols)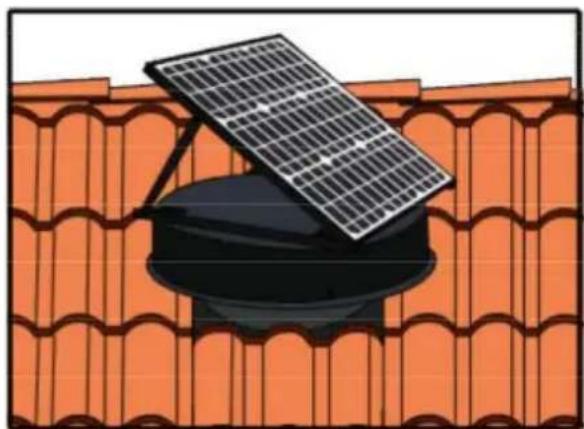
natural_image
Illustration of a solar panel mounted on a roof with orange tiles (no text or symbols)Fabricant: Shanghaimuxinmuyeyouxiangongsi Adresse: Shuangchenglu 803nong11hao1602A-1609shi, baoshanqu, shanghai 200000 CN.
Importé en Australie : SIHAO PTY LTD. 1 ROKEVA STREETEASTWOOD NSW 2122 Australie
YH CONSULTING LIMITED. C/O YH Consulting Limited Bureau 147, Centurion House, London Road, Staines- upon-Thames, Surrey, TW18 4AX
E-CrossStu GmbH
69, rue Mainzer Landstr.,
natural_image
Exterior view of a solar panel mounted on a cylindrical base (no text or symbols visible)natural_image
Exterior view of a black cylindrical solar panel mounted on a circular base (no text or symbols visible)1 x Solarventilator.
ÿ
1 x Controller
natural_image
Black remote control with numeric keypad and function buttons (no text or symbols beyond icons)natural_image
Close-up of vertical metallic bars with serrated edges, no text or symbols visibleI. Metalldach

natural_image
Illustration of a red-tiled roof tiles with wavy black lines (no text or symbols)II. Ziegeldach
I.METALLDACHINSTALLATION
SCHRITT
natural_image
Three geometric diagrams labeled A, B, and C showing 3D shapes with internal squares and dashed lines (no text or symbols)natural_image
Pure diagram of a mechanical or electrical component with no visible text, numbers, or symbolsSCHRITT
natural_image
Illustration of a hand using red power cr Khanps to cut metal strips on a metal shelf, with a dashed oval highlighting the area (no text or symbols)natural_image
Pure diagram of a mechanical or electrical component with vertical lines and a central circular element, no text or symbols present.natural_image
Illustration of a person using a tool to clean or inspect a dark circular object on a metal railing (no text or symbols visible)natural_image
Diagram of a solar panel mounted on a base with green arrows indicating downward motion (no text or symbols)natural_image
Illustration of a hand operating a small electronic device mounted on a grid-patterned surface (no text or symbols visible)natural_image
Illustration of a solar panel mounted on a circular base with a mesh roof (no text or symbols)II. INSTALLATION VON ZIEGELDÄCHERN
SCHRITT
natural_image
Three geometric shapes labeled A, B, and C with internal square markers, no text or symbols present.natural_image
Diagram of a roof drainage system showing airflow and structural components (no text or labels)natural_image
Illustration of a red-tiled roof with a black oval opening and a yellow stripe inside, no text or symbols present.SCHRITT
natural_image
Illustration of a person opening a window onto a tiled roof, with a black object partially visible (no text or symbols)natural_image
Illustration of a hand using a glue gun to clean a tiled roof with a black vent and yellow stripe (no text or symbols)SCHRITT
natural_image
Illustration of a solar panel mounted on a tiled roof, with green arrows indicating airflow or ventilation direction (no text or symbols)natural_image
Illustration of a hand holding a camera on a roof-mounted solar panel mounted on a wall (no text or symbols)
natural_image
Illustration of a solar panel mounted on a roof with orange tiles (no text or symbols)Hersteller: Shanghaimuxinmuyeyouxiangongsi Adresse: Shuangchenglu 803nong11hao1602A-1609shi, Baoshanqu, Shanghai 200000 CN.
Nach AUS importiert: SIHAO PTY LTD. 1 ROKEVA STREETEASTWOOD NSW 2122 Australien
Importiert in die USA: Sanven Technology Ltd. Suite 250, 9166 Anaheim Place, Rancho Cucamonga, CA 91730
| UK | REP |
YH CONSULTING LIMITED. C/O YH Consulting
Limited Office 147, Centurion House, London
Road, Staines-upon-Thames, Surrey, TW18 4AX
www.vevor.com/support
VEVOR®
TOUGH TOOLS, HALF PRICE
Modello: JBSF-350F/JBSF-320G/JBSF-320E
Modello: JBSF-350F/JBSF-320G/JBSF-320E
natural_image
Exterior view of a solar panel mounted on a cylindrical base (no text or symbols visible)natural_image
Exterior view of a black cylindrical solar panel mounted on a circular base (no text or symbols visible)1 x Controllore

natural_image
Black remote control with control buttons and a dial indicator (no text or symbols beyond icons)natural_image
Close-up of vertical metallic bars with serrated edges, no text or symbols visibleI. Tetto in metallo
natural_image
Illustration of a red-tiled roof tiles with wavy black lines (no text or symbols)II. Tetto in tegole
natural_image
Three geometric diagrams labeled A, B, and C showing 3D shapes with internal squares and dashed lines (no text or symbols)natural_image
Diagram of a mechanical or electrical component with a circular dial and red pointer, no visible text or symbolsFASE 3
natural_image
Illustration of a hand using red pliers to cut or mark a metal surface with a dashed oval outline (no text or symbols)natural_image
3D rendering of a circular object suspended between vertical lines, with no visible text or symbolsnatural_image
Illustration of a mechanical device mounted on a metal railing with a circular component inserted (no text or symbols visible)natural_image
Diagram of a solar panel mounted on a base with green arrows indicating downward motion (no text or symbols)natural_image
Illustration of a hand operating a small electronic device mounted on a grid-patterned surface (no text or symbols visible)natural_image
Illustration of a solar panel mounted on a circular base with a mesh roof (no text or symbols)II. INSTALLAZIONE DEL TETTO IN TEGOLE
FASE 1
natural_image
Three geometric shapes labeled A, B, and C with internal square markers, no text or symbols present.natural_image
Diagram of a roof drainage system with red arrows indicating flow direction (no text or symbols)natural_image
Illustration of a red-tiled roof with a black oval opening and a yellow stripe inside, no text or symbols present.FASE 4
natural_image
Illustration of a window installation on a tiled roof, showing a black vent and a device (no text or symbols)natural_image
Illustration of a hand using a glue gun to clean a tiled roof with a black vent and yellow stripe (no text or symbols)FASE 6
natural_image
Illustration of a solar panel mounted on a tiled roof, with green arrows indicating airflow or ventilation direction (no text or symbols)natural_image
Illustration of a hand holding a camera on a roof-mounted solar panel mounted on a wall (no text or symbols)
natural_image
Illustration of a solar panel mounted on a roof with orange tiles (no text or symbols)Produttore: Shanghaimuxinmuyeyouxiangongsi Indirizzo:
Shuangchenglu 803nong11hao1602A-1609shi, baoshanqu, shanghai 200000 CN.
Importato in AUS: SIHAO PTY LTD. 1 ROKEVA STREETEASTWOOD NSW 2122 Australia
Importato negli USA: Sanven Technology Ltd. Suite 250, 9166 Anaheim Place, Rancho Cucamonga, CA 91730
YH CONSULTING LIMITED. C/O YH Consulting
Limited Ufficio 147, Centurion House, London
Road, Staines-upon-Thames, Surrey, TW18 4AX
elettronica www.vevor.com/support
VEVOR®
TOUGH TOOLS, HALF PRICE
natural_image
Exterior view of a solar panel mounted on a cylindrical base (no text or symbols visible)natural_image
Exterior view of a black cylindrical solar panel mounted on a circular base (no text or symbols visible)1 x controlador
< Modelo de control remoto 1 >

natural_image
Black remote control with numeric keypad and function buttons (no text or symbols beyond control icons)< Modelo de control remoto 2 >
natural_image
Close-up of vertical metallic bars with serrated edges, no text or symbols visibleI. Techo de metal
natural_image
Illustration of a red-tiled roof tiles with wavy black lines (no text or symbols)II. Techo de tejas
natural_image
Three geometric diagrams labeled A, B, and C showing 3D shapes with internal squares and dashed lines (no text or symbols)natural_image
Diagram of a mechanical or electrical component with a circular dial and red pointer, no visible text or symbolsPASO 3
natural_image
Illustration of a hand using red pliers to cut or mark a metal surface with a dashed oval outline (no text or symbols)natural_image
Pure diagram of a mechanical or electrical component with vertical lines and a central circular element, no text or symbols present.natural_image
Illustration of a mechanical device mounted on a metal railing with a circular component inserted (no text or symbols visible)natural_image
Diagram of a solar panel mounted on a base with green arrows indicating downward motion (no text or symbols)natural_image
Illustration of a hand operating a small electronic device mounted on a grid-patterned surface (no text or symbols visible)natural_image
Illustration of a solar panel mounted on a circular base with a mesh roof, no text or symbols present.natural_image
Three geometric shapes labeled A, B, and C with internal square markers, no text or symbols present.natural_image
Diagram of a roof drainage system with red arrows indicating flow direction (no text or labels)natural_image
Illustration of a red-tiled roof with a black oval opening and a yellow stripe inside, no text or symbols present.PASO 4
natural_image
Illustration of a person installing or cleaning a tiled roof with a black-and-white emblem (no text or symbols)natural_image
Illustration of a hand using a glue gun to clean a tiled roof with a black vent and yellow stripe (no text or symbols)PASO 6
natural_image
Illustration of a solar panel mounted on a tiled roof, with green arrows indicating airflow or ventilation direction (no text or symbols)natural_image
Illustration of a hand holding a camera on a roof-mounted solar panel mounted on a wall (no text or symbols)
natural_image
Illustration of a solar panel mounted on a roof with orange tiles (no text or symbols)Modele: JBSF-350F/JBSF-320G/JBSF-320E
Modele: JBSF-350F/JBSF-320G/JBSF-320E

natural_image
Exterior view of a solar panel mounted on a cylindrical base (no text or symbols visible)POTRZEBUJESZ POMOCY? SKONTAKTUJ SIĘ Z NAMI!
natural_image
Exterior view of a black cylindrical solar panel mounted on a circular base (no text or symbols visible)1 x wentylator solarny
1 x Kontroler
< Model pilota 1 >

natural_image
Black remote control with control buttons and a dial indicator (no text or symbols beyond icons)natural_image
Close-up of vertical metallic bars with serrated edges, no text or symbols visibleI. Dach metalowy

natural_image
Illustration of a red-tiled roof tiles with wavy black lines (no text or symbols)II. Dach z dachówki
I.MONTAŻ DACHU METALOWEGO
KROK 1
natural_image
Three geometric diagrams labeled A, B, and C showing 3D shapes with internal squares and dashed lines (no text or symbols)natural_image
Pure diagram of a mechanical or electrical component with no visible text, numbers, or symbolsKROK 3
natural_image
Illustration of a hand using red pliers to cut or mark a metal surface with a dashed oval outline (no text or symbols)natural_image
Pure diagram of a mechanical or electrical component with vertical lines and a central circular element, no text or symbols present.natural_image
Illustration of a mechanical device mounted on a metal frame with a circular component, no visible text or symbolsnatural_image
Diagram of a solar panel mounted on a base with green arrows indicating downward motion (no text or symbols)natural_image
Illustration of a hand holding a small device next to a solar panel mounted on a grid-patterned base (no text or symbols)natural_image
Illustration of a solar panel mounted on a circular base with a mesh roof, no text or symbols present.Machine Translated by Google
II.MONTAŻ DACHÓWKI
KROK 1
natural_image
Three geometric shapes labeled A, B, and C with internal square markers, no text or symbols present.natural_image
Diagram of a roof drainage system with visible airflow and structural elements (no text or labels)natural_image
Illustration of a red-tiled roof with a black oval opening and a yellow stripe inside, no text or symbols present.KROK 4
natural_image
Illustration of a window installation on a tiled roof, showing a black vent and a device (no text or symbols)natural_image
Illustration of a hand using a glue gun to clean a tiled roof with a black vent and yellow stripe (no text or symbols)KROK 6
natural_image
Illustration of a solar panel mounted on a tiled roof, with green arrows indicating airflow or ventilation direction (no text or symbols)natural_image
Illustration of a hand holding a camera on a roof-mounted solar panel mounted on a wall (no text or symbols)
natural_image
Illustration of a solar panel mounted on a roof with orange tiles (no text or symbols)Producent: Shanghaimuxinmuyeyouxiangongsi Adres:
Shuangchenglu 803nong11hao1602A-1609shi, Baoshanqu, Szanghaj 200000 CN.
Importowane do AUS: SIHAO PTY LTD. 1 ROKEVA STREETEASTWOOD NSW 2122 Australia
Importowane do USA: Sanven Technology Ltd. Suite 250, 9166 Anaheim Place, Rancho Cucamonga, CA 91730
| REP WIEL KIEJ BRYTANII |
| Przedstaw ciel UE |
YH CONSULTING LIMITED. C/O YH Consulting Limited Biuro 147, Centurion House, London Road, Staines-upon-Thames, Surrey, TW18 4AX
E-CrossStu GmbH
Mainzer Landstr.69,
60329 Frankfurt nad Menem.
VEVOR®
TOUGH TOOLS, HALF PRICE
Model: JBSF-350F/JBSF-320G/JBSF-320E
Model: JBSF-350F/JBSF-320G/JBSF-320E

natural_image
Exterior view of a solar panel mounted on a cylindrical base (no text or symbols visible)HULP NODIG? NEEM CONTACT MET ONS OP!
natural_image
Exterior view of a black cylindrical solar panel mounted on a circular base (no text or symbols visible)1 x Zonneventilator
ÿ
1 x Bedieningseenheid
Productspecificaties
ÿ Model ÿ
| Model | JBSF-350F |  |
| Motor | DC 15V 50W | |
| ZonnepaneelUitvoer | 50 Watt, 15 VDC | |
| UitlaatluchtVolume | ~3500 m3/u | |
| Omvormerspanning | Wisselstroom 100~240V 50 /60Hz |
ÿ Model ÿ
| Model | JBSF-320G |  |
| Motor | DC 15V 35W | |
| Zonnepaneelvermogen | 42 Watt, 15 VDC | |
| Uitlaatlucht Volume | ~3000 m3/u | |
| Omvormerspanning | Wisselstroom 100~240V 50 / 60Hz |
ÿ Model ÿ
< Afstandsbediening Model 1 >

natural_image
Black remote control with numeric keypad and function buttons (no text or symbols beyond icons)< Afstandsbediening Model 2 >
natural_image
Close-up of vertical metallic bars with serrated edges, no text or symbols visibleI. Metalen dak

natural_image
Illustration of a red-tiled roof tiles with wavy black lines (no text or symbols)II. Pannendak
I.METAAL DAKINSTALLATIE
STAP 1
natural_image
Three geometric diagrams labeled A, B, and C showing 3D shapes with internal squares and dashed lines (no text or symbols)natural_image
Diagram of a mechanical or electrical component with a circular dial and red pointer, no visible text or symbolsSTAP 3
natural_image
Illustration of a hand using red pliers to cut or mark a metal surface with a dashed oval outline (no text or symbols)natural_image
Pure diagram of a mechanical or electrical component with vertical lines and a central circular element, no text or symbols present.natural_image
Illustration of a mechanical device mounted on a metal railing with a circular component inserted (no text or symbols visible)natural_image
Diagram of a solar panel mounted on a base with green arrows indicating downward motion (no text or symbols)natural_image
Illustration of a hand operating a small electronic device mounted on a grid-patterned surface (no text or symbols visible)natural_image
Illustration of a solar panel mounted on a circular base with a mesh roof, no text or symbols present.II. INSTALLATIE VAN EEN PANNENDAK
STAP 1
natural_image
Three geometric shapes labeled A, B, and C with internal square markers, no text or symbols present.natural_image
Diagram of a roof drainage system with visible airflow and structural elements (no text or labels)natural_image
Illustration of a red-tiled roof with a black oval opening, featuring a yellow stripe on the wall (no text or symbols)STAP 4
natural_image
Illustration of a window installation on a tiled roof, showing a black vent and a device (no text or symbols)natural_image
Illustration of a hand using a glue gun to clean a tiled roof with a black vent and yellow stripe (no text or symbols)STAP 6
natural_image
Illustration of a solar panel mounted on a tiled roof, with green arrows indicating airflow or ventilation direction (no text or symbols)natural_image
Illustration of a hand holding a camera on a roof-mounted solar panel mounted on a wall (no text or symbols)
natural_image
Illustration of a solar panel mounted on a roof with orange tiles (no text or symbols)Fabrikant: Shanghaimuxinmuyeyouxiangongsi Adres:
Shuangchenglu 803nong11hao1602A-1609shi, baoshanqu, shanghai 200000 CN.
YH CONSULTING LIMITED. C/O YH Consulting Limited Kantoor 147, Centurion House, London Road, Staines-upon-Thames, Surrey, TW18 4AX
garantiecertificaat www.vevor.com/support
VEVOR®
TOUGH TOOLS, HALF PRICE
natural_image
Exterior view of a solar panel mounted on a cylindrical base (no text or symbols visible)BEHÖVER HJÄLP? KONTAKTA OSS!
natural_image
Exterior view of a black cylindrical solar panel mounted on a circular base (no text or symbols visible)1 x solfläkt
1 x Controller
Produktspecifikationer
ÿ Modell ÿ
| Modell | JBSF-350F | |
| Motor | DC 15V 50W | |
| SolpanelProduktion | 50 Watt, 15 VDC | |
| FrånluftVolym | ~3500 m3/h | |
| Inverterspänning | AC 100~240V 50 /60 Hz |
ÿ Modell ÿ
| Modell | JBSF-320G | |
| Motor | DC 15V 35W | |
| Solpanelseffekt 42 Watt, | 15 VDC | |
| FrånluftVolym | ~3000 m3/h | |
| Inverterspänning | AC 100~240V 50 /60 Hz |
ÿ Modell ÿ
| Modell | JBSF-320E | 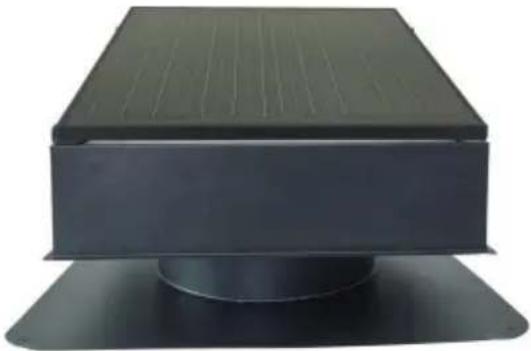 |
| Motor | DC 15V 35W | |
| SolpanelProduktion | 35 Watt, 15 VDC | |
| FrånluftVolym | ~2200 m3/h |
< Fjärrkontrollmodell 1 >
natural_image
Black remote control with numeric keypad and function buttons (no text or symbols beyond icons)< Fjärrkontroll modell 2 >
natural_image
Close-up of vertical metallic bars with serrated edges, no text or symbols visibleI. Metalltak

natural_image
Illustration of a red-tiled roof tiles with wavy black lines (no text or symbols)II. Tegeltak
I.MONTERING AV METALLTAK
STEG 1
natural_image
Three geometric diagrams labeled A, B, and C showing 3D shapes with internal squares and dashed lines (no text or symbols)natural_image
Diagram of a mechanical or electrical component with a circular dial and vertical bars, no visible text or symbols.STEG 3
natural_image
Illustration of a hand using red pliers to cut or mark a metal surface with a dashed oval outline (no text or symbols)natural_image
Pure diagram of a mechanical or electrical component with vertical lines and a central circular element, no text or symbols present.natural_image
Illustration of a mechanical device mounted on a metal railing with a circular component inside (no text or symbols visible)natural_image
Diagram of a solar panel mounted on a base with green arrows indicating downward motion (no text or symbols)natural_image
Illustration of a hand operating a small electronic device mounted on a grid-patterned surface (no text or symbols visible)natural_image
Illustration of a solar panel mounted on a circular base with a mesh roof (no text or symbols)II.MONTERING AV PETELTAK
STEG 1
natural_image
Three geometric shapes labeled A, B, and C with internal square markers, no text or symbols present.natural_image
Diagram of a roof drainage system with red arrows indicating flow direction (no text or labels)natural_image
Illustration of a red-tiled roof with a black oval opening, featuring a yellow stripe on the wall (no text or symbols)STEG 4
natural_image
Illustration of a window installation on a tiled roof, showing a black vent and a device (no text or symbols)natural_image
Illustration of a hand using a glue gun to clean a tiled roof with a black vent and yellow stripe (no text or symbols)STEG 6
natural_image
Illustration of a solar panel mounted on a tiled roof, with green arrows indicating airflow or ventilation direction (no text or symbols)natural_image
Illustration of a hand holding a camera on a roof-mounted solar panel mounted on a wall (no text or symbols)
natural_image
Illustration of a solar panel mounted on a roof with orange tiles (no text or symbols)Tillverkare: Shanghaimuxinmuyeyouxiangongsi Adress:
Shuangchenglu 803nong11hao1602A-1609shi, baoshanqu, shanghai 200000 CN.
Importerad till AUS: SIHAO PTY LTD. 1 ROKEVA STREETEASTWOOD NSW 2122 Australien
Importerad till USA: Sanven Technology Ltd. Suite 250, 9166 Anaheim Place, Rancho Cucamonga, CA 91730
| UK | REP |
| EC | REP |
YH CONSULTING LIMITED. C/O YH Consulting Limited Office 147, Centurion House, London Road, Staines-upon-Thames, Surrey, TW18 4AX
www.vevor.com/support