
JRWD6012 - Wheelchair Vevor - Free user manual and instructions
Find the device manual for free JRWD6012 Vevor in PDF.



| Product type | Electric wheelchair |
| Brand | Vevor |
| Model | JRWD6012 |
| Maximum load | 136 kg |
| Maximum speed | 6 km/h |
| Maximum range | 20 km |
| Battery | Lithium-ion 24 V, 20 Ah |
| Charger | 100-240 V AC, 50/60 Hz, output 24 V DC / 3 A |
| Charging time | 8 to 10 hours (do not exceed 24 h) |
| Motors | 2 DC motors, 24 V, 250 W each |
| Front wheel diameter | 8 inches |
| Rear wheel diameter | 12 inches |
| Seat width | 17.7 or 20 inches (depending on version) |
| Maximum climbing angle | 6° |
| Static stability | 9° |
| Obstacle clearance | 50 mm |
| Weather protection | IPX3 (chair), IPX1 (charger) |
| Driving type | Joystick with speed adjustment (5 levels) |
| Operating modes | Electric and manual (pushed) |
| Brakes | Automatic electromagnetic brakes |
| Warranty | 1 year (excluding consumables) |
| Regular maintenance | Clean with a damp cloth, check tires and battery every 6 months |
Frequently Asked Questions - JRWD6012 Vevor
User questions about JRWD6012 Vevor
0 question about this device. Answer the ones you know or ask your own.
Ask a new question about this device
Download the instructions for your Wheelchair in PDF format for free! Find your manual JRWD6012 - Vevor and take your electronic device back in hand. On this page are published all the documents necessary for the use of your device. JRWD6012 by Vevor.
USER MANUAL JRWD6012 Vevor
Technical Support and E-Warranty Certificate www.vevor.com/support
ELECTRIC WHEELCHAIRS
OPERATING INSTRUCTIONS
MODEL: JRWD6012
We continue to be committed to providing you with tools at competitive prices. "Save Half", "Half Price", or any other similar expressions used by us only represent an estimate of savings you might benefit from buying certain tools with us compared to top brands and does not necessarily mean to cover all categories of tools offered. We kindly remind you to verify carefully when placing an order with us that you are actually saving half in comparison with the top major brands.
VEVOR®
TOUGH TOOLS, HALF PRICE
MODEL: JRWD6012

NEED HELP? CONTACT US!
Have product questions? Need technical support? Please feel free to contact us:
Technical Support and E-Warranty Certificate www.vevor.com/support
This is the original instruction. Please read all manual instructions carefully before operating. VEVOR reserves the right to interpret the user manual. The appearance of the product shall be subject to the product you received. Please forgive us that we won't inform you if there are any technology or software updates on our product.
Preface
Please read the user manual carefully before taking the product into use. This manual contains operations, assembly methods, and simple fault solutions.
This manual applies to our model: JRWD6012.
This manual contains wheelchair maintenance and self-checking methods. Please keep it in a proper place.
Please provide this manual for reference when other people are going to use this wheelchair.
The annotations and illustrations in this manual might slightly differ from the actual parts due to quality improvement or design changes. In case of any discrepancy, the actual parts prevail.
Contact your dealer if there is any ambiguity or question.
Improper use of any vehicle may lead to injury. Unsafe driving could harm yourselves and others.
The electric wheelchair is intended to comfortably transport persons with walking difficulties or no walking abilities.
This electric wheelchair is designed to transport one person only.

Warning symbol
Follow the instructions next to this symbol closely.
Please pay attention to these instructions, otherwise it could result in physical injury or damage to the wheelchair or the environment.
Product Introduction
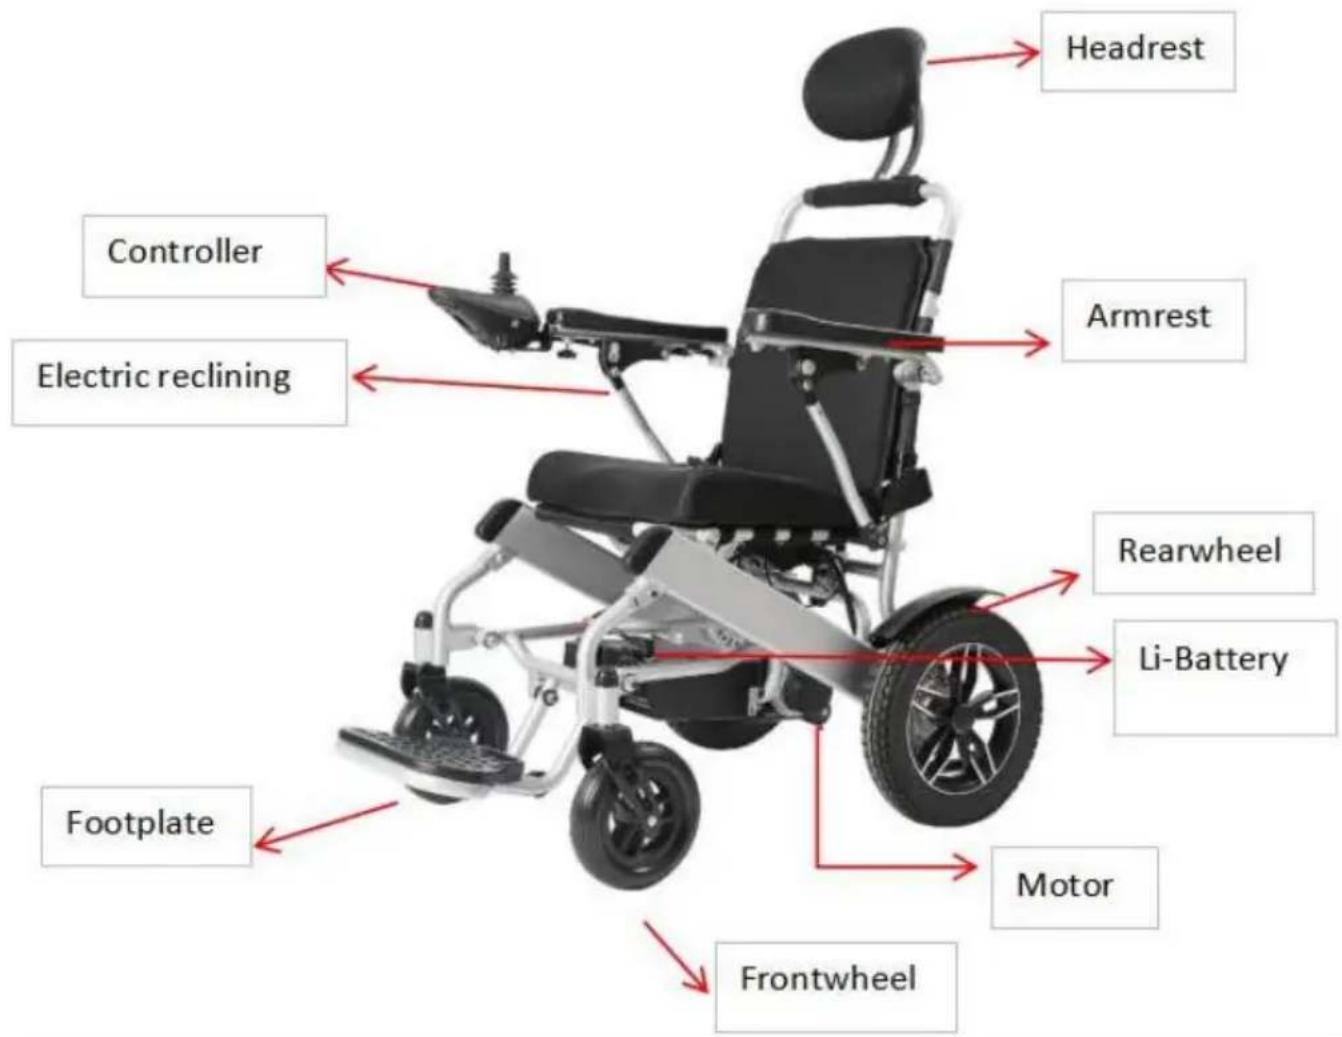
Product Performance
This series of electric wheelchairs are powered by Li-ion battery and drive DC motor. Users control direction and adjust speed by joystick control. Suitable for application of low speed, good road condition, and small s
Safety Instructions
1. Main Security Features
Classified according to the type of protection against electric shock: Type B applied part.
Classified according to the degree of protection against ingress of liquid: IPX3.
Classified according to the safety of use in the presence of a flammable anesthetic mixture with air or with oxygen or nitrous oxide: Non AP/APG type.
Classified according to mode of operation: Continuous operation.
Rated voltage: DC 24V.
No protective effect against the discharge of a defibrillator.
No signal input or output parts.
Non-permanently installed equipment.
2. Driving Instructions
General Driving Cautions
Keep your hands on the armrests to control the wheelchair.
Practice in parks or other safe open areas until you can use the wheelchair skillfully.
Practice driving thoroughly in a safe place to master the principles of moving fast, stopping, and turning circles.
Before driving on the road, be accompanied by a caregiver and confirm that it is safe.
Strictly follow pedestrian traffic rules; do not consider yourself a vehicle driver.
Please drive on the sidewalk and the zebra crossing. Do not drive on the vehicle lane.
Steadily drive, to avoid driving in a 'Z' line or sharp turn.
Accompanied by Caregivers or Avoid Driving in These Conditions
Drive in bad weather, such as rainy day, heavy fog, strong wind, snow. In case the wheelchair is wet, wipe the water immediately.
Drive on bad road conditions, such as muddy, trail, sand road, gravel, etc.
Drive on crowded road.
Drive on no fence side ditch, pond, etc.
Across the railway.
When you have to cross the railway, pause at the turnoff to confirm it is safe, and make sure that the tires
will not be stuck by the railway.
The electric wheelchair is only for personal use, do not carry people or goods, and do not use it for traction purposes.
Precautions for Uphill and Downhill
Avoid driving on the following places: steep hills, tilt places, high steps, channels, etc.
Avoid driving on steep slopes; the slope range should be less than 9 degrees. Please carefully operate the controller when driving on slopes.
Keep moving forward during uphill or downhill.
Slow down speed during downhill.
Avoid driving sideways on the steep.
Forbid driving on the stairs place and avoid crossing high steps.
Avoid crossing wide ditches.
During crossing ditches, keep 90° angel between tires and the ditches.

Do not set the wheelchair to manual mode during uphill and dov
When the wheelchair is malfunction at traffic crossing, please immediate ask passerby for help. And set wheelchair to manual mode, then push wheelchair to leave the scene, or user to get away from the site to place immediately.
Precautions for the Caregivers
Caregivers should confirm that the users ‘feet are on the footrests’ proposition and ensure clothes do not attach to the wheels.
Caregivers should push the wheelchair to move forward to keep safe steep slope or long slope.
Other Notice
Repair and Refit
If it has to repair or refit the wheelchair, please contact seller or sei
department. Do not modify by self. It may cause accident or wheelch malfunction.
Keep Dry
Do not put the wheelchair in a wet place. If the wheelchair gets wet, dry it immediately.

Without our company's confirmation, do not modify the assembly or materials of this wheelchair.
To avoid imbalance, do not add weight arbitrarily. When someone is sitting on the wheelchair or the clutch is not in manual mode, do not use other
vehicles to pull or push the wheelchair.
Service Life
The service life of this product is 5 years from the date of manufacture. Please use the product within the limited period. Do not use it beyond the validity period for more than one year to avoid accidents. Date of manufacture: see the label.
Electromagnetic Compatibility
The wheelchair should be kept away from strong magnetic fields and large inductive electrical equipment, such as radio stations, TV stations, underground radio stations, and cell phone transmitting stations. Pay attention to sources of electromagnetic interference and keep as far away as possible to avoid electromagnetic interference. The electric wheelchair should avoid electromagnetic interference.
Note: The electric wheelchair should meet the electromagnetic compatibility requirements of the YY0505 standard.
Users should install and use the electric wheelchair based on the electromagnetic compatibility information provided.
Portable and mobile RF communication devices can affect the performance of the electric wheelchair. Therefore, please avoid strong electromagnetic disturbances, such as being near a mobile phone or microwave.
Please refer to the attachment for notices and the manufacturer's statement.
The cut-off voltage of the battery is 23V.
The electric wheelchair belongs to Class D in GB/T 18029.21-2012, a wheelchair with electronic differential steering and manual brake.

The electric wheelchair should not be placed or used together with other devices. If it is necessary, please verify that the electric wheelchair can work under those circumstances.
Usage and Operation
Adjustment of Wheelchair: Unfold Wheelchair
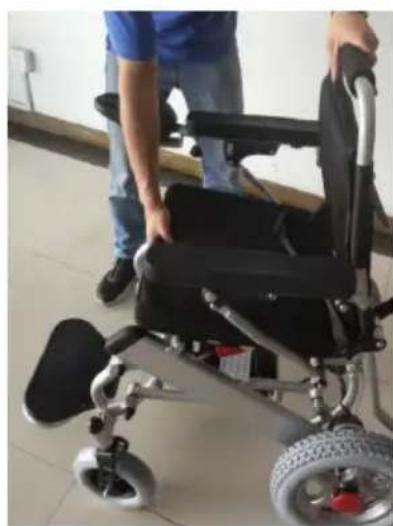
Hold the backrest with one hand and the seat with the other, then open it (picture 1). Fully unfold the wheelchair, then fasten the lock located under the backrest (picture 2). Before use, make sure the lock is properly secured. Otherwise, it may cause the wheelchair to fold while in use, which could be dangerous.
Picture 1 Picture 2
Fold Wheelchair
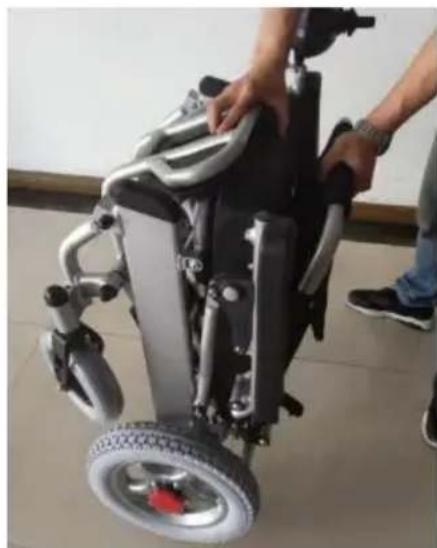
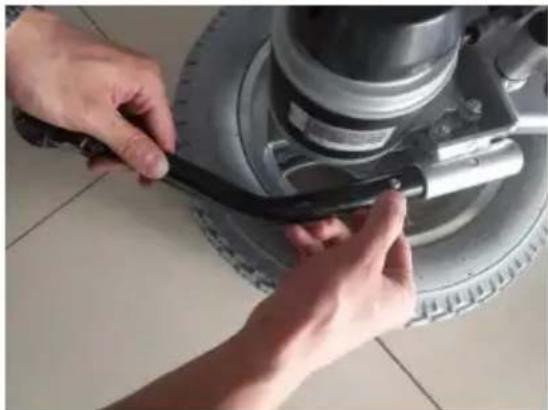
Loosen the lock (picture 3), then hold the backrest with one hand and the seat with the other, and fold it (picture 4).
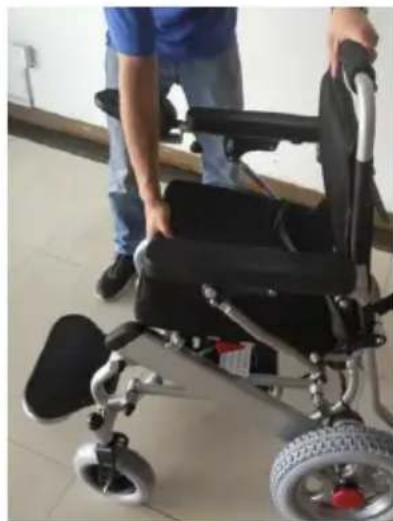
Picture 3 Picture 4
Install Controller
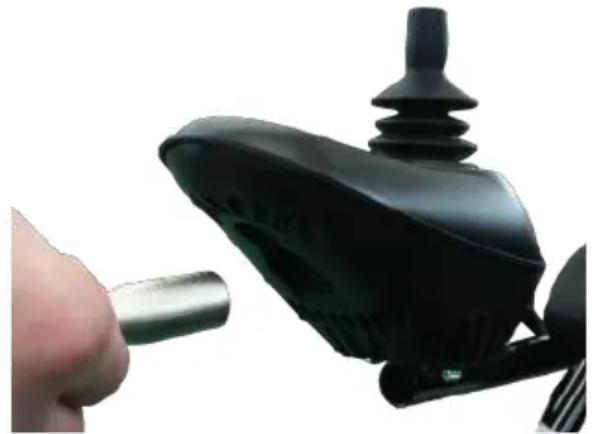
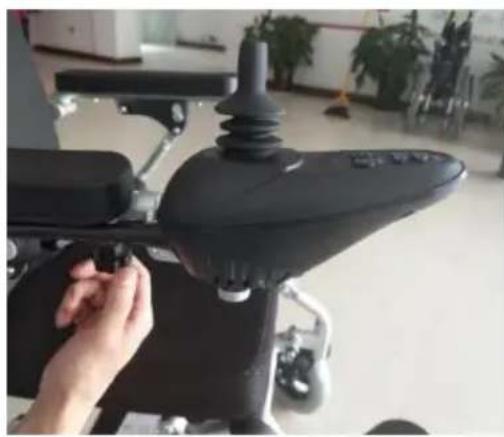
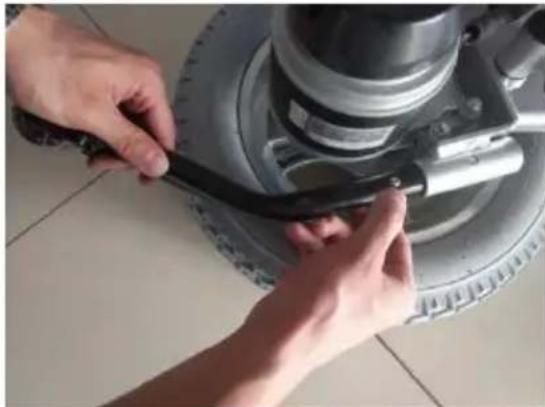
Insert the controller into the armrest tube. Ensure the controller is kept horizontal (picture 5), then tighten the screw (picture 6).
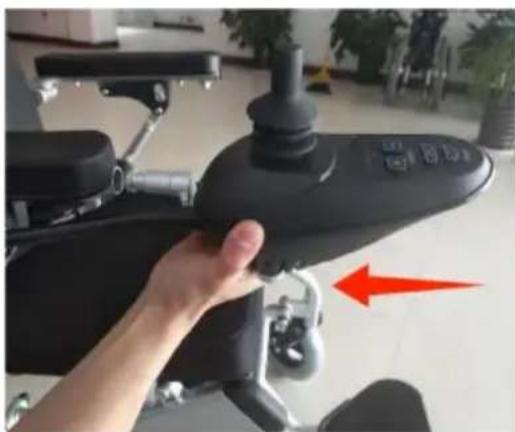
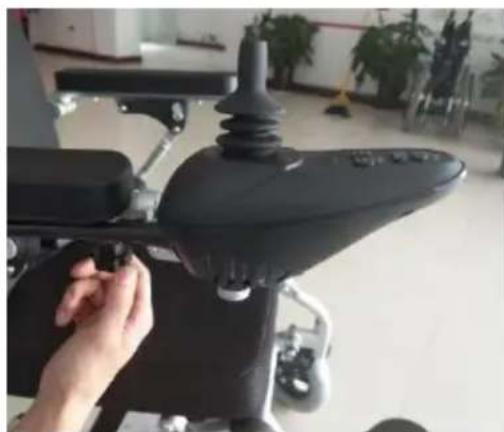
Picture 5 Picture 6
Install and Replace Battery
Dismantle Battery
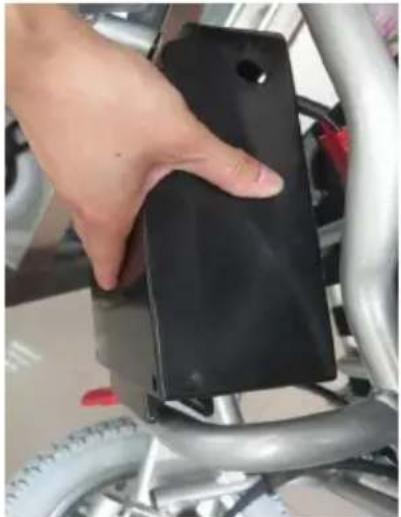
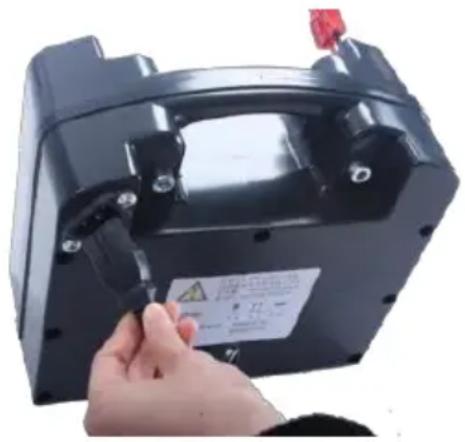
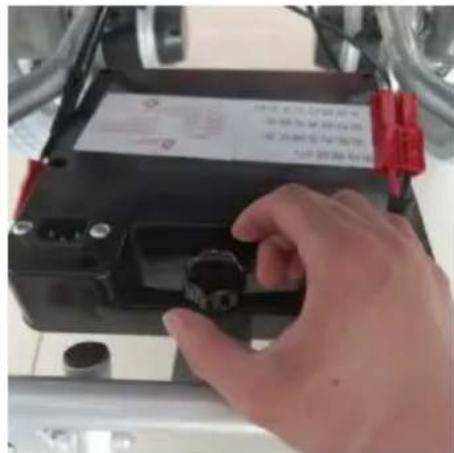
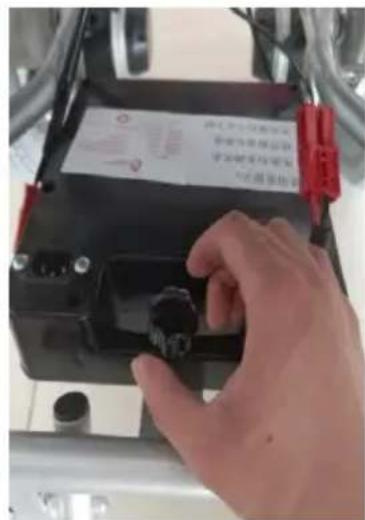
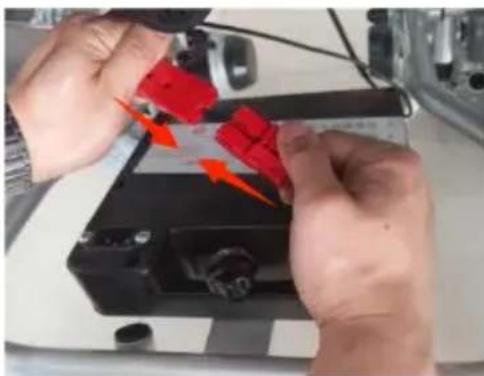
Disconnect the battery plug and the controller plug (picture 7), then remove the screw (picture 8).
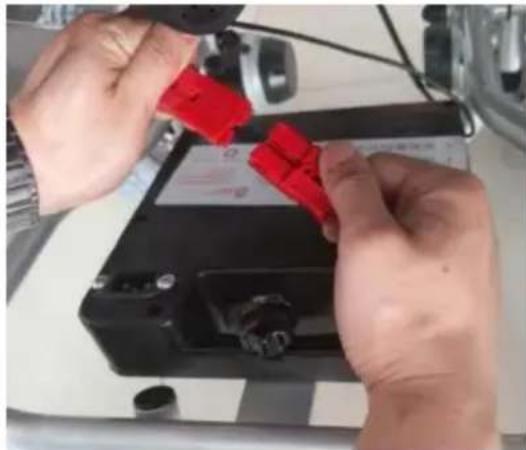
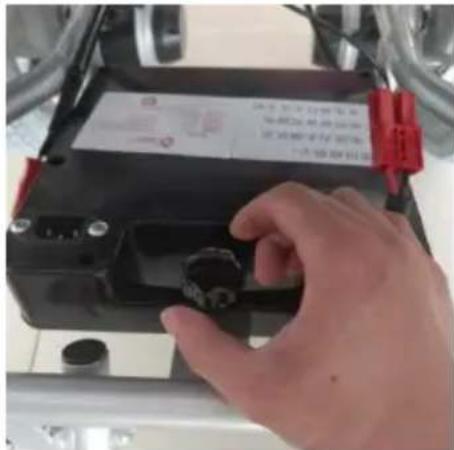
Picture 7 Picture 8
Install Battery
Place the battery groove in the back tube (picture 9), loosen the screw (picture 10). Then connect the battery plug with the controller plug (picture 11).
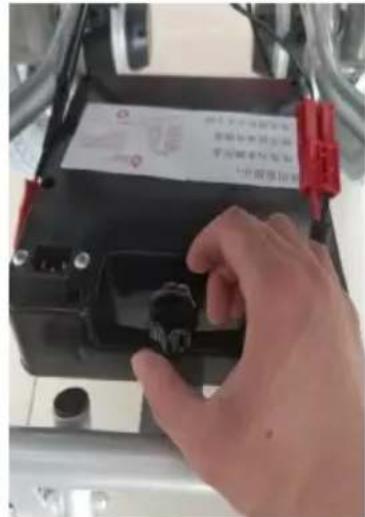
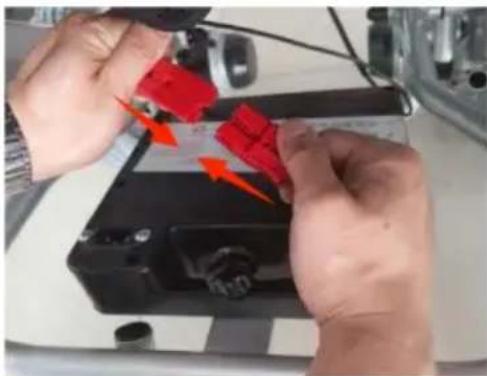
Picture 9 Picture 10 Picture 11
Footplate
The footplate can be pulled up or down (picture 12).
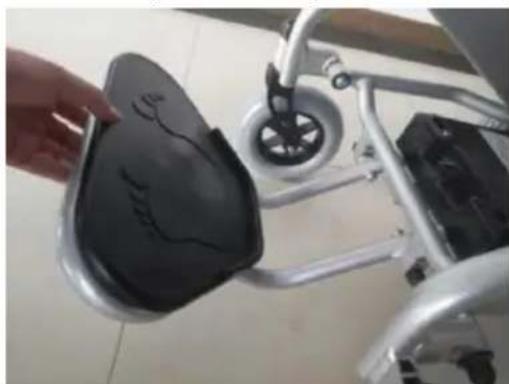
Picture 12
Install and Dismantle Anti-tipper
Press the button to install/dismantle the anti-tipper (picture 13-14).
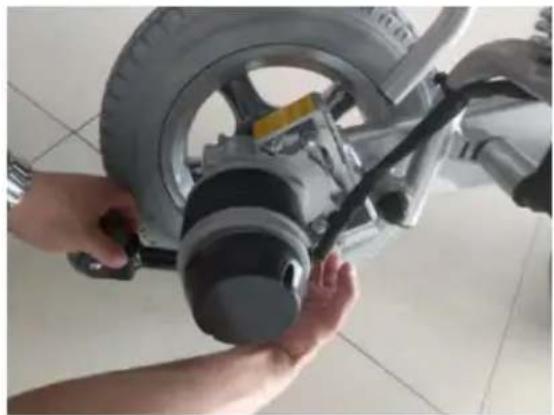
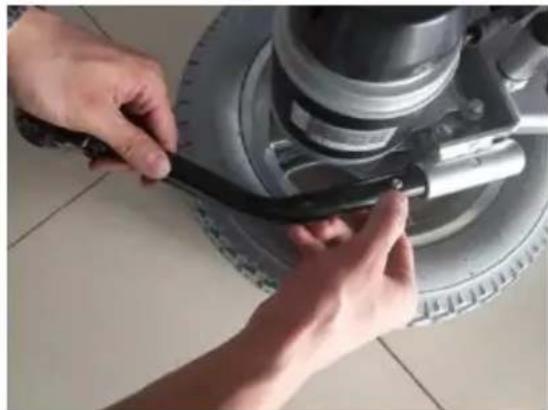
Picture 13 Picture 14
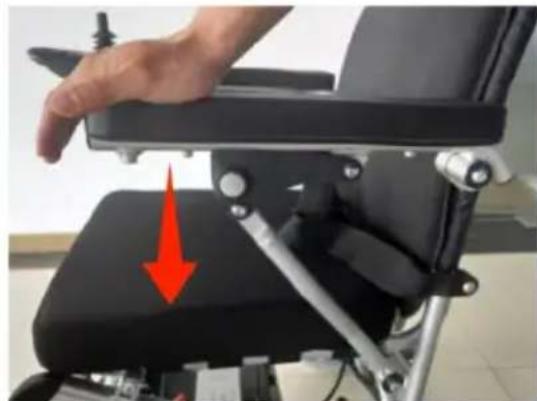
Armrest Flip-up
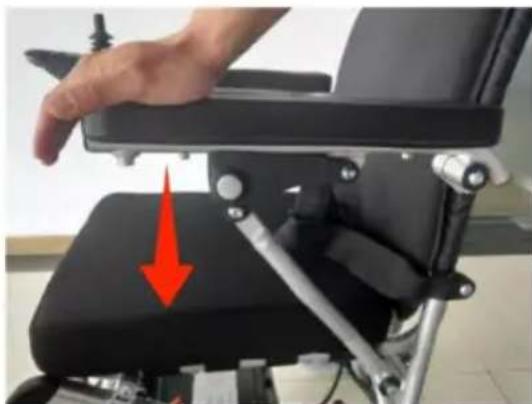
One hand presses the armrest button, another hand flips up the armrest (picture 15). And press down the armrest to the proper position to fix the armrest (picture 16).
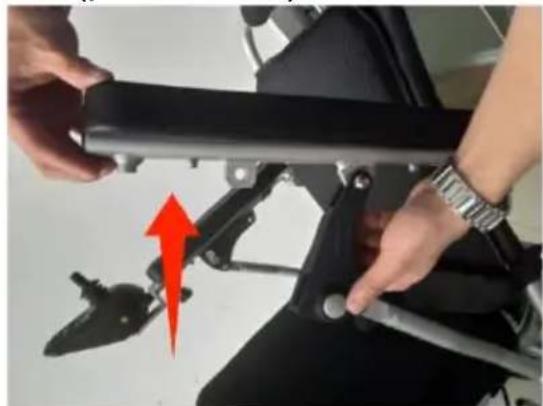
Picture 15 Picture 16
Backrest adjustment
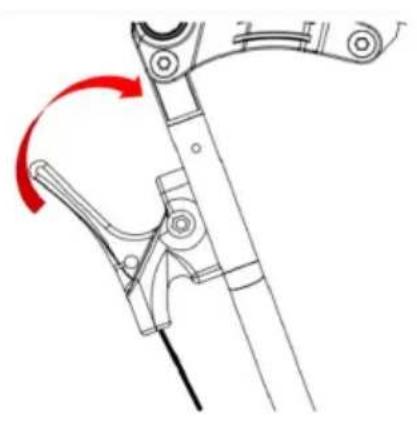
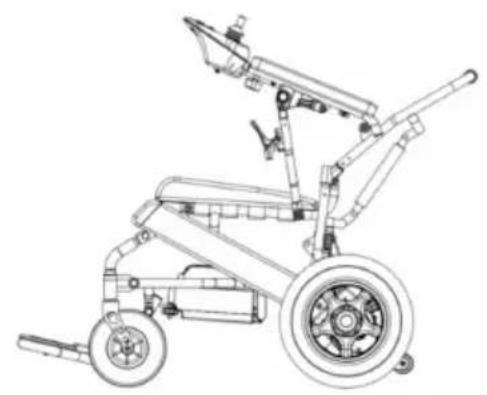
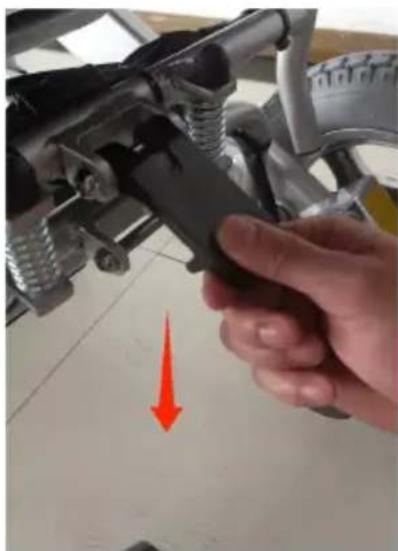
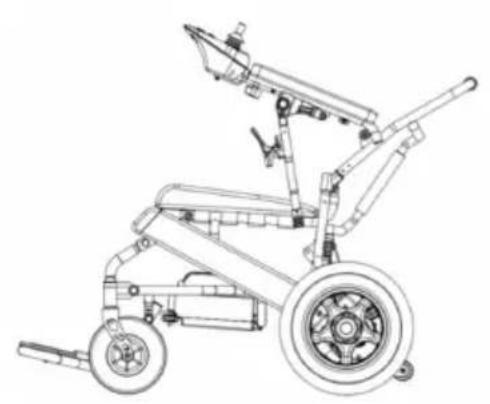
1) As shown in (picture 19), grip the handle tightly in the direction of the arrow. 2) Lie back and release the brake lever at a comfortable angle for the user (picture 20). 3) When restoring the sitting position, stand up first, then grip the handle as shown in (picture 19), and the wheelchair can return to the sitting position.
Attention: Do not drive the wheelchair in the backrest adjustment mode to avoid danger.
Picture 19 Picture 20
Switch between Manual Mode and Electric Mode
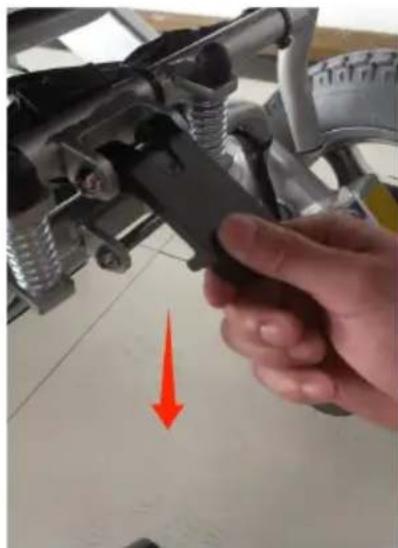
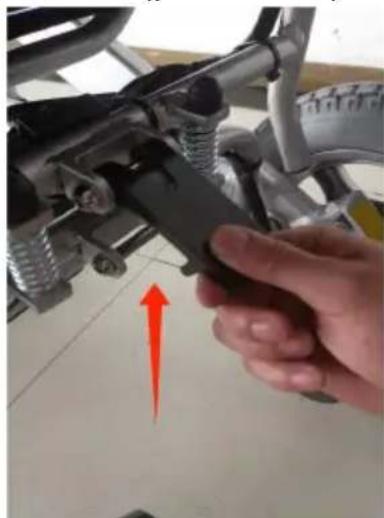
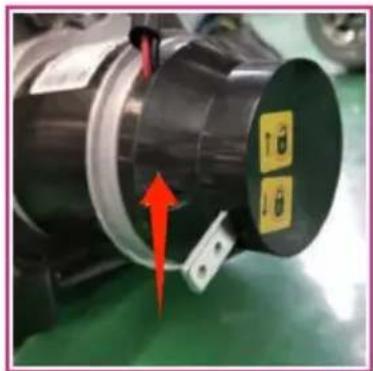
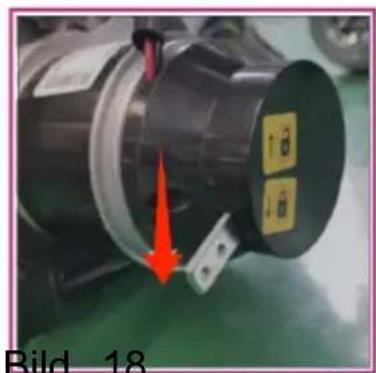
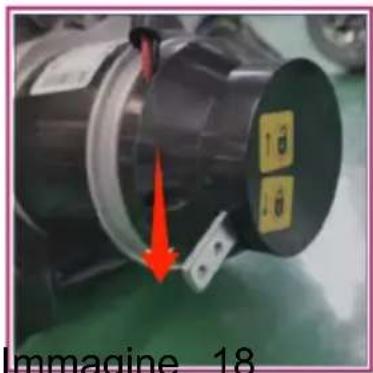
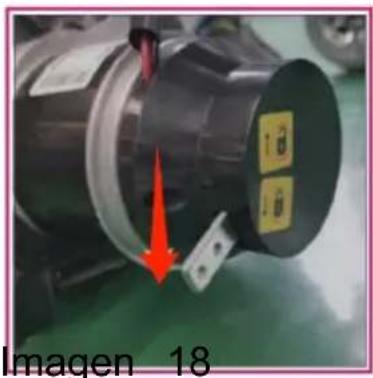
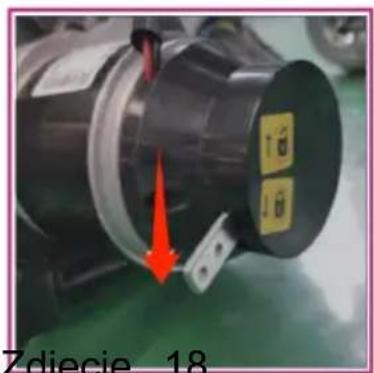
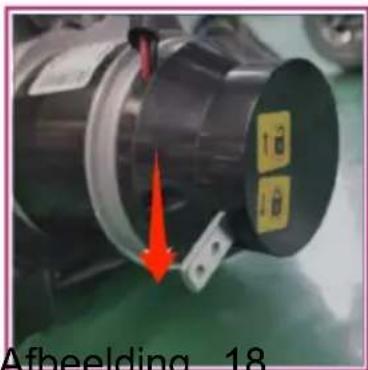
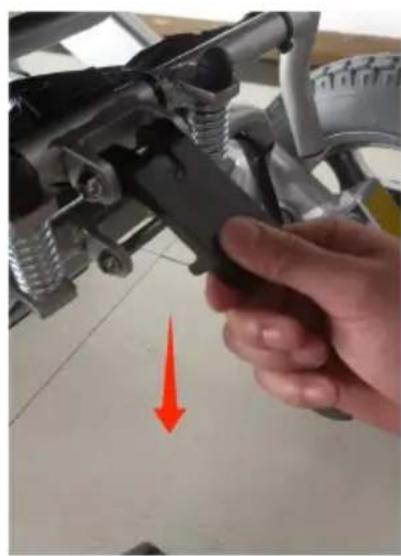
Manual mode: pull up the switch lever on left & right motor (picture) Electric mode: pull down the switch lever on left & right motor (picture)
Picture 17
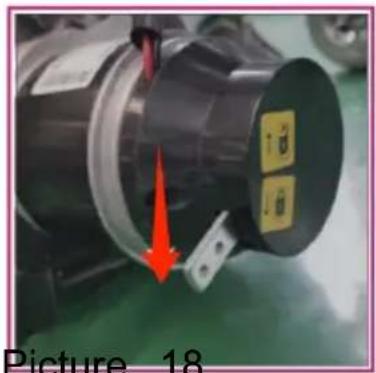
Picture 18
When changing wheelchair from manual mode to electric mode please make sure both left and right switches are in same mode it may cause rollover.
Battery and Charger
Charger Requirements
The charger is used for battery charging. During electric wheelchair is charging, do not use it.
Charger Technical Data
Input voltage: AC100-240V 50/60Hz
Output voltage: 24V/DC
Output current: 3.0A
Ingress protection level is IPX1. The charger should meet the required of GB 4706.1-2005 and GB 4706.18-2005.
Usage of Charger
Type 1 (charge directly in battery)
In order to charge the battery, connect the charger with the power supply battery box's plug. Do as following instructions to complete charging process:
Step 1: Make sure the charger groove is not blocked.
Step 2: Make sure the electric wheelchair is power off.
Step 3: Unplug the plugs which connect the battery box and control
Step 4: Connect the charger's output plug to the battery box's power
Step 5: Connect the charger's main plug to the power supply and the light will be alight. Fully charging needs 8 to 10 hours, do not overcharge than 24 hours.
will be alight. Fully charging needs 8 to 10 hours, do not overcharge for more than 24 hours.
Step 6: To prevent shortening battery life, please charge the battery at least once per month when the wheelchair is not in use.
In order to charge the battery, connect the charger with power supply controller socket. Do as following instructions to complete charging process:
In order to charge the battery, connect the charger to the power supply controller socket. Follow the instructions below to complete the charging process:
Step 2: Make sure the electric wheelchair is power off.
Step 2: Make sure the electric wheelchair is powered off.
Step 3: Make sure the battery and controller are connected.
Step 4: Connect the charger's output plug to the socket below the controller.
Step 5: Connect the charger's main plug to the power supply and the light will be alight. Fully charging needs 8 to 10 hours, do not exceed more than 24 hours.
Step 6: To keep the battery life from being shortened, please charge the battery at least once per month when the wheelchair is not being used.

Do not stop charging until the charge process is finished. Repeated use of a battery that is not fully charged will shorten its life, so the battery should be fully charged as much as possible. When the battery is fully charged, the power indicator will turn green. Do not stop charging before it is fully charged.
After finishing charging, turn off the power supply, otherwise the battery will discharge slowly. Do not charge for more than 24 hours. Over-charging is dangerous.

Users should follow the following rules to avoid charging dangers:
The electric wheelchair does not include the charger. Please use a national standard charger with an output voltage of 24V/DC 1.5A~5A.
It should be well ventilated when charging. Do not expose the wheelchair to sunlight or a humid environment.
The charging environment temperature range is from 10°C to 50°C. If it is out of this range, the battery will not function well and can easily be damaged.
It is normal for the fan to make a sound during charging. It is for cooling the charger, so please do not worry about it.
Prevent liquid from entering the charger during charging. Do not place the charger on flammable items such as fuel, footrest, or seat cushion. Please stay away from flames when charging the battery. Flames may cause battery fire or explosion.
Charging produces hydrogen, so do not smoke while charging.
Do not unplug the power supply when the socket or your hands are wet, as this may cause electric shock. In case of unpredictable accidents that may hurt the user, do not use or sit on the electric wheelchair when charging.
The Usage and Maintenance of Battery
Wrong operation of replacing the battery may cause danger of explosion. The same or recommended type of battery is suitable for replacement. Please make sure the battery poles are correct. Key points for prolonging battery life: charge frequently to keep battery power full. It is better to charge the battery if the wheelchair is not being used. If you stop using it for a long time, it is better to charge twice per month.
System Diagnose
When the indicator LED lights are blinking, it means the wheelchair has abnormalities. The abnormalities may occur in the following parts: motors, brakes, battery, wire connections, etc. Through the product's inner information consultation, the property of the abnormal condition can be detected by the diagnosis signal. The abnormal situation can be detected without other service tools.
Audio Signal Indication
| Description of LED light | The meaning of LED li | Explanation & Solution |
| All LED lights a unlit with no sound | The power is off, wheelc is in standby or sleep n Power is poor contacted. Fuse is tripping or burne out. | |
| All LED lights a lit | The power is turned on, self diagnose is working, the electric wheelchair ca work well. | Less LED lights lit less battery power remaining. |
| The leftmost red LED light is lit | The battery power is extremely inadequate. | To charge immediately. Or battery is malfunction that no able to charge. |
| Two short beeps LED lights blink twice | The left motor is malfunction. | The left motor is poor connected or the wire is disconnected. |
| Three short beeps, LED light blink thrice | The left magnetic brake malfunction. | The left magnetic brake is poor connected or the wire is disconnecte |
| Four short beeps LED lights blink four times | The right motor is malfunction. | The right motor is poor connected or the wire is disconnected. |
| Five short beeps LED lights blink five times | The right magnetic brake malfunction. | The right magnetic brake is poor connected or the wire is disconnecte |
| Six short beeps, LED lights blink six times | controller is in over-current protection status. | Check the brakes, and check if the motor drive mechanism is stuck Check the current ammeter, if it is n excessive current, maybe the controller is malfunction. |
| Seven short beeps, LED light blink seven times | Joystick is malfunction | Joystick doesn’t reset, or the connector is loose. |
| Eight short beeps, LED light blink eight times | controller is malfunction. | Please consult you dealer for maintenance. |
| Nine short beeps LED lights blink nine times | controller is malfunction. | Please consult service center for maintenance. |
Controller
Controller Panel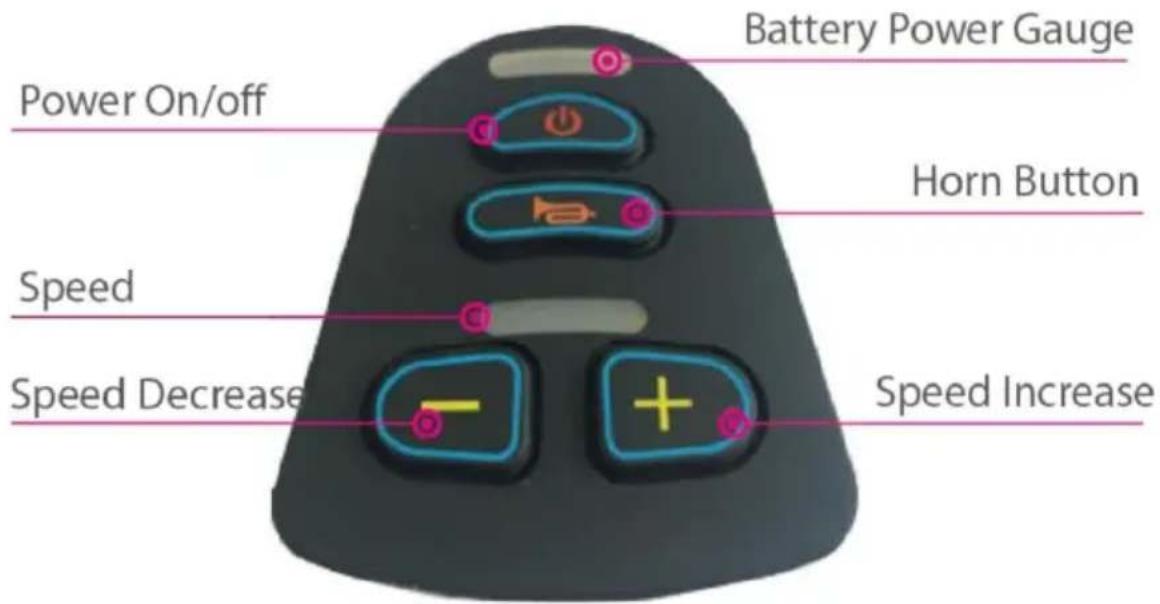
Controller Usage
Power Switch
Press this button, the battery power gauge lights will turn on from the right. Press again, all the LED lights are off.
In some emergency, you can directly turn off power by pressing the power button.
Sleep Mode
If the joystick has no operation for more than 20 minutes, the power turns off automatically, and the system enters sleep mode. The system will wake from sleep mode by pressing the power button.
Speed adjustment
According to user's habits and circumstances, the wheelchair driving speed is adjustable. Adjust speed by pressing the decrease button or increase button.
Speed is divided into five sections, ranging by 20%, 40%, 60%, 80%, of the max speed. First gear of speed: 20% of the max speed. Fifth speed: 100% of the max speed.
Horn Button
Press the horn button, the horn will sound until you release the button.
Battery Power Gauge

After turning on the power, the battery power gauge is working. The battery power gauge also shows the remaining battery capacity. As shown in the picture, the battery is fully charged.
When only the red or yellow LED light is lit, the battery should be charged. For long-distance driving, the battery should be fully charged. If only the red LED light is lit, the battery power is extremely low, and users need to charge the battery as soon as possible.
Use of joystick
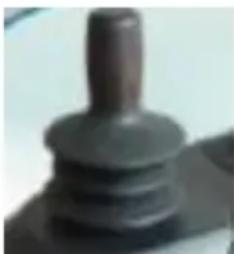
The wheelchair's moving direction is controlled by the joystick. The extent of joystick movement also controls the moving speed.
⚠️ Please turn on or turn off the power when the joystick is in the neutral position. Otherwise, the controller will emit a wrong operation signal. Release the joystick to the middle, and this error will stop. If the error continues, perhaps this part is malfunctioning. Do not use it and contact your dealer for maintenance.
Maintenance
Maintenance of the wheelchair includes cleaning the wheelchair, checking the wheels and battery, and charging the battery.
For further maintenance, please contact your dealer. We suggest checking the wheelchair every half year and performing an annual overhaul.
Cleaning and Battery Maintenance
Cleaning the Wheelchair
Please clean the wheelchair regularly. Clean the parts that are frequently touched by the user's body (such as the seat cushion, armrest, and controller) with a clean, slightly damp cloth. Do not use organic solvents to clean. If the user is a patient, the wheelchair should be cleaned once per week. If the wheelchair is used by someone with an infectious disease, it should be cleaned and disinfected with disinfectants.
Wheels
Check the tires and their wear condition regularly. When the tire tread pattern depth reduces to 1mm, please replace the tire with a new one.
Battery
Make sure the battery is fully charged frequently. To prolong battery life, we strongly recommend that users do not wait until the battery is completely drained before charging.
Wheelchair Malfunction and Checking
When malfunctions happen during the wheelchair is working, please turn off the power before checking. Symptom: completely lose power, and all LED lights on the controller panel are off.
Check Step:
Step 1: To check if the controller's plug is loose.
Step 2: To check if the connection of controller's plug and battery is loose. Please reinsert the plug connector (hold the plug when pulling out the plug. Do not pull the wire to avoid unnecessary damage to the wire). After the above checking, if the wheelchair is still not able to restore power, or if users have any questions about the above checking, please contact your

The controller has a diagnosing system to monitor the controller
motor. Any malfunction of these parts is indicated by the controller. For more details, please kindly refer to the chapter on audio signal indication.
Maintenance Checking
The following is a checking list. The electric wheelchair should be checked regularly according to our suggestion. When you get on or get off the wheelchair, some self-checking is done automatically. For your attention, we particularly list these self-checking items in area A.
| A area | Before use, please check if following parts are correct:1.Backrest 2.Armrest 3.Controller position4.Footrest 5.battery power6.Clutch/adjusting lever for conversion between manual and electric mode |
| B area | Check the following parts monthly, to avoid original par loosing or wearing1. Screws 2. Brakes3. Clutch/adjusting lever for conversion between manual and electric mode 4. The front and rear wheels and t pattern depth5. Connectors' of controller and charger |
| C area | For safety, semiannual overall maintenance is needed. |
Warranty issues
Warranty contents
We elaborately designed this wheelchair for you. If there are improper materials or manufacturing, we provide free repair and lifetime maintenance according to the time and conditions in the warranty cards.
Warranty does not cover these conditions
Subjective impression, no function problems. Usage and aging loss (coating and plating surface, natural fading of resins, etc.).
Maintenance is not applicable when the following happens
Do not regularly check our specified issues.
Improper or wrong maintenance. Operation different from our manual or overload.
Unauthorized modifications.
External factors such as soot, pharmaceuticals, bird droppings, acid rain, flying stones, metal powder, etc. Natural disasters such as typhoons, fires, earthquakes, etc.
The following fees are not covered:
Replacement of consumable materials such as tires, fuses, plastic parts, glass parts, lubricants, etc. Fees for inspection, adjustment, adding oil, cleaning, etc. Fees for regular checks specified by our factory. Unauthorized modifications.
Costs for maintenance by unauthorized service centers.
Customers should pay attention to the following cautions:
In order for the warranty to be valid, customers have the obligation to follow the cautions below: Correctly test and drive the power wheelchair as per the manual instructions.
Daily checking.
Implement the check tips according to our suggestions.
Warranty acceptance.
If warranty service is needed, please bring the power wheelchair and show the sales service card to our service center for warranty service. If you cannot provide the after-sales service card, the service will not be provided.
Protect the environment.
In order to protect the environment, every damaged or scrapped part of the power wheelchair should be returned to our factory or handed over to the State Department for disposal. Do not throw them away randomly.
Warranty valid
The after-sales service card is valid from the stamped date. This product
has a 1-year warranty under normal operating conditions. Consumable parts (such as battery set, cushion, tires, side board, armrest pad, etc.) are not covered under warranty.
Others
Conditions for Transport and Storage
During transport and storage, the electric wheelchair should be correctly placed as indicated by the label.
Transportation should avoid moisture and sunlight, and keep away from heat sources.
In case of electric parts being damaged due to dampness, please avoid stopping the wheelchair in rain, outdoors, or in moisture.
Storage conditions:
Environment temperature: -40°C to +55°C;
Relative humidity ≤ 80%;
Air pressure: 86 kPa to 106 kPa.
Annex of Report - Manufacturer's Declaration of the EUT
| 1 | Guidance and manufacturer's declaration - electromagnet emission | ||
| 2 | The ELECTRIC WHEELCHAIR is intended for use in the electromagnetic environment specified below.The customer or the user of ELECTRIC WHEELCHAIR sho assure that it is used in such an environment. | ||
| 3 | Emissions test | Compliance | Electromagnetic environment - guidar |
| 4 | RF emissions CISPR 11 | Group 1 | The ELECTRIC WHEELCHAIR uses energy only for its internal function.Therefor, its RF emissions are very and are not likely to cause any interference in nearby electronic equipment. |
| 5 | RF emissions CISPR 11 | Class B | The ELECTRIC WHEELCHAIR suitab for use in all establishments, includi domestic establishments and those directly connected to the public low-voltage power supply network th supplies buildings used for domestic purposes. |
| 6 | Harmonic emissions IEC 61000-3-2 | Class A | |
| 7 | Voltage fluctuations / flicker emissions IEC 61000-3-3 | Complies | |
| Recommended separation distances between portable and mobile RF communications equipment and the ELECTRIC WHEELCHAIR | |||
| The ELECTRIC WHEELCHAIR is intended for use in an electromagnetic environment in which radiated RF disturbances controlled. The customer or the user of the ELECTRIC WHEEL can help prevent electromagnetic interference by maintaining a minimum distance between portable and mobile RF communicate equipment (transmitters) and the ELECTRIC WHEELCHAIR as recommended below, according to the maximum output power communications equipment | |||
| Rated maximum output of transmitte W | Separation distance according to frequen of transmitter m | ||
| 150 kHz to 80 MHz d = [ 3.5/V1 ] | 26 MHz to 800 MHz d = [ 3.5/E1 ] | 800 MHz to 2.5 GHz d = [ 7/E1 ] | |
| 0.01 | 0.12 | 0.018 | 0.0345 |
| 0.1 | 0.38 | 0.057 | 0.1095 |
| 1 | 1.2 | 0.18 | 0.345 |
| 10 | 3.8 | 0.57 | 1.095 |
| 100 | 12 | 1.8 | 3.45 |
| For transmitters rated at a maximum output power not listed a recommended separation distance d in metres (m) can be esti using the equation applicable to the frequency of the transmitte P is the maximum output power rating of the transmitter in w according to the transmitter manufacturer.NOTE 1 At 80 MHz and 800 MHz, the separation distance fo frequency range applies.NOTE 2 These guidelines may not apply in all situations.Electromagnetic propagation is affected by absorption and reflec from structures, objects and people.Guidance and manufacturer's declaration - electromagnet immunity | |||
| The ELECTRIC WHEELCHAIR is intended for use in the electromagnetic environment specified below.The customer or the user of the ELECTRIC WHEELCHAIR she assure that it is used in such an environment. | |||
| Immunity test | IEC 60601 test level | Compliance level | Electromagnetic environment -guidance |
| Electrostatic discharge (ESD)IEC 61000-4-2 | ± 6 kV contact ± 8 kV air | ±6 kV contact ± 8 kV air | Floors should be wood, concrete or ceramic tile floors are covered with synthetic material, the relative humidity should be at least 30 |
| Electrostatic transient / burstIEC 61000-4-4 | ± 2 kV for power supply lines ± 1 kV for input/output lines | ±2 kV for power supply lines ± 1 kV for input/output lines | Mains power quality should be that of a ty commercial or hospital environment. |
| SurgeIEC 61000-4-5 | ± 1 kV differential mode ± 2 kV common mode | ±1 kV differential mode ±2 kV common mode | Mains power quality should be that of a ty commercial or hospital environment. |
| Voltage dips, short interruptions and voltage variations on power supply input linesIEC61000-4- 11 | < 5 % UT (>95 % dip in UT) for 0.5 cycle40 % UT (60 % dip UT) for 5 cycles70 % UT (30 % dip UT) for 25 cycles< 5 % UT (>95 % dip in UT) for sec | < 5 % UT (>95 % dip UT) for 0.5 cycle40 % UT (60 % dip UT) for 5 cycles70 % UT (30 % dip UT) for 25 cycles< 5 % UT (>95 % dip UT) for 5 sec | Mains power quality should be that of a ty commercial or hospital environment. If the use the ELECTRIC WHEELCHAIR requires continued operation during power mains interruptions, it is recommended that the ELECTRIC WHEELCHAIR be powered from an uninterruptible power supply or a battery. |
| Power frequency (50/60 Hz) magnetic fieldIEC61000-4-8 | 30A/m | 30A/m | |
| NOTE: UT is the a. c. mains voltage prior to application of t | |||
| Guidance and manufacturer's declaration – electromagnetic immunity |
| The ELECTRIC WHEELCHAIR is intended for use in the electromagnetic environment specified below.The customer or the user of the ELECTRIC WHEELCHAIR should assure that it is used in such an environment. |
| Immunity test | IEC 60601 test level | Compliance level | Electromagnetic environment - guidance |
| Conducted RF IEC 61000-4-6Radiated RF IEC 61000-4-3 | 3 Vrms150 kHz80 MHz20 V/m26 MHz t2.5 GHz | 3V20V/m | Portable and mobile RF communications equipment should be used no closer any part of the ELECTRIC WHEELCHAIR, including cables, than the recommended separation distance calculated from the equation applicable to the frequency of the transmitte Recommended separation distance d = [ 3.5/V1 ] d = [ 3.5/E1 ] 80 MHz to 800 MHz d = [ 7/E1 ] 800 MHz to 2.5 GHzwhere p is the maximum output power rating of the transmitter in watts (W) according to the transmitte manufacturer and d is the recommended separation distance in metres (m).b Field strengths from fixed transmitters, as determined by an electromagnetic site survey,a should be less th the compliance level in ea frequency range.bInterference may occur in vicinity of equipment marked with the following symbol:[YSTC] |
| NOTE 1 At 80 MHz and 800 MHz, the higher frequency rangeNOTE 2 These guidelines may not apply in all situations.Electromagnetic is affected by absorption and reflection from str objects and people. |
| A、Field strengths from fixed transmitters, such as base stations (cellular/cordless) telephones and land mobile radios, amateur rad and FM radio broadcast and TV broadcast cannot be predicted theoretically with accuracy. To assess the electromagnetic environ due to fixed RF transmitters, an electromagnetic site survey should be considered, measured field strength in the location in which the ELECTRIC WHEELCHAIR is used exceeds the applicable RF compliance lev above, the ELECTRIC WHEELCHAIR should be observed to veri normal operation.If abnormal performance is observed, additional measures may be necessary, such as reorienting or relocating the ELECTRIC WHEELCHAIR.B、Over the frequency range 150 kHz to 80 MHz, field strengths less than 3V/m |
Performance Parameters
| Main technical data | JRWD6012 | ||
| Max loading weight | 136kg | Speed | 1~6km/h |
| Battery charger | AC 100~240V, 50Hz, 1.8A | Front wheel diameter | 8 inch |
| Battery | DC 24V 20AH Li-ion | Rear wheel diameter | 12 inch |
| Motor (*2pcs) | DC 24V 250W | Max driving distance | 20km |
| Obstacle climbing | 50mm | Static stability | 9° |
| Seat size | 17.7/20inch* | Climbing angle | 6° |
Attention: “*”
- There are two sizes of seat width for this model, which can be determined from the outer box information;
- The width of the seat refers to the width between the handlebars;
Application Range
Our electric wheelchair is for disabled and elderly people (less than 1 using as walking vehicle, suitable for indoor use. Do not run on the motorways.
Contraindication
People who are under these circumstances: Upper limb is unresponsive, senile dementia, psychopath, physiology can not take care of themselves and doctor request not to use.
Address: Baoshanqu Shuangchenglu 803long 11hao 1602A-1609shi Shanghai
Imported to AUS: SIHAO PTY LTD. 1 ROKEVA STREETEASTWOOD NSW 2122 Australia
Imported to USA: Sanven Technology Ltd. Suite 250, 9166 Anaheim Place, Rancho Cucamonga, CA 91730
| EC | REP |
SHUNSHUN GmbH
Römeräcker 9 Z2021,76351
Unit 5 Albert Edward House, The Pavilio
Preston, United Kingdom
Made In China
VEVOR®
TOUGH TOOLS, HALF PRICE
Technical Support and E-Warranty Certificate
www.vevor.com/support
VEVOR®
TOUGH TOOLS, HALF PRICE
We continue to be committed to provide you tools with competitive price. "Save Half", "Half Price" or any other similar expressions used by us only represent estimate of savings you might benefit from buying certain tools with us compared to top brands and does not necessarily mean to cover all categories of tools offered. We are kindly reminded to verify carefully when you are placing an order with us actually saving half in comparison with the top major brands.
VEVOR®
TOUGH TOOLS, HALF PRICE
MODEL: JRWD601 2

NEED HELP? CONTACT US!
Have product questions? Need technical support? Please feel free to contact us:
Technical Support and E-Warranty Certificate www.vevor.com/support
This is the original instruction. Please read all manual instructions carefully before operating. VEVOR reserves a clear interpretation of the user manual. The appearance of the product shall be subject to the product you received. Please forgive us that we won't inform you if there are any technology or software updates on our product.
Preface
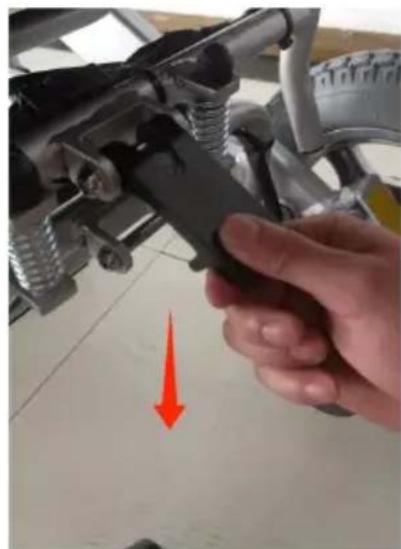
Image 1 Image 2
Folding wheelchair
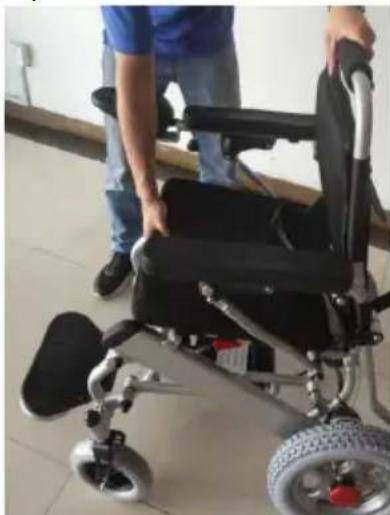
Image 3 Image 4
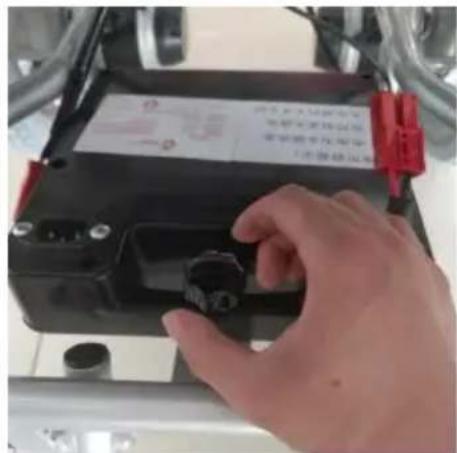
Image 7 Image 8
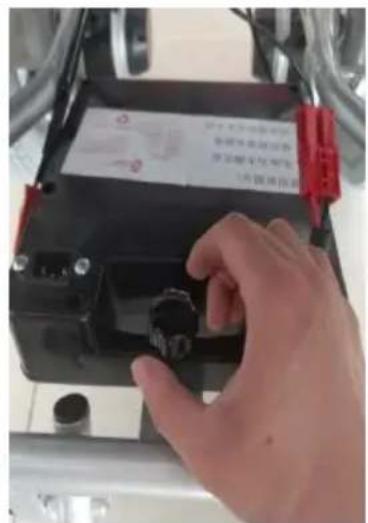
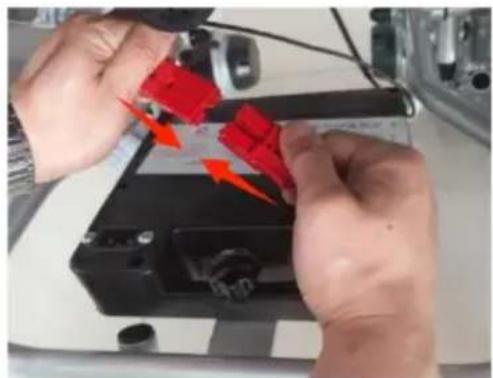
Image 9 Image 10 Image 11
Footrest
Image 12
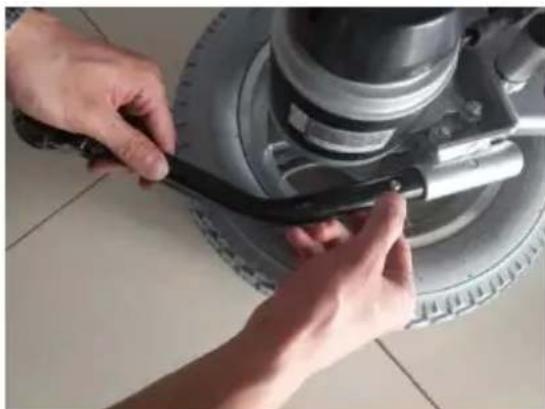
Image 13 Image 14
Foldable armrest
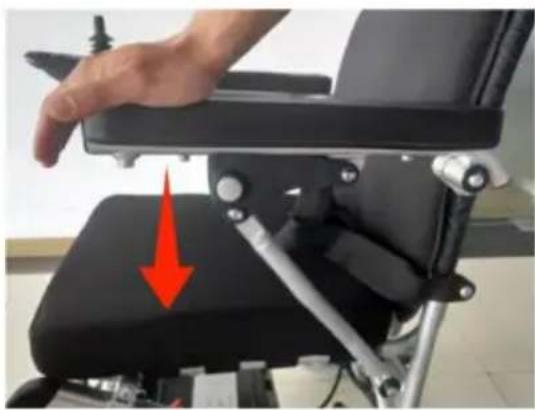
Image 15 Image 16
Backrest adjustment
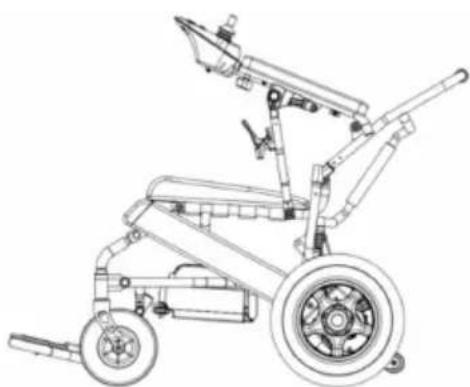
Photo 1 9 Photo 20
Image 17
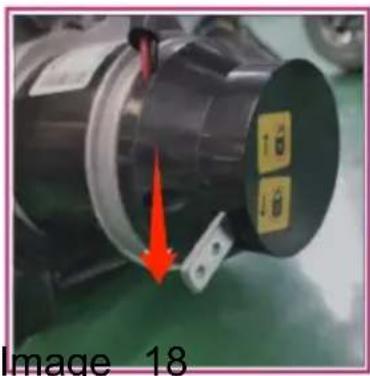
Image 18

Storage conditions:
Unit 5 Albert Edward House, The Pavilio
Preston, United Kingdom
Made in China
VEVOR®
TOUGH TOOLS, HALF PRICE
www.vevor.com/support
VEVOR®
TOUGH TOOLS, HALF PRICE
We continue to be committed to providing you with tools at competitive prices. "Save Half", "Half Price", or any other similar expressions used by us only represent an estimate of savings you might benefit from buying certain tools with us compared to top brands, and does not necessarily mean to cover all categories of tools offered. We kindly remind you to verify carefully when placing an order with us that you are actually saving half in comparison with the top major brands.
VEVOR®
TOUGH TOOLS, HALF PRICE
MODEL: JRWD601 2

NEED HELP? CONTACT US!
Have product questions? Need technical support? Please feel free to contact us:
Technical Support and E-Warranty Certificate www.vevor.com/support
This is the original instruction. Please read all manual instructions carefully before operating. VEVOR reserves the right to interpret the user manual. The appearance of the product shall be subject to the product you received. Please forgive us that we won't inform you of any technology or software updates on our product.
Foreword
Product performance
Image 1 Image 2
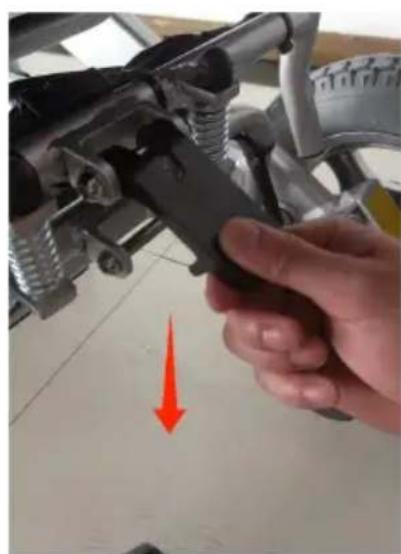
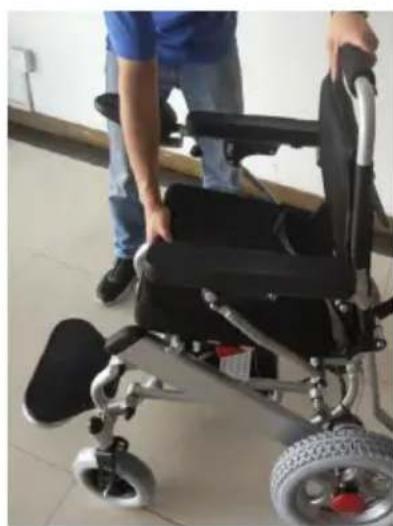
Image 3 Image 4
Install the controller
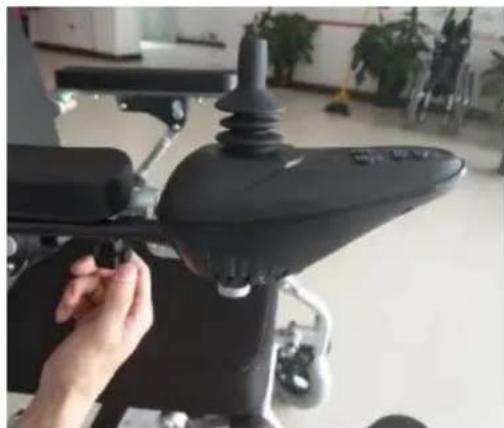
Image 5 Image 6
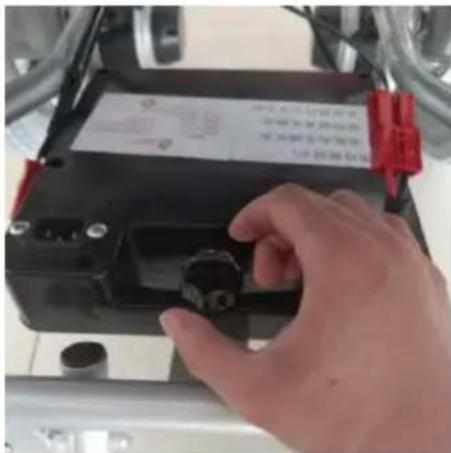
Image 7 Image 8
Install the battery
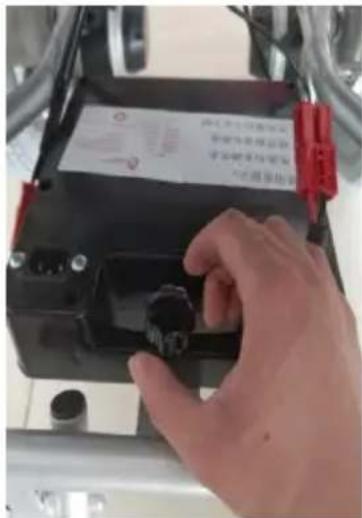
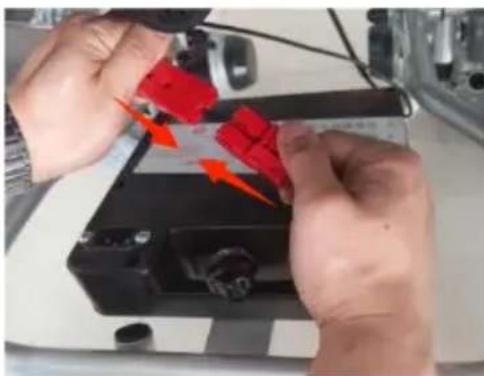
Image 12
Image 13 Image 14
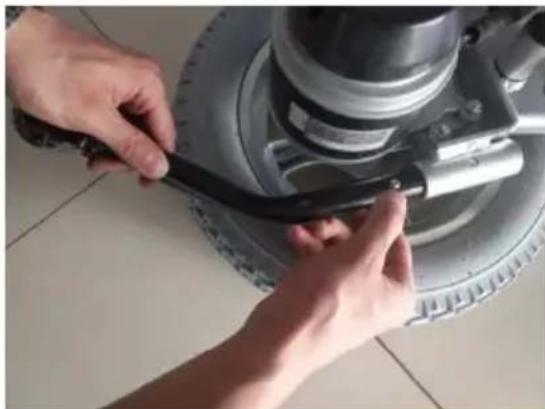
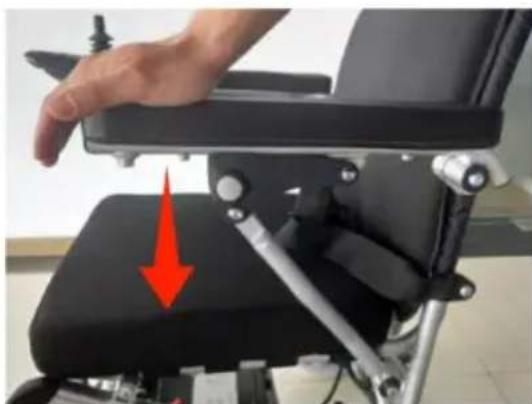
Image 15 Image 16
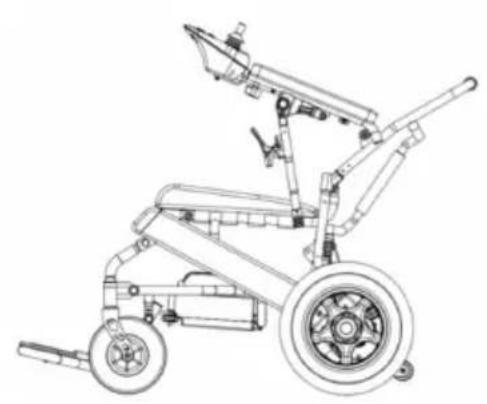
Image 19 Image 20
Image 17
Unit 5 Albert Edward House, The Pavilio
Preston, United Kingdom
www.vevor.com/support
VEVOR®
TOUGH TOOLS, HALF PRICE
We continue to be committed to provide you tools with competitive price. "Save Half", "Half Price" or any other similar expressions used by us only represent estimate of savings you might benefit from buying certain tools with us compared to top brands and does not necessarily mean to cover all categories of tools offered. We kindly remind you to verify carefully when you are placing an order with us that you are actually saving half in comparison with the top major brands.
VEVOR®
TOUGH TOOLS, HALF PRICE
MODEL: JRWD601 2

NEED HELP? CONTACT US!
Have product questions? Need technical support? Please feel free to contact us:
Technical Support and E-Warranty Certificate www.vevor.com/support
This is the original instruction. Please read all manual instructions carefully before operating. VEVOR reserves a clear interpretation of the user manual. The appearance of the product shall be subject to the product you received. Please forgive us that we won't inform you if there are any technology or software updates on our product.
Preface
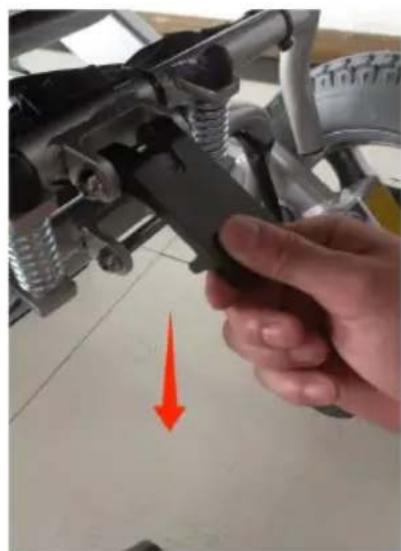
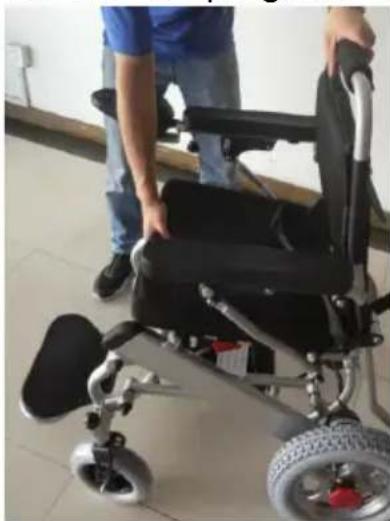
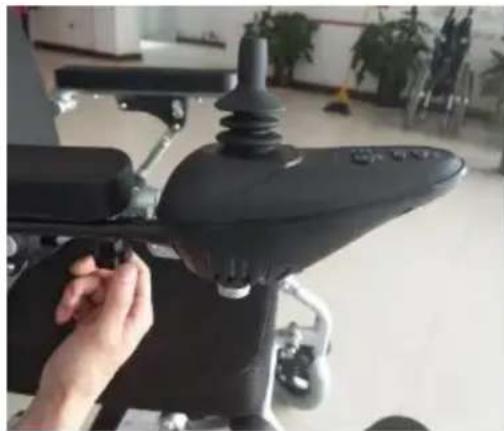
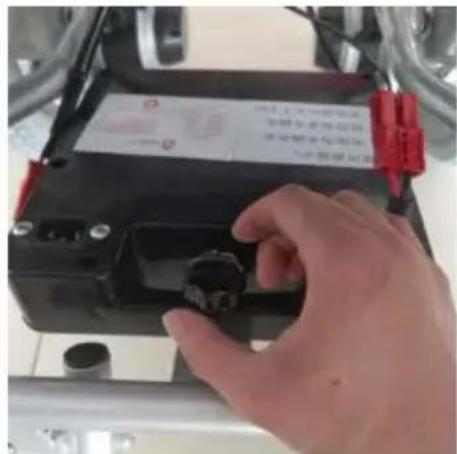
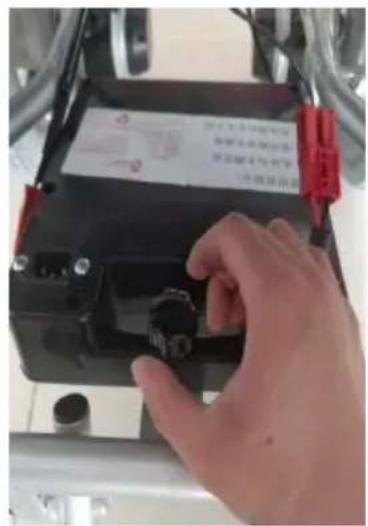
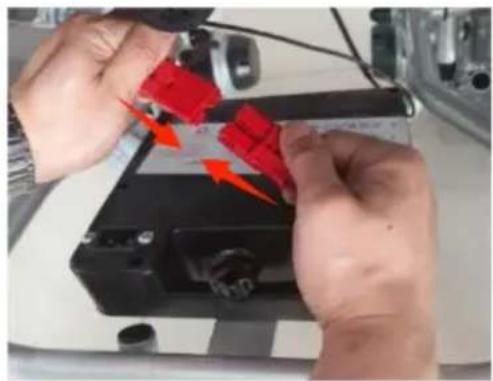
Image 12
Install and remove the anti-tip device
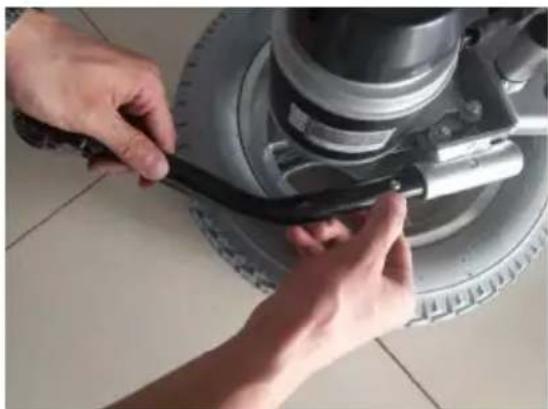
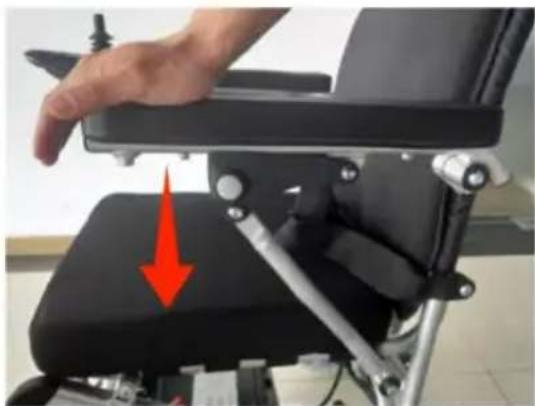
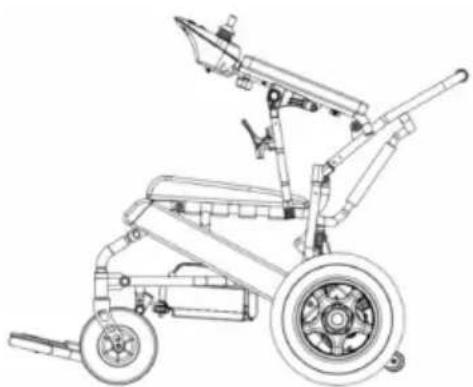
Image 17

Imported into AUS: SIHAO PTY LTD. 1 ROKEVA STREET EASTWOOD NSW 2122 Australia
Unit 5 Albert Edward House, The Pavilio
Preston, United Kingdom
Made in China
VEVOR®
TOUGH TOOLS, HALF PRICE
www.vevor.com/support
VEVOR®
TOUGH TOOLS, HALF PRICE
We continue to be committed to provide you tools with competitive price. "Save Half", "Half Price" or any other similar expressions used by us only represent estimate of savings you might benefit from buying certain tools with us compared to top brands and does not necessarily mean to cover all categories of tools offered. We are kindly reminded to verify carefully when you are placing an order with us actually saving half in comparison with the top major brands.
VEVOR®
TOUGH TOOLS, HALF PRICE
MODEL: JRWD601 2

NEED HELP? CONTACT US!
Have product questions? Need technical support? Please feel free to contact us:
Technical Support and E-Warranty Certificate www.vevor.com/support
This is the original instruction, please read all manual instructions carefully before operating. VEVOR reserves a clear interpretation of the user manual. The appearance of the product shall be subject to the product you received. Please forgive us that we won't inform you if there are any technology or software updates on our product.
Preface
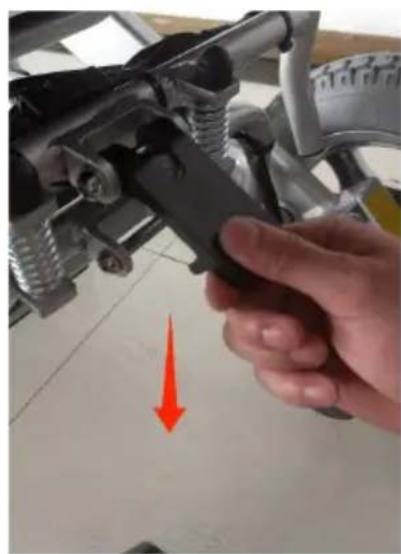
Image 1 Image 2
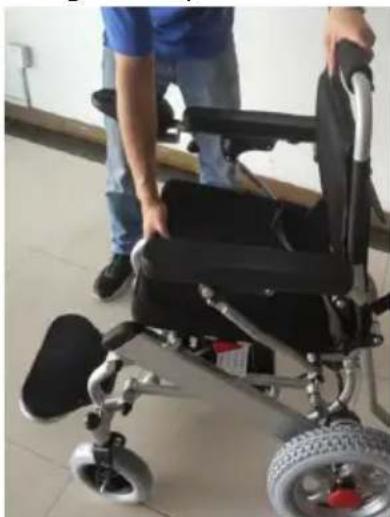
Image 3 Image 4
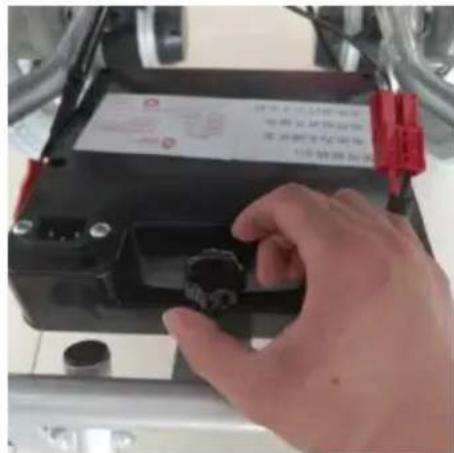
Image 7 Image 8
Install the battery
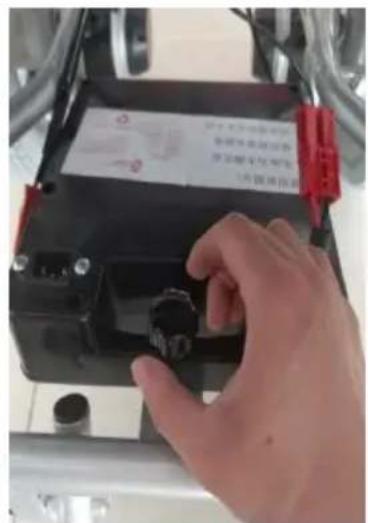
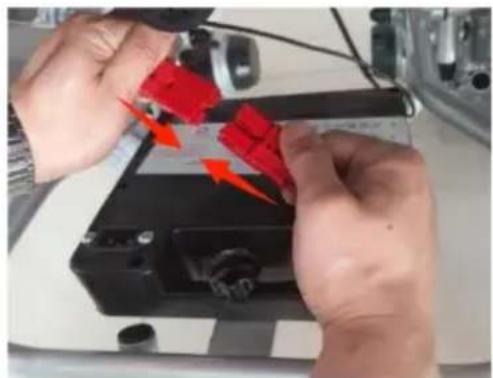
Image 12
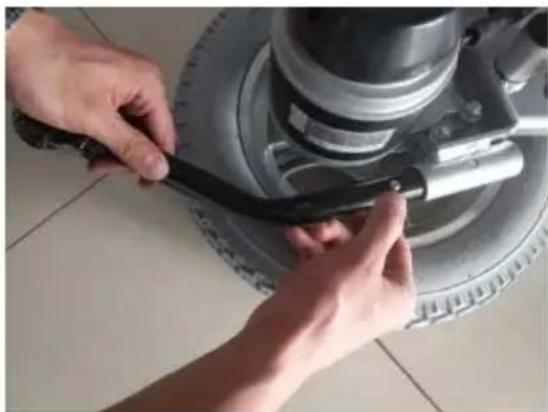
Image 13 Image 14
Folding armrest
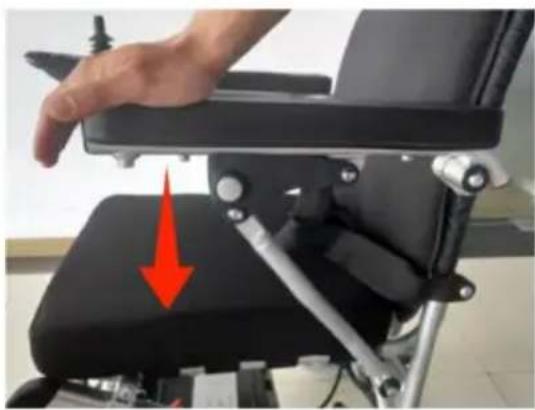
Image 15 Image 16
Backrest adjustment
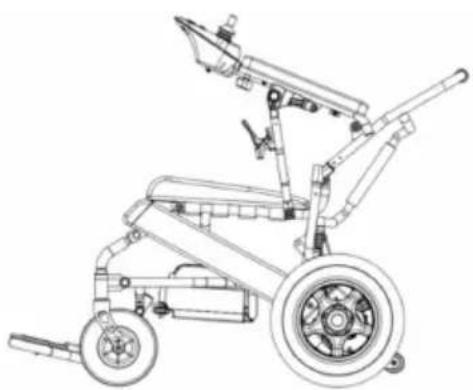
Image 19 Image 20
Image 17

Unit 5 Albert Edward House, The Pavilio
Preston, United Kingdom
Made in China
VEVOR®
TOUGH TOOLS, HALF PRICE
www.vevor.com/support
VEVOR®
TOUGH TOOLS, HALF PRICE
We continue to be committed to provide you tools with competitive price. "Save Half", "Half Price" or any other similar expressions used by us only represent estimate of savings you might benefit from buying certain tools with us compared to top brands and does not necessarily mean to cover all categories of tools offered. We kindly remind you to verify carefully when placing an order with us to ensure you are actually saving half in comparison with the top major brands.
VEVOR®
TOUGH TOOLS, HALF PRICE
MODEL: JRWD601 2

NEED HELP? CONTACT US!
Have product questions? Need technical support? Please feel free to contact us:
Technical Support and E-Warranty Certificate www.vevor.com/support
This is the original instruction. Please read all manual instructions carefully before operating. VEVOR reserves a clear interpretation of the user manual. The appearance of the product shall be subject to the product you received. Please forgive us that we won't inform you of any technology or software updates on our product.
Preface
Product Performance
Picture 1 Picture 2
Picture 3 Picture 4
Install the Controller
Picture 5 Picture 6
Picture 7 Picture 8
Install the Battery
Picture 12
Picture 17


Import to AUS: SIHAO PTY LTD . 1 ROKEVA STREETEASTWOOD NSW 2122 Australia
Import to USA: Sanven Technology Ltd. Suite 250, 9166 Anaheim P Rancho Cucamonga, CA 91730
| EC | REP |
SHUNSHUN GmbH
Römeräcker 9 Z2021, 76351
Unit 5 Albert Edward House, The Pavilio
Preston, United Kingdom
www.vevor.com/support
VEVOR®
TOUGH TOOLS, HALF PRICE
Technical Support and E-Warranty Certificate www.vevor.com/support
We continue to be committed to provide you tools with competitive price. "Save Half", "Half Price" or any other similar expressions used by us only represent estimate of savings you might benefit from buying certain tools with us compared to top brands and does not necessarily mean to cover all categories of tools offered. We kindly remind you to verify carefully when you are placing an order with us that you are actually saving half in comparison with the top major brands.
VEVOR®
TOUGH TOOLS, HALF PRICE
MODEL: JRWD601 2

NEED HELP? CONTACT US!
Have product questions? Need technical support? Please feel free to contact us:
Technical Support and E-Warranty Certificate www.vevor.com/support
This is the original instruction. Please read all manual instructions carefully before operating. VEVOR reserves a clear interpretation of the user manual. The appearance of the product shall be subject to the product you received. Please forgive us that we won't inform you if there are any technology or software updates on our product.
Foreword
Product performance
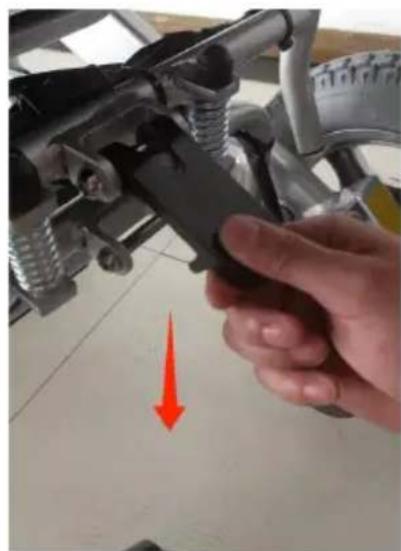
Photo 1 Image 2
Folding wheelchair
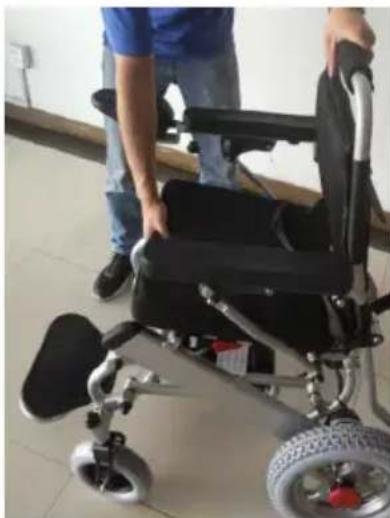
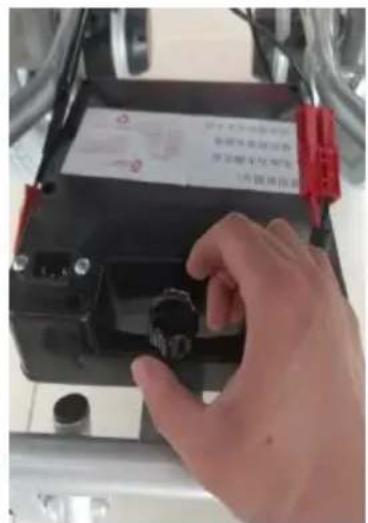
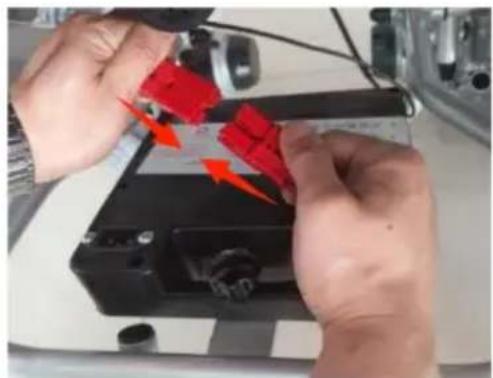
Image 12
Installing and removing the anti-tip support
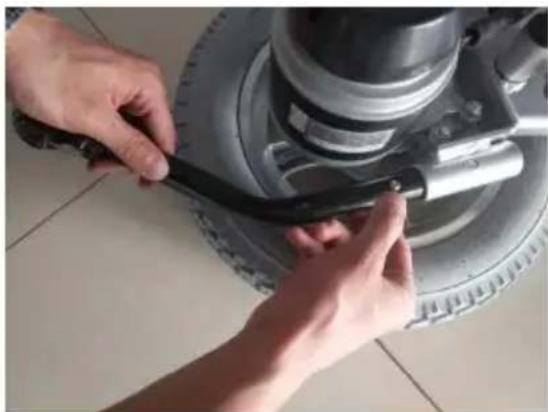
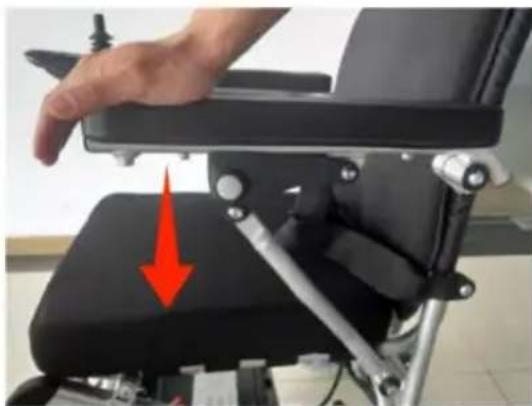
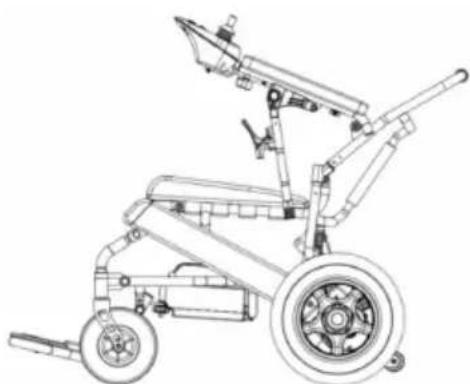
Photo 1 9 Photo 20
Switch between manual mode and electric mode
Image 17
Type 2 (charging via controller)
Anaheim Place, Rancho Cucamonga, CA 91730
| EC | REP |
SHUNSHUN GmbH
Römeräcker 9 Z2021, 76351
Unit 5 Albert Edward House, The Pavilio
Preston, United Kingdom
Made in China
VEVOR®
TOUGH TOOLS, HALF PRICE
www.vevor.com/support
VEVOR®
TOUGH TOOLS, HALF PRICE
We continue to be committed to provide you tools with competitive price. "Save Half", "Half Price" or any other similar expressions used by us only represent estimate of savings you might benefit from buying certain tools with us compared to top brands and does not necessarily mean to cover all categories of tools offered. We kindly remind you to verify carefully when you are placing an order with us that you are actually saving half in comparison with the top major brands.
VEVOR®
TOUGH TOOLS, HALF PRICE
MODEL: JRWD601 2

NEED HELP? CONTACT US!
Have product questions? Need technical support? Please feel free to contact us:
Technical Support and E-Warranty Certificate www.vevor.com/support
This is the original instruction. Please read all manual instructions carefully before operating. VEVOR reserves a clear interpretation of the user manual. The appearance of the product shall be subject to the product you received. Please forgive us that we won't inform you if there are any technology or software updates on our product.
Preface
Product performance
Image 1 Image 2
Fold the wheelchair
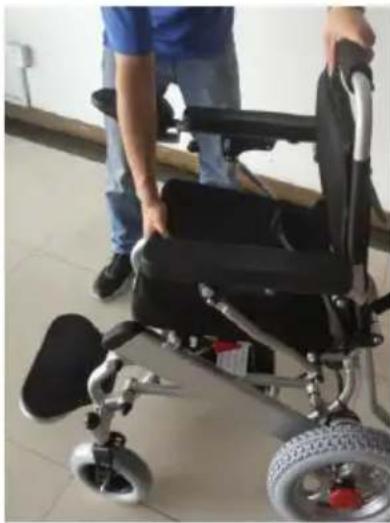
Image 3 Image 4
Install the controller
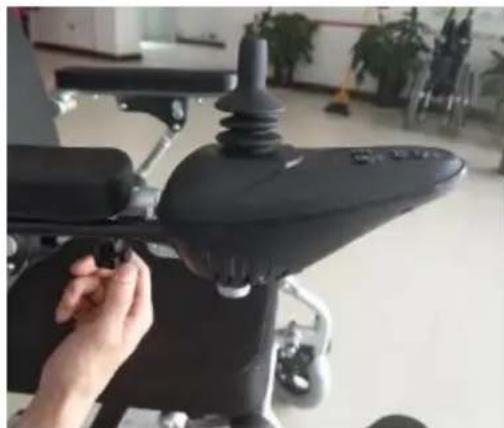
Image 5 Image 6
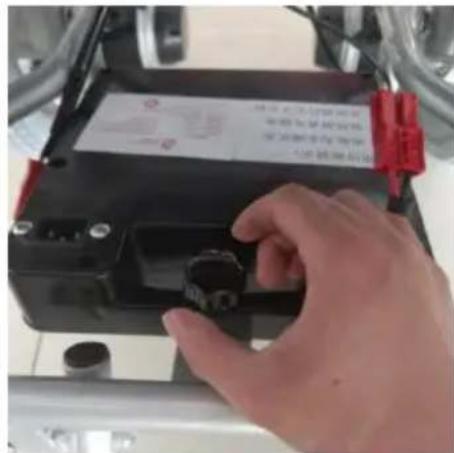
Image 7 Image 8
Install the battery
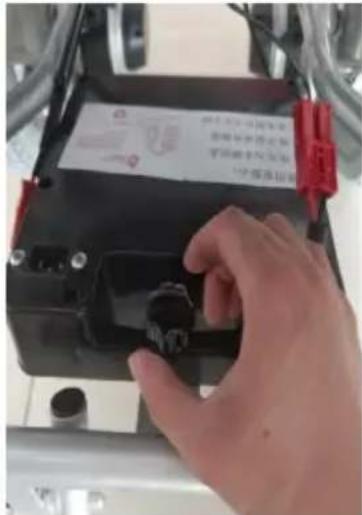
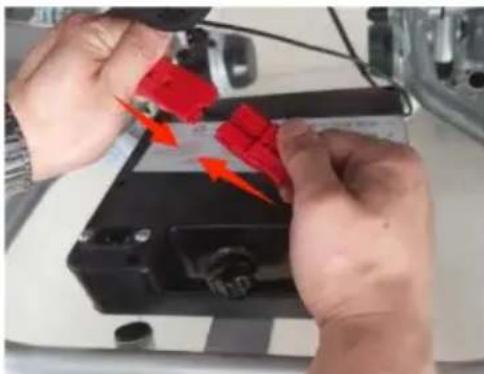
Image 12
Image 13 Image 14
Flip-up armrest
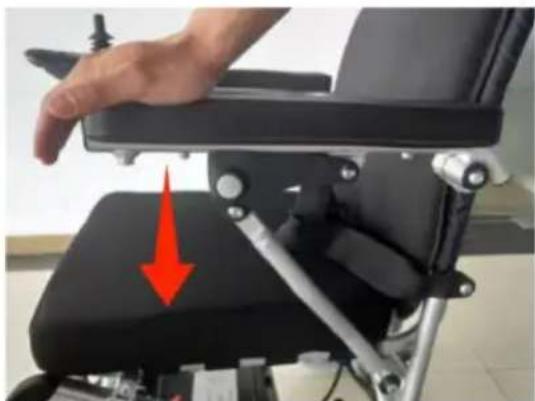
Image 15 Image 16
Backrest adjustment
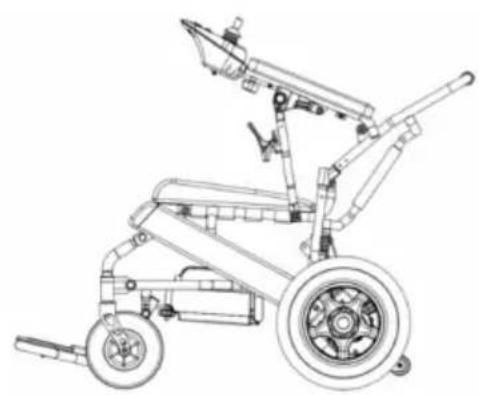
Image 19 Image 20
Image 17
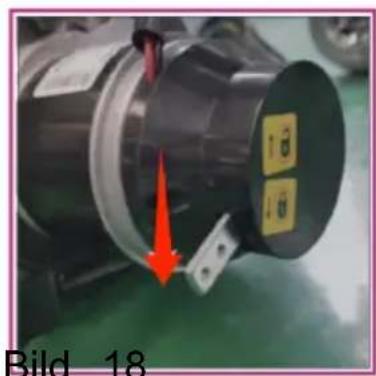
Figure 18
Unit 5 Albert Edward House, The Pavilio
Preston, United Kingdom
Made in China
VEVOR®
TOUGH TOOLS, HALF PRICE
www.vevor.com/support




- ELECTRIC WHEELCHAIRS
- OPERATING INSTRUCTIONS
- VEVOR®
- NEED HELP? CONTACT US
- PREFACE
- WARNING SYMBOL
- PRODUCT INTRODUCTION
- PRODUCT PERFORMANCE
- SAFETY INSTRUCTIONS
- MAIN SECURITY FEATURES
- DRIVING INSTRUCTIONS
- GENERAL DRIVING CAUTIONS
- ACCOMPANIED BY CAREGIVERS OR AVOID DRIVING IN THESE CONDITIONS
- PRECAUTIONS FOR UPHILL AND DOWNHILL
- PRECAUTIONS FOR THE CAREGIVERS
- OTHER NOTICE
- REPAIR AND REFIT
- KEEP DRY
- SERVICE LIFE
- ELECTROMAGNETIC COMPATIBILITY
- USAGE AND OPERATION
- ADJUSTMENT OF WHEELCHAIR: UNFOLD WHEELCHAIR
- FOLD WHEELCHAIR
- INSTALL CONTROLLER
- INSTALL AND REPLACE BATTERY
- INSTALL BATTERY
- FOOTPLATE
- INSTALL AND DISMANTLE ANTI-TIPPER
- ARMREST FLIP-UP
- BACKREST ADJUSTMENT
- SWITCH BETWEEN MANUAL MODE AND ELECTRIC MODE
- BATTERY AND CHARGER
- CHARGER TECHNICAL DATA
- USAGE OF CHARGER
- TYPE 1 (CHARGE DIRECTLY IN BATTERY)
- IN ORDER TO CHARGE THE BATTERY, CONNECT THE CHARGER WITH POWER SUPPLY CONTROLLER SOCKET. DO AS FOLLOWING INSTRUCTIONS TO COMPLETE CHARGING PROCESS
- THE USAGE AND MAINTENANCE OF BATTERY
- SYSTEM DIAGNOSE
- CONTROLLER
- POWER SWITCH
- SLEEP MODE
- SPEED ADJUSTMENT
- HORN BUTTON
- BATTERY POWER GAUGE
- USE OF JOYSTICK
- MAINTENANCE
- CLEANING AND BATTERY MAINTENANCE
- CLEANING THE WHEELCHAIR
- WHEELS
- BATTERY
- WHEELCHAIR MALFUNCTION AND CHECKING
- CHECK STEP
- MAINTENANCE CHECKING
- WARRANTY ISSUES
- WARRANTY CONTENTS
- WARRANTY DOES NOT COVER THESE CONDITIONS
- MAINTENANCE IS NOT APPLICABLE WHEN THE FOLLOWING HAPPENS
- THE FOLLOWING FEES ARE NOT COVERED
- CUSTOMERS SHOULD PAY ATTENTION TO THE FOLLOWING CAUTIONS
- WARRANTY ACCEPTANCE
- PROTECT THE ENVIRONMENT
- WARRANTY VALID
- OTHERS
- CONDITIONS FOR TRANSPORT AND STORAGE
- ATTENTION
- APPLICATION RANGE
- CONTRAINDICATION
- TOUGH TOOLS, HALF PRICE
- FOLDING WHEELCHAIR
- FOOTREST
- FOLDABLE ARMREST
- FOREWORD
- INSTALL THE CONTROLLER
- INSTALL THE BATTERY
- INSTALL AND REMOVE THE ANTI-TIP DEVICE
- FOLDING ARMREST
- INSTALLING AND REMOVING THE ANTI-TIP SUPPORT
- TYPE 2 (CHARGING VIA CONTROLLER)
- FOLD THE WHEELCHAIR
- FLIP-UP ARMREST
Brand : Vevor
Model : JRWD6012
Category : Wheelchair