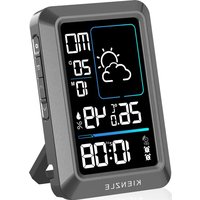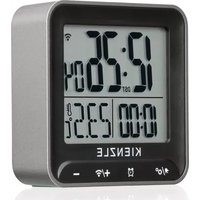
14987 - Alarm clock radio Kienzle - Free user manual and instructions
Find the device manual for free 14987 Kienzle in PDF.


User questions about 14987 Kienzle
0 question about this device. Answer the ones you know or ask your own.
Ask a new question about this device
Download the instructions for your Alarm clock radio in PDF format for free! Find your manual 14987 - Kienzle and take your electronic device back in hand. On this page are published all the documents necessary for the use of your device. 14987 by Kienzle.
USER MANUAL 14987 Kienzle
EN Visit our website via the following QR Code or web link to find further information on this product or the available translations of these instructions.
text_image
Icon representing a document or text page with horizontal lines and a bracket, likely indicating text content.MANUAL DOWNLOAD:
text_image
QR code image containing encoded data, no visible human-readable texttext_image
FSC www.jac.org MIX Paper | Supporting responsible forestry FSC® C182053INHALTSVERZEICHNIS
18. EC DECLARATION OF CONFORMITY

natural_image
Three identical line drawings of a trash bin with crossed crossbars, no text or symbols present.Cd^1Hg^2Pb^3
- About this manual 24
- General safety instructions 24
- Scope of delivery 25
- Before you begin 25
- Product overview 26
- LCD Display 28
- Getting started 30
- Clock reception 30
- Set the clock manually 31
- Language 32
- °C/°F Setting 33
- Setting/Adjusting alarm time 33
- Turn on/off Alarm 34
- Operation 34
-
Temperature 35
-
Touch button lock 35
- Specifications 35
- Notes on cleaning 36
- EC declaration of conformity 36
- Disposal 36
- Warranty 37
1. ABOUT THIS MANUAL

This user manual should be considered part of the device. Read the safety instructions and the user manual carefully before using the device. Keep this user manual for future reference. If the device is sold or passed on, the user manual must be given to the new owner/user of the product. The device is intended for indoor use only!
2. GENERAL SAFETY INSTRUCTIONS

- This device contains electronic components that operate via a power source (batteries). Do not let children use the device unsupervised. Use is only permitted as described in the manual, otherwise there is a risk of ELECTRIC SHOCK!
- Children should only use the device under supervision. Keep packaging materials (plastic bags, rubber bands, etc.) away from children! There is a RISK OF SUFFOCATION!
- Risk of chemical burn — Keep batteries out of the reach of children! Make sure you insert the batteries correctly. Leaking battery acid can lead to chemical burns. Avoid contact of battery acid with skin, eyes and mucous membranes. In the event of contact, rinse the affected region immediately with a plenty of water and seek medical attention.
- Risk of fire/explosion — Do not expose the device to high temperatures. Use only the recommended batteries. Do not short-circuit the device or batteries, or throw them into a fire.
Excessive heat or improper handling could trigger a short-circuit, a fire, or an explosion.
- Do not disassemble the device! If a defect occurs, please contact your specialist dealer. They will contact the service center and, if necessary, send the device in for repair.
- Do not expose the device to high temperatures and protect it from contact with water and high humidity to prevent leakage or explosion of the built-in battery!
- Use only the recommended batteries. Always replace weak or empty batteries with a new, complete set of batteries at full capacity. Do not use batteries from different brands or with different capacities. The batteries should be removed from the unit if it has not been used for a long time.
3. SCOPE OF DELIVERY
Alarm clock, User manual
4. BEFORE YOU BEGIN
- We recommend using alkaline batteries. If temperatures regularly fall below 0°C (32°F), we recommend using lithium batteries.
- Avoid using rechargeable batteries. (Rechargeable batteries cannot maintain correct power requirements.)
- Insert batteries before first use, matching the polarity in the battery compartment. 2x AAA Batteries are required.
5. PRODUCT OVERVIEW
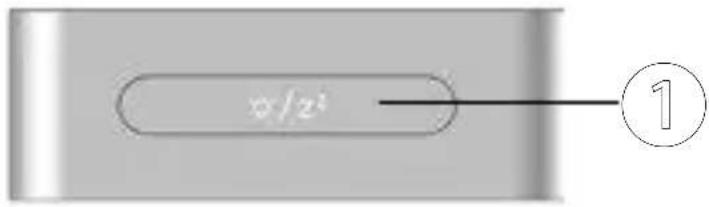
① Press [ ] to activate the backlight for 5 seconds or snooze the alarm for 8 minutes. Press and hold to lock the touch keys. Press and hold again to unlock the touch keys.
② Press [ 🔥] to turn on/off zone (This function is only available if you have set a time zone). In alarm mode, press [ 🔥/○○] to turn on/off alarm. Press and hold to enter time and date setting.
③ Press [💡] to show alarm time of Alarm 1-5 (Monday - Friday) and Alarm 6-7 (Saturday + Sunday).
4 Press [+] to switch between temperature and weekday display. Press and hold to start Radio-Controlled Clock* (RCC) signal receiving. In setting mode, press to increase one unit, press and hold to increase rapidly.
5 Press [→] to switch between date and alarm time. In setting mode, press to decrease one unit, press and hold to decrease rapidly.
⑥ Battery compartment. Fold out to open.
*Radio-controlled clock function not available in every territory.
text_image
x/2¹ ①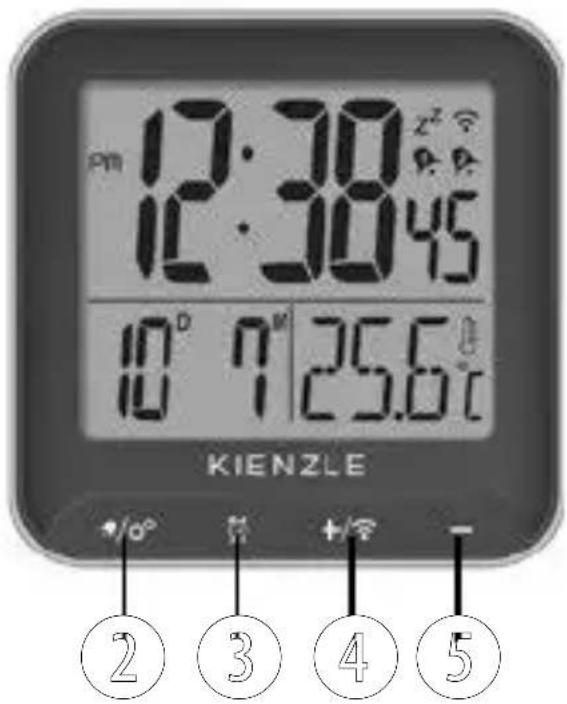
text_image
12:30 12:30 45 10° 7' 25.6°C KIENZLE +/o° M +/W T ② ③ ④ ⑤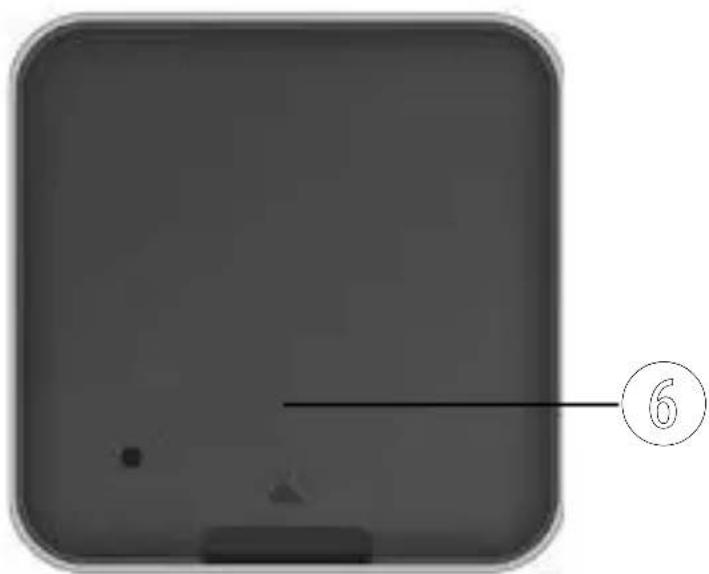
text_image
66. LCD DISPLAY
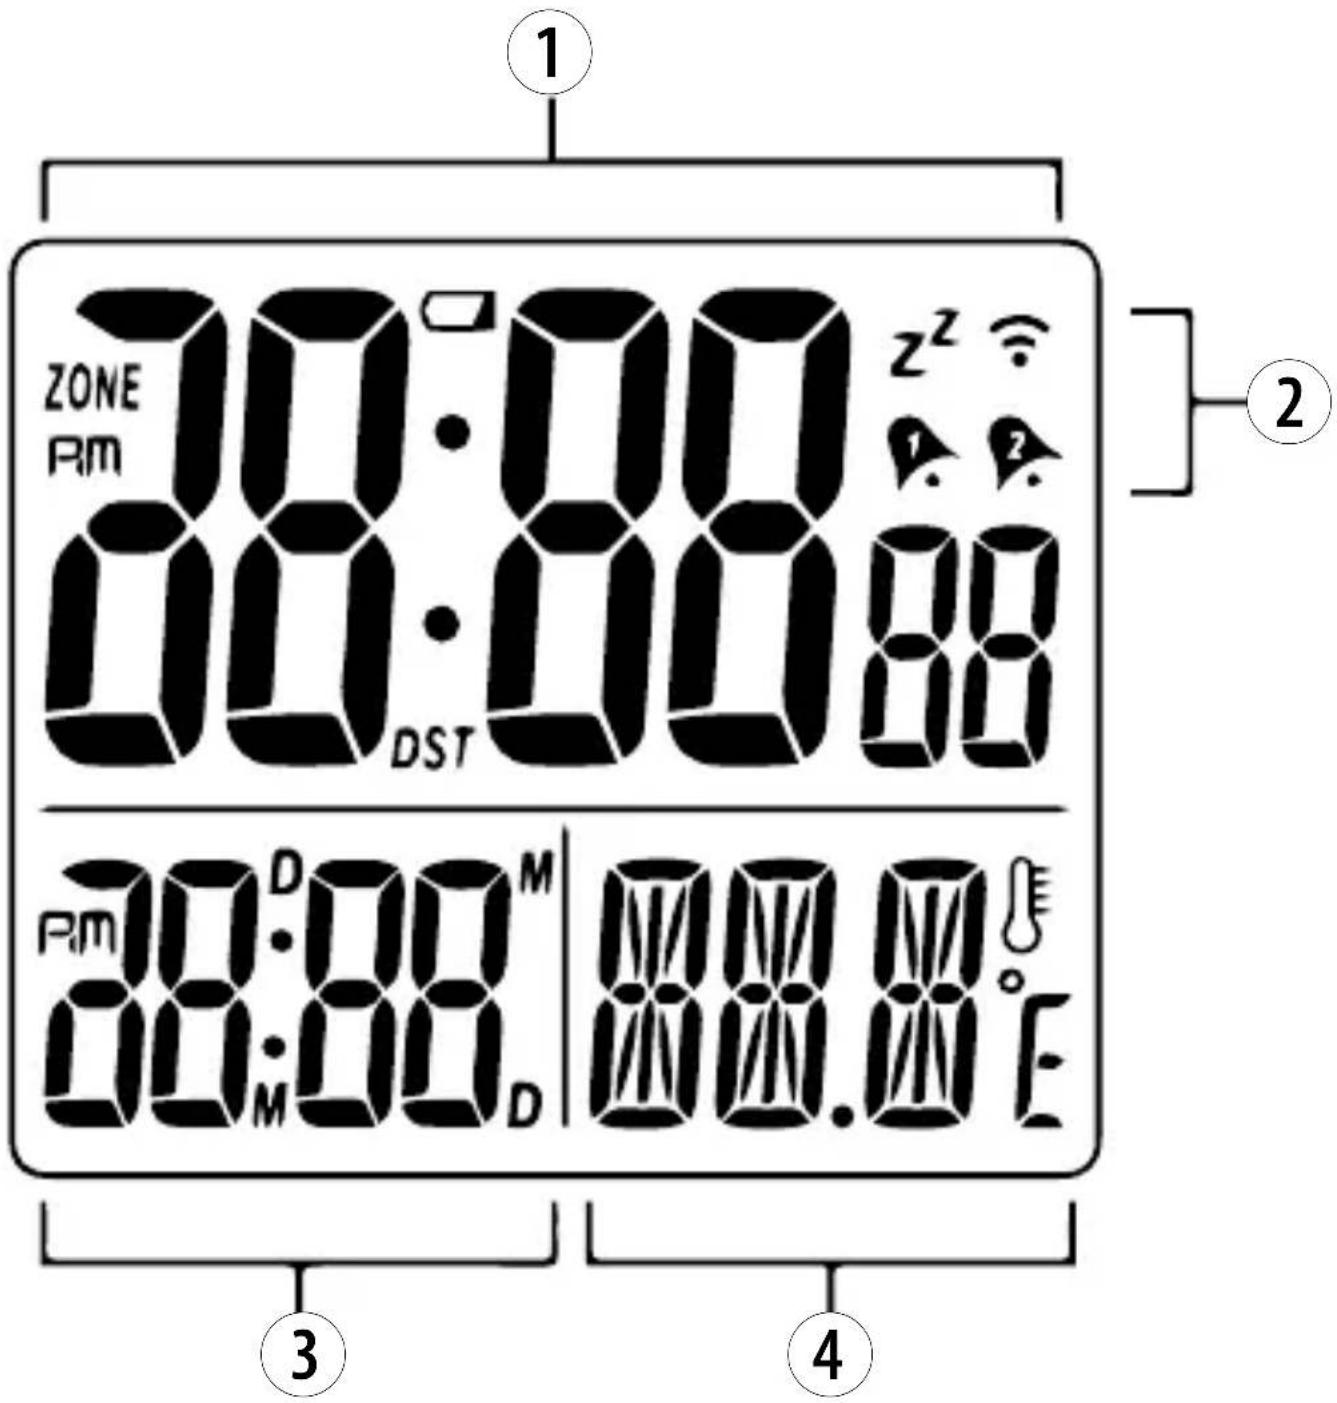
① Time display
② Snooze, RCC signal, Alarm on/off symbol
③ Date display or Alarm time display (Press [—] to switch)
④ Temperature display or Weekday display (press ⏻ to switch)
[ Wi ] RCC signal received
[1] Alarm ON
[ DST ] Daylight Saving Time (DST) ON
[ z ]Snooze activated
[ ] Low battery indicator
[ ] Temperature
text_image
ZONE Rm 00:00:00 DST z² 1 2 3 47. GETTING STARTED
Insert Batteries
- Remove the battery door from the back.
- Insert 2x AAA (LR03)/1.5V batteries. Please ensure the polarities (+/-) of the batteries match upon installation.
- Reattach the battery door.
NOTE: Replace batteries when the display is dim, or when the battery level [ ] is low. The low battery indicator is only displayed when the battery is low. If the batteries are full, no battery status symbol is displayed.
8. CLOCK RECEPTION
- Replace batteries or press [ ] button to initiate RCC receiving.
- RCC receiving can work in both date mode and alarm mode.
- The receiving process takes about 7 minutes.
- During receiving process, the RCC signal symbol flashes
- If the RCC receiving process is successful, the RCC symbol [ ] is permanently displayed and the date and time will
be set automatically. If it fails, RCC setting will quit automatically. Press [+/≡] button to re-initiate RCC receiving.
- RCC receiving will automatically start at 2:03, 3:03, 4:03 or 5:03 every night.
- To stop RCC reception, press the [ ] button.
- If the device is still not receiving the signal, please proceed to set the time manually.
9. SET THE CLOCK MANUALLY
You may set the clock manually if RCC is not available.
- Press and hold [ ] button to enter time and date setting.
- The setting parameter will flash.
- Press [ ] button once, the figure will increase 1 unit (when setting minute, second will reset to 0). Press and hold the [ +/÷ ] button, the figures will increase rapidly.
- Press [ ] button once, the figure will decrease 1 unit (when setting minute, second will reset to 0). Press and hold the [ — ] button, the figures will decrease rapidly.
-
Press [ ] button to confirm setting and enter to next parameter.
-
Sequence of setting: Weekday language → 12/24 Hr → Year (2000 – 2099) → Date format → Month → Date → Hour → Minute → Zone → °C/°F → Key Tone On/Off → Exit
-
If there is no action in 20 seconds, the setting will be saved and will exit the setting mode.
10. LANGUAGE
Five languages are available: GER (German), ENG (English), FRE (French), ITA (Italian), DUT (Dutch)
GermanEnglishFrenchItalianDutch
| SymbolGERENGFREITADUT | |||||
| Monday | MON MON LUN LUN MAA | ||||
| Tuesday | DIE TUE | MAR | MAR | DIN | |
| Wednesday | MIT | WED MER MER WOE | |||
| Thursday | DON | THU | JEU | GIO | DON |
| Friday | FRE | FRI | VEN | VEN | VRI |
| Saturday | SAM | SAT | SAM | SAB | ZAI |
| Sunday | SON | SUN DIM DOM ZON | |||
11. °C/°F SETTING
-
Press and hold [ ] button, enter time and date setting.
-
Press [ ] button several times until the display shows °C/°F.
-
Press the [ ] or [ ] button to switch between Celsius (°C) and Fahrenheit (°F).
12. SETTING/ADJUSTING ALARM TIME
-
Press and hold [ ] button to enter alarm setting.
-
Sequence of setting: Weekday Hour → Weekday Minute → Weekend Hour → Weekend Minute → exit
-
During setting, the setting parameter will flash.
-
Press [ ] button once to increase by 1 or press [ ] once to decrease by 1. Press and hold the button to change the figures rapidly.
-
Press [ ] button to confirm setting and enter to next parameter.
-
The alarm will sound when the alarm setting is finished and turned on.
-
If there is no action in 20 seconds, the setting will be saved and will exit the setting mode.
13. TURN ON/OFF ALARM
- During the alarm time display, press [ ] button once to turn on/off the alarm. (1-5) or (6-7) will flash to indicate which alarm displaying.
- Press [ ] button once to switch to alarm mode. Monday to Friday alarm time will be shown and (1-5) will flash.
- Press [ ] button once to turn on/off Monday to Friday alarm. [ ] will be displayed when alarm if turned on.
- Press [ ] button once to switch to alarm mode. Saturday to Sunday alarm time will be shown and (1-5) will flash. 1-5 = Mo - Fr ; 6-7 = Sa + Su.
- Press [ ] button once to turn on/off Saturday to Sunday alarm. [2] will be displayed when alarm if turned on.
- If there is no action in 5 seconds, it will turn back to time display mode.
14. OPERATION
- At the set time, alarm signal rings.
- During the alarm, press the [ ] button to delay the alarm by 8 minutes.
-
If you do not press any button to stop the alarm, it will automatically turn off after 5 minutes.
-
To stop the alarm, press any button except [ ]/z ^2
- The alarm will start again at the next alarm time, unless you switch off the alarm function.
15. TEMPERATURE
When the indoor temperature is lower than -10^ (14 °F), the screen displays LL.L. When it is higher than 50^ (122 °F), the screen displays HH.H.
16. TOUCH BUTTON LOCK
If the buttons do not react when pressed, the button lock may be activated. You can lock or unlock the touch buttons by pressing and holding the [ ⚙ / Z ^2 ] button for about 4 seconds.
17. SPECIFICATIONS
| Dimensions 66 x 22 x 66 | mm (L x W x H) |
| Weight 64.4 g (Without batteries) | |
| Temperature range -10 | °C to +50 °C (14 °F to 122 °F) |
| Power 2x AAA (LR03) 1.5V batteries |
18. NOTES ON CLEANING
- Remove the batteries before cleaning.
- Only use a dry cloth to clean the exterior of the device. To avoid damaging the electronics, do not use any cleaning fluid.
- Protect the device from dust and moisture.
19. EC DECLARATION OF CONFORMITY

Bresser GmbH hereby declares that the radio equipment type with item number: 14987 complies with Directive 2014/53/EU. The full text of the EC Declaration of
Conformity is available at the following internet address: www.bresser.de/download/14987/CE/14987_CE.pdf
20. DISPOSAL

Dispose of packaging materials sorted by type. Please note the current legal regulations regarding the disposal of the device. Information on proper disposal can be obtained from municipal waste disposal services or the environmental agency. Do not dispose of electronic devices with household waste!

Do not dispose of electronic devices in the household garbage! As per the Directive 2012/19/EU of the European Parliament on waste electrical and electronic equipment and its adaptation into German law, used electronic devices must be collected separately and recycled in an
environmentally friendly manner. Empty old batteries must be disposed of at battery collection points by the consumer. You can find out more information about the disposal of devices or batteries produced after 01.06.2006 from your local waste disposal service or environmental authority.
In accordance with the regulations concerning batteries and rechargeable batteries, disposing of them in the normal household waste is explicitly forbidden. Please make sure to dispose of your used batteries as required by law — at a local collection point or in the retail market. Disposal in domestic waste violates the Battery Directive. Batteries that contain toxins are marked with a sign and a chemical symbol. "Cd" = cadmium, "Hg" = mercury, "Pb" = lead. Fully discharge the battery before disposal.
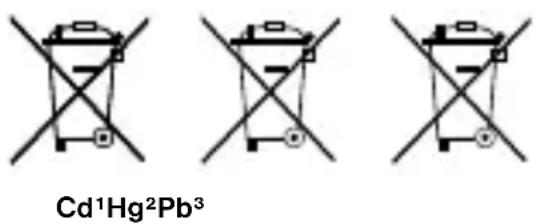
^1 battery contains cadmium
^2 battery contains mercury
^3 battery contains lead
21. WARRANTY
The regular warranty period is 2 years and begins on the day of purchase. To benefit from an extended, voluntary warranty period as indicated on the gift box, registration on our website is required. The full warranty conditions as well as information on warranty extension and services can be viewed at www.bresser.de/warranty_terms.
TABLE DES MATIÈRES
5. VUE D'ENSEMBLE DU PRODUIT
chemical
Chemical symbol for Cd¹Hg²Pb³ reduction with crossed and unexposed structuresnatural_image
Gray rounded square object with a black line and circled number 6, no text or symbols present.6. LCD DISPLAY
① Tijdweergave
chemical
Chemical symbol for Cd¹Hg²Pb³ reduction with crossed and uncrossed representations^1 batterij bevat cadmium
^2 batterij bevat kwik
^3 batterij bevat lood
20. GARANTIE
natural_image
Gray rounded square object with a black line and circled number 6, no text or symbols present.6. DISPLAY LCD
chemical
Chemical symbol for Cd¹Hg²Pb³ reduction with three crossed-out battery structuresnatural_image
Gray rounded square object with a black line and circled number 6, no text or symbols present.6. PANTALLA LCD
chemical
Chemical symbol for Cd¹Hg²Pb³, showing three identical cross-shaped structures with central circles and substituents.^1 la pila contiene cadmio
^2 la pila contiene mercurio
^3 la pila contiene plomo
21. GARANTÍA
Errors and technical changes reserved.
Manual_14987_Alarm-clock-square_de-en-fr-nl-it-es_KIENZLE_v092024a