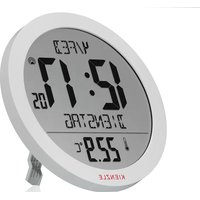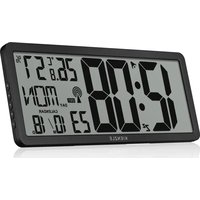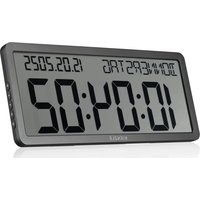
15423 - Clock Kienzle - Free user manual and instructions
Find the device manual for free 15423 Kienzle in PDF.


User questions about 15423 Kienzle
0 question about this device. Answer the ones you know or ask your own.
Ask a new question about this device
Download the instructions for your Clock in PDF format for free! Find your manual 15423 - Kienzle and take your electronic device back in hand. On this page are published all the documents necessary for the use of your device. 15423 by Kienzle.
USER MANUAL 15423 Kienzle
Visit our website via the following QR Code or web link to find further information on this product or the available translations of these instructions.

text_image
Icon representing a document or text page with horizontal lines and a bracket, commonly used to indicate text content.INFOS+DOWNLOADS:
natural_image
Simple shield icon with a checkmark inside, no text or symbols presentGARANTIE · WARRANTY · GARANTÍA · GARANZIA
www.bresser.de/warranty_terms

text_image
FR 15%
text_image
FSC® www.fsc.org MIX Paper | Supporting responsible forestry FSC® C144615DE Bedienungsanleitung......4
EN Instruction manual....10
FR Manuel d'instructions....16
NL Handleiding 22
IT Manuale di istruzioni....28
ES Manual de instrucciones.... 34
INHALTSVERZEICHNIS
- About this manual 10
- General safety instructions 10
- Scope of delivery 11
- Features 11
- Parts Overview 12
- Setting up power supply 13
- Time setting 13
- Week display 14
- 12/24H format 14
- Low battery indicator 14
- Technical data 14
- Cleaning and Maintenance 14
- Disposal 15
- EC Declaration of Conformity 15
- Warranty & Service 15
1. ABOUT THIS MANUAL

This instruction manual is to be considered part of the device.
Before using the device, please read
the safety instructions and the user manual carefully.
Keep this user manual for future reference. If the device is sold or passed on, the instruction manual must be provided to the new owner/user of the product.
2. GENERAL SAFETY INSTRUCTIONS
- RISK OF CHOKING! Keep packaging material, like plastic bags and rubber bands, out of the reach of children, as these materials pose a choking hazard.
-
RISK OF ELECTRIC SHOCK! This device contains electronic components that operate via a power source (batteries). Children should only use the device under adult supervision. Only use the device as described in the manual; otherwise, you run the risk of an electric shock.
-
RISK OF CHEMICAL BURN! Leaking battery acid can lead to chemical burns. Avoid contact of battery acid with skin, eyes and mucous membranes. In the event of contact, rinse the affected region immediately with a plenty of water and seek medical attention.
- RISK OF FIRE/EXPLOSION! Use only the recommended batteries. Do not short-circuit the device or batteries, or throw them into a fire. Excessive heat or improper handling could trigger a short-circuit, a fire or an explosion.
- Use only the recommended batteries. Always replace weak or empty batteries with a new, complete set of batteries at full capacity. Do not use batteries from different brands or with different capacities. Remove the batteries from the unit if it has not been used for a long time.
- The manufacturer is not liable for damage related to improperly installed batteries!
- Do not use rechargeable batteries (accumulators).
- Do not disassemble the device. In the event of a defect, please contact your dealer. The dealer will contact the Service Centre and can send the device in to be repaired, if necessary.
- Check this device, cables and connections for damage before use.
- Do not immerse the unit in water.
- Do not subject the unit to excessive force, shock, dust, extreme temperature or high humidity, which may result in malfunction, shorter electronic life span, damaged batteries and distorted parts.
- Place your device so that it can be disconnected from the power supply at any time. The power outlet should always be near your appliance and should be easily accessible, as the plug of the power cord serves as a disconnect device from the mains supply.
- To disconnect the unit from the mains, always pull the mains plug and never pull the cable!
3. SCOPE OF DELIVERY
RC Wall Clock, 4x AA/LR6 batteries
4. FEATURES
- Time display with DCF
- 12/24HR
- Calendar display
- Low battery indicator
- 7 languages week display
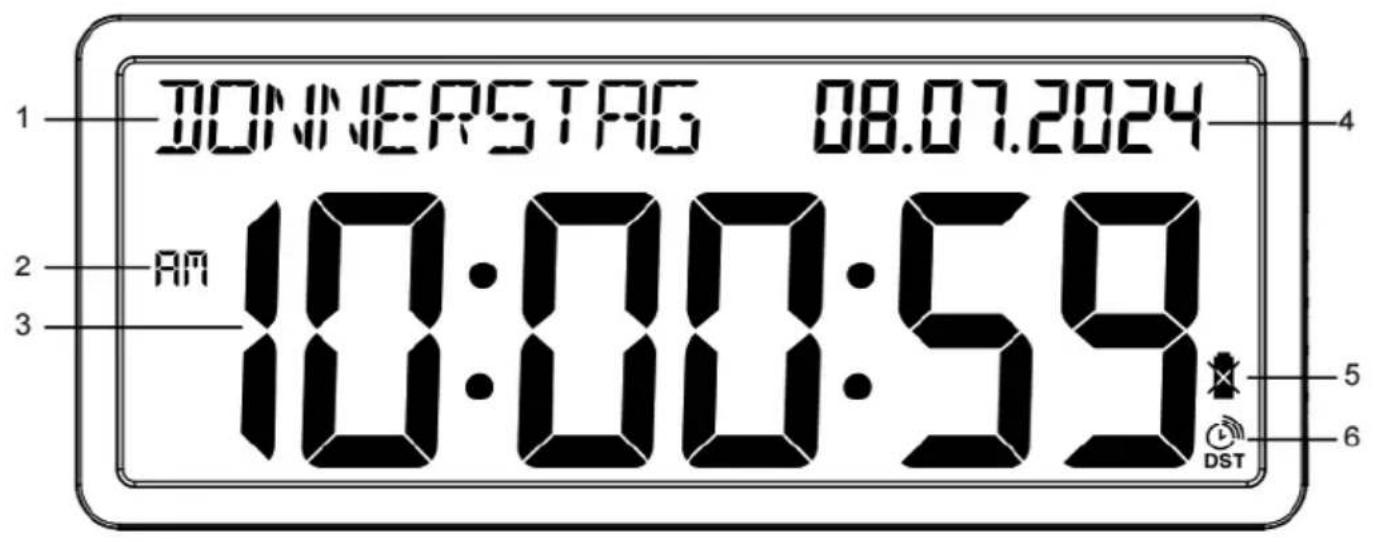
text_image
DONNERSTAG 08.07.2024 10:00:59 AM 3 4 5 6 DST
text_image
A B C D E 7 8 95. PARTS OVERVIEW
A. SET button (Press and hold to enter the time setting mode)
B. ▲P button (Press to select 12H or 24H format, default 24H)
C. DOWN button
D. language button (Press to check the language for which country)
E. DCF button (Press and hold to enter the RCC setting mode)
- 7 languages week display
- AM/PM
- Time display with DCF
- Calendar
- Low battery indicator
- DCF symbol with DST
- Hanging hole
- Battery cover
- Stand
6. SETTING UP POWER SUPPLY
Please prepare 4 x AA batteries for the device
- Remove the battery compartment cover.
- Insert the batteries into the battery compartment. Ensure that the battery polarity (+/-) is correct.
- Replace the battery compartment cover.
- Wait until the time is displayed on the base station.
7. TIME SETTING
After the power is restored, the unit automatically searches for the radio signal. It takes approximately 3-8 minutes for this process to complete. If the radio signal is received correctly, the date and time are set automatically and the reception symbol is displayed. If no radio signal is received, proceed as follows:
- Press and hold the 📋 button on the base unit for approx. 3 seconds to activate reception of the radio signal. Reception is now initialized again.
- The signal could be affected by the building, please try it again outdoors.
- If still no radio signal is received, the time must be set up manually.
Manual time setting
- Press and hold 📄 button for approx. 3 seconds to enter to the time setting mode.
- Digits to be set are flashing.
- Press ▲ button to change the value.
- Press button to confirm and continue to the next setting.
- Settings order: Time zone (+5 to -2) > Hour > Minute > Year > Month > Day > Week language
- Finally press the button to save the settings and exit the setting mode.
8. WEEK DISPLAY
| Language German French Italian Spanish Dansk Dutch English | |||||||
| Mondays | Montag Lundi Lunedì Lunes Mandag Maandag Monday | ||||||
| Tuesdays Dienstag Mardi Martedì Martes Tirsdag Dinsdag Tuesday | |||||||
| Wednesdays | Mittwoch | Mercredi | Mercoledì | Miércoles | Onsdag | Woensdag | Wednesday |
| Thursdays | Donnerstag | Jeudi | Giovedì | Jueves | Torsdag | Donderdag | Thursday |
| Fridays | Freitag | Vendredi | Venerdì | Viernes | Fredag | Vrijdag | Friday |
| Saturdays | Samstag | Samedi | Sabato | Sábado | Lørdag | Zaterdag | Saturday |
| Sundays | Sonntag | Dimanche | Domenica | Domingo | Søndag | Zondag | Sunday |
9. 12/24H FORMAT
In normal model, press the ▲ button to select 12H or 24H format. (Default in 24H format)
10. LOW BATTERY INDICATOR
When the level of the batteries reaches a critical level, the battery level symbol appears in the appropriate area on the display. When replacing the batteries, always remove all batteries and reinsert them. Please pay attention to the correct polarity. (see also chapter "Setting up power supply". When the batteries are full, no battery icon is displayed.
11. TECHNICAL DATA
DCF Radio-controlled time synchronization
Large-format LCD display
Full date display in full text
12. CLEANING AND MAINTENANCE
Before cleaning the device, disconnect it from the power supply (remove batteries)!
Only use a dry cloth to clean the exterior of the device. To avoid damaging the electronics, do not use any cleaning fluid.
Protect the device from dust and moisture. The batteries should be removed from the unit if it has not been used for a long time.
13. DISPOSAL

Dispose of the packaging materials properly, according to their type, such as paper or cardboard. Contact your local waste-disposal service or environmental authority for information on the proper disposal.

Do not dispose of electronic devices in the household garbage!
As per Directive 2012/19/EU of the European Parliament on waste electrical and electronic equipment and its adaptation into German law, used electronic devices must be collected separately and recycled in an environmentally friendly manner.
14. EC DECLARATION OF CONFORMITY
CE Hereby, Bresser GmbH declares that the equipment type with article number 15421, 15422, 15423 is in compliance with Directive: 2014/53/EU. The full text of the EU declaration of conformity is available at the following internet address:
http://www.bresser.de/download/15421/CE/15421_CE.pdf
15. WARRANTY & SERVICE
The regular warranty period is 2 years and begins on the day of purchase. To benefit from an extended voluntary warranty period as stated on the gift box, registration on our website is required.
You can consult the full warranty terms as well as information on extending the warranty period and details of our services at www.bresser.de/warranty_terms.
TABLE DES MATIÈRES
Errors and technical changes reserved.
Manual_15421-15422-15423_rc-wall-clock-with-date-display_de-en-fr-nl-it-es_KIENZLE_v092025a