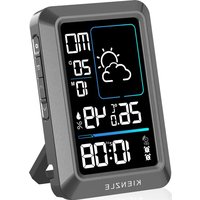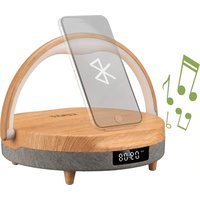
15321 - Alarm clock radio Kienzle - Free user manual and instructions
Find the device manual for free 15321 Kienzle in PDF.


User questions about 15321 Kienzle
0 question about this device. Answer the ones you know or ask your own.
Ask a new question about this device
Download the instructions for your Alarm clock radio in PDF format for free! Find your manual 15321 - Kienzle and take your electronic device back in hand. On this page are published all the documents necessary for the use of your device. 15321 by Kienzle.
USER MANUAL 15321 Kienzle
The Bluetooth® word mark and logos are registered trademarks owned by Bluetooth SIG, Inc. and any use of such marks by Bresser GmbH is under license. Other trademarks and trade names are those of their respective owners.
DE Bedienungsanleitung. 4
EN Instruction manual. 12
FR Manuel d'instructions 20
NL Handleiding 28
Manuale di istruzioni 36
ES Manual de instructaciones 44
INHALTSVERZEICHNIS
Dispose of the packaging materials properly, according to their type, such as paper or cardboard. Contact
your local waste-disposal service or environmental authority for information on the proper disposal.

- About this manual 13
- General safety instructions 13
- Scope of delivery 13
- Features 13
- Parts Overview 15
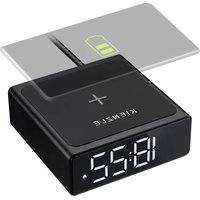
- Wireless Charging 15
7.How to replace the converter 15 - Overview of display functions 16
- Switch on the device 16
-
- and button functions 16
- Bluetooth connection 16
- Clock function 17
- Alarm clock function 17
14.Warm white touch operation Method 18 - Phone Stand Function 18
- Cleaning and Maintenance 18
- Disposal 18
- EC Declaration of Conformity 19
19.Warranty & Service 19
1. ABOUT THIS MANUAL
This instruction manual is to be considered part of the device. Before using the device, please read the safety instructions and the user manual carefully. Keep this user manual for future reference. If the device is sold or passed on, the instruction manual must be provided to the new owner/user of the product. The device is intended for indoor use only!
2. GENERAL SAFETY INSTRUCTIONS
- Choking hazard! Keep packaging material, like plastic bags and rubber bands, out of the reach of children, as these materials pose a choking hazard.
- RISK OF ELECTRIC SHOCK! This device contains electronic components that operate via a power source (adaptors/suggested input power range). Children should only use the device under adult supervision. Only use the device as described in the manual; otherwise, you run the risk of an electric shock.
- RISK of FIRE/EXPLOSION! Do not expose the device to high temperatures. Use only the recommended batteries. Do not short-circuit the device, or throw them into a fire. Excessive heat or improper handling could trigger a short-circuit, a fire or an explosion!
- Do not immerse the unit in water.
- Do not subject the unit to excessive force, shock, dust, extreme temperature or high humidity, which may result in malfunction, shorter electronic life span, damaged batteries and distorted parts.
- Do not disassemble the device. In the event of a defect, please contact your dealer. The dealer will contact the Service Centre and can send the device in to be repaired, if necessary.
- Use only the recommended batteries. Always replace weak or empty batteries with a new, complete set of batteries at full capacity. Do not use batteries from
different brands or with different capacities. Remove the batteries from the unit if it has not been used for a long time.
- The manufacturer is not liable for damage related to improperly installed batteries!
3. SCOPE OF DELIVERY
Bluetooth® speaker, Power adaptor, Instruction manual
4. FEATURES
Bluetooth® version: 5.0
Wireless charging rated voltage: 9V
Speaker power: 5W^*2
Power interface: DC 9V 2A
Wireless charging output power: 10W
Battery capacity: 2000mA
SNR: 85%
Frequency response: 100HZ-20KHZ
Playing time: 3-4h
Charging time: 4-5h
Dimensions: 203 × 192 × 55 mm
Weight: 500 g
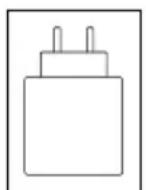
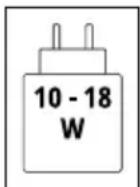
Minimum power required to charge: 10W Maximum power for fastest charging: 18W
Wireless charger output:
MIN 5W / MAX 10W
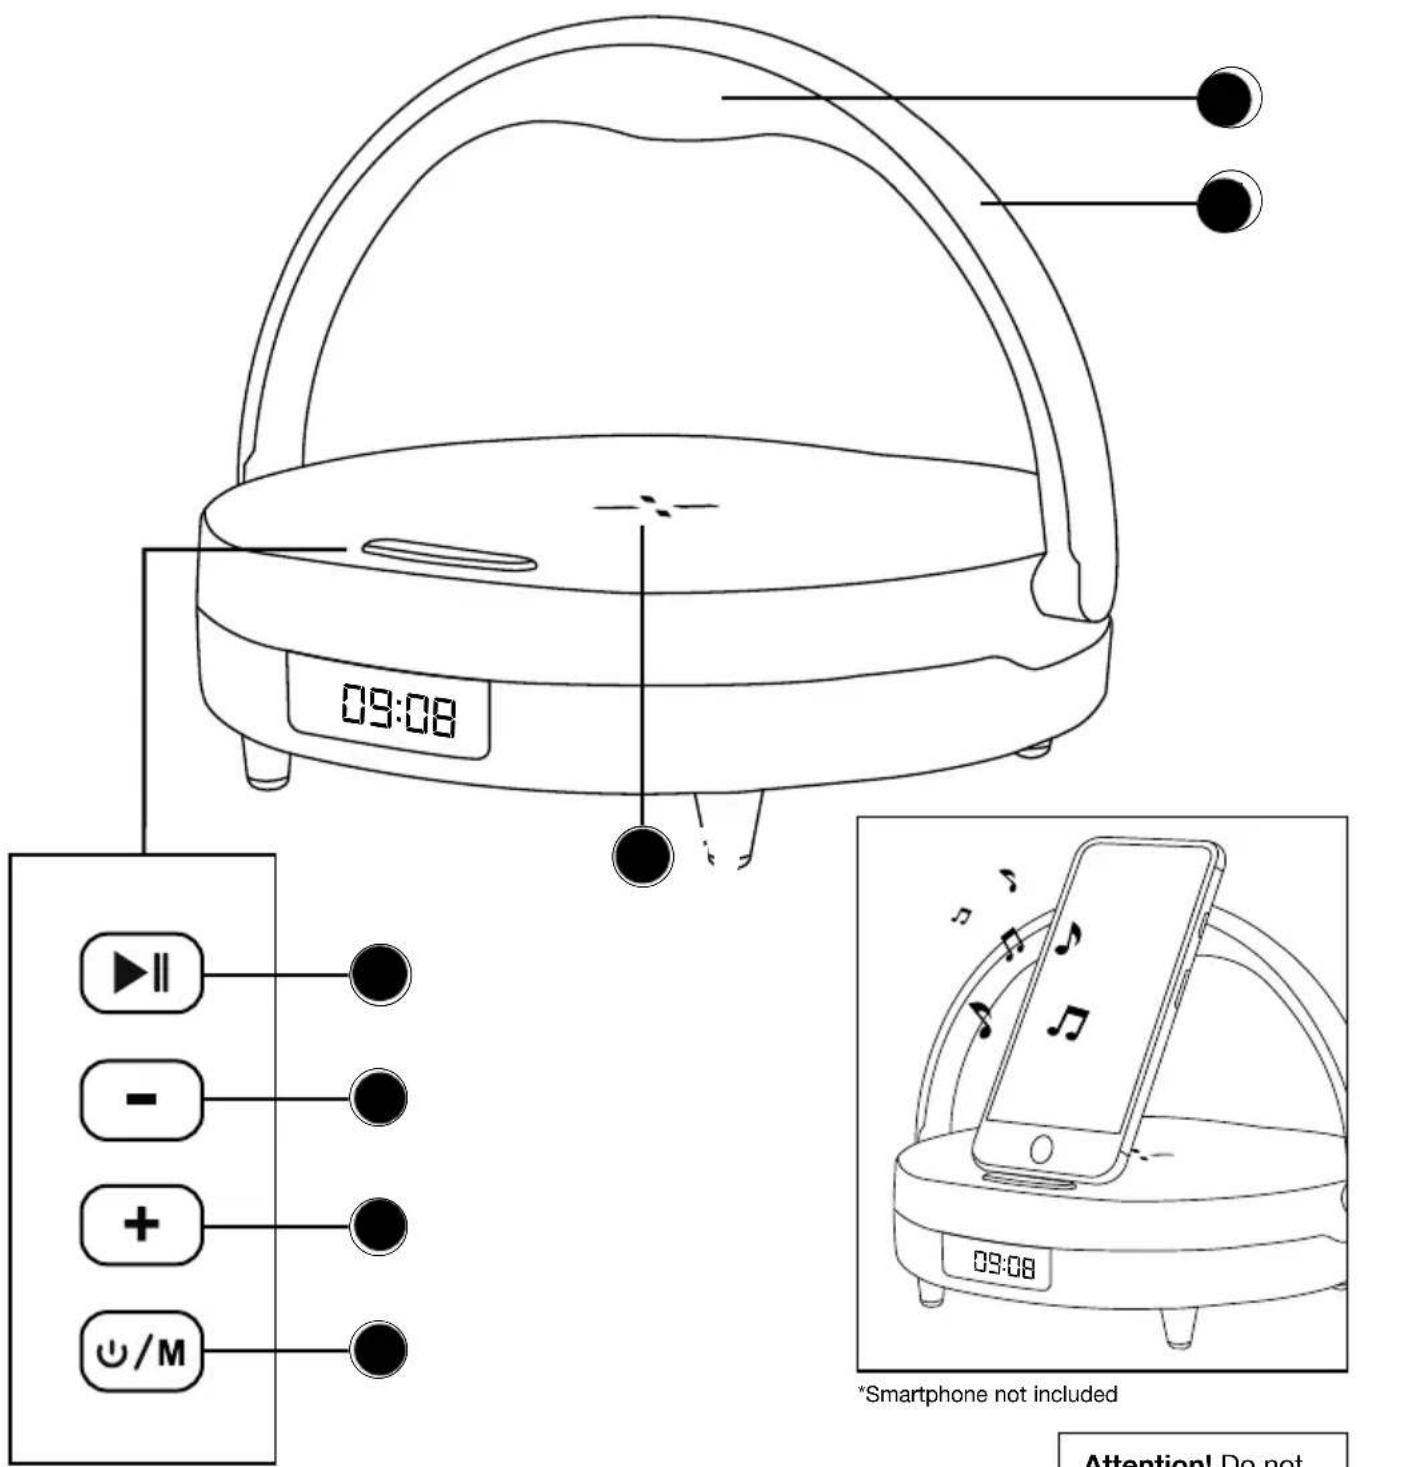
5. PARTS OVERVIEW
- Wireless charging reference point
- Key: Play/pause
- Key: Reduce the volume/ previous song.
- Key: Increase the volume/ next song.
- Key: Turn on/off, Mode Switch Button.
- ON/OFF and dimming Lamp
- Handle
- Light Indicator (Blue/Red)
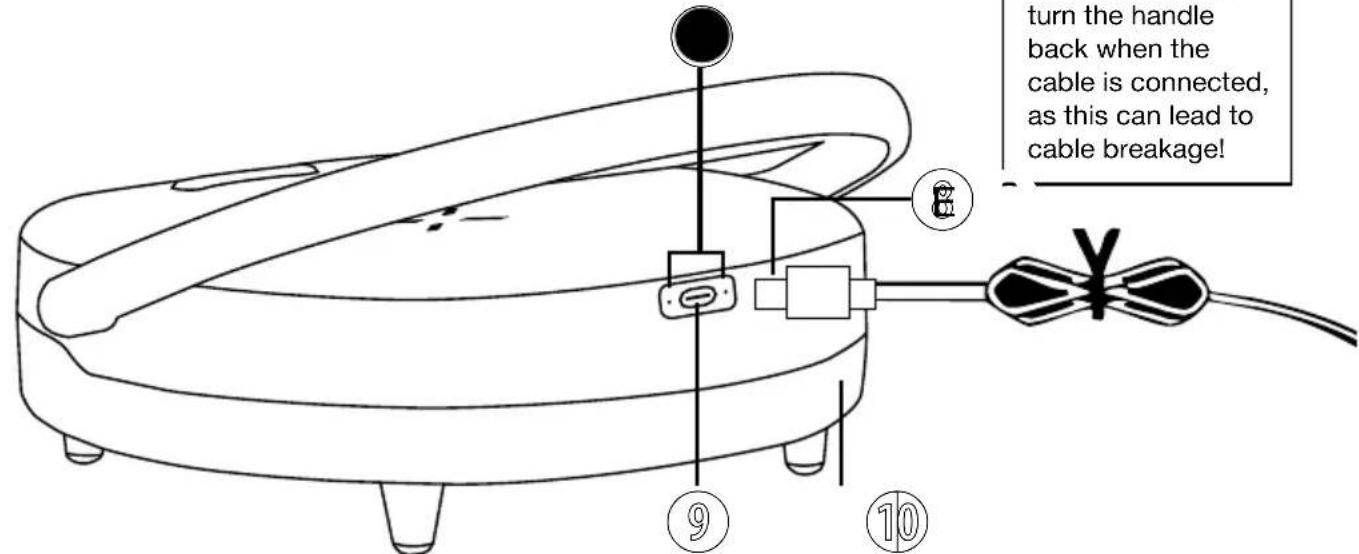
- Type-C Charging Port
- Speaker
6. WIRELESS CHARGING
- Connect the adapter (included) to the Type-C port of the product. After the product is powered on, the charging indicator light turns red and the battery enters the charging mode.
- Place your phone in the designated charging area of this product. The device will automatically initiate charging. During charging, the indicator light will turn blue, indicating that the device is in charging mode.
Note:
- Do not turn the handle back when the cable is connected, as this can lead to cable breakage!
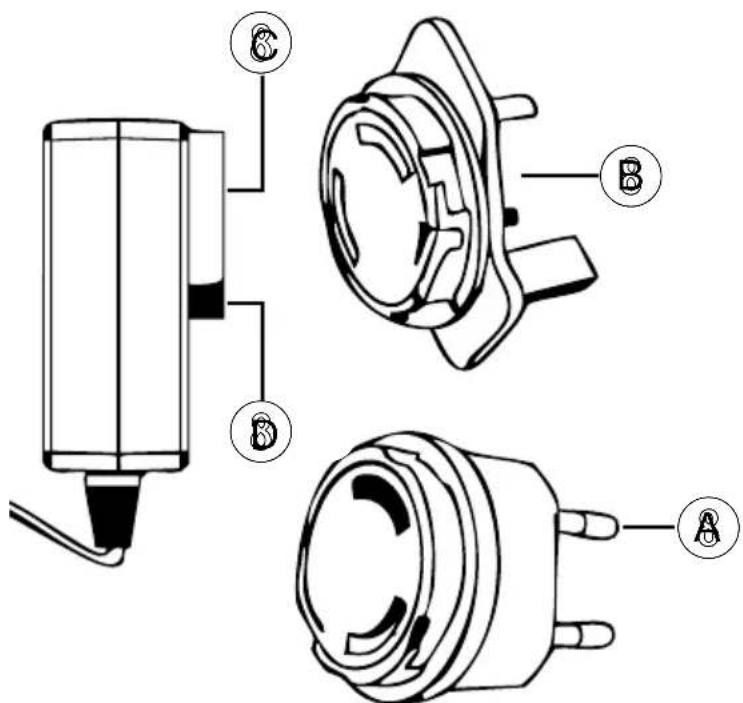
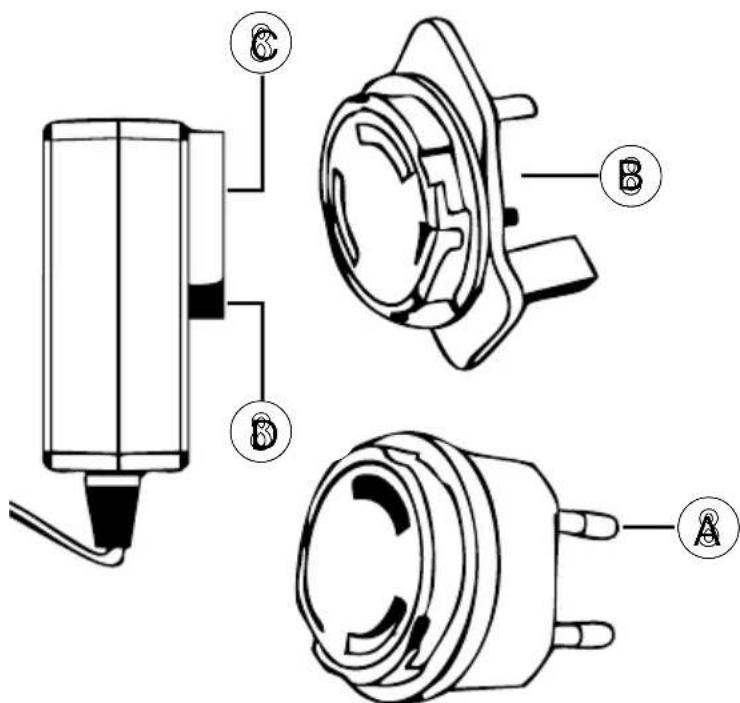
- The product is equipped with two plugs, British and European, which you can replace according to your needs.
- The adapter with cable for mobile phones is 9V/2A and the power is 10W fast charging.
A. European plug adapter
B. UK plug adapter
C. Adapter holder
D. Lock button
E. Type-C interface
7. HOW TO REPLACE THE CONVERTER
Align the port of the desired plug converter with the adapter bracket, then press down firmly and twist it to the left when it bottoms out.
At this point, the plug converter is fixed to the adapter.
When you need to replace the plug converter, simply press the locking button and twist it to the right at the same time to remove the plug converter.
EN
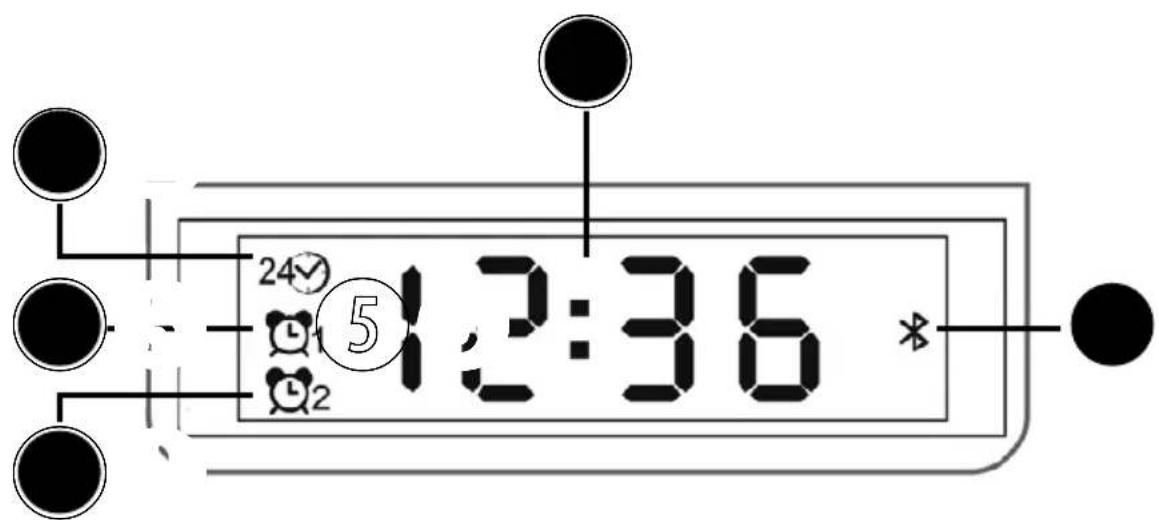
8. OVERVIEW OF DISPLAY FUNCTIONS
- Time (hours and minutes)
- Time is 24 hours
- Symbol for activated alarm 1
- Symbol for activated alarm 2
- Bluetooth logo (flashes when not connected, stops flashing when connected successfully)
9. SWITCH ON THE DEVICE
When the speaker is turned off, press and hold the key for about 3 seconds. The screen lights up to indicate that it has been turned on, and the speaker turns on and enters the time mode.
With short press the button, you can switch between Bluetooth mode, clock mode.
10. AND BUTTON FUNCTIONS
- key: When playing, short press to increase the volume, long press to play the next song.
- When playing, short press to reduce the volume, long press to play the previous song.
11. BLUETOOTH CONNECTION
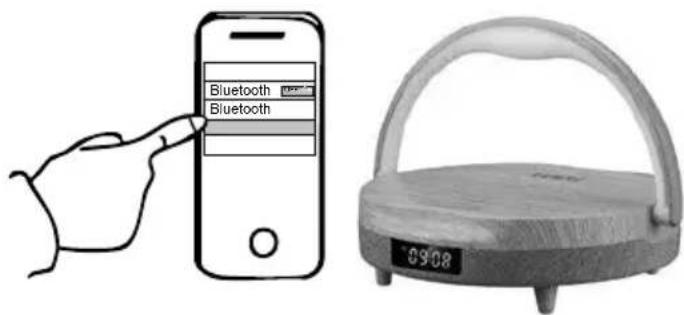
Short press the button to enter Bluetooth mode, (the Bluetooth symbol flashes) the speaker will automatically search for pairing, then turn on the Bluetooth function of the phone, search for the Bluetooth speaker in the Bluetooth device, and the words "KIENZLE LED-Lichtwecker" will appear. Click to select the "KIENZLE LED-Lichtwecker" device name and automatically enter pairing. After the connection is successful, the Bluetooth icon on the screen will no longer flash, indicating that the connection is successful.
12. CLOCK FUNCTION
- When using for the first time, you need to set the time yourself. After turning on the device, switch to the clock mode (the Bluetooth icon disappears from the screen, indicating that the device has entered the clock mode) and press and hold the key for 3 seconds to enter the time setting. The hour digits on the display will flash. At this time, short press the + or key to modify the hour value.
- After setting the hours, short press the key to set the minutes. The minute digits on the display will flash. At this time, short press the + or key to modify the minute value.
- After completing the time setting, press and hold the key for 3 seconds to exit. The time setting is successful.
13. ALARM CLOCK FUNCTION
- In clock mode, press and hold the key for 3 seconds and the hour digits on the display will flash. Then short press the key and the minute digits on the display will flash. Then short press the key to enter the alarm setting.
- Alarm setting: When the alarm symbol is displayed on the screen and the hour digits are flashing, short press the “+” key to modify the hour value.
- After setting the hour, short press the key to set the minute, and the minute digit will flash. At this time, short press the +++ key to modify the minute value.
-
After completing the minute setting, short press the key to display the screen ON or OFF. At this time, short press the + ^ key to select the alarm on or off. After selecting on or off, press the key to set it.
-
After setting the alarm, short press the + key to select the alarm tone, and press the key to set it. you can choose between 5 different alarm tones
- After completing the setting of alarm 1, set alarm 2 in the same way, press and hold the key to exit and return to clock mode.
Note:
When the alarm sounds, press the pause button to pause the alarm (the alarm will sound again ten minutes after the pause), and press the power button to stop the alarm. The alarm will not respond when the power is off.
When the product is powered on (turn on with power button) (the touch light does not work in the power-off state) When the lamp is switched off, it lights up in warm white light at 30% of its brightness the first time it is touched. The second touch increases the brightness to 50% , the third touch to 100% . The fourth touch switches the light off again. This cycle is repeated.
15. PHONE STAND FUNCTION
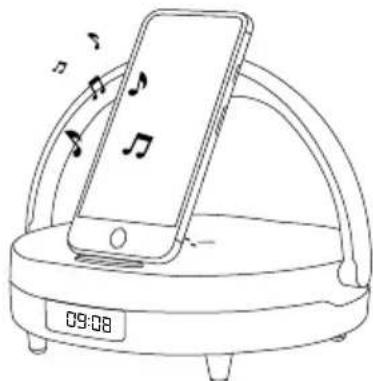
Place your phone on the speaker as shown above and it can be used as a phone stand!
Note:
The cellphone is not included, just to show how to use as a phone stand.
16. CLEANING AND MAINTENANCE
Before cleaning the device, disconnect it from the power supply (remove batteries)!
Only use a dry cloth to clean the exterior of the device. To avoid damaging the electronics, do not use any cleaning fluid.
Protect the device from dust and moisture.
17. DISPOSAL

Dispose of the packaging materials properly, according to their type, such as paper or cardboard. Contact
your local waste-disposal service or environmental authority for information on the proper disposal.

Do not dispose of electronic devices in the household garbage!
As per Directive 2012/19/EU of the European Parliament on waste electrical and electronic equipment and its adaptation into German law, used electronic devices must be collected separately and recycled in an environmentally friendly manner.
18. EC DECLARATION OF CONFORMITY
Hereby, Bresser GmbH declares that the equipment type with article number 15321 is in compliance with Directive: 2014/53/EU. The full text of the EU declaration of conformity is available at the following internet address: http://www.bresser.de/download/15321/15321_CE.pdf
19. WARRANTY & SERVICE
The regular warranty period is 2 years and begins on the day of purchase. To benefit from an extended voluntary warranty period as stated on the gift box, registration on our website is required.
You can consult the full warranty terms as well as information on extending the warranty period and details of our services at www.bresser.de/warranty_terms.
TABLE DES MATIÈRES
Dispose of the packaging materials properly, according to their type, such as paper or cardboard. Contact
your local waste-disposal service or environmental authority for information on the proper disposal.

6. DRAADLOOS OPLADEN
- Sluit de adapter (inbegren) aan op de Type-C poort van het product. Nadat het product is ingeschakeld, worden het oplaadindicatorlampje rood en komt de batterij in de oplaadmodus.
- Place your phone in the designated charging area of this product. The device will automatically initiate charging. During charging, the indicator light will turn blue, indicating that the device is in charging mode.
Opmerking:
9. SCHAKEL HET APPARAAT IN
Dispose of the packaging materials properly, according to their type, such as paper or cardboard. Contact
your local waste-disposal service or environmental authority for information on the proper disposal.

Dispose of the packaging materials properly, according to their type, such as paper or cardboard. Contact
your local waste-disposal service or environmental authority for information on the proper disposal.

Dispose of the packaging materials properly, according to their type, such as paper or cardboard. Contact
your local waste-disposal service or environmental authority for information on the proper disposal.