
Aqua Plus Power VF-VM4501GS - Vacuum Cleaner VESTFROST - Free user manual and instructions
Find the device manual for free Aqua Plus Power VF-VM4501GS VESTFROST in PDF.
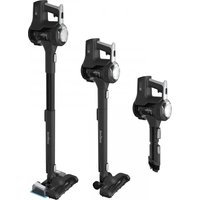


| Product Type | Cordless Vacuum Cleaner |
| Brand | Vestfrost |
| Model | Aqua Plus Power VF-VM4501GS |
| Motor Type | BLDC / Inverter |
| Power Supply | Lithium-ion battery 24 V max |
| Runtime (normal power) | Up to 60 min |
| Runtime (max power) | Up to 14 min |
| Charging time | 3.5 h |
| Noise level | <= 82 dB |
| Number of batteries included | 1 (2 on some models) |
| Box contents | Li-ion battery, charger, external charging station, motorized floor brush, crevice tool, long and flexible crevice tool (optional), brush attachment with water tank and foot pump (optional), mini turbo brush (optional), soft brush (optional), sofa brush (optional), pet brush and hose (optional) |
| Filter type | Washable post-motor filter, fiber filter, foam filter, filter sieve |
| Filter maintenance | Receptacle filter: clean frequently; post-motor filter: clean every 6 months |
| Dust container capacity | Not specified |
| Special features | Two speed levels, LED display, adjustable motorized brush (carpet/floor), front light, brush attachment for washing with water tank |
| Safety | Overheat protection thermostat, automatic shut-off, use by children aged 8 and above under supervision |
| Operating temperature | 0 °C to 40 °C |
| Recycling | Li-ion battery should not be disposed of with household waste; electrical appliance to be recycled at collection point |
| Warranty | 1 year minimum (according to local legislation), covers material and manufacturing defects |
Frequently Asked Questions - Aqua Plus Power VF-VM4501GS VESTFROST
User questions about Aqua Plus Power VF-VM4501GS VESTFROST
0 question about this device. Answer the ones you know or ask your own.
Ask a new question about this device
Download the instructions for your Vacuum Cleaner in PDF format for free! Find your manual Aqua Plus Power VF-VM4501GS - VESTFROST and take your electronic device back in hand. On this page are published all the documents necessary for the use of your device. Aqua Plus Power VF-VM4501GS by VESTFROST.
USER MANUAL Aqua Plus Power VF-VM4501GS VESTFROST
Cordless vacuum cleaner
Operation manual
Cordless vacuum cleaner
Operation manual
Cordless vacuum cleaner
Operation manual
Thank you for purchasing a Vestfrost product.
Our company's 55 years of experience is a guarantee of quality of our products, in which latest technologies are combined with simplicity of use.
We are convinced that our product will meet your expectations.
Kind regards,
The Vestfrost team
READ THIS USER MANUAL CAREFULLY BEFORE YOU USE THE APPLIANCE AND SAVE IT FOR FUTURE REFERENCE.
Important Safeguards
- This appliance can be used by children aged from 8 years and above and persons with reduced physical, sensory or mental capabilities or lack of experience and knowledge if they have been given supervision or instruction concerning use of the appliance in a safe way and understand the hazards involved.
• Children shall not play with the appliance.
- Prevent unintentional starting. Ensure the switch is in the off-position before connecting to battery pack, picking up or carrying the appliance. Carrying the appliance with your finger on the switch or energizing appliance that has the switch on invites accidents.
- Do not touch nozzle when the vacuum cleaner is on.
- Do not put any object into openings. Do not use with any openings blocked; keep free of dust, lint, hair and anything that may reduce air flow.
- Do not use outdoors or on wet surfaces.
- Do not operate the vacuum cleaner or charger if it has been damaged in any way. If vacuum cleaner is not working as it should, has been dropped, damaged, left outdoors, or dropped into water, call the Customer Service
- To avoid excessive heat and damage to the unit or battery, the vacuum cleaner will not operate while charging.
- Do not allow to be used as a toy. Close attention is necessary when used by or near children.
- Use only as described in this manual. Use only manufacturer's recommended attachments.
- Recharge only with the charger specified by the manufacturer.
- A charger that is suitable for one type of battery pack may create a risk of fire when used with another battery pack.
- Do not use a battery pack or appliance that is damaged or modified.
Damaged or modified batteries may exhibit unpredictable behavior resulting in fire, explosion or risk of injury.
- Do not expose a battery pack or appliance to fire or excessive temperature. Exposure to fire or temperature above 130°C (266°F) may cause explosion.
- Follow all charging instructions and do not charge the battery pack or appliance outside of the temperature range specified in the instructions.
Charging improperly or at temperatures outside of the specified range may damage the battery and increase the risk of fire.
- Have servicing performed by a qualified repair person using only identical replacement parts. This will ensure that the safety of the product is maintained.
- Do not modify or attempt to repair the appliance or the battery pack except as indicated in the instructions for use and care.
- The terminals on both the vacuum cleaner and battery should be kept free and clean of objects. Do not insert metal objects inside the terminals.
- Do not pull or carry the charger by cord, use cord as a handle, close a door on cord, or pull cord around sharp edges or corners. Do not run appliance over cord. Keep cord away from heated surfaces.
- This charger is not intended for use by travelers.
- Do not use extension cords or outlets with inadequate current-carrying capacity for the charger.
- Do not unplug by pulling on cord. To unplug, grasp the plug, not the cord.
- Do not handle charger or vacuum cleaner with wet hands.
- Use appliances only with specifically designated battery packs.
- Use of any other battery packs may create a risk of injury and fire.
- Liquid ejected from the battery may cause irritation or burns. If the liquid gets on the skin, (1) seek medical attention, (2) wash quickly with soap and water, and (3) neutralize with a mild acid such as lemon juice or vinegar. If the liquid gets into the eyes, flush them immediately with clean water for a minimum of 10 minutes.
- When battery pack is not in use, keep it away from other metal objects, like paper clips, coins, keys, nails, screws or other small metal objects that can make a connection from one terminal to another. Shorting the battery terminals together may cause burns or a fire.
- Do not incinerate this appliance even if it is severely damaged.
- This product is functioning at temperature range within 0°C-40°C (40°F-104°F).
- This vacuum cleaner creates suction. Keep hair, loose clothing, fingers, and all parts of body away from openings and moving parts.
- Do not pick up anything that is burning or smoking, such as cigarettes, matches, or hot ashes.
- Do not use without filters in place.
- Use extra care when cleaning stairs.
- Do not use to pick up flammable or combustible liquids, such as gasoline, or use in areas where they may be present.
- Store vacuum cleaner and charger indoors in a cool, dry area. To avoid electric shock and/or cleaner damage, do not expose to weather elements.
- Keep your work area well lit. Unplug electrical appliances before vacuuming them.
- Overcharging, short circuiting, reverse charging, mutilating or incinerating the cells and the batteries must be avoided.
- The battery should be fully charged at least every 6 months in order to maintain vacuum cleaner efficiency.
What's inside the box
Lithium Ion battery (2 pcs. on some models)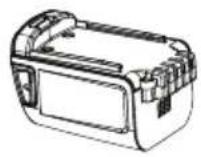
Charger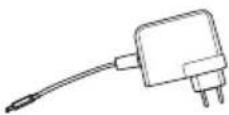

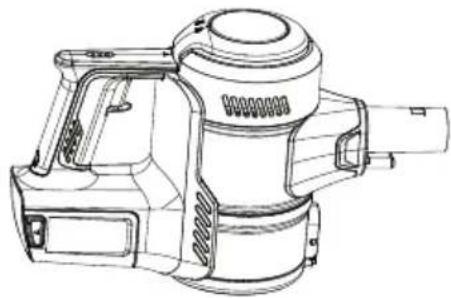
Cordless vacuum cleaner
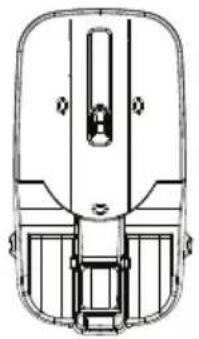
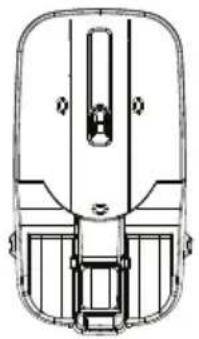
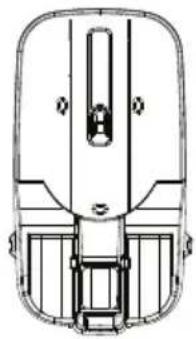
Wall mount
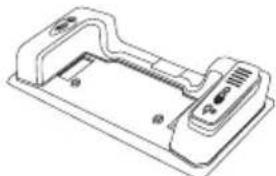
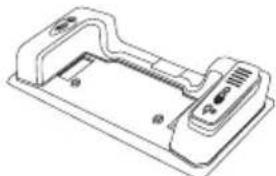
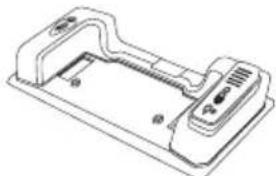
External battery charging dock
Operation manual and important safeguards
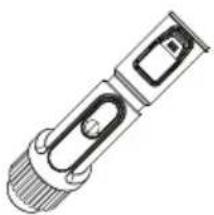
2-in-1 tool
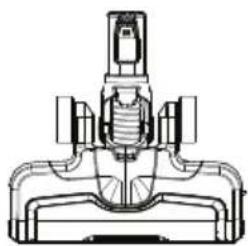
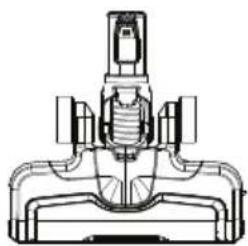
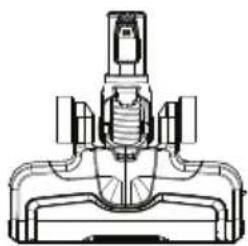
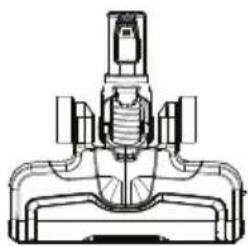
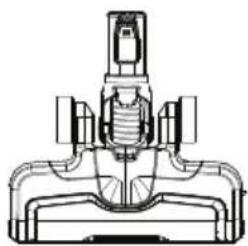
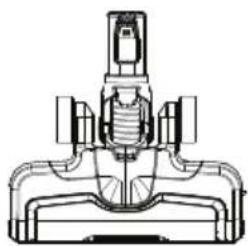
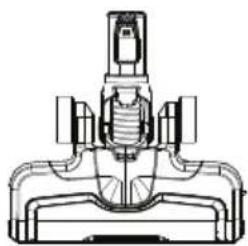
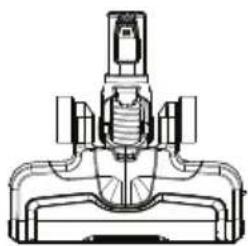
Motorized floor head

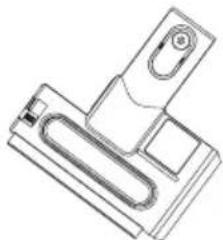
Crevice tool

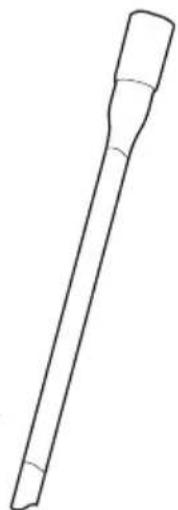
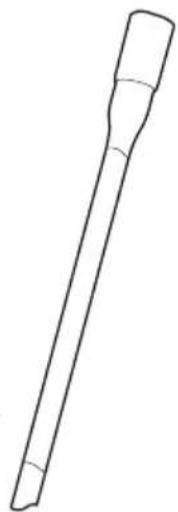
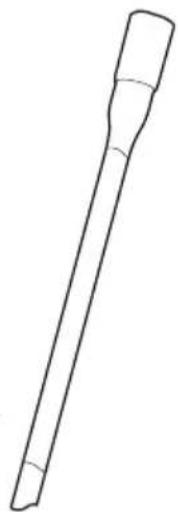
Telescopic tube
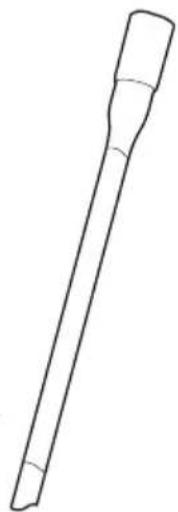
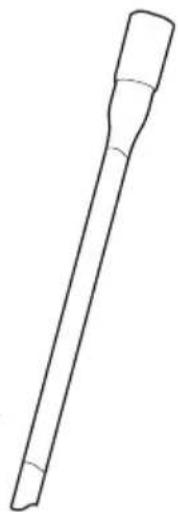
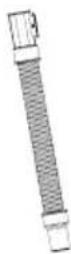
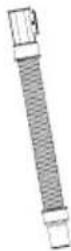
Long flexible crevice tool (optional accessory)
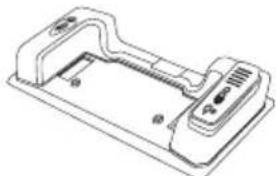
Mop attachment with water tank and foot pump plus 2 mopping pads (optional accessory)
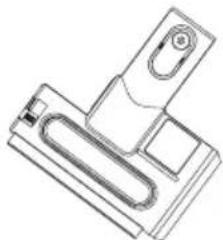
Mini turbo brush (optional accessory)
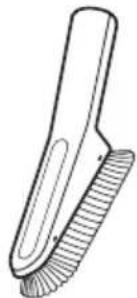
Soft brush (optional accessory)
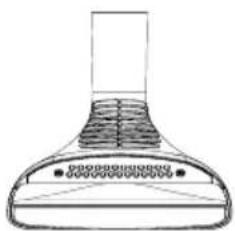
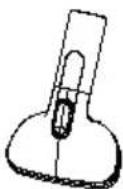
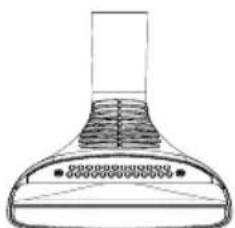
Sofa brush (optional accessory)
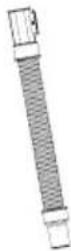
Pet brush and flexible hose (optional accessory)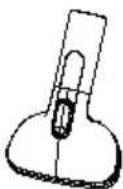
Part names
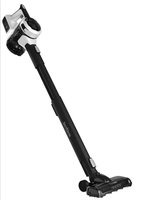
Cordless vacuum cleaner with telescopic tube attached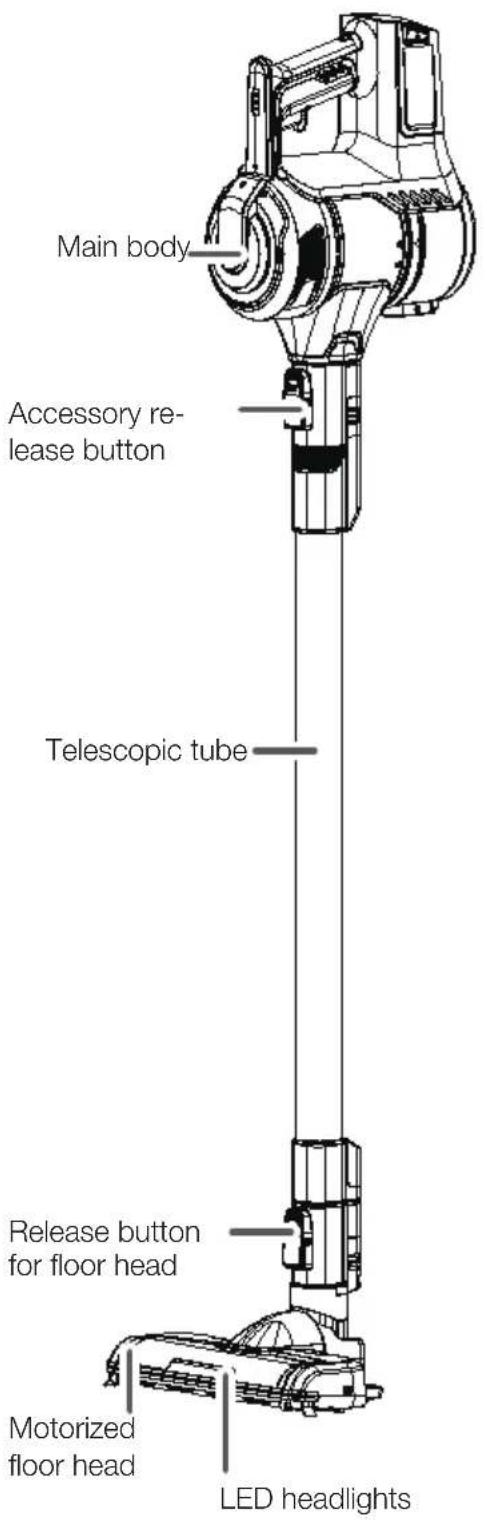
Main body details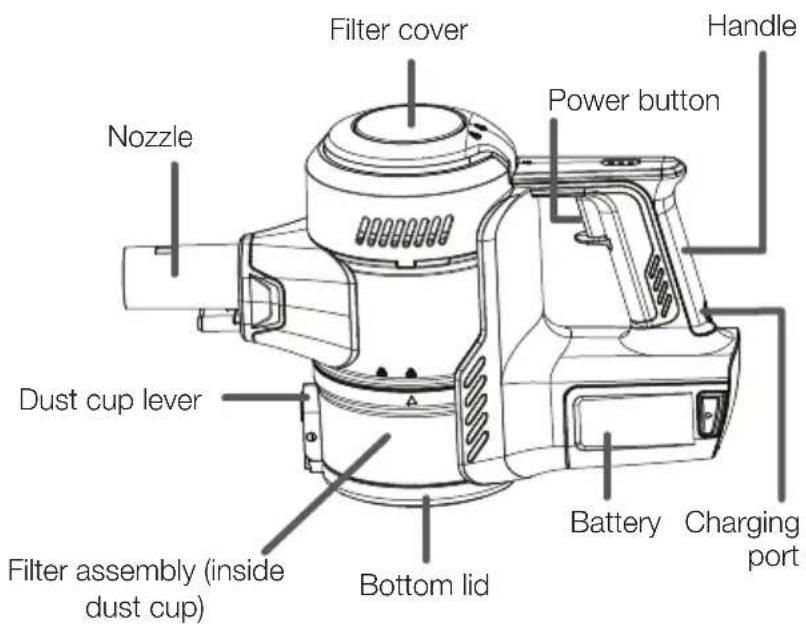
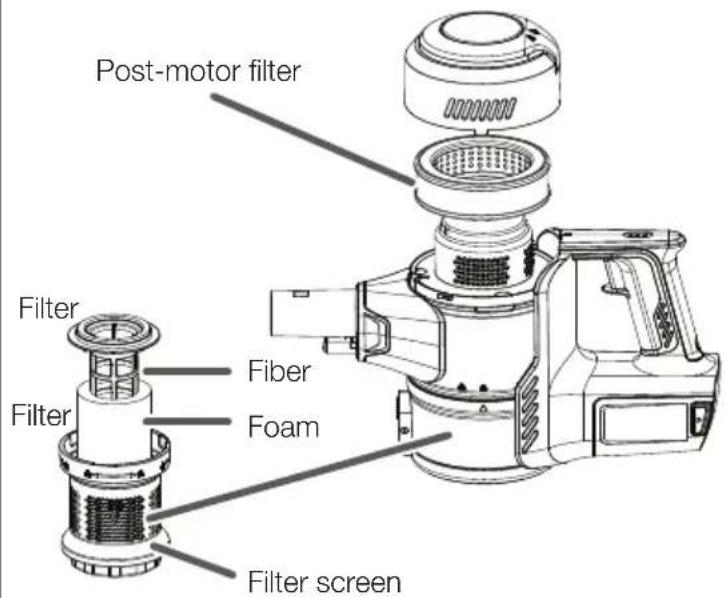
Filters location
For filter maintenance instructions, see page 8.
Easy assembly
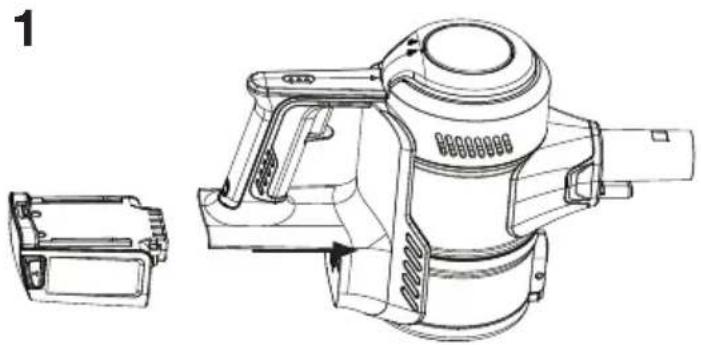
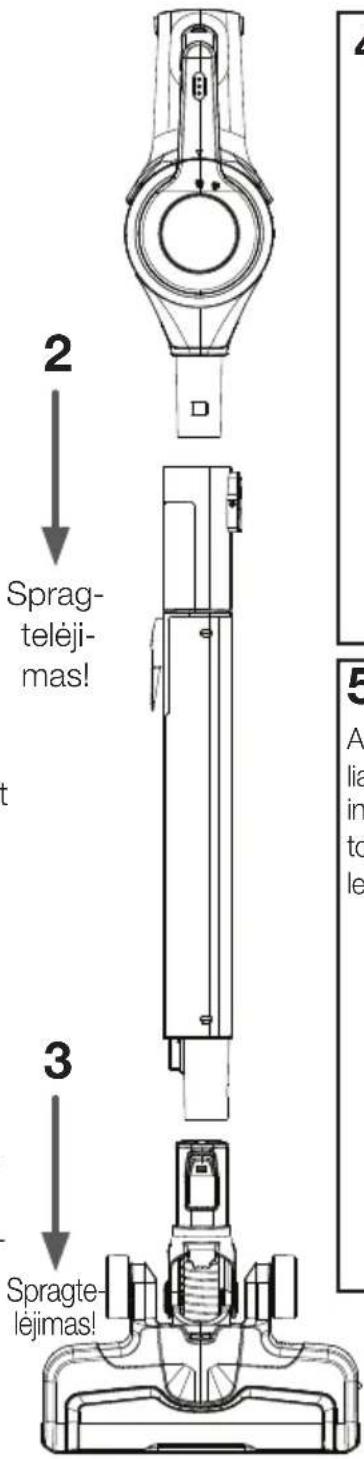
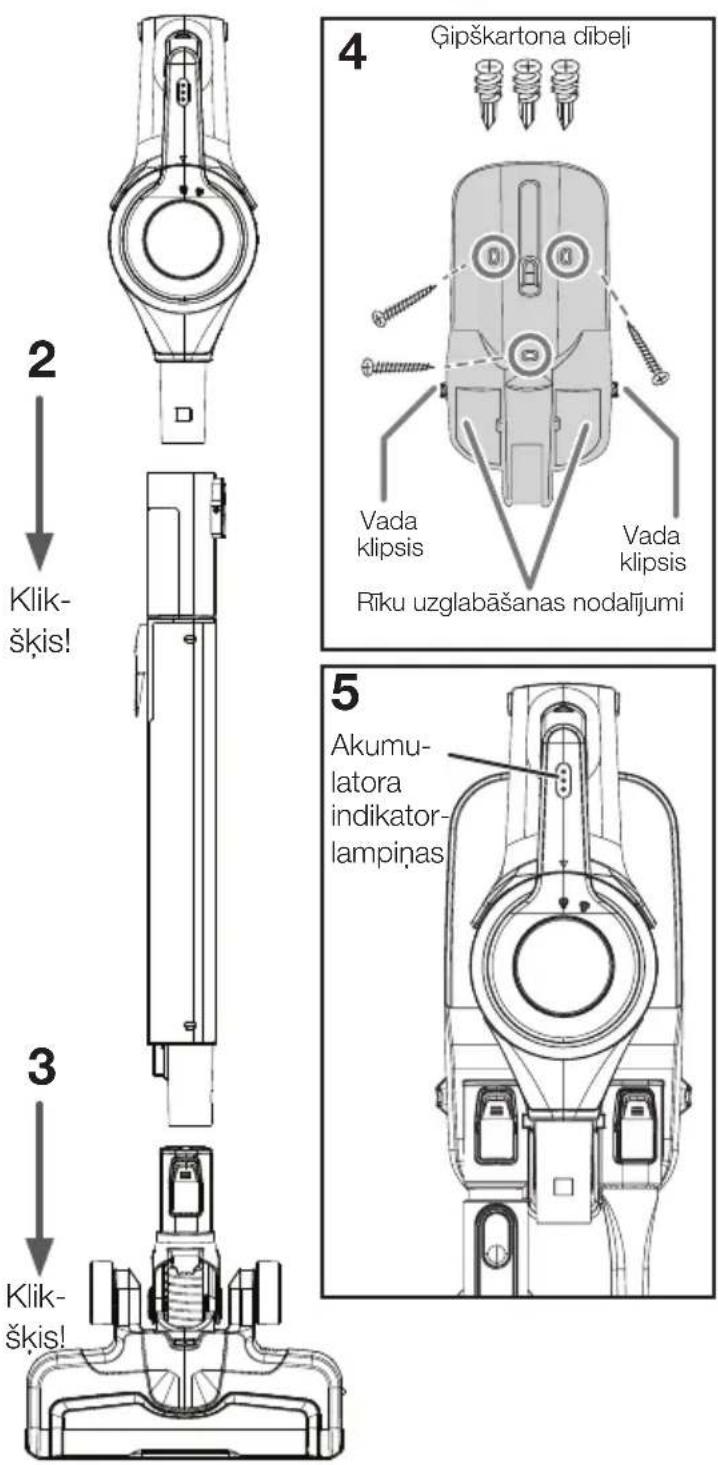
- Slide the battery into the compartment below the handle of the vacuum cleaner and ensure it is firmly attached (Fig. 1).
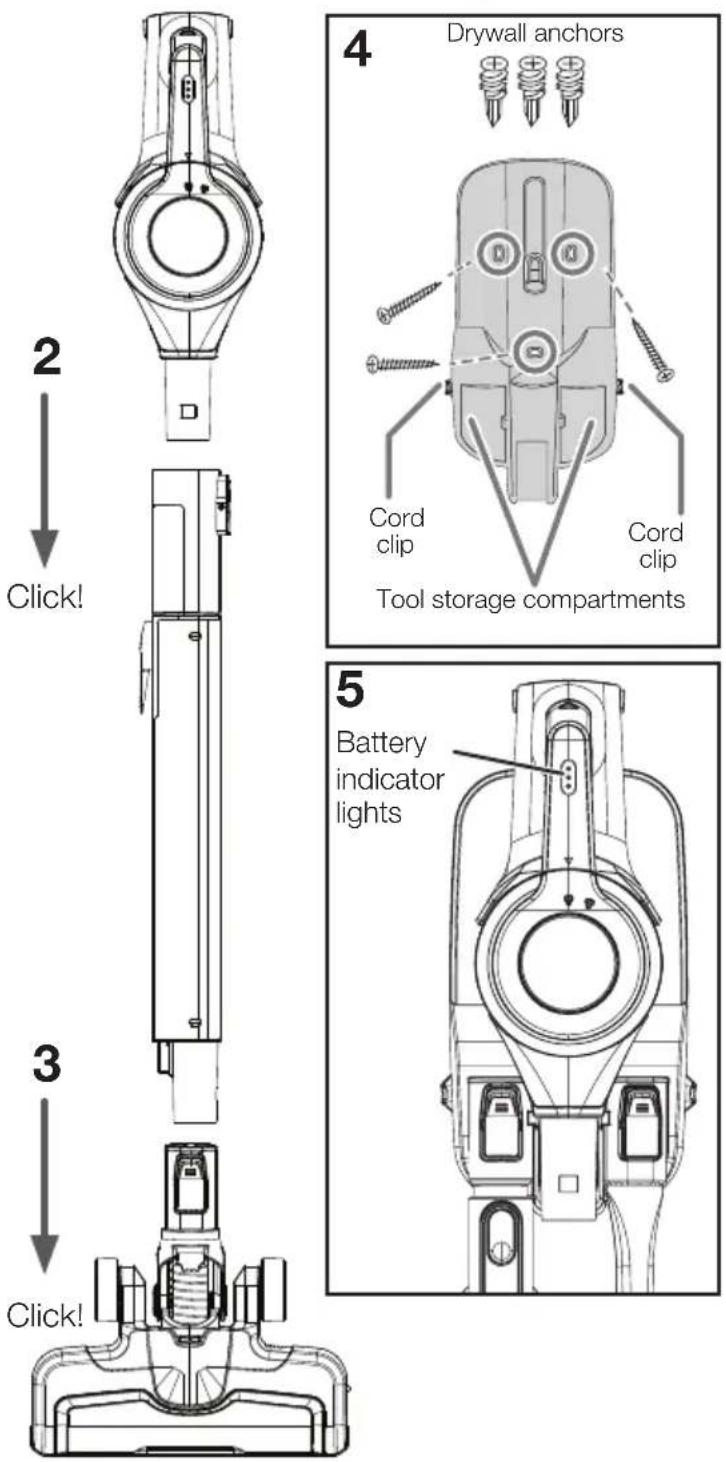
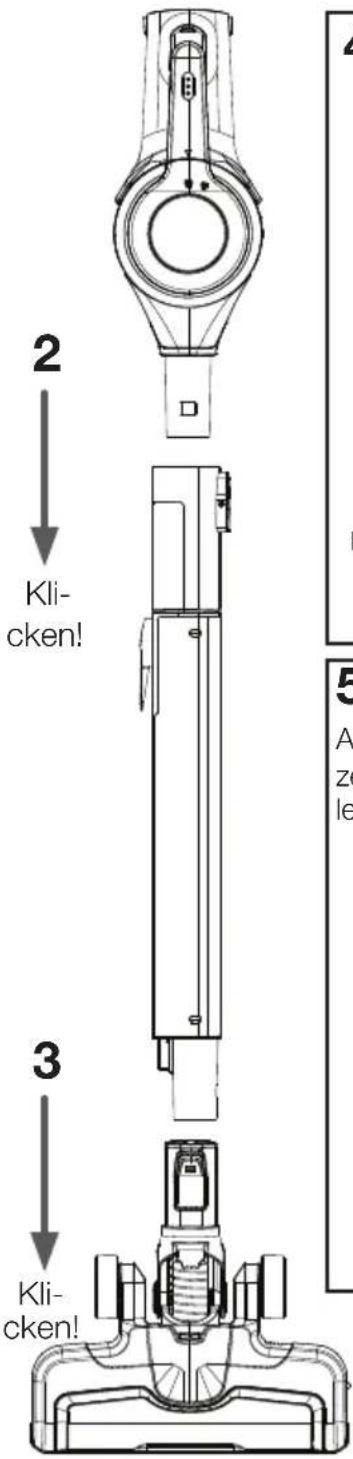
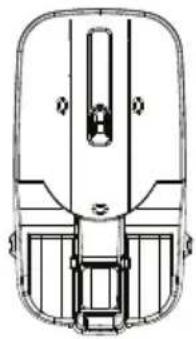
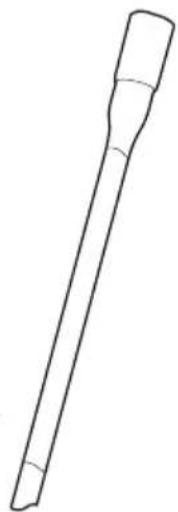
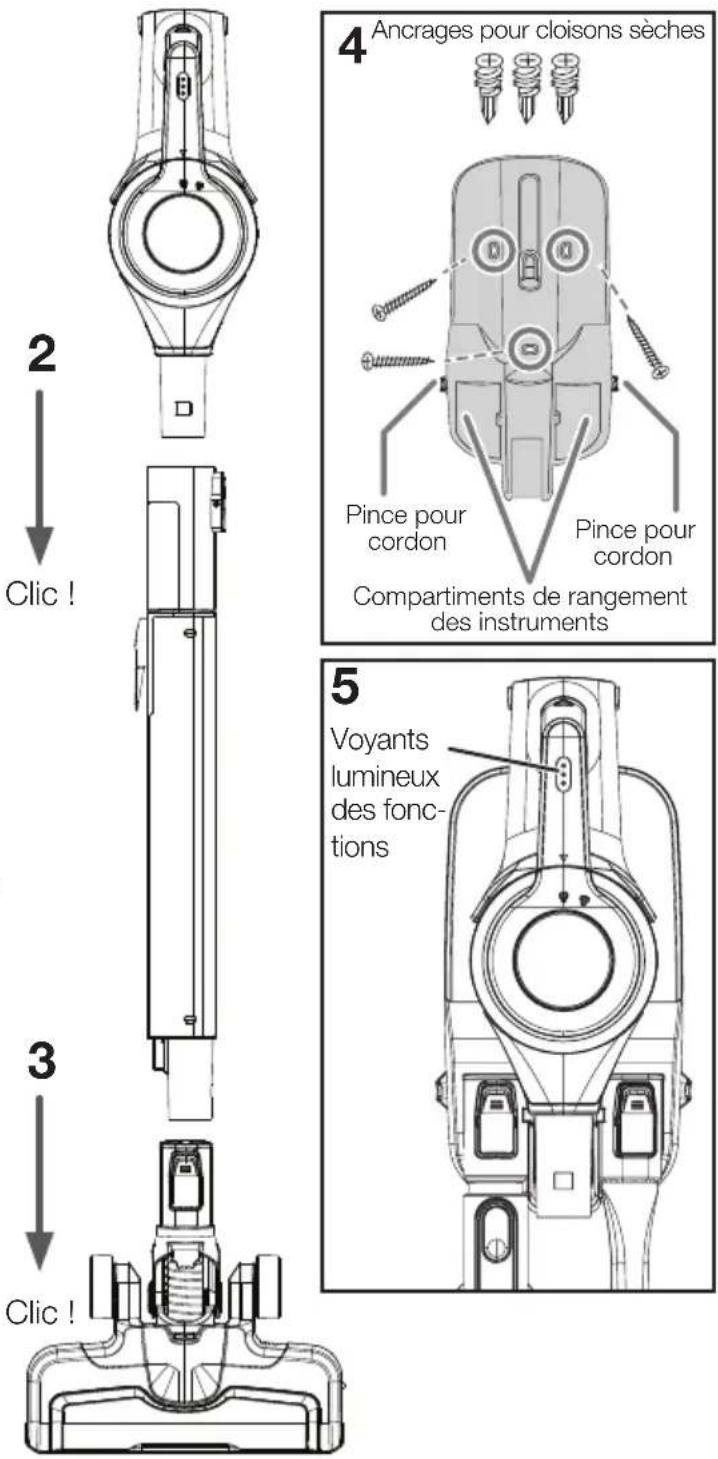
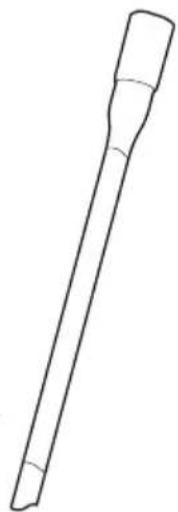
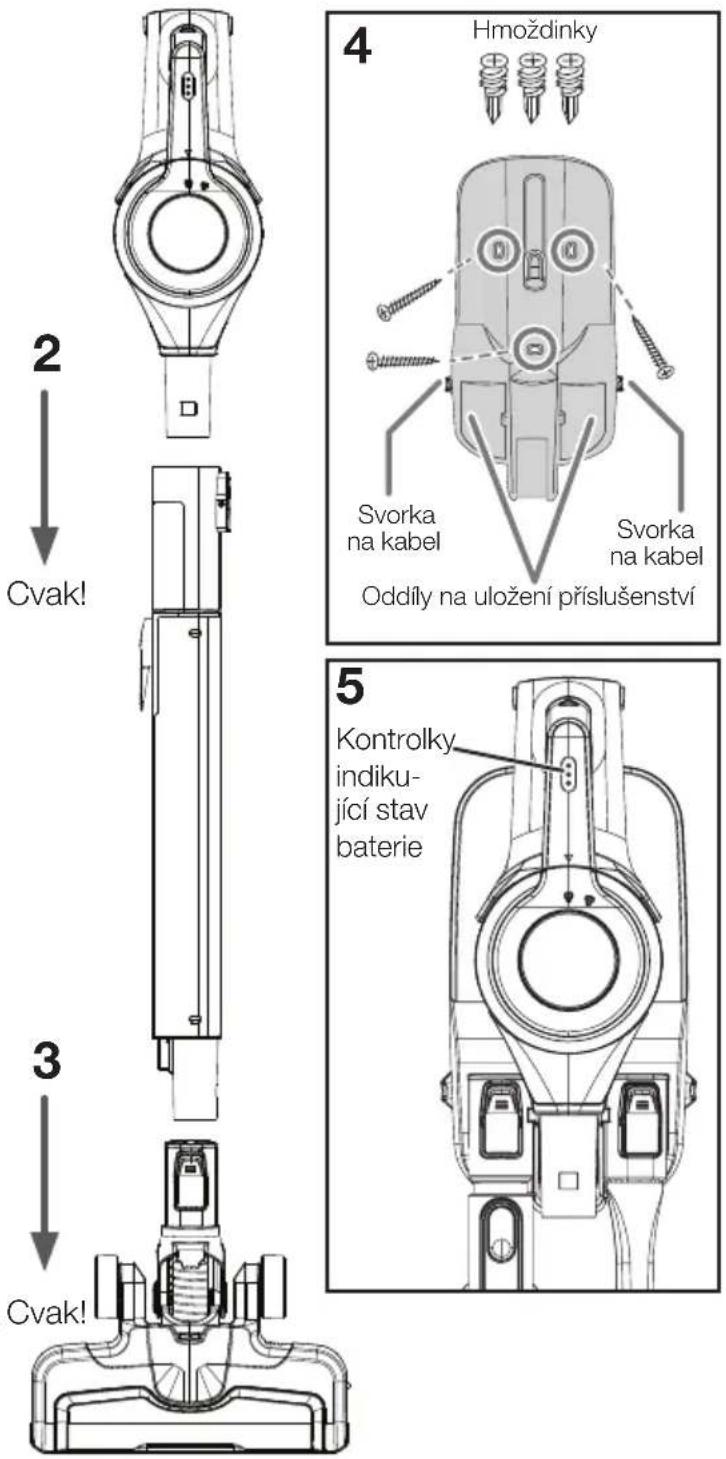
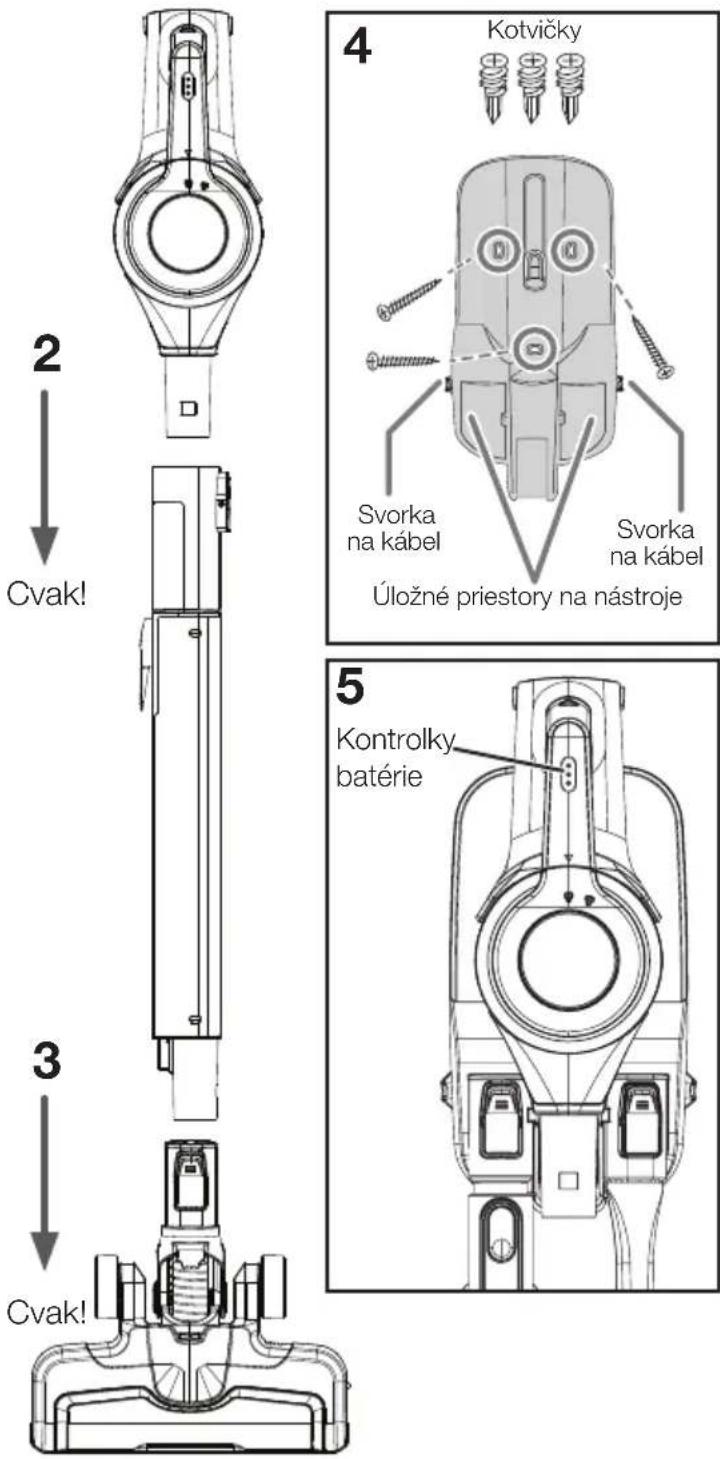
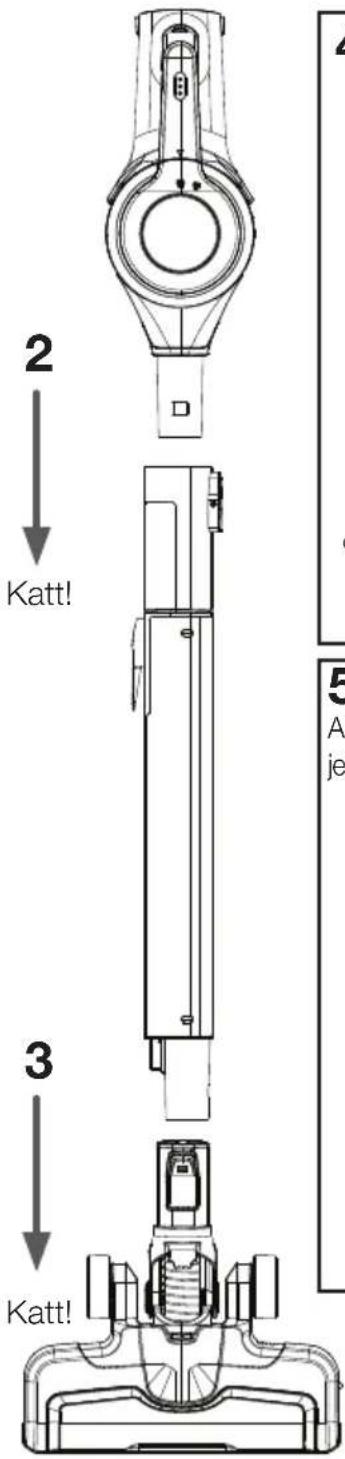
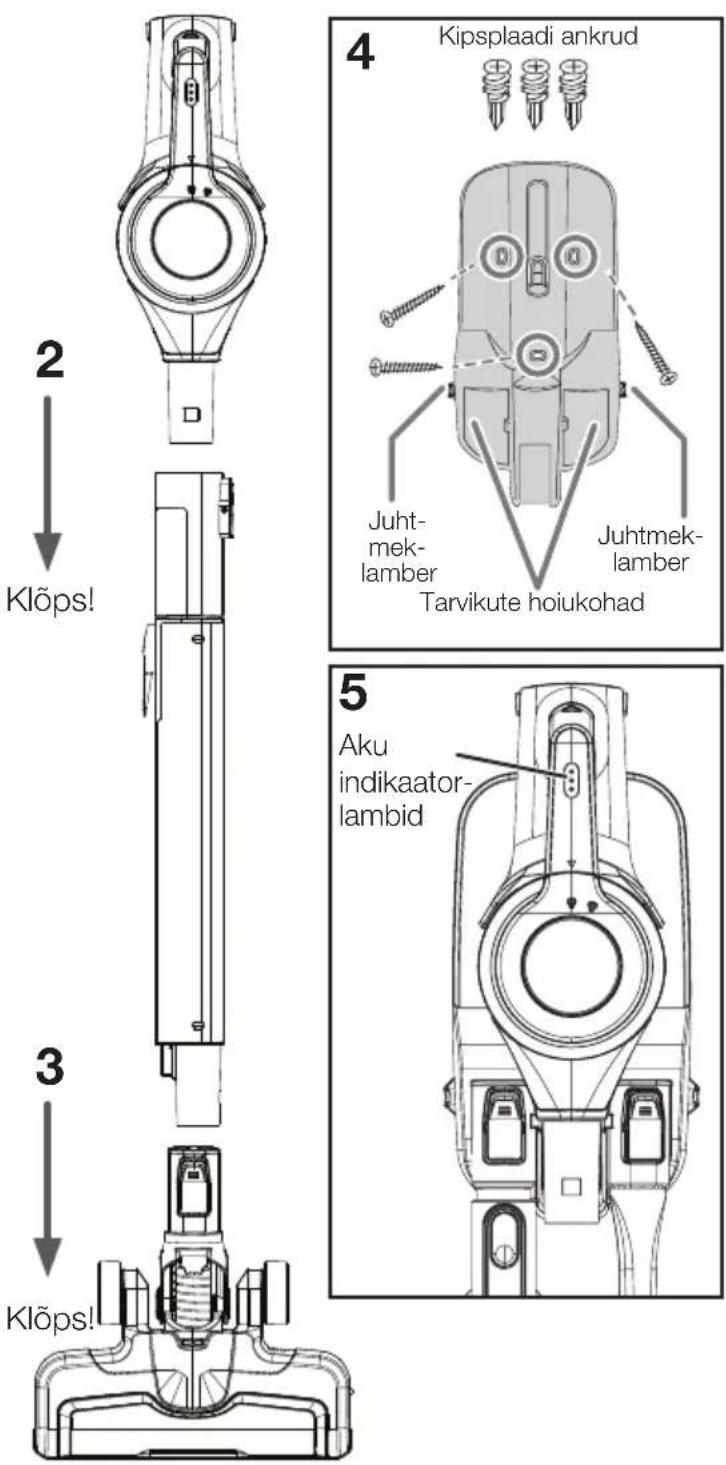
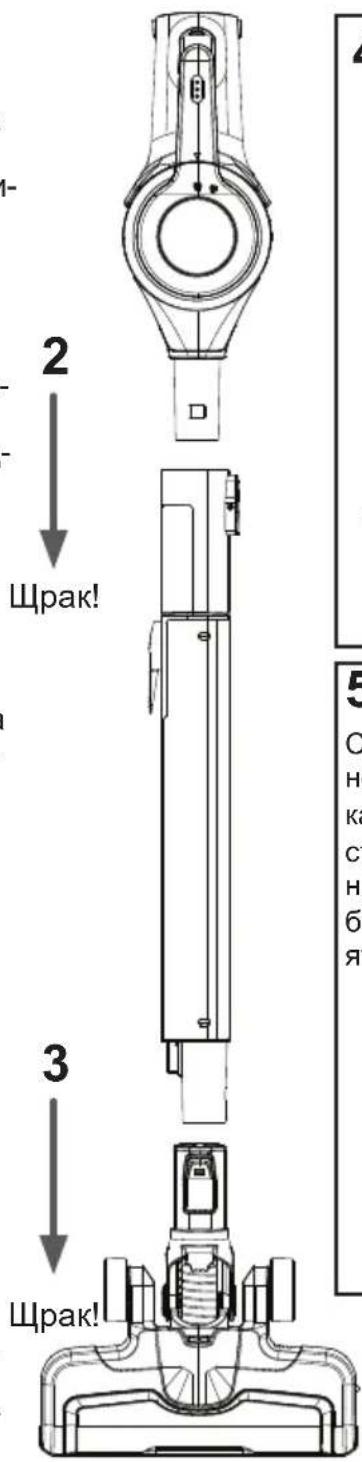
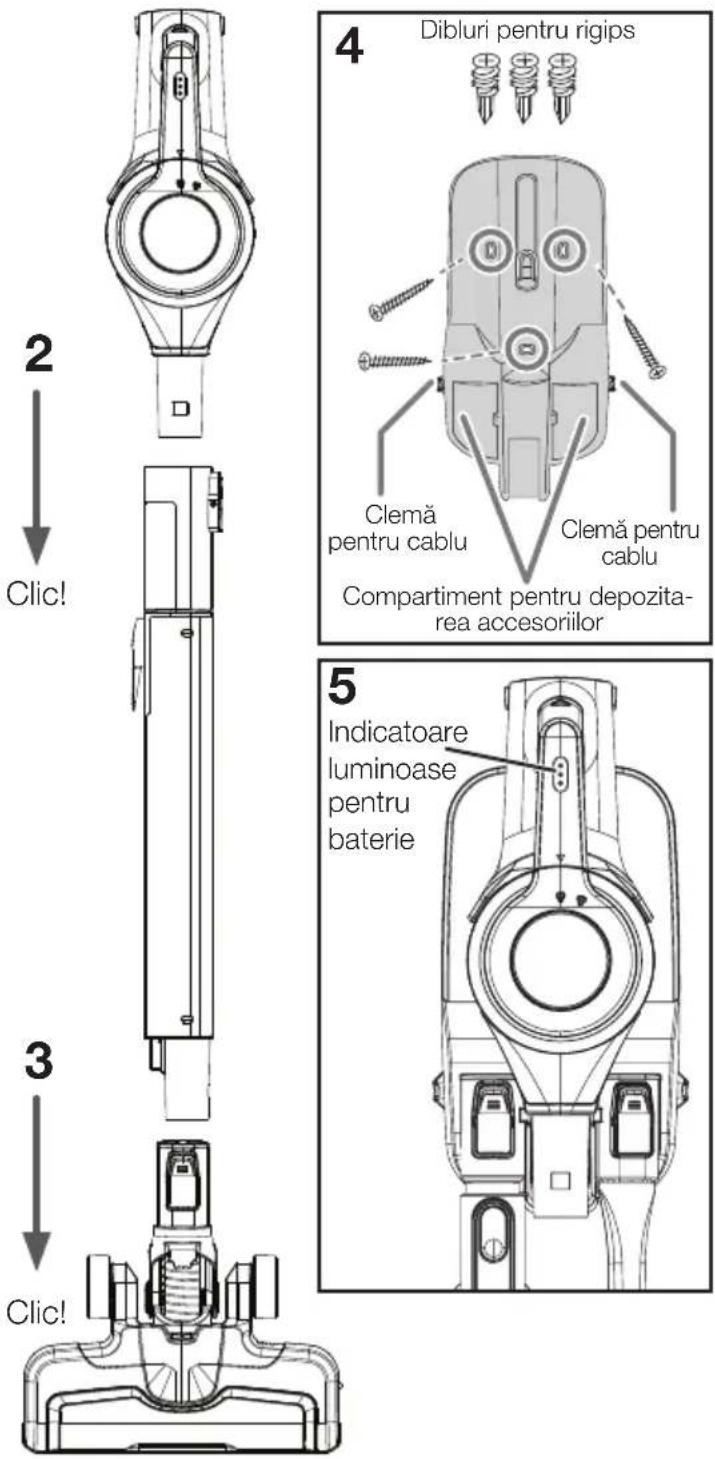
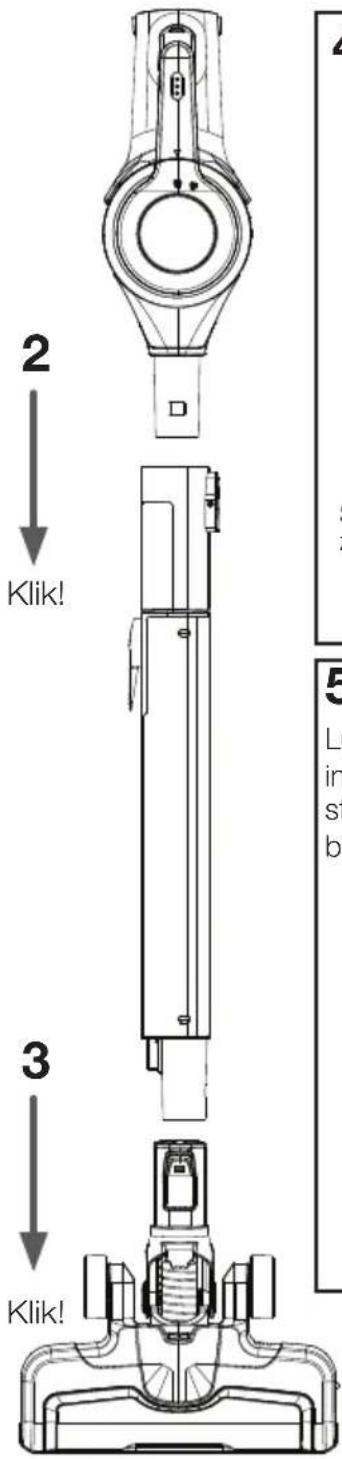
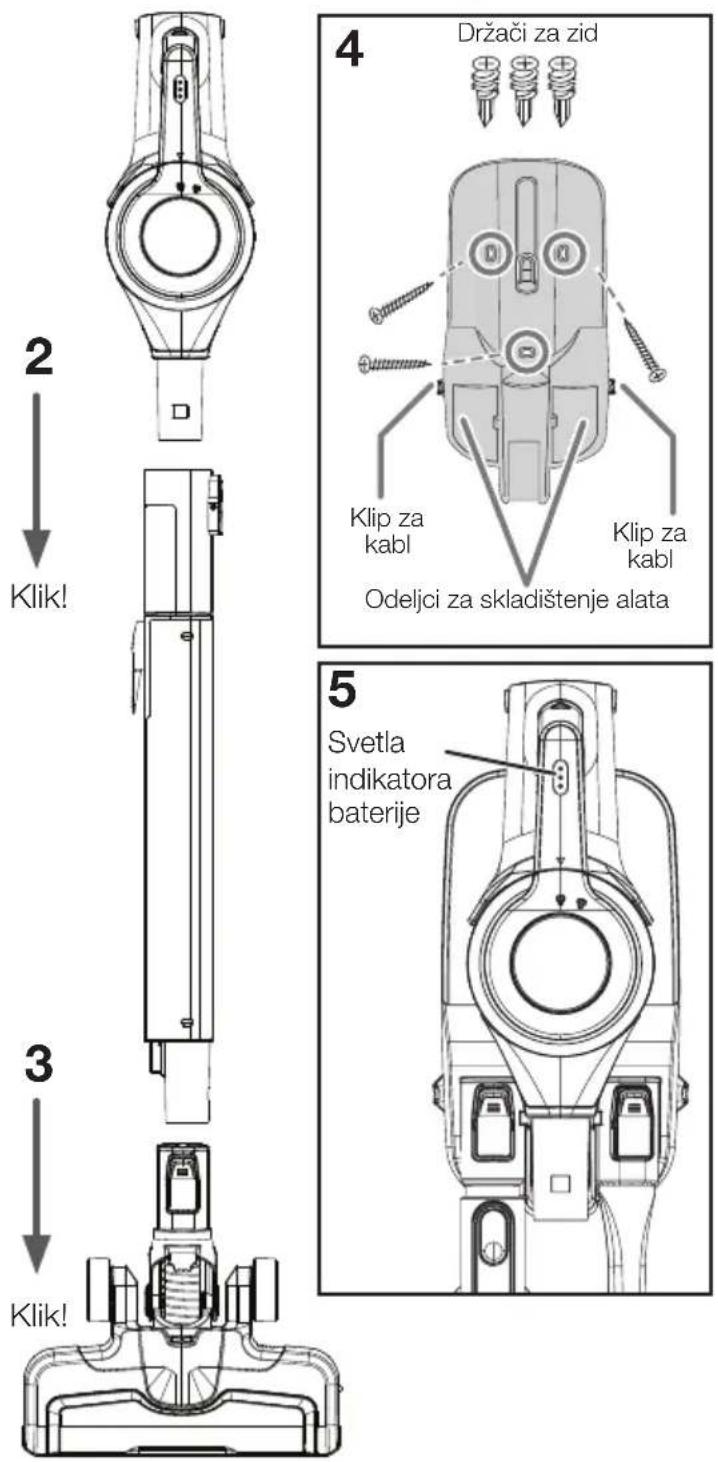
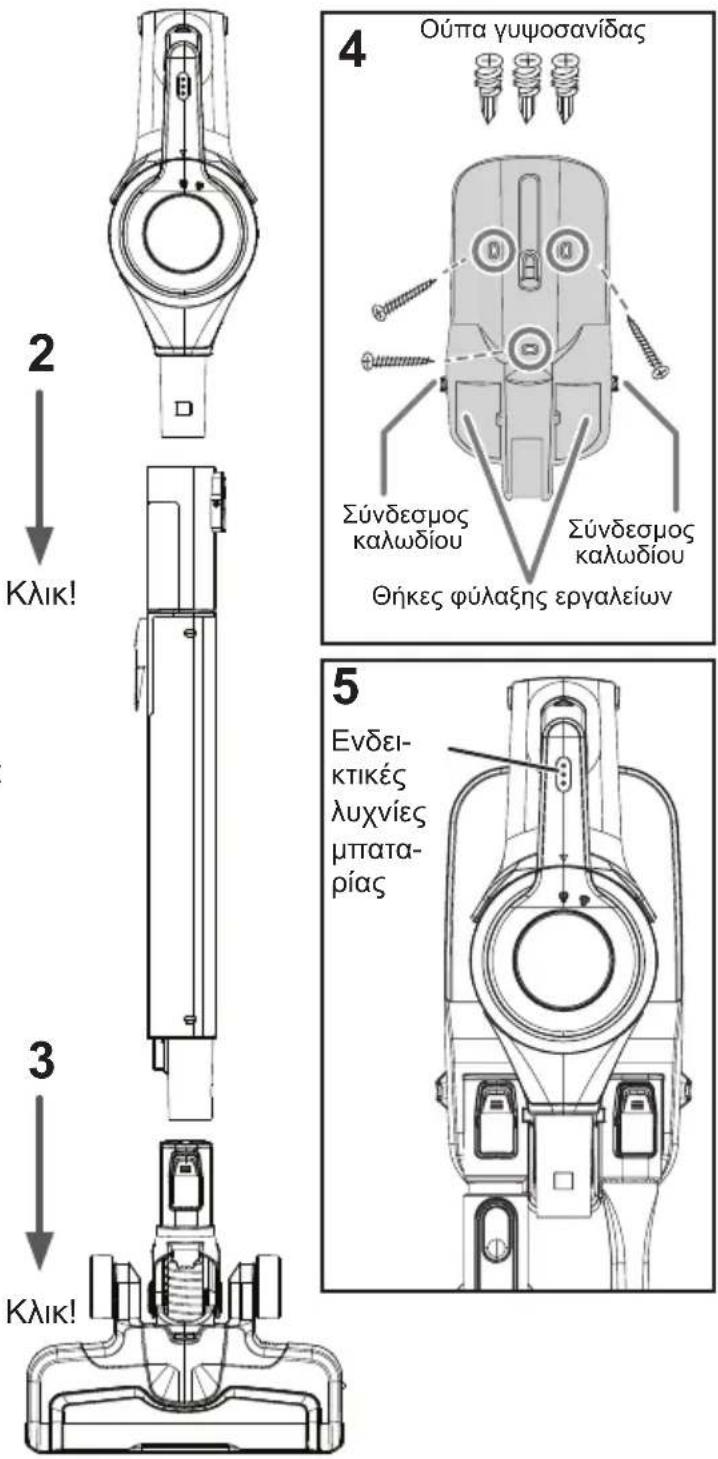
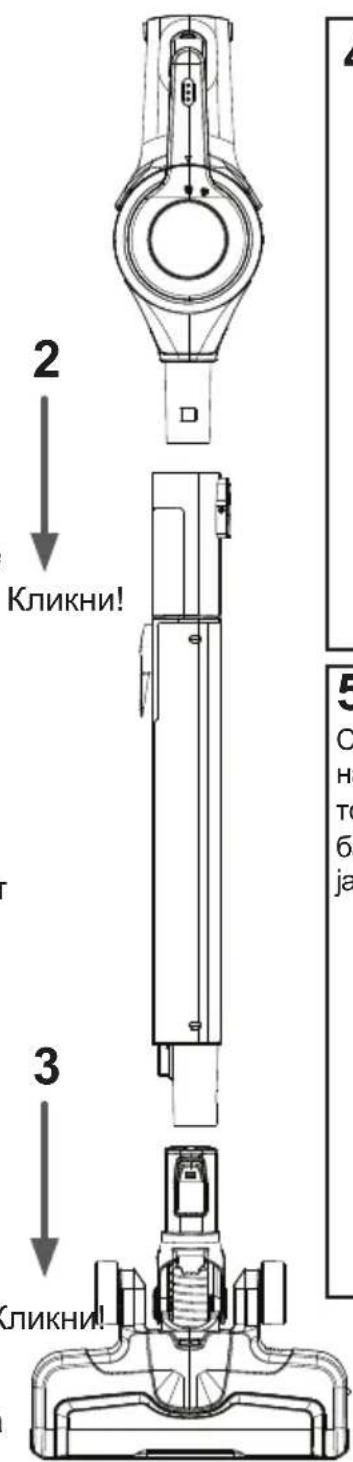
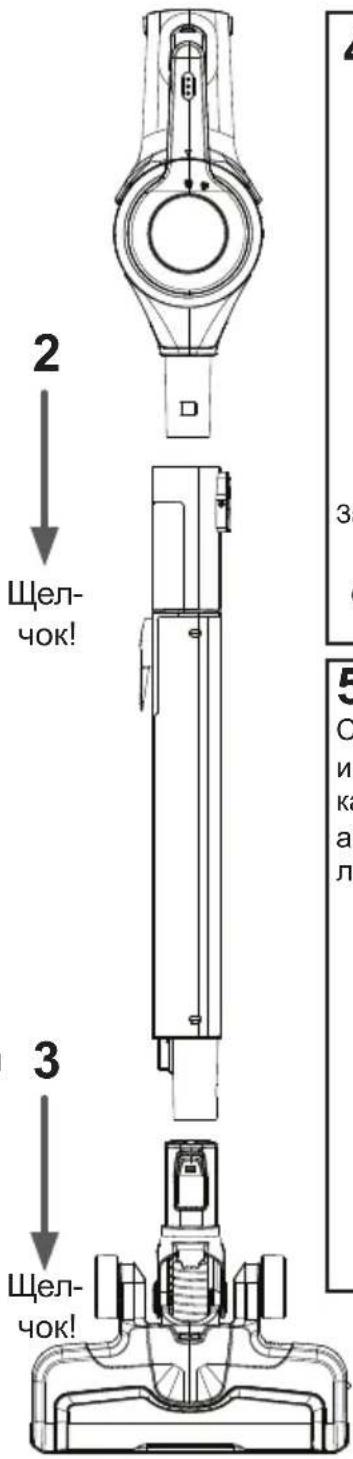
- Slide the telescopic tube onto the cordless vacuum cleaner until it clicks into place (Fig. 2).
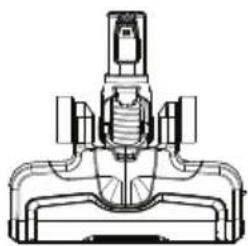
- Push the telescopic tube into the motorized floor nozzle until it clicks (Fig. 3).
How to install the wall mount (optional; the vacuum cleaner is designed to be freestanding)
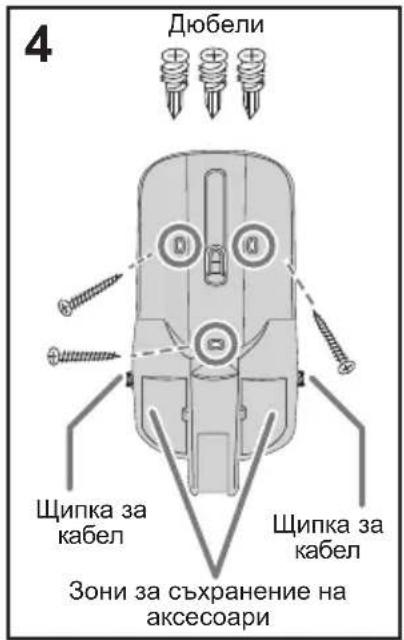
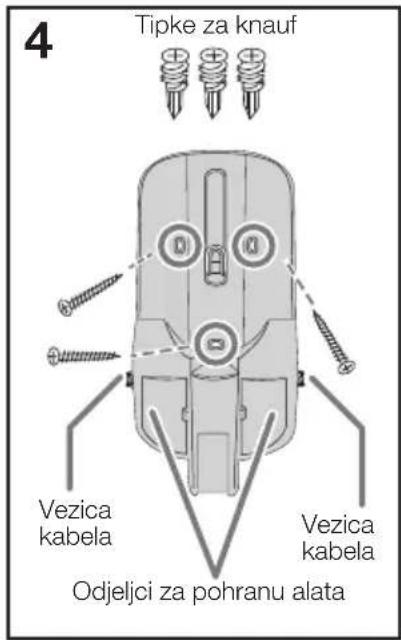
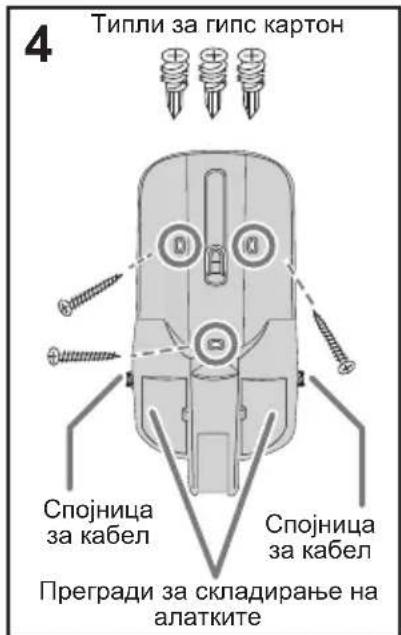
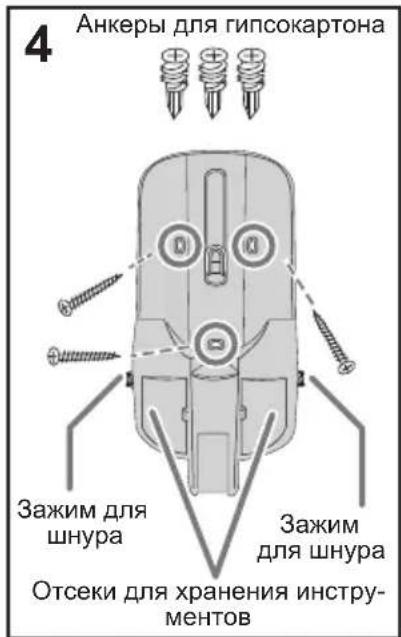
- Choose a location near a power outlet. Position the mount high enough on the wall to allow the telescopic tube and motorized floor nozzle to hang freely.
- Place the mount against the wall and use a pencil to mark the drill holes.
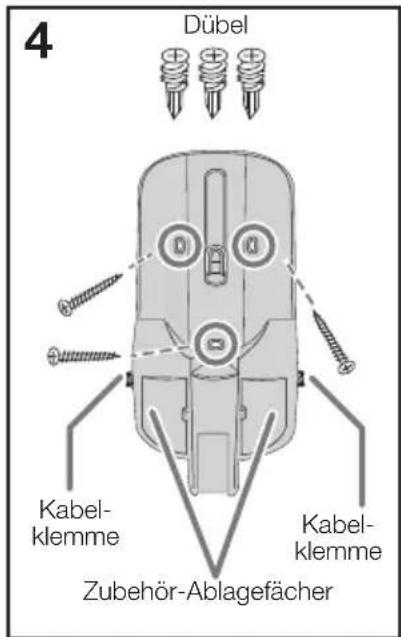
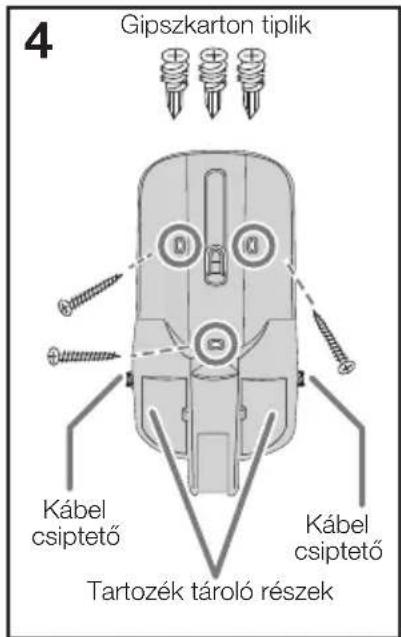
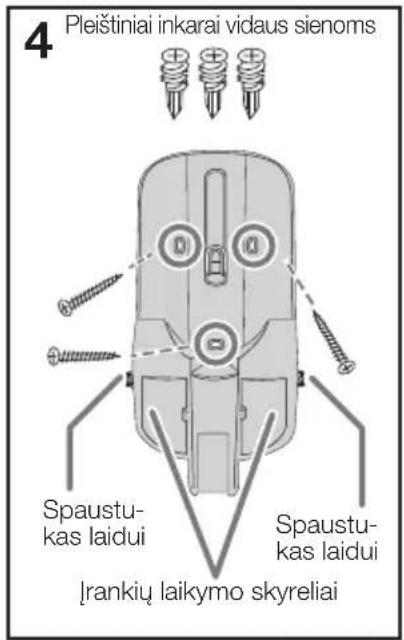
- Drill holes (with a 1/4" bit) and insert drywall anchors. Insert screws through the holes on the mount and tighten until firmly attached (Fig. 4).
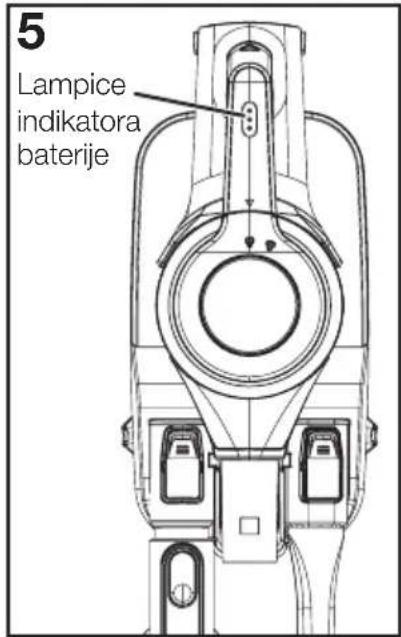
How to charge the battery and store accessories (Fig. 5)
- Place the assembled vacuum cleaner on the wall mount or leave it freestanding.
- Plug the charger into the power socket, then into the charging port on the hand vac.
- Attach tools to the storage compartments on the wall mount. Alternatively, on some models, you can charge the battery in the external charging dock.
Battery indicator lights show the level of charge (Fig. 5).
- Indicator lights will stop flashing once fully charged.
- For the first time, the battery should be fully charged to maintain its performance. This may take up to four hours.
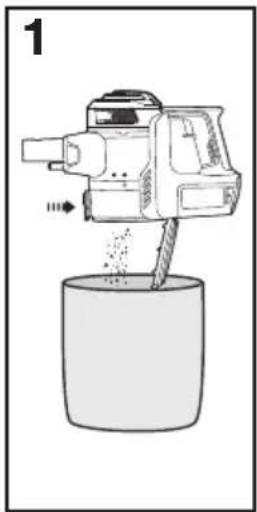
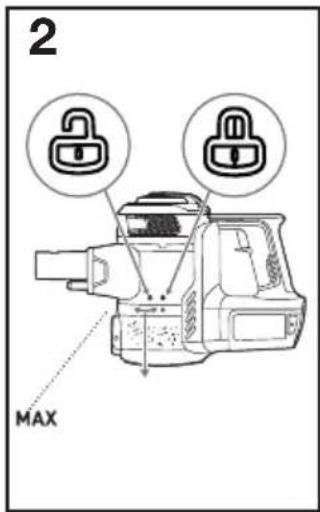
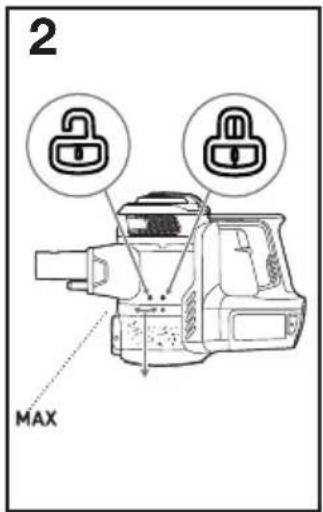
Empty dust cup after every use
There are two ways to empty the dust cup:
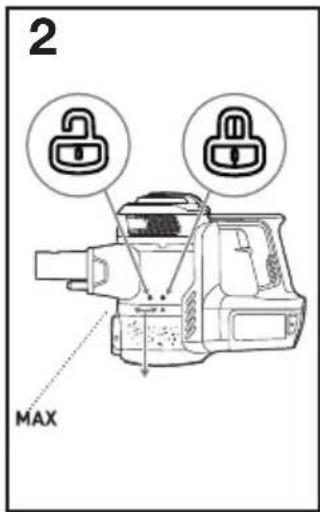
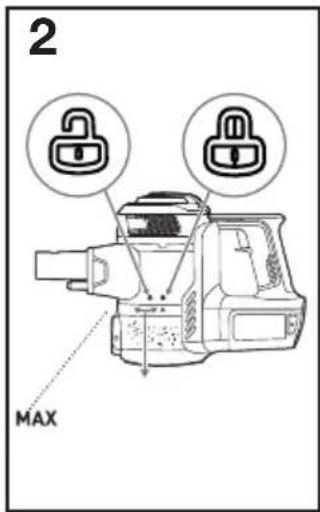
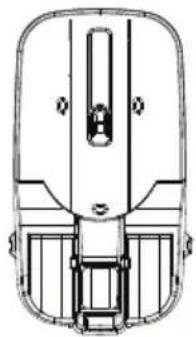
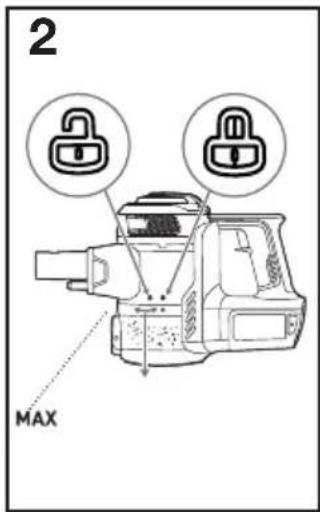
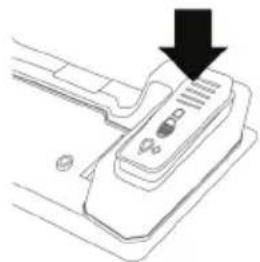
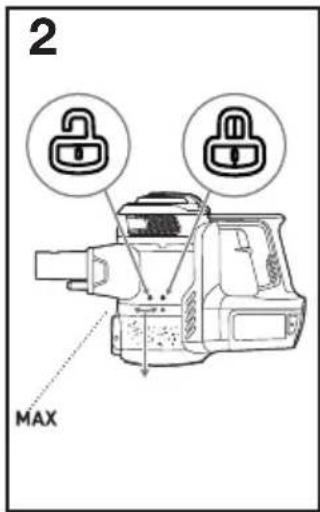
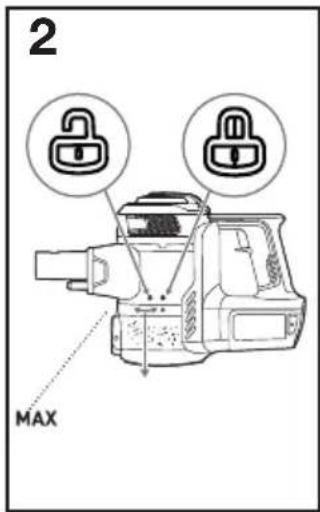
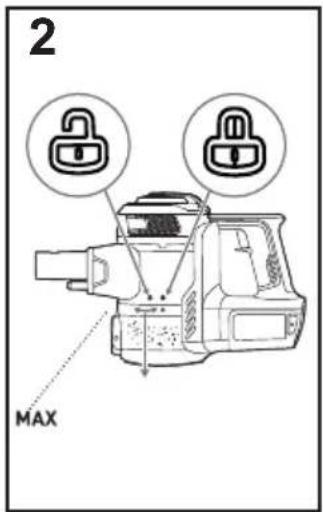
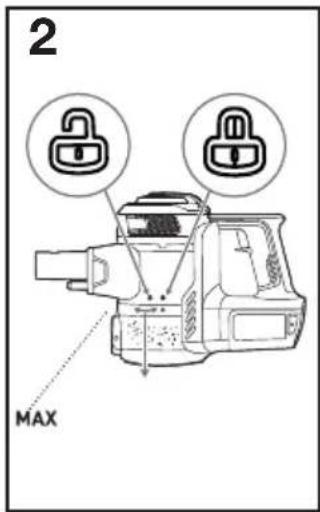
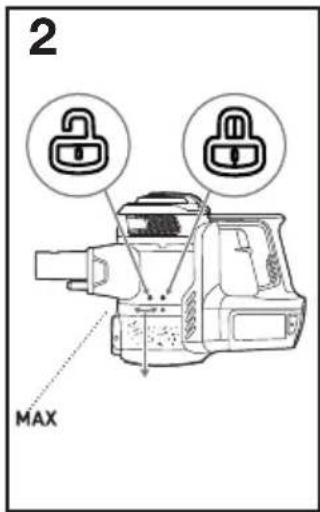
- Hold cleaner over bin. Press lever to release bottom lid of dust cup to remove debris. (Fig. 1).
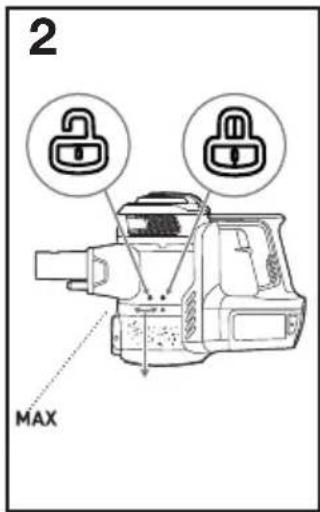
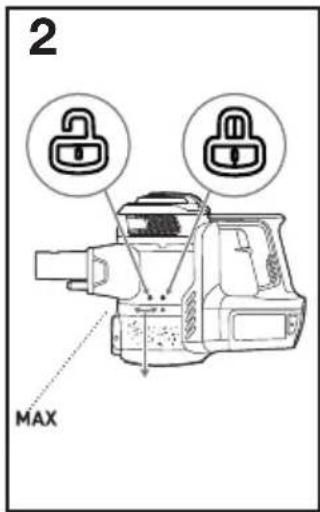
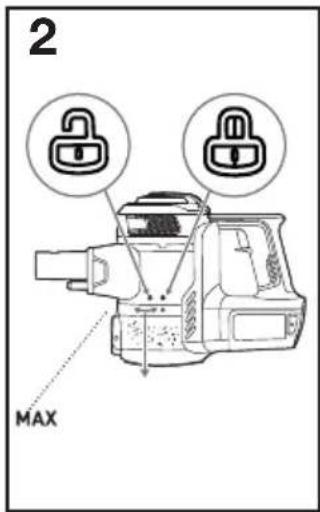
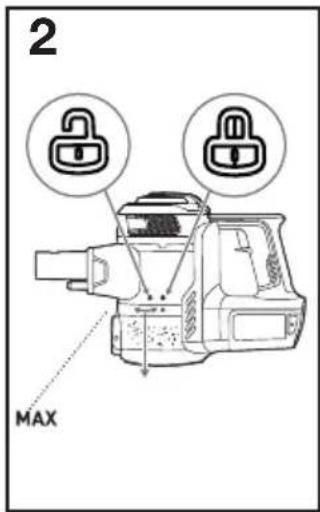
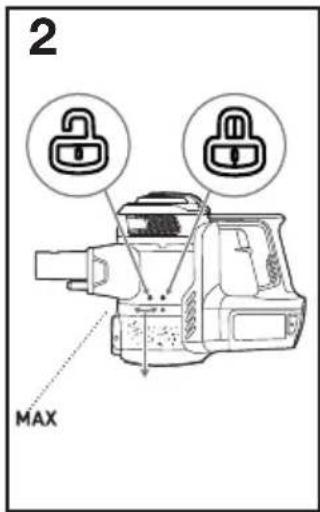
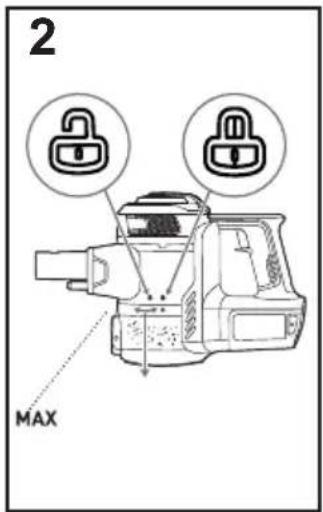
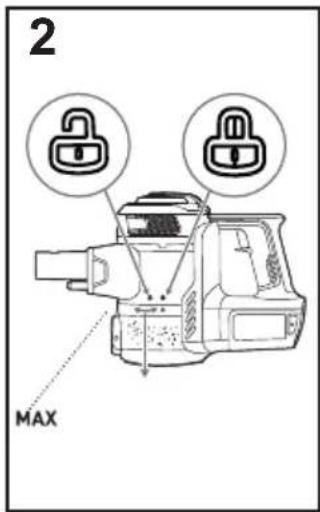
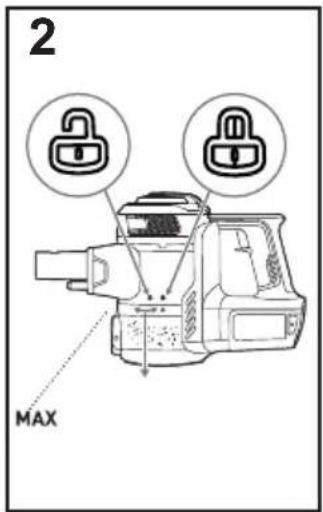
- Alternatively remove entire dust cup from the vacuum cleaner by twisting to 'unlock' position (Fig. 2). Once emptied, reattach dust cup by lining up arrow ▲ and 'unlock' position. Twist dust cup until arrow ▲ lines up with 'locked' position.
Models: SA-VP35..., SA-VP40... only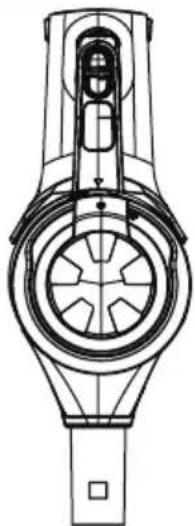
Two speed levels and LED screen
- Maximum speed button. Increases suction power.
- Carpet/Floor button adjust the speed of the motorized floor head.
How to use vacuum cleaner and accessories

Caution!
Moving parts! Always turn off cordless vacuum cleaner before attaching accessories.
The vacuum cleaner can be used with or without tools.
- To use without tools, press release button and remove telescopic tube. Collect debris directly with cordless vacuum cleaner nozzle (Fig. 1).
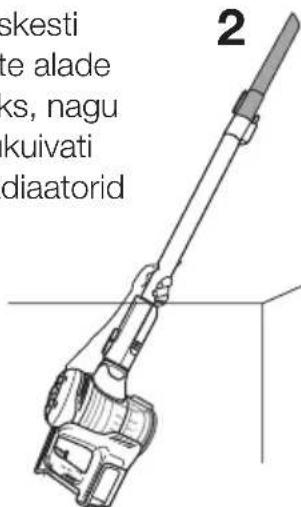
- To use tools with telescopic tube, press release button to remove motorized floor nozzle. Slide tool onto end of telescopic tube until it clicks (Fig. 2).
- To use tools with cordless vacuum cleaner only, press release button to remove telescopic tube. Slide tool onto the vacuum cleaner until it clicks (Fig. 3).
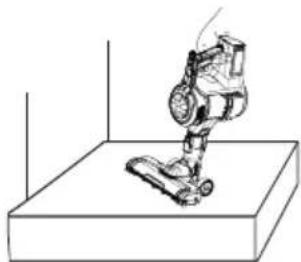
How to use cordless vacuum cleaner with motorized floor head.
Recommended for stairs.
- Press release button to remove telescopic tube from vacuum cleaner. Attach motorized floor nozzle directly to vacuum cleaner until it clicks.
- Click power button once to start.
Operation without accessories
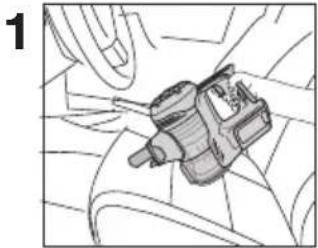

Crevice tool: Cleans hard-to-reach areas such as corners, baseboard edges, dryer vents, radiators, and other tight spaces.
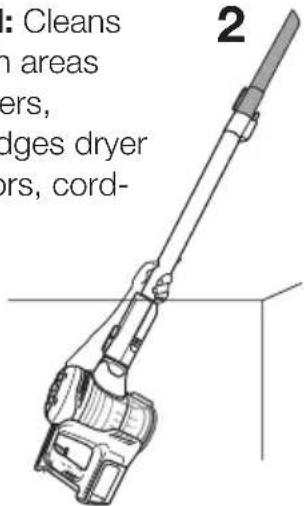
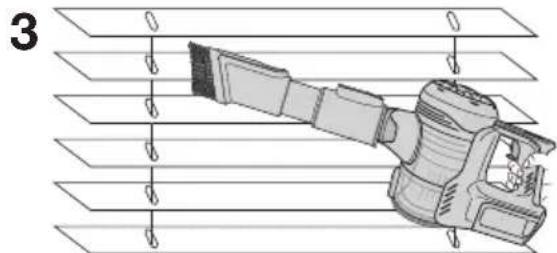
2-in-1 tool: Use brush to vacuum blinds, vents, or upholstered surfaces. Use felt portion to clean delicate surfaces.
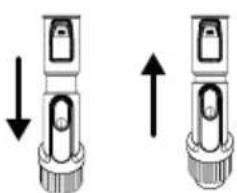
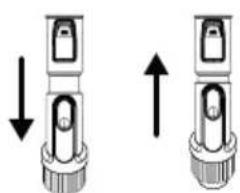
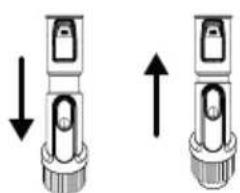
To switch between tools, press button and slide brush up or down.
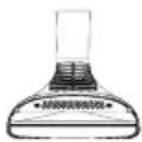
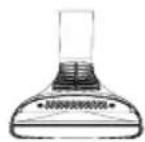
Sofa brush: Ideal for cleaning upholstery.
Pet brush:
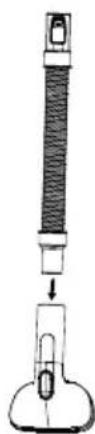
- Connect the hose to cleaner.
- Connect pet brush to hose.
- Hold the pet brush and clean your pet. Should you groom the pet's hair, press the button on the brush until it locks. The spurs will stick out and get locked.
- Once finished, press the button again and the spurs will retract.
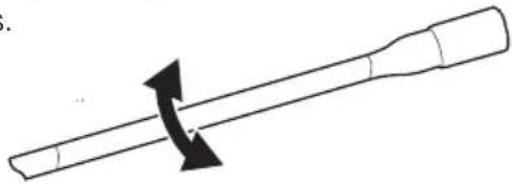
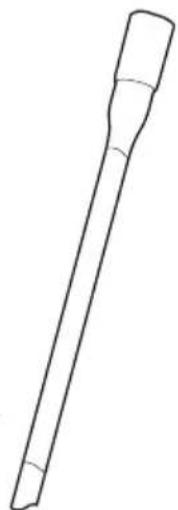
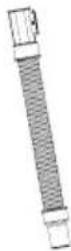
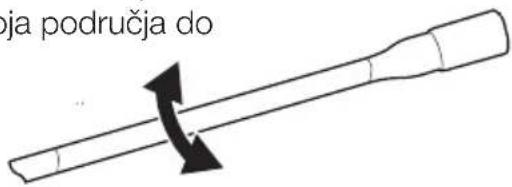
Long flexible crevice tool: Use for narrow spaces in upholstery or cars.
You can bend it to vacuum any difficult to reach areas.
Mop attachment
- For vacuuming and wet swabbing at the same time, attach the mop attachment to the floor nozzle.
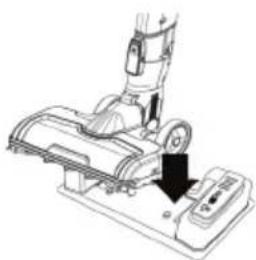
- Before use, fill the tank with water or a suitable floor cleaner. Observe the maximum filling level.
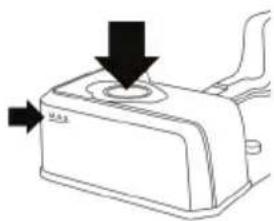
Wet swabbing
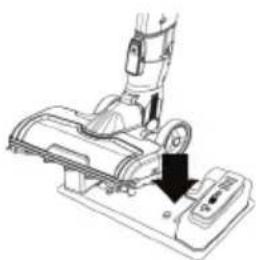
To wipe with a damp cloth, you have to actuate the foot pump on the water tank from time to time, depending on the surface, by stepping on it with your left foot. Wet the textile cloth before attaching it, for a better cleaning result.
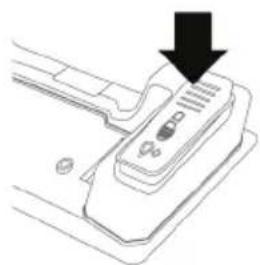
Cleaning the mini turbo brush
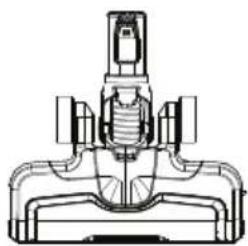
- Press the button and detach the brush head.
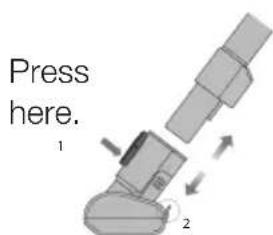
- Clean the brush when there is a lot of tangled hair or accumulated dirt on the axis or wheels.
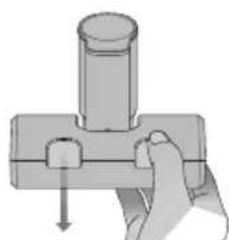
Pull here
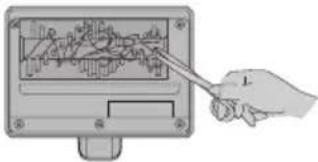
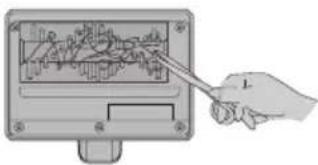
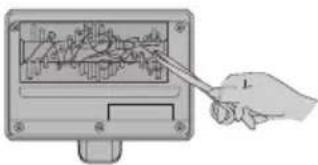
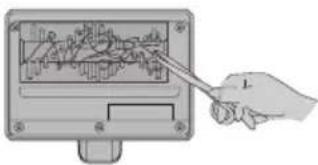
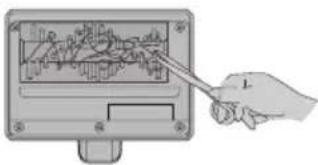
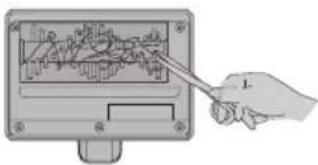
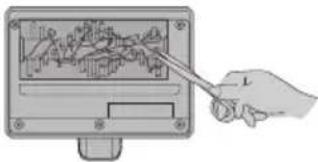
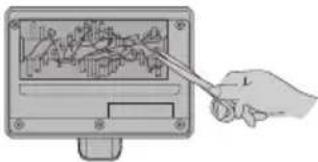
- Clean the brush with a napkin or a cloth wrapped around a toothpick. Cut tangled hair with scissors if necessary.
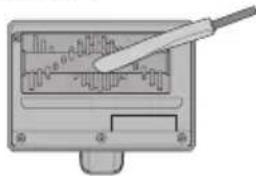
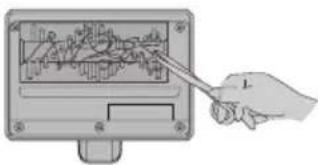

Warning!
- If the dust blocks the airflow of the brush, wipe it off with a toothpick.
- The bottom cover is the only part that can be washed with water.
- Do not apply oil to the ends of the electric brush.
How to maintain your vacuum cleaner

Caution!
Moving parts! Always turn off the vacuum cleaner before attaching accessories.
Never use vacuum cleaner without filters, filter screen and dust cup. Please make sure all items are placed in proper position.
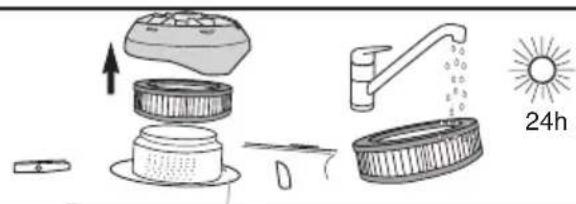
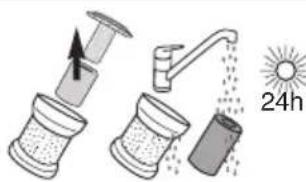
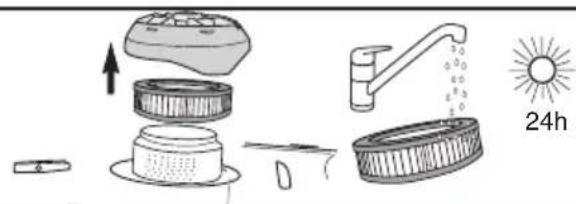
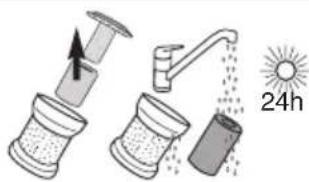
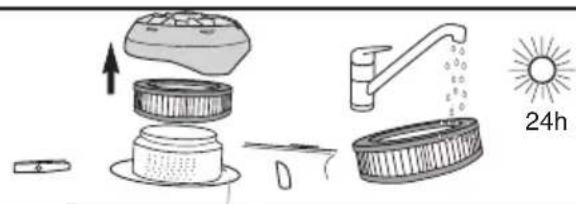
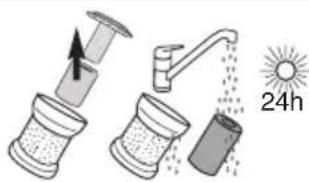
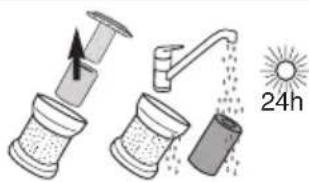
Washable dust cup filter - clean frequently
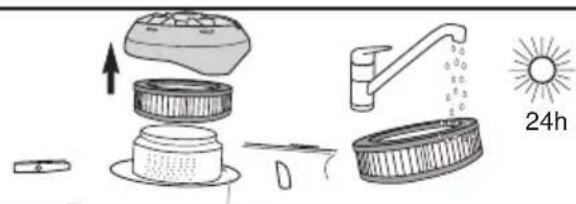
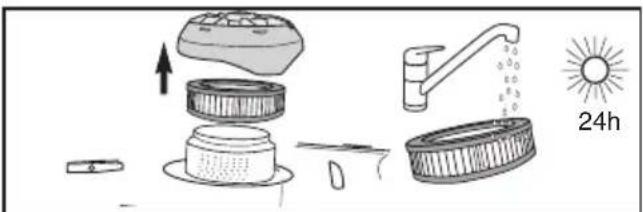
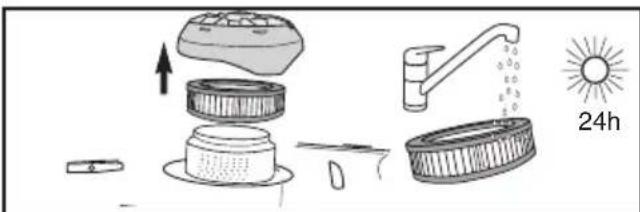
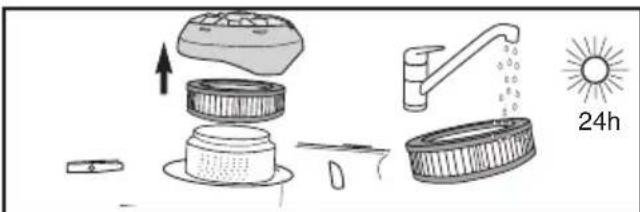
Washable post-motor filter – clean every 6 months
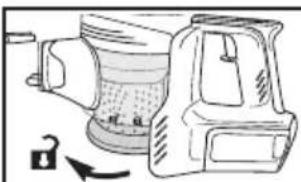
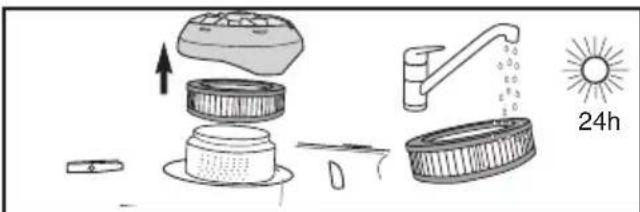
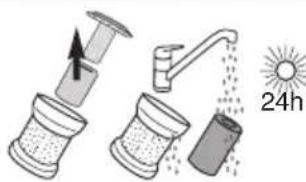
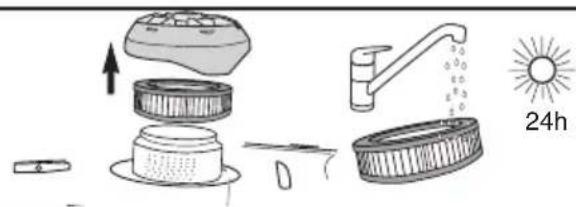
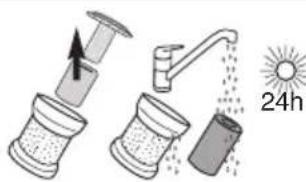
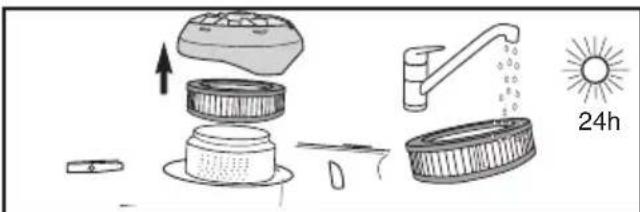
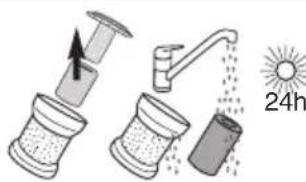
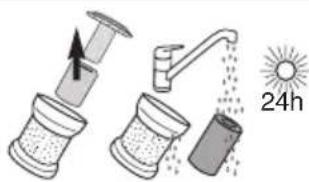
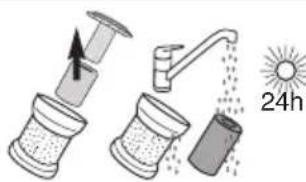
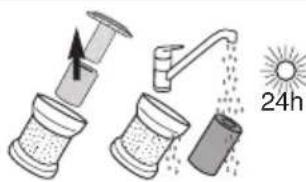
- Twist dust cup and remove.
- Twist filter screen and remove.
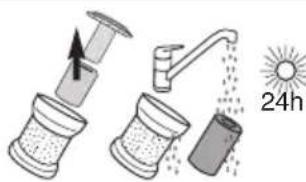
- Lift out foam filter and holder.
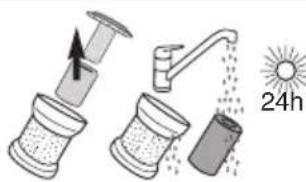
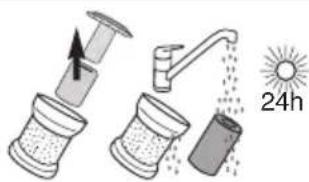
- Separate foam filter from fiber filter by pulling them apart.
- Rinse and dry.
- Reassemble once completely dry
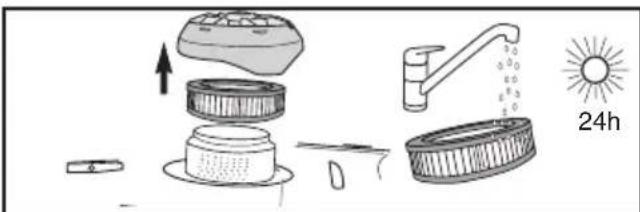
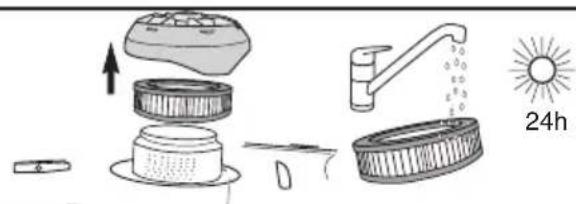
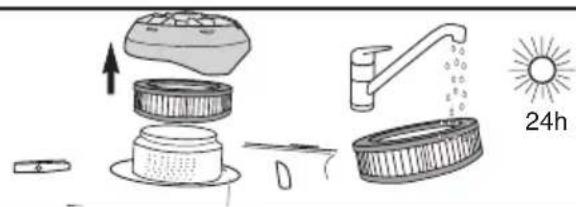
- Twist filter cover and remove.
- Lift out post-motor filter.
- Shake to remove dust.
- Every 6 months, replace filter or rinse and dry THOROUGHLY.
- Reposition filter and cover and twist to "lock".
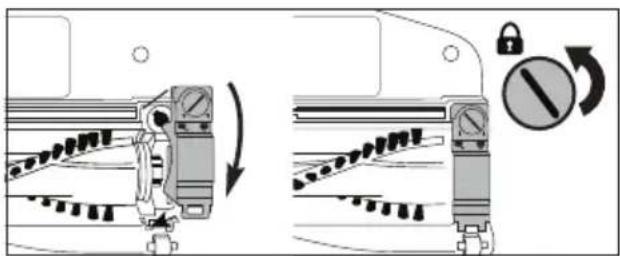
Brushroll maintenance - clean frequently or when brushroll indicator light turns red
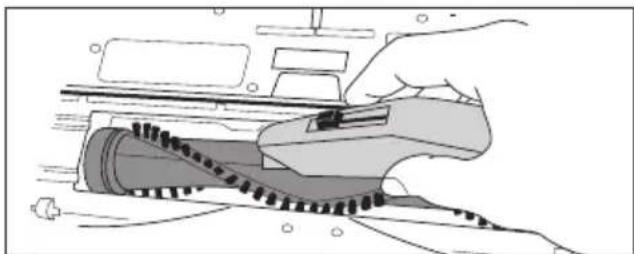
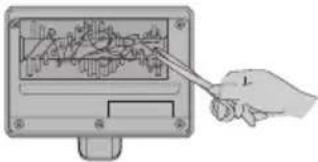
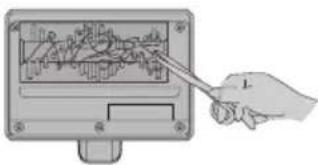
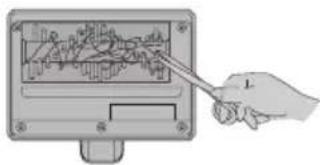
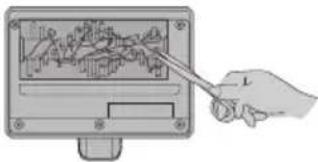
Place motorized floor nozzle upside down. Use scissors or knife to cut tangled hair, threads.
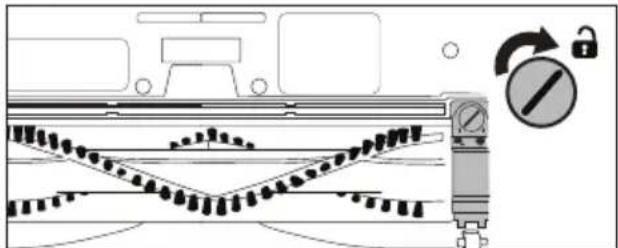
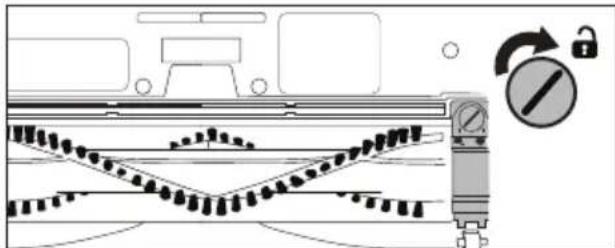
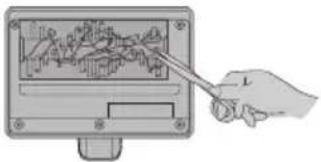
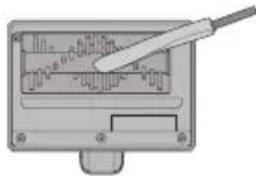
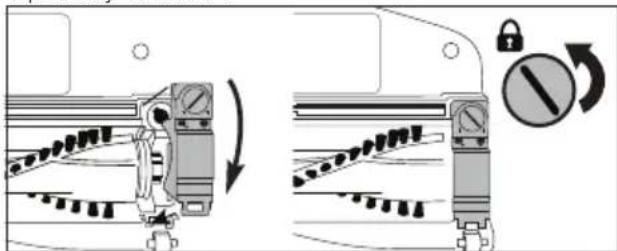
If debris cannot be removed easily, remove retainer clip to access brushroll. Using flathead screwdriver or coin, turn screw to the 'unlock' position.
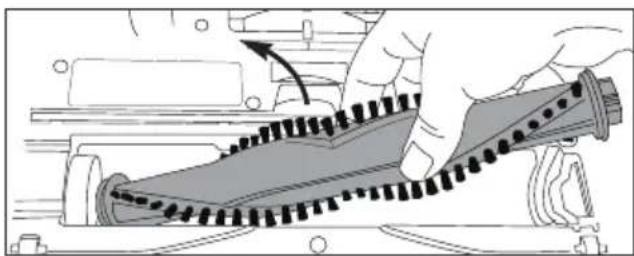
Remove retainer clip and lift out brushroll to clean and remove debris.
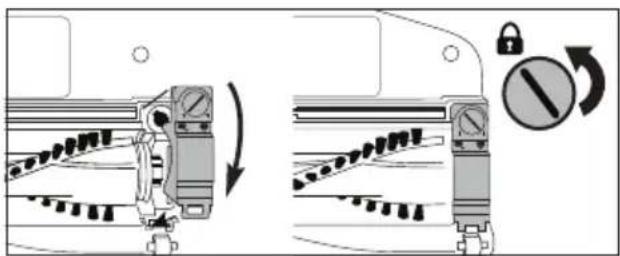
To reassemble:
- Align one end of brushroll with floor nozzle gear.
- Press other end into slot.
- Hook retainer clip under tab and press down.
- Insert screw and turn to 'lock' position.
Troubleshooting

Make sure vacuum cleaner is off and charging plug is unplugged.
| NOTICE: Thermal cut-off | |
| This vacuum cleaner has a special thermostat that protects the vacuum cleaner in case of motor overheating. If the vacuum suddenly shuts off, proceed as follows: 1) Check the vacuum for a possible source of overheating such as a full dust cup, blocked telescopic tube or clogged filters. If these conditions are found, fix them and wait at least 30 minutes before attempting to use the vacuum. 2) After the 30 minute period, press the power button. | |
| Problem Solution | |
| Motor will not start • Make sure cleaner is fully powered.- Push charger securely into electrical outlet, try another outlet or check circuit breaker.- See detailed “thermal cut-off” instructions above. | |
| Charging indicator lights are not lit while charging | Make sure charger is securely inserted into electrical outlet.Make sure charging plug is securely inserted into vacuum cleaner.Indicator lights stop blinking when fully charged. |
Discarding the vacuum cleaner and battery pack

Before discarding this vacuum cleaner, dispose of battery in an environmentally safe manner. Do not discard battery with your regular household trash.
Important battery disposal information.
Find a disposal location nearest you.
To preserve natural resources, please recycle or dispose of expired battery pack properly. This product contains a lithium-ion battery. It must be disposed of properly. Local laws may prohibit disposal of lithium-ion batteries in ordinary trash. Consult your local waste authority for information regarding available recycling and/or disposal options.
Operating time
| VF-VM4001WB VF-VM4301WG VF-VM4501GS | |
| Motor type BLDC / Inverter | |
| Battery Li-Ion, 24V max | |
| Operation in max power mode | Up to 14 min |
| Operation in normal power mode | Up to 60 min |
| Charging time 3,5 h | |
| Noise level <=82dB | |
Information on Disposal for Users (private households)
1. In the European Union
Attention: If you want to dispose of this equipment, please do not use the ordinary dust bin!
Used electrical and electronic equipment must be treated separately and in accordance with legislation that requires proper treatment, recovery and recycling of used electrical and electronic equipment.
Following the implementation by member states, private households within the EU states may return their used electrical and electronic equipment to designated collection facilities free of charge*. In some countries* your local retailer may also take back your old product free of charge if you purchase a similar new one.
*Please contact your local authority for further details.
2. In other Countries outside the EU
If you wish to discard this product, please contact your local authorities and ask for the correct method of disposal. For Switzerland: Used electrical or electronic equipment can be returned free of charge to the dealer, even if you don't purchase a new product. Further collection facilities are listed on the homepage of www.swico.ch or www.sens.ch.
Additional information on disposal
- Packaging
The packaging is designed to protect the vacuum cleaner from being damaged during transportation. It is made of environmentally friendly materials and can be recycled.
Dispose of packaging that is no longer required at an appropriate recycling point.
- Old appliances
This appliance contains rechargeable lithium-ion batteries. The appliance must therefore only be disposed of by an authorised after-sales service or dealer.
Warranty Information
- The manufacturer provides warranty in accordance with the legislation of the customer's own country of residence, with a minimum of 1 year, starting from the date on which the appliance is sold to the end user.
- The warranty only covers defects in material or workmanship.
- The repairs under warranty may only be carried out by an authorized service centre.
- When making a claim under the warranty, the original bill of purchase (with purchase date) must be submitted.
- The warranty will not apply in cases of:
Normal wear and tear
- Incorrect use, e.g. overloading of the appliance, use of non-approved accessories
- Use of force, damage caused by external influences.
- Damage caused by non-observance of the user manual, e.g. connection to an unsuitable mains supply or non-compliance with the installation instructions.
- Partially or completely dismantled appliances.
Further Terms & conditions of the warranty, please visit:
www.vestfrosthome.eu
Cordless vacuum cleaner
Wall bracket
External battery charging station
2-in-1 tool
Telescopic tube
Sofa brush (optional accessory)
Models: only SA-VP35 ..., SA-VP40 ...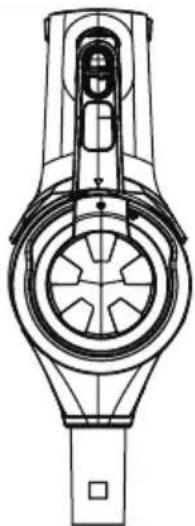

Wet wiping
Pull here

Warning!
Cordless vacuum cleaner
Wall mount
2-in-1 accessory
Telescopic tube


Attention!
Wall bracket
2-in-1 nozzle
Telescopic tube

Models: Only SA-VP35..., SA-VP40...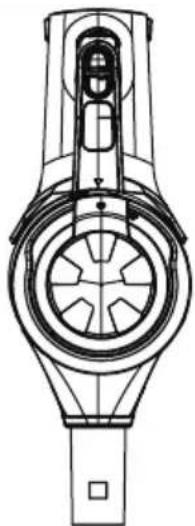

Pull here

Warning:
Reassembly:
Cordless vacuum cleaner
2-in-1 tool
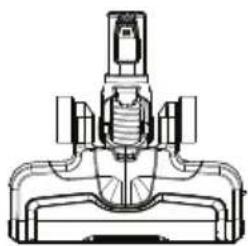
Floor head with motor

Telescopic tube
Models: Only SA-VP35..., SA-VP40...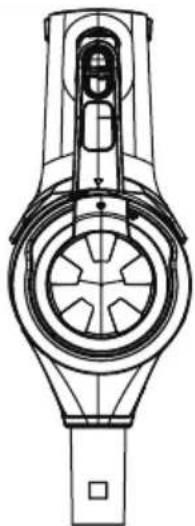

Wet wiping
Pull here
! Warning!
Reassembly:
Cordless vacuum cleaner
Wall holder
2-in-1 tool
Crevasse tool

Only models: SA-VP35..., SA-VP40...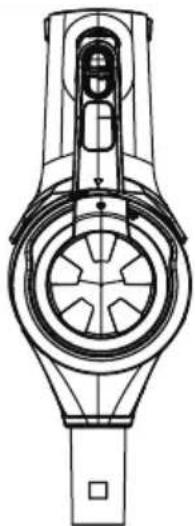

Crevasse tool:
Wet wiping
If you want to wipe with a damp cloth, you must from time to time, depending on the surface, activate the foot pump on the water tank by stepping on it with your left foot. Moisten the cloth before applying it to achieve better cleaning results.
Pull here

Warning!
Remove the clip and pull out the brush to clean and remove debris.
Wall holder
2-in-1 tool
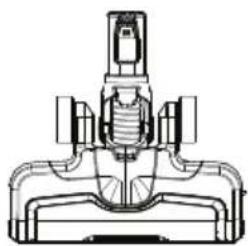
Motorized floor head

Crevice tool
Telescopic tube
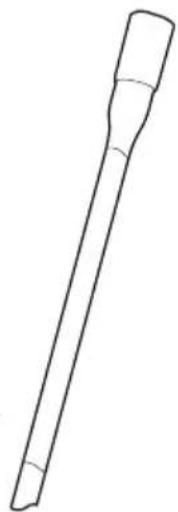

Crevice tool:
Damp mopping

Warning!
Assembly:
Wall holder
Tool "two in one"
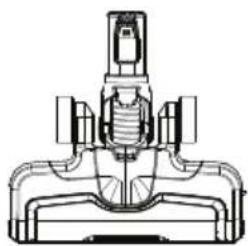
Motorized floor brush

Telescopic tube
Upholstery brush (optional accessory)
Mini turbo brush (optional accessory)
Only for models SA-VP35..., SA-VP40...

Washing
Pull here


Warning!
Reassemble:
Cordless vacuum cleaner
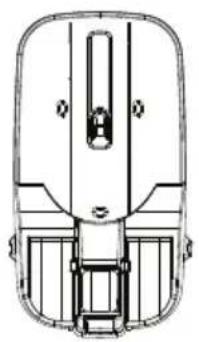
Wall mounting
Figure 2-1
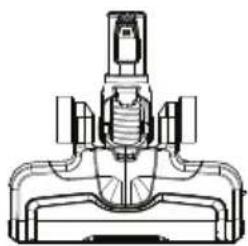
Crevice nozzle

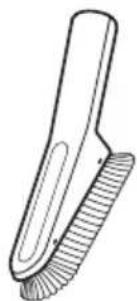
Mini turbo brush (optional accessory)
Only for models: SA-VP35..., SA-VP40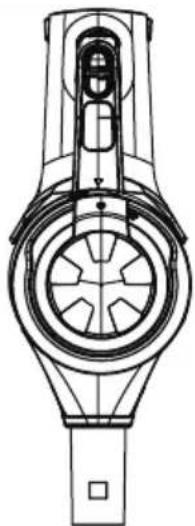

Gentle cleaning
Pull here

Warning!
Remove the lock and take out the brush roller and remove dirt.
Attachment
2-in-1 tool
Crevasse nozzle

Telescopic tube
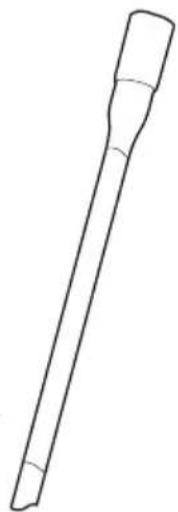
Long flexible crevasse nozzle (accessory)
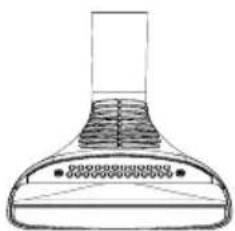
Mini turbo brush (accessory)
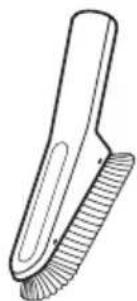
Soft brush (accessory)
Soft brush (accessory)
Only models SA-VP35..., SA-VP40...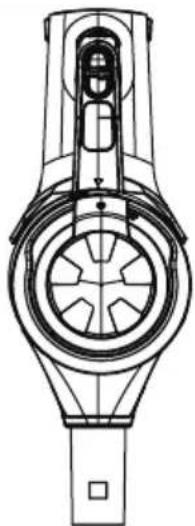
Use without accessories
1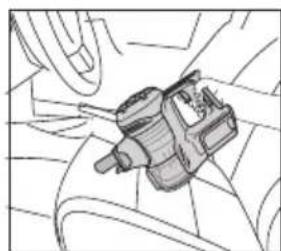

Piluotsik: for cleaning hard-to-reach areas, such as corners, dryer vents, radiators, etc.
Cleaning with the mini turbo brush
Pull here

Warning!
Assembly:
Wall mounting bracket
2-in-1 attachment
Active nozzle

Telescopic tube
Only models SA-VP35..., SA-VP40...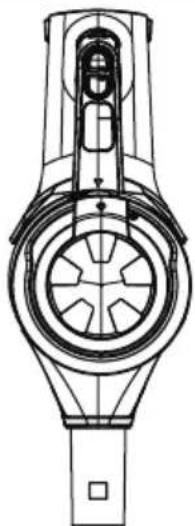

Wet wiping
Pull here

Warning!
Cordless vacuum cleaner
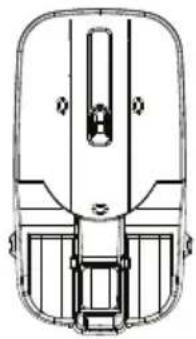
Wall mount
2-in-1 accessory
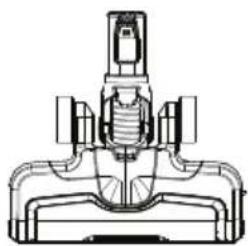
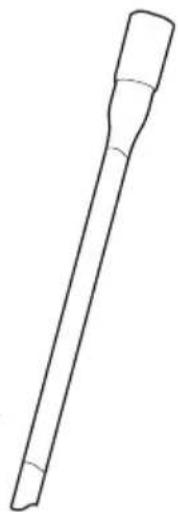
Telescopic tube
Mini turbo brush (optional accessory)
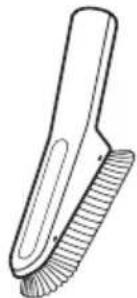
Sofa brush (optional accessory)
Models: only SA-VP35..., SA-VP40...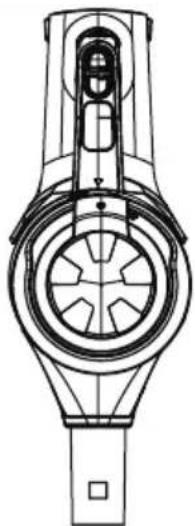

Pull here

Warning!
For reassembly:
Cordless vacuum cleaner
Wall bracket
External battery power connector
2-in-1 tool
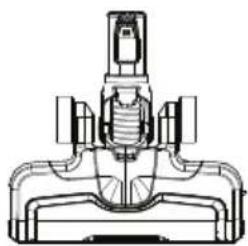
Motorized floor cleaning head

Crevice tool
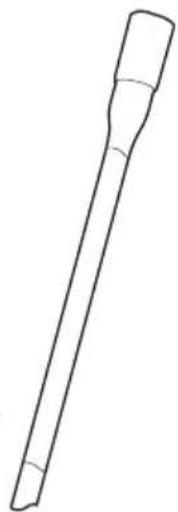
Extendable hose
Mini turbo brush (additional accessory)
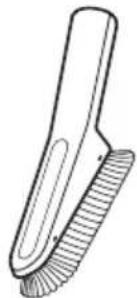

Models only: SA-VP35..., SA-VP40...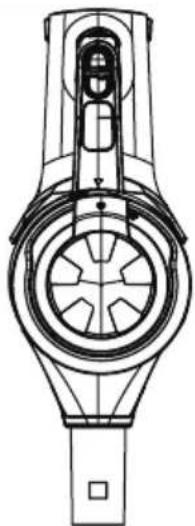

Wet wiping
Pull here
- Clean the brush with a cloth or a cloth wrapped around a toothpick. Cut tangled hair with scissors if necessary.
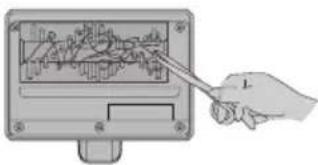

Warning!
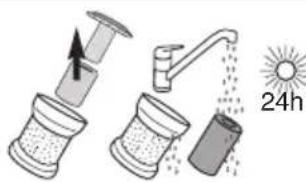
- Turn the dust container over and remove it.
- Turn the filter protection and remove it.
- Lift the foam filter and holder.
- Separate the foam filter
from the fiber filter by pulling them apart.
- Rinse and dry.
- When completely dry, reassemble them.
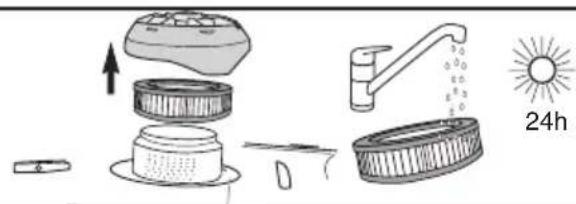
- Turn the filter cover and remove it.
- Remove the filter behind the motor.
- Shake it to remove dust.
- Every 6 months, replace the filter or thoroughly rinse and dry it.
- Reinstall the filter and cover, and turn to the 'lock' position.
Insert the motorized head. Use scissors or a knife to cut tangled hair or threads.
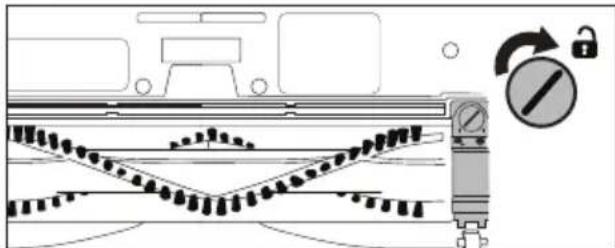
Remove the retaining pin and lift the brush roller to clean it and remove debris.
To reassemble:
Wall mounting
External battery charging port
2-in-1 tool
Motorized floor head

Crevice tool

Telescopic wand
Long flexible crevice tool (optional accessory)
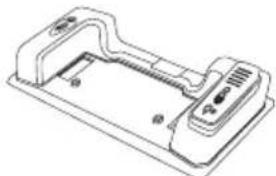
Cleaning attachment with water tank and foot pump (optional accessory)
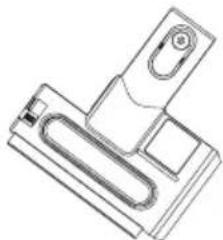
Mini turbo brush (optional accessory)
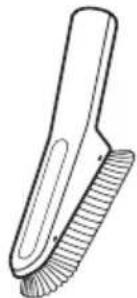
Soft brush (optional accessory)
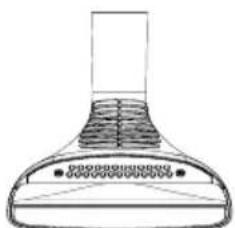
Sofa brush (optional accessory)
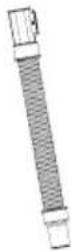
Pet brush and flexible hose (optional accessory)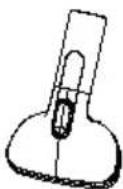
Part names
Empty the dust cup after each use
Models: SA-VP35..., SA-VP40... only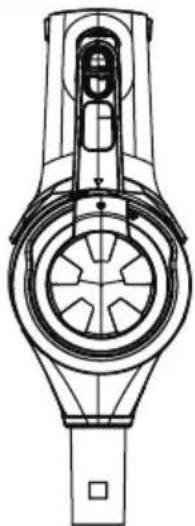
Two speed levels and LED display
- Maximum speed button. Increases suction power.
- Carpet/floor button adjusts the speed of the motorized floor head.
How to use the vacuum cleaner and accessories

Caution!
Operation without accessories
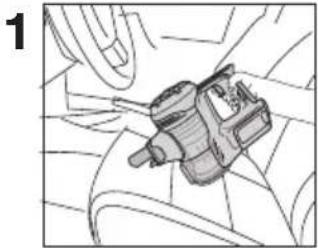

Crevice tool: Cleans hard-to-reach areas such as corners, table frames, drying fans, radiators, wirelessly.
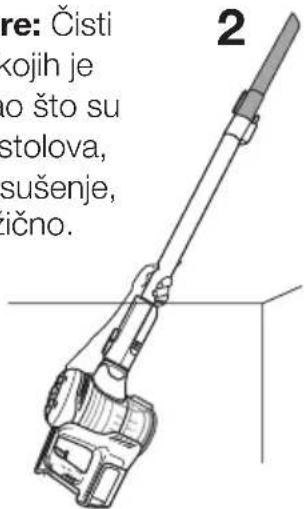
2-in-1 tool: Use the brush to vacuum blinds, ventilation holes, or upholstered surfaces. Use the part for cleaning delicate surfaces.
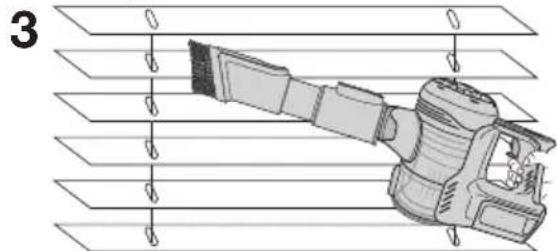
To switch to another tool, press the button and slide the brush up or down.
Sofa brush: Ideal for cleaning upholstery.
Long flexible crevice tool: Use for tight spaces in upholstery or cars. You can bend it to vacuum any hard-to-reach areas.
Cleaning accessory
- To vacuum and wet clean at the same time, attach the cleaning accessory to the floor nozzle.
Wet cleaning.
To clean with a wet cloth, you must use the foot pump on the water tank from time to time, depending on the surface, by stepping on it with your left foot. Keep the textile cloth wet before attaching, for better cleaning results.
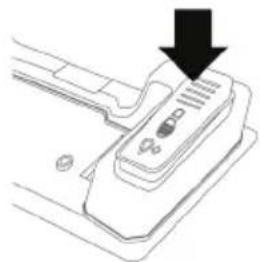
Pull here
- Clean the brush with a tissue or cloth wrapped around a toothpick. Cut tangled hair with scissors if necessary.

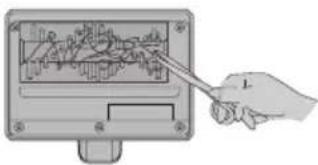

Warning!
- If dust blocks the brush flow, wipe it with a toothpick.
- The bottom cover is the only part that can be washed with water.
- Do not apply oil to the ends of the electric brush.
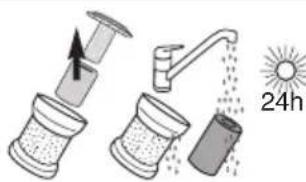
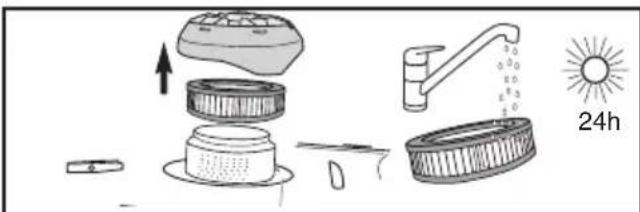
- Twist the dust cup and remove.
- Turn the filter screen over and remove it.
- Lift the foam filter and holder.
- Separate the filter from
Place the motorized floor nozzle upside down. Use scissors or a knife to cut tangled hair, strings.
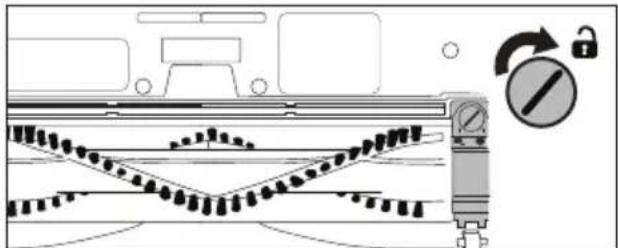
If debris cannot be easily removed, remove the retaining clip to access the brush roll. Using a flat-head screwdriver or a coin, turn the screw to the "unlocked" position.
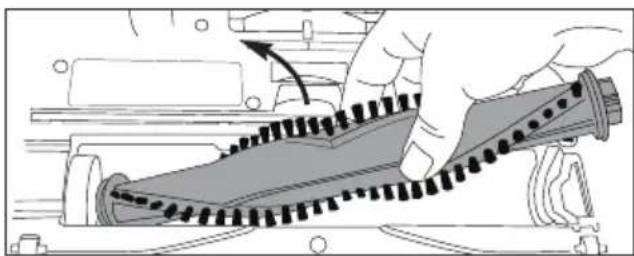
Remove the retaining clip and lift out the brush roll, then remove debris.
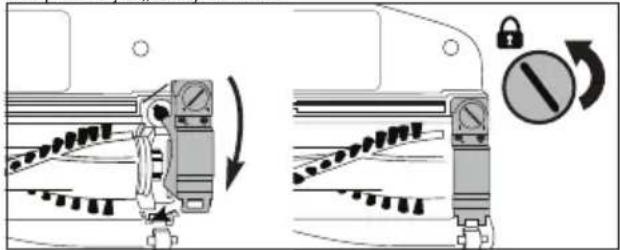
To reassemble:
- Connect one end of the brush roll to the gear floor nozzle.
- Press the other end into the slot.
- Hook the retaining clip under the tab and press down.
- Insert the screw and turn to the "locked" position.
Troubleshooting

Cordless vacuum
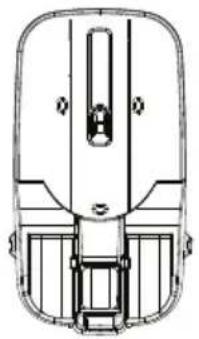
Wall mount
2-in-1 tool
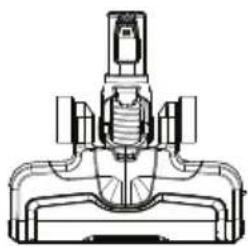
Motor head for floor cleaning
Telescopic tube
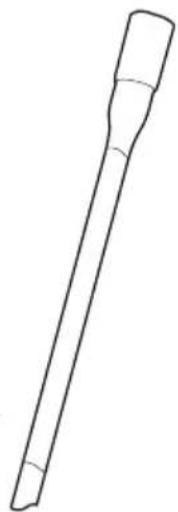
Long flexible tool for tight spaces (accessory)
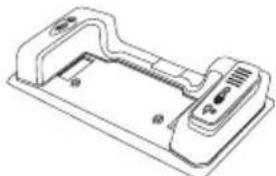
Wiping attachment with water tank and foot pump (accessory)
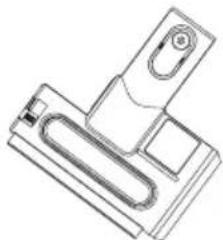
Mini turbo brush (accessory)
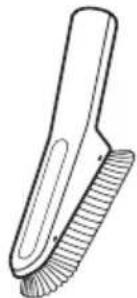
Soft brush (accessory)

Empty the dust container after each use
The dust container can be emptied in two ways:

Models: only SA-VP35..., SA-VP40...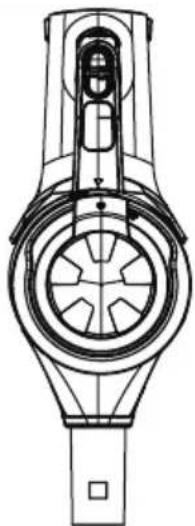
Two speeds and LED display
- Button for maximum speed. Increases suction power.
- Button for adjusting the speed of the motor head for cleaning carpets/floors.
Use without attachments
1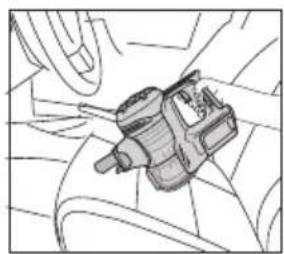
To change the tool, press the button and move the brush up or down.
- Before use, fill the tank with water or a suitable floor cleaning agent. Pay attention to the maximum level mark.
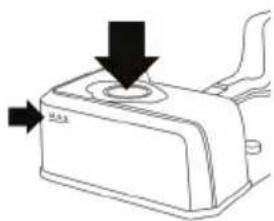
Washing
For wiping with a damp cloth, you must periodically press the foot pump on the water tank. For better results, moisten the cloth before attaching it.
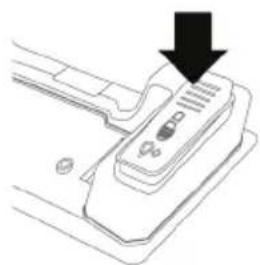
Pull here
- Clean the brush with a toothpick wrapped in a napkin or cloth. If necessary, cut tangled hair with scissors.
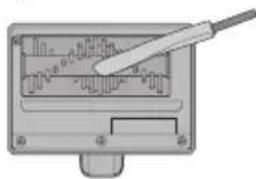
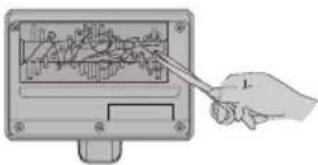

WARNING!
- If dust clogs the airflow through the brush, clean it with a toothpick.
- The bottom cover is the only part that can be washed with water.
- Do not apply oil to the ends of the electric brush.
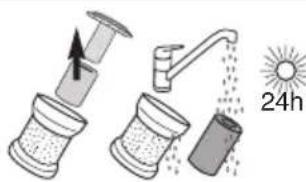
- Turn the dust container and remove it.
- Turn the filter screen and remove it.
- Remove the foam filter and holder.
- Separate the filter from
the foam and fiber filter.
Place the motorized floor nozzle upside down. Use scissors or a knife to cut tangled hair, strings, fibers, etc.
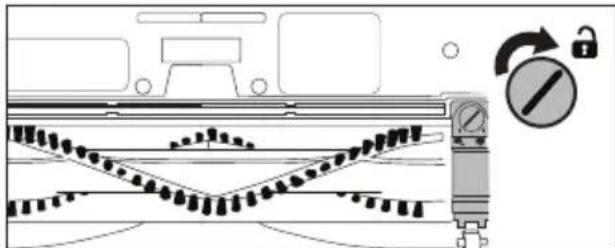
If the clumps cannot be easily removed, release the retaining clip to access the brush. Use a flat-head screwdriver or a coin to turn the screw to the unlocked position.
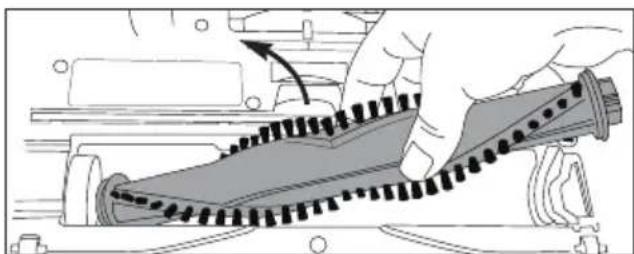
Reassembly:
- Align one end of the brush with the floor nozzle.
- Press the other end into the slot.
- Hook the retaining clip under the tab and press down.
- Insert the screw and turn it to the locked position.
Troubleshooting

Make sure the vacuum is turned off and the charging plug is disconnected from the outlet.
NOTE: thermal shutdown
| Ovaj usisavač opremljen je posebnim termostatom koji ga štiti u slučaju pregrijavanja motora. Ako se usisavač iznenada isključi, napravite sljedeće: 1) provjerite moguće uzroke pregrijavanja kao što je puna posuda za prašinu, začepljena teleskopska cijev ili začepljeni filtri. Otklonite uzrok pregrijavanja i pričekajte barem barem 30 minuta prije ponovne upotrebe usisavača. 2) Nakon 30 minuta pritisnite tipku napajanja. | |
| Problem Rješenje | |
| Motor se ne pokreće • | Provjerite je li usisavač pod napajanjem.- Punjač čvrsto pritisnite u strujnu utičnicu, isprobajte drugu utičnicu ili provjerite osigurač.- Pregledajte detaljne, prethodno navedene upute o „toplinskom isključivanju“. |
| Lampice indikatora punjenja ne svijetle tijekom punjenja | • Provjerite je li punjač čvrsto priključen u strujnu utičnicu.• Provjerite je li utikač punjača čvrsto priključen u usisavač.• Lampice indikatora prestaju treperiti kada je uređaj potpuno napunjen. |
Disposal of the vacuum and battery

Wall mount
2-in-1 tool
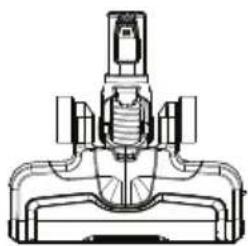

Wet mopping
Pull here

Warning!
2-in-1 tool
Telescopic tube
Models: only SA-VP35..., SA-VP40...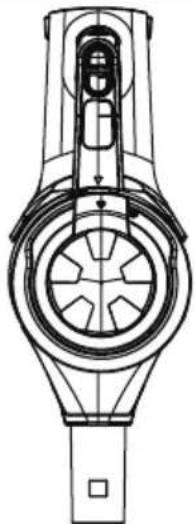

Wet wiping

Warning!
Wall mounting
2-in-1 tool
Crevasse nozzle

Wet cleaning
Pull here

CAUTION!
Assembly:
- CORDLESS VACUUM CLEANER
- READ THIS USER MANUAL CAREFULLY BEFORE YOU USE THE APPLIANCE AND SAVE IT FOR FUTURE REFERENCE
- IMPORTANT SAFEGUARDS
- WHAT'S INSIDE THE BOX
- PART NAMES
- FILTERS LOCATION
- EASY ASSEMBLY
- HOW TO INSTALL THE WALL MOUNT (OPTIONAL; THE VACUUM CLEANER IS DESIGNED TO BE FREESTANDING)
- HOW TO CHARGE THE BATTERY AND STORE ACCESSORIES (FIG. 5)
- BATTERY INDICATOR LIGHTS SHOW THE LEVEL OF CHARGE (FIG. 5)
- EMPTY DUST CUP AFTER EVERY USE
- TWO SPEED LEVELS AND LED SCREEN
- HOW TO USE VACUUM CLEANER AND ACCESSORIES
- CAUTION
- THE VACUUM CLEANER CAN BE USED WITH OR WITHOUT TOOLS
- HOW TO USE CORDLESS VACUUM CLEANER WITH MOTORIZED FLOOR HEAD
- PET BRUSH
- MOP ATTACHMENT
- WET SWABBING
- CLEANING THE MINI TURBO BRUSH
- WARNING
- HOW TO MAINTAIN YOUR VACUUM CLEANER
- WASHABLE DUST CUP FILTER - CLEAN FREQUENTLY
- WASHABLE POST-MOTOR FILTER – CLEAN EVERY 6 MONTHS
- BRUSHROLL MAINTENANCE - CLEAN FREQUENTLY OR WHEN BRUSHROLL INDICATOR LIGHT TURNS RED
- TO REASSEMBLE
- TROUBLESHOOTING
- DISCARDING THE VACUUM CLEANER AND BATTERY PACK
- OPERATING TIME
- INFORMATION ON DISPOSAL FOR USERS (PRIVATE HOUSEHOLDS)
- IN THE EUROPEAN UNION
- IN OTHER COUNTRIES OUTSIDE THE EU
- ADDITIONAL INFORMATION ON DISPOSAL
- PACKAGING
- OLD APPLIANCES
- WARRANTY INFORMATION
- WET WIPING
- ATTENTION
- CREVASSE TOOL
- CREVICE TOOL
- DAMP MOPPING
- ASSEMBLY
- WASHING
- REASSEMBLE
- GENTLE CLEANING
- CLEANING WITH THE MINI TURBO BRUSH
- FOR REASSEMBLY
- EMPTY THE DUST CUP AFTER EACH USE
- TWO SPEED LEVELS AND LED DISPLAY
- HOW TO USE THE VACUUM CLEANER AND ACCESSORIES
- CLEANING ACCESSORY
- WET CLEANING
- EMPTY THE DUST CONTAINER AFTER EACH USE
- TWO SPEEDS AND LED DISPLAY
- DISPOSAL OF THE VACUUM AND BATTERY
- WET MOPPING
Brand : VESTFROST
Model : Aqua Plus Power VF-VM4501GS
Category : Vacuum Cleaner