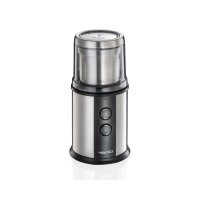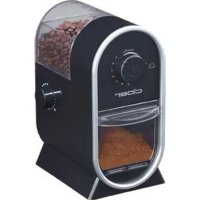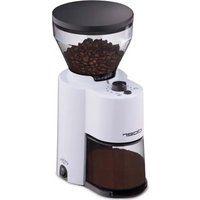
7521 - Coffee grinder Cloer - Free user manual and instructions
Find the device manual for free 7521 Cloer in PDF.


User questions about 7521 Cloer
0 question about this device. Answer the ones you know or ask your own.
Ask a new question about this device
Download the instructions for your Coffee grinder in PDF format for free! Find your manual 7521 - Cloer and take your electronic device back in hand. On this page are published all the documents necessary for the use of your device. 7521 by Cloer.
USER MANUAL 7521 Cloer
Basic safety instructions
-
The appliance is intended to be used in household only and using in:
-
staff kitchen areas in shops, offices and other working environments, in farm houses,
-
by clients in hotels, motels and other residential type environments,
on bed and breakfast type environments.
- Have repairs of Cloer electronic appliances carried out only by authorized Cloer specialist dealers or by the Cloer customer service. Improper repairs can involve substantial dangers for the user. Furthermore, this will void your warranty claims.
- Only operate the appliance at household-usual power sockets. Check if the mains voltage stated on the type plate is up to that of your power supply network.
- If the supply cord is damaged, it must be replaced by Cloer, its service agent or similarly qualified persons in order to avoid a hazard.
-
Pull power plug of the power socket
-
in case of a defect,
- if the appliance is not used for a longer time,
before any cleaning, -
during no supervision,
before removing the lid. -
Do not stretch the feed cable over sharp edges and do not tighten it too tight, do not use it for carrying and protect it from heat (hotplate, for example).
- This appliance can be used by people with reduced physical, sensory or mental capabilities or lack of experience and knowledge if they have been given supervision or instruction concerning use of the appliance in a safe way and understand the hazards involved.
- This appliance must not be used by children. Cleaning and user maintenance shall not be made by children. Keep the appliance and its cord out of reach of children to ensure they do not play with it.
- Do not use the appliance outdoors.
- Protect the appliance from humidity (splashing water or rain)
- More information about proper cleaning on the following pages. Do not immerse appliance in water or any other liquids.
- CAUTION! The grinding ring of the coffee grinder is sharp. Danger of injury!
- The coffee grinder is exclusively intended to grind coffee beans. Do not fill any other foodstuffs (other beans, nuts etc.) into the device.
- The device has a capacity of max. 300g . CAUTION! Do not fill the device with coffee beans above the edge. Please note that the ground coffee receptacle has a maximum volume of 110g .
- Never operate the appliance without coffee beans.
- Never operate the appliance without the grinding ring. The grinding ring, in turn, may not be used without the fitted seal.
- Never leave the machine unattended when in use.
- Never use the coffee bean holder or the ground coffee receptacle without a lid.
- Only remove the coffee bean holder when it is empty, otherwise the beans will fall through the bottom openings. If necessary, pour out the beans. First disconnect the appliance from the mains supply and remove the ground coffee receptacle.
- Should the grinder not start properly, this could be due to trapped coffee beans. In this case, select "18" the coarsest grinding setting, and try again. You can then revert to the original grinding setting while the machine is running.
Technical Data
| type volt hz watt | |||
| 752 220 | 240 50/60 14 | 0-150 | |
Before the first use
- Read these operating instructions carefully before using the appliance for the first time.
- Remove all packing parts and possibly stickers, but not the type plate nor the serial number.
- Clean the device with a moist cloth.
- Place the coffee grinder on a dry, slip-resistant and level surface.
EC Label / Safety information

The appliance meets the requirements of the applicable EC directives.

The appliance is designed for indoor domestic use only.
ATTENTION! Always unplug the appliance when not in use and before cleaning.
Assembly
To begin with, make sure that the appliance is not connected to the mains and that the standby switch 8 is set to the OFF "O" position.
- Prior to assembly, ensure that the grinder is free of any old coffee beans.
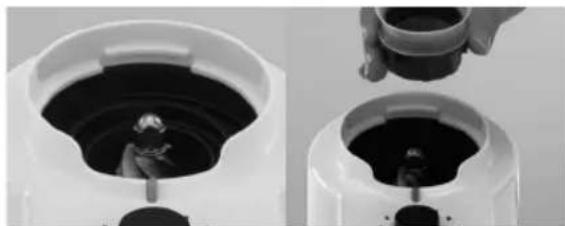
- Fit the grinding ring ① incl. seal on the grinding cone (below the coffee bean receptacle ⑤. The three teeth of the grinding ring will fit exactly into the three notches in of the device. Beware! Sharp edges
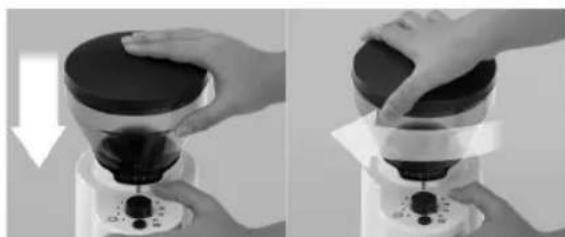
- Attach the empty coffee bean holder ⑤ to the device. Do this by aligning the triangle on the coffee bean holder with the grey mark on the appliance. Now press the coffee bean holder down and turn it clockwise towards the grinding coarseness setting.
-
Attention! If the coffee bean container cannot be inserted correctly, the plastic ring underneath the bean container is probably not in the correct position. Proceed as follows:
-
Remove the coffee bean container and the grinding ring incl. seal.
- Turn the plastic ring with your hands or with a screwdriver to the left as far as it will go. The arrow on the plastic ring must point to the marking on the housing.
- Reinsert the grinding ring incl. seal and bean container. The bean container must point with the triangle to the grey marking on the machine. Press the container down and turn it clockwise to the desired grind.
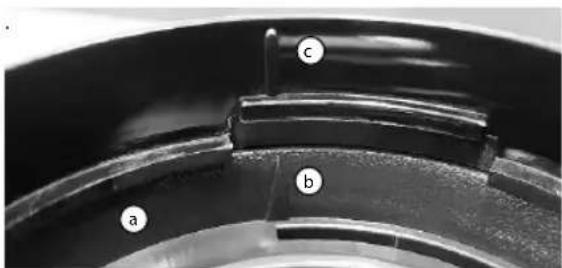
- Please note that for safety reasons, your coffee grinder will not function if the coffee bean holder is not properly fitted.
Now place the ground coffee receptacle with its lid into position.
Operation
- Insert the plug into the socket.
- Select the desired coarseness ⑥ , by turning the coffe bean holder ⑤
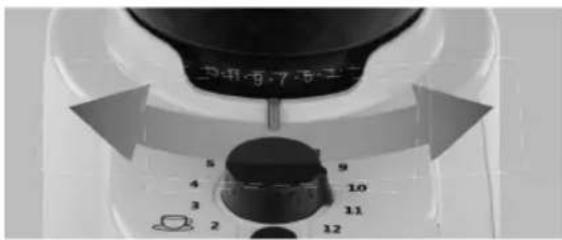
COARSE·17·15·13·11·9·7·5·3·1FINE
NOTE
The lower the number, the finer the degree of grinding. The lower the number, the finer the degree of grinding.
- You can also use the cup number selector ② for pre-setting the grinding time.
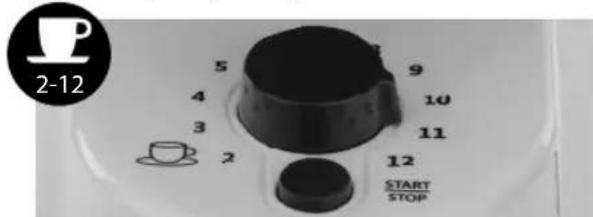
- The grinder is optimised for filter coffee. A coarseness setting between 7-9 corresponds to commercially available ground filter coffee. The cup number selector (2-12) is designed to grind approx. 5 - 7g of coffee per cup. The amount of ground coffee produced is also influenced by other factors such as coffee type and moisture content.
- Pour coffee beans into the coffee bean holder (5) (max. 300 g).
NOTE Change coarseness setting
In case the coffee beans have already been added, only adjust the coarseness setting.
EN
- Set the power switch ⑧ to ON "I" to provide the electrical supply.
To start the device, briefly press the stop/start button ③.
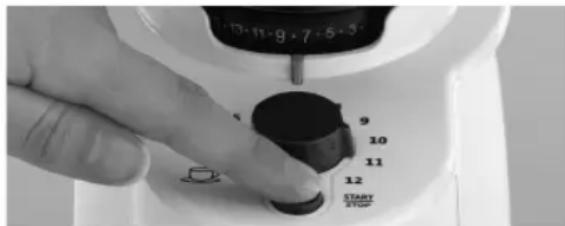
- The machine stops automatically when the desired amount of ground coffee has been produced.
- You can also turn the machine off manually by briefly pressing the stop/start button ③ again.
Advice about the ground coffee receptacle
Please make sure that the ground coffee receptacle ④ does not overflow during operation.
- You can now remove the coffee bean holder.
- Transfer the ground coffee directly into your coffee machine or into a storage container.
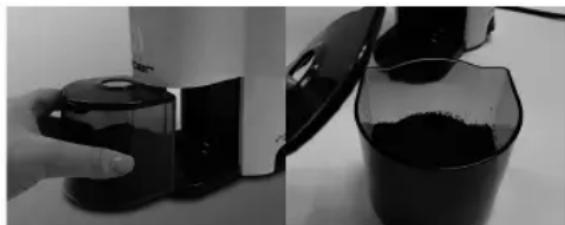
Ground coffee static
Due to friction produced in the conical grinder, it is unfortunately unavoidable for the ground coffee to become electrostatically charged and possibly stick to the plastic ground coffee receptacle. For easy removal of the ground coffee, we recommend tapping the ground coffee container lightly on the work surface a few times after removing it from the appliance.
- The power consumption in stand-by mode complies to European guidelines.
- Should you also wish to eliminate this power consumption, switch the grinder off to the "O" position by using the mains switch (8).
Espresso and mocha
- Even though the coarseness setting of the coffee grinder is optimised for filter coffee, it can also be used to make espressos.
- For espressos, the coarseness should be set below 4.
- You can also select settings below 1. You will obtain a really fine powder by turning the dial all the way to its stop position. Depending on the coffee bean size, this may however prevent any beans from falling into the grinding mechanism.
- As a result, the engine runs on empty and the engine noise is louder than usual. If this is the case, turn to a slightly coarser setting.
- You cannot set the number of cups as you would with filter coffee, as it takes longer to grind coffee very finely. Turn the knob to a larger setting or start the grinding process several times over.
French Press
- A French press requires a coarseness setting of greater than 16.
- You can also set grinding coarseness beyond the markers along the white line. Be careful not to turn past the line however, unless you wish to remove the container. Be sure there is enough space in the coffee receptacle to allow for overfilling.
- The coarser the coffee is ground, the more ground coffee is produced within the same period of time. For the same number of cups, grinding for a French press will produce more ground coffee than grinding at a filter coffee setting. Should this not be to your liking, you can adjust the setting higher or lower.
Cleaning
- Pull the power plug prior to cleaning the device for safety reasons.
- Never put the device in the dishwasher.
- Remove the coffee bean holder ⑤ and ground coffee receptacle ④ from the device, rinse normally and allow to dry. Make sure that the coffee bean holder is empty when you remove it.
- Wipe the housing with a moist cloth.
- Regularly remove coffee bean residues from the grinder and grinding ring. Use the brush provided for this purpose.
- We recommend you use a soft brush to remove any residual ground coffee that still adheres to the appliance after use.
- Please note: When using the finer grinding settings, the passage between the grinder and the ground coffee receptacle may clog more quickly and more frequent cleaning of the machine and the cone grinder is recommended.
- Do not use abrasive cleaning agents, cleaning sprays or scouring pads.
Cleaning the conical grinder
- Pull the power plug prior to cleaning the device for safety reasons.
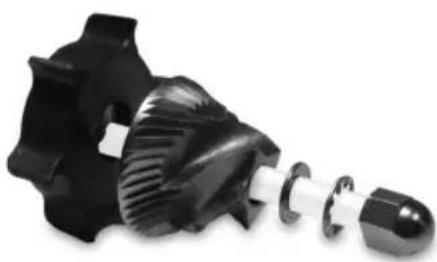
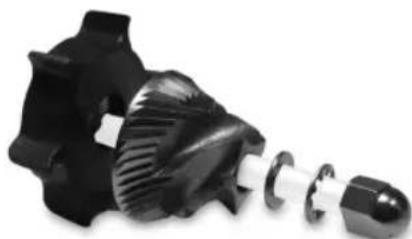
- You can loosen the nut of the grinding cone with a size 8 open-ended spanner. To do this, you need to counter it with a screwdriver on one of the wings below the cone.
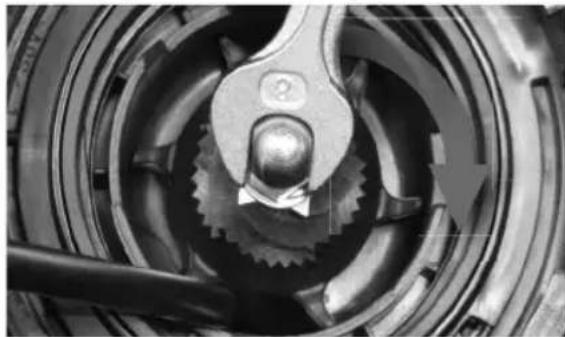

CAUTION! Do not injure yourself on the sharp edges.
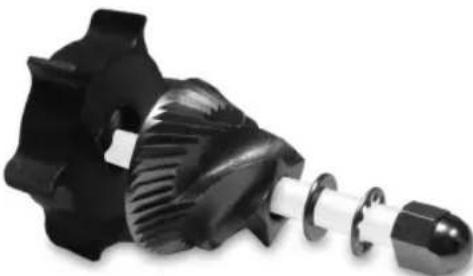
- Below the locknut you will find a washer as well as a toothed washer.
- Below it is the cone and below the cone is the winged ring, which can also be removed.
- This brief disassembly step then allows you to remove the ground coffee from all components.
- Please use the supplied brush or a damp cloth for cleaning.
- When assembling, please make sure that the winged ring and the cone are positioned correctly.
Environmentally friendly disposal
We use environmentally friendly packaging for the transport of our appliances. Please recycle cardboard/paper and plastic packaging appropriately.
ATTENTION!
Electrical appliances should not be disposed of with the household trash.
Electrical appliances contain valuable raw materials. When an appliance is worn-out, please take it to a recognised recycling facility. Consult the local authorities for information on recycling appliances.
Warranty
Cloer electrical appliances are in conformity with the currently required EC-guidelines and safety regulations. If your Cloer electrical appliance has a defect or it does not work properly, contact your specialist dealer.
Registered clients have at their disposal our technical customer service.
Manufacturer warranty
Please register your appliances in the period of 6 months since the purchase in order to benefit from our manufacturer warranty. The published conditions of warranty in the moment of the registration are valid. You will find conditions of warranty and product registration here:

Manufacturer warranty
https://cloer.eu/guarantee
Do not injure yourself on the sharp edges.
CAUTION! Do not injure yourself on the sharp edges.
© 2024 by Cloer Germany GmbH&CoKG