
K 7 Power Flex - Pressure washer Kärcher - Free user manual and instructions
Find the device manual for free K 7 Power Flex Kärcher in PDF.
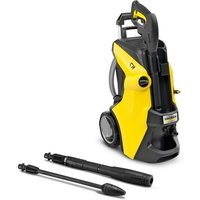


| Product type | High-pressure cleaner |
| Brand | Kärcher |
| Model | K 7 Power Flex |
| Supply voltage | 230 V / 50 Hz |
| Power consumption | 3.0 kW |
| Protection rating | IPX5 |
| Protection class | Class I |
| Recommended fuse | 16 A (slow-blow) |
| Operating pressure | 150 bar (15 MPa) |
| Maximum permissible pressure | 180 bar (18 MPa) |
| Nominal water flow rate | 9.2 l/min |
| Maximum water flow rate | 10 l/min |
| Detergent flow rate | 0.3 l/min |
| Maximum inlet water temperature | 60 °C |
| Maximum suction height | 0.5 m |
| Weight (operational) | 19.0 kg |
| Dimensions (L x W x H) | 458 x 330 x 669 mm |
| Sound pressure level | 80 dB(A) |
| Sound power level | 96 dB(A) |
| Use | Domestic use |
| Main functions | High pressure, detergent, Vario Power lance (adjustable pressure), Rotabuse lance, integrated hose reel, accessory storage |
| Safety | Main switch, gun lock, Auto-Stop function, motor thermal protection |
| Maintenance | Cleaning the water inlet strainer, frost protection |
| Warranty | According to country-specific conditions (see manual) |
Frequently Asked Questions - K 7 Power Flex Kärcher
User questions about K 7 Power Flex Kärcher
0 question about this device. Answer the ones you know or ask your own.
Ask a new question about this device
Download the instructions for your Pressure washer in PDF format for free! Find your manual K 7 Power Flex - Kärcher and take your electronic device back in hand. On this page are published all the documents necessary for the use of your device. K 7 Power Flex by Kärcher.
USER MANUAL K 7 Power Flex Kärcher
Chairman of the Board of Management
S. Reiser
Manager Regulatory Affairs & Certification
71364 Winnenden (Germany)
Tel.: +49 7195 14-0
Fax: +49 7195 14-2212
Winnenden, 2022/10/01
Contents
General notes. 11
Environmental protection. 11
Intended use 11
Accessories and spare parts 11
Scope of delivery. 11
Device description 11
Safety devices 12
Symbols on the device 12
Installation 12
Initial startup 12
Operation 13
Transport 13
Storage 13
Care and service 14
Troubleshooting guide 14
Warranty 15
Technical data 15
EU Declaration of Conformity 15
General notes


Read these original operating instructions and the enclosed safety instructions before using the device for the first time.
Proceed accordingly.
Keep both books for future reference or for future owners.
Environmental protection

The packing materials can be recycled. Please dispose of packaging in accordance with the environmental regulations.

Electrical and electronic devices contain valuable, recyclable materials and often components such as batteries, rechargeable batteries or oil,
which - if handled or disposed of incorrectly - can pose a potential danger to human health and the environment. However, these components are required for the correct operation of the device. Devices marked by this symbol are not allowed to be disposed of together with the household rubbish.
Cleaning work producing in oily waste water, e.g. washing engines, washing undercarriages etc., may only be performed at washing stations with an oil separator. Working with detergents may only be performed on watertight surfaces with connection to the waste water sewage system. Do not allow detergent to enter waterways or the soil. Extraction of water from public waterways is not permitted in some countries.
Notes on the content materials (REACH)
Current information on content materials can be found at: www.kaercher.de/REACH
Intended use
Use the high-pressure cleaner in private households only.
The high-pressure cleaner is intended for cleaning machines, vehicles, buildings, tools, facades, terraces, garden machines etc. using a high-pressure water jet.
Accessories and spare parts
Only use original accessories and original spare parts. They ensure that the appliance will run fault-free and safely.
Information on accessories and spare parts can be found at www.kaercher.com.
Scope of delivery
The scope of delivery for the appliance is shown on the packaging. Check the contents for completeness when unpacking. If any accessories are missing or in the event of any shipping damage, please notify your dealer.
Device description
The maximum amount of equipment is described in these operating instructions. Depending on the model used, there are differences in the scope of delivery (see packaging).
For the figures, please refer to the graphics page.
① Stand with carrying handle ② Water connection with built-in strainer ③ Transport wheel ④ Hose guide ⑤ Trigger "0/OFF" / "I/ON" ⑥ Storage for spray lances ⑦ High-pressure hose ⑧ Plug 'n' Clean detergent bottle ⑨ Storage / parking position for high-pressure gun ⑩ Transport handle, extendable ⑪ Spray lance dirt blaster for stubborn soiling ⑫ Vario Power spray lance for common cleaning tasks. The working pressure can be continuously increased from "SOFT" to "HARD". To adjust the working pressure, release the trigger gun lever and turn the spray lance to the desired position. Detergent can be added to the water jet when the spray lance is turned all the way in the SOFT direction.
⑬ High-pressure gun ⑭ Button for separating the high-pressure hose from the high-pressure gun ⑮ High-pressure gun lever ⑯ High-pressure gun lock ⑰ Carrying handle ⑱ Hose switch ⑲ High pressure hose reel ⑳ Crank handle for hose reel ㉑ Type plate ㉒ Accessory compartment ㉓ Hook for net attachment ㉔ Mesh for accessory compartment ㉕ Mains connection cable with mains plug
㉖ Coupling for the water connection ㉗* Garden hose (fabric reinforced, diameter at least 1/2 inch (13 mm), length at least 7.5 m, with commercially available quick coupling) ㉘* KARCHER suction hose for water supply from open containers (order no. 2.643-100)
- additionally required
Safety devices
WARNING
Danger of injury!
Serious injuries due to missing, modified or ineffective safety devices.
Do not bypass or remove the safety devices and do not render them ineffective. Safety devices are provided for your own protection.
Power switch
The power switch prevents unintentional operation of the device.
High-pressure gun lock
The lock locks the lever of the high-pressure gun and prevents the device from starting unintentionally.
Auto-stop function
If the lever of the high-pressure gun is released, the pressure switch turns off the pump and the high-pressure jet stops. The pump switches on again when the lever is pressed.
Motor circuit breaker
The motor circuit breaker shuts off the device if power consumption is too high.
Symbols on the device
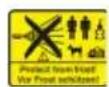
Do not aim the high-pressure jet at persons, animals, live electrical equipment or the device itself.
Protect the device against frost.
The device may not be connected to the public drinking water network.
Installation
For the illustrations, refer to the graphics page.
Fit the supplied loose parts onto the device before starting up the device.
Have the included screws and the appropriate screwdriver ready.
Mounting the accessory net
- Hang the accessory net on the hooks. Illustration C
Push the high-pressure hose through the hose guide.
- Insert the high-pressure hose through the hose guide from the rear.
Illustration D
Installing the water connection coupling
- Screw the water connection coupling onto the water connection on the device.
Illustration E
Initial startup
- Place the device on a level surface.
- Completely unwind the high-pressure hose.
- Pull the high-pressure hose completely forward through the hose guide and eliminate any loops and twists.
- Insert the high-pressure hose into the high-pressure gun until it audibly clicks into place.
Note
Take care to ensure the correct alignment of the nipple. Illustration F. Check the secure connection by pulling on the high-pressure hose. Plug the mains plug into a mains socket.
Note
Take care not to exceed the maximum permissible mains impedance at the electrical connection point (see chapter Technical data).
Contact your electricity supplier in the case of any uncertainties regarding the mains grid impedance at your electrical connection point.
Water supply
For the connection values, see the type plate or chapter Technical data.
Observe the water distribution company regulations.
ATTENTION
Damage through contaminated water
Contamination in the water can damage the pump and the accessories.
KÄRCHER recommends using the KÄRCHER water filter for protection (special accessory, order number 4.730-059).
Connection to the water line
ATTENTION
Risk of damage!
Damage to the pump when using a hose coupling with aquastop on the water connection of the device.
Do not use a hose coupling with aquastop on the water connection of the device.
Use a hose coupling with "aquastop" on the tap only.
- Plug the garden hose onto the water connection coupling.
Illustration G
- Connect the garden hose to the water line.
- Open the water tap completely.
Suck water from open containers
This high-pressure cleaner with the KARCHER suction hose is suitable for sucking in surface water, e.g. from water butts or ponds (for maximum suction height, see Technical data).
- Unscrew the coupling on the water connection.
- Fill the suction hose with water.
- Screw the suction hose onto the water connection of the device and hang it in a water source (e.g. rain barrel).
Vent the device
- Switch the device on "I/ON".
- Unlock the lever of the high-pressure gun.
- Press the lever of the high-pressure gun. The device switches on.
- Allow the device to run for a maximum of 2 minutes until the water escaping from the high-pressure gun is free of air bubbles.
- Release the lever of the high-pressure gun.
- Lock the lever of the high-pressure gun.
Operation
ATTENTION
Risk of damage!
Damaging the pump during dry running.
Switch off the device if it does not build up pressure within 2 minutes.
Proceed according to the instructions in chapter Troubleshooting guide.
High-pressure operation
ATTENTION
Damage to painted or sensitive surfaces
Surfaces can be damaged when the jet is too close to the surface or an unsuitable spray lance is used.
Maintain a minimum spray distance of 30 cm when cleaning painted surfaces.
Do not clean car tyres, paint or sensitive surfaces such as wood with the dirt blaster.
- Insert a spray lance into the high-pressure gun and lock it by turning it 90°.
Illustration H
- Switch the device on ("I/ON").
- Unlock the lever of the high-pressure gun.
- Press the lever of the high-pressure gun. The device switches on.
Operation with detergent
△DANGER
Failure to adhere to the safety data sheet
Incorrect handling of the detergent can seriously damage your health
Observe the safety data sheet of the detergent manufacturer, in particular the instructions on personal protective equipment.
Note
A Plug 'n' Clean detergent bottle is required for operating with detergent. KÄRCHER detergents can be purchased ready for use in a Plug 'n' Clean detergent bottle.
Note
Detergents may only be added at low pressure.
- Remove the lid from the Plug 'n' Clean detergent bottle.
- Press the detergent bottle into the Plug 'n' Clean detergent connection with the opening facing downwards.
Illustration I
- Use the Vario Power spray lance.
- Turn the spray lance all the way into the "SOFT" position.
The detergent solution is mixed with the water jet during operation.
Recommended cleaning method
- Spray the detergent sparingly on the dry surface and let it work for a while (do not let it dry).
- Rinse off the loosened dirt with the high-pressure jet.
After operation with detergent
- Flush the device with clear water for approx. 30 seconds.
Interrupting operation
- Release the lever of the high-pressure gun.
When the lever is released, the device switches off. The high-pressure in the system is maintained.
- Lock the lever of the high-pressure gun.
Illustration J
- Set the high-pressure gun with the spray lance in the parking position.
- For work breaks longer than 5 minutes, switch off the device "0/OFF".
Ending operation
CAUTION
Danger of injury!
Injuries due to uncontrolled water escaping under high pressure.
Only disconnect the high-pressure hose from the high-pressure gun or the device if there is no pressure in the system.
- Release the lever of the high-pressure gun.
- Close the water tap.
- Press the lever of the high-pressure gun for 30 seconds.
The pressure in the system is released.
- Release the lever of the high-pressure gun.
- Lock the lever of the high-pressure gun.
- Switch off the device "0/OFF".
- Disconnect the device from the water supply.
- Pull the mains plug out of the outlet.
Transport
CAUTION
Risk of injury or damage due to the weight of the device!
Injury and damage.
Be aware of the weight of the device during transport and storage.
Pulling device
- Pull out the transport handle until it audibly engages.
- Pull the device by the transport handle.
Carrying the device
- Lift and carry the device by the carrying handles.
Transporting the device in a vehicle
- Before horizontal transport, pull the Plug 'n' Clean detergent bottle out of the holder and close it with the lid.
- Secure the device against shifting and tipping.
Storage
CAUTION
Risk of injury or damage due to the weight of the device!
Injury and damage.
Be aware of the weight of the device during transport and storage.
Storing the device
- Place the device on a level surface.
- Disconnect the spray lance from the high-pressure gun.
- Press the separation button on the high-pressure gun and disconnect the high-pressure hose from the high-pressure gun.
- Without a hose reel: Store the high-pressure hose on the device.
ATTENTION
Damage to the high-pressure hose
Damage to the high-pressure hose through incorrect direction of rotation
Observe the correct direction of rotation of the hose reel when winding on the hose.
- With a hose reel: Use the crank handle to turn the hose reel counterclockwise and wind up the high-pressure hose.
- Stow the mains connection and accessories on the device.
- Put both spray lances into the storage for the spray lance:
a Spray lance dirt grinder: Nozzle downwards
b Spray lance Vario Power: Nozzle upwards
Before prolonged storage, observe additional instructions, see chapter Care and service.
Frost protection
ATTENTION
Danger of frost
Incompletely emptied devices can be destroyed by frost.
Completely empty the device and accessories.
Protect the device from frost.
The following must be met:
The device is disconnected from the water supply. - The high-pressure gun is separated from the high-pressure hose. 1. Switch on the device "I/ON". 2. Wait a maximum of 1 minute until no more water comes out of the high-pressure hose. 3. Switch off the device. 4. Store the device with all accessories in a frost-proof room.
Care and service
△DANGER
Danger of electric shock
Injuries due to touching live parts
Switch off the device.
Remove the mains plug.
The device is maintenance-free, i.e. you do not need to perform any maintenance work.
Clean the sieve in the water connection
ATTENTION
Risk of damage!
Damage to the sieve due to improper cleaning.
Clean the sieve only under running water against its flow direction.
Do not use sharp or hard objects, e.g. needles or wire brushes.
ATTENTION
Risk of damage!
Damage to the device and accessories when operating without a sieve or with a damaged sieve.
Check the sieve for damage before inserting it into the water connection. Replace a damaged sieve immediately.
Do not operate the device without a sieve.
Clean the sieve in the water connection if necessary.
- Unscrew the coupling on the water connection. 2. Pull out the sieve.
Illustration K
- Clean the sieve under running water.
- Insert the sieve into the water connection.
Troubleshooting guide
Malfunctions often have simple causes that you can remedy yourself using the following overview. When in doubt, or in the case of malfunctions not mentioned here, please contact your authorized Customer Service.
△DANGER
Danger of death!
Fatal injuries due to electric shock when touching live parts.
Do not touch any live parts.
Switch off the device.
Pull the mains plug out of the mains socket.
Device not running
- Press the lever of the high-pressure gun. The device switches on.
- Check that the voltage specified on the type plate corresponds to the voltage of the power source.
- Check the mains connection cable for damage.
- If the motor is overloaded and the motor circuit breaker has triggered:
a Switch off the device "0/OFF". b Allow the device to cool down for 1 hour. c Switch the device on "I/ON" and resume operation.
Have the device checked by Customer Service if this fault occurs repeatedly.
The device does not start up, the motor buzzes
Voltage drop due to a weak mains grid or when using an extension cable
- When switching on, first press the lever on the high-pressure gun and then switch on the device "I/ON".
Device does not reach required pressure
The water supply is too low.
- Open the water tap fully.
- Check the water inlet for an adequate flow rate.
- Check the setting at the spray lance.
- Check that the maximum suction height is not exceeded.
The sieve in the water connection is dirty.
- Pull the sieve in the water connection out using flat pliers.
- Clean the sieve under running water.
Illustration K
Air is in the device.
- Vent the device:
a) Switch on the device without a connected spray lance for a maximum of 2 minutes. b) Press the high-pressure gun and wait until the water escaping from the high-pressure gun is free of air bubbles. c) Connect the spray lance.
Strong pressure fluctuations
- Cleaning the high-pressure nozzle:
a) Remove contamination from the nozzle drill with a needle. b) Rinse the high-pressure nozzle with water from the front.
- Check the water supply volume.
Device leaking
- The device leaks a small amount for technical reasons. If the leak is severe, request authorised Customer Service.
Detergent is not sucked in
- Use the Vario Power spray lance and turn it to "MIX".
- Check that the Plug 'n' Clean detergent bottle is seated in the connection for the detergent with the opening facing down.
Warranty
The warranty conditions issued by our relevant sales company apply in all countries. We shall remedy possible malfunctions on your appliance within the warranty period free of cost, provided that a material or manufacturing flaw is the cause. In a warranty case, please contact your dealer (with the purchase receipt) or the next authorised customer service site.
(See overleaf for the address)
Further warranty information (if available) can be found in the service area of your local Kärcher website under "Downloads".
Technical data
| K 7 Premium Power Flex | Power Flex | ||
| Electrical connection | |||
| Voltage | V | 230 | |
| Phase ~ 1 1 | |||
| Frequency Hz 50 50 | |||
| Maximum permissible mains grid impedance | Ω 0,394 +j0,246 | 0,394 +j0,246 | |
| Power rating kW 3,0 3,0 | |||
| Degree of protection | IPX5 | IPX5 | |
| Protection class | I | I | |
| Power protection (slow-blowing) | A | 16 | 16 |
| Water connection | |||
| Feed pressure (max.) MPa | 1,2 1,2 | ||
| Input temperature (max.) | °C | 60 60 | |
| Input amount (min.) | l/min | 12 12 | |
| Suction height (max.) m | 0,5 0,5 | ||
| Device performance data | |||
| Operating pressure | MPa | 15 15 | |
| Max. permissible pressure | MPa | 18 18 | |
| Water flow rate | l/min | 9,2 9,2 | |
| Maximum flow rate | l/min | 10 10 | |
| Detergent flow rate | l/min | 0,3 0,3 | |
| High-pressure gun recoil force | N | 27 | 27 |
| Dimensions and weights | |||
| Typical operating weight | kg | 19,4 19,0 | |
| Length | mm | 459 458 | |
| Width | mm | 330 | 330 |
| Height | mm | 669 669 | |
| Determined values in acc. with EN 60335-2-79 | |||
| Hand-arm vibration value | m/s2 | <2,5 <2,5 | |
| Uncertainty K | m/s2 | 0,6 0,6 | |
| Sound pressure level LpA | dB(A) | 80 80 | |
| Uncertainty KpA | dB(A) | 3 3 | |
| Sound power level LWA+ uncertainty KWA | dB(A) | 96 96 | |
Exception according to Regulation (EU) 2019/1781 Annex I Section 2 (12): j)
Subject to technical changes without notice.
EU Declaration of Conformity
We hereby declare that the machine described below complies with the relevant basic safety and health requirements in the EU Directives, both in its basic design and construction as well as in the version placed in circulation by us. This declaration is invalidated by any changes made to the machine that are not approved by us.
Product: High-pressure cleaner
Type: 1.317-xxx
Currently applicable EU Directives
2006/42/EC (+2009/127/EC)
2014/30/EU
2011/65/EU
2000/14/EC
2009/125/EC
Commission Regulation(s)
(EU) 2019/1781
Harmonised standards used
EN 60335-1-30
EN 60335-2-79
EN 62233:2008
EN 55014-1:2017 + A11:2020
EN 55014-2:1997 + A1:2001 + A2:2008
EN 61000-3-2:2014
EN 61000-3-11:2000
EN IEC 63000:2018
Applied conformity evaluation method
2000/14/EG: Annex V
Sound power level dB(A)
Measured: 93
Guaranteed: 96
The signatories act on behalf of and with the authority of the company management.
H.Jenner
Chairman of the Board of Management
S. Reiser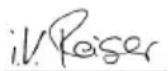
Manager Regulatory Affairs & Certification
Documentation supervisor:
S. Reiser
Alfred Karcher SE & Co. KG
Alfred-Karcher-Str.28-40
71364 Winnenden (Germany)
Ph.: +49 7195 14-0
Fax: +49 7195 14-2212
Winnenden, 2022/10/01
Contents
General remarks. 16
2006/42/EC (+2009/127/EC)
2014/30/EU
2011/65/EU
2000/14/EC
2009/125/EC
Applied ordinance(s)
(EU) 2019/1781
H. Jenner Chairman of the Board of Management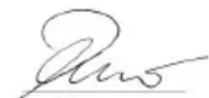
S. Reiser Manager Regulatory Affairs & Certification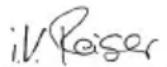
Responsible for documentation:
S. Reiser
Alfred Kärcher SE & Co. KG
Alfred-Karcher-Str. 28-40
71364 Winnenden (Germany)
Tel.: +49 7195 14-0
Fax: +49 7195 14-2212
Winnenden, 01/10/2022
Indices
Chairman of the Board of Management
S. Reiser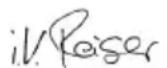
Manager Regulatory Affairs & Certification
71364 Winnenden (Germany)
Tel.: +49 7195 14-0
Fax: +49 7195 14-2212
Winnenden, 01/10/2022
2006/42/EC (+2009/127/EC)
2014/30/EU
2011/65/EU
2000/14/EC
2009/125/EC
Chairman of the Board of Management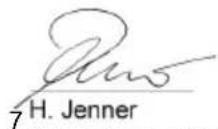
S. Reiser Manager Regulatory Affairs & Certification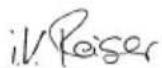
Documentation manager:
S. Reiser
Alfred Karcher SE & Co. KG
Alfred-Karcher-Str.28-40
71364 Winnenden (Germany)
Tel.: +49 7195 14-0
Fax: +49 7195 14-2212
Winnenden, 01/10/2022
Index
General information 31
2006/42/EC (+2009/127/EC)
2014/30/EU
2011/65/EU
2000/14/EC
2009/125/EC
Applicable regulation(s)
(EU) 2019/1781
Chairman of the Board of Management
S. Reiser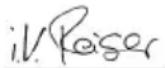
Manager Regulatory Affairs & Certification
.7
Winnenden, 01/10/2022
Contents
Chairman of the Board of Management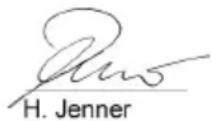
S. Reiser Manager Regulatory Affairs & Certification
71364 Winnenden (Germany)
Tel.: +49 7195 14-0
Fax: +49 7195 14-2212
Winnenden, 2022/10/01
Table of contents
General notes. 41
Environmental protection 42
2006/42/EC (+2009/127/EC)
2014/30/EU
2011/65/EU
2000/14/EC
2009/125/EC
Chairman of the Board of Management
S. Reiser Manager Regulatory Affairs & Certification
Winnenden, 2022/10/01
Contents
General information 46
Environmental protection 46
H.Jenner Chairman of the Board of Management
S. Reiser Manager Regulatory Affairs & Certification
Authorized for documentation:
S. Reiser
Alfred Kärcher SE & Co. KG
Alfred-Karcher-Str. 28 - 40
D-71364 Winnenden (Germany)
Phone: +49 7195 14-0
Fax: +49 7195 14-2212
Winnenden, 01.10.2022
Contents
General instructions 51
H.Jenner Chairman of the Board of Management
S. Reiser Manager Regulatory Affairs & Certification
71364 Winnenden (Germany)
Phone: +49 7195 14-0
Winnenden, 1.10.2022
Contents
General notes. 56
Environmental protection. 56
2006/42/EC (+2009/127/EC)
2014/30/EU
2011/65/EU
2000/14/EC
2009/125/EC 230
Applied directive(s)
(EU) 2019/1781
Applied harmonized standards
EN 60335-1 EN 60335-2-79 EN 62233: 2008 EN 55014-1:2017 + A11:2020 EN 55014-2: 1997 + A1: 2001 + A2: 2008 EN 61000-3-2: 2014 EN 61000-3-11:2000 EN IEC 63000:2018
Chairman of the Board of Management
S. Reiser
Manager Regulatory Affairs & Certification
71364 Winnenden (Germany)
Tel.: +49 7195 14-0
Winnenden, 2022/10/01
Contents
Relevant EU Directives
2006/42/EC (+2009/127/EC)
2014/30/EU
2011/65/EU
2000/14/EC
2009/125/EC
Applied regulation(s)
(EU) 2019/1781
Applied harmonized standards
EN 60335-1
EN 60335-2-79
EN 62233: 2008
EN 55014-1:2017 + A11:2020
EN 55014-2: 1997 + A1: 2001 + A2: 2008
EN 61000-3-2: 2014
EN 61000-3-11:2000
EN IEC 63000:2018
Chairman of the Board of Management
S. Reiser
Manager Regulatory Affairs & Certification
71364 Winnenden (Germany)
Tel.: +49 7195 14-0
Fax: +49 7195 14-2212
Winnenden, 2022/10/01
Table of Contents
General instructions 65
Environmental protection 65
Product: High-pressure cleaner
Type: 1.317-xxx
H. Jenner Chairman of the Board of Management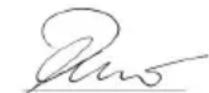
S. Reiser Manager Regulatory Affairs & Certification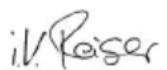
Documentation officer:
S. Reiser
Alfred Kärcher SE & Co. KG
Alfred-Karcher-Str. 28-40
71364 Winnenden (Germany)
Tel: +49 7195 14-0
Winnenden, 2022/10/01
Chairman of the Board of Management
S. Reiser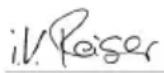
Manager Regulatory Affairs & Certification
Documentation prepared by:
S. Reiser
Alfred Kärcher SE & Co. KG
Alfred-Karcher-Str. 28 - 40
71364 Winnenden (Germany)
Phone: +49 7195 14-0
Fax: +49 7195 14-2212
Winnenden, 01.10.2022.
Contents
H. Jenner Chairman of the Board of Management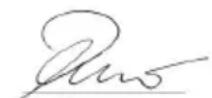
S. Reiser Manager Regulatory Affairs & Certification
2006/42/WE (+2009/127/WE)
2014/30/UE
2011/65/UE
2000/14/WE
2009/125/WE
H.Jenner Chairman of the Board of Management
S. Reiser Manager Regulatory Affairs & Certification
Documentation administrator: S. Reiser
Alfred Karcher SE & Co. KG
Alfred-Karcher-Str. 28 - 40
71364 Winnenden (Germany)
Tel.: +49 7195 14-0
Chairman of the Board of Management
S. Reiser
Manager Regulatory Affairs & Certification
Winnenden, 2022/10/01
Contents
General Instructions 90
Environmental Protection 90
Intended Use 90
Accessories and Spare Parts 91
Scope of Delivery 91
Description of the Device 91
2006/42/EC (+2009/127/EC)
2014/30/EU
2011/65/EU
2000/14/EC
2009/125/EC
Applied Standards
(EU) 2019/1781
2000/14/EC: Annex V
Chairman of the Board of Management
S. Reiser
Manager Regulatory Affairs & Certification
Authorized for documentation:
S. Reiser
Alfred Kärcher SE & Co. KG
Alfred-Karcher-Str.28-40
Winnenden, 2022/10/01
Contents
2006/42/EC (+2009/127/EC)
2014/30/EU
2011/65/EU
2000/14/EC
2009/125/ES
2000/14/ES: Annex V
H.Jenner Chairman of the Board of Management
S. Reiser Manager Regulatory Affairs & Certification
71364 Winnenden (Germany)
Tel.: +49 7195 14-0
Fax: +49 7195 14-2212
Winnenden, 01.10.2022
Table of contents
General instructions 100
Environmental protection 100
Intended use 100
Accessories and spare parts. 100
Scope of delivery. 100
Description of the device 100
Safety devices 101
Symbols on the device. 101
Mounting. 101
Start-up 101
Operation 102
Transport 102
Storage 103
2006/42/EC (+2009/127/EC)
2014/30/EU
2011/65/EU
2000/14/EC
2009/125/EC
Applicable regulation(s)
(EU) 2019/1781
Winnenden, 1. 10. 2022
Table of contents
Relevant EU directives
2006/42/EC + 2009/127/EC)
2014/30/EU
2011/65/EU
2000/14/EC
2009/125/EC
Regulation(s) used
(EU) 2019/1781
Harmonised standards applied
EN 60335-1
EN 60335-2-79
EN 62233: 2008
EN 55014-1:2017 + A11:2020
EN 55014-2: 1997 + A1: 2001 + A2: 2008
EN 61000-3-2: 2014
EN 61000-3-11:2000
EN IEC 63000:2018
Conformity assessment procedure
2000/14/EC: Annex V
Sound power level dB(A)
Measured: 93
Guaranteed: 96
H. Jenner Chairman of the Board of Management
S. Reiser Manager Regulatory Affairs & Certification
Person responsible for compiling the technical documentation:
S. Reiser
Alfred Karcher SE & Co. KG
Alfred-Karcher-Str. 28 - 40
71364 Winnenden (Germany)
Tel.: +49 7195 14-0
Fax: +49 7195 14-2212
Winnenden, 2022/10/01
Contents
General notes 110
Environmental protection 110
H.Jenner Chairman of the Board of Management
S. Reiser Manager Regulatory Affairs & Certification
2006/42/EC (+2009/127/EC)
2014/30/EU
2011/65/EU
2000/14/EC
2009/125/EC
Applied provision(s)
(EU) 2019/1781
Applied harmonized standards
EN 60335-1
EN 60335-2-79
EN 62233: 2008
EN 55014-1:2017 + A11:2020
EN 55014-2: 1997 + A1: 2001 + A2: 2008
EN 61000-3-2: 2014
EN 61000-3-11:2000
EN IEC 63000:2018
H.Jenner Chairman of the Board of Management
S. Reiser Manager Regulatory Affairs & Certification
Person authorized for Documentation:
S. Reiser
Alfred Kärcher SE & Co. KG
Alfred-Karcher-Str.28-40
71364 Winnenden (Germany)
Tel.: +49 7195 14-0
Winnenden, 2022/10/01
Contents
General safety instructions 120 Environmental protection 120 Intended use. 120 Accessories and spare parts 120 Scope of delivery 120 Description of the device 120 Safety devices 121 Symbols on the device. 121 Installation 121 Initial startup 121 Operation 122 Transport 123 Storage 123 Care and maintenance 123 Troubleshooting 123 Warranty 124 Technical data 124 EU Declaration of Conformity 125
General safety instructions

Before using the device for the first time, read these original operating instructions and the
accompanying safety instructions. Keep them for future use.
Keep both booklets for later use or for the next owner.
Environmental protection

The packaging materials are recyclable. Dispose of packaging in an environmentally responsible manner.

Electrical and electronic devices contain recyclable materials and, often, hazardous components such as batteries, rechargeable batteries or oil, which
if handled incorrectly or disposed of improperly can pose a risk to human health and the environment. However, these components are essential for the correct operation of the device. Devices bearing this symbol must not be disposed of with household waste. Work on oil-containing waste, e.g. oil filters or the underside of vehicles, may only be carried out at collection points equipped with oil separation. Work on refrigerant-containing devices may only be carried out at collection points for refrigerants or contaminated cleaning agents. The refrigerant must be collected separately. The water from cleaning oil-containing parts must not be discharged into the sewer system.
Information on substances (REACH)
Current information on substances can be found at: www.kaercher.de/REACH
Intended use
Use the supplied high-pressure cleaner exclusively for domestic use.
The supplied high-pressure cleaner is intended for cleaning vehicles, machines, buildings,
H.Jenner Chairman of the Board of Management
S. Reiser Manager Regulatory Affairs & Certification
Head of Quality Management:
S. Reiser
Alfred Kärcher SE & Co. KG
Alfred-Karcher-Str. 28 - 40
71364 Winnenden (Germany)
Tel: +49 7195 14-0
Fax: +49 7195 14-2212
Winnenden, 2022/10/01
Contents
General safety instructions. 125
Ambient temperature 125
Intended use 125
Accessories. Spare parts. 125
Scope of delivery. 126
Description of the device 126
Safety devices. 126
Symbols on the device 126
Installation 126
Commissioning 127
Operation 127
Transport 128
Storage 128
Maintenance and servicing. 129
Troubleshooting 129
Warranty 130
Technical characteristics 130
Declaration of conformity with EU standards ... 130
General information

Before first use of the device, read the original instructions for operation and the attached safety instructions. Act in accordance with them.
Keep both brochures for further use or for future owners.
Environmental protection
Packaging materials are recyclable. Dispose of packaging without harming the environment.

Electrical and electronic devices often contain valuable materials suitable for recycling and may contain components such as batteries,

accumulators or oil, which, if handled improperly, can be hazardous to health and the environment. However, these components are necessary for the proper operation of the device. Devices marked with this symbol must not be disposed of with household waste.
Work that produces oily wastewater, e.g., engine washing, must only be carried out on washing pads with an oil separator.

Work with cleaning agents must only be carried out on water-permeable surfaces with connection to the domestic sewage system. Do not allow cleaning agents to enter water bodies or soil.

Water intake from open water bodies is not permitted in some countries.

Information on components (REACH)
Information for the user
KOMNOHEHTAX CM. www.kaercher.de/REACH
Intended use
Use the high-pressure cleaner only as intended.
The high-pressure cleaner is intended for cleaning machines, vehicles, buildings,
tools, facades, terraces, garden equipment, etc. with a water jet under high pressure.
Spare parts
Use only original accessories and spare parts. Only they
guarantee safe and uninterrupted operation of the device.
- Connect the garden hose to the coupling for water supply.
Figure G
- Connect the garden hose to the water inlet. 3. Fully open the water tap.
Water from open reservoirs
This high-pressure cleaner is suitable for drawing surface water with the KARCHER suction hose, for example from rain barrels or ponds (maximum suction height see technical data).
- Remove the coupling on the water supply connection.
- Fill the suction hose with water. 3. Screw the suction hose onto the water supply connection on the device and place it in the water source (e.g., in a rain barrel).
Air inlet on the device
- Turn on the device «ION»
- Unlock the high-pressure pistol lever.
- Press the high-pressure pistol lever. The device turns on.
- Let the device run for up to 2 minutes until water comes out of the high-pressure pistol without bubbles.
- Release the high-pressure pistol lever.
- Lock the high-pressure pistol lever.
Operation
WARNING
Risk of damage!
Risk of pump damage when running dry.
Turn off the device if it does not build pressure within 2 minutes.
Follow the instructions in section 2 Troubleshooting.
Working with high pressure
WARNING
Cleaning painted or varnished surfaces
Surfaces are damaged if the distance to the object is too small or if an unsuitable spray tube is selected.
When cleaning painted surfaces, maintain a distance of at least 30 cm. Do not clean car tires, painted or varnished surfaces with a dirt grinder.
- Insert the spray tube into the high-pressure gun and lock it in place by turning it 90°. Figure H
- Switch on the device (I/ON).
- Unlock the trigger of the high-pressure gun.
- Press the trigger of the high-pressure gun. The device switches on.
Operation with cleaning agents
DANGER
Failure to observe the safety instructions
Serious injuries due to improper use of the cleaning agent.
Observe the safety instructions of the cleaning agent manufacturer, in particular the instructions regarding personal protective equipment.
Note
For working with cleaning agents, a container with cleaning agent Plug'n'Clean is required. KARCHER cleaning agents can be purchased in a special Plug'n'Clean container system.
Note
The cleaning agent can only be added at low pressure.
- Remove the container lid with the cleaning agent from the Plug'n' Clean system.
- Install the container with the cleaning agent opening downwards into the Plug'n' Clean system. Figure 1
- Use the Vario Power spray lance.
- Turn the spray lance to the "SOFT" position. During operation, the cleaning agent solution is added to the water jet.
Recommended cleaning method
- Spray the cleaning agent economically onto the dry surface and allow it to take effect (do not let it dry).
- Rinse off the dirt with a high-pressure jet.
After using the cleaning agent
- Rinse the device with clean water for approx. 30 seconds.
Interrupting operation
- Release the trigger of the high-pressure gun. When the trigger is released, the device switches off. High pressure remains in the system.
- Lock the trigger of the high-pressure gun. Figure J
- Place the high-pressure gun and spray lance in the parking position. 4. During breaks longer than 5 minutes, the device should be switched off with the ON/OFF switch.
End of operation
CAUTION
Danger of injury!
Improper output may occur under high pressure.
Disconnect from high pressure only when the system is depressurized.
- Release the lever of the high-pressure pistol.
- Close the water supply tap.
- Press the lever of the high-pressure pistol for 30 seconds. The remaining pressure in the system is released.
- Release the lever of the high-pressure pistol.
- Secure the lever of the high-pressure pistol.
- Switch the device to "0/OFF".
- Disconnect the device from the water supply system.
- Remove the spray lance from the gun.
Transport
CAUTION
Danger of injury from tipping due to the weight of the device!
Disposal.
During storage and transportation, keep the device in its packaging.
Device activation
- Pull out the handles for transportation up to the stop.
- Hold the device by the transportation handle.
Carrying the device
- Hold the device with both hands and carry it.
Transporting the device in a vehicle
Protection against freezing
WARNING
Danger of freezing
Devices that are not completely emptied can be damaged by frost.
Completely empty the device and accessories.
Protect the device from frost.
The following conditions must be met:
- The device is disconnected from the water supply system.
- The high-pressure hose is disconnected from the high-pressure pump.
- Turn on the device.
- Wait no more than 1 minute until water stops coming out of the high-pressure pump.
- Turn off the device.
- Store the device and all accessories in a frost-free room.
Care and technical maintenance
DANGER
Danger of electric shock
Risk of injury from touching live parts
Turn off the device.
Remove the mains plug.
The device does not require technical maintenance, that is, regular technical maintenance is not required.
Cleaning the mesh filter in the water connection piece
ATTENTION
Danger of damage!
Damage due to incorrect cleaning.
Clean the filter only under running water against the direction of flow.
Do not use sharp or hard objects such as needles or wire brushes.
WARNING
Danger of damage!
Damage to the device and accessories when operating without a filter or with a damaged filter.
Check the filter for damage before inserting it into the water inlet connection. Replace a damaged filter immediately.
Do not operate the device without a filter.
If necessary, remove the filter from the water inlet connection.
- Unscrew the union nut on the water inlet connection.
- Remove the filter. Figure K
- Rinse the filter under running water.
- Insert the filter into the water inlet connection.
Help with malfunctions
Most malfunctions have simple causes, so with the help of the following overview they can be fixed independently. In case of doubt or if malfunctions not described here occur, contact the authorized customer service.
DANGER
Danger to life!
Fatal injuries can result from electric shock when touching live parts.
Do not touch live parts.
Switch off the device.
Remove the mains plug from the socket.
The device does not work
- Press the high-pressure switch. The device switches on.
2. Check that the voltage indicated on the rating plate matches the voltage of the power supply.
- Check the cable for damage.
- If the motor is overloaded and the motor protection switch has tripped, switch off the device "0 / OFF".
Let the device cool down for 1 hour. Switch the device "I/ON" back on and resume work.
The device may turn on multiple times; have the device checked by the service department.
The device does not turn on, the motor hums.
Voltage drop due to weak electrical network or when using an extension cord.
- When turning on, first press the high-pressure switch lever, then turn on the device with 'ON'.
No pressure is created in the device.
Too weak water supply.
- Open the water supply tap completely.
- Check that the water supply is sufficient.
- Check the adjustment of the jet tube.
- Check that the maximum suction height is not exceeded.
The filter in the water supply pipe is clogged.
- Remove the filter from the water supply pipe and rinse it.
- Rinse the filter under running water. See figure K.
Air accumulates in the device.
- Remove air from the device:
a. Run the device without the spray lance for no more than 2 minutes. b. Press the high-pressure gun trigger until water emerges from the gun without air bubbles. c. Replace the spray lance.
Pressure drops
- Clean the high-pressure nozzle:
a. Remove blockages from the nozzle opening using a pin. b. Rinse the high-pressure nozzle with water.
Detergent is not being drawn in
- Use the Vario Power spray lance and turn it to the "MIX" position.
- Check that the Plug'n'Clean detergent container is inserted with the opening facing down into the detergent suction port.
Warranty
In each country, the applicable warranty conditions set by our sales company apply. We will repair possible malfunctions of the device free of charge during the warranty period, if the cause is defects in materials or manufacturing defects. In the event of complaints during the warranty period, please contact the retailer who sold the product or the nearest authorized customer service center.
(Address is indicated on the back)
Additional warranty information (in some countries) can be found in the service area of the local Kärcher website under "Downloads".
The date of manufacture is shown on the factory plate or in the format MM/YYYY, where MM is the month of manufacture and YYYY is the year of manufacture, or in coded form.
The following values apply to the device:
Example: 30290 3rd digit 0 means decade of issue 2, decade of issue 9, second digit of month of issue 0, first digit of month of issue. Thus, in this example, code 30290 indicates the date of issue 09/(2)023.
Technical characteristics
Product: High-pressure washer Type 1.317-xxx
Applicable directives EC
2006/42/EC (+2009/127/EC)
2014/30/EC
2011/65/EC
2000/14/EC
2009/125/EC
Applied regulation(s)
(EC) 2019/1781
Applied harmonized standards
EN 60335-1
EN 60335-2-79
EN 62233: 2008
EN 55014-1:2017 + A11:2020
EN 55014-2: 1997 + A1: 2001 + A2: 2008
EN 61000-3-2: 2014
EN 61000-3-11:2000
EN IEC 63000:2018
Applied method of conformity assessment
Sound power level L(WA)
Measured: 93
Guaranteed: 96
The following declarations are valid from the date of this declaration.
H. Jenner
Chairman of the Board of Management
S. Reiser
Manager Regulatory Affairs & Certification
Person responsible for documentation:
II. Dimensions (S. Reiser)
Alfred Kärcher SE & Co. KG
Alfred-Karcher-Str. 28-40
71364 Winnenden (Germany)
Tel.: +49 7195 14-0
Fax: +49 7195 14-2212
Version: 01.10.2022
Contents
General safety instructions 131
Environmental protection 131
Intended use 131
Accessories and spare parts 131
Scope of delivery 131
Description of the device 131
Safety devices 132
Device setup 132
Collection 132
Commissioning 132
Operation 133
Transportation 134
Storage 134
Maintenance and technical service 134
Troubleshooting 134
Warranty 135
Technical specifications 135
Declaration of conformity with EU standards 136
General instructions


Before first use, read the original instruction manual carefully.
Operation and safety instructions must be followed accordingly.
Keep this brochure for future reference.
Use of the device.
Environmental protection

Packaging materials are recyclable. Please dispose of packaging in an environmentally responsible manner.

Electrical and electronic devices contain valuable recyclable materials and components, such as batteries, accumulators, and parts, which in case of
improper handling or improper disposal may pose a potential hazard to human health and the environment. However, these components are necessary for the proper operation of the device. Devices marked with this symbol are prohibited from being disposed of together with household waste.

Work with cleaning agents, as a result of which
soapy water with cleaning agent content, e.g., detergent, rinsing agent, etc., may only be discharged into the public sewer system.

Work with cleaning agents must only be carried out on working surfaces, not on public roads, with discharge into the public sewer. Cleaning agents must not enter water bodies or soil.

Taking water from open water is prohibited in some countries.
Notes on ingredients (REACH)
Current information on ingredients is available at: www.kaercher.de/REACH
Intended use
Use the high-pressure cleaner only in domestic households.
The high-pressure cleaner is intended for cleaning machines, vehicles, buildings, tools, facades, terraces, garden and horticultural equipment, etc. with a high-pressure water jet.
Scope of delivery and spare parts
Spare parts, accessories and consumables are not covered by the warranty. Therefore, the manufacturer guarantees safe and uninterrupted operation of the device only when using original spare parts and accessories.
Information about spare parts can be found at www.kaercher.com.
Scope of delivery
The scope of delivery of the device is indicated on the packaging. When unpacking the device, check the completeness of the delivery. In case of missing accessories or damage caused by transport, please contact your dealer.
Description of the device
The operating instructions describe the maximum scope of delivery. The scope of delivery varies depending on the model (see packaging). See the figures on page 3.

Device switch 0/OFF / I/ON

Storage hook for the spray lance

High-pressure hose

In case of mains voltage fluctuations, switch off the device using the device switch.
Symbols on the device
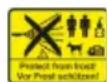
Do not direct the high-pressure water jet at people, animals, live electrical equipment, or the device itself. Protect the device from frost.

Direct connection to the public drinking water supply is not permitted.
Assembly
See figures on the page with illustrations. Before commissioning, attach the loose parts supplied to the device. Tighten the screws included in the scope of delivery with the appropriate torque.
- Install the filter. The filter is attached as follows. Figure C
Pulling the high-pressure hose through the diaphragm
- Pull the high-pressure hose through the guide for the hose. Figure D
Install the fitting for water supply
- Screw the fitting for water supply onto the water supply pipe. Figure E
Commissioning
- Place the device on a level surface.
- Completely unwind the high-pressure hose.
- Completely pull the high-pressure hose through the front and loosen all nuts and screws.
- Insert the high-pressure hose into the high-pressure pistol up to the stop.
Operation
Follow the instructions for correct use. Figure F
- Check the connection by pulling on the high-pressure hose.
- Insert the spray lance into the socket.
The resistance of the water supply line (see chapter Technical data) must not exceed the maximum permissible resistance.
If questions arise regarding the water supply line, contact the organization that supplies electricity.
Water connection
The connection parameters are specified on the factory rating plate or in the chapter Technical data. Observe the connection requirements.
CAUTION
Damage due to contaminated water. Contamination, e.g., sand, can cause damage to the pump and accessories. To protect, use a KARCHER water filter (special accessory, order no. 4.730-059).
Connecting to the water supply
CAUTION
Risk of damage!
Damage to the pump when using the Aquastop coupling with the protective system against dry running on the pump connection piece for water supply.
Do not use the Aquastop coupling on the pump connection piece for water supply. Use the Aquastop coupling with the Aquastop system only on the water tap.
- Install the coupling flange on the pipe for water supply.
Figure G
2. Press the coupling flange onto the water pipe. 3. Fully open the water tap.
Use of surface water with the help of the KARCHER suction hose, for example, from 600 liters for floor water or tanks (maximum suction height see Technical data).
- Screw the coupling onto the water inlet pipe. 2. Fill the suction hose with water.
- Connect the suction hose to the water inlet pipe on the device and place it in the water source (for example, in a tank with floor water).
Removing air from the device
- Switch on the device I/ON>.
- Unlock the trigger of the high-pressure gun.
- Press the trigger of the high-pressure gun. The device switches on. 4. Let the device run for a maximum of 2 minutes until water starts to come out of the high-pressure gun without bubbles.
- Release the trigger of the high-pressure gun.
- Lock the trigger of the high-pressure gun.
Operation
Attention
Risk of damage!
Damage to the pump in case of dry running.
For example, if the device has not been used for 2 minutes.
Follow the instructions in the troubleshooting section for each malfunction.
Operation at high pressure
WARNING
Cleaning of damaged or worn surfaces
Surfaces should be cleaned if they are damaged or if an unsuitable spray tube is selected.
When cleaning damaged surfaces, maintain a distance of at least 30 cm.
Do not clean car tires, damaged or worn surfaces using a high-pressure cleaner.
- Insert the spray tube into the high-pressure pistol and secure it by turning it 90 degrees clockwise.
- Pull out the device (I/ON).
- Unlock the trigger of the high-pressure pistol.
- Press the trigger of the high-pressure pistol.
The device switches on.
Eknpnyataia 3 MnHm 3ac06om
△HEBE3NEKA
Hedompumannnnapnpma6e3neku
Serious injury or death through incorrect use of the product.
Follow the manufacturer's safety instructions, especially the instructions for personal protective equipment.
Insert
For use with the product, a container with the product Plug'n'Clean is required. KARCHER products can be purchased ready for use in a special container of the Plug'n'Clean system.
Insert
The product may only be used with low pressure.
- Insert the container with the product into the Plug'n'Clean system.
- Insert the container with the product opening downwards into the Plug'n'Clean system's product supply.
Operation
Recommended method of application
- Spray the product evenly onto a dry surface and allow to act for a short time (do not rub).
- Rinse off the film with a water jet at high pressure.
a Jet tube with dirt trap: nozzle down. b Jet tube Vario Power: nozzle up.
Follow the operating instructions before commissioning, maintenance and servicing.
Frost protection
CAUTION
Danger of freezing
If the appliance is not drained, it may be damaged by frost.
Drain the appliance completely and store it properly.
Protect the appliance from frost.
The following conditions must be met:
- Disconnect the appliance from the water supply. Disconnect the high-pressure hose from the high-pressure gun.
- Switch the appliance to "I/ON".
- Wait no more than 1 minute until water stops emerging from the high-pressure gun.
- Switch off the device.
- Store the device with accessories in a closed room protected from frost.
Maintenance and technical service
SAFETY
Danger of electric shock
Immediately after switching off the device, the parts that conduct current are still under voltage.
Switch off the device.
Pull out the mains plug.
The device does not require technical maintenance, i.e. regular technical maintenance is not necessary.
Connecting the strainer to the water supply pipe
WARNING
Danger of damage!
Damage to the strainer due to incorrect connection.
Connect the strainer only under running water against the direction of flow and flow. Do not use sharp or hard objects such as knives or screwdrivers.
WARNING
Safety instructions!
Connect the device to the mains only via a properly installed socket with a protective earth conductor or via a socket with a protective earth conductor.
Check the protective earth conductor for damage before inserting it into the water supply pipe. Replace damaged protective earth conductors immediately.
Do not operate the device without a protective earth conductor.
If necessary, clean the filter system in the water supply pipe.
- Unscrew the union nut on the water supply pipe.
- Remove the filter system. See figure K
- Rinse the filter system under running water.
- Insert the filter system into the water supply pipe.
Troubleshooting
Malfunctions often have a simple cause that can be eliminated independently with the help of the instructions
listed below. If in doubt or in the event of unspecified malfunctions, contact an authorized service center.
SAFETY
Danger to life!
Live parts can cause electric shock if touched. Do not touch live parts. Disconnect the device. Pull the mains plug out of the socket.
PnncpiHne npauoc
- Hatncchytn Baxijb BnCOKOHanipHOro nictoneTa. PnucpiB BMKAeTbcra.
- Ipepeipntu BiinobiHictb Hanpytn, 3a3haeHoHa 3aBocbki Ta6nui, Hanpy3i Dxepena KINBneHHra.
- NpebipntmepexeBnKa6bHa noIkoJKeHHa
4. If the engine is overheated and the fuse has blown, turn the switch to "0/OFF".
b) Wait for the device to cool down for 1 hour. c) Turn the switch to "I/ON" and restart the work.
If the fuse blows several times, check the device at a service center.
The device does not start, the lamp is on
Check the power supply for weak electrical interference or when using an extension cord.
1. When turning on, first press the high-pressure button, then turn the switch to "I/ON".
No pressure is created in the device
Weak water supply.
1. Check the water supply hose for damage. 2. Check that the water pressure is sufficient. 3. Check the connection of the spray hose. 4. Check that the maximum suction height has not been exceeded.
Remove the filter from the water supply hose.
Clogged.
- Remove the filter from the hose by pulling it out flat.
- Rinse the filter under running water. Then insert it back.
In the device there is a filter.
- Remove the filter from the device:
a) Turn off the device without disconnecting the spray hose for no more than 2 minutes. b) Press the high-pressure nozzle and wait until water comes out without any filter. c) Connect the spray hose.
Check the pressure.
- Clean the high-pressure nozzle: a) Remove any blockage from the nozzle opening. b) Rinse the high-pressure nozzle with water from the inside.
- Check the water volume that is supplied.
Leakage.
- Minor leakage of the device is due to technical features. In case of severe leakage, contact an authorized service center.
The device is not being used.
- Use the spray hose with Vario Power and turn it to the «MIX» position.
2. Check that the container is filled with a minimum of 3 mm of Plug'n'Clean detergent via the suction hose.
Warranty
The warranty terms established by our authorized dealer apply to this product. We will repair possible malfunctions of the device free of charge during the warranty period, provided that the malfunction is caused by material defects or manufacturing defects. In the event of a claim during the warranty period, please contact the dealer from whom you purchased the product or the nearest authorized customer service center. (Addresses on the back) You can find more information about the warranty (if applicable) in the customer service area of the Kärcher website under "Downloads".
Technical specifications
Product: High-pressure washer
Type: 1.317-xxx
Applicable EC directives
2006/42/EG (+2009/127/EG)
2014/30/EC
2011/65/EC
2000/14/EG
2009/125/EC
Applied regulation(s)
(EC) 2019/1781
Applied harmonized standards
EN 60335-1
EN 60335-2-79
EN 62233: 2008
EN 55014-1:2017 + A11:2020
EN 55014-2: 1997 + A1: 2001 + A2: 2008
EN 61000-3-2: 2014
EN 61000-3-11:2000
EN IEC 63000:2018
Conformity assessment method
2000/14/EC: Annex V
Measured sound power level, L(A)
Measured: 93
Guaranteed: 96
Person authorized to sign on behalf of and with the authority of the management.
H. Jenner
Chairman of the Board of Management
S. Reiser
Manager Regulatory Affairs & Certification
Responsible for document release:
S. Reiser
Alfred Kärcher SE & Co. KG
Alfred-Karcher-Str. 28 - 40
71364 Winnenden (Germany)
Tel.: +49 7195 14-0
Fax: +49 7195 14-2212
Place, date: Winnenden, 01.10.2022
Table of contents
1. Introduction
2. Safety instructions
3. Technical data
Kepek-kaapak khe kocankby beuekter 137
Xekizinim xnhabbl 137
KypbInfbHbH cnNaTTamacbl 137
KopraHbic kypaJ-ka6dbikTapbl 137
KypbInfbdaft6enrinep 138
OpHaTy 138
PaindaNaHyra 6epy 138
PaindanaHy. 138
TacbImaJdav 139
CaKtay. 139
Kytim XaHe TexHkaJIbIK KbI3MeT KepceTy 140
Akaynap Ke3iHderi KEmek. 140
Keninik. 140
TexHnKaJIbIK CUNaTTaMaJapbl 141
EO cTaHapTTapbHa cAKeCTiri TpaJIbI deKnapaUra 141
XaJIbI HycKaynap

KpybIINbHbI anfaw pet kondaH6ac 6pybH,ocbl naDanaHy XeHiNderi TynHcKa HcyckayIbIK neh 6epinre
Kayincizik KeHHderi Hcckaynapbl Okbin IbfbIbI3.
Onapra caa apekeT etiH3.
Eki kitanshaHbI da api kappaa naDanaHy hemece keNeci neci yuih caKtan KOyblHbI3.
KopwaFAH opTaHbI Kopray

OpaybI MATEPnAnIapBHy Tynl3aunlayfa 60naIb. OpaybIurpIbI KOpwaH optara Kayinci3 Typne yTynl3aunnaHbI3.

3NeKtpIik XHe 3NeKtpOHHbIK 6YbIMdapDbIH KypamblHa KaTe KOJIaHy HeMece yTINn3aunraJlay HtINXkeiHde aadam DeHCaylbIbHa XHe KopUaHaN opTaFakayin
TeHdipy bIKTmAn, KyHb KaTaN eHdIeMNI MaTePnAIIap XHe 6aTapeJnap, AkKMyJIaTOpnap Hemece MaN CnAKTbI 6eIWeKTEp KNI Ke3deCeI. AaJa, aTaJIMbIi 6eIWeKTEp 6yIbIMDb TnicIHwe naIdaIaHny yIiH KAKET 6oNaDb. Ocbl TaHbAmEH 6eJIrIeHReH KpyBfJbnapDbI yI KOkbiCTapbImeH 6ipre Tactayfa 6oMaIdbI.
Ta3apTy Ke3iHne KypambHda MaBb6ap aKnacynap TybIHdAaTbIH KymMbICTapdbI (MbICaNbl, KO3FaNTKbIHTapbIH, TynTePiH Kyy) MaNbI aBbIpIbIbIb6ap Kyy anaHapbIHda rHa Kypri3yre pyKcat 6epinei.
KyfbIu KypaIapMeH KyMbICTapdbI Kepi3re 6ypbIaNtBnH repMeTnKaIbIK KyMbIC aHaIapbIHda rHa Kypri3yre pyKcat bepinei. KYfbIu KypaIapDbI cy KoMaJAPbHa Hemece Xepre TeKnHei3.
KeinepenepeKoFamdbk cy KOnMaIapbIH cy anyFa TbBIM caNbHaDbI.
KypamdaftbI3aTap6oBbHuaHyckaynap (REACH)
BmybIMhBiH KpyamblHaIaftbI3aTtapTypaIbCoHfblMmimETTepdiMbHaMeKeHka6oBuHwa Tabyfa60ana:www.kaercher.de/REACH
БуиьIMды MaKcaTbIHa cэйКec KОДаHy
The device is intended for cleaning hard surfaces, walls, terraces, and garden furniture with a high-pressure water jet.
Required and included accessories
Only use the required or included accessories. Otherwise, the device may be damaged and its safe operation cannot be guaranteed.
The required and included accessories are listed on the device's type plate and on the website www.kaercher.com.
Safety instructions
The safety instructions are shown on the device's type plate. Follow the safety instructions and warnings during operation. If the required accessories are missing or if the device is damaged, contact your dealer.
Device description
The maximum scope of delivery is shown on the packaging. Deviations are possible in the scope of delivery (see enclosed documentation).
See the illustrations on the fold-out pages.
① Trigger gun ② High-pressure hose ③ Hose coupling ④ Water connection with filter ⑤ ON/OFF switch ⑥ Detergent suction hose ⑦ High-pressure nozzle ⑧ Plug'n'Clean detergent bottle ⑨ High-pressure hose storage / holder ⑩ Storage for spray lance ⑪ Brush nozzle for stubborn dirt ⑫ Vario Power spray lance for common cleaning tasks
The high-pressure jet can be adjusted from "SOFT" to "HARD". To change the high-pressure jet, turn the spray lance to the desired setting. The SOFT setting is suitable for delicate surfaces, while the HARD setting is for stubborn dirt.
14 High-pressure nozzle 15 High-pressure hose storage 16 High-pressure hose holder 17 Spray lance storage 18 ON/OFF switch 19 High-pressure hose connection 20 Handle for hose storage 21 Trigger gun 22 Water connection 23 Spray lance for stubborn dirt 24 Storage for accessories 25 Extension hose with quick coupling 26 Water connection adapter 27 ** Water filter (replaceable, diameter - min. 1/2 inch (13 mm), length - min. 7.5 m, standard water connection) 28 * KARCHER spray lance for water extraction (order no. 2.643-100)
** Optional accessory
Safety devices
DANGER
Cable television signal splitters
The splitter is designed to connect one input cable to two outputs.
Automatic tube function
When the cable television signal is weak, the built-in amplifier automatically boosts it and stops when the signal is strong. The signal is split after amplification.
Safety precautions
Before connecting, read the safety precautions carefully.
Installation
Keep the cable television device away from heat sources, open flames, and electrical appliances that generate heat, and do not cover the device. Protect the device from moisture.

Do not expose the device to dripping or splashing water.
Operation
Connect the cables as shown in the figures.
Do not attempt to repair the device yourself; contact a qualified technician.
Do not use abrasive or corrosive cleaners; wipe with a dry cloth.
Accessories included
- Connect the cables to the appropriate connectors. The device
Connect the wires according to the wiring diagram.
- Connect the cube-shaped socket, insert the cube into the socket. Figure D
Install the coupling intended for the water outlet.
- Insert the coupling intended for the water outlet into the socket intended for the water outlet. Figure E
Draining
- Install the device in its proper place.
- Connect the cube-shaped plug to the socket.
- Connect the cube-shaped plug to the socket, then secure it with screws.
- Connect the cube-shaped plug to the socket, then secure it with screws.
Instruction
During operation, keep the device away from water.
Figure F
- Connect the cube-shaped plug, then tighten the screws.
- Insert the plug into the socket.
Instruction
Use only original spare parts and accessories from the manufacturer (technical spare parts and accessories). If you do not use original spare parts, the warranty will be void.
Water supply
Do not operate the device if the water supply hose is damaged.
Do not kink or crush the water supply hose.
CAUTION
Water inlet filter
The water inlet filter must be checked and cleaned regularly.
For KARCHER protection, use the KARCHER water filter (optional accessory, order no. 4.730-059).
Connecting the water supply
CAUTION
Risk of damage!
When connecting the water supply, the Aquastop-NE connector must be tightened securely.
Connect the water supply hose with the Aquastop-NE connector.
Only connect the Aquastop-NE connector to the water tap.
- Place the drain hose properly in the drain. See figure G.
- The Kuban River with a cube-shaped bend.
- The cube and its mind are only that much.
Language from the beginning of the word analysis
This device is intended for spraying water with the KARCHER cube, for cleaning, washing, and rinsing surfaces with water (see the maximum technical specifications).
- Do not use the device without water.
- Do not operate the pump with water.
- Do not use the device for spraying liquids other than water, and do not use it for water that is not clean (e.g., water containing sand).
Dry the device after use.
- Turn off the device (I/ON).
- Do not use the device without a filter.
- Do not use the device without a filter. Turn off the device.
- Do not run the device without water for more than 2 minutes.
- Do not use the device without a filter.
- Do not use the device without a filter.
Paindanahy
HAZARD WARNING
Close the lid!
Close the lid when the device is not in use.
If the device does not fit in the bag, remove it.
During operation, follow the instructions for use.
HIGH VOLTAGE - DO NOT TOUCH
HAZARD WARNING
Do not open the device while it is connected to the power supply.
Do not open the device if it is damaged or if there are signs of malfunction.
Keep a distance of at least 30 cm from the device during operation.
Do not touch the device with wet hands or while standing in water.
- Place the device on a flat surface and secure it at a 90-degree angle. See figure
- Power switch (ON/OFF)
- Turn the device off before cleaning.
- KorapbI tereepinHnntoTtH teTirHe 6acblb3. KypblFbKocblJaB1.
Ta3aay kypanapbImeH naandaHa
△KAYIN
Texhukanbik meNkKammbi caKmMay
Kyfbiw Kypandaipo muicihue naudana6arah Kaadaa deHcaynbikka aybip 3akim Keenei.
Kyfbw KypandobH eHdpuyuici KyparaH mexHukanbik mknkxammbl, Kebihece Xeke KopraHbc KypandaBb 6ouhwa Hyckaynapdbi kappaHb3.
Hycay
Kyfbu Kypandapmen Kymbc ic mey yuih Plug n'Clean aphaubblbcbmaman eminei. KARCHER Kyfbu Kypandapbl Plug n' Clean bIdbicmapbHda kondahyra daubn KyuiHde cambnaabbl.
Hycay
Kyfbiu Kypanbmek memeH2i KbicbIM Ke3iHde apanacmbipyra bona.
- Plug 'n' Clean Kyfbu KypaIbHa apHaIraH bIbIcTbIH KaKnaBbI aIbIN TaCTaHbI3.
- Plug'n'Clean kYfblu KpaJIbHa apHaJIraH KaIraBliKa caHbIaaybIH TeMeH KapaTbIn, kYfblU KpaIra apHaIraH bIDbcTb KbcBn Xa6blHbI3. Cypert I
- Vario Power TeTirin naJaIaHbIbI3.
- TeTikTi «SOFT» KyniHe tipenreHne 6ypaHbI3. Kymbc 6apbcbHa Jkyfblu KypaJbH epitHici cy aRbICbHa apanaactbiplaDbI.
- Remove the cap and pour the liquid into the container (centrifuge).
- Do not touch the heating element while it is hot.
After using the device with the cap
- Rinse the cap with clean water for 30 seconds.
Stopping the device
- Turn the heating element to the OFF position. After turning it off, the device will cool down. Do not touch the heating element until it has cooled.
- Turn the heating element to the OFF position. Figure J
- Place the cap intended for storing the heating element in its proper position.
- After use, if the device will not be used for more than 5 minutes, turn off the device (0/OFF).
Cleaning the device
WARNING
Danger of burns!
After use, allow the device to cool before cleaning. Do not immerse the heating element in water; wipe it with a damp cloth.
- Turn the heating element to the OFF position.
- Switch off the device.
- After turning on the device, wait 30 seconds before using the tube. If the device does not turn on,
- After turning on the device, wait for the tube to heat up.
- After turning on the device, wait for the tube to warm up.
- Turn off the device (ON/OFF).
- Turn off the device by pressing the button.
- Unplug from the power outlet.
Cleaning
WARNING
Before cleaning, make sure the device is turned off and unplugged!
Do not immerse in water or any other liquid.
After cleaning and drying, store the device in a safe place.
Troubleshooting
- Check if the tube is properly inserted.
- Check the cleaning brush for the device.
Sharpening tools
- Sharpening tool kit contents.
When driving a car
- During driving, the Plug'n'Clean sharpening tool must be stored in the glove compartment and covered with the cap.
- Sharpening is not permitted while driving or when the engine is running.
Caution
WARNING
Do not start the engine or close the hood while the sharpening tool is in the engine compartment!
Do not close the hood.
After sharpening and before driving, remove the sharpening tool from the engine compartment.
Sharpening tool maintenance
Help in case of breakdown
If the vehicle breaks down, the hazard warning lights should be switched on and the vehicle should be secured with a warning triangle. If you have a flat tire or other breakdown, contact the nearest service center.
Caution
Emergency!
The current leakage current must not exceed the values specified by the manufacturer.
The current leakage current must not exceed the specified values.
Turn off the device.
Do not touch the device with wet hands.
Device protection system
- Press the power button to turn on. The device will turn on.
- In the formal declaration, the necessary checks and adjustments must be performed by qualified personnel.
- Close the protective covers.
- If the device is not used for a long time, its protection system automatically activates: turn off the device ("0/OFF").
b) Press the device switch to "I/ON" and start it again.
If the device malfunctions, it must be serviced by qualified personnel.
KypbIbI icke KocbnMaIdbI, Ko3rAnTkbIw ryinDen Typ
Onci3XeJIHHcepiHHeMeCe Y3apTyu Ka6JIbI naDanaHydbIH OcepHKePHeyDiKyJaybl.
- KocatbH Ke3e aIdbImeH XorapbTereypiHINCTOJIeTTI 6acbHb3, aI cOaH KeiH KpybJfBihbKocbHb3 (I/ON').
KypbIINfbl KbcBIM TydbIpMaadbl
Cy kTeKi3y kTeKJnikci3.
- Cy Ky6bipyHbH WyMErH ToIbIKTaI aWbHb3.
- Xekkinikti cy meneepi 6epinin kaTbip Ma, xok na, TeKcepiH3.
- LlymektiH petTeiImiHTekcepij3.
- Makcimamabicopy 6nikiri acbIN KeTkeH xok na, Tekcepi3.
Cyjekiyre apHaHaH XaHaFbIUtTaBf IeNk NaCTaHDbI.
- Cy kTeKiyre apHaJraH XaIraFbIuTah eneKTI KEMnipayb3dbH KEMerImeH WbIrapbHb3.
- EneKti cy afbicbHbH actbHda xybIn anbHbI3. Cypert K
KypbIflbldaflblya.
- KypblrblHbI XeJdTeiH3:
a KypblfblHbXkAnFaHraH WymeKci3 MaKcMym 2 MNHYKa KOCblHbI3. b Kofapbi Tereypihdi nctoletti 6acblb3 kHe cy kenipwikci3 wblknafahwa kyTih3. cUyMeKti KocbiHb3.
- Before servicing, disconnect the appliance from the power supply.
b. Before servicing, unplug the appliance.
- Check the water supply and the filter.
Cleaning the appliance
- The cleaning procedure is described in the operating instructions, step 3. Use only the service kit authorized by the manufacturer for cleaning.
Cleaning the filter
- Turn the Vario Power nozzle and remove it from the "MIX" position.
- Turn the appliance upside down, with the Plug'n' Clean opening facing down, in the section for the cleaning agent.
Filter
The filter and the accessories supplied with the appliance must be cleaned regularly. If the material is damaged or the accessories are worn, replace them. If the filter is damaged, contact the after-sales service or
contact the service department without delay.
(see spare parts)
For questions about the filter, please refer to the service information on the Karcher website under "Service".
Date format: MM/YYYY. MM is the month, YYYY is the year.
- Wbifapblfah Xblbl HeMece KOrTaIfah Tpyde.
Keke caHapbIH MaBHaCb KeIeciJe 6oJaBb: Mbicab:30290
3 Θндірінгін XVIIbIbI 0 ΘnipinreH facbipbl 2 ΘHπiπIeH OHNbIbI 9 ΘHidipinreh aibihbEkiHsi cahi 0 ΘHπiπreH aIbIbH bipHsi caHbI CoHbImeH 6yI MbIcAJa 30290 KoIbI 09/(2)023 eHπiπreH KyHIn 6ilipeJI.
Technical specifications
Applicable standards
(EU) 2019/1781
KoandaHbInaTbIn 6ipi3deHdpinre H cTahdapTTap
EN 60335-1
EN 60335-2-79
EN 62233: 2008
EN 55014-1:2017 + A11:2020
EN 55014-2: 1997 + A1: 2001 + A2: 2008
EN 61000-3-2: 2014
EN 61000-3-11:2000
EN IEC 63000:2018
2000/14/EC:V referred to
Measured sound power level dB(A)
Uncertainty: 93
Guaranteed sound power level: 96
The product complies with the requirements of the applicable EU directives and the corresponding conformity assessment procedures.
H. Jenner
Chairman of the Board of Management
S. Reiser
Manager Regulatory Affairs & Certification
Authorized documentation representative:
C. Reiner
Alfred Kärcher SE & Co. KG
Alfred-Karcher-Str. 28 - 40
71364 Winnenden (Germany)
Tel.: +49 7195 14-0
Fax: +49 7195 14-2212
Winnenden, 2022/10/01
Safety instructions 142
Protection of the environment 142
Intended use 142
Accessories and spare parts 142
Scope of delivery 142
Description of the device 142
Device setup 143
Symbols on the device 143
Installation 143
Start-up 143
Operation 144
Transport 145
Storage 145
Adjustment and repair 145
Help in case of damage 146
Warranty 146
Technical data 146
EC Declaration of Conformity 147
General information


Read the first edition of the product instructions for use carefully before operating the device.
Follow the safety instructions.
Keep them for future reference.
Store these instructions for later use or for the next owner.
Environmental protection

Packaging materials are subject to recycling. Please dispose of packaging according to local environmental regulations. Electrical and electronic devices are collected as materials subject to recycling, and sometimes components such as batteries, accumulators, or oil,
which, if handled or disposed of incorrectly, can pose a risk to health and the environment. For proper operation of the device, all these components are necessary. Devices marked with this symbol must not be disposed of together with household waste.
WARNING: Do not use the device if the oil level is low, e.g. due to leaks. Oil changes must only be performed at oil change points.
Work with cleaning agents must only be carried out on impermeable working surfaces with a connection to the sewer system for waste water. Do not allow cleaning agents to enter water basins or the ground.

In some countries, taking water from public water basins is not permitted.
Information on ingredients (REACH) Current information on ingredients can be found at: www.kaercher.de/REACH
Intended use
Use the high-pressure cleaner only in private households.
The high-pressure cleaner is intended for cleaning machines,
vehicles, building structures, tools, facades, terraces, garden equipment, etc. with a high-pressure water jet.
Accessories and spare parts
Use only original accessories and original spare parts. They ensure the safe and trouble-free operation of the device.
Information on accessories and spare parts can be found at: www.kaercher.com.
Scope of delivery
The scope of delivery of the device is shown on the packaging. When unpacking, check the contents for completeness. In case of missing accessories or transport damage, please contact your dealer.
Description of the device
These operating instructions describe the maximum equipment. There are differences in the delivery scope depending on the model (see packaging). See the illustrations and the text with graphics.
1 Handle for carrying 2 Water connection with integrated hose guide 3 High-pressure hose 4 Marking 5 Switch "0/OFF"/"I/ON" 6 Storage compartment for accessories 7 Marking for high-pressure operation 8 Nozzle for applying Plug n' Clean 9 Storage compartment / parking position for high-pressure lance 10 Handle for transport, with pull-out option 11 Spray lance with rotary nozzle for stubborn dirt 12 Spray lance Vario Power for the most common cleaning tasks. Working pressure can be increased continuously from SOFT to HARD. To adjust the working pressure, press the trigger on the spray lance and turn the lance to the desired pressure setting. If the spray lance is turned fully to SOFT, detergent can be added. 13 High-pressure lance 14 Button to release the high-pressure lance from the high-pressure gun 15 High-pressure gun 16 High-pressure gun lock
17 Handle for carrying 18 Nozzle for marking 19 Drum for marking for high-pressure operation 20 Drum for marking 21 Type plate 22 Fastening clip 23 Hook for fastening the cable 24 Cable for fastening clip 25 Cable holder with cable 26 Water outlet connector 27 Marking (reinforced, minimum diameter 1/2" (13 mm), minimum length 7.5 m, with connection to the water supply network) 28 *Suction hose KARCHER for water supply from open reservoirs (order no. 2.643-100)
- Subject to change without notice
Safety devices
△DANGER
Danger of injury!
Serious injuries may occur if safety devices are modified, bypassed, or neglected.
Do not bypass or disable safety devices and do not remove them. Safety devices serve for your protection.
Safety device
The safety device prevents unintentional starting of the device.
Switching off the device
- Switch the device to "I/ON".
- Lock the high-pressure gun.
- Press the trigger of the high-pressure gun. The device switches on.
- Let the device run for max. 2 minutes until water exits without bubbles from the high-pressure gun.
- This pistol is intended for work under high pressure. 6. Lock the pistol's handle for work under high pressure.
Operation
WARNING
Danger of injury!
Never operate the tool when dry. Switch off the device if you do not find the pressure within 2 minutes.
Proceed according to the instructions in Chapter "Help with malfunctions".
Working with high pressure
WARNING
Damage to painted or delicate surfaces
Surfaces can be damaged if the jet is held too close or if an unsuitable nozzle is selected for spraying.
When cleaning painted surfaces, keep a minimum distance of 30 cm from the jet.
Do not clean car tires, nails, or delicate surfaces such as wood with the jet for tightening.
- Insert the spray nozzle into the high-pressure pistol and secure it by turning it 90°.
- Switch on the device ("I/ON").
- Unlock the handle of the high-pressure pistol.
- The device is designed for high-pressure cleaning. The detergent is included.
Working with detergents
DANGER
Unreadable information sheet for safety
Serious health hazards due to incorrect use of the detergent
Keep the safety information sheet provided by the manufacturer of the detergents, especially the instructions for personal protective equipment.
Note
For working with detergents, the Plug 'n' Clean detergent bottle is required. KARCHER detergents can be purchased ready for use with the Plug 'n' Clean detergent bottle.
Note
Detergent can only be added at low pressure.
- Remove the cap of the Plug 'n' Clean detergent bottle.
- Press the detergent bottle with the opening into the detergent connection of the Plug 'n' Clean. Turn
- Adjust the Vario Power spray lance.
- Turn the spray lance to the "SOFT" position. During operation, the detergent solution mixes with the water jet.
Recommended method for cleaning
- Apply the preparation to the dry surface and allow it to act (do not rinse).
- Rub the dissolved foam with a brush under high pressure.
Working with the preparation
- Apply the product. Wait 30 seconds, then rinse with water.
Stopping work
- Release the trigger of the spray gun for high-pressure work. The pressure is released, the product is expelled. The high pressure in the system is maintained. 2. Lock the trigger of the spray gun for high-pressure work. Figure
- Place the spray gun for high-pressure work with the required nozzle in the parking position.
- When stopping work for more than 5 minutes, turn off the device with the "ON/OFF" switch.
Starting work
DANGER
Risk of injury!
The spray jet can cause uncontrolled escape of water under high pressure.
Remove the high-pressure work nozzle from the high-pressure work gun or from the device only if the system has pressure.
- Release the trigger of the spray gun for high-pressure work.
- Close the water tap.
- Set the device to high pressure for 30 seconds. The pressure in the system is released.
- Release the trigger for high pressure operation. 5. Lock the trigger for high pressure operation. 6. Turn the switch to "0/OFF".
- Disconnect the device from the water supply. 8. Remove the detergent siphon hose.
Transport
CAUTION
Risk of injury or damage due to improper transport of the device!
Injury and damage.
When transporting and storing, observe the weight of the device.
Carrying the device
1. Remove the carrying handle for transport until it locks into place. 2. Carry the device by the handle for transport.
Carrying the device
- Lift the device by the handle for carrying and carry it.
Transporting the device in a vehicle
- Before transporting in a vehicle, remove the detergent bottle from the opening and close it with the cap. 2. Secure the device against slipping and tipping over.
Storage
Danger of injury and damage to the device before and during work!
Injury hazard.
When transporting and storing, observe the device's instructions.
Storing the device
- Place the device on a flat surface.
- Remove the plug for the high-voltage work socket.
- First remove the separating cap from the high-voltage work socket and detach the high-voltage work socket marking from the high-voltage work socket.
- Without marking pen: Attach the high-voltage work marking to the device.
ATTENTION
The high-voltage work marking is damaged.
The high-voltage work marking is damaged because the direction of the arrow is incorrect. When attaching, observe the direction of the arrow on the marking drum.
- With marking pen: With the handle, turn the marking drum counterclockwise to the arrow on the high-voltage work marking.
- Attach the marking pen to the device's accessories.
- Place the two plugs for the high-voltage work socket in the storage location for the high-voltage work socket plugs.
The device must be grounded before filling: Fill the Vario Power device: Fill the device
Before prolonged storage, pay special attention to the instructions in Chapter 1, Care and Maintenance.
Protection against freezing
WARNING
Danger of freezing
Improper use of the device may result in damage from freezing. Use the device and accessories properly. Protect the device from freezing. The following conditions must be met:
- The device is disconnected from the water supply.
- The device for working under high pressure is marked with a symbol for working under high pressure.
- Turn on the device "ON". 2. Wait at least 1 minute until the symbol for working under high pressure disappears.
- Turn off the device.
- Store the device and all accessories in a room protected from freezing.
Care and maintenance
DANGER
Instructions for checking the device before use.
Damage to the device.
Selecting the target.
The device does not require maintenance, i.e., you do not need to perform periodic maintenance work.
Cleaning the filter in the water outlet
WARNING
Risk of injury!
Follow the instructions for correct cleaning.
Clean the filter only with clean water against the direction of flow.
Do not use sharp or hard objects, e.g., knives or metal brushes.
WARNING
Risk of injury!
Damage to the device and accessories when working without a filter or with a damaged filter.
Before placing the filter in the water outlet, check for damage. Replace the filter cartridge immediately.
Remove the device from the socket.
Check the hose for water leaks if necessary.
- Disconnect the hose from the water connection. 2. Remove the filter. Figure K 3. Clean the filter under running water.
- Place the filter back into the water connection.
Help with malfunctions
Many malfunctions that occur are elementary and can be fixed by yourself with the help of the instructions given. If you have not succeeded or the malfunctions are not described here, contact the authorized service.
DANGER
Danger to life!
Electric shock hazard due to moisture contact with live parts. Do not touch live parts.
Disconnect the device.
Avoid contact with water.
Device does not work
- Press the button on the device for high pressure operation. The device switches on.
- Check that the voltage on the type plate matches the voltage of the power source.
- Check the power supply cable for damage.
- If the device is switched on and the protection is activated:
a. Switch off using "0/OFF". b. Leave it off to cool down for 1 hour. c. Switch on using "I/ON" and press it again for operation.
If the fault occurs repeatedly, contact the service department for a check.
The device has tripped, the motor is humming.
Voltage drop due to weak electrical supply or when using an extension cable.
- When switching on for the first time, press the reset button for high lift, then switch on the device "I/ON".
The device does not reach the lift height.
The water supply is too weak.
- Open the water tap fully.
- Check the water supply for sufficient pressure.
- Check the setting for the pressure switch.
- Check if the maximum suction height has been exceeded.
The suction hose is blocked.
1. Remove the suction strainer with flat pliers. 2. Clean the strainer under running water. Figure K
The device has air in it.
- BeHTnJInpaIte ypeJa:
a BkHIOUe Te ypea 6e3 Cbbp3aHa Tpb6a 3a pa3npbckBaHe 3a MaKcImaJIHo 2 MmHyTu. b HaTnCHeTe nCToIeta 3a pa6oTa noB BnCOKo HnAraHe nN3uKaaiTe, DOKaTO BOaTa 3aNoUHe
da n3Tnua 6e3 Mexypyeta OT NnctOneta 3a pa60ta noBnCOKo HnIrahe.
CcbpxKeTe Tpb6ata 3a pa3npbckBaHe.
CnHn Kone6aHa Ha HanaHeTo
Chairman of the Board of Management
S. Reiser
Manager Regulatory Affairs & Certification
Пьномошник NOДOKум entaunraTа:
S. Reiser
Alfred Karcher SE & Co. KG
Alfred-Karcher-Str. 28 - 40
71364 Winnenden (Germany)
Ten.: +49 7195 14-0
aKc: +49719514-2212
Power
Premium K7
Flex
Power
Flex
aJb
| 230 | 230 | V | a |
| 1 | 1 | ~ | all |
| 50 | 50 | Hz | J |
| 0,394 | 0,394 | Ω | ag |
| j0,246+ | j0,246+ | g | |
| 3,0 | 3,0 | kW | d |
| IPX5IPX5 | g | ||
| I | I | a | |
| 16 | 16 | A | a |
| olal all | |||
| 1,2 | 1,2 | MPa | (ul) |
| 60 | 60 | C° | (II) |
| 12 | 12 | l/min | (d) |
| 0,5 | 0,5 | m | (ul) |
| Jall | |||
| 15 | 15 | MPa | J |
| 18 | 18 | MPa | all |
| 9,2 | 9,2 | l/min | all |
| 10 | 10 | l/min | all |
| 0,3 | 0,3 | l/min | all |
| 27 | 27 | N | all |
| Jall | |||
| 19,0 | 19,4 | kg | all |
| 458 | 459 | mm | all |
| 330 | 330 | mm | all |
| 669 | 669 | mm | all |
| EN 60335-2-79 | |||
| 2,5> | 2,5> | m/s2 | all |
| 0,6 | 0,6 | m/s2 | all |
| 80 | 80 | dB(A) | LpA all |
| 3 | 3 | dB(A) | pA all |
| 96 | 96 | dB(A) | LWA all |
a 1y
Jbclg>Jl>ddclmall
gale dai kai abu w uul Uk>Ung K JIJI g 1uU> fuiu plal jorjll aieuwUl ablu
clll l a 1111111111111111111
.oo
( 2) A B
104
11/ jua/sic ailgdoia/ jzll /aay dao 1
a/b/9 c>ae/1g//
. a.b.l9 c> a.e.g./11 c/> U|muab U
jgljllc.
a/100 100
J aJ b,| J a + J b| = | X - Y|
JU 1200
- JJ
- go jolbal
3.
- a < 0 > 2a
J
a"jLJI;ab01
b.3j>1g acl
c"JgJd
∴ α = y/x
- "OFF/0" j
- 8.
"I/ON" jJJI J
2.
3.
5.
6.
4
Therefore, cos α = BP/PC = sqrt(3/5)
4
.
a p 2a( a 1 + ap)
.2
42 A
Plug n' Clean.
KARCHER 100
Plug n' Clean aBll sgo a>J j pIwWl oJt
Plug'n'Clean aabll algo >j cbc 1
Plug n Clean
∴ pa + 1 xp - yp.
a>la! oogD
olal al aLg ayalal l 1
- all
jglj
a>la oogE
J
(059-4.730 111/11 a111111) KARCHER
4
Therefore, y = -(x - 2)^2 + 3 = -x^2 + 6x + 5
a1 > a2 > a3 > a4 < a5 > a6 > a7 > a8 > ...
J 30/otol2g, Aquastop
jIe//olaoalog, Aquastop jgego gboj aJllo
.04o uu2u U / Aquastop jge> go ggbj i jb pui U
- ω_d = ω_d
11
Olaall Vagol Vario Power wll J "SOFT" a 10000000000000000000000000000000000000000000000000000000000000000000000000000000000000000
12
Jlll Jai jll ③
Jell biaill wss no Jll baiaill gbs Jaa Jll biaill wss
14
JaJaa ①7
ogb jol ⑧
20
23
The minimum value of ai is k.
3
23
24
25
26
28
12
REACH( www.kaercher.de/REACH
Register your product and benefit from many advantages.
www.kaercher.com/welcome


Rate your product and tell us your opinion.
www.kaercher.com/dealersearch
Alfred Kärcher SE & Co. KG
Alfred-Karcher-Str. 28-40
71364 Winnenden (Germany)
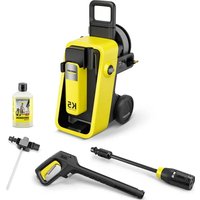

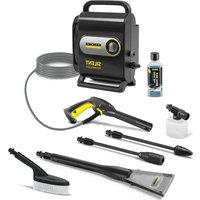
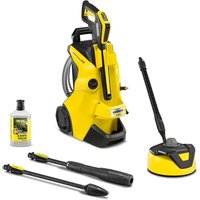
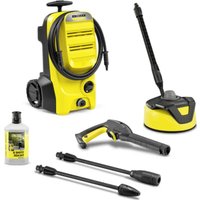
- CONTENTS
- GENERAL NOTES
- ENVIRONMENTAL PROTECTION
- NOTES ON THE CONTENT MATERIALS (REACH)
- INTENDED USE
- ACCESSORIES AND SPARE PARTS
- SCOPE OF DELIVERY
- DEVICE DESCRIPTION
- SAFETY DEVICES
- WARNING
- POWER SWITCH
- HIGH-PRESSURE GUN LOCK
- AUTO-STOP FUNCTION
- MOTOR CIRCUIT BREAKER
- SYMBOLS ON THE DEVICE
- INSTALLATION
- MOUNTING THE ACCESSORY NET
- PUSH THE HIGH-PRESSURE HOSE THROUGH THE HOSE GUIDE
- INSTALLING THE WATER CONNECTION COUPLING
- INITIAL STARTUP
- NOTE
- WATER SUPPLY
- ATTENTION
- CONNECTION TO THE WATER LINE
- SUCK WATER FROM OPEN CONTAINERS
- VENT THE DEVICE
- OPERATION
- HIGH-PRESSURE OPERATION
- ILLUSTRATION H
- OPERATION WITH DETERGENT
- △DANGER
- ILLUSTRATION I
- RECOMMENDED CLEANING METHOD
- AFTER OPERATION WITH DETERGENT
- INTERRUPTING OPERATION
- ILLUSTRATION J
- ENDING OPERATION
- CAUTION
- TRANSPORT
- PULLING DEVICE
- CARRYING THE DEVICE
- TRANSPORTING THE DEVICE IN A VEHICLE
- STORAGE
- STORING THE DEVICE
- FROST PROTECTION
- DANGER OF FROST
- CARE AND SERVICE
- DANGER OF ELECTRIC SHOCK
- CLEAN THE SIEVE IN THE WATER CONNECTION
- RISK OF DAMAGE
- ILLUSTRATION K
- TROUBLESHOOTING GUIDE
- DANGER OF DEATH
- DEVICE NOT RUNNING
- THE DEVICE DOES NOT START UP, THE MOTOR BUZZES
- DEVICE DOES NOT REACH REQUIRED PRESSURE
- THE SIEVE IN THE WATER CONNECTION IS DIRTY
- STRONG PRESSURE FLUCTUATIONS
- DEVICE LEAKING
- DETERGENT IS NOT SUCKED IN
- WARRANTY
- EU DECLARATION OF CONFORMITY
- CURRENTLY APPLICABLE EU DIRECTIVES
- COMMISSION REGULATION(S)
- HARMONISED STANDARDS USED
- APPLIED CONFORMITY EVALUATION METHOD
- SOUND POWER LEVEL DB(A)
- INDICES
- INDEX
- TABLE OF CONTENTS
- APPLIED DIRECTIVE(S)
- APPLIED HARMONIZED STANDARDS
- APPLICABLE REGULATION(S)
- RELEVANT EU DIRECTIVES
- REGULATION(S) USED
- HARMONISED STANDARDS APPLIED
- APPLIED PROVISION(S)
- GENERAL SAFETY INSTRUCTIONS
- INFORMATION ON SUBSTANCES (REACH)
- GENERAL INFORMATION
- PACKAGING MATERIALS ARE RECYCLABLE. DISPOSE OF PACKAGING WITHOUT HARMING THE ENVIRONMENT
- SPARE PARTS
- FIGURE G
- WATER FROM OPEN RESERVOIRS
- AIR INLET ON THE DEVICE
- WORKING WITH HIGH PRESSURE
- CLEANING PAINTED OR VARNISHED SURFACES
- OPERATION WITH CLEANING AGENTS
- DANGER
- FAILURE TO OBSERVE THE SAFETY INSTRUCTIONS
- AFTER USING THE CLEANING AGENT
- END OF OPERATION
- DANGER OF INJURY
- DEVICE ACTIVATION
- PROTECTION AGAINST FREEZING
- CARE AND TECHNICAL MAINTENANCE
- CLEANING THE MESH FILTER IN THE WATER CONNECTION PIECE
- HELP WITH MALFUNCTIONS
- DANGER TO LIFE
- THE DEVICE DOES NOT WORK
- THE DEVICE DOES NOT TURN ON, THE MOTOR HUMS
- NO PRESSURE IS CREATED IN THE DEVICE
- PRESSURE DROPS
- DETERGENT IS NOT BEING DRAWN IN
- TECHNICAL CHARACTERISTICS
- APPLICABLE DIRECTIVES EC
- SOUND POWER LEVEL L(WA)
- GENERAL INSTRUCTIONS
- NOTES ON INGREDIENTS (REACH)
- SCOPE OF DELIVERY AND SPARE PARTS
- DESCRIPTION OF THE DEVICE
- ASSEMBLY
- PULLING THE HIGH-PRESSURE HOSE THROUGH THE DIAPHRAGM
- INSTALL THE FITTING FOR WATER SUPPLY
- COMMISSIONING
- WATER CONNECTION
- CONNECTING TO THE WATER SUPPLY
- REMOVING AIR FROM THE DEVICE
- OPERATION AT HIGH PRESSURE
- CLEANING OF DAMAGED OR WORN SURFACES
- EKNPNYATAIA 3 MNHM 3AC06OM
- △HEBE3NEKA
- HEDOMPUMANNNNAPNPMA6E3NEKU
- INSERT
- RECOMMENDED METHOD OF APPLICATION
- MAINTENANCE AND TECHNICAL SERVICE
- SAFETY
- CONNECTING THE STRAINER TO THE WATER SUPPLY PIPE
- TROUBLESHOOTING
- PNNCPIHNE NPAUOC
- THE DEVICE DOES NOT START, THE LAMP IS ON
- CLOGGED
- IN THE DEVICE THERE IS A FILTER
- CHECK THE PRESSURE
- LEAKAGE
- THE DEVICE IS NOT BEING USED
- XAJIBI HYCKAYNAP
- KOPWAFAH OPTAHBI KOPRAY
- KYPAMDAFTBI3ATAP6OBBHUAHYCKAYNAP (REACH)
- БУИЬIMДЫ MAKCATBIHA CЭЙКEC KОДАHY
- REQUIRED AND INCLUDED ACCESSORIES
- SAFETY INSTRUCTIONS
- CABLE TELEVISION SIGNAL SPLITTERS
- AUTOMATIC TUBE FUNCTION
- SAFETY PRECAUTIONS
- CONNECT THE CABLES AS SHOWN IN THE FIGURES
- ACCESSORIES INCLUDED
- CONNECT THE WIRES ACCORDING TO THE WIRING DIAGRAM
- INSTALL THE COUPLING INTENDED FOR THE WATER OUTLET
- DRAINING
- INSTRUCTION
- FIGURE F
- CONNECTING THE WATER SUPPLY
- LANGUAGE FROM THE BEGINNING OF THE WORD ANALYSIS
- DRY THE DEVICE AFTER USE
- PAINDANAHY
- HAZARD WARNING
- CLOSE THE LID
- HIGH VOLTAGE - DO NOT TOUCH
- DO NOT OPEN THE DEVICE WHILE IT IS CONNECTED TO THE POWER SUPPLY
- TA3AAY KYPANAPBIMEH NAANDAHA
- △KAYIN
- HYCAY
- AFTER USING THE DEVICE WITH THE CAP
- STOPPING THE DEVICE
- CLEANING THE DEVICE
- CLEANING
- SHARPENING TOOLS
- WHEN DRIVING A CAR
- SHARPENING TOOL MAINTENANCE
- HELP IN CASE OF BREAKDOWN
- DEVICE PROTECTION SYSTEM
- KYPBIBI ICKE KOCBNMAIDBI, KO3RANTKBIW RYINDEN TYP
- KYPBIINFBL KBCBIM TYDBIPMAADBL
- CLEANING THE APPLIANCE
- CLEANING THE FILTER
- FILTER
- APPLICABLE STANDARDS
- KOANDAHBINATBIN 6IPI3DEHDPINRE H CTAHDAPTTAP
- MEASURED SOUND POWER LEVEL DB(A)
- SAFETY DEVICE
- SWITCHING OFF THE DEVICE
- DAMAGE TO PAINTED OR DELICATE SURFACES
- WORKING WITH DETERGENTS
- UNREADABLE INFORMATION SHEET FOR SAFETY
- RECOMMENDED METHOD FOR CLEANING
- WORKING WITH THE PREPARATION
- STOPPING WORK
- STARTING WORK
- RISK OF INJURY
- CARE AND MAINTENANCE
- DEVICE DOES NOT WORK
- THE DEVICE HAS TRIPPED, THE MOTOR IS HUMMING
- THE DEVICE DOES NOT REACH THE LIFT HEIGHT
- THE WATER SUPPLY IS TOO WEAK
- THE SUCTION HOSE IS BLOCKED
- THE DEVICE HAS AIR IN IT
- CNHN KONE6AHA HA HANAHETO
- JBCLG>JL>DDCLMALL
- J
Brand : Kärcher
Model : K 7 Power Flex
Category : Pressure washer