
SS-7645 - Coffee machine Sogo - Free user manual and instructions
Find the device manual for free SS-7645 Sogo in PDF.

| Product type | Espresso coffee machine |
| Brand | Sogo |
| Model | SS-7645 |
| Voltage | 220-240 V |
| Power | 800 W |
| Frequency | 50-60 Hz |
| Tank capacity | 0.24 L (4 cups) |
| Pressure | 3.5 bars |
| Kettle material | Die-cast aluminum alloy |
| Filter | Stainless steel mesh |
| Included accessories | Heat-resistant glass carafe (0.4 L), measuring spoon |
| Functions | Espresso, cappuccino, café crème |
| Steam nozzle | Yes, for frothing milk |
| Safety system | Overheat and overpressure protection |
| Automatic shut-off | After 25 minutes |
| Removable drip tray | Yes, for easy cleaning |
| Indicator light | On/off and steam function |
| Cleaning and maintenance | Descaling recommended every 2-3 months |
| Maintenance | Do not immerse, clean with a damp sponge |
| Number of cups | 4 cups maximum |
Frequently Asked Questions - SS-7645 Sogo
User questions about SS-7645 Sogo
0 question about this device. Answer the ones you know or ask your own.
Ask a new question about this device
Download the instructions for your Coffee machine in PDF format for free! Find your manual SS-7645 - Sogo and take your electronic device back in hand. On this page are published all the documents necessary for the use of your device. SS-7645 by Sogo.
USER MANUAL SS-7645 Sogo
natural_image
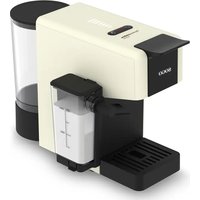
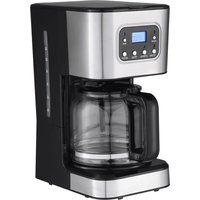
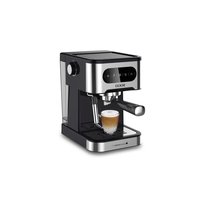
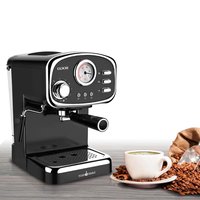
Black SOGO coffee maker with visible brand logo and control panel (no text or symbols on device body)
CAFETERA ESPRESSO ESPRESSO COFFEE MAKER MACHINE À CAFÉ ESPRESSO MÁQUINA DE CAFÉ ESPRESSO ESPRESSO KAFFEEMASCHINE CAFFETTIERA PER CAFFÈ ESPRESSO
-
Important Note P. 14
-
Symbol definitions P. 14
-
Safety instructions for the user P. 14
I. General precautions during the use of electrical equipment P. 14-15
II. Restrictions on use to avoid personal injury P. 16-17
III. Product use restrictions due to poor condition or breakdown P. 17
IV. Restrictions on use when used with children and elders P. 17-18
V. IMPORTANT WARNING P. 18-19
VI. Instructions to follow when using the device P. 19-20
-
Product features P. 21
-
Technical specifications P. 21
-
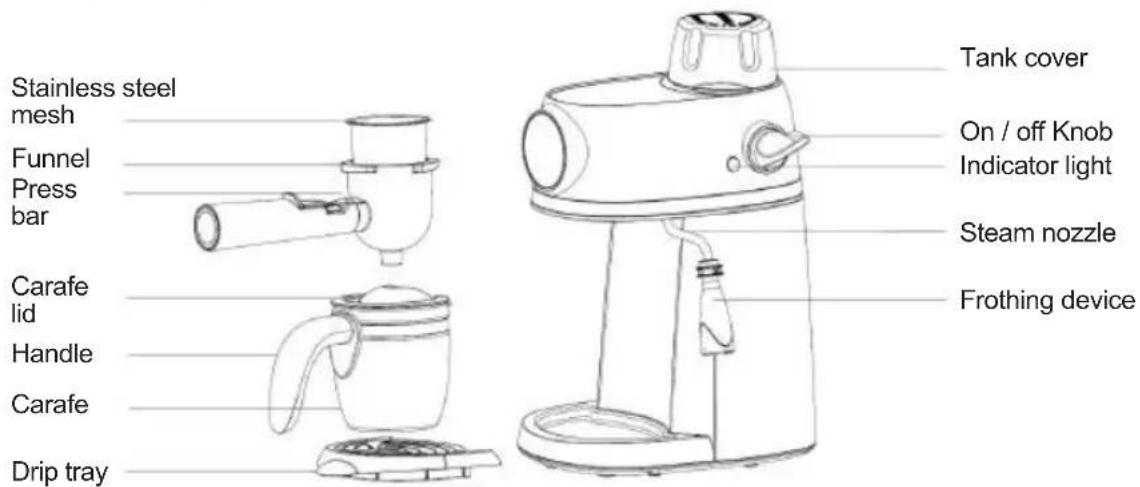
Parts description P. 21
-
Instructions for use P. 21-23
-
Cleaning and maintenance P. 24
-
Trouble Shooting P. 25
-
Declaration of conformity P. 574
-
Responsibility for disposal, details of the manufacturer and after-sales service P.75
ÍNDICE
• Always read the instruction book carefully before using.
- This manual can be downloaded from our web page www.sogo.es
- Keep these instructions for future reference.
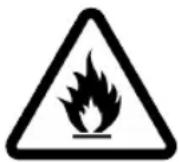
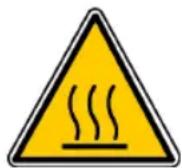
2. Symbol definitions
1


3
4
GENERAL PRECAUTIONS
1- Important information and useful hinds on use
2- Warning against dangerous situations in terms of life and property
3- Warning against fire risk
4- Warning against hot surfaces
5- Cautions while using electrical and electronic equipment.
3. Safety instructions for the user
1.
GENERAL PRECAUTIONS
General precautions during the use of electrical equipment
- Do not use the appliance for any other purpose than described in this manual.
- Do not use or store the appliance outdoors.
• Always place the appliance on to the flat and even surface. - This product is intended for indoor, non-industrial, non-commercial and only for household use. Do not use the item outdoors or for any other purpose. Misuse or improper handling may cause problems in the appliance and cau-
se injury to the user.
- The unit must be used only for the intended purposes. No liability is accepted for damages arising from improper use or wrong handling.
- Ensure that the voltage indicated on the name-plate matches the mains voltage before plugging in the appliance.
• Always remove the plug from the power socket when the appliance is not in use. Do not leave the appliance unattended when switched on.
- Close supervision is necessary when any appliance is being used by or near children.
- Before cleaning or storing your appliance, always unplug the appliance from the power supply and let it cool down.
- The device is not completely disconnected from the power source, even after it has been turned off. To disconnect it completely, disconnect it from the mains plug.
- The appliances are not intended to be operated by means of an external timer or separate remote-control system.
- This appliance is intended to be used in household and similar applications such as
- Staff kitchen areas in shops, offices and other working environments;
- Farm houses and by clients in hotels, motels and other residential type environments;
- Bed and breakfast type environments;
- Catering and similar non-retail applications.
- Avoid spillage on the connector
II. Restrictions on use to avoid personal injury
- Do not let the appliance operate unattended.
- Do not place or operate this appliance near water sources.
- Do not place or operate the appliance and its power cord on or near hot surfaces (e.g., stove plates) or open flames.
- Do not leave the power cord hanging from sharp edges and keep away from hot objects and flames. Do not wind the cord around the appliance and do not bend it.
- Neither immerse the housing, which contains electrical components and the heating elements in water, nor rinse it under the tap.
- Never use accessories that are not recommended by the manufacturer.
- The use of accessories not recommended or sold by the appliance manufacturer may result in fire, electric shock or injury to persons.
- When you want to remove the plug from the wall contact, please do this at the plug itself and not by pulling on the cable or the appliance itself.
- To avoid electric shock, make sure your hands are dry before plugging or unplugging.
- Do not use the device with wet hands, on damp floors or when the atmosphere is humid, there is a risk of electric shock.
- While using the appliance, make sure that the power cord must not be caught or crushed.
- Do not let the motor unit, cord or plug get wet to protect against risk of electric shock.
- Be careful, while handling electrical appliances, as the surface of the heating element is subject
to residual heat after use. Any misuse may cause potential injury to the user and may damage the appliance.
- Do not touch the outer surface of the appliance as it can get very hot during operation. Instead, use the handle or mitts.
III. ⚠️ Product use restrictions due to poor condition or breakdown
- Never immerse the appliance or the plug-in water or any other liquid. In the event of the appliance falling in water, disconnect immediately from the mains supply and take it to an authorized service agent for repair before reusing.
- Do not use the appliance if it has fallen on the floor, if there are visible signs of damage or if it has a leak.
- Do not use the appliance if the cable or plug is damaged. In case of the cord be damaged, it must be replaced only by the manufacturer, its service agent or similarly qualified persons in order to avoid Hazard.
- In case of appliance malfunction, or if it has been damaged in any manner, return the appliance to the nearest authorized service facility for examination, repair or adjustment.
- In case of hardware problems, do not attempt to repair the product yourself. Repairs should only be carried out by qualified technicians.
IV. ⚠️! Restrictions on use when used with children and elders
• Children should be supervised to ensure that they do not play with the appliance.
- Cleaning and user maintenance shall not be made by children without supervision.
- Keep the appliance and its cord out of the reach of the children.
- Appliances can be used by persons with reduced physical, sensory or mental capabilities or lack of experience and knowledge if they have been given supervision or instructions concerning use of the appliance in a safe way and understand the hazards.
• Children shall not play with the appliance.
- This appliance can be used by children aged from 8 years and above and persons with reduced physical, sensory or mental capabilities or lack of experience and knowledge if they have been given supervision or instruction concerning use of the appliance in a safe way and understand the hazards involved.
• Children should be supervised to ensure that they do not play with the appliance.
- Cleaning and user maintenance shall not be made by children unless they are older than 8 and supervised.
- Keep the appliance and its cord out of reach of children less than 8 years.
V. IMPORTANT WARNING
- To avoid a circuit overload when using this product, do not operate another high-wattage
product on the same electrical circuit.
- A short power supply cord is provided with this product. An extension cord is not recommended for use with this product, but if one must be used:
- The marked electrical rating of the cord must be at least as great as that of the product.
- Arrange the extension cord so that it does not hang where it can be tripped over or pulled unintentionally.
VI. Instructions to follow when using the device
- The appliance has been incorporated with a grounded plug. Please ensure the wall outlet in your house is well earthed.
- Be careful to not to get burned by the steam.
- Do not touch the hot surface of appliance (such as steam wand, and the brewing filter while in use). Use handle or knobs.
- Do not let the coffee maker operate without water.
- Do not remove the metal funnel, when appliance is brewing coffee or when steam and hot water escape from metal funnel and ensure to release the pressure in water tank before removing metal funnel.
- Relief pressure through steam wand before removing tank cover or metal funnel.
- WARNING: The filling aperture must not be opened during use.
- WARNING: Potential injury from misuse.
- WARNING: high risk to get burn! Do not touch the hot parts of coffee maker.
- The coffee-maker shall not be placed in a close cabinet.
- Do not touch or move the coffee maker while in use.
- Never use the coffee maker in the environment of high temperature, high magnetic field and humidity, do not place the coffee maker on or hot surface or beside fire or another electrical appliance, such as on the top of refrigerator, avoid to be damaged.
- When the appliance prompts trouble, never operation the appliance, do not place the foreign object into the brewer.
- Never use the detergent or hot water for cleaning the brewing component, to avoid the running component is lack of lubricant oil and the component will be distortion as the high temperature.
CLEANING AND MAINTENANCE
Kindly refer to the cleaning and maintenance section for details on how to clean surfaces which comes in the contact of food.
4. Product features
To make espresso, cappuccino or latte Coffee with the help of coffee powder
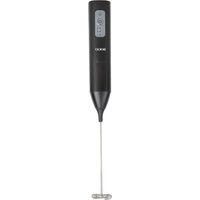
Steam nozzle to heat/froth milk, cappuccinos etc
To make 4 espresso coffee cups at a time
0.24 Die casting aluminium alloy boiler
7-8 bar steam pressure system to make nice and strong coffee (original 3.5Bar)
Efficient steam system for fast heating
Manually flow stop feature
With thermal heater to measure coffee temperature
Overheating and Overpressure system for device and user safety
Detachable drop tray for easy cleaning
Indicator light for on/off and to indicate frothing and coffee function
Accessories: Heat resistant 0.4L glass jar to collect coffee and spoon for coffee measurement
5. Technical specifications
| Voltage Power Frequency Capacity | ||
| 220-240V 800W 50 – 60Hz 0.24L / 4 Cups |
6. Description of parts
7. Operation manual
A. FOR THE FIRST USE
-
Remove the coffee maker packaging, and check the accessories according to the list.
-
Clean all the detachable components following the instructions given in "CLEANING AND MAINTENANCE" section. Then assemble them completely.
-
Make sure to place the stainless-steel mesh in its position. Place the carafe on removable drip tray.
-
Operate the coffee maker following the instruction given in "B" and "C" section (With water, without coffee powder in steel mesh) and repeat the process 2-3 times.
B. MAKE ESPRESSO COFFEE
- Remove the tank cover by turning it in anti-clockwise. Pour appropriate water in water tank with the carafe. Tank capacity is 240ml at once, make sure not to exceed water level from the max quantity. Note:
1) The glass carafe has the been marked with cups marking, the maximum tank capacity is equal to 4 cups or 240ml of water and minimum tank capacity is equal to 2 cups or 120 ml of water.
2) Before pouring the water into the water tank, make sure the power cord is unplugged from the power outlet and the steam knob is in position.
-
After pouring the water into tank replace back the tank cover in its position by turning the tank cover in clockwise direction, until it locks in position.
-
Place the steel mesh into funnel, add coffee powder to steel mesh with the help of measuring spoon, with the help of one spoon coffee powder can make about a cup of top-grade coffee, press the coffee powder with the help of tamper.
Note:
1) Fill the steel mesh with desired quantity of coffee powder to make desired cups of coffee, the steel mesh also has been marked with cups quantity, ex. 2 and 4 cups.
2) Do not use fine coffee powder, please use designated coarse coffee powder.
- Make sure the tubers on the funnel align with the grooves in the coffee maker, then insert the funnel from the "☐" position, and fix it into coffee maker moving it anti-clockwise towards "☐"
position until it is locked firmly (see Fig. 1).

Fig. 1
-
Place the carafe on the drip tray.
-
Plug the power cord into wall outlet.
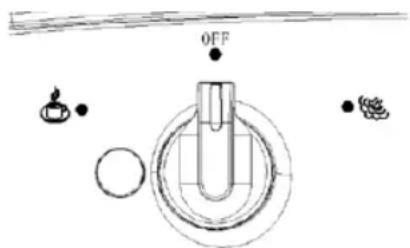
Turn the on/off button towards position and the indicator light turns on, wait for about 2 minutes and there will be coffee flowing out.
- After you have obtained the desired amount of coffee, turn the on / off knob to position, the indicator light will go out and the coffee stops flowing, your coffee is ready now. Then remove the carafe and turn the on / Off knob to position to release the residual steam of the tank.
WARNING: Do not leave the coffee maker unattended during coffee preparation.
-
Before removing steel mesh or opening the tank cover, make sure the pressure of the tank must be released. To release the pressure, turn the steam knob to the ● position, and pressure of tank will remove through the frothing device. Once the pressure has been released, wait for the steel mesh to cool down, and then you can remove the steel mesh or open the tank cover.
-
Once you have finished the coffee preparation, you can remove the funnel out by turning it clockwise, and then pour out the coffee residue from steel mesh by pressing press bar. Let the steel mesh and funnel cool down completely, and then rinse them under running water. (After assembling of steel mesh again, the press bar needs to move on its original position).
C. FROTHING MILK/ MAKE CAPPUCCINO
With the help of steam nozzle and frothing device you can prepare frothing milk or a nice cup of cappuccino, by topping up frothing milk over espresso coffee.
Method:
- Prepare nice cup of espresso following the espresso coffee making process "B".
-
Fill a jug with desired amount of milk for each cappuccino to be prepared, it is recommended to use whole milk at refrigerator temperature and not hot.
Note: While choosing the jug or cup size make sure that its diameter must not be less than 70 ± 5 mm, and also note as milk increases in volume, so the jug or cup must be enough long, so that it shouldn't spill out of it. -
Turn the steam knob to the position and indicator light will turn on.
-
Insert the frothing device into the milk about two centimetres, in about 2 minutes, the steam will come out from the frothing device. Prepare frothing milk by moving milk jug or cup from up to down.
Note: make sure not to fill too much water (should be≤200ml) to keep balance between steam and water quantity, it the water quantity will be more in the water tank, the steam amount will be little, and water content in frothing milk will be too much.
- When you have got the desired amount of frothing milk, turn the on / Off knob to position and it stop frothing. Wait for few seconds and then remove the jug. Once you have removed the jug, turn the steam control knob to position to release the residual steam pressure from the tank.
Note:
1) Clean the steam nozzle and frothing device with the help of wet sponge, immediately after the steam stops generating and make sure not to get hurt, while cleaning it.
2) Do not open the water tank cover, until you drain out the water vapor and release the pressure.
- Pour the frothed milk into the espresso prepared, and your cappuccino is ready. Sweeten it as per taste and if desired, sprinkle the froth on the top of it with little cocoa powder.
Note: It is recommended not to use the coffee maker immediately after preparing coffee, let it cool
down before making the coffee again, it is necessary to avoid experience of any burnt smell in your espresso coffee.
- After turning the knob to coffee position or steam position, the unit will turn off automatically after 25 minutes.
CLEAN AND MAINTENANCE
- Remove the plug from the wall outlet and let the coffee maker cool down completely before cleaning.
- Clean outer housing of coffee maker with the help of moisture-proof sponge or any damp cloth. Note: Do not clean it with alcohol or abrasive cleanser. Never immerse the housing in water for cleaning.
- To clean the funnel and steel mesh, turn the funnel in anticlockwise, remove the coffee residue and you can clean it with soapy detergent, and finally rinse it with clear water.
- Clean all the detachable attachments with the help of normal soapy detergent and rinse it with the water and let it dry.
CLEANING MINERAL DEPOSITS
- To make sure coffee maker works efficiently, the internal piping need to clean regularly. So, to make full use of your coffee machine and to clean the left-over mineral deposits, you must clean it every 2-3 months with the help of water and descaler, following the steps mentioned below.
- Fill the tank with water and descaler to the MAX level (the proportion of water and descaler should be 4:1, for more details you can follow the instruction of descaler which you will buy. If possible try to use “homemade descaler”, you can make the descaler with the help of citric acid (which you can get it easily from any chemist’s or drug stores). To prepare homemade descaler, take water and citric acid in the proportion of 100 parts of water and 3 parts of citric acid.
- Following the espresso coffee maker instructions, place the funnel (without any coffee powder) and carafe in their place. File the water tank with the liquid prepared and plug in the switch to the wall outlet.
- Turn the steam knob to 🔒 position, the indicator light will be turned on, and fill the glass carafe up to 2 cup position with the liquid poured into the tank. Then turn the steam knob to ⬤ position and wait for 5s.
- Turn the steam knob to ● position and release steam for 2min, then turn the steam knob to position to stop the unit immediately, let the descaler be deposited in the unit and wait for 15 minutes for the next step of cleaning.
- Restart the unit and repeat the steps 4-5 again and make sure to repeat this process at least 3 times.
- Then turn the steam knob to ⚙• position to brew, until all the descaler is flushed out of water tank.
- Once finished the cleaning process with descaler repeat the same process with normal clean water and repeat the process until the water has been completely flushed out, while brewing clean water it is not necessary to wait for 15 minutes.
-
Repeat the step 8 at least 3 times to make sure the internal piping is clean and once you have cleaned the internal piping your coffee maker is ready to prepare the coffee.
-
TROUBLE SHOOTING
| Problems Causes Solutions | ||
| Water is leaking from Carafe or water leaks out from lid of carafe | The carafe is not located properly | Let centreline of carafe aligns with leakage opening of brew basket well. |
| The level of water in the tank exceeds the scale of MAX. | The water level in the tank should be within the scale of MIN and MAX. | |
| The metal parts in the tank getting rust. | The descaler is not recommended type. It may corrode the metal parts in the tank. | Use the descaler recommended by manufacturer. |
| Water leaks from the bottom of coffee maker. | There is excess of water in the drip tray. | Remove the water and clean the drip tray. |
| The coffee maker is malfunctioning. | Please contact with the authorized service facility for repair. | |
| Water leaks of outer side of filter. | There is some coffee powder on filter edge. | Get rid of excess coffee powder. |
| Espresso coffee tastes acidic (vinegar) | The internal piping has not been cleaned properly with clean water. | Clean coffee maker as per the instructions given in “before the first use” for various times. |
| The coffee powder is stored in a hot, wet place for a long time. | Please use fresh coffee powder, or store unused coffee powder in a cool, dry place. After opening a package of coffee powder, reseal it tightly and store it in a refrigerator to maintain its freshness. | |
| The coffee maker doesn’t work | The power outlet is not plugged properly. | Plug the power cord into a wall outlet correctly, if the appliance still does not work, please contact with the authorized service facility for repairing. |
| The steam cannot froth | The steam ready indicator (green indicator) is not illuminated. | Only after the steam ready indicator (green indicator) is illuminated, the steam can be used to froth. |
| The container is too big or the shape is not fit. | Use high and narrow cup. | |
| You have used skimmed milk Use whole milk or half-skimmed milk | ||
Do not repair the appliance by yourself, if you do not find cause of failure, contact the authorized service centre for repair.
1. IMPORTANT:
DECLARATION OF CONFORMITY
This device complies with EU Low Voltage Directive 2014/35/EC.
Electromagnetic Compatibility Directive 2014/30/EU. Directive 2015/863/EU on the restriction of the use of certain hazardous substances in electrical.
Directive 2009/125/EC on the eco-design requirements applicable to energy-related products.
This symbol on the product or on the packaging indicates that this product can't be disposed as normal rubbish or household waste. All the electrical, electronic equipment's and battery-operated units must recycle in proper manner and according to the local municipal laws. You can recycle them by taking them to government authorized disposal centres or specialized bins which you can find in any nearby big super markets, electronics or electro domestics products stores or malls who have these types of facilities available.
Designed by: SOGO based on European quality standards
Imported by: Sanysan Appliances S.L, NIF: B98753056, C/ Barcas 2, 2, 46002 Valencia, Spain
Product manufactured in P.R.C. After-sales service: www.sogosat.com sogosat@sogosat.com / 0034 902 222 161
- ÍNDICE
- Symbol definitions
- Safety instructions for the user
- General precautions during the use of electrical equipment
- Restrictions on use to avoid personal injury
- ⚠️ Product use restrictions due to poor condition or breakdown
- ⚠️! Restrictions on use when used with children and elders
- IMPORTANT WARNING
- Instructions to follow when using the device
- CLEANING AND MAINTENANCE
- Product features
- Technical specifications
- Description of parts
- Operation manual
- FOR THE FIRST USE
- MAKE ESPRESSO COFFEE
- Note:
- FROTHING MILK/ MAKE CAPPUCCINO
- Method:
- CLEAN AND MAINTENANCE
- CLEANING MINERAL DEPOSITS
- IMPORTANT:
- DECLARATION OF CONFORMITY
Brand : Sogo
Model : SS-7645
Category : Coffee machine