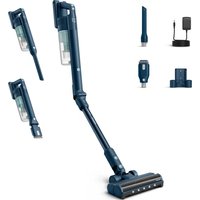
5000 Series XC5242 - Broom PHILIPS - Free user manual and instructions
Find the device manual for free 5000 Series XC5242 PHILIPS in PDF.

 FR
FR
 BG
BG
 CS
CS
 DA
DA
 DE
DE
 EL
EL
 EN
EN
 ES
ES
 ET
ET
 FI
FI
 HU
HU
 ID
ID
 IT
IT
 KK
KK
 LT
LT
 LV
LV
 MK
MK
 NL
NL
 NO
NO
 PL
PL
 PT
PT
 RO
RO
 RU
RU
 SK
SK
 SL
SL
 SQ
SQ
 SV
SV
 TH
TH
 TR
TR
 UK
UK
 VI
VI
 ZH
ZH
| Product type | 2-in-1 cordless stick vacuum (vacuum and wash on models XC5244) |
| Tube technology | FlexIT tube bendable up to 95° |
| Battery | Lithium-ion, 4 h charge, charge temperature 5-40 °C |
| Power modes | Eco, Normal, Turbo |
| Water tank capacity (XC5244) | 300 ml |
| Filtration type | Washable foam filter |
| Filter maintenance | Monthly cleaning, replacement every 6 months (ref. XV1651) |
| Mop cloth (XC5244) | Microfiber, replacement every 6 months (ref. XV1630) |
| Water tank descaling | Monthly |
| Display | Battery percentage and error codes |
| Operating temperature | 0-40 °C |
| Charging options | Wall mount or direct adapter |
| Included accessories | Main nozzle, FlexIT tube, crevice tool, combination tool, mini Turbo brush (depending on model) |
| Compatible floors | Hard floors and textiles (wash sealed hard floors) |
| Brush type | Motorized rotating brush |
| Removable battery | Yes |
| Error code E2 | Inappropriate temperature |
| Error code E5 | Insufficiently charged battery |
| Error code E9 | Brush problem |
| Codes i4, i5, i6, i7 | Brush block, motor block, adapter not unplugged, wrong adapter |
Frequently Asked Questions - 5000 Series XC5242 PHILIPS
User questions about 5000 Series XC5242 PHILIPS
0 question about this device. Answer the ones you know or ask your own.
Ask a new question about this device
Download the instructions for your Broom in PDF format for free! Find your manual 5000 Series XC5242 - PHILIPS and take your electronic device back in hand. On this page are published all the documents necessary for the use of your device. 5000 Series XC5242 by PHILIPS.
USER MANUAL 5000 Series XC5242 PHILIPS
* = 0-9, representing different colors

English 4
Bahasa Indonesia 32
Bahasa Melayu 60
Čeština 88
Dansk 116
Deutsch 144
Eesti 172
Español 200
Français 228
Hrvatski 256
Italiano 284
Latviešu 312
Lietuviškai 340
Magyar 367
Nederlands 395
Norsk 423
Polski 450
Português 478
Română 506
Shqip 534
Slovenščina 562
Slovensky 589
Srpski 617
Suomi 645
Svenska 673
Tiếng Việt 701
Türkçe 729
Ελληνικά 757
Български 786
Македонски 814
Русский 842
Українська 870
Қазақша 898
ภาษาไทย 926
简体中文 956
繁體中文 984
한국어 1010
1037 العربية
1064 فارس
Contents
Introduction 4
General description 4
Before first use 5
Installing the wall mount ____ 5
Preparing for use 6
Charging 6
Using the appliance 7
Assembling the appliance 7
Using the FlexIT tube 8
Vacuuming soft and hard floors 9
Vacuuming while mopping hard floors (XC5244 only) 10
Versatile usage and accessories 13
Using the nozzle 13
Using the Mini TurboBrush (XC5243, XC5244 only) 13
Using the crevice tool 14
Using the combination tool 14
After use – Maintenance ____
Frequent maintenance after each cleaning cycle 15
Dust bucket maintenance 15
Aqua tank maintenance (XC5244 only) 16
Periodic maintenance intermittently 18
Dust management system maintenance 18
Nozzle maintenance 20
Mini TurboBrush maintenance (XC5243, XC5244 only) 22
Aqua tank maintenance (XC5244 only) 22
Replacement 24
User interface signals and their meaning 25
Troubleshooting 27
Dry cleaning 27
When using the Vacuum and Mop Nozzle 30
Introduction
Thank you for buying this product! To fully benefit from the support that we offer, register your product at www.philips.com/support.
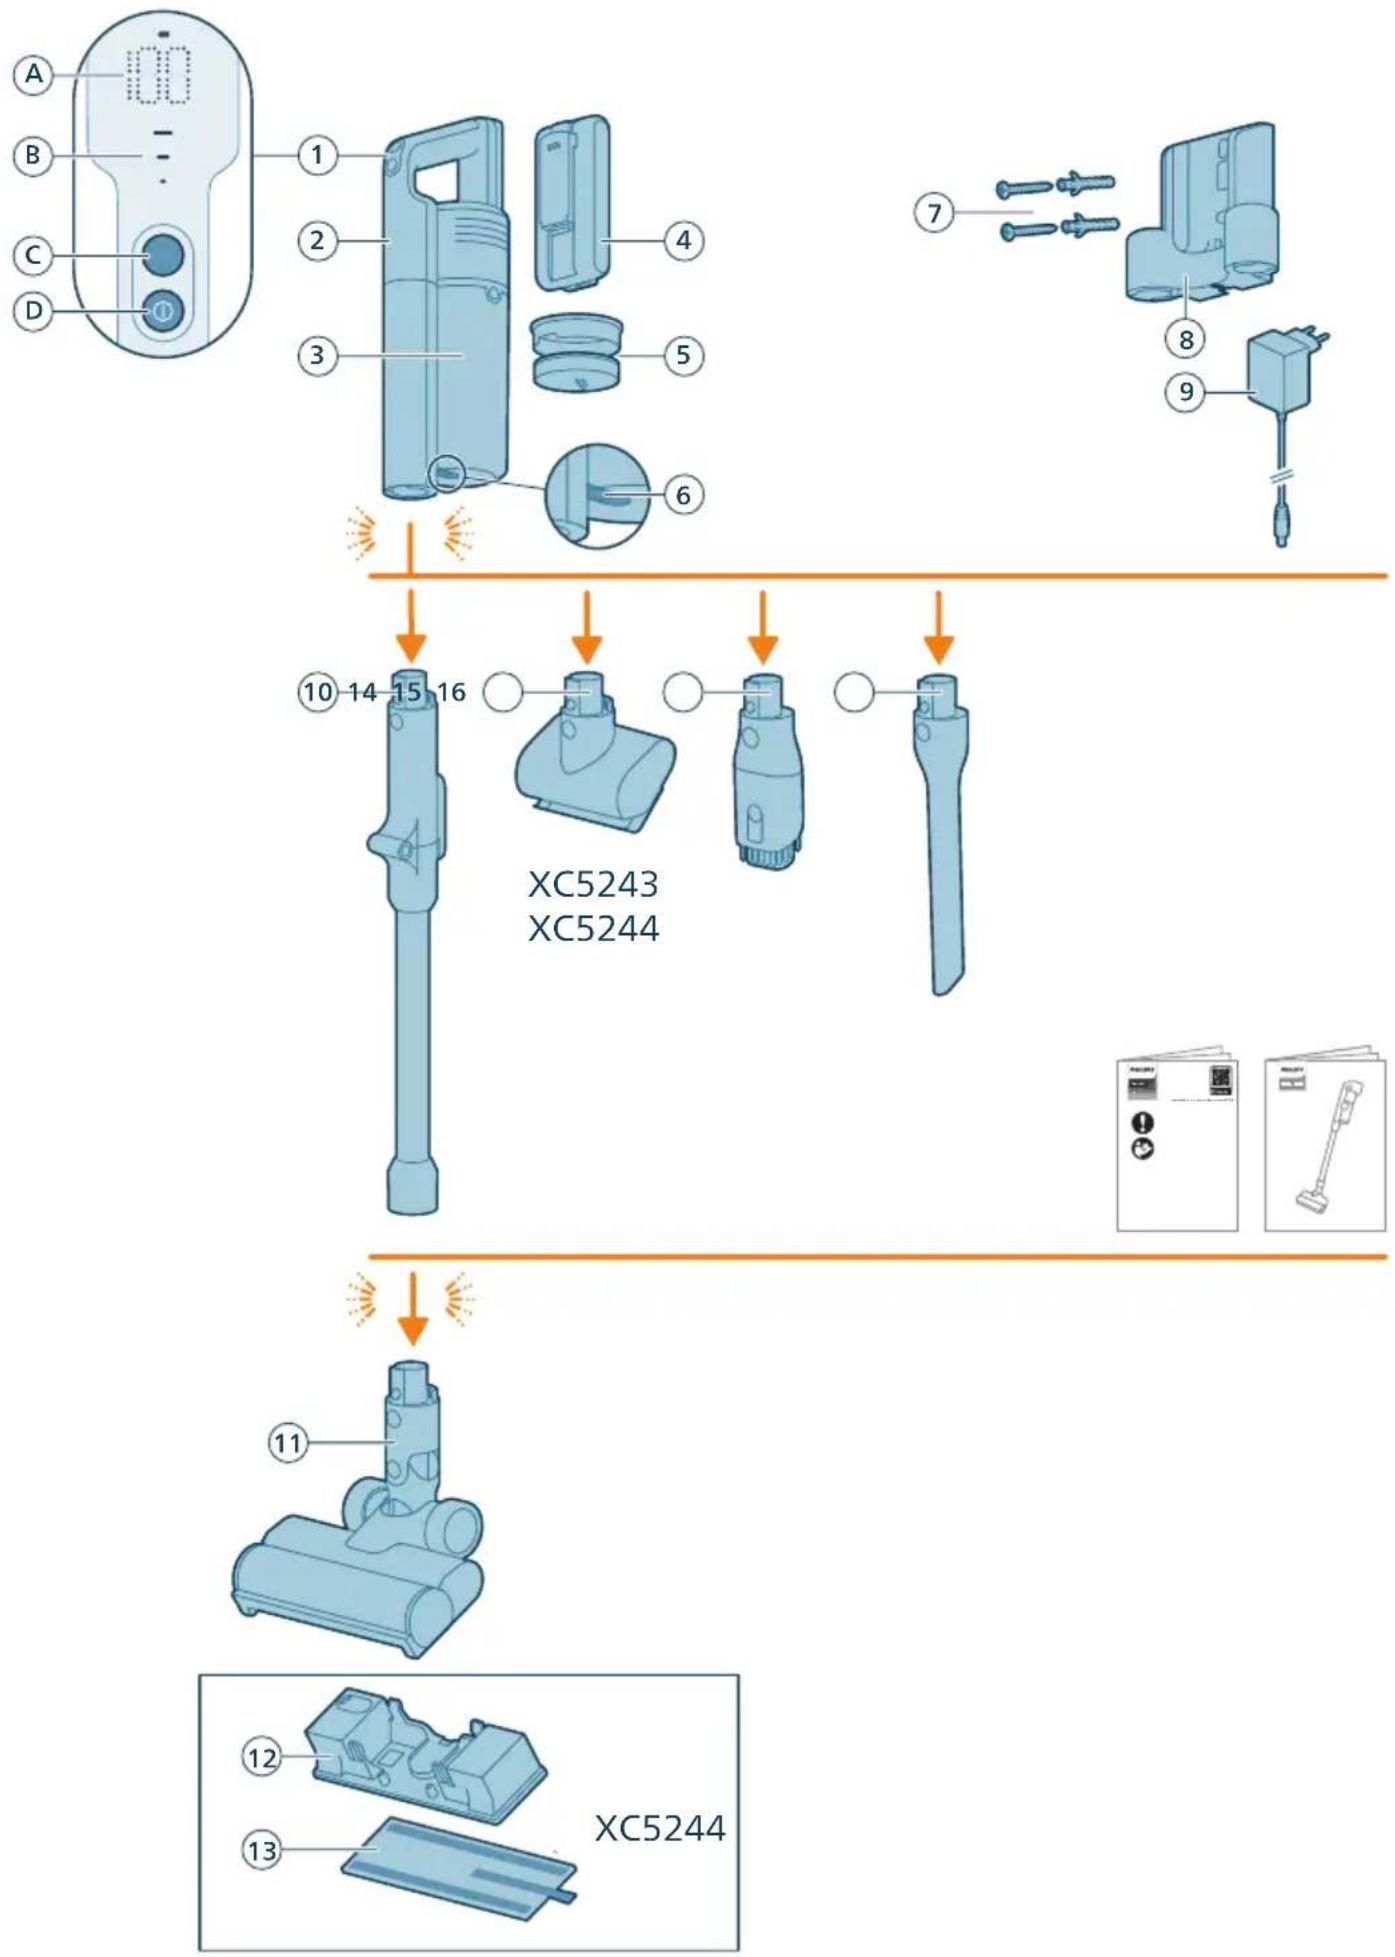
General description
1 Control panel
a Percentage of battery level
b Power level indicators
c Power selection button
d On/off button
2 Handheld
3 Dust bucket
4 Battery
5 Filter
6 Dust bucket release button
7 Screw set
8 Wallmount
9 Adapter
10 Tube
11 Nozzle
12 Aqua tank (XC5244 only)
13 Microfiber mopping pad (XC5244 only)
14 Mini TurboBrush (XC5243, XC5244 only)
15 Combination tool
16 Crevice tool
Before first use
Installing the wall mount
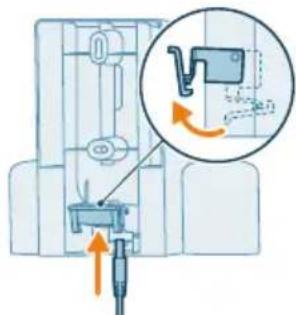
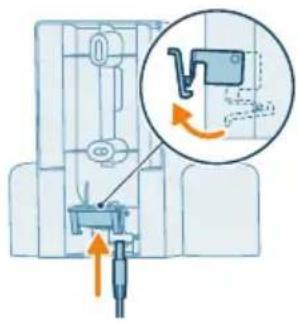
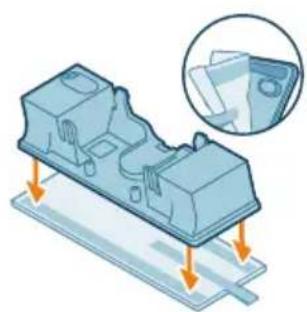
1 Invert the wall mount and unlatch the lever. Insert the charging port, ensuring the metal part is visible and pointing upright on the front side of the wall mount.
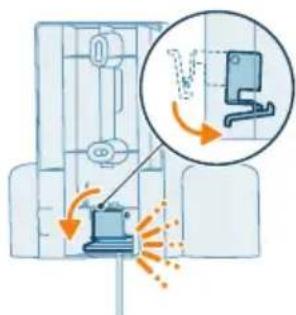
2 Close the lever. Make sure the lever is locked in place with a "CLICK" sound.
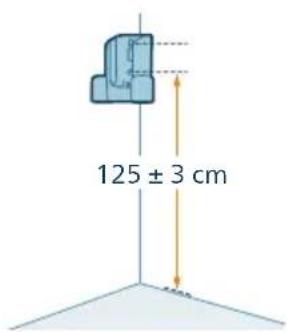
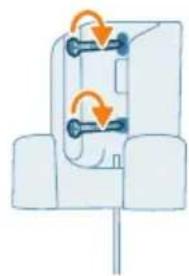
3 Securely affix the wall mount to your preferred position on the wall, ensuring that the lowest mounting screw holes are approximately 125 cm from the floor.
Caution: Be careful when you drill holes in the wall to fasten the wall mount, to avoid the risk of electric shock.
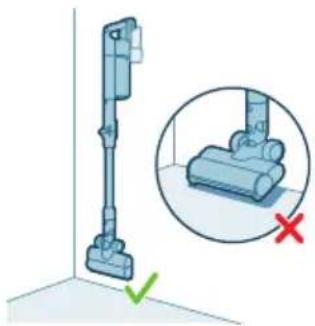
i Note: Verify that the placement of the wall mount allows the entire appliance to hang on the wall without the nozzle coming into contact with the floor.
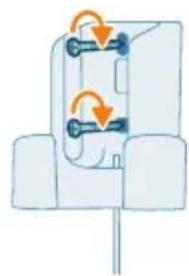
4 Once you have determined the optimal position and height for storing and charging your appliance, firmly tighten the screws to secure the wall mount in place.
Preparing for use
Charging
The appliance is equipped with a Li-Ion battery. Charging from empty to full takes about 4 hours.
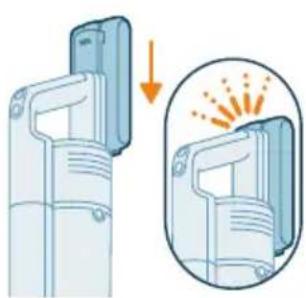
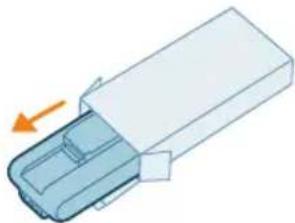
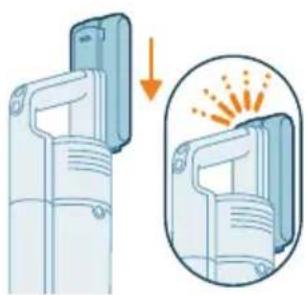
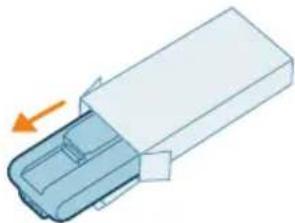
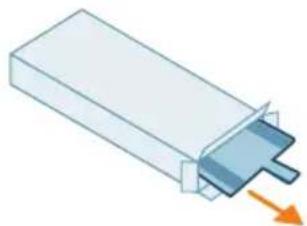
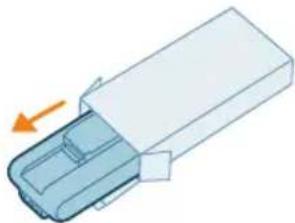
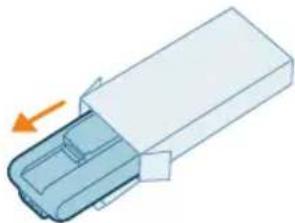
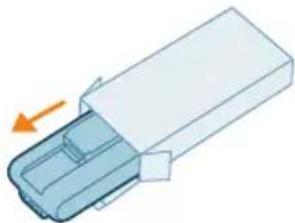
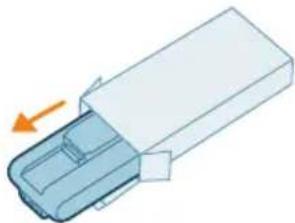
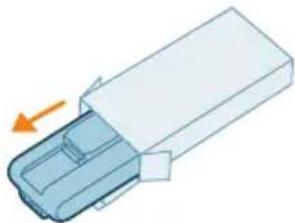
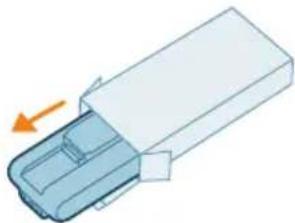
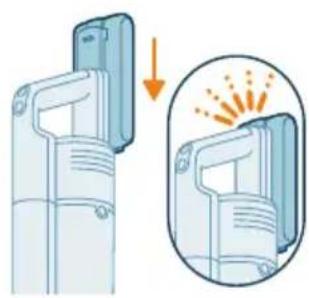
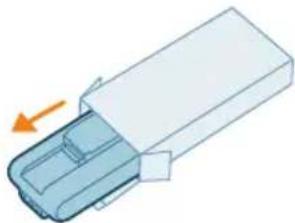
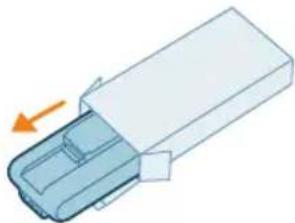
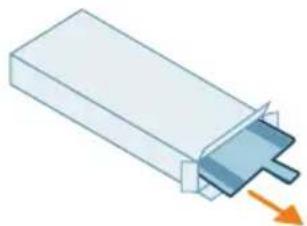
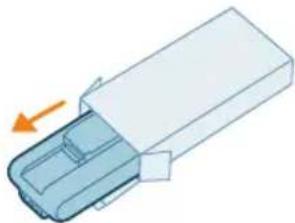
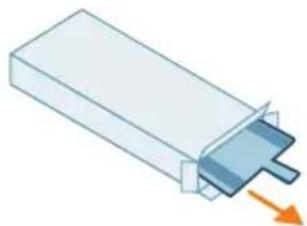
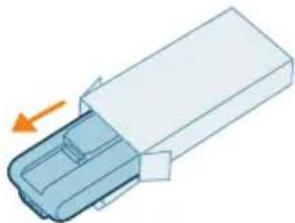
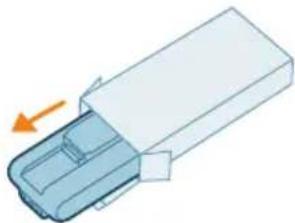
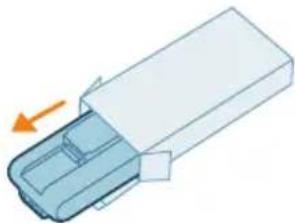
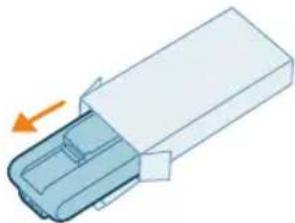
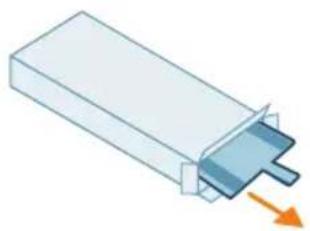
1 Attach the battery pack to the main body of the appliance, ensuring a secure connection that's confirmed with a "CLICK" sound.
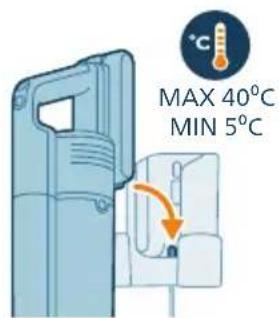
2 Charge your appliance by placing it onto the assembled wall mount.
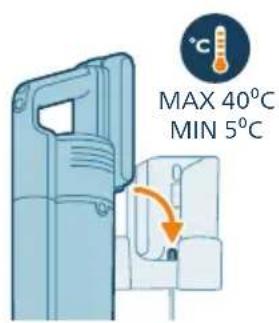
Warning: Charge the appliance at a temperature above 5 °C and below 40 °C.
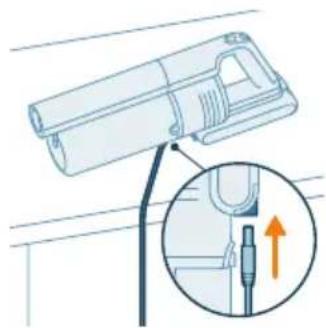
i Note: You can also place the handheld on a level and stable surface, and directly connect the charging cable to the appliance.
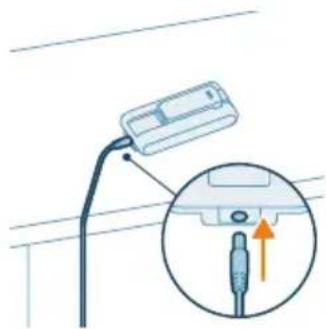
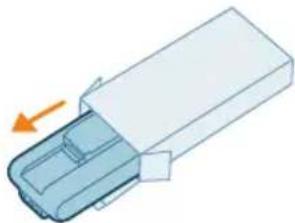
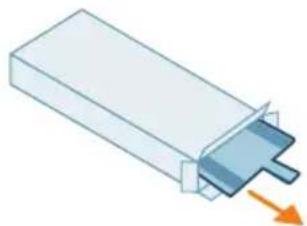
i Note: Another option is to place the battery on a level and stable surface, and directly connect the charging cable to the battery.
![graph TD A["Start"] --> B["4 hrs"] B --> C["End"]](/content/2026/04/721249/images/529e3ac071873d2ec8727574f3b1d0cafb817b58e162f11c53a2672a1ba98158.jpg)
3 The appliance is designed to reach a full charge within 4 hours. You can monitor the charging progress on the screen. When the appliance is fully charged, the value 100% lights up on the screen. After a few seconds, the display will turn off.
Using the appliance
Assembling the appliance
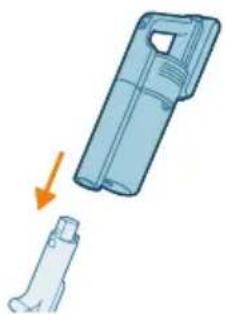
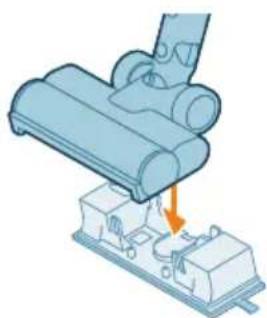
1 Attach the handheld to the tube. Confirm the attachment with a "CLICK" sound.
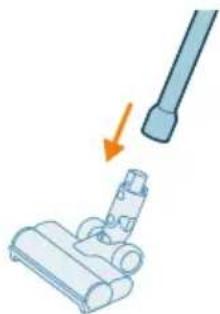
2 Attach the tube to the nozzle. Confirm the attachment with a "CLICK" sound.
Using the FlexIT tube
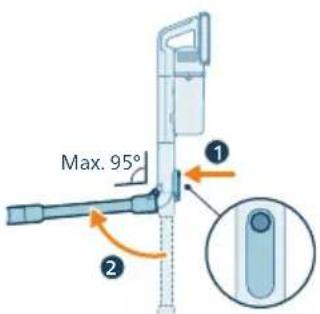
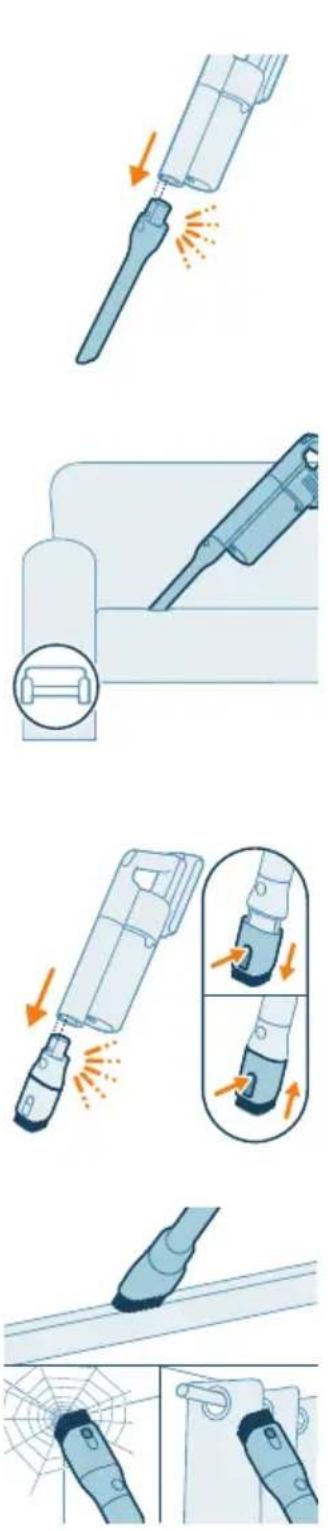
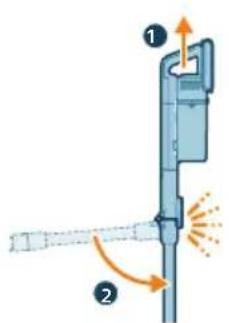
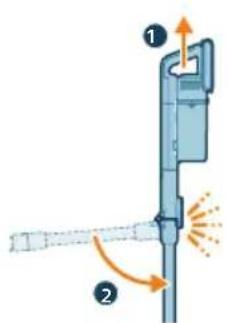
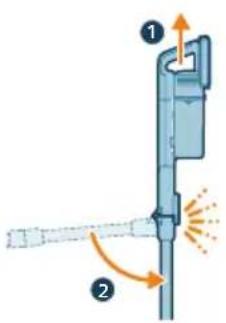
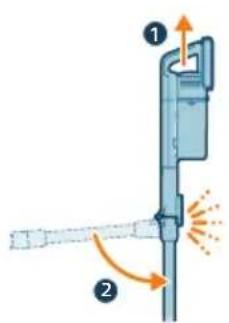
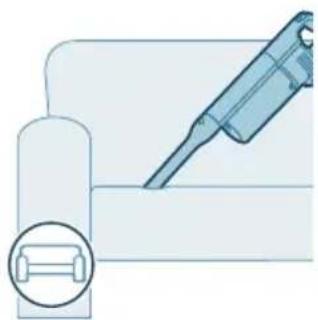
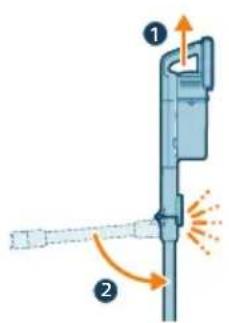
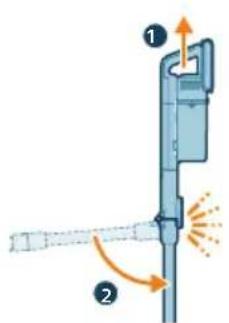
This appliance is equipped with a FlexIT tube which allows you to bend the tube up to 95 degrees.
1 Press the release button on the tube to unlock bending.
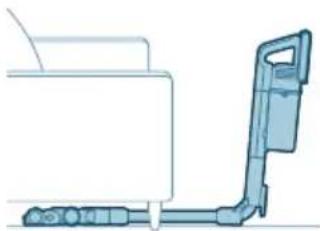
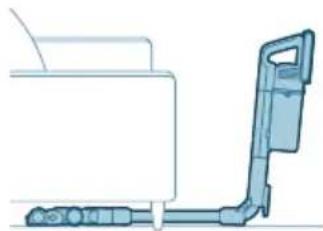
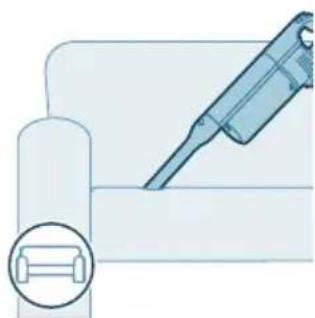
2 Move the nozzle with the bended tube underneath the sofa.
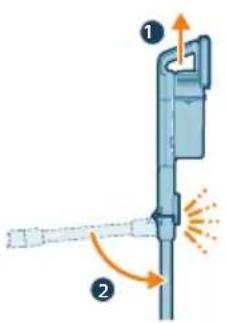
3 To bring the tube to the upright position, lift the handheld upwards and place the lower part of the tube back to position.
Vacuuming soft and hard floors
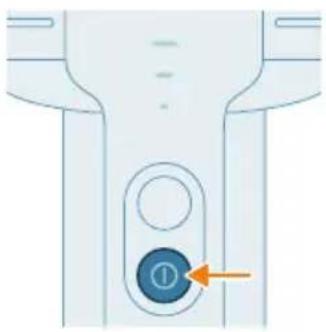
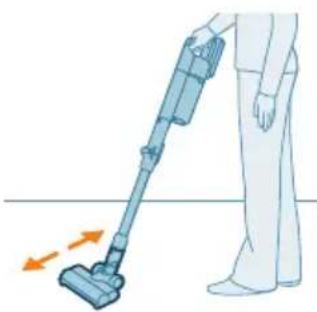
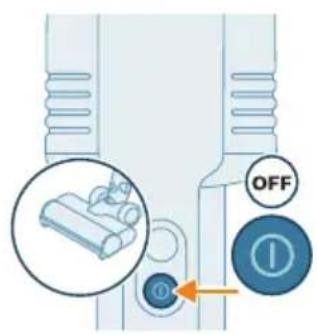
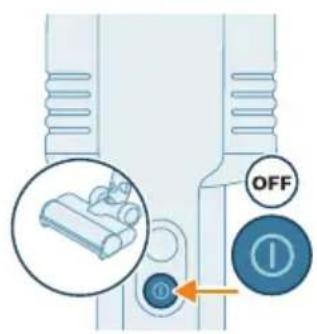
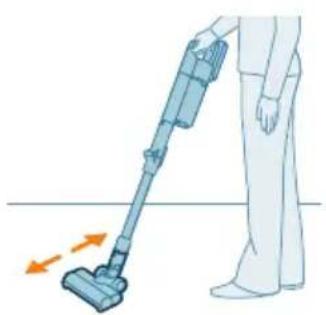
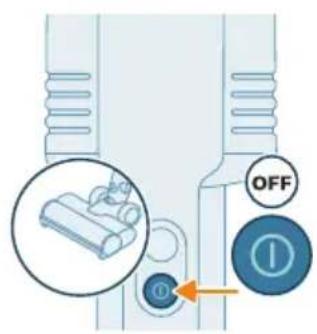
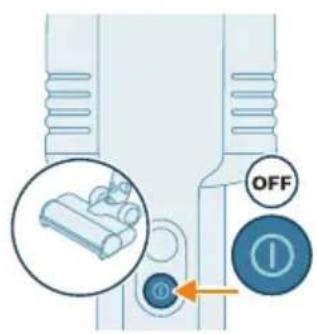
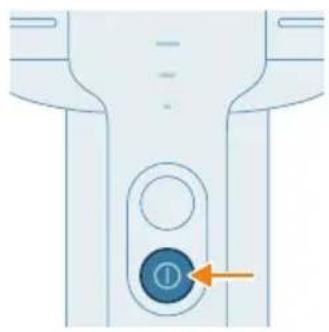
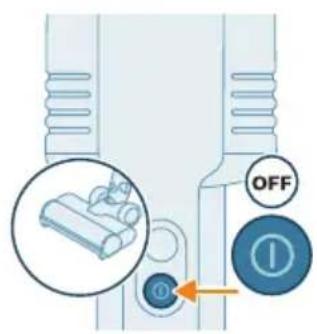
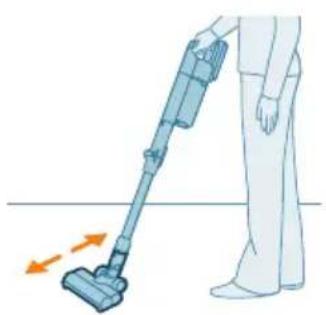
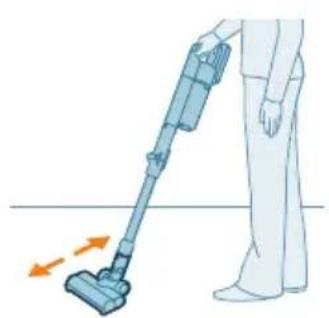
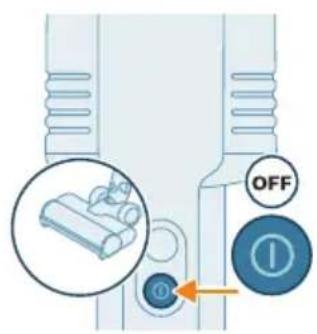
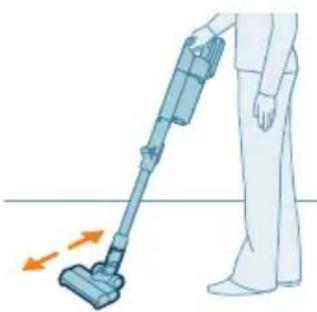
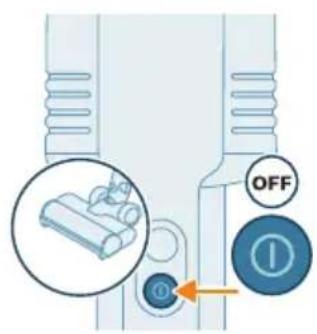
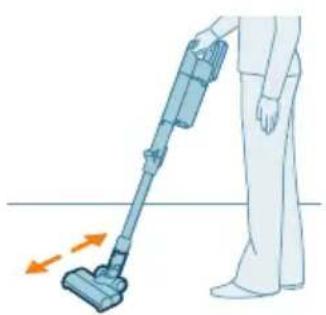
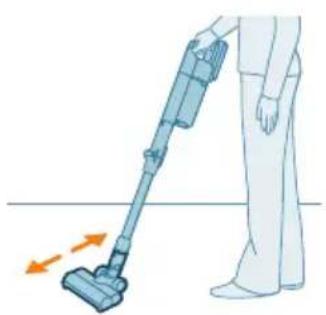
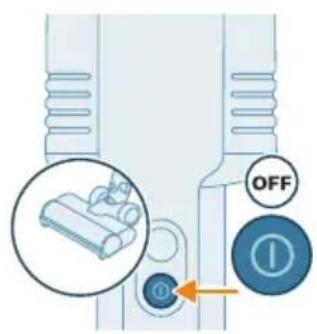
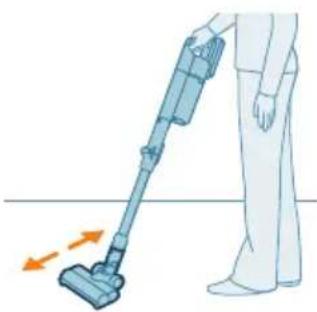
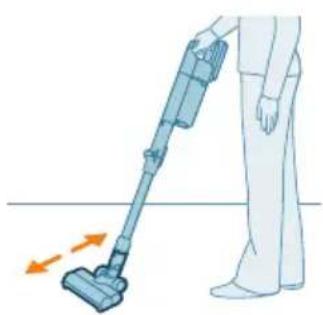
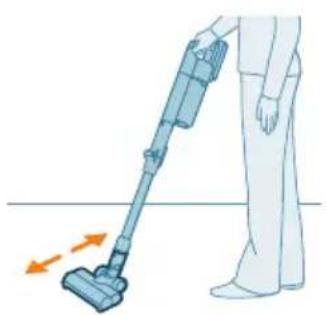
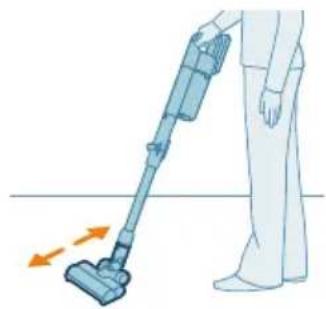
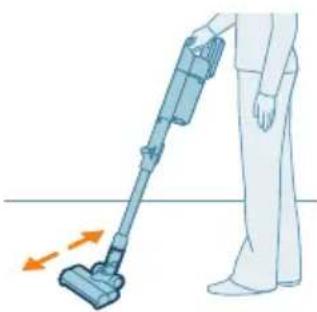
1 Press the on/off button to switch on the appliance.
i Note: To switch off the appliance, press the on/off button again.
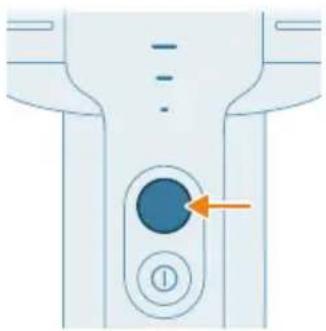
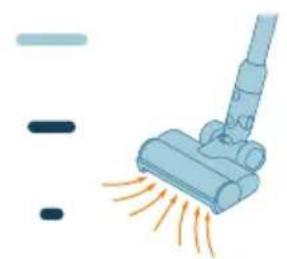
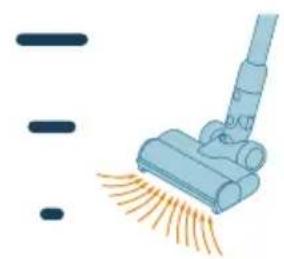
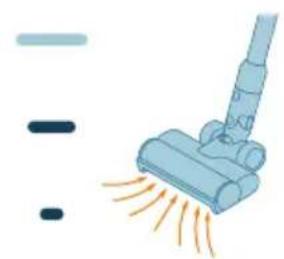
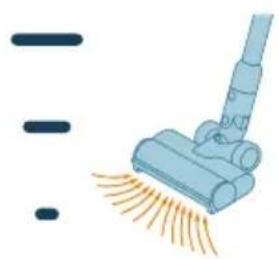
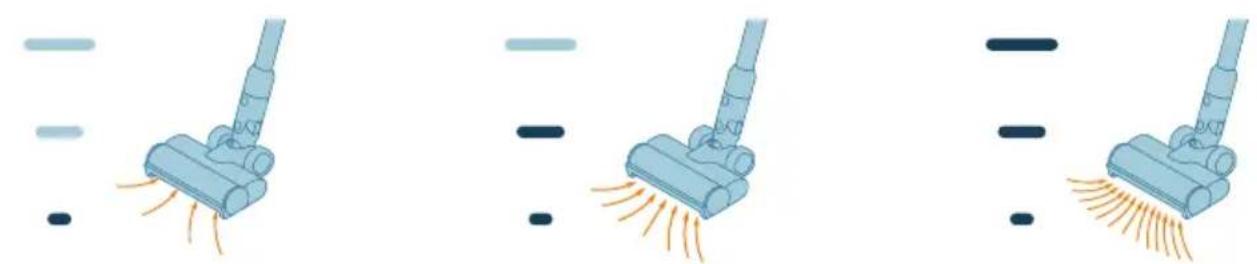
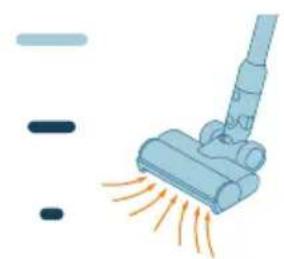
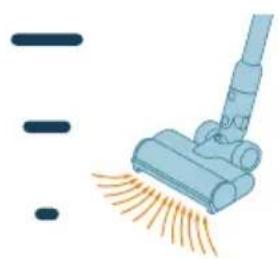
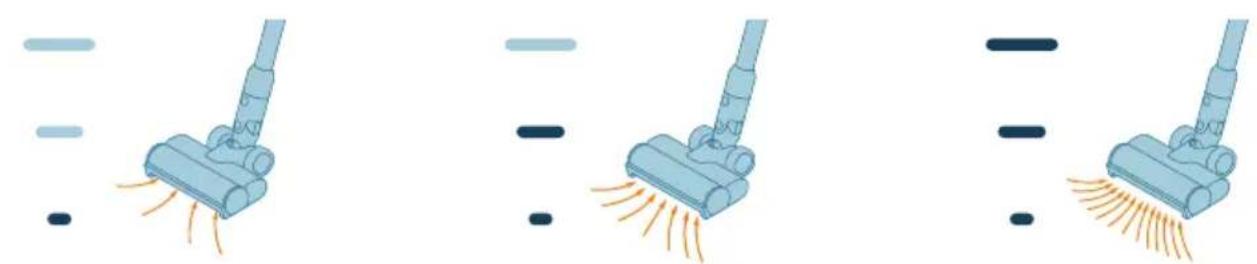
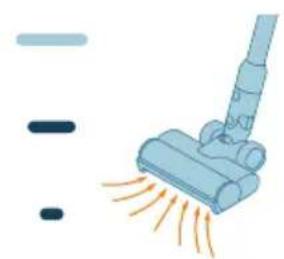
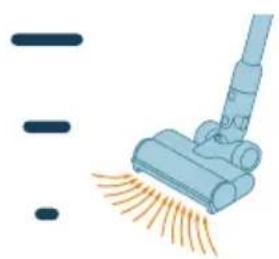
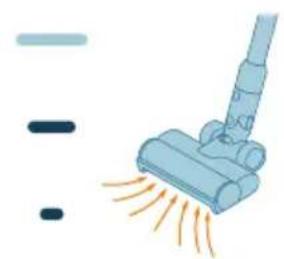
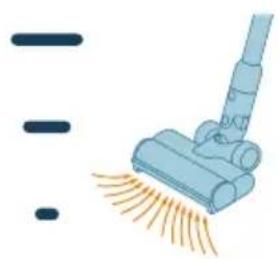
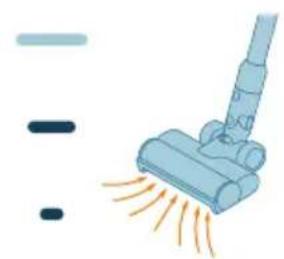
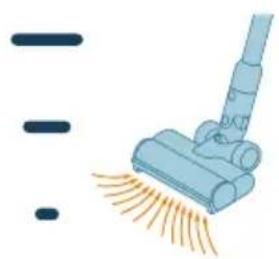
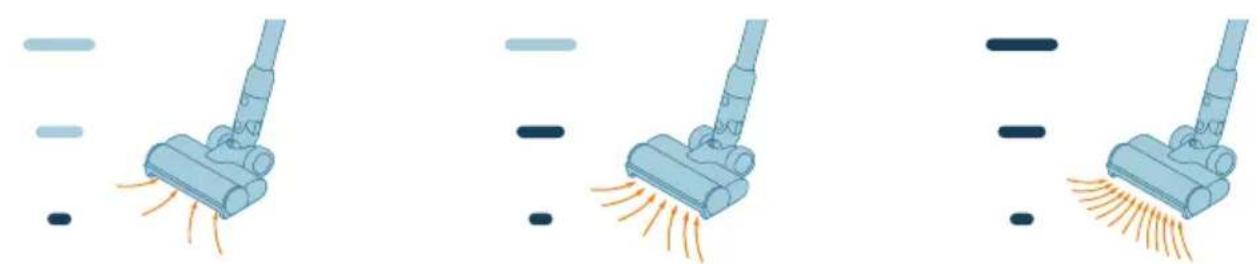
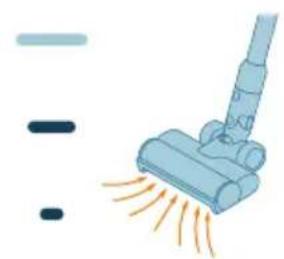
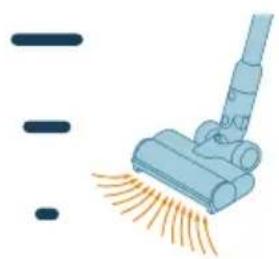
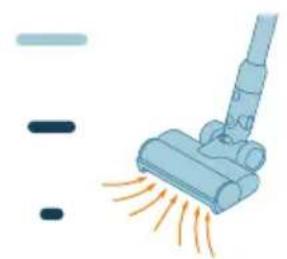
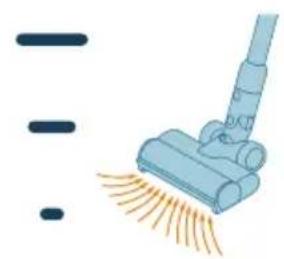
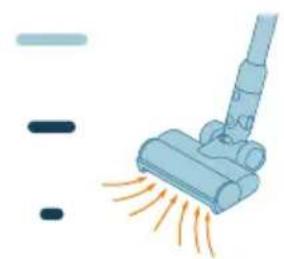
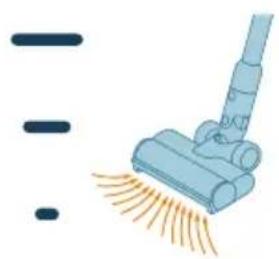
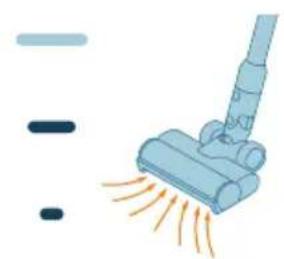
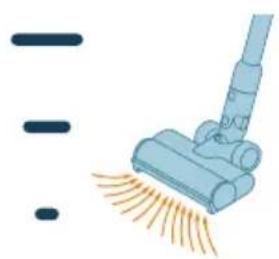
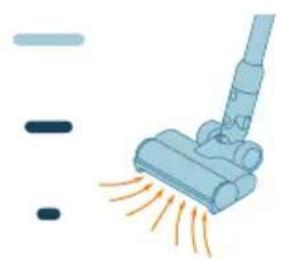
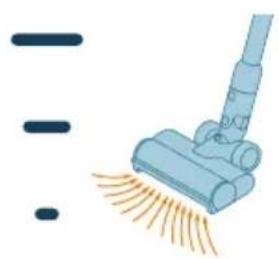
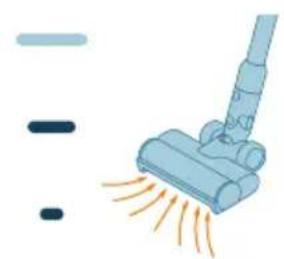
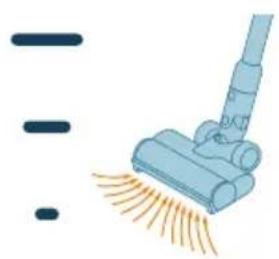
2 Use the power selection button button to toggle through three different power settings: eco mode, normal mode, turbo mode.
Eco Normal Turbo
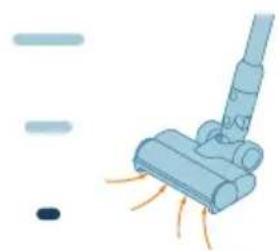
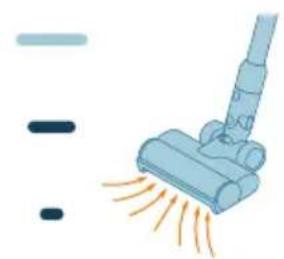
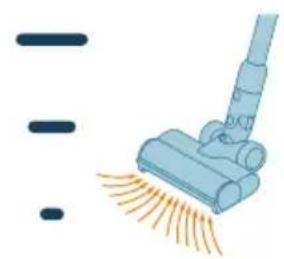
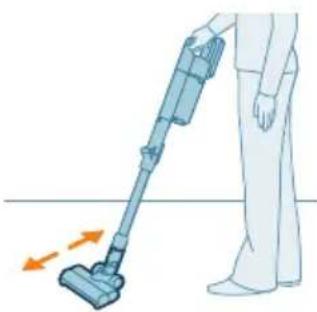
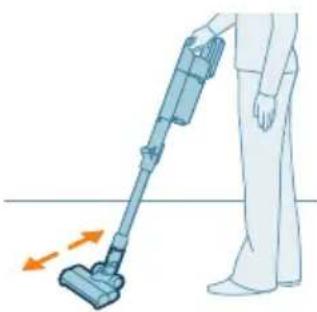
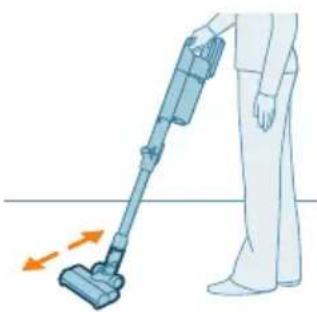
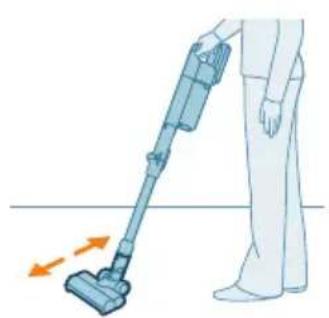
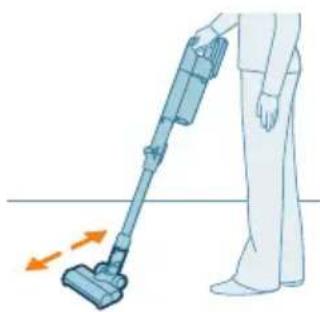
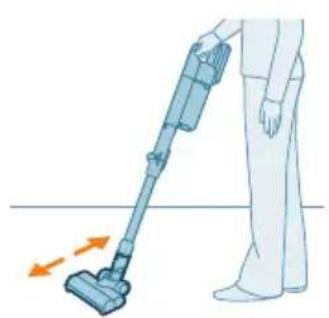
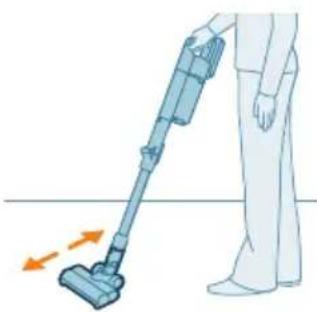
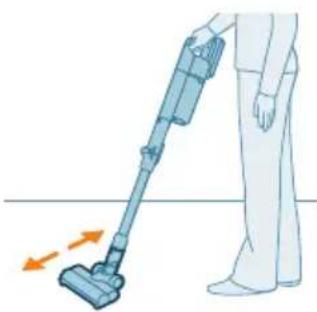
3 You can clean on hard or soft floors with the vacuum cleaner.
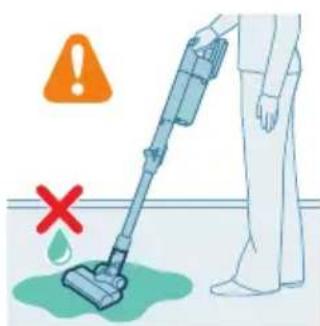
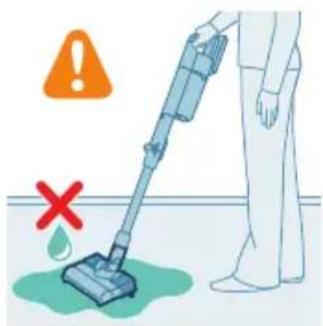
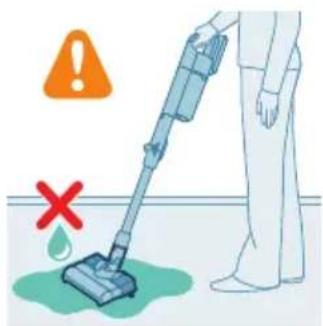
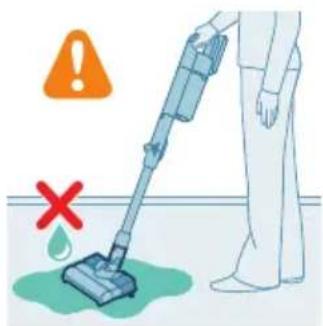
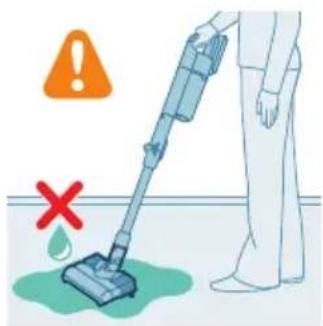
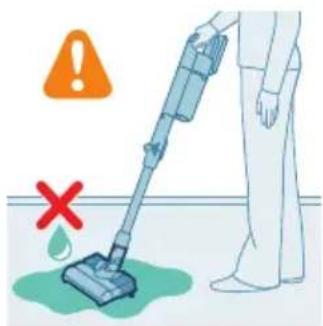
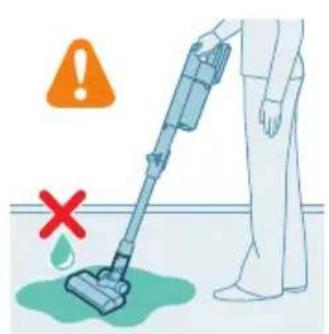
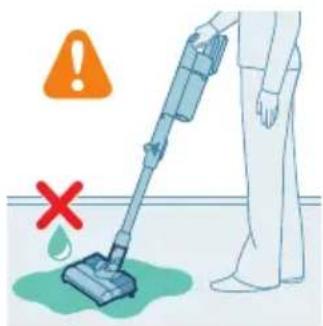
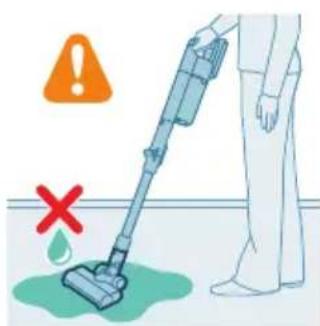
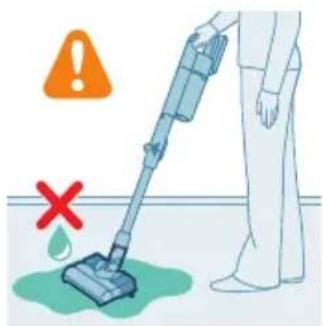
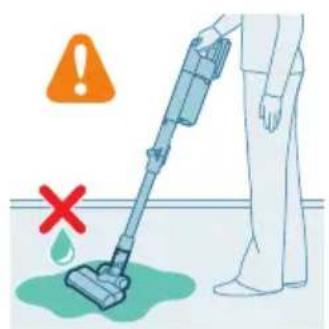
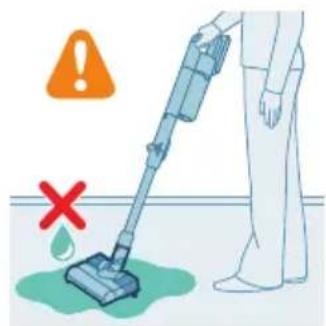
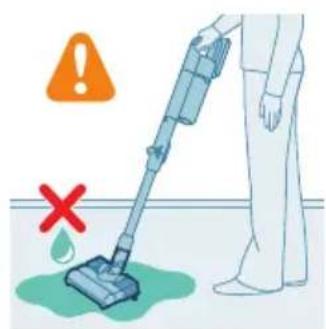
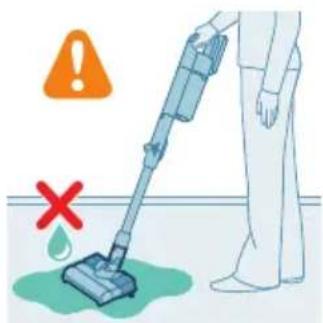
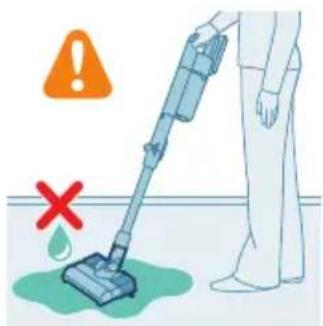
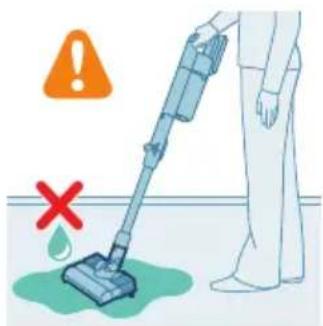
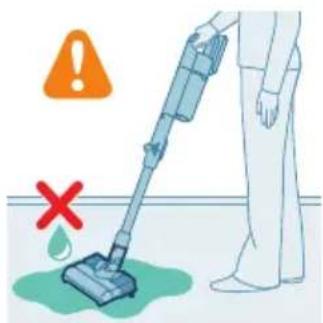
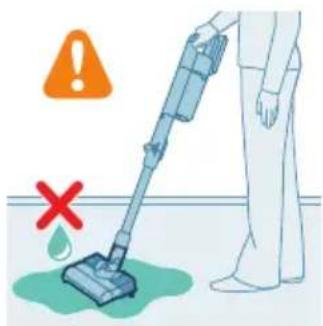
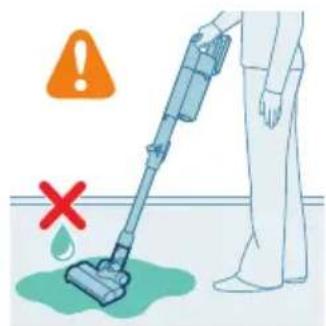
Warning: Do not vacuum up water or other liquids.
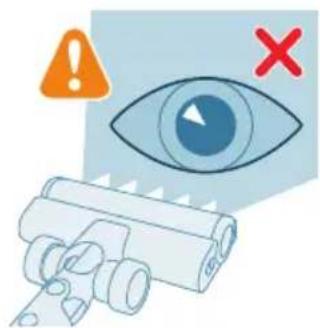
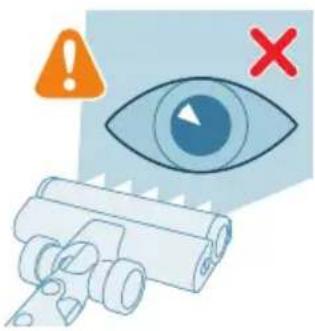
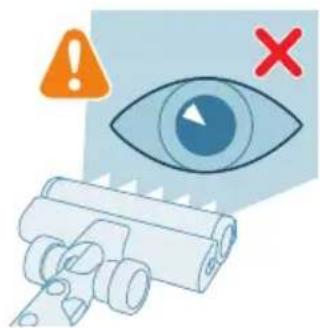
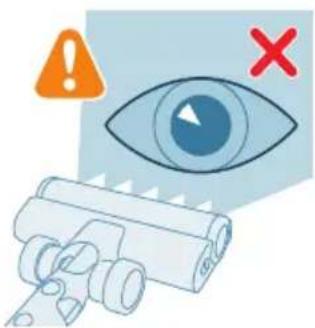
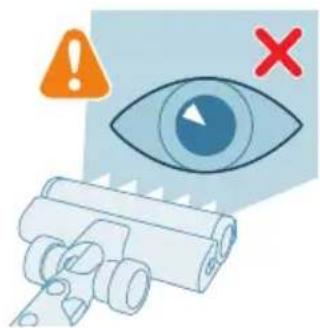
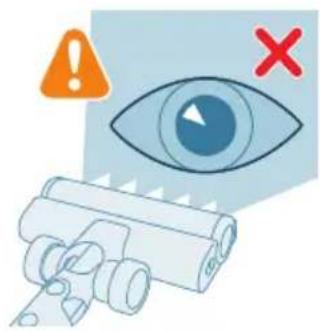
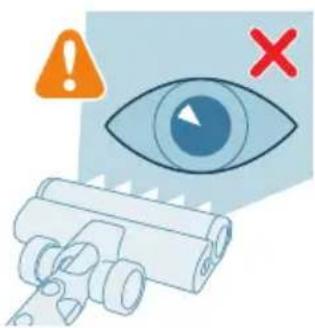
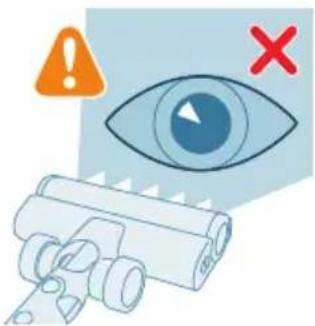
Caution: Do not look directly into the illuminated LEDs or point the LEDs at someone's eyes. The LED light is very bright.
Vacuuming while mopping hard floors (XC5244 only)
Caution: Only use the aqua tank on hard floors with a water-resistant top coat (such as linoleum, enameled tiles and varnished parquet) and stone floors (such as marble). If your floor has not been treated to make it water-resistant, check with the manufacturer if you can use water to clean it. Do not use the aqua tank on hard floors of which the water-resistant top coat is damaged.
i Note: Do not use the aqua tank to clean carpets.
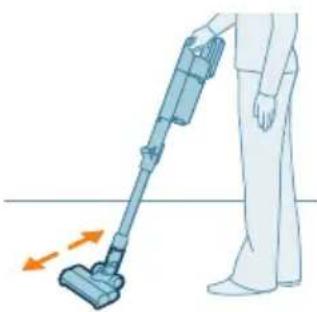
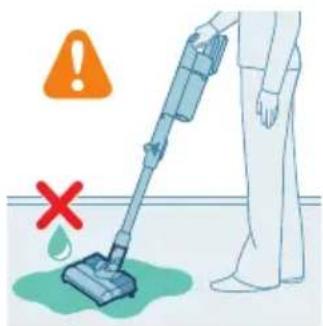
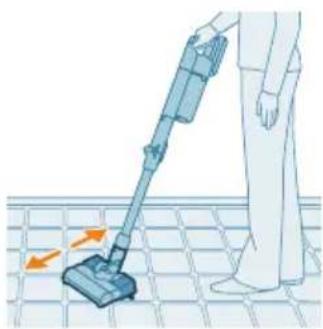
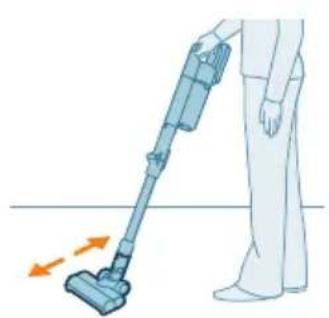
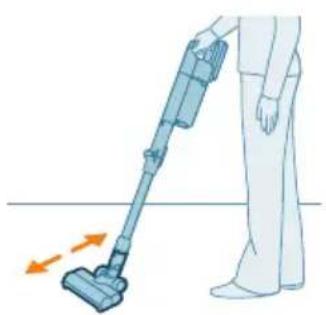
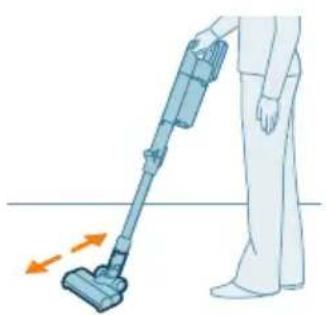
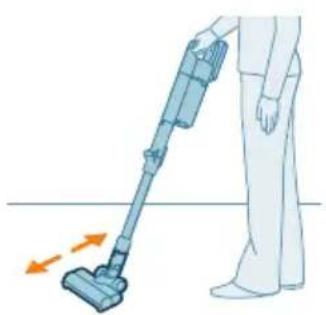
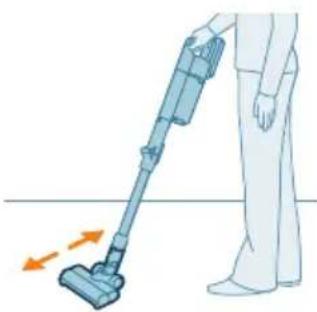
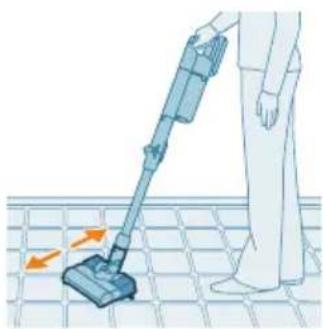
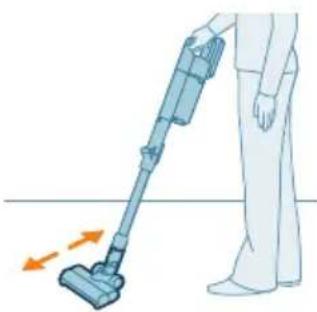
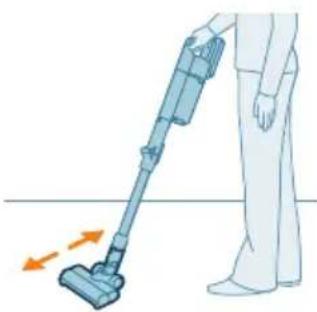
i Note: Do not move the appliance with aqua tank assembled sideways, as this leaves water traces. Only move forwards and backwards.
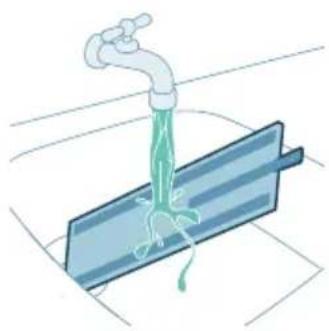
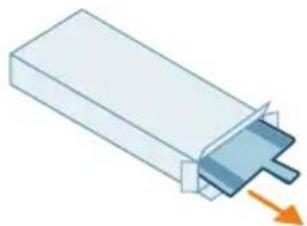
1 Pre-wet the microfiber mopping pad with water before use.
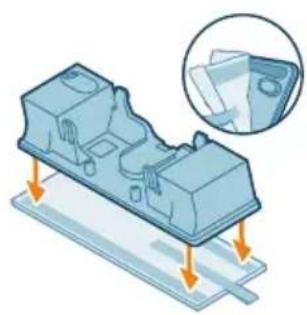
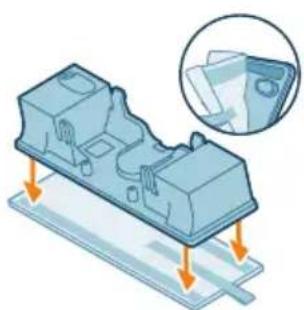
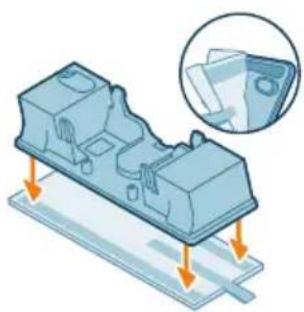
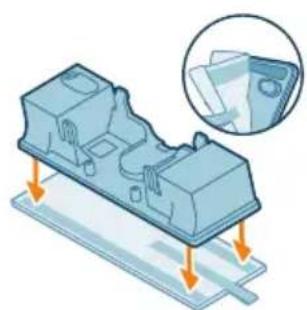
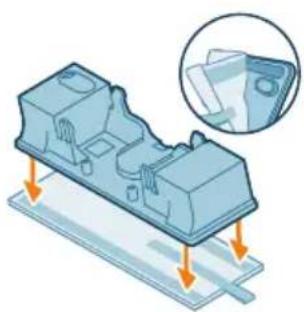
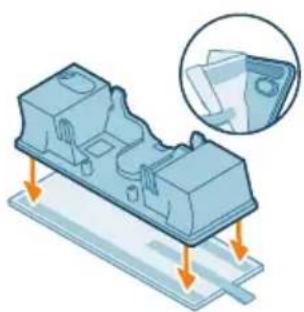
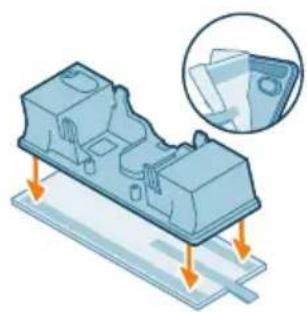
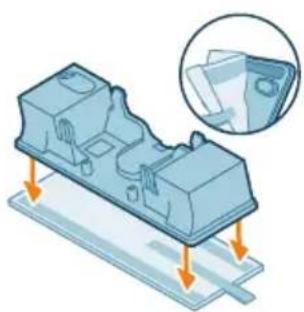
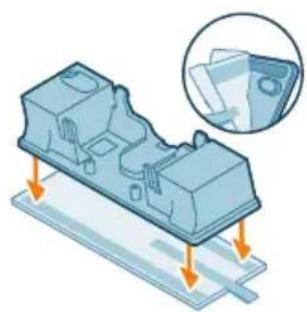
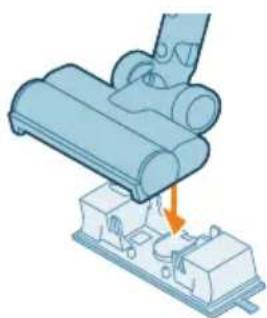
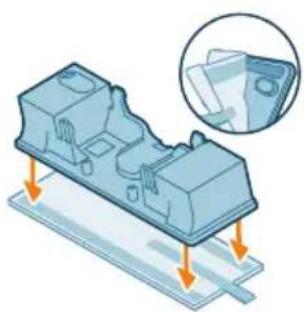
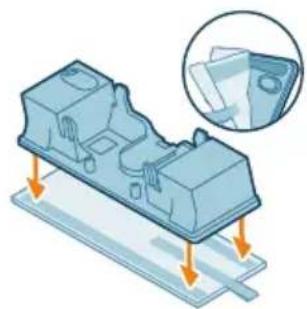
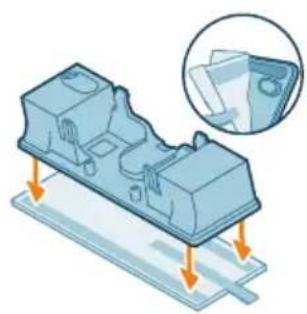
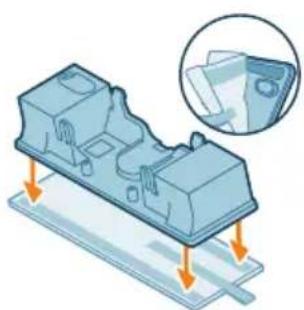
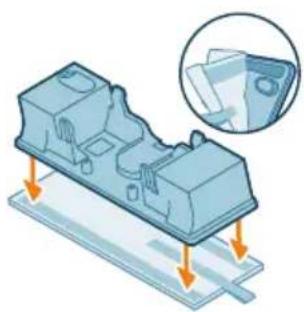
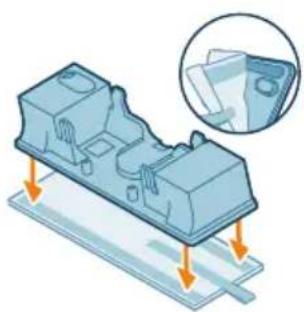
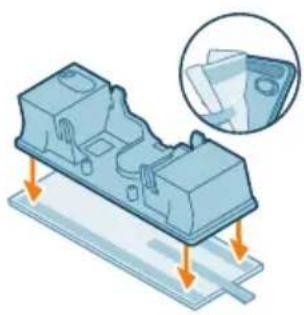
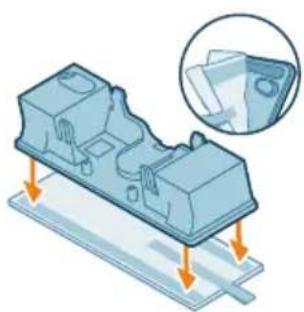
2 Secure the microfiber mopping pad underneath the aqua tank. Align the velcro straps under the aqua tank and behind the cloth.
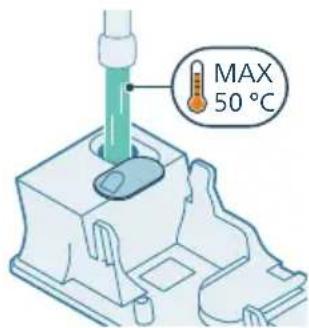
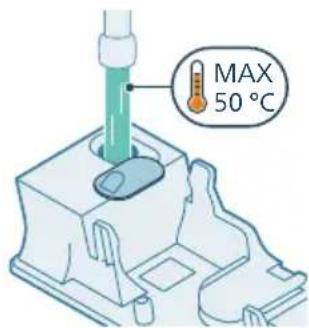
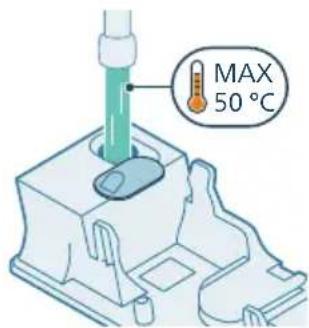
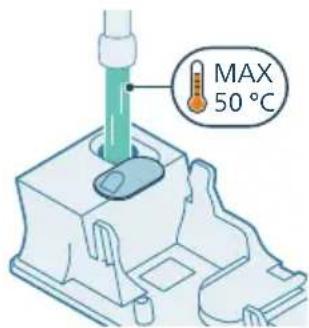
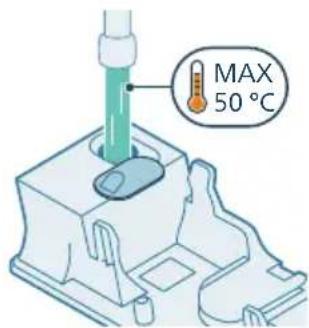
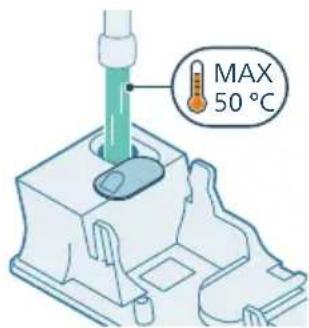
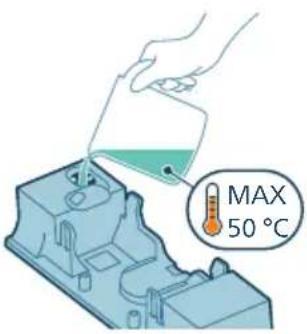
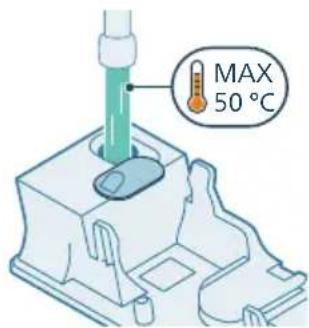
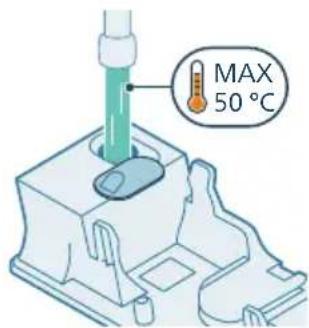
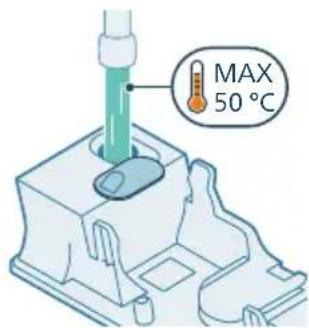
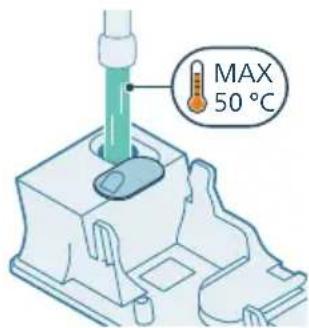
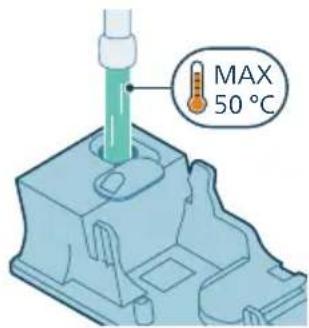
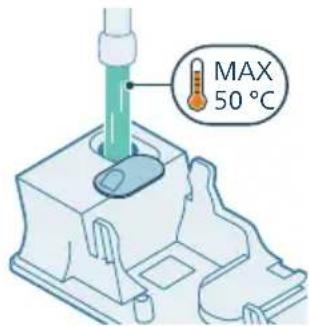
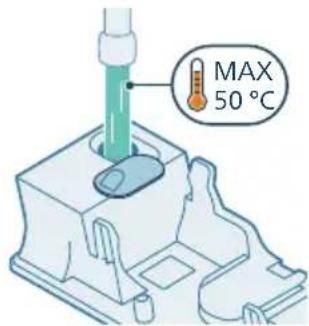
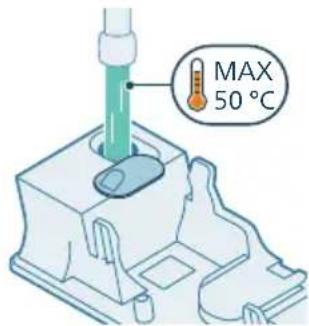
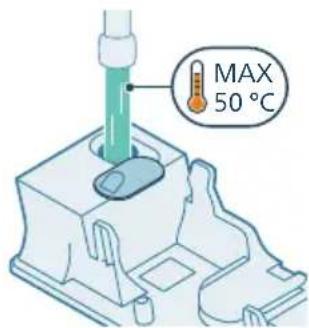
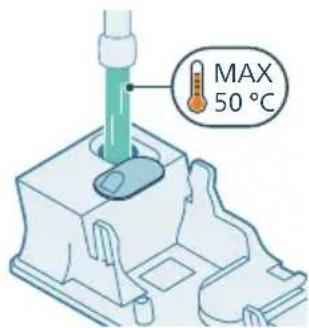
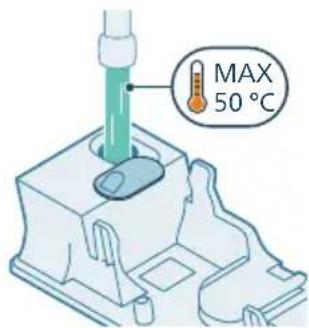
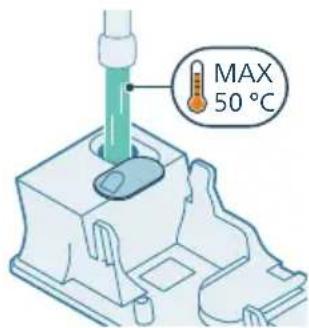
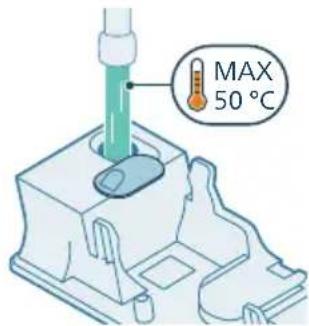
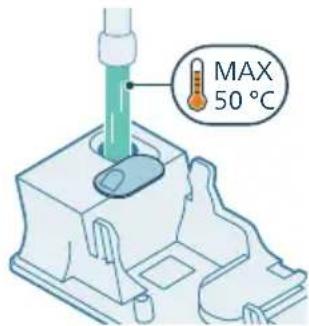
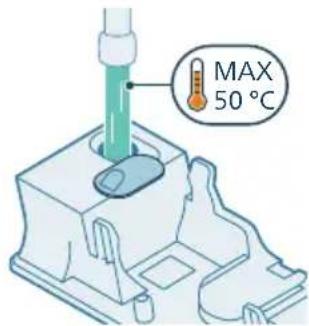
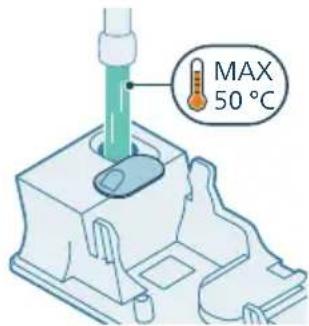
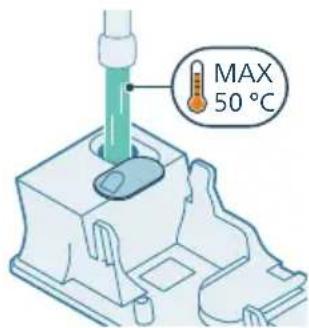
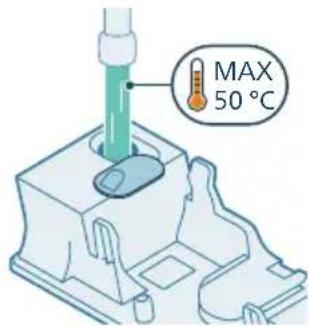
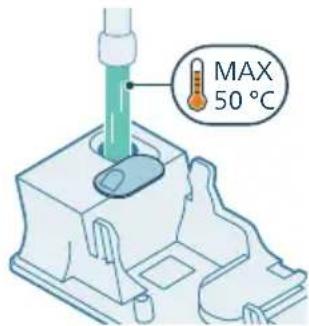
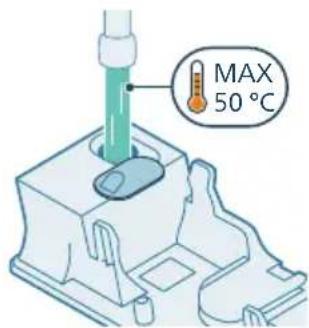
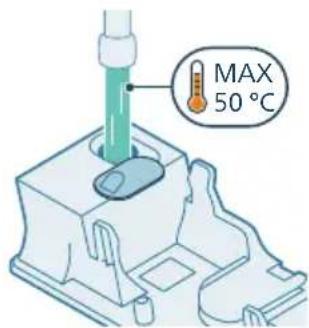
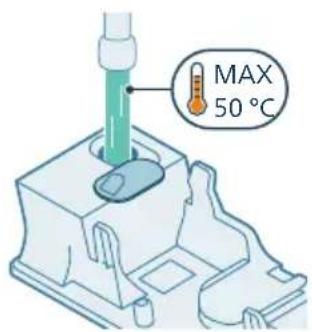
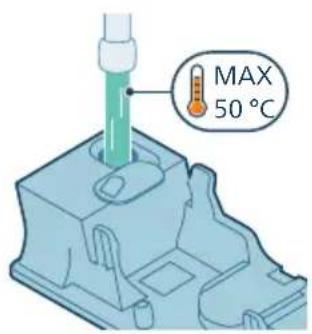
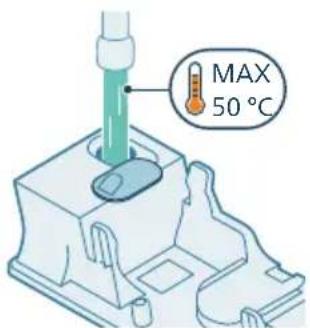
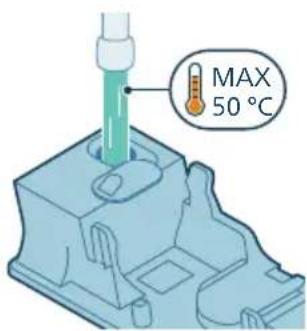
3 Open the rubber cap on top of the tank. Fill the tank with water, ensuring the water temperature does not exceed 50 °C.
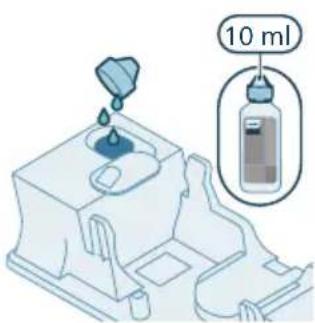
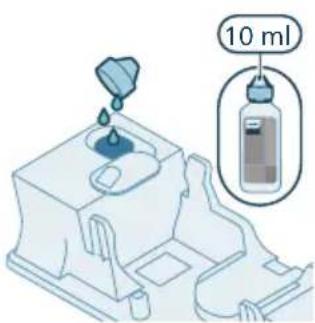
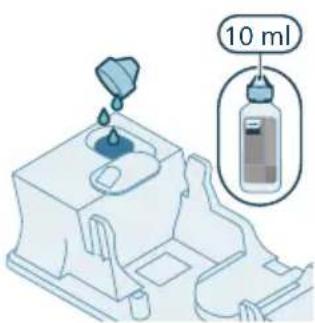
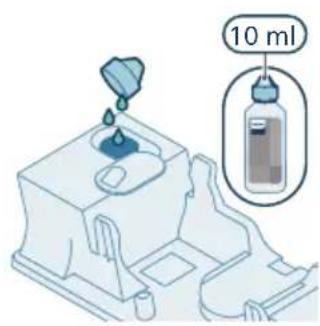
4 (Optional) If you wish to add a liquid floor cleaner into the aqua tank, opt for a low-foaming or non-foaming variety that can be diluted. We recommend the XV1792 Philips Floor Cleaner. Add only a few drops of the liquid cleaner to the water.

5 Close the aqua tank properly.
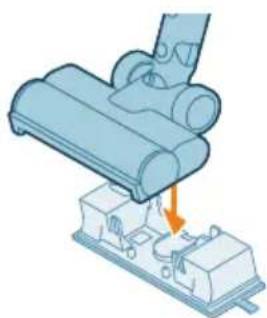
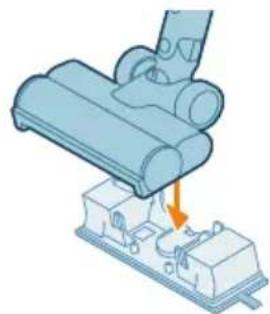
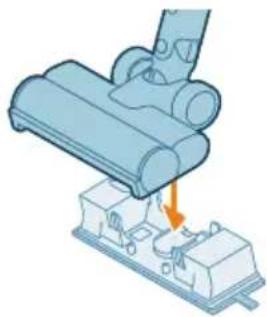
6 Attach the prepared aqua tank to the aqua nozzle and you're set to begin. For proper usage, it is essential to firmly attach the tank to the wheels of the nozzle when it's at the correct orientation.
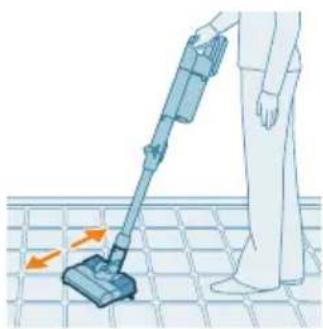
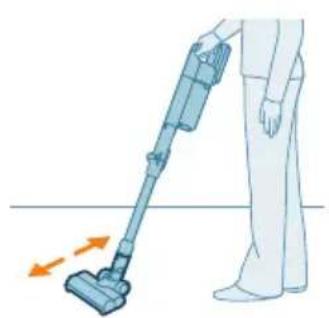
7 Press the on/off button to switch on the appliance. You can effectively clean hard floors with the attached aqua module on the nozzle.
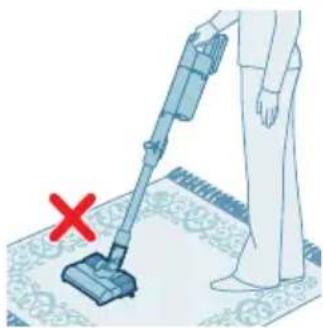
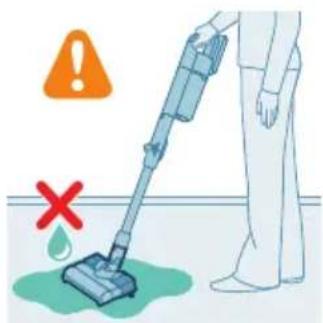
i Note: The aqua module is not suitable for soft floors like carpet.
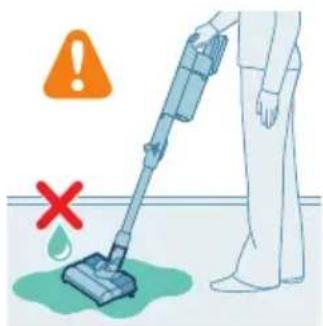
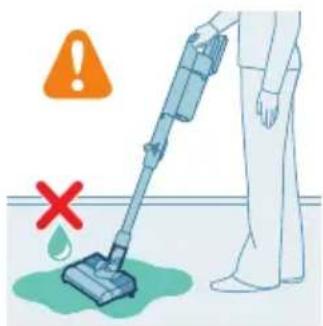
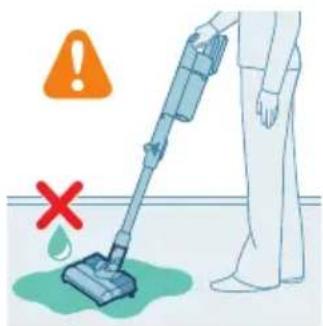
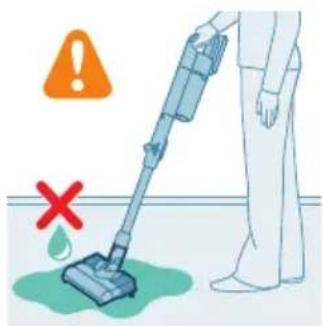
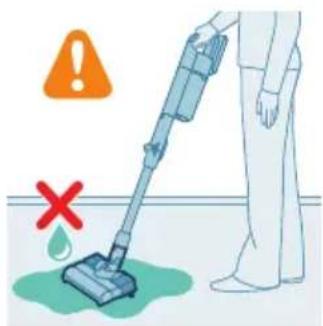
Caution: The aqua module should not be used to pick up water puddles.
Tips and other important information
- It is not necessary to vacuum the floor before mopping, as the Vacuum & Mop set-up actively wet-cleans your hard floor to capture all kinds of dirt, including liquids and stains. On carpets and rugs, use the Vacuum only set-up.
- The appliance can leave a small puddle of water on the floor if you do not move the appliance while switching it off. You can reduce the size of the puddle by moving the appliance while switching it off. If needed, you can remove the last drops with a cloth.
Usage restrictions
- The Vacuum & Mop set-up is suitable for vacuuming and mopping all types of hard floors, except uncoated wooden floors.
- The Vacuum & Mop set-up is intended for regular cleaning of hard floors. Always follow the cleaning instructions for your hard floor when you use this appliance.
- If you want to add a liquid floor cleaner other than XV1792 Philips Floor Cleaner to the water in the clean aqua tank, make sure that you use a low-foaming or non-foaming liquid floor cleaner that can be diluted in water like XV1792 Philips Floor Cleaner.
- As the clean aqua tank has a capacity of 300 ml, you only have to add a few drops (max 10ml) of liquid floor cleaner to the water.
- If you use the Vacuum & Mop set-up on linoleum floors, only do so on linoleum floors that are properly affixed to prevent linoleum from being drawn into the nozzle.
- If you move/lift the appliance over a carpet or rug when it is switched off, wastewater droplets may end up on your carpet or rug.
- Do not push the appliance over the floor grilles of convector heaters. As the appliance cannot pick up water that comes out of the nozzle when you move it over the grille, water ends up at the bottom of the convector pit.
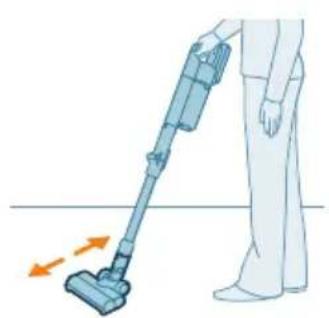
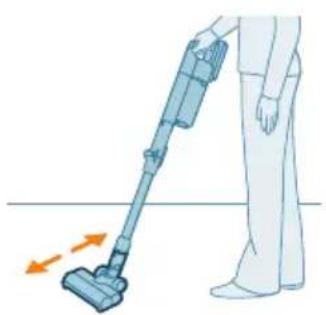
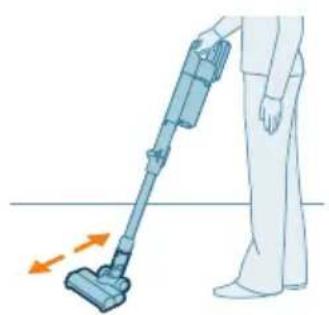
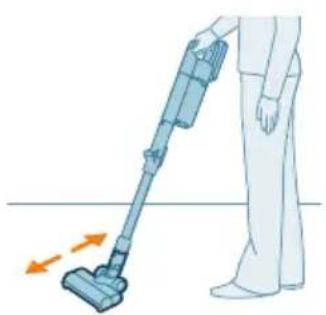
- While cleaning, do not lift the nozzle from the floor or move the nozzle sideways, and do not make strong turns, as this leaves water traces. Only move forwards and backwards.
i Note: The operating time depends on the power level used during cleaning.
Versatile usage and accessories
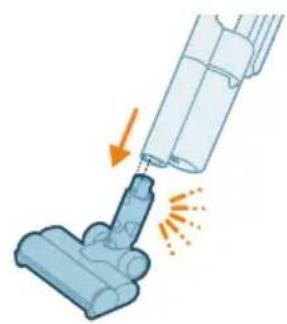
Warning: When using any accessory, do not vacuum up water or other liquids.
Using the nozzle
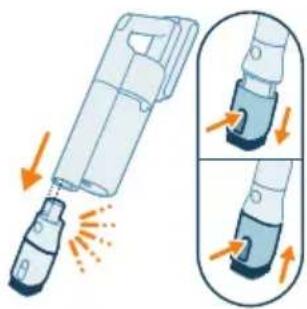
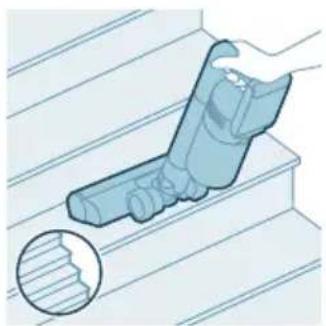
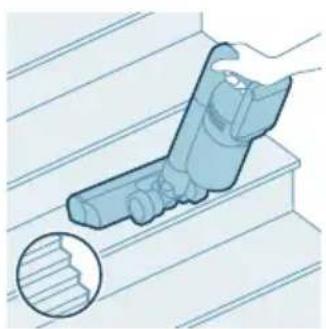
1 Attach the nozzle directly to the handheld.
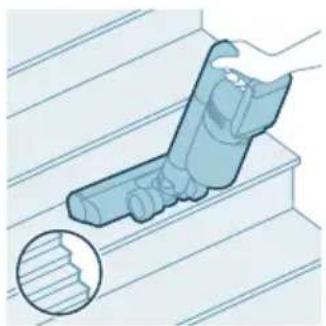
2 This combination is for cleaning dynamic surface height, such as stair case.
Using the Mini TurboBrush (XC5243, XC5244 only)
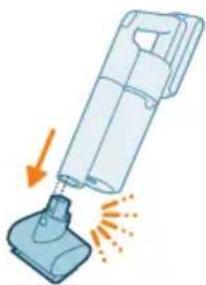
1 To attach the Mini TurboBrush, insert the tube of the handheld into the Mini TurboBrush.
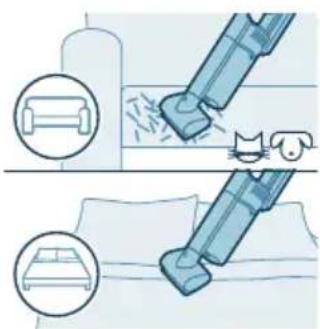
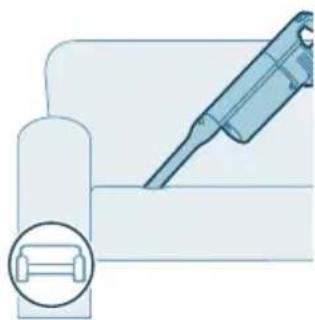
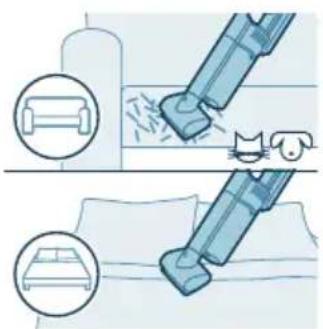
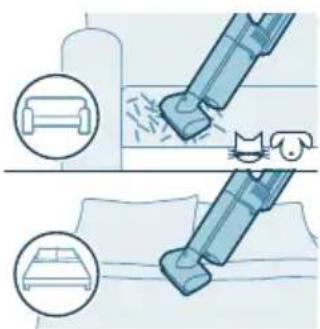
2 You can use the Mini TurboBrush for standard cleaning, for instance of soft areas such as beds and couches. You can adjust the power setting to suit your cleaning needs.
3 You can use the Mini TurboBrush for extra thorough cleaning, for instance to vacuum up pet hair, or to clean small patches of dirt, such as spilled breadcrumbs. You can adjust the power setting to suit your cleaning needs.
Using the crevice tool
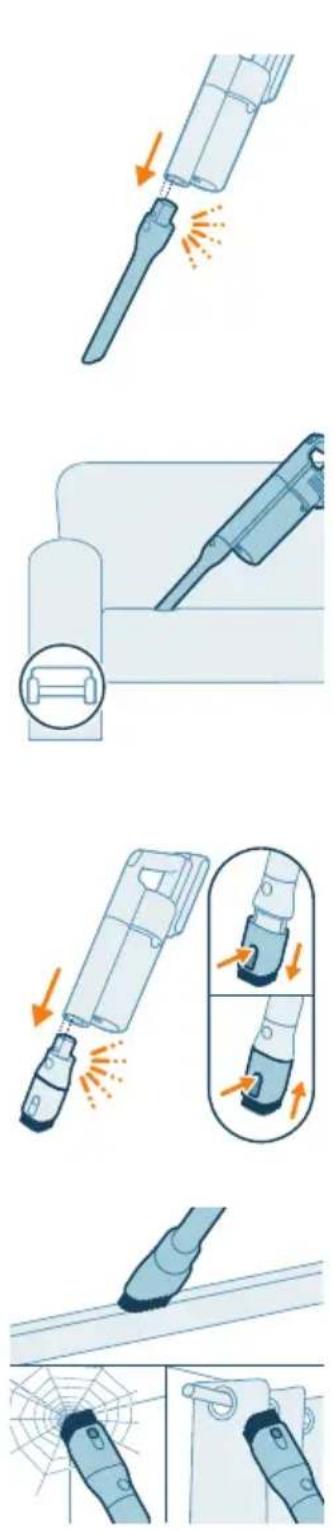
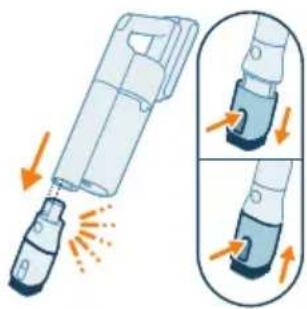
1 To attach the crevice tool, insert the tube or handheld into the crevice tool.
2 You can use the long crevice tool to clean narrow corners or hard-to-reach places. You can adjust the power setting to suit your cleaning needs.
Using the combination tool
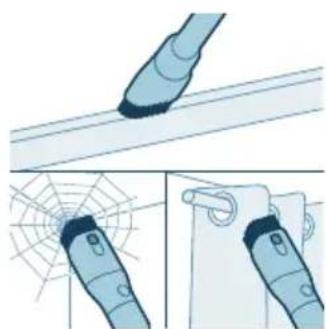
1 To attach the combination tool, insert the tube or handheld into the combination tool.
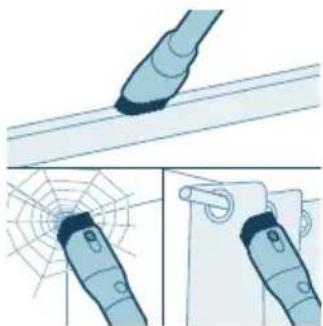
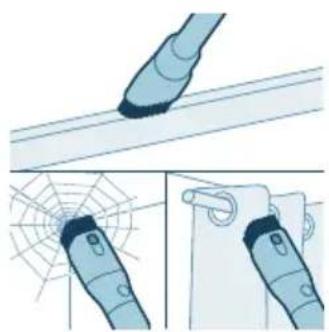
2 The combination tool is designed for cleaning window frames, curtains, or spider webs, with a customizable brush release and illumination settings.
After use – Maintenance
Frequent maintenance after each cleaning cycle
Dust bucket maintenance
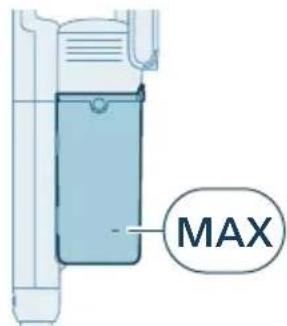
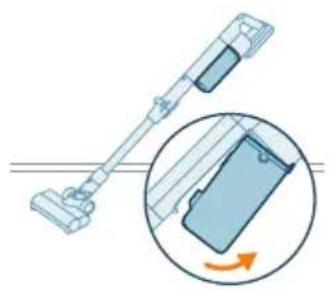
Empty the dust bucket after each use or when the dust is reaching the MAX level indicator.
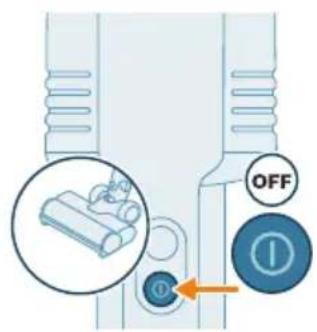
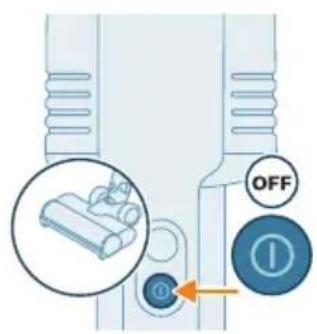
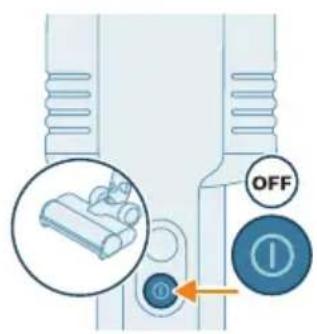
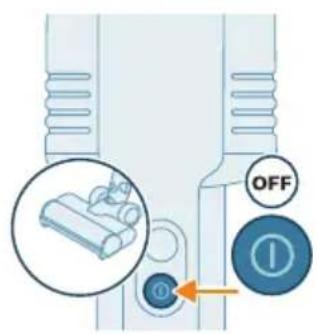
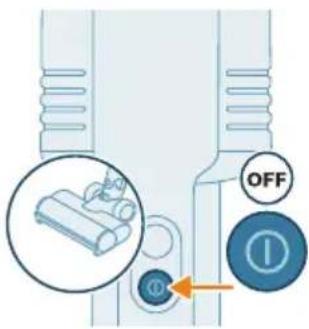
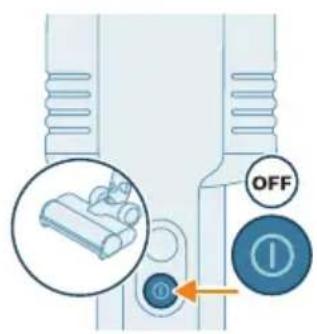
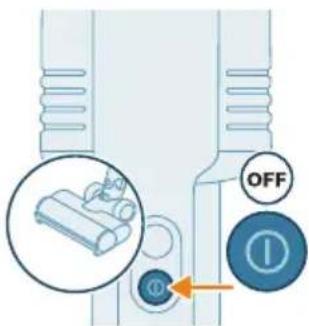
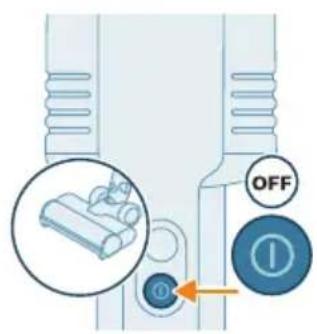
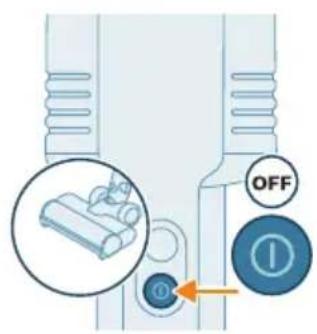
1 Switch off the appliance.
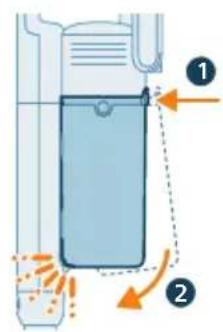
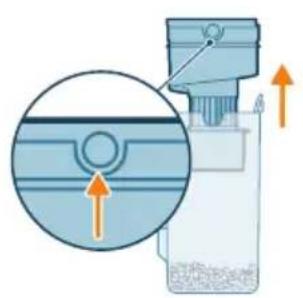
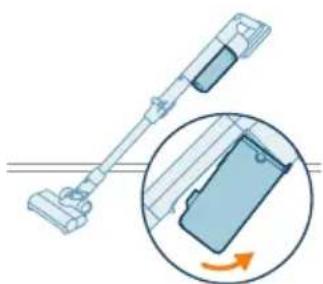
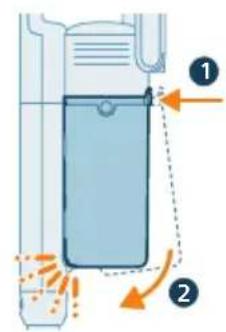
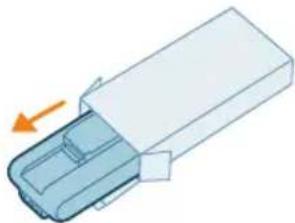
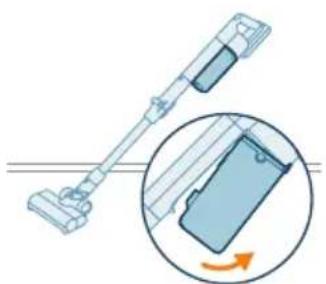
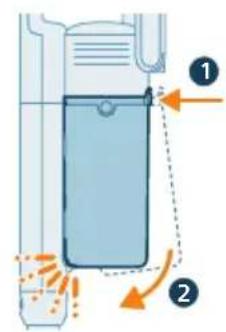
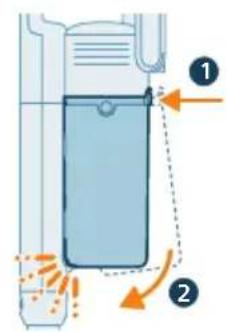
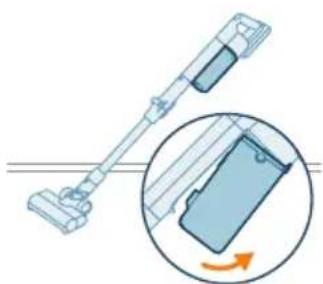
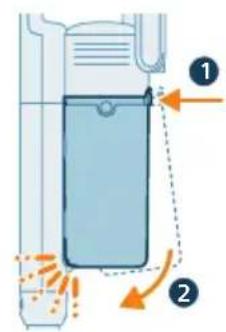
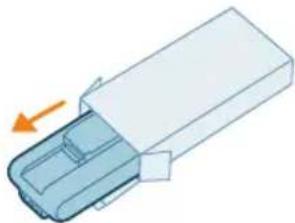
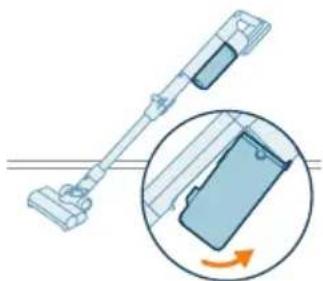
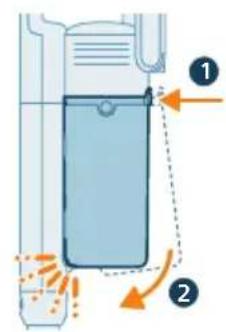
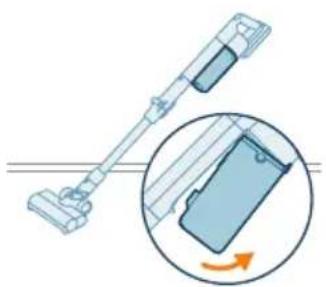
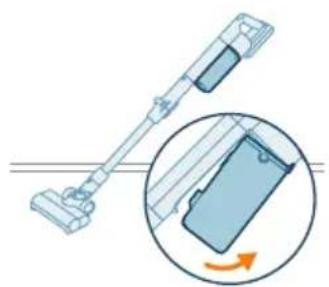
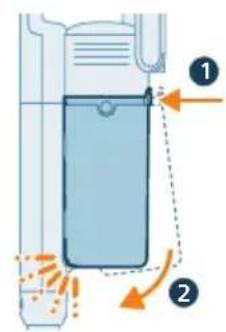
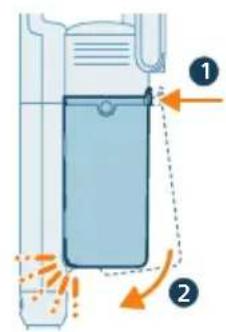
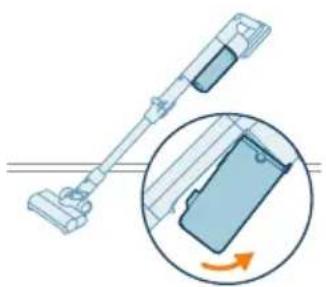
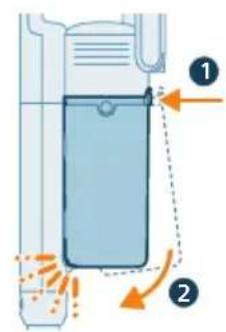
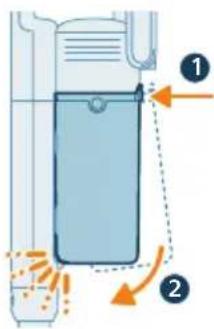
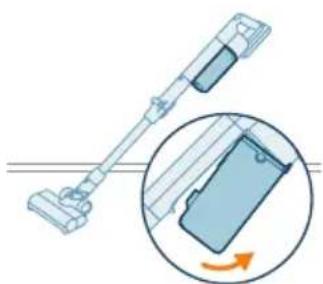
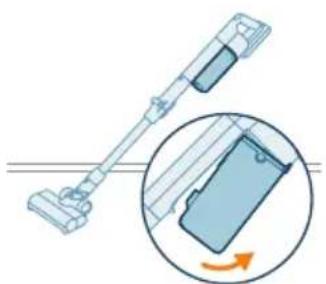
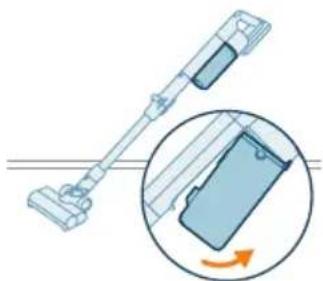
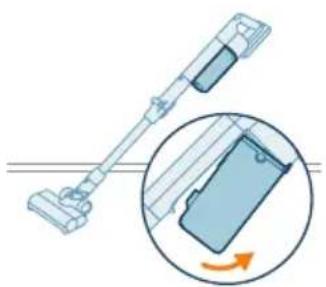
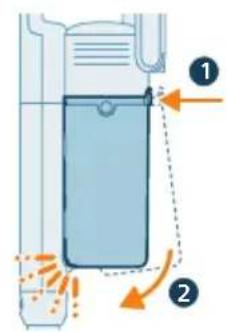
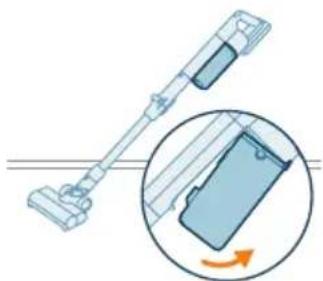
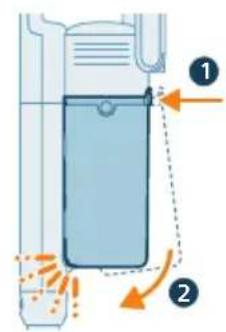
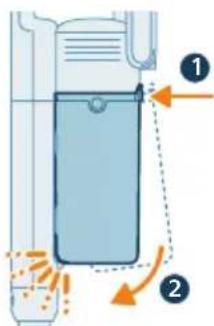
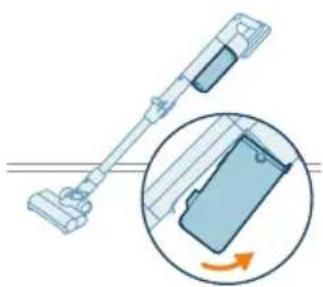
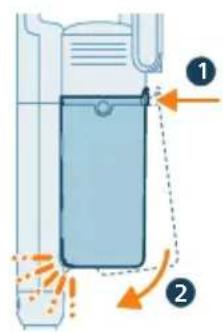
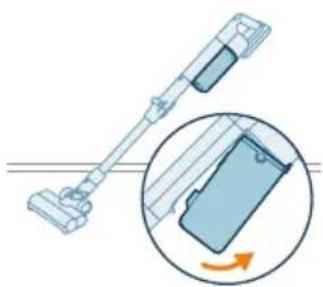
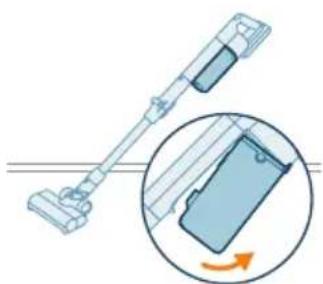
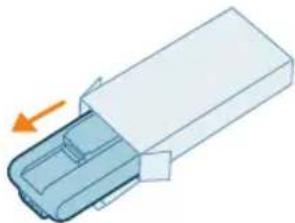
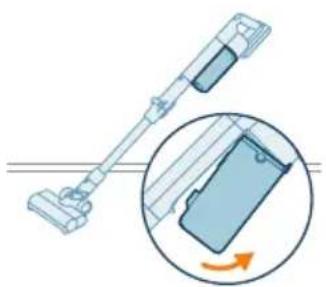
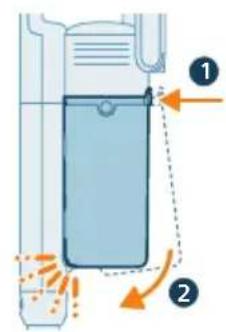
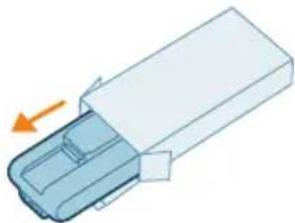
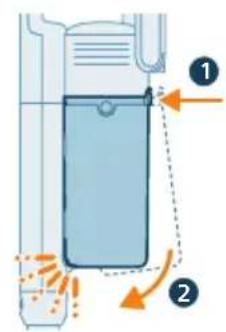
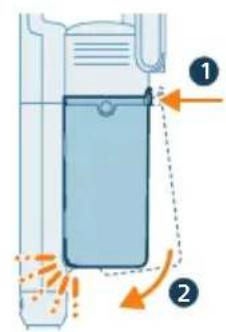
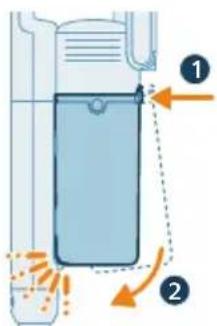
2 Hold the appliance in a 45 degree angle as shown in the illustration. Remove the dust bucket by pressing the release button, located at the bottom of the bucket.
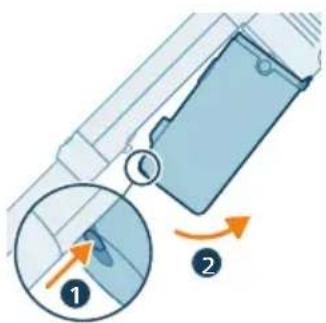
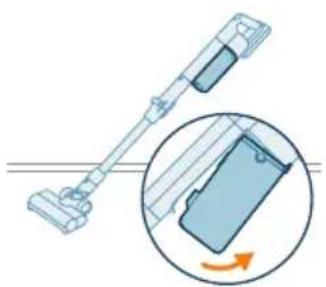
i Note: Remove the dust bucket while keeping the appliance in an upright position to avoid spilling of pollution.
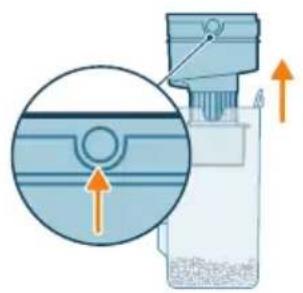
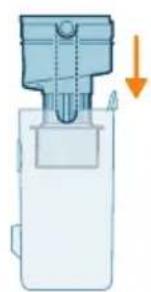
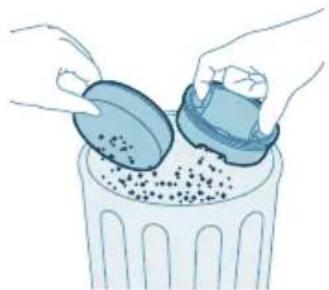
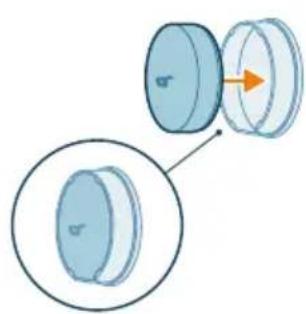
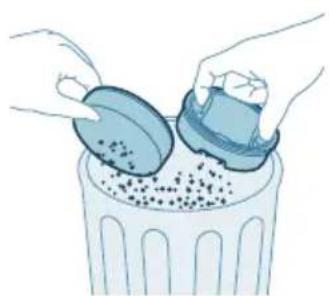
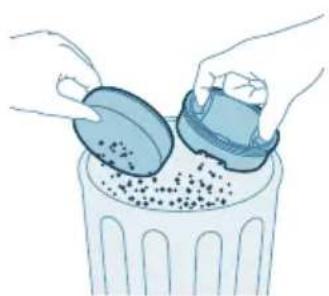
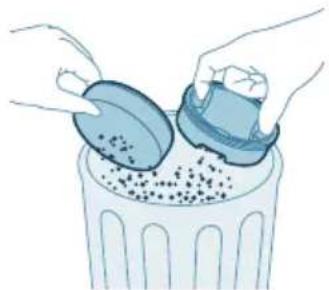
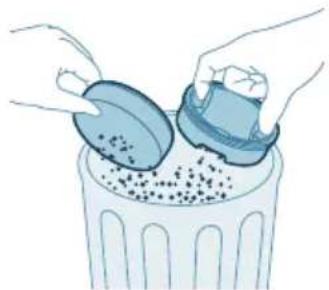
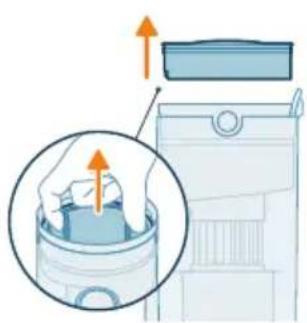
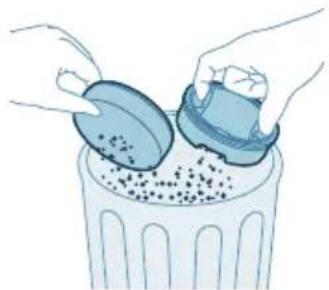
3 Hold onto the two dented circles on the side of the cyclone. Remove the cyclone from the dust bucket by lifting it out from the bucket
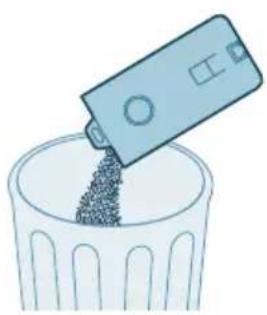
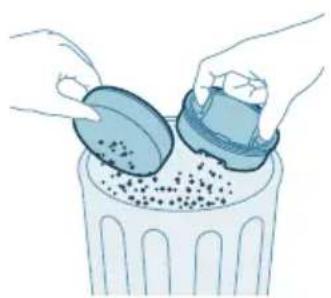
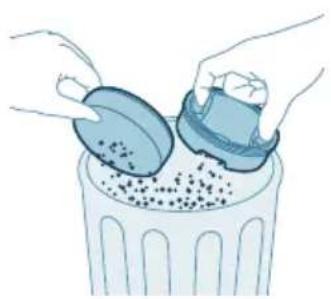
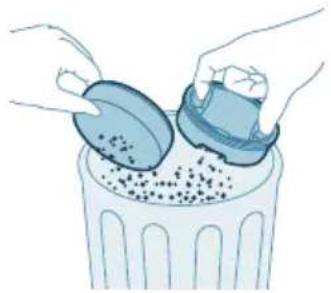
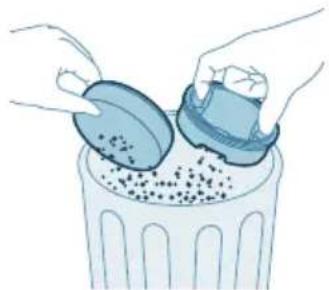
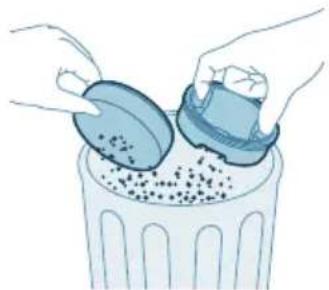
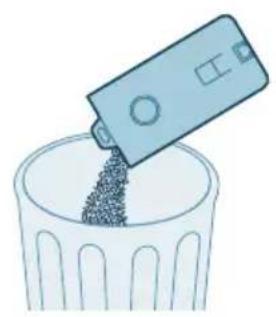
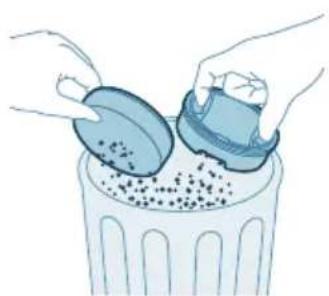
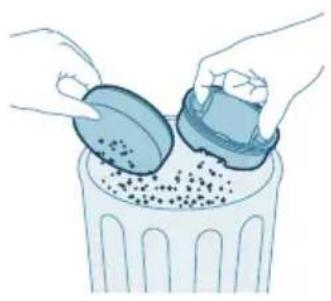
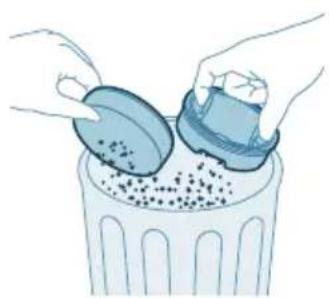
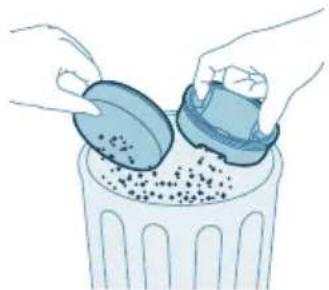
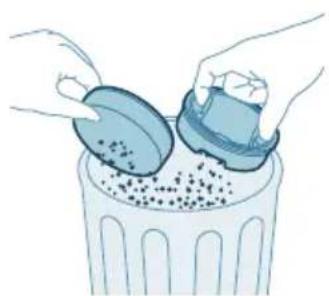
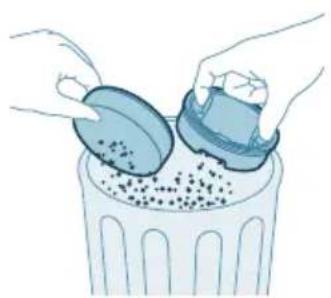
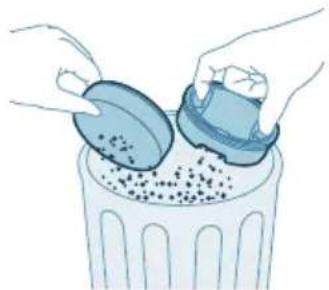
4 Empty the collected dust in the dust bucket over the trash bin.
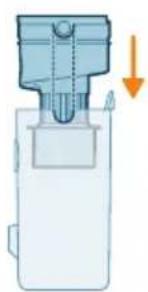
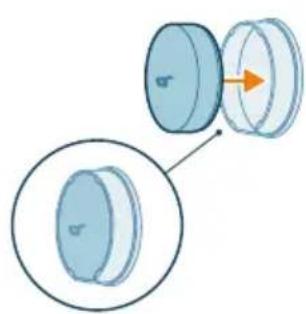
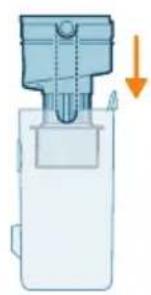
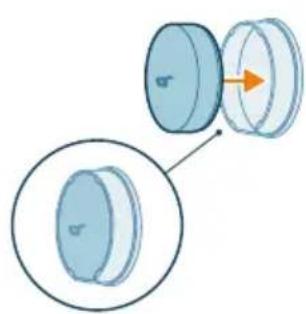
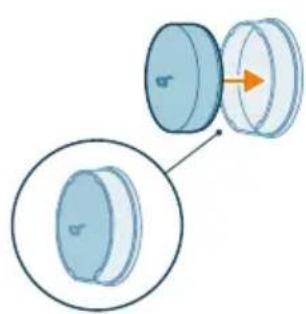
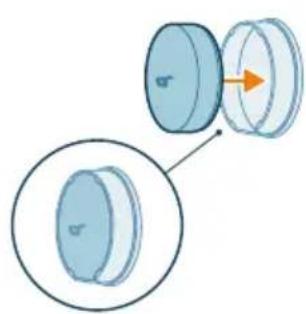
5 Place the cyclone back in the dust bucket. Make sure the two parts are aligned: the two semicircles must be connected to each other.
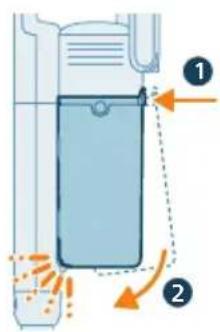
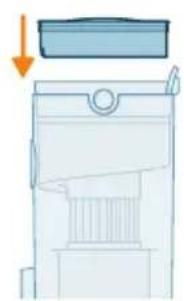
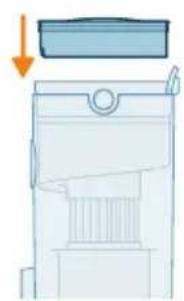
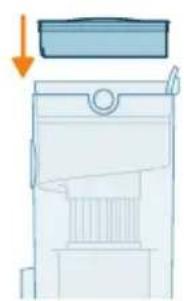
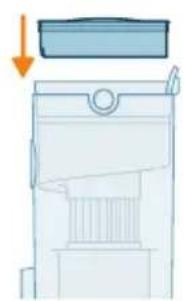
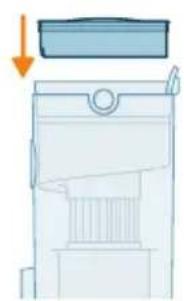
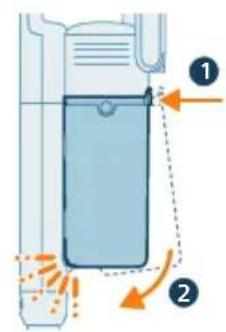
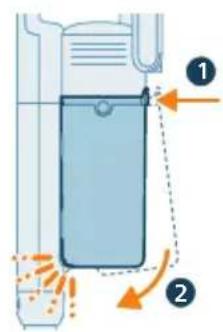
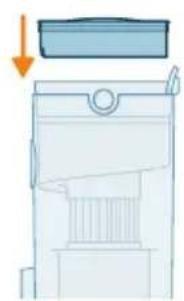
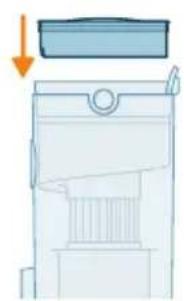
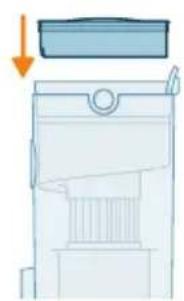
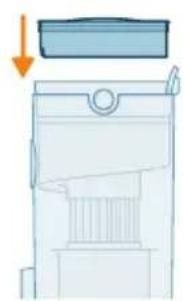
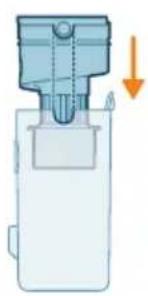
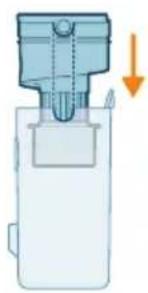
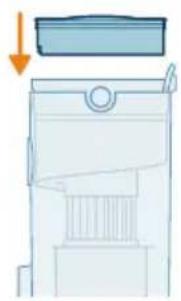
6 Place back the assembled bucket. First align the filter side of the bucket before hinging it in place.
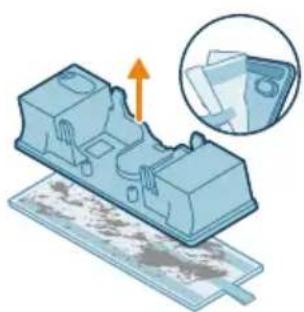
Aqua tank maintenance (XC5244 only)
Clean the aqua tank after each use.
1 Remove the microfiber mopping pad.
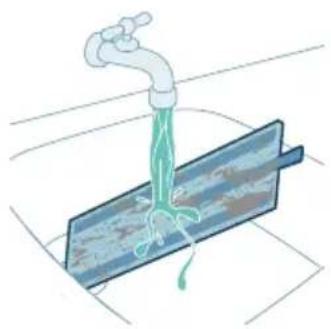
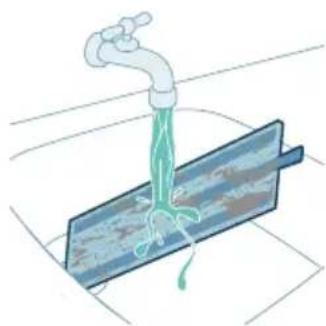
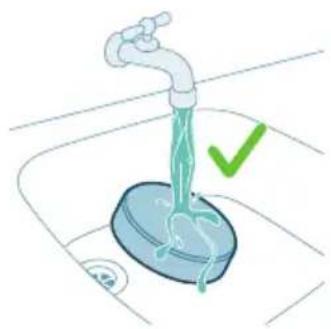
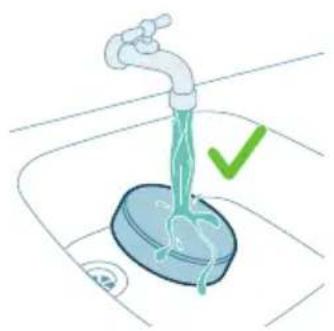
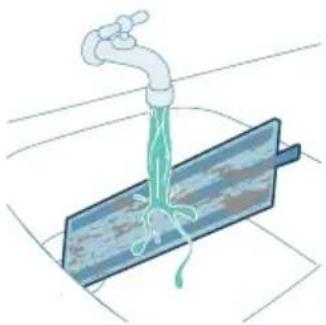
2 Rinse the mopping pad under the tap and wash it by hand or in a washing machine.
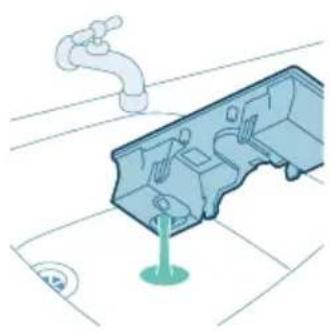
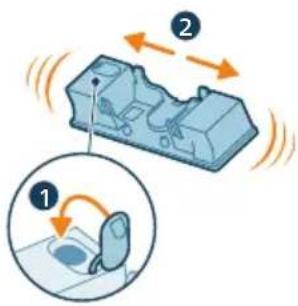
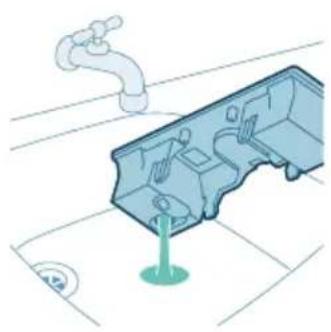
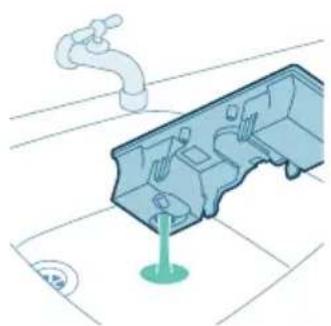
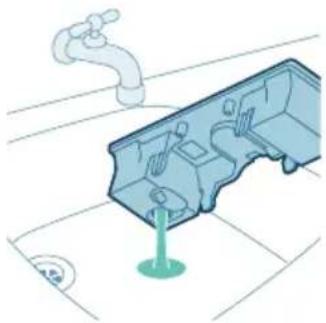
3 Pour out any remaining water in the aqua tank.
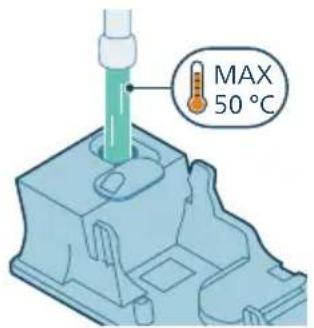
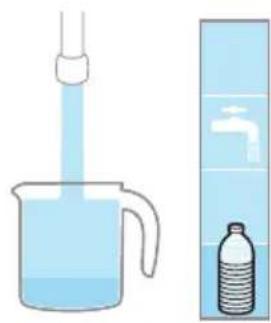
4 Fill the aqua tank with water.
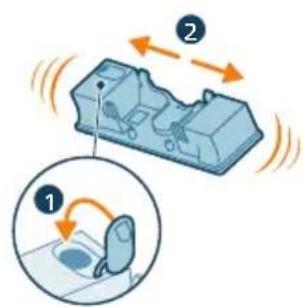
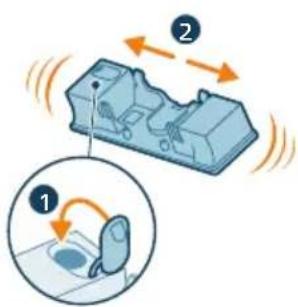
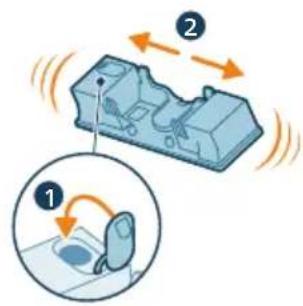
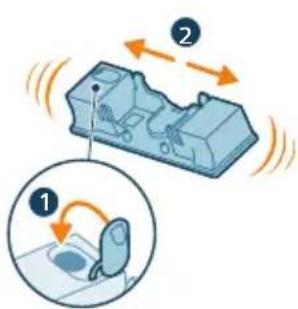
5 Close the aqua tank properly and shake the aqua tank to remove detergent residuals.
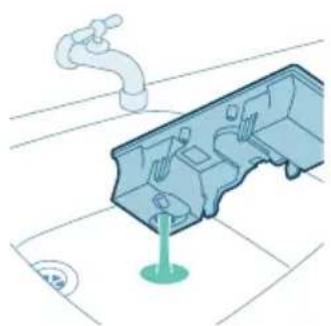
6 Empty the aqua tank and leave it open to dry.
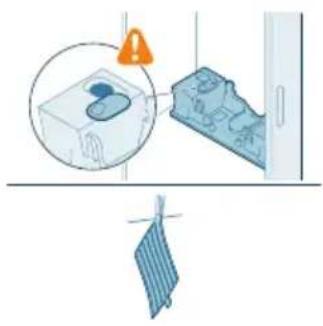
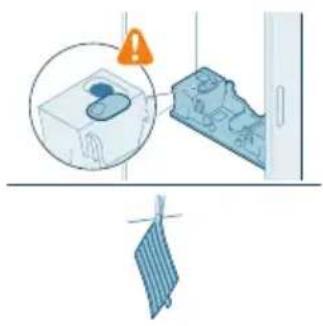
7 Make sure to not lose the tank cap during storage. Hang the microfiber mopping pad dry.
i Note: We recommend replacing the microfiber mopping pad every 6 months (accessory XV1630).
Periodic maintenance intermittently
Dust management system maintenance
For optimal performance, we recommend cleaning the filter of your vacuum cleaner monthly and replacing the filter every six months (accessory XV1651).
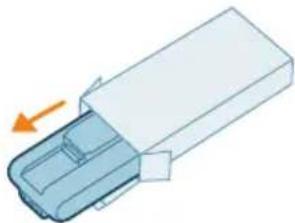
1 Lift the filter to remove it from the dust bucket.
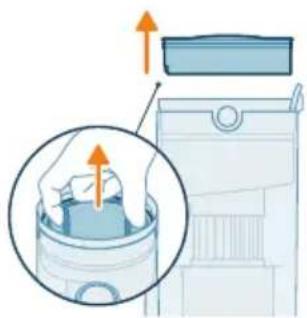
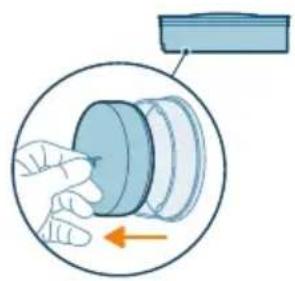
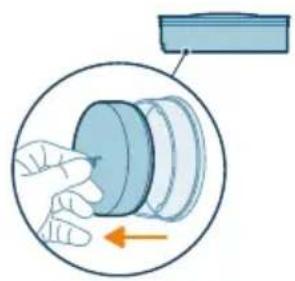
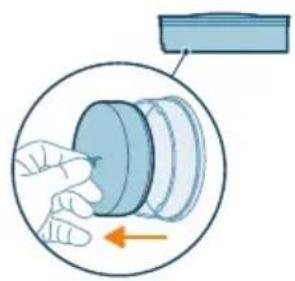
2 Remove the washable foam filter from the plastic filter casing.
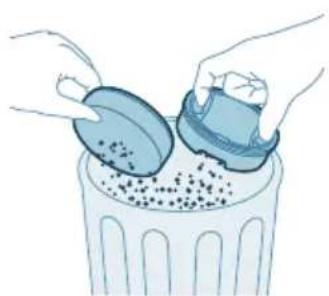
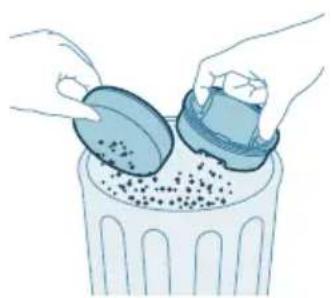
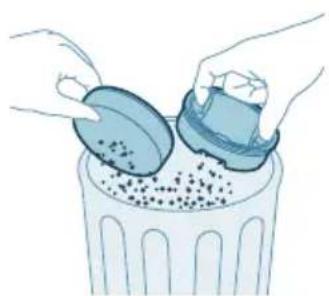
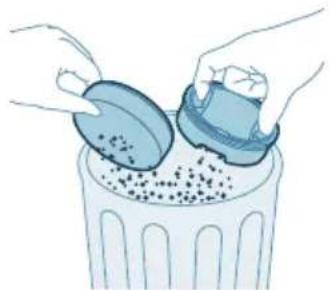
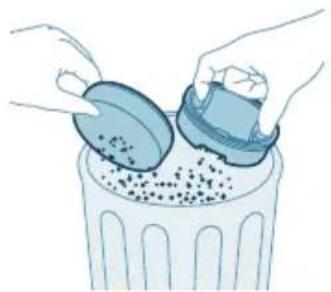
3 Tap both the filter casing and the foam filter over a trash bin.
i Note: Make sure to clean the filter case thoroughly by tapping it firmly over a trash bin until no more dust is released from the filter case.
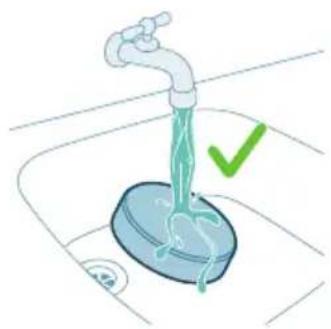
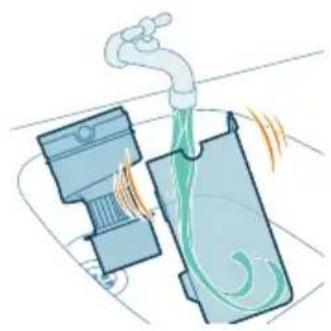
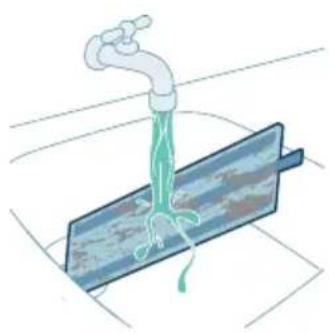
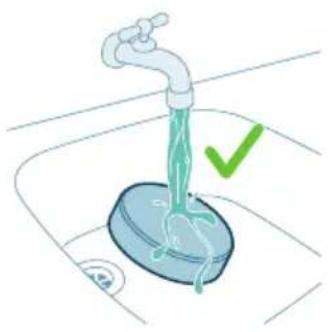
4 Rinse the foam filter under the tap.
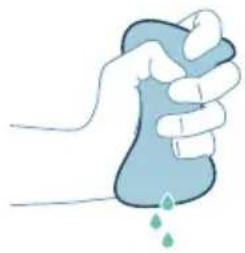
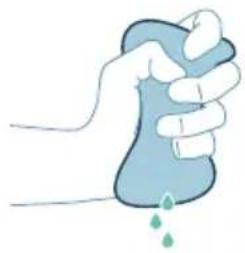
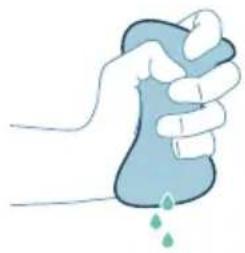
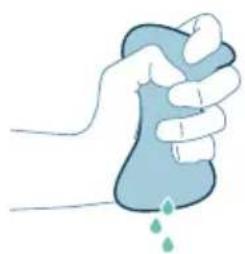
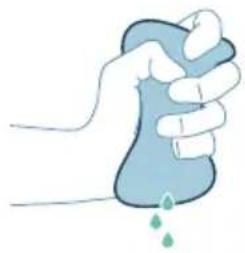
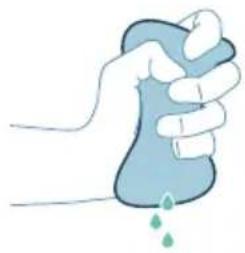
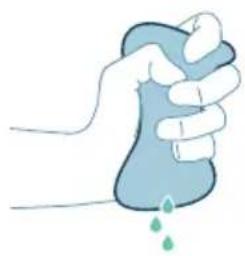
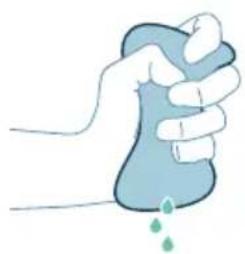
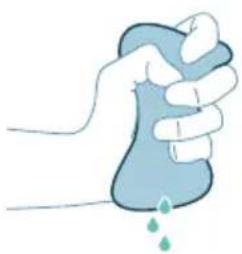
5 Squeeze the foam filter till clean water comes out.
i Note: for best cleaning result, run the water through the filter with the dirtier side facing downwards, allowing deeply set dust to be washed out.
i Note: Do not rinse the filter case.
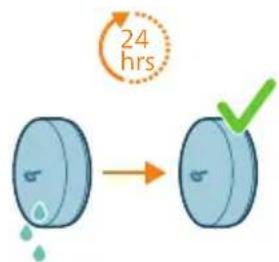
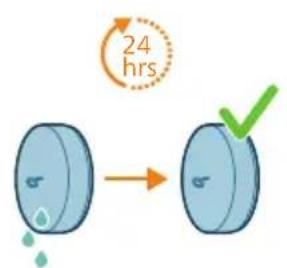
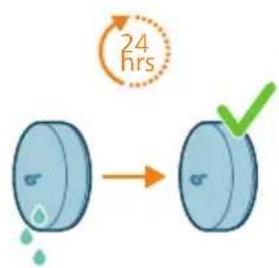
6 Leave the washed filter to dry for 24 hours before reassembling the foam filter in the filter casing.
i Note: do not dry the sponge filter in direct sunlight, on the radiator or in the tumble dryer.
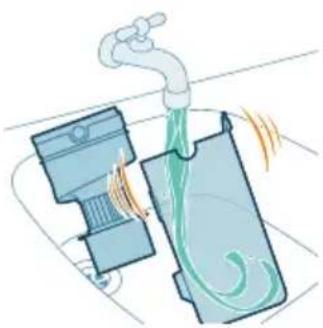
7 For thorough maintenance, clean the dust bucket and cyclone under a running tap or in warm soapy water.
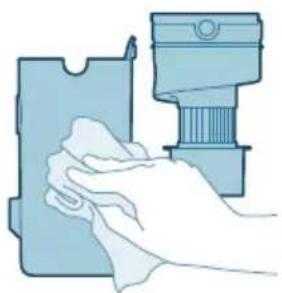
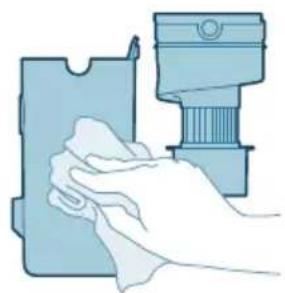
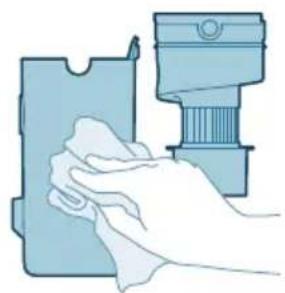
8 Wipe the cleaned dust bucket and cyclone dry.
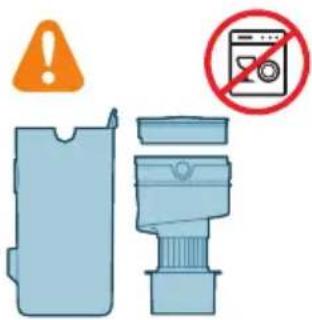
Caution: Make sure all parts are completely dry before you reassemble them.

i Note: all parts cannot be cleaned in the dishwasher.
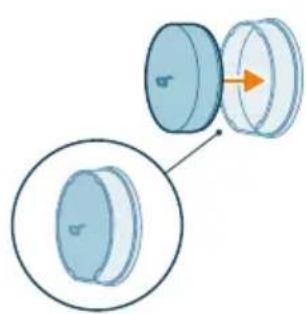
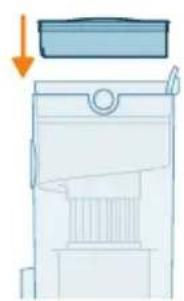
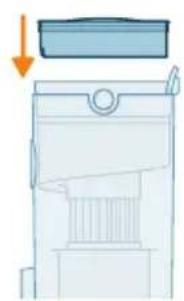
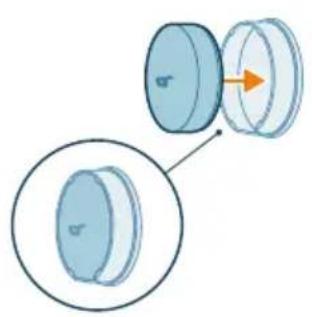
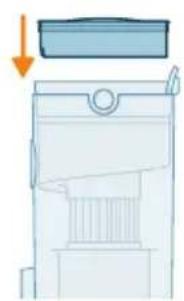
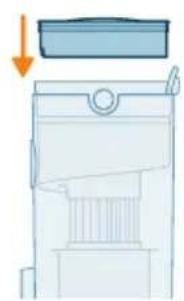
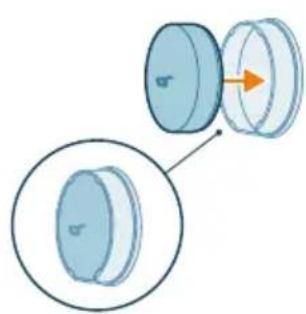
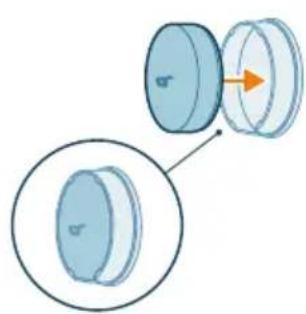
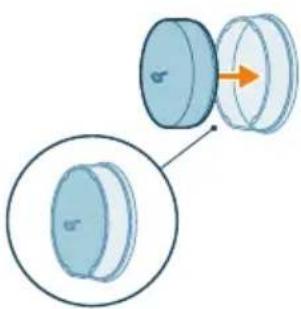
9 Insert the form filter into the filter casing.
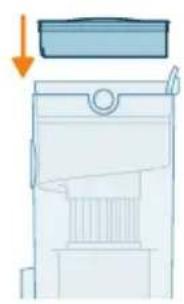
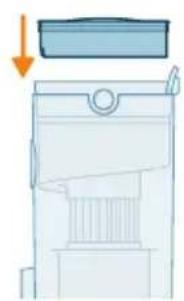
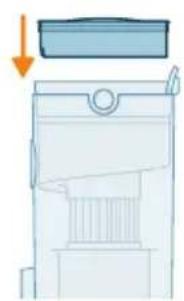
10 Reassemble the filter in the dust bucket.
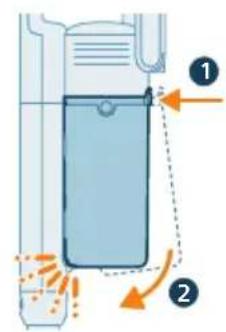
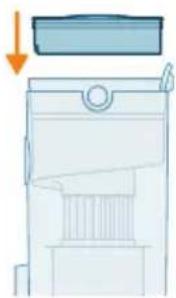
11 Place back the assembled bucket. First align the filter side of the bucket before hinging it in place.
i Note: After maintenance, always make sure the filter is assembled in the appliance before using it.
Nozzle maintenance
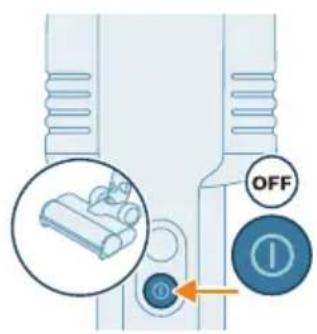
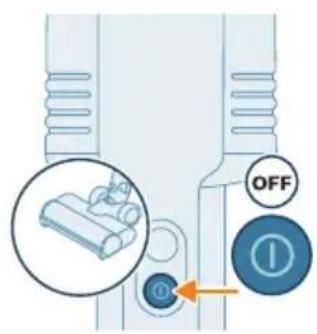
1 Always switch off the appliance before cleaning the nozzle brush.
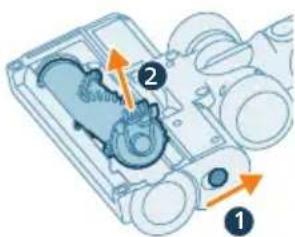
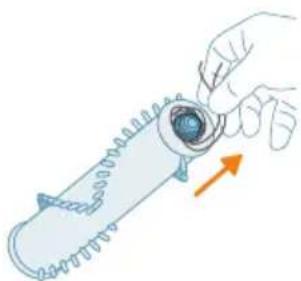
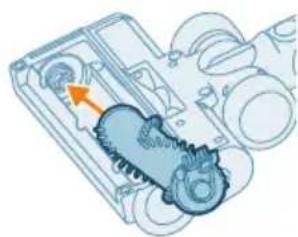
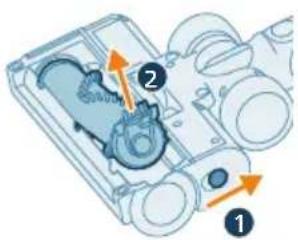
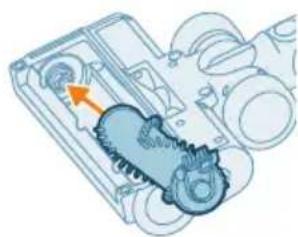
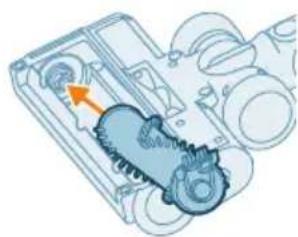
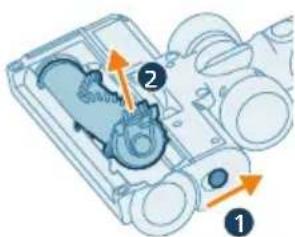
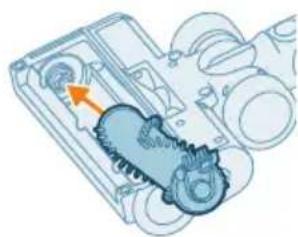
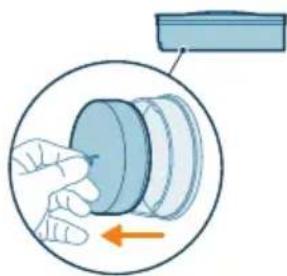
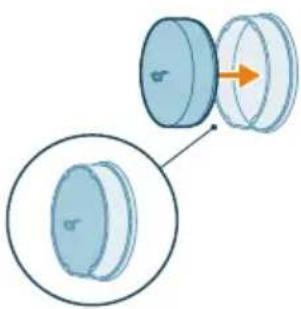
2 Hold the button on the side of the nozzle with one hand while removing the brush with the other hand.
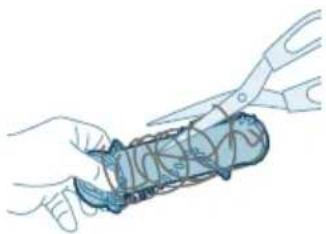
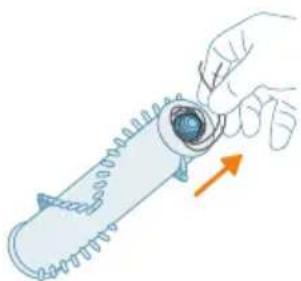
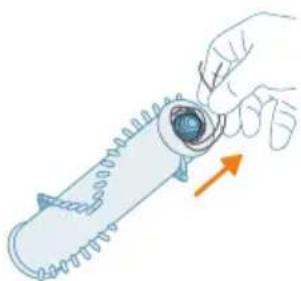
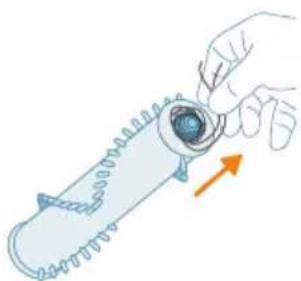
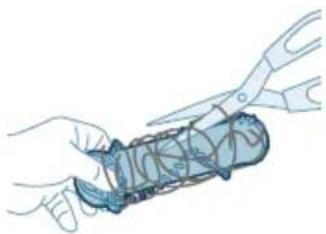
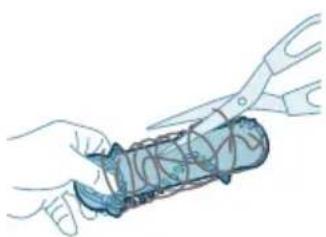
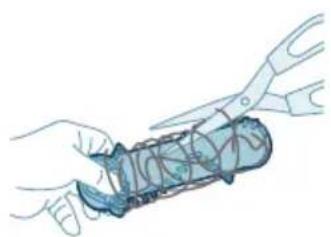
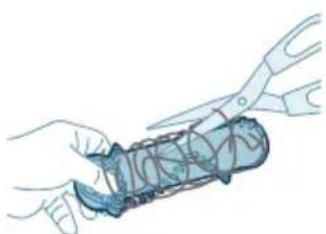
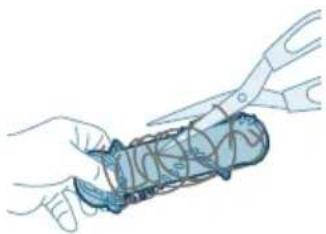
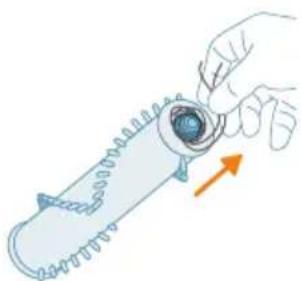
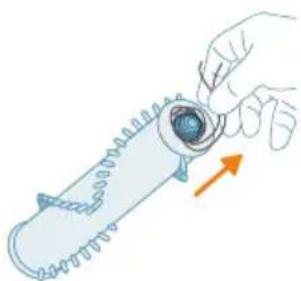
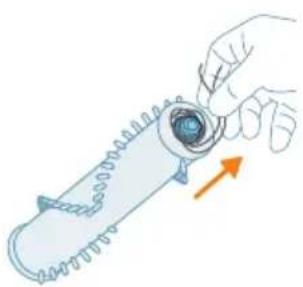
3 Carefully detach any tangled hair from the brush. Support the removal of pollution with a pair of scissors.
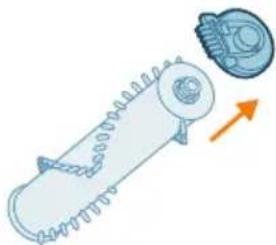
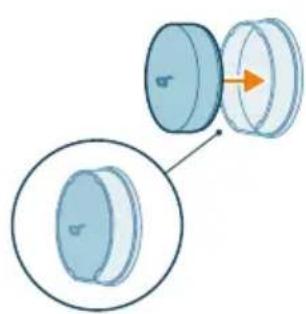
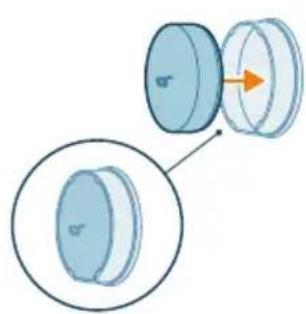
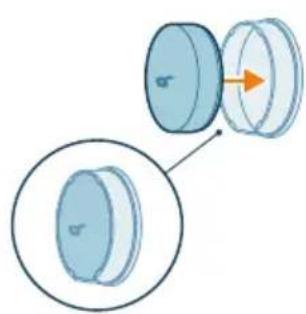
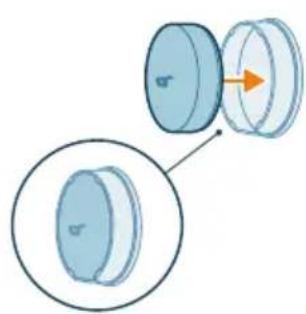
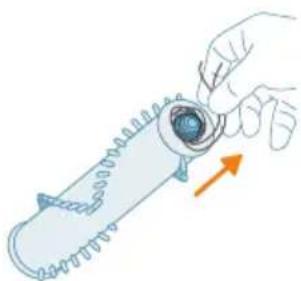
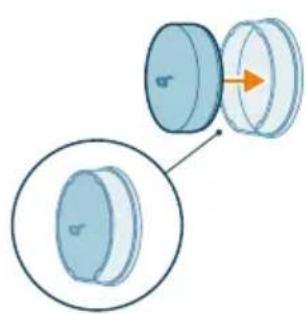
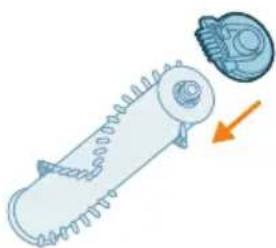
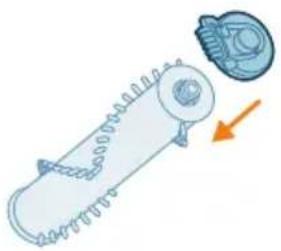
4 Remove the side cap.
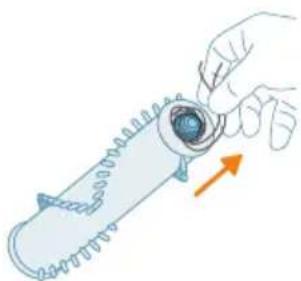
5 Detach any tangled hair in the brush.

6 Reassemble the cap.
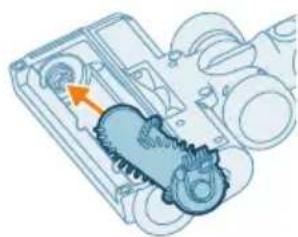
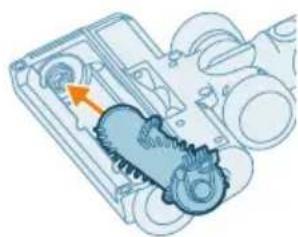
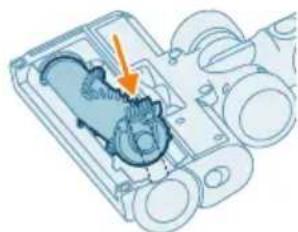
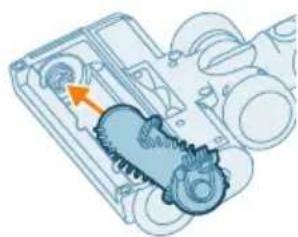
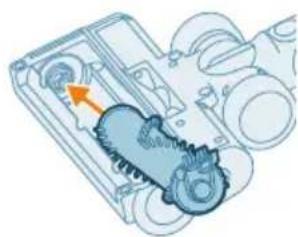
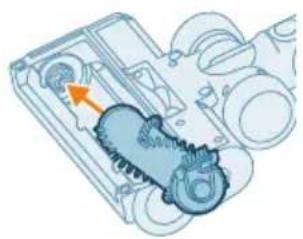
7 When reassembling the brush, ensure proper alignment by first placing one side in position before clicking in the other side.
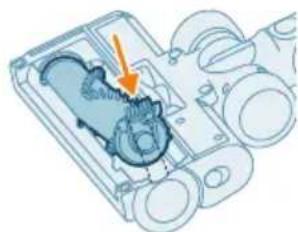
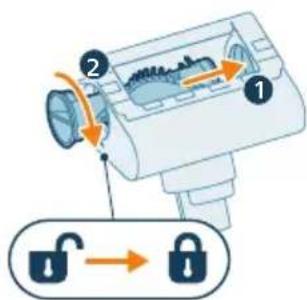
8 Lock the nozzle brush by securing it until you hear a "CLICK" sound.
i Note: Check and remove any pollution around the nozzle wheels.

Mini TurboBrush maintenance (XC5243, XC5244 only)
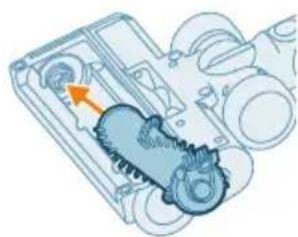
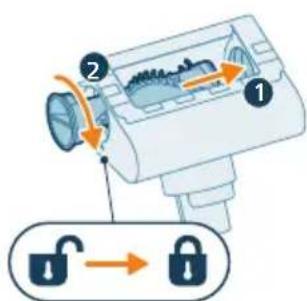
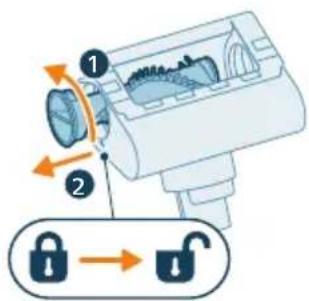
1 Rotate the side lock counter-clockwise to release the brush from its position.
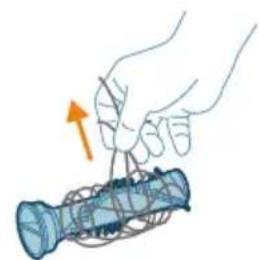
2 Use your hands or a pair of scissors to remove any pollution from the brush.
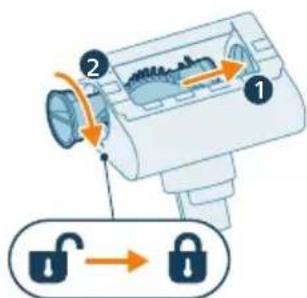
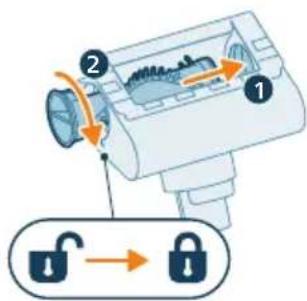
3 When reassembling the brush, simply align the brush back in its original position. Make sure the inner end is aligned. Rotate clockwise to lock the brush. When the brush is properly assembled, you will hear a "CLICK" sound.
Aqua tank maintenance (XC5244 only)
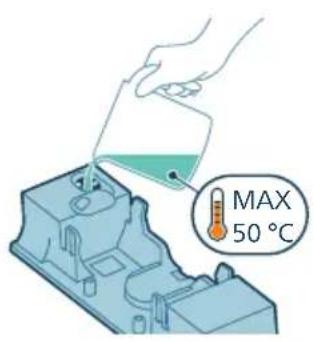
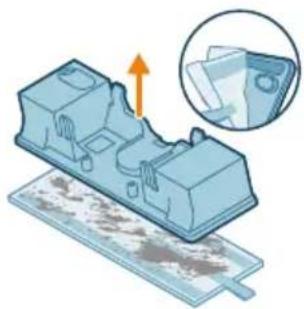
Descale the aqua tank once every month to avoid limescale build-up.
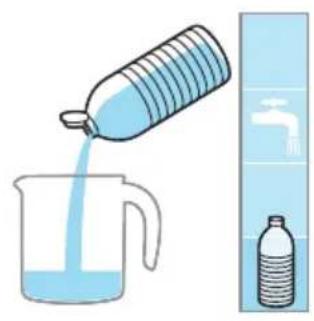
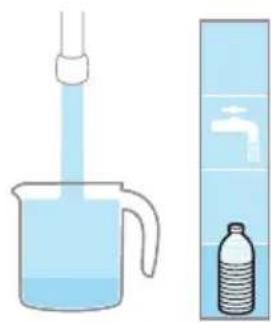
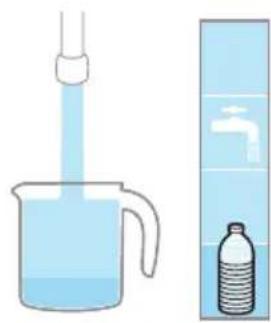
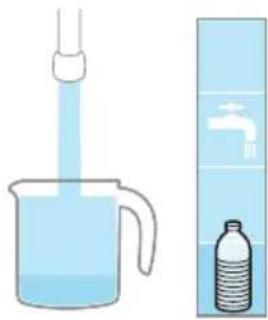
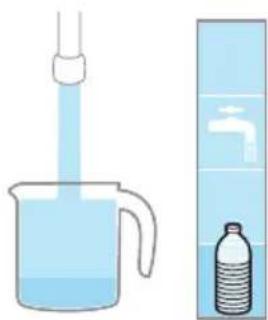
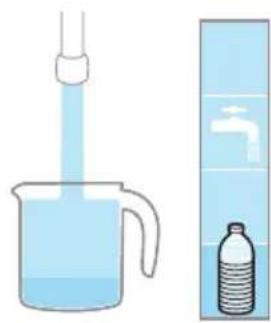
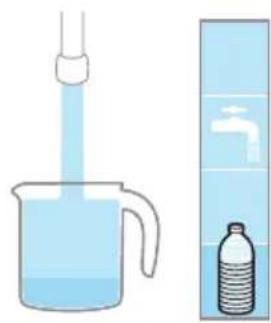
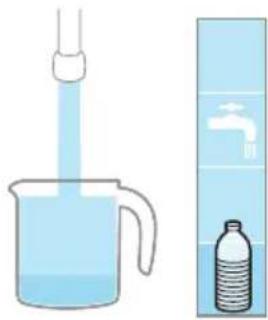
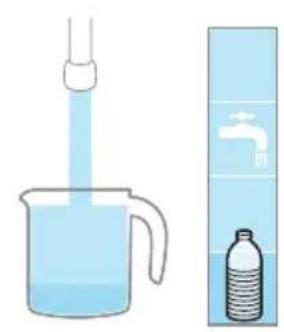
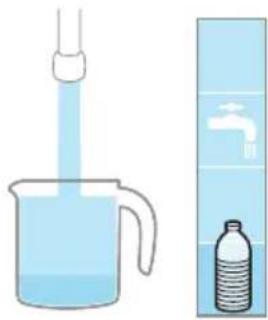
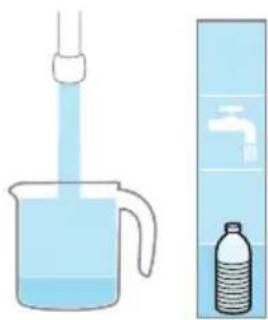
1 Add some descaling liquid to a measuring cup.
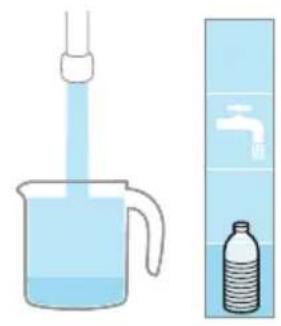
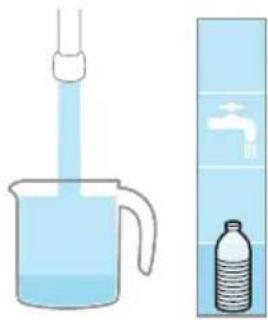
2 Add the correct amount of water in the measuring cup.
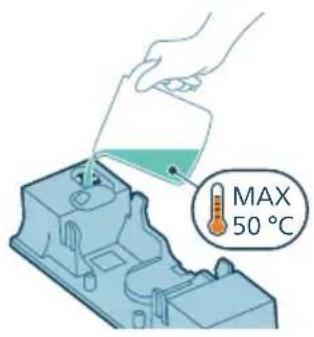
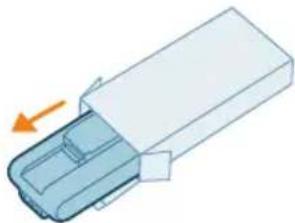
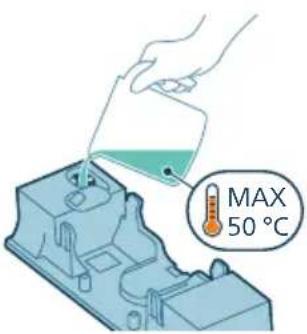
3 Add the mixed liquid in the aqua tank.
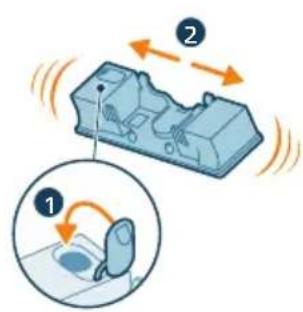
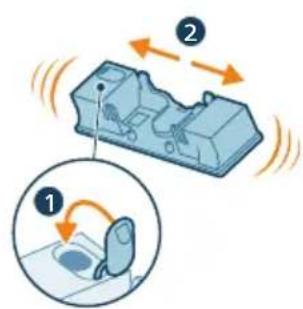
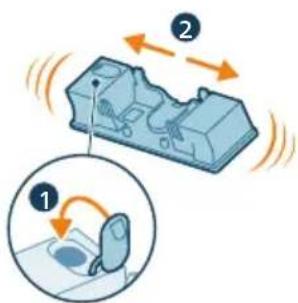
4 Close the Aqua tank properly before shaking the tank for the descaling liquid to spread evenly.
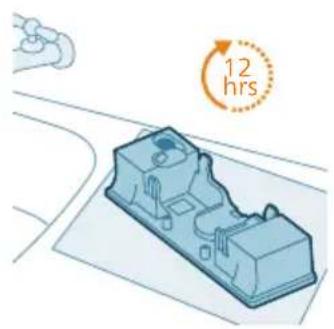
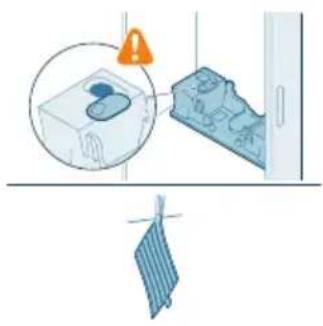
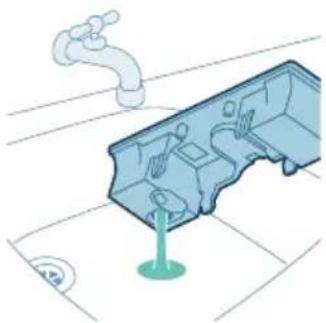
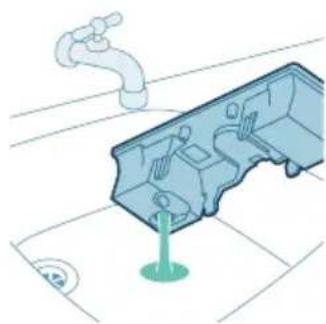
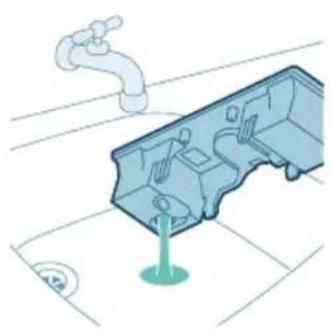
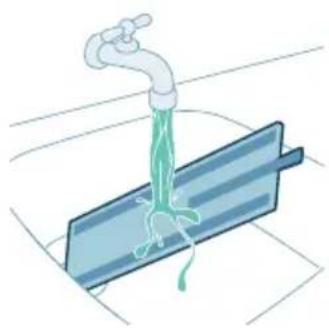
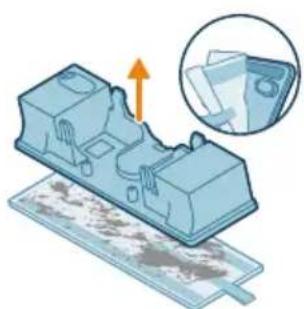
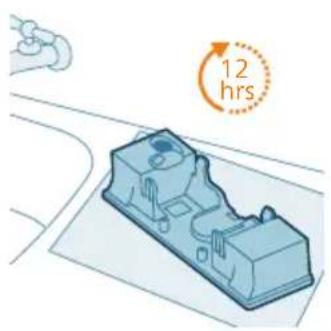
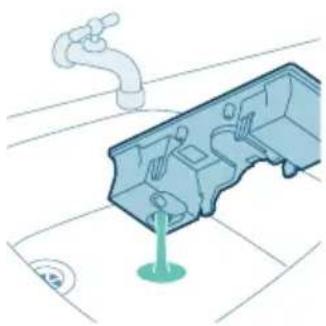
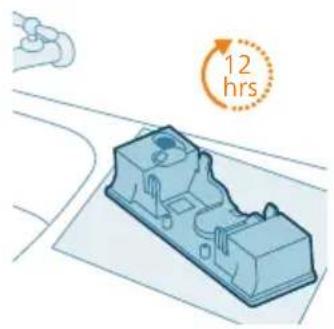
5 Leave the aqua tank (without the microfiber mopping pad) upright over 12 hours. Water is expected to slowly come out from the bottom of the aqua tank. We recommend to place the aqua tank inside the sink or over a cloth.
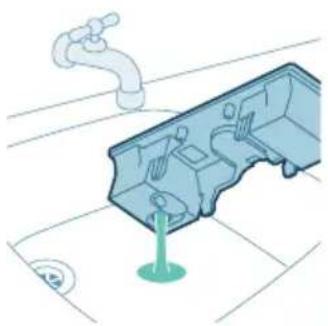
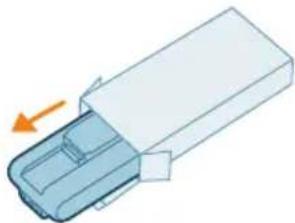
6 Rinse and remove any remaining liquid inside the aqua tank.
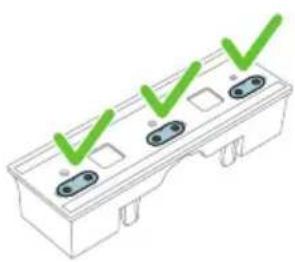
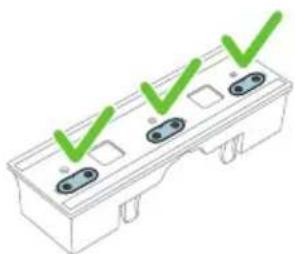
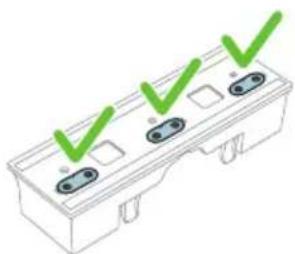
i Note: Always make sure the three water strips are in place. the water tank only functions properly when all three waters strips are in place.
Replacement
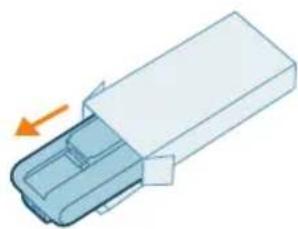
To buy accessories or spare parts, visit www.philips.com/parts-and-accessories or go to your Philips dealer. You can also contact the Philips Consumer Care Center in your country.
Replacement parts and type numbers:
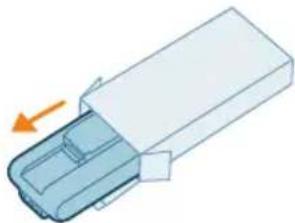
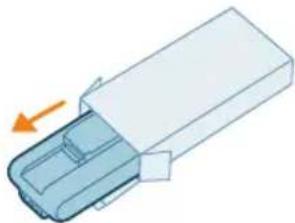
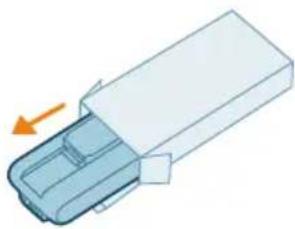
Replacement filter XV1651/01
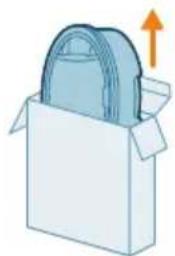
XV1651/01
Battery XV1653/01
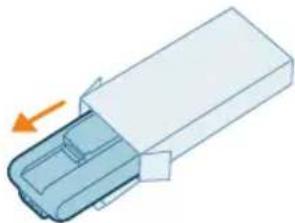
XV1653/01
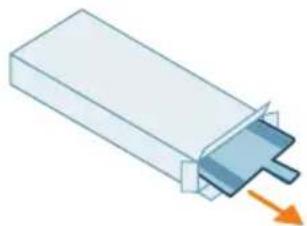
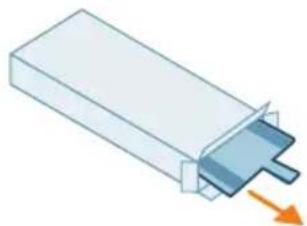
Microfiber mopping pad XV1630/01
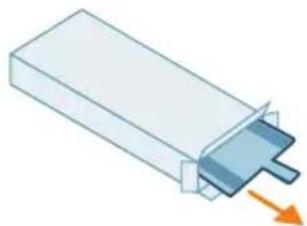
XV1630/01
i Note: Replace the filter and the microfiber mopping pad every 6 months to ensure maximum performance.
User interface signals and their meaning
Signal Meaning of signal
E2 The appliance is operated above or below the functioning

temperature. Please use and store the appliance in a room with a temperature between 0 °C and 40°C. Charge the appliance or battery at a temperature between 5 °C and 40 °C.
E5 The battery does not have enough power to be switched on.

Connect the appliance again to the charger. If the appliance still does not charge, take it to a Philips service center or contact the Consumer Care Center.
Signal Meaning of signal
E9 There is an issue with the nozzle.

Take it to a Philips service center or contact the Consumer Care Center.
i4 The brush is stuck or objects are stuck in the air flow channel.

Make sure the appliance is switched off. Clean the nozzle according to the user manual and check the tube by removing the tube from the main appliance. Remove the object in the nozzle or tube and restart the appliance.
When used on certain carpets, the brush may become stuck. If this happens, adjust the floor cleaning direction and power mode to continue cleaning.
i5 The motor is jammed or damaged.

Remove the battery, wait 10 seconds, and then put the battery back. If this does not work, please take the appliance to a Philips service center or contact the Consumer Care Center.
i6 The display shows i6 (seen from upside down with the battery icon

under i6). The adapter is not removed.
Remove the adapter before operating the appliance.
Signal Meaning of signal
i7 The display shows i7 seen from upside down with the battery icon

under i7). A wrong adapter is used.
Make sure that you use the adapter supplied.

The battery level is low and needs to be charged. Charge the appliance or the battery via the suggested charging methods.
Troubleshooting
This chapter summarizes the most common problems you could encounter with the appliance. If you are unable to solve the problem with the information below, visit www.philips.com/support for a list of frequently asked questions or contact the Consumer Care Center in your country.
Dry cleaning
Problem Possible cause Solution
| The appliance does not respond when the on/off button is pushed. | The display shows the battery empty icon. | To charge the battery, connect the appliance to the charging station or attach the handheld (with the battery installed) directly to the power plug of the adapter. |
| The charging station is not stable on the wall. | The screws holding the charging station are loose. | Tighten the screws. |
| The screws are not the right size. | Mount the charging station with the supplied screws. | |
| The charging station is not attached to a stable wall. | Check that the wall on which the charging station will be mounted is stable. | |
| The appliance suddenly stops working. | When the appliance has an internal malfunction, the buttons will not respond and the screen will remain blank. | Connect the appliance to the charging station or attach the handheld vacuum cleaner directly to the adapter. Check the display. If an error code appears, you can find its meaning in the previous chapter about user interface signals. |
Problem Possible cause Solution
| (code: E2) The appliance is not working at a suitable temperature. | Use and store the appliance at a temperature between 0 °C and 40 °C. Charge the appliance or battery at a temperature between 5 °C and 40 °C. | |
| (code: i4, i5) The brush is stuck or objects are stuck in the air flow channel. | Make sure the appliance is switched off. Clean the nozzle according to the instructions and check the tube by removing the tube from the main appliance. Remove the object in the nozzle or tube and restart the appliance. | |
| (code: E9) The motorized nozzle is short circuited. | Take it to a Philips service center or contact the Consumer Care Center. | |
| The appliance has a lower suction power than usual. | The filter and the cyclone are dirty. | Empty the dust bucket. Clean the filter and the cyclone according to the instructions. Make sure the filter is washed at least once a month, when using the appliance regularly. Make sure hair and dirt stuck in the cyclone are removed. |
| The dust bucket is not attached properly to the appliance. | Make sure the dust bucket is attached properly. | |
| The filter has expired and needs to be replaced. | If it is no longer possible to clean the filter according to the instructions, you can buy new filters in the online Philips shop at www.philips.com/support or at your Philips dealer. | |
| Dust escapes from the appliance. | The filter is dirty. Clean the filter according to the instructions. | |
| The filter is not present in the appliance. | Make sure that the filter is in the appliance and assembled correctly. | |
| Something is blocking the cyclone. | Check the cyclone for stuck objects and remove any object blocking the cyclone. Also ensure all hair and dirt stuck in the cyclone are removed. | |
| The dust bucket is not properly attached to the appliance. | Empty the dust bucket and attach it correctly to the appliance. | |
| The appliance is rotated or flipped when the power is off. | Keep the appliance upright when the power is off. | |
| The appliance does not move smoothly across the floor when cleaning a carpet. | The selected suction power has been too high. | Try all three power settings and locate the one that works best for your maneuverability needs. |
| The vacuuming direction is not aligned with the direction of the carpet piles. | Check the direction of the carpet piles and adjust the vacuuming direction to align with the direction of the piles. | |
Problem Possible cause Solution
| The brush does not turn anymore. | The brush is clogged with hair or dirt. | Clean the brush by hand or with a pair of scissors. |
| (code i4) The brush may stop turning when it encounters too much resistance from a high-pile carpet. | Adjust the carpet cleaning directions and power modes to continue cleaning. | |
| The roller brush has not been assembled properly into the nozzle after cleaning. | Follow the instructions in the cleaning chapter of the user manual to slide the roller brush into the nozzle properly. Confirm your assembly with the "click" sound. | |
| (code: E9) The motorized nozzle is short circuited . | Take it to a Philips service center or contact the Consumer Care Center. | |
| The LEDs in the nozzle do not come on. | The nozzle has not been attached to the tube or appliance properly. | Attach the nozzle to the appliance or handheld properly. |
| The appliance is not charging. | The power plug is not connected properly to the appliance or the adapter is not inserted into the wall socket properly. | Make sure that the power plug is connected properly to the appliance and that the adapter is inserted into the wall socket properly. |
| The power plug is not placed properly in the charging station. | Make sure the plug is fixed properly in the charging station. Check if the plug is angled and the charging station is holding the plug in place. | |
| (code i7) An adapter other than the supplied adapter is being used. | Make sure that you use the adapter supplied. | |
| (code E5) The battery malfunctions. | The battery has failed. Replace the battery. | |
| If you have checked the above and the appliance still does not charge, take it to a Philips service center or contact the Consumer Care Center. | ||
| The appliance is charging very slow. | An external adapter or an adapter from other appliances is used. | Charge the appliance with the supplied adapter. |
| The battery is charged and attached, but the appliance cannot be switched on. | The appliance is still connected to the adapter. | Remove the appliance from the adapter before restarting it. |
| Something is wrong with the appliance. | Take it to a Philips service center or contact the Consumer Care Center. |
Problem Possible cause Solution
| The Mini TurboBrush does not function properly. | The roller brush is blocked. Remove hairs from the brush with a pair of scissors. Follow the instructions in the user manual. | |
| The roller brush is blocked by fabric or surfaces during cleaning. | Keep the Mini TurboBrush aligned with the surface and do not push the Mini TurboBrush into soft surfaces. | |
| The roller brush is not properly inserted into the Mini TurboBrush. | Make sure that roller brush and the Mini TurboBrush are properly connected and that there is no gap between the parts. Follow the instructions in the manual. | |
| The appliance delivers static shocks. | The appliance builds up static electricity. The lower the air humidity, the more state electricity is build up. | Discharge the appliance by frequently holding the tube against other metal objects in the room (for example the legs of a table or chair, etc.). Or raise the air humidity level in the room. |
| The dust and dirt that is vacuumed up is static. | Empty the dust bucket and clean the filter according to the instructions in the previous chapter. | |
When using the Vacuum and Mop Nozzle
Problem Possible cause Solution
| The water flow from the water tank is reduced. | The microfiber mopping pad is not placed correctly and blocks the wetting strip as a result. | Make sure that you place the mopping pad correctly. Check the instructions in the previous chapters for proper placement. |
| The water tank is empty or nearly empty. | Refill the water tank. | |
| A microfiber mopping pad is used that is not supplied by Philips. | Only use an original Philips microfiber mopping pad. The mopping pads can be bought in the online Philips shop at www.philips.com/support or at your Philips dealer. | |
| Lime scale has build up in the wetting strip. | Buy a new wetting strip in the online Philips shop at www.philips.com/support or at your Philips dealer. | |
| Too much water flows out of the water tank at a too high speed. | The water tank cap is not attached properly. | Check the cap and make sure it is fully and properly closed. |
| One or more water strips are missing from the bottom of the water tank. | Check if all three water strips are present below the tank and placed in the correct orientation. If it is assembled correctly, the three water strips should be flush with the surfaces around it. |
Problem Possible cause Solution
| The floor dries with stripes. Too much liquid cleaner has been added to the water. | Use only a few drops of liquid cleaner or use a cleaner that foams less. |
| The microfiber mopping pad is not placed correctly. | Make sure that the mopping pad is placed correctly. Check the instructions in previous chapters for proper placement. |
| An incorrect mopping pad is used. | Only use Philips XV1630/01 microfiber mopping pad. The mopping pads can be bought in the online Philips shop at www.philips.com/support or at your Philips dealer. |
lsi
Pendahuluan 32
Keterangan umum 32
2 Pasang kain pel serat mikro di bawah tangki air. Sejajarkan strip velcro di bawah tangki air dan di bagian belakang kain.
10 Pasang kembali filter ke wadah debu.
4 Lepaskan tutup samping.
XV1651/01
Baterai XV1653/01
XV1653/01
Kain pel serat mikro XV1630/01
XV1630/01
Amaran: Jangan vakum air atau cecair lain.
Penggunaan TurboBrush Mini (XC5243, XC5244 sahaja)
i Nota: Tanggalkan timba habuk sementara memastikan perkakas dalam keadaan menegak untuk mengelakkan pencemaran tertumpah.
4 Bilas penuras busa di bawah paip.
4 Tanggalkan tudung sisi.
6 Pasang semula tudung.
Penyelenggaraan TurboBrush Mini (XC5243, XC5244 sahaja)
XV1651/01
Bateri XV1653/01
XV1653/01
Pad mengemop mikrofiber XV1630/01
XV1630/01
6 Znovu víčko nasadte.
XV1651/01
Baterie XV1653/01
XV1653/01
XV1630/01
Klargøring
2 Brug sugestyrkeknappen til at skifte mellem tre forskellige indstillinger for sugestyrke: eco-tilstand, normal tilstand, turbo-tilstand.
Eco Normal Turbo
Brug af Mini TurboBrush (kun XC5243, XC5244)
4 Tøm det opsamlede støv i støvbeholderen ned i skraldespanden.
4 Skyl skumfilteret under vandhanen.
4 Fjern sidedækslet.
XV1651/01
Batteri XV1653/01
XV1653/01
Mikrofibermoppeptide XV1630/01
XV1630/01
en forkert adapter.
XV1651/01
Akku XV1653/01
XV1653/01
XV1630/01
⚠️ Hoiatus! Ärge kunagi imege seadme sisse vett ega mönda muud vedelikku.
Veepaagi hooldus (ainult mudelil XC5244)
4 Eemaldage otsakork.
Väikese turboharja hooldus (ainult mudelitel XC5243 ja XC5244)
2 Lisage mööteanumasse vajalik kogus vett.
XV1651/01
Aku XV1653/01
XV1653/01
Mikrokiudmopp XV1630/01
XV1630/01
Kasutatakse vale adapterit.
Kontrollige, et kasutaksite öiget adapterit.

Usar el minicepillo Turbo (solo XC5243, XC5244)
XV1651/01
Batería XV1653/01
XV1653/01
XV1630/01
Installation du support mural
Entretien de la mini-brosse Turbo (XC5243, XC5244 uniquement)
XV1651/01
Batterie XV1653/01
XV1653/01
Frange de lavage en microfibre XV1630/01
XV1630/01
1 Preokrenite zidni nosač i otkvačite ručicu. Umetnite priključak za punjenje, pritom pazeći da je metalni dio vidljiv i usmjeren prema gore na prednjoj strani zidnog nosača.
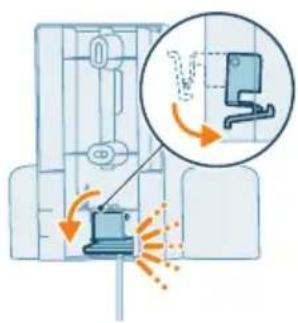
3 Sigurno pričvrstite zidni nosač na željeni položaj na zidu, pritom pazeći da se najniže postavljene rupe za nosive vijke nalaze otprilike 125 cm iznad poda.
Uređaj je opremljen litij-ionskom baterijom. Potpuno punjenje prazne baterije traje otprilike 4 sati.
1 Pričvrstite komplet baterija na glavno tijelo uređaja, pritom pazeći da je veza čvrsta, što će vam potvrditi zvuk „KLIK”.
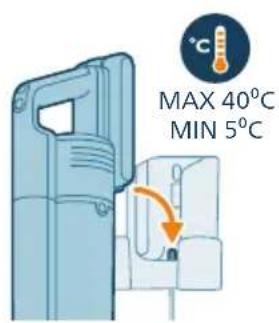
2 Napunite uređaj tako što ćete ga postaviti na sastavljeni zidni nosač.
Upozorenje: uredaj punite pri temperaturi iznad 5 °C i ispod 40 °C.
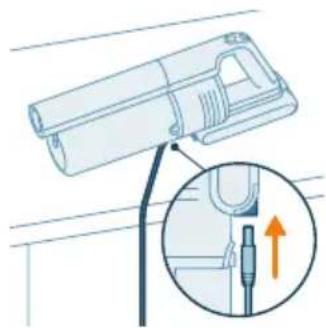
i Napomena: druga je mogućnost postavljanje baterije na stabilnu vodoravnu površinu i izravno spajanje kabela za punjenje na bateriju.
![graph TD A["Start"] --> B["4 hrs"] B --> C["End"]](/content/2026/04/721249/images/6e1b353c08bfa09c28b321a6b451a856b395a6d576a66575ec8bb870aa6e28cf.jpg)
3 Da biste cijev vratili u uspravan položaj, podignite dršku prema gore i vratite donji dio cijevi u položaj.
Usisavanje podova od mekog i tvrdog materijala
2 S pomoću gumba za odabir snage prebacujte se između tri različite postavke snage: način rada eco, normalni način rada i način rada turbo.
Eco Normal (uobičajena) Turbo
3 Pomoću usisavača možete čistiti tvrde ili meke podove.
2 Pričvrstite jastučić za brisanje od mikrovlakana ispod spremnika za vodu. Poravnajte trake od čičak-materijala ispod spremnika za vodu s onima na stražnjoj strani krpe.
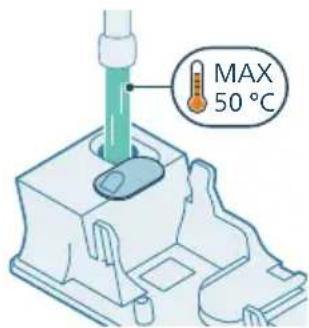
3 Otvorite gumeni čep na vrhu spremnika. Napunite spremnik vodom pritom pazeći da temperatura vode ne prelazi 50 °C.
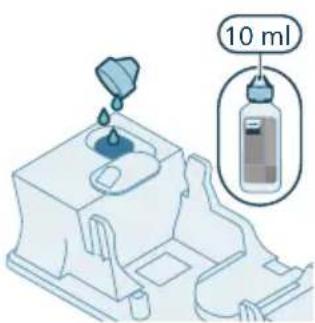
6 Spojite pripremljeni spremnik za vodu na mlaznicu za vodu i spremni ste početi. Za pravilnu uporabu bitno je čvrsto pričvrstiti spremnik na kotačiće mlaznice kada je u ispravnom položaju.
i Napomena: vodeni modul nije prikladan za meke podove kao što su tepisi.
A Oprez: vodeni modul se ne smije upotrebljavati za brisanje vodenih lokvi.
Uporaba mini turbo četke (samo XC5243, XC5244)
3 Držite za dva udubljena kruga sa strane ciklonske komore. Uklonite ciklonsku komoru iz spremnika za prašinu podizanjem iz spremnika.
4 Ispraznite prašinu prikupljenu u spremniku za prašinu u kantu za smeće.
Održavanje spremnika za vodu (samo XC5244)
Očistite spremnik za vodu nakon svake uporabe.
1 Uklonite jastučić za brisanje od mikrovlakana.
2 Isperite jastučić za brisanje pod slavinom te ga operite ručno ili u perilici rublja.
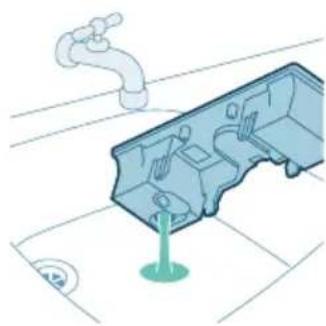
3 Izlijte svu vodu preostalu u spremniku za vodu.
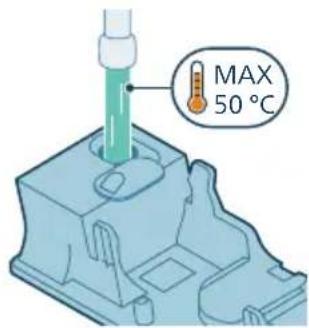
4 Napunite spremnik za vodu vodom.
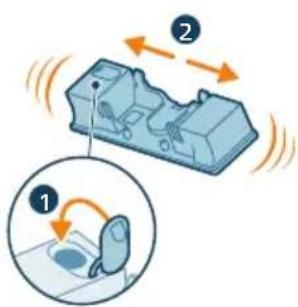
5 Pravilno zatvorite spremnik za vodu i protresite ga kako biste uklonili ostatke sredstva za čišćenje.
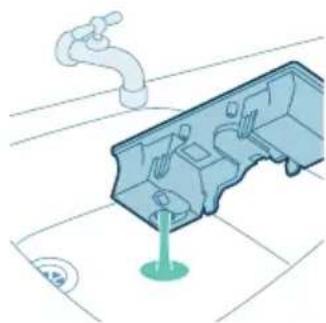
6 Ispraznite spremnik za vodu i ostavite ga da se osuši.
2 Izvadite perivi pjenasti filtar iz plastičnog kućišta filtra.
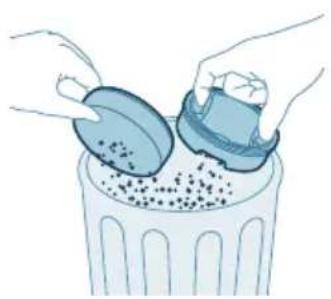
3 Istresite kućište filtra i pjenasti filtar iznad kante za smeće.
i Napomena: obavezno temeljito očistite kućište filtra tako što ćete čvrsto lupkati po njemu iznad kante za smeće sve dok iz kućišta filtra ne prestane izlaziti prašina.
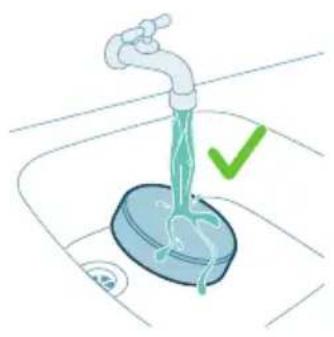
4 Isperite filtar od pjene pod mlazom vode iz slavine.
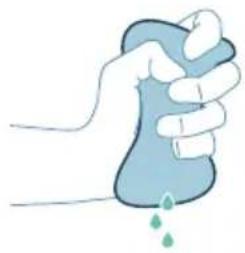
8 Brisanjem osušite očišćeni spremnik za prašinu i ciklonsku komoru.
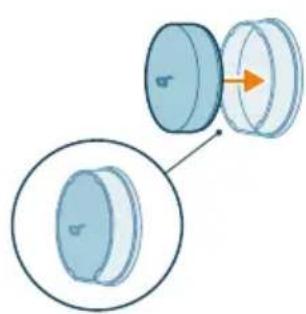
2 Jednom rukom držite gumb sa strane mlaznice dok drugom rukom uklanjate četku.
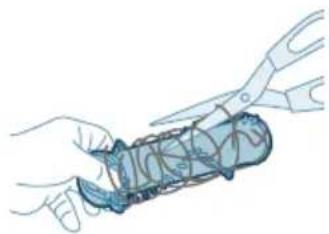
3 Pažljivo uklonite zapetljane dlake s četke. Olakšajte si uklanjanje prljavštine škarama.
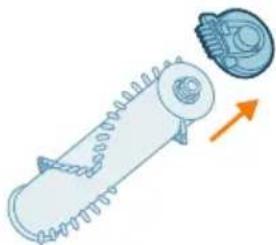
4 Uklonite bočni poklopac.
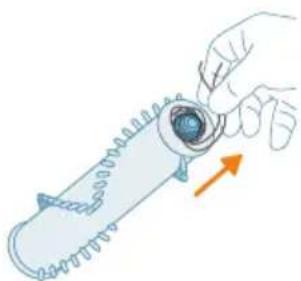
5 Odvojite dlake koje su se zapetljale u četku.
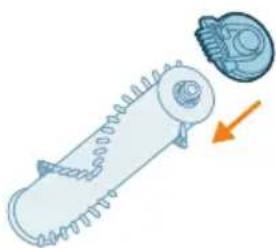
6 Ponovno postavite poklopac.
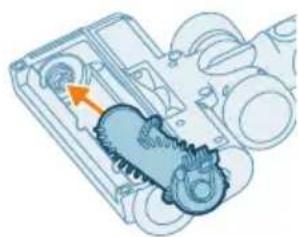
7 Kada ponovno postavljate četku, osigurajte pravilno poravnanje tako da prvo postavite jednu stranu na odgovarajuće mjesto prije nego što utisnete drugu stranu (dok ne čujete škljocaj).
Održavanje mini turbo četke (samo XC5243, XC5244)
2 Rukom ili pomoću škara uklonite prljavštinu s četke.
6 Isperite spremnik za vodu i izlijte svu preostalu tekućinu.
XV1651/01
Baterija XV1653/01
XV1653/01
Jastučić za brisanje od mikrovlakana XV1630/01
XV1630/01
E9 Postoji problem s mlaznicom.

Odnesite ga u ovlašteni servisni centar tvrtke Philips ili se obratite centru za službu za potrošače.
Upotrebljavate krivi prilagodnik.
Pobrinite se da upotrebljavate isporučeni prilagodnik.

Razina napunjenosti baterije je niska i potrebno je napuniti bateriju.
Uređaj i bateriju punite preporučenim načinima punjenja.
Rješavanje problema
XV1651/01
Batteria XV1653/01
XV1653/01
XV1630/01
2 Piestipriniet mikroškiedras mazgāšanas paliktni zem ūdens tvertnes. Salāgojiet "Velcro" aizdares zem ūdens tvertnes un aiz paliktna.
Üdens tvertnes apkope (tikai XC5244)
3 Izlejiet no ūdens tvertnes atlikušo ūdeni.
4 Piepildiet üdens tvertni ar üdeni.
2 Iznemiet mazgājamo putu filtru no plastmasas filtra korpusa.
3 Pasitiet pa atkritumu tvertni gan ar filtra korpusu, gan ar putu filtru.
2 Ar vienu roku turiet sprauslas sānos esošo pogu un vienlaikus ar otru roku noņemiet suku.
Mazās turbo sukas apkope (tikai XC5243 un XC5244)
XV1651/01
Akumulators XV1653/01
XV1653/01
XV1630/01
akumulatora ikona). Tiek izmantots nepareizs adapteris.
2 Perkelkite antgalj su sulenktu vamzdžiu po sofa.
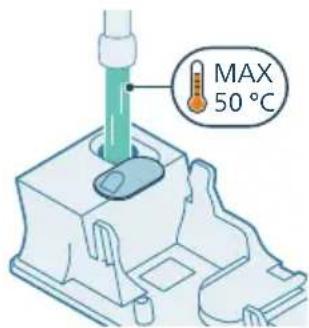
5 Tinkamai uždarykite vandens bakelj.
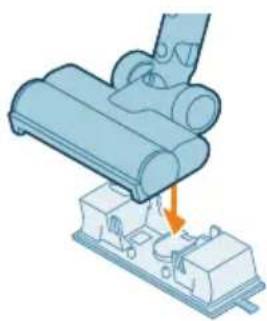
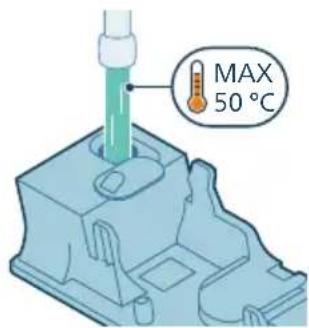
4 Vandens bakelj užpildykite vandeniu.
XV1651/01
Akumuliatorius XV1653/01

XV1653/01
XV1630/01
piktograma po i7). Naudojamas netinkamas adapteris.
XV1651/01
XV1653/01
XV1630/01
XV1651/01
Accu XV1653/01

XV1653/01
Microvezeldweilmop XV1630/01
XV1630/01
3 Fest veggmonteringen der du vil ha den på veggen, og pass på at de laveste hullene til monteringsskruene er ca. 125 cm fra gulvet.
2 Fest slangen på munnstykket. Det skal kommen en "KLIKK"-lyd når den går i inngrep.
Advarsel: Ikke sug opp vann eller andre væsker.

5 Lukk vannbeholderen ordentlig.
2 Skyll moppeputen under springen og vask den for hånd eller i vaskemaskin.
5 Lukk vannbeholderen godt, og rist den for å få bort eventuelle rester av vaskemiddel.
2 Ta det vaskbare skumfilteret ut av filterhuset i plast.
3 Bank ut filterhuset og skumfilteret over en søppelbøtte.
4 Skyll skumfilteret under springen.
2 Hold knappen på siden av munnstykket med den ene hånden mens du fjerner børsten med den andre hånden.
XV1651/01
Batteri XV1653/01
XV1653/01
Moppepute i mikrofiber XV1630/01
XV1630/01
brukes feil adapter.
XV1651/01
Akumulator XV1653/01
XV1653/01
XV1630/01
3 Pode limpar pavimentos ou superfícies macias com o aspirador.
Utilizar a mini escova turbo (apenas XC5243 e XC5244)
1 Para acoplar a mini escova turbo, insira o tubo do aparelho portátil na mini escova.
9 Insira o filtro de espuma no invólucro do filtro.
10 Volte a montar o filtro no recipiente do pó.
4 Remova a tampa lateral.
6 Volte a colocar a tampa.
XV1651/01
Bateria XV1653/01
XV1653/01
XV1630/01
Utilizarea periei Mini Turbo (doar XC5243, XC5244)
6 Puneti la loc capacul.
XV1651/01
Baterie XV1653/01
XV1653/01
XV1630/01
Este utilizat un adaptor greşit.
6 Rivendosni kapakun.
Bateria XV1653/01
XV1653/01
XV1630/01
Sinjali Kuptimi i sinjalit
Sinjali Kuptimi i sinjalit
Sinjali Kuptimi i sinjalit
3 Dobro pritrdite stenski nosilec na želeno mesto na steni in poskrbite, da bodo najnižje luknje za vijake približno 125 cm od tal.
2 Šobo z upognjeno cevjo pomaknite pod kavč.
1 Za vklop aparata pritisnite gumb za vklop/izklop.
i Opomba: Za izklop aparata ponovno pritisnite gumb za vklop/izklop.

2 Mikrovlaknasto blazinico za mokro brisanje pritrdite pod posodo z vodo. Poravnajte ježke pod posodo za vodo in na spodnji strani krpe.
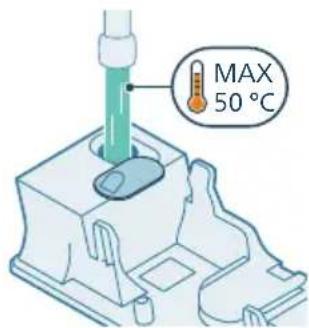
3 Odprite gumijasti pokrovček na vrhu posode za vodo. Posodo napolnite z vodo, katere temperatura ne sme presegati 50 °C.
A Opozorilo: Mokrega modula se ne sme uporabljati za sesanje lužic.
Uporaba kombiniranega nastavka
1 Kombinirani nastavek pritrdite tako, da vanj vstavite cev ali ročno enoto.
2 Mikrovlaknasto blazinico za mokro brisanje izperite pod tekočo vodo in jo operite ročno ali v pralnem stroju.
3 Iz posode za vodo izlijte morebitno preostalo vodo.
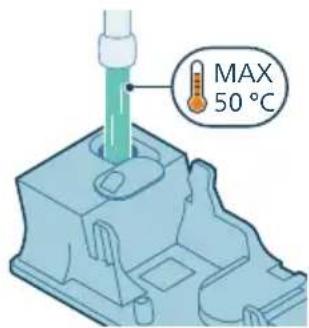
4 Posodo za vodo napolnite z vodo.
7 Pazite, da med shranjevanjem ne izgubite pokrovčka posode. Mikrovlaknasto blazinico za mokro brisanje obesite, da se posuši.
1 Filter dvignite in ga odstranite iz posode za prah.
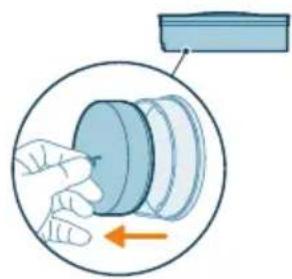
3 Ohišje filtra in penasti filter stresite nad smetnjakom.
4 Penasti filter izperite pod tekočo vodo.
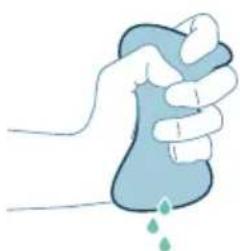
5 Penasti filter ožemajte, dokler iz njega ne priteče čista voda.
10 Filter vstavite v posodo za prah.
11 Sestavljeno posodo vstavite nazaj. Najprej poravnajte stran posode, na kateri je filter, nato jo pritrdite na mesto.
XV1651/01
Baterija XV1653/01
XV1653/01
Mikrovlaknasta blazinica za mokro brisanje XV1630/01
XV1630/01
i Opomba: Filter in mikrovlaknasto blazinico za mokro brisanje zamenjajte vsakih 6 mesecev, da zagotovite optimalno delovanje aparata.
2 Pripojte trubicu k hubici. Pripojenie overte podla počutelného cvaknutia.
2 Presuňte hubicu s ohnutou trubicou pod pohovku.
Varovanie: Nevysávajte vodu ani iné kvapaliny.
5 Pevne nádobu na vodu uzavrite.
A Varovanie: Nech použijete akékolvek príslušenstvo, nevysávajte vodu ani iné tekutiny.
Používanie hubice
1 Hubicu pripojte priamo k ručnému vysávaču.
Používanie malej turbokeyy (iba modely XC5243, XC5244)
1 Ak chcete malú turbokefu nasadiť, zasuňte trubicu ručného vysávača do malej turbokefy.
Údržba nádoby na vodu (iba model XC5244)
2 Opláchnite mopovaciu podušku pod tečúcou vodou a vyperte ju v ruke alebo v práčke.
7 Dajte si pozor, aby ste počas skladovania nestratili veko nádoby. Mopovaciu podušku z mikrovlákna zaveste a nechajte uschnút.
8 Vyčistenú nádobu na prach a cyklón utrite dosucha.
10 Znovu filter namontujte do nádoby na prach.
2 Jednou rukou držte tlačidlo na bočnej strane hubice a druhou rukou vyberte kefu.
Údržba malej turbokeyy (iba modely XC5243, XC5244)
XV1651/01
Batéria XV1653/01
XV1653/01
Mopovacia poduška z mikrovlákna XV1630/01
XV1630/01
i Poznámka: Filter a mopovaciu podušku z mikrovlákna vymieňajte každých 6 mesiacov, aby ste zaručili maximálny výkon.
1 Okrenite zidni nosač naopačke i otkačite ručicu. Postavite priključak za punjenje tako da metalni deo bude vidljiv i okrenut uspravno sa prednje strane zidnog nosača.
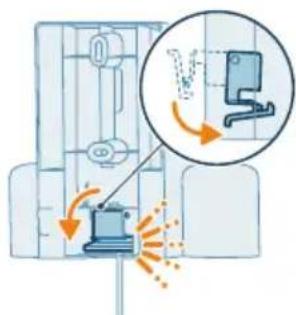
2 Zatvorite ručicu. Uverite se da je ručica blokirana i da se čuo zvuk „KLIK“.
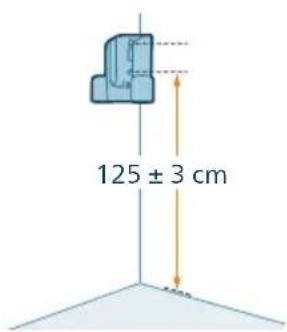
3 Čvrsto zakačite zidni nosač na željeni položaj na zidu i uverite se da su najniže rupe za zavrtnje za montažu na zid udaljene približno 125 cm od poda.
Oprez: Budite oprezni prilikom bušenja rupa u zidu za pričvršćivanje zidnog nosača kako biste izbegli opasnost od strujnog udara.
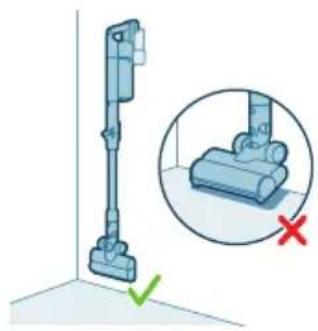
i Napomena: Uverite se da postavljanje zidnog nosača omogućava celom aparatu da visi na zidu tako da mlaznica ne dodiruje pod.
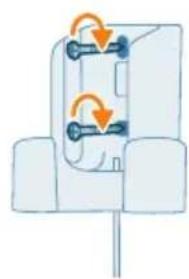
4 Kada utvrdite optimalni položaj i visinu za odlaganje i punjenje aparata, čvrsto pritegnite zavrtnje kako biste učvrstili zidni nosač.
Priprema za upotrebu
i Napomena: Možete i da postavite dršku na ravnu i stabilnu površinu i da direktno povežete kabl za punjenje sa aparatom.
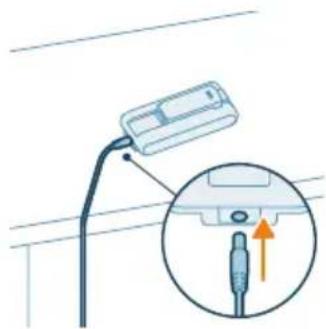
i Napomena: Druga opcija je da postavite bateriju na ravnu i stabilnu površinu i da direktno povežete kabl za punjenje sa baterijom.
![graph TD A["Start"] --> B["4 hrs"] B --> C["End"]](/content/2026/04/721249/images/2e6efbdb3845b469d8a3cc39dfd6cb3eb5629cf53461033e27cf4127f9907904.jpg)
2 Spojite cev sa mlaznicom. Potvrdite spajanje tako što ćete čuti klik kada postavljate.
Upotreba FlexIT cevi
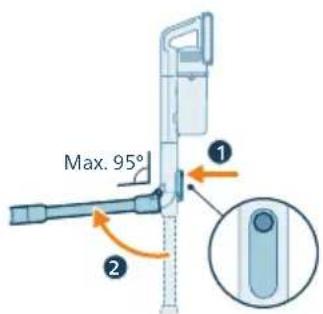
Ovaj aparat je opremljen sa FlexIT cevi koja vam omogućava da savijate cev do 95 stepeni.
1 Pritisnite dugme za oslobađanje na cevi da biste otključali savijanje.
2 Pomoću dugmeta za biranje snage prebacujte između tri različite postavke snage: režim eco, normalan režim, režim turbo.
Eco Normalna Turbo
3 Usisivačem možete čistiti tvrde ili mekane podne površine.
Upozorenje: Nemojte usisavati vodu niti neku drugu tečnost.
A Oprez: Nemojte gledati direktno u uključene LED lampice niti usmeravati LED lampice u nečije oči. LED svetlo je vrlo blještavo.
Usisavanje tokom brisanja podova od tvrdog materijala (samo za model XC5244)
A Oprez: Rezervoar za vodu koristite samo na tvrdim podovima s vodootpornom površinom (kao što su linoleum, pločice ili lakirani parket) i kamenim podovima (kao što je mermer). Ako vaš pod nije tretiran da postane vodootporan, proverite sa proizvođačem da li možete da koristite vodu za njegovo čišćenje. Nemojte da koristite rezervoar za vodu na tvrdim podovima na kojima je vodootporni sloj oštećen.
i Napomena: Nemojte da koristite rezervoar za vodu za čišćenje tepiha.
i Napomena: Aparat sa montiranim rezervoarom za vodu ne pomerajte bočno, pošto to može da ostavi tragove vode. Pomerajte je samo napred ili nazad.
1 Pre upotrebe prvo pokvasite uložak za čišćenje od mikrovlakana.
2 Pričvrstite uložak za čišćenje od mikrovlakana ispod rezervoara za vodu. Poravnajte čičak trake ispod rezervoara za vodu iza krpe.
3 Otvorite gumeni poklopac na vrhu rezervoara. Napunite rezervoar vodom, pazeći da temperatura vode ne prelazi 50 °C.
6 Spojite pripremljeni rezervoar za vodu za mlaznicu za vodu i spremni ste da počnete. Za pravilnu upotrebu važno je da rezervoar bude čvrsto postavljen na točkiće mlaznice kada je u ispravnom položaju.
i Napomena: Vodeni modul nije pogodan za upotrebu na mekanim podovima poput tepiha.
Upotreba mini turbo četke (samo za modele XC5243, XC5244)
2 Mini turbo četku možete koristiti za standardno čišćenje, na primer, mekih površina poput kreveta i kauča. Postavku snage možete prilagoditi tako da odgovara vašim potrebama za čišćenje.
3 Mini turbo četku možete koristiti za dodatno temeljno čišćenje, na primer za usisavanje dlaka kućnih ljubimaca ili za čišćenje malih mrlja prljavštine, poput prosutih mrvica hleba. Postavku snage možete prilagoditi tako da odgovara vašim potrebama za čišćenje.
i Napomena: Izvadite posudu za prašinu držeći aparat u uspravnom položaju kako bi se izbeglo prosipanje nečistoća.
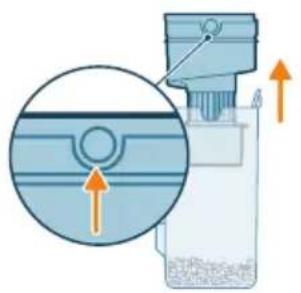
3 Držite za dva udubljena kruga sa strane ciklonske komore. Izvadite ciklonsku komoru iz posude za prašinu tako što ćete ga podići iz posude
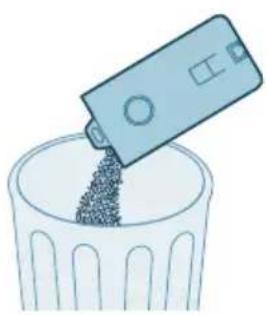
4 Ispraznite prikupljenu prašinu u posudi za prašinu iznad kante za otpatke.
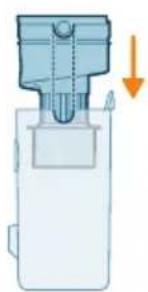
5 Vratite ciklonsku komoru u posudu za prašinu. Uverite se da su dva dela poravnata: dva polukruga moraju biti međusobno povezana.
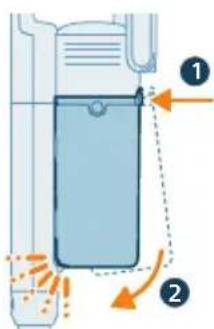
6 Vratite sklopljenu posudu. Prvo poravnajte stranu sa filterom na posudi pre nego što je zakačite.
Održavanje rezervoara za vodu (samo za model XC5244)
Očistite rezervoar za vodu nakon svake upotrebe.
2 Isperite i uložak za čišćenje ispod česme i ga operite ga ručno ili u mašini za pranje veša.
5 Pravilno zatvorite rezervoar za vodu i protresite ga kako biste uklonili ostatke deterdženta.
6 Ispraznite rezervoar za vodu i ostavite ga otvorenog da se osuši.
7 Uverite se da čep nije odvrnut tokom odlaganja. Okačite uložak za čišćenje od mikrovlakana da se osuši.
i Napomena: Preporučujemo zamenu uloška za čišćenje od mikrovlakana na svakih 6 meseci (dodatna oprema XV1630).
Povremeno održavanje
Održavanje sistema za prikupljanje prašine
3 Istresite kućište filtera i filter od pene iznad korpe za otpatke.
i Napomena: obavezno temeljno očistite kućište filtera tako što ćete čvrsto lupkati po njemu iznad kante za smeće sve dok iz kućišta filtera ne prestane da izlazi prašina.
4 Isperite filter od pene pod mlazom vode iz slavine.
5 Cedite filter od pene sve dok iz njega ne počne da izlazi čista voda.
i Napomena: za najbolje rezultate čišćenja, neka voda curi kroz filter tako da prljavija strana bude okrenuta nadole, kako bi se isprala prašina koja je prodrla duboko.
7 Za temeljno održavanje, očistite posudu za prašinu i ciklonsku komoru pod mlazom tekuće vode ili u toploj vodi sa sapunicom.
8 Brisanjem osušite očišćenu posudu za prašinu i ciklonsku komoru.
9 Umetnite filter od pene u kućište filtera.
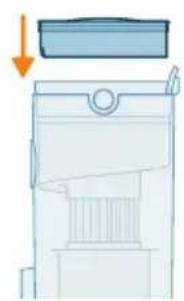
10 Vratite filter u posudu za prašinu.
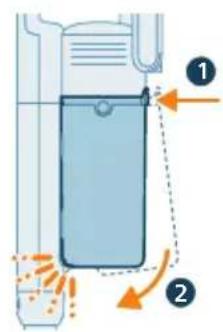
11 Vratite sklopljenu posudu. Prvo poravnajte stranu sa filterom na posudi pre nego što je zakačite.
i Napomena: Nakon održavanja, pre upotrebe uvek proverite da li je filter u aparatu sklopljen.
Održavanje mlaznice
1 Uvek isključite aparat pre čišćenja četke mlaznice.
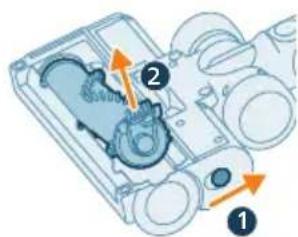
2 Jednom rukom držite dugme sa strane mlaznice dok drugom rukom uklanjate četku.
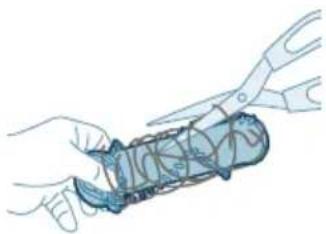
3 Pažljivo uklonite zapetljane dlake sa četke. Makazama možete olakšati uklanjanje prljavštine.
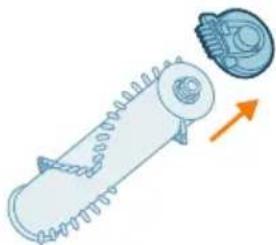
4 Uklonite bočni poklopac.
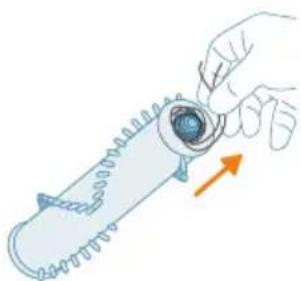
5 Odvojite dlake koje su se zapetljale u četku.
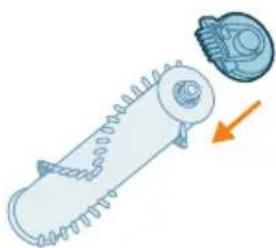
6 Ponovno postavite poklopac.
2 Rukama ili makazama uklonite svu prljavštinu sa četke.
3 Kada ponovo stavljate četku, jednostavno je poravnajte nazad u prvobitni položaj. Proverite da li je unutrašnji kraj poravnat. Okrećite četku u smeru kretanja kazaljke na satu kako biste je učvrstili. Kada se četka pravilno sastavi, čućete zvuk „KLIK”.

Održavanje rezervoara za vodu (samo za model XC5244)
6 Isperite i uklonite preostalu tečnost u rezervoaru za vodu.
Zamenski filter XV1651/01
XV1651/01
Baterija XV1653/01
XV1653/01
Uložak za čišćenje od mikrovlakana XV1630/01
XV1630/01
4 Irrota sivukansi.
6 Kokoa kansi.
Miniturboharjan kunnossapito (vain XC5243, XC5244)
XV1651/01
Akku XV1653/01
XV1653/01
Mikrokuitumoppi XV1630/01
XV1630/01
4 Skölj skumfiltret under kranen.
XV1651/01
Batteri XV1653/01
XV1653/01
Mikrofibermoppdyna XV1630/01
XV1630/01
adapter används.
4 Tháo nắp bên.
6 Lắp lại nắp.
XV1651/01
Pin XV1653/01
XV1653/01
XV1630/01
XV1651/01
XV1653/01
Mikrofiber paspaslama bezi XV1630/01
XV1630/01
XV1651/01
Μπαταρία XV1653/01

XV1653/01
XV1630/01
12 Aqua tank (XC5244 only)
XV1651/01
Батерия XV1653/01
XV1653/01
XV1630/01
Користење на Mini TurboBrush (само XC5243, XC5244)
XV1651/01
Батерија XV1653/01
XV1653/01
XV1630/01

XV1651/01
Аккумулятор XV1653/01
XV1653/01
XV1630/01
XV1651/01
Батарея XV1653/01
XV1653/01
XV1630/01
Шағын турбо щетканы пайдалану (тек ХС5243, ХС5244)
5 Шатаскан шашты щеткадан ажыратыңыз.
XV1651/01
Батарея XV1653/01
XV1653/01
XV1630/01 микроталшыкты еден жуу төсемесі

XV1630/01
ข้อควรระวัง:
![graph TD A["Gear Icon"] --> B["Timer Icon"] style A fill:#f9f,stroke:#333 style B fill:#bbf,stroke:#333 note right of A "4 hrs"](/content/2026/04/721249/images/c11699d723e7fe7fba2716a8ff74ccc75cf06101e0dbad0692b61c1badf76623.jpg)
Eco ปกติ เทอร์โบ

XV1651/01
XV1653/01
XV1630/01
2 将带有弯管的吸嘴移到沙发下面。
1 按开/关按钮启动产品。
3 硬地面或软地面皆可用吸尘器清洁。
警告:请勿吸入水或其他液体。
1 使用前将微纤维清洁布用水预先润湿。
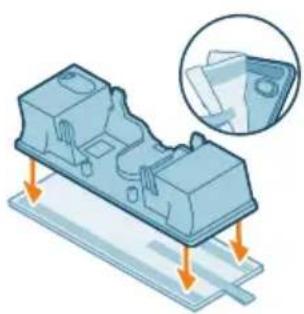
5 盖好水箱。
警告:此出水模组不可用于水坑吸水。
提示和其他重要信息
4 将集尘桶收集的灰尘倒入垃圾箱。
1 取下微纤维清洁布。
3 务必将水箱内残留的水全部倒出。
4 为水箱注水。
5 盖好水箱并摇晃箱体,去除残留的洗涤剂。
除尘管理系统保养
2 从塑料滤网盒中取出可水洗海绵滤网。
4 在水龙头下冲洗海绵滤网。
5 挤压海绵滤网,直至滤网流出净水。
8 将洗净的集尘桶和旋风滤网擦干。
4 取下侧盖。
5 清除吸嘴刷上所有缠绕的毛发。
6 重新装回侧盖。
8 锁定吸嘴刷,听到“咔嗒”声即可。
注意:检查并清除吸嘴轮周围的污物。
2 用手或剪刀清除刷子上的污物。
水箱保养(仅限 XC5244)
水箱需每月除垢一次,避免水垢积聚。
1 在量杯中添加少量除垢液。
2 在量杯中添加适量水。
3 将混合液注入水箱内。
4 盖好水箱后晃动箱体,摇匀除垢液。
XV1651/01
电池 XV1653/01
XV1653/01
微纤维清洁布 XV1630/01
XV1630/01
适配器未拔出。
先拔掉适配器,然后重启产品。
信号 信号含义
2 將裝上彎管的吸頭伸到沙發下方。
1 按下開關按鈕,開啟產品電源。
警示:請勿用來吸水或其他液體。
5 蓋好水箱。
警告:請勿將濕拖模組用於處理水灘。
秘訣和其他重要資訊
使用縫隙工具
4 將集塵桶所收集的灰塵倒入垃圾桶。
灰塵管理系統維護

注意:所有零件都不可用洗碗機清洗。
9 將泡綿濾網插入濾網盒。
10 將濾網裝回集塵桶中。



- CONTENTS
- INTRODUCTION
- GENERAL DESCRIPTION
- BEFORE FIRST USE
- INSTALLING THE WALL MOUNT
- PREPARING FOR USE
- CHARGING
- USING THE APPLIANCE
- ASSEMBLING THE APPLIANCE
- USING THE FLEXIT TUBE
- VACUUMING SOFT AND HARD FLOORS
- VACUUMING WHILE MOPPING HARD FLOORS (XC5244 ONLY)
- CAUTION: THE AQUA MODULE SHOULD NOT BE USED TO PICK UP WATER PUDDLES
- TIPS AND OTHER IMPORTANT INFORMATION
- USAGE RESTRICTIONS
- VERSATILE USAGE AND ACCESSORIES
- USING THE NOZZLE
- USING THE MINI TURBOBRUSH (XC5243, XC5244 ONLY)
- USING THE CREVICE TOOL
- USING THE COMBINATION TOOL
- AFTER USE – MAINTENANCE
- FREQUENT MAINTENANCE AFTER EACH CLEANING CYCLE
- DUST BUCKET MAINTENANCE
- AQUA TANK MAINTENANCE (XC5244 ONLY)
- PERIODIC MAINTENANCE INTERMITTENTLY
- DUST MANAGEMENT SYSTEM MAINTENANCE
- NOZZLE MAINTENANCE
- MINI TURBOBRUSH MAINTENANCE (XC5243, XC5244 ONLY)
- REPLACEMENT
- USER INTERFACE SIGNALS AND THEIR MEANING
- SIGNAL MEANING OF SIGNAL
- TROUBLESHOOTING
- DRY CLEANING
- WHEN USING THE VACUUM AND MOP NOZZLE
- LSI
- PENGGUNAAN TURBOBRUSH MINI (XC5243, XC5244 SAHAJA)
- PENYELENGGARAAN TURBOBRUSH MINI (XC5243, XC5244 SAHAJA)
- KLARGØRING
- BRUG AF MINI TURBOBRUSH (KUN XC5243, XC5244)
- VEEPAAGI HOOLDUS (AINULT MUDELIL XC5244)
- VÄIKESE TURBOHARJA HOOLDUS (AINULT MUDELITEL XC5243 JA XC5244)
- USAR EL MINICEPILLO TURBO (SOLO XC5243, XC5244)
- INSTALLATION DU SUPPORT MURAL
- ENTRETIEN DE LA MINI-BROSSE TURBO (XC5243, XC5244 UNIQUEMENT)
- USISAVANJE PODOVA OD MEKOG I TVRDOG MATERIJALA
- A OPREZ: VODENI MODUL SE NE SMIJE UPOTREBLJAVATI ZA BRISANJE VODENIH LOKVI
- UPORABA MINI TURBO ČETKE (SAMO XC5243, XC5244)
- ODRŽAVANJE SPREMNIKA ZA VODU (SAMO XC5244)
- ODRŽAVANJE MINI TURBO ČETKE (SAMO XC5243, XC5244)
- RJEŠAVANJE PROBLEMA
- ÜDENS TVERTNES APKOPE (TIKAI XC5244)
- MAZĀS TURBO SUKAS APKOPE (TIKAI XC5243 UN XC5244)
- UTILIZAR A MINI ESCOVA TURBO (APENAS XC5243 E XC5244)
- UTILIZAREA PERIEI MINI TURBO (DOAR XC5243, XC5244)
- SINJALI KUPTIMI I SINJALIT
- UPORABA KOMBINIRANEGA NASTAVKA
- POUŽÍVANIE HUBICE
- POUŽÍVANIE MALEJ TURBOKEYY (IBA MODELY XC5243, XC5244)
- ÚDRŽBA NÁDOBY NA VODU (IBA MODEL XC5244)
- ÚDRŽBA MALEJ TURBOKEYY (IBA MODELY XC5243, XC5244)
- PRIPREMA ZA UPOTREBU
- UPOTREBA FLEXIT CEVI
- USISAVANJE TOKOM BRISANJA PODOVA OD TVRDOG MATERIJALA (SAMO ZA MODEL XC5244)
- UPOTREBA MINI TURBO ČETKE (SAMO ZA MODELE XC5243, XC5244)
- ODRŽAVANJE REZERVOARA ZA VODU (SAMO ZA MODEL XC5244)
- POVREMENO ODRŽAVANJE
- ODRŽAVANJE SISTEMA ZA PRIKUPLJANJE PRAŠINE
- ODRŽAVANJE MLAZNICE
- MINITURBOHARJAN KUNNOSSAPITO (VAIN XC5243, XC5244)
- КОРИСТЕЊЕ НА MINI TURBOBRUSH (САМО XC5243, XC5244)
- ШАҒЫН ТУРБО ЩЕТКАНЫ ПАЙДАЛАНУ (ТЕК ХС5243, ХС5244)
- 提示和其他重要信息
- 除尘管理系统保养
- 水箱保养(仅限 XC5244)
- 信号 信号含义
- 警告:請勿將濕拖模組用於處理水灘。
- 秘訣和其他重要資訊
- 使用縫隙工具
- 灰塵管理系統維護
Brand : PHILIPS
Model : 5000 Series XC5242
Category : Broom