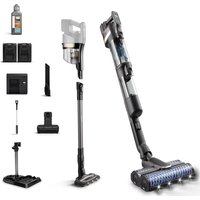
USER MANUAL 7000 Series XC7065 PHILIPS
English 4
Čeština 38
Dansk 72
Deutsch 107
Eesti 143
Español 177
Français 212
Hrvatski 247
Italiano 281
Latviešu 316
Lietuviškai 351
Magyar 385
Nederlands 420
Norsk 455
Polski 489
Português 524
Română 559
Shqip 594
Slovenščina 629
Slovensky 663
Srpski 697
Suomi 731
Svenska 765
Türkçe 799
Ελληνικά 833
Български 869
Македонски 905
Русский 941
Українська 977
Қазақша 1012
Contents
Introduction 4
General description 4
Before first use 5
Installing the wall mount 5
Storing the accessories on the wall mount 6
Preparing for use 7
Using the appliance 8
Assembling the appliance 8
Vacuuming soft and hard floors 8
Vacuuming while mopping hard floors 9
Versatile usage and accessories 12
Customizations and additional information 16
After use – Maintenance 18
Frequent maintenance after each cleaning cycle 18
Periodic maintenance intermittently 21
Replacement 30
User interface signals and their meaning 31
Troubleshooting 33
Dry cleaning 33
Wet cleaning 37
Introduction
Thank you for buying this product! To fully benefit from the support that we offer, register your product at www.philips.com/mycordlessvacuum-7000s.
General description
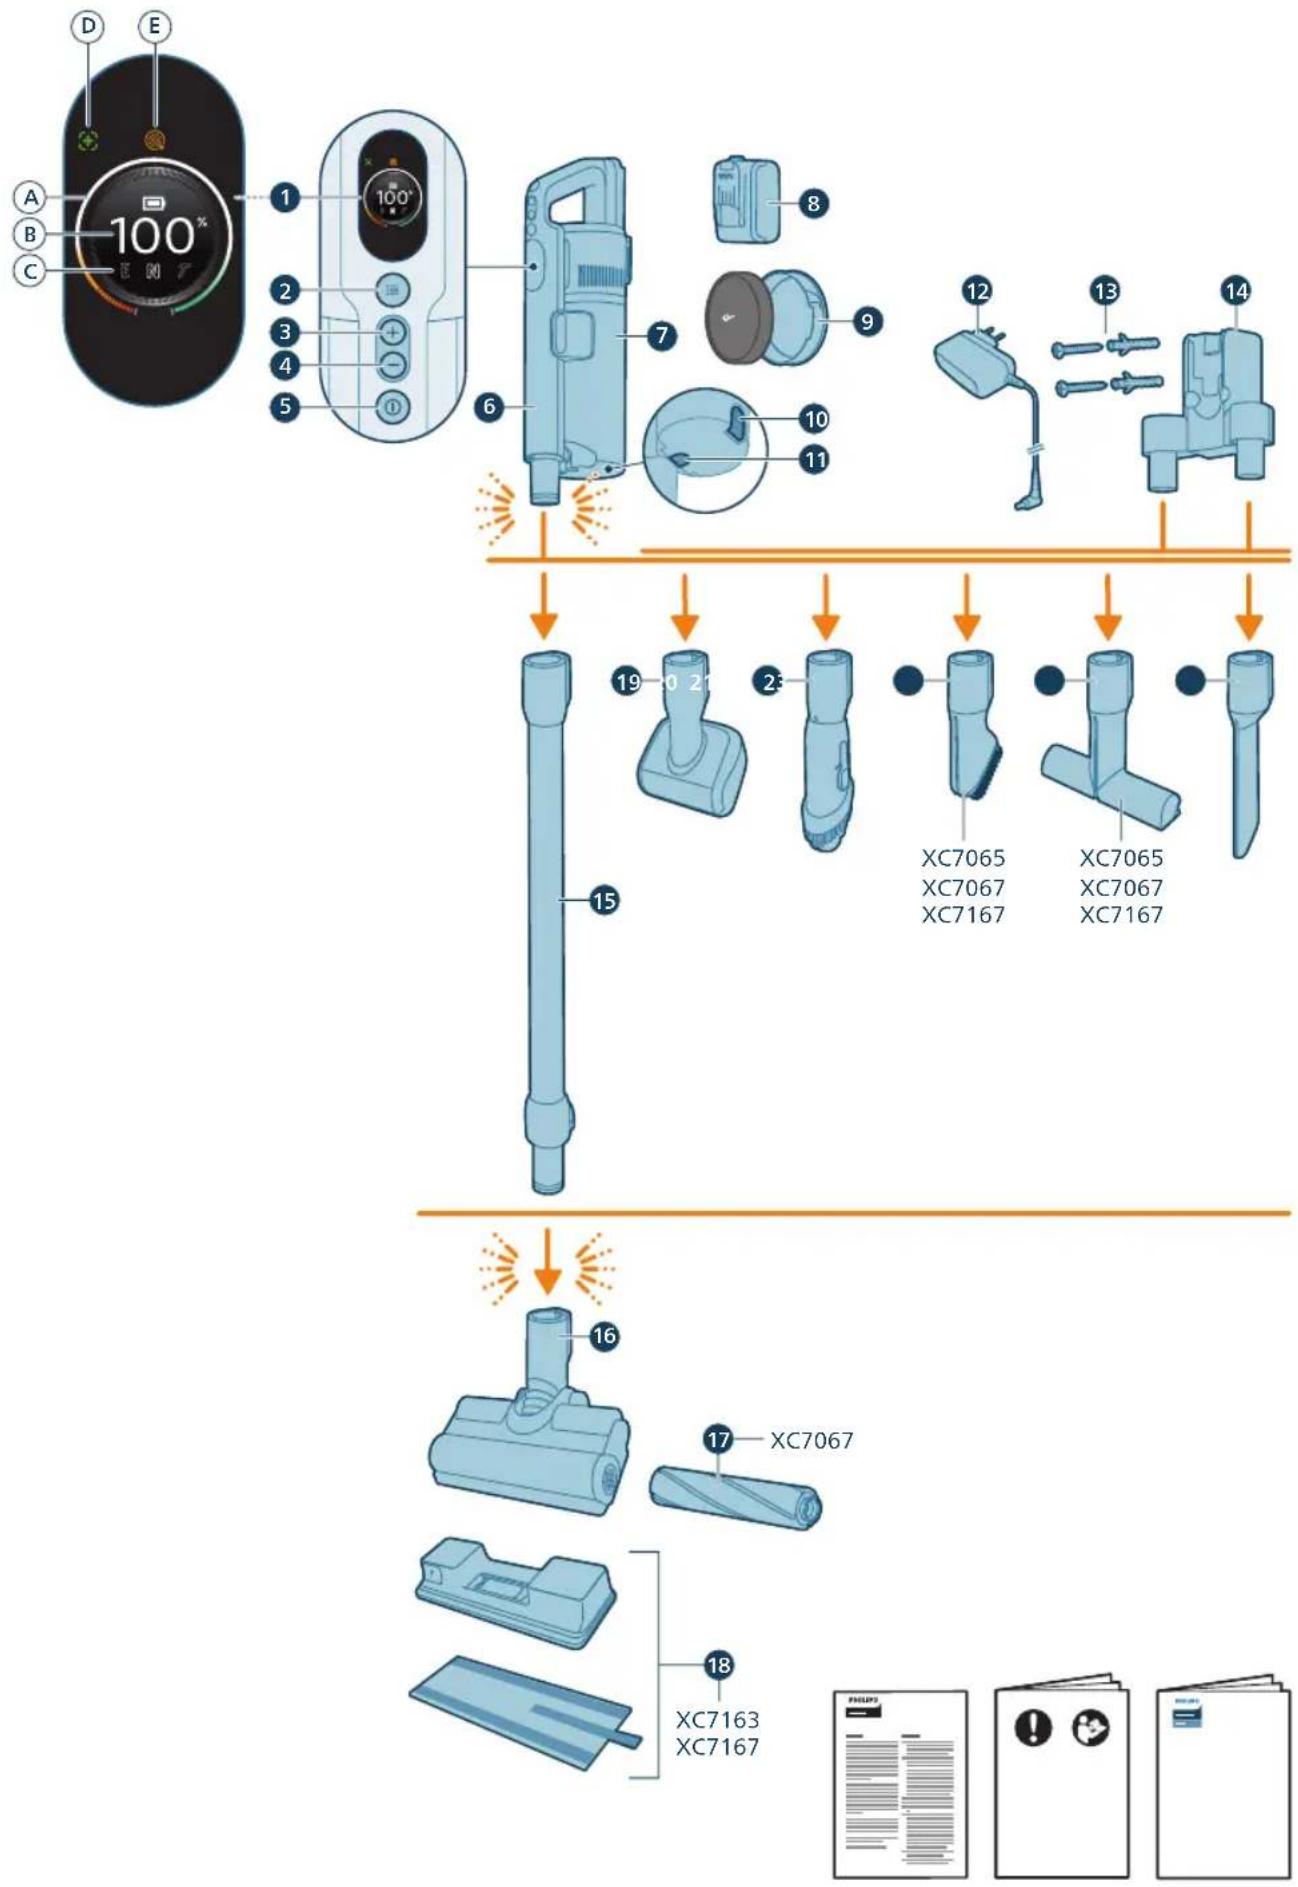
1 Digital display
a Ring indicator of battery level
b Percentage of battery level
c Selected power level
d 'Floor Type Recognition feature activated' icon
e Filter cleaning reminder icon
2 Menu/Confirm button
3 + Button
4 - Button
5 On/off button
6 Handheld
7 Dust bucket
8 Battery
9 Replacement filter
10 Easy empty button
11 Dust bucket release button
12 Adapter
13 Screws
14 Wallmount
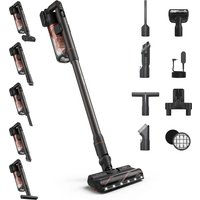
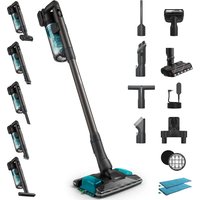
15 Tube
16 TriActive Smart LED nozzle
17 Delicate floor brush (XC7067 only)
18 Aqua tank & Microfiber mopping pad ((XC7163,XC7167 only)
19 PetPro Nozzle
20 Combination tool
21 Soft brush (XC7065, XC7067, XC7167 only)
22 Upholstery nozzle (XC7065, XC7067, XC6167 only)
23 Crevice tool
Before first use
Installing the wall mount
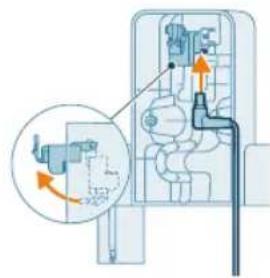
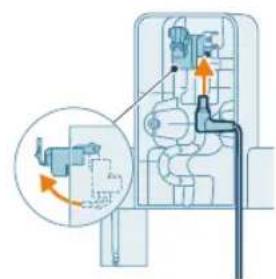
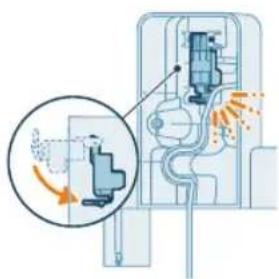
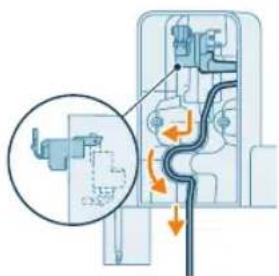
1 Invert the wall mount and unlatch the gray lever. Insert the charging port, ensuring the metal part is visible and pointing upright on the front side of the wall mount.
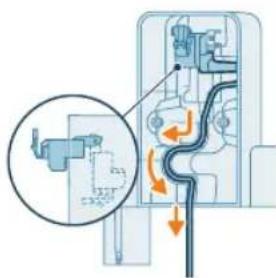
2 Neatly arrange the cable by tucking it into the designated groove.
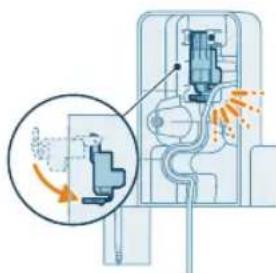
3 Close the gray lever. Make sure the gray lever is locked in place with a "CLICK" sound.
6 English
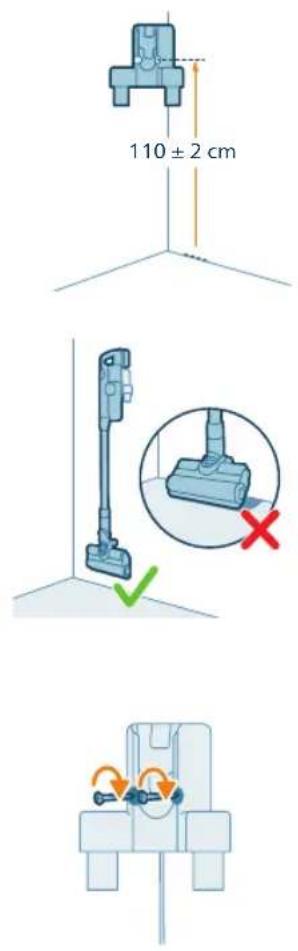
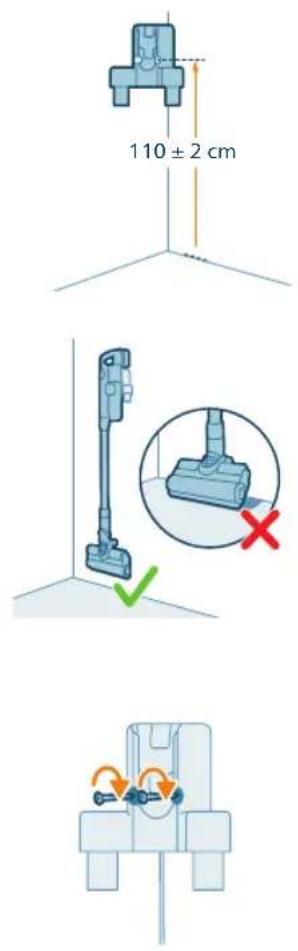
4 Securely affix the wall mount to your preferred position on the wall, ensuring that the mounting screw holes are approximately 110 cm from the floor.
Caution: Be careful when you drill holes in the wall to fasten the wall mount, to avoid the risk of electric shock.
i Note: Verify that the placement of the wall mount allows the entire appliance to hang on the wall without the nozzle coming into contact with the floor.
5 Once you have determined the optimal position and height for storing and charging your appliance, firmly tighten the screws to secure the wall mount in place.
Storing the accessories on the wall mount
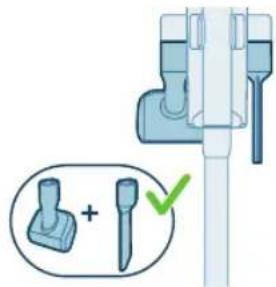
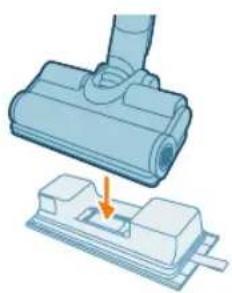
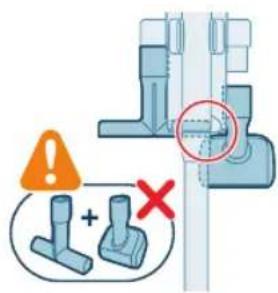
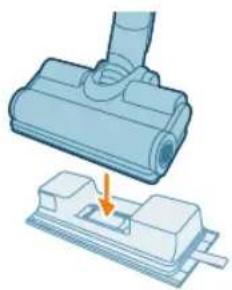
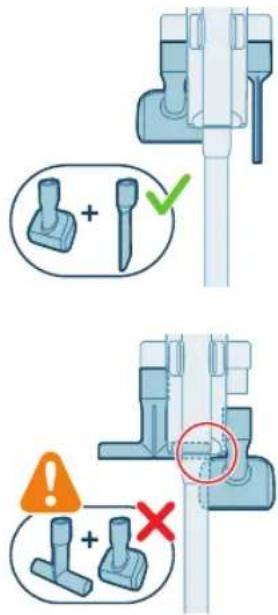
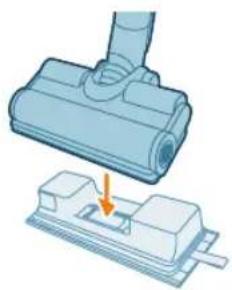
All accessories can be stored on the wallmount with exception of combining PetPro Nozzle & Upholstery tool.
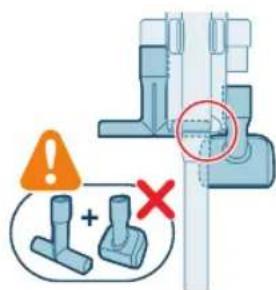
i Note: Be cautious that the PetPro Nozzle and the Upholstery tool could not be stored on the wall mount together.
Preparing for use
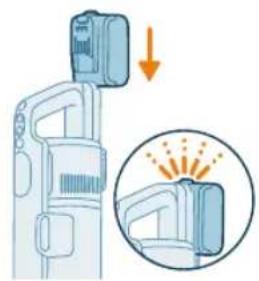
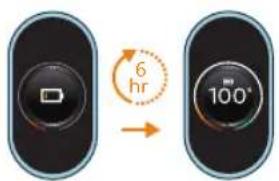
The appliance is equipped with a Li-Ion battery. Charging from empty to full takes about 6 hours.
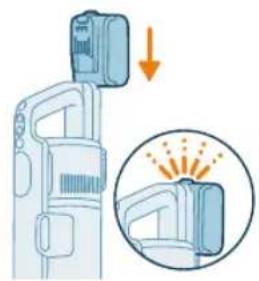
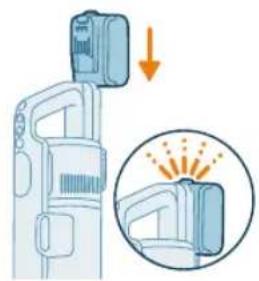
1 Attach the battery pack to the main body of the appliance, ensuring a secure connection that's confirmed with a "CLICK" sound.
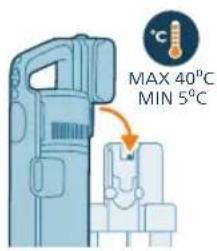
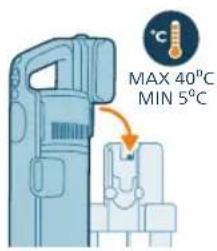
2 Charge your appliance by placing it onto the assembled wall mount.
⚠ Warning: Store and charge the appliance at a temperature above 5 °C and below 40 °C.
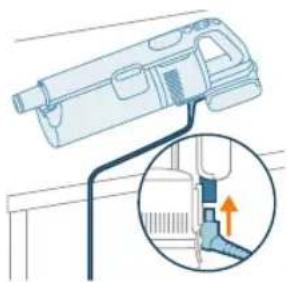
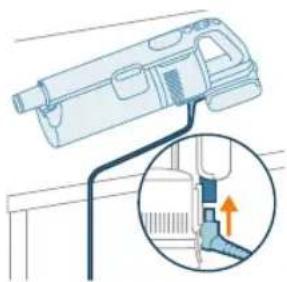
i Note: You can also place the handheld on a level and stable surface, and directly connect the charging cable to the appliance.
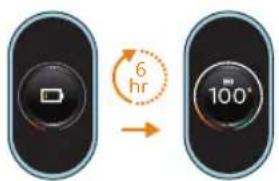
3 The appliance is designed to reach a complete charge within 6 hours. You can monitor the charging progress on the screen. When the appliance is fully charged, the value 100% lights up on the screen. After a few minutes, the display will switch off.
8 English
Using the appliance
Assembling the appliance
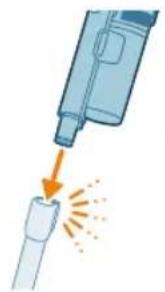
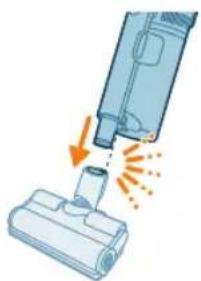
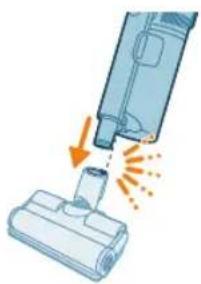
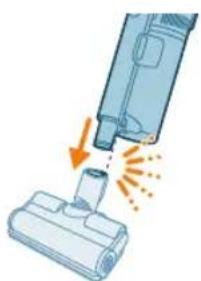
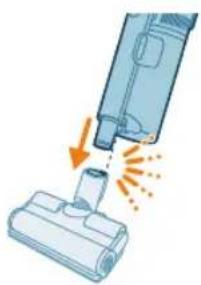
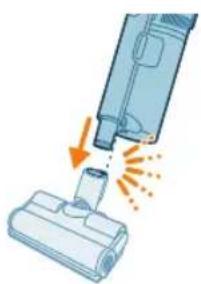
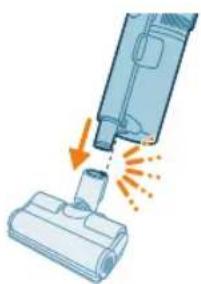
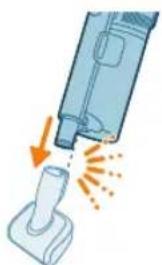
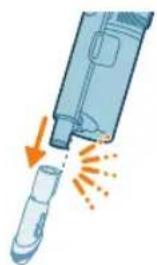
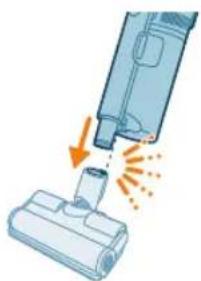
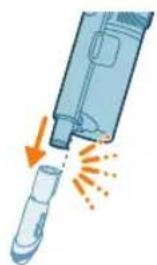
1 Attach the handheld to the tube. Confirm the attachment with a "CLICK" sound.
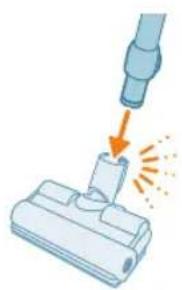
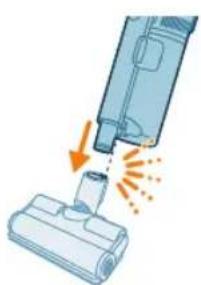
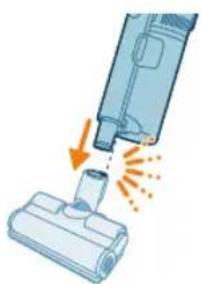
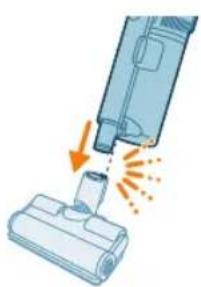
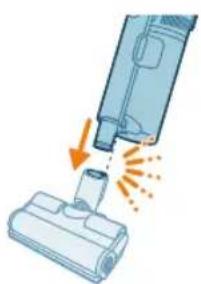
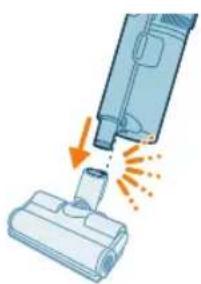
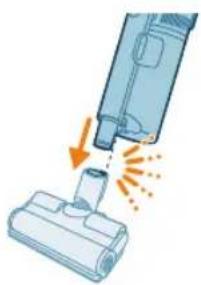
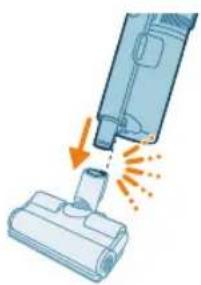
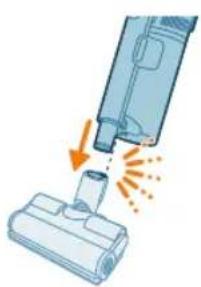
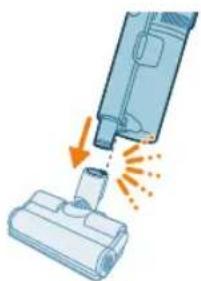
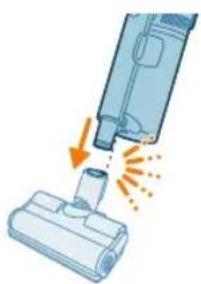
2 Attach the tube to the nozzle. Confirm the attachment with a "CLICK" sound.
Vacuuming soft and hard floors
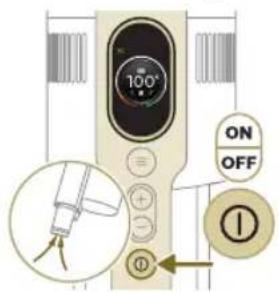
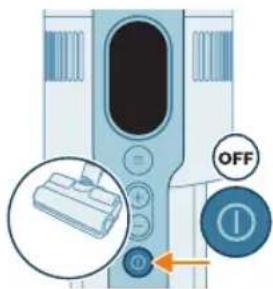
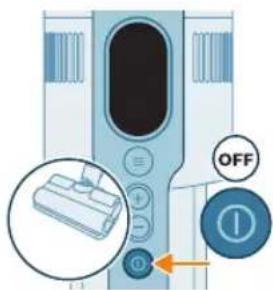
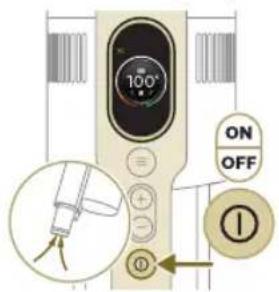
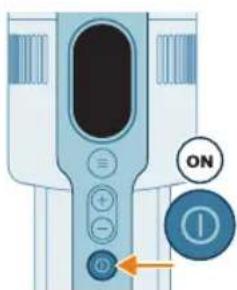
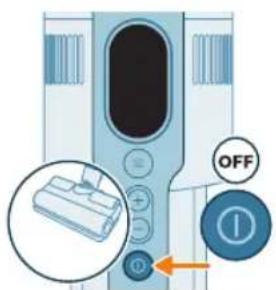
1 Press the on/off button to switch on the appliance.
i Note: To switch off the appliance, press the on/off button again.
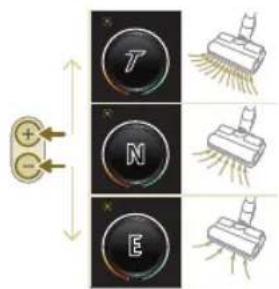
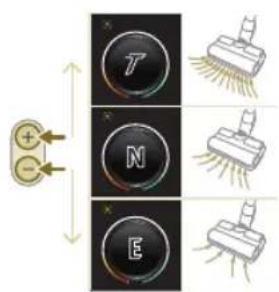
2 Use the + and - buttons to toggle through three different power settings.
T - turbo mode
N - normal mode
E - eco mode
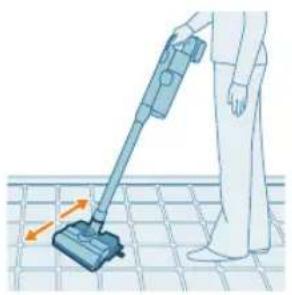
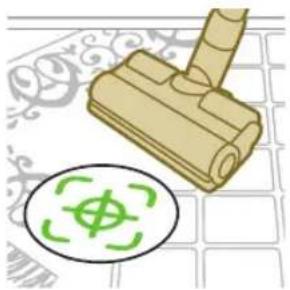
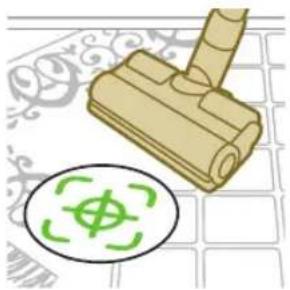
3 You can clean on hard or soft floors with the vacuum cleaner.
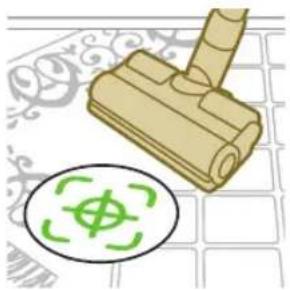
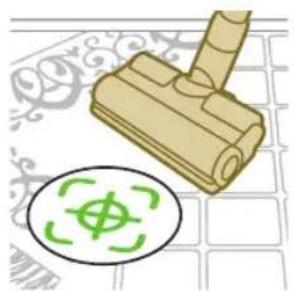
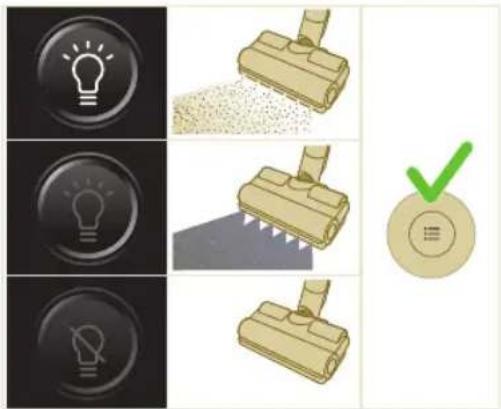
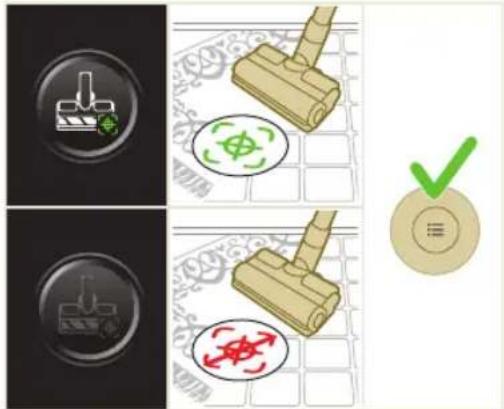
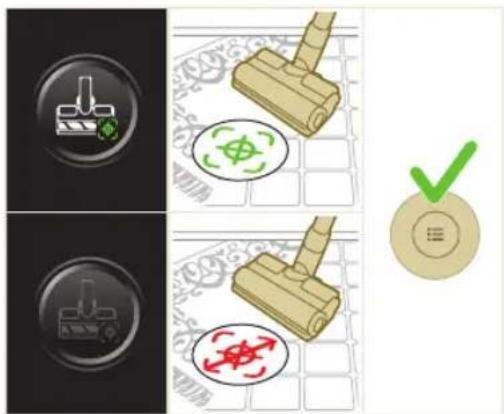
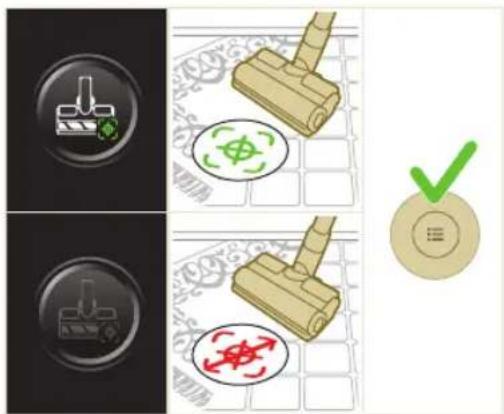
i With Floor Type Recognition enabled, the appliance recognizes the floor type and automatically optimizes its performance within the power settings you have selected. To disable this feature, check how to customize settings below.
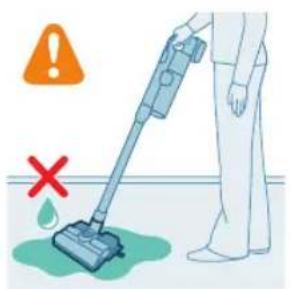
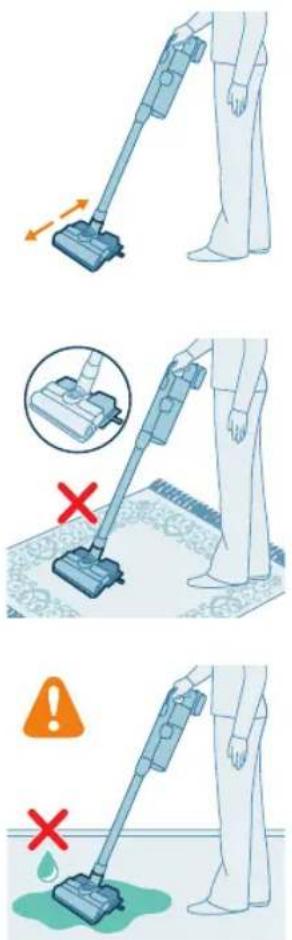
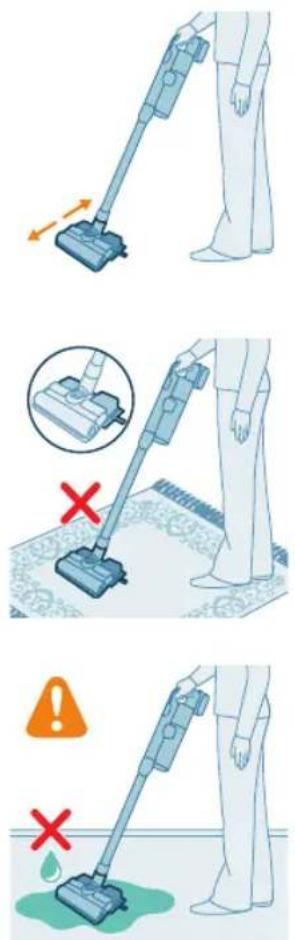
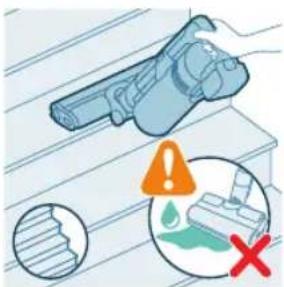
Warning: Do not vacuum up water or other liquids.
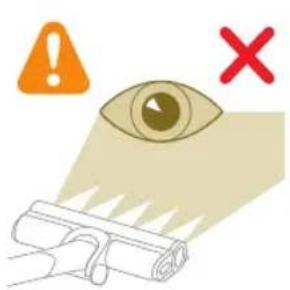
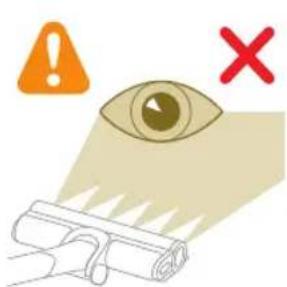
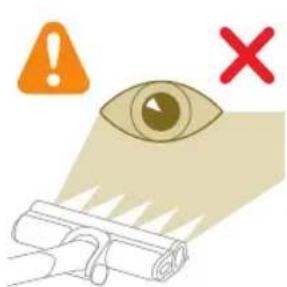
Caution: Do not look directly into the illuminated LEDs or point the LEDs at someone's eyes. The LED light is very bright.
Vacuuming while mopping hard floors
Caution: Only use the aqua tank on hard floors with a water-resistant top coat (such as linoleum, enameled tiles and varnished parquet) and stone floors (such as marble). If your floor has not been treated to make it water-resistant, check with the manufacturer if you can use water to clean it. Do not use the aqua tank on hard floors of which the water-resistant top coat is damaged.
i Note: Do not use the aqua tank to clean carpets.
English
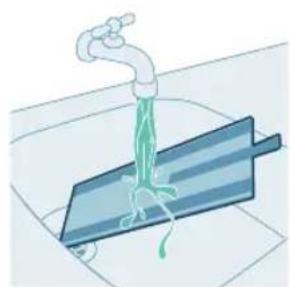
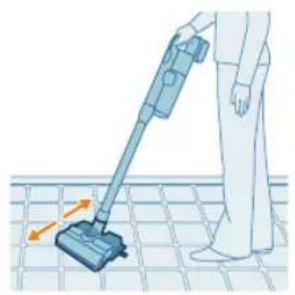
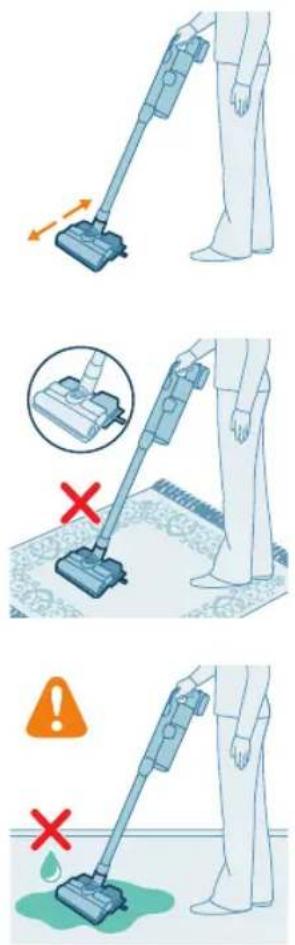
i Note: Do not move the appliance with aqua tank assembled sideways, as this leaves water traces. Only move forwards and backwards.
1 Pre-wet the microfiber mopping pad with water before use.
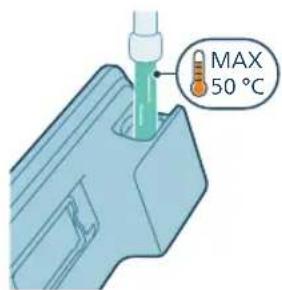
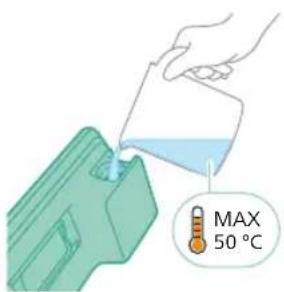
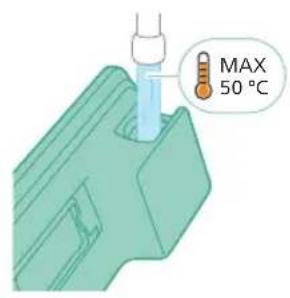
2 Fill the tank with water, ensuring the water temperature does not exceed 50° C.
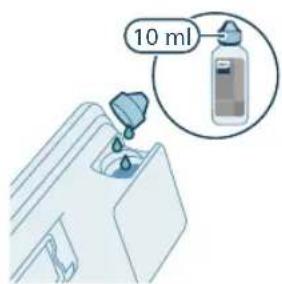
3 (Optional) If you wish to add a liquid floor cleaner into the aqua tank, opt for a low-foaming or non-foaming variety that can be diluted. We recommend the XV1792 Philips Floor Cleaner. Add only a few drops of the liquid cleaner to the water.
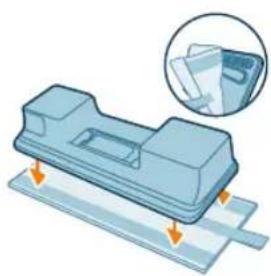
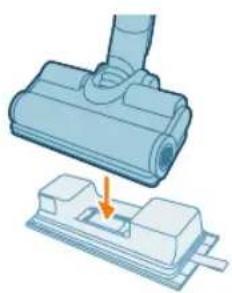
4 Secure the microfiber mopping pad underneath the aqua tank. Align the velcro straps under the aqua tank and behind the cloth.
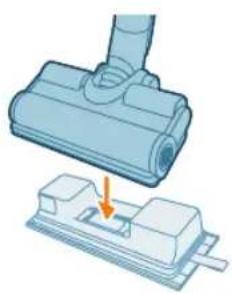
5 Attach the prepared aqua tank to the aqua nozzle and you're set to begin.
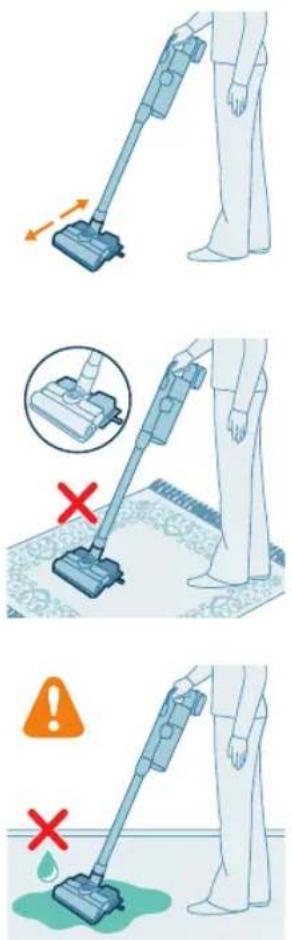
6 Press the on/off button to switch on the appliance. You can effectively clean hard floors with the attached aqua module on the nozzle.
i Note: The aqua module is not suitable for soft floors like carpet.
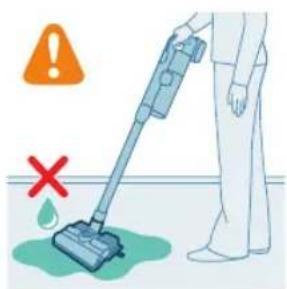
Caution: The aqua module should not be used to pick up water puddles.
- It is not necessary to vacuum the floor before mopping, as the Vacuum & Mop set-up actively wet-cleans your hard floor to capture all kinds of dirt, including liquids and stains. On carpets and rugs, use the Vacuum only set-up.
- The appliance can leave a small puddle of water on the floor if you do not move the appliance while switching it off. You can reduce the size of the puddle by moving the appliance while switching it off. If needed, you can remove the last drops with a cloth.
Usage restrictions
- The Vacuum & Mop set-up is suitable for vacuuming and mopping all types of hard floors, except uncoated wooden floors.
- The Vacuum & Mop set-up is intended for regular cleaning of hard floors. Always follow the cleaning instructions for your hard floor when you use this appliance.
- If you want to add a liquid floor cleaner other than XV1792 Philips Floor Cleaner to the water in the clean aqua tank, make sure that you use a low-foaming or non-foaming liquid floor cleaner that can be diluted in water like XV1792 Philips Floor Cleaner.
- As the clean aqua tank has a capacity of 250 ml, you only have to add a few drops (max 10ml) of liquid floor cleaner to the water.
12 English
- If you use the Vacuum & Mop set-up on linoleum floors, only do so on linoleum floors that are properly affixed to prevent linoleum from being drawn into the nozzle.
- If you move/lift the appliance over a carpet or rug when it is switched off, wastewater droplets may end up on your carpet or rug.
- Do not push the appliance over the floor grilles of convector heaters. As the appliance cannot pick up water that comes out of the nozzle when you move it over the grille, water ends up at the bottom of the convector pit.
- While cleaning, do not lift the nozzle from the floor or move the nozzle sideways, and do not make strong turns, as this leaves water traces. Only move forwards and backwards.
i Note: The operating time depends on the power level used during cleaning.
Versatile usage and accessories
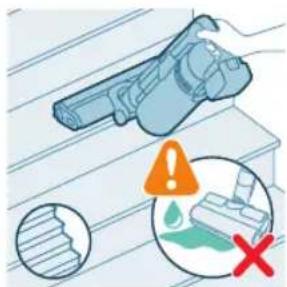
Warning: When using any accessory, do not vacuum up water or other liquids.
Caution: Do not look directly into the illuminated LEDs or point the LEDs at someone's eyes. The LED light is very bright.
Using the handheld
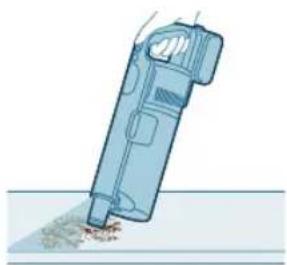
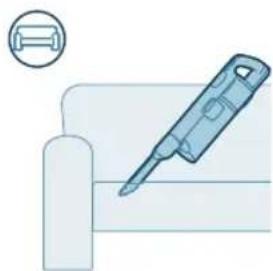
You can use the handheld directly without any cleaning tool to vacuum up dusts.
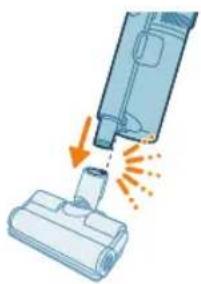
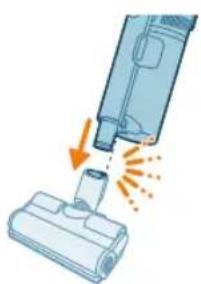
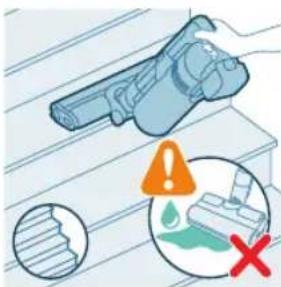
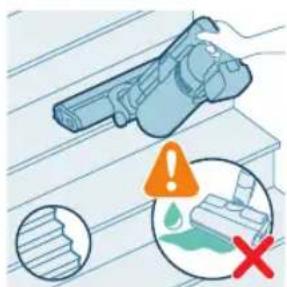
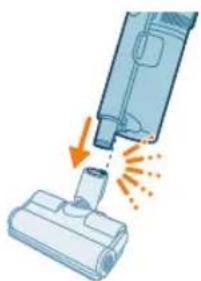
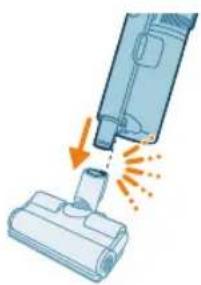
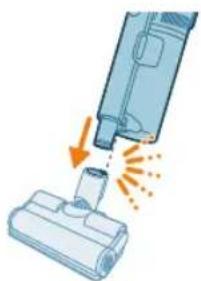
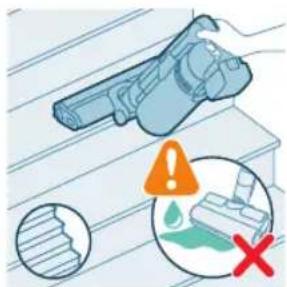
Using the nozzle
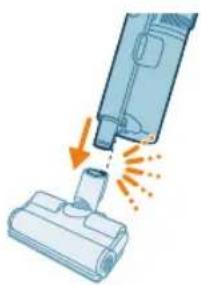
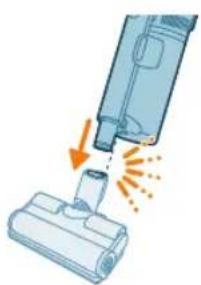
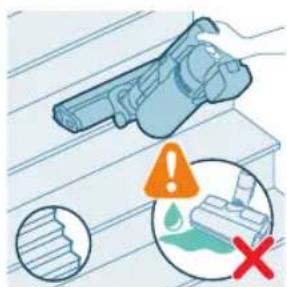
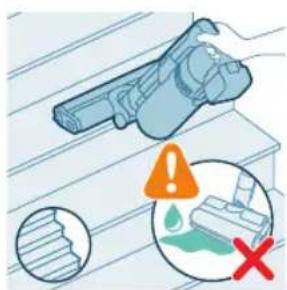
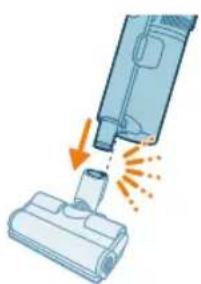
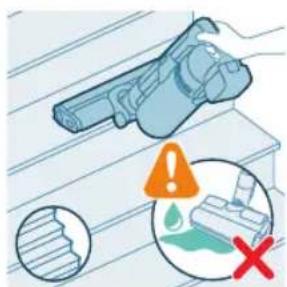
1 Attach the nozzle directly to the handheld.
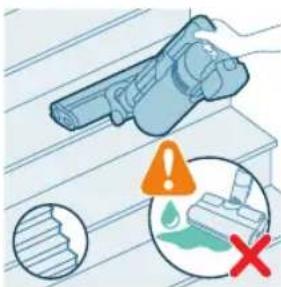
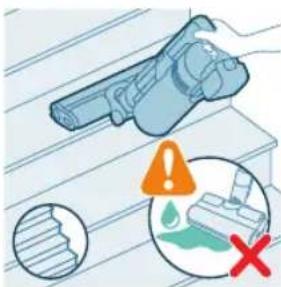
2 This combination is for cleaning dynamic surface height, such as stair case.
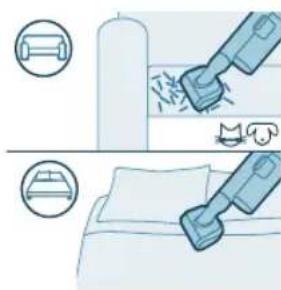
Using the PetPro Nozzle
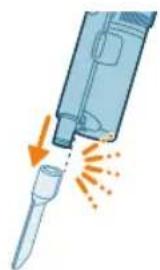
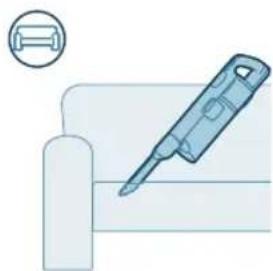
The PetPro Nozzle effectively removes pet hair and small messes like crumbs, and is ideal for soft surfaces such as beds and couches.
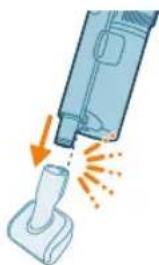
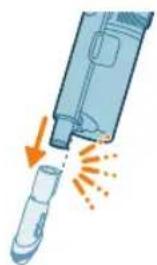
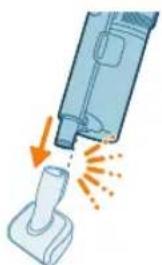
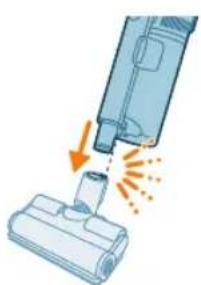
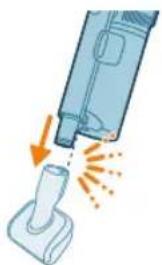
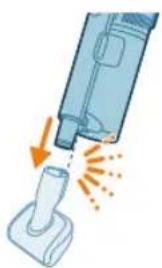
To attach the PetPro Nozzle, insert the tube of the handheld into the PetPro Nozzle. Adjust the power setting to match your cleaning needs.
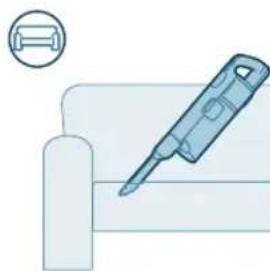
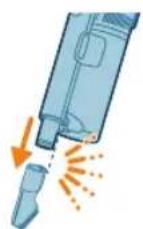
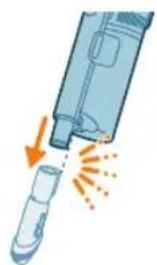
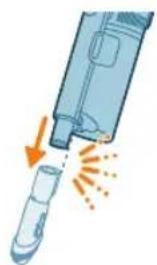
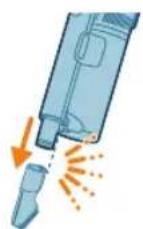
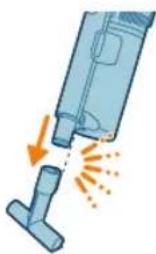
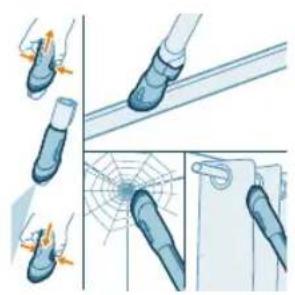
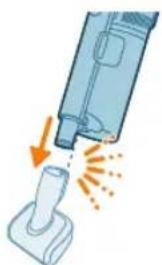
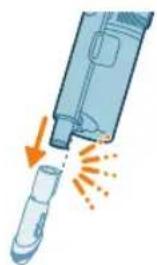
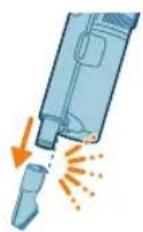
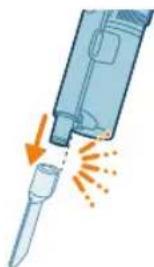
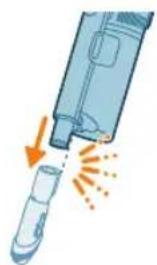
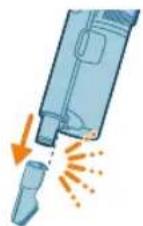
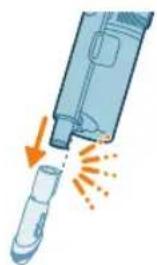
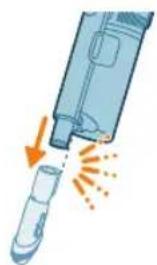
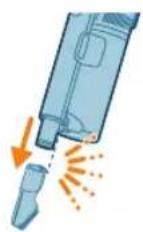
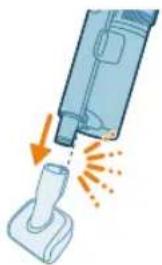
Crevice tool can be used for cleaning tight, narrow spaces like between couch cushions, along baseboards, or in car interiors.
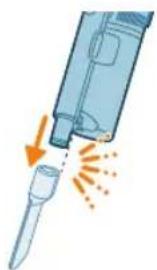
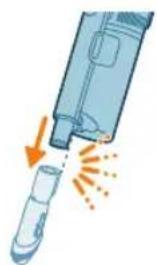
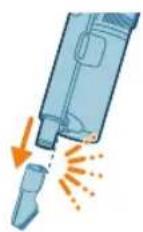
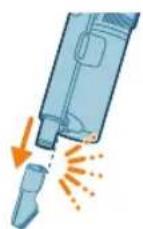
To attach the crevice tool, insert the tube or handheld into the crevice tool.
English
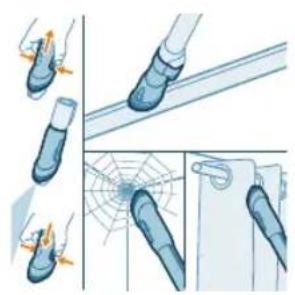
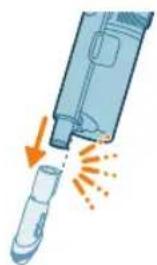
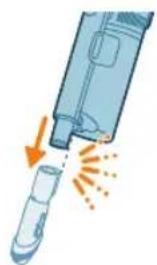
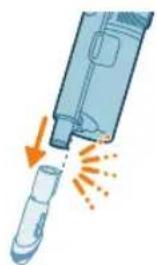
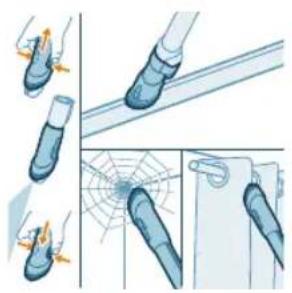
The combination tool has a soft brush to clean spiderwebs or delicate surfaces like curtains and a narrow nozzle for tight or hard-to-reach spots like window frames.
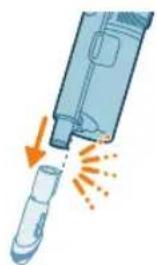
To attach the combination tool, insert the tube or handheld into the combination tool.
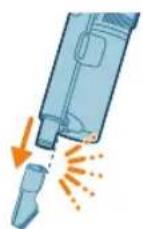
Using the soft brush
Soft brush gently cleans fragile or delicate surfaces like lampshades, blinds, and screens. It's included in models XC7065, XC7067 and XC7167.
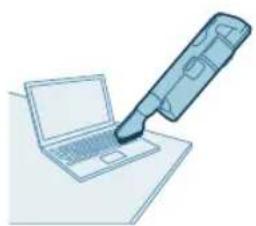
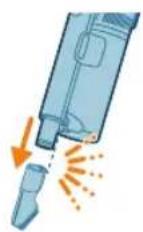
To attach the soft brush, insert the tube or handheld into the soft brush.
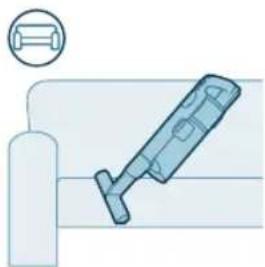
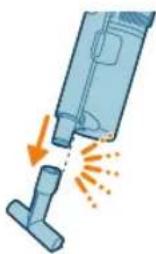
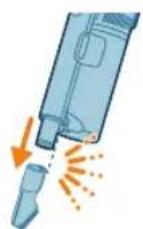
Upholstery tool cleans soft fabric furniture like sofas, cushions, and chairs. It's included in models XC7065, XC7067 and XC7167.
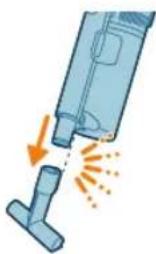
To attach the upholstery tool, insert the tube or handheld into the upholstery tool.
Using the Delicate Floor brush
Delicate Floor brush is the soft brush with grey and orange material and can be used to gently clean delicate hard floor types like cork, hard wood and natural stone. It's included in XC7067.
To replace the brush, follow the below steps:
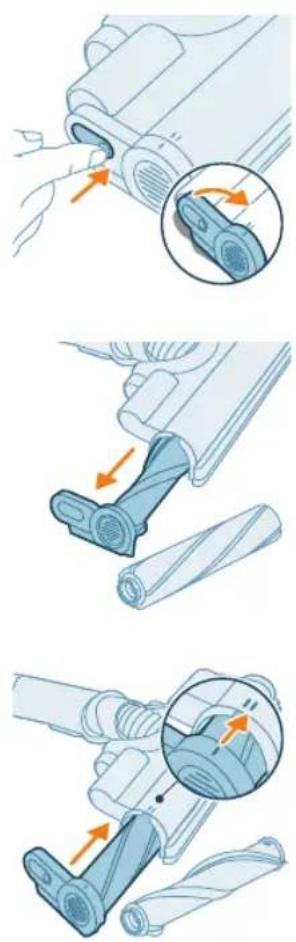
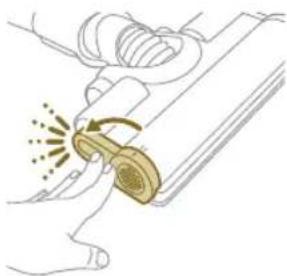
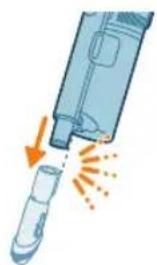
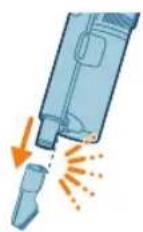
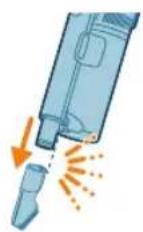
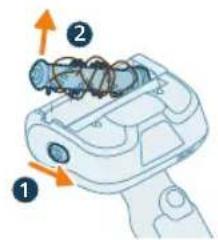
1 To access the brush, locate the button on the side of the nozzle. Press it and rotate to open. Gently remove the brush and the side cap of the nozzle.
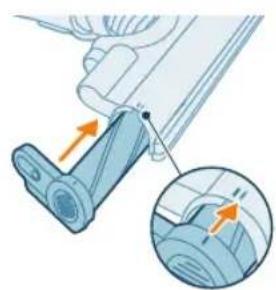
2 Pull the brush out of the side cover with force. Remove the side cap from the original brush roll and cap in onto the Delicate Floor brush.
3 Insert the Delicate Floor brush back to the side cover with force, please make sure the brush is firmly installed. When reassembling, ensure proper alignment of the brush.
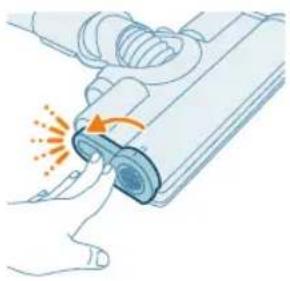
4 Lock the brush by securing it until you hear a "CLICK" sound.
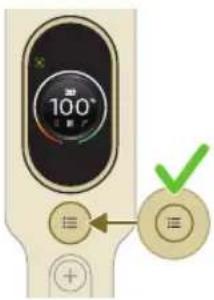
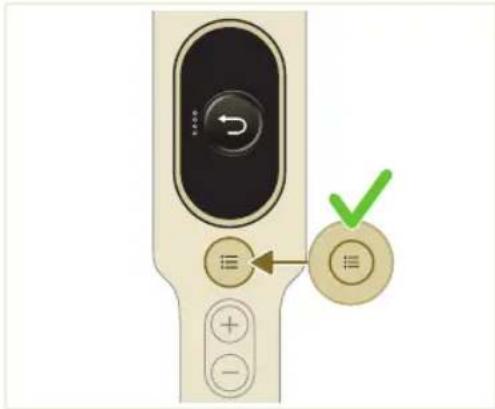
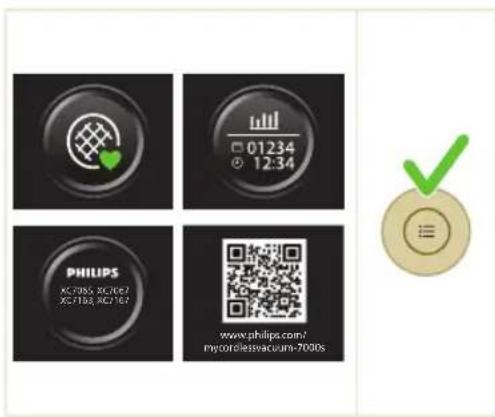
The appliance is equipped with various options to customize and monitor in the menu.
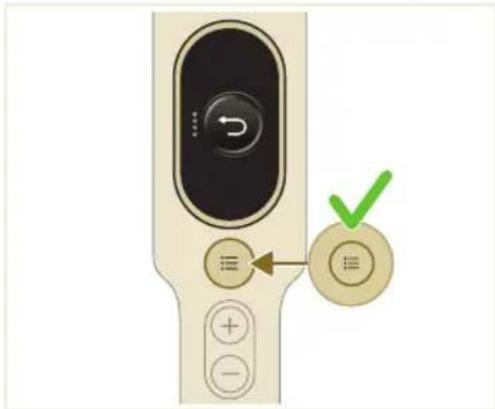
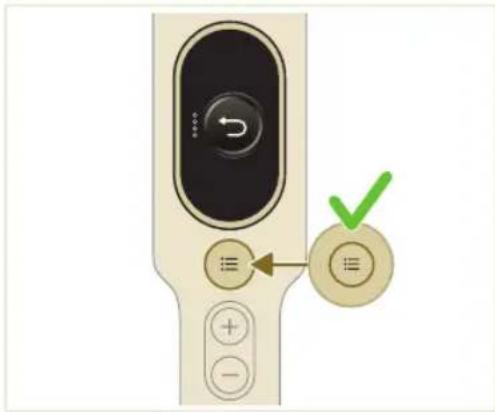
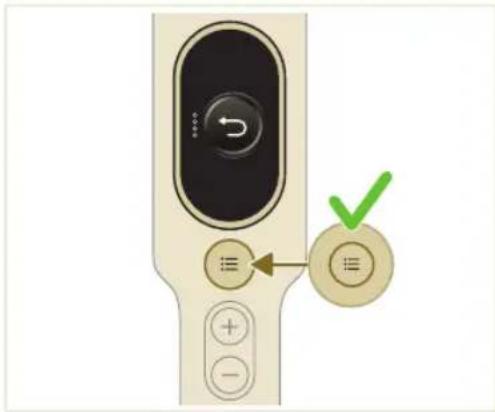
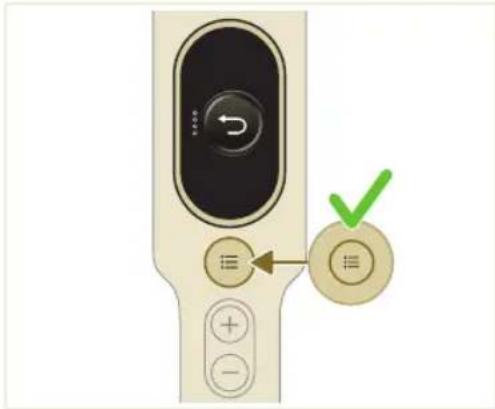
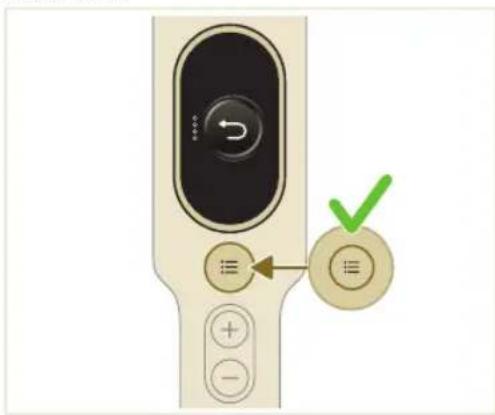
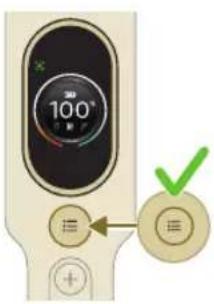
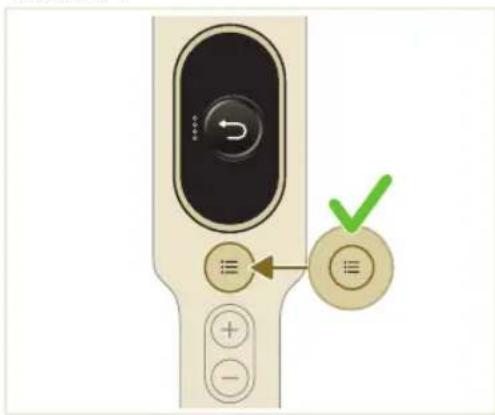
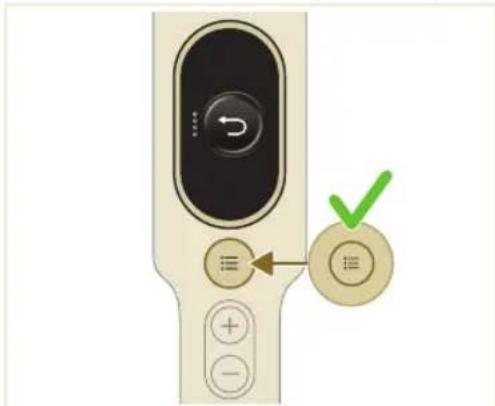
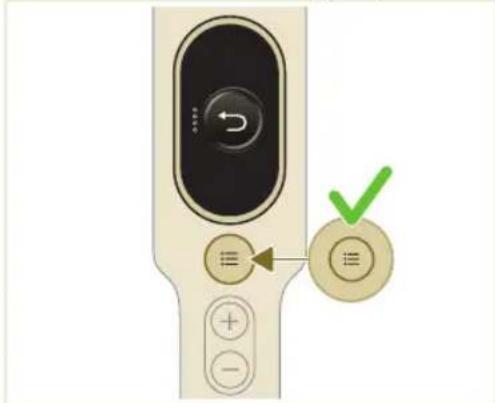
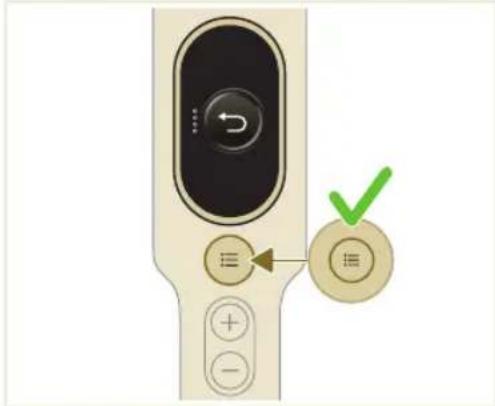
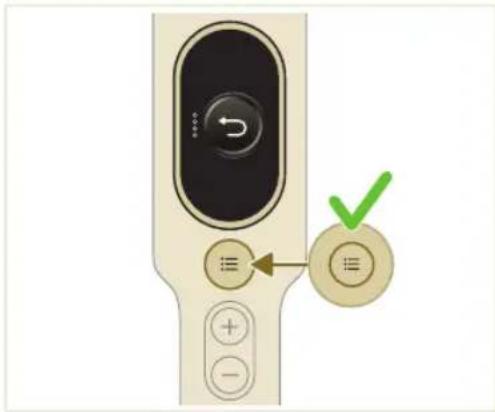
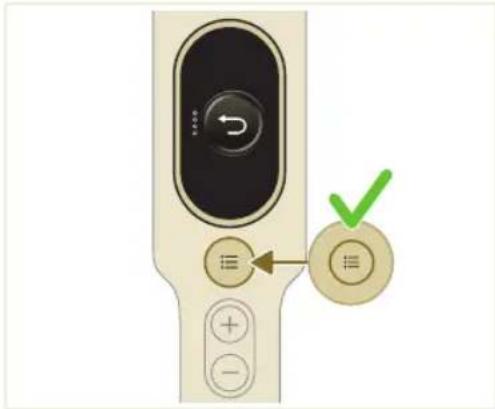
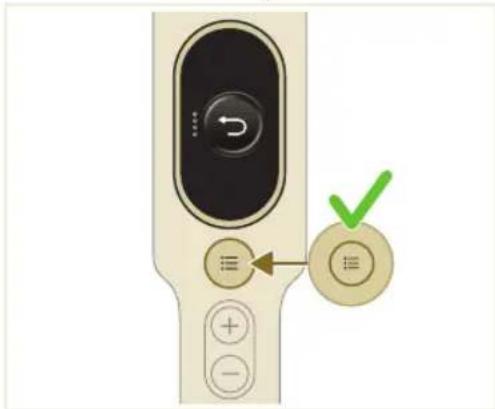
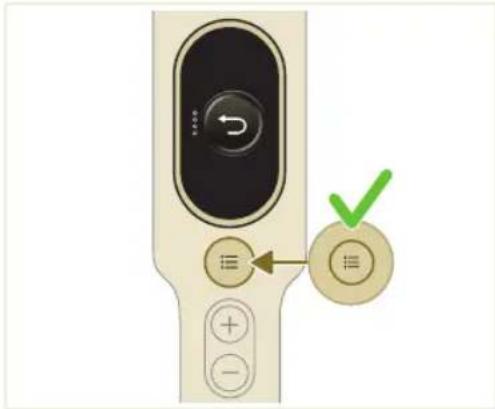
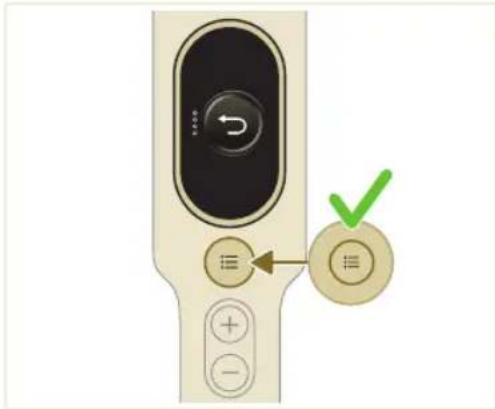
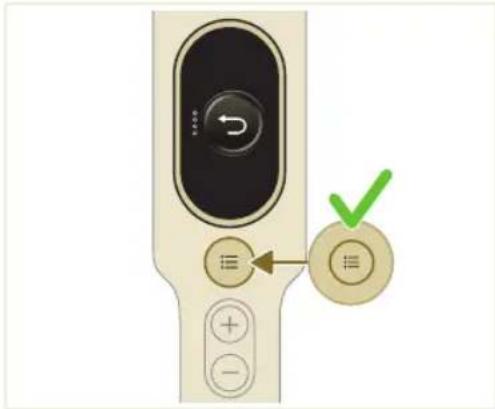
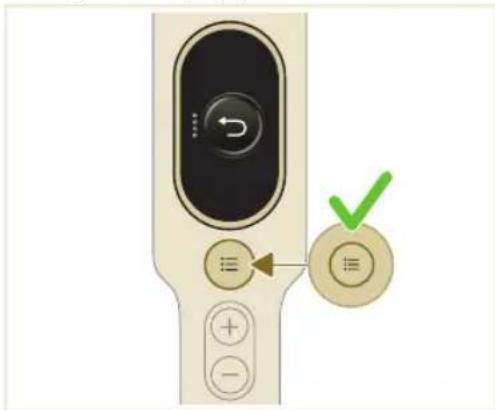
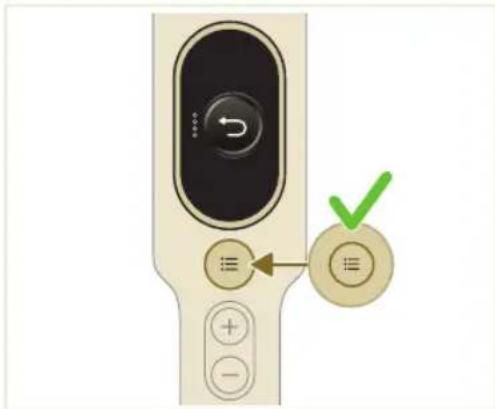
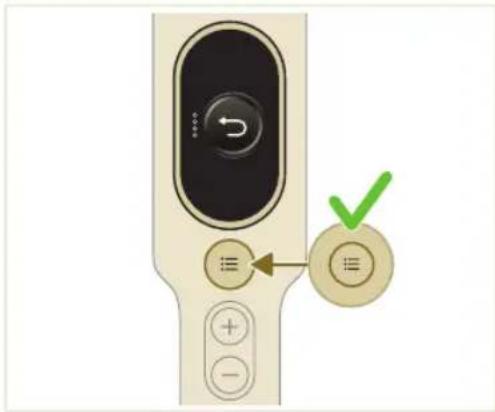
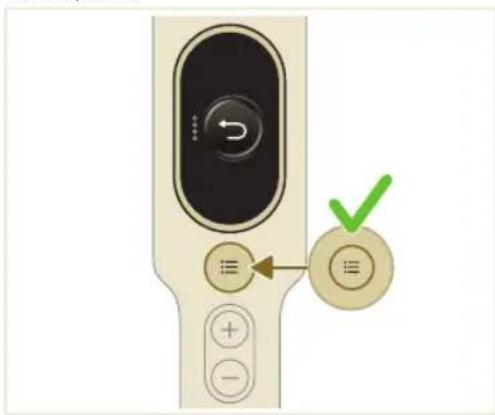
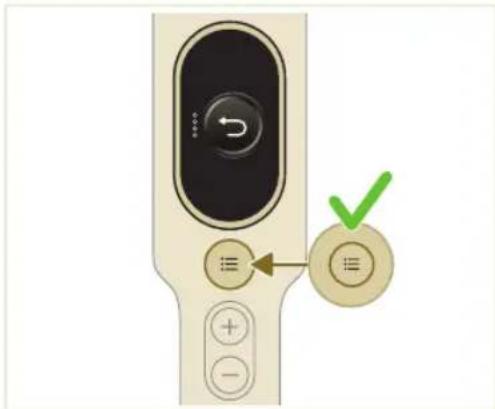
1 To access the menu settings, press the menu button.
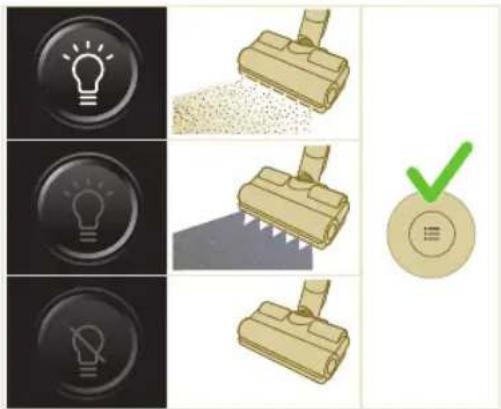
2 Toggle through the options using the + and - buttons. These options include adjusting illumination, enabling or disabling Floor Type Recognition, accessing additional information about your appliance, and returning to the previous screen.
3 Once your desired option is highlighted, confirm your choice by pressing the menu button again.

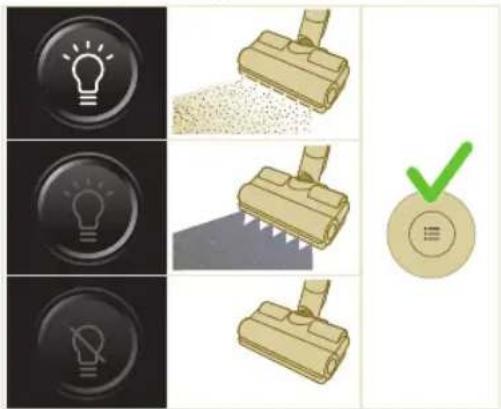
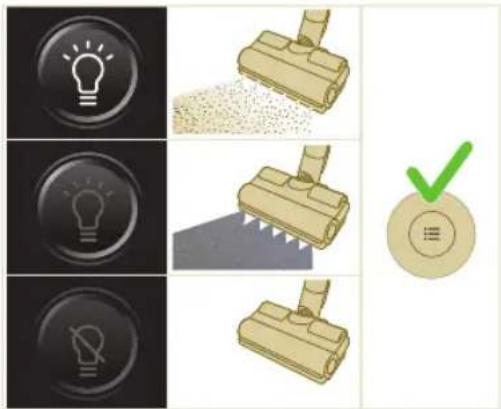
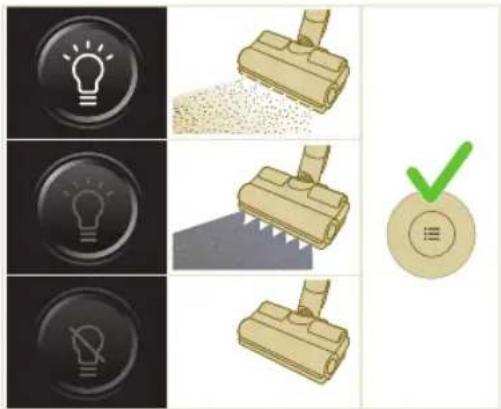
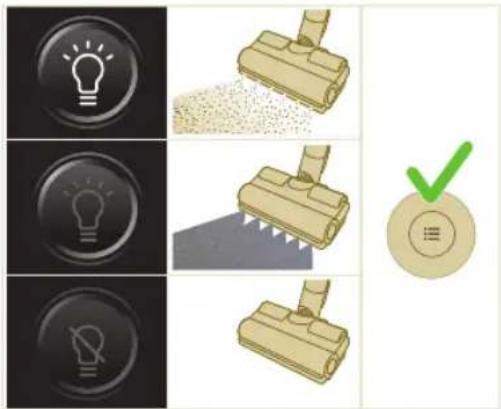
Modify the illumination brightness
Press the menu button and toggle to the illumination feature. Confirm by pressing the menu button again.
To modify the illumination brightness, toggle through the available levels and confirm by pressing the menu button.

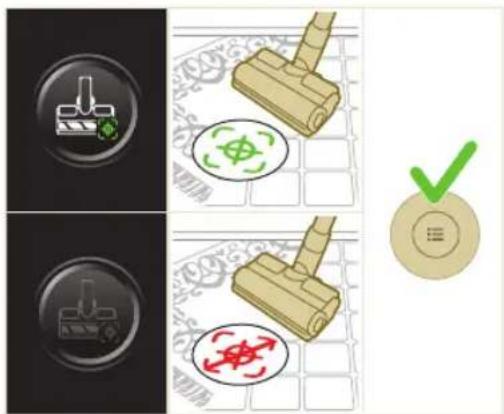
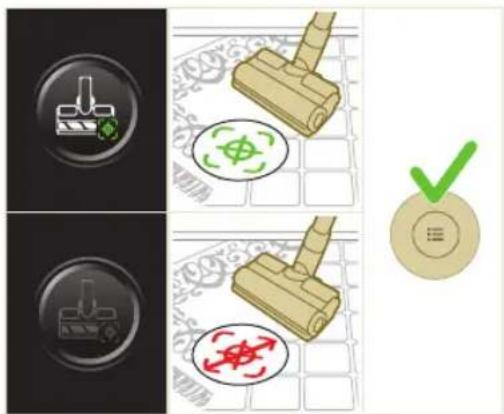
Floor Type Recognition
Press the menu button and toggle to the Floor Type Recognition feature.
Confirm by pressing the menu button again.
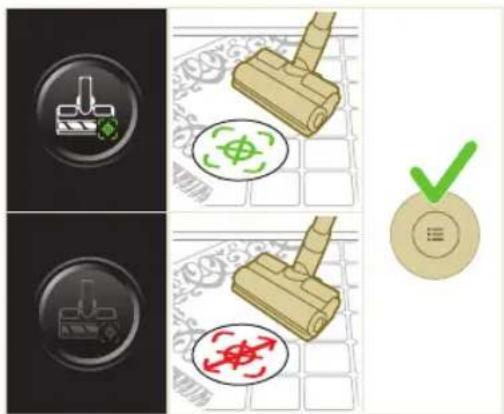
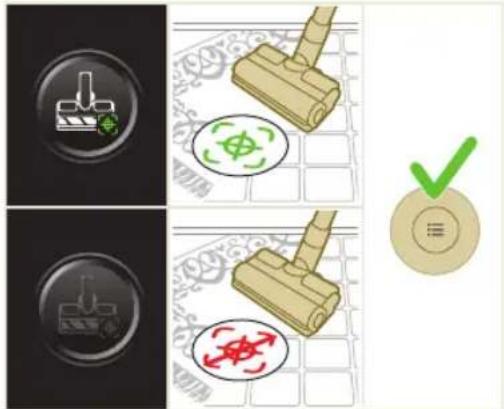
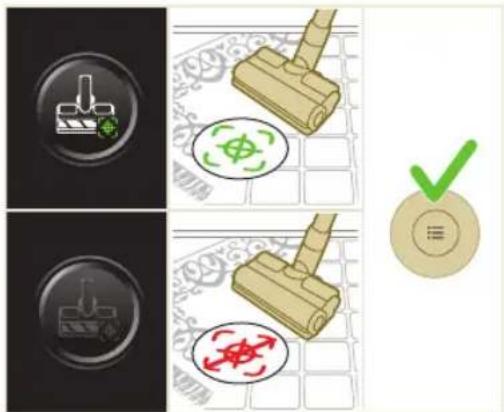
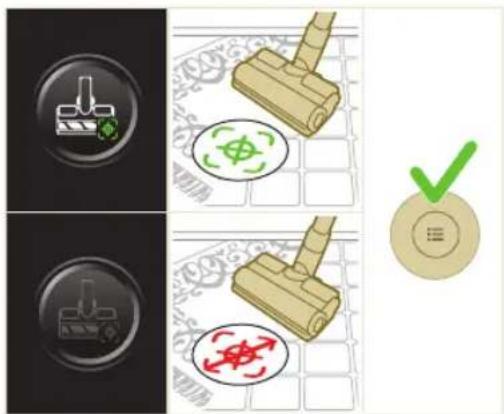
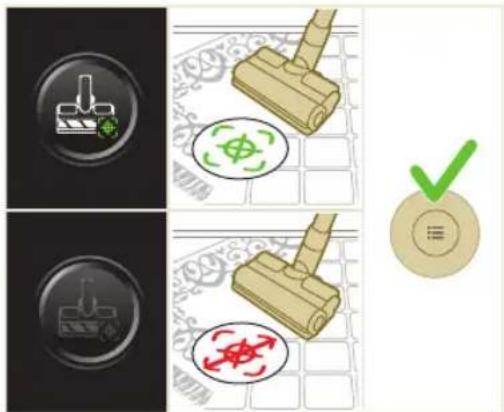
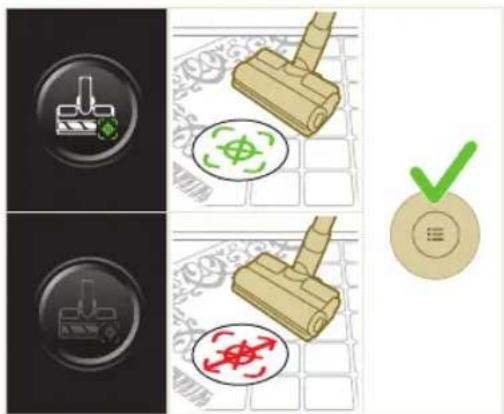
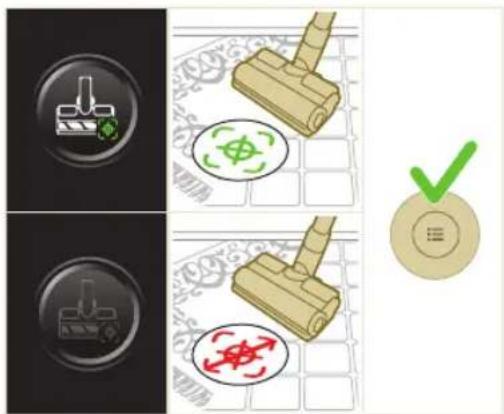
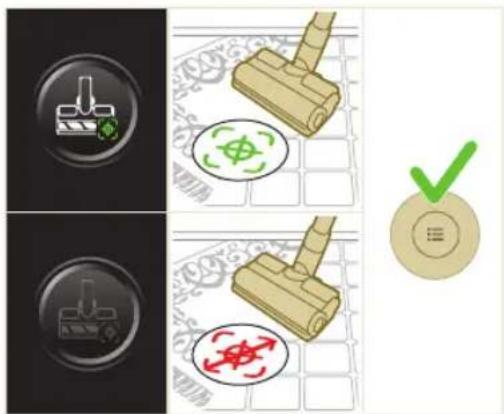
In the Floor Type Recognition screen, toggle this function and confirm your decision by pressing the menu button. When successfully enabled, a green icon will appear at the upper left corner of the display after you go back to the main screen.
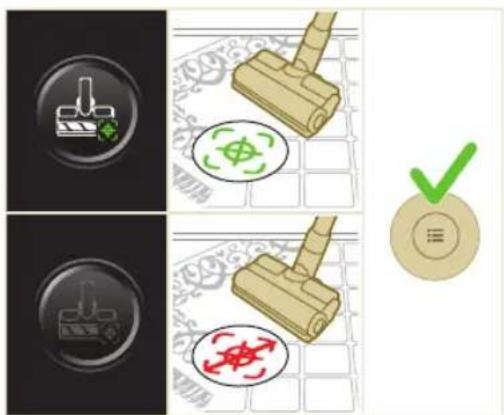
i Note: Floor Type Recognition can only be enabled or disabled when the motorized nozzle is attached to the handheld. As a result, when no motorized nozzle in combination with the main brush is attached to the main appliance, there will be one item less in your menu. Attach the motorized nozzle to see this Floor Type Recognition item in your menu.
i Note: When you first receive your appliance, Floor Type Recognition is enabled.
i Note:The Floor Type Recognition function becomes active when the nozzle identifies different cleaning surfaces while in motion.
i Floor Type Recognition does not work in combination with the Delicate Floor Brush (included in model XC7067).
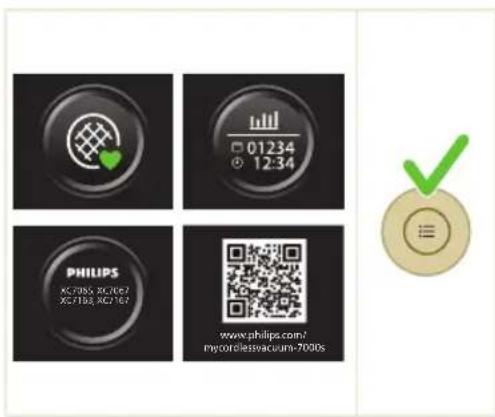
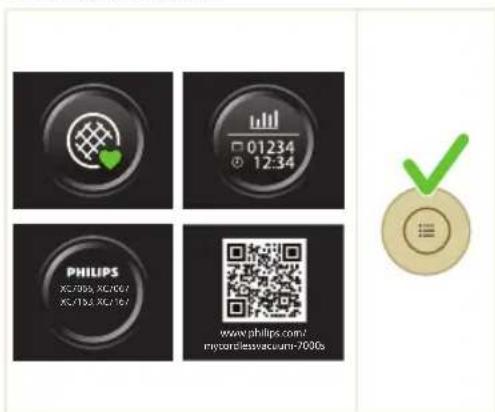
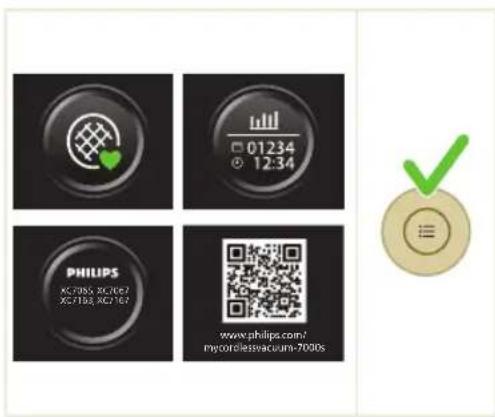
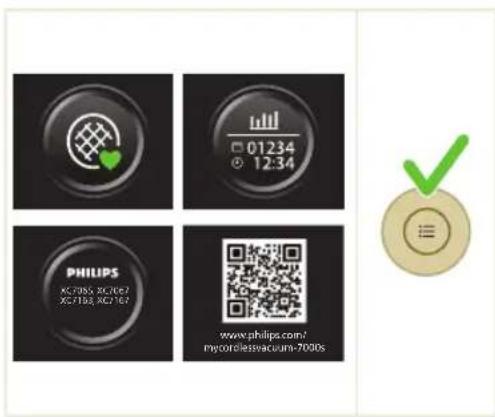
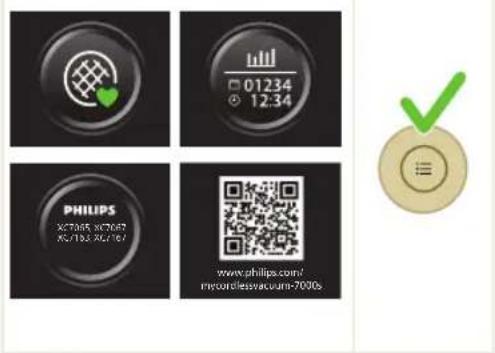
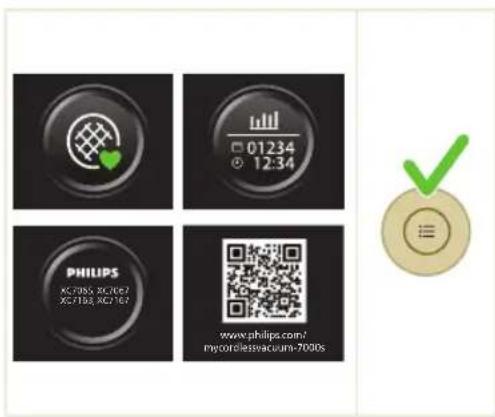
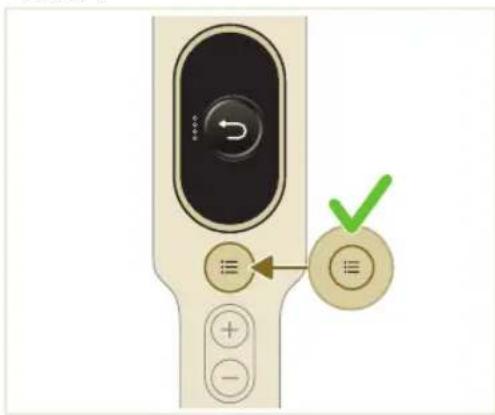
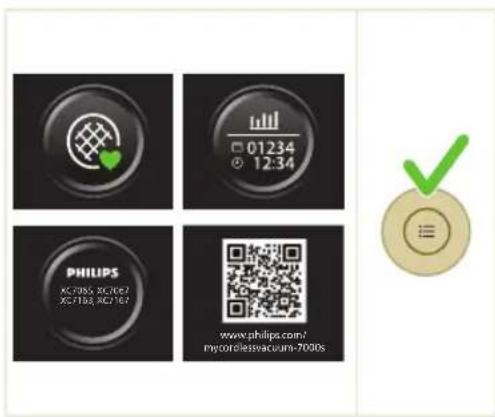
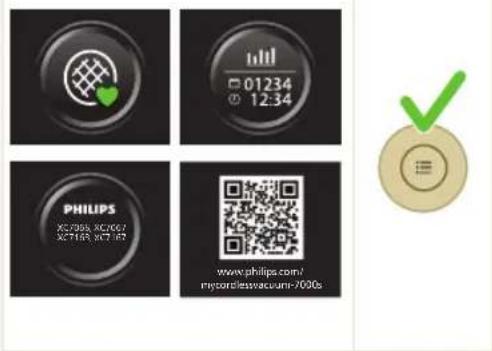
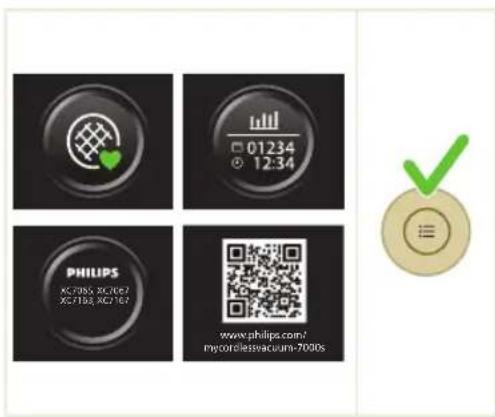
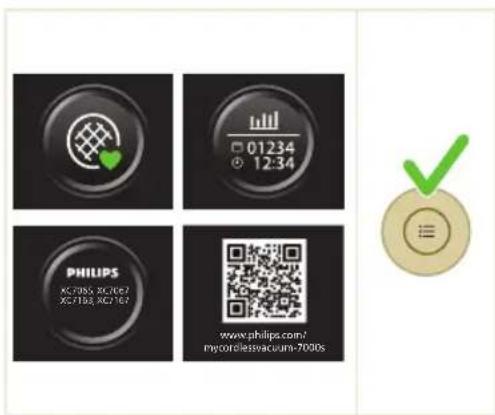
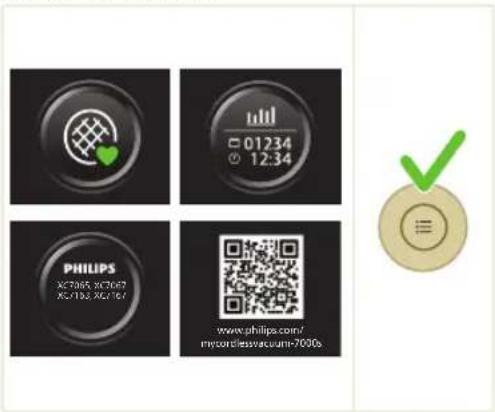
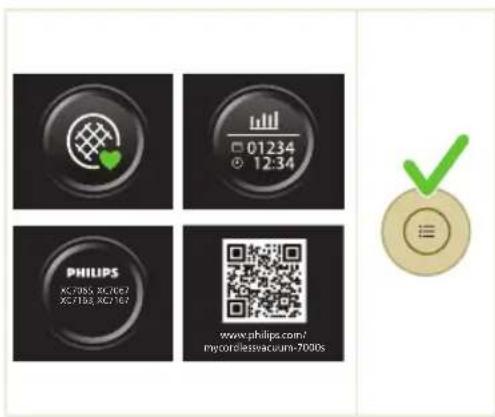
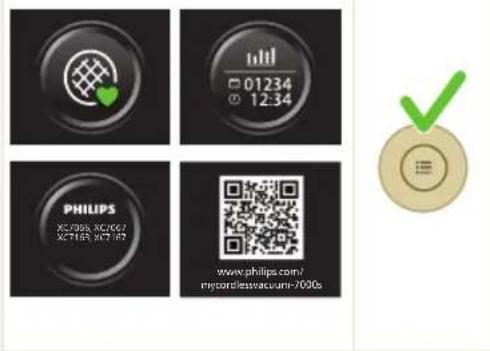
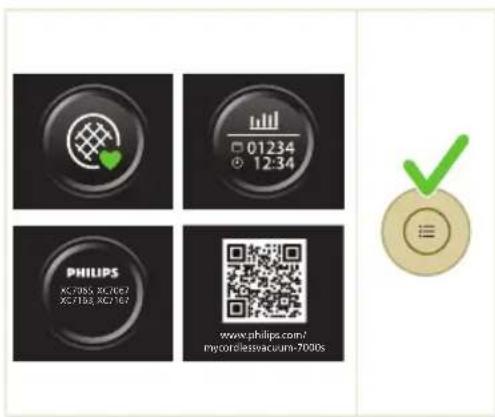
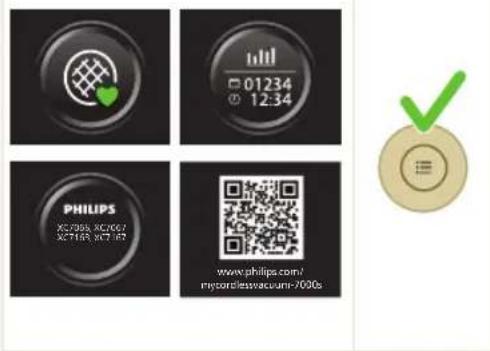
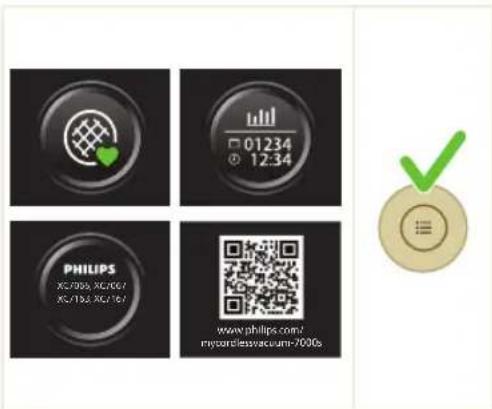
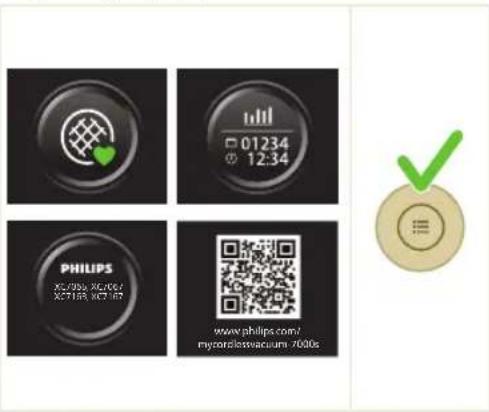
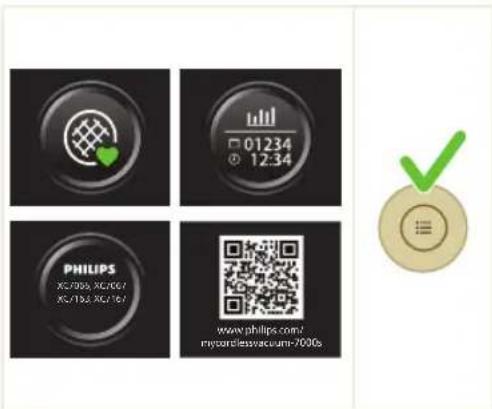
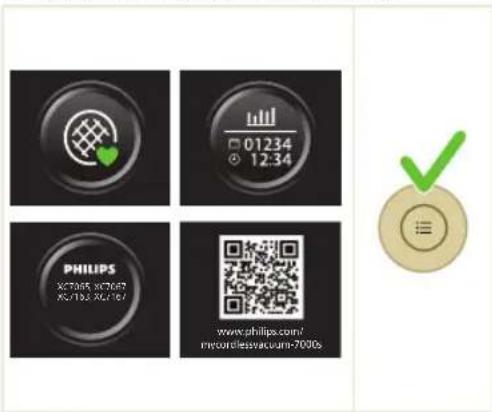
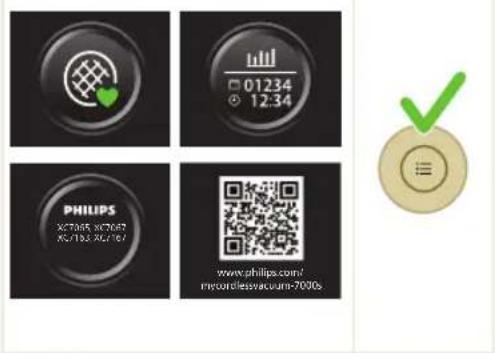
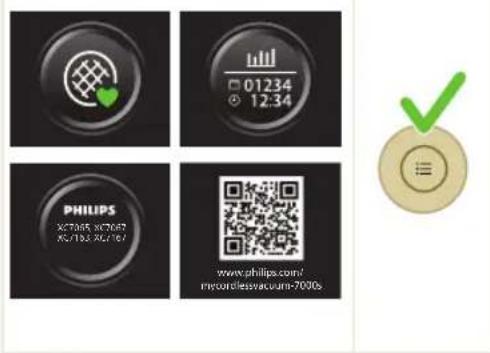
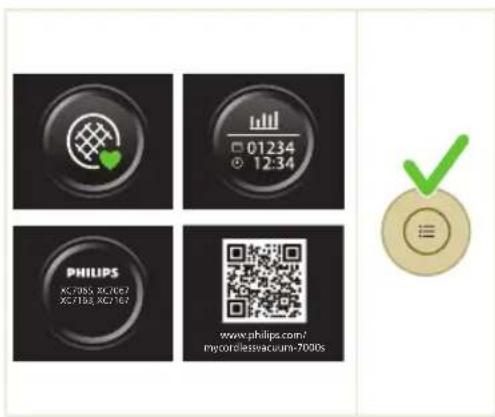
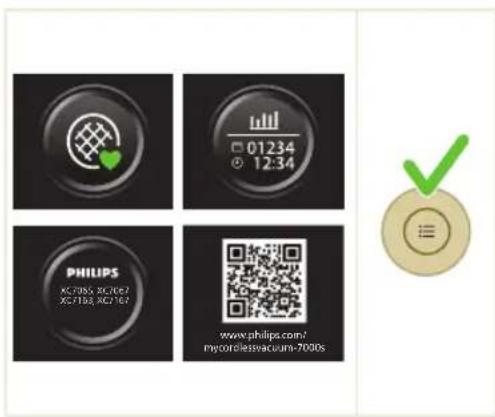
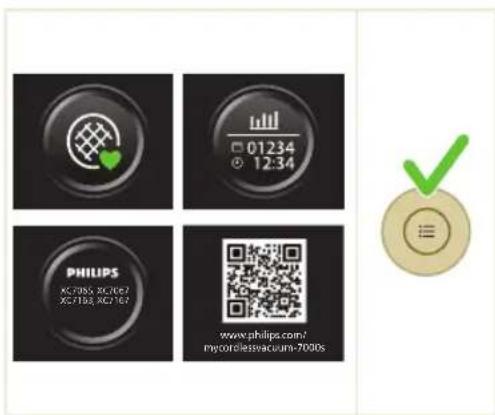
Press the menu button and toggle to the "additional information" option. Confirm by pressing the menu button again.
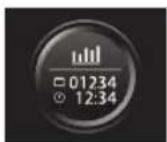
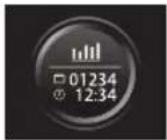
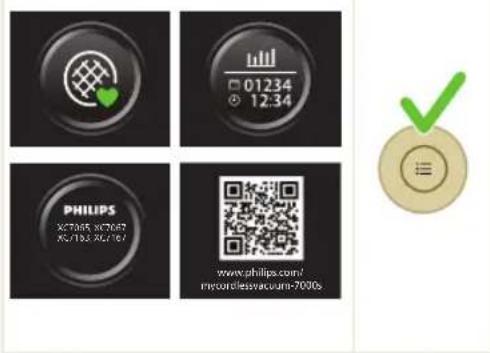
In the "additional information" screen, you can check the filter health, battery health, total usage time, model of your appliance, and access of a QR code for additional online information.

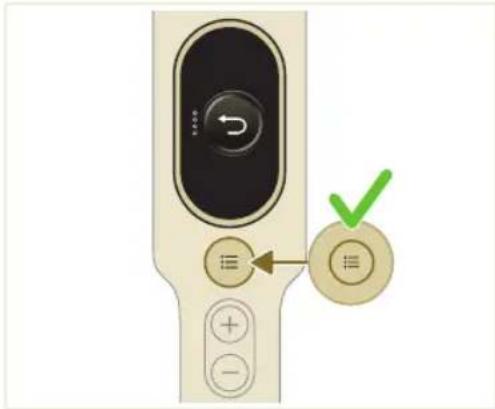
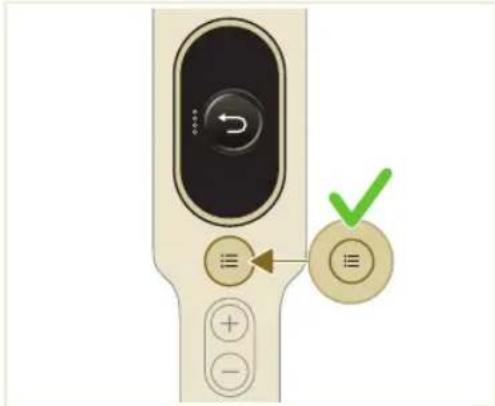
Return
To exit the menu and return to the previous screen, select the "Return" option.

After use – Maintenance
Frequent maintenance after each cleaning cycle
Dust management system maintenance
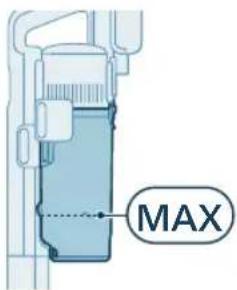
Empty the dust bucket after each use or when the dust is reaching the MAX level indicator.
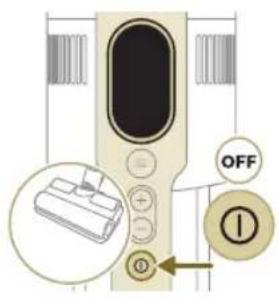
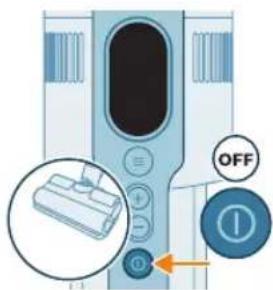
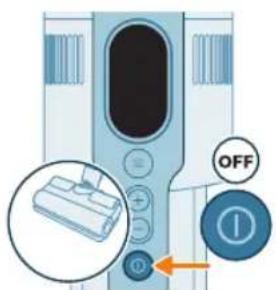
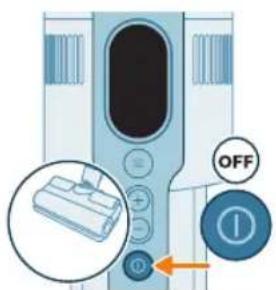
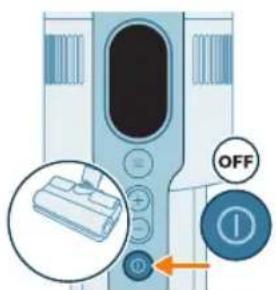
1 Switch off the appliance.
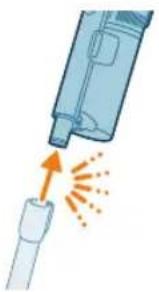
2 Remove the handheld include the dust bucket from the tube.
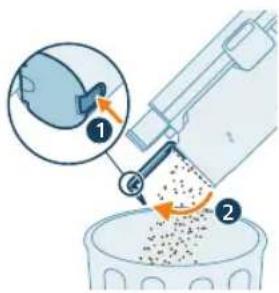
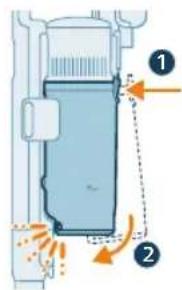
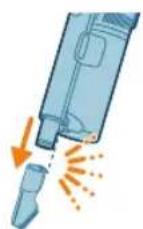
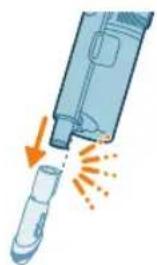
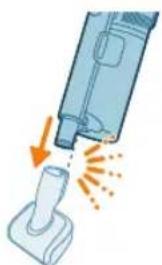
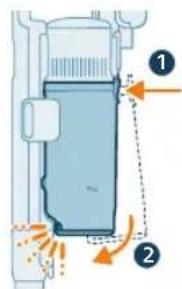
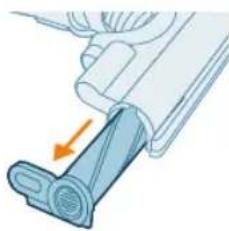
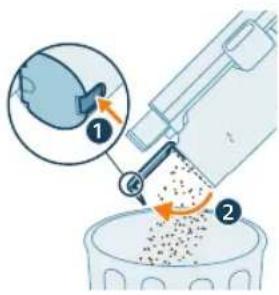
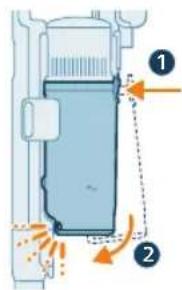
3 Hold the dust bucket above a trash bin and press the Easy Empty Button (1) to empty the bucket (2).
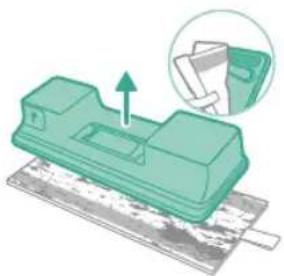
Aqua tank maintenance
Clean the aqua tank after each use.
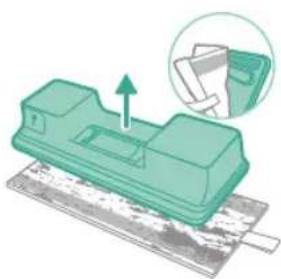
1 Remove the microfiber mopping pad.
20
English
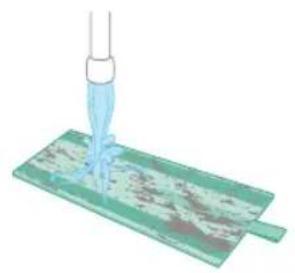
2 Rinse the mopping pad under the tap and wash it by hand or in a washing machine.

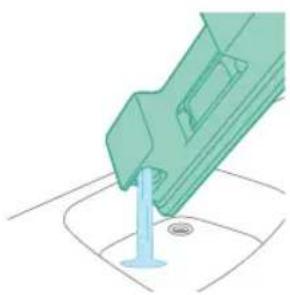
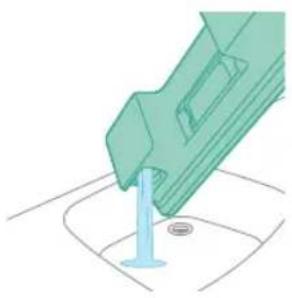
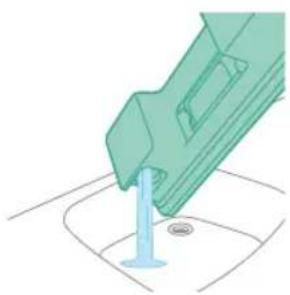
3 Pour out any remaining water in the aqua tank.
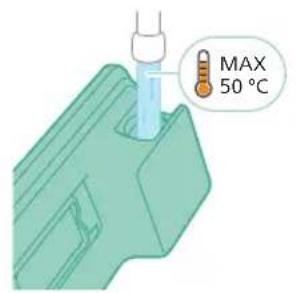
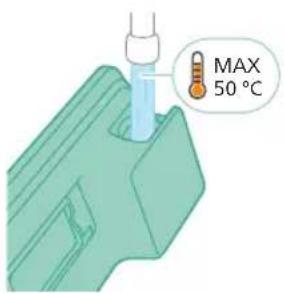
4 Fill the aqua tank with water.
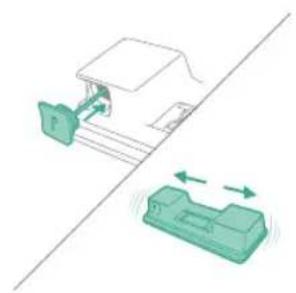
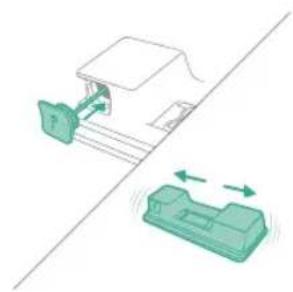
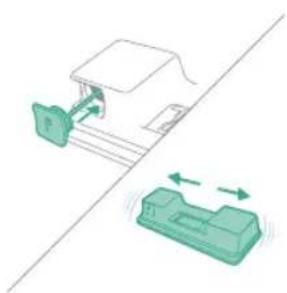
5 Close the aqua tank properly and shake the aqua tank to remove detergent residuals.
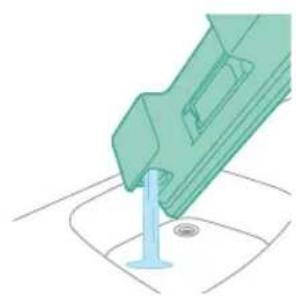
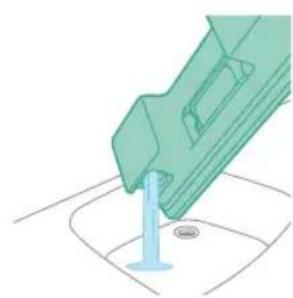
6 Empty the aqua tank and leave it open to dry.
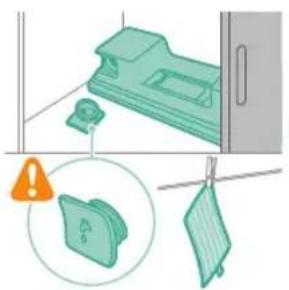
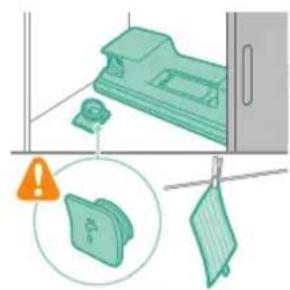
7 Make sure to not lose the tank cap during storage. Hang the microfiber mopping pad dry.
Periodic maintenance intermittently
Cleaning the filter
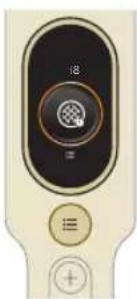
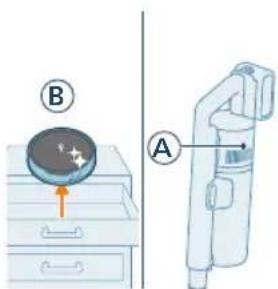
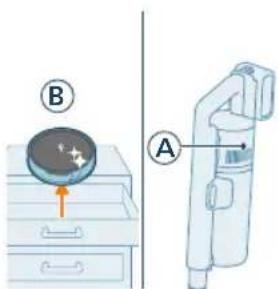
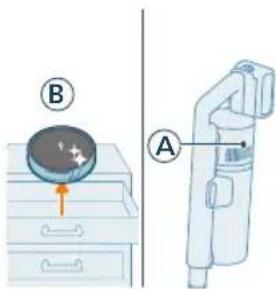
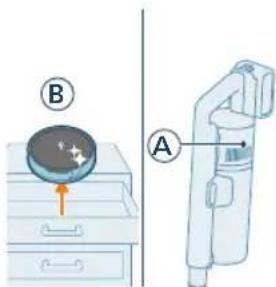
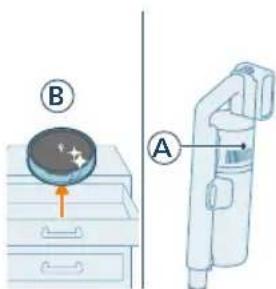
Clean the filter at least once every month or when you see the notification for filter cleaning (i8).
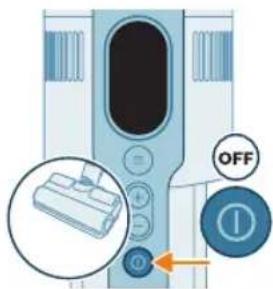
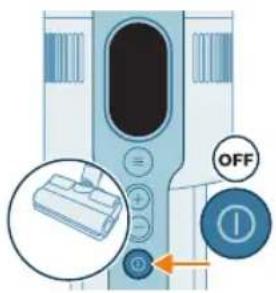
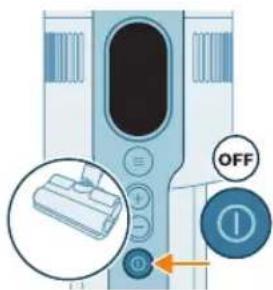
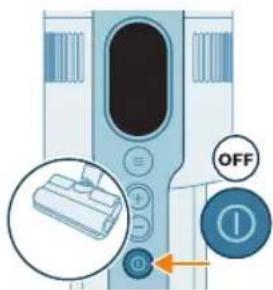
1 Turn off appliance.
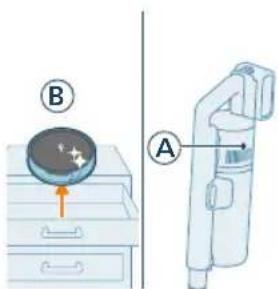
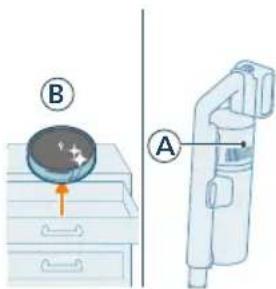
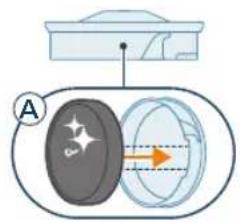
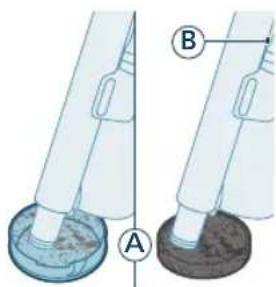
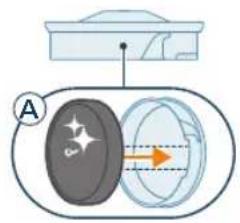
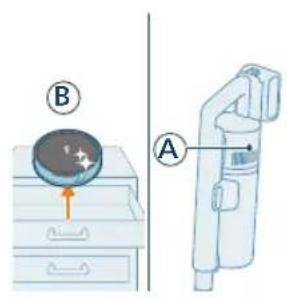
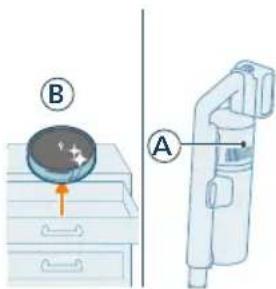
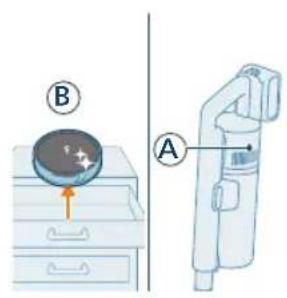
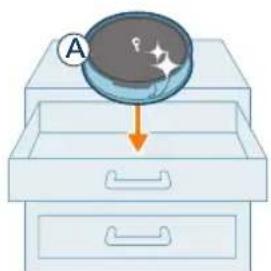
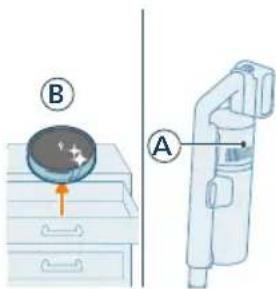
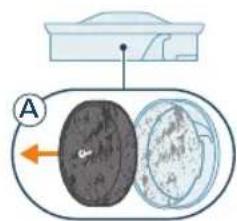
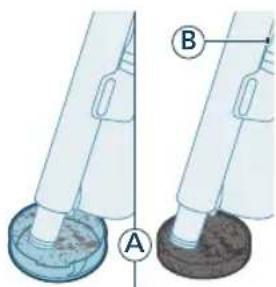
2 While the dirty filter (A) is still in the appliance, make sure to have your replacement filter (B) ready on the side.
22 English
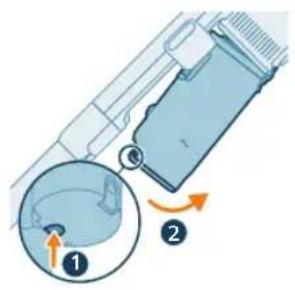
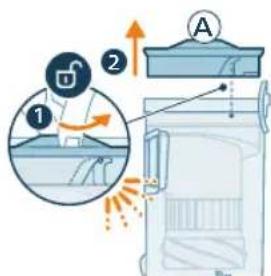
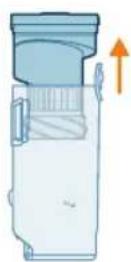
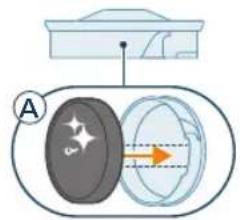
3 Remove the bucket by pressing the bucket release button.
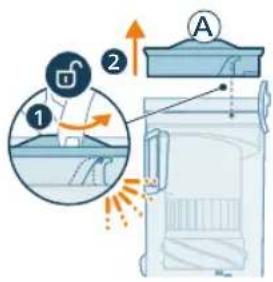
4 Rotate the filter (A) counter-clockwise to remove it from the dust bucket.
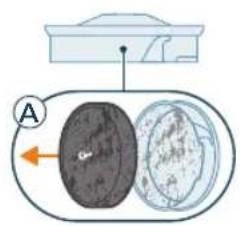
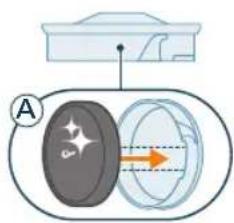
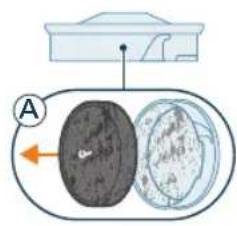
5 Remove the foam filter (A) from the plastic filter case.
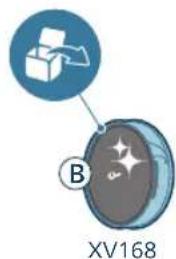
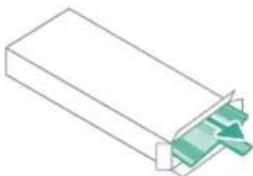
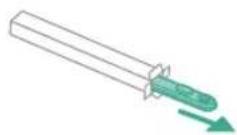
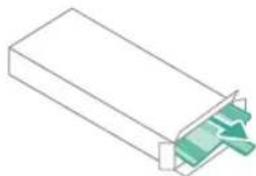
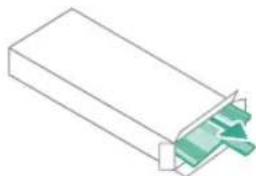
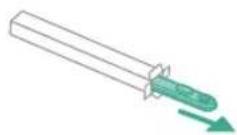
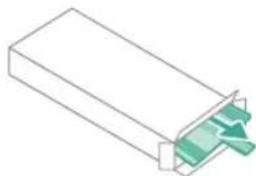
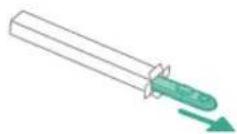
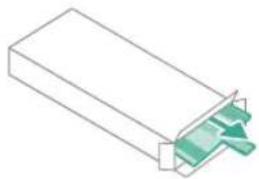
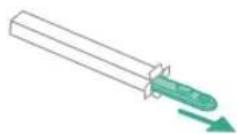
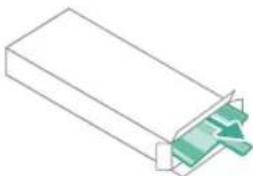
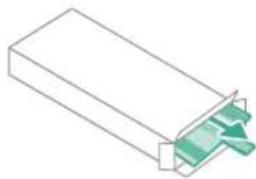
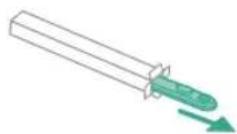
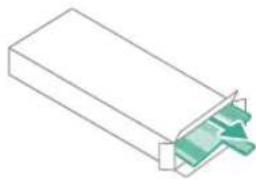
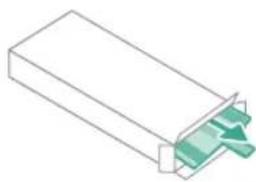
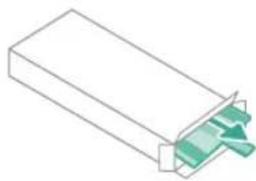
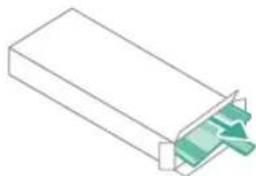
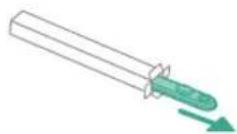
6 Unpack the replacement filter (B).
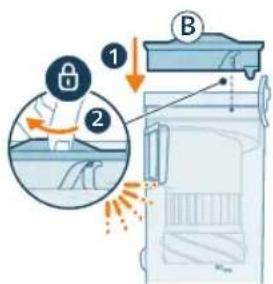
7 Install the clean filter (B) in the dust bucket. Rotate the filter clock-wise to fix it in place.
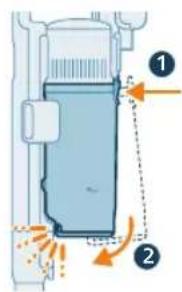
8 Place the dust bucket back onto the handheld First align the filter side of the bucket before hinging it in place.
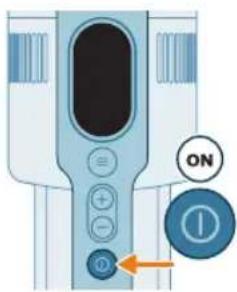
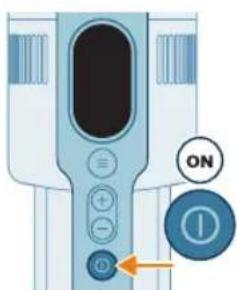
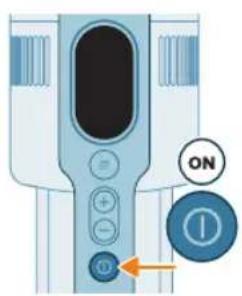
9 Turn on the appliance.
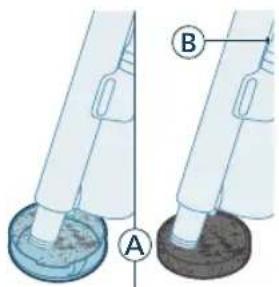
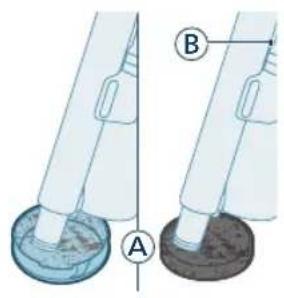
10 Vacuum the polluted filter case and foam filter (A).
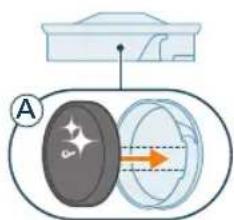
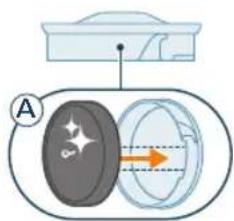
11 Reassemble the clean foam filter (A) in the clean filter case.
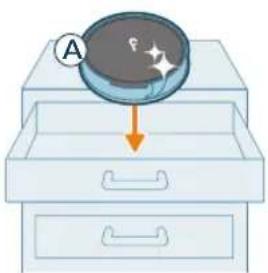
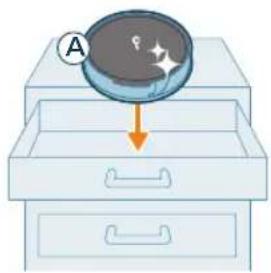
i Note: The filter (A) is now cleaned thoroughly and can be stored for future use when the current filter (B) needs to be cleaned.
24 English
Cleaning the bucket and cyclone
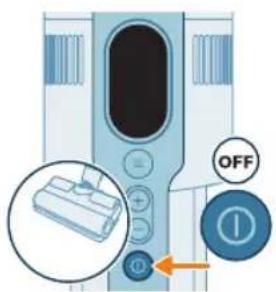
1 Turn off appliance.
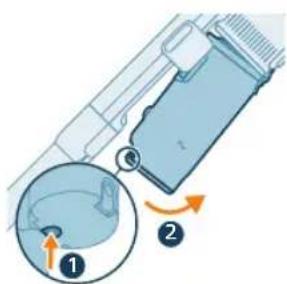
2 Remove the bucket by pressing the bucket release button.
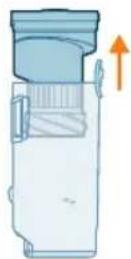
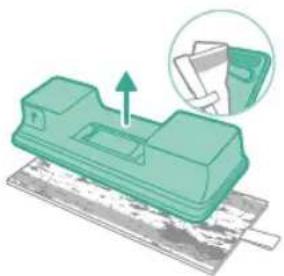
3 Hold onto the black grip. Remove the cyclone from the dust bucket by lifting it out from the bucket.
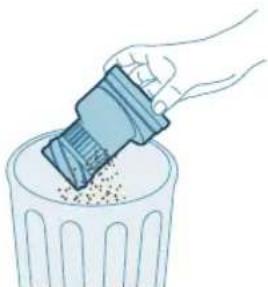
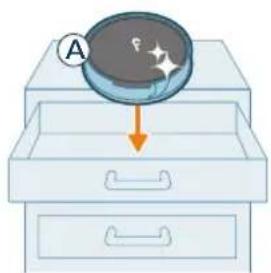
4 Tap the cyclone against a bin to remove remaining dust & dirt.
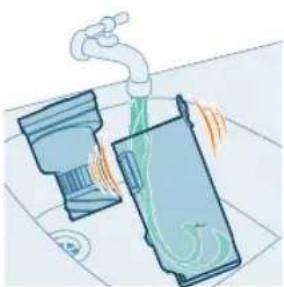
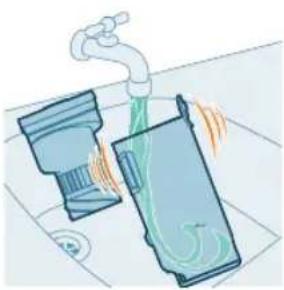
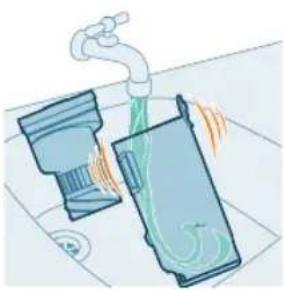
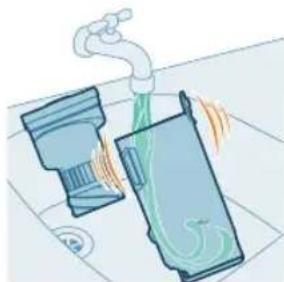
5 For thorough maintenance, clean the dust bucket and cyclone under a running tap or in warm soapy water.
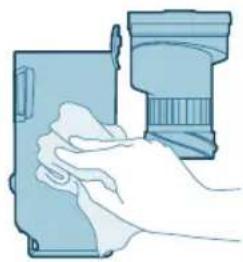
6 Wipe the cleaned dust bucket and cyclone dry.
Caution: Make sure all parts are completely dry before you reassemble them.
Note: all parts cannot be cleaned in the dishwasher.
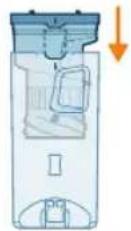
7 Reassemble the cyclone in the dust bucket.
8 Place back the assembled bucket. First align the filter side of the bucket before hinging it in place.
Note: After maintenance, always make sure the filter is assembled in the appliance before using it.
PrecisionPower Smart Nozzle maintenance
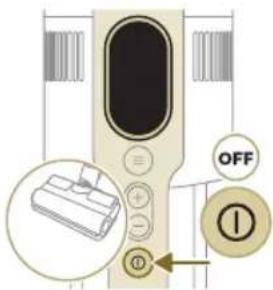
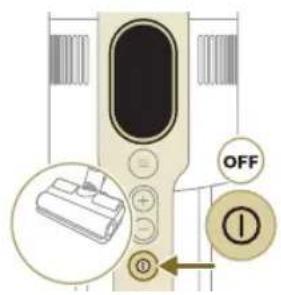
1 Always switch off the appliance before cleaning the nozzle brush roll.
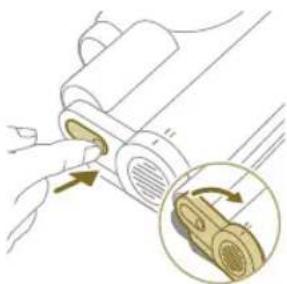
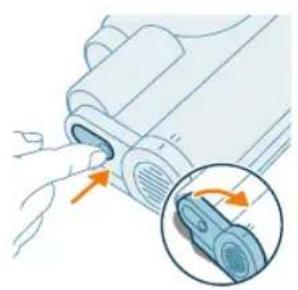
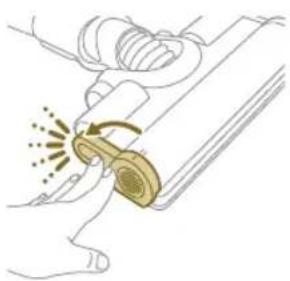
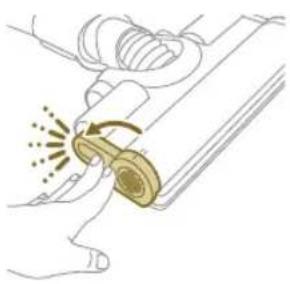
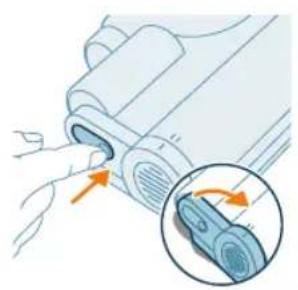
2 To access the brush roll, locate the button on the side of the nozzle. Press it and rotate to open.
26
English
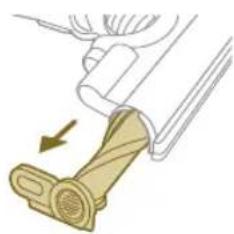
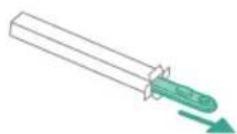
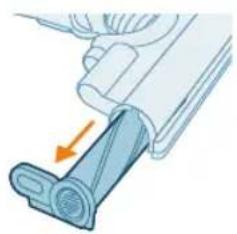
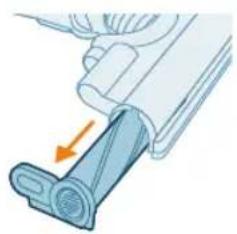
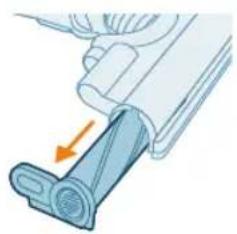
3 Gently remove the brush roll and the side cap of the nozzle.
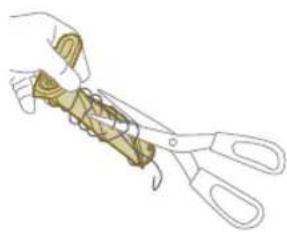
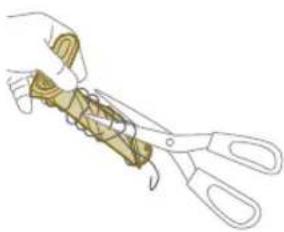
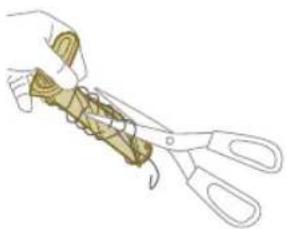
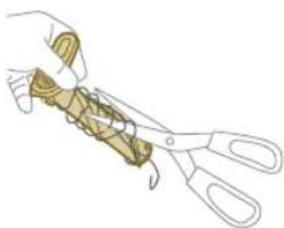
4 Carefully detach any tangled hair from the brush roll. Support the removal of pollution with a pair of scissors.
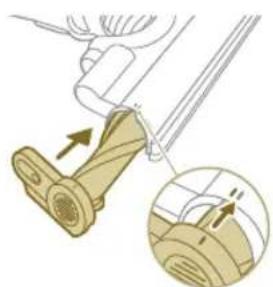
5 When reassembling, ensure proper alignment of the brush roll.
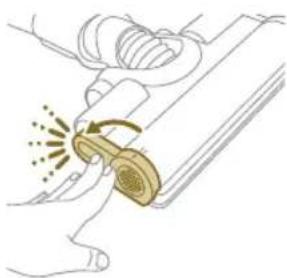
6 Lock the nozzle brush roll by securing it until you hear a "CLICK" sound.
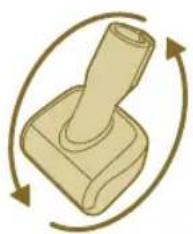
PetPro Nozzle maintenance
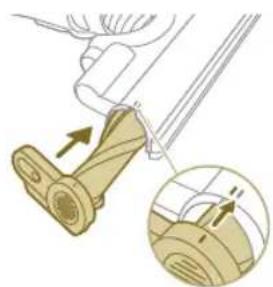
1 Turn the brush over to access the cleaning area.

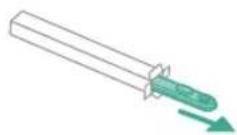
2 Slide the side button to release the brush from its position.
3 Use your hands or a pair of scissors to remove any pollution from the brush.
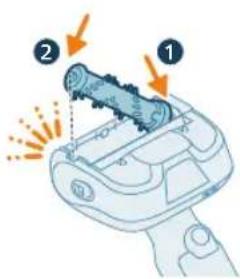
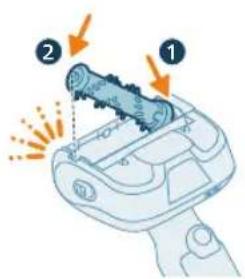
4 When reassembling the brush, start by placing one side in position before attaching the other side. When the brush is properly assembled, you will hear a "CLICK" sound.
Delicate Floor brush maintenance (for XC7067)
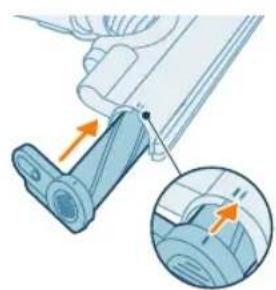
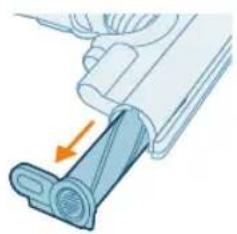
1 To access the brush, locate the button on the side of the nozzle. Press it and rotate to open. Gently remove the brush and the side cap of the nozzle.
2 Pull the brush out of the side cover with force.
English
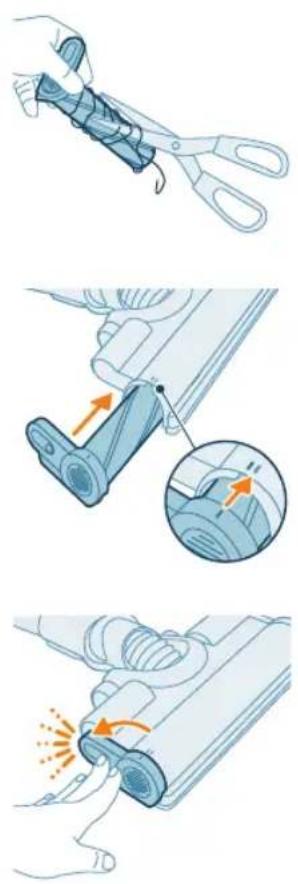
3 Carefully detach any tangled hair from the brush roll. Support the removal of pollution with a pair of scissors.
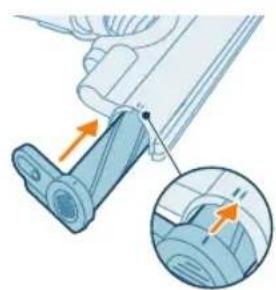
4 Insert the brush back to the side cover with force, please make sure the brush is firmly installed. When reassembling, ensure proper alignment of the brush.
5 Lock the brush by securing it until you hear a "CLICK" sound.
Aqua tank maintenance
Descale the aqua tank once every month to avoid limescale build-up.
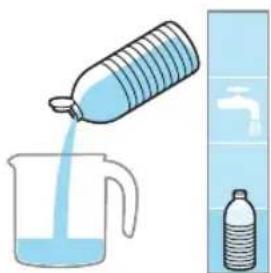
1 Add some descaling liquid to a measuring cup.
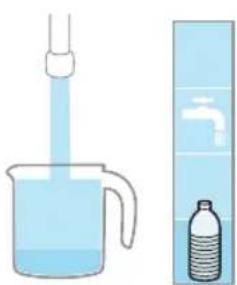
2 Add the correct amount of water in the measuring cup.
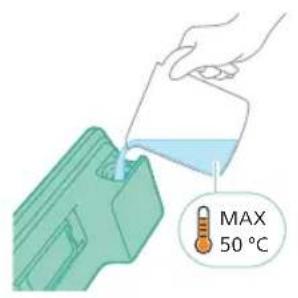
3 Add the mixed liquid in the aqua tank.
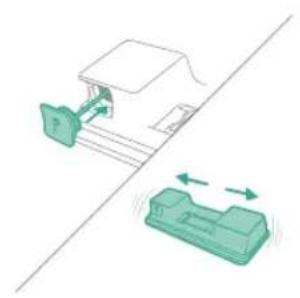
4 Close the Aqua tank properly before shaking the tank for the descaling liquid to spread evenly.
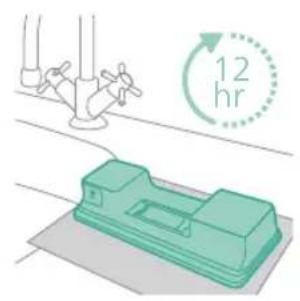
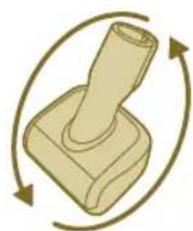
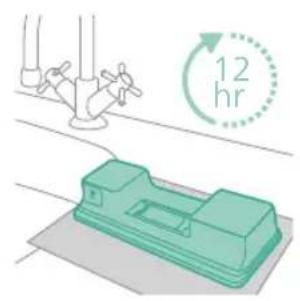
5 Leave the aqua tank (without the microfiber mopping pad) upright over 12 hours. Water is expected to slowly come out from the bottom of the aqua tank. We recommend to place the aqua tank inside the sink or over a cloth.
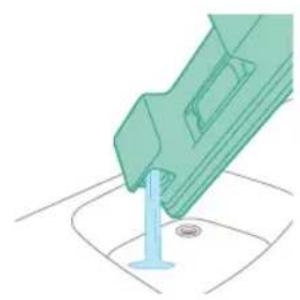
6 Rinse and remove any remaining liquid inside the aqua tank.
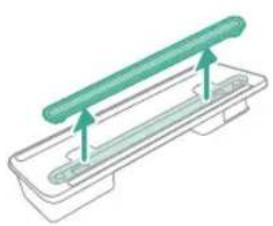
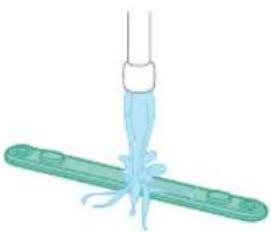
Water strip maintenance
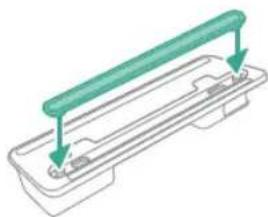
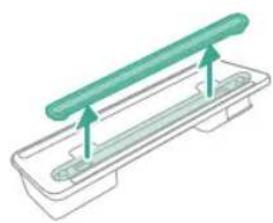
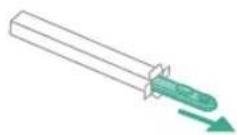
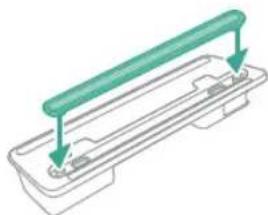
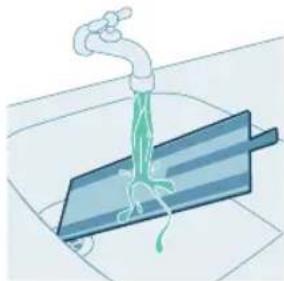
1 Remove the water strip from the bottom of the aqua tank for a thorough cleaning.
30
English
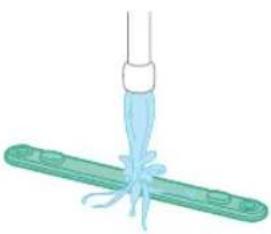
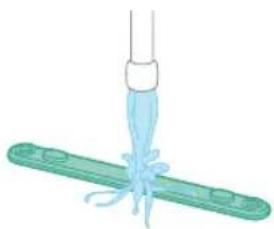
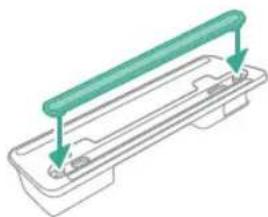
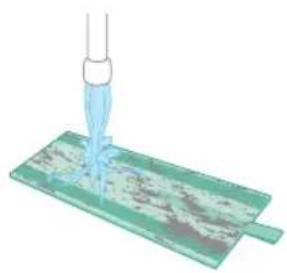
2 Rinse the water strip under the tap.
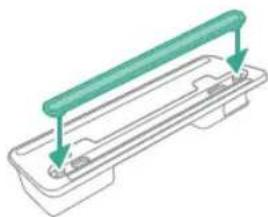
3 Attach the water strip back to the aqua tank after cleaning.
Replacement
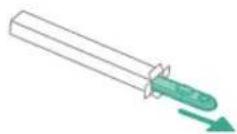
To buy accessories or spare parts, visit www.philips.com/parts-and-accessories or go to your Philips dealer. You can also contact the Philips Consumer Care Center in your country.
Replacement parts and type numbers:
Replacement filter XV1681/01
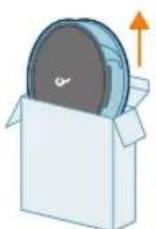
XV1681/01
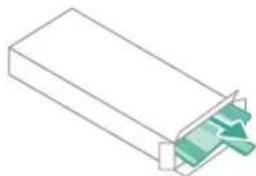
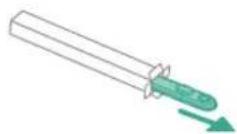
Brush roll CP0667/01
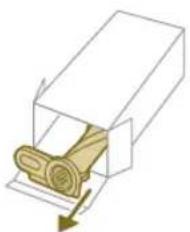
CP0667/01
Microfiber mopping pad XV1670/02
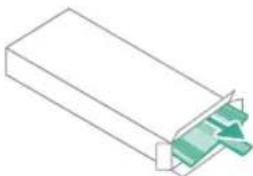
XV1670/02
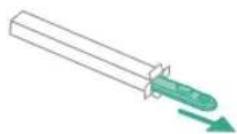
Water strip CP0381/01
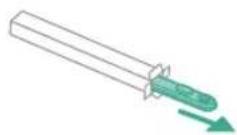
CP0381/01
i Note: Replace the filter and the microfiber mopping pad every 6 months to ensure maximum performance.
User interface signals and their meaning
Signal Meaning of signal
E1 Malfu

opliance.
Remove the battery, wait 10 seconds, and then put the battery back. If this does not work, please take the appliance to a Philips service center or contact the Consumer Care Center.
E2 The a
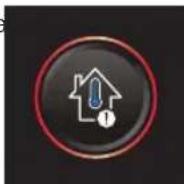
rated below the functioning temperature.
Move the appliance to a warmer room. Do not store, charge or use the appliance at a temperature below 5 °C or above 40 °C.
E3 The a
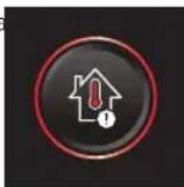
rated above the functioning temperature.
Move the appliance to a cooler room. Do not store, charge or use the appliance at a temperature below 5 °C or above 40 °C.
E5 The b
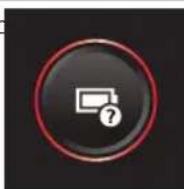
ed.
Take the appliance to a Philips service center or contact the Consumer Care Center.
32 English
Signal Meaning of signal
| E9 The n | 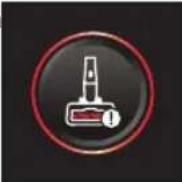 | d above the functioning temperature.Switch off the appliance and wait 15 minutes. Touch the upper housing of the nozzle to feel if it is still warm. If the nozzle is still warm, wait longer for the nozzle to cool down. Once the nozzle has cooled down, try switching the appliance back on. |
| i4 The no |  | Make sure the appliance is switched off. Clean the nozzle according to the user manual and check the tube by removing the tube from the main appliance.Remove the object in the nozzle or tube and restart the appliance. |
| i5 Foreign | 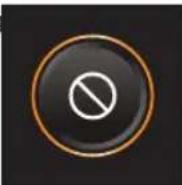 | in the airflow passage.Make sure the appliance is switched off. Clean the nozzle according to the user manual and check the tube by removing the tube from the main appliance.Remove the object in the nozzle, tube, or handheld and restart the appliance. |
| i6 The ad | 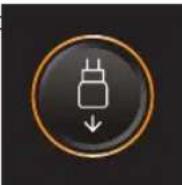 | noved.Remove the adapter before operating the appliance. |
| i7 A wro |  | ed.Only use the original adapter to charge the appliance. |
| i8 The fil |  | Clean the filter. Follow the instructions on the screen or in the users manual.You can buy new filters in the online Philips shop atwww.philips.com/supportor at your Philips dealer.If you keep getting an i8 information code after cleaning the filter, check the troubleshooting table below. |
| i10 The k |  | operly inserted.Remove the battery, and then put the battery back. If this does not work, please take the appliance to a Philips service center or contact the Consumer Care Center. |
|  | The battery level is low and needs to be charged. Charge the appliance or the battery via the suggested charging method. |
Troubleshooting
This chapter summarizes the most common problems you could encounter with the appliance. If you are unable to solve the problem with the information below, visit www.philips.com/support for a list of frequently asked questions or contact the Consumer Care Center in your country.
Dry cleaning
Problem Possible cause Solution
| The appliance does not respond when the on/off button is pushed. | The display shows the battery empty icon. | To charge the battery, connect the appliance to the charging station or attach the handheld vacuum cleaner directly to the power plug of the adapter. |
| The charging station is not stable on the wall. | The screws holding the charging station are loose. | Tighten the screws. |
| The screws are not the right size. | Mount the charging station with the supplied screws. |
| The charging station is not attached to a stable wall. | Check that the wall on which the charging station will be mounted is stable. |
| The appliance suddenly stops working. | When the appliance has an internal malfunction, the buttons will not respond and the screen will remain blank. | Connect the appliance to the charging station or attach the handheld vacuum cleaner directly to the adapter. Check the display. If an error code appears, you can find its meaning in the user manual. |
| (code: E2, E3) The appliance is not working at a suitable temperature. | Make sure the appliance is used at a temperature of 5-40 °C. |
| (code: i4, i5) The brush roll is stuck or objects are stuck in the air flow channel. | Make sure the appliance is switched off. Clean the nozzle according to the user manual and check the tube by removing the tube from the main appliance. Remove the object in the nozzle or tube and restart the appliance. |
| (code: E9) The motorized nozzle is overheated. | Switch off the appliance and wait 15 minutes. Touch the upper housing of the nozzle to feel if it is still warm. If the nozzle is still warm, wait longer for the nozzle to cool down. Once the nozzle has cooled down, try switching the appliance back on. |
| The appliance has a lower suction power than usual. | The filter and the cyclone are dirty. | Empty the dust bucket. Clean the filter and the cyclone. Make sure the filter is washed at least once a month, when using the appliance regularly. Make sure hair and dirt stuck in the cyclone are removed. |
Problem Possible cause Solution
| The dust container is not attached properly to the appliance. | Make sure the dust container is attached properly. |
| Dust escapes from the appliance. | The filter is dirty. Clean the filter. See also the user manual. |
| The filter is not present in the appliance. | Make sure that the filter is in the appliance and assembled correctly. |
| Something is blocking the cyclone. | Check the cyclone for stuck objects and remove any object blocking the cyclone. Also ensure all hair and dirt stuck in the cyclone are removed. |
| The dust container is not properly attached to the appliance. | Empty the dust container and attach the dust container correctly to the appliance. |
| The appliance is rotated or flipped when the power is off. | Keep the appliance upright when the power is off. |
| The appliance does not move smoothly across the floor when cleaning a carpet. | The floor type recognition function is not on. | Switch on the floor type recognition function in the digital menu. |
| The selected suction power has been too high. | Decrease the suction power. See also the user manual. |
| The brush does not turn anymore. | The brush is clogged with hair or dirt. | Clean the brush by hand or with a pair of scissors. |
| (code i4) The brush may stop turning when it encounters too much resistance from a high-pile carpet. | Switch off the appliance and then switch it back on again. |
| The roller brush has not been assembled properly into the nozzle after cleaning. | Follow the instructions in the cleaning chapter of the user manual to slide the roller brush into the nozzle properly. Secure the roller brush inside the nozzle by snapping the locking lever in place. |
| (code: E9) The motorized nozzle is overheated. | Switch off the appliance and wait 15 minutes. Touch the upper housing of the nozzle to feel if it is still warm. If the nozzle is still warm, wait longer for the nozzle to cool down. Once the nozzle has cooled down, try switching the appliance back on. |
| The LEDs in the nozzle do not come on. | The nozzle has not been attached to the tube or appliance properly. | Attach the nozzle to the appliance or handheld properly. |
| The lighting feature is disabled. Enable this feature in the menu. Adjust the brightness of nozzle LEDs in the menu. |
Problem Possible cause Solution
| The LEDs in the handheld do not come on. | The lighting feature is disabled. Enable this feature in the menu. Adjust the brightness of handheld LEDs in the menu. |
| The light in the accessory does not come on. | The accessory is attached to the tube. | Remove the tube and attach the accessory directly to the handheld. |
| The accessory is not attached to the appliance properly. | Attach the accessory to the appliance properly. |
| The lighting in my nozzle, handheld, and accessories is not bright enough. | The brightness is dimmed. Adjust the brightness of lighting in the menu. |
| The appliance is not charging. | The power plug is not connected properly to the appliance or the adapter is not inserted into the wall socket properly. | Make sure that the power plug is connected properly to the appliance and that the adapter is inserted into the wall socket properly. |
| The power plug is not placed properly in the charging station. | Make sure the plug is fixed properly in the charging station. Check if the plug is angled and the charging station is holding the plug in place. |
| (code i7) An adapter other than the supplied adapter is being used. | Make sure that you use the adapter supplied. |
| (code i10) The battery is not properly installed. | Make sure that the battery is pushed all the way in the slot and properly installed. |
| (code E5) The battery malfunctions. | The battery has failed. Replace the battery. |
| | If you have checked the above and the appliance still does not charge, take it to a Philips service center or contact the Consumer Care Center. |
| The appliance is charging very slow. | An external adapter or an adapter from other appliances is used. | Charge the appliance with the supplied adapter. |
| The battery is charged and attached, but the appliance cannot be switched on. | The appliance is still connected to the adapter. | Remove the appliance from the adapter before restarting it. |
| (code: E1) Something is wrong with the appliance. | Remove the battery, wait 10 seconds, and then put the battery back. If this does not work, please take the appliance to a Philips service center or contact the Consumer Care Center. |
| The display shows the filter icon (code: i8). | The filter is dirty. Clean the filter. | Follow the instructions on the screen or in the users manual. |
Problem Possible cause Solution
| | If you keep getting an i8 information code after cleaning the filter, you can consider the following solutions:- If you have a spare clean filter, you can replace the old filter with the new one. Then, use the handheld to carefully clean the old foam filter and the filter case.- Alternatively, if you have access to another vacuum cleaner or a mini vacuum, you can use it to easily clean both the foam filter and the filter case.Note: Always ensure that a filter is present in the appliance before switching it on. |
| The filter is old. You can buy new filters in the online Philipsshop at www.philips.com/support or at your Philips dealer. |
| | If you have checked the above and the appliance still shows the error, take it to a Philips service center or contact the Consumer Care Center. |
| The mini Turbo brush does not function properly. | The roller brush is blocked. Remove hairs from the brush with a pair of scissors. Follow the instructions in the user manual. |
| The roller brush is blocked by fabric or surfaces during cleaning. | Keep the mini Turbo brush aligned with the surface and do not push the Turbo brush into soft surfaces. |
| The roller brush is not properly inserted into the mini Turbo brush. | Make sure that roller brush and the mini Turbo brush are properly connected and that there is no gap between the parts. Follow the instructions in the manual. |
| The suction power does not feel stable. | Nothing is wrong. This is the feature of "Floor Type Recognition" being triggered. Your appliance is detecting the floor type and cleaning with an optimized performance for that floor. | No action needed. If you prefer to clean with a consistent power of your choice, disable this smart feature in the menu of your appliance. |
| The Floor Type Recognition is not reacting logically. | The brush is clogged with hair or dirt. | Clean the brush with a pair of scissors or by hand. See the instructions in the user manual. |
Problem Possible cause Solution
| The appliance delivers static shocks. | The appliance builds up static electricity. The lower the air humidity, the more state electricity is build up. | Discharge the appliance by frequently holding the tube against other metal objects in the room (for example the legs of a table or chair, etc.). Or raise the air humidity level in the room. |
| The dust and dirt that is vacuumed up is static. | Empty the dust container and clean the filter according to the instructions in the user manual. |
Wet cleaning
Problem Possible cause Solution
| The water flow from the water tank is reduced. | The wetting strip is blocked by dirt. | Remove the wetting strip and clean it. Place the clean wetting strip back. |
| The microfiber mopping pad is not placed correctly and blocks the wetting strip as a result. | Make sure that you place the mopping pad correctly. Check the user manual for proper placement. |
| The water tank is empty or nearly empty. | Refill the water tank. |
| A microfiber mopping pad is used that is not supplied by Philips. | Only use an original Philips microfiber mopping pad. The mopping pads can be bought in the online Philips shop at www.philips.com/support or at your Philips dealer. |
| Lime scale has build up in the wetting strip. | Buy a new wetting strip in the online Philips shop at www.philips.com/support or at your Philips dealer. |
| Too much water flows out of the water tank at a too high speed. | The water tank cap is not attached properly. | Check the cap and make sure it is fully and properly closed. |
| The strip is not placed properly in the bottom of the water tank. | Check the strip and make sure that it is fitted properly in the bottom plate of the water tank. |
| The floor dries with stripes. Too much liquid cleaner has been added to the water. | Use only a few drops of liquid cleaner or use a cleaner that foams less. |
| The microfiber mopping pad is not placed correctly. | Make sure that the mopping pad is placed correctly. Check the user manual for proper placement. |
| An incorrect mopping pad is used. | Only use Philips XV1670/02 microfiber mopping pad for the 7000 series. The mopping pads can be bought in the online Philips shop at www.philips.com/support or at your Philips dealer. |
Obsah
Úvod 38
Všeobecný popis 38
www.philips.com/mycordlessvacuum-7000s.
Všeobecný popis
1 Digitální displej
Používání hubice
52
Čeština

Návrat
Po použití – údržba
1 Vypněte přístroj.
CP0667/01
XV1670/02
Smáčecí pásek CP0381/01
CP0381/01
Brug af mundstykket

Retur
3 Hold støvbeholderen over en skraldespand, og tryk på knappen til nem tømning (1) for at tømme beholderen (2).
Rens filteret mindst en gang om måneden, eller når du ser meddelelsen om filterrensning (i8).
1 Sluk for apparatet.
10 Støvsug det snavsede filterkabinet og skumfilter (A).
4 Bank cyklonen mod en skraldespand for at fjerne resterende støv og snavs.
5 Sørg for at justere børsterullen korrekt, när du samler den igen.
2 Skyl vandstrimlen under rindende vand.
CP0667/01
Mikrofibermoppeptide XV1670/02
XV1670/02
Vandstrimmel CP0381/01
CP0381/01
www.philips.com/mycordlessvacuum-7000s.
Verwenden der Düse

Bodenarterkennung
Zurückkehren
CP0667/01
134 Deutsch
XV1670/02
Wasserspender CP0381/01
CP0381/01
Otsaku kasutamine
Piluotsaku kasutamine
Polstriotsaku kasutamine
Polstriotsakuga saab puhastada tekstiilkattega mööblit, nagu diivanid, padjad ja toolid. See on kaasas mudelitega XC7065, XC7067 ja XC7167.
Tagasi
Veepaagi hooldus
160
Eesti
10 Puhastage tolmuimejaga tolmune filtrikorpus ja vahtfilter (A).
Eesti
PetPro otsaku hooldus
2 Lisage mööteanumasse vajalik kogus vett.
2 Loputage niisutusriba kraani all.
Osade vahetamine
CP0667/01
Mikrokiust puhastuslapp XV1670/02
XV1670/02
Niisutusriba CP0381/01
CP0381/01
www.philips.com/mycordlessvacuum-7000s.
Descripción general
1 Pantalla digital
Uso de la boquilla
Uso del cepillo suave

Volver
CP0667/01
204 Español
Almohadilla para fregar de microfibra XV1670/02
XV1670/02
Tira humectante CP0381/01
CP0381/01
Installation du support mural

Retour
Entretien de la bandelette
CP0667/01
XV1670/02
Bandelette CP0381/01
CP0381/01
c Odabrana razina snage
2 Pravilno postavite kabel umetanjem u žlijeb koji je tome namijenjen.
4 Sigurno pričvrstite zidni nosač na željeni položaj na zidu, pritom pazeći da se rupe za nosive vijke nalaze otprilike 110 cm iznad poda.
Uređaj je opremljen litij-ionskom baterijom. Potpuno punjenje prazne baterije traje otprilike 6 sati.
1 Pričvrstite komplet baterija na glavno tijelo uređaja, pritom pazeći da je veza čvrsta, što će vam potvrditi zvuk „KLIK”.
2 Napunite uredaj tako što ćete ga postaviti na sastavljeni zidni nosač.
⚠ Upozorenje: uredaj pohranite i punite pri temperaturi iznad 5 °C i ispod 40 °C.
2 S pomoću gumba + i – prebacujte se između tri različite postavke snage.
T – turbo način rada
N – normalni način rada
E – ekološki način rada
252 Hrvatski
3 Pomoću usisavača možete čistiti tvrde ili meke podove.
i Napomena: ne pomičite uređaj s montiranim spremnikom za vodu u stranu jer to ostavlja tragove vode. Pomičite samo naprijed i nazad.
4 Pričvrstite jastučić za brisanje od mikrovlakana ispod spremnika za vodu. Poravnajte trake od čičak-materijala ispod spremnika za vodu s onima na stražnjoj strani krpe.
5 Spojite pripremljeni spremnik za vodu na mlaznicu za vodu i spremni ste početi.
254
Hrvatski
Uporaba mlaznice
Uporaba mlaznice PetPro
Za pričvršćivanje mlaznice PetPro umetnite cijev ručne jedinice u mlaznicu PetPro. Postavku snage prilagodite tako da odgovara vašim potrebama za čišćenje.
Uporaba nastavka za uske površine
Nastavak za proreze može poslužiti za čišćenje uskih, skučenih prostora, kao što su procjepi između jastuka na kauču, uz rubne letve ili u unutrašnjosti automobila.
Uporaba kombiniranog nastavka
Uporaba nastavka za namještaj
Nastavak za namještaj čisti mekani namještaj od tkanine, kao što su naslonjači, jastuci i stolice. Isporučuje se uz modele XC7065, XC7067 i XC7167.
Za pričvršćivanje nastavka za namještaj umetnite u njega cijev ili držak.
4 Četku učvrstite tako da je zatežete dok ne začujete zvuk „KLIK”.
Prepoznavanje vrste poda
Povratak
Nakon upotrebe – održavanje
2 Izvadite ručni uređaj zajedno s spremnikom za prašinu iz cijevi.
262
Hrvatski
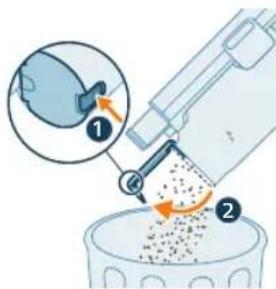
3 Držite spremnik za prašinu iznad kante za smeće i pritisnite tipku za lako pražnjenje (1) kako biste ga ispraznili (2).
Održavanje spremnika za vodu
Očistite spremnik za vodu nakon svake uporabe.
1 Uklonite jastučić za brisanje od mikrovlakana.
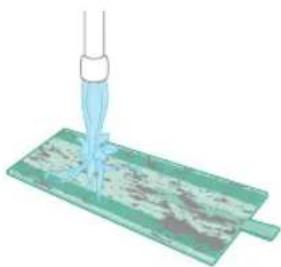
2 Isperite jastučić za brisanje pod slavinom te ga operite ručno ili u perilici rublja.
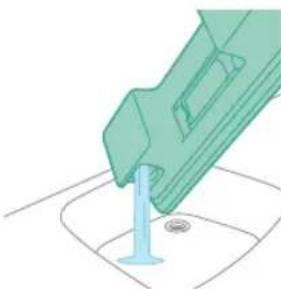
3 Izlijte svu vodu preostalu u spremniku za vodu.
4 Napunite spremnik za vodu vodom.
5 Pravilno zatvorite spremnik za vodu i protresite ga kako biste uklonili ostatke sredstva za čišćenje.
6 Ispraznite spremnik za vodu i ostavite ga da se osuši.
264 Hrvatski
3 Uklonite spremnik pritiskom gumba za otpuštanje spremnika.
8 Vratite spremnik za prašinu na ručni uredaj. Prvo poravnajte stranu spremnika na kojoj se nalazi filtar, a zatim ga zakvačite na mjesto.
9 Uključite uredaj.
10 Usisajte zaprljano kućište filtra i pjenasti filtar (A).
266
Hrvatski
11 Ponovno sastavite čisti pjenasti filtar (A) u čistom kućištu filtra.
i Napomena: filtar (A) je sada temeljito očišćen i može se pohraniti za buduću upotrebu kada bude potrebno očistiti trenutni filtar (B).
Čišćenje spremnika i ciklonske komore
2 Uklonite spremnik pritiskom gumba za otpuštanje spremnika.
3 Držite crnu dršku. Uklonite ciklonsku komoru iz spremnika za prašinu podizanjem iz spremnika.
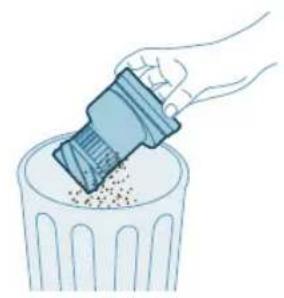
4 Istresite ciklonsku komoru iznad kante za smeće da biste uklonili prašinu i prljavštinu.
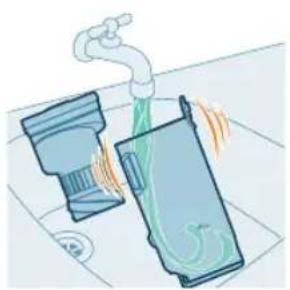
6 Brisanjem osušite očišćeni spremnik za prašinu i ciklonsku komoru.
Održavanje pametne mlaznice PrecisionPower
1 Prije čišćenja valjkaste četke mlaznice obavezno isključite uredaj.
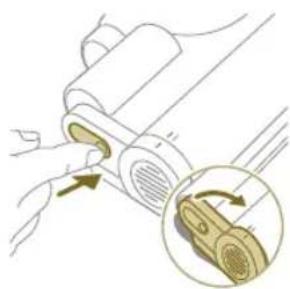
2 Za pristup valjkastoj četki pronadite gumb na bočnoj strani mlaznice. Pritisnite ga i zakrenite da biste ga otvorili.
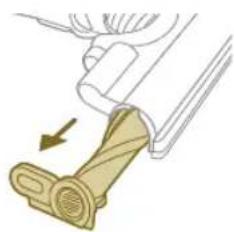
4 Pažljivo uklonite zapetljanu kosu s valjkaste četke. Olakšajte si uklanjanje prljavštine škarama.
Održavanje mlaznice PetPro
3 Rukom ili pomoću škara uklonite prljavštinu s četke.
4 Kada ponovno postavljate četku, počnite postavljanjem jedne strane na mjesto prije nego što pričvrstite drugu stranu. Kada se četka pravilno sastavi čut ćete zvuk „KLIK”.
270 Hrvatski
6 Isperite spremnik za vodu i izlijte svu preostalu tekućinu.
3 Vratite traku za vlaženje natrag na spremnik za vodu nakon čišćenja.
Zamjena dijelova
Kako biste kupili dodatke ili rezervne dijelove, posjetite
www.shop.philips.com/parts-and-accessories ili se obratite distributeru tvrtke Philips. Također se možete obratiti centru za korisničku podršku tvrtke Philips u svojoj zemlji.
CP0667/01
Jastučić za brisanje od mikrovlakana XV1670/02
XV1670/02
Traka za vlaženje CP0381/01
CP0381/01
284 Italiano
294 Italiano

Indietro
Pulizia del filtro
CP0667/01
308 Italiano
XV1670/02
3 Ar puteklsüceju var tirit gan cietus, gan mikstus gridas segumus.
4 Piestipriniet mikroškiedras mazgāšanas paliktni zem ūdens tvertnes. Salāgojiet "Velcro" aizdares zem ūdens tvertnes un aiz paliktņa.
5 Pievienojiet sagatavoto üdens tvertni üdens padeves sprauslai. Tagad varat säkt tirišanu.
Uzgaļa lietošana
1 Pievienojiet uzgali tieši rokas modulim.
Lai pievienotu šauro uzgali, pievienojiet cauruli vai rokas moduli šaurajam uzgalim.

Atgriešanās
Üdens tvertnes apkope
11 Atkal ievietojiet tiro putu filtru (A) tira filtra korpusa.
4 Lai noņemtu atlikušos puteklus un netīrumus, viegli piesitiet piesitiet ciklonisko nodalījumu pie atkritumu tvertnes.
6 Noslaukiet sausu iztirito puteklu grozu un ciklonisko nodalijumu.
Üdens sloksnes apkope
2 Skalojiet udens sloksni zem tekoša krana udens.
3 Kad udens sloksne ir notirita, piestipriniet to atpakal pie udens tvertnes.
Nomaina
CP0667/01
XV1670/02
Üdens sloksne CP0381/01
CP0381/01
Antgalio naudojimas
Grjžtis
Filtro valymas
CP0667/01
Mikropluošto plovimo šluostė XV1670/02
XV1670/02
Drékinimo juosta CP0381/01
CP0381/01



Kilépés
A szűrő tisztítása
CP0667/01
XV1670/02
CP0381/01 vízadagoló lapka
CP0381/01

Vloertypeherkenning
Terug
2 Spoel de watertuit af onder de kraan.
CP0667/01
Microvezeldweilmop XV1670/02
XV1670/02
Watertuit CP0381/01
CP0381/01
2 Fest slangen på munnstykket. Det skal kommen en "KLIKK"-lyd når den går i inngrep.
Advarsel: Ikke sug opp vann eller andre væsker.
5 Fest den klargjorte vannbeholderen til munnstykket, så er alt klart.
Norsk
Bruke munnstykket
Endre styrke på belysningen
i Merk: Gulvtypegjenkjenning kan bare bli aktivert eller deaktivert när den motoriserte dysen er festet til den håndholdte enheten. Når en motorisert dyse kombinert med hovedbørsten ikke er festet til hovedapparatet, vil det derfor



Tilbake
2 Skyll moppeputen under springen og vask den for hånd eller i vaskemaskin.
5 Lukk vannbeholderen godt, og rist den for å få bort eventuelle rester av vaskemiddel.
Rengjøre filteret
1 Slå av apparatet.
472 Norsk
6 Gå over den rengjorte støvbeholderen og syklonen med en tørr klut.
6 Fest børsterullen på munnstykket – det høres en "KLIKK"-lyd när den går i inngrep.
Vedlikeholde den skånsomme gulvbørsten (gjelder XC7067)
2 Skyll vannstrimmelen under springen.
CP0667/01
Moppepute i mikrofiber XV1670/02
XV1670/02
Vannstrimmel CP0381/01
CP0381/01
Używanie ssawki
Powrót
506 Polski
Wymiana
CP0667/01
XV1670/02
www.philips.com/mycordlessvacuum-7000s.
Descrição geral
1 Visor digital
3 Pode limpar pavimentos ou superfícies macias com o aspirador.
Utilizar o bocal
Utilizar o bocal PetPro

Regressar
3 Remova suavemente a escova rotativa e a tampa lateral do bocal.
4 Feche devidamente o depósito Aqua, agitando-o de forma a distribuir uniformemente o líquido descalcificante.
CP0667/01
XV1670/02
Utilizarea duzei PetPro
Utilizarea accesoriiului mixt

Return (Revenire)
1 Opriti aparatul.
CP0667/01
XV1670/02
Modifikoni nivelin e ndriçimit
608 Shqip

Kthimi
1 Fikeni pajisjen.
CP0667/01
XV1670/02
Sinjali Kuptimi i sinjalit
Sinjali Kuptimi i sinjalit
4 Dobro pritrdite stenski nosilec na želeno mesto na steni in poskrbite, da bodo luknje za vijake približno 110 cm od tal.
Vso dodatno opremo lahko shranite na stenski nosilec z izjemo kombinacije nastavkov PetPro in nastavka za oblazinjeno pohištvo.
i Opomba: Upoštevajte, da nastavka PetPro in nastavka za oblazinjeno pohištvo istočasno ni mogoče shraniti na stenskem nosilcu.
632 Slovenščina
Priprava za uporabo
1 Za vklop aparata pritisnite gumb za vklop/izklop.
i Opomba: Za izklop aparata ponovno pritisnite gumb za vklop/izklop.
4 Mikrovlaknasto blazinico za mokro brisanje pritrdite pod posodo z vodo. Poravnajte ježke pod posodo za vodo in na spodnji strani krpe.
Uporaba nastavka
Uporaba nastavka PetPro
Uporaba kombiniranega nastavka
Uporaba nastavka za oblazinjeno pohištvo
Vrnitev
3 Posodo za prah držite nad košem za smeti in pritisnite gumb za enostavno praznjenje (1), da izpraznite posodo (2).
1 Odstranite mikrovlaknasto blazinico za mokro brisanje.
2 Mikrovlaknasto blazinico za mokro brisanje izperite pod tekočo vodo in jo operite ročno ali v pralnem stroju.
3 Iz posode za vodo izlijte morebitno preostalo vodo.
4 Posodo za vodo napolnite z vodo.
7 Pazite, da med shranjevanjem ne izgubite pokrovčka posode. Mikrovlaknasto blazinico za mokro brisanje obesite, da se posuši.
1 Izklopite aparat.
646
Slovenščina
4 Filter obrnite (A) v levo in ga odstranite iz posode za prah.
7 Namestite čisti filter (B) v posodo za prah. Filter zasučite v desno, da se zaskoči.
10 Posesajte umazano ohišje filtra in penasti filter (A).
11 Čisti penasti filter (A) ponovno namestite v čisto ohišje filtra.
4 Ciklonski element narahlo potolcite ob koš za smeti, da odstranite preostali prah in umazanijo.
8 Sestavljeno posodo vstavite nazaj. Najprej poravnajte stran posode, na kateri je filter, nato jo pritrdite na mesto.
3 Previdno odstranite vrtljivo krtačo in stranski pokrovček nastavka.
5 Pri ponovnem sestavljanju poskrbite, da bo vrtljiva krtača pravilno poravnana.
2 Potisnite stranski gumb, da sprostite ščetko iz položaja.
652 Slovenščina
CP0667/01
Mikrovlaknasta blazinica za mokro brisanje XV1670/02
XV1670/02
3 Zatvorte sivú páku. Podl'a počutelného cvaknutia sa uistite, že sivá páka je na svojom mieste.
2 Pripojte trubicu k hubici. Pripojenie overte podl'a počutelného cvaknutia.
Varovanie: Nevysávajte vodu ani iné kvapaliny.
Používanie hubice
1 Hubicu pripojte priamo k ručnému vysávaču.
672 Slovensky
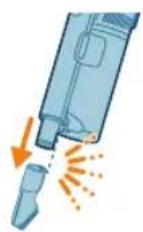
1 Ku kefe sa dostanete pomocou tlačidla na boku hubice. Stlačte ho a otáčaním otvorte. Jemne odstráňte kefu a bočné veko hubice.
Zmena jasu osvetlenia

Návrat
Po použití – údržba
2 Vyberte ručný držiak vrátane nádoby na prach z trubice.
2 Opláchnite mopovaciu podušku pod tečúcou vodou a vyperte ju v ruke alebo v práčke.

7 Dajte si pozor, aby ste počas skladovania nestratili veko nádoby. Mopovaciu podušku z mikrovlákna zaveste a nechajte uschnúť.
680 Slovensky
1 Vypnite spotrebič.
8 Umiestnite nádobu na prach spät na rukovät. Najprv zarovnajte stranu nádoby s filtrom a až potom ju upevnite na miesto.
9 Zapnite spotrebič.
682 Slovensky
10 Znečistené puzdro filtra a penový filter (A) povysávajte.
6 Vyčistenú nádobu na prach a cyklón utrite dosucha.
3 Jemne vyberte valček kefy a bočné veko hubice.
Slovensky

CP0667/01
Mopovacia poduška z mikrovlákna XV1670/02
XV1670/02
1 Okrenite zidni nosač naopačke i otkačite sivu ručicu. Postavite priključak za punjenje tako da metalni deo bude vidljiv i okrenut uspravno sa prednje strane zidnog nosača.
4 Čvrsto zakačite zidni nosač na željeni položaj na zidu i uverite se da su rupe za zavrtnje za montažu na zid udaljene približno 110 cm od poda.
A Oprez: Budite oprezni prilikom bušenja rupa u zidu za pričvršćivanje zidnog nosača kako biste izbegli opasnost od strujnog udara.
i Napomena: Uverite se da postavljanje zidnog nosača omogućava celom aparatu da visi na zidu tako da mlaznica ne dodiruje pod.
5 Kada utvrdite optimalni položaj i visinu za odlaganje i punjenje aparata, čvrsto pritegnite zavrtnje kako biste učvrstili zidni nosač.
Odlaganje dodataka na zidnom nosaču
Svi dodaci mogu da se odlažu na zidnom nosaču, sa izuzetkom kombinovanja PetPro papučica i nastavka za tapacirani nameštaj.
i Napomena: Pazite, jer PetPro papučica i nastavak za tapacirani nameštaj ne mogu zajedno da se odląžu na zidnom nosaču.
700 Srpski
Priprema za upotrebu
i Napomena: Možete i da postavite dršku na ravnu i stabilnu površinu i da direktno povežete kabl za punjenje sa aparatom.
2 Spojite cev sa mlaznicom. Potvrdite spajanje tako što ćete čuti klik kada postavljate.
Usisavanje podova od mekog i tvrdog materijala
2 Pomoću dugmadi + i – prebacujte između tri različite postavke snage.
T - režim turbo
N – normalan režim
E – režim eco
702 Srpski
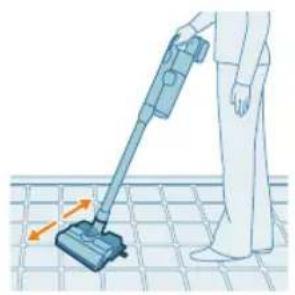
3 Usisivačem možete čistiti tvrde ili mekane podne površine.
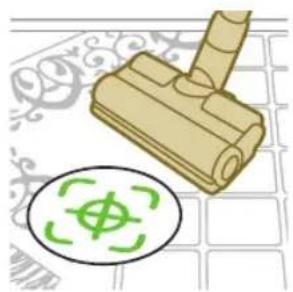
i Sa omogućenim prepoznavanjem vrste podne površine, aparat prepoznaje tip podne površine i automatski optimizuje svoj učinak unutar podešavanja snage koje ste izabrali. Da biste onemogućili ovu funkciju, u nastavku proverite kako da prilagodavate podešavanja.
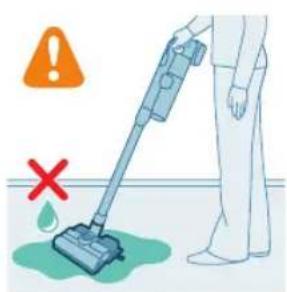
Upozorenje: Nemojte usisavati vodu niti neku drugu tečnost.
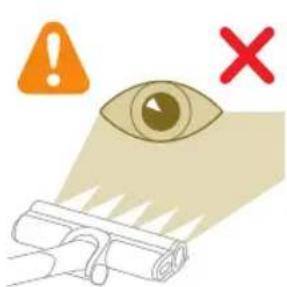
A Oprez: Nemojte gledati direktno u uključene LED lampice niti usmeravati LED lampice u nečije oči. LED svetlo je vrlo blještavo.
Usisavanje tokom brisanja podova od tvrdog materijala
Oprez: Rezervoar za vodu koristite samo na tvrdim podovima s vodootpornom površinom (kao što su linoleum, pločice ili lakirani parket) i kamenim podovima (kao što je mermer). Ako vaš pod nije tretiran da postane vodootporan, proverite sa proizvodačem da li možete da koristite vodu za njegovo čišćenje. Nemojte da koristite rezervoar za vodu na tvrdim podovima na kojima je vodootporni sloj oštećen.
i Napomena: Nemojte da koristite rezervoar za vodu za čišćenje tepiha.
4 Pričvrstite uložak za čišćenje od mikrovlakana ispod rezervoara za vodu. Poravnajte čičak trake ispod rezervoara za vodu iza krpe.
i Napomena: Vodeni modul nije pogodan za upotrebu na mekanim podovima poput tepiha.
Korišćenje mlaznice
Korišćenje PetPro papučice
PetPro papučica efikasno uklanja dlake kućnih ljubimaca i male nerede poput mrvica, a idealna je za meke površine kao što su kreveti i kaučevi.
Za pričvršćivanje PetPro papučice umetnite cev drške u PetPro papučicu. Postavku snage možete prilagoditi tako da odgovara vašim potrebama za čišćenje.
Za pričvršćivanje nastavka za uske površine umetnite u njega cev ili dršku.
Upotreba kombinovanog nastavka
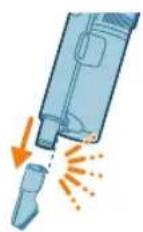
Za pričvršćivanje mekane četke, umetnite cev ili dršku u mekanu četku.
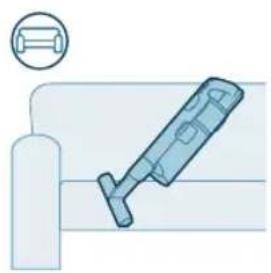
Upotreba nastavka za tapacirani nameštaj
Dodatak za tapacirane površine čisti nameštaj od meke tkanine kao što su sofe, jastuci i stolice. Uključeno je na modelima XC7065, XC7067 i XC7167.
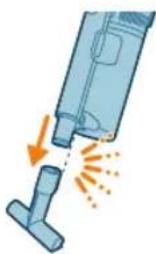
Za pričvršćivanje nastavka za tapacirani nameštaj, umetnite u njega cev ili dršku.
Korišćenje četke za delikatne podove
Četka za delikatne podove je meka četka sa sivim i narandžastim materijalom i može se koristiti za nežno čišćenje delikatnih tipova tvrdih podova kao što su pluta, tvrdo drvo i prirodni kamen. Uključena je u XC7067.
Da biste zamenili četku, pratite uputstva ispod:
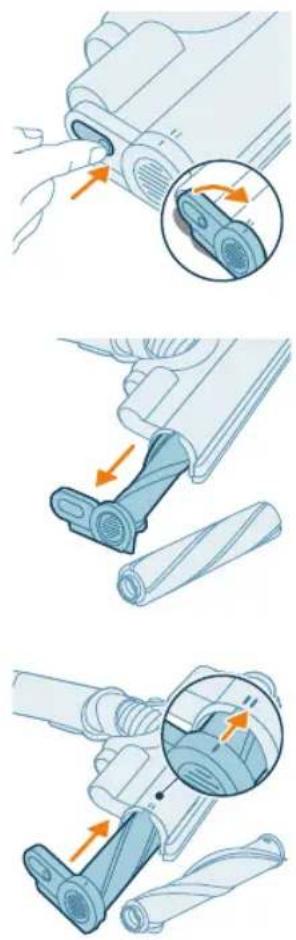
1 Da biste pristupili četki, pronadite dugme sa strane papučice. Pritisnite ga i okrenite da biste otvorili. Nežno skinite četku i bočni poklopac papučice.
Izmena jačine osvetljenosti
Pritisnite dugme menija i krećite se do funkcije osvetljenja. Potvrdite ponovnim pritiskanjem dugmeta menija.
Da biste izmenili jačinu osvetljenja, krećite se kroz dostupne nivoe i potvrdite pritiskom na dugme menija.
Prepoznavanje vrste poda
Pritisnite dugme menija i krećite se do prepoznavanja vrste poda. Potvrdite ponovnim pritiskanjem dugmeta menija.
U ekranu za prepoznavanje vrste poda, krećite se kroz ovu funkciju i potvrdite odluku pritiskom na dugme menija. Kada je uspešno omogućeno, zelena ikona će se pojaviti u gornjem levom uglu ekrana nakon što se vratite na glavni ekran.

i Napomena: Prepoznavanje vrste poda može biti omogućeno ili onemogućeno samo kada je motorizovana mlaznica spojena za dršku. Kao rezultat toga, kada motorizovana papučica u kombinaciji sa glavnom četkom nije spojena za glavni aparat, u meniju će se nalaziti jedna stavka manje. Pričvrstite motorizovanu mlaznicu kako biste videli ovu stavku za prepoznavanje vrste poda u meniju.
i Napomena: Kada dobijete uređaj, prepoznavanje vrste poda je omogućeno.
i Napomena: Funkcija prepoznavanja vrste poda postaje aktivna kada mlaznica tokom kretanja identifikuje različite vrste podnih površina.
i Prepoznavanje tipa poda ne radi u kombinaciji sa četkom za delikatne podove (uključena u model XC7067).
Pritisnite dugme menija i krećite se do opcije „dodatne informacije“. Potvrdite ponovnim pritiskanjem dugmeta menija.
Na ekranu „dodatne informacije“ možete proveriti ispravnost filtera, ispravnost baterije, ukupno vreme korišćenja, model aparata i pristupiti QR kodu za dodatne informacije na internetu.

Vraćanje
Nakon korišćenja – Održavanje
2 Izvadite dršku, uključujući posudu za prašinu iz cevi.
712 Srpski
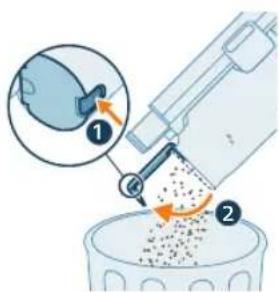
3 Držite posudu za prašinu iznad kante za smeće i pritisnite dugme za jednostavno pražnjenje (1) da biste ispraznili posudu (2).
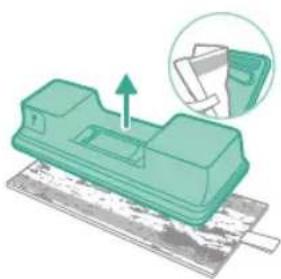
2 Isperite i uložak za čišćenje ispod česme i ga operite ga ručno ili u mašini za pranje veša.
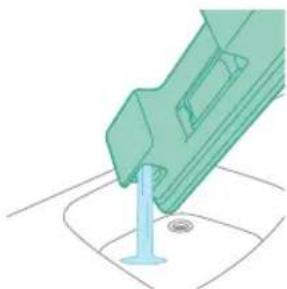
5 Pravilno zatvorite rezervoar za vodu i protresite ga kako biste uklonili ostatke deterdženta.
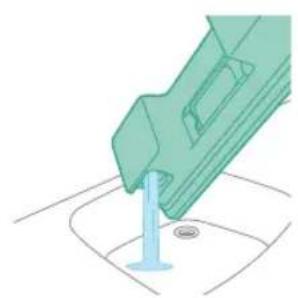
6 Ispraznite rezervoar za vodu i ostavite da otvorenog da se osuši.
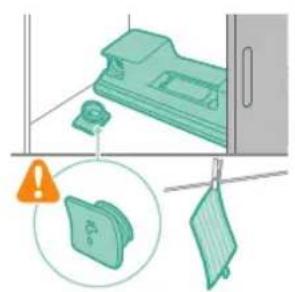
7 Uverite se da čep nije odvrnut tokom odlaganja. Okačite uložak za čišćenje od mikrovlakana da se osuši.
Povremeno održavanje
Čišćenje filtera
714 Srpski
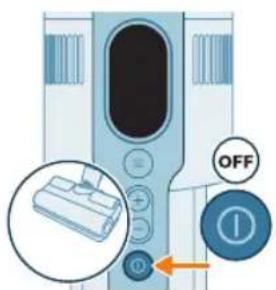
1 Isključite aparat.
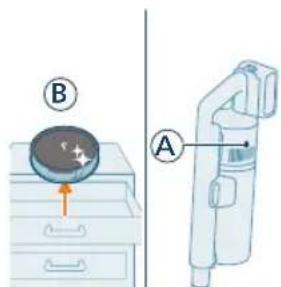
3 Uklonite posudu pritiskom dugmeta za otpuštanje posude.
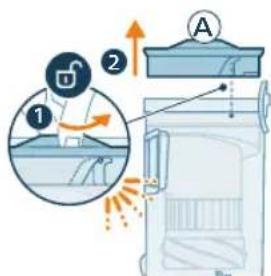
4 Okrenite filter (A) u smeru suprotnom od kretanja kazaljke na satu da biste ga odvojili od posude za prašinu.
7 Postavite čisti filter (B) u posudu za prašinu. Okrenite filter u smeru suprotnom od kretanja kazaljki na satu kako biste ga pričvrstili.
8 Postavite posudu za prašinu nazad na dršku. Prvo poravnajte stranu filtera posude pre nego što je zakačite na mesto.
9 Uključite aparat.
10 Usisajte zaprljano kućište filtera i filter od pene (A).
Srpski
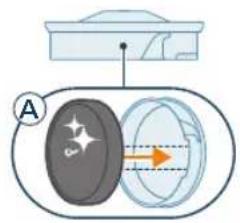
11 Ponovo sastavite čisti filter od pene (A) u čistom kućištu filtera.
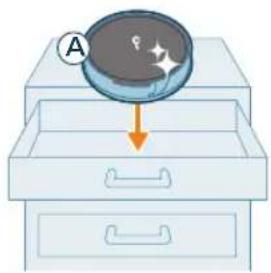
i Napomena: Filter (A) je sada temeljno očišćen i može se odložiti za buduću upotrebu kada je potrebno očistiti trenutni filter (B).
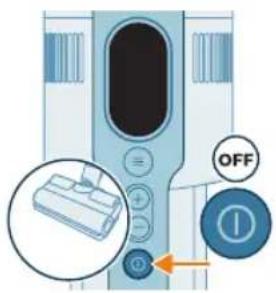
Čišćenje posude i ciklonske komore
1 Isključite aparat.
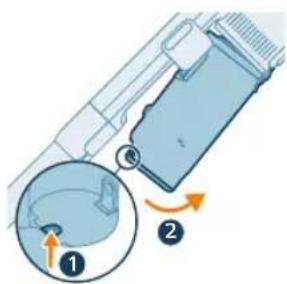
2 Uklonite posudu pritiskom dugmeta za otpuštanje posude.
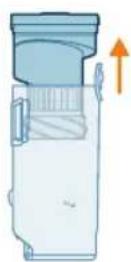
4 Istresite ciklonsku komoru iznad kante za otpatke da biste uklonili preostalu prašinu i prljavštinu.
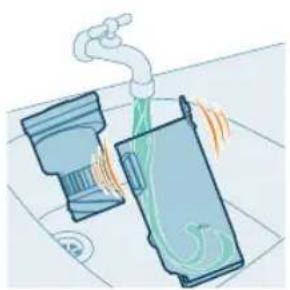
5 Za temeljno održavanje, očistite posudu za prašinu i ciklonsku komoru pod mlazom tekuće vode ili u toploj vodi sa sapunicom.
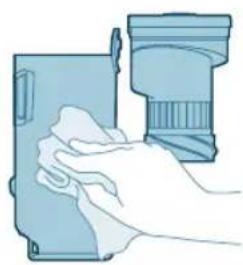
6 Brisanjem osušite očišćenu posudu za prašinu i ciklonsku komoru.
8 Vratite sklopljenu posudu. Prvo poravnajte stranu sa filterom na posudi pre nego što je zakačite.
Napomena: Nakon održavanja, pre upotrebe uvek proverite da li je filter u aparatu sklopljen.
Održavanje PrecisionPower pametne mlaznice
1 Uvek isključite aparat pre nego čišćenja valjkaste četke mlaznice.
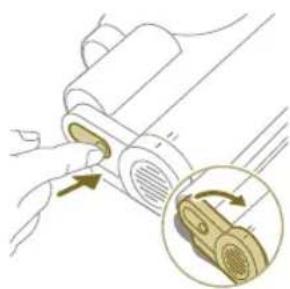
2 Da biste pristupili valjkastoj četki, pronadite dugme sa strane mlaznice. Pritisnite ga i okrenite da biste otvorili.
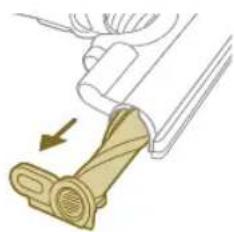
3 Nežno skinite valjkastu četku i bočni poklopac mlaznice.
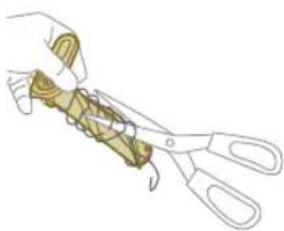
4 Pažljivo otkačite svu zapetljanu kosu sa valjkaste četke. Makazama možete olakšati uklanjanje prljavštine.
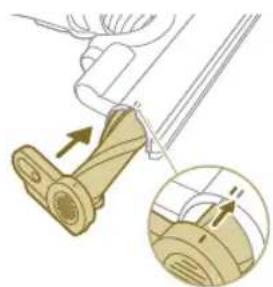
5 Prilikom ponovnog sklapanja, uverite se da je valjkasta četka pravilno poravnata.
Održavanje PetPro papučice
3 Rukama ili makazama uklonite svu prljavštinu sa četke.
4 Prilikom ponovnog sklapanja četke, počnite tako što ćete postaviti jednu stranu u položaj pre nego što zakačite drugu stranu. Kada je četka pravilno sklopljena, čućete zvuk klika.
720 Srpski
Održavanje četke za delikatne podove (za XC7067)
1 Da biste pristupili četki, pronadite dugme sa strane papučice. Pritisnite ga i okrenite da biste otvorili. Nežno skinite četku i bočni poklopac papučice.
2 Snažno izvucite četku iz bočnog poklopca.
3 Pažljivo otkačite svu zapetljanu kosu sa valjkaste četke. Makazama možete olakšati uklanjanje prljavštine.
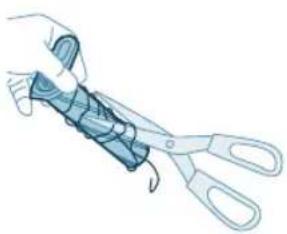
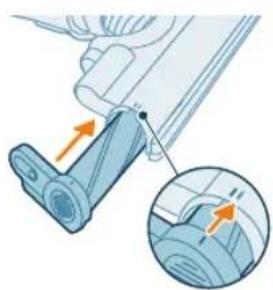
4 Snažno umetnite četku nazad na bočni poklopac i proverite da li je četka čvrsto postavljena. Prilikom ponovnog sklapanja, uverite se da je četka pravilno poravnata.

6 Isperite i uklonite preostalu tečnost u rezervoaru za vodu.
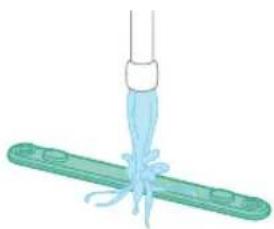
2 Isperite traku za vodu pod mlazom vode.
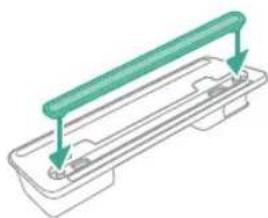
3 Nakon čišćenja vratite traku za vodu u rezervoar za vodu.
Zamena
CP0667/01
XV1670/02
Traka za vodu CP0381/01
CP0381/01
www.philips.com/mycordlessvacuum-7000s.
Yleiskuvaus
Palaa
Suomi

CP0667/01
Mikrokuitumoppi XV1670/02
XV1670/02
Vesiliuska CP0381/01
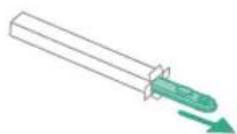
CP0381/01
www.philips.com/mycordlessvacuum-7000s.
Allmän beskrivning
1 Digital skärm
Använda munstycket
Retur
782
Svenska
CP0667/01
Mikrofibermoppdyna XV1670/02
XV1670/02
Vattendoserare CP0381/01
CP0381/01
Başlığı kullanma
Zemin Türü Tanıma
Geri Dön
Su haznesi bakımı
Filtreyi temizleme
Değişim
CP0667/01
Mikrofiber paspaslama bezi XV1670/02
XV1670/02
Su şeridi CP0381/01
CP0381/01
Χρήση του πέλματος

CP0667/01
XV1670/02
Taivía vépou CP0381/01
CP0381/01

Връщане
1 Изключете уреда.
CP0667/01
XV1670/02
Водна лента СР0381/01
CP0381/01

Врати се
CP0667/01
XV1670/02

Возврат
1 Выключите прибор.
CP0667/01
XV1670/02

1 Вимкніть прилад.