
MAD1100DADK - Deep fryer MIDEA - Free user manual and instructions
Find the device manual for free MAD1100DADK MIDEA in PDF.

| Product type | Dual-zone air fryer |
| Brand | Midea |
| Model | MAD1100DADK |
| Supply voltage | 220-240 V~ |
| Frequency | 50/60 Hz |
| Rated power | 1550-1850 W |
| Total capacity | 11 L |
| Upper basket capacity | Approximately 5.5 L |
| Lower basket capacity | Approximately 5.5 L |
| Number of programs | 10 cooking functions |
| Main functions | Air fry, grill, roast, bake, dehydrate, bagel, toast, reheat (via presets) |
| Sync finish | Yes, to finish cooking at the same time in both zones |
| Connectivity | Wi-Fi (2.4 GHz) via SmartHome app |
| Interior light | Yes, LIGHT touch control |
| Display type | Digital display with control knob |
| Basket and tray material | Non-stick coating |
| Cleaning | Manual cleaning with warm water and dish soap; do not put in dishwasher |
| Safety | Auto shut-off on smoke, hot surface, surge protection |
| Weight | Approximately 8 kg (estimate) |
| Dimensions (L x D x H) | Approximately 40 x 30 x 35 cm (estimate) |
| Included accessories | Upper basket, crisper plate, grill tray, drip tray |
| Standby power consumption | 0.8 W (standby mode), 2.0 W (network standby) |
Frequently Asked Questions - MAD1100DADK MIDEA
User questions about MAD1100DADK MIDEA
0 question about this device. Answer the ones you know or ask your own.
Ask a new question about this device
Download the instructions for your Deep fryer in PDF format for free! Find your manual MAD1100DADK - MIDEA and take your electronic device back in hand. On this page are published all the documents necessary for the use of your device. MAD1100DADK by MIDEA.
USER MANUAL MAD1100DADK MIDEA
natural_image
Line drawing of a Midea air fryer device with lid and front panel (no text or symbols)TWO-ZONE AIR FRYER OVEN

SmartHome

Download the app & activate product
USER MANUAL
MAD1100DADK
LANGUAGES
EN English
IT Italian
DE German
FR France
ES Spanish
PL Polish
CZ Czech
SK Slovakia
THANK YOU LETTER
Thank you for choosing Midea! Before using your new Midea product, please read this manual thoroughly to ensure that you know how to operate the features and functions that your new appliance offers in a safe way.
EN
CONTENTS
THANK YOU LETTER 01
SAFETY INSTRUCTIONS 02
SPECIFICATIONS 09
PRODUCT OVERVIEW 10
OPERATING INSTRUCTIONS 11
APP SETUP AND OPERATION 26
CLEANING AND MAINTENANCE 28
TROUBLESHOOTING 30
TRADEMARKS, COPYRIGHTS AND LEGAL STATEMENT 32
DISPOSAL AND RECYCLING 33
DATA PROTECTION NOTICE 34
IMPORTANT SAFEGUARDS
Intended Use
The following safety guidelines are intended to prevent unforeseen risks or damage from unsafe or incorrect operation of the appliance. Please check the packaging and appliance on arrival to make sure everything is intact to ensure safe operation. If you find a damage, please contact the retailer or dealer. Please note that for alterations to the appliance are not allowed for your safety concern. Unintended use may cause hazards and loss of warranty claims.
EN
Explanation of Symbols

Danger
This symbol indicates that there are dangers to the life and health of persons due to extremely flammable gas.

Warning of electrical voltage
This symbol indicates that there is a danger to life and health of persons due to voltage.

Warning
The signal word indicates a hazard with a medium level of risk which, if not avoided, may result in death or serious injury.

Caution
The signal word indicates a hazard with a low degree of risk which, if not avoided, may result in minor or moderate injury.

Attention
The signal word indicates important information (e.g. damage to property), but not danger.

Observe instructions
This symbol indicates that a service technician should only operate and maintain this appliance in accordance with the operating instructions.
Read these operating instructions carefully and attentively before using/commissioning the unit and keep them in the immediate vicinity of the installation site or unit for later use!
WARNING
Safety Instructions
- If the supply cord is damaged, it must be replaced by the manufacturer, its service agent or similarly qualified persons in order to avoid a hazard.
- Do not immerse any part of the appliance in water or other liquid.
- Warning: Avoid spillage on the connector.
- Do not use outdoors.
- This appliance is intended to be used in household and similar applications such as:
-Staff kitchen areas in shops, office and other working environments;
-farm houses;
-by clients in hotels, motels and other residential type environments;
-In bed and breakfast type environments.
- This appliance can be used by children aged from 8 years and above and persons with reduced physical, sensory or mental capabilities or lack of experience and knowledge if they have been given supervision or instruction concerning use of the appliance in a safe way and understand the hazards involved. Children shall not play with the appliance.
- Cleaning and user maintenance shall not be made by children unless they are older than 8 and supervised. Keep the appliance and its cord out of reach of children aged less than 8 years.
- Children should be supervised to ensure that they do not play with the appliance. Keep the appliance and its cord out of reach of children.
-
Warning: Misuse may cause potential injury.
-
Appliances are not intended to be operated by means of an external timer or separate remote-control system. WARNING: If the surface is cracked, switch off the appliance to avoid the possibility of electric shock.
• Always put the ingredients to be fried in the basket, to prevent it from coming into contact with the heating elements. - Do not cover the air inlet and the air outlet openings while the appliance is operating.
- Do not fill the pan with oil as this may cause a fire hazard. Never touch the inside of the appliance while it is operating.
- During hot air frying, hot steam is released through the air outlet openings. Keep your hands and face at a safe distance from the steam and from the air outlet openings. Also be careful of hot steam and air when you remove the pan from the appliance.
- Immediately unplug the appliance if you see dark smoke coming out of the appliance. Wait for the smoke emission to stop before you remove the pan from the appliance.
• The surface are liable to get hot during use.
• Operation frequency band(s): 2.4Ghz
• RF output power: 18dBm - Type of equipment: WBR3
- RED Declaration of Conformity (DoC) please refer to page 25.
SPECIFICATIONS
EN
| Product Model | MAD1100DADK |
| Voltage | 220-240V~ |
| Frequency | 50/60Hz |
| Rated Power | 1550-1850W |
| Capacity 11L |
| Mode | power consumption | Time for the equipment to reach the applicable low power mode or condition |
| standby mode | 0.8W | 20min |
| networked standby | 2.0W | 20min |
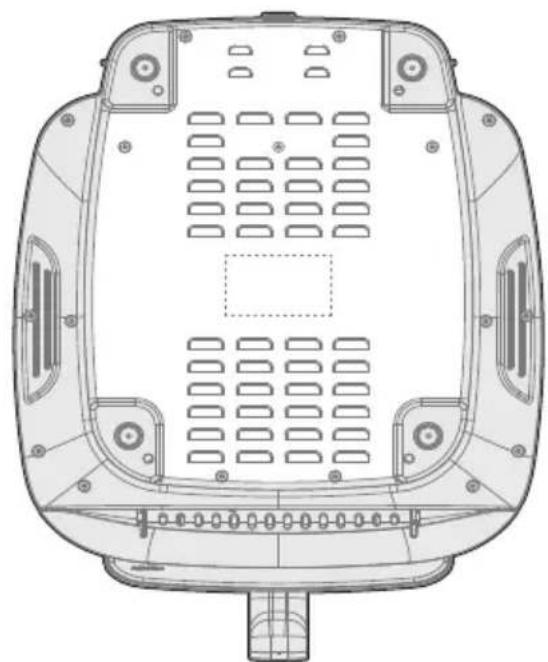
How To Find The Model Name And Serial Number
Both the model name and serial number can be found on the rating label that is located on the bottom of the air fryer.
natural_image
Technical line drawing of a vehicle rear panel with ventilation grilles and mounting holes (no text or symbols)PRODUCT OVERVIEW
Parts and Accessories
Before using your new air fryer, make sure that all parts and accessories are included.
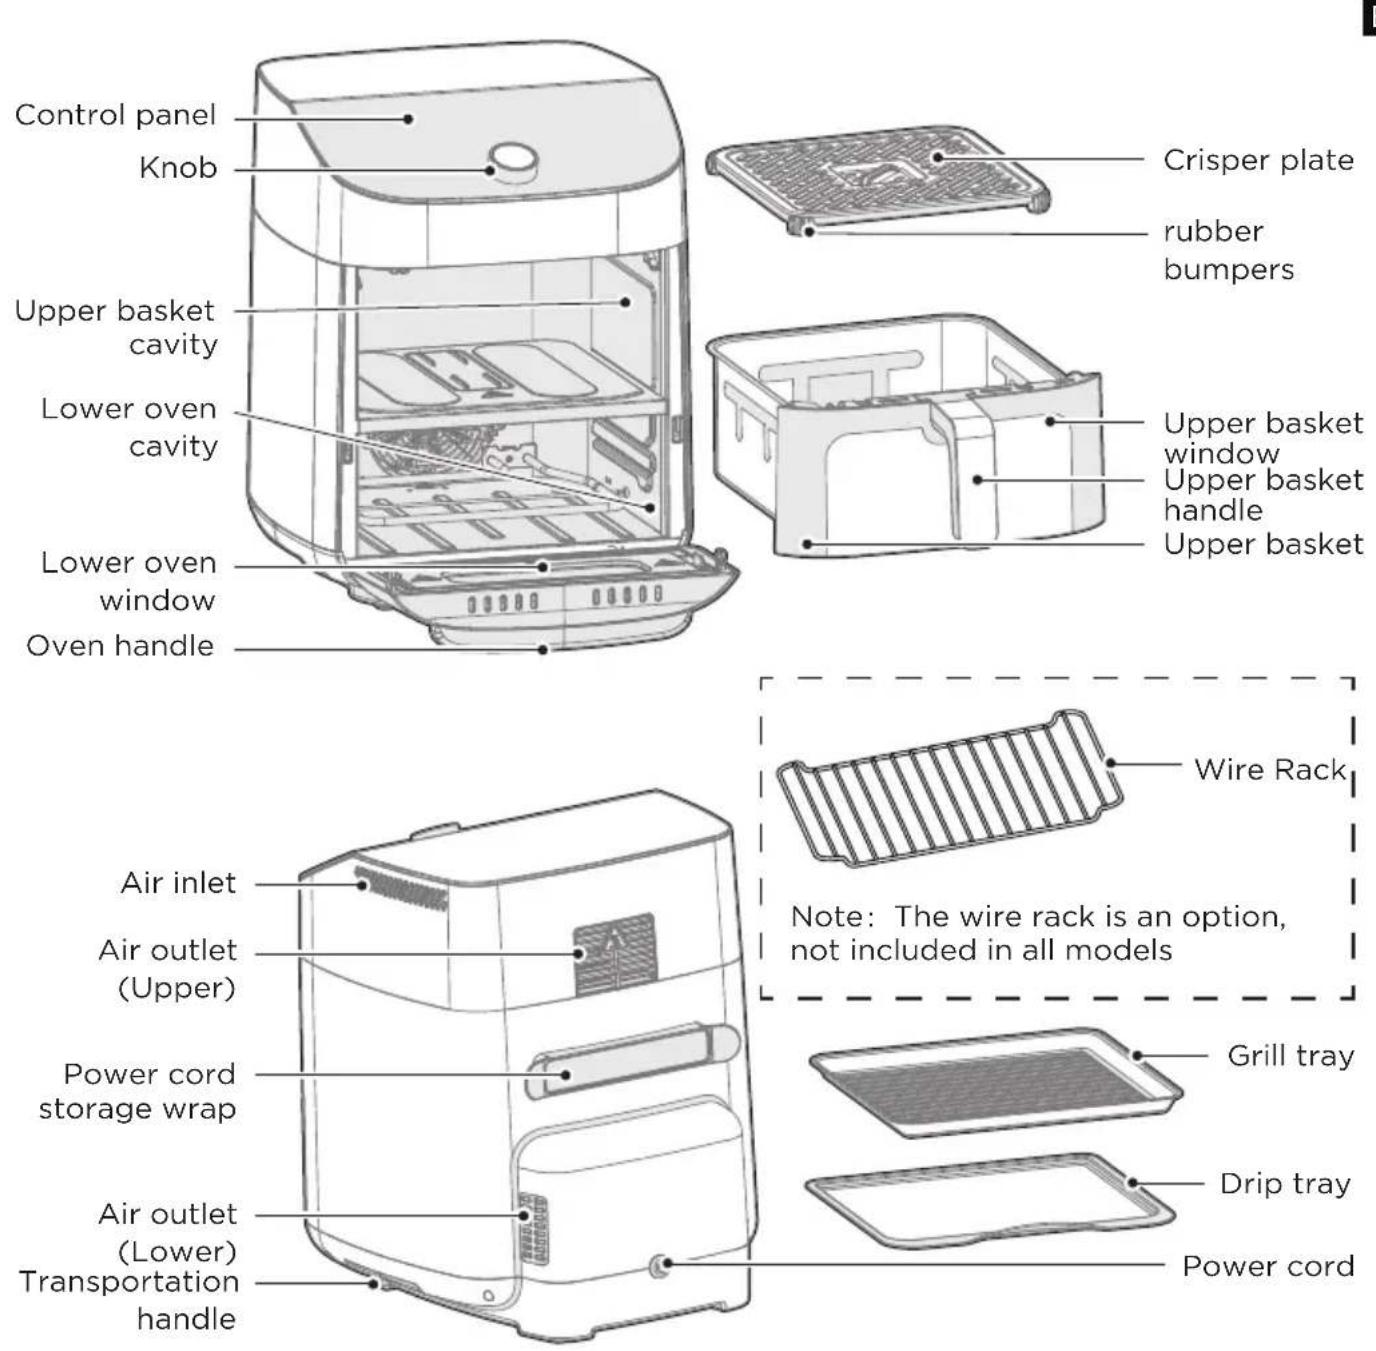

NOTE
All the pictures in this manual are for explanatory purposes only. Any discrepancy between the real object and the illustration in the drawing shall be subject to the real subject.
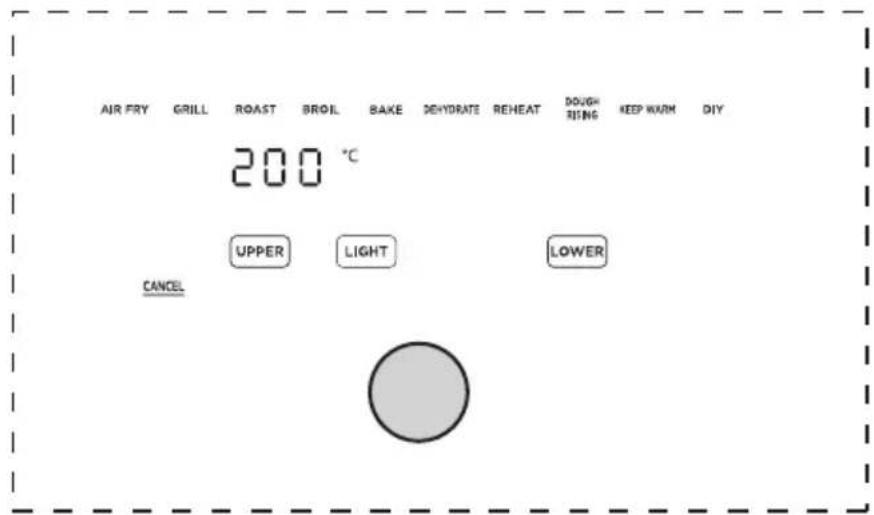
OPERATING INSTRUCTIONS
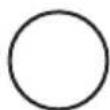
Control Panel
EN
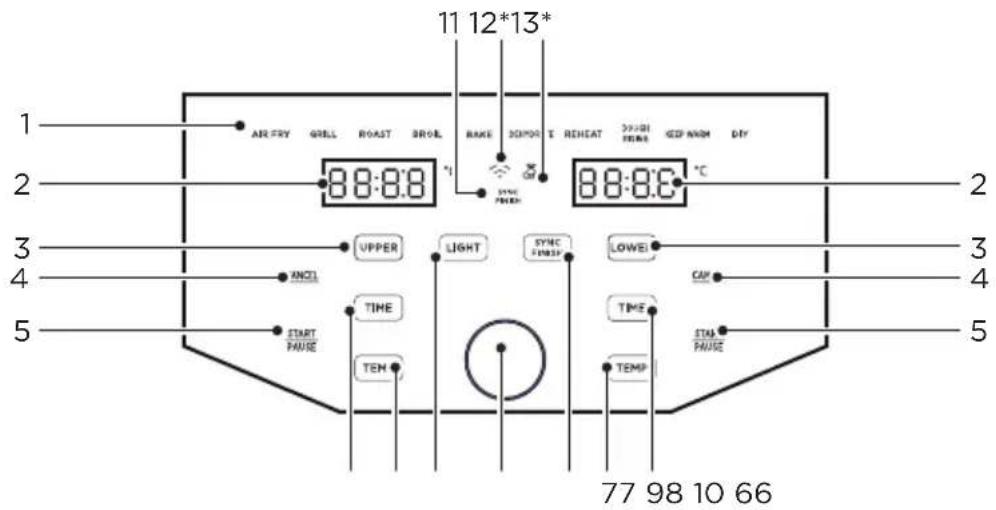
*Only applies to APP connected models.
| DescriptionName | ||
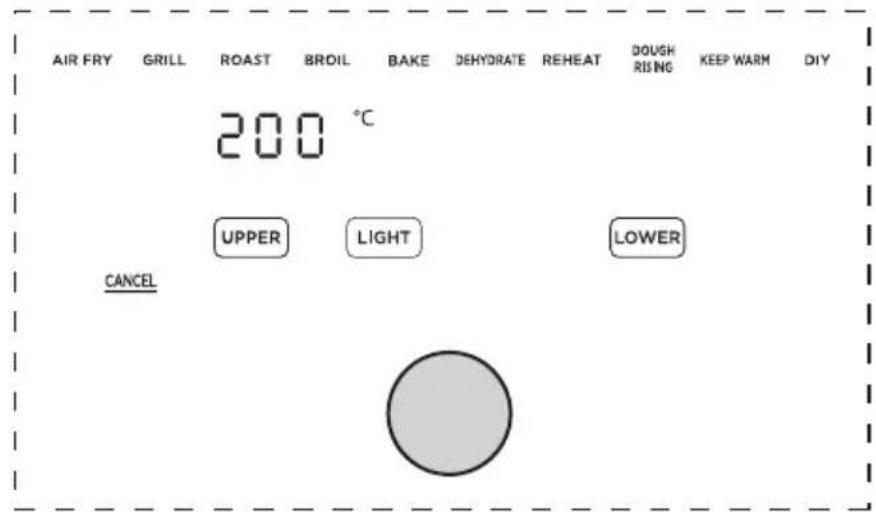
| 1 Functions | Any of the 10 functions can be used in the upper or lower cavity to cook a large variety of meals. The temperature and time can be adjusted for each function. After touchingUPPERorLOWERrotate the knob to change the function and push the knob to select the function. | |
| 2 | Display | The cook time, set temperature, reminder messages, and error messages are shown here. |
| 3 | Cavity Selection Button | TouchUPPERorLOWERto program or adjust the function for each cavity. While cooking,UPPERorLOWERcan be touched to show the respective function for each cavity. |
| 4 | Cancel | TouchCANCELwhile cooking to stop the cooking cycle and touchCANCELwhile programming to return to the standby state. |
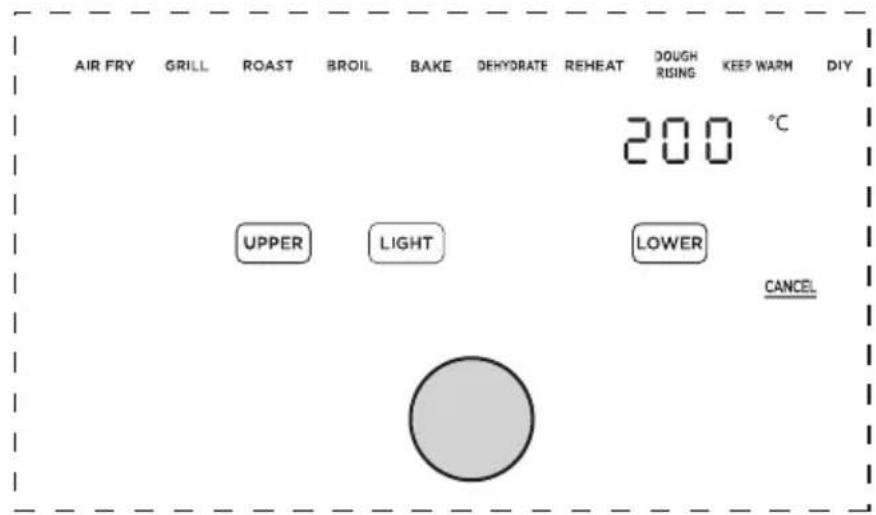
| 5 Start/Pause | TouchSTARTPAUSEto start cooking. While cooking, touchSTARTPAUSEto pause cooking and touch again to resume cooking. | |
| 6 TIME | After selecting a function, touchandPTo atethe knob to adjust the set cook time. | |
| 7 TEMP | After selecting a function, touchandPTo atethe knob to adjust the set temperature. | |
| 8 LIGHT | • At any time, touchLIGHTto activate or deactivate the light in both cavities. | |
| 9 | SYNC FINISH Button | • The sync finish function will make both cavities finish cooking at the same time. After programming both cavities, touchSYNCFINISto activate or deactivate the sync finish function. If the sync finish function is activated, “SYNC FINISH” will appear and touching eitherSTARTPAUSEwill start both cavities. The cavity with less cook time will display “HoLd” until both cavities have the same remaining cook time. |
| 10 Knob | • Rotate the knob to adjust and push the knob to select the cook time, set temperature, or function. | |
| 11 | SYNC FINISH Indicator | • If the sync finish indicator is visible, the sync finish function is activated. |
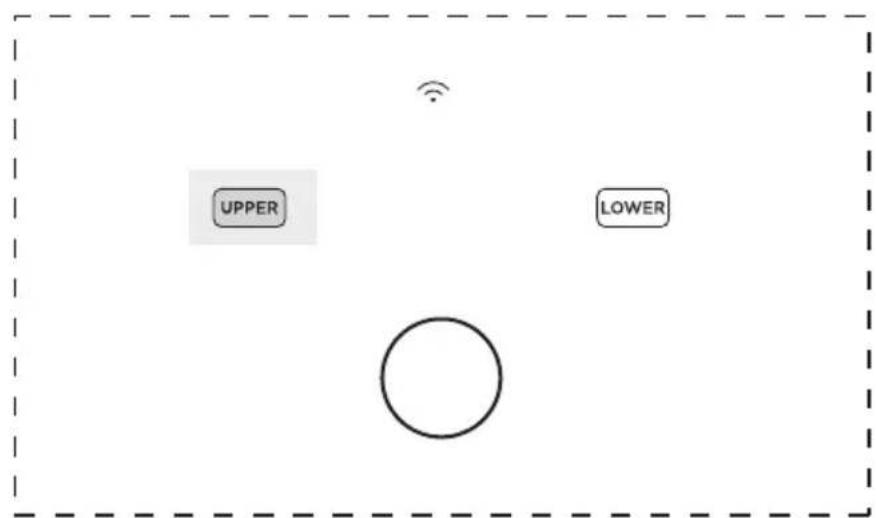
| 12* | APP Connection* | • Ifflashing, the air fryer is available to connect to SmartHome. If solid, the air fryer is connected to SmartHome. Long press the knob button to reconnect to APP. |
| 13* | APP Recipe* | • If theis visible, cooking settings for a SmartHome recipe have been uploaded to the air fryer. |
Display Messages
EN
| DescriptionMessage | |
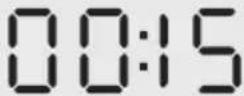 | ·While programming, the display will show the set cook time. While cooking, the display will show the remaining cook time. |
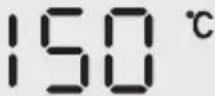 | ·The display shows the set temperature. |
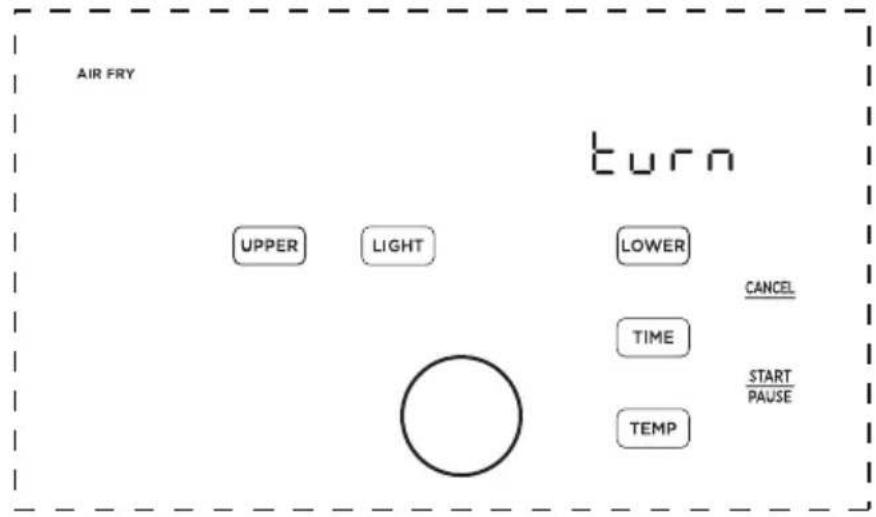
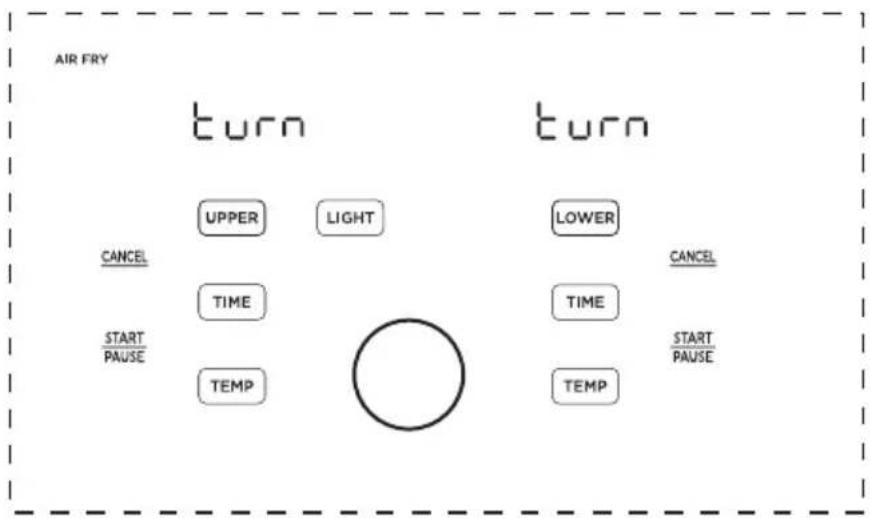
 | ·Some recipes will display the "turn Food" reminder when the food is ready to be turned, flipped, or shook. |
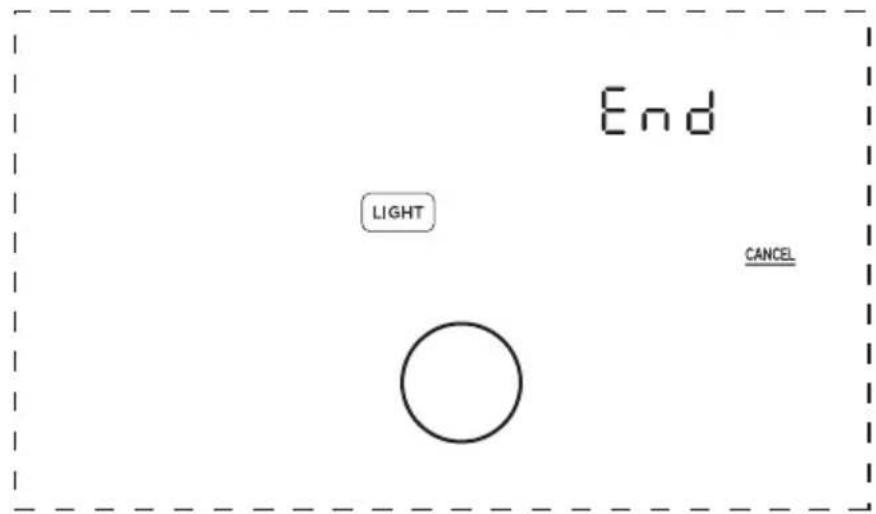
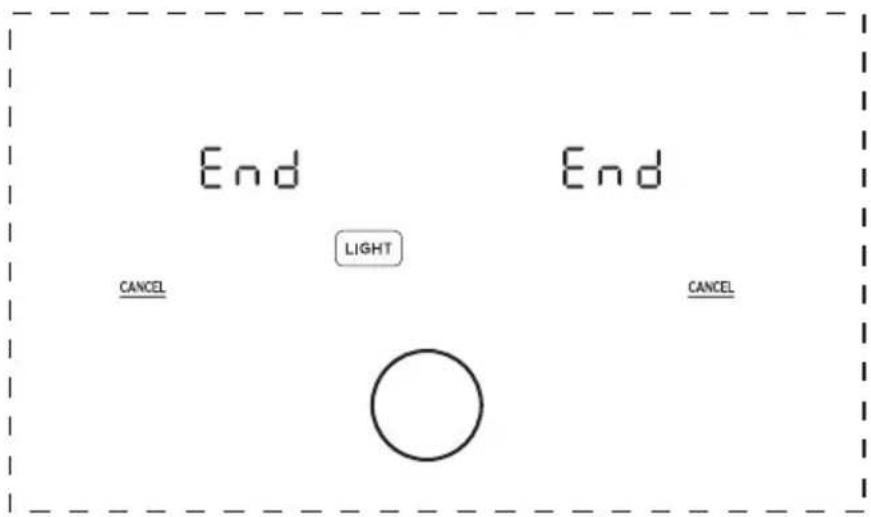
 | ·Cooking is complete and the upper basket or lower tray can be removed. |
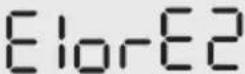 | ·The upper cavity is not operating properly. Please contact our Customer Service Center. |
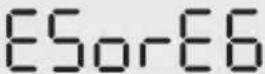 | ·The lower cavity is not operating properly. Please contact our Service service Center. |
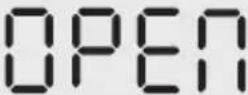 | ·The upper basket was removed, or the lower door is open. Note: No buttons for that cavity can be used while open. |
 | ·While the sync finish function is activated, the cavity with less cook time will show "HoLd" until both cavities have the same remaining cook time. |
Upper Cavity Cooking (Basket)
- Place the crisper plate into the basket (crisper plate handle up) and evenly place food onto the crisper plate.
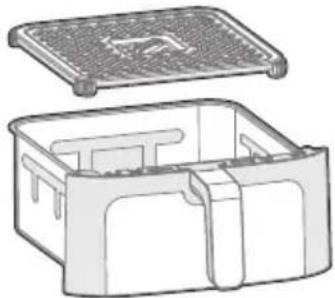
natural_image
Technical line drawing of a two-part container with lid and side compartments (no text or symbols)EN
- Insert the basket into the upper cavity.
- Plug the air fryer into an appropriate power outlet and the air fryer will now be in standby mode.
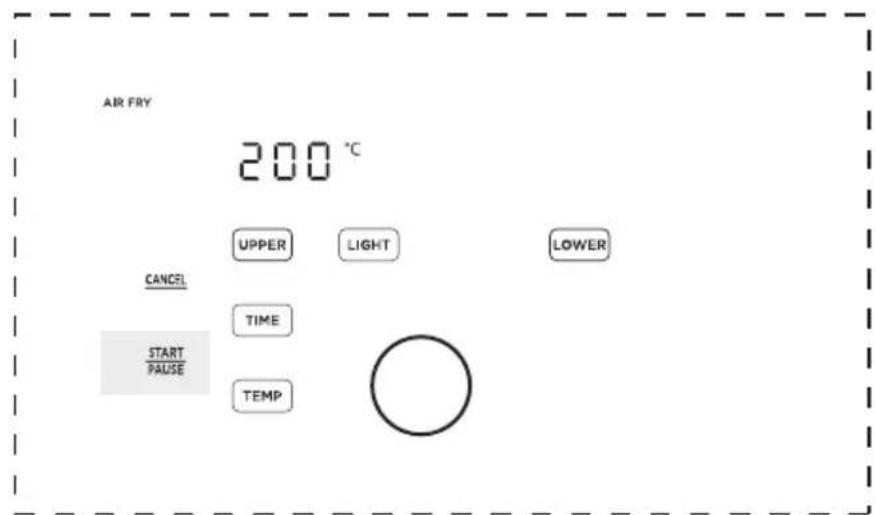
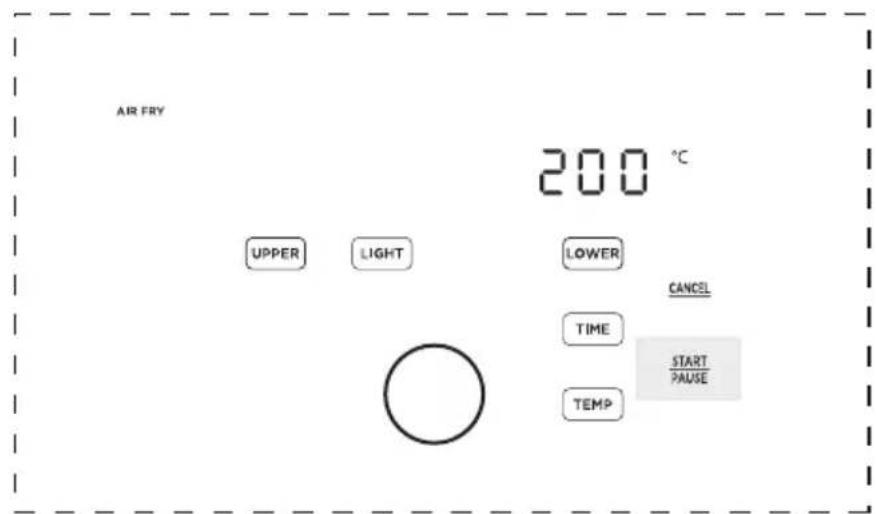
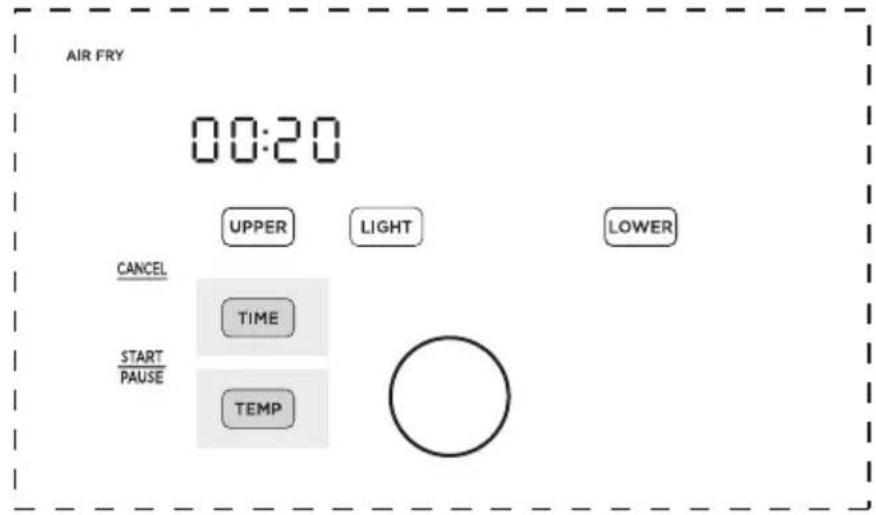
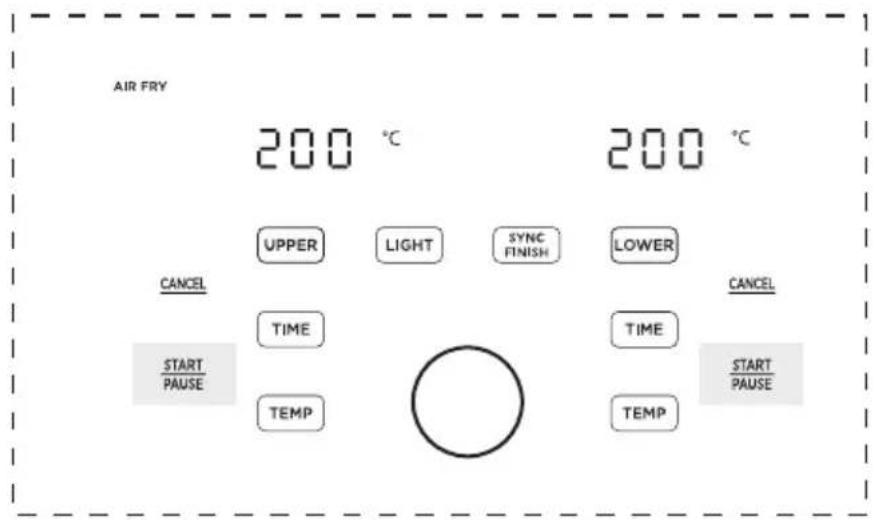
- Touch UPPER to start programming a cooking cycle for the upper cavity.


- Rotate the knob to change the function and press the knob to select a function.
- The preset cook time will now be flashing. Rotate and push the knob to adjust and select a cook time. If you want to further adjust the temperature or time, touch or TEMP and rotate/push the knob to adjust the temperature or time. Note: The function can still be changed by touching UPPER.
EN
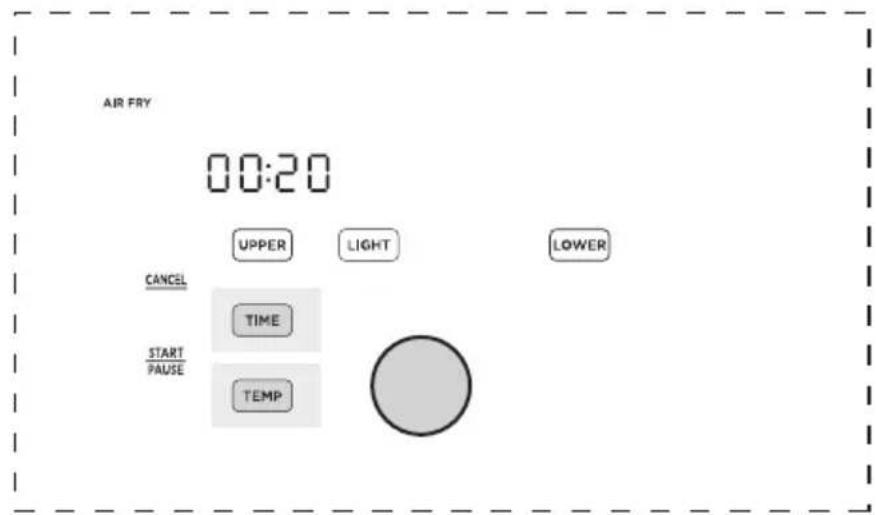
- Once the desired function, temperature, and time have been selected, touch the left START to start cooking.
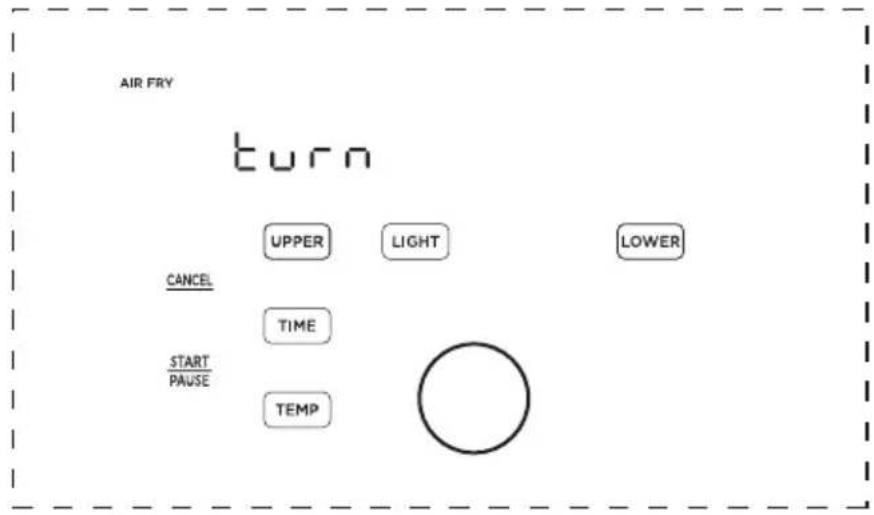
- Approximately half-way through cooking, the left display will show "Turn Food" If recommended by the recipe, turn, flip, or shake the food. After 30 seconds the "Turn Food" will go away.
flowchart
graph TD
    A["AIR FRY"] --> B["turn"]
    B --> C["UPPER"]
    B --> D["LIGHT"]
    B --> E["LOWER"]
    C --> F["CANCEL"]
    D --> G["TIME"]
    E --> H["START/PAUSE"]
    F --> I["TEMP"]
    G --> J[" "]
    H --> J
EN
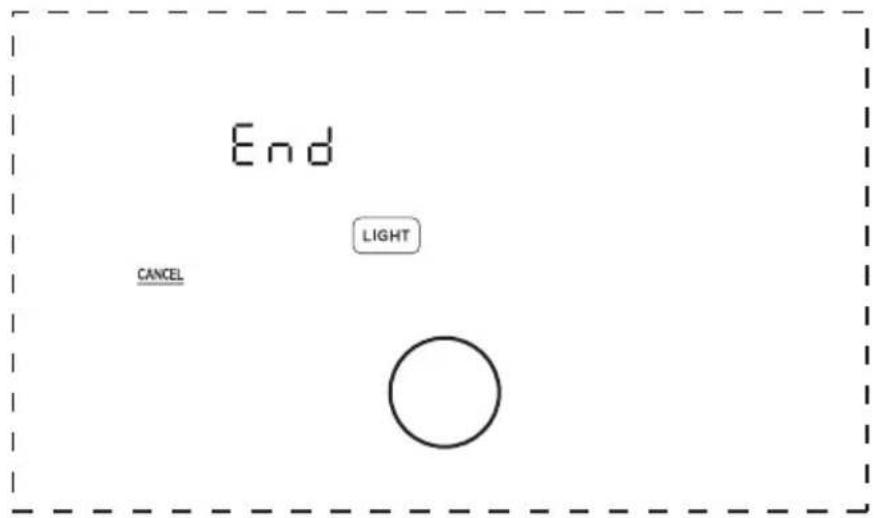
- When cooking is complete, the left display will show "End" and there will be 3 beeps. The food is now ready to be removed.
Lower Cavity Cooking (Oven)
- Insert the drip tray into the lower cavity.
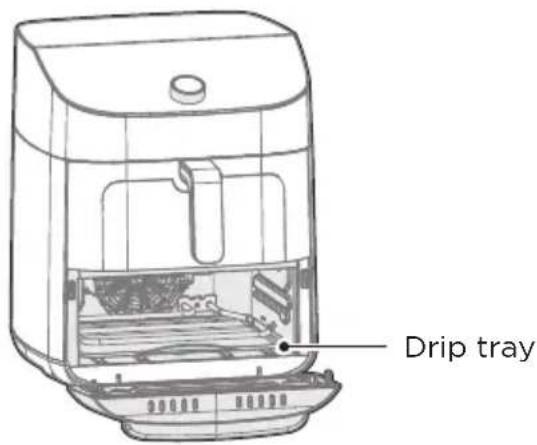
- Evenly place food on the lower tray.
- Insert the grill tray into the lower cavity.
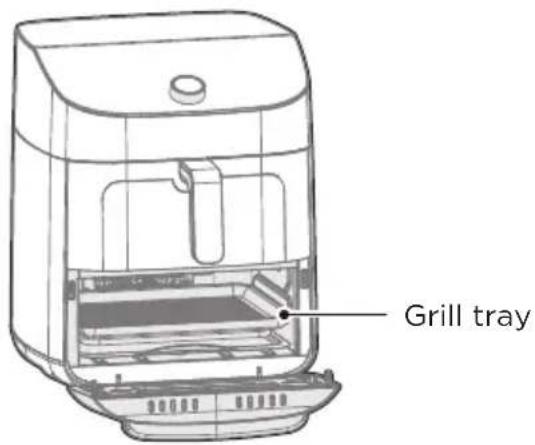
- Plug the air fryer oven into an appropriate power outlet and the air fryer will now be in standby mode.
- Touch LOWER to start programming a cooking cycle for the lower cavity.
UPPER
LOWER
- Rotate the knob to change the function and press the knob to select a function.
EN
- The preset cook time will now be flashing. Rotate and push the knob to adjust and select a cook time. If you want to further adjust the temperature or time, touch TIME or TEMP and rotate/push the knob to adjust the temperature or time. Note: The function can still be changed by touching LOWER .
- Once the desired function, temperature, and time have been selected, touch the right START to start cooking.
- Approximately half-way through cooking, the right display will show "Turn Food". If recommended by the recipe, turn, flip, or shake the food. After 30 seconds the "Turn Food" will go away.
EN
flowchart
graph TD
    A["AIR FRY"] --> B["UPPER"]
    A --> C["LIGHT"]
    B --> D[" "]
    C --> D
    D --> E["LOWER"]
    E --> F["CANCEL"]
    F --> G["TIME"]
    G --> H["START/PAUSE"]
    H --> I["TEMP"]
    I --> J["Turn"]
- When cooking is complete, the right display will show "End" and there will be 3 beeps. The food is now ready to be removed.
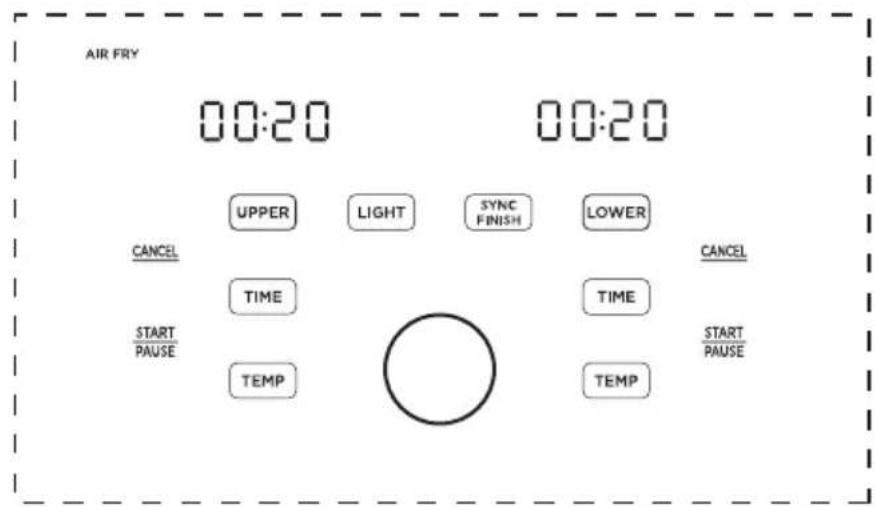
Two-Zone Cavity Cooking (Basket and Oven)
- Place the crisper plate into the basket (handle up) and evenly place food onto the crisper plate. Then, evenly place food on the lower tray.
- Insert the basket into the upper cavity and tray into the lower cavity.
- Plug the air fryer into an appropriate power outlet and the air fryer will now be in standby mode.
- Touch UPPER or LOWER to start programming a cooking cycle for the upper or lower cavity.
- Rotate the knob to change the function and press the knob to select a function.
- The preset cook time will now be flashing. Rotate and push the knob to adjust and select a cook time. If you want to further adjust the temperature or time, touch or TEMP and rotate/push the knob to adjust the temperature or time. Note: The function can still be changed by touching UPPER or LOWER .
EN
- Repeat steps 4-6 for the cavity (Upper or Lower) that has not been programmed.
- With SYNC FINISH: After programming both cavities, touch SYNC FINISH to activate the sync finish function. If the sync finish function is activated, "SYNC FINISH" will appear and touching either START PAUSE will start both cavities. The cavity with less cook time will display "Hold" until both cavities have the same remaining cook time.
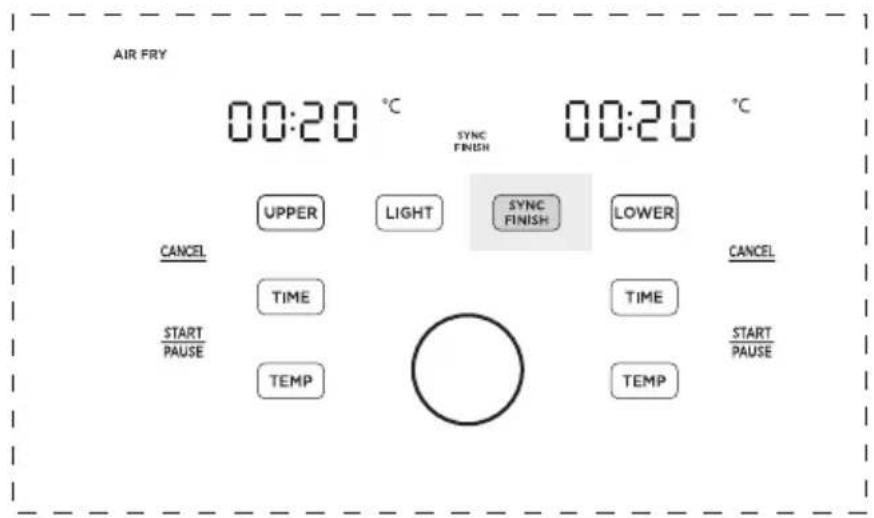
EN
- Without SYNC FINISH: After programming touch SYNC FINISH to activate or deactivate the sync finish function. If sync finish is deactivated, the START button must be touched independently to start cooking in each cavity.
- Approximately half-way through cooking, the displays will show "Turn Food". If recommended by the recipe, turn, flip, or shake the food. After 30 seconds the "Turn Food" will go away.
EN
flowchart
graph TD
    A["AIR FRY"] --> B["turn"]
    B --> C["UPPER"]
    B --> D["LIGHT"]
    B --> E["LOWER"]
    B --> F["CANCEL"]
    B --> G["TIME"]
    B --> H["TIME"]
    B --> I["START/PAUSE"]
    B --> J["TEMP"]
    B --> K["○"]
    K --> L["TIME"]
    K --> M["TEMP"]
    N["CANCEL"] --> O["START/PAUSE"]
- When cooking is complete, the displays will show "End" and there will be 3 beeps. The food is now ready to be removed.
Is something missing or damaged?
Contact the customer advisor and we will be happy to serve you.
WARNING
To avoid the risk of fire, property damage, and/or personal injury, do not place anything on top of the appliance, and do not block the air vents.
Cooking
• These cooking options give your meals all the rich and crispy flavor of deep frying with with little to no oil.
- The default time and temps are a starting point that you can experiment with to get the results you like best.
- The function listed for each food is a recommendation for optimal cooking. Any function can be used in both the upper basket and lower oven cavities.
| Ingredient | Recommended function | Frozen | Upper Basket Setting | Lower Oven Setting | ||||||
| Amount | Cooking Temp | Time (Single) | Time (Dual) | Amount | Cooking Temp | Time (Single) | Time (Dual) | |||
| French Fries | Air Fry | Yes | 1.1 lbs | 185°C | 16min | 24min | 0.6 lbs | 200°C | 21min | 27min |
| Chicken Wings | Air Fry | Yes | 1.3 lbs | 185°C | 17min | 21min | 0.9 lbs | 19min | 22min20 | |
| Air Fry | No | 1.3 lbs | 185°C | 14min | 18min | 0.9 lbs | 200°C | 17min | 20min | |
| Chicken Thighs | Air Fry | Yes | 2.4 lbs | 180°C | 36min | 42min | 1.4 lbs | 200°C | 39min | 43min |
| Air Fry | No | 2.4 lbs | 180°C | 19min | 23min | 1.4 lbs | 200°C | 20min | 24min | |
| Dehydrated Apples | Dehydrate | No | 1 piece | 90°C | 120min | 150min | 1 piece | 90°C | 120min | 150min |
| Beef Burgers | Grill | Yes | 1 piece | 175°C | 8min | 11min | 1 piece | 175°C | 8min | 11min |
| Bagel | Bagel | No | 2 Bagel Halves | 185°C | 3min | 5min | 2 Bagel Halves | 185°C | 4min | 6min |
| Asparagus | Roast | No | 0.88lbs | 180°C | 10min | 14min | 0.66lbs | 195°C | 12min | 14min |
| Chicken Breasts | Air Fry | Yes | 1.1 lbs | 37min | 39min | 180°C 1.1 lbs | 37min | 39min200°C | ||
| Air Fry | No | 1.1 lbs | 21min | 22min | 180°C 1.1 lbs | 21min 22min | ||||
| Toast | Toast | No | 4 slices | 180°C | 6min | 10min | 4 slices | 200°C | 6min | 8min |
| Breaded Chicken | Air Fry | Yes | 2 pieces | 185°C | 13min | 18min | 2 pieces | 15min | 20min2 | |
| Breaded Fish | Air Fry | Yes | 0.6 lbs | 185°C | 13min | 18min | 0.6 lbs | 200°C | 15min | 20min |
| Breaded Shrimp | Air Fry | Yes | 0.4 lbs | 185°C | 9min | 13min | 0.4 lbs | 200°C | 11min | 15min |
| French Toast Sticks | Toast | Yes | 0.3 lbs | 175°C | 5-9min | 6-10 min | 0.3 lbs | 195°C | 6-10 min | 6-10 min |
| Brussel Sprouts | Air Fry | No | 0.9 lbs | 9-12min190°C | 0.9 lbs | 16-24 min | 12-18 min | 16-22 min | ||
| Chocolate Chip Cookies | Bake | No | 0.2 lbs | 8-1360°C | 9-15 min | 0.2 lbs | 175°C | 9-15 min | 9-16 min | |
| Pepperoni Pizza | Bake | Yes | 9 inch | 10min | 167min | 0.9 min | 18min | |||
EN
Hints
• Always place food evenly on the crisper plate and grill tray for best cooking results.
• Overlapping food may result in uneven cooking performance.
- To increase crispiness, small amounts of oil can be sprayed or brushed onto the food before cooking.
- If the air fryer has been paused for more than 10 minutes, it will return to standby mode and clear all the existing settings.
- For most foods, turning, shaking, or flipping half-way through cooking will achieve the best cooking results.
- Time and Temp can be adjusted at any time during cooking process.
EN

CAUTION
- To avoid the risk of fire, property damage and personal injury, DO NOT spray cooking oil into the cooking cavity.
- Do not place any objects on top of air fryer at any time.
RED Declaration of Conformity (DoC)
Unique identification of this DoC:
We,
Manufacturer's name: Guangdong Midea Consumer Electric Manufacturing Co., Ltd.
Manufacturer's Address: 19 Sanle Road, Beijiao, Shunde, 528311 Foshan, Guangdong, PEOPLE'S REPUBLIC OF CHINA
Declare under our sole responsibility that the product:
Product name: Kitchen machines (Air fryer)
Trade name: Midea
Type or model: MF-CY110A2
Relevant supplementary information:
(e.g. lot, batch or serial number, sources and numbers of items)
To which this declaration relates is in conformity with the essential requirements and other relevant requirements of the RED Directive (2014/53/EU).
The product is in conformity with the following standards and/or other normative documents:
HEALTH & SAFETY (Art. 3(1)(a)): EN 60335-1:2012/A15:2021, EN
60335-2-9:2003/A13:2010, EN 62233:2008, EN 62311:2008, EN IEC 62311:2020
EMC (Art. 3(1)(b)): EN IEC 55014-1:2021, EN IEC 55014-2:2021, EN 301 489-1
V2.2.3:2019, EN 301 489-17 V3.2.4:2020
SPECTRUM (Art. 3(2)): EN 300 328 V2.2.2:2019
OTHER (incl. Art. 3(3) and voluntary specs):
Other Union harmonization legislation (where applicable): N/A
Accessories: N/A
Software: N/A
Technical file held by: Guangdong Midea Consumer Electric Manufacturing Co., Ltd. Place and date of issue (of this DoC): 19 Sanle Road, Beijiao, Shunde, 528311 Foshan, Guangdong, PEOPLE'S REPUBLIC OF CHINA
2023-11-30
Signed by or for the manufacturer: Guangdong Midea Consumer Electric Manufacturing Co., Ltd.
APP SETUP AND OPERATION
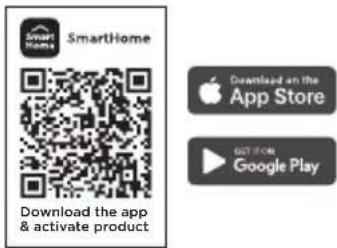
Download the SmartHome app
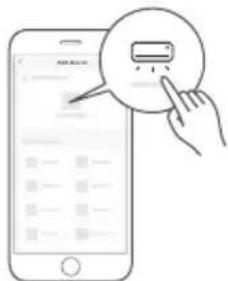
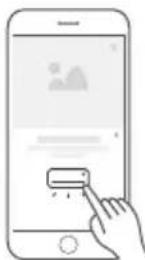
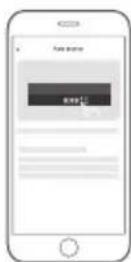
On an app market (Google Play Store, Apple App Store), search for SmartHome* and find the SmartHome app. Download and install it on your phone. You can also download the app by scanning the QR code below.
Connect your devices to SmartHome
① Please make sure your mobile phone is connected to a wireless network. If it is not, go to Settings and enable wireless networks and Bluetooth.
2 Please power on your devices.
3 Open SmartHome app on your phone.
5 If no message appears, select "+" on the page and select your device in the list of nearby devices available. If your device is not listed, please add your device manually by the device category and device model.
Register and log in
Open the SmartHome app, and create a new account to start (you can also register through a third-party account). If you already have an existing account, use the account to log in.

4 If a message of "Smart devices discovered nearby" appears, click to add.
6 Connect your device to the wireless network according to instructions on app. If the connection fails, please follow the instructions provided by the app to continue with the operation.
NOTE
- Make sure your devices are powered on.
- Keep your mobile phone close enough to your device when you are connecting your device to the network.
- Connect your mobile phone to the wireless network at home, and make sure you know the password of the wireless network.
- Check if your wireless router supports 2.4 GHz band and turn it on. If you are not sure whether the router supports 2.4 GHz band, please contact the router manufacturer.
- The device cannot connect to the wireless network that requires authentication, and it usually appears in public areas such as hotels, restaurants, etc. Please connect to a wireless network that does not require authentication.
- Turn off the WLAN+ (Android) or WLAN Assistant (iOS) function of your mobile phone when connecting your device to the network.
- In the case that your device connected to a wireless network before but it needs to reconnect, please click “+” on the app Home page, and add your device again by the device category and model according to the instructions on app.
CLEANING AND MAINTENANCE
- Clean the basket, crisper plate and grill tray after each use.
• Always unplug the air fryer and let it cool to room temperature before cleaning. Never use harsh chemical detergents, scouring pads, or powders on any of the parts or components. - Let all surfaces dry thoroughly before use, and before storage.
| Cleaning methodPart or accessory | |
| Upper basket | Clean the air fryer basket with a sponge or cloth and warm water and dish soap. then rinse well. Ensure that all grease and food debris are removed.DO NOT immerse the basket in water or any other liquid.DO NOT clean in the dishwasher. |
| Grill tray | Clean the grill tray with a cloth or sponge and warm water with dish soap.The grill tray has non-stick coating. To avoid damage to the non-stick coating, DO NOT use metal cleaning utensils.DO NOT clean in the dishwasher. |
| Crisper plate | Clean the crisper plate with a cloth or sponge and warm water with dish soap.The crisper plate has non-stick coating. To avoid damage to the non-stick coating, DO NOT use metal cleaning utensils.DO NOT clean in the dishwasher. |
| Drip tray | Clean the drip tray with a cloth or sponge and warm water with dish soap.The drip tray has non-stick coating. To avoid damage to the non-stick coating, DO NOT use metal cleaning utensils.DO NOT clean in the dishwasher. |
| Upper basket cavity/Lower oven cavity | Clean the cooking cavity with a sponge or soft cloth and warm water and dish soap.To remove baked-on grease and food residue from cooking cavity, spray with a mixture of baking soda and vinegar and wipe clean with a damp cloth.For stubborn residue, allow the mixture to sit on the affected area for several minutes before scrubbing clean.Check the heating element for oil spatter and food debris.Clean the heating element with a damp cloth as needed.Ensure the heating element is completely dry before next use.DO NOT clean in the dishwasher. |
| Exterior | Clean with a soft and damp cloth or sponge and wipe dry. |
| Upper basket window/Lower oven window | Clean the internal and external side of the windows with a cloth or sponge and warm water with dish soap. DO NOT use metal cleaning utensils. |
Any other servicing must be performed by an authorized representative.
WARNING
- Without proper cleaning, food and grease splatter may build up around the heating element. This can cause smoke, fire, and personal injury.
- If you see or smell smoke, touch Cancel, unplug the appliance, and allow it to cool. Remove food residue or grease with a soft cloth and dishsoap.
EN
TROUBLESHOOTING
Operation of your appliance can lead to errors and malfunctions. The following tables contain possible causes and notes for resolving an error message or malfunction. It is recommended to read the table below carefully in order to save your time and money that may cost for calling to the service center.
| Possible Reasons SolutionsProblem | ||
| No power | Improper power cord and outlet connection | Check that the power cord is firmly plugged into outlet. If this cannot solve the problem, please contact the Customer Service Center. |
| Display shows E1 or E2 | The unit is not operating properly | Contact the Customer Service Center. |
| Cannot activate Sync Finish | Both the upper basket and lower oven have not been programmed | To activate Sync Finish a function must be selected for both cavities. Then, the SYNC FINISH button will appear. If Sync Finish is activated the Sync Finish indicator SYNC FINISH will be lit up. See OPERATION INSTRUCTIONS. |
| Cannot select function | Not using knob | After touching UPPER or LOWER the knob can be rotated to change the function and pushed to select a function. The actual functions cannot be touched for selection. See OPERATION INSTRUCTIONS. |
| Cannot pause single cavity | Sync Finish is activated | While Sync Finish is activated, either START button will start, pause, and resume both cavities to ensure that both cavities finish at the same time. If you wish to control each cavity independently, do not use Sync Finish. |
| Food undercooked | The upper basket and lower oven are operating at the same time | Overall, the Two-Zone Air Fryer Oven is faster than cooking two consecutive batches in the same air fryer. However, if the upper basket and lower oven are operating simultaneously, cook times will need to be increased. See COOKING. |
EN
| Possible Reasons SolutionsProblem | ||
| Food undercooked | · Food not placed in an even layer | · For best cooking performance, place food in an even layer with no overlapping. See COOKING. |
| Food not crispy | · Crisper plate not used in upper basket | · For the best air frying performance, always use the crisper plate in the upper basket. The crisper plate allows air to flow underneath food and produces the best cooking results. |
| · Food improperly prepped | · For optimal crispiness, spray or brush small amounts of oil onto food before air frying. See COOKING. | |
| Lower oven improperly cooking | · Grill tray placed in wrong slot | · The grill tray can be placed into an upper or lower slot within the lower oven cavity. Ensure that the grill tray is placed in the proper slot before cooking. See COOKING. |
| · Incorrect cook time or temperature | · The lower oven is a unique design. Traditional cook times and temperatures may need to be adjusted for the lower oven. See COOKING. | |
| Difficult to see through windows | · Improper window cleaning | · Clean the interior and exterior of windows after each use. See CLEANING AND MAINTENANCE. |
| · Light not activated | · Before looking through a window, be sure to activate the lights by touching LIGHT . | |
| Difficult to remove or insert upper basket | · Too much food within basket | · Do not pile food too high or the food will contact the top of the upper cavity. This can result in difficulty inserting and removing the upper basket and may cause food to burn. |
| · Debris on basket exterior or within upper cavity | · Remove all debris from the basket exterior and within the upper cavity. See CLEANING AND MAINTENANCE. | |
TRADEMARKS, COPYRIGHTS AND LEGAL STATEMENT
Midea logo, word marks, trade name, trade dress and all versions there of are valuable assets of Midea Group and/or its affiliates (“Midea”), to which Midea owns trademarks, copyrights and other intellectual property rights, and all goodwill derived from using any part of an Midea trademark. Use of Midea trademark for commercial purposes without the prior written consent of Midea may constitute trademark infringement or unfair competition in violation of relevant laws.
This manual is created by Midea and Midea reserves all copyrights thereof. No entity or individual may use, duplicate, modify, distribute in whole or in part this manual, or bundle or sell with other products without the prior written consent of Midea.
All the described functions and instructions were up to date at the time of printing this manual. However, the actual product may vary due to improved functions and designs.
DISPOSAL AND RECYCLING
Important Instructions for Environment
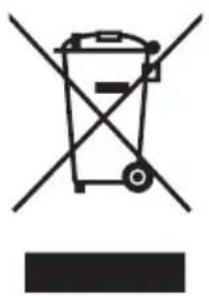
Compliance with the WEEE Directive and Disposing of the Waster Product: This product complies with EU WEEE Directive (2012/19/EU). This product bears a classification symbol for waster electrical and electronic equipment (WEEE).
This symbol indicates that this product shall not be disposed with other household wastes at the end of its service life. Used device must be returned to official collection point for recycling of electrical electronic devices. To find these collection systems please contact to your local authorities or retailer where the product was purchased. Each household performs important role in recovering and recycling of old appliance. Appropriate disposal of used appliance helps prevent potential negative consequences for the environment and human health.
Compliance with RoHS Directive
The product you have purchased complies with EU RoHS Directive (2011/65/EU). It does not contain harmful and prohibited materials specified in the Directive.
Package Information
Packaging materials of the product are manufactured from recyclable materials in accordance with our National Environment Regulations. Do not dispose of the packaging materials together with the domestic or other wastes. Take them to the packaging material collection points designated by the local authorities.
natural_image
Recycling symbol with three chasing arrows forming a triangle (no text or labels)DATA PROTECTION NOTICE
For the provision of the services agreed with the customer,
we agree to comply without restriction with all stipulations of applicable data protection law, in line with agreed countries within which services to the customer will be delivered, as well as, where applicable, the EU General Data Protection Regulation (GDPR).
Generally, our data processing is to fulfil our obligation under contract with you and for product safety reasons, to safeguard your rights in connection with warranty and product registration questions. In some cases, but only if appropriate data protection is ensured, personal data might be transferred to recipients located outside of the European Economic Area.
Further information are provided on request. You can contact our Data Protection Officer via MideaDPO@midea.com. To exercise your rights such as right to object your personal date being processed for direct marketing purposes, please contact us via MideaDPO@midea.com. To find further information, please follow the QR Code.
natural_image
Technical line drawing of a vehicle rear panel with ventilation slots and mounting feet (no text or symbols)PANORAMICA DEL PRODOTTO
Parti e accessori
natural_image
Technical line drawing of a mechanical housing with top and side views (no text or symbols)IT
natural_image
Line drawing of an air fryer with open lid and internal compartments (no text or symbols)Teglia da griglia
V2.2.3:2019, EN 301 489-17 V3.2.4:2020
SPECTRUM (Art. 3(2)): EN 300 328 V2.2.2:2019
ALTRI (incl. Art. 3(3) e specifiche volontarie):

natural_image
Symbol of a waste bin with no text or labels, crossed by two diagonal lines and a solid black rectangle below (no text or symbols present)natural_image
Recycling symbol with three chasing arrows forming a triangle (no text or labels)natural_image
Technical line drawing of a vehicle chassis back panel with ventilation slots and mounting feet (no text or symbols)PRODUKTÜBERSICHT
Teile und Zubehör
natural_image
Technical line drawing of a mechanical housing or enclosure with top and side views (no text or symbols)Adresse Hersteller: 19 Sanle Road, Beijiao, Shunde, 528311 Foshan, Guangdong, VOLKSREPUBLIK CHINA
V2.2.3:2019, EN 301 489-17 V3.2.4:2020
SPEKTRUM (Art. 3(2)): EN 300 328 V2.2.2:2019
natural_image
Symbol of a trash bin crossed with no visible text or labelsnatural_image
Recycling symbol with three chasing arrows forming a triangle (no text or labels)DATENSCHUTZHINWEISE
VUE D'ENSEMBLE DU PRODUIT 06
INSTRUCTIONS SUR LE FONCTIONNEMENT 07
CONFIGURATION ET FONCTIONNEMENT DE L'APPLICATION 22
NETTOYAGE ET ENTRETIEN 24
DÉPANNAGE 26
MARQUES, DROITS D'AUTEUR ET MENTIONS LEGALES 28
ELIMINATION ET RECYCLAGE 29
AVIS SUR LA PROTECTION DES DONNEES 30
CONSIGNES DE SECURITE
Usage prévu
natural_image
Technical line drawing of a vehicle chassis back panel with no visible text or symbolsVUE D'ENSEMBLE DU PRODUIT
natural_image
Technical line drawing of a mechanical housing or enclosure with a top panel and internal compartments (no text or symbols)natural_image
Line drawing of an air fryer with open lid and internal compartments (no text or symbols)Plateau d'égouttage
FR
natural_image
Line drawing of an air fryer with open lid and internal compartments (no text or symbols)Plateau du gril
V2.2.3:2019, EN 301 489-17 V3.2.4:2020
SPECTACLE (article 3, paragraphe 2) : EN 300 328 V2.2.2:2019

natural_image
Symbol of a trash bin crossed out by two crossed lines, with no text or labels present.natural_image
Recycling symbol with three chasing arrows forming a triangle (no text or labels)AVIS SUR LA PROTECTION DES DONNEES
natural_image
Technical line drawing of a vehicle rear panel with ventilation grilles and mounting feet (no text or symbols)natural_image
Technical line drawing of a two-part mechanical housing with lid and internal compartments (no text or symbols)V2.2.3:2019, EN 301 489-17 V3.2.4:2020
ESPETRO (Art. V2.2.3:2019, EN 301 489-17 V3.2.4:2020

natural_image
Symbol of a trash bin crossed with no text or numbers, representing environmental restriction (no text present)natural_image
Recycling symbol with three chasing arrows forming a triangle (no text or labels)INSTALACJA I OBSŁUGA APLIKACJI 26
CZYSZCZENIE I KONSERWACJA 28
ROZWIAZYWANIE PROBLEMÓW 30
ZNAKI TOWAROWE, PRAWA AUTORSKIE I OŚWIADCZENIE PRAWNE 32
UTYLIZACJA I RECYKLING 33
INFORMACJA O OCHRONIE DANYCH OSOBOWYCH 34
INSTRUKCJE BEZPIECZEŃSTWA
Przeznaczenie
natural_image
Technical line drawing of a vehicle front panel with no visible text or symbolsPRZEGLĄD PRODUKTU
Części i akcesoria
natural_image
Technical line drawing of a rectangular container with lid and side compartments (no text or symbols)Adres producenta: 19 Sanle Road, Beijiao, Shunde, 528311 Foshan, Guangdong, CHIŃSKA REPUBLIKA LUDOWA
INSTALACJA I OBSŁUGA APLIKACJI

UTYLIZACJA I RECYKLING
natural_image
Symbol of a trash bin crossed out by two crossed lines, with no text or labels present.PL
natural_image
Recycling symbol with four arrows forming a triangle (no text or labels)INFORMACJA O OCHRONIE DANYCH OSOBOWYCH
LIKVIDACE A RECYKLACE 29
UPOZORNĚNÍ K OCHRANĚ DAT 30
DŮLEŽITÉ BEZPEČNOSTNÍ POKYNY
Zamýšlené Použití
natural_image
Technical line drawing of a vehicle rear panel with ventilation grilles and mounting feet (no text or symbols)PŘEHLED PRODUKTŮ
natural_image
Technical line drawing of a rectangular container with lid and side compartments (no text or symbols)V2.2.3:2019, EN 301 489-17 V3.2.4:2020
SPEKTRUM (čl. 3 odst. 2): EN 300 328 V2.2.2:2019
LIKVIDACE A RECYKLACE
natural_image
Symbol of a trash bin crossed with a diagonal line and a horizontal bar below (no text or labels)C
natural_image
Recycling symbol with four arrows forming a triangle (no text or labels)UPOZORNĚNÍ K OCHRANĚ DAT
natural_image
Technical line drawing of a vehicle chassis back panel with no visible text or symbolsPREHL'AD VÝROBKU
Časti a Príslušenstvo
natural_image
Technical line drawing of a rectangular container with lid and side compartments (no text or symbols)V2.2.3:2019, EN 301 489-17 V3.2.4:2020
SPEKTRUM (Článku 3 ods. 2): EN 300 328 V2.2.2:2019
natural_image
Symbol of a trash bin crossed with no visible text or labelsSúlad so Smernicou RoHS
SK
natural_image
Recycling symbol icon with three chasing arrows forming a triangle (no text or labels)UPOZORNENIE O OCHRANE OSOBNÝCH ÚDAJOV
Welcome to MIDEA Service
Dear Customer,
Thank you for purchasing Midea products. Please attach your purchase certificate (invoice or sales slip) to this warranty and keep it properly. If service is required during the warranty period, proof of purchase must be provided. If can't provide, in/out of warranty will be defined by Manufacturer.
Midea product warranty applies to inherent defects in materials and workmanship from the date of initial purchase. For warranty period, please visit www.midea-group.com or your local call center. Warranty service must be obtained from Midea Consumer Services or an authorized Midea servicer.
Warranty terms and conditions
NORMAL RESPONSIBILITIES OF THE CONSUMER
This warranty applies only to products in ordinary household use, and the consumer is responsible for the items listed below:
- Proper use of the appliance in accordance with instructions provided with the product.
- Routine maintenance and cleaning necessary to keep in good working condition.
- Proper installation by an authorized service professional in accordance with instructions provided with the appliance and in accordance with all local plumbing, electrical and / or gas codes.
- Proper connection to a grounded power supply of sufficient voltage, replacement of blown fuses, repair of loosened connections or defects in house wiring.
- Expenses for making the appliance accessible for servicing.
- Damages to finish after installation.
EXCLUSIONS
- Damage due to mishandling or fire and becomes invalid if repair has been attempted by unauthorized persons.
- Any failure to follow the instructions as mentioned in the user manual.
- Fluctuation in voltage or any modifications/adjustments made to comply with local electrical, safety and technical standards.
- Damages caused by fire, accident or any natural disaster, damage due to mishandling, wear & tear, voltage fluctuations.

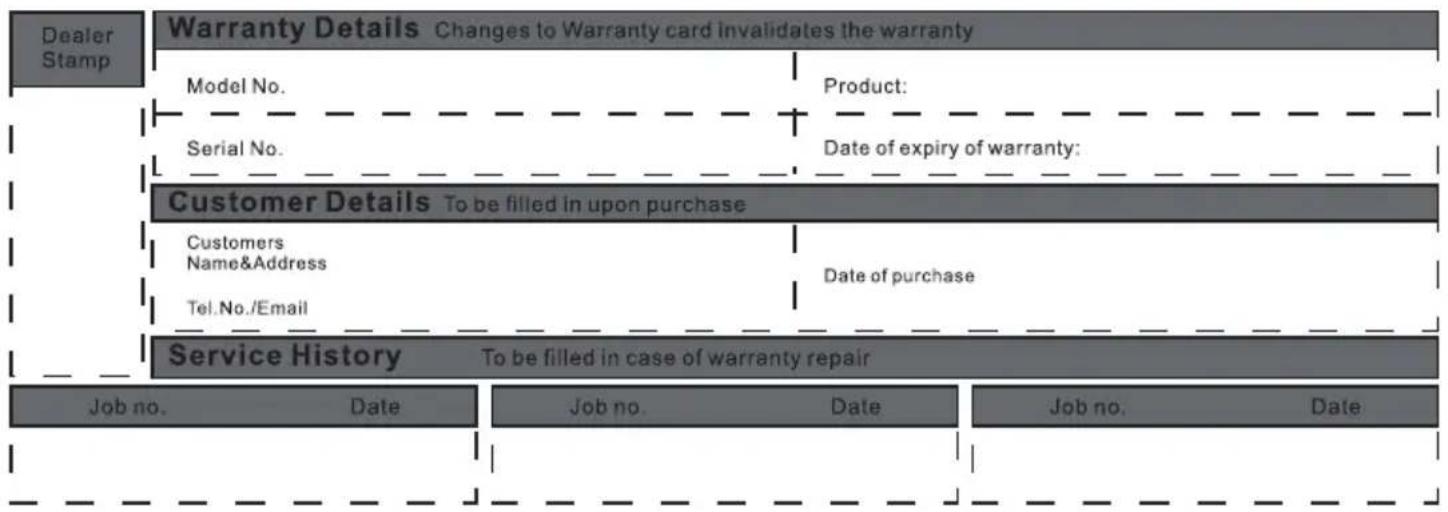
flowchart
graph TD
    A["Dealer Stamp"] --> B["Warranty Details Changes to Warranty card invalidates the warranty"]
    B --> C["Model No."]
    C --> D["Serial No."]
    D --> E["Customer Details To be filled in upon purchase"]
    E --> F["Customers Name&Address"]
    F --> G["Tel.No./Email"]
    G --> H["Service History To be filled in case of warranty repair"]

    subgraph Customer Details
        I["Product:"]
        J["Date of expiry of warranty:"]
    end

    subgraph Service History
        K["Job no. Date"] --> L["Job no. Date"] --> M["Job no. Date"]
    end
SERVICE CONTACTS
| Albania | 355 |
| Bosnia and Herzegovina | +387 (033) 407 93 |
| +387 (033) 407 937 | |
| Croatia | +385 1 619 5582 |
| Cyprus | +357 24 813890 |
aikavols / cilbup42015 059
| Germany | 49 (0) 6196 9020 0 |
| Greece | 80111 22 622 |
| 210483347 | |
| Hungary | +36 23 769 245 |
| Italy | 199240626 |
| Kosovo | 38349779349 |
| 38349779100 |
Malta +356 21237601
| Moldova | +373 (022) 54-54-74 |
| North Macedonia | 389230848 |
| Portugal | 35 1225025742 |
| Roumania | 0742726843(07GARANTEI)/*414 |
Slovakia 421 2 5710 1800
| Slovenia | +385 1 619 5582 |
| Spain | 34 934803322 |
| Srbija | +381 11 3188 033 |
Latvia/Estonia +37037329000 Lithuania +37037329000
| Poland | +48 800088680 |
| Hungary | +36 1 888 3250 |
| +36 96 512 527 | |
| +36 96 512 512 | |
| Romania | 021 9196 |
| 021 528 9196 | |
| Czech | +420 538 880 274 |
Importer
Albania
CED Electric Distributors Ltd
P.O.Box 45071
7100 Aradippou-Larnaca Cyprus
+357 24 813890
Germany
Midea Europe GmbH
FG EUROPE SA Vouliagmenis 128
Ave, Glyfada,
P.O. 16674 - Athens, Greece
Italy
Midea Italia S.R.L.
Via Luigi Bodio 29/37 - Milano (MI)
20158 Italy
Kosovo
Elkos Shpk, address : Road Zona
Industriale P.N, 30 000 Peje, Kosove.
Malta
Kencar Co. Ltd.
168, Industrial Estate,
Luqa LQA 3000, Malta.
North Macedonia
Setec Se Od Tehnika Doo
Street 1523 no.1
Municipality of Kisela Voda 1000 Skopje
Republic of North Macedonia
Tel. 0038923080877
Portugal
MIDEA HOME APPLIANCES UK LTD
Conavon Court Ground Floor, 12 Blackfriars
Street, Salford, Manchester M3 5BQ UK
0333 900 1101
service_uk@midea.com
Czech
Importer: Beryko s.r.o., Pod V inicemi
931/2 Plzeň, 30100
Latvia/Estonia
Importer: ACC Distribution, UAB
Raudondvario pl. 131 B, LT-47191
Kaunas, Lithuania
Service Data: Raudondvario pl.131B-4,
Kaunas, LT-47191, Tel: +37037329000
E-mail: info@servisaict.lt
https://servisaict.eu/en/
Lithuania
Importer: ACC Distribution, UAB
Raudondvario pl. 131 B, LT-47191 Kaunas,
Lithuania
Service Data: Vilnius Geležinio
Vilko str. 6, LT-03150 Kaunas
https://servisaict.eu/en/
Poland
Importer: Hama Polska Sp. z o.o. I
https://www.midea.com/pl
Hungary
Importer: Blizzard Hungary kft. 1162
Global City Business Park
Sos. Bucuresti Nord nr. 10
Corp O1, etaj 10
Voluntari, 077190 Ilfov
Service Data: Bucuresti-Nord road,
No. 10, Corps O1, Voluntari, Ilfov
County, Romania, Tel: 021 9196, 021
528 9196, infoclienti@altexservice.ro
Roumanla
ASBIS Romania SRL
J40/5587/1998 | RO10656216
Splaiul Independentei 319, Sector 6,
Bucuresti
Phone : +40 21 337 1097
Fax : +40 21 337 1091
DATENSCHUTZHINWEISE
make yourself at home

www.midea.com
© Midea 2022 all rights reserved
| MIDEA | Midea Europe GmbH Ludwig-Erhard-Str.14, 65760 Eschborn. Germany | kundenservice@midea.com |
| MIDEA ITALIA S.R.L. Via Luigi Bodio 29/37 -Milano (MI) 20158 Italy | assistenza@midea.com | |
| Midea Electrics France 253 RUE SAINT-HONORE 75001 PARIS | service_france@midea.com | |
| MIDEA HOME APPLIANCES UK LTD Conavon Court Ground Floor, 12 Blackfriars Street, Salford,Manchester M3 5BQ UK | service_uk@midea.com |
Guangdong Midea Consumer Electric Manufacturing Co., Ltd. 19 Sanle Road, Beijiao, Shunde, Foshan, Guangdong, China


- TWO-ZONE AIR FRYER OVEN
- USER MANUAL
- MAD1100DADK
- LANGUAGES
- THANK YOU LETTER
- CONTENTS
- IMPORTANT SAFEGUARDS
- Intended Use
- Explanation of Symbols
- Danger
- Warning of electrical voltage
- Warning
- Caution
- Attention
- Observe instructions
- Safety Instructions
- SPECIFICATIONS
- How To Find The Model Name And Serial Number
- PRODUCT OVERVIEW
- Parts and Accessories
- NOTE
- OPERATING INSTRUCTIONS
- Control Panel
- Display Messages
- Upper Cavity Cooking (Basket)
- Lower Cavity Cooking (Oven)
- Two-Zone Cavity Cooking (Basket and Oven)
- EN
- Cooking
- Hints
- RED Declaration of Conformity (DoC)
- APP SETUP AND OPERATION
- Download the SmartHome app
- Connect your devices to SmartHome
- Register and log in
- CLEANING AND MAINTENANCE
- TROUBLESHOOTING
- TRADEMARKS, COPYRIGHTS AND LEGAL STATEMENT
- DISPOSAL AND RECYCLING
- Important Instructions for Environment
- Compliance with RoHS Directive
- Package Information
- DATA PROTECTION NOTICE
- PANORAMICA DEL PRODOTTO
- Parti e accessori
- PRODUKTÜBERSICHT
- Teile und Zubehör
- DATENSCHUTZHINWEISE
- CONSIGNES DE SECURITE
- Usage prévu
- VUE D'ENSEMBLE DU PRODUIT
- FR
- AVIS SUR LA PROTECTION DES DONNEES
- INSTRUKCJE BEZPIECZEŃSTWA
- Przeznaczenie
- PRZEGLĄD PRODUKTU
- Części i akcesoria
- INSTALACJA I OBSŁUGA APLIKACJI
- UTYLIZACJA I RECYKLING
- INFORMACJA O OCHRONIE DANYCH OSOBOWYCH
- DŮLEŽITÉ BEZPEČNOSTNÍ POKYNY
- Zamýšlené Použití
- PŘEHLED PRODUKTŮ
- LIKVIDACE A RECYKLACE
- UPOZORNĚNÍ K OCHRANĚ DAT
- PREHL'AD VÝROBKU
- Časti a Príslušenstvo
- Súlad so Smernicou RoHS
- UPOZORNENIE O OCHRANE OSOBNÝCH ÚDAJOV
- Welcome to MIDEA Service
- Dear Customer,
- Warranty terms and conditions
- NORMAL RESPONSIBILITIES OF THE CONSUMER
- EXCLUSIONS
- SERVICE CONTACTS
- Importer
- Albania
- Germany
- Italy
- Kosovo
- Malta
- North Macedonia
- Portugal
- Czech
- Latvia/Estonia
- Lithuania
- Poland
- Hungary
- Roumanla
Brand : MIDEA
Model : MAD1100DADK
Category : Deep fryer