SS-16080 - Vacuum Cleaner Sogo - Free user manual and instructions
Find the device manual for free SS-16080 Sogo in PDF.


User questions about SS-16080 Sogo
0 question about this device. Answer the ones you know or ask your own.
Ask a new question about this device
Download the instructions for your Vacuum Cleaner in PDF format for free! Find your manual SS-16080 - Sogo and take your electronic device back in hand. On this page are published all the documents necessary for the use of your device. SS-16080 by Sogo.
USER MANUAL SS-16080 Sogo
natural_image
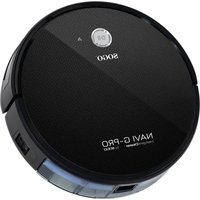
Black circular robotic vacuum cleaner with 'SOGO' branding and 'NAVI G-PRO' model label (no additional text or symbols visible)
ROBOT ASPIRADOR INTELIGENTE ROBOT VACUUM CLEANER ROBOT ASPIRATEUR INTELLIGENT ROBÔ DE LIMPEZA DE VÁCUO INTELIGENTE ROBOTER VAKUUMREINIGER ROBOT ASPIRAPOLVERE INTELIGENTE
Caution: please read and preserve these important instructions
INDEX
- Always read the instruction book carefully before use.
- This manual can be downloaded from our website, www.sogo.com
- Keep these instructions for future reference.
SAFETY INSTRUCTIONS FOR USER
- The Appliances is not to be used by persons (including children) with reduced physical, sensory or mental capabilities, or lack of experience and knowledge, unless they have been given supervisión or instruction.
- Children being supervised not to play with the appliance.
- This appliance can be used by children aged from 8 years and above and persons with reduced physical, sensory or mental capabilities or lack of experience and knowledge if they have been given supervision or instruction concerning use of the appliance in a safe way and understand the hazards involved.
• Children should not play with the appliance. - Cleaning and user maintenance should not be made by children without supervisión.
- This appliance should only be used for domestic cleaning, as described in this user guide.
- Make sure that the voltage indicated on the rating plate matches the main wall outlet voltage before plugging in the appliance.
- Only use recommended original spare parts.
- Never use accessories that are not recommended by the manufacturer.
-
The use of accessories not recommended or sold by the appliance manufacturer may result in fire, electric shock or injury to persons.
-
Do not disassemble, repair or manipulate the product without authorization or any prior knowledge, doing so it might damage the product or pose Hazard.
- Make sure the dust box and filtering cloth are installed properly before use.
- Don't spray with or pick up flammable liquids, cleaning fluids, aerosols or their vapours.
- Don't put your hair, clothes, fingers or other part of body close to the main brush or side brushes.
- Don't use this device in a baby room.
- Do not over-bend or press the flexible cord with heavy or sharp objects. Do not let the robot cleaner walk over the cord or tangle the cord when it is cleaning. Keep the cord away from heat sources.
- WARNING: Only authorized technicians can disassemble the producto, Users are not allowed to disassemble or repair the product, otherwise it may damage the product.
- WARNING: Do not use the product in an environment with risk of fire or explosión.
- WARNING: This product must be used with the original power adapter, otherwise the product can be damaged.
- WARNING: Do not sit or stand on this product; doing so could damage the product causing it to fall over.
- WARNING: If the metal part of the power plug is dusty, please wipe it with a dry cloth.
- WARNING: Do not wash or soak the main body and electronic accessories in water, otherwise the product might get damaged by short circuit.
- WARNING: Do not let the metal and conductive materials to come in contact with the battery; doing so might cause short circuit.
- Do not use a damaged charging dock.
- Do not use damaged cord or adapter. Do not
use the robot cleaner if it is broken or damaged. Search for after sales services to get it repaired to avoid getting hurt.
- Turn off the switch before you clean or maintain the device.
- Do not touch the product with wet hands; doing so might cause an electric shock.
- Do not place this product where it is easy to drop off (tables, chair, etc).
- This product has sophisticated design and must be protected from long term exposure to the sun-light.
- Don't use this product on moist ground (like bathroom) or with ponding area.
- Make sure this product is not used to vacuum cigarette ends, lighters, matches or any other flammables waste that may cause a fire.
- Clean the dust bin and vacuuming port before every single use, clear out dust, hair or cotton fibre at the suction port frequently. Don't let the block inlet of the dust box.
- Make sure to turn off the product when the product is out of service for a long time.
- Before charging, check the adaptor and outlet whether these are properly connected.
- Please check carefully to see if the power adaptor is connected to the socket prior to the use, to avoid the damage to the robot
- Before use, clear the objects of the floor(remove all the fragile objects and cords, clothing, papers, loose cables. Also make sure to lift curtains and drapes of the floor to avoid any possible accidents.) Make sure the carpet corner edges are down. Any hanging tablecloth or curtain should not touch the ground.
- Never use the product to clean the construction waste.
- Use this product in temperature from 0°C to 40°C
SAFETY INSTRUCTIONS FOR RECHARGEABLE BATTERY
- Always use the dedicated battery adaptor to avoid leakage heating or rupture.
- Do not transport or preserve with necklaces, hair pins and other metal objects, doing so may lead to short circuit, resulting in leakage, heating or rupture.
- End of life battery removal: If the appliance is to be disposed off, the batteries must be removed first. The appliance must be disconnected from the supply mains when removing the battery.
- Never charge the batteries if the ambient temperature is above 40 degrees centigrade or below 0 degree centigrade.
- Turn off the power switch during product transportation or when you do not need to use this product for a long time.
- It is normal for the charger to become warm when charging.
- If abnormal overheating is discovered during charging, stop using it immediately to avoid leakage, heating or rupture.
- To prolong the service life of battery, please remove the battery and store in cool, dry environment if it is out of service for a long time, this will avoid the leakage, heating or rupture.
- Do not soak it in the water or let it come into the contact with any liquid.
- Make sure to stop using it immediately in case of any exception(like discoloration or deformation)
- Always use tape to insulate the battery's electrode when recycling or disposing of it.
- Please strictly follow the instructions of this USER MANUAL while using the device. No responsibility being taken to any loss or damages caused by
improper use.
- WARNING: Leaks from battery cells can occur under extreme usage or temperature conditions. If the liquid gets on the skin, wash quickly with water. If the liquid gets into the eyes, flush them immediately with clean water for a minimum 10minutes. Seek medical attention immediately after that.
- Do not use the rechargeable batteries in any other devise. This battery is only suitable for Smart cleaning robots.
- If the battery's outer box found to be deformed and expanded, or leakage of electrolyte is found, do not charge and stop using to avoid danger.
- Do not throw or inflict a strong impact on to the battery; doing so might cause leakage, heating or rupture.
- Do not disassemble the battery pack: doing so may cause the battery rupture and electrolyte outflow, leading to fire, explosión and other dangers.
IMPORTANT:
text_image
NAVI G-PRO intelligentCleaner by SOGO tuya Smart Apptext_image
QR code with central orange logo containing a stylized 't' or bird symbolScan the QR code to download
text_image
tuya Log In Sign Up Try Now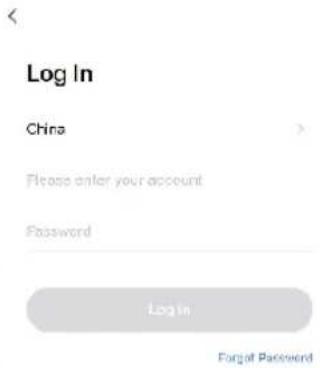
text_image
Log In China Please enter your account Password Login Forgot Passwordtext_image
Add Manually Auto Scan Non-cash Wear Aid TUV Surroundings Large Home differences Small Home differences Lunch differences Security Sensors Transit Air Flux Space lubbing Honey Carbon Maximaker lamp Air Flux HVACtext_image
Welcome Home Set your home location for more informa... All Devices XXXXXXX-robot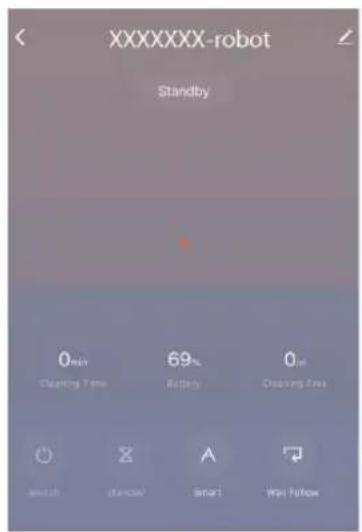
text_image
XXXXXXXX-robot Standby 0min Clamping Time 69% Battery 0at Clamping Time Switch Standard Smart Wall Followtext_image
kingxchip_robot Device Information Tap-to-Run and Automation Third-party Control Alexa Google Assistants Small Genie Device Offline Notification Offline Notification Others Share DeviceWIFI SET UP INSTRUCTIONS
- Scan QR code of Figure 1, then download and install "Tuya smart" app or Search for Tuya Smart on the App Store or Android App platforms. Then, download and install it.

text_image
QR code with central orange logo containing a stylized 't' or bird symbolScan the QR code to download
- Open the Tuya smart app. If you don't have an account, please register first, then click and log in.
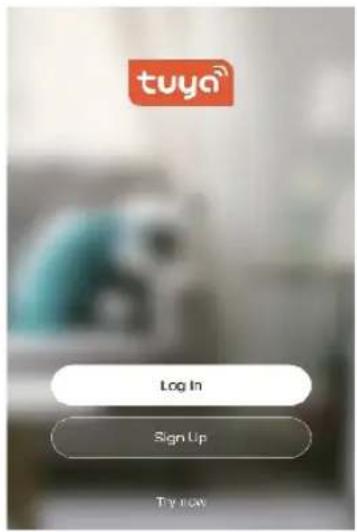
text_image
tuya Log In Sign Up Try Now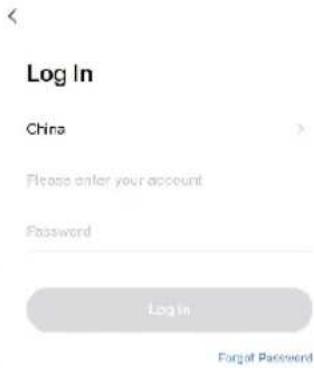
text_image
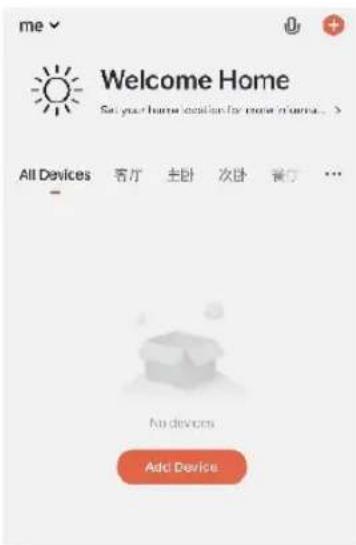
Log In China Please enter your account Password Login Forgot Password- After logging in, click the "+" sign in the upper right corner of the home page to add the device. Then on the device selection page you should choose the small appliances on the left side and the sweeping robots on the right. Follow the page prompts to connect.
text_image
me Welcome Home Set your home location for more n°urna. > All Devices 客厅 主卧 次卧 餐灯 ... No devices Add Device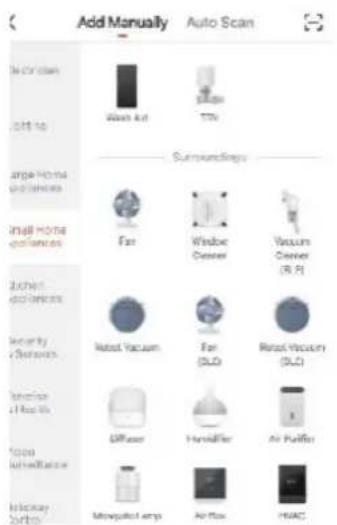
text_image
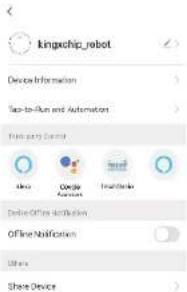
Add Manually Auto Scan Non-cash Wear Aid TUV Surroundings Large Home differences Small Home differences Lunch differences Security Sensors Transit Air Flux Small differences Highway Carbon Retest Vacuum Fan (50) Rust Vacuum (50) Diffuser Hybridifier Air Purifier Minugated lamp Air Flux HVAC- When the app displays the page shown in figure 6, you can use the app to control your sweeping robot. Click the device to enter the control interface of app. In this interface, you can select different cleaning modes, or view the cleaning process / status. Click the icon on the top right to see more options.

text_image
Welcome Home Get your home location for more information... AI Devices XXXXXXX robot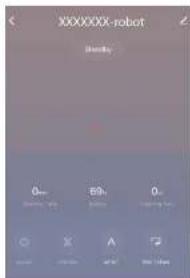
text_image
XXXXXXXX-robot Balance 0- 5th 0- Closing time A B- This interface can be connected to the smart audio system to realize the one key execution of multiple control functions.
text_image
Kingchip_rebot Device Information Top-to-Run and Automation File parts Control Status Cancel Forward Define Office Administration Offline Notification Options Share DeviceINSTRUCTIONS DE CONFIGURATION DU WI-FI
text_image
QR code with central orange logo containing a stylized 't' or bird symbolScan the QR code to download
text_image
tuya Log In Sign Up Try Now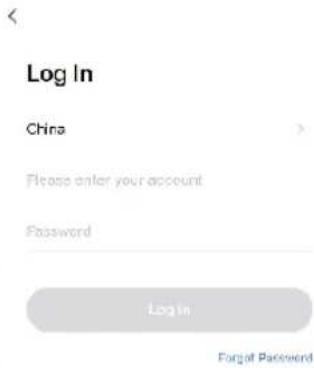
text_image
Log In China Please enter your account Password Login Forgot Passwordtext_image
Add Manually Auto Scan Non-cash Wear Aid TUV Surroundings Large Home differences Small Home differences Lunch differences Security Sensors Transit Air Flux Space lubbing Honey Carbon Retest Vacuum Fan (SLC) Rust Vacuum (SLC) Diffuser Hybridifier Air Purifier Minugated lamp Air Flux HVACtext_image
Welcome Home Set your home location for more informa... All Devices XXXXXXX-robot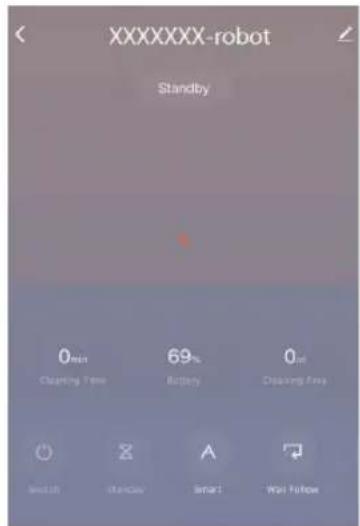
text_image
XXXXXXXX-robot Standby 0min Clamping Time 69% Battery 0min Clamping Time Switch Standard Smart Main Followtext_image
kingxchip_robot Device Information Tap-to-Run and Automation Third-party Control Alexa Google Assistants Small Genie Device Offline Notification Offline Notification Others Share Devicetext_image
QR code with central orange logo containing a stylized 't' or bird symbolScan the QR code to download
text_image
tuya Log In Sign Up Try Now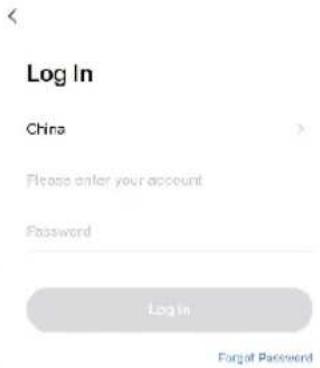
text_image
Log In China Please enter your account Password Login Forgot Passwordtext_image
Add Manually Auto Scan Non-cash Wear Aid TUV Surroundings Large Home differences Small Home differences Lunch differences Security Sensors Transit Air Flux Small differences Highway Carbon Retest Vacuum Fan (50) Rust Vacuum (50) Diffuser Hybridifier Air Purifier Minugated lamp Air Flux HVACtext_image
Welcome Home Set your home location for more informa... All Devices XXXXXXX-robot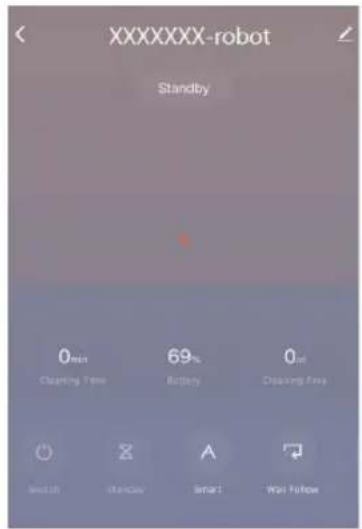
text_image
XXXXXXXX-robot Standby 0min Chapping Time 69% Battery 0st Display Free Switch Standard Smart Wait Followtext_image
kingxchip_robot Device Information Tap-to-Run and Automation Third-party Control Alexo Google Assistant Email Genie Device Offline Notification Offline Notification Others Share Devicetext_image
QR code with central orange logo containing a stylized 't' or bird symbolScan the QR code to download
text_image
tuya Log In Sign Up Try Now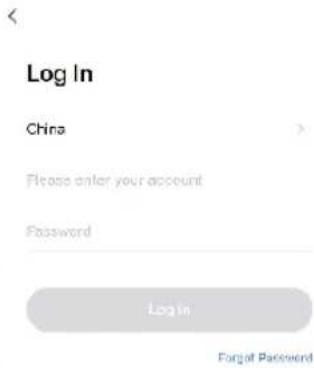
text_image
Log In China Please enter your account Password Login Forgot Passwordtext_image
Add Manually Auto Scan Non-cash Wear Aid TUV Surroundings Large Home differences Small Home differences Lunch differences Security Sensors Transit Air Flux Space lubbing Honey Carbon Retest Vacuum Fan (50) Rust Vacuum (50) Diffuser Hybridifier Air Purifier Minugated lamp Air Flux HVACtext_image
Welcome Home Set your home location for more informa... > All Devices XXXXXXX-robot
text_image
XXXXXXXX-robot Standby 0min Clamping Time 69% Battery 0at Clamping Time Switch Standard Smart Wall Followtext_image
kingxchip_robot Device Information Tap-to-Run and Automation Third-party Control Alexa Google Assistant Email Genie Device Offline Notification Offline Notification Others Share Devicetext_image
QR code with central orange logo, likely linking to a digital service or websiteScan the QR code to download
text_image
tuya Log In Sign Up Try Now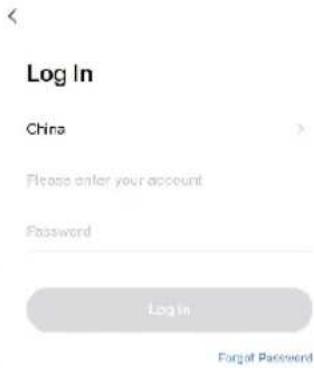
text_image
Log In China Please enter your account Password Login Forgot Passwordtext_image
Welcome Home Set your home position for more in terms. > All Devices 客厅 主卧 次卧 餐灯 ... No devices Add Device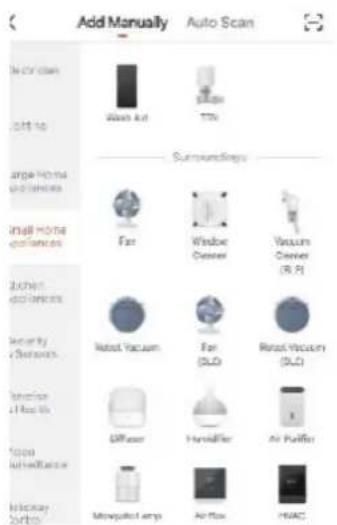
text_image
Add Manually Auto Scan Non-cash Wear Aid TUV Surroundings Large Home differences Small Home differences Lunch differences Security Sensors Transit Air Flux Small differences Highway Carbon Retest Vacuum Fan (50) Rust Vacuum (50) Diffuser Hybridifier Air Purifier Minugated lamp Air Flux HVACtext_image
Welcome Home Set your home location for more informa... All Devices XXXXXXX-robot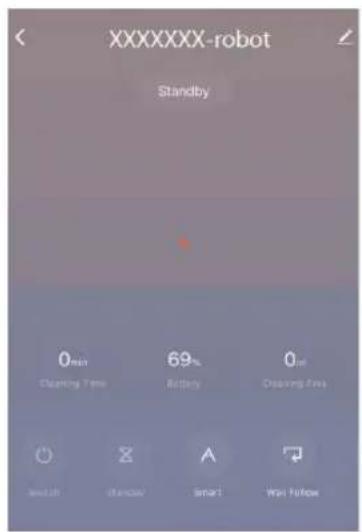
text_image
XXXXXXXX-robot Standby 0min Clamping Time 69% Battery 0at Clamping Time Switch Standard Smart Wall Followtext_image
kingxchip_robot Device Information Tap-to-Run and Automation Third-party Control Alexa Google Assistants Small Genie Device Offline Notification Offline Notification Others Share DeviceCOMPONENTES DE PRODUCTO PRODUCT COMPONENTS COMPOSANTS DU PRODUIT COMPONENTES DO PRODUTO PRODUKTKOMPONENTEN COMPONENTI DEL PRODOTTO
Nombre de las Piezas / Name of Parts Nom des pièces / Nome das peças Name der Teile / Nome delle parti
Especificaciones de producto / product specifications Spécification de produit / Especificação do produto Produktspezifikation / Specifiche di prodotto
Características de producto / Product characteristics Caractéristiques du produit / Características do produto Produktmerkmale / Caratteristiche del prodotto
natural_image
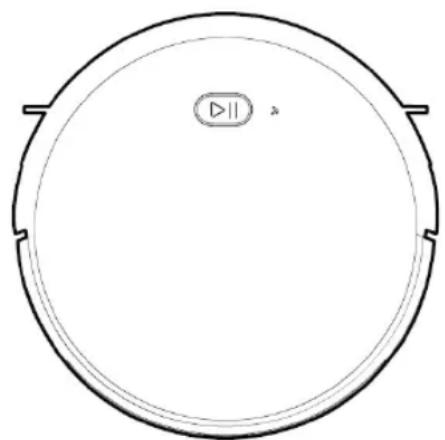
Simple circular diagram with a play button labeled 'D11' and an arrow symbol, no text or numbers present.
natural_image
Top-down schematic of a circular device with labeled ports (L, R) and internal components (no text or symbols beyond labels)COMPONENTES DE PRODUCTO / PRODUCT COMPONENTS / COMPOSANTS DU PRODUIT COMPONENTES DO PRODUTO / PRODUKTKOMPONENTEN / COMPONENTI DEL PRODOTTO
Nombre de las piezas / Name of Parts / Nom des pièces / Nome das peças / Name der Teile / Nome delle parti
natural_image
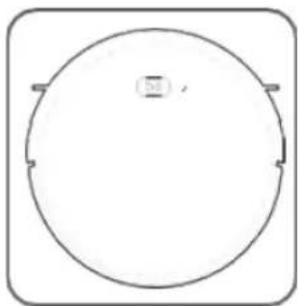
Simple circular diagram with four corner arrows and a small square symbol inside (no text or labels)Cuerpo Principal / Main Body Corps principal / Corpo Principal Hauptkörper / Corpo principale
natural_image
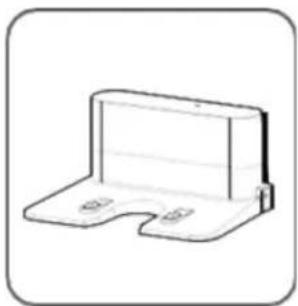
Simple line drawing of a metal bracket or support structure (no text or symbols)Base de carga / Charging Base Base de chargement Base de carregamento Ladestation / Base di ricarica
natural_image
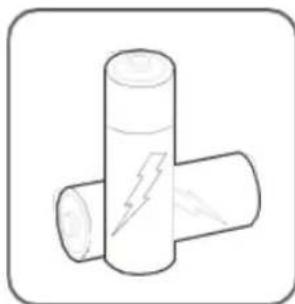
Simple line drawing of two cylindrical objects with a lightning bolt symbol on one (no text or labels)2xAAA Pilas (No Incluida) 2xAAABatteries (Not included) 2xAAABatteries (Non Incluses) 2xAAA Baterias (NAO Incluida) 3 Batterien (nicht im Lieferumfang enthalten) 2xAAABatterie (NONincluse)
text_image
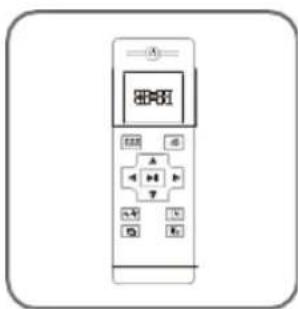
Diagram of a remote control device with labeled buttons and display screenMando a Distancia Remote Control Télécommande / Controle remoto Fernbedienung /Telecomando
natural_image
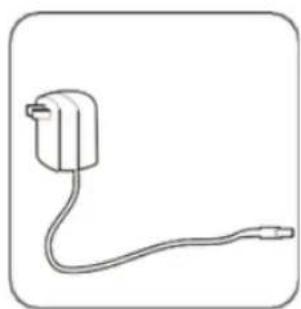
Simple line drawing of a plug with a cord, no text or symbols presentnatural_image
Simple line drawing of a paintbrush (no text or symbols)Cepillo de limpieza / Cleaning brush Brosse de nettoyage Escova de limpeza Reinigungsbürste Pennello per la pulizia
natural_image
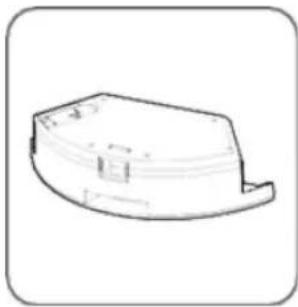
Simple line drawing of a curved mechanical component (no text or symbols)Deposito de Agua / Water Tank Réservoir d'eau / Deposito de agua Wassertank / Serbatoio d'acqua
natural_image
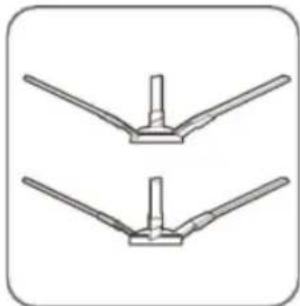
Two identical line drawings of a V-shaped mechanical component with a central shaft (no text or symbols)Cepillo Laterales / Side Brushes Brosse latérale / Escova lateral Seitenbürste / Spazzola laterale
natural_image
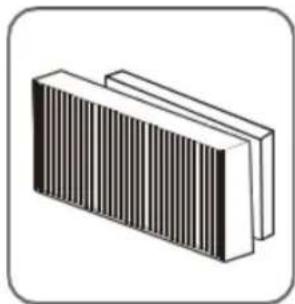
Illustration of a rectangular electronic component with vertical striped pattern (no text or symbols)Filtro Hepa de alta eficiencia High eficient Hepa filter Filtre Hepa hautement efficace Filtro Hepa de alta eficiencia Hocheffizienter Hepa-Filter Filtro Hepa ad alta efficienza
natural_image
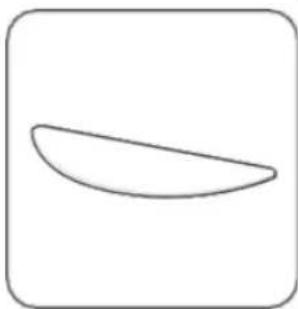
Simple curved line drawing inside a rounded square frame (no text or symbols)Mopa / Mop Vadrouille / Esfregão Mopp / Mocio
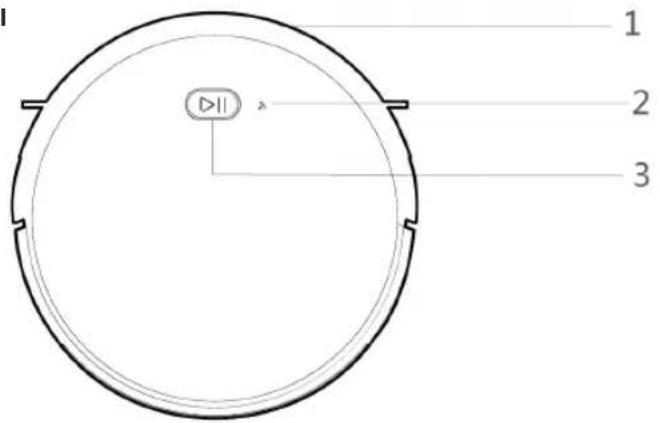
Cuerpo Principal / Main Body Corps principal / Corpo Principal Hauptkörper / Corpo principale
text_image
1 2 3- Bumper / Parachoque / Pare-chocs / Parachoque / Stoßstange / Paraurti
- Indicador de WI-FI / Wi-Fi Indicator / indicateur wi-fi/ indicador wi-fi / Wi-Fi-Anzeige / indicatore wi-fi
- Boton de control / Control Button / bouton de contrôle / botão de controle / Steuertaste / pulsante di controllo
text_image
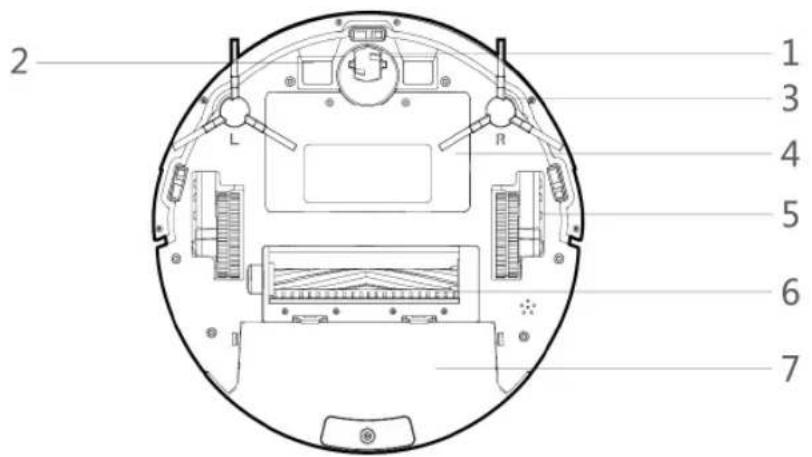
2 L R 1 3 4 5 6 7- Rueda Universal / Universal Wheel / Roue universelle / Roda universal / Universalräd / Ruota universale
- Electrodos de carga / Charging Electrodes / Électrodes de charge / Eletrodos de carga / Ladeelektroden / Elettrodi di carica
- Cepillo laterales / Side Brushes / brosse latérale / escova lateral / Seitenbürste / spazzola laterale
- Tapa de la batería / Battery Cover / Couvercle de la batterie / Tampa da batería / Batterieabdeckung / Coperchio della batteria
- Ruedas laterales / Side Wheels / Roues latérales / Rodas Laterais / Seitenräder / Ruote laterali
- Cepillo rodante / Rolling brush / Brosse à rouler / Escova rolante / Rollbürste / Spazzola rotante
- Deposito de polvo / Dust tank / Réservoir à poussière / Tanque de poeira / Staubbehälter / Serbatoio polvere
text_image
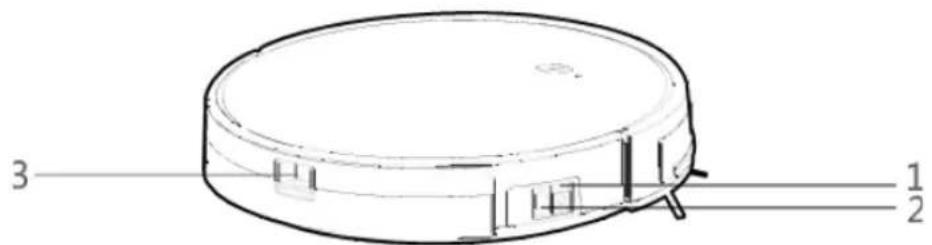
3 1 2- Entrada de corriente DC / DC Power Jack / Prise d'alimentation CC / Tomada de energia DC / Gleichstromsteckdose / Presa di corrente continua
- Interruptor de alimentación / Power switch / Interrupteur / Botão liga / desliga / Netzschalter / Interruttore di alimentazione
- Botón de liberación del depósito de polvo / Dust tank reléase button / Bouton de libération du bac à poussière / Botão de liberação do depósito de pó / Entriegelungsknopf für den Staubbehälter / Pulsante di rilascio del contenitore della polvere
Depósito de polvo / Dust Box
Boîte à poussière / Caixa de poeira
Staubkasten / Scatola per la polvere
text_image
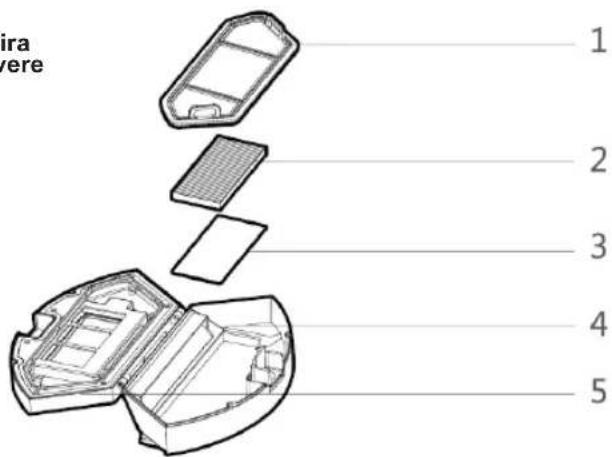
1 2 3 4 5- Pre filtro / Pre filter / Pré filtre / Pré filtro / Vorfilter / Pre filtro
- Filtro Hepa de alta eficiencia / High eficient Hepa filter / Filtre Hepa hautement efficace / Filtro Hepa de alta eficiencia / Hocheffizienter Hepa-Filter / Filtro Hepa ad alta efficienza
- Esponja de filtro / Filter sponge / Éponge filtrante / Esponja de filtro / Schwamm filtern / Spugna filtrante
- Deposito de polvo / Dust tank / Réservoir à poussière / Tanque de poeira / Staubbehälter / Serbatoio polvere
- Tapa de la caja de polvo / Dust box cover / Couvercle de la boîte à poussière / Tampa da caixa de poeira / Staubkastenabdeckung / Coperchio scatola polvere
Deposito de Agua / Water Tank
Réservoir d'eau / Deposito de agua
Wassertank / Serbatoio d'acqua
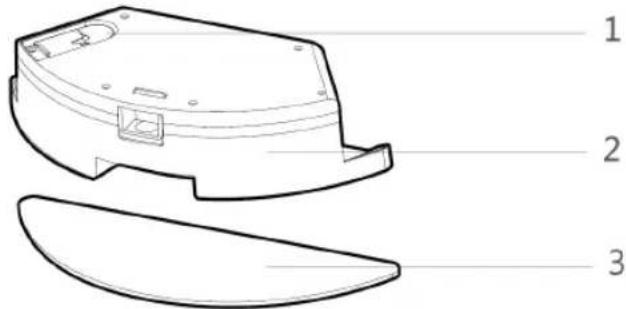
text_image
Technical diagram of a device casing with labeled parts 1, 2, and 3- Tapón de sellado del deposito de agua / wáter tank sealing cap Bouchon d'étanchéité de la boîte à poussière / Tampa de vedação do tanque de agua / Verschlussdeckel des Wassertanks / Tappo di chiusura del serbatoio dell'acqua
- Depósito de Agua / Water tank / réservoir d'eau / tanque de agua / Wassertank / serbatoio d'acqua
- Fregona / Mop / Vadrouille / Esfregão / Mopp / Mocio
Base de carga / Charging Base
Base de chargement / Base de carregamento
Ladestation / Base di ricarica
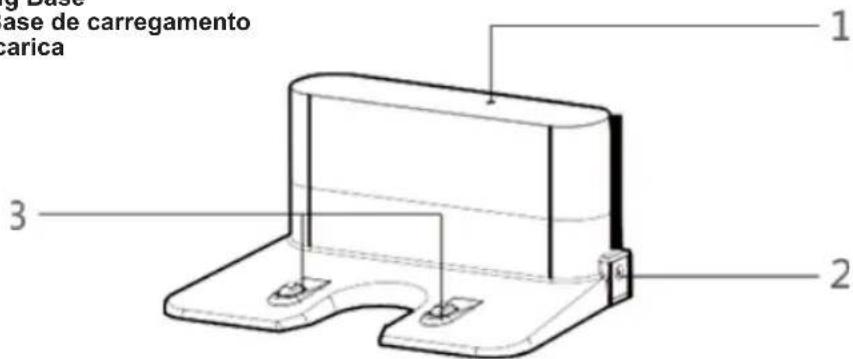
text_image
1 2 3 Carregamento ase de carregamento- Indicador de carga / Charging Indicator / Témoin de charge / Indicador de carga / Ladeanzeige / Indicatore di carica
- Entrada de corriente DC / DC Power Jack / Prise d'alimentation CC / Tomada de energia DC / Gleichstromsteckdose / Presa di corrente continua
- Terminal de carga / Charging terminal / Terminal de charge / Terminal de carga / Terminal laden / Terminale di carico
ESPECIFICACIONES DE PRODUCTO / PRODUCT SPECIFICATIONS / SPÉCIFICATION DE PRODUIT ESPECIFICAÇÃO DO PRODUTO / PRODUKTSPEZIFIKATION / SPECIFICHE DI PRODOTTO
| Estructura / Structure / Structure / Estrutura / Struktur / Struttura | |
| Diámetro del cuerpo principal / Diameter of the main bodyDiamètre du corps principal / Diâmetro do corpo principalDurchmesser des Hauptkörpers / Diametro del corpo principale | 330 mm |
| Grosor del cuerpo principal / Thickness of the main bodyÉpaisseur du corps principal / Espessura do corpo principalDicke des Hauptkörpers / Spessore del corpo principale | 75 mm |
| Peso neto del cuerpo principal / Net weight of the main bodyPoids net du corps principal / Peso líquido do corpo principalNettogewicht des Hauptkörpers / Peso netto del corpo principale | 3.0 kgs |
| Electrónica / Electronic / Électronique / Eletrônica / Elektronisch / Elettronica | |
| Voltaje / Voltage / TensionVoltagem / Stromspannung / Voltaggio | 14.4V |
| Capacidad de la batería / Battery capacityCapacité de la batterie / Capacidade de cargaBatteriekapazität / Capacità della batteria | 2600 mAh |
| Tipo de botón del cuerpo principal / Main body button typeType de bouton du corps principal / Tipo de botão do corpo principalTyp der Hauptkörpertaste / Tipo di pulsante del corpo principale | LED button |
| Accesorio / Accessory / Accessoire / Acessório / Zubehörteil / Accessorio | |
| Capacidad de la caja de polvo / Dust box capacity / Capacité de la boîte à poussière / Capacidade da caixa de poeira / Staubkastenkapazität / Capacità contenitore polvere | 600ml |
| Capacidad del tanque de agua / Water tank capacity / Capacité du réservoir d'eau / Capacidade do tanque de água / Wassertankkapazität / Capacità serbatoio acqua | 350ml |
| Parámetros de proceso / Process parameters / Paramètres de processus Parâmetros do processo / Prozessparameter / Parametri di processo | |
| Tipo de Carga / Charging Type / Type de charge Tipo de Carregamento / Ladungsart / Tipo di ricarica | Manual / Automático Manual Automatic Manuel / automatique Manual / automático Manuell / automatisch Manuale / automatico |
| Duración operativa / Operating duration / Durée de fonctionnement / Duração operacional / Betriebsdauer / Durata operativa | <= 120 min |
| Duración de la carga / Charging duration / Durée de charge Duração de carregamento / Ladedauer / Durata della ricarica | 240 - 300 min |
CARACTERÍSTICAS DE PRODUCTO / PRODUCT CHARACTERISTICS CARACTERÍSTIQUES DU PRODUIT CARACTERÍSTICAS DO PRODUTO PRODUKTMERKMALE / CARATTERISTICHE DEL PRODOTTO
Multiple Smart Cleaning modes
4cleaning modes are designed to suit different needs, which can be switched by the remote controller and App, which improves the cleaning efficiency and saves 30% of the power.
It is simple to operate, press the Control Button to start cleaning. Follow the Voice Prompt and let the robot start working for you.
Designs humanisés
natural_image
Technical line drawing of a mechanical device with open and closed compartments, showing internal components and a faucet (no text or symbols)Dust box can be washed with water
The dust box and the pre-filter can be directly flushed with water without too much hassle, which can avoid secondary pollution caused by dust flying!
natural_image
Line drawing of a circular device with a handle and internal components, no text or symbols present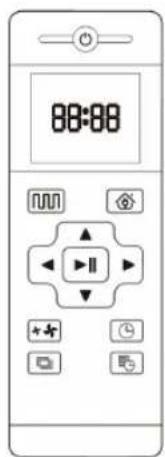
text_image
88:88INSTRUCCIONES DE USO / INSTRUCTIONS FOR USE / MODE D'EMPLOI INSTRUÇÕES DE USO / GEBRAUCHSANWEISUNG
Atención / Attention / Attention / Atenção / Achtung / Attenzione
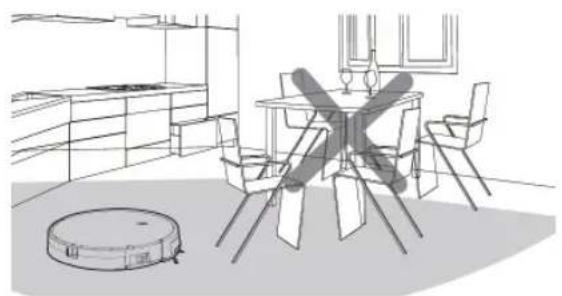
natural_image
Line drawing of a modern dining area with a circular vacuum cleaner and a table with chairs (no text or symbols)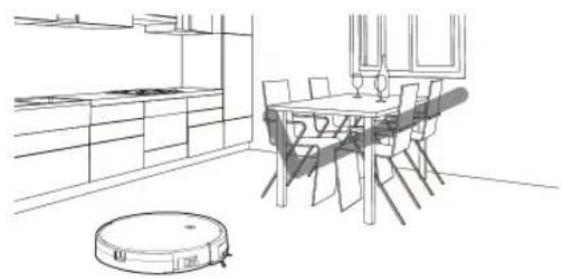
natural_image
Line drawing of a modern kitchen interior with a circular vacuum cleaner and a round table (no text or symbols)When it is working, please remove all the obstacles from the Robot vacuum cleaners way, such like furniture, home Appliances, tables, chairs etc. to get the maximum cleaning results.
natural_image
3D architectural diagram of a staircase with stairs and a circular object on top (no text or symbols)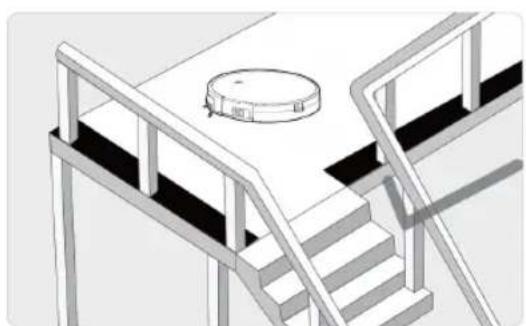
natural_image
3D architectural rendering of a staircase with railings and a circular vent (no text or symbols)If the robot works at the stairway, on the Edge of the step or the entrance to the narrow area among the furniture etc. Please place a fence to ensure safe and smooth work.
natural_image
Illustration showing a person standing in a hallway near a robotic vacuum cleaner, with a fan and antenna nearby (no text or symbols)Do not stand in narrow places such as thresholds and aisles to avoid missing sweeping. When the robot is working, please ensure that the object with the thickness less then 1.8cm is not placed in the way of cleaning, to prevent the robot from climbing and getting jam.
natural_image
Diagram showing a car charging near an electric scooter, with a cross symbol indicating anti-corruption (no text or labels present)Please pay attention to remove objects, such as power cords, toys ets which are scattered on the ground to avoid getting in touch and entangle the robot. Do not use the mopping function on the carpet, if there is a carpet in the house, please roll up the Edge of the carpet in advance.
natural_image
Line drawing of a room interior with a vacuum cleaner and hallway (no text or symbols)In accessories includes a magnetic tape, which helps to delimit the cleaning zone by not letting the robot to cross the magnetic border created by tape.
text_image
Technical diagram of a device rear view with labeled components and directional arrows indicating movement or assembly.CÓMO QUITAR LA BATERÍA
HOW TO REMOVE THE BATTERY
- Take out two screws on the battery cover with a screw driver.
- Take out the battery cover.
- Take out the battery and unplug the electric wires to remove the battery.
COMMENT RETIRER LA BATTERIE
When the robot is in the vicinity of the charging base and virtual protection wall, it may not be able to distinguish the instructions issued by the remote controller. If you do not use the remote contro-ller for a long time, please remove the batteries.
No matter in which mode the robot is, this button will bring it in to the cleaning mode.
Pressing this button to shift in to the recharging mode, and the logo will be displayed on the screen of the remote controller.
In the standby mode, press this button to continue moving forwards, and release it to return to standby mode. In the Schedule setting mode, press this button to increase the number.
Press this button and robot will rotate 180°.
In the modes of Schedule Setting and Clock Setting, press this button to decrease the number.
In the standby mode, press this button to continue turning left and release it to return to standby mode. In the Schedule setting mode press this button to switch from minute to hour.
In the standby mode, press this button to continue turning right and release it to return to standby mode. In the Schedule setting mode press this button to switch from hour to minute.
During operation, press this button to pause the robot. In the Schedule setting mode or Clock setting mode with this button make sure to save all settings.
In any cleaning mode press this button to adjust the suction power. There are Normal suction and Powerful Suction for your option.
Press this button to enter the Clock Setting mode and press the Confirm button to exit.
In the standby mode press this button to enter in to the Schedule Setting mode and the display flashes icon 📄. In the Schedule Setting mode press this button to save the data and exit the Schedule Setting mode and the display will always display the icon 📄. In the Schedule setting mode press this button for 3S to cancel the Schedule Setting function and the displayed icon 📄 will disappear.
Place the charging base against the wall. Do not place any objects within 3.3 ft to the left / right and 6.6 ft to the front and do not place any mirrors or other reflective objects within this distance and avoid from sunlight.
natural_image
Line drawing of a circular device with a handle and small inset components, no text or symbols presentSwitch on the robot, which makes the Control button will turn on the White light, and enter the Selected mode If the robot is not activated within 10 minutes, the robot will enter automatically into the Sleep mode.
natural_image
Line drawing of hands connecting a circular device to an electrical outlet with plug (no text or symbols)Mantenga el interruptor de encendido encendido antes de cargar la máquina Please keep the power switch turned on before charging the machine Veuillez garder l'interrupteur d'alimentation allumé avant de charger la machine Por favor, mantenha o interruptor de energia ligado antes de carregar a máquina Bitte lassen Sie den Netzschalter eingeschaltet, bevor Sie das Gerät aufladen Tenere l'interruttore di alimentazione acceso prima di caricare la macchina
Charge mode A: Fix the charging pin into the DC power jack of the robot and plug in the power supply.
natural_image
Technical line drawing of a circular mechanical component with a central control knob (no text or symbols)Mantenga el interruptor de encendido encendido antes de cargar la máquina Please keep the power switch turned on before charging the machine Veuillez garder l'interrupteur d'alimentation allumé avant de charger la machine Por favor, mantenha o interruptor de energia ligado antes de carregar a máquina Bitte lassen Sie den Netzschalter eingeschaltet, bevor Sie das Gerät aufladen Tenere l'interruttore di alimentazione acceso prima di caricare la macchina
Charge mode B: Press Return for Auto charging button on the remote controller or Press Re-charge icon on App to auto dock the Robot with the charging base.
natural_image
Technical line drawing of a circular mechanical component with a central control knob (no text or symbols)Press the Return for Auto Charging on the remote controller to make the robot return for charging. When Cleaning is completed or the battery is too low, the robot will automatically start finding the charging base to charge itself. PIs keep the charging base energized, otherwise the machine will not be able to find the charging base.
Charging Instructions
- For the very first operation, please let the robot run out of power.
- Charge the robot for 12 hours for the first time of the operation. When the charging is finished the control button light turns off.
- When the robot is charged, the LED light of control button will flash.
- If the robot is out of service for a long time, please turn off the power switch.
- Please charge the robot as soon as possible after the battery is used completely.
- The product must be use with the power adapter and charger provided by the factory.
- Please charge the robot for 12 hours for the first time of operation. when the charging is done, the control button light turns off.
Instructions de chargement
natural_image
Simple circular diagram with a play button labeled 'D||' and letter 'A' at the top (no text or symbols beyond basic labels)Puesta en marcha
- Make sure the power switch on to the side of the robot is switched on.
- Press the control button or the cleaning mode on the remote controller to start the robot.
Pause
The pause function is to switch the robot from the operating mode to the pause mode and the robot can be paused by the following operations:
01. Press the control button on the robot to pause the robot.
02. Press the power on/off button on the remote controller to pause the robot.
Note: Once the machine is paused, the machine can be reoperate.
Sleep
Sleep mode means that the robot is stopped and the indicator light is off. If the robot is not active within 10 minutes, the robot will enter into the sleep mode automatically.
Note: If the robot is out of service for a long time, please turn off the power switch.
Commencez
natural_image
Line drawing of a hand inserting a small component into a curved mechanical housing (no text or symbols)While charging, please remove the water tank to avoid any type of danger.
Open the tank sealing cap, slowly inject water into the water tank and fill it with enough water
natural_image
Technical line drawing of a mechanical component with lid and base (no text or symbols)While charging, please remove the water tank to avoid any type of danger.
How to fix the microfiber mop?
Seal the water tank sealing cap, then fix the microfiber mop to the velcro on the bottom of the water tank.
natural_image
Line drawing of a circular robotic device with a handle and label (no text or symbols on the device itself)While charging, please remove the water tank to avoid any type of danger.
How to install the water tank?
Press the release button on the dust box to remove it and then install the water tank.
text_image
Diagram of a hand pressing a button on a device control panel with play, pause, and scroll iconsYou can set the current local time on your robot by pressing the clock setting button on the remote controller, then press confirm button.
Press the "schedule setting" button to set the scheduled cleaning time for the robot(eg. Setting 6:30 am everyday at the standby mode.
natural_image
Hand pressing a button on a device control panel (no text or symbols visible)☆ En el modo de configuración de programación, siga las indicaciones de voz para confirmar todas sus operaciones.
☆ At the Schedule setting mode follow the voice prompts to confirm all your operations.
☆ En mode de programmation, suivez les invites vocales pour confirmer toutes vos opérations.
☆ No modo de configuração de programação, siga as instruções de voz para confirmar todas as suas operações
☆ Befolgen Sie im Zeitplaneinstellungsmodus die Sprachanweisungen, um alle Ihre Vorgänge zu bestätigen.
☆ Nella modalità di impostazione del programma segui le istruzioni vocali per confermare tutte le tue operazioni.
- Presione el botón de configuración de la programación para ingresar al modo de configuración de la programación y configure la programación en el control remoto o la aplicación.
- Si necesita cancelar la programación, simplemente presione el botón de configuración de programación durante 3 segundos.
- Press the Schedule setting button to enter into the Schedule setting mode and set the Schedule on the remote controller or App.
- If you need to cancel the Schedule, just press the Schedule setting button for 3 seconds.
- Appuyez sur le bouton de réglage de la planification pour entrer dans le mode de réglage de la planification et définir la planification sur la télécommande ou l'application.
- Si vous devez annuler le programme, appuyez simplement sur le bouton de réglage du programme pendant 3 secondes.
- Pressione o botão de configuração de programação para entrar no modo de configuração de programação e defina a programação no controle remoto ou aplicativo.
- Se você precisar cancelar a programação, basta pressionar o botão de configuração de programação por 3 segundos.
- Drücken Sie die Zeitplaneinstellungstaste, um in den Zeitplaneinstellungsmodus zu wechseln und den Zeitplan auf der Fernbedienung oder App festzulegen.
- Wenn Sie den Zeitplan abbrechen müssen, drücken Sie einfach die Taste für die Zeitplaneinstellung 3 Sekunden lang.
- Premere il pulsante di impostazione della pianificazione per accedere alla modalità di impostazione della pianificazione e impostare la pianificazione sul telecomando o sull'app.
- Se è necessario annullare la pianificazione, è sufficiente premere il pulsante di impostazione della pianificazione per 3 secondi.
Modos de limpieza / Cleaning modes / Modes de nettoyage
natural_image
Simple line drawing of three vertical bars with a small circle at the end (no text or symbols)Plan cleaning (S shape Cleaning)
The robot will perform the Smart plan cleaning in s shape according to the room environment.
natural_image
Simple geometric diagram with a square and a circle, no text or symbols present.Limpieza de bordes
The robot will clean along the longest Edge of the room.
Nettoyage des bords
natural_image
Simple spiral diagram with an arrow indicating direction (no text or symbols)Limpieza de manchas
The robot will perform the concentrated cleaning on a specified dirty area(app controlled only)
Nettoyage localisé
The robot will perform the S shape cleaning with mop according to the room environment.
☆ Please do not move or control with remote while it is working or it will readjust the cleaning route and repeat cleaning.
☆ There is a normal phenomenon that the robot performs with a brief pause while cleaning, please keep patience as it is thinking and making decisions or discovering where to clean.
Mode de nettoyage
natural_image
Line drawing of a circular robotic device with attached components (no text or symbols)
natural_image
Line drawing of a hand holding a wrench and screwdriver (no text or symbols)MANTENIMIENTO DEL PRODUCTO / PRODUCT MAINTENANCE / MAINTENANCE DES PRODUITS MANUTENÇÃO DO PRODUTO / PRODUKTWARTUNG / MANUTENZIONE DEL PRODOTTO
Limpieza y reemplazo del cepillo lateral / Side Brush Cleaning and Replacement Nettoyage et remplacement de la brosse latérale / Limpeza e substituição da escova lateral Reinigung und Austausch der Seitenbürste / Pulizia e sostituzione della spazzola laterale
natural_image
Technical diagram of a vehicle interior showing front and rear views with labeled components (no text or symbols beyond labels)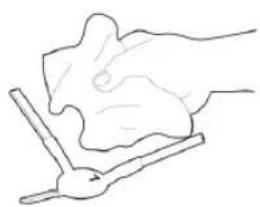
natural_image
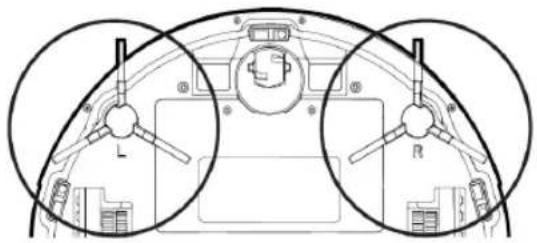
Simple line drawing of a hand holding a piece of tissue or material, no text or symbols presentCheck the side brush's condition frequently to see if it has been damaged or entangled with other objects. Clean the side brush with a cleaning tool or cloth. When the side brush is da-maged and can not be used please replace it as soon as possible. L and R sidejs correspond to each other.
natural_image
Line drawing of a robotic vacuum cleaner (no text or symbols)natural_image
Diagram showing a cross-section of a mechanical component above a petri dish with scattered particles below (no text or labels)natural_image
Technical line drawing of a mechanical housing or enclosure with open and closed sections (no text or symbols)Retire el prefiltro / Remove the pre-filter. Retirez le préfiltre / Remova o pré-filtro. Entfernen Sie den Vorfilter / Rimuovere il prefiltro.
natural_image
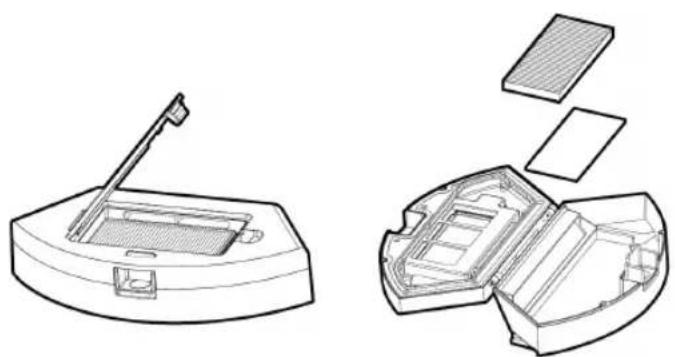
Technical line drawings of a device with internal components, showing exploded and assembled views (no text or symbols)Open the high efficient filter cover, and remove the high efficient filter and filter sponge. It is not recommended to wash the high efficient filter with water. Please throw off the debris carefully
natural_image
Line drawing of a device with open lid and faucet, showing internal components and airflow (no text or symbols)natural_image
Exploded view diagram of a battery pack assembly showing internal compartments and exterior panels (no text or labels)Dry the dust box and filter components, keep them dry to ensure a longer service. After the pre-filter is used for 15-30 days, it can be washed. The maximum service life of the high-efficient filter is 3 months.
natural_image
Line drawing of a curved electronic device casing with internal components (no text or symbols)Re-install the pre-filter and high efficient filter in the dust box.
Before installing the filter, make sure that the high efficient filter and the pre-filter are dry.
Do not expose the high-efficient filter and pre-filter to sunlight.
natural_image
Line drawing of a robotic vacuum cleaner (no text or symbols)Cover the dust box and fix into the main body.
natural_image
Line drawing of a circular robotic vacuum cleaner with attached clamped components (no text or symbols)Pres the reléase button to take out the water tank.
natural_image
Technical line drawing of a mechanical component with two views: top shows a curved lid, bottom shows a rectangular housing (no text or symbols)Retirar la fregona / Remove the mop Retirez la vadrouille / Remova o esfregão Entfernen Sie den Mopp / Rimuovere la scopa
natural_image
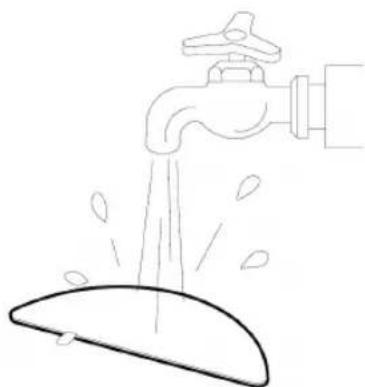
Simple line drawing of a faucet spraying water onto a surface (no text or symbols)Lavar y secar la fregona / Wash and dry the mop Lavez et séchez la vadrouille / Lave e seque o esfregão Den Mopp waschen und trocknen / Lava e asciuga la scopa
natural_image
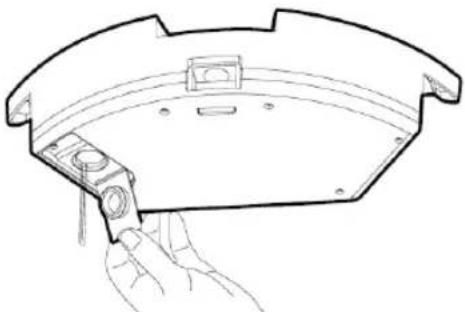
Line drawing of a hand holding a small mechanical component, no text or symbols presentVierta el resto del agua del tanque de agua / Por out the rest of the water from water tank Videz le reste de l'eau du réservoir d'eau / Despeje o resto da água do tanque de água Gießen Sie den Rest des Wassers aus dem Wassertank / Versare il resto dell'acqua dal serbatoio dell'acqua
natural_image
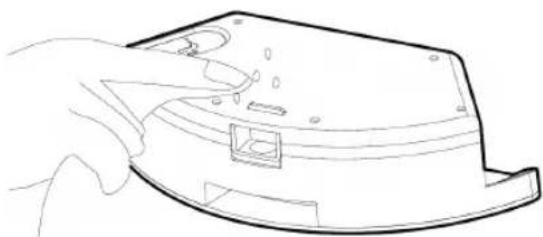
Line drawing of a hand inserting a component into a device casing (no text or symbols)Limpiar el tanque y secarlo / Clean the tank and dry it Nettoyez le réservoir et séchez-le / Limpe o tanque e seque-o Reinigen Sie den Tank und trocknen Sie ihn ab / Pulisci il serbatoio e asciugalo
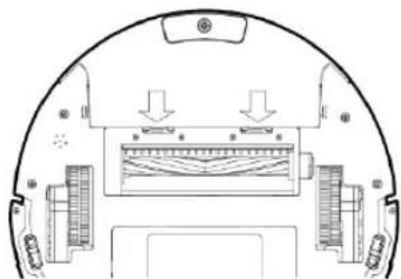
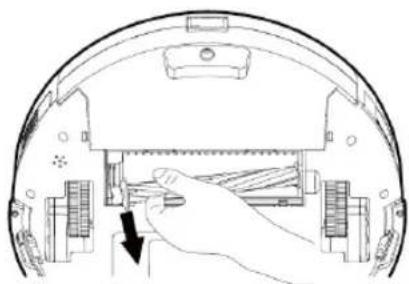
Mantenimiento de los componentes del cepillo rodante / Maintenance of Rolling Brush Components Maintenance des composants de la brosse roulante / Manutenção de componentes da escova giratória Pflege der Rollbürste Komponenten / Manutenzione dei componenti delle spazzole rotanti
natural_image
Top-down schematic of a mechanical or electronic component with labeled parts (no text or symbols)Abra los componentes del cepillo giratorio / Open the Rolling brush components Ouyrez les composants de la brosse roulante / Abra os componentes da escova giratória Öffnen Sie die Walzbürstenkomponenten / Aprire i componenti della spazzola rotante
natural_image
Diagram of a hand inserting a component into a device housing (no text or symbols visible)Retire el cepillo giratorio y limpie todos los residuos y el pelo Remove the Rolling brush and clean off all debris and hair Retirez la brosse roulante et nettoyez tous les débris et cheveux Remova a escova giratória e limpe todos os detritos e cabelos Entfernen Sie die Rollbürste und entfernen Sie alle Rückstände und Haare Rimuovere la spazzola rotante e pulire tutti i detriti e i capelli
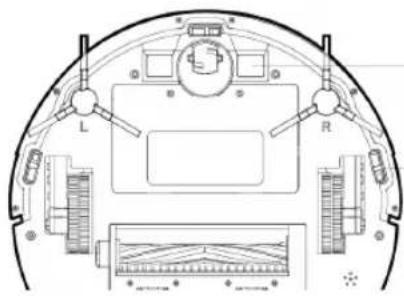
Mantenimiento de otros componentes / Maintenance of Other Components Maintenance des autres composants / Manutenção de outros componentes Wartung anderer Komponenten / Manutenzione di altri componenti
text_image
Technical diagram of a mechanical or electrical component with labeled parts L and R, showing internal structure and a magnified inset.Trozo de electrodo / Electrode slice Tranche d'électrode / Fatia de eletrodo Elektrodenscheibe / Fetta di eletrodo
Sensor / Sensor / Capteur Sensor / Sensor / Sensore
Use the cleaning tools or a dry soft cloth to clean periodically the electrode slice of robot chassis and the sensor window.
natural_image
Technical line drawing of a mechanical bracket or support structure (no text or symbols)natural_image
Silhouette of a person with thought bubble and gears, symbolizing thinking or collaboration (no text)FALLOS COMUNES
| Problems Possible Reasosn Solutions | ||
| The robot can not be charged. | The electrodes between the main body and the charging base are not connected properly. | Make sure that the electrodes between the main body and the charging base are properly connected. |
| The charging base is switched off while the robot is switched on, which leads to the loss of power. | Keep charging the robot when it is not working to be prepare for next cleaning assignment. | |
| The robot is stuck during the work | The robot may be stuck by wi-res/cables on the ground, hanging curtains or obstacles around the carpets. | The robot will try to get itself out au-toma-tically.However,please help it manually if it doesn't. |
| The robot goes back to recharge without finishing the cleaning work | The robot detects that the power may be not enough so automati-cally get back to recharge. | Charge the robot. |
| The robot works at different speeds on different floor types.For example,it works longer on the wood floors than on carpets. | The length of working time varies be-cause of the complexities of room environments,the amount of garbage and different cleaning modes. | |
| The robot does not perform cleaning work auto-matically as scheduled | The robot is not switched on and the robot can not perform cleaning work as scheduled when it is powered off. | Turn on the robot. |
| The power level of the robot is too low to work. | Keep charging the robot when it is not working to be prepare for next cleaning assignment. | |
| The robot is stucked or twined by obstacles. | Turn off the robot and clean the dust box.Then turn over the robot to clean its components, such as wheels and side brushes. | |
| Remote control malfunction (effective range is 5 m) | The remote controller is short or out of power. | Change the batteries and install the batteries correctly. |
| The robot is short or out of power. Make sure that the robot is switched on with enough power for operation.. | ||
| The infrared ray are blocked because the infrared emitter on the remote controller or the infrared receiver in the robot is contaminated. | Wipe the infrared emitter on the remote controller or the infrared receiver on the robot with a clean cotton cloth. | |
| Interference emitted by other devices that exist nearby. | Avoid using the remote control near other infrared devices. | |
| When the robot is working there is missed sweep the route is chaotic, the deviation is reversed and the app side cleaning map shows irregulation and is not neat | The drive wheel and the ground may slip due to the robot climbing small steps, thresholds and door bars, thus affecting the its judgment on the working environment of the whole house. | It is recommended to close the door in the area and clean the area separately. The robot has the function of self-identification single room. It will return to the starting. |
| Work on a waxed, polished floor or smooth floortile, resulting in reduced friction between the drive wheel and the ground. | It is recommended that you clean the floor after the wax is air-dried. | |
| The wires, slippers, etc. placed on the ground affect the normal operation of the robot. | Before the machine is working, please arrange the scattered wires, slippers and other objects on the ground to minimize the scattered objects on the ground. | |
DÉFAUTS COURANTS
text_image
Exploded view diagram of a device with 15 labeled parts, showing internal components and assembly.- Panel de vidrio / Glass Panel / Panneau de verre / Painel de vidro / Glasscheibe / Pannello di vetro
- Revestimiento / Shell / Enrobage / Revestimento / Glasur / Rivestimento
- Componentes del cepillo lateral / Side Brush Components / Composants de la brosse latérale Componentes da escova lateral / Seitenbürstenkomponenten / Componenti della spazzola laterale
- Componente de la rueda del lado derecho / Right Side Wheel Component / Composant de roue latérale droite Componente da roda do lado direito / Rechtsradkomponente / Componente della ruota laterale destra
- Componentes del ventilador / Fan Components / Composants du ventilateur / Componentes do ventilador / Lüfterkomponenten / Componenti della ventola
- Componentes de ruedas universales / Universal Wheel Components / Composants de roue universels / Componentes universais da roda / Universalradkomponenten / Componenti per ruote universali
- Revestimento inferior / Bottom Shell / Enrobage inférieure / Revestimento Inferior / Bodenschale / Rivestimento inferiore
- Componentes del cepillo rodante / Rolling Brush Components / Composants de la brosse à rouler Componentes da escova giratória / Rollenbürstenkomponenten / Componenti della spazzola rotante
- Batería / Battery / La batterie / Bateria / Batterie / Batteria
- Tapa de la batería / Battery Cover / Couvercle de la batterie / Tampa da bateria / Batterieabdeckung / Coperchio della batteria
- Componente de la rueda del lado izquierdo / Left Side Wheel Component / Composant de roue côté gauche Componente da roda do lado esquerdo / Radkomponente auf der linken Seite / Componente della ruota laterale sinistra
- Cepillo lateral izquierdo / Left Side Brush / Brosse latérale gauche / Escova do lado esquerdo Linke Seitenbürste / Spazzola laterale sinistra
- Cepillo lateral derecho / Right Side Brush / Brosse latérale droite / Escova do lado direito / Rechte Seitenbürste Spazzola laterale destra
- Componentes de la caja de polvo / Dust Box Components / Composants de la boîte à poussière Componentes da caixa de poeira / Staubbox-Komponenten / Componenti della scatola della polvere
- Depósito de agua / Water Tank / Réservoir d'eau / Tanque de água / Wassertank / Serbatoio d'acqua
Aplicación:
The product is suitable for cleaning house, hotel rooms, and small offices and provides good cleaning for various floors, such as wooden floor, hard floor, tile floor, and short-pile carpets (short-pile should be shorten than 1.5cm), etc.
Application:
This symbol means that in case you wish to dispose of the product once its working life has ended, take it to an authorised waste agent for the selective collection of waste electrical and electronic equipment (WEEE).

Imported by:
Sanysan Appliances S.L, NIF: B98753056, C/ Barcas 2, 2
46002 Valencia, Spain
Product made in P.R.C. – Designed by SOGO based on the European Quality Standards
Customer Service: www.sogosat.com / sogosat@sogosat.com / 0034 902 222 161
DECLARATION OF CONFORMITY
This device complies with Low Voltage Directive 2014/35/EC, Electromagnetic Compatibility Directive 2014/30/EU, Directive 2015/863/EU on the restriction of the use of certain hazardous substances in electrical and electronic equipment and Directive 2014/53/EU related to the requirements for safety and health, electromagnetic compatibility and the efficient use of the radio spectrum.