USER MANUAL IG U8F2L X IGNIS
Instructions for use
| 3 | Jahresende |
| БългAPСКИ | Инструкции за у鞘отрава | Стр. 15 |
| ČESKY Námod k obsslze Strana 27 |
| DANSK Brugsanvisninger Side 39 |
| NEDERLANDS Gebruiksaanwijzing | Pagina 51 | |
| SUOMI Käytöohje Sivu 63 |
| FRANÇAIS Directives d'utilisation | Page 75 | |
| DEUTSCH Gebrauchsanleitung Seite 87 |
| ЕLANHNIKA | Одneyίες χρήσης | Σελίδα 99 |
| MAGYAR | Használati utmutató | 111. oldal |
| ITALIANO | Istruzioni per l'uso | Pagina 123 |
| ΚΑ3ΑΚ | Παιώνουν Κυκάνβα | 135-6et |
| NORSK | Brukerveiledning | Side 147 |
| POLSKI | Instrukcja obstugi | Strona 159 |
| PORTUGUES | Instruções de utilizesçao | Págrina 171 |
| ROMÁNÁ | Instruetiónile de utilizesare | Pagina 183 |
| РУССКИ | Инструкции по эхельатаци | Стр. 195 |
| SLOVENÇINA | Námod na použivanie | Strana 207 |
| ESPÁÑOL | Instrucciones de uso | Págrina 219 |
| SVENSKA | Bruksanvisning | Sidan 231 |
| ΥΚΡΑΙΗСБΚA | Иnstрукции за винорисанни | стор. 243 |
| ENGLISH | Instructions for use | Page 255 |
4 1 4 1.1 4 1.2 4 (Jai) 1.3 5 2 5. .2.1 5. PROFREEZE 6TH SENSE 2.2 5 2.3 5... BLACK OUT ALARM 2.4 5 2.5 5. 2.6 6. *PARTY MODEJ 2.7 6. SHOCK FREEZE 2.8 6. FAST FREEZE 2.9 7. * (g) ECO NIGHT 2.10 7. *FREEZE CONTROL 2.11 7 2.12 8. ICE MATE 2.13 8. *LED di sileglio 2.14 8 3 8. 3.1 8 3.2 9 1ebljai:4 9. 0a 10. 2 10. .4.3 10. 4.4 11. 5 12 6 12 5 / 6.1 12 6.2 12 6.3 12 7 13 8 13. 8.1 14 8.2 14 9 ∴ S = 1/2S 1 + 1/2S 2 + ... + 1/2S 267 (1) 267 (2.1) 271
∴ 4k = 3
*
a a a a a a a a a a a a a a a a a a a a
1.1
jao joo.1.1
jgl 1 jgl jgl Jg 1 g 1 g 1 g
1 1
50 jie
aillll aalld 10000000000000000000000000000000000000000
1.1.2
Iaill aill aill alalll alalall alalal alalal (aiya Cldg)
y y 15
6THSENSE 2.2 PROFREEZE J J J J J J J J J J J J J J J J J J J J J J J J J J J J J J J J J J J J J
J
J
J
J
J
J
J
J
J
J
J
J
J
J
J
J
J
J
J
J
J
J
J
J
J
J
J
J
J
J
J
J
J
J
J
J
J
J
J
J
J
J
J
J
J
J
J
J
J
J
2.3

FAST FREEZE 2.9 24
24
*FREEZE CONTROL 2.11
"ae ydl gllyagill" aabg 2 gglgall .
"ae wll gil aayill" gial y. jaiy alal jaii "ey wll ayill" ayg y. jaiy p i 11. . qai y "ey wll ayill" (jw ell) "ae wll gil aayill" ayg y, jaiy lal jaiy
aaii 1
le lghal g. aill jaiy jil jail qall jay, jaiy jil g. jiali y jil g baiol >ON< Jaiill
a 1
-22°
a 22
jll
e 1
Fast freezin
Fast Freezing
a 100
Ss 6th Sense yzill y Ss 501y ProFreeze yzill

J 2.10
*(gul)
aai 1
*LED 2.14 LED
4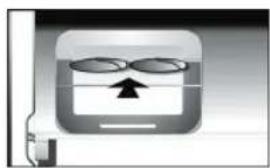
LED
p13
c.3.2
jz jz jz aaa 3.1
aKa a 1jgbl Jj jzall
a 24 1
120 151. Jia jia jia jia jia jia jia jia jia jia jia jia jia jia jia jia jia jia jia jia jia jia jia jia jia jia jia jia jia jia jia jia jia jia jia jia jia jia jia jia jia jia jia
E
e 1
2
/6.1
jgl jgl gla glal dlgl y a y o jai jai all
∴ + = 2
J.6.2
aai al jzj 1
2
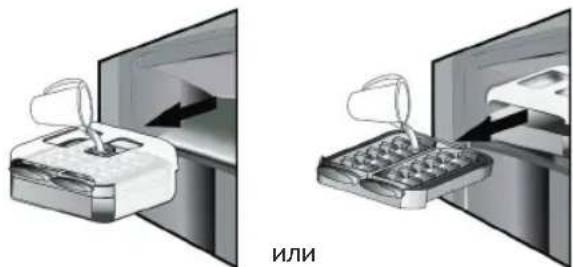
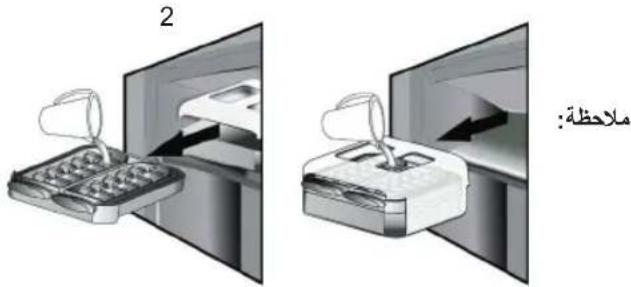
Place the Ice Mate container in place of the water tank for making ice cubes. Be careful not to spill water.
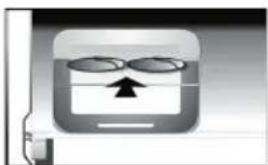
Wait until ice cubes form (it is recommended to wait about an hour).
NOTE: The Ice Mate accessory is optional. It can be placed in a horizontal position and either in the freezer compartment or removed from the appliance when ice cube making is not needed.
3. USE
3.1. HOW TO INCREASE THE FREEZER STORAGE CAPACITY
You can increase the freezer storage capacity by:
Remove the shelves/drawers* to store large products. - Place food products directly on the freezer shelves. Remove the Ice Mate*. Remove the bottle rack.
HOW TO REMOVE THE ICE CUBES
Make sure the storage container is placed in place under the water tank. If not, place it in position.
Turn one of the dispensing knobs clockwise until the tank is emptied. The ice cubes will fall into
the storage container.
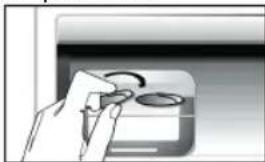
Turn the knob a second time for the second half of the tank, if necessary.
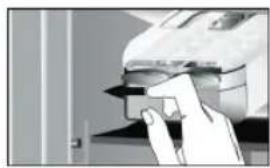
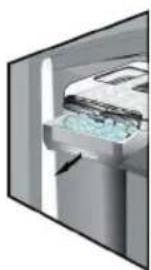
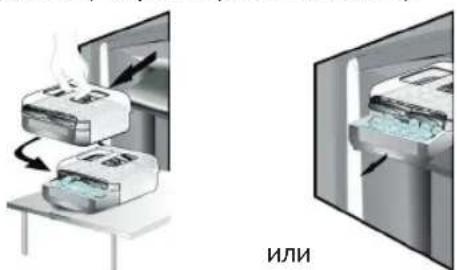
To remove the ice, gently lift the storage container and pull it towards you.
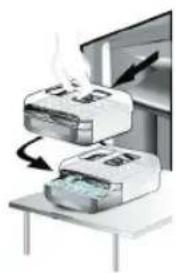
NOTE: If you prefer, you can remove the Ice Mate accessory from the appliance to remove the ice cubes, whichever is convenient for you (e.g., directly onto the table).
2.14. LIGHTING SYSTEM / INTERIOR LIGHT*
The lighting system in the freezer compartment uses LED lamps, which provide both good illumination and low energy consumption. If the LED lighting system does not work, contact the service department for repair.
3.2.3 DEFROSTING
Do not block the air outlet area (on the rear wall inside the product) with stored items. If the freezer is covered with frost, the storage volume may be reduced to a minimum by removing the frost. All appliances, including those with a no-frost system, may have internal temperature variations depending on the room temperature, the frequency of door opening, and the location of the appliance. When setting the temperature, these factors must be taken into account. Unless otherwise specified, the appliance's accessories are not suitable for use in a dishwasher.
4. TIPS FOR STORING FOOD
The freezer is designed for storing frozen food, making ice cubes, and freezing fresh food in the freezer compartment.
The maximum amount of fresh food that can be frozen within a period of 24 hours is indicated on the rating plate (...kg/24h).
If you have small quantities of food to store in the freezer, we recommend using the coldest areas of the freezer compartment, which correspond to the lower or middle area depending on the model (see the product card to check which area is recommended for freezing fresh food).
4.1. STORAGE TIME FOR FROZEN FOOD
The table shows the recommended storage time for frozen fresh food.
| Храни вreme HA | Съхранения (мeceи) |
| Mecо | |
| Говень do 8-12 | |
| Свинско, телеско 6-9 | |
| Агентko 6-8 | |
| Заецко 4-6 | |
| Мляно / карANTя 2-3 | |
| Наденица 1-2 | |
| |
| Птици | |
| Пиile 5-7 | |
| Пуйka 6 | |
| Дреболи 2-3 | |
| |
| Ранообразни | |
| Мекотеля, краз, омар 1-2 | |
| Краз, рak 1-2 | |
| |
| Міді | |
| Стриді с черпікі 1-2 | |
| |
2.4. Power failure alarm 65 2.5. Temperature alarm 65 2.6. Door open alarm 65 2.7. Party mode* 66 2.8. Shock freeze function* 66 2.9. Quick freeze* 66 2.10. Eco Night function (night electricity tariff)* 67 2.11. Freezer management 67 2.12. Automatic defrost prevention (No Frost) 67 2.13. Ice Mate 68 2.14. LED lighting system* 68
Chapter 3: Use 68
3.1. Adding frozen food storage guidelines 68 3.2. Notes 68
Chapter 4: Tips for food storage 69
4.1. Storage time for frozen food 69 4.2. Tips for freezing and storing fresh products 70 4.3. Using ice packs* 70 4.4. Frozen food: shopping tips 70
Chapter 5: Operating sounds 71
Chapter 6: Recommended actions when the appliance is not in use 72
6.1. Long absence / holiday period 72 6.2. Moving 72 6.3. Power failure 72
Chapter 7: Appliance maintenance and cleaning 72
Chapter 8: Troubleshooting guide 73
8.1. Before contacting service 73 8.2. Faults 74
Chapter 9: Service 74
Other:
Reversing the door (version 1) 267
Reversing the door (version 2) 269
REMOVAL/INSTALLATION OF INTERNAL PARTS 271
NOTE:
6th Sense Freeze Control/ ProFreeze Freeze
6th Sense Freeze Control-/ ProFreeze Freeze
9. CUSTOMER SERVICE CENTER
Refer to the images for the customer service center.
Operate the appliance to check if the problem is resolved. If the problem is not resolved, disconnect the appliance from the power supply and wait before operating it again.
After performing the checks mentioned in the "Troubleshooting Guide" and operating the appliance again, if your appliance still does not work properly, contact the customer service center and report the problem.
Provide the following details:
4-CHAPTER: PRODUCT MAINTENANCE AND CARE 141
4.1. CLEANING THE PRODUCT EXTERIOR 141 4.2. PRODUCT INTERIOR CLEANING AND MAINTENANCE 142 4.3. REPLACING THE BULB* 142 4.4. CLEANING THE PRODUCT INTERIOR 142
5-CHAPTER: FUNCTIONAL FAULTS 143
6-CHAPTER: INSTALLATION AND OPERATING INSTRUCTIONS 144
6.1. CONNECTION TO POWER SUPPLY 144 6.2. REPLACING THE DOOR 144 6.3. LAMP REPLACEMENT 144
7-CHAPTER: TECHNICAL SERVICE AND WARRANTY 144
8-TAPAY: AKAYLIKTARLY WEEWY HYSKAYLYFBLY 145 8.1. KENJIIK BOINIHSA KBIZMET KORCETY BONIMIHE HABARLACYDIN ANDYINDA... 145 8.2. AKAYLIKTAR 146
9-TAPAY: KENJIIDIK BOINBIHUA KBIZMET KORCETY 146
Backanap:
ECIKTIN AULYIY BAFYITYN AYISTYRU (1 HYSKA). 267
ECIKTIN AULYIY 5AFYITYN AYISTYRU (2 HYSKA) 269
KATYRYLYTYN IWKI BOILININ ANY/CAJU. 271
ECKERTTIE:
BUL NUSKALAR BIRLIKTE ULGILER UCHIN KOLLANILADI, SONLIKTAN OLAR EZGERILIKTERE BOLUVI MUMKIN. BELGILI BIR KURULUSLARGA GALA KATYSTYKOLLANILAN BELGILERDE JOKLYKZAMEN (*) KERSTETILER.
KANA SATYP ALINGAN KURULUSUNUZA ARNALGAN SUKNILARDI KYSKASHA ISKE KOSU ISKALYLYGYNAN TABYGA BOLANABLY.
1. INSTALLATION
1.1. INSTALLATION OF A SINGLE STRUCTURE
To ensure the structure's proper and safe operation, install it on a flat and level surface.
The distance between the rear wall of the structure and the wall behind it should be at least 50 mm.
This space is necessary for proper ventilation.
1.2. INSTALLATION OF TWO STRUCTURES
The refrigerator is designed to operate in both fresh food and freezer compartments (as shown in the figure). To prevent condensation between the compartments, the fresh food compartment and the freezer compartment are separated by a partition.
The two compartments are separated by a partition (as shown in the figure). They are designed to operate independently.
1.3. TEMPERATURE ADJUSTMENT (IF AVAILABLE)
The temperature adjustment is done by the temperature control knobs (for some models).
If the fresh food compartment is colder than the freezer compartment, turn the thermostat knob counterclockwise to the M10 position to make the fresh food compartment warmer.
If the freezer compartment is colder than the fresh food compartment, turn the thermostat knob counterclockwise to the M10 position to make the freezer compartment warmer.
2. FUNCTIONS
2.1. SMART DISPLAY
This function is used to save energy. To turn the function on or off, press and hold the button for a short time. After turning on the Smart Display, the display turns off after two seconds. To adjust the temperature or use other functions, you need to wake the display by pressing any button. After 15 seconds of inactivity, the display turns off again. When the function is turned off, the display stays on. After a power failure, the Smart Display turns on automatically. This function does not affect the temperature settings; it only turns off the display to save energy.
Note: The Smart Display function is designed to reduce energy consumption. This function is useful for users who are interested in saving energy.
2.2. 6TH SENSE CONTROL / PROFREEZE CONTROL
The 6th Sense Control / ProFresh Control function is designed to maintain the temperature in the following cases:
- When the door is opened frequently
When the door is opened, the temperature inside rises, and the function automatically adjusts to maintain the optimal temperature. If the food is stored in the freezer, the function activates to keep the food at the best quality, ensuring it is not damaged. The function is designed to work under these conditions.
Note: The temperature of the food, the ambient temperature, and the amount of food stored in the freezer affect the 6th Sense Control / ProFresh Control function. Therefore, the function may vary depending on these factors.
2.3. KOCY/KTY
Press the button to switch to the On/Stand-by mode. In this mode, the device is in standby and the button will light up. The button must be pressed to turn the device on. This operation should be performed carefully. Press the button to switch to the On/Stand-by mode.
2.4. DOOR OPENING
When the door is opened, the temperature of the freezer will automatically rise to the ambient temperature. If the temperature of the freezer rises above the set temperature, the door open indicator will light up, the alarm indicator will sound, and the door will be opened. To stop the alarm, press the alarm stop button once. When the door is opened, the following will occur:
If the freezer temperature is not set, but the door is opened, the freezer temperature must be maintained for 24 hours. If the freezer temperature is set, the door will be opened, and the temperature will be maintained. The door must be kept closed to maintain the temperature. The temperature of the freezer will be maintained by the thermostat. The door opening is intended for the safe storage of food. This will not affect the safety and quality of the food, and the temperature of the freezer will be maintained.
2.5. TEMPERATURE SETTING
The temperature is indicated by the temperature indicator (°C). The following settings are possible:
After the initial start-up, the temperature of the freezer will be higher than the set temperature. The temperature of the freezer will be maintained by the thermostat. To set the temperature, press the temperature setting button once. The temperature of the freezer will be set to -10°C. The temperature indicator (°C) will show the set temperature. The temperature will be maintained automatically.
2.6. DOOR OPENING
The door opening is indicated by the door open indicator and the alarm will sound. If the door is opened for more than 2 minutes, the alarm will sound. To stop the alarm, press the alarm stop button or close the door.
2.7. DEFROSTING

To defrost the freezer, press the defrost button. After 30 seconds, the defrosting will start (the defrosting will take about 0.75 minutes). The door will open, and the defrosting will start. Press the defrost button to start defrosting.
Note: Do not press the defrost button for more than 30 seconds.
2.8. FAST FREEZING*
The "Shock Freeze" function is used to quickly freeze food products. When the "Shock Freeze" function is activated, the food products are frozen faster, preserving their quality, taste, and nutritional value. If the "Shock Freeze" function is not used, it is recommended to freeze food products that have been cleaned and prepared for freezing.
Expert tip: If the Shock Freeze function is not used, it is possible to freeze food products. However, this may affect the quality and shelf life of the products.
To use the "Shock Freeze" function:
- Press the "Shock Freeze" button once. The function will run for 12 hours. The function will not be activated again within 12 hours.
- Instead of the "Shock Freeze" button, press the "Fast Freeze" button: It is not possible to activate the "Shock Freeze" and "Fast Freeze" functions at the same time.
- The "Shock Freeze" indicator will turn off.
- To use the "Shock Freeze" (Fast Freeze) function, press the button on the control panel: The indicator light will turn on, and the freezing process will be accelerated.
- Before freezing food products, it is recommended to clean them and cut them into pieces no larger than 2 cm (about 2 cm) to ensure even freezing.
- To achieve maximum freezing capacity, it is recommended to activate the "Shock Freeze" function before placing food products in the freezer.
- After using the "Shock Freeze" function, the indicator light will turn off automatically after 4-5 hours. The indicator light will turn off. Therefore, the "Shock Freeze" (Fast Freeze) function can be activated again by pressing the button on the control panel: the indicator light will turn off.
Please note:
- It is not possible to use the "Shock Freeze" and "Fast Freeze" functions at the same time. If the "Fast Freeze" function is activated, the "Shock Freeze" function will not be activated until the "Fast Freeze" function is turned off.
- If the Shock Freeze indicator light does not turn on,
"Shock Freeze" (quick freezing) function is used for freezing fresh food, preserving the indicator, freezing packaged food and freezing liquids. This function is an accelerated freezing process. During the freezing process (maximum duration: 1.5 hours), packaged food is frozen in the fastest possible way and the "Shock Freeze" process is carried out in freezing mode.
-Indicator - lamp
If the food has been frozen for a long time: in this case, the food may have been frozen for a short time. To use the "Shock Freeze" (quick freezing) function, first activate the function (set the freezer to the coldest setting), then press the freezer button for 1 second.
2.9. QUICK FREEZING*
Within 24 hours, the food placed in the freezer must be completely frozen according to the technical characteristics of the freezer.
Before placing food in the freezer, this function should be activated 24 hours in advance to ensure optimal freezing. To use/deactivate this function, press the start button on the control panel. After placing food in the freezer, the quick freezing function will be active for 24 hours; the quick freezing function will automatically turn off after 50 hours.
Attention:
For the purpose of preserving quality, the food should be frozen as quickly as possible, and the quick freezing function should be activated at least 1 hour before freezing.
Using the "Shock Freeze" function
To avoid damaging the appliance, it is not possible to use the "Shock Freeze" and "Quick Freeze" functions at the same time. Therefore, if the "Quick Freeze" function is already active, to deactivate the "Shock Freeze" function, you must first turn it off and then activate it.
2.10. ECO NIGHT FUNCTION (NIGHT ECONOMY TARIFF)

The Eco Night function is designed for countries where electricity tariffs are lower at night (when electricity consumption is lower than during the day) and where there are time-of-use tariffs. In such countries, electricity tariffs are lower at night.
To activate the function, press the button at the start time of the reduced tariff. For example, if the reduced tariff starts at 8 PM, press the button at that time. When the Eco Night indicator is on, the function is active. When the function is activated, the freezer's thermostat will automatically adjust to the set time, so that during the night, the freezer will consume less electricity.
Note: To save energy, the function should be activated both during the day and at night. If the function is not activated, the freezer will operate normally. To activate the function, press the button. When the Eco Night indicator is on, the function is active.
Warning: The freezer's thermostat is controlled by the Eco Night function, so the temperature may be higher than set.
MUSIC PIECES PREPARATION RULES
Prepare the surface for applying the music pieces.
NOTE: Only with water, fill completely (maximum level = 2/3 of the capacity).
Or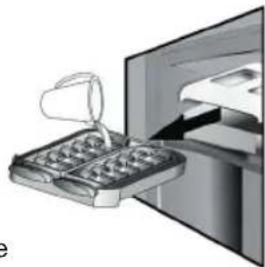
Apply the adhesive to the surface, then place the music pieces on it. Do not pour water.
If the music pieces are stuck, wait (at least 4 hours).
NOTE: The adhesive can be removed. It can be placed on a surface where music will be applied later, or if the music piece is not needed, it can be removed dry.
3. Usage
3.1. INCREASING THE ADHESIVE CAPACITY OF THE MUSIC
The adhesive capacity can be increased by the following:
- For large surfaces, take the buckets / containers. Place them on the music pieces. Take the music piece. Install it on the wall.
METHOD FOR TAKING MUSIC PIECES
Place the piece in the place indicated on the surface. If it is not, remove it.
Before starting, check the time against the clock. The music pieces are for
YaBbIfbHa Tcyedi.
Kaket 6oJca, HayaHbH 6aKa JapTbcI yuH 2-Kaamdb KaTajHaB13.
M3bany yuH, caTay yuBbIH cI KeTePi3 XHe 3i3re kapan TapTbIHbI3.
ECKEPTNE: KaIacahbI3, My3 KeceKTepiH bIHfaiNbI xepDe any ywiH, My3 Xacay KaIb6bH KypblfdaN TYreIeI WbIapBn anyfa 6onaIbI (MbICaIbI: YCTenDiH yctiHe).
2.14. JAPbIK IIOJTBI JAM KYNECI*
My3daTkbIb6eimHderi JapbIKTaHdbpy Kyneci JapbIK dIOaTbI WAM KynecIH NaIaHaHbIN, KaKcbI JapbIKTaHdbpy MeH KyaTbIH TeMeH DeHreIde TyTBiHbYbHa MymKiHdIK 6peedi. KapbIK NIOd WambHbIH Kyneci KymbIC icTeMeCe, OHbl aybICTbpy yWH, KbI3MeT KepeTy optaBfBImeH xa6apNaacbHbI3.
3.2.ECKEPTNEJIEP
Aya ubyfapy aimafbiH (eHIMHi iwiHderi apTkki Ka6bipra) TaFAM eHIMDepimeH byfattamaHb3. My3daTkbIiXkblIeH kAMTaMaCbI3 etInce, XaKbIuTbI any apkblCaKTay KeJeMih 6apbIHwa apTTbipyfa 60nabl. Bapnbkepeep,kanbIHTapXHeTaptbIn anbHaTBn ceBETepi anyra 6onaBl. KypbIbIbIH iKi TemnepaTypapabHa KOpwaH opTa TemnepaTypacbl,ecik awydbH xNiniri XHe KypbIbIbIHbH opHaIaCKaH opHbI cep etyi MyMkiH. TemnepaTypaHbI opHaTY Ke3iHde OcbI paKTopJIapDbI eckepy KaKeT. BackacbI KepeTeIMeCe, KpybInfbl KepeKxapaKaTapbIH bIDbc Xyy MaunHaCbIHda Xyyf a6onMaHdbI.
4. TAFAMdbI CAKTAY KEHECTEPI
KaTbIPfblu KaTbIPbINFaH TaFAM, My3 KeceKTePiH Xacay XeHE 6aNfbH TaFamDbI My3daTKblw 6eJIMiHde caKTayfa apHaNFAH TamaaOpBn. 24 caraTbIK Ke3eHde caKayfa 6oNaTbIH 6aIbIH TaAMhbIH KINORpMMdbIK MInIepi TexHkAnbIK DepeKTeP TaKTacbIHda KepceTiinreH (...Kr/24 car). My3daTkblTa cakTaNbIH a3bIK-TyNtIKTH MeIwepi a3 bONca, My3daTkbIu 6eNIMHH yIrrE 6aHaNbICTbXorapfbl Hemece opTaHfbI aMakKa CnKEc eH CaNbIB aMaftbIH naJaNAHFAH XeH (6aIbIH Tarambl My3daTyFa apHaIraFah aMakTbI aHbIKTay YUH OHIM CnNaTTaMacbIH KapaHbI3).
4.1.MY3DAtblIFAH A3bIK-TYJIKTICAKTAY YAKblTbl
KecTe My3daTbIaNfAH 6aNfBtIa3bIK-TyNIkTI YcbIbIaNtBtH CaTay YaKbITbH KepCteJI.
| A3bIK TYJIK CAKTAY | YAKbITbl
(aйлар) |
| Ет | |
| Сиьр ecti 8 - 12 | |
| Шошka eti, бухоту eti 6 - 9 | |
| Козы eti 6 - 8 | |
| Когн 4 - 6 | |
| Та rtылган et / iшек- karын 2 - 3 | |
| Шужыктар 1 - 2 | |
| |
| Уй күсbl | |
| Балanan 5 - 7 | |
| Курketaybl 6 | |
| Кустардын iшек- karны 2 - 3 | |
| |
| Шаяntэрізділір | |
| Моллюckтep, омар 1 - 2 | |
| Шаян, омар 1 - 2 | |
| |
| Моллюск | |
| Кабыршы lынган устрица 1 - 2 | |
| |
| Балык | |
| "майы" (акторе, майшабак, скубрави) | 2 - 3 |
| "майы emec салык" (нелIM, камбаа) | 3 - 4 |
| |
| БугaNicipiIlreH eT | |
| Ет, уй КУСы | 2 - 3 |
| |
| Сут симдерi | |
| Май | 6 |
| Ipimшik | 3 |
| Шайkanлган калегий | 1 - 2 |
| БалMuЗдak | 2 - 3 |
| Жальiptka | 8 |
| |
| Сорна сени Туздыктар | |
| Сорна | 2 - 3 |
| Ет таframдарын.apналган Туздык | 2 - 3 |
| Паштет | 1 |
| Ратуй | 8 |
| |
| Писipin'reн нан симдері сени нан | |
| Нан | 1 - 2 |
| ТорТ (Каралайыm) | 4 |
| Пechенbe (Кекстер) | 2 - 3 |
| КуIMak | 1 - 2 |
| Писipin'meген камыр | 2 - 3 |
| Писipin'ren кremi барSBалиш | 1 - 2 |
| Пица | 1 - 2 |
JEMICTEP MEH KOKOHICTEP
| A3bIK TYJIK CAKTAY | YAKbITbI (aɪnap) |
| Жемістор | |
| Алма 12 | |
| Θρικ 8 | |
| Кара 6улдірген 8 - 12 | |
| Кара Karaçakat / кызыл Karaçakat 8 - 12 | 12 |
| Шие 10 | |
| Шабдалы 10 | |
| Алмурт 8 - 12 | |
| Алхоры 10 | |
| Таńкураи 8 - 12 | |
| Култынай 10 | |
| Payгаш 10 | |
| Жеміstшырьнданы (anelpьсин, лимон, гpeйнфрут) | 4 - 6 |
| |
| Көkenістэр 8 - 10 | |
| Корншen 6 - 8 | |
| Райхан | 12 |
| Буршakтар | 8 - 10 |
| Берікгүл | 8 - 10 |
| Брokkonи | 8 - 10 |
| БpróccSEL opamжанырсы | 8 - 10 |
| Гулді opamжанырak | 10 - 12 |
| Сабіз 6 - 8 | |
| БалдырKEK | 8 |
| СанырayкУлakтар (ko3bИкУрбИK) | 6 - 8 |
| Акжелken | 10 - 12 |
| Бурсы | 12 |
| Асбуршak 12 | |
| Туие 6уршak | 12 |
| Сayмалдык | 8 - 10 |
| Кызанak | 8 - 10 |
| ЦуKKINH | |
BapnbMy3daTbIHaTaraMdapra6eJIriKoIBIN,KYHIN 6enrinerenXeH.Benri Kocy a3bIK-TyNIkTI aHBIKtan, canacbi HaapnaFaHwa JkapamdbblbMKep3iMe He denIH naDanaHy yaBtBIn aHbIKayra KEMeKTecedi. EpiinreH a3bIK-TyNIkTI kaTa My3daTnAbI3.
4.2.BALFBH TAFAMdbI MY3DATY XHE CAKTAY BOHBIHUA KEHECTEP
Before storing food products, they must be packed in appropriate packaging: foil bags, plastic bags, food film, and sealed containers or packaging. For products that need to be stored, the storage conditions, temperature, and shelf life must be observed. To prevent spoilage, contamination, and the growth of harmful microorganisms, it is necessary to store food products properly.
Some products may require special handling before storage.
Warning:
- When storing, keep food products out of direct sunlight. Do not touch stored products with bare hands or sharp objects. If a product is damaged after storage, do not consume it. After opening, the stored product can be stored again. Do not store together with cleaning agents.
4.3. STORING PACKAGED PRODUCTS
Packaged products should be stored in a cool, dry place after opening. To avoid contamination, place them on a clean surface or in a sealed container.
4.4. STORED PRODUCTS: SHELF LIFE AND EXPIRY
When checking the expiry date of stored products:
Check the packaging for damage (if the packaging is damaged, the product may spoil quickly). If the packaging is torn or the contents are leaking, do not store it and it may be unsafe to use. - When checking, take the stored products out of the container and do not touch them with bare hands. - After checking, put the products back in the storage container. - If a product has an unusual smell, do not consume it. Discard it within 24 hours. Do not expose it to temperatures above the minimum recommended or freeze it. Do not store it in the refrigerator. - Store the product in a cool, dry place.
5. FUNCTIONAL DEVICES
The devices mentioned in the instructions are designed to be used with automatic machines for cutting and mixing, and are equipped with motors.
Some functional devices may be optional:
The device is used for cutting and mixing, and for separating the pulp from the seeds. It is also used for grinding and mixing ingredients together. It is used for cutting two types of products. - It is used for separating the pulp from the seeds.
The following functional devices are available:
The device is used for cutting, mixing, or grinding after the initial processing step.
The taps and valves of the compressor must be opened smoothly.
Before starting the unit, the valves must be closed.
If the compressor is not used for a long time, the oil level in the oil sump must be checked, and the compressor must be started briefly.
The compressor must be operated with the "start" button.
The compressor's oil level must be checked with the thermostat before starting the unit.
6. MAINTENANCE AND TROUBLESHOOTING
6.1. OPERATION/START-UP
Before starting, ensure that the oil level is correct and that the unit is clean.
6.2. SHUTDOWN
- Close all valves.
- They should be closed slowly, one by one, or according to the manual, and secured with a lock.
- The thermostat must be set to the minimum position.
- Close the valve, secure it with a lock, and secure the lock with a key.
6.3. TROUBLESHOOTING
If troubleshooting is required, contact the company that supplied the electrical equipment and ask for their instructions.
Attention: The poultry farm and the poultry farm's employees must strictly follow the safety rules.
Language specialists should be consulted; they can help with translation and proofreading.
If the product is defective, it should be returned to the seller.
For 24 carat gold plated products.
- The poultry farm's safety rules are established. The possibilities of the products mentioned in this document are limited.
For products plated with more than 24 carats.
- The publisher is not responsible for the content and the product's layout. If the publisher's team is not complete, and the author's team is not complete, then the errors will be corrected quickly.
- The author is not responsible.
7. TECHNICAL SERVICE AND MAINTENANCE OF THE POULTRY FARM
Before performing maintenance or service, disconnect the device from the electrical supply or the electrical power source.
Clean the poultry farm with a dry cloth intended for this purpose. Do not use water. Do not use cleaning agents with abrasive substances. This may cause damage or malfunction. Clean the poultry farm with a soft, dry cloth; do not use a damp cloth.
These cleaning instructions are provided.
The capacitor installed on the poultry farm must be cleaned with a dry cloth before cleaning.
Warnings:
To prevent malfunctions, use only original spare parts from the manufacturer. Using non-original spare parts may cause damage. They should be replaced by qualified personnel. - Before starting work or replacing parts, disconnect the device from the power supply.
8. FAULT INDICATION
8.1. BEFORE CONTACTING SERVICE FOR REPAIRS...
If you have identified a fault yourself, you can try to eliminate simple faults using the following table.
| ПОНБЛЕМА ШЕЛIMI | |
| Курьлгы жуmbic ictemеidi: - Куат кабенин керneyi сөйес жуmbic icteитih розтkafoюкылган 6a? - Унддаги олькгу кушесинн корrayшы курьлгыары мehсakтыдырышарынTekсердizhi3 6e? | |
| Epyt no深加工ида cy 6ap 6oJca: - Бул bICTbK, дымьлг aya paы kезнд ekanыntbболытаблады. ПОДон, тinti, karрылай тоны сolyы мукin.Курьлгынсу тereimпindey, bip deнгдe снkeцсдурахын Kaesketikisi3i3. | |
| Erep ecik tibfizdaktskiblshimEnжahacatbIH KypbilflbKoprnycbihnshetterpiжынбɔлca: - Бул кашидai bICTbK aya paынддakhe кOMnpceccop jymbicicten Tурразда kaынлгы tabылады.. | |
| Шam жуmbic ictemeidi: - Yunisideri зелкгу кушесинн корrayшы курьлгыары мehсakтыдырышарынTekсердizhi3 6e? - Куат кабелiniн керneyi сөийес куmbic icteитih розтkafoюкылган 6a? - Харыдinoларзakыдалоган кафдддддддддддддддддддддддддддддддддддддддддддддддддддддддддддддддддддддддддддддддддддддддддддддддддддд徳ячын taibalmahar 6a? -Есik тиисише кушьлг Турліжafддларfaбaylahandstby: eciktih aushilny kuniiliri, caKTanfah taramhbHmmeileeri,балmederi temperatypa,tempepaTyrpanbIbnapametri.Kondehcatopda (KypbilflbHbHapTKbIgAIF) shan He mece Mambikxinajmafaran 6a? -Есik тиисише кушьлгНаKcTANFah OPAHDA motopədteridey y3aftbpak kymblc icteydii.Kурьлгы eciri 6ipa3 yakhtka aushik kaildbiplnca hemecetaramhbHng yken Kelemci caktaIca, KypbilflbHbHng iki KaIIirigin calkbHdaty uoiH, motop y3aftbpak yakbit 6ohyЖуmbic icteydii. | |
| Kурьлгы temnerapatypacbI tibmJorapbI bonca: | Kурьлгынбackару оль�entтepi дурьс opHaTBldbMa?Kурьлгыfa TaramhbHkonMeileeri calbHdBiMa?Eciktiu xni aushilmaTbHbHn Tekcepiniz. Eciktiu Tniicti Tpyde xazbllfaHbHn Tekcepiniz. |
| Erep ecikterТиICTiТурdeaushilmaca xene Jozabilmaca: | Taram opamdapbHbHc ecikti tipemeitihin Tekcepiniz. lshi kselekter hemces aBToMaTTb My3 rehepataOpbI opbHdapbHnda ekehin Tekcepiniz. Ecik tibfizdaktskblstapbI kip hemec ziaBickak emectinrH tekcepiniz. KypbilhlbHn teric TpyraHbHa Ka3 jeTeKiz3i3i3. |
8.2. FAULTS
If the device does not operate, check the items listed in the table below (e.g., 1-fault, 2-fault, etc.). Before contacting service for repairs, check the following: the device is connected to the power supply, the power cord and plug are in good condition, and the fuse is intact.
| Акayльк кodы Бейнелену |
| КаTe 2 | F apriniHжылбіltayы 0,5 сек. бoьинша косылады/өшedi. KOCUлы ke3de 2 pet кылбіltайды с对象и 5 секунд boйы ewipулì生态保护у. Ynri kaïталанды. | -88 x2 |
| КaTe 3 | F apriniHжылбіltayы 0,5 сек. саын косылады/өшedi. KOCUлы ke3de 3 pet кылбіltайды с对象и 5 секунд boйы ewipулì生态保护у. Ynri kaïtаланды. | -88 x3 |
| KaTe 6 | F apriniHжылбіltayы 0,5 сек. саын косылады/өшedi. KOCUлы ke3de 6 pet кылбіltайды с对象и 5 секунд boйы ewipулì生态保护у. Ynri kaïtаланды. | -88 x6 |
9. SERVICE AND REPAIRS
Before contacting service for repairs:
To avoid injury, do not open the device. If the device is damaged, unplug it and wait at least one hour before touching it.
If the device does not operate after replacing the fuses, contact service for repairs and describe the problem.
Please provide the following information:
- Model and serial number (given in the technical data sheet),

0000 000 0000
Serial number (written after SERVICE in the defect table on the inside of the device), your full name, phone number, and email address.
Excerpt:
This manual contains important safety information. Before operating the appliance, read the instructions carefully and keep them for future reference.
INDEX
Chapter 1: INSTALLATION 148
1.1 INSTALLATION OF A SINGLE APPLIANCE 148 1.2. INSTALLATION OF TWO APPLIANCES 148 1.3. ADJUST THE DOORS (IF AVAILABLE) 148
Chapter 2: FUNCTIONS 149
2.1. SMART DISPLAY* 149 2.2. 6TH SENSE FREEZE CONTROL / PROFREEZE FREEZE CONTROL 149 2.3. ON/STAND BY 149 2.4. POWER FAILURE ALARM 149 2.5. TEMPERATURE ALARM 149 2.6. DOOR OPEN ALARM 149 2.7. PARTY MODE* 150 2.8. SHOCK FREEZE* 150 2.9. QUICK FREEZE* 150 2.10. ECO NIGHT FUNCTION (NIGHT RATES) * 151 2.11. FREEZE CONTROL 151 2.12. AUTOMATIC NO FROST 151 2.13. ICE MATE 152 2.14. LED LIGHTING SYSTEM* 152
Chapter 3: USE 152
3.1. HOW TO INCREASE THE FREEZER'S STORAGE CAPACITY 152 3.2. NOTES 152
Chapter 4: TIPS FOR STORING FOOD 153
4.1. STORAGE TIME AND FROZEN FOOD 153 4.2. TIPS FOR FREEZING AND STORING FRESH FOOD 154 4.3. USING FREEZER ELEMENTS* 154 4.4. FROZEN FOOD: SHOPPING TIPS 154
Chapter 5: OPERATING NOISES 155
Chapter 6: RECOMMENDATIONS IF THE APPLIANCE IS NOT IN USE 156
6.1. ABSENCE/VACATION 156 6.2. MOVING 156 6.3. POWER FAILURE 156
Chapter 7: MAINTENANCE AND CLEANING 156
Chapter 8: TROUBLESHOOTING GUIDE. 157
8.1. BEFORE CONTACTING THE SERVICE DEPARTMENT 157 8.2. FUNCTIONAL ERRORS 158
Chapter 9: SERVICE DEPARTMENT 158
Other:
DOOR REVERSAL (VERSION_1) 267
DOOR REVERSAL (VERSION_2) 269
REMOVAL/INSTALLATION OF INTERIOR IN FREEZER 271
NOTE:
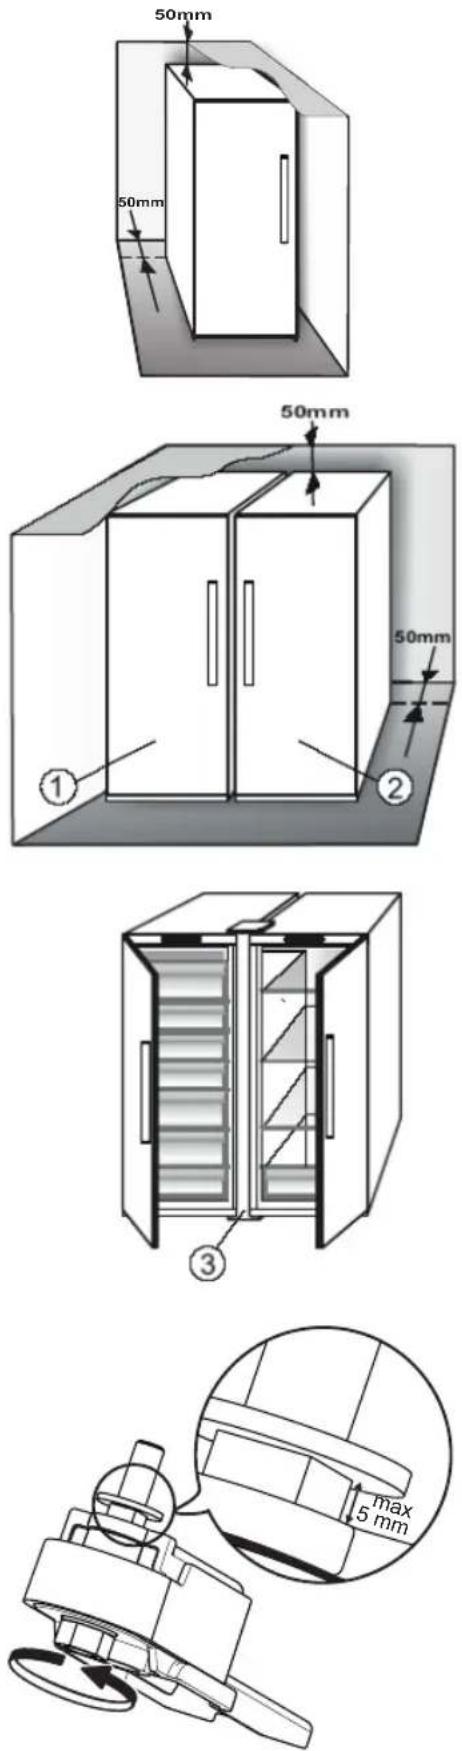
The distance from the rear side of the appliance to the wall must be at least 50 mm.
Reducing this distance increases the energy consumption of the appliance.
1.2. INSTALLATION OF TWO APPLIANCES
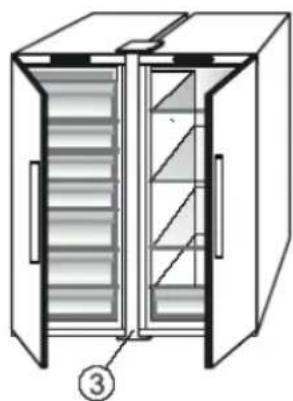
When installing a freezer ① and a refrigerator ② together, the freezer must be installed on the left, and the refrigerator on the right (as shown in the figure). On the left side of the refrigerator there is a special device that prevents condensation from forming in the gap between the two appliances.
We recommend installing both appliances using the set of connecting elements ③ (as shown in the figure). You can purchase the set at a service center.
1.3. DOOR ADJUSTMENT (IF EQUIPPED)
Leveling the doors using adjustable hinges (on some models)
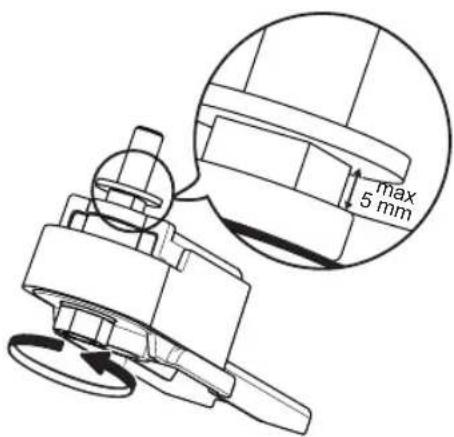
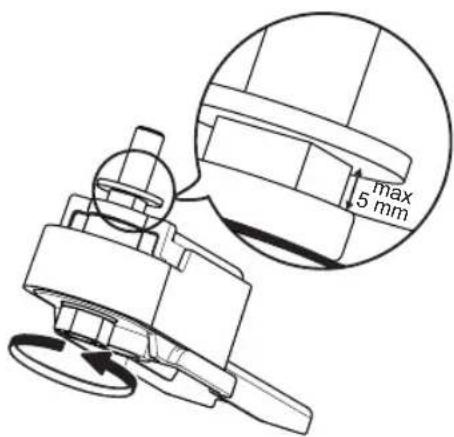
If the refrigerator door is lower than the freezer door, lift the refrigerator door by turning the adjusting screw counterclockwise with a key.
If the freezer door is lower than the refrigerator door, lift the freezer door by turning the adjusting screw counterclockwise with a key.
2. FUNCTIONS
2.1. SMART DISPLAY MODE
This function can be used to save energy. To activate or deactivate this function, follow the instructions in the "Quick User Guide". Two seconds after activation, the intelligent display goes off. To adjust the temperature or use other functions, it is necessary to activate the display by pressing any button. Approximately 15 seconds after any operation, the display turns off again. When the function is deactivated, the display returns to its normal state. The "Smart Display" function automatically deactivates in case of a power failure. It should be noted that this operation does not disconnect the appliance from the electrical supply, but only reduces the energy consumption of the display.
Principle: The appliance's energy consumption is related to operation with the "Smart Display" function activated. This function is available only on models with a user interface on the door.
2.2. 6TH SENSE FREEZE CONTROL / PROFREEZE FREEZE CONTROL
The "6th Sense Freeze Control/ ProFreeze Freeze Control" function maintains the required temperature level in the following situations:
- Door left open
The function activates if, with the door open, the internal temperature rises so much that safe food storage cannot be guaranteed. The function works until optimal storage conditions are restored. - Fresh food placed in the freezer compartment The function activates if fresh food is placed in the freezer compartment. The function works until optimal conditions are achieved, ensuring the highest quality freezing with minimal energy consumption.
Note: In addition to the quantity of products placed in the freezer, the duration of the "6th Sense Freeze Control/ ProFreeze Freeze Control" function is also affected by the ambient temperature and the quantity of products already in the freezer. Therefore, the active time may vary. This is quite normal.
2.3. ON/STANDBY MODE
This function switches the appliance to standby mode. To switch the appliance to standby mode, press and hold the button
"On/Standby" for 3 seconds. When the appliance is in standby mode, the lighting in the refrigerator compartment works. Remember that this action does not disconnect the appliance from the electrical supply. To switch the appliance back on, simply press the On/Standby button again.
2.4. POWER FAILURE WARNING
After a power failure, the appliance automatically checks the temperature in the freezer compartment. If the temperature in the freezer chamber has risen above the freezing level, after power restoration the power indicator lights up and the alarm indicator flashes with an audible alarm signal.
To turn off the alarm signal, press the alarm off button. Stop Alarm. If the "Power failure" signal occurs, it is recommended to perform the following actions:
- If the products in the freezer chamber have thawed but are still cold, they should be consumed within the next 24 hours.
- If the products in the freezer have been frozen, it means they have thawed and then refrozen after power restoration. Repeated freezing adversely affects the taste, quality, and nutritional properties of the products and may make them unsafe. In such cases, it is recommended not to consume the products and to discard all contents of the freezer. The "Power failure" signal indicates the need to check the products in the freezer in case of power interruptions. This system by itself does not ensure the quality of the products and does not guarantee their safety for consumption; it only indicates the need to check the quality of the products in the freezer chamber.
2.5. TEMPERATURE ALARM SIGNAL
An audible alarm signal sounds and the temperature indicator (°C) flashes. This signal is given in the following cases:
The appliance is connected to the power supply after a prolonged power outage if the temperature in the freezer chamber is too high; the quantity of products in the freezer chamber exceeds the permissible values indicated on the data plate - the freezer compartment door remained open for a prolonged period.
To turn off the audible alarm signal, press the alarm off button. Stop Alarm. The alarm indicator turns off automatically after the temperature in the freezer chamber drops below -10°C; at this point, the temperature indicator (°C) stops flashing and again displays the set temperature value.
2.6. DOOR OPEN SIGNAL
An audible signal sounds and the warning light △ flashes. The signal is activated if the door remains open for more than 2 minutes. To turn off the audible signal, close the door or press the signal off button △.
2.7. PARTY MODE

Use this function for rapid cooling of bottles in the freezer compartment. 30 minutes after activating the mode (this time is required to cool a 0.75 L bottle without breaking the glass), the function symbol starts flashing and an audible alarm signal sounds. Remove the bottle from the freezer compartment and press the "Disable Super Freeze" button to stop the signal.
Important: Do not leave the bottle in the freezer compartment longer than necessary for its cooling.
2.8. SHOCK FREEZE*
The express freezing function is designed for ultra-fast freezing of fresh products weighing no more than 2 kg. The "Shock Freeze" express freezing function minimizes the formation of ice crystals in products during the freezing process. Thanks to this, the highest quality of defrosted food is guaranteed before its consumption. When the express freezing function is inactive, the freezer compartment can be used for normal freezing or for storing frozen products.
Application: When the express freezing function is operating in active mode, a slight sound may be emitted. This is normal. The sound is created by the air flow that ensures optimal distribution of cold.
ACTIVATION AND DEACTIVATION OF THE EXPRESS FREEZING FUNCTION:
- Make sure that at least 12 hours have passed since the last activation of the express freezing function. Do not activate this function more often than every 12 hours.
- Make sure that the express freezing function is inactive: it is impossible to activate the express freezing function and the fast freezing function simultaneously. 3. Empty the express freezing compartment. 4. Activate the express freezing function by pressing and holding the button on the right side of the control panel until the pictogram lights up, and in the lower part of the compartment the fans turn on, which intensify the flow of cold air and, consequently, speed up the freezing process.
- Place the products in the freezer compartment, at a distance of at least 2 cm from the fans located in the rear part of the compartment, so that the cold air can circulate.
- To ensure maximum freezing speed, it is recommended not to turn off the express freezing function until it deactivates automatically and not to open the door.
7. The express freezing function deactivates automatically 3-5 hours after activation: the indicator goes out, the fans turn off. This function can also be turned off manually at any time by pressing and holding the button on the control panel until the indicator goes out and the fans turn off.
Attention:
This function is not compatible with the fast freezing function.
To ensure maximum efficiency of the appliance, do not use the express freezing and fast freezing functions simultaneously. If the fast freezing function has been activated, turn it off before activating the express freezing function (and vice versa).
IF THE FANS OF THE EXPRESS FREEZING COMPARTMENT DO NOT TURN ON
After activating the express freezing function, it is possible that the indicator lights up but the fans do not start working. This is quite normal and indicates that the freezer compartment is defrosting. After the defrosting stage is completed (maximum duration: 1.5 hours), the fans turn on automatically, and the express freezing function starts operating in normal mode.
- If the indicator
It lights up
If the light does not turn on after pressing the button, this means that the button was pressed for too long. To deactivate the fast freeze function, first deactivate the fast freeze function for this purpose, press and hold the button for 3 seconds, then press and release the button without holding it for more than 1 second.
2.9. FAST FREEZE*
The quantity of fresh food products (in kg) that can be frozen within 24 hours is indicated on the rating plate.
This function can be used to achieve optimal temperature characteristics of the appliance 24 hours before placing fresh products in the freezer. Please follow the instructions provided in the quick reference guide to activate this function. As a rule, after placing products, 24 hours is sufficient for their quick freezing. In this mode, the fast freeze function automatically turns off after 50 hours.
Attention:
To save energy when freezing small quantities of products, the fast freeze function can be turned off after a few hours.
This function is incompatible with the fast freeze function.
To ensure maximum efficiency of the appliance, do not use the fast freeze and fast freeze functions simultaneously. If the fast freeze function has been activated, turn it off before activating the fast freeze function (and vice versa).
2.10. ECO NIGHT FUNCTION (NIGHT TARIFF)
The Eco Night function ensures basic energy consumption during off-peak hours (usually at night), when electricity is available without restrictions and costs less than during the day (only in countries where a multi-tariff system is in effect). You can check with your local energy supply company. To activate this function, press the button when the period of reduced night rates begins. For example, if night rates apply from 20:00, press the button exactly at that moment. The Eco Night indicator shows that the function is operating in active mode. After activation, the appliance automatically adjusts energy consumption according to the time of day, i.e., it consumes less electricity during the day than at night.
IMPORTANT: For effective operation, the function must be activated both day and night. The function continues to work until deactivation (or until power interruption or disconnection of the appliance from the mains). To deactivate the function, press the button again. If the Eco Night indicator is not lit, this means the function is off.
Note: The delayed energy consumption indicator refers to the operation mode with the Eco Night function deactivated.
2.11. FROST CONTROL*
"Frost Control" is a control technology that minimizes temperature fluctuations in the freezer compartment. This is achieved through an innovative ventilation system, completely independent of the refrigerator compartment. Freezing times are significantly reduced, and products retain their nutritional quality and color.
To enable the "Freeze Control" function, select the function in the menu, set the value to >ON< and press the "OK" button to confirm the selection. To disable the function, repeat these steps, selecting the value >OFF<. The function operates only within a temperature range from 22°C to 24°C.
If at the moment of enabling the function the set temperature of the freezer was warmer than 22°C, it automatically adjusts to 22°C. If the user changes the temperature of the freezer, bringing it outside the operating range, the function automatically turns off.
When the "Quick Freeze" function is enabled, the operation of the "Freeze Control" function is blocked until the "Quick Freeze" function is turned off.
2.12. AUTOMATIC DEFROSTING (AUTOMATIC NO FROST)
This appliance provides automatic defrosting taking into account the operating conditions and atmospheric humidity.
In No Frost freezer compartments, cold air circulates around the storage areas, preventing the formation of ice. Thanks to this, manual defrosting is not required.
Frozen products do not stick to the walls, their packaging is not damaged, and cleanliness and order are maintained in the storage area.
In combination with "6th Sense Freeze Control/ ProFreeze Freeze Control", this function not only regulates the temperature based on sensor readings - it directs cooling power to where it is needed, optimizing energy consumption.
2.13. ICE MAKER (ICE MATE)*
REMOVING THE ICE CUBE TRAY
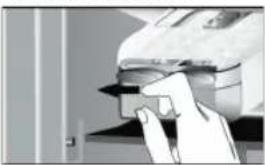
The ice cube tray can be removed by pulling it towards you.
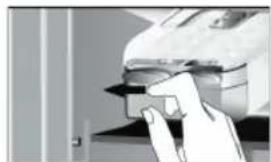
CAUTION: Use only drinking water (maximum fill level = 2/3 of the total capacity).
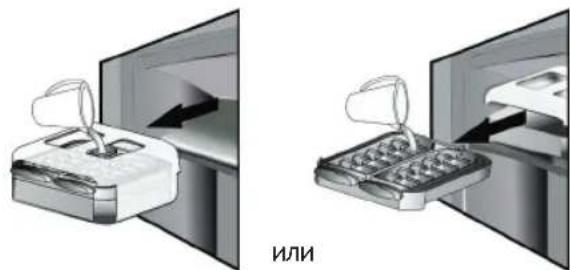
Place the ice cube tray back into the freezer compartment, then insert the tray into the ice maker. Be careful not to spill water.
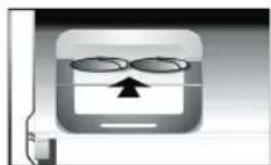
Here are some sounds that the operating appliance may make:
A clicking sound when the appliance is turned on for the first time or after a long pause.
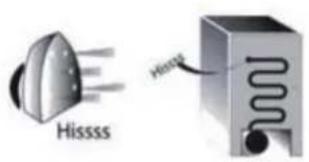
Noise during operation of the pipe heater.
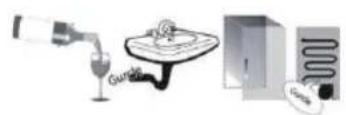
Operation of the compressor.
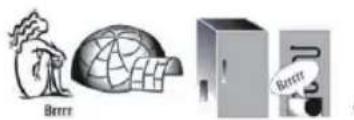
Noise accompanying the start of the fan motor of the water valve.
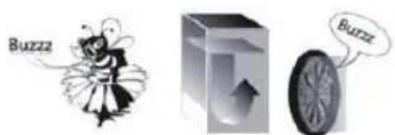
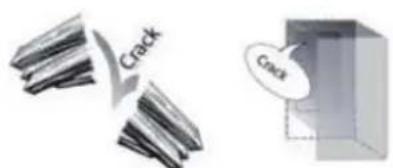
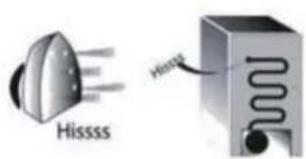
Crackling accompanying the start of the compressor or the fall of ice cubes into the ice container; sharp clicks at the moment of switching on or off the compressor.
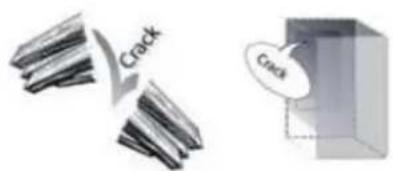
The sound of the thermostat regulating the frequency of compressor pulses.
6. IF THE APPLIANCE IS NOT IN USE
6.1. LONG ABSENCE/VACATION
If you are planning a long absence, it is recommended to consume the products and turn off the refrigerator and freezer to save electricity.
6.2. MOVING
- Remove all internal elements. 2. Wrap them in film and secure with tape so that they do not rattle and cannot be lost on the way.
- Tighten the adjustable legs so that they do not touch the floor.
- Close the doors and secure them with tape, also secure the power cord.
6.3. POWER OUTAGE
In case of a power outage, contact your local electricity company and clarify how long the outage will last.
Note: A refrigerator filled with products keeps the cold longer than an empty one.
7. CLEANING AND CARE
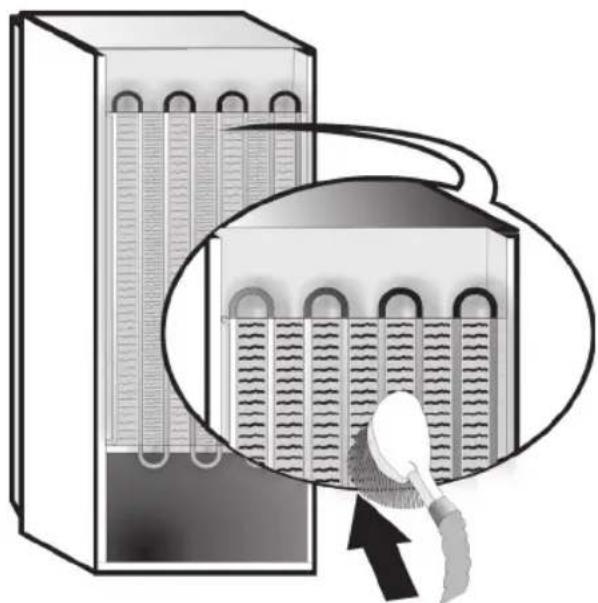
Before performing any cleaning or maintenance operations, disconnect the appliance from the electrical network. Regularly clean the appliance using a soft cloth dampened with a solution of warm water and a neutral cleaning agent, specially designed for cleaning the internal surfaces of refrigerators. Do not use abrasive agents. Do not use flammable liquids for cleaning refrigerator elements. Vapors can create a fire hazard. Clean the external surfaces of the appliance and the door gasket with a damp cloth, then wipe them dry with a dry cloth.
Do not use a steam cleaner.
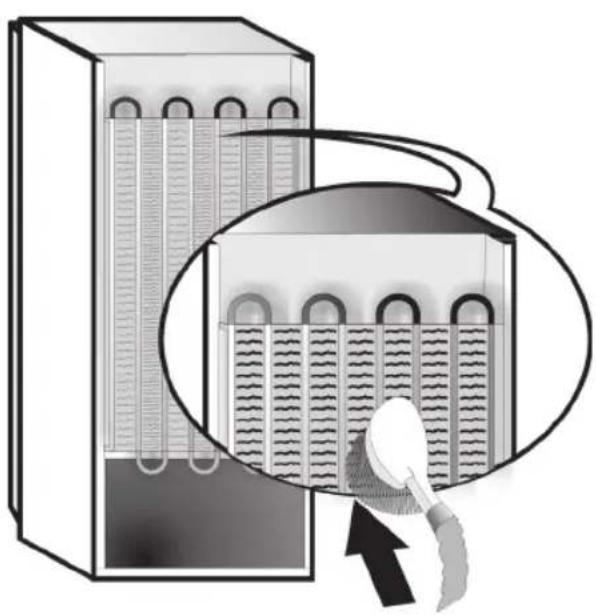
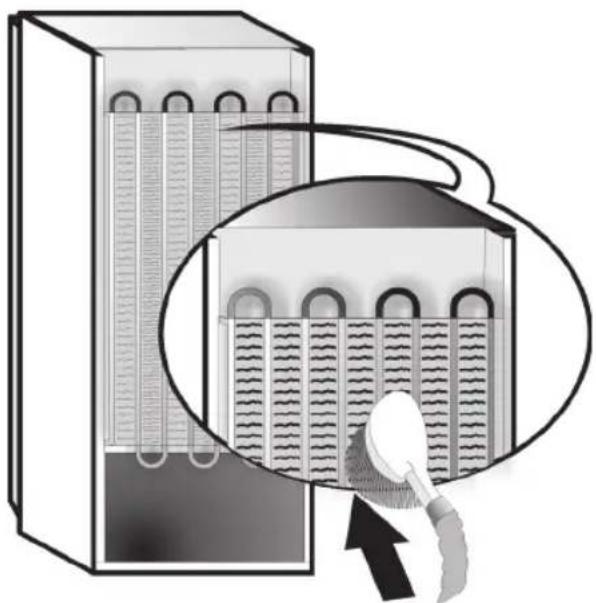
The condenser on the back side of the appliance should be cleaned regularly with a vacuum cleaner.
Bath:
The buttons and display on the control panel cannot be cleaned with alcohol or alcohol-containing liquids: they must be wiped with a dry cloth. The tubes of the cooling system are located near the defrosting heater and may heat up. Regularly clean them with a vacuum cleaner. If it is necessary to install a glass shelf, lift the front part of the shelf up so that the limiter is released.
If the products still have ice crystals visible, they can be frozen again, although the taste and aroma of the products may deteriorate.
Products that are in a bad condition are better to throw away.
If the power outage lasts less than 24 hours:
- Keep the refrigerator doors closed. This will allow the products to stay cold longer.
If the power outage lasts more than 24 hours:
- Unload the freezer compartment and place the products in a portable freezer. If you do not have a portable freezer or artificial ice, use the products as soon as possible.
- Empty the ice tray.
8. TROUBLESHOOTING
8.1. BEFORE CONTACTING THE SERVICE CENTER
Minor malfunctions during the operation of the device can often be fixed independently without the use of any tools.
| HENCNPABHOCTb CNTOCOB | UCTPAHEHIN |
| Прибор He pa6oTaet: • Y6eДиTeСь,чTo | Прибор ВКЛоЧенВ рОзЕТКУ эЛeKtrPчeСКоI cetи CпраВиьнБIM наряжehнeM. |
| Приборы.TЗаинТьe uсточТьa H эЛeKtrPчeСКeпpeДoxpaHITeLbВ bAsse KВapTnpe. |
| Если в лоте пазмоганьаюцeroу усточТьа нахонлалсь ВODa: | •ЭтоHopmaЛьноВжаркУв ВлajЖИУNo Погody. ПогдOn может нахонл�ьсь Даду Дду ПОЛOBИнь. Y6eДиTeCь,чTo priбор устовлелСтPORO rorp3ONHTaJIbHo: эTO pripeДOTВРАТН BblINBAHne BovlH N3 ラOTka. |
| Если края Коруca,нановяшесь вkontантыс уллOTнгельноги погнладков дervсы,нагревaitс: | •ЭтоHopmaЛьноВжаркУв Погodyи Когда Pa6oTaet KMПpeccop. |
| He pa6oTaet BvytpenHeeocbeшени: | •Приборы.TЗаинТьe uсточТьa H эЛeKtrPчeСКeпpeДoxpaHITeLbВ bAsse KВapTnpe. |
| •Y6eДиTeСь,чTo priбор ВКЛоченВ рог�ETКУ эЛeKtrPчeСКоI ceTy CпраВиьнБIM наряжehнeM. |
| •Если He pa6oTaOT CБETODINOДы,погдОВаTeLNo СLEДуETOBATNTСВЕВСНБИ N3EHTRP,посКЛьу CBETODINOДы TOTOxe TПla MoJH NO ПOLIуNTB TOЛьКВ CBepBISCHbIX ΒeHTPax Иln ABTopH3OBAHbIX DmIEpOB. |
| Если создаловь вechatlenе,чTo dBngateль pa6oTaet chepechypdolgo: | •ДиТьнБ�сь pa6oТы DBHrAteЯЗаиСHTOT ряda Фaktorob:чactOTA OTKpbIbAHNЯ DBerцы, KolIичecТВО пordуКТВ,temпepaТура Bo3dUxaВ ПOMESEнH, yctaHOBIIeHNOЗhaueHne Tempepatурь. |
| •Приборы, He habOKПИнCSь Лblьи ГразьHa KOHNDeHcatope (c TblьнOH CTOPONbI Пriборa). |
| •Приборы,Хороо Llin ЗakрыТДерцa. |
| •Приборы,В поядke Llin улOTннТьньы поглakдки DBePuaB. |
| •ВжаркNe Дин Или ecIn B ПOMeшeHINи Зakрko,ДВngarTeLb obStuHpo pa6oTaET DdOLbIe. |
| •Если Дeрца pri6oBaOpdoJIoTo octabalacb OTKpyToи Иln ecIn B xOLOДиЛнIKE xpaHITcR 6OJIbSoo KolIичecTBO пordyKТВ, dBngarTeLb BydET pa6oTaTb DdOLbIe CZeIbUO oxJaJedHn Kaemры pri6oBa. |
| Если в hamepe симшом ВсICOKаяtemпepатура: | •Приборы,праВиьно Лlin NaCTroPoHa TempepaTурa. |
| •He sblyIO Лlin BLOKeH O IIpr6Op 6OJIbSoo KolIичecTBO pordyKТВ? |
| •Y6eДиTeСь,чTo DBePua He OTKpyBaETC StIshKOMЧАСТ. |
| •Y6eДиTeСь,чTo DBePua ПлOTH O ZAkpyIta. |
| Если дeрца п loxo otKpyBaAeTcRиЗakрыBaEeTcR: | •Y6eДиTeСь,чTo pOdoKtBu He 6IoknpyOT DBePru. |
| •Y6eДиTeСь,чTo ABTOMATnueCkoe uSTPOCTBO ДдяпriГOTOBIeHINа K6bIKOB Лda HaxOДNTcT OTOH Na CBOeM MeCTe. |
| •Y6eДиTeСь,чTo уПLOTNTHeЛьнЯ ПОКЛадka DBePru He 3aIIINIIaET. |
| •Y6eДиTeСь,чTo pri6oBp UcTAHOBJIeN CTpOrO rorp3ONTalbHo. |
8.2. TROUBLESHOOTING
If alarm signals are triggered, they will be displayed as codes (e.g., alarm1, alarm2, etc.); contact the service center and provide the alarm code. An audible alarm sounds, the alarm indicator light flashes, and the letter F appears on the word display according to the fault codes described below:
TABLE OF CONTENTS
Chapter 1: INSTALLATION 232
1.1. INSTALLING ONE APPLIANCE 232 1.2. INSTALLING TWO APPLIANCES 232 1.3. ADJUSTING THE DOORS (IF APPLICABLE) 232
Chapter 2: FUNCTIONS 233
2.1. SMART DISPLAY* 233 2.2. 6TH SENSE FREEZER CONTROL / PROFREEZE FREEZER CONTROL 233 2.3. ON/STANDBY 233 2.4. POWER FAILURE ALARM 233 2.5. TEMPERATURE ALARM 233 2.6. DOOR OPEN ALARM 233 2.7. PARTY MODE* 234 2.8. SHOCK FREEZE* 234 2.9. QUICK FREEZE* 234 2.10. ECO NIGHT FUNCTION (NIGHT MODE) * 235 2.11. FREEZER CONTROL 235 2.12. AUTOMATIC DEFROSTING (NO FROST) 235 2.13. ICE MATE 236 2.14. LED LIGHTING* 236
Chapter 3: USE 236
3.1. INCREASING STORAGE SPACE IN THE FREEZER 236 3.2. NOTES 236
Chapter 4: TIPS FOR FOOD STORAGE 237
4.1. STORING FROZEN FOOD 237 4.2. TIPS FOR FREEZING AND STORING FRESH FOOD 238 4.3. USING THE FREEZER LAMPS* 238 4.4. FROZEN FOOD: SHOPPING TIPS 238
Chapter 5: OPERATING NOISES 239
Chapter 6: WHEN THE APPLIANCE IS NOT IN USE 240
6.1. ABSENCE/VACATION 240 6.2. WHEN MOVING 240 6.3. POWER FAILURE 240
Chapter 7: CLEANING AND MAINTENANCE 240
Chapter 8: TROUBLESHOOTING GUIDE 241
8.1. BEFORE CONTACTING THE SERVICE ORGANIZATION 241 8.2. MALFUNCTION 242
3.1. INCREASING THE STORAGE SPACE IN THE FREEZER
4.4.3 STORAGE OF FROZEN PRODUCTS: USEFUL TIPS
Frozen products should be stored according to the instructions given on the packaging.
Check that the packaging is not damaged (frozen products may be stored in damaged packaging). If the packaging is damaged or has moisture stains, it is possible that the products in the packaging have been partially thawed due to poor storage conditions. - When transporting frozen products, keep them in insulated bags to maintain the required temperature. Upon returning home, immediately place frozen products in the freezer compartment. - If products have partially thawed, do not refreeze them. Such products should be consumed within one day. - Avoid or minimize temperature changes. Store products for the period of their best quality, the expiration date is indicated on the packaging. Always follow the storage conditions indicated on the packaging.
5. NOISES DURING OPERATION
The noise heard during operation of the appliance is a normal phenomenon, as the appliance has a certain number of fans and compressors that automatically turn on and off.
How to reduce the intensity of some noises heard during operation of the appliance
Place the appliance and install it on a flat surface. Do not install the appliance close to surrounding furniture. - Check that the components inside the appliance are correctly installed. - Check that the shelves and containers do not touch each other.
Some noises that may be heard during operation of the appliance
Clicking sound during the first activation of the appliance or after a long period of inactivity.
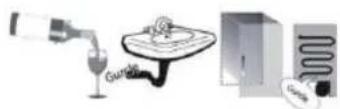
Bubbling sound when the refrigerant is in the cooling pipes.
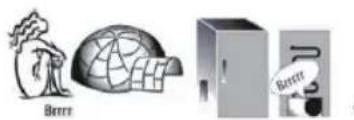
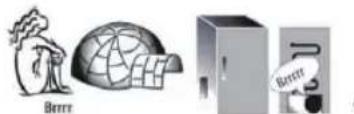
A "brrr" sound is heard during compressor operation.
Danger: Do not perform maintenance on the valve or fan.
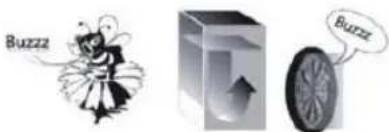
Tripping the circuit breaker or disconnecting the compressor or condenser fan from the power supply. When the compressor is switched on, the valve opens.
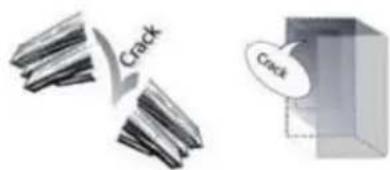
Valves and thermostats regulate the frequency of compressor operation.
6. RECOMMENDATIONS FOR NON-USE OF THE APPLIANCE
6.1. ABSENCE/LEAVING
In case of prolonged absence, it is recommended to empty the refrigerator of food products and turn it off to save electricity.
6.2. MOVING
- Remove the internal parts of the refrigerator.
- Wrap the removable parts of the refrigerator in paper and secure them with adhesive tape so that they do not knock against each other and get lost.
- Close the door at the recommended height so that it does not protrude above the support surface.
- Close the doors and secure them with adhesive tape, as well as secure the power cord to the appliance with tape.
6.3. POWER OUTAGE
In case of a power outage, contact your local electricity supplier and ask when the power supply will be restored.
Note: A fully loaded refrigerator will maintain a lower temperature longer than a partially loaded one.
Food products should be checked periodically; this means they are not yet frozen, but their taste properties and quality may be lost.
Keep the product frozen until the moment of use.
If the product is defrosted in the microwave for more than 24 hours, follow the instructions below.
- Do not open the freezer. This is necessary to maintain the low temperature in the freezer for a long time.
If the product is defrosted in the microwave for more than
24 hours, follow the instructions below.
- Stop freezing from the moment of removal from the freezer to the portable cooler. If it is impossible to do this and there are thawed packages with ice, first of all, it is necessary to freeze them again, if they are still cold.
- Shape the ice cubes into the desired form.
7. MAINTENANCE AND CARE
Before performing cleaning or maintenance, unplug the appliance from the power supply or turn off the power.
It is recommended to clean the appliance with a damp cloth and a mild detergent (especially if the appliance has been in contact with food). Never use abrasive cleaners. Never use sharp objects or solvents. They may damage the surface or cause a fire. Wipe the exterior surface with a damp cloth and then dry it.
Do not use a steam cleaner. It is necessary to regularly clean the condenser, located on the back of the appliance, using a vacuum cleaner.
Important!
The buttons and the control panel display must not be wiped with cloths containing alcohol, but only with a dry cloth. The tubes of the cooling system are located under the appliance for collecting defrosted water and may heat up. Periodically clean these tubes with a vacuum cleaner. To remove or insert the ice tray, lift the front part of the tray so as not to damage the tray.
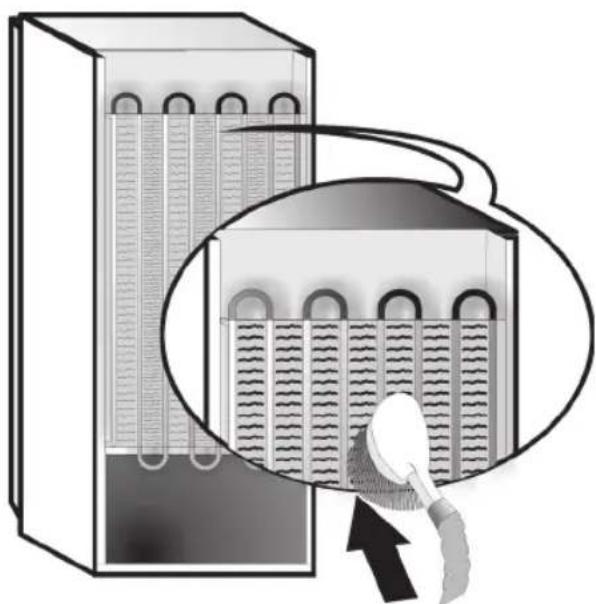
8. TROUBLESHOOTING
8.1. BEFORE CONTACTING THE SERVICE CENTER, READ THE INFORMATION PROVIDED BELOW
The effectiveness of the device may be affected by minor faults that can be fixed independently and without the use of special tools.
Before contacting the service center after the warranty service, check the following:
Turn the device off and on and check if the problem persists. If the problem persists, disconnect the device from the power source and wait for one hour before turning it on again.
If after following the instructions in the "Troubleshooting and Turning On" section and turning the device on again the problem persists, contact the service center and describe the fault.
Provide the following information:
- The serial number of the device (indicated on the nameplate with technical data), the problem description,
0000 000 0000
SERVICE
- The service number (the number indicated after the word "SERVICE" on the nameplate with technical data, located in the middle of the device), full postal address; telephone number and country/region code.
Receipt.
The opening voltage may vary. The warranty does not cover damage caused by unauthorized service center repairs.
INDEX
Chapter 1: INSTALLATION 256
1.1 INSTALLING SINGLE APPLIANCE 256 1.2. INSTALLING TWO APPLIANCES 256 1.3.ADJUSTDOORS(IFAVAILABLE) 256
Chapter 2: FUNCTIONS 257
2.1. SMART DISPLAY* 257
2.2. 6TH SENSE FREEZE CONTROL / PROFREEZE FREEZE CONTROL 257
2.3. ON/STAND BY 257
2.4. BLACK OUT ALARM 257
2.5. TEMPERATURE ALARM 257
2.6. DOOR OPEN ALARM 257
2.7. PARTY MODE* 258
2.8. SHOCK FREEZE* 258
2.9. FAST FREEZE* 258
2.10. ECO NIGHT FUNCTION (NIGHT TIME RATE) * 258
2.11. FREEZE CONTROL 258
2.12. AUTOMATIC NO FROST 258
2.13. ICE MATE 260
2.14. LED LIGHT SYSTEM* 260
Chapter 3: USE 260
3.1. HOW TO INCREASE FREEZER STORAGE CAPACITY 260
3.2. NOTES 260
Chapter 4: FOOD-STORAGE TIPS 261
4.1. STORAGE TIME OF FROZEN FOODS 261
4.2. TIPS FOR FREEZING AND STORING FRESH FOOD 262
4.3. USING ICE PACKS* 262
4.4. FROZEN FOOD: SHOPPING TIPS 262
Chapter 5: FUNCTIONAL SOUNDS 263
Chapter 6: RECOMMENDATION IN CASE OF NO USE OF THE APPLIANCE 264
6.1. ABSENCE/VACATION 264
6.2. MOVING 264
6.3. POWER FAILURE 264
Chapter 7: MAINTENANCE AND CLEANING 264
Chapter 8: TROUBLESHOOTING GUIDE 265
8.1. BEFORE CONTACTING AFTER-SALES SERVICE 265
8.2. FAILURES 266
Chapter 9: AFTER-SALES SERVICE 266
Others:
REVERSE DOOR SWING (VERSION_1) 267
REVERSE DOOR SWING (VERSION_2) 269
REMOVING/INSERTING THE FREEZER INTERIOR 271
NOTE:
The instructions apply to several models, so there may be differences. Sections which only apply to certain appliances are indicated with an asterisk (*).
Functions which are dedicated specially for your already bought model of product you will find in QUICK START GUIDE.
1. INSTALLATION
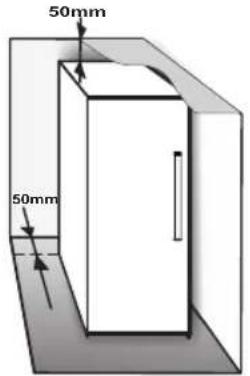
1.1. INSTALLING SINGLE APPLIANCE
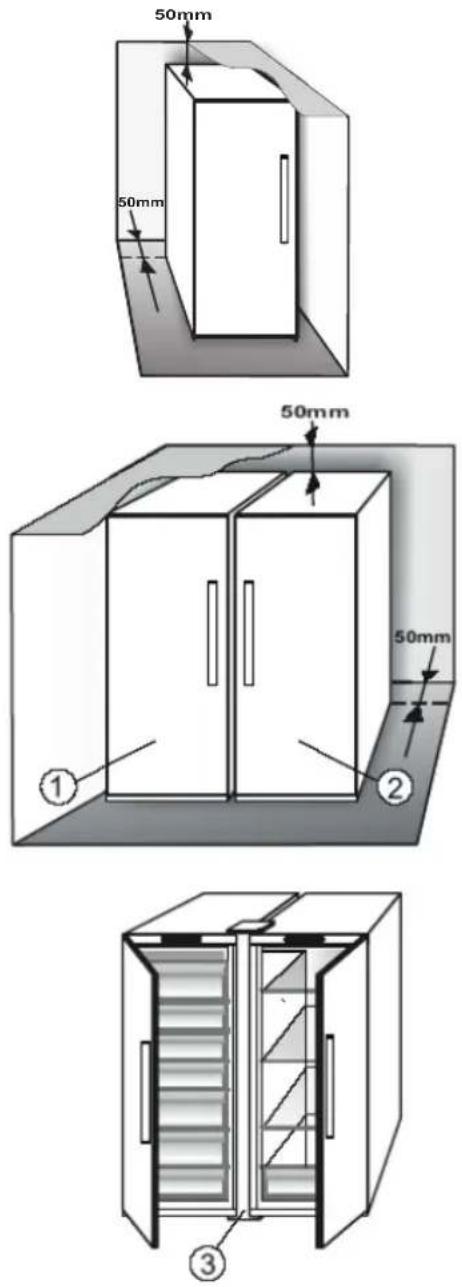
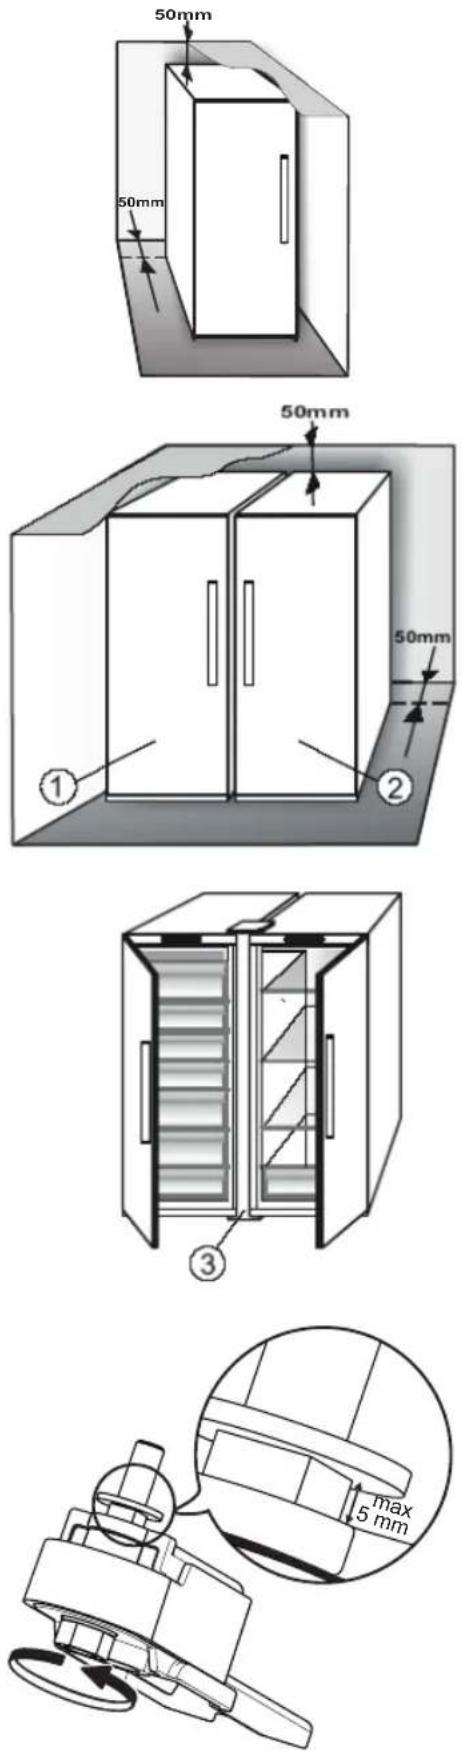
To guarantee adequate ventilation, leave a space on both sides and above the appliance.
The distance between the rear of the appliance and the wall behind the appliance should be at least 50 mm.
A reduction of this space will increase the Energy consumption of product.
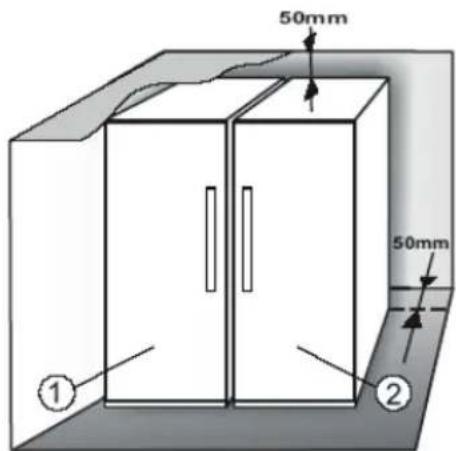
1.2. INSTALLING TWO APPLIANCES
During installing the freezer ① and the fridge ② together ensure that the freezer is located on the left and the fridge on the right (as shown on the drawing). Left side of refrigerator is equipped with special device in order to avoid condensation problems between appliances.
We recommended installing two appliances together using the linking-kit ③ (as shown on the drawing). You can buy it in Service.
1.3. ADJUST DOORS (IF AVAILABLE)
To level the doors using the adjustable lower hinge (select models)
If the refrigerator door is lower than the freezer door, raise the refrigerator door by turning the adjustment screw counterclockwise using a M10 wrench.
If the freezer door is lower than the refrigerator door, raise the freezer door by turning the adjustment screw counterclockwise using a M10 wrench.
2. FUNCTIONS
2.1. SMART DISPLAY*
This function can be used to save energy. Please follow the instructions contained in the Quick Start Guide to activate/deactivate the function. Two seconds after activation of the Smart Display, the display goes off. To adjust the temperature or use other functions, it is necessary to activate the display by pressing any button. After about 15 seconds without performing any action, the display goes off again. When function is deactivated the normal display is restored. The Smart Display is automatically disabled after a power failure. Remember that this function does not disconnect the appliance from the power supply, but only reduce the energy consumed by external display.
Note: The declared appliance energy consumption refers to operation with the Smart Display function activated. This function is available only on the model with User Interface on the door.
2.2. 6TH SENSE FREEZE CONTROL / PROFREEZE FREEZE CONTROL
The 6th Sense Freeze Control/ ProFreeze Freeze Control function works to maintain the right temperature in the following cases:
- Door opened for a while
The function activates when door opening causes the internal temperature to increase to values that do not ensure safe storage of food and remains active until optimal storage conditions have been restored.
- Fresh food stored in the freezer
The function activates when fresh food is placed in the freezer and remains active until optimal freezing conditions are reached so as to ensure the best freezing quality with the lowest power consumption.
Note: Besides the quantity of food loaded into the freezer, ambient temperature and the quantity of food already inside the freezer affect the duration of the 6th Sense Freeze Control/ ProFreeze Freeze Control function. Therefore significant duration variations are quite normal.
2.3. ON/STAND BY
This function turns On/Stand-by the freezer compartments. To put the product in Stand-by, press & hold the On/Stand-by button for 3 seconds. When the appliance is in Stand-by, the light inside the freezer compartment does not work. Remember that this operation does not disconnect the appliance from the power supply. To switch the appliance On again, simply press the On/Stand-By button .
2.4. BLACK OUT ALARM
After a power blackout, your product is designed to automatically monitor the temperature in the freezer when electricity is resupplied. If the temperature in the freezer rises above freezing level, the Black Out indicator turns on, the Alarm indicator blinks and the acoustical alarm sounds when electricity is resupplied.
To reset the alarm press the Stop Alarm button just once.
In case of Black Out Alarm, the following actions are recommended:
If the food in the freezer is unfrozen but still cold, all the food in the freezer should be eaten within the next 24 hours.
- If the food in the freezer is frozen, this indicates the food was thawed and then refrozen when electricity was re-supplied which degrades taste, quality and nutritional value and also could be unsafe. It is recommended to not consume the food but to dispose of the entire content of the freezer. The Black Out Alarm is designed to provide guidance on food quality in the freezer in the event of electricity black out. This system does not guarantee food quality or safety and consumers are advised to use their own judgment in evaluating food quality in freezer compartment.
2.5. TEMPERATURE ALARM
The acoustic alarm sounds and temperature indicator (°C) blinks. The alarm is activated when:
- The appliance is connected to the power supply after prolonged disuse
- The freezer compartment temperature is too high
- The quantity of fresh foods loaded into the freezer exceeds that indicated on the rating plate
- The freezer door has been left open for a long time. To mute the alarm buzzer press Stop Alarm button just once. The Alarm indicator is automatically turned-off as soon as the freezer compartment reaches a temperature below -10°C and the temperature set indicator (°C) stops blinking and shows the chosen setting.
2.6. DOOR OPEN ALARM
The Alarm icon lights up blinking and the acoustic alarm sounds. The alarm is activated when the door is left open for more than 2 minutes. To disengage the door alarm close the door, or press once Stop Alarm button to mute the acoustic alarm.
2.7. PARTY MODE

Use this function to chill drinks inside the freezer compartment. 30 minutes after selection (the time required to chill a 0.75 l bottle without the glass breaking), the symbol flashes, an acoustic alarm sounds: remove the bottle from the freezer compartment and press the Stop Alarm button to disable the alarm.
Important: do not leave the bottle inside the freezer compartment longer than the time necessary for chilling.
2.8. SHOCK FREEZE*
The "Shock Freeze" compartment is specifically designed to freeze up to 2 kg of fresh food extremely quickly. The ultra-fast "Shock Freeze" function minimizes the formation of ice crystals inside the food as it freezes, thus ensuring it is of the best possible quality when defrosted prior to consumption. When the "Shock Freeze" function is not active, the compartment can be used as normal for traditional freezing or for the storage of already frozen foods.
Note: When the Shock Freeze function is active you may hear a humming sound. This is absolutely normal and is caused by airflow that permits optimum cold distribution inside the compartment.
Activating and deactivating the "Shock Freeze" function:
- Make sure at least 12 hours have passed since the last time the "Shock Freeze" function was activated (if at all). Do not activate the function more frequently than once every 12 hours.
- Make sure that the "Fast Freeze" function is not active: "Shock Freeze" and "Fast Freeze" functions cannot be active together at the same time.
- Empty the "Shock Freeze" compartment.
- Activate the "Shock Freeze" function by briefly touching the button on the control panel: the icon lights up and the fans on the bottom of the compartment come on, increasing the flow of cold air and accelerating the freezing process as a result.
- Place the food to be frozen inside the compartment, a few centimeters (min. 2 cm) away from the fans on the back of the compartment, so that cold air can circulate.
- To achieve maximum freezing speed, we recommend not to deactivate the "Shock Freeze" function until its automatic deactivation, keeping closed the door.
- The "Shock Freeze" function is automatically deactivated 4-5 hours after its activation: the indicator switches off and the fans are deactivated. The "Shock Freeze" function may nevertheless be switched off at any time as desired, by briefly pressing the button on the control panel: the indicator switches off and the fans are deactivated.
Attention:
- Incompatibility with the "Fast Freeze" function. To guarantee optimal performance, the "Shock Freeze" and "Fast Freeze" functions cannot be used at the same time. Therefore, if the "Fast Freeze" function has been already engaged, it has to be disengaged first to activate the "Shock Freeze" function (and vice-versa).
- If the fans in the Shock Freeze compartment do not start working
After the "Shock Freeze" function has been activated, it may happen that the indicator * lights up as expected, but the fans do not start working. This is normal and means that freezer defrosting is in progress. At the end of the defrosting phase (maximum duration: 1.5 hours), the fans will automatically start working and the "Shock Freeze" process will begin as normal.
- If the indicator does not light up
If, after the button is pressed, the icon lights up: in this case the button has been pressed for too long. To activate the "Shock Freeze" function, first deactivate the Fast Freeze function (holding the button for 3 seconds, then briefly touch the button, without keeping it pressed for more than 1 second.
2.9. FAST FREEZE*
The amount of fresh food (in kg) that can be frozen in 24 hours is indicated on the appliance rating plate.
This function can be used for optimum appliance performance, 24 hours before placing fresh food in the freezer. Please follow the instructions contained in the Quick Start Guide to activate/deactivate the function. After placing fresh food in the freezer, 24 hours on Fast Freeze function is generally sufficient; After 50 hours the Fast Freeze function automatically deactivates.
Attention:
In order to save energy, when freezing small amounts of food, the fast freeze function can be deactivated after a few hours.
- Incompatibility with the "Shock Freeze" function
To guarantee optimal performance, the "Shock Freeze" and "Fast Freeze" functions cannot be used at the same time. Therefore, if the "Fast Freeze" function has been already engaged, it has to be disengaged first to activate the "Shock Freeze" function (and vice-versa).
2.10. ECO NIGHT FUNCTION (NIGHT TIME RATE) *
The Eco Night function enables appliance energy consumption to be concentrated in the reduced rate hours (generally at night), when electricity is readily available and costs less than during the daytime (only in countries that utilise a time based multi-rate system - check energy rates with the local electricity company). To activate the function, press the button at the reduced rate start time (depending on the specific rates plan). For example, if the reduced rate starts at 8 p.m., press the button at that time. When the Eco Night indicator ON, the function is ON. Once the function is activated, the appliance automatically adapts energy consumption according to the time selected, i.e. consuming less energy during the day than at night.
IMPORTANT: To operate properly, the function must be on during the night and day. The function remains on until deactivated (or it is deactivated in case of a power failure or appliance switch-off). To deactivate the function, press the button again. When the Eco Night indicator is OFF, the function is OFF.
Note: The declared appliance energy consumption refers to operation with the Eco Night function deactivated.
2.11. FREEZE CONTROL*
Freeze Control is an advanced technology that reduces temperature fluctuations in the whole freezer compartment to minimum, thanks to an innovative air system, totally independent from the fridge. Freeze burns are significantly reduced and food preserves its original quality and color.
To activate the Freeze Control choose the function from the menu, set to ON and press OK button to confirm the selection. To deactivate this function repeat the same procedure setting to OFF.
The function works properly in a defined range of temperature: between -22°C and -24°C.
When the function is engaged and the current temperature in the freezer is set to the warmer set point than -22°C, the temperature is automatically set to -22°C to match the working range.
If the function is engaged and the user modify the freezer temperature out of the working range, the function is automatically switched off.
In case of Fast freezing is engaged, the function "Freeze control" is inhibited until the Fast Freezing function switched off.
2.12. AUTOMATIC NO FROST
This product is designed to defrost automatically according to conditions of use and ambient humidity. No Frost freezers provide chilled air circulation around the storage areas and prevent the formation of ice, thereby completely eliminating the need for defrosting. Frozen items don't stick to the walls, labeling stays legible and storage space remains neat and clear.
In combination with the 6th Sense Freeze Control/ ProFreeze Freeze Control, not only does it control the sensor, but directs the cooling power exactly where it is needed, optimizing energy efficiency.
2.13. ICE MATE*
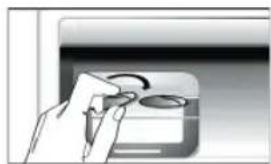
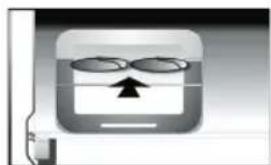
HOW TO MAKE ICE CUBES
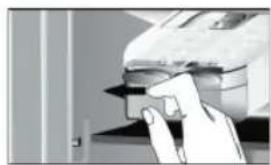
You can remove the ice cube tray by pulling it towards you.
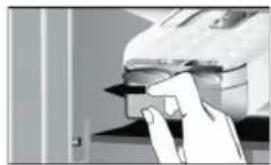
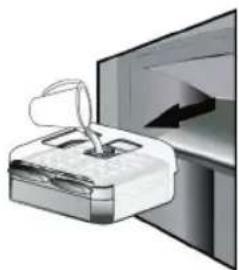
WARNING: fill with potable water only (maximum level = 2/3 of the overall capacity).
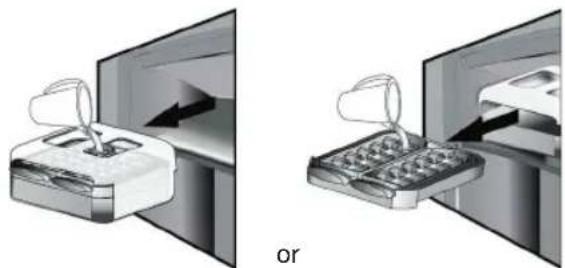
Place again the Ice Mate in freezer compartment, or reinsert the ice cube tray within the Ice Mate. Take care not to spill water.
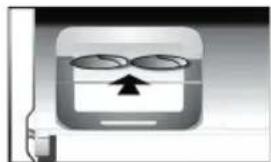
Wait until the ice cubes are formed (it is recommended to wait for about 4 hours).
NOTE: Ice Mate is removable. It can be placed in horizontal position anywhere in the freezer compartment or taken out of the appliance when icemaking is not required.
3. USE
3.1. HOW TO INCREASE FREEZER STORAGE CAPACITY
You can increase storage capacity in the freezer compartment by:
- removing the baskets / flaps* to allow the storage of big products.
- placing the food products directly on the freezer shelves.
- removing the Ice Mate*.
- removing bottle rack*.
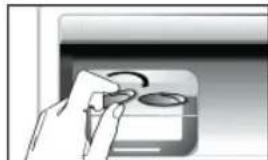
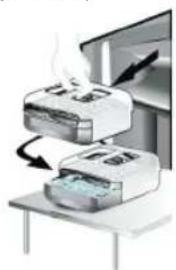
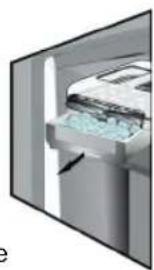
HOW TO TAKE ICE CUBES
Make sure that the storage bin is in place under the ice tray. If not, slide into place.
Twist one of levers firmly in the clockwise direction until the tray twists slightly. The ice cubes fall into the storage bin.
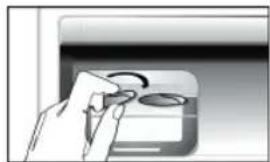
Repeat Step 2 for the other half of the tray, if necessary. To get ice, slightly lift up the storage bin and pull it towards you.
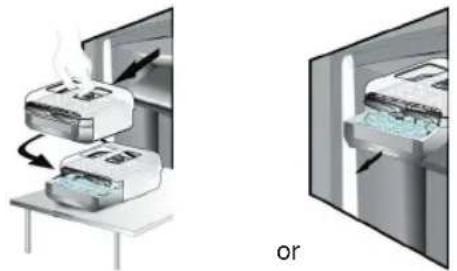
NOTE: if you prefer, you can remove the entire Ice Mate from the appliance, to take the ice cubes wherever is convenient for you (for example: directly on the table).
2.14. LED LIGHT SYSTEM*
The light system inside the freezer compartment uses LEDs light, allowing a better lightning as well as very low energy consumption. If the LED light system does not work, please contact the Service to replace it.
3.2. NOTES
- Do not block the air outlet area (on the back wall inside the product) with food products. If the freezer is provided with a flap, it is possible to maximize the storage volume by removing the flap.
- All shelves, flaps and pull-out baskets are removable.
- The internal temperatures of the appliance may be affected by the ambient temperature, frequency of door opening, as well as location of the appliance. Temperature setting should take into consideration these factors.
- Unless otherwise specified the appliance accessories are not dishwasher safe.
4. FOOD-STORAGE TIPS
The freezer is the ideal storage location for store frozen food, make ice cubes and freeze fresh food in the freezer compartment.
The maximum number of kilograms of fresh food that can be frozen within a 24-hour period is indicated on the rating plate ( ... kg / 24h ).
If you have a little quantity of food to store in the freezer, we recommend to use the coldest areas of your freezer compartment, corresponding to the upper or the middle area, depending on your model (see the product sheet to know which is the area where is suggested to freeze fresh food).
4.1. STORAGE TIME OF FROZEN FOODS
The table shows the recommended storage time for frozen fresh foods.
| FOODST STORAGE | TIME
(months) |
| Meat | |
| Beef 8 - 12 | |
| Pork, veal 6 - 9 | |
| Lamb 6 - 8 | |
| Rabbit 4 - 6 | |
| Mince / offal 2 - 3 | |
| Sausages 1 - 2 | |
| |
| Poultry | |
| Chicken 5 - 7 | |
| Turkey 6 | |
| Giblets 2 - 3 | |
| |
| Crustaceans | |
| Molluscs creab, lobster 1 - 2 | |
| Creab, lobster 1 - 2 | |
| |
| Shellfish | |
| Oyster, shucked | 1 - 2 |
| |
| Fish | |
| “fatty” (salmon, herring, mackerel) | 2-3 |
| “lean” (cod, sole) | 3-4 |
| |
| Stews | |
| Meat, poultry | 2-3 |
| |
| Dairy products | |
| Butter | 6 |
| Cheese | 3 |
| Double cream 1-2 | |
| Ice-cream 2-3 | |
| Eggs | 8 |
| |
| Soups and sauces | |
| Soup | 2-3 |
| Meat sauce | 2-3 |
| Pate | 1 |
| Ratatouille | 8 |
| |
| Pastry and bread | |
| Bread | 1-2 |
| Cakes (plain) | 4 |
| Gateaux (cakes) | 2-3 |
| Crepes | 1-2 |
| Uncooked pastry | 2-3 |
| Quiche | 1-2 |
| Pizza | 1-2 |
FRUITS AND VEGETABLES
| FOODS STORAGE | TIME
(months) |
| Fruits | |
| Apples 12 | |
| Apricots 8 | |
| Blackberries 8 - 12 | |
| Blackcurrants / Redcurrants 8 - 12 | |
| Cherries 10 | |
| Peaches 10 | |
| Pears 8 - 12 | |
| Plum 10 | |
| Raspberries 8 - 12 | |
| Strawberries 10 | |
| Rhubarb 10 | |
| Fruit juices (orange, lemon, grapefruit) | 4 - 6 |
| |
| Vegetables 8 - 10 | |
| Asparagus 6 - 8 | |
| Basil 12 | |
| Beans 8 - 10 | |
| Artichokes | 8 - 10 |
| Broccoli | 8 - 10 |
| Brussels sprout | 8 - 10 |
| Cauliflower | 10 - 12 |
| Carrots | 6 - 8 |
| Celery | 8 |
| Mushrooms (champignons) | 6 - 8 |
| Parsley | 10 - 12 |
| Peppers | 12 |
| Peas | 12 |
| Runner-beans | 12 |
| Spinach | 8 - 10 |
| Tomatoes | 8 - 10 |
| Zucchini | |
We recommend to label and date all your frozen food. Adding a label will help you to identify foods and to know when they should be used before their quality deteriorates. Do not re-freeze defrosted food.
4.2. TIPS FOR FREEZING AND STORING FRESH FOOD
- Before freezing, wrap and seal fresh food in: aluminium foil, cling film, air and water-tight plastic bags, polythene containers with lids or freezer containers suitable for freezing fresh food.
- Food must be fresh, mature and of prime quality in order to obtain high quality frozen food.
- Fresh vegetables and fruit should preferably be frozen as soon as they are picked to maintain the full original nutritional value, consistency, colour and flavor.
Some meat, especially game, should be hung before it is frozen.
Note:
Always leave hot food to cool before placing in the freezer. Eat fully or partially defrosted foods immediately. Do not refreeze unless the food is cooked after it has thawed. Once cooked, the thawed food can be refrozen. - Do not freeze bottles with liquid.
4.3. USING ICE PACKS*
Ice packs helps in keeping frozen the foodstuffs in case of power failure. For the best usage of them, place them above food stored in the top of compartment.
When purchasing frozen food products:
- Ensure that the packaging is not damaged (frozen food in damaged packaging may have deteriorated). If the package is swollen or has damp patches, it may not have been stored under optimal conditions and defrosting may have already begun.
- When shopping, buy frozen foods at the end of your trip and transport them in a thermally insulated cool bag.
- Once at home, place the frozen foods immediately in the freezer.
- If food has defrosted even partially, do not re-freeze it. Consume within 24 hours.
- Avoid or reduce temperature variations to the minimum. Respect the best-before date on the package. Always observe the storage information on the package.
5. FUNCTIONAL SOUNDS
Sounds coming from your appliances are normal since it has a number of fans and engines to regulate performances that switch on and off automatically.
Some of the functional sounds can be reduced through
- Leveling the appliance and installing it on an even surface
- Separating and avoiding contact between the appliance and furniture.
- Checking if the internal components are correctly placed.
- Checking if bottles and containers are not in contact with each other.
Some of the functional sounds you might hear:
A hissing sound when switching on the appliance for the first time or after a long pause.
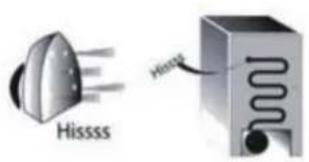
A gurgling sound when refrigerant fluid enters into the pipes.
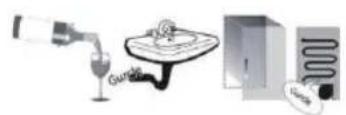
BRRR sound is from the compressor running.
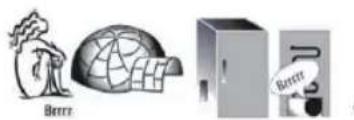
Buzzing sound when water valve or fan start working.
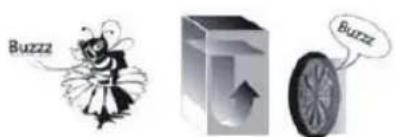
A cracking sound when compressor starts or when ready ice drops into ice box abrupt clicks when compressor switches on and off.
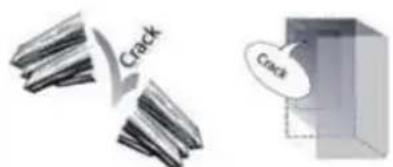
The click comes from the thermostat, which regulates how often the compressor runs.
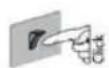
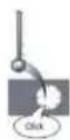
6. RECOMMENDATIONS WHEN THE APPLIANCE IS NOT IN USE
6.1. ABSENCE/VACATION
If you will be away for an extended period, it is recommended to use up the food and disconnect the appliance to save energy.
6.2. MOVING
- Remove all internal parts.
- Wrap them well and secure them with adhesive tape so they do not knock together or get lost.
- Screw in the adjustable feet so they do not touch the supporting surface.
- Close and secure the door with adhesive tape, and also use adhesive tape to fasten the power cord to the appliance.
6.3. POWER FAILURE
In the event of a power failure, contact your local electricity supplier and ask how long the outage is expected to last.
Note: Keep in mind that a fully stocked appliance will stay cold longer than a partially filled one.
If ice crystals are still visible on the food, it may be refrozen, although the flavor and aroma may be affected.
If food appears to be in poor condition, it is best to discard it.
For power failures lasting up to 24 hours.
- Keep the door of the appliance closed. This will allow the stored food to stay cold as long as possible.
For power failures lasting more than 24 hours.
- Empty the freezer compartment and arrange the food in a portable freezer. If this type of freezer is not available and, likewise, no artificial ice packs are available, try to use up the food, which is more easily perishable.
- Empty the ice tray.
7. MAINTENANCE AND CLEANING
Before any cleaning or maintenance operation, unplug the appliance from the mains or disconnect the electrical power supply.
Periodically clean the appliance with a cloth and a solution of lukewarm water and neutral detergent specifically for refrigerator interiors. Never use abrasives. Never clean refrigerator parts with flammable fluids. The fumes can create a fire hazard or explosion. Clean the outside of the appliance and the door seal with a damp cloth and dry with a soft cloth.
Do not use steam cleaners.
Condenser placed in the rear of the appliance should be cleaned regularly using a vacuum cleaner.
Important:
- The buttons and control panel display must not be cleaned with alcohol or alcohol-derived substances, but with a dry cloth.
- The refrigeration system pipes are located near the defrost pan and can become hot. Periodically clean them with a vacuum cleaner.
- To remove or insert the glass shelf, move up the front part of the shelf to pass the stopper.
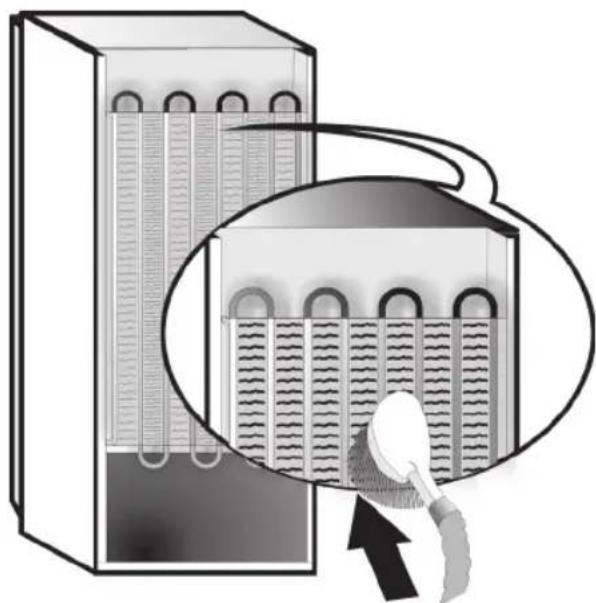
8. TROUBLESHOOTING GUIDE
Performance problems often result from little things you can find and fix yourself without tools of any kind.
| PROBLEM SOLUTION | |
| The appliance is not working: • Is the power cable plugged into a live socket with the proper voltage?
• Have you checked the protection devices and fuses of the electrical system in your home? | If there is water in the defrost pan: • This is normal in hot, damp weather. The pan can even be half full. Make sure the appliance is level so that the water does not overflow. |
| If the edges of the appliance cabinet, which come in contact with the door seal, are warm to the touch: • This is normal in hot weather and when the compressor is running. | If the light does not work: • Have you checked the protection devices and fuses of the electrical system in your home?
• Is the power cable plugged into a live socket with the proper voltage?
• In case the LEDs are broken the user must call the Service for exchange of the same type available only at our After-sales Service Centers or authorized dealers. |
| If the motor seems to run too much: • Motor running time depends on different things: number of door openings, amount of food stored, temperature of the room, setting of the temperature controls.
• Is the condenser (back the appliance) free of dust and fluff?
• Are the door properly closed?
• Are the door seals properly fitted?
• On hot days or if the room is warm, the motor naturally runs longer.
• If the appliance door has been left open for a while or if large amounts of food have been stored, the motor will run longer in order to cool down the interior of the appliance. | If the motor seems to run too much: • Motor running time depends on different things: number of door openings, amount of food stored, temperature of the room, setting of the temperature controls.
• Is the condenser (back the appliance) free of dust and fluff?
• Are the door properly closed?
• Are the door seals properly fitted?
• On hot days or if the room is warm, the motor naturally runs longer.
• If the appliance door has been left open for 1/2 hour or if large amounts of food have been stored, the motor will run longer in order to cool down the interior of the appliance. |
| If the appliance temperature is too high: • Are the appliance controls correctly set?
• Has a large amount of food been added to the appliance?
• Check that the door is not opened too often.
• Check that the door close properly. | If the doors do not open and close properly: • Check that food packages are not blocking the door.
• Check that the internal parts or automatic ice maker are not out of position.
• Check that the door seals are not dirty or sticky.
• Ensure the appliance is level. |
8.2. FAILURES
In the event of operation alarms, they will also be displayed in the digits LEDs, (e.g. Failure1, Failure 2, etc...) call After-sales Service and specify the alarm code. The acoustic alarm sounds, the Alarm icon lights up and the F letter on the digit display blinks according to failure code described below:
| Failure code Visualization |
| Error 2 | F letter blink on/off at 0,5 sec. Blinks ON 2 times then remain off for 5 seconds. Pattern repeats. | -88 x2 |
| Error 3 | F letter blink on/off at 0,5 sec. Blinks ON 3 times then remain off for 5 seconds. Pattern repeats. | -88 x3 |
| Error 6 | F letter blink on/off at 0,5 sec. Blinks ON 6 times then remain off for 5 seconds. Pattern repeats. | -88 x6 |
9. AFTER-SALES SERVICE
Switch the appliance on again to see if the problem has been solved. If it has not, disconnect the appliance from the power supply and wait for about an hour before switching on again.
If, after performing the checks described in the Troubleshooting Guide and switching the appliance on again, your appliance still does not work properly, contact the After-sales Service, explain the problem.
Specify:
the model and appliance serial number (stated on the rating plate), the nature of the problem,
SERVICE
0000 000 0000
the Service number (the number after the word SERVICE on the data plate on the inside of the appliance), - your full address, - your telephone number and area code.
Note:
The direction of door opening can be changed. If this operation is performed by After-sales Service it is not covered by the warranty.
(1)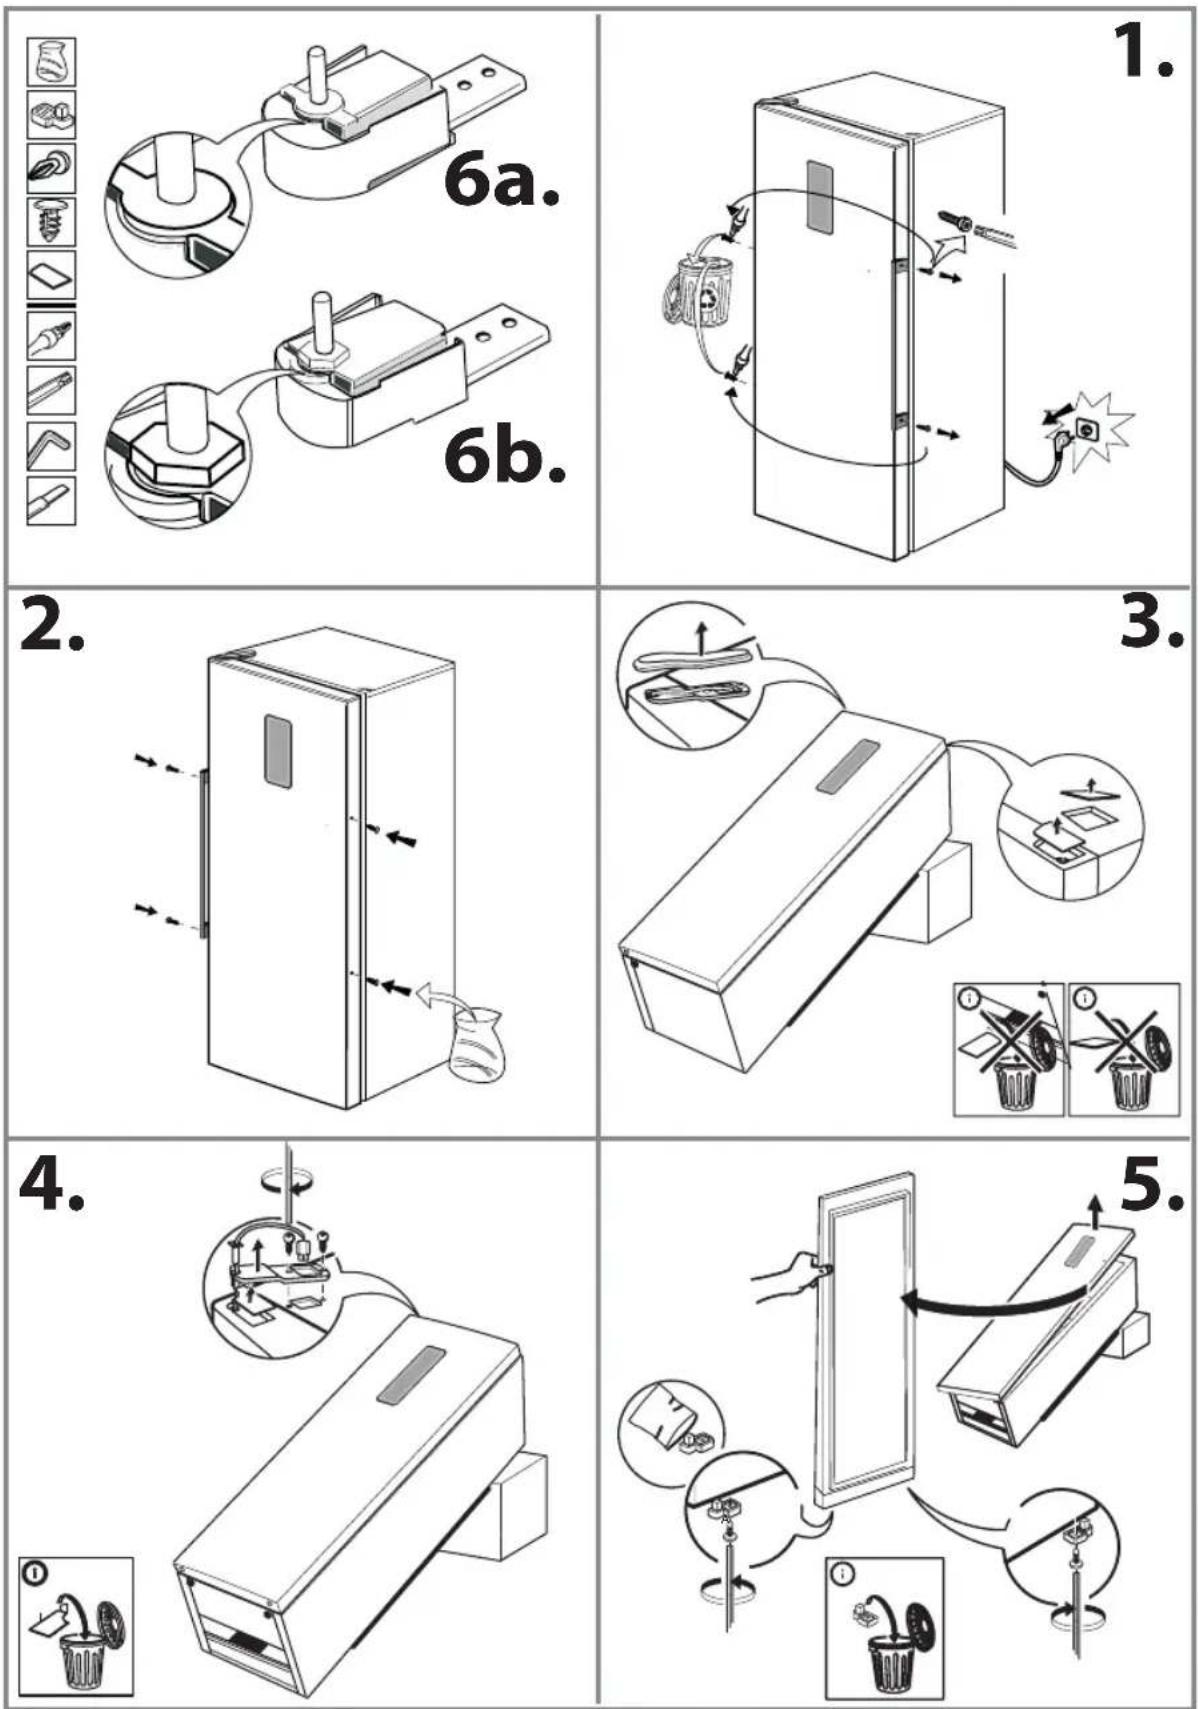
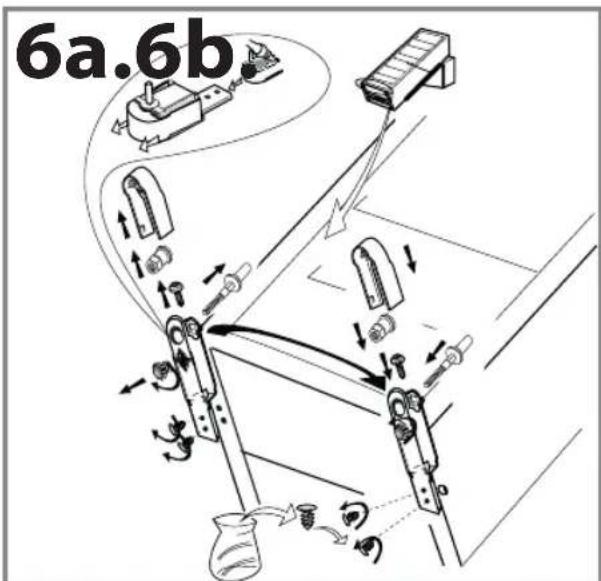
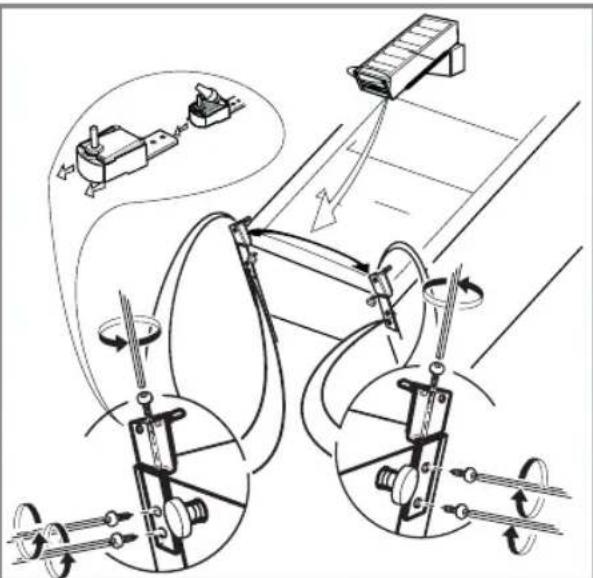
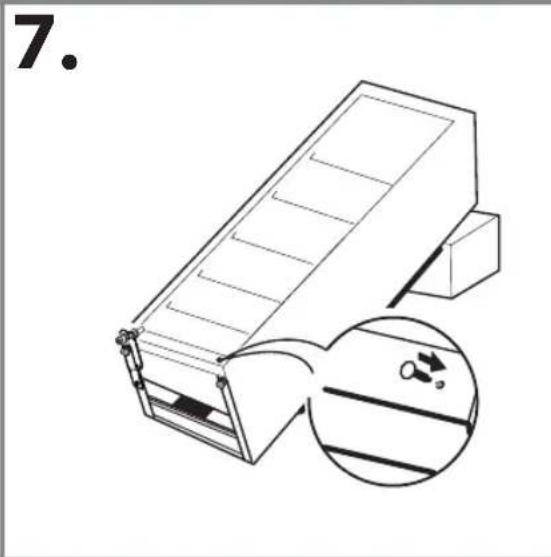
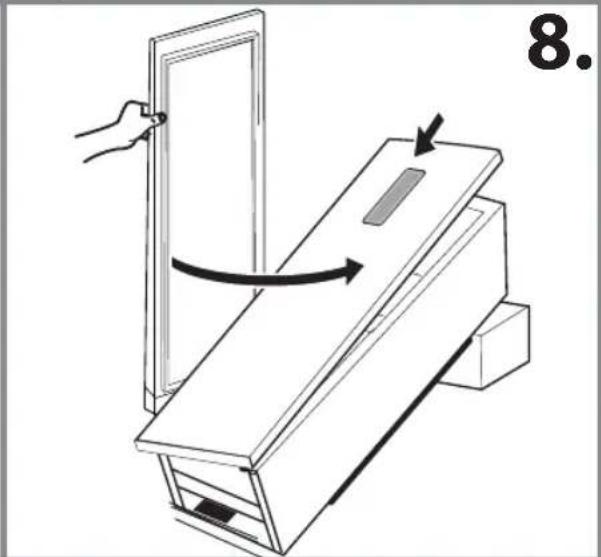
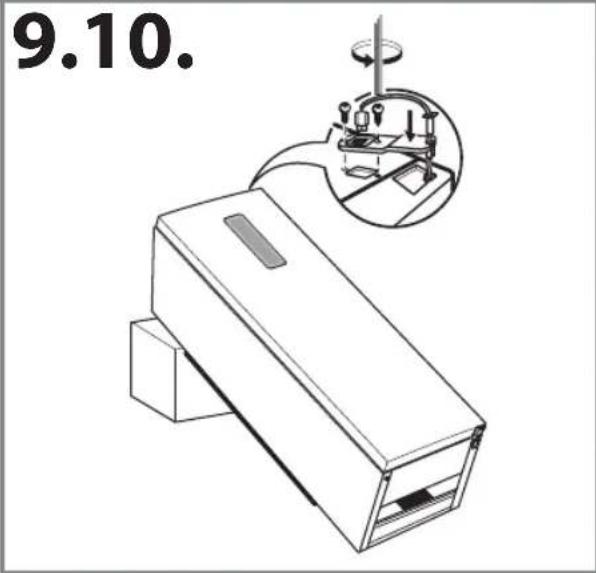
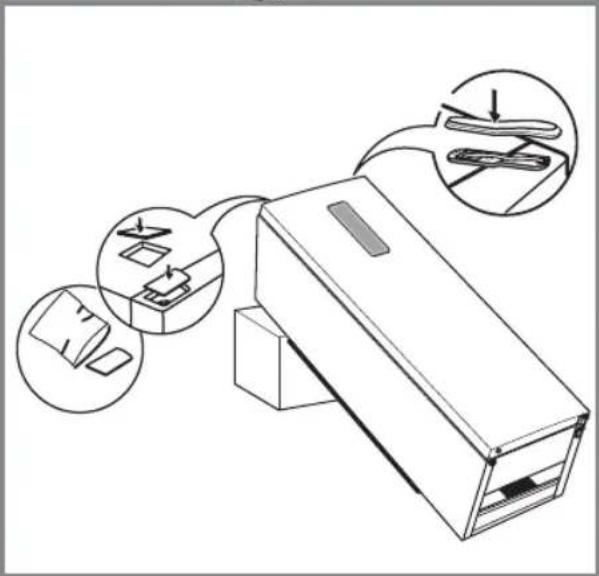
(2)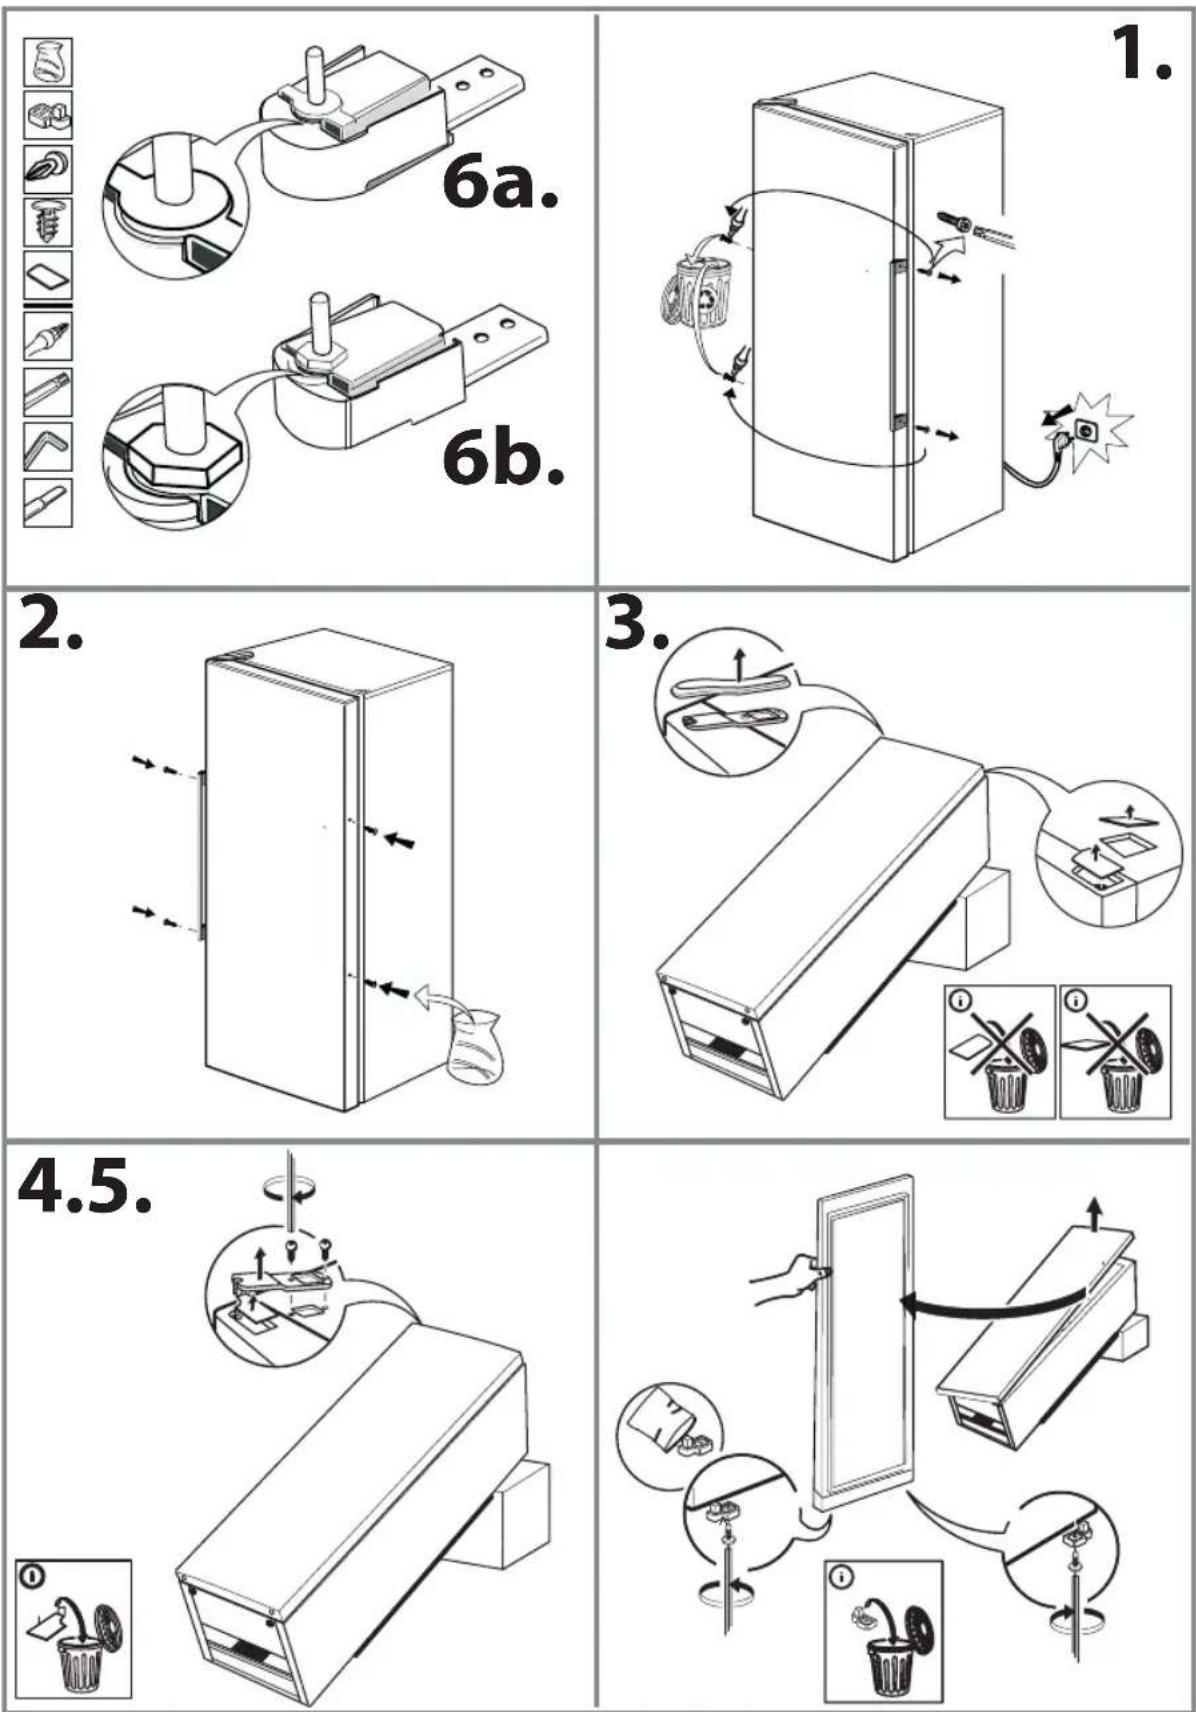
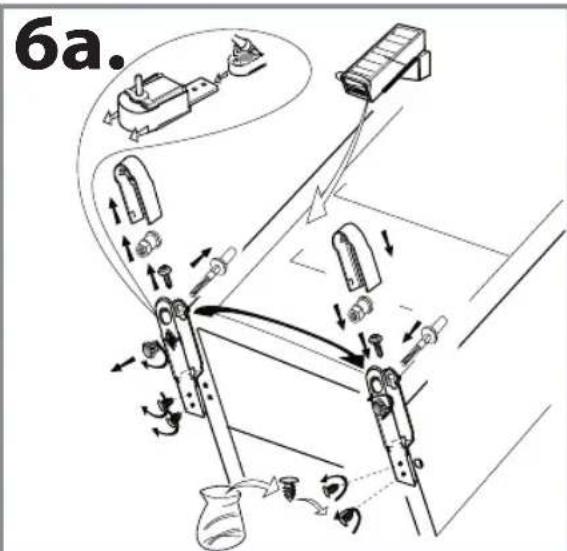
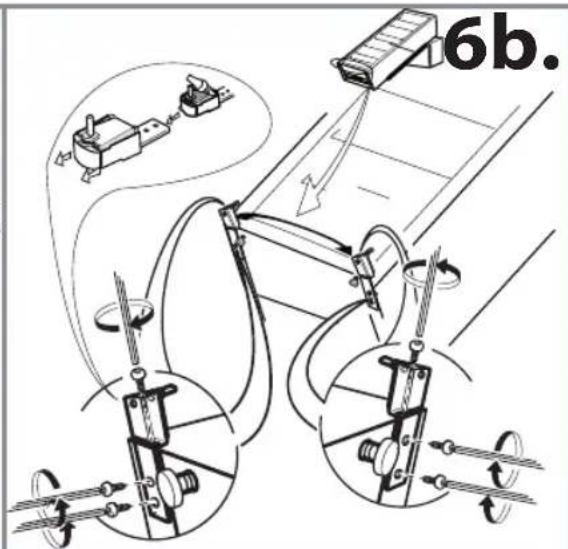
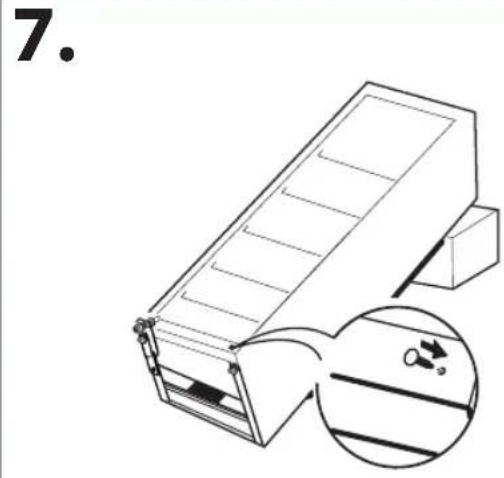
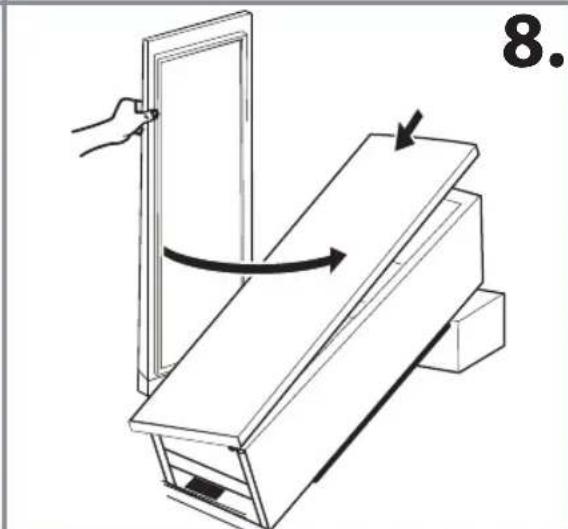
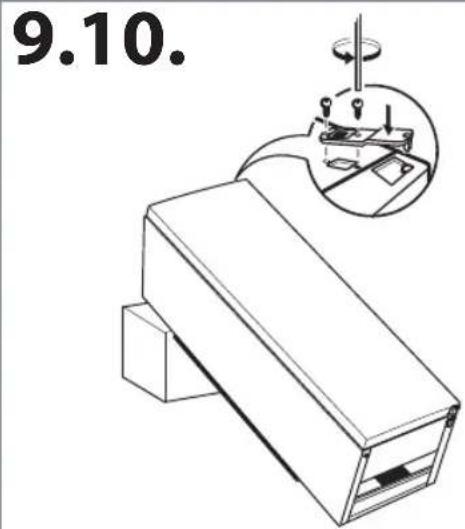
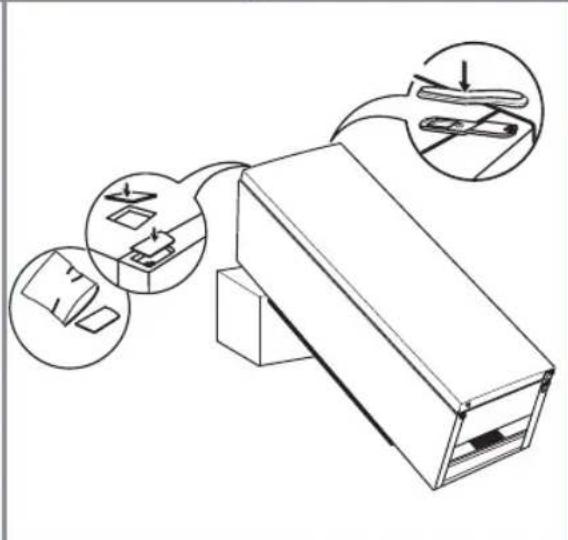
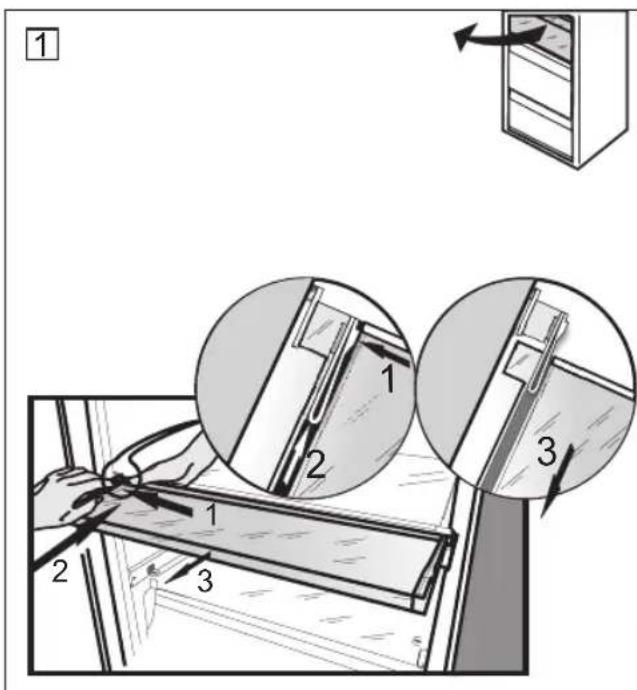
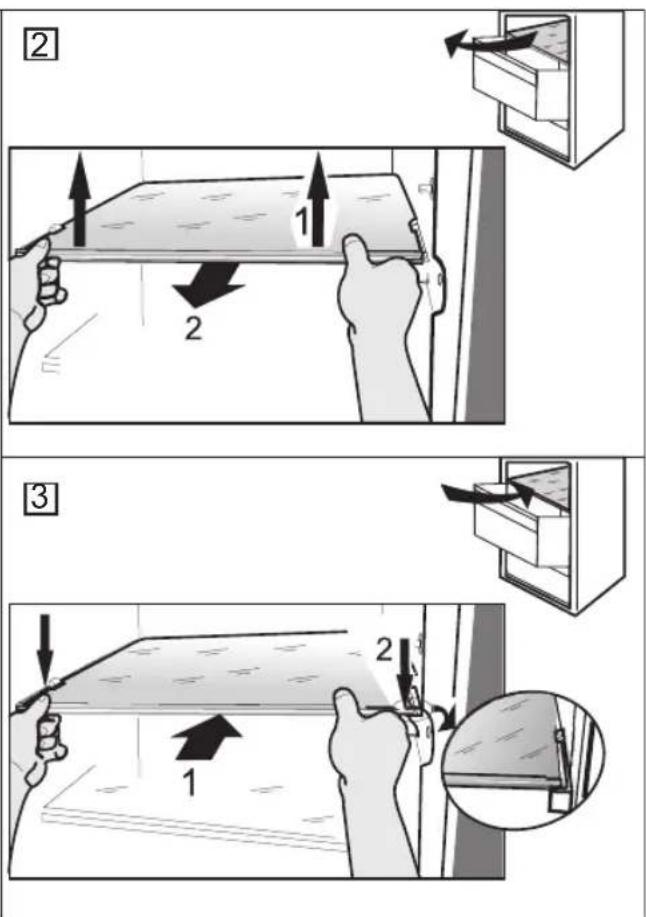
1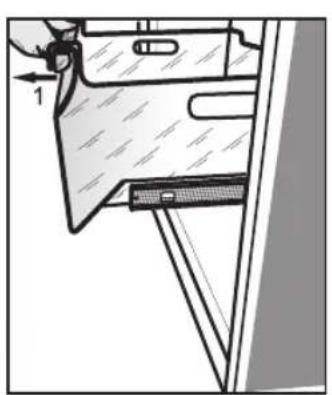
3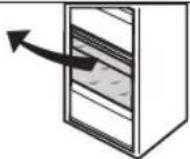
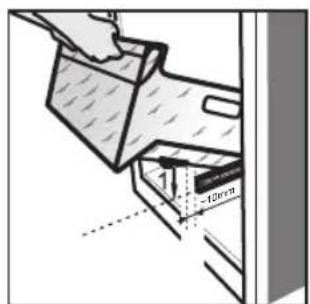
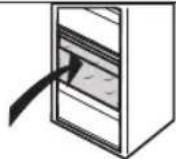
4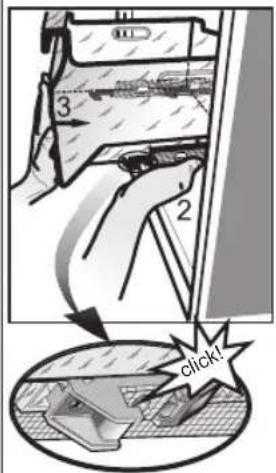
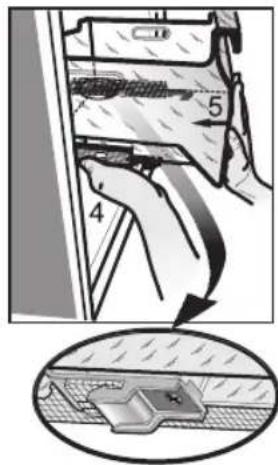
2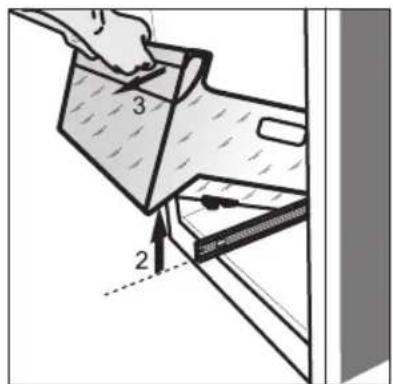

400010844785
195138713.00
AR
FINLDACZBGFR
O
O
HU
GRADE


O
O
PLNOKZ
RU S
ES
SVUI
GB

01/16