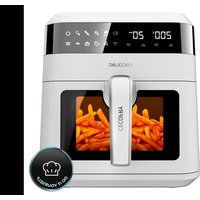
TurboCecofry 4D Healthy - Deep fryer CECOTEC - Free user manual and instructions
Find the device manual for free TurboCecofry 4D Healthy CECOTEC in PDF.

| Product Type | Multifunction Hot Air Fryer |
| Brand | Cecotec |
| Model | TurboCecofry 4D Healthy |
| Reference | 03055 |
| Power | 1350 W |
| Power Supply | 220-240 V~, 50-60 Hz |
| Tank Capacity | 5 liters (approx.) |
| Material | Heat-resistant plastic, stainless steel |
| Functions | 8 automatic programs: sauté, rice, yogurt, pan, toast, fries, oven, manual |
| Temperature Range | 100 °C to 240 °C |
| Timer | Up to 1h30 in manual mode; fixed times for programs |
| Display | Backlit LCD |
| Stirring Paddle | Removable, driven by transmission shaft |
| Oven Rack | Two cooking levels |
| Lid | Transparent, removable |
| Cleaning | Removable parts dishwasher safe: lid, tank, paddle, rack, handle |
| Safety | Automatic shut-off at end of cooking, beep, overload protection |
| Included Accessories | Tank, stirring paddle, oven rack, handle, measuring spoon, trivet |
| Warranty | 2 years |
| After-Sales Service | Official Cecotec Service (phone: +34 9 63 21 07 28) |
Frequently Asked Questions - TurboCecofry 4D Healthy CECOTEC
User questions about TurboCecofry 4D Healthy CECOTEC
0 question about this device. Answer the ones you know or ask your own.
Ask a new question about this device
Download the instructions for your Deep fryer in PDF format for free! Find your manual TurboCecofry 4D Healthy - CECOTEC and take your electronic device back in hand. On this page are published all the documents necessary for the use of your device. TurboCecofry 4D Healthy by CECOTEC.
USER MANUAL TurboCecofry 4D Healthy CECOTEC
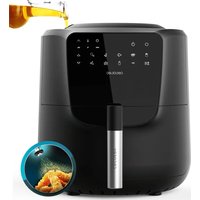
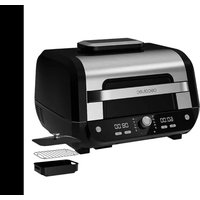
natural_image
Exterior view of a cecotec air fryer with digital display and control buttons (no readable text or symbols beyond branding)-
Safety instructions 15
-
Parts and components 17
-
Before usE 17
-
Operation 17
-
Cleaning and maintenance 21
-
Troubleshooting 21
-
Technical specifications 22
-
Disposal of old electrical appliances 22
-
Technical support service and warranty 22
SOMMAIRE
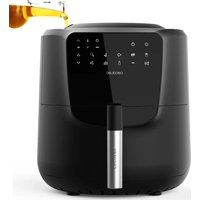
Fig./Img./Abb./Afb./Rys./Obr.2
natural_image
Line drawing of a pan with sticks being lifted by a pan, showing a downward arrow indicating compression (no text or symbols)Fig./Img./Abb./Afb./Rys./Obr. 3
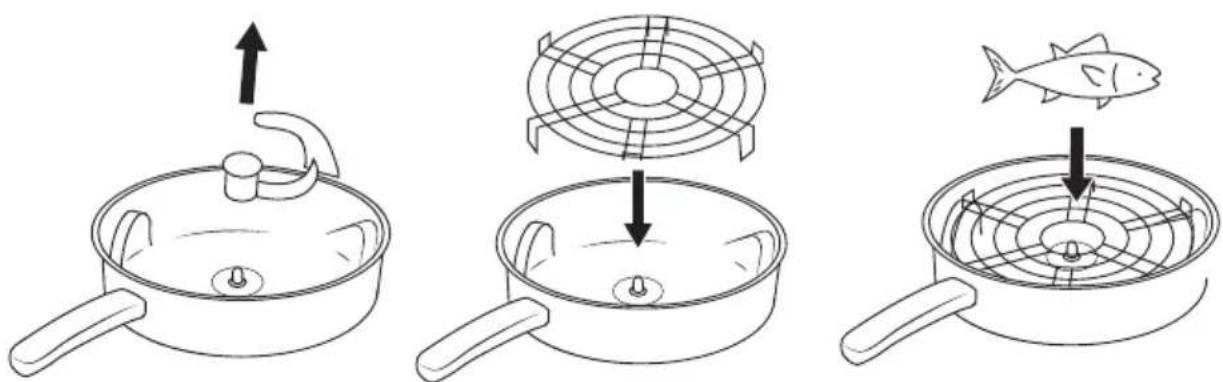
Fig./Img./Abb./Afb./Rys./Obr. 4
natural_image
Diagram showing two mechanical assembly steps with arrows indicating motion (no text or symbols)Fig./Img./Abb./Afb./Rys./Obr.3
natural_image
Two technical line drawings of a mechanical component with arrows indicating motion or rotation (no text or symbols)Fig./Img./Abb./Afb./Rys./Obr. 4
1. SAFETY INSTRUCTIONS
This product is exclusively designed to cook. Use it only to this end. Do not use it without food in its inner pot.
Never touch the hot surfaces of the appliance, use its handles. Do not touch the housing while the product is working. The only pieces that can be touched while in operation are the handles of the lid and inner pot, and the realease button.
This appliance is designed for domestic use only. Any problem caused by a commercial use or misuse of the appliance will not be covered under the warranty.
In order to prevent electric shocks, do not immerse the power cord, plug or main body in water or any other liquid.
Do not let children play with the appliance.
Make sure the appliance is in an even, clean, dry, and firm surface.
Do not leave the appliance unattended while in use.
Cook exclusively in the inner pot, in order to prevent electric shocks.
Do not let the cord hang over the edge of tables or counters, nor touch hot surfaces.
Place the fryer close to the wall and keep the power cord at a safe distance from the edge of the table or counter.
Extreme caution must be taken when moving an appliance containing oil or other hot liquids.
Unplug the appliance from the mains supply when not in use
ENGLISH
and before cleaning. Allow it to cool downbefore assembling or disassembling parts. Turn off the fryer before unplugging it. Do not operate the appliance with a damaged cord or plug, nor after the appliance malfunctions or has been damaged in any way. Contact the official Technical Support Service of Cecotec. Do not try to repair the product by yourself.
Do not turn the appliance on with the lid open. If you open the lid during the cooking process, the heating elements and the fan will stop working until the lid is closed again.
The use of accessory attachments not recommended by Cecotec may cause damages.
Make sure that the voltage of the mains supply matches the rated voltage of the appliance, specified in therating label.
Make sure the socket to which you connect the fryer is grounded. Extension cords may be used if care is taken during their use.
A short power-supply cord should be used to reduce the risk resulting from tangles or tripping over it. The marked power rating of the extension cord should be, at least, as high as the power rating of the appliance.
The cord should be arranged so that it does not hang over the counter or table.
While in use, the fryer will be very hot. Place it out of reach of children.
Food will also be hot, be careful no to burn yourself.
The fryer must be placed at an appropriate distance from the edge of the table or counter.
Place the power cord out of reach of children.
Warn the children not to touch the food or appliance when hot.
Do not place the appliance on or near heat sources, such as gas or electric hobs, or hot ovens.
Do not insert any object in the air inlet of the fan.
Unplug the appliance when not in use, to move it, to clean it, if
it malfunctions, or if the power cord is damaged.
2. PARTS AND COMPONENTS
Fig. 1
- Detachable, transparent upper cover
- Heating element with fan
- Plate
- Locking mechanism
- Opening button
- LCD screen
- Control panel
- Mixing arm
- Inner pot
- Handle
- 2-level baking rack
- Shaft
- Main body
- Tablemat
- Measuring spoon
3. BEFORE USE
Read the instruction manual carefully before the first use.
Remove all packaging materials and stickers on the appliance, except the rating label.
Before the first use, pour 300-500 ml of water in the inner pot and boil it for 20 minutes to wash the inner pot and to get rid of the plastic smell. Then, wash the inner pot and the mixing arm separately.
4. OPERATION
Place the cooker on a smooth and stable surface.
Plug the power cord to a socket. The blue lights will turn on and the fryer will beep, signaling the machine is in standby mode (power consumption while in standby will not be larger than 1 W). The display will blink, showing the temperature is set at 100 °C yand the time at 00:00.
Press the opening button to open the lid.
Take out the inner pot, and put some food in it.
Put the inner pot containing food into the cooker, add the oil, and close the lid.
Select the desired function by pressing down the corresponding button on the control panel.
Select the cooking menu or set the cooking time and temperature manually.
ENGLISH
Fig. 2
Menus
Stir-fry

Press the upwards button once to select the Sauté programme. The LCD display will show 00:05. Time is set at 5 minutes and temperature is set at 240 °C.
Press the button to configure the temperature between 100-240 °C with the buttons. You can also set the temperature while cooking.
Press the selecting button to set the time between 5 and 20 minutes. You can also set the temperature while cooking.
Press the power button to start cooking. The background light will become orange and the timer will start to count down. The temperature will remain on the display.
In this function, both upper and lower heating elements will work, as well as the top fan and the mixing arm.
Rice

Press the upwards button twice to select the Rice programme. The LCD display will show 00:25. Time is set at 25 minutes and temperature is set at 200 °C.
Press the button to configure the Temperature between 100-240 °C with the buttons. You can also set the temperature while cooking.
Press the selection button to set the time between 15 - 30 minutes with the upwards/downwards buttons. You can also set the temperature while cooking.
Press the power button to start cooking. The background light will become orange and the timer will start to count down. The temperature will remain on the display.
In this function, only the lower heating element and mixing arm work.
Yoghurt

Press the upwards button three times to select the Yoghurt menu. The LCD display will show 00:30. Time is set at 30 minutes.
Temperature cannot be adjusted.
Press the selection button to set the time between 1 minute and 16:30 hours with the upwards/downwards buttons. You can also set the temperature while cooking.
Press the power button to start cooking. The background light will become orange and the timer will start to count down. The temperature will remain on the display.
In this function, only the upper heating element and fan work.
Pan

Press the upwards button four times to select the Pan programme. The LCD display will show 00:20. Time is set at 20 minutes and temperature is set at 240 °C.
Press the selection button to set the temperature between 100-240 °C. You can also set the
temperature while cooking.
Press the selecting button to set the time between 5 minutes and one hour. You can also set the temperature while cooking.
Press the power button to start cooking. The background light will become orange and the timer will start to count down. The temperature will remain on the display.
In this function, only the lower heating element and mixing arm work.
Toasting

Press the upwards button five times to select the Toasting menu. The LCD display will show 00:08. Time is set at 8 minutes and temperature is set at 230 °C.
Press the selection button to set the temperature between 100-240 °C. You can also set the temperature while cooking.
Press the selecting button to set the time between 4 and 20 minutes. You can also set the temperature while cooking.
Press the power button to start cooking. The background light will become orange and the timer will start to count down. The temperature will remain on the display.
In this function, only the upper heating element and fan work.
French fries

Press the upwards button six times to select the French fries menu. The LCD display will show 00:30. Time is set at 30 minutes.
Press the selecting button to set the time between 25 and 35 minutes. You can also set the temperature while cooking.
Press the power button to start cooking. The background light will become orange and the timer will start to count down. The temperature will remain on the display.
In this function, both upper and lower heating elements work, as well as the top fan and the mixing arm.
Oven

Press the upwards button seven times to select the Oven programme. The LCD display will show 00:30. Time is set at 30 minutes and temperature is set at 225 °C.
Press the selection button to set the temperature between 100-240 °C. You can also set the temperature while cooking.
Press the selecting button to set the time between 10 minutes and 1:30 hours. You can also set the temperature while cooking.
Press the power button to start cooking. The background light will become orange and the timer will start to count down. The temperature will remain on the display.
In this function, only the upper heating element and fan work.
Manual

Press the upwards button eight times to select the Manual menu. The LCD display will show
ENGLISH
00:05. Time is set at 5 minutes and temperature is set at 100 °C.
Press the selection button one more time and the temperature icon will blink. Press the upwards button within the next 3 seconds to increase the time one by one up to 01:00 hour. If you press the downwards button, the time will decrease one by one down to 00:00.
Press the selection button one more time and the temperature icon will blink. Press the upwards button within the next 3 seconds to increase the temperature in 5 °C intervals up to 240 °C. If you press the downwards button, temperature will decrease temperature in 5 °C intervals up to 100 °C.
Every time you press the upward/downward buttons, the buzzer will beep. If you hold both buttons, the buzzer will not beep. If you do not press down the upward/downward buttons within the first 3 seconds, the system will enter standby mode.
After choosing the settings, press the power button to start cooking. The background light will become orange and the timer will start to count down. Temperature will remain in the screen. The upward/downward buttons and power button will be disabled when the cooker starts to work.
In this function, both upper and lower heating elements work, as well as the top fan and the mixing arm.
Start cooking
The working time will be counted down in minutes. When the last minute is reached, the time will be counted down in seconds. When the timer shows the remaining 30 seconds, the heating plate will stop working, but the mixing arm will keep rotating. When the time is finished, the machine will stop and the buzzer will beep 10 times. The fan will keep working for 3 min. After 3 min., the machine will enter standby mode. Press the power button for 3 seconds while the cooker is working to stop it and enter standby mode. The background light will turn blue. If the temperature of inner pot equals or exceeds the selected temperature, the lower heating element will stopworking, but the mixing arm will keep rotating. If the temperature of the inner pot is lower than the selected one, the bottom heating plate will start working again.
After cooking, take out the inner pot and pour the food into a different container.
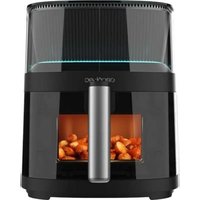
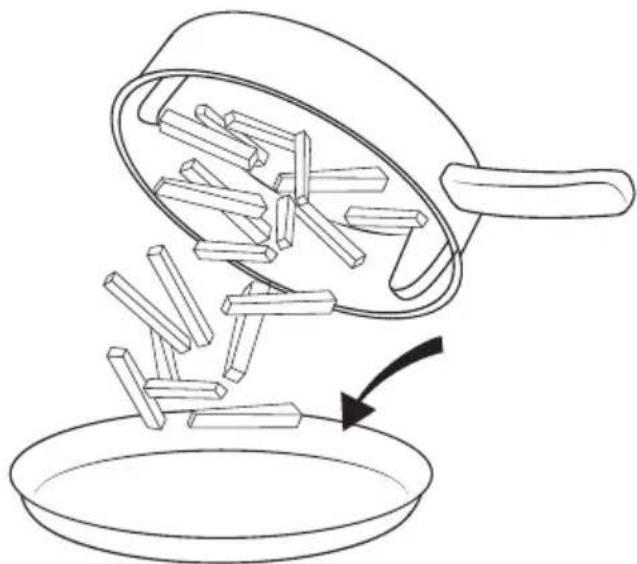
Fig. 3
Cook at two levels: bake or toast
Press the opening button to open the lid. Remove the mixing blade from the inner pot (to attach it again, insert the shaft of the inner pot on the hole of the mixing arm until you hear a click).
Place the centre of the baking rack over the shaft.
Put food on the baking rack. You can add foodstuffs on the baking rack or in the inner pot if you wish to cook at two levels. (2 in 1).
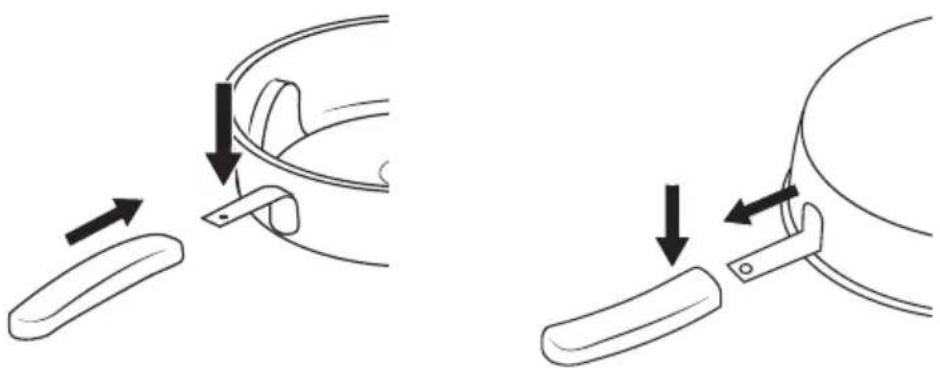
Fig.4
Detachable parts
Handle
Attach the handle by pressing its button and sliding it into place until you hear a click.
Turn the inner pot upside down and press the button on the handle to remove it.
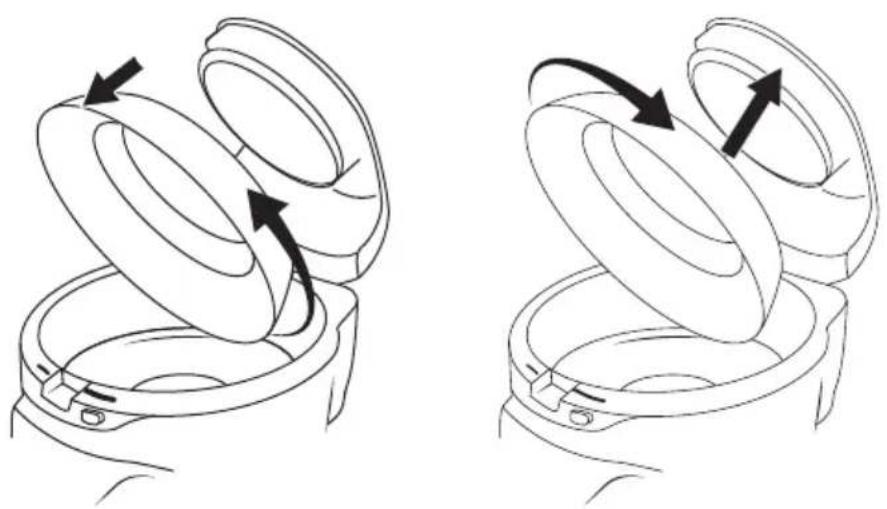
Fig. 5
Transparent cover
Open the lid and rotate the upper cover with both hands counterclockwise. Move it downwards to separate it from the upper body. To place it back in, follow these steps:
Step 1: Hold the upper cover with both hands and aim it against the insertion positions on the body.
Step 2: Rotate the upper cover clockwise until you hear a click.
Fig. 6
5. CLEANING AND MAINTENANCE
The following accessories are dishwasher-safe: Detachable and transparent upper cover, mixing arm, inner pot, handle and 2-levels backing rack.
After cooking, pull out the plug and use a soft wet sponge or dishcloth to wipe the appliance. Wait until all components are cold to clean the appliance.
Use warm water with a little bit of detergent to clean the inner pot and accessories. Then, use rinse with water, and dry with a cloth.
The inner pot can be washed by hand or in dishwashers, but do not squeeze it and or change its shape, as it could affect its performance.
The mixing arm can be washed by hand or in dishwashers. It should be washed regularly, including the round cover.
The filter should be washed regularly (every 5 uses).
The cover of the heater should be washed with a wet dish cloth.
6. TROUBLESHOOTING
Error code
-
E1
-
E2
Description
-
Buttons and menu do not work
-
Buttons and menu do not work
ENGLISH
Possible causes
- Short-circuit in the sensor
- Open circuit in the sensor
Solution
- Contact the official Technical Support Service of Cecotec.
- Contact the official Technical Support Service of Cecotec.
7. TECHNICAL SPECIFICATIONS
Product reference: 03055
Product name: Turbo Cecofry 4D Healthy
Power: 1350 W, 220-240 V\~, 50-60 Hz
8. DISPOSAL OF OLD ELECTRICAL APPLIANCES
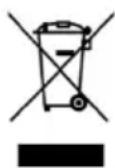
The European directive 2012/19/EU on Waste Electrical and Electronic Equipment (WEEE), specifies that old household electrical appliances must not be disposed of with the normal unsorted municipal waste. Old appliances must be collected separately, in order to optimize the recovery and recycling of the materials they contain, and reduce the impact on human health and the environment.
The crossed out “wheeled bin” symbol on the product reminds you of your obligation to dispose of the appliance correctly. The crossed out “wheeled bin” symbol on the product reminds you of your obligation to dispose of the appliance correctly.
Consumers must contact their local authorities or retailer for information concerning the correct disposal of old appliances and/or their batteries.
9. TECHNICAL SUPPORT SERVICE AND WARRANTY
This product is under warranty for 2 years from the date of purchase, as long as the proof of purchase is submitted, the product is in perfect physical condition, and it has been given proper use, as explained in this instruction manual.
The warranty will not cover the following situations:
The product has been used for purposes other than those intended for it, misused, beaten, exposed to moisture, immersed in liquid or corrosive substances, as well as any other fault
ENGLISH
attributable to the customer.
The product has been disassembled, modified, or repaired by persons, not authorised by the official Technical Support Service of Cecotec.
Faults deriving from the normal wear and tear of its parts, due to use.
The warranty service covers every manufacturing defects of your appliance for 2 years, based on current legislation, except consumable parts. In the event of misuse, the warranty will not apply.
If at any moment you detect any problem with your product or have any doubt, do not hesitate to contact Cecotec Technical Support Service at +34 963 210 728.
1. INSTRUCTIONS DE SÉCURITÉ
6. PROBLEEMOPLOSSING
Foutmelding
Quart de Poblet, Valencia (Spain)
YV01200102