
Cecofry FireDome 8000 Pro - Deep fryer CECOTEC - Free user manual and instructions
Find the device manual for free Cecofry FireDome 8000 Pro CECOTEC in PDF.

User questions about Cecofry FireDome 8000 Pro CECOTEC
0 question about this device. Answer the ones you know or ask your own.
Ask a new question about this device
Download the instructions for your Deep fryer in PDF format for free! Find your manual Cecofry FireDome 8000 Pro - CECOTEC and take your electronic device back in hand. On this page are published all the documents necessary for the use of your device. Cecofry FireDome 8000 Pro by CECOTEC.
USER MANUAL Cecofry FireDome 8000 Pro CECOTEC
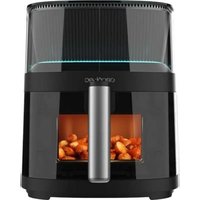
natural_image
Exterior view of a black and silver CECOtec microwave oven with digital display (no visible text or symbols on main body)Safety instructions 7
- Parts and components 44
- Before use 45
- Operation 45
- Cleaning and maintenance 48
- Troubleshooting 49
- Technical specifications 50
- Disposal of old electrical and electronic appliances 50
- Technical support and warranty 51
- Copyright 51
SOMMAIRE
Before using the appliance, read the following instructions carefully. Keep this instruction manual for future reference or new users.
- All safety instructions must be closely followed when using the appliance.
- When using electrical and electronic appliances, basic precautions must always be followed to reduce the risk of fire, electrical shock, and injury.
- This appliance can be used by children aged 8 years and above and persons with reduced physical, sensory, or mental capabilities or lack of experience and knowledge if they have been given supervision or instruction concerning use of the appliance in a safe way and understand the
hazards involved. Children must not play with the appliance. Cleaning and user maintenance should not be carried out by unsupervised children.
- Keep this appliance and its power cable out of reach of children under the age of 8.
- This symbol means “caution, hot surface”. The temperature of the accessible surfaces may be high when the appliance is in operation.
- This appliance is not intended to be operated by means of an external timer or separate remote-control system.
- Do not immerse the cable, plug, or any other non-removable part of the appliance in water or any other liquid. Do not expose the electrical connections to water.
- This device is designed for domestic use only and is not intended for bars, restaurants, farmhouses, hotels, motels, and offices.
- Position the appliance in such a way to avoid spillage of hot liquids. Be especially careful with the handle.
- Make sure the voltage of your mains supply matches the voltage requirements specified in the rating label of the appliance.
- We recommend that the room where you intend to use the appliance is equipped with a working extractor fan or is well ventilated.
- Incorrect or improper use can damage the appliance and be dangerous for the user. Use the device only for the purposes described in this manual.
-
Unplug the appliance from the mains supply before moving it, carrying out any cleaning or maintenance task, or when not in use.
-
Do not use outdoors.
- Check the power cable regularly for visible damage. If the cable is damaged, it must be repaired by the official Cecotec Technical Support Service to avoid any type of danger.
- Do not twist, bend, pull, or damage the power cable. Protect it from sharp edges and heat sources. Do not allow the cable to touch hot surfaces. Do not let the cable hang over the edge of the working surface or worktop.
- Do not use extension cords, unless advised by a qualified electrician. Using the wrong type of extension cable could cause damage to the appliance or injuries to the user.
- Do not use the appliance if its cable, plug, or housing are damaged, nor after it malfunctions or has been dropped or damaged in any way.
- The appliance should not be used in potentially dangerous locations, such as flammable, explosive, chemical-laden, or wet atmospheres.
- Place the appliance on an even, heat-resistant surface. Be careful when placing the basket out of the air fryer. Place the handle inwards to prevent spillage of what's inside. Do not place the appliance near heat sources, places with high humidity levels, or combustible materials.
- Do not insert or allow fingers or foreign objects to enter any ventilation or exhaust openings, as it could cause electrical shock or fire.
- Do not fill the basket with oil to avoid causing a fire hazard.
- Do not touch the interior of the appliance while in operation.
- Always place the ingredients to be cooked inside the basket to prevent them from touching the heating elements.
- Make sure your hands are dry before handling the plug or
switching on the appliance.
- Unplug the appliance from the outlet when not in use or when it is being cleaned. Allow it to cool down completely before attaching or removing parts and before cleaning the appliance.
- Do not leave the appliance unsupervised while plugged to the mains.
- Cleaning and maintenance must be carried out according to this instruction manual to make sure the appliance operates properly.
- Do not place the appliance against the wall. Leave a safety distance of 10 cm on the back of the appliance and 10 cm on each side. Do not place any object on top of the appliance when in use.
- Hot steam is released through the air outlet openings of the appliance during operation. Keep your hands and face at a safety distance from the steam and from the air outlet openings. Hot air may come out when removing the basket from inside the appliance.
- Immediately unplug the appliance if you notice black smoke coming out of it. Wait until the smoke disappears to remove the basket from the appliance.
- We recommend the use of gloves when touching the basket and rack.
- Do not try to repair the appliance by yourself.
- Supervise children to prevent them from playing with the appliance.
INSTRUCTIONS DE SÉCURITÉ
- Cover
- Splatter screen
- Main body
- Control panel
Fig. 2
- Power icon
- Temperature indicator
- Default programmes
- Time indicator
- Start/Stop icon
- Preheating icon
- Temperature icon
- Time icon
- Manual function
- Knob
- Default programme and grill levels
Fig.3
- Glass lid
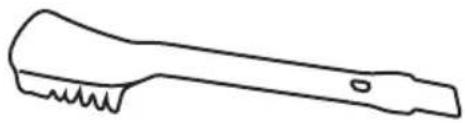
- Cleaning brush
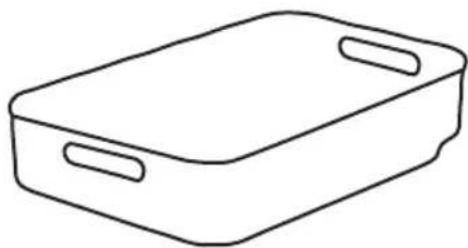
- Aluminium basket
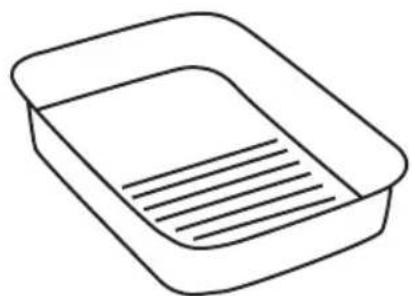
- Aluminium tray
NOTE:
the graphics in this manual are schematic representations and may not exactly match the device.
2. BEFORE USE
- This appliance is packaged in a way as to protect it during transport. Take the device out of its box and remove all packaging materials. You can keep the original box and other packaging elements in a safe place. This will help you prevent damage to the device when transporting it in the future. In case the original packaging is disposed of, make sure all packaging materials are recycled accordingly.
- Make sure all parts and components are included and in good conditions. If there is any piece missing or in bad conditions, contact the official Cecotec Technical Support Service immediately.
Box content
- Glass lid
- Cleaning brush
- Aluminium basket
- Aluminium tray
- Air fryer
- Instruction manual
3. OPERATION
The control panel display shows the time in HH:MM format. The left display shows the cooking temperature and the OPEN and CLOSE messages when you open the lid. The right display shows the cooking time and the ADD FOOD message. Turn the knob to choose one of the preset functions with different cooking times/temperatures.
Recommended icons
Preheating: press the Start/Stop icon to start preheating after having chosen the preset programme, adjust the time/temperature of this if needed (temperature and time ranges are different for cooking process, preheating process cannot be adjusted). The preheat icon light will come on. It takes about 4-5 minutes to preheat, depending on the selected temperature.
Note: if you do not open the lid to add food after the preheating process is completed, the unit will continue to operate in the preheating mode.
Note: only the chips, roast, bake desserts, grill, manual and griddle programmes have preheating. If you want to cancel preheating, press the preheat button, then the device will go directly to the cooking progress.
Add food: when preheating is complete, the appliance will beep, and the function icon light will flash. The display will show "Add food". Open the lid and put the ingredients in the cooking plate. Once the lid is closed, cooking will begin, and the timer will start counting down. If it is
ENGLISH
necessary to open the lid during the cooking process, the appliance will stop temporarily. Close it, and the unit will continue with the previous operation automatically, without the need to press the Start/Stop icon again.
Pressing the Start/Stop icon will pause the cooking process. During the cooking process, the time and temperature can be adjusted by pressing the temperature button and the time button. If you do not open the lid to add food after the preheating process is completed, the unit will continue to operate in the preheating mode.
Operating icons
Power icon
- Once the unit is plugged into the power supply, press the power icon to turn it on. It will enter standby mode, the power icon lights, and the display will turn on. Pressing it during cooking stops the current cooking function and switches the unit off.
- Once the cooking process is finished, the unit will beep 5 times and the display will show the word END. The icon lights will turn off except the power icon. The heating element will stop working, the fan will continue to run for 1 minute, then the display will turn off, all lights will turn off, and the product will turn off too. If you need it to stop working in advance, press the power icon to turn it off.
Temperature setting
Press the temperature icon, turn the knob to choose different cooking temperatures in any function, choose any programme and then adjust the cooking temperature if necessary. Next, press the Start/Stop icon to start cooking; each setting is 5 °C. When using the Grill function, turn to the grill icon and press the temperature icon to set the cooking temperature mode: LOW, MEDIUM, HIGH, MAX.
Time adjustment
Press the time icon, turn the knob to set the cooking time in any function, choose any programme and then adjust the cooking time if necessary. Next, press the Start/Stop icon to start cooking, each setting is 1 minute.
Start/Stop icon
- After selecting the temperature and time, press the Start/Stop icon to start cooking. During the preheating and cooking process, press the Start/Stop icon. The appliance will pause during operation and the display will flash “- - - - - -”. Press the Start/Stop icon again to continue operation.
- If you need to re-select the function during the preheating and cooking process, you must press the Start/Stop icon and then re-select the function.
Sleep mode
The appliance shall switch off if there is no interaction with the control panel for 1 minute. It will also turn off if the selected function is stopped or cancelled and there is no interaction with the control panel for 5 minutes.
Use of the internal grill
Splatter screen
Located on the underside of the lid, the splatter screen keeps the heating element clean. Always ensure that the splatter screen is fitted when cooking. If the splatter screen is not used, oil will accumulate on the heating element, which may cause fumes.
Removing the splatter screen
Remove the splatter screen for cleaning after each use. First allow the splatter screen to cool completely. Then, remove it by using your thumb to release the front clip by pushing the front clip upwards and using your other hand to pull one of the tabs towards you. This will release the splatter screen, allowing you to pull it out of the slot along the back of the lid.
Installation of the splatter screen
To install, gently push the splatter screen onto the back of the lid. Insert the rear tab and the protector with the slot on the back. Then push the splatter screen upwards until it clicks into the clip at the front.
The settings for the default programmes are shown below:
| Function Icon | Time | Temperature | Time range | Tempera-ture range | Preheating | Splatter screen (open or closed) | |
| Chips |  | 18 min | 205 °C | 1-60min | 50-230 °C | YES | Off |
| Dehydrate |  | 6 hrs. | 70 °C | 30min-24h | 50-95 °C | Off | |
| Roast |  | 25 min | 205 °C | 1-60min | 50-220 °C | YES | Off |
| Bake desserts |  | 15 min | 175 °C | 1-60min | 50-205 °C | YES | Off |
| Defrost |  | 10 min | 205 °C | 1min-60min | 50-230 °C | Off | |
| Grill 20 min |  | 150 °C Low | 1min-30min | Non-adjustable | YES Off | ||
| 175 °C Medium | |||||||
| 205 °C High | |||||||
| 230 °C Maximum | |||||||
| Manual |  | 1min | 50 °C | 1-60min | 50-230 °C | YES | Off |
| Keep warm 12 |  | 60 °C 1min | -10H 50-80 °C | Open or closed | |||
| Steam* 20 mi |  | °C 1min-90 | min | Non-adjustable | Open | ||
| Stew* |  | 30 min | 95 °C | 1min-180min | 90-100 °C | Open | |
| Grill |  | 30 min | 230 °C | 1-60 min. | 50-230 °C | YES | Open or closed |
| Slow cooking* |  | 180 min | 85 °C 10min-10H | 70-95 °C | Open |
Warning
For steam, stew and slow cooking functions, the display will show error code E6 if the inside cooking temperature exceeds the set limited programme temperature. As these functions need to add water inside for cooking, if the temperature is excessive, it means that during cooking there could be a lack of water. Error E6 tells you to add more water or stop cooking to avoid the risk.
4. CLEANING AND MAINTENANCE
- Unplug the power cable before cleaning the inner grill and allow the grill to cool completely.
- The inside and outside surfaces of the grill, grill plate, pan and vegetable basket can be cleaned with a soft cotton cloth or non-abrasive sponge with a neutral detergent and water.
- Do not use brushes or hard items for cleaning to avoid damaging the internal surface of the grill and the protective coating of the accessories.
- Do not use toxic and corrosive cleaning agents such as petrol, thinners, or polishes.
-
Cleaned parts must be dried before using them.
-
Please do not clean the heating tube.
-
Do not immerse the grill in a liquid such as water.
-
TROUBLESHOOTING
| Fault Causes Solutions | ||
| Unable to switch on the display | You did not press the power icon hard enough and/or it is dirty. | Press and hold the power icon for 1 second and/or wipe the touch panel. |
| Plug not plugged in or power supply exhausted. | Connect the plug or replace it. | |
| The fryer basket is not correctly positioned. | Place the basket in the fryer to make sure the switch is on. | |
| The fan does not work after switching on the product | Deteriorated internal ventilation wiring. | Contact the Cecotec Customer Service. |
| Power icon is not pressed. | After parameter setting, press Start / Pause. | |
| Does not heat up after switching on | Printed circuit board coupling. | Contact the Cecotec Customer Service. |
| Heating pipe wiring terminal falls off. | Contact the Cecotec Customer Service. | |
| Power icon is not pressed. | After parameter setting, press Start / Pause. | |
| Food does not fry | The selected temperature is too low. | Adjust the temperature according to the recipe. |
| Cooking time is too short. | Adjust the time according to the recipe. | |
| There is too much food in the basket. | Bake the food in batches. | |
| Food is fried unevenly | The food did not turn over during cooking. | Bake the food and turn it up and down. |
| Food cannot be cooked properly | The basket is too full. Remove part of the ingredients. | |
| The basket is not placed in the fryer. | Place it. | |
ENGLISH
| There is a white smoke in the roasting process | Fatty ingredients are roasting. | There is smoke leakage during the cooking process of the ingredients, which is a normal phenomenon. |
| Residues remain in the fryer after the last cooking process. | Wash it and then use it. | |
| E1-E2 | Short-circuit in the lid temperature sensor. | Contact the Cecotec Customer Service. |
| E4-E5 | Short-circuit in the base temperature sensor. | Contact the Cecotec Customer Service. |
| E3-E6 Device overheating. | Add water if using steam, stew, and slow cooking modes. | |
6. TECHNICAL SPECIFICATIONS
Product reference: 04950
Product: Cecofry FireDome 8000 Pro Air Fryer
Power: 1500-1700 W
Voltage: 220-240 V\~
Frequency: 50-60 Hz
Capacity: 8 L
Technical specifications may change without prior notification to improve product quality.
Made in China | Designed in Spain
7. DISPOSAL OF OLD ELECTRICAL AND ELECTRONIC APPLIANCES
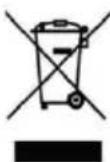
This symbol indicates that, according to the applicable regulations, the product and/or batteries must be disposed of separately from household waste. When this product reaches the end of its shelf life, you should dispose of the cells/batteries/accumulators and take them to a collection point designated by the local authorities.
Consumers must contact their local authorities or retailer for information concerning the correct disposal of old appliances and/or their batteries.
Compliance with the above guidelines will help protecting the environment.
8. TECHNICAL SUPPORT AND WARRANTY
Cecotec shall be liable to the end user or consumer for any lack of conformity that exists at the time of delivery of the product under the terms, conditions, and deadlines established by the applicable regulations.
It is recommended that repairs be carried out by qualified personnel.
If at any moment you detect any problem with your product or have any doubt, do not hesitate to contact the official Cecotec Technical Support Service at +34 963 210 728.
9. COPYRIGHT
The intellectual property rights over the texts in this manual belong to CECOTEC INNOVACIONES, S.L. All rights reserved. The contents of this publication may not, in whole or in part, be reproduced, stored in a retrieval system, transmitted, or distributed by any means (electronic, mechanical, photocopying, recording or similar) without the prior authorization of CECOTEC INNOVACIONES, S.L.
FRANÇAIS
1. PIÈCES ET COMPOSANTS
Img. 1
Product: Airfryer Cecofry FireDome 8000 Pro
Vermogen: 1500-1700 W
Voltage: 220-240 V\~
natural_image
Simple line drawing of a rounded rectangular shape with a central abstract symbol (no text or labels)2
natural_image
Line drawing of a mechanical tool with textured handle and base (no text or symbols)3
natural_image
Simple line drawing of a rectangular tray with two handles (no text or symbols)4
natural_image
Simple line drawing of a rectangular tray with horizontal lines inside, no text or symbols present.Fig./Img./Abb./Afb./Rys.3
www.cecotec.es


- SOMMAIRE
- INSTRUCTIONS DE SÉCURITÉ
- Fig. 2
- Fig.3
- NOTE:
- BEFORE USE
- Box content
- OPERATION
- Recommended icons
- ENGLISH
- Operating icons
- Power icon
- Temperature setting
- Time adjustment
- Start/Stop icon
- Sleep mode
- Use of the internal grill
- Splatter screen
- Removing the splatter screen
- Installation of the splatter screen
- CLEANING AND MAINTENANCE
- TECHNICAL SPECIFICATIONS
- DISPOSAL OF OLD ELECTRICAL AND ELECTRONIC APPLIANCES
- TECHNICAL SUPPORT AND WARRANTY
- COPYRIGHT
- FRANÇAIS
- PIÈCES ET COMPOSANTS
- Img. 1
Brand : CECOTEC
Model : Cecofry FireDome 8000 Pro
Category : Deep fryer