Oxford - Rowing Machine Prixton - Free user manual and instructions
Find the device manual for free Oxford Prixton in PDF.

| Brand | Prixton |
| Model | Oxford |
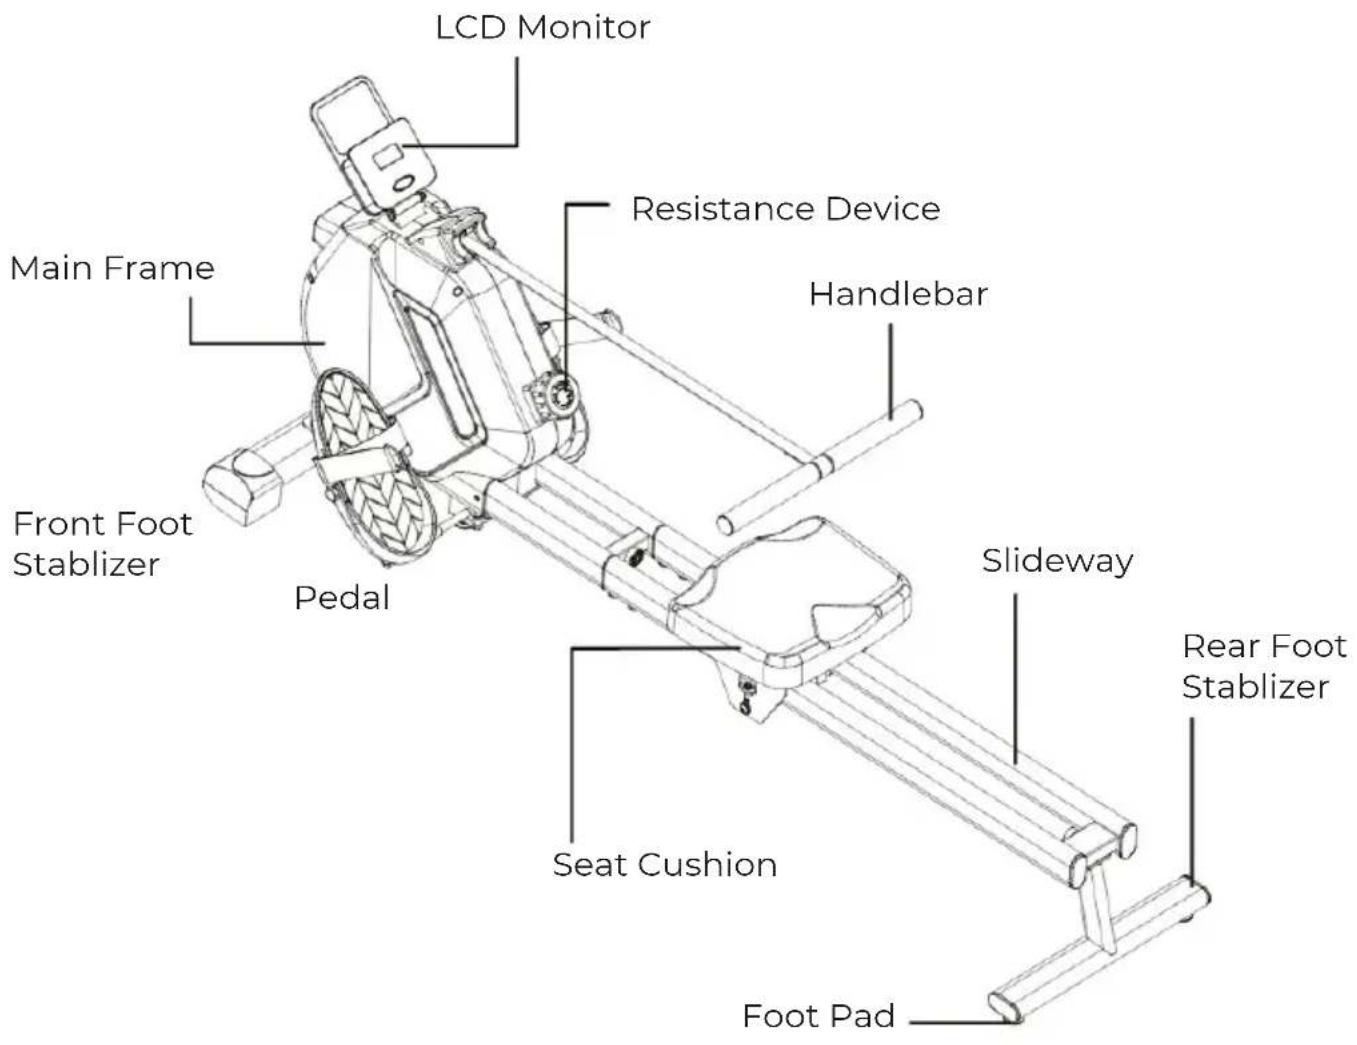
| Product type | Magnetic rower |
| Dimensions (assembled) | 1600 x 540 x 640 mm |
| Slide distance | 0 - 720 mm |
| Handlebar belt length | 0 - 1700 mm |
| Flywheel weight | 3.0 kg |
| Resistance | Magnetic, 16 levels |
| Maximum user weight | 120 kg |
| Monitor power supply | 2 AA batteries (not included) |
| Monitor functions | Time, strokes/min, distance, calories, stroke count, total strokes, SCAN mode |
| Usage | Home use only |
| Assembly required | Yes, with tools provided |
| Maintenance | Clean with damp cloth, check fittings weekly |
| Transport | Transport wheels at front, grab rear stabilizer |
| Storage | Clean, dry environment, away from children and pets |
| Safety | Read instructions, warm-up, prior medical supervision |
| Warranty | Compliant with the legislation of the country of purchase, contact www.prixton.com |
Frequently Asked Questions - Oxford Prixton
User questions about Oxford Prixton
0 question about this device. Answer the ones you know or ask your own.
Ask a new question about this device
Download the instructions for your Rowing Machine in PDF format for free! Find your manual Oxford - Prixton and take your electronic device back in hand. On this page are published all the documents necessary for the use of your device. Oxford by Prixton.
USER MANUAL Oxford Prixton
natural_image
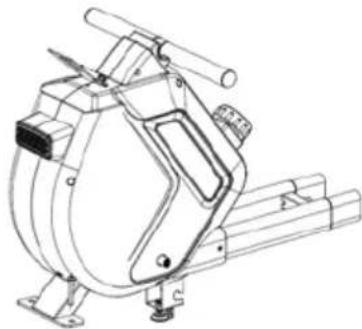
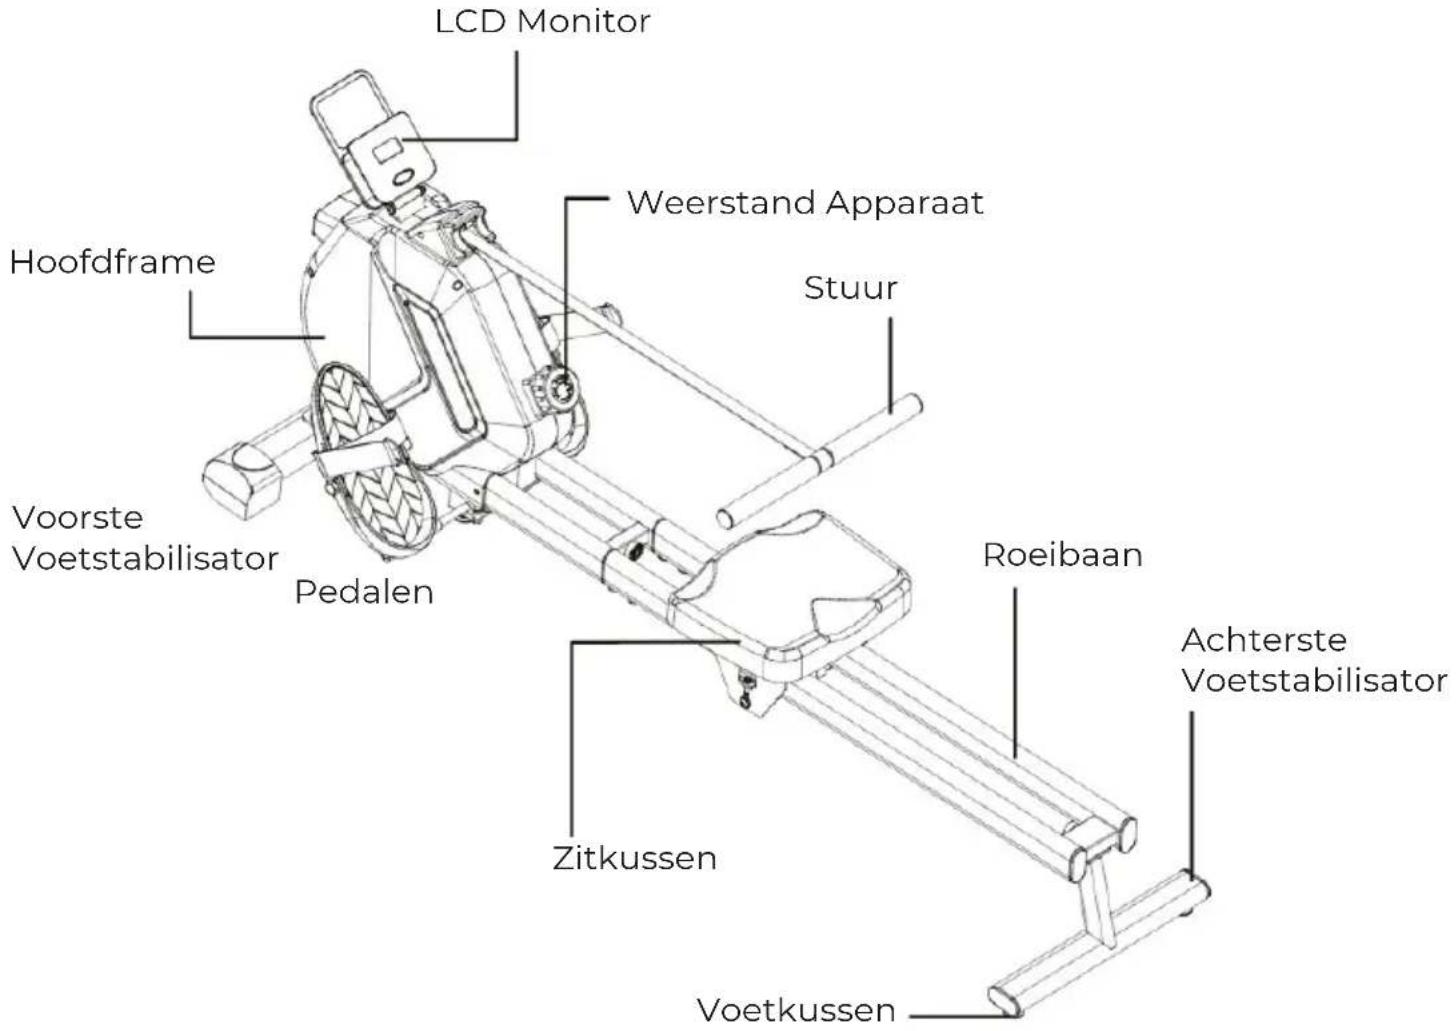
Line drawing of a stationary exercise machine with levers and wheels (no text or symbols)MÁQUINA DE REMO ROWING MACHINE
INDEX
ES 3
EN 11
FR 19
IT 27
DE 35
PT 43
NL 51
IMPORTANTE!
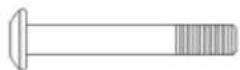
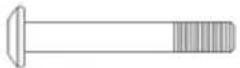
Perno hexagonal exterior M12160mm x 2
S2 S3
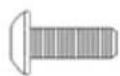
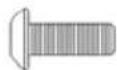
Perno hexagonal M850mm x 2

Perno hexagonal M816mm x 8
S4 S5 S6
Perno hexagonal M625mm x 2
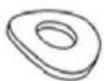
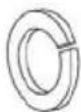
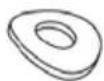
Arandela curva φ8 x 4
Arandela plana φ8 × 6
S7 S8
natural_image
Technical line drawing of a mechanical device with lever and base mount (no text or symbols)(C)
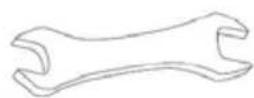
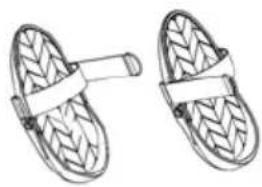
Pedales
natural_image
Illustration of two types of woven sandals with straps (no text or symbols)natural_image
Simple line drawing of two parallel cylindrical rods with a small inset showing a small hole (no text or symbols)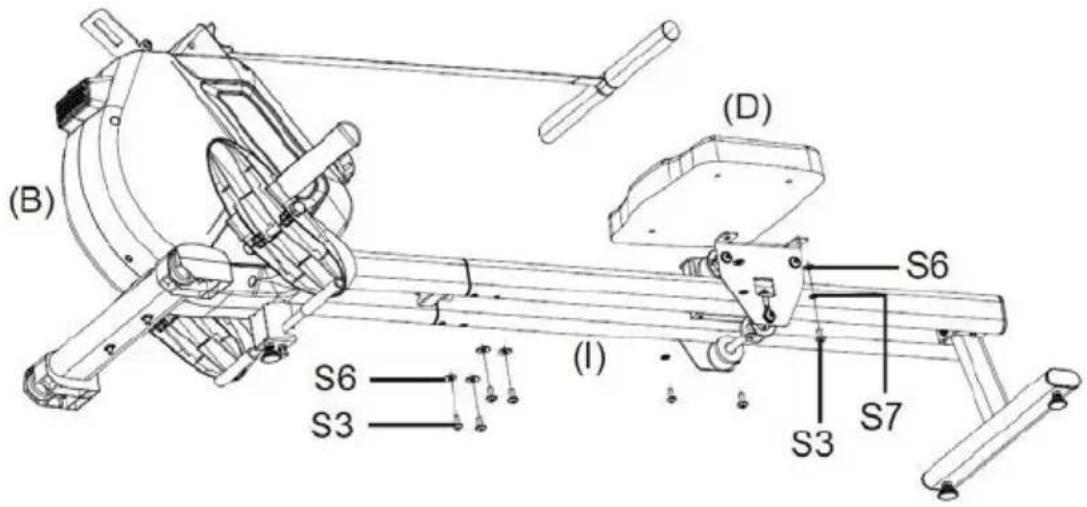
natural_image
Technical line drawing of a mechanical device (A) and its internal components (B), showing assembly and assembly details without any text or symbols.natural_image
Technical line drawing of a mechanical device with an arrow indicating motion, showing assembly and assembly steps (no text or symbols)Please read all instructions carefully before using this product. Retain this manual for future reference.
SAFETY INSTRUCTION
Basic precautions should always be followed, including the following safety instructions when using this equipment: Read all instructions before using this equipment.
- Read all the instructions in this manual and do warm up exercises before using this equipment.
- Before exercise, in order to avoid injuring the muscle, warm-up exercise of every position of the body is necessary. Refer to Warm Up and Cool Down Routine page. After exercise, relaxation of the body is suggested for cool-down.
- Please make sure all parts are not damaged and fixed well before use. This equipment should be placed on a flat surface when using. Using a mat or other covering material on the ground is recommended.
- Please wear proper clothes and shoes when using this equipment; do not wear clothes that might catch any part of the equipment.
- Do not attempt any maintenance or adjustments other than those described in this manual. Should any problems arise, discontinue use and consult an Authorized Service Representative.
- Do not use the equipment outdoors.
- This equipment is for household use only.
- Only one person should be on the equipment while in use.
- Keep children and pets away from the equipment while in use. This machine is designed for adults only. The minimum free space required for safe operation is not less than two meters.
- If you feel any chest pains, nausea, dizziness, or short of breath, you should stop exercising immediately and consult your physician before continuing.
- The maximum weight capacity for this product is 120kgs.
WARNING: Before beginning any exercise program consult your physician. This is especially important for the persons who are over 35 years old or who have pre-existing health problems. Read all instructions before using any fitness equipment.
CAUTION: Read all instructions carefully before operating this product. Retain this Owner's Manual for future reference.
HARDWARE & TOOLS PACK
S1

M12*160mm Outer Hex Bolt x 2
S2 S3
M8*50mm Hex Bolt x 2

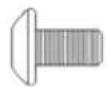
M8*16mm Hex Bolt
x 8
S4 S5 S6
M6*25mm Hex Bolt
x 2
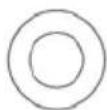
φ8 Curve Washer x 4

φ8 Flat Washer x 6
S7 S8
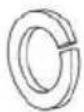
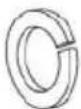
φ8 Spring Washer x 10 φ6 Flat Washer x 2

S9

φ6 Spring Washer
× 2
S10 S11
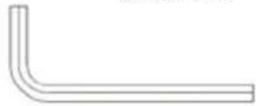
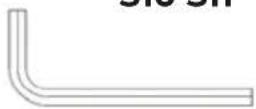
5#/ Allen Wench x 1
Wench x 1
ASSEMBLY PARTS LIST
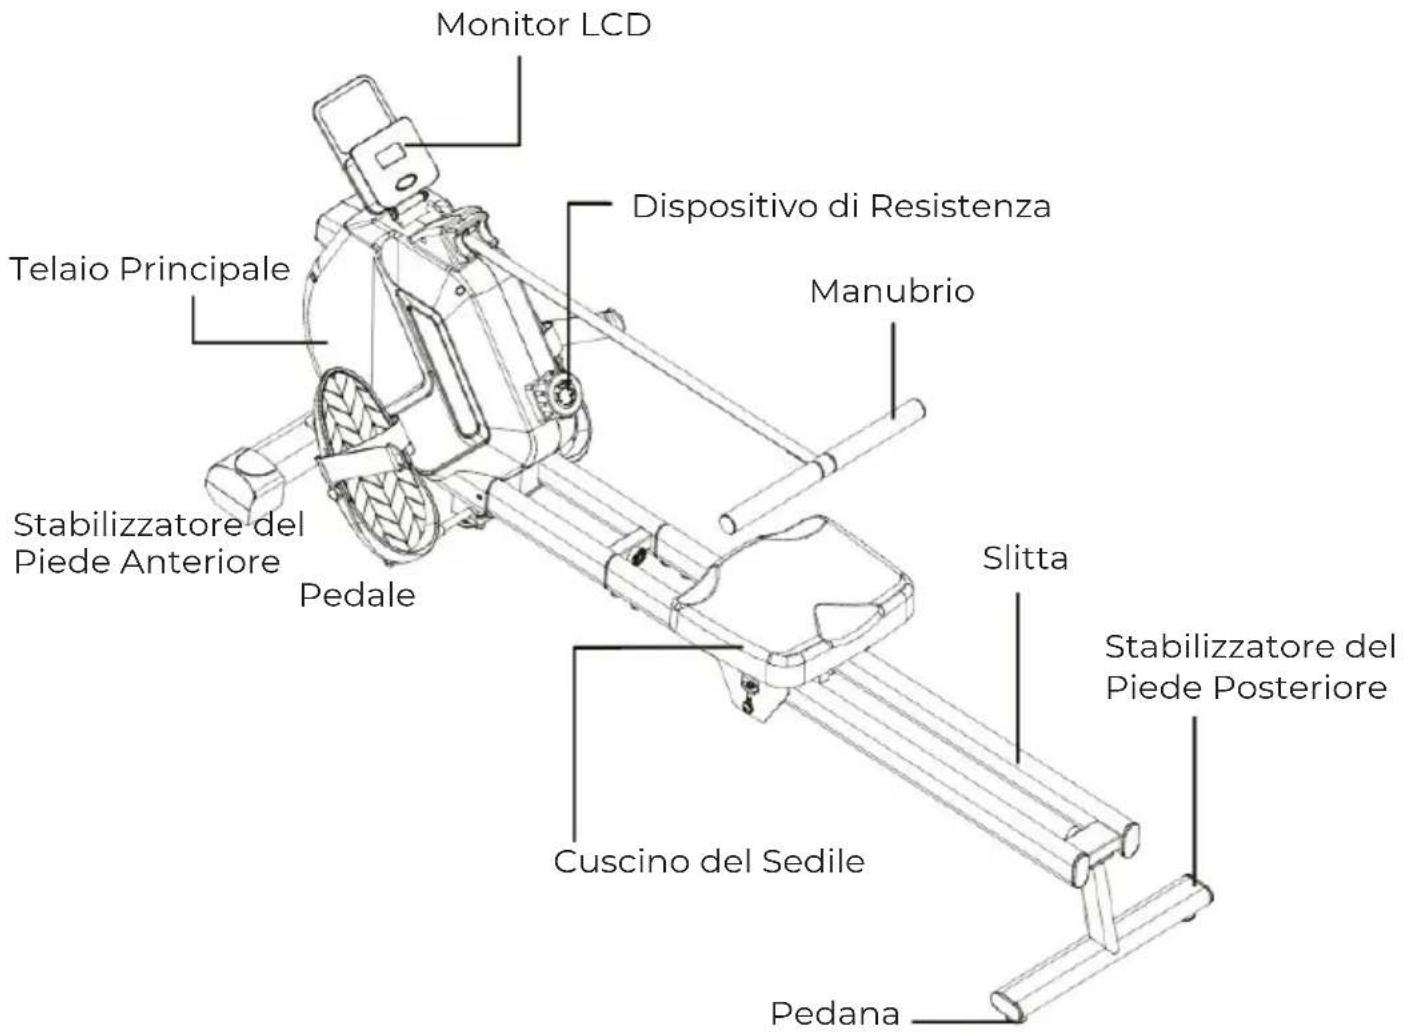
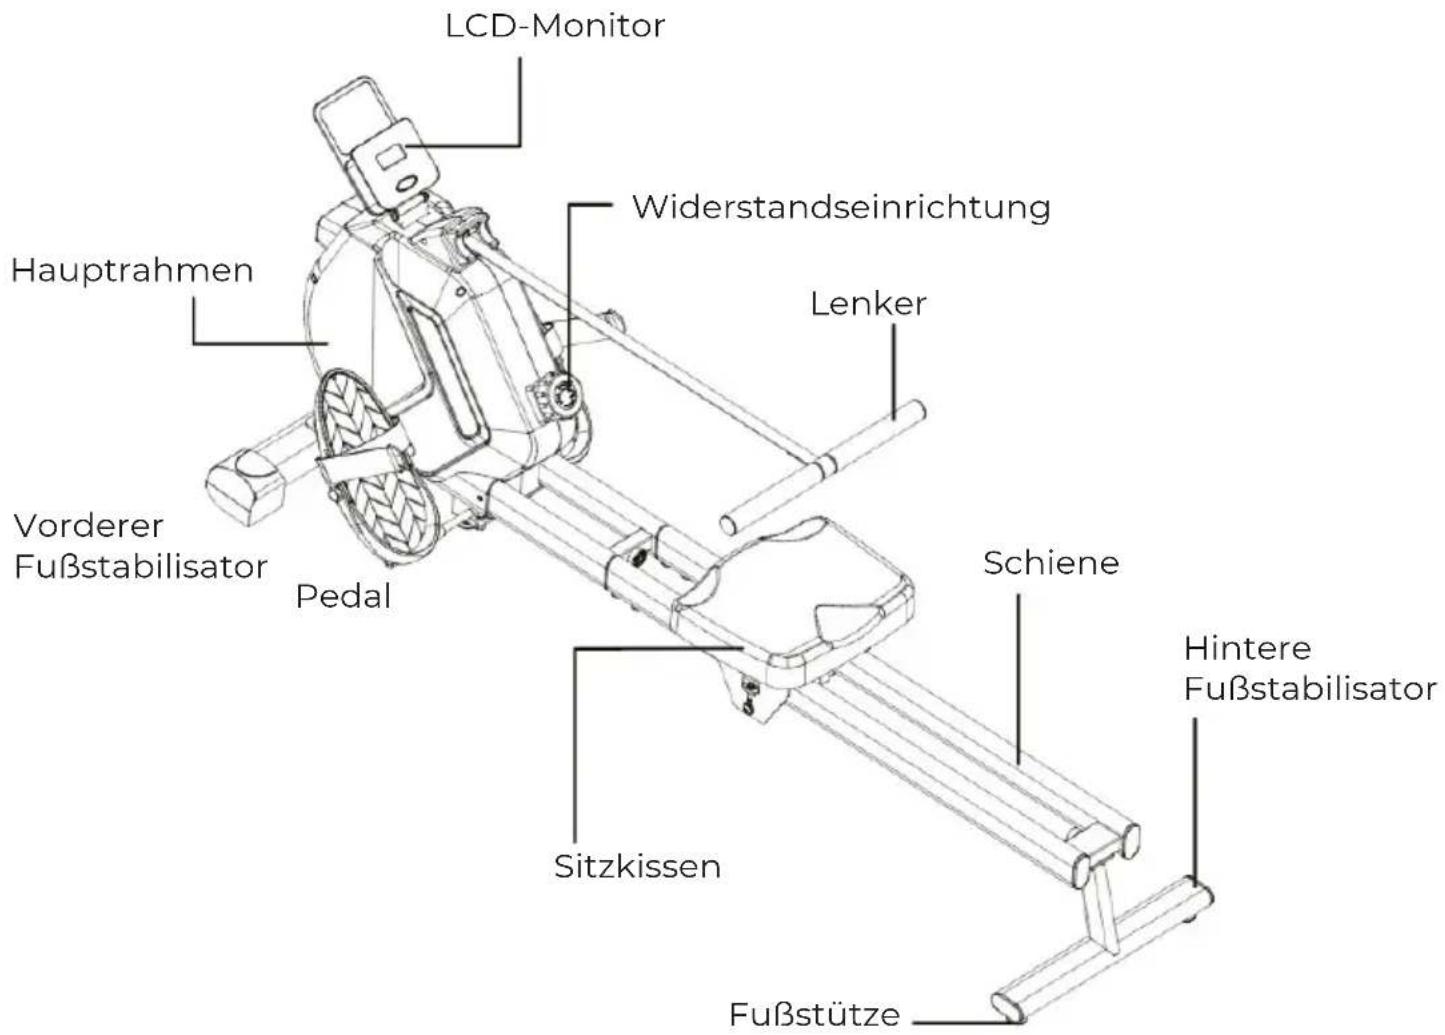
(A)
LCD Monito
(D)
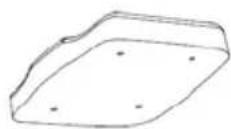
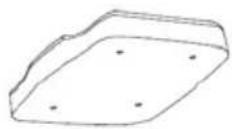
Seat Cushion
(B)
Main Fram
natural_image
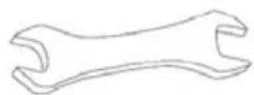
Technical line drawing of a mechanical device with no visible text or symbols(E)
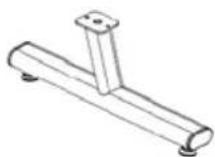
Rear Foot
Stablizer
(C)
Pedals
natural_image
Two hand-woven swah or slipcoats with textured surfaces and straps (no text or symbols)(F)
Front Foot Stablizer
(G)
Pedal Crossbar

(H)
Seat Cushion
Stablizer

(1)
Rower Slideway
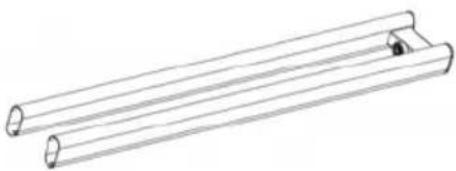
natural_image
Line drawing of two parallel cylindrical rods with a small inset showing a small hole (no text or symbols)WORKING INSTRUCTION
TECHNICAL SPECIFICATION
FlyWheel Weight : 3.0 KG
Magnetic Resistance Range: 16 Levels
Assembly Size: 1600x540x640mm
Sliding Distance: 0\~720mm
Handlebar Belt Length: 0\~1700mm
MONITOR FUNCTION:
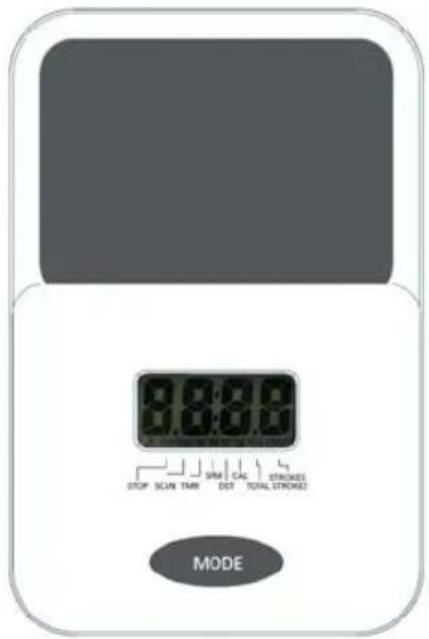
1. Power on the device
After powering on, the full screen display lasts for 1 second, and the default mode is SCAN.
2. SCAN mode
In SCAN mode, The monitor displays in cycles: SCAN+TMR, SCAN+SPM, SCAN+DST, SCAN+CAL, SCAN+STROKES, SCAN+Total STROKES, and switches to the next displayed content every 5 seconds.
Short press the MODE key to exit SCAN mode and switches to display in cycles through vari-ous modes, including SCAN, TMR, SPM, DST, CAL, STROKES and Total STROKES. After waking up from sleep, the monitor enter into SCAN mode.
3. Indoor Rower Icon
The Indoor rower icon is always displayed in the lower left corner.
4. STOP Icon
The monitor display "STOP" after the machine is not in use in 4 seconds, and the icon disap-peared while the machine is in use again.
5. TMR Mode
In TMR mode, it displays the rowing time.
Long press the MODE key, the TMR will be restart and reset.
6. SPM mode
In SPM mode, it displays the rowing speed.
Long press the MODE key, the DST will be restart and reset.
7. DST mode
In DST mode, it displays the rowing distance in KM.
Long press the MODE key, the DST will be restart and reset.
8. The CAL mode
In CAL mode, it displays the calories burned.
Long press the MODE key, the DST will be restart and reset.
9. STROKES mode
In STROKES mode, it displays the numbers of rowing.
Long press the MODE key, the DST will be restart and reset.
10. TOTAL STROKES display mode
In TOTAL STROKES mode, it displays the cumulative numbers of rowing.
Long press the MODE key, the DST will be restart and reset.
11. Sleep
No signal input for 2 minutes, enter into the sleep state.
12. Wake Up
Rowing signal, MODE key, can wake up. Turn resistance regulator, can not wake up.
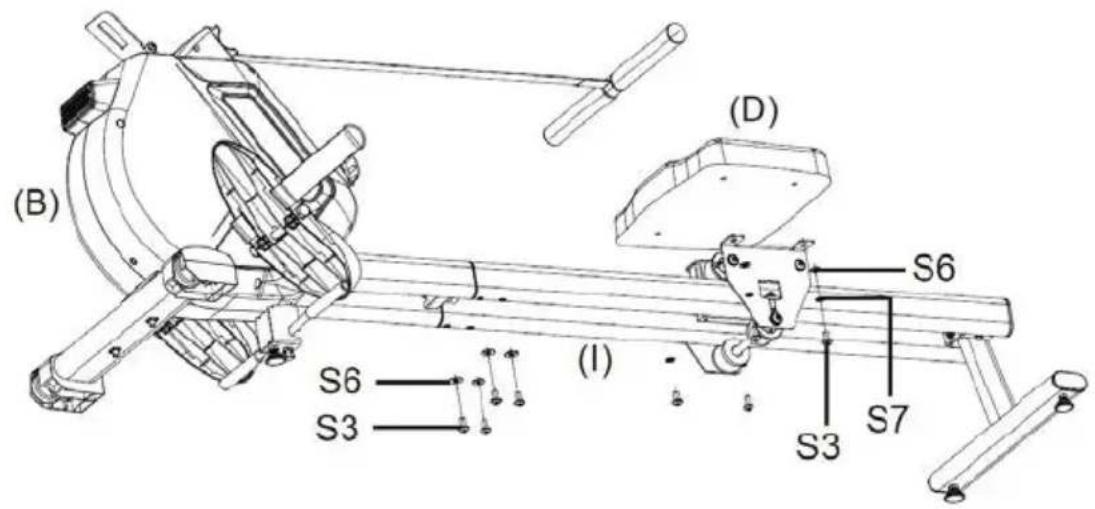
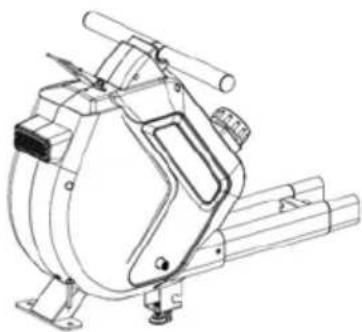
ASSEMBLY :
1. Installing the Front Foot Stablizer
STEP1. Align the bolt holes on the main frame(B) and the Front Foot Stablizer(F), install the Hex Bolts(S2), Flat Wash-ers(S6), Spring Washers(S7) and tighten with 5# Allen Wrench (S10) provided.
STEP2. Installing the Pedal Crossbar(G) onto the main frame(B) and tighten with the Bolt and Nut pre-installed.
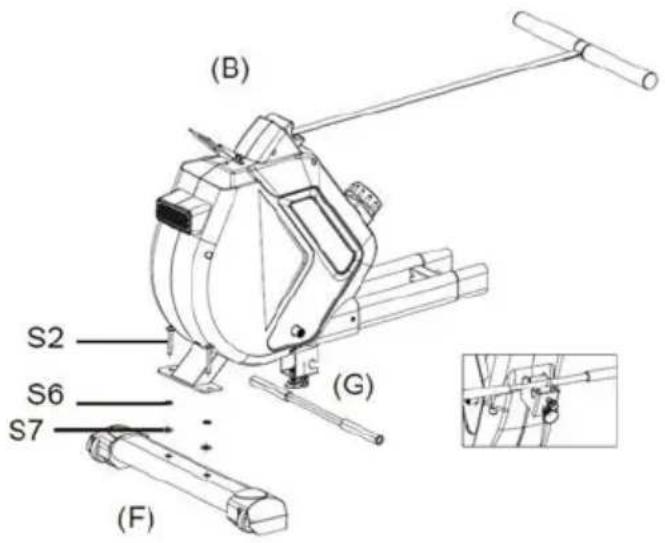
2. Installing the Pedals
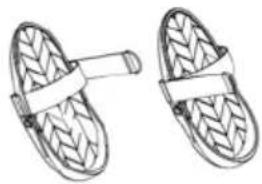
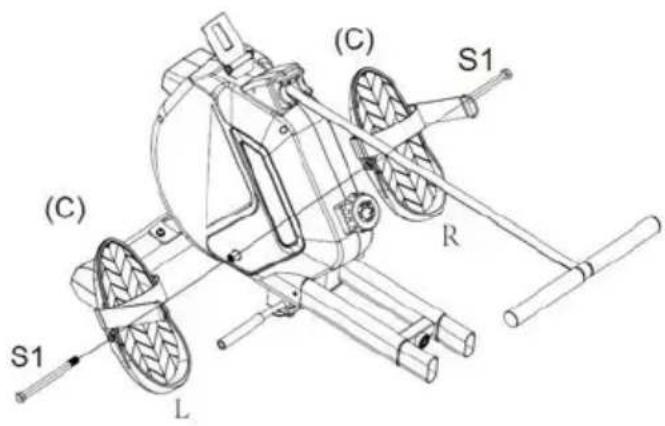
Installing the Padels(C) onto the main frame(B) and tighten with the Outer Hexagonal Bolt(S1) and the Wrench (S11) provided.
NOTE: Distinguish Pedals between left (L) and right (R). Do not install in the wrong position.
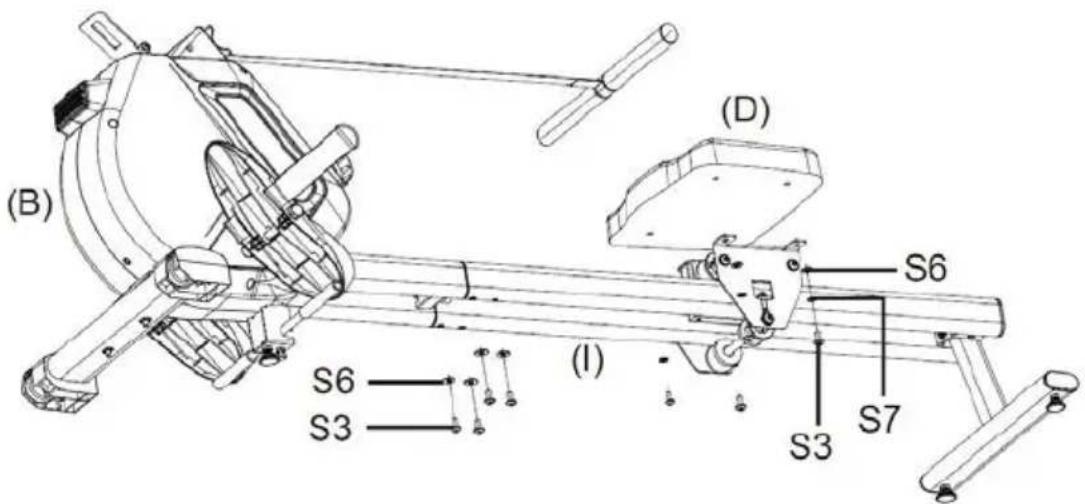
3. Installing the Seat Cushion Stablizer
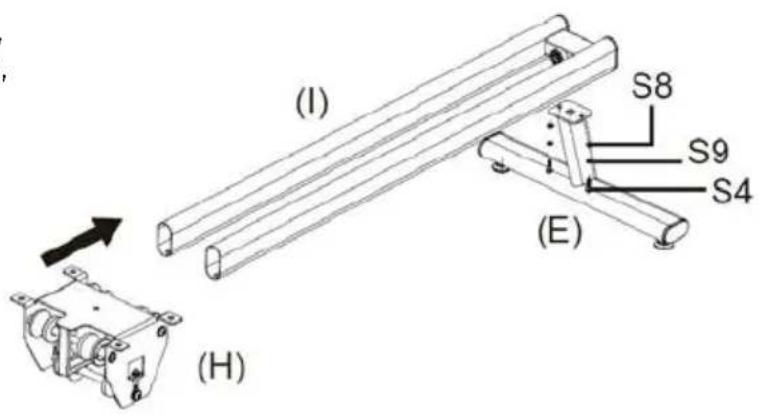
STEP1. Align the bolt holes on the Slide-way(I) and the Rear Foot Stablizer(E), install the Hex Bolts(S4), Flat Wash-ers(S8), Spring Washers(S9) and tighten with 5# Allen Wrench (S10) provided.
STEP2. Installing the Seat Cushion Stablizer(H) onto the Slideway(I) in the right direction.
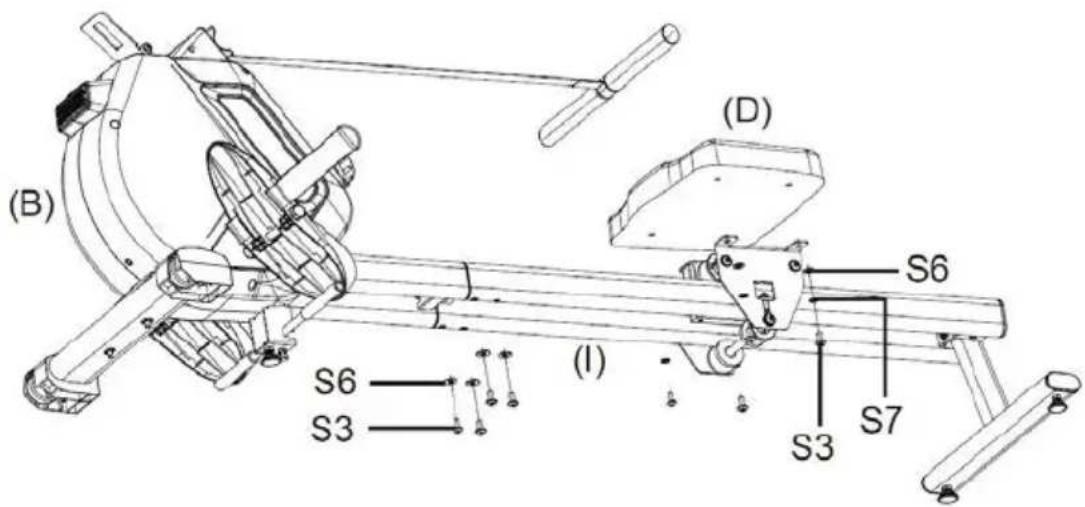
4. Installing the Seat Cushion & the Slideway
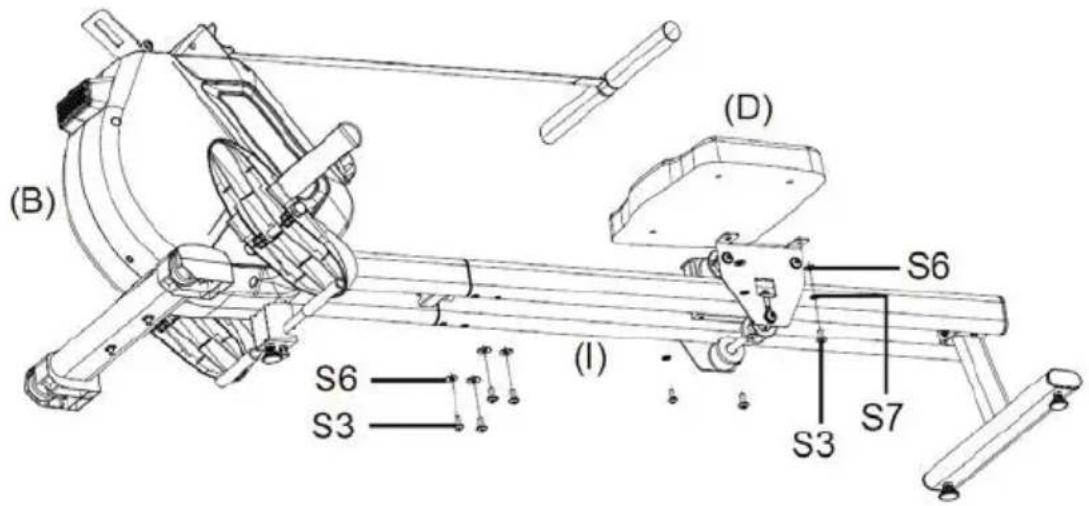
STEP1. Installing the Slideway(I) onto the Main Frame(B) in the right direction and tighten with Hex Bolts(S3) and Flat Washers(S6) provided.
STEP2. Installing the Seat Cushion(D) onto the Seat Cushion Stablizer(H) and tighten with Hex Bolts(S3), Flat Washers(S6) and Spring Washers(S7) provided.
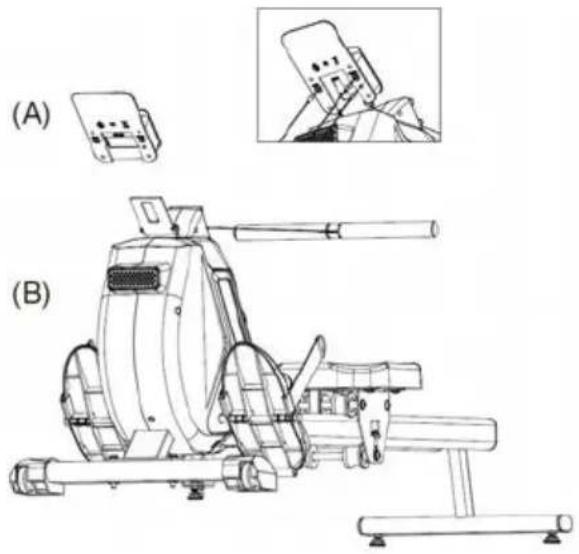
5. Installing the LCD Monitor
STEP1. Installing the batteries (2xAA) into the Monitor first.
STEP2. Installing the Minitor(A) onto the Main Frame(B) in the right direction.
STEP3. Inserting the signal heads into the corresponding sockets.
natural_image
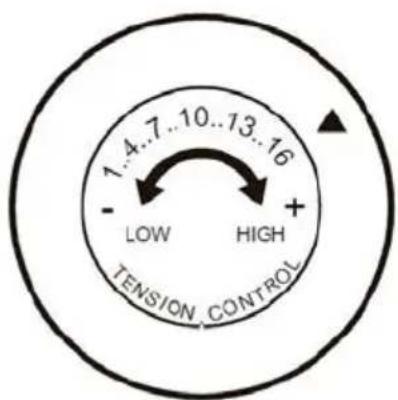
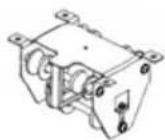
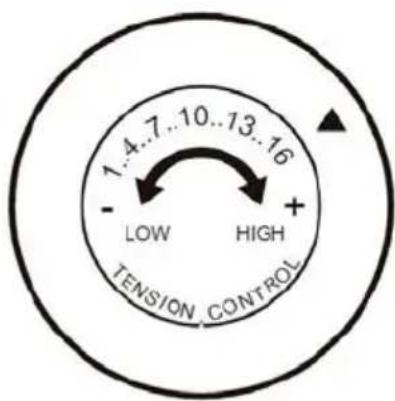
Technical line drawing of a mechanical device with labeled sections (A) and (B), showing internal components and assembly (no text or symbols present)ADJUSTING THE TENSION
To increase the tension, turn the Tension adjustor in a CLOCKWISE(+) direction.
To decrease the tension, turn the Tension adjustor in a COUNTERCLOCKWISE(-) direction.
There are 16 levels of Magnetic resistance.
MAINTENANCE & TRANSPORTING
MAINTENANCE
The rowing machine can be cleaned with a soft, clean damp cloth. Do not use abrasives or solvents on plastic parts. Wipe your perspiration off the rowing machine after each use. Be careful not to get excessive moisture on the monitor as this might cause the electronics to fail. Keep the rowing machine out of direct sunlight to prevent damage. Inspect all assembly bolts, nuts, screws, and pedals on the machine for proper tightness every week.
TRANSPORTING
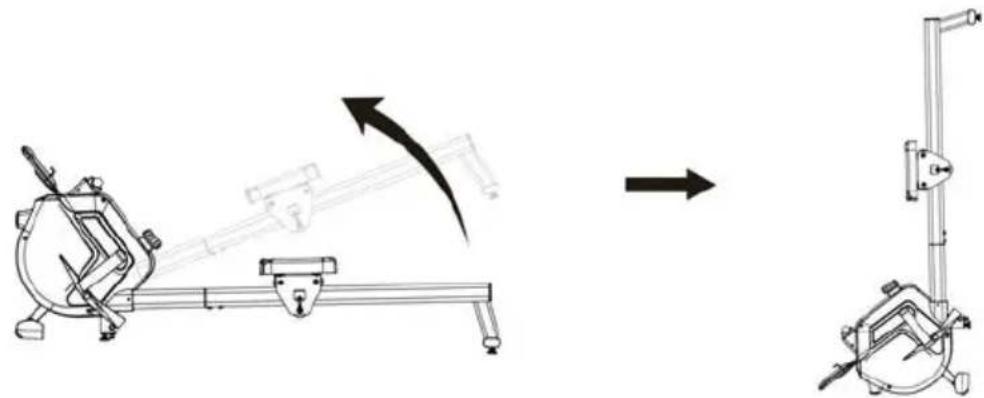
Grasp the Rear Foot Stabilizer with both hands until the Wheels on the Front Stabilizer make contact with the ground. Pull or Push the Rowing Machine to the desired storage area before upringting the Rowing Machine. Always maintain both hands on the machine during transportation.
STORAGE
Store the Rowing Machine in a clean and dry environment away from pets and children.
natural_image
Mechanical assembly diagram showing a lever mechanism and a separate vertical clamp device (no text or symbols)Warranty policy
This product complies with the warranty law in force in the country of purchase. When you have a problem that you can not solve, you must access the web www.prixton.com and click on the contact option to send us your assistance form.
These technical and electrical specifications are those of typical units and may be changed without prior notice in order to provide improved equipment.
Simplified EU Declaration Of Conformity
We, La Trastienda Digital located in Avenida Cervantes 49, módulo 25, Basauri 48970, Bizkaia hereby declare that the following goods, imported and selling at European market:
| BRAND | MODEL NAME DESCRIPTION | CATEGORY |
| Prixton OXFORD | ROWING MACHINE | Fitness |
Are in compliance with the EC Council Directive of 2014/53/EU (EM DIRECTIVE) and harmonized standards and with the board of the 16th of April 2014.
The complete text of the UE Declaration of conformity is available anytime at this website address:
www.prixton.com
LA TRASTIENDA DIGITAL
IMPORTANT!
Boulon hexagonal M625mm x 2
S7 S8
Rondelle ressort φ8 × 10
S10 S11
Clé Allen 5# x 1
S2 S3

Boulon hexagonal M850mm x 2
Rondelle courbe φ8 × 4
Rondelle plate φ6 × 2
Clé x 1

Boulon hexagonal M816mm x 8
Rondelle plate φ8 × 6
S9

Rondelle ressort φ6 × 2
(A)
Moniteur LCD

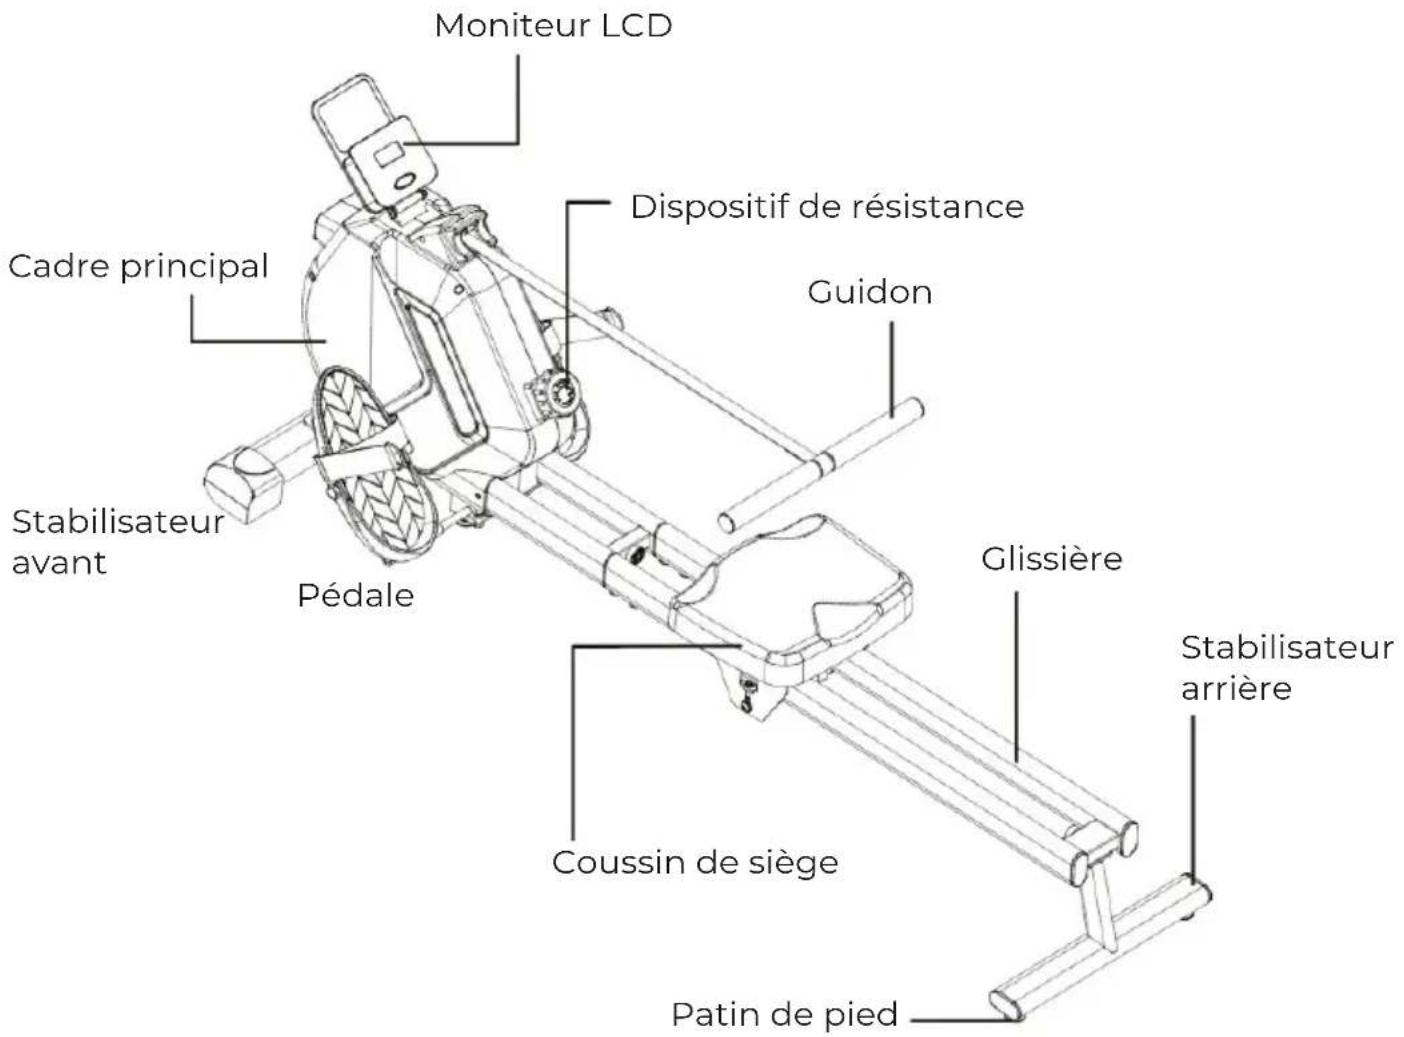
(B)
Cadre principal

natural_image
Technical line drawing of a mechanical device with no visible text or symbols(C)
Pédales
natural_image
Two hand-wear sandals with textured surfaces and straps (no text or symbols)natural_image
Line drawing of two parallel cylindrical rods with a small inset showing a small hole (no text or symbols)INSTRUCTIONS DE FONCTIONNEMENT

natural_image
Technical line drawing of a mechanical device (A) and its internal components (B), showing assembly and assembly details without any text or symbols.INSTRUCTIONS D'UTILISATION
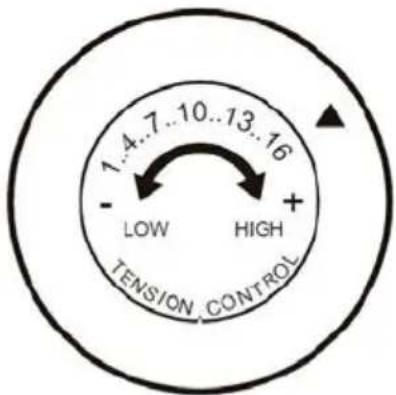
RÉGLAGE DE LA TENSION
natural_image
Technical line drawing of a mechanical device with no visible text or symbolsnatural_image
Illustration of two woven slip-on shoes with straps (no text or symbols)natural_image
Line drawing of two parallel cylindrical rods with a small inset showing a small hole (no text or symbols)ISTRUZIONI PER L'USO
natural_image
Technical line drawing of a mechanical device with labeled sections (A) and (B), showing internal components and assembly (no text or symbols present)ISTRUZIONI PER L'USO
natural_image
Technical line drawing of a mechanical device with an arrow indicating motion direction (no text or symbols)Schraubenschlüssel x 1
MONTAGETEILELISTE
natural_image
Technical line drawing of a mechanical device with no visible text or symbolsnatural_image
Line drawing of two woven slipcoats with straps (no text or symbols)natural_image
Simple line drawing of two parallel cylindrical rods with a small protrusion at one end (no text or symbols)ARBEITSANWEISUNG
natural_image
Technical line drawing of a mechanical device with labeled sections (A) and (B), showing internal components and assembly (no text or symbols present)natural_image
Technical line drawing of a mechanical device with an arrow indicating motion, showing a shaft and lever assembly (no text or symbols)Garantiepolitik
Parafuso Externo Hexagonal M12160mm x 2
S2 S3

Parafuso Hexagonal M850mm x 2
Parafuso Hexago- nal M816mm x 8
S4 S5 S6

Parafuso Hexagonal M625mm x 2
Arruela Curva φ8 x 4
Arruela Plana φ8 x 6
S7 S8
Arruela de Mola φ8 x 10 Arruela Plana φ6 x 2

S9

Arruela de Mola φ6 x 2
S10 S11
Chave Allen 5# x 1
Chave de Aperto x 1
ASSEMBLY PARTS LIST
(A)
Monitor LCD
(B)
Estrutura Principal
natural_image
Technical line drawing of a mechanical device with no visible text or symbols(C)
Pedais
natural_image
Two hand-woven woven sandals with straps (no text or symbols)(D)
Almofada do
Assento
natural_image
Line drawing of two parallel cylindrical rods with a small inset showing a small hole (no text or symbols)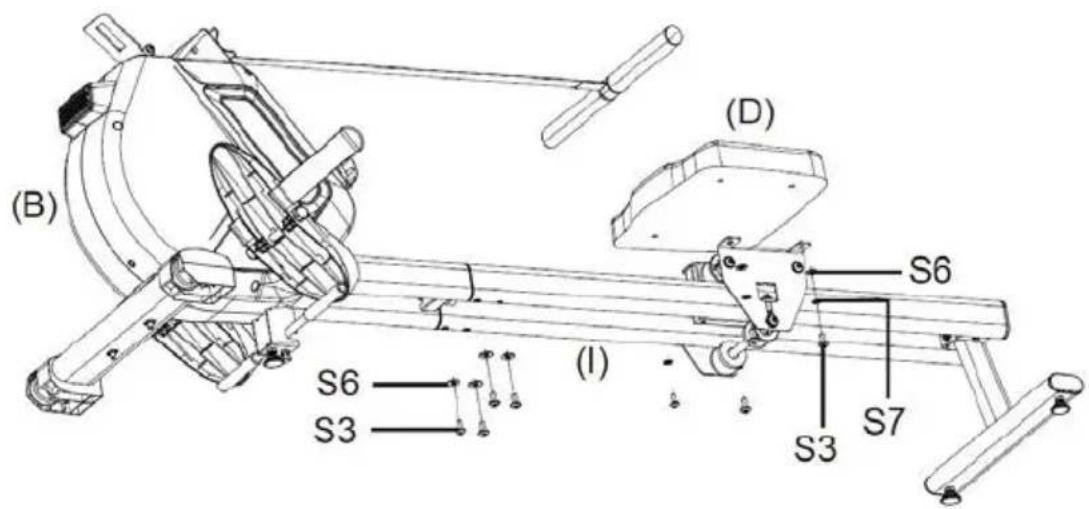
natural_image
Technical line drawing of a mechanical device with labeled sections (A) and (B), showing internal components and assembly (no text or symbols present)natural_image
Diagram showing a mechanical device with an arrow indicating motion, alongside its exploded view (no text or symbols present)Política de garantia
natural_image
Technical line drawing of a mechanical device with no visible text or symbolsnatural_image
Two hand-worn snowshoe with textured surface and handle (no text or symbols)natural_image
Simple line drawing of two parallel cylindrical rods with a small inset showing a small hole (no text or symbols)WERKINSTRUCTIE
3. Installeren van de zitkussenstabilisator
natural_image
Technical line drawing of a mechanical device with labeled sections (A) and (B), showing internal components and assembly (no text or symbols present)GEBRUIKSINSTRUCTIE: