
BA806 - Bread maker GRAEF - Free user manual and instructions
Find the device manual for free BA806 GRAEF in PDF.

| Brand | Graef |
| Model | BA806 |
| Product type | Bread machine |
| Power supply | 220-240 V ~ 50 Hz (see rating plate) |
| Power consumption | Approx. 600 W (estimate) |
| Bread capacity | 500 g or 750 g |
| Number of programs | 36 automatic programs including bread, dough, jam, yogurt, chutney, bake only, and DIY function |
| Keep warm function | Automatic after baking (1 hour) |
| Delayed programming | Up to 36 hours |
| Browning level | 3 levels (light, medium, dark) |
| Ingredient compartment | Automatic addition of dry ingredients (seeds, nuts) during kneading |
| Kneading paddle removal | Possibility to remove the kneading paddle after kneading (programs 1-23 and 36) |
| Display | LCD screen with touch keys |
| Bread pan material | Non-stick |
| Included accessories | Bread pan, kneading paddle, extraction hook, measuring cup, measuring spoon |
| Cleaning | Bread pan and kneading paddle not dishwasher safe; hand wash only |
| Safety | Automatic shutdown in case of overheating (display H:HH); overload protection |
| Warranty | 2 years (manufacturer warranty) |
| Customer service | service@graef.de |
Frequently Asked Questions - BA806 GRAEF
User questions about BA806 GRAEF
0 question about this device. Answer the ones you know or ask your own.
Ask a new question about this device
Download the instructions for your Bread maker in PDF format for free! Find your manual BA806 - GRAEF and take your electronic device back in hand. On this page are published all the documents necessary for the use of your device. BA806 by GRAEF.
USER MANUAL BA806 GRAEF
natural_image
Illustration of a GRAEF kitchen appliance with a circular button and side-mounted legs (no text or symbols on the device itself)EN Operating Instructions
Information on these operating instructions....20
Warning messages 20
General safety instructions....21
Danger caused by electric current 23
Intended use....23
Limitation of liability 23
After-sales service 24
Unpacking 24

Disposal of the packaging 24

Disposal of the unit 24
Requirements on the installation location....24
Electrical connection....25
Prior to first use....25
Control panel 26

Menu 26

Weight....26

Preset time....26

Browning degree....27

Removing the dough hook 27

DIY....27
Commissioning....27

Hotplate function....29
Cleaning 29
Troubleshooting....29
Two-year warranty....31
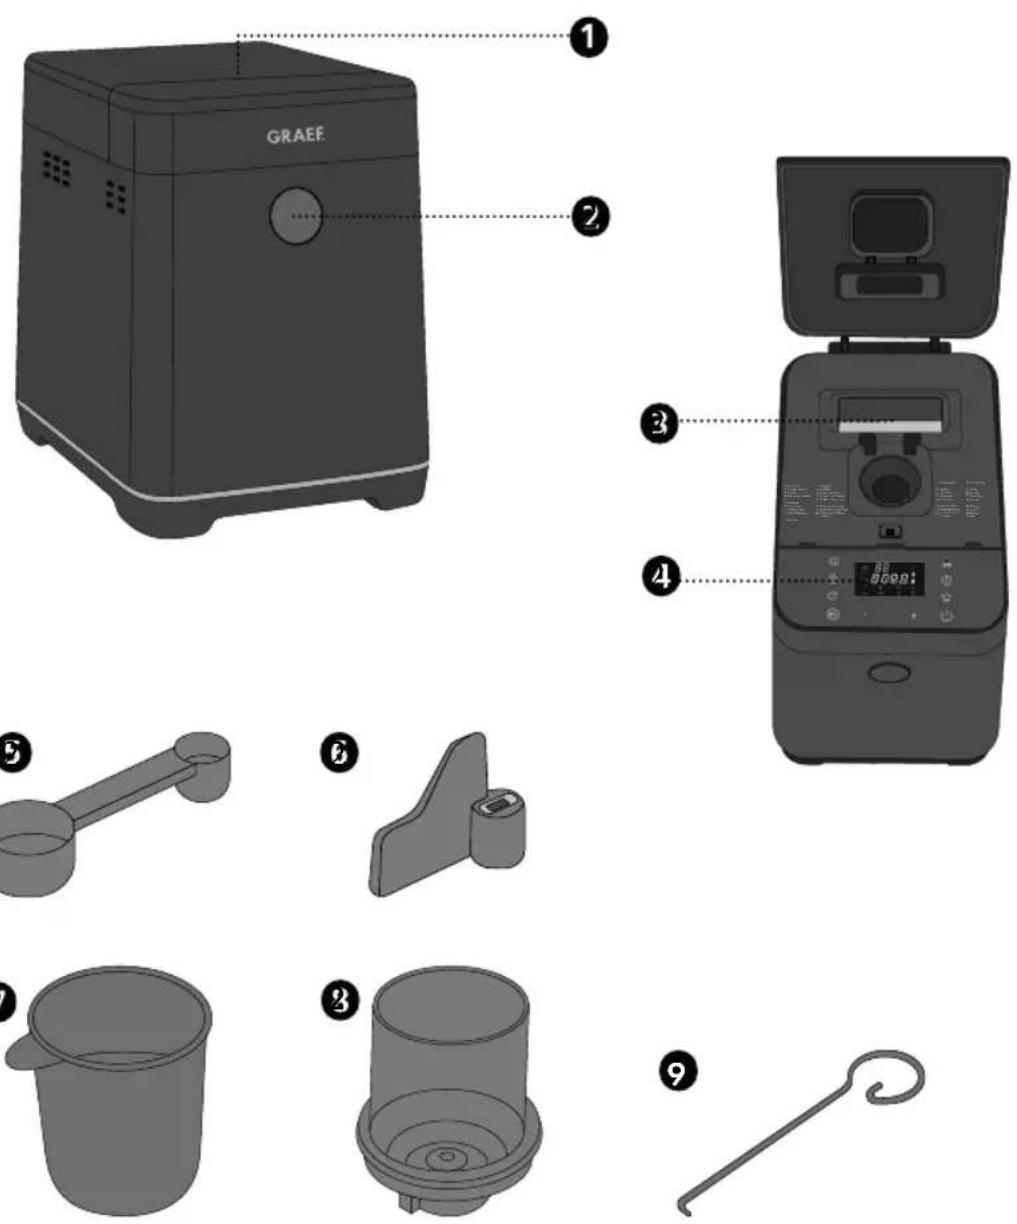
PRODUCT DESCRIPTION

natural_image
3D rendered mechanical lever or handle component with two cylindrical ends and a central shaft (no text or symbols)
natural_image
Simple 3D illustration of a beaker with a lid, no text or symbols present① Lid opening button of the ingredients tray
2 Lid opening button of the breadbox
③ Ingredients compartment
4 Display
Measuring spoon
Dough hook
② Measuring cup
2 Water tank
9 Extraction hook
PREFACE
Dear Customer,
You have made a good choice by buying this automatic breadmaker. You have purchased a recognized quality product.
Thank you for your purchase and we hope you enjoy using your new Graef automatic bread-maker.
INFORMATION ON THESE OPERATING INSTRUCTIONS
These operating instructions are an integral part of the breadmaker (hereinafter referred to as the "unit") and provide important information on the start-up, safety, intended use and maintenance of the unit.
The operating instructions have to be available at the unit at all times. The instructions have to be read and applied by every person which deals with
- Commissioning
- Operation
- Fault correction and/or
- Cleaning
of the unit.
Keep these operating instructions and pass them on to the next owner along with the unit.
These operating instructions cannot take into consideration every conceivable use. For further information or in the event of problems that are not covered or not covered in sufficient detail in these instructions, please contact Graef customer service or your specialist dealer.
WARNING MESSAGES
In these operating instructions, the following warning messages and signal words are used:
WARNING
This refers to a potentially dangerous situation. Failure to observe this warning may result in serious injury or even death.
CAUTION
This refers to a potentially dangerous situation. In case of non-observation of this warning message, material damage may occur.
IMPORTANT!
This refers to application tips and other especially important information!
GENERAL SAFETY INSTRUCTIONS
This unit is in conformity with the safety instructions mentioned hereinbefore. However, incorrect handling may lead to personal injury and material damage.
For safe handling of this unit, please observe the following safety instructions:
- Before using the unit check for any external visible damage of the housing, the connection cable and plug. Do not operate a damaged unit.
- Repairs may be carried out only by an expert or by Graef after-sales service. Incorrect repairs may cause considerable hazards for the user. In addition, any claim under guarantee is forfeited.
- Defective parts must be replaced by original spare parts only. Only these parts are guaranteed to meet the safety requirements.
- This unit can also be used by children from 8 years age as well as by persons with limited physical, sensory or mental ability or with a lack of experience and/or knowledge if they are supervised or have been trained in using the unit and have understood the dangers which may result from it. Cleaning and user maintenance must not be carried out by children, unless they are 8 years or older and are supervised during the process.
- The unit and its connecting cable have to be clear of children who are younger than 8 years.
- Children should be supervised in order to make sure that they do not play with this unit.
- The unit is not intended to be used with an external timer or a separate remote control.
- Always disconnect the connecting cable by using plug; do not pull the connecting cable.
- Do not use the unit if the connecting cable or plug are damaged.
• Prevent that liquids get on the plug.
- If the connection cable is damaged, it must be replaced by the manufacturer, the after-sales service or a similarly qualified person in order
to prevent danger.
- Do not open the housing under any circumstances. When touching live connections or changing the electrical and mechanical structure, there is danger of electric shock.
- Never touch live parts. They may cause an electric shock or even may lead to death.
- Before connecting the unit, compare the connecting data (voltage and frequency) on the type plate with those of your energy network. These details must correspond so that no damage occurs to the unit.
- Check to be sure that the connecting cable has been safely laid. If the cable gets caught somewhere, the unit may fall down from the work surface.
- Packaging materials must not be used for playing. There is danger of suffocation.
- Never use the unit in the vicinity of a heat source.
- Never use the unit outdoors, and always keep it in a dry place.
- Do not use the unit near flammable materials (such as curtains, drapes or similar objects) to avoid fire.
- Do not block any ventilation slots.
- Please clean the baking chamber after each use to prevent the flour and crumb residues from smoking or burning the next time you bake.
- Stick to the maximum quantities in the recipe instructions, otherwise liquids and dough can overflow and lead to overheating and fire. If there is an overflow of dough or liquids, unplug the unit immediately, let it cool and clean the baking chamber.
DANGER CAUSED BY ELECTRIC CURRENT
WARNING
Mortal danger is caused by contact with live cables or components!
Please observe the following safety instructions in order to prevent exposure to electric current:
- Do not use the unit if the connecting cable or plug are damaged.
- In this case, you should let the Graef Customer Service or an authorized specialist install a new connecting cable before re-using the unit.
- Do not open the housing under any circumstances. When touching live connections or changing the electrical and mechanical structure, there is danger of electric shock.
- Never touch live parts. They may cause an electric shock or even may lead to death.
INTENDED USE
Use the unit only for making breads, doughs, jams, yogurts and chutneys or for "Stirring and warming" (see detailed description under program 30). Another or any exceeding use shall not be considered intended.
This unit is not intended for commercial use, but for use in the home or similar areas such as:
• Staff kitchens in shops and offices
• In agricultural estates
- By guests in hotels, motels and other living quarters
• In bed and breakfast boarding houses
IMPORTANT!
Use only in household-like areas!
CAUTION
The unit can cause dangers, if is not used as intended.
• Use the unit exclusively as intended.
- Observe the procedures described in these operating instructions.
Claims of any kind caused by damage by unintended use shall be excluded.
The risk shall be borne sole by the user.
LIMITATION OF LIABILITY
All technical information, data and notes on the installation, the operation and the care contained in these operating instructions correspond to the last status before printing, and are rendered under consideration of our previous experience and to the best of knowledge.
No claims may be derived from the specifications, illustrations and descriptions in these instructions.
The manufacturer does not assume any liability for damage caused by:
• Non-observation of the instructions
- Unintended use
- Improper repairs
• Technical modifications
• Use of unapproved spare parts
Translations are carried out to the best of knowledge. We do not assume any liability for translation mistakes. The original German text shall be binding only.
AFTER-SALES SERVICE
If your Graef unit is damaged, please contact your dealer or the Graef Customer Service at +49 (2932) 9703-677 or write an e-mail to service@graef.de.
IMPORTANT!
If possible, keep the original packaging during the guarantee period of the unit in order to be able to pack the unit correctly in case of guarantee.
UNPACKING
When unpacking the unit, proceed as follows:
- Remove the unit from the box.
- Remove the packaging parts.
- Remove any stickers on the unit. Do not remove the type plate!

DISPOSAL OF THE PACKAGING
The packaging protects the unit against transport damage. The packaging materials are selected according to the environmental compatibility and disposal-related aspects and can therefore be recycled. The return of packaging into the material cycle saves raw material and reduces the waste volume. Dispose of the packaging material no longer needed at collection points for the "Green Dot" recycling system (in Germany).

DISPOSAL OF THE UNIT
At the end of its service life, this product cannot be disposed of in normal domestic waste. The symbol on the product and in the operating instructions point out to this fact. Reuse the materials according to their marking. With the reuse, recycling or other forms of recycling of old equipment, you make an important contribution to the protection of our environment. Please ask your municipal administration for the disposal point.
REQUIREMENTS ON THE INSTALLATION LOCATION
For safe and faultless operation of the unit, the following requirements of the installation location
have to be met:
- The unit has to be placed on a solid, flat, horizontal, and non-slipping surface with a sufficient weight-carrying capacity.
• Make sure that the unit cannot topple over. - Choose the location in such a way that children cannot reach the connecting cable of the unit.
- Do not place the unit on hot surfaces, such as hotplates, or near them.
- Never use the unit outdoors, and always keep it in a dry place.
- Do not use the unit near flammable materials (such as curtains, drapes or similar objects) to avoid fire.
- The unit is not designed for installation in a wall or a built-in cupboard.
- Do not set up the unit in a hot, wet or moist environment.
- The socket has to be easily accessible so that the power cable can be removed easily in case of emergency.
ELECTRICAL CONNECTION
For safe and fault-free operation of the unit, the following requirements have to be met during the electrical connection:
- Before connecting the unit, compare the connecting data (voltage and frequency) on the type plate with those of your energy network. These details must correspond so that no damage occurs to the unit. In case of uncertainty, contact a qualified electrician.
- The socket has to be protected at least by a 10 amps circuit breaker.
- Make sure that the connecting cable is not damaged and not laid across hot surfaces or sharp edges.
- The connecting cable must not be stretched tightly.
- The electric safety of the unit is ensured only when it is connected to a socket with protective conductor installed correctly. Operation on a socket without protective conductor is forbidden. If in doubt, let the house installation be checked by a skilled electrician. The manufacturer does not assume responsibility for damage which has been caused by missing or interrupted protective conductor.
PRIOR TO FIRST USE
- Clean all parts as described under "Cleaning".
- Put the dough hook in the breadbox and place it in the unit.
- Start the program 35 (baking only) for 30 minutes.
- Let the unit, the breadbox and the dough hook cool.
• After cooling, clean all parts again as described under "Cleaning".
IMPORTANT!
When the unit is switched on for the first time, there may be a slight emission of smoke and odours, thus provide for sufficient ventilation (e.g. open the window) when the unit is first used.
CONTROL PANEL
1 MENU — select the program you want.
2 WEIGHT — select the desired amount of bread.
3 PRESET TIME — select when the baking process should be finished.
4 START / PAUSE — start/pause the baking process.
5 BROWNING DEGREE — select the desired browning degree.

Light
Medium Dark

6 REMOVING THE DOUGH HOOK — with the programs 1–23 and 36 the dough hook can be optionally removed after kneading.
⑦ DIY — Do it yourself. Create your own program.
8 POWER — On/off switch.
+/- — to change the settings, e.g. weight or preset time, or to toggle between programs in the menu (forward/backward).

MENU
Touch the symbol, and use the +/- touch keys to select the program you want. The number of the program appears in the display.

WEIGHT
Press the symbol G, and use the +/- touch keys to choose whether you want to bake a 750 g or 500 g loaf. The chosen weight flashes.

PRESET TIME
If you want to set the completion time to a specific value, you can change the start time. Press both the symbol and ☐ the +/- touch keys to change the starting time. In this way, the real
program runtime is not changed, only the starting time.
Example:
Program: 1
Duration: 3 hours
Preset time: 3 hours
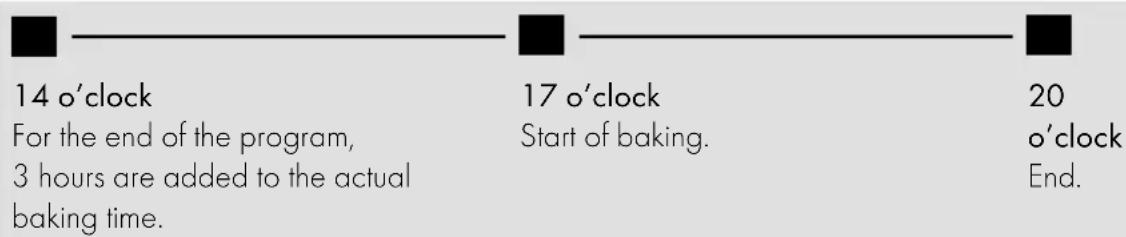
You start at 14:00 and want the loaf to be ready at 20:00. Adjust the preset time to 3 hours. You can set up to 36 hours.

BROWNING DEGREE
The medium browning degree is preset for all types of bread. If you would prefer the bread to be lighter or darker, press the symbol 7 and use the +/- touch keys to select the desired browning degree. The chosen browning degree is indicated by flashing.

REMOVING THE DOUGH HOOK
With the programs 1–23 and 36 you can optionally remove the dough hook after the last kneading operation. To do this, after selecting the desired menu, press the symbol 📁. If flashing, the "Removing the dough hook" function is enabled. After the last kneading operation you will hear several beeps. The dough hook can be removed now. Press the ▶ symbol to continue with the baking process.

DIY
Create your own program using the "DIY" touch key. You can set the individual operating times for each baking step individually.
Press the symbol 📄 or +/− to navigate through the programs up to program 36.
Switching key tones on or off (+/-)
Press and hold "+" and "-" simultaneously for 2 seconds to switch the touch keys tones on or off.
COMMISSIONING
- Plug the connecting cable into the socket.
• The display lights up. - Open the lid.
-
Fit the breadbox slightly turned to the left (diagonally) and then turn it clockwise until it fits straight and firmly in place.
-
Fit the dough hook.
• Fill the breadbox with all the desired ingredients.
IMPORTANT!
- Please follow the order and quantities indicated in the recipe.
- As general rule, when baking bread, fill in first water and/or other liquid ingredients. Then add other ingredients, such as yeast or sugar. Add flour and salt as the last ingredient.
- Close the top cover.
- Select the desired program using the "Menu" touch key.
IMPORTANT!
Before pressing the symbol ▶∥ you can optionally change the weight, preset time and degree of browning. Furthermore, with the programs 1–23 and 36 you can apply the function "Removing the kneading hooks".
IMPORTANT!
The ingredients tray is only suitable for coarsely chopped and dry ingredients. Fill moist, sticky and powdery ingredients directly into the breadbox.
- Additional ingredients such as sunflower seeds, seeds or nuts (chopped) can be added automatically during the kneading process though the ingredients tray.
- Press the symbol to start the baking process.
- Kneading starts.
WARNING
Do NOT reach into the breadbox with your hand or objects (e.g. a dough scraper) while the unit is running. The unit must first be paused.
- When the baking operation is complete, you will hear several beeps.
- Press the lid opening button.
WARNING
Caution, hot! Use a potholder or oven glove to remove the breadbox.
- Remove the breadbox. Turn the handle slightly clockwise to unlock the breadbox.
CAUTION
As the breadbox is made of metal, it gets hot! Put the breadbox on a heat-resistant surface.
• Take out the bread.
IMPORTANT!
As the breadbox is non-stick coated, do not use sharp objects to remove the bread.
- Remove the dough hook from the bread using the removal hook provided, if it has not al-
ready been removed.
- Put the bread on a rack to cool.
IMPORTANT!
If the dough hook cannot be removed from the breadbox, pour hot water into the breadbox at a level high enough to cover the dough hook. Leave this to stand for about 5-10 minutes and then remove the dough hook.
If the dough hook gets stuck while removing, turn the dough hook back and forth a little and pull it out.

HOTPLATE FUNCTION
Once the baking process is complete, the bread is automatically kept warm for another hour, unless you press the symbol ▶.
CLEANING
IMPORTANT!
Allow the unit and all components to cool before cleaning.
- Remove the plug from the socket.
- Turn the breadbox slightly anti-clockwise and remove it.
- Remove the dough hook from the breadbox and clean both with a little washing-up liquid under running water.
- Remove any dirt on or in the housing with a damp cloth. Do not pour water into the housing or onto cables, plugs and ventilation.
- Do not immerse the unit in water or an other liquid.
- Using a cloth, thoroughly dry all parts and reinsert all parts into the unit.
- The breadbox and dough hook are not suitable for dishwashers.
- To remove even the smallest amounts of ingredients, you can vacuum out the interior.
TROUBLESHOOTING
| Error Cause Solution | ||
| Smoke comes out of the ventilation slots during the baking process. | Leftover bread sticks to the heating element. | Pull out the mains plug, allow the unit to cool and clean the heating element. |
| You have used ingredients that are too moist or too fine in the ingredients tray. | Pull out the mains plug, allow the unit to cool and clean the heating element. Only put dry or coarsely chopped ingredients in the breadbox. | |
| The top of the bread is dent-ed, the crust is too thick or too hard. | If you leave the bread in the breadbox for too long after baking, too much water will evaporate. | Remove the bread immediately or at the latest immediately after automatic warming. |
| It is difficult to get the bread out of the breadbox. | The dough hook sticks to the drive shaft. | Turn the breadbox upside down and shake it. |
| The ingredients are not fully mixed and the bread is baked badly. | Unsuitable program select-ed. | Check both the recipe and the program. |
| The lid has been opened too often. | Do not open the lid too often. | |
| The dough hook has not been correctly fit on the shaft. | Check that the dough hook is fitted correctly. | |
| The motor is running, but the dough is not being kneaded. | The breadbox or dough hook is not inserted correctly. | Check that the breadbox and dough hook are inserted correctly. |
| The dough is too heavy. Stick to the quantities given in the recipes. | ||
| The bread is too small or the dough does not rise. | Improper flour used. Use the type and quantity of flour specified in the recipe. | |
| The yeast is not effective. The yeast must be stored in a cool, dry place. Pay attention to the information in the recipe. | ||
| Too little yeast was used. Pay attention to the quantity specified in the recipe. | ||
| The bread is hollow in the centre. | The water temperature is too high. | Make sure that the water is lukewarm and the temperature does not exceed 30 °C. |
| Too much water or no salt added. | Pay attention to the quantities indicated in the recipe. | |
| The bread is too heavy and hard. | Too much flour and too little water added. | Pay attention to the quantities indicated in the recipe. |
| Too many nuts or fruit inserted. | Reduce the quantities. | |
| Bread is too dark and has a thick crust. | A lot of sugar can cause the bread to have a dark colour and a thick crust. | For recipes that contain a lot of sugar, press 5-10 minutes before the time has elapsed, the symbol ▶ and take out the bread. |
Unusual display
| H:HH is displayed after the start. | The temperature in the baking chamber is too high. | Press the symbol pull the plug. Open the lid, remove the breadbox and allow the unit to cool with the lid open. |
| E:EE is indicated. Fault in the sensor. | Contact the customer service of Graef. | |
TWO-YEAR WARRANTY
For this product, we assume 24 months manufacturer warranty for defects, which are due to production or material defects. Your legal warranty claim in conformity with Section 437 et seq. of the German Civil Code (BGB) shall remain unaffected by this regulation. The warranty does not cover damage caused by improper handling or unintended use, or defects that only slightly affect the function or value of the unit. Moreover, transport damage insofar we are not responsible shall be excluded from the claims under guarantee. A warranty claim is excluded for damage caused by a repair which has not been carried out by us or one of our agents. In case of justified complaints, we shall repair the defective product or replace it by a product without defects at our discretion.
TABLE DES MATIÈRES

natural_image
3D rendered image of a mechanical lever or handle with two cylindrical ends and a central shaft (no text or symbols)
natural_image
3D rendered mechanical part with a cylindrical base and a triangular support (no text or symbols)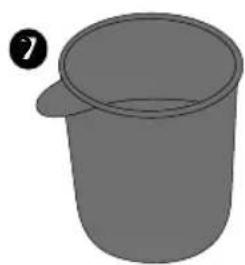
natural_image
Simple 3D illustration of a beaker with a lid, no text or symbols present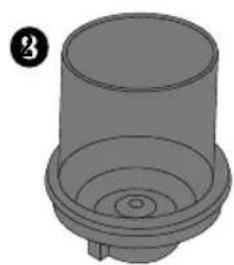
natural_image
3D rendered diagram of a cylindrical mechanical component with concentric circular layers (no text or symbols)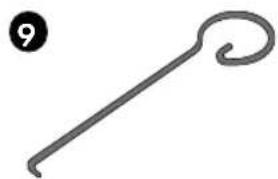
natural_image
Simple line drawing of a hook-like object with a numbered circle (9) in the top-left corner, no text or symbols present.natural_image
3D rendered image of a mechanical lever or handle with two cylindrical ends and a central shaft (no text or symbols)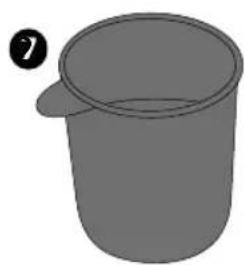
natural_image
Simple 3D illustration of a beaker with a lid, no text or symbols presentnatural_image
3D rendered mechanical part with two cylindrical ends and a long central shaft (no text or symbols)
natural_image
Simple 3D illustration of a beaker with a lid, no text or symbols present
natural_image
3D rendered image of a mechanical lever or handle (no text or symbols)

natural_image
Simple 3D illustration of a beaker with a lid and spout, no text or symbols present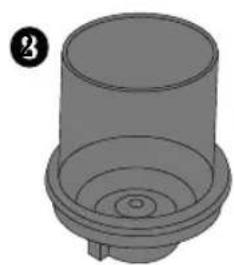
natural_image
3D rendered mechanical component with concentric circular grooves and a cylindrical top (no text or symbols)
natural_image
Simple line drawing of a hook-like object with a numbered circle (9) in the top-left corner, no text or symbols present.Panel obstugi....126

Menu 127

Masa 127

natural_image
3D rendered image of a mechanical lever or handle with two cylindrical ends and a central shaft (no text or symbols)
natural_image
Simple 3D illustration of a beaker with a lid, no text or symbols presentnatural_image
3D rendered image of a mechanical lever or handle with two cylindrical ends and a central shaft (no text or symbols)
natural_image
Simple 3D illustration of a beaker with a lid, no text or symbols presentPOŽADAVKY NA MÍSTO INSTALACE
natural_image
3D rendered mechanical lever or handle component with two cylindrical ends and a central shaft (no text or symbols)
natural_image
Simple 3D illustration of a beaker with a lid, no text or symbols present① Otvorenie veka nádoby na suroviny
2 Otvorenie veka hnetacej nádoby
3 Nádoba na suroviny
4 Displej
Odmerková lyžica
natural_image
3D rendered mechanical part with cylindrical ends and a handle (no text or symbols)