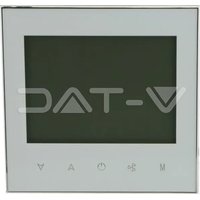
VT-5888 - Smart Home V-TAC - Free user manual and instructions
Find the device manual for free VT-5888 V-TAC in PDF.


| Product Type | Programmable smart thermostat for home |
| Brand | V-TAC |
| Model | VT-5888 |
| Dimensions (approx.) | 86 x 86 mm (standard box) or 60 mm (European box) |
| Weight (approx.) | 200 g |
| Power supply | 230 V ~ 50 Hz |
| Connectivity | Wi-Fi 2.4 GHz, Bluetooth (for pairing) |
| Mobile app | V-TAC Smart Light (iOS and Android) |
| Voice assistants | Amazon Alexa, Google Home |
| Weekly programming | 6 periods per day (comfort and economy) |
| Operating modes | Heating, cooling, ventilation |
| Fan speed | Automatic, high, medium, low |
| Lock function | Full lock or half lock |
| Temperature range | 5 °C to 35 °C (estimate) |
| Temperature accuracy | ±0.5 °C |
| Display | Backlit LCD screen |
| Installation | Flush-mounted (wall box 86 mm or 60 mm) |
| Maintenance and cleaning | Clean with a dry, soft cloth. Do not use abrasive products. |
| Safety | Cut the power before installation. Installation by a certified electrician. |
| Spare parts and repairability | Contact the local distributor or supplier for spare parts. |
| General information | WiFi compatible smart thermostat, control via app and voice commands, customizable weekly programming. |
Frequently Asked Questions - VT-5888 V-TAC
User questions about VT-5888 V-TAC
0 question about this device. Answer the ones you know or ask your own.
Ask a new question about this device
Download the instructions for your Smart Home in PDF format for free! Find your manual VT-5888 - V-TAC and take your electronic device back in hand. On this page are published all the documents necessary for the use of your device. VT-5888 by V-TAC.
USER MANUAL VT-5888 V-TAC
WEEE Number: 80133970
INSTALLATION INSTRUCTION
FAN COIL THERMOSTATS SMART CONTROL
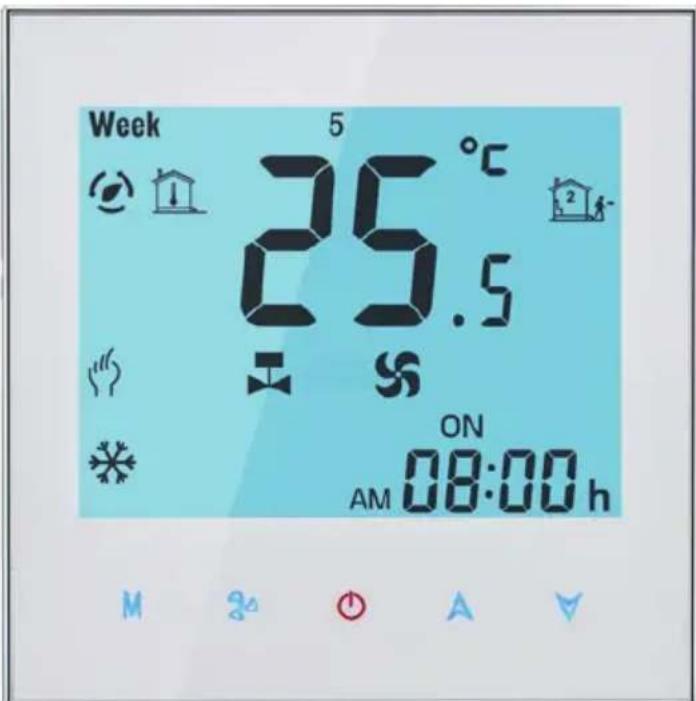
INTRODUCTION
Thank you for selecting and buying V-TAC product. V-TAC will serve you the best. Please read these instructions carefully before starting the installation and keep this manual handy for future reference. If you have any another query, please contact our dealer or local vendor from whom you have purchased the product. They are trained and ready to serve you at the best.

Multi-Language Manual - QR CODE
Please scan the QR code to access the manual in multiple languages.
TECHNICAL DATA
Power Supply: 95\~240 VAC, 50/60Hz
Fan Relay Amps Resistance: 5A; Inductive: 3A
Valve Relay Amps Resistance: 3A; Inductive: 1A
Sensor: NTC 3950, 10K
Accuracy: ±0.5°C
Set Temp. Range: 5-35°C
Display Temp. Range: 5\~99°C
Ambient Temp.: 0\~45°C
Ambient Humidity: 5\~95%
RH (Non Condensing)
Storage Temp.: -5\~ 45°C
Power Consumption: <1.5W
Timing Error: <1%
Shell Material: PC + ABS(Fireproof)
Wire Terminals: Wire 2 x 1.5mm2
or 1 x 2.5mm2
Protection Class: IP20
PACKAGE
Thermostat (1PC)
User Manual (1PC)
Screws (1PC)
Wall Plate (1PC)
FUNCTION
- 0.5°C Accuracy keeps temperature within the level you set
- Data stored will be saved even when the device is turned off.
- 5 weekdays + 2 weekends in programmable schedule and can set into
6 periods max per day. - Create thermostat group to centrally control.
- Voice Control: Integrated with Amazon Alexa and Google Assistant
- Supports device sharing.
- All setting languages synchronize to your time zone, address and language.
- No limit to add room.
- Supports smart scene.
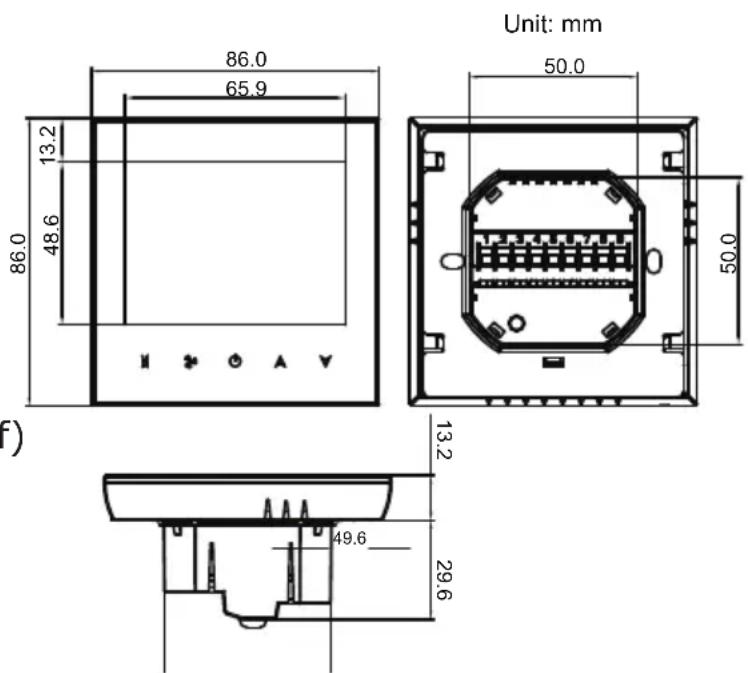
- Unit size: 86mm hidden box and European 60mm round box is suitable
INSTALLATION DIAGRAM
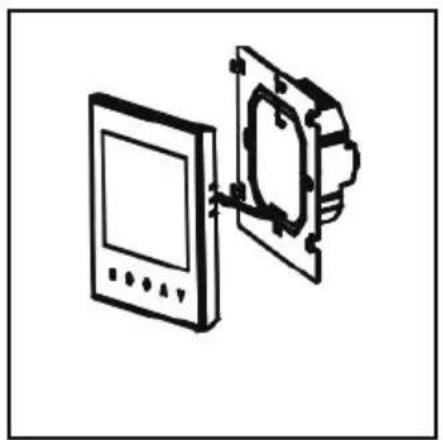
natural_image
Diagram of a device with two components, one showing a screen and the other a mechanical housing (no text or symbols)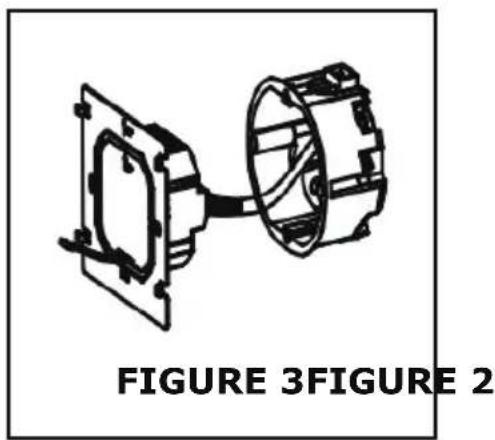
natural_image
Technical line drawing of a mechanical assembly with two components, labeled FIGURE 3 and FIGURE 2 (no text or symbols on the diagram itself)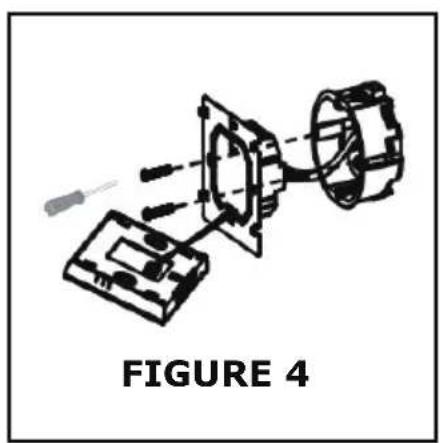
natural_image
Diagram of a mechanical assembly with labeled figure 4, showing components like a housing and motor assembly (no text or symbols on the diagram itself)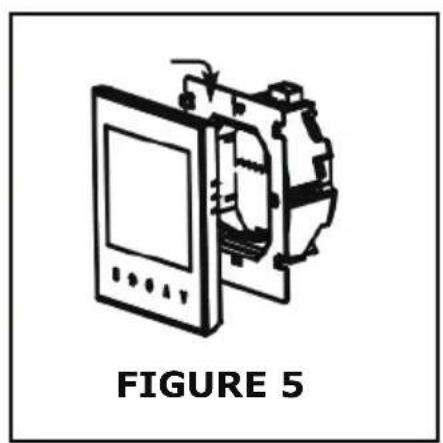
natural_image
Technical line drawing of a device with labeled figure 5 (no text or symbols on the diagram itself)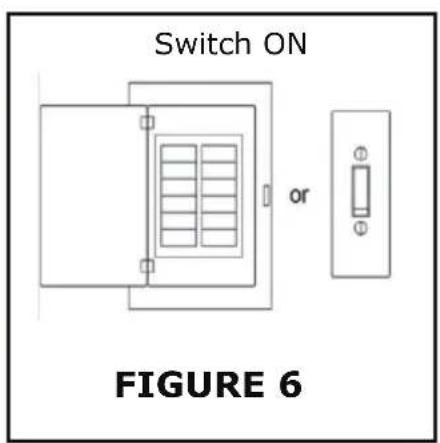
OVERVIEW
Warning!
1) Please make sure to turn off the power before starting the installation.
2) Check the ratings given in the instructions and on the product to make sure the product is suitable for your application.
3) Install only by certified Electrician.
This marking indicates that this product should not be disposed of with other household wastes.
Caution, risk of electric shock.
WIRING DIAGRAM
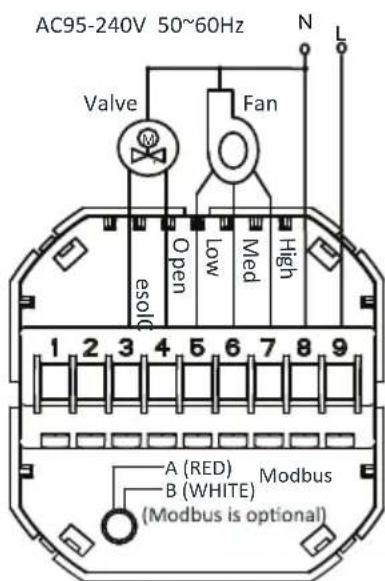
Two Pipe, On/off
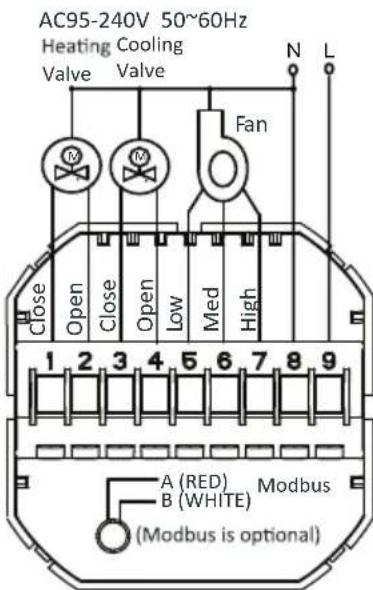
Four Pipe, On/off
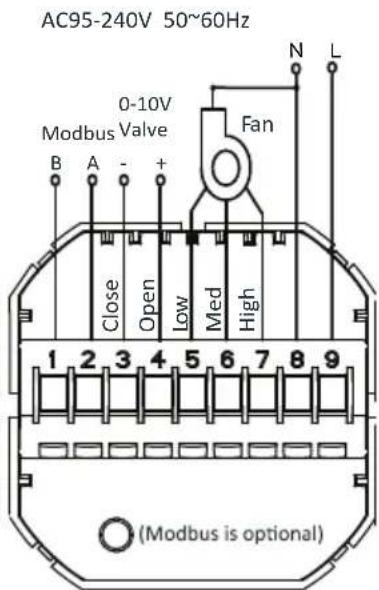
Two Pipe, Modulating
INSTALLATION
Note: Thermostat is suitable for installation within a standard 86m pattress box or European 60mm pattress box.
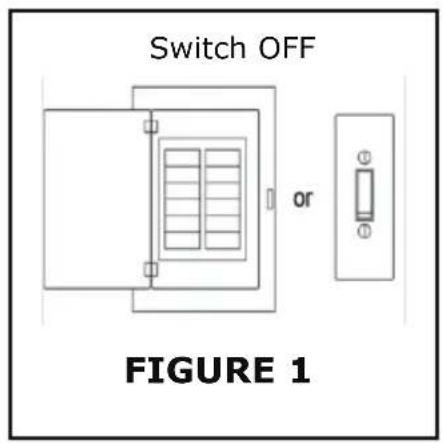
Step 1: Switch off the power before starting the installation (Refer to Fig1).
Step 2: Remove the mounting plate by rotating the LCD part (Refer to Fig2).
Step 3: Connect the wires according to the wiring diagram then connect the device to the power supply (Refer to Fig3).
Step 4: Fix the mounting plate into the wall then screw it properly inside the box (Refer to Fig4).
Step 5: Fasten the body of thermostat and the mounting plate (Refer to Fig5).
Step 6: Switch on the power and test the device.
OPERATION
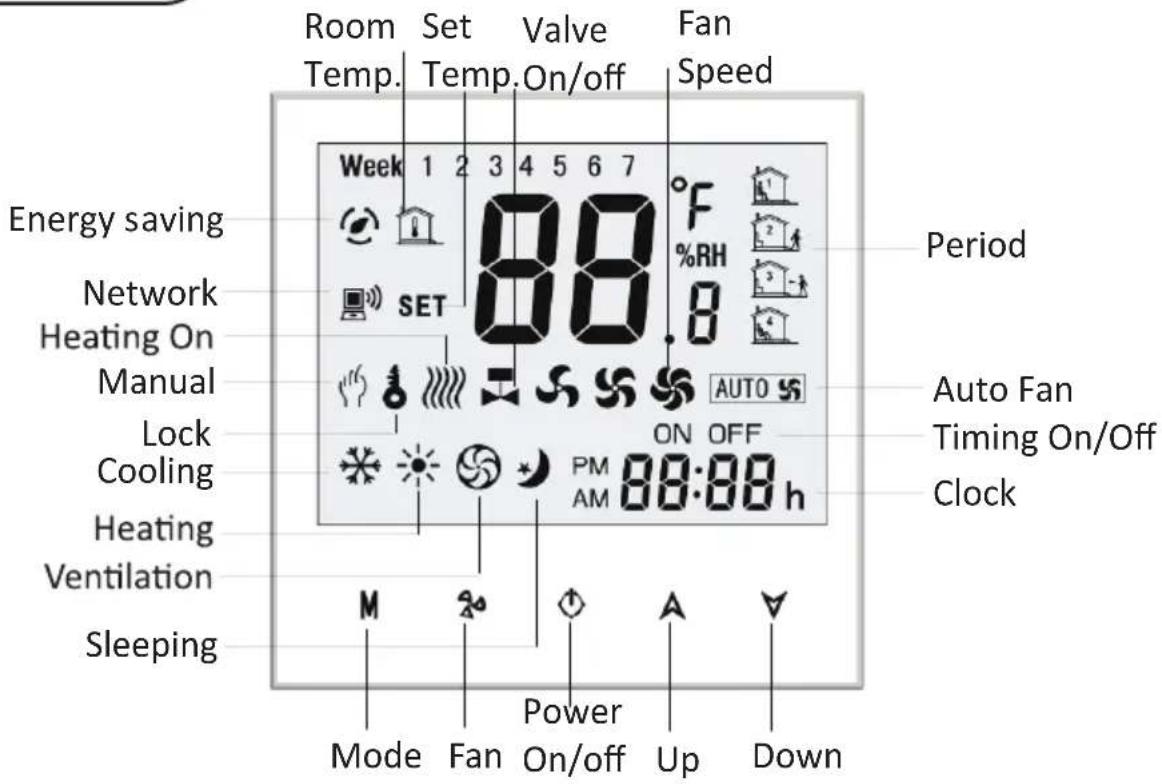
1. Power On/Off
- Press (⏻) power button to turn on/off the thermostat.
2. Manual & Programmable
- Press and hold (M) button, (💡) flash icon will appear on the screen.
- Press (A) arrow up button to select manual then press (√) arrow down button to select weekly programmable
3. Temperature Settings
- Press (A)(V) arrow button to set the temperature. (☐) will display in the left corner of screen
4. Lock mode Settings
- Press and hold (A)(∀) button for 5 seconds to lock/unlock your thermostat.
- In items 3 of high senior options, you can select full lock or half lock
5. Selecting the system mode
- Press (M) to change the system mode heating, cooling, and ventilation.
- In the Ventiallation mode - the valve is off but the fan runs.
6. Setting the Fan Speed
- Press (♀) button to select the fans speed options AUTO-HIGH-MED-LOW
7. Adjusting/Setting the Clock
- Press and hold (M) button, (☐) will flash on the screen.
- Press (M) to set the MINUTE, HOUR, WEEKDAYS (1= Monday, 2= Tuesday, 3= Wednesday, 4= Thursday, 5= Friday, 6= Saturday, and 7= Sunday) by using the (A)(V) arrow button. After 3 seconds the value will be confirmed automatically.
8. Adjusting temperature in Weekly Programmable
- Press (M) button to do the adjustment of weekly programmable. Then press (M) button to change the different items. Press (A) or (V) to set relative values.
NOTE: Thermostat provides 6 scheduled heating and cooling periods each day - three comfort periods - 1, 3 & 5 (the temperature required when room is occupied) and three economical period - 2, 4 & 6 (the temperature required when room is unoccupied).
You can set both the time and temperature for each of these six daily periods. Adjusting /setting the schedules can only be carried out when in program mode. Press (M) button to change between manual mode and programmable mode. In manual mode, (💡) icon will appear on the screen. Press the (M) button for 4x until the weekday schedule appear on the screen. Weekday schedule settings are 1,2,3,4, and 5. Use
(A)(∀) arrow button to control/adjust the time for the 1st period (Comfort). Then, press the (M) button and use the (A)(∀) arrow button to set the desired temperature for 1st period. You can repeat this process in 2 - 6 periods. press (M) button once more to enter the weekend schedule settings (6 & 7 will show along the top of the screen). Repeat the above process to set the weekend schedule. Press (M) button once more to confirm and exit.
DEFAULT PROGRAM SCHEDULE SETTINGS
| TIME DISPLAY | WEEKDAY (MON-FRI) (1 2 3 4 5 shows on screen) | WEEKEND (SAT) (6 shows on screen) | WEEKEND (SUN) (7 shows on screen) | |||
| TIME | TEMPERATURE | TIME | TEMPERATURE | TIME | TEMPERATURE | |
| Period 1 | 06:00 | 20°C 06:00 20°C | 06:00 | 20°C | ||
| Period 2 | 08:00 | 15°C 08:00 20°C | 08:00 | 20°C | ||
| Period 3 | 11:30 | 15°C 11:30 20°C | 11:30 | 20°C | ||
| Period 4 | 13:30 | 15°C 13:30 20°C | 13:30 | 20°C | ||
| Period 5 | 17:00 | 22°C 17:00 20°C | 17:00 | 20°C | ||
| Period 6 | 22:00 | 15°C 22:00 15°C | 22:00 | 15°C | ||
Note: Programmable mode - The set temperature and time cannot be adjusted.
FUNCTIONS & OPTIONS SETTINGS
When the power is off, press and hold (M) button and (80) Fan button at the same time for 5 seconds in order to reach the system function. Then, press (M) button to change the different items.
Note: All the settings will confirm automatically when power is on.
| Code | Function Default | Setting & Options | ||
| 1 | Temperature Compensation | -7 to 7°C | -1 | |
| 2 Fan Control | 00: When room temperature reaches the set point, the fan will turn off. | 01: When room temperature reaches the set point, the fan will turn to low speed | 0 | |
| 3 Locking Button | 00: All buttons are locked except power button. | 01: All buttons are locked. | 01 | |
| 4 Heat / Cool 00: Cool Only 01: Heat/Cold | 01 | |||
| 5 | Min Set Temperature | 5 to 15°C | 05 | |
| 6 | Max Set Temperature | 15 to 35°C | 35 | |
| 7 12/24 Hours 00: | 12 Hours 01: 24 Hours | 01 | ||
| 8 | Display Mode | 00: Display both set temperature and room temperature | 01: Display set temperature only | 00 |
| 9 | Energy saving mode | 00: Non-energy saving mode | 01: Energy Saving mode, set temperature and keep economy temperature. | 00 |
| A | Heating economy temperature | 10 to 30°C | 20 | |
| B | Cooling economy temperature | 10 to 30°C | 26 | |
| C | Deadband temperature | 1 to 5°C | 1 | |
APP INSTALLATION
Step 1: Turn the power button ON of the device.
Step 2: Scan the given QR code, or download "V-TAC Smart Light" from the App Store (iOS) or the Google Play Store (Android).
Step 3: Open the V-TAC Smart Light app and tap on register for creating a new account. If you already have an existing account, please proceed to please proceed to logging in (Ref Fig 1).
For ANDROID For IOS


Fig 1
Step 4:
A) Mobile Number: Select the country, then enter your mobile number. Once done, tap 'Next' (Ref Fig 2).
B) E-Mail: Enter your email id and tap on 'Next' (Ref Fig 2).
Step 5: Enter the verification code which will be sent to your mobile number/email id, then assign a new password to your account and tap on "Confirm" to complete the registration process (Ref Fig 3). Once done you will be redirected to V-TAC Smart Light Home page.
Step 6: Tap on 'Add Device' or the + sign. Make sure the device is switched on.
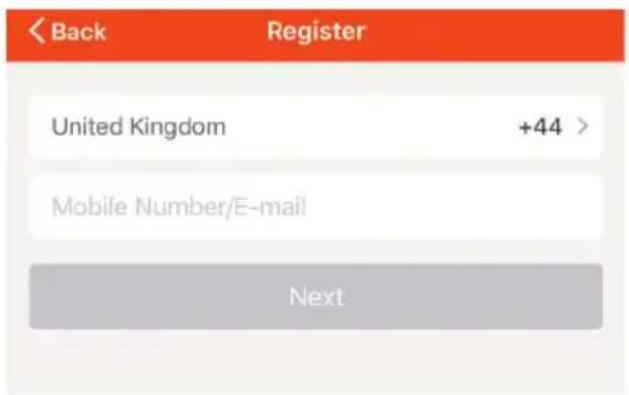
Fig 2
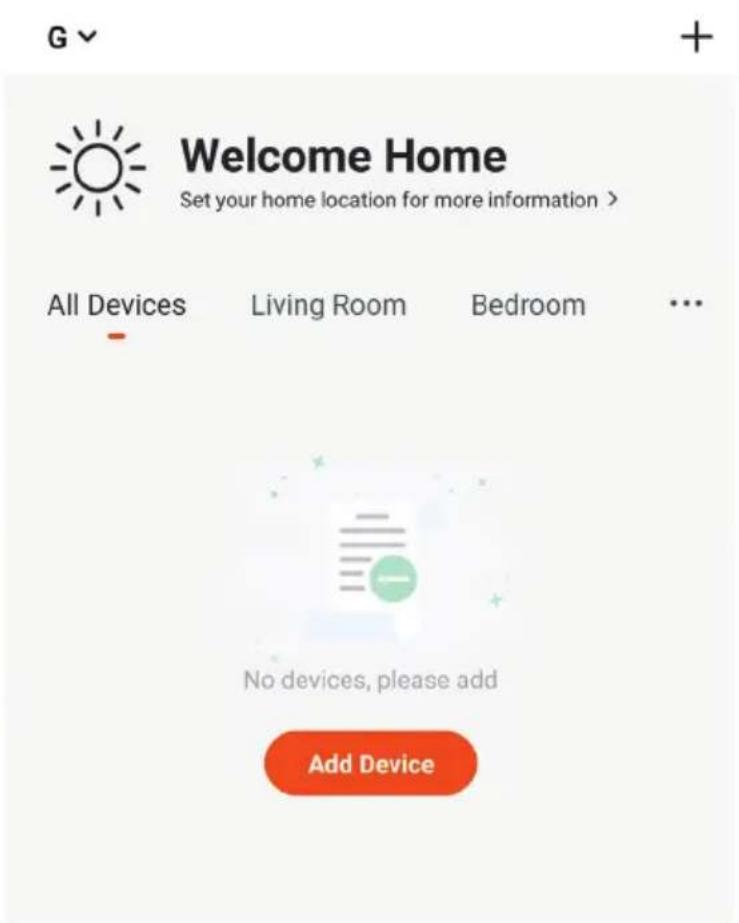
Fig 4
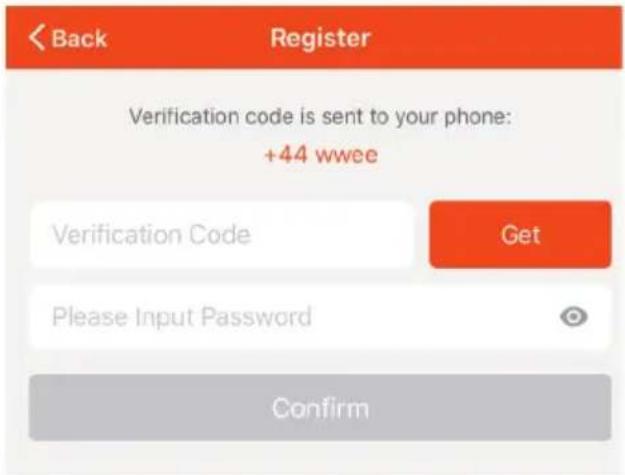
Fig 3
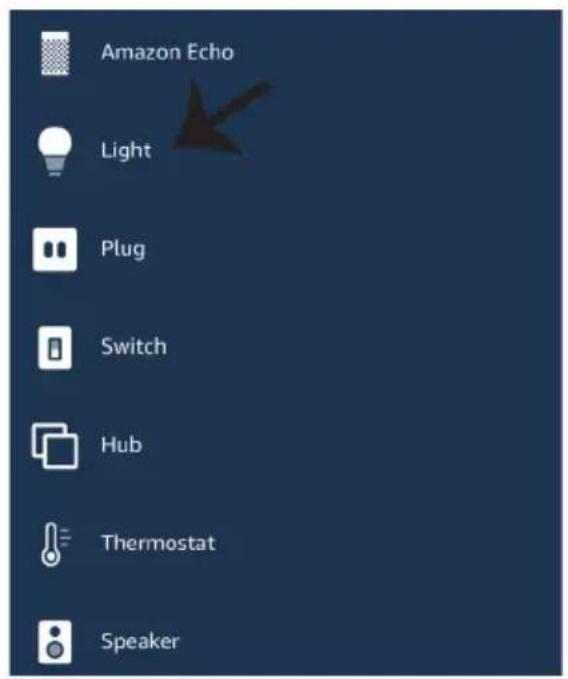
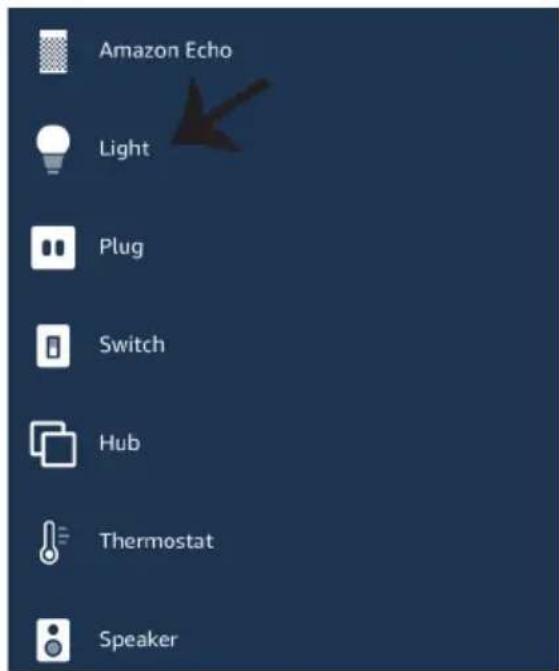
Step 7: To select the device, tap on Home appliances, and then choose "Thermostat" to start Pairing process of the device to the app (Ref Fig 5).
Step 8: Pairing Process
EZ MODE:
A) Turn On the thermostat by pressing the (⏻) power button.
B) Hold the (⏻) power button and (∀) arrow down button for 8 seconds. The backlight will power on and the (WiFi) wifi icon will start flashing one time per second.
C) On the App, Confirm if the light blinks rapidly, Enter wifi password and click "Confirm" (Ref Fig 6 & 7).
AP MODE:
A) With power off, press and hold the ( ) arrow for eight (8) seconds. The backlight will be on and the icon ( ) will flash one time per second.
B) Press and hold the ( ∨ ) arrow for eight (8) seconds again. The icon (💡) will flash one time every (3) seconds.
C) On the App, Confirm if the light blinks rapidly, Enter wifi password and click "Confirm" (Ref Fig 6 & 7).
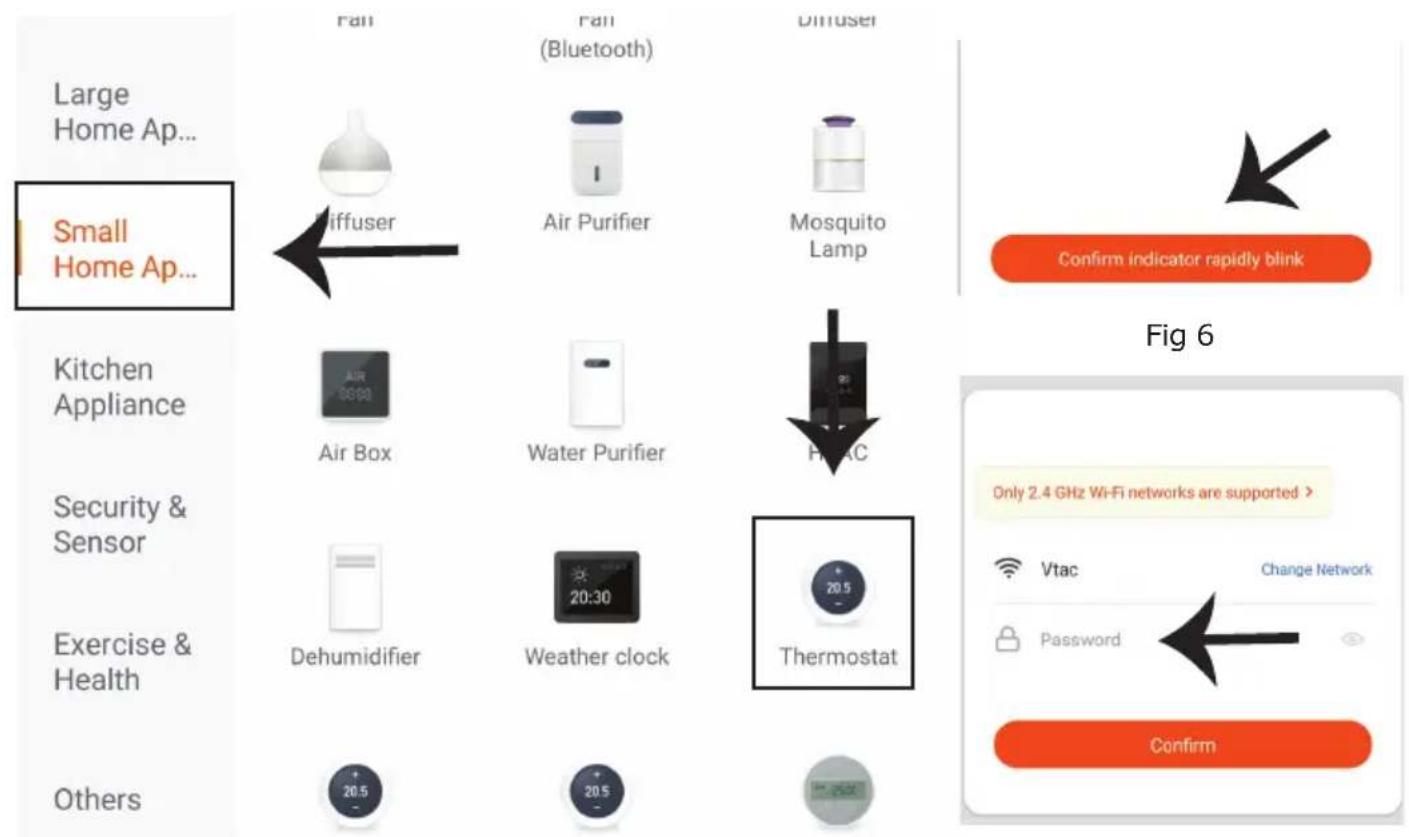
Fig 5
Fig 7
Connecting Now
pie
| Category | Value (%) | |---|---| | Start | 0 | | End | 3 |Make sure your phone and device are as close to your router as possible.
- Searching for Device
- Registering device to the cloud
- Initializing your Device
Fig 8
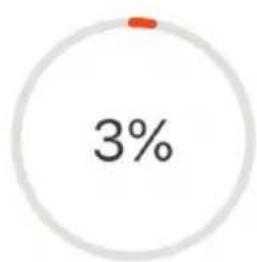
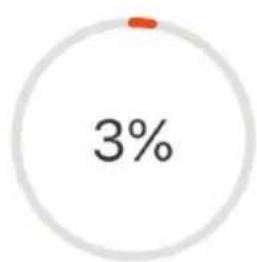
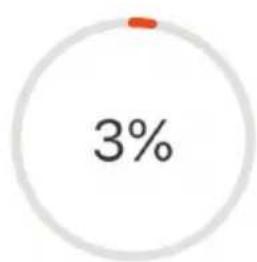
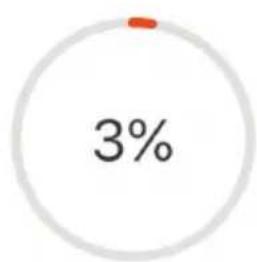
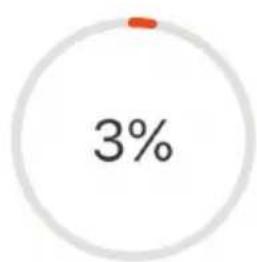
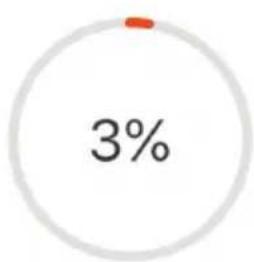
Step 9: Once you have successfully completed step 8, you will be redirected to "Connecting Now" page, where the App searches, registers and initializes the device (ref Fig 8). Once it is completed your device will be successfully paired.
Step10: Once your device is successfully paired, rename the device to your preference. And then tap on completed.
Step11: You can now start controlling your device with the App. Tap the device name on the home page to enter the controls and features of the device.
PROGRAMMING YOUR THERMOSTAT
When your room is established successfully, it will display on the home screen. The round button is to turn on/off your room. Click the line to enter into thermostat programming mode.
(💡) Power on/off button. When the screen is bright, it is power on; when the screen is dark, it is power off.
(☐) Mode button. In this mode you can set cooling, heating and ventilation. (☐) is heating, (☐) is cooling, and (☐) is ventilation.
( Low > ) Fan speed button. Press this button to select auto, low, medium and high speed. ( Auto ) is auto speed, ( ) is low speed, ( ) is medium speed, and ( ) is high speed.
( ) Manual button - In this mode the heating can be set manually (i.e. NOT using the pre-programmed settings)
(💡) Program button - When this button shows, your thermostat is in program mode and will follow any pre-set heating schedule. When in Manual mode, press the (💡) button to select mode (💡) and vice versa.
( ) Economy button - In this mode, the temperature will be at 26 degrees. This temperature cannot be changed or adjusted.
(💡) Lock/Unlock button. If the button is green, the screen is "locked". If button is grey, the screen is "Unlocked".
*Slide the yellow button backwards or forwards to manually adjust the temperature, the temperature will show in the centre of the page. After a few seconds the current room temperature will show.
*When in program mode, click on the schedule setting(at the bottom of the page) to be taken to be schedule page where you can simply click on the working days (MON-FRI) and then the time/temperature. to adjust to your preferred schedule.
* You can set 6 periods - time and temperature
* Repeat the above after clicking on the Weekend (SAT-SUN) settings at the top of the page
* Once your schedule has been set, click on SAVE and the app will send the programming to your thermostat and confirm the schedule has been saved.
ALEXA SETTINGS
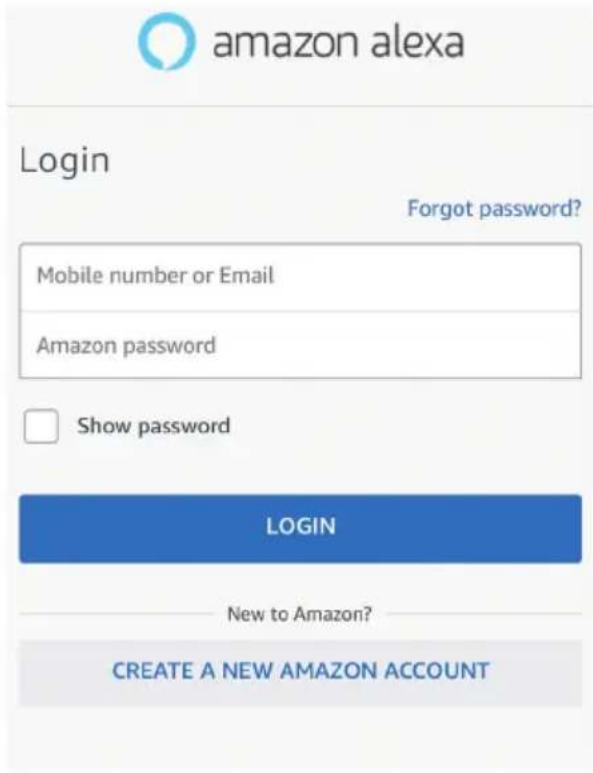
Step1: Install the Amazon Alexa app via the App Store(iOS) or the Play Store (Android) and register. If you already have an existing account with Amazon Alexa, please proceed to logging in.
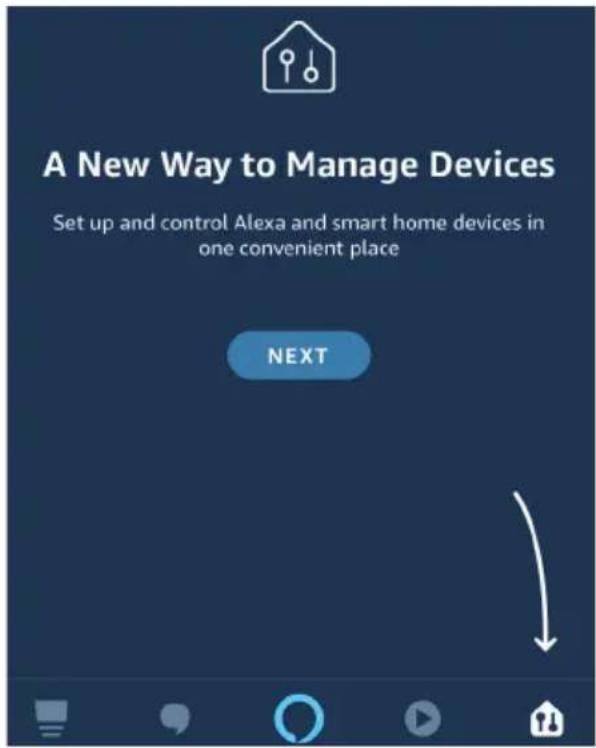
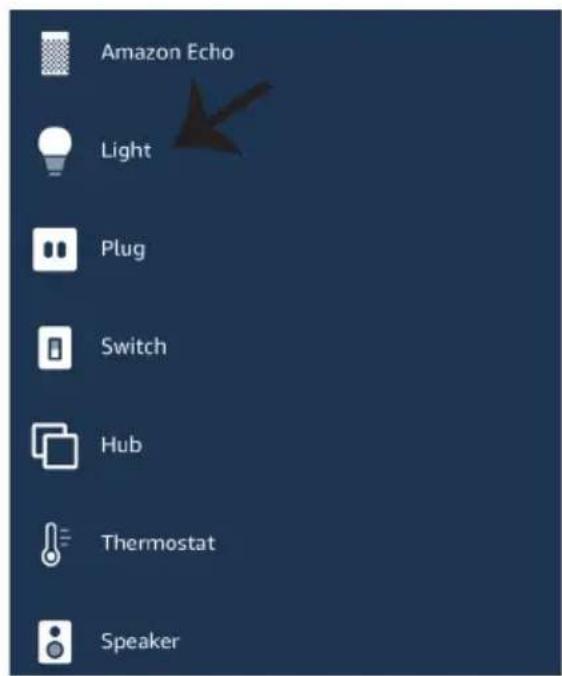
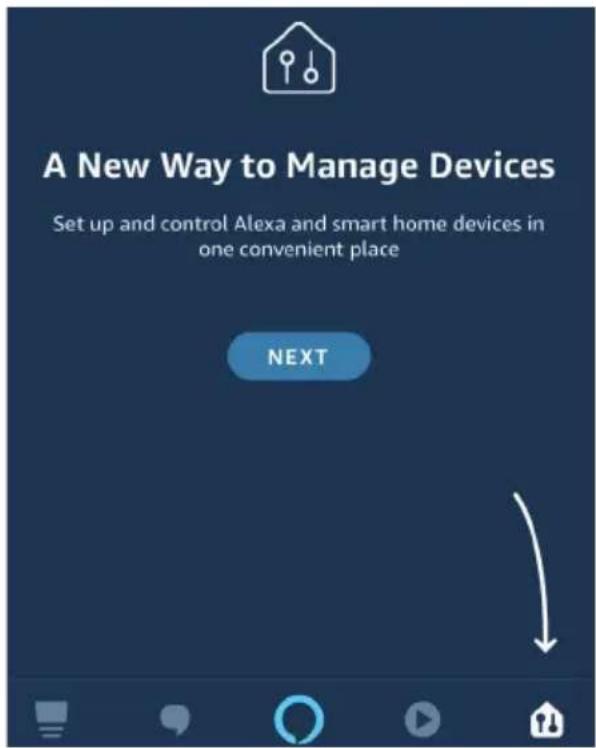
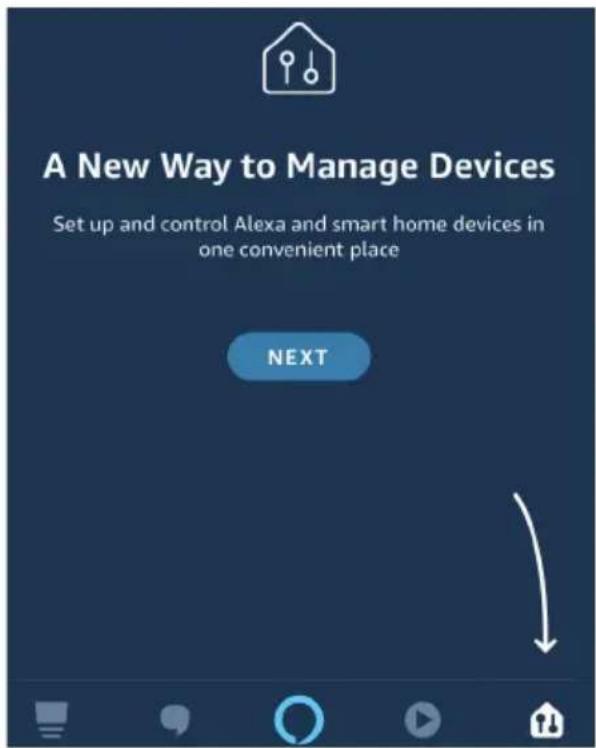
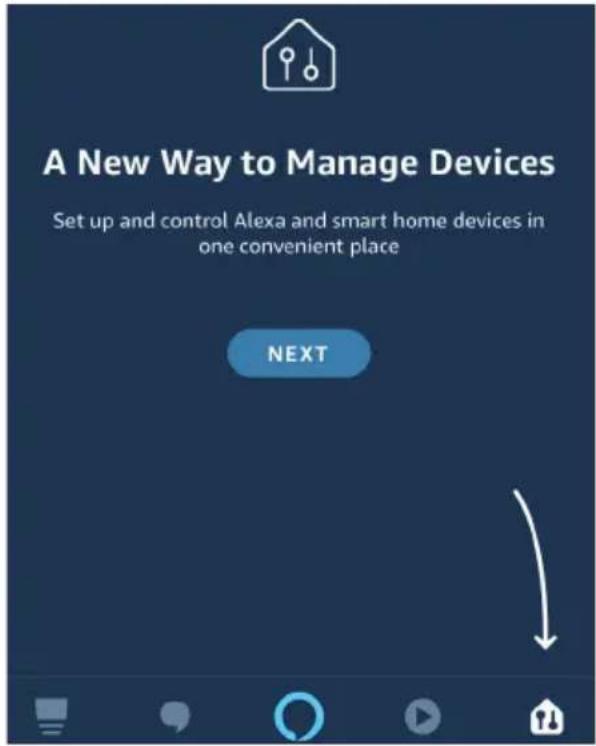
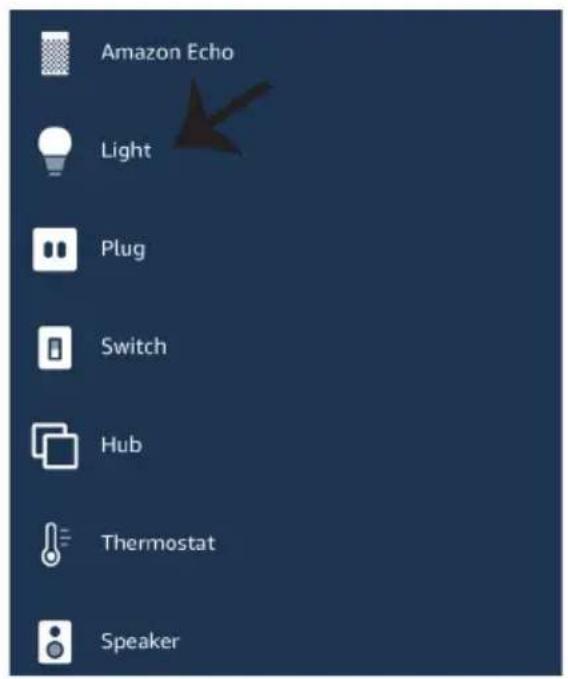
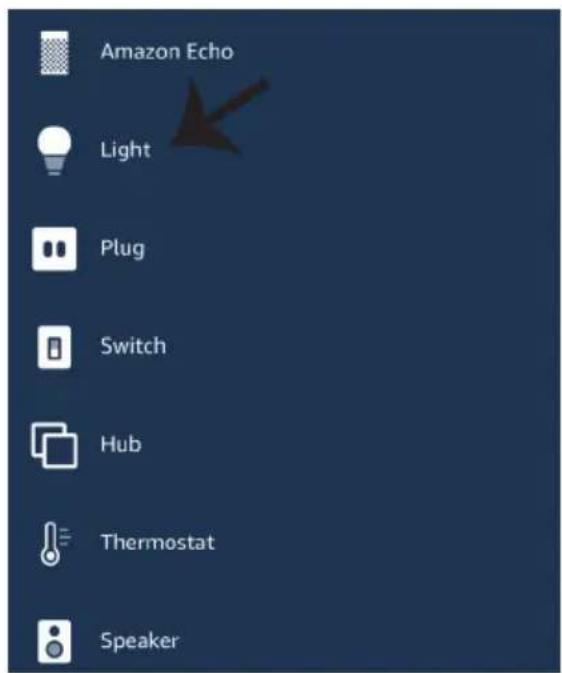
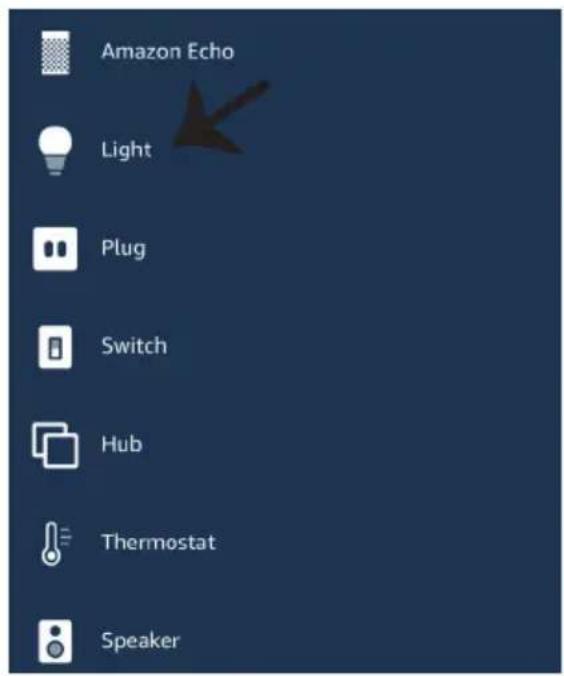
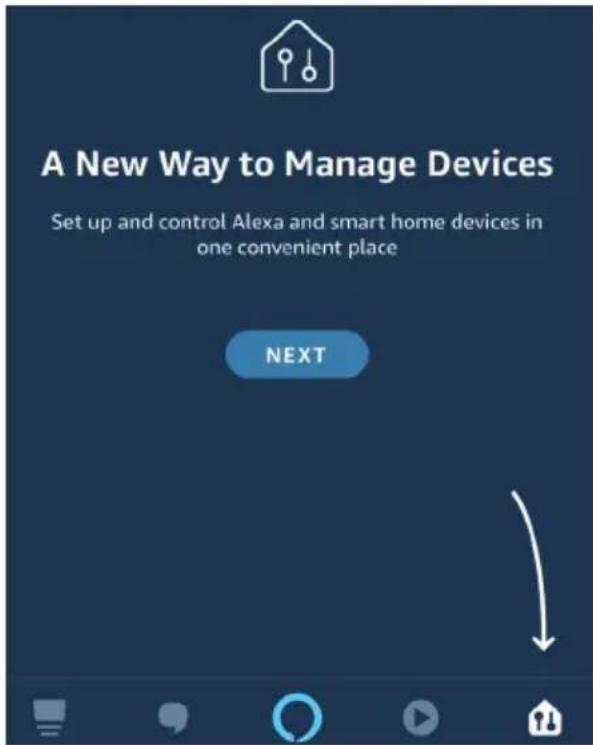
Step2: Once you are on the Amazon Alexa home page, tap on the lower right icon — where the arrow is pointed— to add a new device and skill.
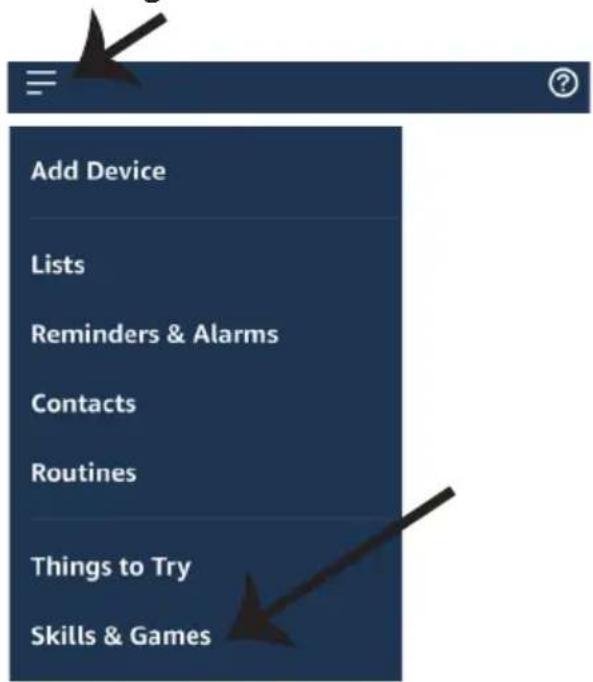
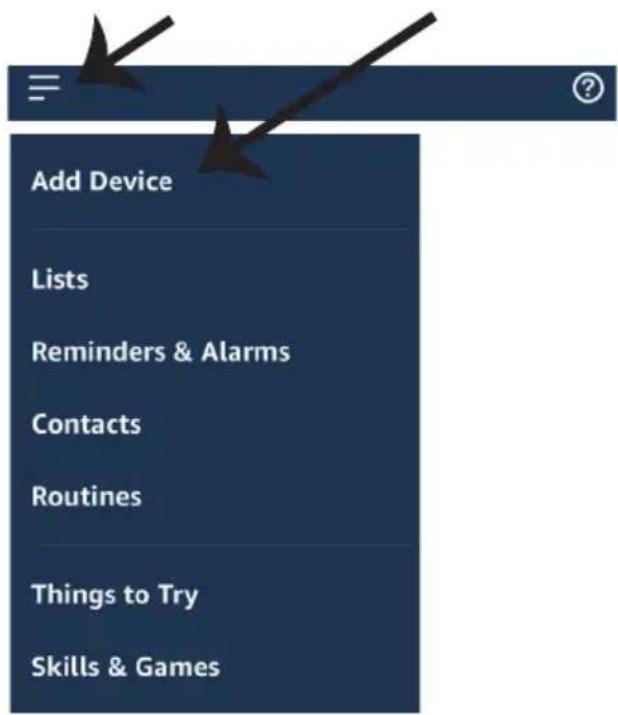
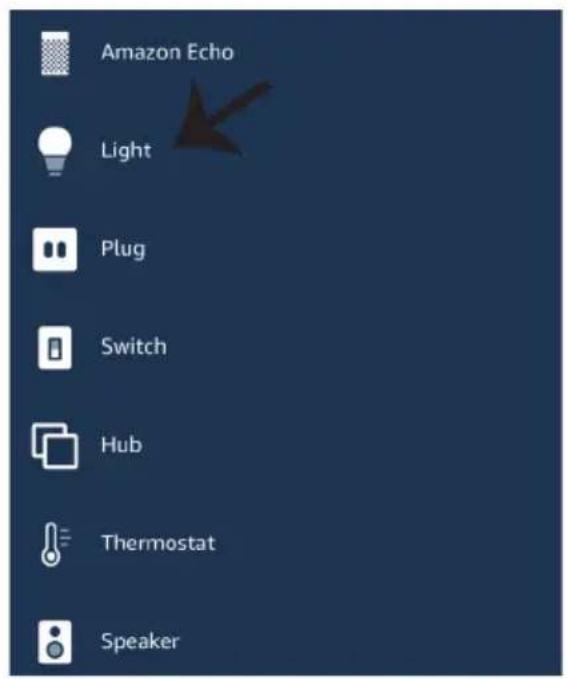
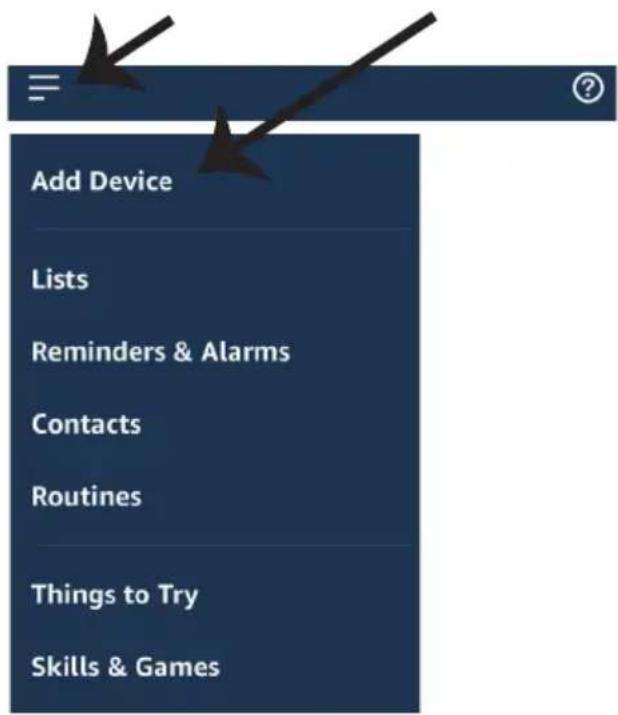
Step3: Tap on = settings and tap on "skills and games" as shown below.
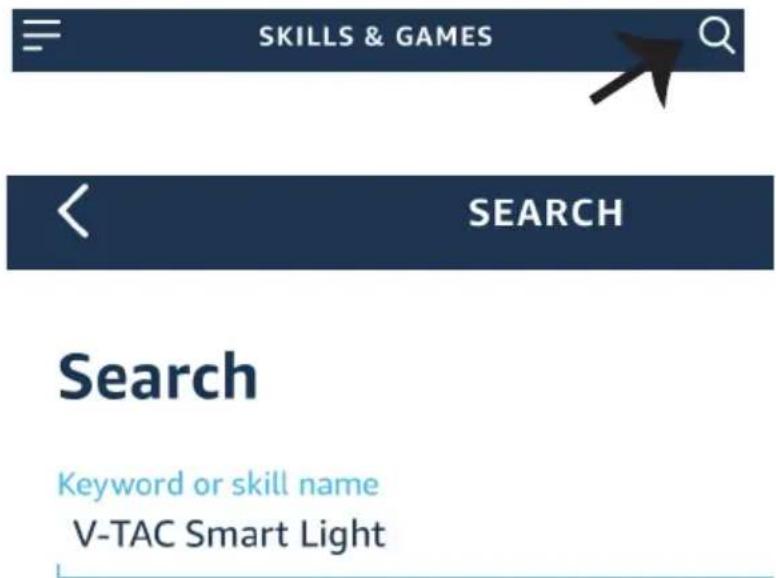
Step4: Search for 'V-TAC Smart Light' on the "Skills & Games" page as shown below.
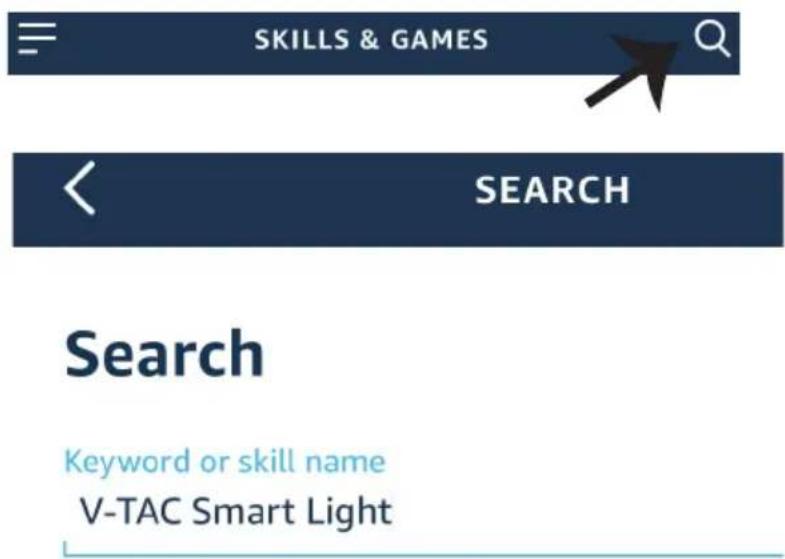
Step5: Enable the Skill.
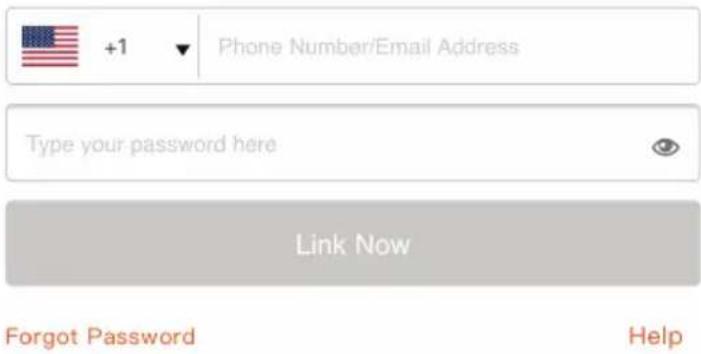
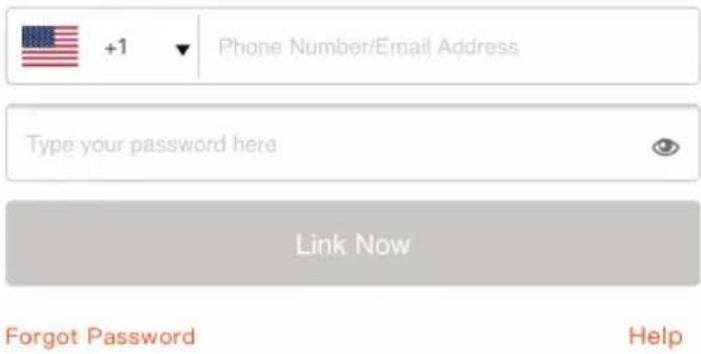
Step6: Enter your V-TAC Smart Light login ID and password and tap on "Link Now"
ENABLE
Account linking in progress

+1

Phone Number/Email Address
Type your password here

Link Now
Forgot Password
Help
Step7: Once you tap on Link Now, you will be redirected to a new page requesting for authorization(Ref Image below). Tap on "Authorize"
Step8: You will receive confirmation of the account being linked successfully (Ref Image below)

Alexa by Amazon will be able to:
Receive your public profile Control your devices over internet
Done

skills-store.amazon.in

amazon alexa
V-TAC has been successfully linked.
What to do next:
→ Close this window to discover smart home devices you can control with Alexa.
Authorize
Step8: Discover your smart device on Alexa. Once you have enabled the skill
A) You can use voice command "Alexa discover devices" to the Alexa device which you have.
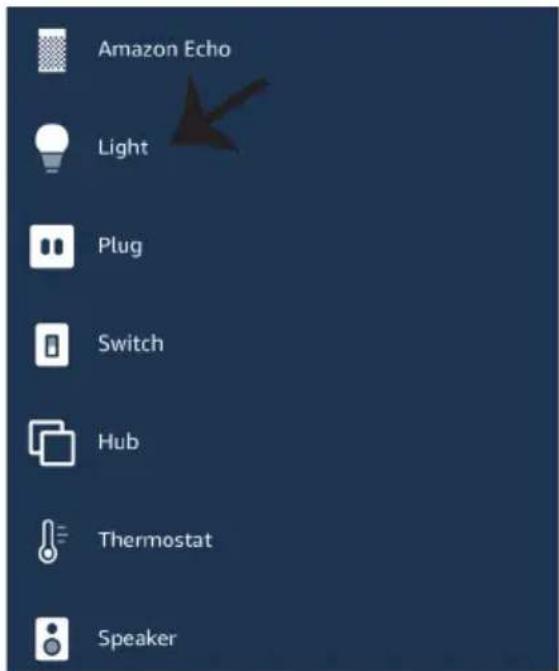
B) To add device manually on home page tap on which you are adding and tap on discover device.

and tap on Add device, select the device
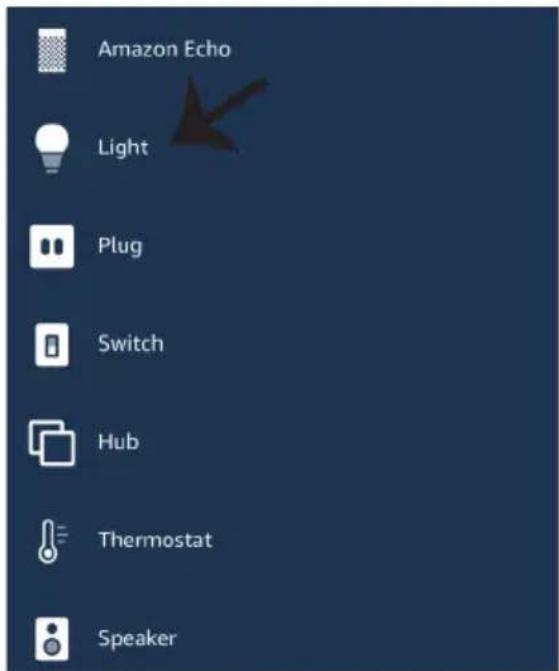
Note: Discovering the device must be done every time the device's name is changed on the app.
ALEXA Commands
Now, you can control your smart device using voice commands on Alexa. Below are a few example commands of how you can use:
➢! Alexa, turn on/off the thermostat.
➢! Alexa, set the temperature to 22^ C
THINGS TO REMEMBER BEFORE STARTING INSTALLATION:
- V-TAC Smart Light App & Amazon Alexa App
- Make sure you have Amazon Alexa Device(including Echo, Echo Tap, or Echo Dot)
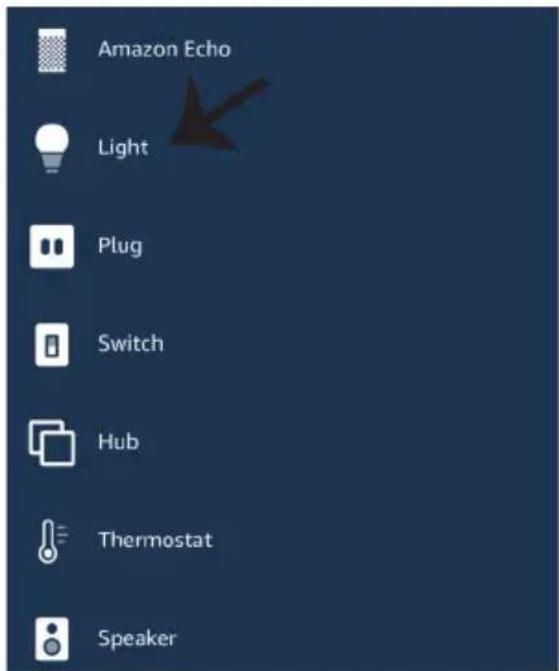
- Smart Device - Lamp
- Stable Wifi network
GOOGLE HOME SETTINGS
Step1:
a&b) Install the Google Home app via the App Store (iOS) or the Play Store (Android) and register. If you already have an existing account with Google Home, please proceed to logging in.
c) Create a New Home/Choose from the existing home if any.
d) Power ON the Google Home device and connect it to the App.(Then Proceed to step 2)
a. Welcome home
Your content and devices all in one place

natural_image
Abstract geometric shapes including squares, circles, and a crescent (no text or symbols)GET STARTED >
b. Choose account
This account will be used to personalize your experience
c. Choose a home
You will be able to control the devices and services in this home.

Create another home
d. Plug in your device
Make sure your device is nearby and connected to power, then try again

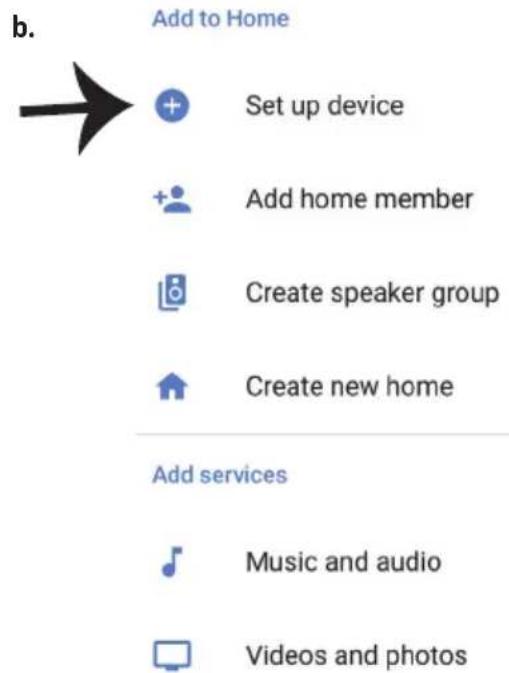
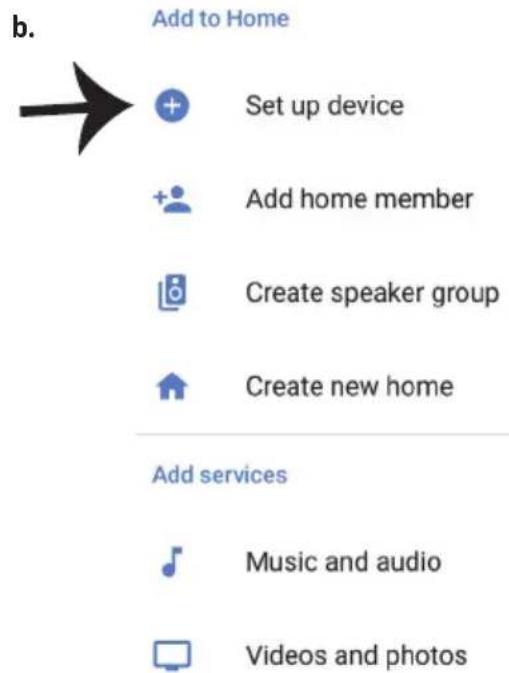
Step2: Once you are on the Google home page, tap on the Add "+" icon—to add a new device and skill. And then tap on Set up device as shown in below image.
a.

Play
Office

Broadcast


Add

Settings
Office
1 device

Office Speaker
Pause
b.

Add to Home

Set up device

Add home member

Create speaker group

Create new home
Add services

Music and audio

Videos and photos
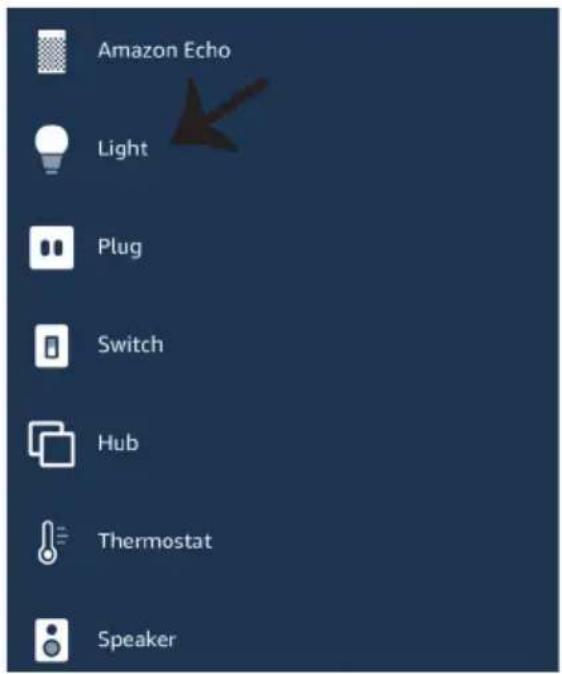
Step3: Make sure the Smart Bulb is paired with V-TAC Smart Light app before starting step 3. Tap on the arrow section as highlighted in the below image.
Set up
Set up new devices or add existing devices and services to your home
Step4: Type "V-TAC Smart Light" on the search bar and tap on the icon of "V-TAC Smart Light"

V-TAC Smart Light

New devices

Set up new devices
Google Home, smart displays and devices labelled 'Made for Google' such as C by GE smart bulbs
Works with Google

Have something already set up?

Link your smart home services such as Philips Hue and TP-Link
Step5: Sign In with your V-TAC Smart Light Login credentials to Link the Smart Light device
Step6: Tap on Authorize in order to proceed to linking the device.

Google will be able to:
Receive your public profile Control your devices over internet

Step7
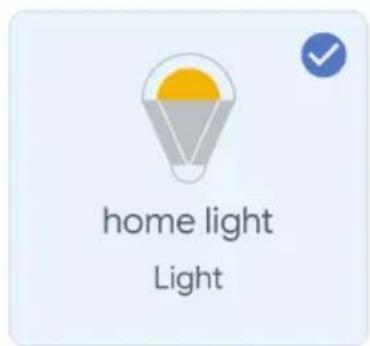
a. Account will now be linked, please stay on the page you will be redirected in few seconds to select the device to add to your home.
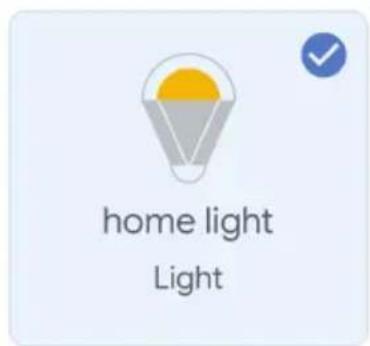
b. Select the device and tap on Next as show in image b.
a. Done
assistant.google.com

Account is now Linked
b. ×
Choose device
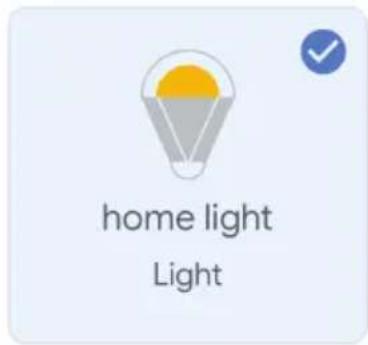
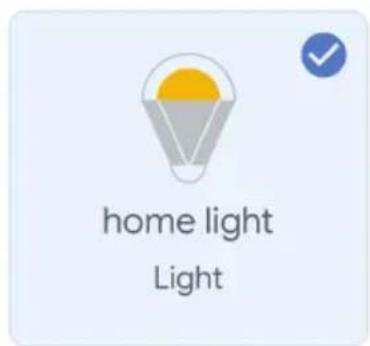
Step8: Select the Home where you would like to add the Smart Light under. (Or) you can create a New home in order to add the Smart Light to it.
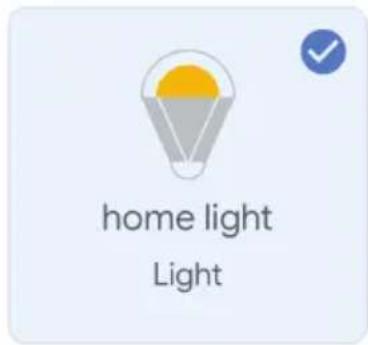
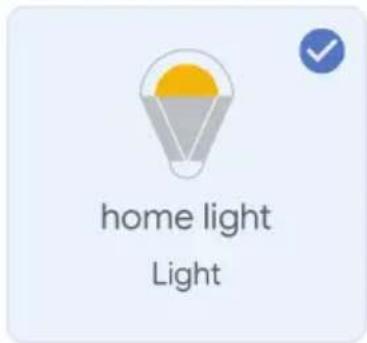
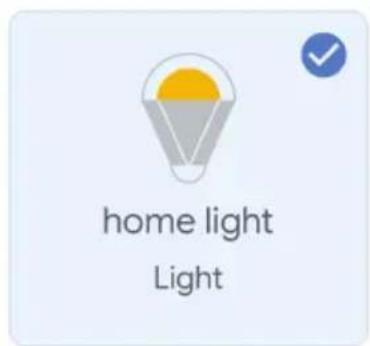
Step9: You have successfully added Smart Light device to your Google home App.
Choose a home
You will be able to control the devices and services in this home.

Smart-Home

Office

Smart Home

Create another home
Smart-Home

Off

On

Add

Settings
Master bedroom
1 device

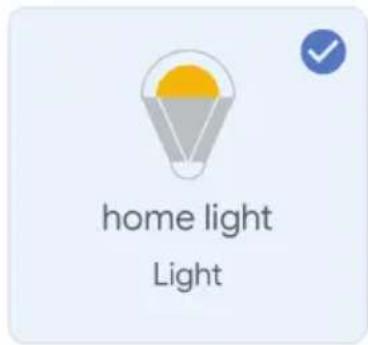
home light
Off
。
On

Local devices
1 device

Office Speaker
Step10:
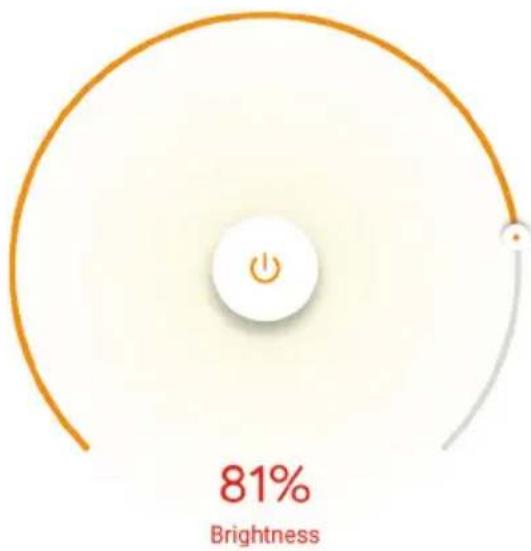
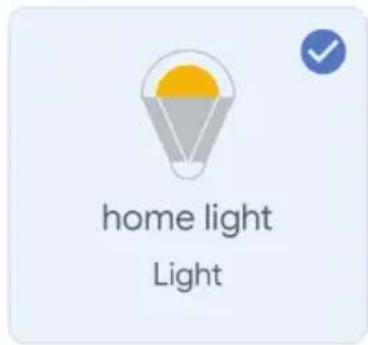
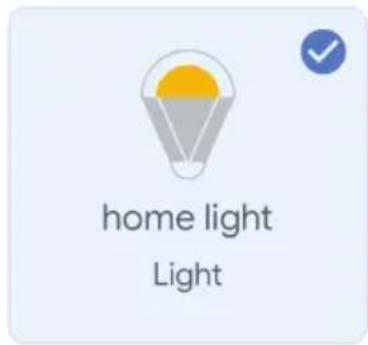
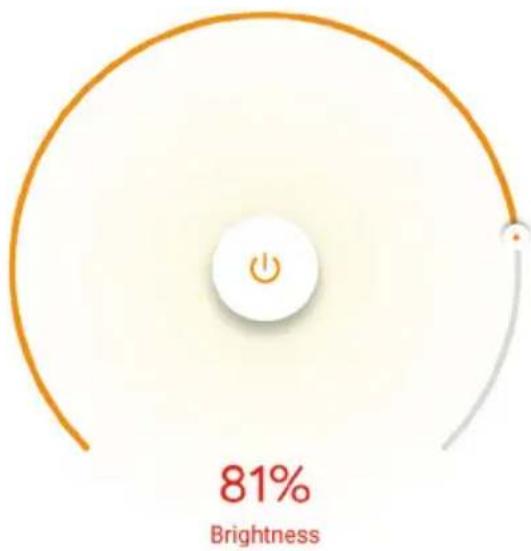
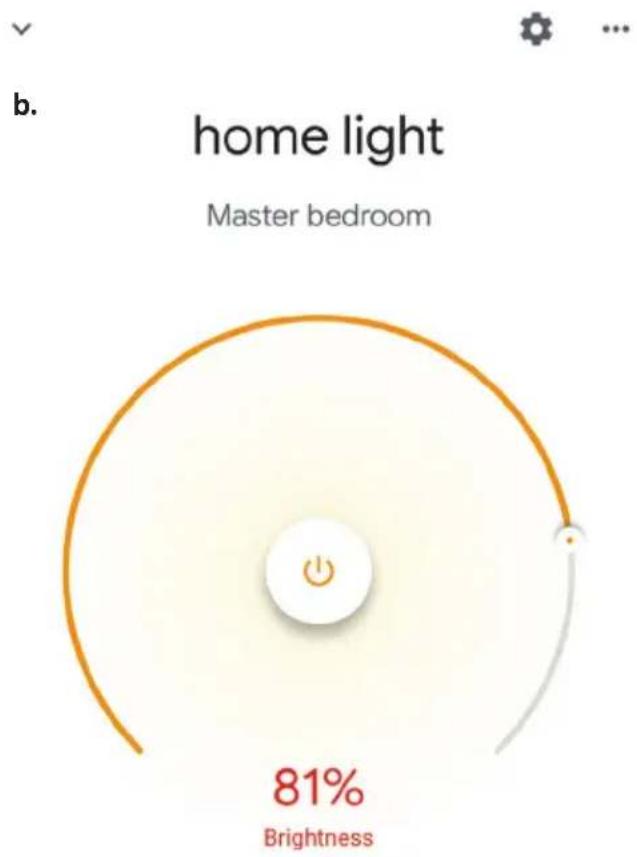
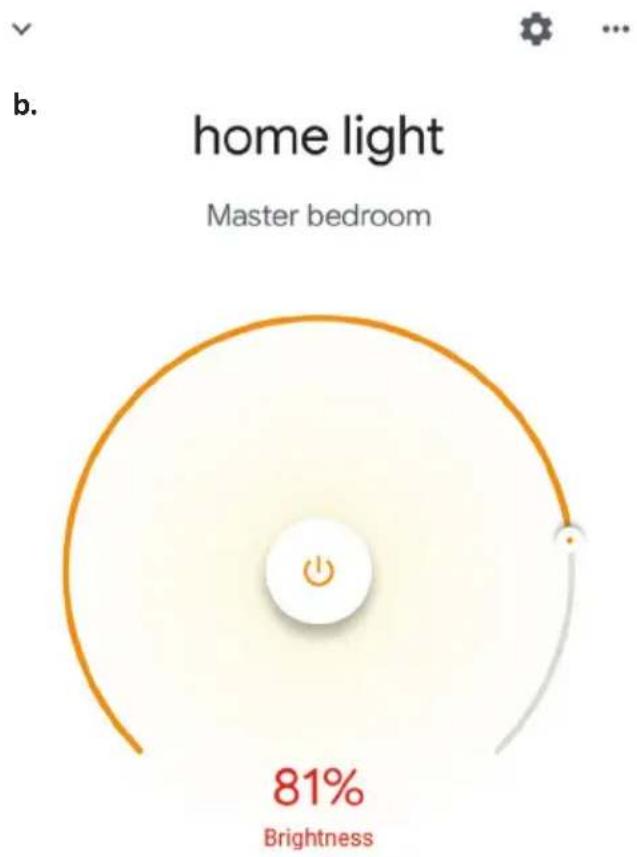
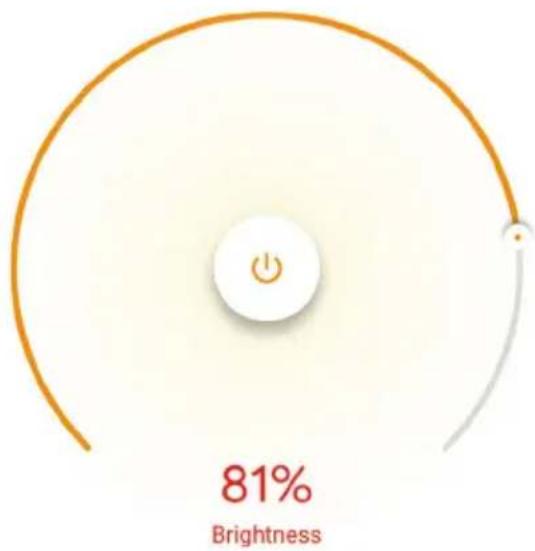
a. You can turn the Lamp On/OFF by taping on On/Off options as shown below. (OR) You can tap on the Smart Lamp.
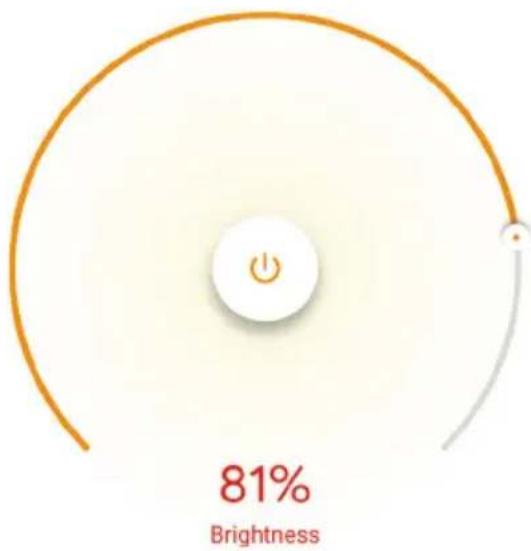
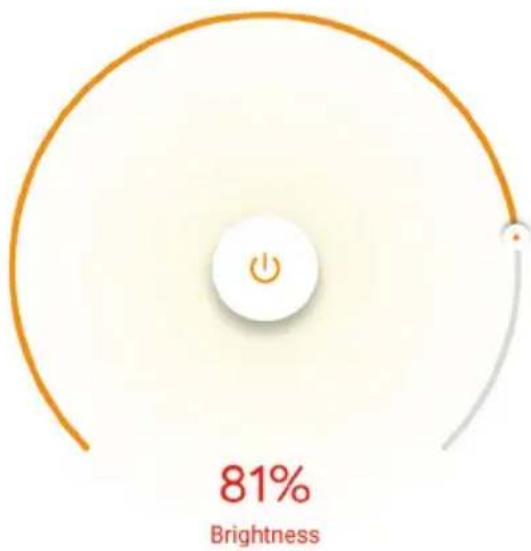
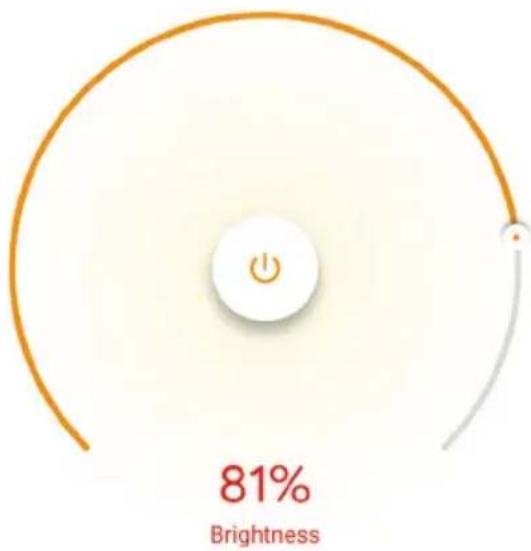
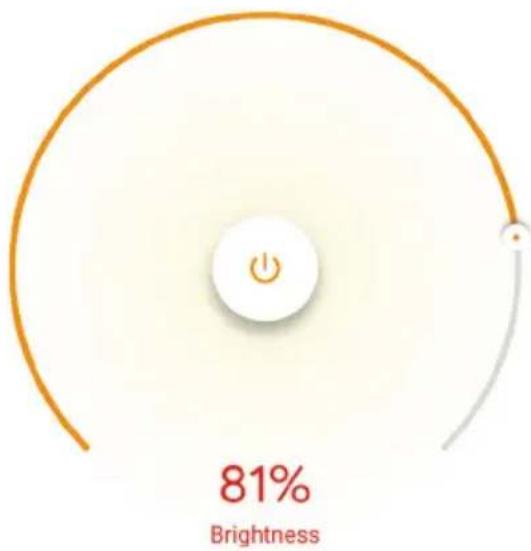
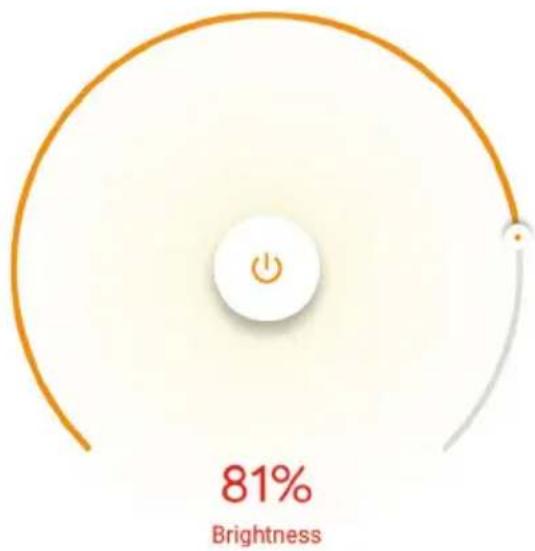
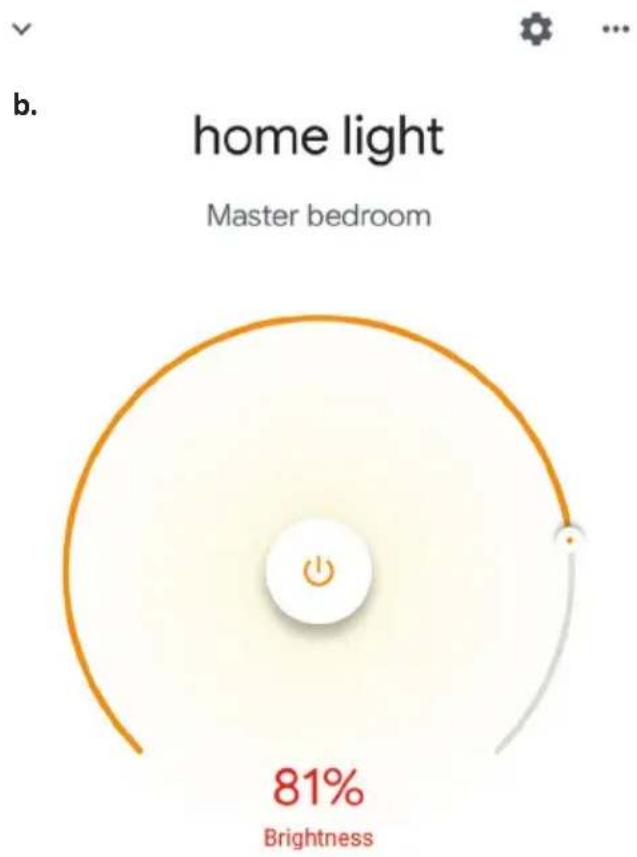
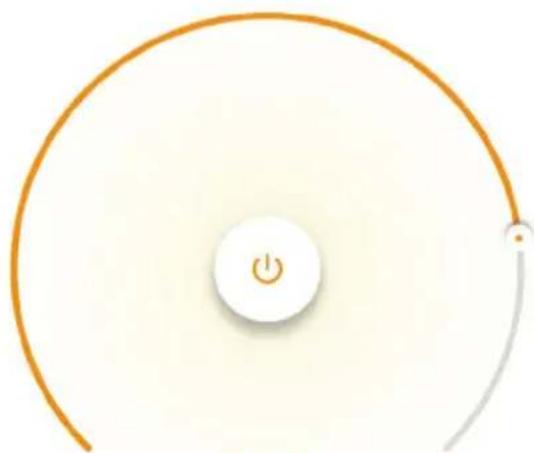
b. You will be redirected to page(as shown in image b) where you can control the lights "Power and Dimmingfunctionality".
a. Smart-Home

Master bedroom
1 device

home light


Local devices
1 device

Office Speaker
b.


home light
Master bedroom
pie
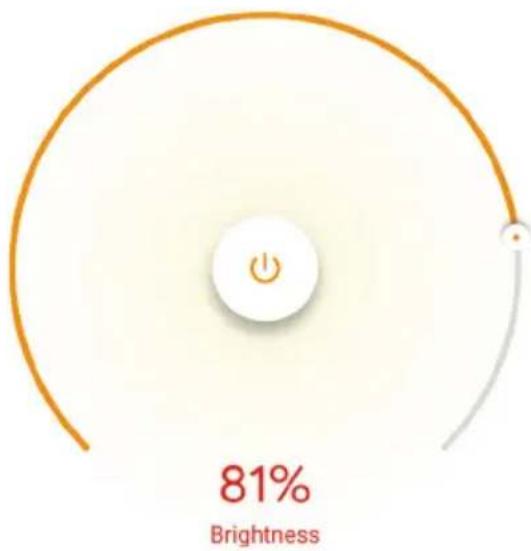
| Metric | Value | |--------|-------| | Brightness | 81% |Google Commands:
Now, you can control your smart device using voice commands on Google Home. Below are a few example commands of how you can use your Google home device:
➢! OK Google, turn on/off the thermostat
➢! OK Google, set the temperature to 22^ C
THINGS TO REMEMBER BEFORE STARTING INSTALLATION:
- V-TAC Smart Light App & Google Home App
- Make sure you have Google Home Device
- Smart Device - Lamp
- Stable Wifi network
INTRODUCTION
| Code | Function Default | Setting & Options | ||
| 1 | Temperature Compensation | -7 to 7°C | -1 | |
| 2 Fan Control | 00: When room temperature reaches the set point, the fan will turn off. | 01: When room temperature reaches the set point, the fan will turn to low speed | 0 | |
| 3 Locking Button | 00: All buttons are locked except power button. | 01: All buttons are locked. | 01 | |
| 4 Heat / Cool 00: Cool Only 01: Heat/Cold | 01 | |||
| 5 | Min Set Temperature | 5 to 15°C | 05 | |
| 6 | Max Set Temperature | 15 to 35°C | 35 | |
| 7 12/24 Hours 00: 12 Hours 01: 24 Hours | 01 | |||
| 8 | Display Mode | 00: Display both set temperature and room temperature | 01: Display set temperature only | 00 |
| 9 | Energy saving mode | 00: Non-energy saving mode | 01: Energy Saving mode, set temperature and keep economy temperature. | 00 |
| A | Heating economy temperature | 10 to 30°C | 20 | |
| B | Cooling economy temperature | 10 to 30°C | 26 | |
| C | Deadband temperature | 1 to 5°C | 1 | |
APP INSTALLATION

Fig 1
Étape 4:
Fig 2
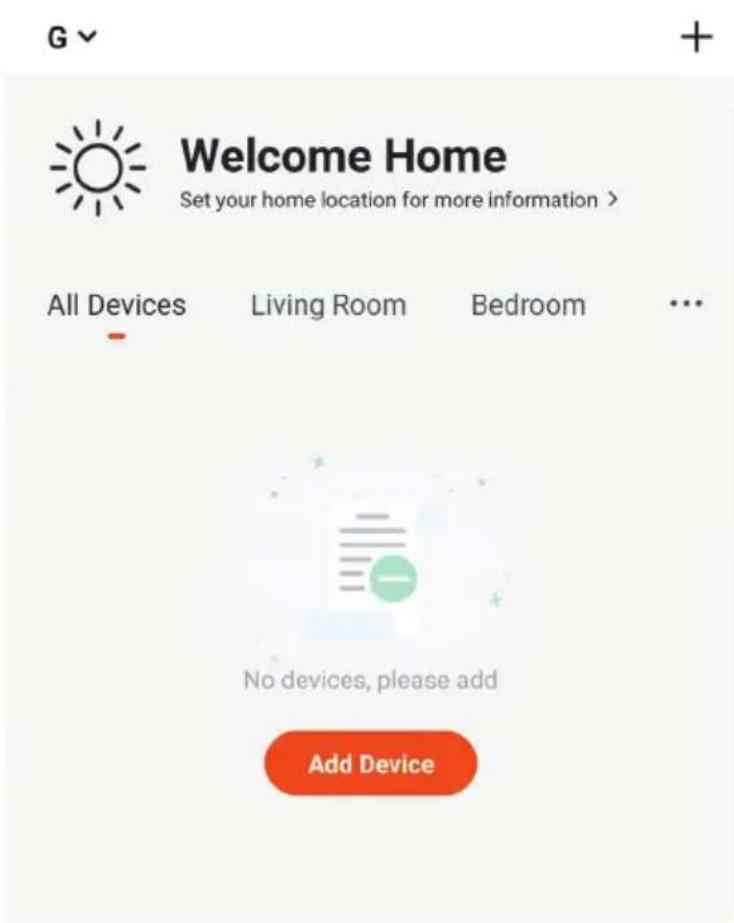
Fig 4
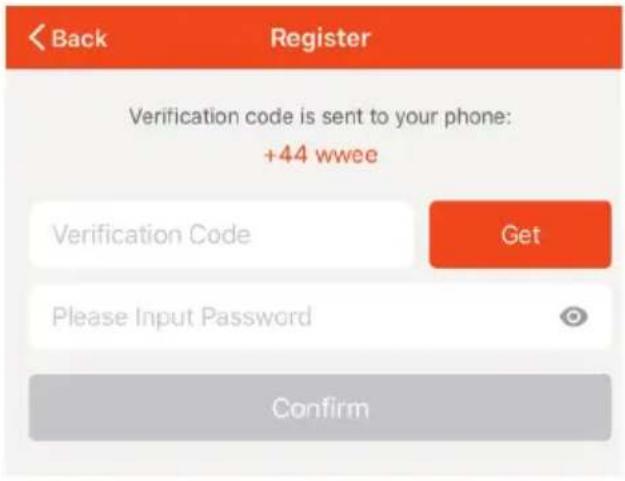
Fig 3
Fig 5
Fig 7
Connecting Now
pie
| Category | Value (%) | |---|---| | Start | 0 | | End | 3 |Make sure your phone and device are as close to your router as possible.
- Searching for Device
- Registering device to the cloud
- Initializing your Device
Fig 8
Account linking in progress
Alexa by Amazon will be able to:
Receive your public profile Control your devices over internet

skills-store.amazon.in

amazon alexa

V-TAC has been successfully linked.
What to do next:
→ Close this window to discover smart home devices you can control with Alexa.
Your content and devices all in one place

natural_image
Abstract geometric shapes including a square, circle, and triangle (no text or symbols)GET STARTED >
b. Choose account
This account will be used to personalize your experience
c. Choose a home
You will be able to control the devices and services in this home.

Create another home
d. Plug in your device
Make sure your device is nearby and connected to power, then try again

Office
1 device

Office Speaker
Pause
b.
Add to Home

Set up device

Add home member

Create speaker group

Create new home
Add services

Music and audio

Videos and photos
Set up new devices or add existing devices and services to your home
Google Home, smart displays and devices labelled 'Made for Google' such as C by GE smart bulbs
Works with Google

Have something already set up?

Link your smart home services such as Philips Hue and TP-Link

Google will be able to:
Receive your public profile Control your devices over internet

Étape 7:
Account is now Linked
b. ×
Choose device
You will be able to control the devices and services in this home.

Smart-Home

Office

Smart Home

Create another home
Smart-Home

Off

On

Add

Settings
Master bedroom
1 device

home light
Off
。
On

Local devices
1 device

Office Speaker
Étape 11:
Master bedroom
1 device

home light
Off · On

Local devices
1 device

Office Speaker
b.


home light
Master bedroom
pie
| Metric | Value | |--------|-------| | Brightness | 81% |Commandes Google:
Note: Programmable mode - The set temperature and time cannot be adjusted.
| Code | Function Default | Setting & Options | ||
| 1 | Temperature Compensation | -7 to 7°C | -1 | |
| 2 Fan Control | 00: When room temperature reaches the set point, the fan will turn off. | 01: When room temperature reaches the set point, the fan will turn to low speed | 0 | |
| 3 Locking Button | 00: All buttons are locked except power button. | 01: All buttons are locked. | 01 | |
| 4 Heat / Cool 00: Cool Only 01: Heat/Cold | 01 | |||
| 5 | Min Set Temperature | 5 to 15°C | 05 | |
| 6 | Max Set Temperature | 15 to 35°C | 35 | |
| 7 12/24 Hours 00: 12 Hours 01: 24 Hours 01 | ||||
| 8 | Display Mode | 00: Display both set temperature and room temperature | 01: Display set temperature only | 00 |
| 9 | Energy saving mode | 00: Non-energy saving mode | 01: Energy Saving mode, set temperature and keep economy temperature. | 00 |
| A | Heating economy temperature | 10 to 30°C | 20 | |
| B | Cooling economy temperature | 10 to 30°C | 26 | |
| C | Deadband temperature | 1 to 5°C | 1 | |
APP INSTALLATION

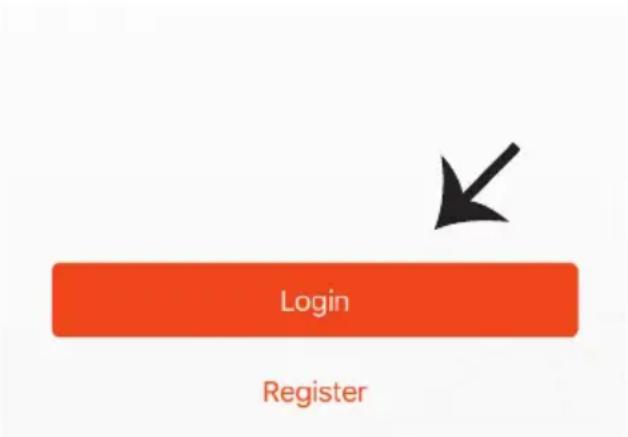
Fig 1
Step 4:
A) Mobile Number: Select the country, then enter your mobile number. Once done, tap 'Next' (Ref Fig 2).
B) E-Mail: Enter your email id and tap on 'Next' (Ref Fig 2).
Step 5: Enter the verification code which will be sent to your mobile number/email id, then assign a new password to your account and tap on "Confirm" to complete the registration process (Ref Fig 3). Once done you will be redirected to V-TAC Smart Light Home page.
Step 6: Tap on 'Add Device' or the + sign. Make sure the device is switched on.
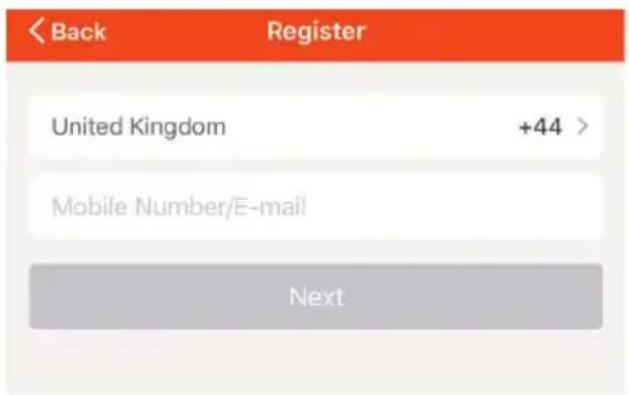
Fig 2
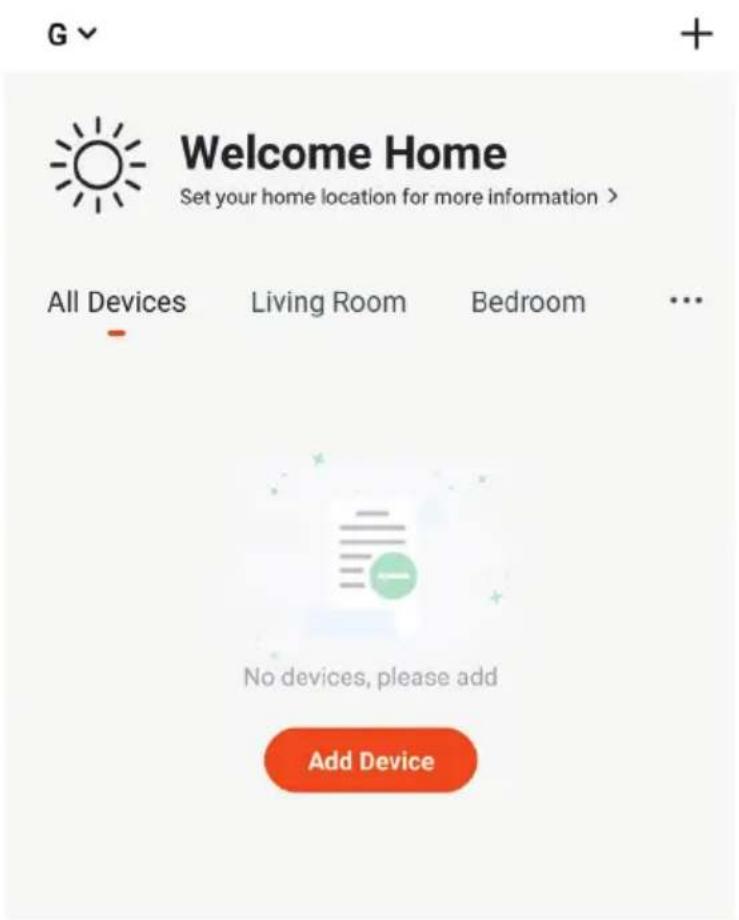
Fig 4
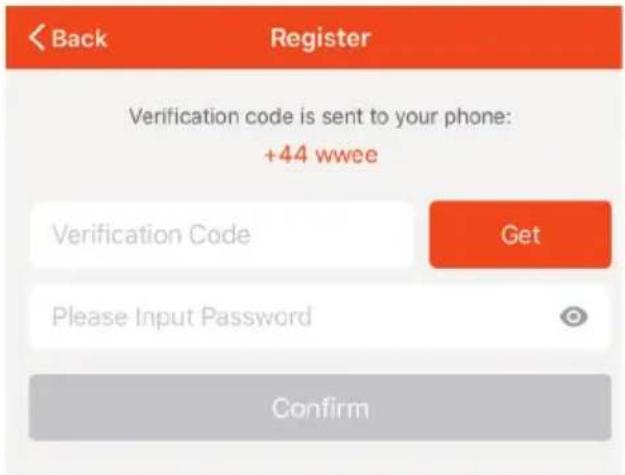
Fig 3
Fig 5
Fig 7
Connecting Now
pie
| Value | |---| | 3% |Make sure your phone and device are as close to your router as possible.
- Searching for Device
- Registering device to the cloud
- Initializing your Device
Fig 8
CREATE A NEW AMAZON ACCOUNT
Account linking in progress
Phone Number/Email Address
Type your password here

Link Now
Forgot Password
Help
Alexa by Amazon will be able to:
Receive your public profile Control your devices over internet

skills-store.amazon.in

amazon alexa

V-TAC has been successfully linked.
What to do next:
→ Close this window to discover smart home devices you can control with Alexa.
Your content and devices all in one place

natural_image
Abstract geometric shapes including squares, circles, and triangles (no text or symbols)GET STARTED >
b. Choose account
This account will be used to personalize your experience
c. Choose a home
You will be able to control the devices and services in this home.

Create another home
d. Plug in your device
Make sure your device is nearby and connected to power, then try again

Create speaker group

Create new home
Add services

Music and audio

Videos and photos
Set up new devices or add existing devices and services to your home
Google Home, smart displays and devices labelled 'Made for Google' such as C by GE smart bulbs
Works with Google

Have something already set up?

Link your smart home services such as Philips Hue and TP-Link

Google will be able to:
Receive your public profile Control your devices over internet

Schritt 7:
Account is now Linked
b. ×
Choose device
You will be able to control the devices and services in this home.

Smart-Home

Office

Smart Home

Create another home
Master bedroom
1 device

home light


Local devices
1 device

Office Speaker
b.


home light
Master bedroom
pie
| Metric | Value | |--------|-------| | Brightness | 81% |GOOGLE HOME-Befehle
Note: Programmable mode - The set temperature and time cannot be adjusted.
ЗАДАВАНЕ НА ФУНКЦИИТЕ И ОПЦИИТЕ
| Code | Function Default | Setting & Options | ||
| 1 | Temperature Compensation | -7 to 7°C | -1 | |
| 2 Fan Control | 00: When room temperature reaches the set point, the fan will turn off. | 01: When room temperature reaches the set point, the fan will turn to low speed | 0 | |
| 3 Locking Button | 00: All buttons are locked except power button. | 01: All buttons are locked. | 01 | |
| 4 Heat / Cool 00: Cool Only 01: Heat/Cold | 01 | |||
| 5 | Min Set Temperature | 5 to 15°C | 05 | |
| 6 | Max Set Temperature | 15 to 35°C | 35 | |
| 7 12/24 Hours 00: 12 Hours 01: 24 Hours 01 | ||||
| 8 | Display Mode | 00: Display both set temperature and room temperature | 01: Display set temperature only | 00 |
| 9 | Energy saving mode | 00: Non-energy saving mode | 01: Energy Saving mode, set temperature and keep economy temperature. | 00 |
| A | Heating economy temperature | 10 to 30°C | 20 | |
| B | Cooling economy temperature | 10 to 30°C | 26 | |
| C | Deadband temperature | 1 to 5°C | 1 | |
АРР ИНСТАЛАЦИЯ

Fig 1
Стъпка 4:
Fig 2
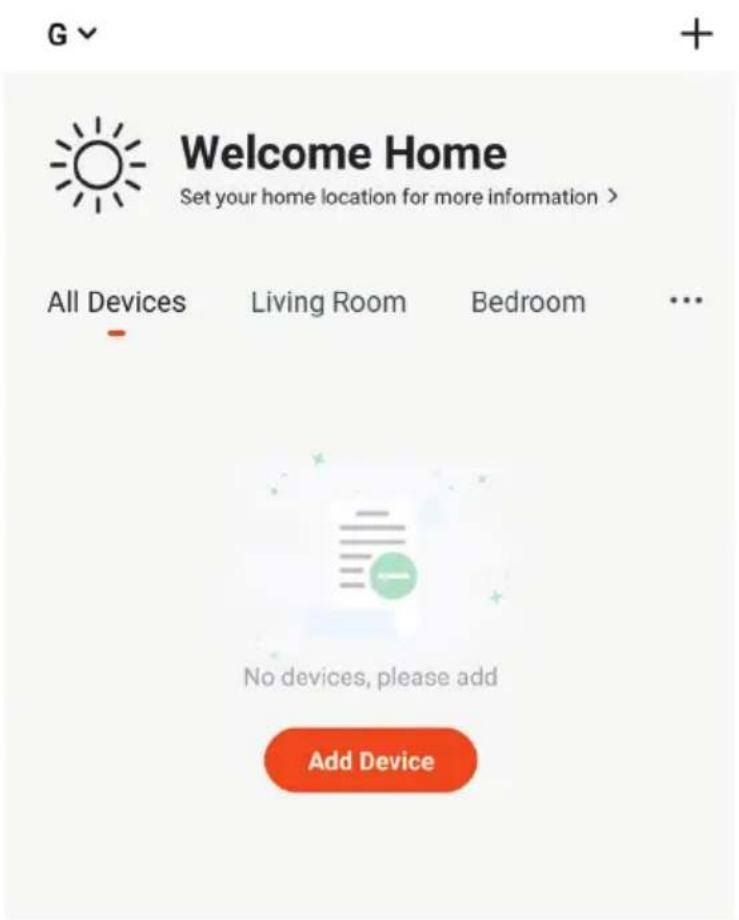
Fig 4
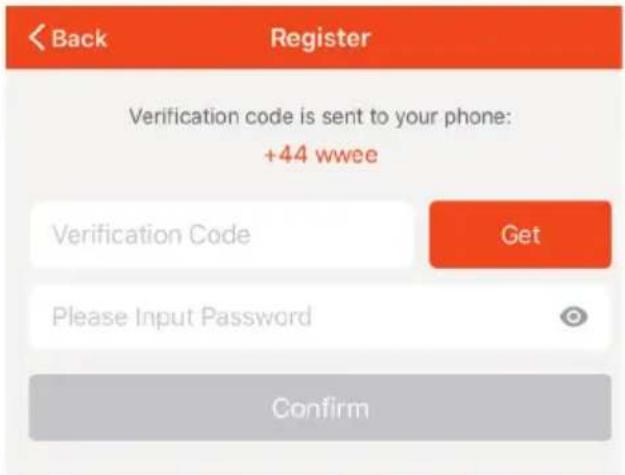
Fig 3
Fig 5
Fig 7
Connecting Now
pie
| Value | |---| | 3% |Make sure your phone and device are as close to your router as possible.
- Searching for Device
- Registering device to the cloud
- Initializing your Device
Fig 8
CREATE A NEW AMAZON ACCOUNT
Стъпка 3: Натиснете

Settings
Account linking in progress
Phone Number/Email Address
Type your password here

Link Now
Forgot Password
Help
Alexa by Amazon will be able to:
Receive your public profile Control your devices over internet

Done

skills-store.amazon.in

amazon alexa
V-TAC has been successfully linked.
What to do next:
→ Close this window to discover smart home devices you can control with Alexa.
Your content and devices all in one place

natural_image
Abstract geometric shapes including squares, circles, and triangles (no text or symbols)GET STARTED >
b. Choose account
This account will be used to personalize your experience
c. Choose a home
You will be able to control the devices and services in this home.

Create another home
d. Plug in your device
Make sure your device is nearby and connected to power, then try again

Create speaker group

Create new home
Add services

Music and audio

Videos and photos
Set up new devices or add existing devices and services to your home
Google Home, smart displays and devices labelled 'Made for Google' such as C by GE smart bulbs
Works with Google

Have something already set up?

Link your smart home services such as Philips Hue and TP-Link
Forgot Password
Help

Google will be able to:
Receive your public profile Control your devices over internet

Стъпка 7:
Account is now Linked
b. ×
Choose device
You will be able to control the devices and services in this home.

Smart-Home

Office

Smart Home

Create another home
Master bedroom
1 device

home light
Off · On

Local devices
1 device

Office Speaker
b.


home light
Master bedroom
pie
| Metric | Value | |--------|-------| | Brightness | 81% |Команди на Google:
Note: Programmable mode - The set temperature and time cannot be adjusted.
FUNKCIJE I OPCIJE
Kad je napajanje isključeno pritisnite istovremeno i zadržite gumb (M) i gumb (90) ventilatora na 5 sekundi da biste ušli u postavke sustava. Zatim pritisnite gumb (M) za unos promjena pojedinih jedinica.
| Code | Function Default | Setting & Options | ||
| 1 | Temperature Compensation | -7 to 7°C | -1 | |
| 2 Fan Control | 00: When room temperature reaches the set point, the fan will turn off. | 01: When room temperature reaches the set point, the fan will turn to low speed | 0 | |
| 3 Locking Button | 00: All buttons are locked except power button. | 01: All buttons are locked. | 01 | |
| 4 Heat / Cool 00: Cool Only 01: Heat/Cold | 01 | |||
| 5 | Min Set Temperature | 5 to 15°C | 05 | |
| 6 | Max Set Temperature | 15 to 35°C | 35 | |
| 7 12/24 Hours 00: 12 Hours 01: 24 Hours 01 | ||||
| 8 | Display Mode | 00: Display both set temperature and room temperature | 01: Display set temperature only | 00 |
| 9 | Energy saving mode | 00: Non-energy saving mode | 01: Energy Saving mode, set temperature and keep economy temperature. | 00 |
| A | Heating economy temperature | 10 to 30°C | 20 | |
| B | Cooling economy temperature | 10 to 30°C | 26 | |
| C | Deadband temperature | 1 to 5°C | 1 | |
APP INSTALACIJA

Fig 1
Korak 4:
Otvorite aplikaciju V-TAC Smart Light i kliknite Register (registriranje) da biste registrirali novi račun (account).
Korak 5:
A) Broj mobitela: Odaberite svoju zemlju i unesite broj mobilnog telefona. Zatim pritisnite 'Next'.
B) E-mail: Unesite adresu e-pošte i pritisnite 'Next'.
Fig 2
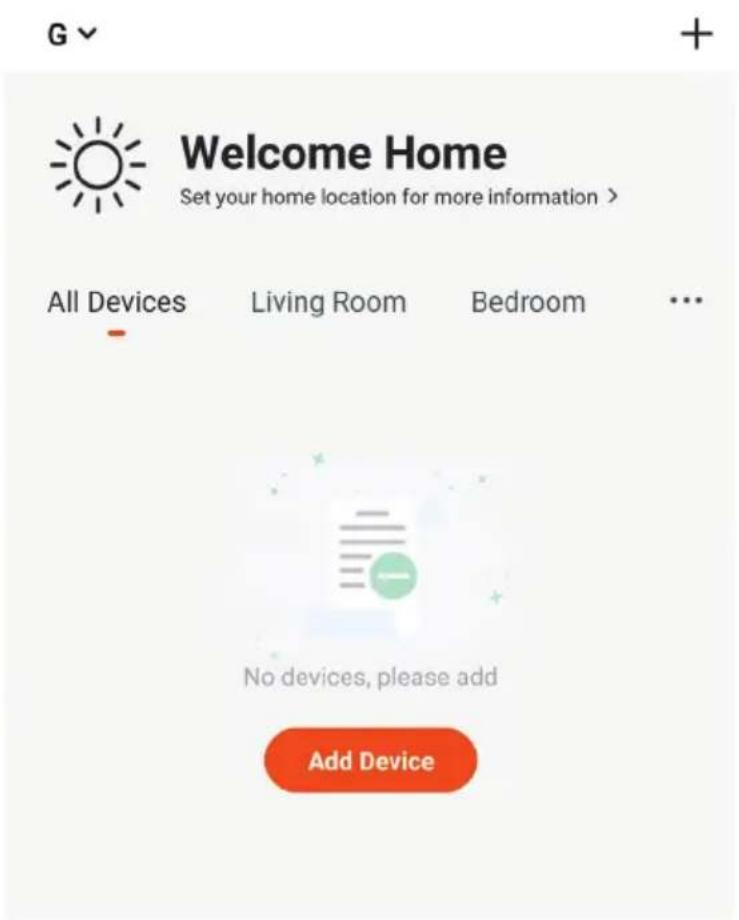
Fig 4
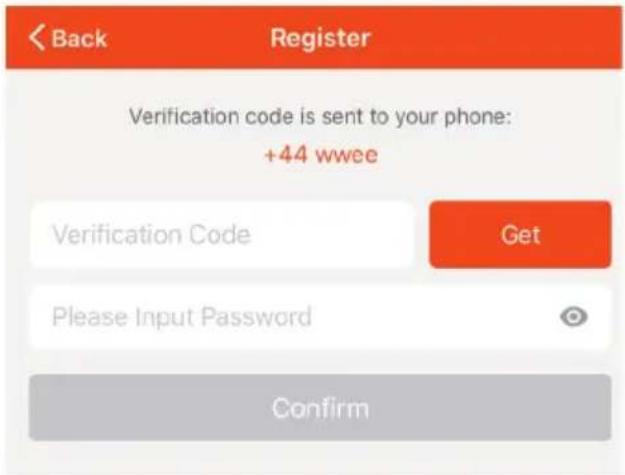
Fig 3
Korak 7: Da biste izabrali uređaj, pritisnite Home appliances, zatim izaberite "Termostat" da biste započeli postupak sinkronizacije uređaja s aplikacijom (vidite sliku 5).
Korak 8: postupak sinkronizacije
REŽIM EZ:
Fig 5
Fig 7
Connecting Now
pie
| Category | Value (%) | |---|---| | Start | 0 | | End | 3 |Make sure your phone and device are as close to your router as possible.
- Searching for Device
- Registering device to the cloud
- Initializing your Device
Fig 8
CREATE A NEW AMAZON ACCOUNT
Korak 3.: Pritisnite

Settings
Account linking in progress
Korak 6.: Unesite korisničko ime i lozinku za „V-TAC Smart Light“ i kliknite "Link Now".

+1

Phone Number/Email Address
Type your password here

Link Now
Forgot Password
Help
Korak 7.: Nakon što kliknete "Link Now" bit ćete preusmjereni na novu stranicu koja zahtijeva autorizaciju (pogledajte sliku u nastavku). Pritisnite "Authorize".
Alexa by Amazon will be able to:
Receive your public profile Control your devices over internet

Done

skills-store.amazon.in

amazon alexa

V-TAC has been successfully linked.
What to do next:
→ Close this window to discover smart home devices you can control with Alexa.
Korak 9. Otkrijte Vaš pametni uređaj u Alexa. Nakon što odobrite opciju:
A) Možete dati glasovnu naredbu „Alexa discover devices“ Vašem uređaju Alexa.
B) Da biste ručno dodali uređaj, na početnoj stranici pritisnite 📋, a zatim Add devices, odaberite uređaj, koji želite dodati, i pritisnite Discover device.
Your content and devices all in one place

natural_image
Abstract geometric shapes including squares, circles, and a crescent (no text or symbols)GET STARTED >
b. Choose account
This account will be used to personalize your experience
c. Choose a home
You will be able to control the devices and services in this home.

Create another home
d. Plug in your device
Make sure your device is nearby and connected to power, then try again

Korak 2: Čim dođete do Googlove početne stranice, pritisnite ikonu Dodaj("+" ) da biste dodali novi uređaj ili vještinu. Zatim pređite na "Postavi uređaj" kao što je prikazano na slici ispod.
a.

Play
Office

Broadcast


Add

Settings
Office
1 device

Office Speaker
Pause
b.

Add to Home

Set up device

Add home member

Create speaker group

Create new home
Add services

Music and audio

Videos and photos
Korak 3: Uvjerite se da je Pametna žarulja uparena s aplikacijom V-TAC Smart Light prije nego prijeđete na korak 3. Pritisnite strelicu kao što je prikazano na slici ispod.
Set up
Set up new devices or add existing devices and services to your home
Korak 4.: Upišite "V-TAC Smart Light" u traku za pretraživanje i pritisnite ikonu "V-TAC Smart Light"

V-TAC Smart Light

New devices

Set up new devices
Google Home, smart displays and devices labelled 'Made for Google' such as C by GE smart bulbs
Works with Google

Have something already set up?

Link your smart home services such as Philips Hue and TP-Link
Korak 5: Prijavite se sa svojim V-TAC Smart Light vjerodajnicama da biste uključili Smart Light uređaj
Korak 6: Odaberite V-TAC Smart Light kao što je prikazano ispod i pritisnite Poveži sada (Link Now).

Google will be able to:
Receive your public profile Control your devices over internet

Korak 8:
a. Računi će biti povezani, ostanite na strani te ćete za par sekundi biti preusmjereni na odabir domaćeg uređaja.
b. Odaberite uređaj i pritisnite Dalje (kao što je prikazano na slici b).
a. Done
assistant.google.com

Account is now Linked
b. ×
Choose device
Korak 9: Odaberite Home, kojem ćete dodati Smart Light (ili) možete napraviti novi Home kojem ćete dodati Smart Light.
Choose a home
You will be able to control the devices and services in this home.

Smart-Home

Office

Smart Home

Create another home
Master bedroom
1 device

home light


Local devices
1 device

Office Speaker
b.


home light
Master bedroom
pie
| Metric | Value | |--------|-------| | Brightness | 81% |Google Naredbe:
Note: Programmable mode - The set temperature and time cannot be adjusted.
CONFIGURANDO AS FUNÇÕES E OPÇÕES
| Code | Function Default | Setting & Options | ||
| 1 | Temperature Compensation | -7 to 7°C | -1 | |
| 2 Fan Control | 00: When room temperature reaches the set point, the fan will turn off. | 01: When room temperature reaches the set point, the fan will turn to low speed | 0 | |
| 3 Locking Button | 00: All buttons are locked except power button. | 01: All buttons are locked. | 01 | |
| 4 Heat / Cool 00: Cool Only 01: Heat/Cold | 01 | |||
| 5 | Min Set Temperature | 5 to 15°C | 05 | |
| 6 | Max Set Temperature | 15 to 35°C | 35 | |
| 7 12/24 Hours 00: 12 Hours 01: 24 Hours 01 | ||||
| 8 | Display Mode | 00: Display both set temperature and room temperature | 01: Display set temperature only | 00 |
| 9 | Energy saving mode | 00: Non-energy saving mode | 01: Energy Saving mode, set temperature and keep economy temperature. | 00 |
| A | Heating economy temperature | 10 to 30°C | 20 | |
| B | Cooling economy temperature | 10 to 30°C | 26 | |
| C | Deadband temperature | 1 to 5°C | 1 | |
APP INSTALAÇÃO

Fig 1
Passo 4:
Fig 2
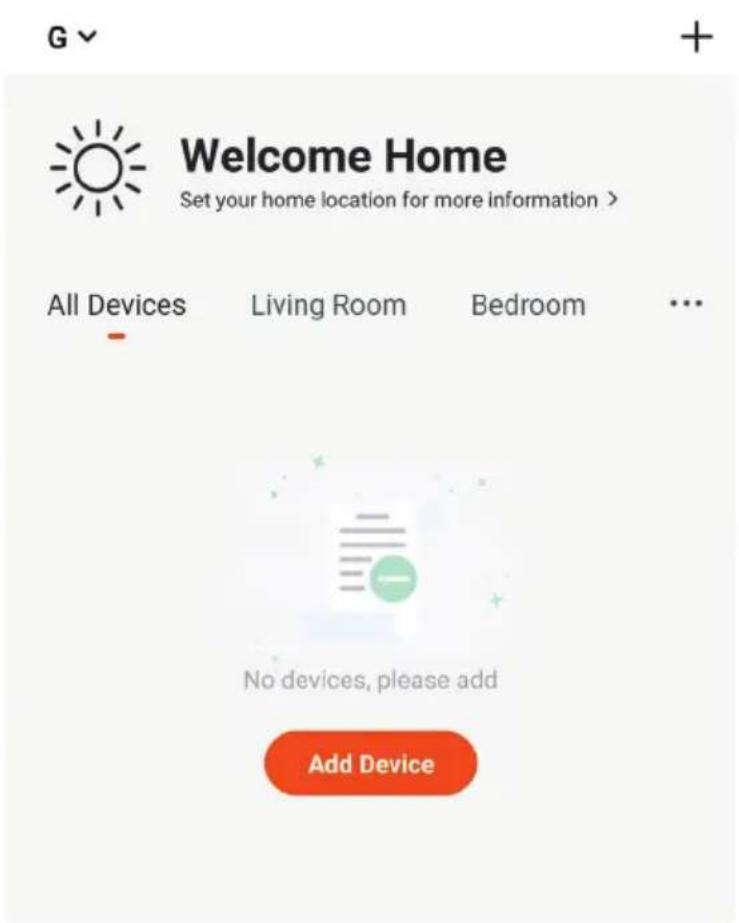
Fig 4
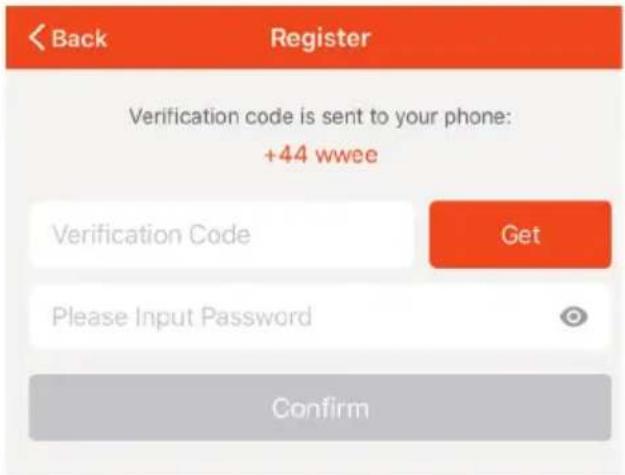
Fig 3
Fig 5
Fig 7
Connecting Now
pie
| Category | Value (%) | |---|---| | Start | 0 | | End | 3 |Make sure your phone and device are as close to your router as possible.
- Searching for Device
- Registering device to the cloud
- Initializing your Device
Fig 8
Account linking in progress
Phone Number/Email Address
Type your password here

Link Now
Forgot Password
Help
Alexa by Amazon will be able to:
Receive your public profile Control your devices over internet

skills-store.amazon.in

amazon alexa

V-TAC has been successfully linked.
What to do next:
→ Close this window to discover smart home devices you can control with Alexa.
Your content and devices all in one place

natural_image
Abstract geometric shapes including squares, circles, and a crescent (no text or symbols)GET STARTED >
b. Choose account
This account will be used to personalize your experience
c. Choose a home
You will be able to control the devices and services in this home.

Create another home
d. Plug in your device
Make sure your device is nearby and connected to power, then try again

Office
1 device

Office Speaker
Pause
b.

Add to Home

Set up device

Add home member

Create speaker group

Create new home
Add services

Music and audio

Videos and photos
Set up new devices or add existing devices and services to your home
Passo 4: Digite "V-TAC Smart Light" na barra de pesquisa e toque no ícone de "V-TAC Smart Light"

V-TAC Smart Light

New devices

Set up new devices
Google Home, smart displays and devices labelled 'Made for Google' such as C by GE smart bulbs
Works with Google

Have something already set up?

Link your smart home services such as Philips Hue and TP-Link

Google will be able to:
Receive your public profile Control your devices over internet

Passo 8:
Account is now Linked
b. ×
Choose device
You will be able to control the devices and services in this home.

Smart-Home

Office

Smart Home

Create another home
Master bedroom
1 device

home light


Local devices
1 device

Office Speaker
b.


home light
Master bedroom
pie
| Metric | Value | |--------|-------| | Brightness | 81% |Comados do Google:
Note: Programmable mode - The set temperature and time cannot be adjusted.
CONFIGURAR LAS FUNCIONES Y OPCIONES
| Code | Function Default | Setting & Options | ||
| 1 | Temperature Compensation | -7 to 7°C | -1 | |
| 2 Fan Control | 00: When room temperature reaches the set point, the fan will turn off. | 01: When room temperature reaches the set point, the fan will turn to low speed | 0 | |
| 3 Locking Button | 00: All buttons are locked except power button. | 01: All buttons are locked. | 01 | |
| 4 Heat / Cool 00: Cool Only 01: Heat/Cold | 01 | |||
| 5 | Min Set Temperature | 5 to 15°C | 05 | |
| 6 | Max Set Temperature | 15 to 35°C | 35 | |
| 7 12/24 Hours 00: 12 Hours 01: 24 Hours 01 | ||||
| 8 | Display Mode | 00: Display both set temperature and room temperature | 01: Display set temperature only | 00 |
| 9 | Energy saving mode | 00: Non-energy saving mode | 01: Energy Saving mode, set temperature and keep economy temperature. | 00 |
| A | Heating economy temperature | 10 to 30°C | 20 | |
| B | Cooling economy temperature | 10 to 30°C | 26 | |
| C | Deadband temperature | 1 to 5°C | 1 | |
APP INSTALACIÓN

Fig 1
Paso 4:
Fig 2
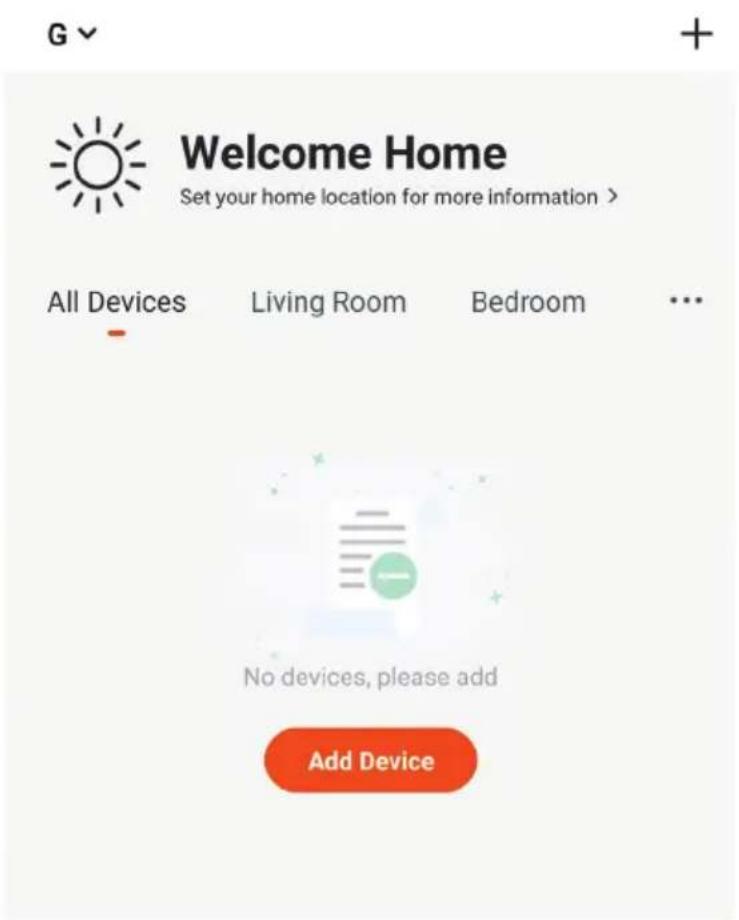
Fig 4
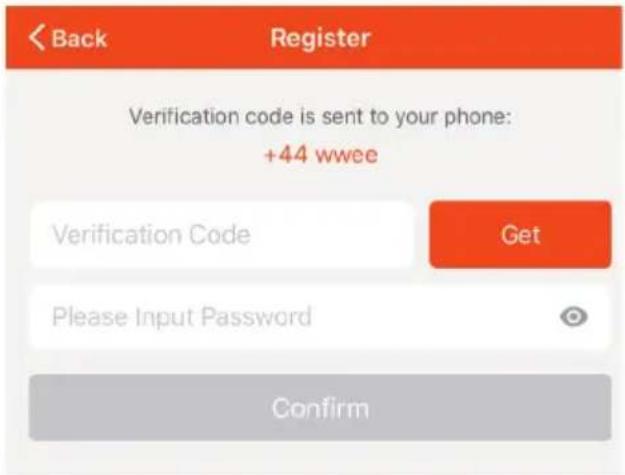
Fig 3
Fig 5
Fig 7
Connecting Now
pie
| Category | Value (%) | |---|---| | Start | 0 | | End | 3 |Make sure your phone and device are as close to your router as possible.
- Searching for Device
- Registering device to the cloud
- Initializing your Device
Fig 8
Account linking in progress


Forgot Password
Help
Alexa by Amazon will be able to:
Receive your public profile Control your devices over internet

Done

skills-store.amazon.in

amazon alexa

V-TAC has been successfully linked.
What to do next:
→ Close this window to discover smart home devices you can control with Alexa.
Your content and devices all in one place

natural_image
Abstract geometric shapes including a square, circle, and crescent on a light background (no text or symbols)GET STARTED >
b. Choose account
This account will be used to personalize your experience
c. Choose a home
You will be able to control the devices and services in this home.

Create another home
d. Plug in your device
Make sure your device is nearby and connected to power, then try again

Office
1 device

Office Speaker
Pause
b.

Add to Home

Set up device

Add home member

Create speaker group

Create new home
Add services

Music and audio

Videos and photos
Set up new devices or add existing devices and services to your home
Google Home, smart displays and devices labelled 'Made for Google' such as C by GE smart bulbs
Works with Google

Have something already set up?

Link your smart home services such as Philips Hue and TP-Link

Google will be able to:
Receive your public profile Control your devices over internet

Paso 7:
Account is now Linked
b. ×
Choose device
Paso 8:
You will be able to control the devices and services in this home.

Smart-Home

Office

Smart Home

Create another home
Smart-Home

Off

On

Add

Settings
Master bedroom
1 device

home light

。

Local devices
1 device

Office Speaker
Paso 11:
Master bedroom
1 device

home light
Off · On

Local devices
1 device

Office Speaker
b.


home light
Master bedroom
pie
| Metric | Value | |--------|-------| | Brightness | 81% |Comandos de Google:
Note: Programmable mode - The set temperature and time cannot be adjusted.
| Code | Function Default | Setting & Options | ||
| 1 | Temperature Compensation | -7 to 7°C | -1 | |
| 2 Fan Control | 00: When room temperature reaches the set point, the fan will turn off. | 01: When room temperature reaches the set point, the fan will turn to low speed | 0 | |
| 3 Locking Button | 00: All buttons are locked except power button. | 01: All buttons are locked. | 01 | |
| 4 Heat / Cool 00: Cool Only 01: Heat/Cold | 01 | |||
| 5 | Min Set Temperature | 5 to 15°C | 05 | |
| 6 | Max Set Temperature | 15 to 35°C | 35 | |
| 7 12/24 Hours 00: | 12 Hours 01: 24 Hours | 01 | ||
| 8 | Display Mode | 00: Display both set temperature and room temperature | 01: Display set temperature only | 00 |
| 9 | Energy saving mode | 00: Non-energy saving mode | 01: Energy Saving mode, set temperature and keep economy temperature. | 00 |
| A | Heating economy temperature | 10 to 30°C | 20 | |
| B | Cooling economy temperature | 10 to 30°C | 26 | |
| C | Deadband temperature | 1 to 5°C | 1 | |
APP INSTALLATION

Fig 1
4. lépés:
Fig 2
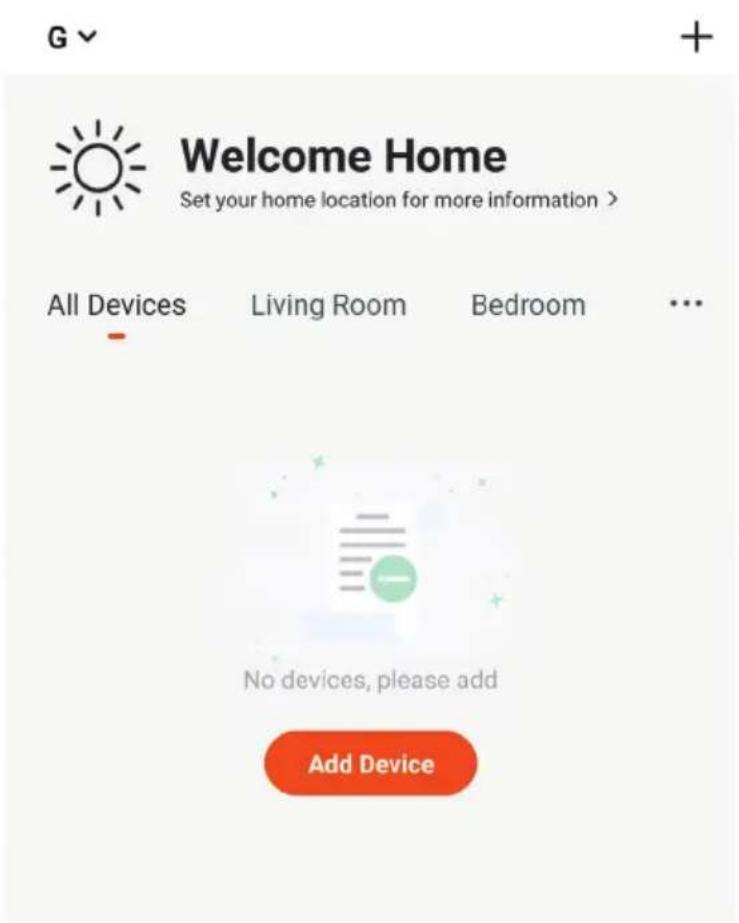
Fig 4
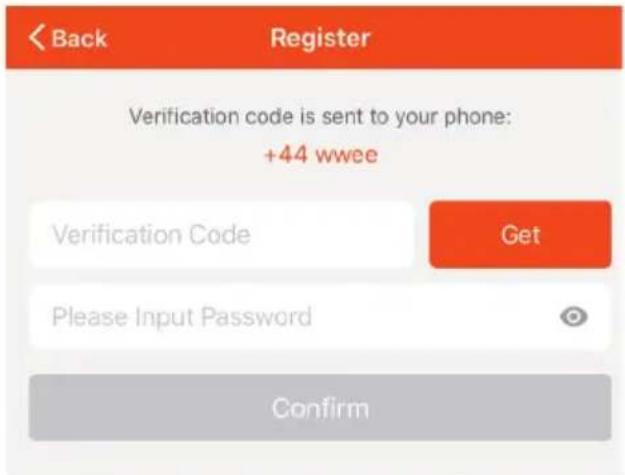
Fig 3
Fig 5
Fig 7
Connecting Now
pie
| Category | Value (%) | |---|---| | Start | 0 | | End | 3 |Make sure your phone and device are as close to your router as possible.
- Searching for Device
- Registering device to the cloud
- Initializing your Device
Fig 8
Account linking in progress
Alexa by Amazon will be able to:
Receive your public profile Control your devices over internet

skills-store.amazon.in

amazon alexa


V-TAC has been successfully linked.
What to do next:
→ Close this window to discover smart home devices you can control with Alexa.
Your content and devices all in one place

natural_image
Abstract geometric shapes including squares, circles, and a crescent (no text or symbols)GET STARTED >
b. Choose account
This account will be used to personalize your experience
d. Plug in your device
Make sure your device is nearby and connected to power, then try again
c. Choose a home
You will be able to control the devices and services in this home.


Create another home
Office
1 device

Office Speaker
Pause
b.

Add to Home

Set up device

Add home member

Create speaker group

Create new home
Add services

Music and audio

Videos and photos
Set up new devices or add existing devices and services to your home
New devices

Set up new devices
Google Home, smart displays and devices labelled 'Made for Google' such as C by GE smart bulbs
Works with Google

Have something already set up?
Link your smart home services such as Philips Hue and TP-Link

Google will be able to:
Receive your public profile Control your devices over internet

7. lépés:
Account is now Linked
b. ×
Choose device
You will be able to control the devices and services in this home.

Smart-Home

Office

Smart Home

Create another home
Master bedroom
1 device

home light



Local devices
1 device

Office Speaker

b.
home light
Master bedroom
pie
| Metric | Value | |--------|-------| | Brightness | 81% |Google Parancsai:
Note: Programmable mode - The set temperature and time cannot be adjusted.
| Code | Function Default | Setting & Options | ||
| 1 | Temperature Compensation | -7 to 7°C | -1 | |
| 2 Fan Control | 00: When room temperature reaches the set point, the fan will turn off. | 01: When room temperature reaches the set point, the fan will turn to low speed | 0 | |
| 3 Locking Button | 00: All buttons are locked except power button. | 01: All buttons are locked. | 01 | |
| 4 Heat / Cool 00: Cool Only 01: Heat/Cold | 01 | |||
| 5 | Min Set Temperature | 5 to 15°C | 05 | |
| 6 | Max Set Temperature | 15 to 35°C | 35 | |
| 7 12/24 Hours 00: | 12 Hours 01: 24 Hours | 01 | ||
| 8 | Display Mode | 00: Display both set temperature and room temperature | 01: Display set temperature only | 00 |
| 9 | Energy saving mode | 00: Non-energy saving mode | 01: Energy Saving mode, set temperature and keep economy temperature. | 00 |
| A | Heating economy temperature | 10 to 30°C | 20 | |
| B | Cooling economy temperature | 10 to 30°C | 26 | |
| C | Deadband temperature | 1 to 5°C | 1 | |
APP INSTALLATION

Fig 1
Passo 4:
Fig 2
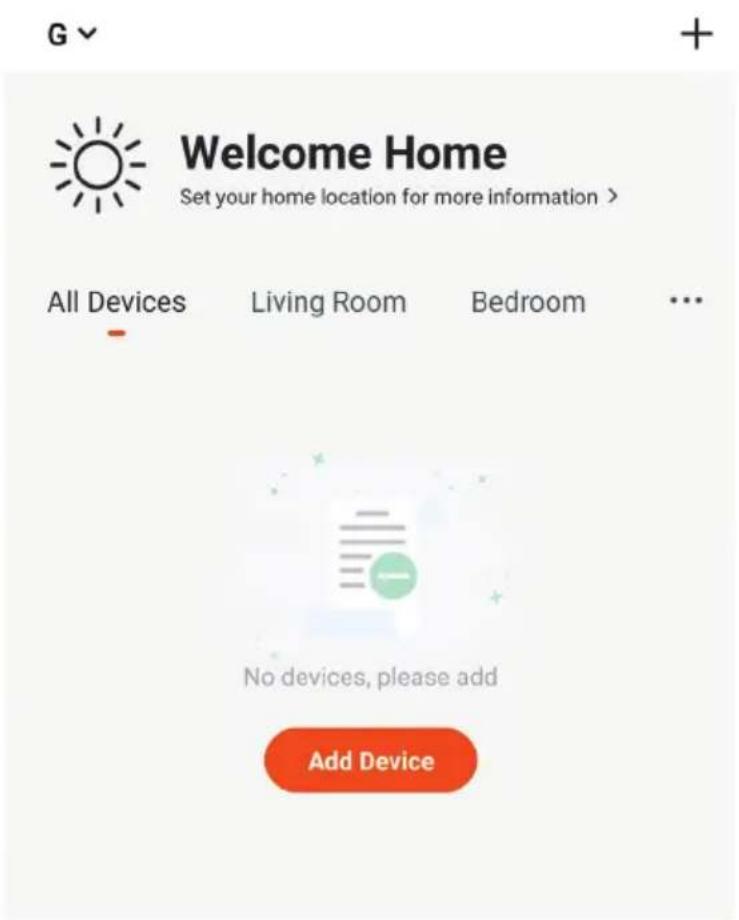
Fig 4
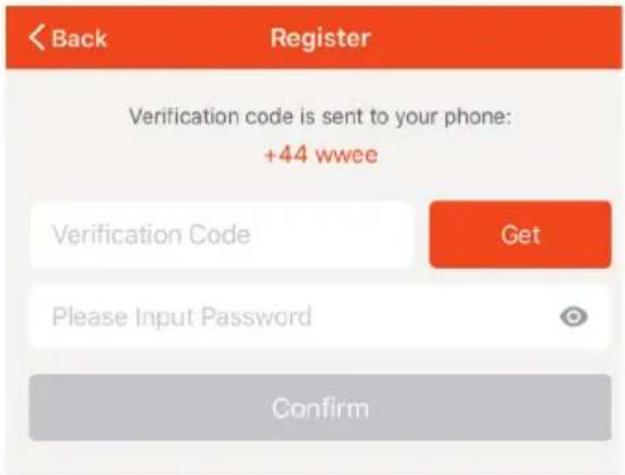
Fig 3
Fig 5
Fig 7
Connecting Now
pie
| Category | Value (%) | |---|---| | Start | 0 | | End | 3 |Make sure your phone and device are as close to your router as possible.
- Searching for Device
- Registering device to the cloud
- Initializing your Device
Fig 8
Account linking in progress
Phone Number/Email Address
Type your password here
Link Now
Forgot Password
Help
Alexa by Amazon will be able to:
Receive your public profile Control your devices over internet

skills-store.amazon.in

amazon alexa

V-TAC has been successfully linked.
What to do next:
→ Close this window to discover smart home devices you can control with Alexa.
Your content and devices all in one place

natural_image
Abstract geometric shapes including squares, circles, and triangles (no text or symbols)GET STARTED >
b. Choose account
This account will be used to personalize your experience
d. Plug in your device
Make sure your device is nearby and connected to power, then try again
c. Choose a home
You will be able to control the devices and services in this home.


Create another home
Office
1 device

Office Speaker
Pause
b.

Add to Home

Set up device

Add home member

Create speaker group

Create new home
Add services

Music and audio

Videos and photos
Set up new devices or add existing devices and services to your home
New devices

Set up new devices
Google Home, smart displays and devices labelled 'Made for Google' such as C by GE smart bulbs
Works with Google

Have something already set up?
Link your smart home services such as Philips Hue and TP-Link

Google will be able to:
Receive your public profile Control your devices over internet

Passo 7:
Account is now Linked
b.

Choose device
You will be able to control the devices and services in this home.

Smart-Home

Office

Smart Home

Create another home
Passo 11:
pie
| Metric | Value | |--------|-------| | Brightness | 81% |Comandi di Google:
Note: Programmable mode - The set temperature and time cannot be adjusted.
| Code | Function Default | Setting & Options | ||
| 1 | Temperature Compensation | -7 to 7°C | -1 | |
| 2 Fan Control | 00: When room temperature reaches the set point, the fan will turn off. | 01: When room temperature reaches the set point, the fan will turn to low speed | 0 | |
| 3 Locking Button | 00: All buttons are locked except power button. | 01: All buttons are locked. | 01 | |
| 4 Heat / Cool 00: Cool Only 01: Heat/Cold | 01 | |||
| 5 | Min Set Temperature | 5 to 15°C | 05 | |
| 6 | Max Set Temperature | 15 to 35°C | 35 | |
| 7 | 12/24 Hours | 00: 12 Hours | 01: 24 Hours | 01 |
| 8 | Display Mode | 00: Display both set temperature and room temperature | 01: Display set temperature only | 00 |
| 9 | Energy saving mode | 00: Non-energy saving mode | 01: Energy Saving mode, set temperature and keep economy temperature. | 00 |
| A | Heating economy temperature | 10 to 30°C | 20 | |
| B | Cooling economy temperature | 10 to 30°C | 26 | |
| C | Deadband temperature | 1 to 5°C | 1 | |
APP INSTALLATION

Fig 1
Βήμα 4:
Fig 2
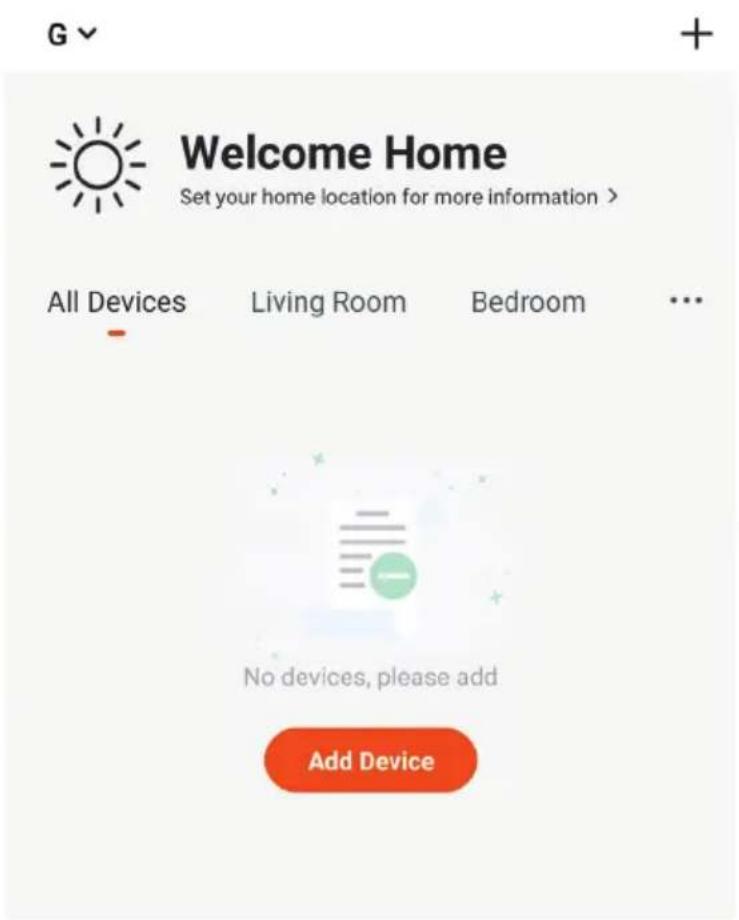
Fig 4
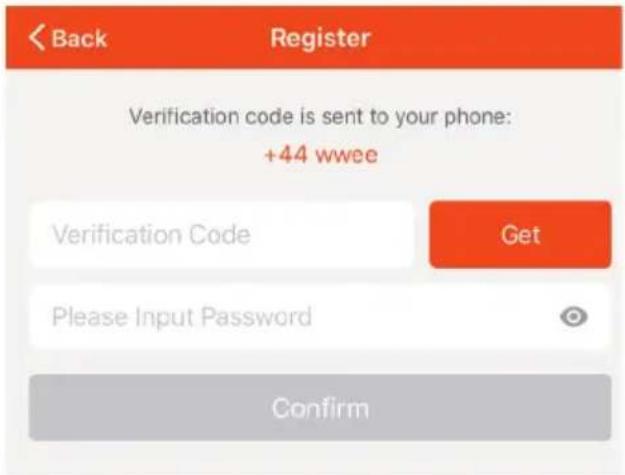
Fig 3
Fig 5
Fig 7
Connecting Now

pie
| Category | Value (%) | |---|---| | Start | 0 | | End | 3 |Make sure your phone and device are as close to your router as possible.
- Searching for Device
- Registering device to the cloud
- Initializing your Device
Fig 8
Account linking in progress
Phone Number/Email Address
Type your password here
Link Now
Forgot Password
Help
Alexa by Amazon will be able to:
Receive your public profile Control your devices over internet

skills-store.amazon.in

amazon alexa

V-TAC has been successfully linked.
What to do next:
→ Close this window to discover smart home devices you can control with Alexa.
Your content and devices all in one place

natural_image
Abstract geometric shapes including squares, circles, and triangles (no text or symbols)GET STARTED >
b. Choose account
This account will be used to personalize your experience
d. Plug in your device
Make sure your device is nearby and connected to power, then try again
c. Choose a home
You will be able to control the devices and services in this home.


Create another home
Set up new devices or add existing devices and services to your home
Google Home, smart displays and devices labelled 'Made for Google' such as C by GE smart bulbs
Works with Google

Have something already set up?

Link your smart home services such as Philips Hue and TP-Link

Google will be able to:
Receive your public profile Control your devices over internet

Βήμα 7:
Account is now Linked
b. ×
Choose device
You will be able to control the devices and services in this home.

Smart-Home

Office

Smart Home

Create another home
Smart-Home

Off

On

Add

Settings
Master bedroom
1 device

home light
Off
。

Local devices
1 device

Office Speaker
Βήμα 11:
pie
| Metric | Value | |--------|-------| | Brightness | 81% |Εντολές στο Google:
Note: Programmable mode - The set temperature and time cannot be adjusted.
| Code | Function Default | Setting & Options | ||
| 1 | Temperature Compensation | -7 to 7°C | -1 | |
| 2 Fan Control | 00: When room temperature reaches the set point, the fan will turn off. | 01: When room temperature reaches the set point, the fan will turn to low speed | 0 | |
| 3 Locking Button | 00: All buttons are locked except power button. | 01: All buttons are locked. | 01 | |
| 4 Heat / Cool 00: Cool Only 01: Heat/Cold | 01 | |||
| 5 | Min Set Temperature | 5 to 15°C | 05 | |
| 6 | Max Set Temperature | 15 to 35°C | 35 | |
| 7 12/24 Hours 00: 12 Hours 01: 24 Hours | 01 | |||
| 8 | Display Mode | 00: Display both set temperature and room temperature | 01: Display set temperature only | 00 |
| 9 | Energy saving mode | 00: Non-energy saving mode | 01: Energy Saving mode, set temperature and keep economy temperature. | 00 |
| A | Heating economy temperature | 10 to 30°C | 20 | |
| B | Cooling economy temperature | 10 to 30°C | 26 | |
| C | Deadband temperature | 1 to 5°C | 1 | |
APP INSTALLATION

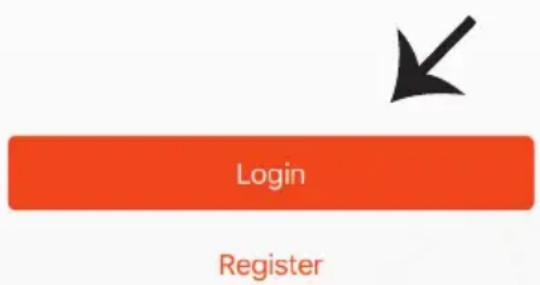
Fig 1
Krok 4:
Fig 2
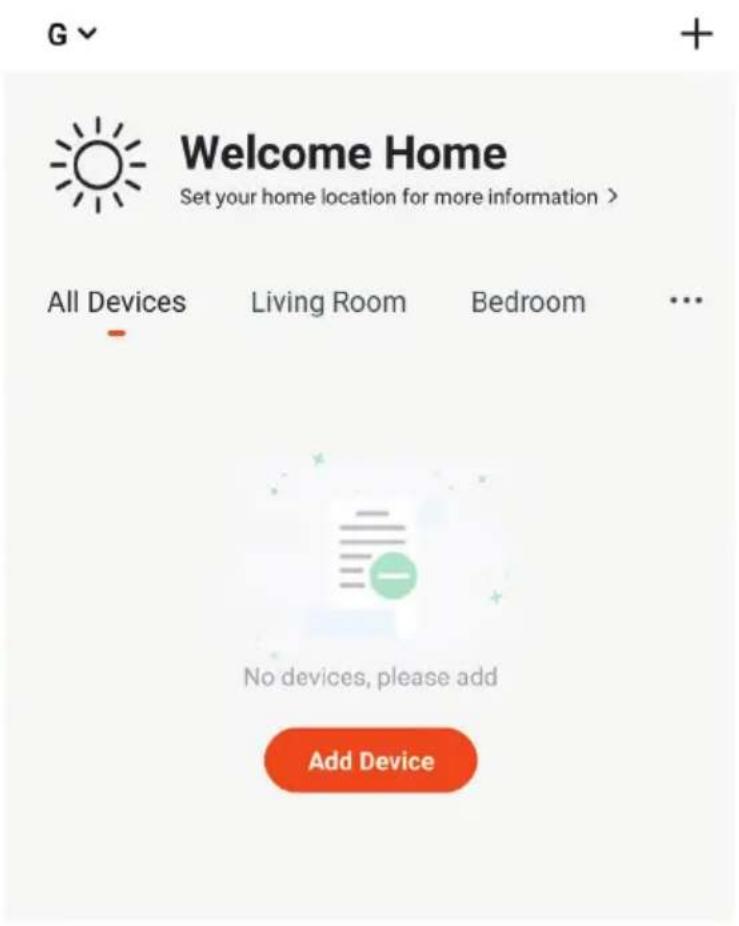
Fig 4
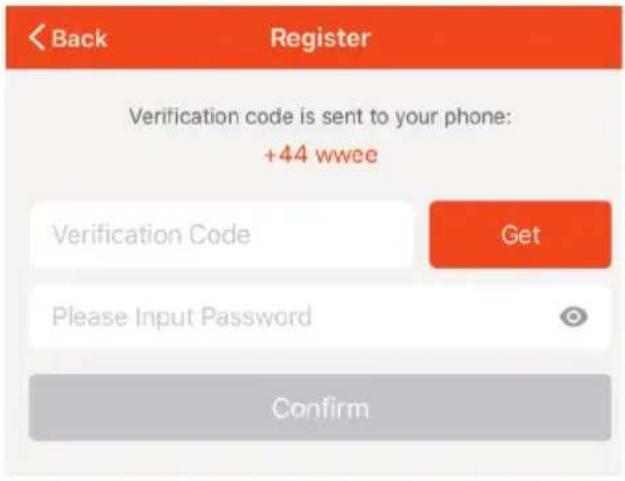
Fig 3
Fig 5
Fig 7
Connecting Now
pie
| Value | |---| | 3% |Make sure your phone and device are as close to your router as possible.
- Searching for Device
- Registering device to the cloud
- Initializing your Device
Fig 8
Account linking in progress
Phone Number/Email Address
Type your password here
Link Now
Forgot Password
Help
Alexa by Amazon will be able to:
Receive your public profile Control your devices over internet

Done

skills-store.amazon.in

amazon alexa

V-TAC has been successfully linked.
What to do next:
→ Close this window to discover smart home devices you can control with Alexa.
Your content and devices all in one place

natural_image
Abstract geometric shapes including squares, circles, and a crescent (no text or symbols)GET STARTED >
b. Choose account
This account will be used to personalize your experience
d. Plug in your device
Make sure your device is nearby and connected to power, then try again
c. Choose a home
You will be able to control the devices and services in this home.


Create another home
Office
1 device

Office Speaker
Pause
b.

Add to Home

Set up device

Add home member

Create speaker group

Create new home
Add services

Music and audio

Videos and photos
Set up new devices or add existing devices and services to your home
Google Home, smart displays and devices labelled 'Made for Google' such as C by GE smart bulbs
Works with Google

Have something already set up?

Link your smart home services such as Philips Hue and TP-Link

Google will be able to:
Receive your public profile Control your devices over internet

Krok 7:
Account is now Linked
b. ×
Choose device
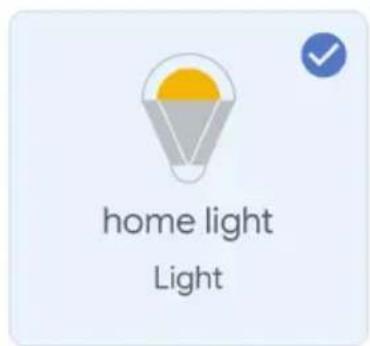
You will be able to control the devices and services in this home.

Smart-Home

Office

Smart Home

Create another home
pie
| Metric | Value | |--------|-------| | Brightness | 81% |Komendy Google:
Note: Programmable mode - The set temperature and time cannot be adjusted.
SETAREA FUNCTIILOR ŞI OPTIUNILOR
| Code | Function Default | Setting & Options | ||
| 1 | Temperature Compensation | -7 to 7°C | -1 | |
| 2 Fan Control | 00: When room temperature reaches the set point, the fan will turn off. | 01: When room temperature reaches the set point, the fan will turn to low speed | 0 | |
| 3 Locking Button | 00: All buttons are locked except power button. | 01: All buttons are locked. | 01 | |
| 4 Heat / Cool 00: Cool Only 01: Heat/Cold | 01 | |||
| 5 | Min Set Temperature | 5 to 15°C | 05 | |
| 6 | Max Set Temperature | 15 to 35°C | 35 | |
| 7 12/24 Hours 00: | 12 Hours 01: 24 Hours | 01 | ||
| 8 | Display Mode | 00: Display both set temperature and room temperature | 01: Display set temperature only | 00 |
| 9 | Energy saving mode | 00: Non-energy saving mode | 01: Energy Saving mode, set temperature and keep economy temperature. | 00 |
| A | Heating economy temperature | 10 to 30°C | 20 | |
| B | Cooling economy temperature | 10 to 30°C | 26 | |
| C | Deadband temperature | 1 to 5°C | 1 | |
APP INSTALLATION


Fig 1
Pasul 4:
Fig 2
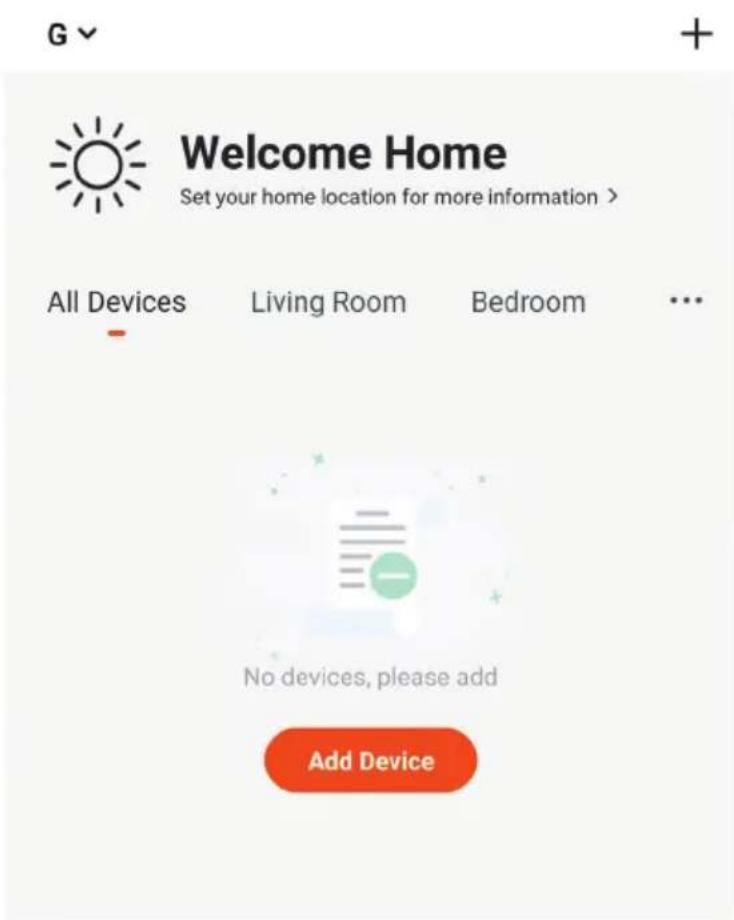
Fig 4
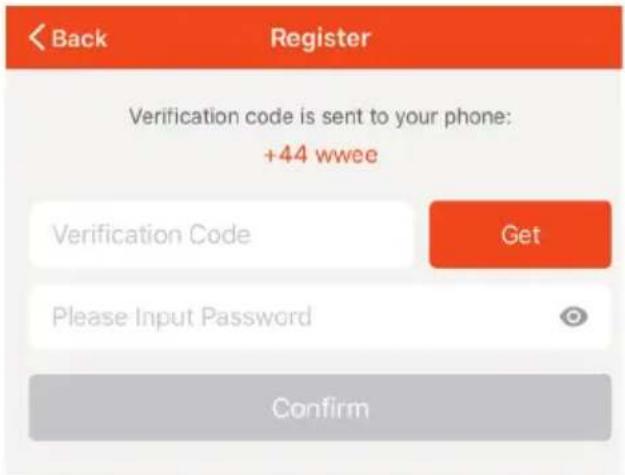
Fig 3
Fig 5
Fig 7
Connecting Now
pie
| Category | Value (%) | |---|---| | Start | 0 | | End | 3 |Make sure your phone and device are as close to your router as possible.
- Searching for Device
- Registering device to the cloud
- Initializing your Device
Fig 8
PROGRAMAREA TERMOSTATULUI
Account linking in progress
Phone Number/Email Address
Type your password here
Link Now
Forgot Password
Help
Alexa by Amazon will be able to:
Receive your public profile Control your devices over internet

Done

skills-store.amazon.in

amazon alexa

V-TAC has been successfully linked.
What to do next:
→ Close this window to discover smart home devices you can control with Alexa.
Your content and devices all in one place

natural_image
Abstract geometric shapes including a triangle, square, circle, and rectangle (no text or symbols)GET STARTED >
b. Choose account
This account will be used to personalize your experience
d. Plug in your device
Make sure your device is nearby and connected to power, then try again
c. Choose a home
You will be able to control the devices and services in this home.


Create another home
Set up new devices or add existing devices and services to your home
Google Home, smart displays and devices labelled 'Made for Google' such as C by GE smart bulbs
Works with Google

Have something already set up?

Link your smart home services such as Philips Hue and TP-Link

Google will be able to:
Receive your public profile Control your devices over internet

Pasul 8:
Account is now Linked
b. ×
Choose device
You will be able to control the devices and services in this home.

Smart-Home

Office

Smart Home

Create another home
Smart-Home

Off

On

Add

Settings
Master bedroom
1 device

home light
Off
。

Local devices
1 device

Office Speaker
Pasul 11:
Master bedroom
1 device

home light
Off · On

Local devices
1 device

Office Speaker

b.
home light
Master bedroom
pie
| Metric | Value | |--------|-------| | Brightness | 81% |Comenzile Google:
Note: Programmable mode - The set temperature and time cannot be adjusted.
| Code | Function Default | Setting & Options | ||
| 1 | Temperature Compensation | -7 to 7°C | -1 | |
| 2 Fan Control | 00: When room temperature reaches the set point, the fan will turn off. | 01: When room temperature reaches the set point, the fan will turn to low speed | 0 | |
| 3 Locking Button | 00: All buttons are locked except power button. | 01: All buttons are locked. | 01 | |
| 4 Heat / Cool 00: Cool Only 01: Heat/Cold | 01 | |||
| 5 | Min Set Temperature | 5 to 15°C | 05 | |
| 6 | Max Set Temperature | 15 to 35°C | 35 | |
| 7 12/24 Hours 00: | 12 Hours 01: 24 Hours | 01 | ||
| 8 | Display Mode | 00: Display both set temperature and room temperature | 01: Display set temperature only | 00 |
| 9 | Energy saving mode | 00: Non-energy saving mode | 01: Energy Saving mode, set temperature and keep economy temperature. | 00 |
| A | Heating economy temperature | 10 to 30°C | 20 | |
| B | Cooling economy temperature | 10 to 30°C | 26 | |
| C | Deadband temperature | 1 to 5°C | 1 | |
APP INSTALLATION

Fig 1
Krok 4:
Fig 2
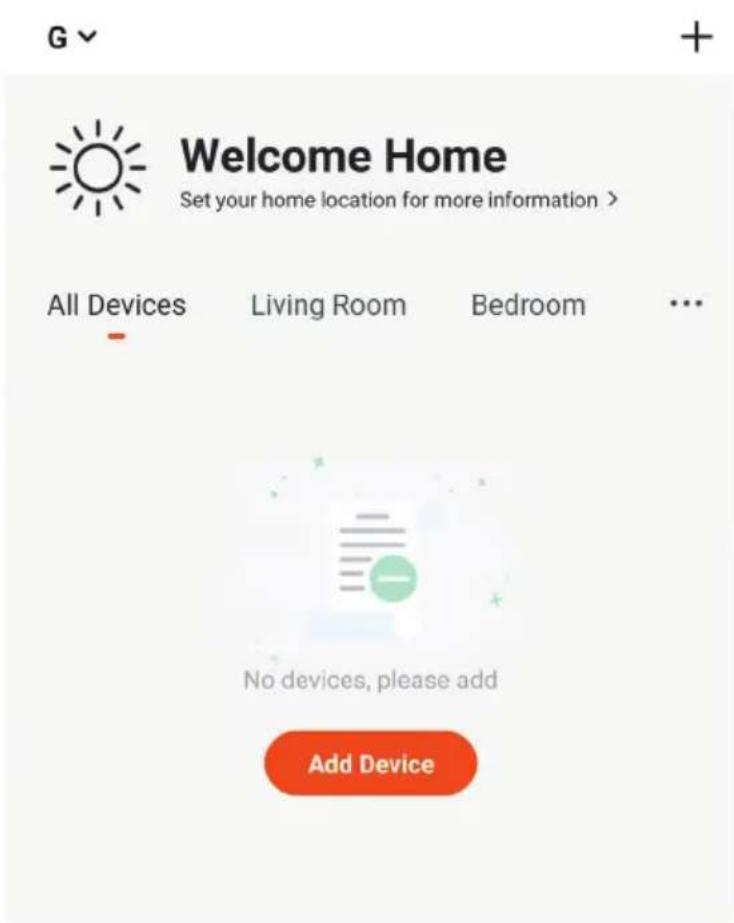
Fig 4
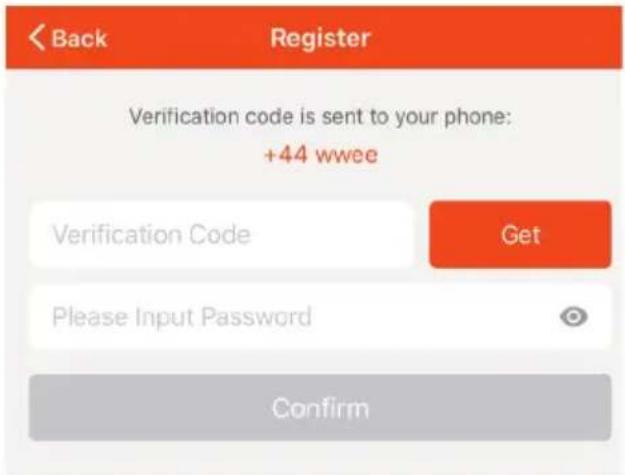
Fig 3
Fig 5
Fig 7
Connecting Now
pie
| Category | Value (%) | |---|---| | Start | 0 | | End | 3 |Make sure your phone and device are as close to your router as possible.
- Searching for Device
- Registering device to the cloud
- Initializing your Device
CREATE A NEW AMAZON ACCOUNT
Account linking in progress
Phone Number/Email Address
Type your password here
Link Now
Forgot Password
Help
Alexa by Amazon will be able to:
Receive your public profile Control your devices over internet

Done

skills-store.amazon.in

amazon alexa

V-TAC has been successfully linked.
What to do next:
→ Close this window to discover smart home devices you can control with Alexa.
POVELY APLIKACE ALEXA
a. Welcome home Your content and devices all in one place

natural_image
Abstract geometric shapes including a triangle, square, circle, and rectangle (no text or symbols)GET STARTED >
b. Choose account
This account will be used to personalize your experience
c. Choose a home
You will be able to control the devices and services in this home.

Create another home
d. Plug in your device
Make sure your device is nearby and connected to power, then try again

Set up new devices or add existing devices and services to your home
Google Home, smart displays and devices labelled 'Made for Google' such as C by GE smart bulbs
Works with Google

Have something already set up?
Link your smart home services such as Philips Hue and TP-Link

Google will be able to:
Receive your public profile Control your devices over internet

Krok 7:
Account is now Linked
b. ×
Choose device
You will be able to control the devices and services in this home.

Smart-Home

Office

Smart Home

Create another home
Smart-Home

Off

On

Add

Settings
Master bedroom
1 device

home light
Off
On

Local devices
1 device

Office Speaker
Krok 10:
Master bedroom
1 device

home light



Local devices
1 device

Office Speaker
b.


home light
Master bedroom
natural_image
Circular diagram with a power button and a small terminal, no text or symbols present81%
Brightness
Povely v Google:

- INSTALLATION INSTRUCTION
- FAN COIL THERMOSTATS SMART CONTROL
- INTRODUCTION
- Multi-Language Manual - QR CODE
- TECHNICAL DATA
- PACKAGE
- FUNCTION
- Warning!
- WIRING DIAGRAM
- INSTALLATION
- Note: Thermostat is suitable for installation within a standard 86m pattress box or European 60mm pattress box.
- OPERATION
- Power On/Off
- Manual & Programmable
- Temperature Settings
- Lock mode Settings
- Selecting the system mode
- Setting the Fan Speed
- Adjusting/Setting the Clock
- Adjusting temperature in Weekly Programmable
- FUNCTIONS & OPTIONS SETTINGS
- APP INSTALLATION
- Step 4:
- Step 8: Pairing Process
- EZ MODE:
- AP MODE:
- PROGRAMMING YOUR THERMOSTAT
- ALEXA SETTINGS
- ALEXA Commands
- THINGS TO REMEMBER BEFORE STARTING INSTALLATION:
- GOOGLE HOME SETTINGS
- Step1:
- a. Welcome home
- b. Choose account
- c. Choose a home
- d. Plug in your device
- Set up
- New devices
- Works with Google
- Step7
- Choose a home
- Smart-Home
- Master bedroom
- Step10:
- Google Commands:
- Étape 4:
- Connecting Now
- Étape 7:
- Étape 11:
- Commandes Google:
- Schritt 7:
- GOOGLE HOME-Befehle
- ЗАДАВАНЕ НА ФУНКЦИИТЕ И ОПЦИИТЕ
- АРР ИНСТАЛАЦИЯ
- Стъпка 4:
- Add services
- Стъпка 7:
- Команди на Google:
- FUNKCIJE I OPCIJE
- APP INSTALACIJA
- Korak 4:
- Korak 5:
- REŽIM EZ:
- Korak 8:
- Google Naredbe:
- CONFIGURANDO AS FUNÇÕES E OPÇÕES
- APP INSTALAÇÃO
- Passo 4:
- Passo 8:
- Comados do Google:
- CONFIGURAR LAS FUNCIONES Y OPCIONES
- APP INSTALACIÓN
- Paso 4:
- Paso 7:
- Paso 8:
- Paso 11:
- Comandos de Google:
- lépés:
- lépés:
- Google Parancsai:
- Passo 7:
- Passo 11:
- Comandi di Google:
- Βήμα 4:
- Βήμα 7:
- Βήμα 11:
- Εντολές στο Google:
- Krok 4:
- Krok 7:
- Komendy Google:
- SETAREA FUNCTIILOR ŞI OPTIUNILOR
- Pasul 4:
- PROGRAMAREA TERMOSTATULUI
- Pasul 8:
- Pasul 11:
- Comenzile Google:
- POVELY APLIKACE ALEXA
- Krok 10:
- Povely v Google:
Brand : V-TAC
Model : VT-5888
Category : Smart Home