CID 30/1 - Cooker CANDY - Free user manual and instructions
Find the device manual for free CID 30/1 CANDY in PDF.

| Brand | Candy |
| Model | CID 30/1 |
| Product type | Built-in induction hob |
| Number of cooking zones | 2 zones |
| Cooking zones | Front zone: ⌀ 160 mm (1300/1500 W max) Rear zone: ⌀ 180 mm (1800/2000 W max) |
| Boost function | Yes, on each zone |
| Timer | Yes, up to 99 minutes (alarm or automatic shut-off) |
| Control lock | Yes |
| Pause mode | Yes |
| Automatic shut-off | Yes, depending on power level (2 to 8 h) |
| Pan detection | Yes, with display if pan absent or unsuitable |
| Residual heat indicator | Yes ('H' display) |
| Supply voltage | 220-240 V ~ 50/60 Hz |
| Total installed power | 3500 W |
| Product dimensions (W×D×H) | 288 × 520 × 59 mm |
| Built-in dimensions (W×D) | 268 × 500 mm |
| Weight (estimated) | Approximately 5.5 kg |
| Cleaning and maintenance | Ceramic hob cleaner, scraper (retractable blade). Do not use steam cleaner or abrasive pads. |
| Spare parts and repairability | Contact a qualified technician or authorized after-sales service. Do not disassemble yourself. |
| Safety | Child lock, automatic shut-off, pan detection, residual heat indicator, mandatory grounding. |
Frequently Asked Questions - CID 30/1 CANDY
User questions about CID 30/1 CANDY
0 question about this device. Answer the ones you know or ask your own.
Ask a new question about this device
Download the instructions for your Cooker in PDF format for free! Find your manual CID 30/1 - CANDY and take your electronic device back in hand. On this page are published all the documents necessary for the use of your device. CID 30/1 by CANDY.
USER MANUAL CID 30/1 CANDY
natural_image
Black electrical stove burner with two circular ventricles and a digital display showing time and battery (no text or symbols on main body)CID 30/1


Thank you for purchasing the CANDY induction hob. Please read this instruction manual carefully before using the hob and keep it in a safe place for future reference.
CONTENTS
SAFETY INSTRUCTIONS 02
SPECIFICATIONS 07
PRODUCT OVERVIEW 08
OPERATION INSTRUCTIONS 10
QUICK START GUIDE 18
CLEANING AND MAINTENANCE 20
TROUBLESHOOTING 21
INSTALLATION 24
DISPOSAL AND RECYCLING 28
SAFETY INSTRUCTIONS
Intended Use
The following safety guidelines are intended to prevent unforeseen risks or damage from unsafe or incorrect operation of the appliance. Please check the packaging and appliance on arrival to make sure everything is intact to ensure safe operation. If you find any damage, please contact the retailer or dealer. Please note modifications or alterations to the appliance are not allowed for your safety concern. Unintended use may cause hazards and loss of warranty claims.
Explanation of Symbols
 | DangerThis symbol indicates that there are dangers to the life and health of persons due to extremely flammable gas. |
 | Warning of electrical voltageThis symbol indicates that there is a danger to life and health of persons due to voltage. |
 | WarningThe signal word indicates a hazard with a medium level of risk which, if not avoided, may result in death or serious injury. |
 | CautionThe signal word indicates a hazard with a low degree of risk which, if not avoided, may result in minor or moderate injury. |
 | AttentionThe signal word indicates important information (e.g. damage to property), but not danger. |
 | Observe instructionsThis symbol indicates that a service technician should only operate and maintain this appliance in accordance with the operating instructions. |
Read these operating instructions carefully and attentively before using/commissioning the unit and keep them in the immediate vicinity of the installation site or unit for later use!
SAFETY WARNINGS
Your safety is important to us. Please read this information before using your cooktop.
INSTALLATION
Electrical Shock Hazard
- Disconnect the appliance from the mains electricity supply before carrying out any work or maintenance on it.
- Connection to a good earth wiring system is essential and mandatory.
- Alterations to the domestic wiring system must only be made by a qualified electrician.
- Failure to follow this advice may result in electrical shock or death.
Cut Hazard
• Take care - panel edges are sharp.
- Failure to use caution could result in injury or cuts.
Important Safety Instructions
- Read these instructions carefully before installing or using this appliance.
- No combustible material or products should be placed on this appliance at any time.
- Please make this information available to the person responsible for installing the appliance as it could reduce your installation costs.
- In order to avoid a hazard, this appliance must be installed according to these instructions for installation.
- This appliance is to be properly installed and earthed only by a suitably qualified person.
- This appliance should be connected to a circuit which incorporates an isolating switch providing full disconnection from the power supply.
- Failure to install the appliance correctly could invalidate any warranty or liability claims.
- This appliance can be used by children aged from 8 years and above and persons with reduced physical, sensory or mental capabilities or lack of experience and knowledge if they have been given supervision or instruction concerning use of the appliance in a safe way and understand the hazards involved.
-
Children shall not play with the appliance. Cleaning and user maintenance shall not be made by children without supervision.
-
If the supply cord is damaged, it must be replaced by the manufacturer, its service agent or similarly qualified persons in order to avoid a hazard.
- WARNING: If the surface is cracked, switch off the appliance to avoid the possibility of electric shock, for hob surfaces of glass-ceramic or similar material which protect live parts
- Metallic objects such as knives, forks, spoons and lids should not be placed on the hob surface since they can get hot
- A steam cleaner is not to be used.
- Do not use a steam cleaner to clean your cooktop.
- The appliance is not intended to be operated by means of an external timer or separate remote-control system.
- WARNING: Danger of fire: do not store items on the cooking surfaces.
- The cooking process has to be supervised. A short term cooking process has to be supervised continuously.
- WARNING: Unattended cooking on a hob with fat or oil can be dangerous and may result in fire. NEVER try to extinguish a fire with water, but switch off the appliance and then cover flame e.g. with a lid or a fire blanket.
Electrical Shock Hazard
- Do not cook on a broken or cracked cooktop. If the cooktop surface should break or crack, switch the appliance off immediately at the mains power supply (wall switch) and contact a qualified technician.
- Switch the cooktop off at the wall before cleaning or maintenance.
- Failure to follow this advice may result in electrical shock or death.
Health Hazard
- This appliance complies with electromagnetic safety standards.
- However, persons with cardiac pacemakers or other electrical implants (such as insulin pumps) must consult with their doctor or implant manufacturer before using this appliance to make sure that their implants will not be affected by the electromagnetic field.
- Failure to follow this advice may result in death.
Hot Surface Hazard
- During use, accessible parts of this appliance will become hot enough to cause burns.
-
Do not let your body, clothing or any item other than suitable cookware contact the Induction glass until the surface is cool.
-
Keep children away.
- Handles of saucepans may be hot to touch. Check saucepan handles do not overhang other cooking zones that are on.
- Keep handles out of reach of children.
- Failure to follow this advice could result in burns and scalds.
Cut Hazard
- The razor-sharp blade of a cooktop scraper is exposed when the safety cover is retracted. Use with extreme care and always store safely and out of reach of children.
- Failure to use caution could result in injury or cuts.
Important safety instructions
- Never leave the appliance unattended when in use. Boilover causes smoking and greasy spillovers that may ignite.
- Never use your appliance as a work or storage surface.
- Never leave any objects or utensils on the appliance.
- Do not place or leave any magnetisable objects (e.g. credit cards, memory cards) or electronic devices (e.g. computers, MP3 players) near the appliance, as they may be affected by its electromagnetic field.
- Never use your appliance for warming or heating the room.
• After use, always turn off the cooking zones and the cooktop as described in this manual (i.e. by using the touch controls). Do not rely on the pan detection feature to turn off the cooking zones when you remove the pans. - Do not allow children to play with the appliance or sit, stand, or climb on it.
- Do not store items of interest to children in cabinets above the appliance. Children climbing on the cooktop could be seriously injured.
- Do not leave children alone or unattended in the area where the appliance is in use.
- Children or persons with a disability which limits their ability to use the appliance should have a responsible and competent person to instruct them in its use. The instructor should be satisfied that they can use the appliance without danger to themselves or their surroundings.
- Do not repair or replace any part of the appliance unless specifically recommended in the manual. All other servicing should be done by a qualified technician.
- Do not place or drop heavy objects on your cooktop.
- Do not stand on your cooktop.
-
Do not use pans with jagged edges or drag pans across the Induction glass surface as this can scratch the glass.
-
Do not use scourers or any other harsh abrasive cleaning agents to clean your cooktop, as these can scratch the Induction glass.
-
This appliance is intended to be used in household and similar applications such as:
-
Staff kitchen areas in shops, offices and other working environments;
- Farm houses;
- By clients in hotels, motels and other residential type environments;
-
Bed and breakfast type environments.
-
WARNING: The appliance and its accessible parts become hot during use.
- Care should be taken to avoid touching heating elements.
- Children less than 8 years of age shall be kept away unless continuously supervised.
Congratulations on the purchase of your new Ceramic Hob.
We recommend that you spend some time to read this Instruction / Installation Manual in order to fully understand how to install correctly and operate it. For installation, please read the installation section.
Read all the safety instructions carefully before use and keep this Instruction / Installation Manual for future reference.
SPECIFICATIONS
| CID 30/1Cooking Hob | |
| Cooking Zones | 2 Zones |
| Supply Voltage | 220-240V~ 50Hz or 60Hz |
| Installed Electric Power | 3500W |
| Product Size L×W×H(mm) | 288×520×59 |
| Building-in Dimensions A×B (mm) | 268×500 |
Weight and Dimensions are approximate. Because we continually strive to improve our products we may change specifications and designs without prior notice.
| ValueSymbol Unit | |||
| Model identification | - | CID 30/1 | |
| Type of hob Built-in hob- | |||
| Number of cooking zones and/or areas | - | 2 zones | |
| Heating technology (induction cooking zones and cooking areas, radiant cooking zones, solid plates) | - | Induction cooking zones | |
| For circular cooking zones or area: diameter of useful surface area per electric heated cooking zone, rounded to the nearest 5 mm | ∅ | Zone1: 16,0Zone2: 18,0 | cm |
| For non-circular cooking zones or areas: length and width of useful surface area per electric heated cooking zone or area, rounded to the nearest 5 mm | N/A | cmL,W | |
| Energy consumption per cooking zone or area calculated per kg | EC_electric cooking | Zone1: 194,4Zone2: 183,7 | Wh/kg |
| Energy consumption for the hob calculated per kg | EC_electric hob | 189,1 | Wh/kg |
Data determined according to standard EN 60350-2 and Commission Regulations (EU) No 66/2014.
PRODUCT OVERVIEW
Top View
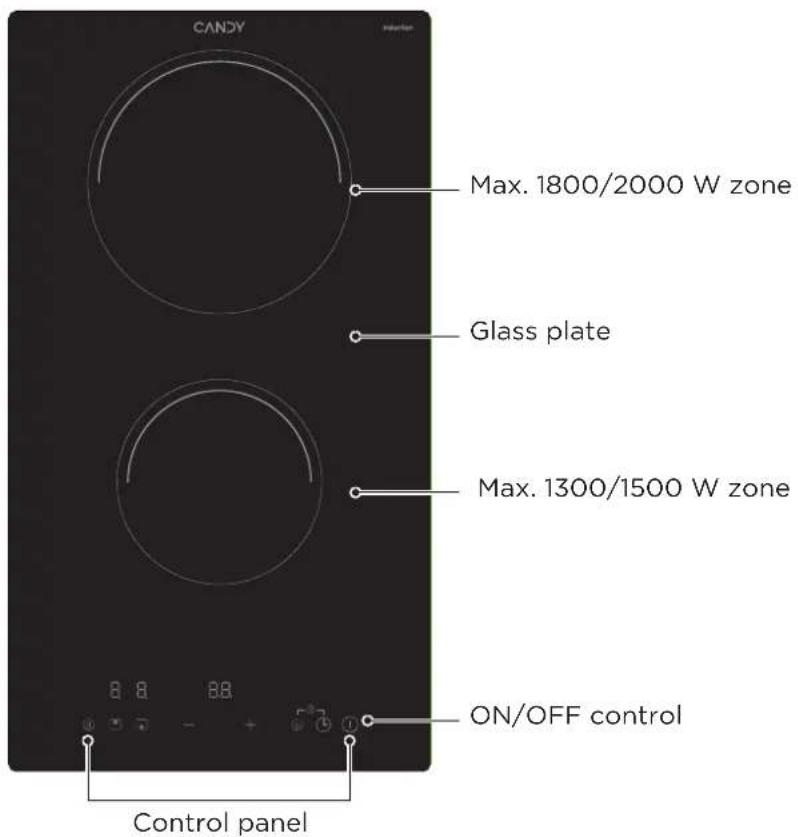
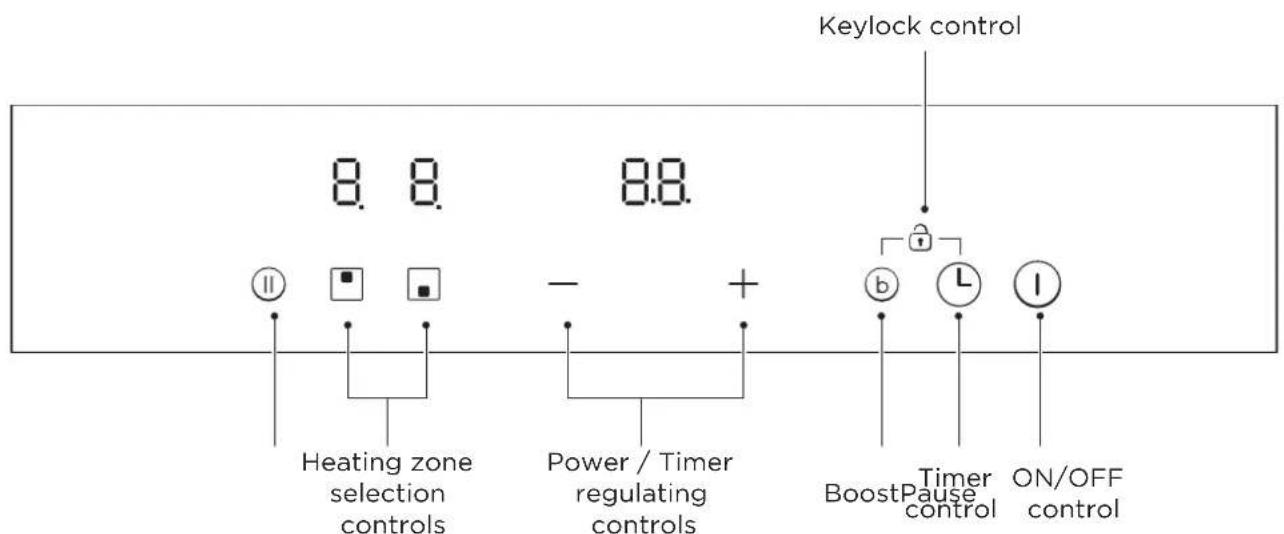
Control Panel

NOTE
All the pictures in this manual are for explanation purpose only. Any discrepancy between the real object and the illustration in the drawing shall be subject to the real subject.
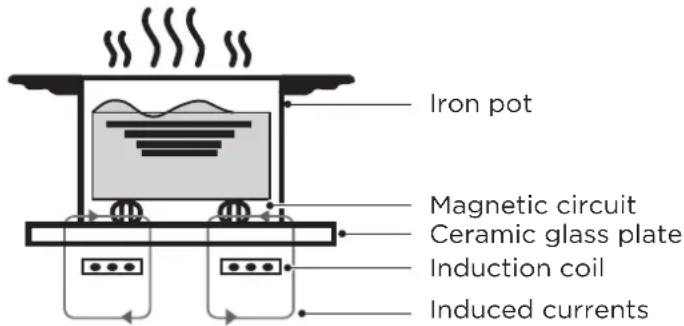
Working Theory
Induction cooking is a safe, advanced, efficient, and economical cooking technology. It works by electromagnetic vibrations generating heat directly in the pan, rather than indirectly through heating the glass surface. The glass becomes hot only because the pan eventually warms it up.
Before Using Your New Induction Hob
- Read this guide, taking special note of the 'Safety Warnings' section.
- Remove any protective film that may still be on your ceramic hob.
OPERATION INSTRUCTIONS
Touch Controls
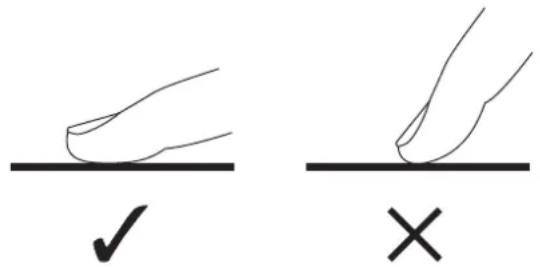
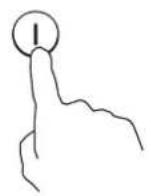
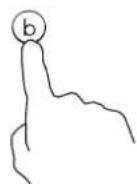
- The controls respond to touch, so you don't need to apply any pressure.
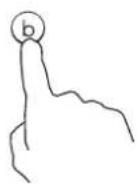
- Use the ball of your finger, not its tip.
- You will hear a beep each time a touch is registered.
- Make sure the controls are always clean, dry, and that there is no object (e.g. a utensil or a cloth) covering them. Even a thin film of water may make the controls difficult to operate.
Choosing the Right Cookware

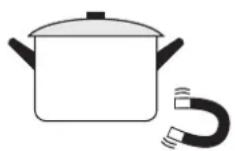
- Only use cookware with a base suitable for induction cooking. Look for the induction symbol on the packaging or on the bottom of the pan.
- You can check whether your cookware is suitable by carrying out a magnet test.
Move a magnet towards the base of the pan.
If it is attracted, the pan is suitable for induction.
- If you do not have a magnet:
- Put some water in the pan you want to check.
-
If does not flash in the display and the water is heating, the pan is suitable.
-
Cookware made from the following materials is not suitable: pure s tainless steel, aluminum or copper without a magnetic base, glass, wood, porcelain, ceramic, and earthenware.
- Some pots and pans on the market are not suitable for induction cooking, Because they have only a part of the bottom in ferromagnetic material with parts in another material. These areas may heat up at different levels or with lower power. In certain cases, where the bottom is made mainly of non-ferromagnetic materials, the hob might not recognise the pan and therefore not switch on the cooking zone.
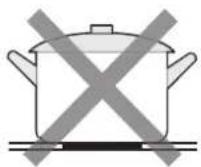
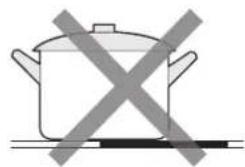
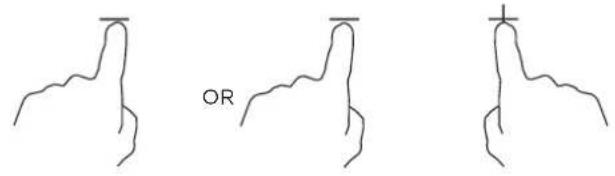
- Do not use cookware with jagged edges or a curved base.
natural_image
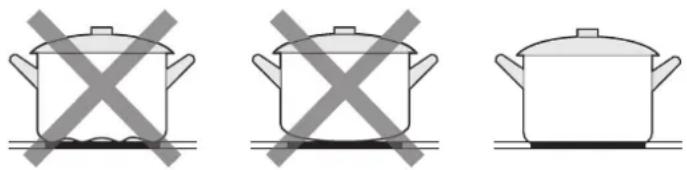
Three identical cooking pots with crossed x marks, no text or symbols present- Make sure that the base of your pan is smooth, sits flat against the glass, and is the same size as the cooking zone. Use pans whose diameter is as large as the graphic of the zone selected. Using a pot a slightly wider energy will be used at its maximum efficiency. If you use smaller pot efficiency could be less than expected. Always centre your pan on the cooking zone.

natural_image
Simple line drawing of a cooking pot with crossed-out triangular symbol (no text or labels)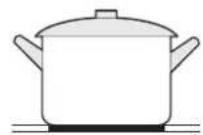
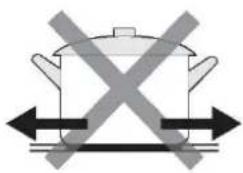
• Always lift pans off the ceramic hob - do not slide, or they may scratch the glass.
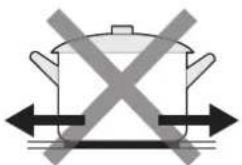
natural_image
Simple line drawing of a cooking pot with crossed arrows indicating pressure or direction (no text or symbols)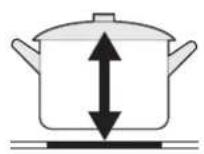
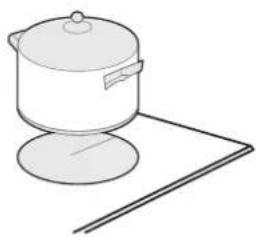
- The cooking zones are, up to a limit, automatically adapted to the diameter of the pan. However the bottom of this pan must have a minimum of diameter according to the corresponding cooking zone. To obtain the best efficiency of your hob, please place the pan in the centre of the cooking zone.
| Cooking zone | The base diameter of induction cookware | |
| Minimum (mm) | Minimum (mm) | |
| 160mm 120 | 160 | |
| 180mm 140 | 180 | |
How to Use
1. Start Cooking
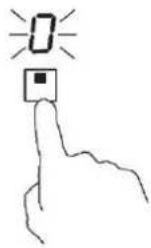
- Touch the ON/OFF control for one second. After power on, the buzzer beeps once, all displays show "-" or "-" , indicating that the induction hob has entered the state of standby mode.
- Touching the heating zone selection control, and the indicator next to the key will flash.
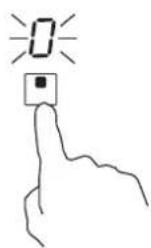
- Place a suitable pan on the cooking zone that you wish to use.
• Make sure the bottom of the pan and the surface of the cooking zone are clean and dry.
natural_image
Simple line drawing of a cooking pot on a stand (no text or symbols)- Select a heat setting by touching the “-” or “+” control.
- If you don't choose a heat setting within 1 minute, the Induction hob will automatically switch off. You will need to start again at step 1.
- You can modify the heat setting at any time during cooking.
If the display flashes ≥ ≤ alternately with the heat setting
This means that:
- You have not placed a pan on the correct cooking zone or,
- The pan you're using is not suitable for induction cooking or,
- The pan is too small or not properly centered on the cooking zone.
No heating takes place unless there is a suitable pan on the cooking zone.
The display will automatically turn off after 2 minutes if no suitable pan is placed on it.
2. Finish Cooking
- Touching the heating zone selection control that you wish to switch off.
- Turn the whole cooktop off by touching the ON/OFF control.

- Turn the cooking zone off by scrolling down to "O" or touching "-" and "+" control together. Make sure the display shows "O".
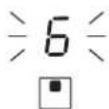
- Beware of hot surfaces H will show which cooking zone is hot to touch. It will disappear when the surface has cooled down to a safe temperature. It can also be used as an energy saving function if you want to heat further pans, use the hotplate that is still hot.

3. Locking the Controls
- You can lock the controls to prevent unintended use (for example children accidentally turning the cooking zones on).
- When the controls are locked, all the controls except the ON/OFF control are disabled.
| To lock the controls | |
| Touch the lock control | The timer indicator will show “Lo” |
| To unlock the controls | |
| Touch and hold the lock control for a while. | |
When the hob is in the lock mode, all the controls are disable except the ON/OFF ①, you can always turn the induction hob off with the ON/OFF ①control in an emergency, but you shall unlock the hob first in the next operation.
4. Timer Controls
You can use the timer in two different ways:
- You can use it as a minute minder. In this case, the timer will not turn any cooking zone off when the set time is up.
- You can set it to turn one or more cooking zones off after the set time is up. The timer of maximum is 99 min.
Using the Timer as a Minute Minder
If you are not selecting any cooking zone
- Make sure the cooktop is turned on.
Note: you can use the minute minder at least one zone shall be active.
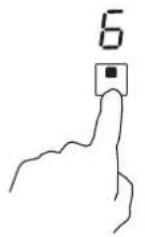
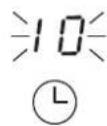
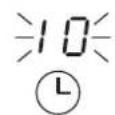
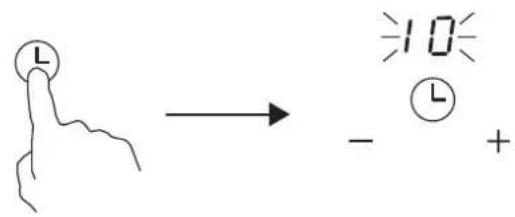
- Touch the controls of the timer. The minder indicator will start flashing and "10" will show in the timer display.
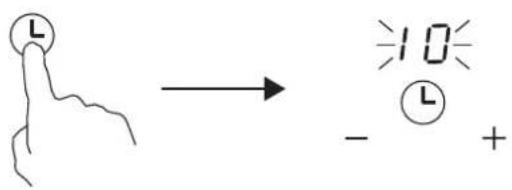
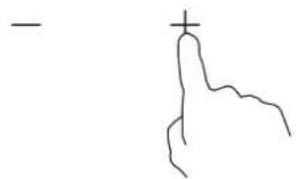
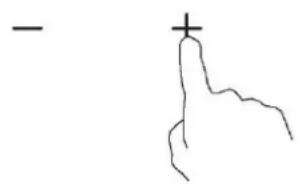
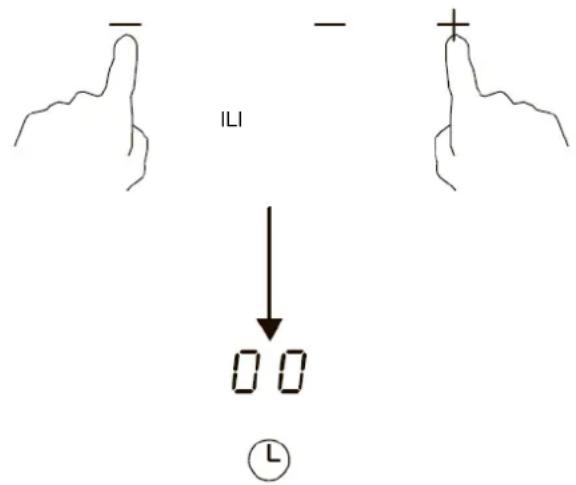
- Set the time by touching the “-” or “+” control of the timer
Hint: Touch the “-” or “+” control of the timer to decrease or increase by 1 minute once. Touch and hold the “-” or “+” control of the timer to decrease or increase by 10 minutes.
natural_image
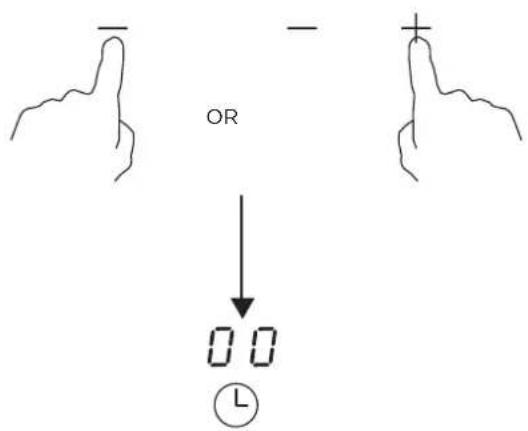
Simple line drawing of a hand holding a plant with a cross mark (no text or symbols)- Touching the “-” and “+” together, the timer is cancelled, and the “00” will show in the minute display.

- When the time is set, it will begin to count down immediately. The display will show the remaining time and the timer indicator will flash for 5 seconds.
If you touch the timer control during the timer indicator flashing, it will stop flashing immediately.
- Buzzer will beep for 30 seconds and the timer indicator shows “- -” when the setting time finished.

Setting the Timer to Turn One or More Cooking Zones Off Set one zone
- Touching the heating zone selection control that you want to set the timer for.
- Set the time by touching the “-” or “+” control of the timer.
Hint: Touch the “-” or “+” control of the timer once will decrease or increase by 1 minute.
Touch and hold the “-” or “+” control of the timer will decrease or increase by 10 minutes.
- When the time is set, it will begin to count down immediately. The display will show the remaining time and the timer indicator flash for 5 seconds.
If you touch the timer control during the timer indicator flashing, it will stop flashing immediately.
NOTE
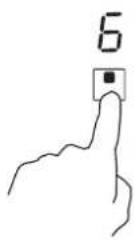
The red dot next to power level indicator will illuminate indicating that zone is selected.
- Touch timer control, the minder indicator will start flashing and "10" will show in the timer display.
- Touching the “-” and “+” together, the timer is cancelled, and the “00” will show in the minute display.
- When cooking timer expires, the corresponding cooking zone will be switch off automatically.


Other cooking zone will keep operating if they are turned on previously.
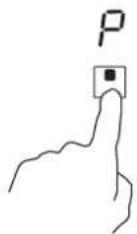
5. Using the Boost Function
Activate the boost function
- Touching the heating zone control.

- Touching the Boost control. Make sure the display shows "p".
Cancel the Boost function
-
Touching the heating zone control that you wish to cancel the boost function.
-
Turn the cooking zone off by touching the Boost control. Make sure the display shows "O".
• The function can work in any cooking zone.
- The cooking zone returns to its original setting after 5 minutes.
- If the original heat setting equals 0, it will return to 9 after 5 minutes.
6. Pause Mode
- You can pause the heating instead of shutting the hob off.
- When entering the Pause mode, all the controls except the ON/OFF control are disabled.
To enter pause mode
Touching the key of "Pause".
All the indicator will show "||".
To exit pause mode
Touching the key of "Pause" again.

When the hob is in the pause mode, all the controls are disable except the ON/OFF ①, you can always turn the induction hob off with the ON/OFF ① control in an emergency. The hob will shut down after 10min if you don't exit the pause mode.
7. Default Working Times
Auto shut down is a safety protection function for your induction hob. It shut down automatically if ever you forget to turn off your cooking. The default working times for various power levels are shown in the below table:
| Power level 1 | 2 | 3 | 4 | 5 | 6 | 7 | 8 | 9 | |
| Default working timer (hour) | 8 | 8 | 8 | 4 | 4 | 4 | 2 | 2 | 2 |
When the pot is removed, the induction hob can stop heating immediately and the hob automatically switch off after 2 minutes.

People with a heart pace maker should consult with their doctor before using this unit.
QUICK START GUIDE
Take care when frying as the oil and fat heat up very quickly, particularly if you're using PowerBoost. At extremely high temperatures oil and fat will ignite spontaneously and this presents a serious fire risk.
Cooking Tips
- When food comes to the boil, reduce the temperature setting.
- Using a lid will reduce cooking times and save energy by retaining the heat.
- Minimize the amount of liquid or fat to reduce cooking times.
- Start cooking on a high setting and reduce the setting when the food has heated through.
Simmering, Cooking rice
- Simmering occurs below boiling point, at around 85^ , when bubbles are just rising occasionally to the surface of the cooking liquid. It is the key to delicious soups and tender stews because the flavours develop without overcooking the food. You should also cook egg-based and flour thickened sauces below boiling point.
- Some tasks, including cooking rice by the absorption method, may require a setting higher than the lowest setting to ensure the food is cooked properly in the time recommended.
Searing Steak
To cook juicy flavorsome steaks:
- Stand the meat at room temperature for about 20 minutes before cooking.
- Heat up a heavy-based frying pan.
- Brush both sides of the steak with oil. Drizzle a small amount of oil into the hot pan and then lower the meat onto the hot pan.
- Turn the steak only once during cooking. The exact cooking time will depend on the thickness of the steak and how cooked you want it. Times may vary from about 2 - 8 minutes per side. Press the steak to gauge how cooked it is - the firmer it feels the more 'well done' it will be.
- Leave the steak to rest on a warm plate for a few minutes to allow it to relax and become tender before serving.
For Stir-frying
- Choose an ceramic compatible flat-based wok or a large frying pan.
- Have all the ingredients and equipment ready. Stir-frying should be quick. If cooking large quantities, cook the food in several smaller batches.
- Preheat the pan briefly and add two tablespoons of oil.
- Cook any meat first, put it aside and keep warm.
- Stir-fry the vegetables. When they are hot but still crisp, turn the cooking zone to a lower setting, return the meat to the pan and add your sauce.
- Stir the ingredients gently to make sure they are heated through.
- Serve immediately.
Detection of Small Articles
- When an unsuitable size or non-magnetic pan (e.g. aluminium), or some other small item (e.g. knife, fork, key) has been left on the hob, the hob automatically go on to standby in 1 minute. The fan will keep cooking down the induction hob for a further 1 minute.
Heat Settings
The settings below are guidelines only. The exact setting will depend on several factors, including your cookware and the amount you are cooking. Experiment with the induction hob to find the settings that best suit you.
| Heat setting Suitability | |
| 1 - 2 | ·delicate warming for small amounts of food·melting chocolate, butter, and foods that burn quickly·gentle simmering·slow warming |
| 3 - 4 | ·reheating·rapid simmering·cooking rice |
| 5 - 6 · pancakes | |
| 7 - 8 | ·sautéing·cooking pasta |
| 9 | ·stir-frying·searing·bringing soup to the boil·boiling water |
CLEANING AND MAINTENANCE
| What?How?Important! | ||
| Everyday soiling on glass (fingerprints, marks, stains left by food or non-sugary spillovers on the glass) | 1. Switch the power to the cooktop off.2. Apply a cooktop cleaner while the glass is still warm (but not hot!)3. Rinse and wipe dry with a clean cloth or paper towel.4. Switch the power to the cooktop back on. | ·When the power to the cooktop is switched off, there will be no 'hot surface' indication but the cooking zone may still be hot! Take extreme care.·Heavy-duty scourers, some nylon scourers and harsh/abrasive cleaning agents may scratch the glass. Always read the label to check if your cleaner or scourer is suitable.·Never leave cleaning residue on the cooktop: the glass may become stained. |
| Boilovers, melts, and hot sugary spills on the glass | Remove these immediately with a fish slice, palette knife or razor blade scraper suitable for Ceramic glass cooktops, but beware of hot cooking zone surfaces:1. Switch the power to the cooktop off at the wall.2. Hold the blade or utensil at a 30° angle and scrape the soiling or spill to a cool area of the cooktop.3. Clean the soiling or spill up with a dish cloth or paper towel.4. Follow steps 2 to 4 for 'Everyday soiling on glass' above. | ·Remove stains left by melts and sugary food or spillovers as soon as possible. If left to cool on the glass, they may be difficult to remove or even permanently damage the glass surface.·Cut hazard: when the safety cover is retracted, the blade in a scraper is razor-sharp. Use with extreme care and always store safely and out of reach of children. |
| Spillovers on the touch controls | 1. Switch the power to the cooktop off.2. Soak up the spill3. Wipe the touch control area with a clean damp sponge or cloth.4. Wipe the area completely dry with a paper towel.5. Switch the power to the cooktop back on. | ·The cooktop may beep and turn itself off, and the touch controls may not function while there is liquid on them. Make sure you wipe the touch control area dry before turning the cooktop back on. |
TROUBLESHOOTING
Operation of your appliance can lead to errors and malfunctions. The following tables contain possible causes and notes for resolving an error message or malfunction. It is recommended to read the tables carefully below in order to save your time and money that may cost for calling to the service center.
| Problem Possible causes What to do | ||
| The cooktop cannot Be turned on. | No power. | Make sure the ceramic hob is connected to the power supply and that it is switched on.Check whether there is a power outage in your home or area. If you've checked everything and the problem persists, call a qualified technician. |
| The touch controls are unresponsive. | The controls are locked. | Unlock the controls. See section 'Using your ceramic cooktop' for instructions. |
| The touch controls are difficult to operate. | There may be a slight film of water over the controls or you may be using the tip of your finger when touching the controls. | Make sure the touch control area is dry and use the ball of your finger when touching the controls. |
| The glass is being scratched. | Rough-edged cookware.Unsuitable, abrasive scourer or cleaning products being used. | Use cookware with flat and smooth bases. See 'Choosing the right cookware'.See 'Care and cleaning'. |
| Some pans make crackling or clicking noises. | This may be caused by the construction of your cookware (layers of different metals vibrating differently). | This is normal for cookware and does not indicate a fault. |
| The induction hob makes a low humming noise when used on a high heat setting. | This is caused by the technology of induction cooking. | This is normal, but the noise should quieten down or disappear completely when you decrease the heat setting. |
| Fan noise coming from the induction hob. | A cooling fan built into your induction hob has come on to prevent the electronics from overheating. It may continue to run even after you've turned the induction hob off. | This is normal and needs no action. Do not switch the power to the induction hob off at the wall while the fan is running. |
| Pans do not become hot and appears in the display. | The induction hob cannot detect the pan because it is not suitable for induction cooking.The induction hob cannot detect the pan because it is too small for the cooking zone or not properly centred on it. | Use cookware suitable for induction cooking.See section 'Choosing the right cookware'.Centre the pan and make sure that its base matches the size of the cooking zone. |
| The induction hob or a cooking zone has turned itself off unexpectedly, a tone sounds and an error code is displayed (typically alternating with one or two digits in the cooking timer display). | Technical fault. | Please note down the error letters and numbers, switch the power to the induction hob off at the wall, and contact a qualified technician. |
Failure Display and Inspection
The induction hob is equipped with a self diagnostic function. With this test the technician is able to check the function of several components without disassembling or dismounting the hob from the working surface.
- Failure code occur during customer using & Solution;
| Failure code | Problem Solution | |
| No Auto-Recovery | ||
| E1 | Ceramic plate temperature sensor failure--open circuit. | Check the connection or replace the ceramic plate temperature sensor. |
| E2 | Ceramic plate temperature sensor failure--short circuit. | |
| E7 | Ceramic plate temperature sensor failure | |
| C1 | High temperature of ceramic plate sensor. | Wait for the temperature of ceramic plate return to normal.Touch “ON/OFF” button to restart unit. |
| E3 | Temperature sensor of the IGBT failure --open circuit. | Replace the power board. |
| E4 | Temperature sensor of the IGBT failure --short circuit | |
| C2 | High temperature of IGBT. | Wait for the temperature of IGBT return to normal.Touch “ON/OFF” button to restart unit.Check whether the fan runs smoothly;if not , replace the fan. |
| EL | Supply voltage is below the rated voltage. | Please inspect whether power supply is normal.Power on after the power supply is normal. |
| EH | Supply voltage is above the rated voltage. | |
| EU | Communication error. | Reinsert the connection between the display board and the power board.Replace the power board or the display board. |
- Specific Failure & Solution
| Failure Problem Solution A Solution B | |||
| The LED does not come on when unit is plugged in. | No power supplied. | Check to see if plug is secured tightly in outlet and that outlet is working. | |
| The accessorial power board and the display board connected failure. | Check the connection. | ||
| The accessorial power board is damaged. | Replace the accessorial power board. | ||
| The display board is damaged. | Replace the display board. | ||
| Some buttons can't work, or the LED display is not normal. | The display board is damaged. | Replace the display board. | |
| The Cooking Mode Indicator comes on, but heating does not start. | High temperature of the hob. | Ambient temperature may be too high. Air Intake or Air Vent may be blocked. | |
| There is something wrong with the fan. | Check whether the fan runs smoothly; if not , replace the fan. | ||
| The power board is damaged. | Replace the power board. | ||
| Heating stops suddenly during operation and the display flashes “u”. | Pan Type is wrong. | Use the proper pot (refer to the instruction manual.) | Pan detection circuit is damaged, replace the power board. |
| Pot diameter is too small. | |||
| Cooker has overheated; | Unit is overheated. Wait for temperature to return to normal.Push “ON/OFF” button to restart unit. | ||
| Heating zones of the same side ( Such as the first and the second zone ) would display “u”. | The power board and the display board connected failure; | Check the connection. | |
| The display board of communicate part is damaged. | Replace the display board. | ||
| The Main board is damaged. | Replace the power board. | ||
| Fan motor sounds abnormal. | The fan motor is damaged. | Replace the fan. | |
The above are the judgment and inspection of common failures.
Please do not disassemble the unit by yourself to avoid any dangers and damages to the induction hob.
INSTALLATION
Selection of installation equipment
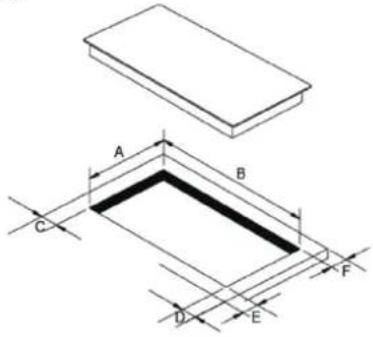
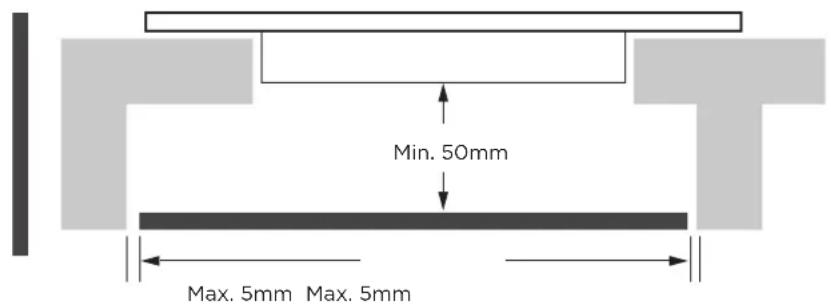
Cut out the work surface according to the sizes shown in the drawing.
For the purpose of installation and use, a minimum of 50mm space shall be preserved around the hole. Be sure the thickness of the work surface is at least 30mm. Please select heat-resistant and insulated work surface material (Wood and similar fibrous or hygroscopic material shall not be used as work surface material unless impregnated) to avoid the electrical shock and larger deformation caused by the heat radiation from the hotplate. As shown below:

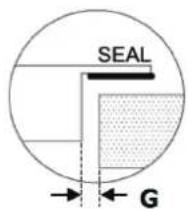
Note: The safety distance between the sides of the hob and the inner surfaces of the worktop should be at least 3mm.
Min.3mm
| A(mm) | B(mm) | C(mm) | D(mm) | E(mm) | F(mm) | G |
| 268+4-0 | 500+4-0 | 50 min. | 50 min. | 50 min. | 50 min. | 3mm min. |
Under any circumstances, make sure the Induction cooker hob is well ventilated and the air inlet and outlet are not blocked. Ensure the Induction cooker hob is in good work state. As shown below.

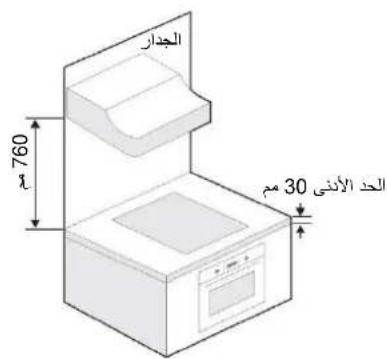
Note: The safety distance between the hotplate and the cupboard above the hotplate should be at least 760mm.
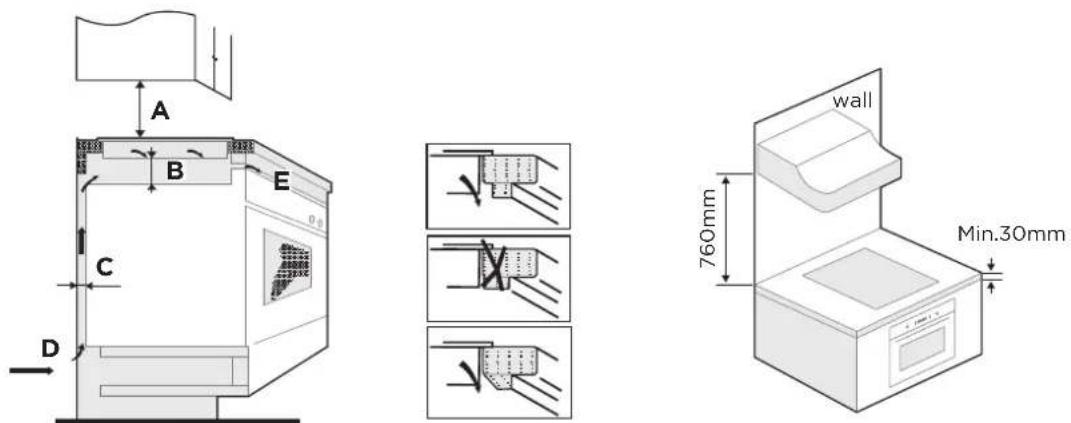
| A(mm) | B(mm) | C(mm) | D | E |
| 760 | 50 min. | 20 min. | Air intake | Air exit 5mm |
WARNING: Ensuring Adequate Ventilation
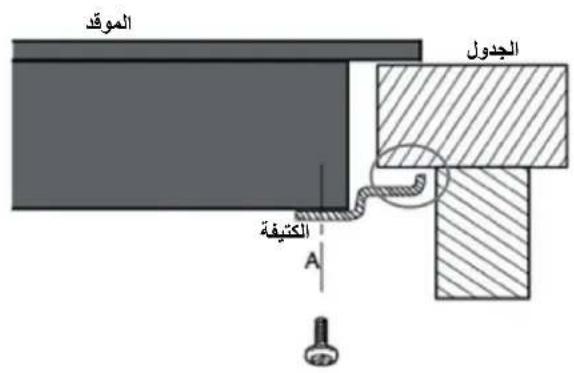
Make sure the induction cooker hob is well ventilated and that air inlet and outlet are not blocked. In order to avoid accidental touch with the overheating bottom of the hob, or getting unexpected electric shock during working, it is necessary to put a wooden insert, fixed by screws, at a minimum distance of 50mm from the bottom of the hob. Follow the requirements below.
There are ventilation holes around outside of the hob. YOU MUST ensure these holes are not blocked by the worktop when you put the hob into position.
- Be aware that the glue that join the plastic or wooden material to the furniture, has to resist to temperature not below 150^ , to avoid the unstuck of the paneling. - The rear wall, adjacent and surrounding surfaces must therefore be able to withstand an temperature of 90^ .
Before Installing the Hob, Make Sure That
- The work surface is square and level, and no structural members interfere with space requirements.
- The work surface is made of a heat-resistant and insulated material.
- If the hob is installed above an oven, the oven has a built-in cooling fan.
- The installation will comply with all clearance requirements and applicable standards and regulations.
- A suitable isolating switch providing full disconnection from the mains power supply is incorporated in the permanent wiring, mounted and positioned to comply with the local wiring rules and regulations.
The isolating switch must be of an approved type and provide a 3 mm air gap contact separation in all poles (or in all active [phase] conductors if the local wiring rules allow for this variation of the requirements). - The isolating switch will be easily accessible to the customer with the hob installed.
- You consult local building authorities and by-laws if in doubt regarding installation.
- You use heat-resistant and easy-to-clean finishes (such as ceramic tiles) for the wall surfaces surrounding the hob.
After Installing the Hob, Make Sure That
- The power supply cable is not accessible through cupboard doors or drawers.
- There is adequate flow of fresh air from outside the cabinetry to the base of the hob.
- If the hob is installed above a drawer or cupboard space, a thermal protection barrier is installed below the base of the hob.
- The isolating switch is easily accessible by the customer.
Before locating the fixing brackets
The unit should be placed on a stable, smooth surface (use the packaging). Do not apply force onto the controls protruding from the hob.
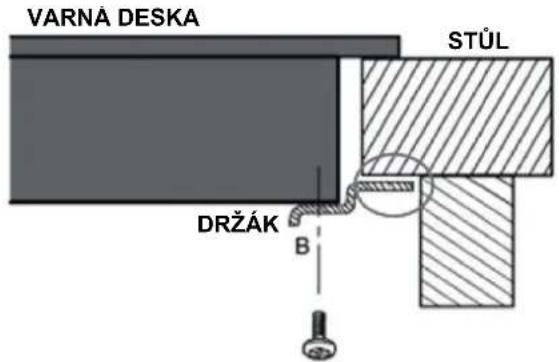
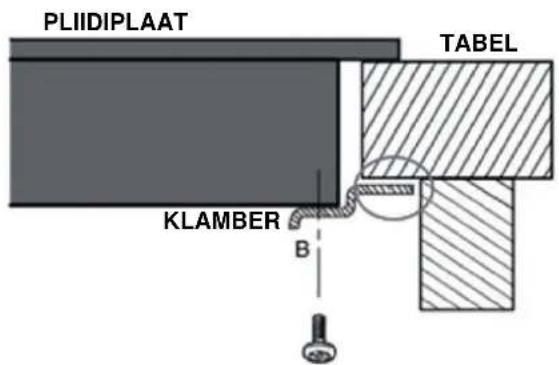
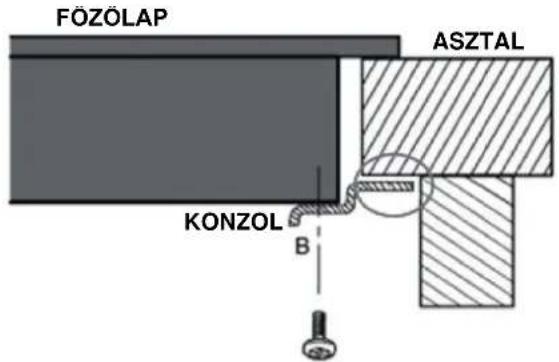
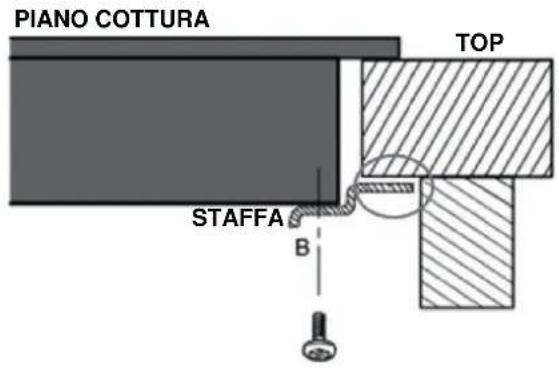
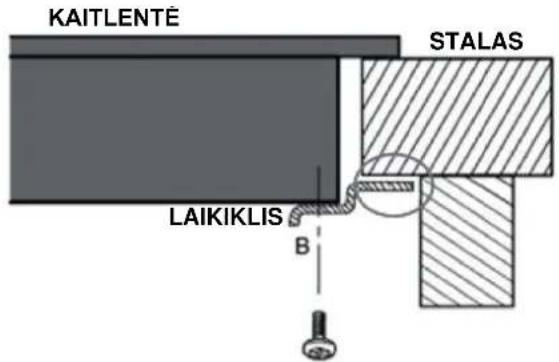
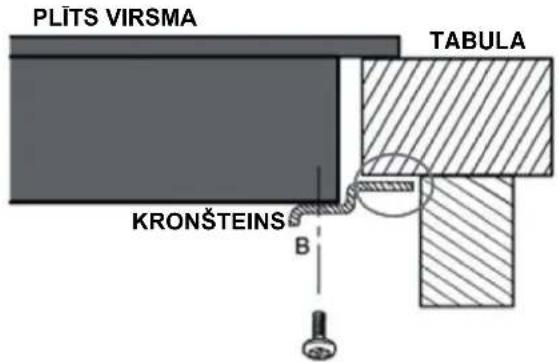
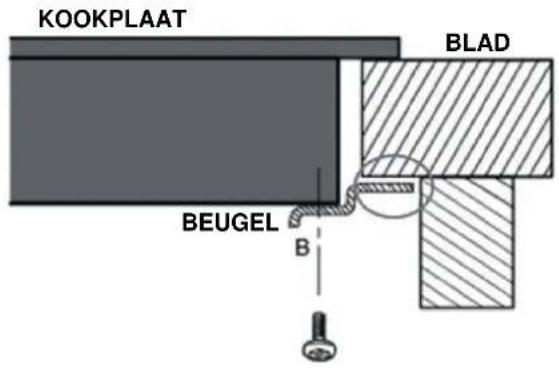
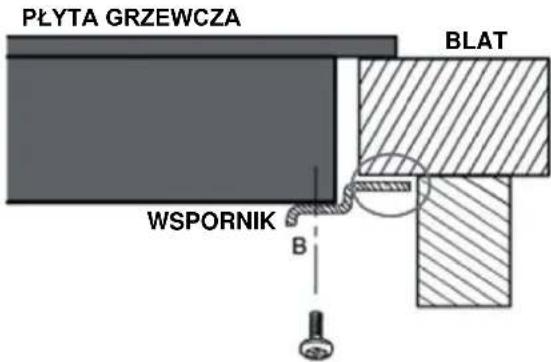
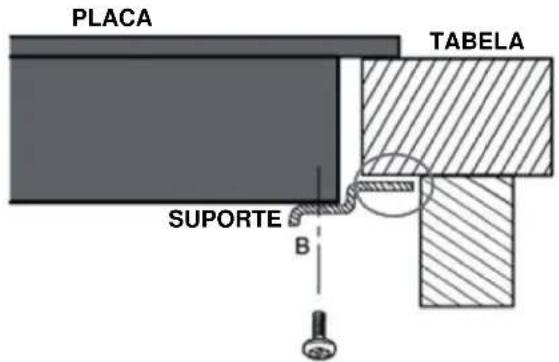
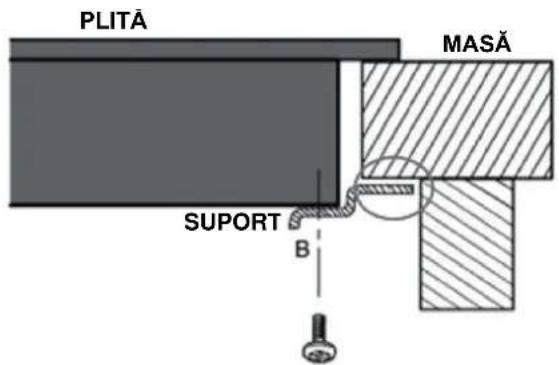
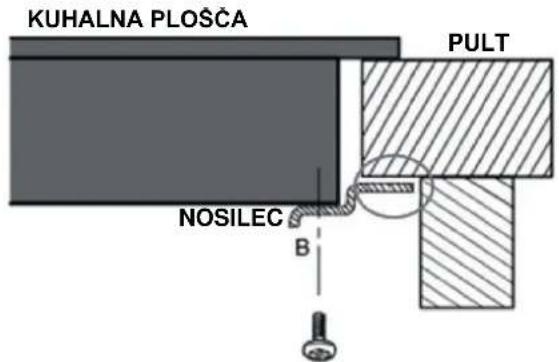
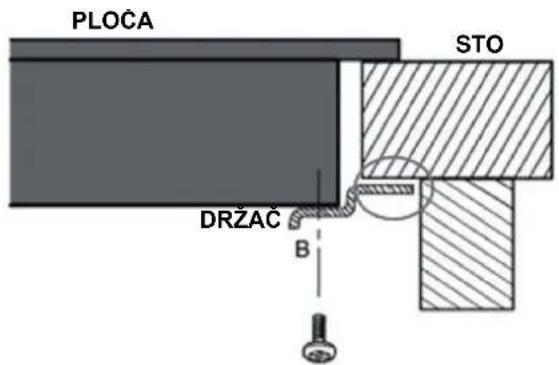
Adjusting the Bracket Position
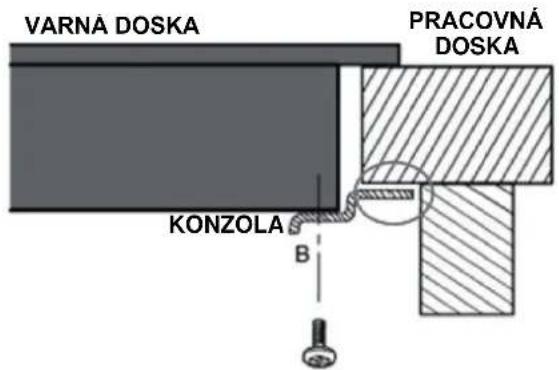
Fix the hob on the work surface by screw 4 brackets on the bottom of hob(see picture) after installation.
Adjust the bracket position to suit for different table top thickness.
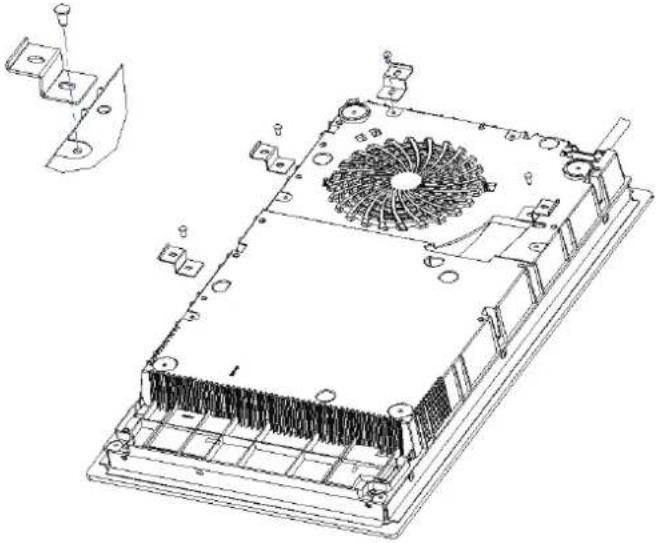
natural_image
Technical line drawing of an electronic device with cooling fan and heatsink (no text or symbols)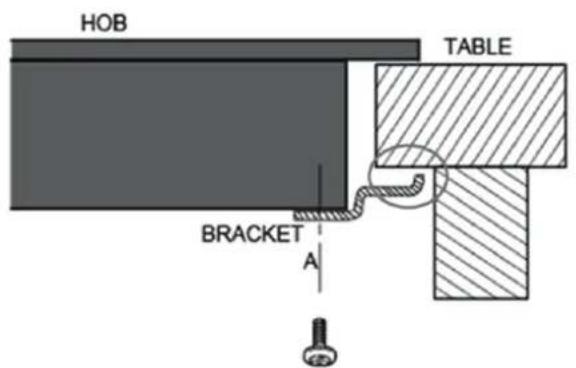
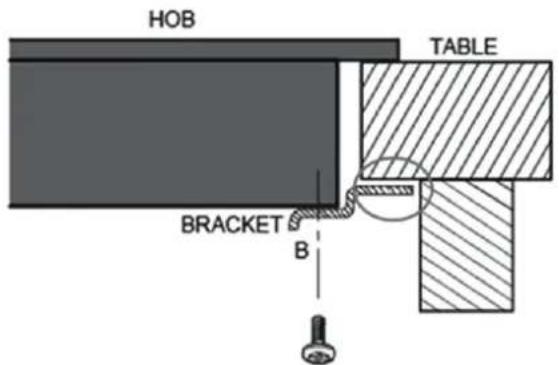

Under any circumstances, the brackets cannot touch with the inner surfaces of the worktop after installation (see picture).
CAUTIONS
- The induction hotplate must be installed by qualified personnel or technicians. We have professionals at your service. Please never conduct the operation by yourself.
- The hob will not be installed directly above a dishwasher, fridge, freezer, washing machine or clothes dryer, as the humidity may damage the hob electronics.
- The induction hotplate shall be installed such that better heat radiation can be ensured to enhance its reliability.
- The wall and induced heating zone above the table surface shall withstand heat.
- To avoid any damage, the sandwich layer and adhesive must be resistant to heat.
- A steam cleaner is not to be used.

This hob must be connected to the mains power supply only by a suitably qualified person. Before connecting the hob to the mains power supply, check that:
- The domestic wiring system is suitable for the power drawn by the hob.
- The voltage corresponds to the value given in the rating plate.
- The power supply cable sections can withstand the load specified on the rating plate.
To connect the hob to the mains power supply, do not use adapters, reducers, or branching devices, as they can cause overheating and fire.
The power supply cable must not touch any hot parts and must be positioned so that its temperature will not exceed 75^ C at any point.

Check with an electrician whether the domestic wiring system is suitable without alterations. Any alterations must only be made by a qualified electrician.
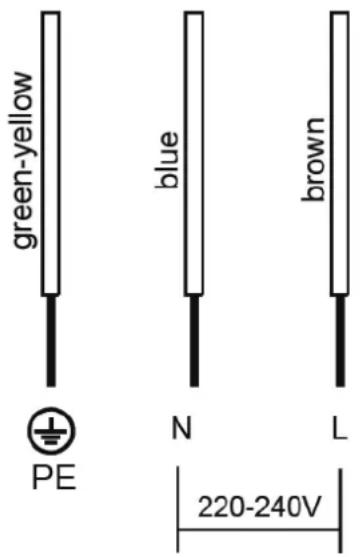
The power supply should be connected in compliance with the relevant standard, or a single-pole circuit breaker. The method of connection is shown below.
- If the cable is damaged or to be replaced, the operation must be carried out the by after-sale agent with dedicated tools to avoid any accidents.
- If the appliance is being connected directly to the mains an omnipolar circuit-breaker must be installed with a minimum opening of 3mm between contacts.
- The installer must ensure that the correct electrical connection has been made and that it is compliant with safety regulations.
- The cable must not be bent or compressed.
- The cable must be checked regularly and replaced by authorised technicians only.
- The yellow/green wire of the power supply cable must be connected to the earth of both power supply and appliance terminals.
- The manufacturer cannot be held responsible for any accidents resulting from the use of an appliance which is not connected to earth, or with faulty earth connection continuity.
- If the appliance has a socket outlet, it must be installed so that the socket outlet is accessible.

The bottom surface and the power cord of the hob are not accessible after installation.
DISPOSAL AND RECYCLING
Important instructions for environment
Compliance with the WEEE Directive and Disposing of the Waster Product:
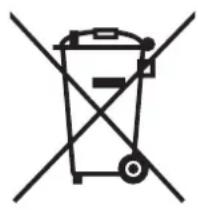
This product complies with EU WEEE Directive (2012/19/EU). This product bears a classification symbol for waster electrical and electronic equipment (WEEE).
This symbol indicates that this product shall not be disposed with other household wastes at the end of its service life. Used device must be returned to official collection point for recycling of electrical electronic devices. To find these collection systems please contact to your local authorities or retailer where the product was purchased. Each household performs important role in recovering and recycling of old appliance.
Appropriate disposal of used appliance helps prevent potential negative consequences for the environment and human health.
natural_image
Symbol of a trash bin crossed with a diagonal line, representing no waste or discharge (no text or labels)
Compliance with RoHS Directive
The product you have purchased complies with EU RoHS Directive (2011/65/EU). It does not contain harmful and prohibited materials specified in the Directive.
Package information
Packaging materials of the product are manufactured from recyclable materials in accordance with our National Environment Regulations.
Do not dispose of the packaging materials together with the domestic or other wastes. Take them to the packaging material collection points designated by the local authorities.

natural_image
Recycling symbol with three arrows forming a triangle (no text or labels)OBSAH
BEZPEČNOSTNÍ POKYNY 2
TECHNICKÉ ÚDAJE----7
PŘEHLED VÝROBKU 8
POKYNY PRO OVLÁDÁNÍ----10
STRUČNÝ NÁVOD----18
ČIŠTĚNÍ A ÚDRŽBA----20
ŘEŠENÍ PROBLÉMŮ 21
INSTALACE 24
LIKVIDACE A RECYKLACE 28
BEZPEČNOSTNÍ POKYNY
Určené použití
natural_image
Three identical cooking pots with crossed-out X marks, placed on a surface (no text or symbols)natural_image
Simple line drawing of a pot with crossed arrows indicating pressure or force (no text or symbols)
natural_image
Simple line drawing of a cooking pot on a stand (no text or symbols)natural_image
Technical line drawing of an electronic device casing with cooling fins and mounting brackets (no text or symbols)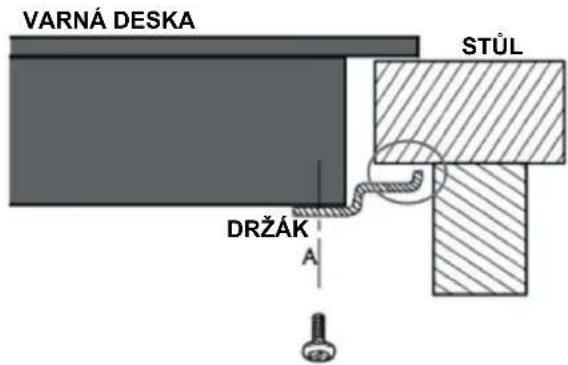

LIKVIDACE A RECYKLACE
natural_image
Symbol of a trash bin crossed with no text or labels, accompanied by a black rectangular block below (no readable text or symbols)natural_image
Recycling symbol with three chasing arrows forming a triangle (no text or labels)INHALT
natural_image
Three identical cooking pots with crossed X marks placed on their bases, no text or symbols present.natural_image
Simple line drawing of a cooking pot on a stand (no text or symbols)natural_image
Technical line drawing of an electronic device chassis with cooling fans and mounting brackets (no text or symbols)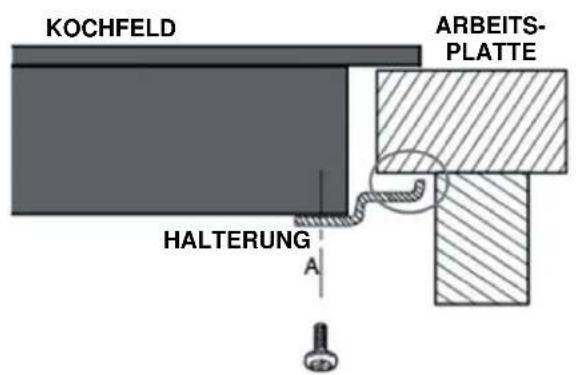
natural_image
Symbol of a trash bin crossed with no text or labels, accompanied by a blank rectangular block below (no text or symbols present)natural_image
Recycling symbol with three chasing arrows forming a triangle (no text or labels)ΠΕΡΙΕΧΟΜΕΝΑ
natural_image
Three identical cooking pots with crossed X marks on their bases, placed horizontally on a flat surface (no text or symbols)natural_image
Four identical cooking pots with crossed-out X marks, shown in a row (no text or symbols)natural_image
Simple line drawing of a cooking pot on a stand (no text or symbols)natural_image
Three hand diagrams showing different outline shapes with no text or symbolsnatural_image
Technical line drawing of an electronic device with a fan and internal components (no text or symbols)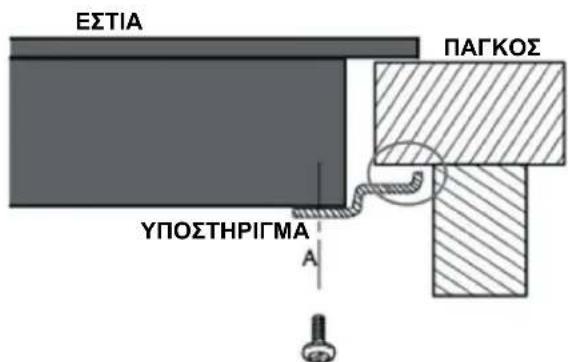
natural_image
Symbol of a trash bin crossed out by two crossed lines, with a solid black rectangle below (no text or labels)natural_image
Recycling symbol with three chasing arrows forming a triangle (no text or labels)ÍNDICE
natural_image
Three identical cooking pots with crossed X marks placed on their bases, no text or symbols present.natural_image
Simple line drawing of a cooking pot on a stand (no text or symbols)natural_image
Simple line drawings of three abstract human-like figures with no text or symbolsnatural_image
Simple line drawing of a hand holding a plus sign (no text or symbols present)natural_image
Technical line drawing of an electronic device chassis with cooling fan and mounting bracket (no text or symbols)
natural_image
Symbol of a trash bin crossed with no text or numbers, representing waste sorting or disposal (no text present)natural_image
Recycling symbol with three chasing arrows forming a triangle (no text or labels)SISUKORD
OHUTUSJUHISED 2
SPETSIFIKATSIOONID----7
TOOTE ÜLEVAADE 8
KASUTUSJUHISED----10
KIIRKÄSIJUHEND----18
PUHASTAMINE JA HOOLDUS 20
VEAOTSING 21
PAIGALDAMINE 24
KÖRVALDAMINE JA RINGLUSSEVÖTT 28
OHUTUSJUHISED
Sihtotstarve
Olulised ohutusjuhised
Olulised ohutusjuhised
natural_image
Three identical cooking pots with crossed X marks, placed on different scales (no text or symbols)natural_image
Simple line drawing of a cooking pot with crossed arrows indicating opposing pressure (no text or symbols)
natural_image
Simple line drawing of a cooking pot on a stand (no text or symbols)natural_image
Technical line drawing of an electronic device with a fan and internal components (no text or symbols)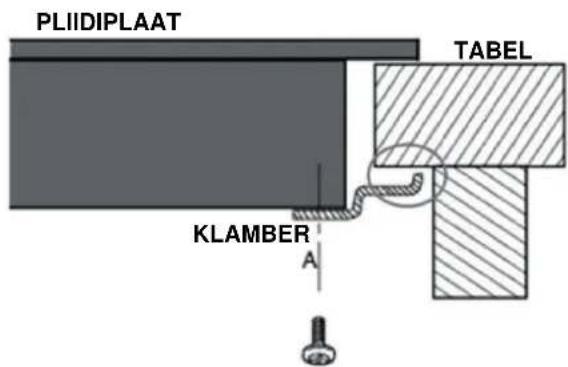

natural_image
Symbol of a trash bin crossed with no text or labels, accompanied by a solid black rectangle below (no text or symbols present)natural_image
Recycling symbol with three chasing arrows forming a triangle (no text or labels)SOMMAIRE
CONSIGNES DE SÉCURITÉ----2
CARACTÉRISTIQUES TECHNIQUES----7
PRÉSENTATION DU PRODUIT 8
MODE D'EMPLOI----10
GUIDE DE DÉMARRAGE RAPIDE 18
NETTOYAGE ET ENTRETIEN----20
DÉPANNAGE 21
INSTALLATION 24
ÉLIMINATION ET RECYCLAGE 28
CONSIGNES DE SÉCURITÉ
Utilisation prévue
natural_image
Three identical cooking pots with crossed X marks on their bases, placed horizontally on a flat surface (no text or symbols)natural_image
Four identical cooking pots with crossed-out X marks, shown in a row (no text or symbols)natural_image
Simple line drawing of a cooking pot on a stand (no text or symbols)natural_image
Simple line drawing of a hand holding a vertical line with a plus sign (no text or symbols)natural_image
Technical line drawing of an electronic device with a fan and internal components (no text or symbols)


natural_image
Symbol of a trash bin crossed with no text or numbers, representing waste sorting or disposal (no text present)natural_image
Recycling symbol with three chasing arrows forming a triangle (no text or labels)
SADRŽAJ
UPUTE U VEZI SIGURNOSTI 2
SPECIFIKACIJE 7
PREGLED PROIZVODA----8
UPUTE ZA UPOTREBU 10
KRATKE UPUTE ZA UPORABU 18
ČIŠĆENJE I ODRŽAVANJE 20
RJEŠAVANJE PROBLEMA 21
UGRADNJA 24
ZBRINJAVANJE I RECIKLIRANJE 28
UPUTE U VEZI SIGURNOSTI
Namjena
natural_image
Three identical cooking pots with crossed X marks, placed on different scales (no text or symbols)- Pazite da dno posude bude glatko, da se postavlja ravno uz staklo i da je jednake veličine kao zona za kuhanje. Upotrebljavajte posude promjera jednako velikog kao i odabrana zona. Ako upotrebljavajte nešto širi lonac, jamči se maksimalna iskoristivost energije. Ako upotrebljavate manji lonac, učinkovitost može biti manja od očekivane. Postavite posudu u središte zone za kuhanje.

- Uvijek podignite posude s keramičke ploče za kuhanje – ne vucite ih njima jer tako možete ogrepsti staklo.
natural_image
Simple line drawing of a cooking pot with crossed arrows indicating opposing directions (no text or symbols)
- Zone za kuhanje se do ograničenja automatski prilagođavaju promjeru posude. Međutim, dno ove posude mora imati minimalni promjer u skladu s odgovarajućom zonom za kuhanje. Da biste na najbolji način iskoristili svoju ploču za kuhanje, postavite posudu u središte zone za kuhanje.
| Zona za kuhanje | Promjer dna indukcijskog posuđa za pripremanje | |
| Minimalno (mm) | Minimalno (mm) | |
| 160 mm | 120 | 160 |
| 180 mm | 140 | 180 |
Način upotrebe
1. Početak kuhanja
natural_image
Simple line drawing of a cooking pot on a stand (no text or symbols)- Odaberite postavku topline dodirivanjem upravljačkog elementa „-” ili „+”.
- Ako ne odaberete postavku topline u roku od 1 minute, indukcijska ploča za kuhanje će se automatski isključiti. Morate početi ponovno od 1. koraka.
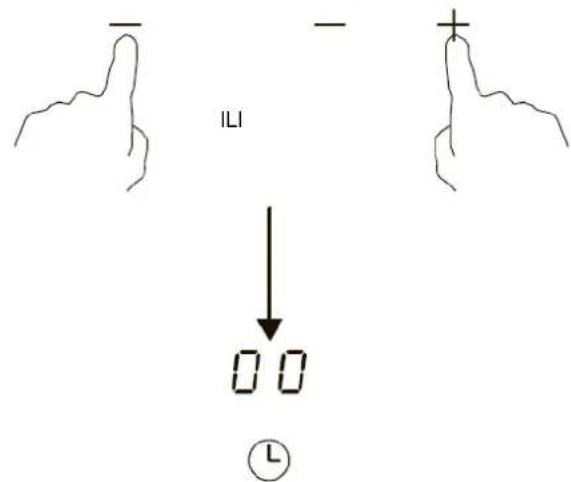
- Postavite vrijeme dodirivanjem upravljačkog elementa „-” ili „+” vremenskog programatora Savjet: Jednom dodirnite upravljački element „-” ili „+” vremenskog programatora da bi se vrijeme smanjilo ili povećalo za 1 minutu. Dodirnite i držite upravljački element „-” ili „+” vremenskog programatora i vrijeme će se smanjiti ili povećati za 10 minuta.
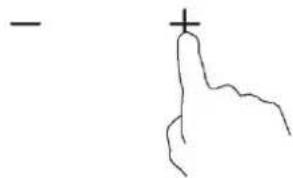
- Istovremenim dodirivanjem upravljačkih elemenata „-” i „+” poništava se vremenski programator, a na zaslonu s minutama prikazuje se „00”.
KRATKE UPUTE ZA UPORABU

Budite oprezni pri prženju jer se ulje i masnoće veoma brzo zagriju, a osobito ako se koristite značajkom PowerBoost. Pri iznimno visokim temperaturama dolazi do spontanoga zapaljenja ulja i masti, a to predstavlja ozbiljan rizik za nastanak požara.
natural_image
Technical line drawing of an electronic device with a fan and cooling panel (no text or symbols)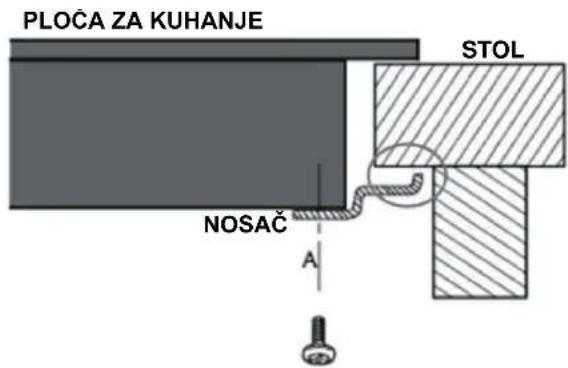
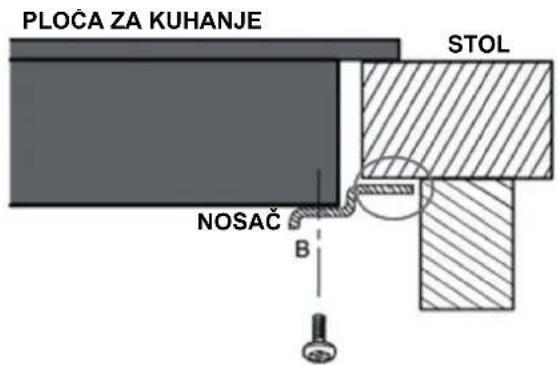

Ni pod kojim se okolnostima nosači ne smiju dodirivati s unutarnjim površinama radne površine nakon ugradnje (pogledajte sliku).
OPREZ
natural_image
Symbol of a trash bin crossed out by two crossed lines, with a solid black rectangle below (no text or labels)Usklađenost s Direktivom RoHS
natural_image
Recycling symbol with three chasing arrows forming a triangle (no text or labels)TARTALOMJEGYZÉK
BIZTONSÁGI UTASÍTÁSOK----2
MÜSZAKI ADATOK 7
TERMÉK ÁTTEKINTÉSE----8
ÜZEMELTETÉSRE VONATKOZÓ ELŐÍRÁSOK ---- 10
GYORS ÜZEMBE HELYEZÉSI ÚTMUTATÓ---- 18
natural_image
Three identical cooking pots with crossed X marks on their bases, placed on a flat surface (no text or symbols)natural_image
Simple line drawing of a cooking pot on a stand (no text or symbols)natural_image
Technical line drawing of an electronic device casing with cooling fins and mounting brackets (no text or symbols)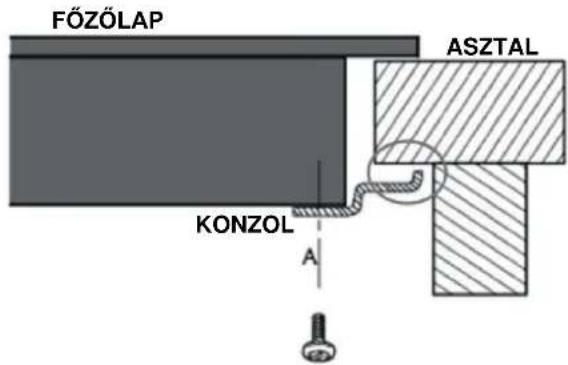

natural_image
Symbol of a trash bin crossed with no visible text or labelsnatural_image
Recycling symbol with three chasing arrows forming a triangle (no text or labels)SOMMARIO
ISTRUZIONI PER LA SICUREZZA 2
SPECIFICHE----7
PANORAMICA DEL PRODOTTO 8
ISTRUZIONI PER L'USO 10
GUIDA RAPIDA 18
PULIZIA E MANUTENZIONE----20
RISOLUZIONE DEI PROBLEMI ----21
INSTALLAZIONE 24
SMALTIMENTO E RICICLAGGIO----28
ISTRUZIONI PER LA SICUREZZA
Uso previsto
natural_image
Three identical cooking pots with crossed X marks, no text or symbols presentnatural_image
Simple line drawing of a cooking pot with crossed-out triangular symbol (no text or labels)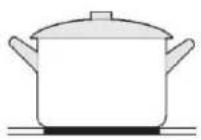
natural_image
Simple line drawing of a pot with crossed arrows indicating pressure or direction (no text or symbols)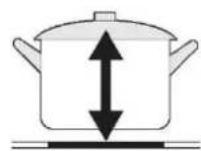
natural_image
Simple line drawing of a cooking pot on a stand (no text or symbols)natural_image
Simple line drawing of a hand holding a plus sign (no text or symbols present)natural_image
Technical line drawing of an electronic device chassis with cooling fan and mounting bracket (no text or symbols)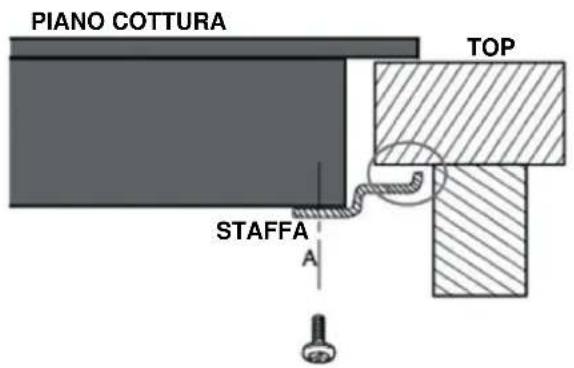

natural_image
Symbol of a trash bin crossed with no text or labels, accompanied by a solid black rectangle below (no text or symbols present)natural_image
Recycling symbol with three chasing arrows forming a triangle (no text or labels)TURINYS
SAUGOS INSTRUKCIJOS 2
SPECIFIKACIJOS 7
GAMINIO APŽVALGA 8
NAUDOJIMO INSTRUKCIJOS----10
GREITOS PRADŽIOS VADOVAS----18
VALYMAS IR PRIEŽIŪRA----20
TRIKČIŲ ŠALINIMAS 21
IRENGIMAS----24
IŠMETIMAS IR PERDIRBIMAS----28
SAUGOS INSTRUKCIJOS
natural_image
Three identical cooking pots with crossed X marks, placed on a flat surface (no text or symbols)natural_image
Simple line drawing of a pot with crossed arrows indicating pressure or force (no text or symbols)
natural_image
Simple line drawing of a cooking pot on a stand (no text or symbols)natural_image
Simple line drawing of a hand holding a plus sign (no text or symbols present)Min. 3 mm
| A (mm) | B (mm) | C (mm) | G (mm) | E (mm) | F (mm) | G |
| 268+4-0 | 500+4-0 | Min. 50 | Min. 50 | Min. 50 | Min. 50 | Min. 3 mm |
natural_image
Technical line drawing of an electronic device casing with cooling fins and mounting brackets (no text or symbols)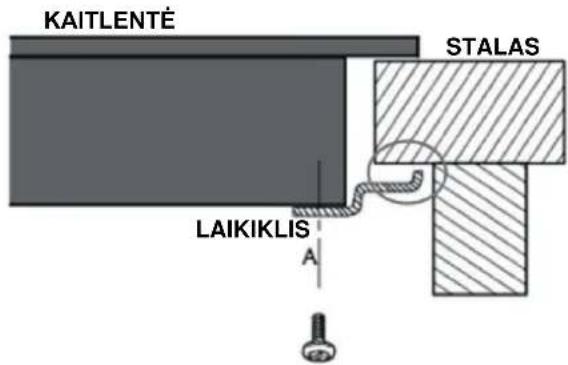

natural_image
Symbol of a trash bin crossed with no text or numbers, representing waste sorting or disposal (no text present)natural_image
Recycling symbol with three chasing arrows forming a triangle (no text or labels)SATURS
DROŠĪBAS NORĀDĪJUMI----2
SPECIFIKĀCIJAS 7
PRODUKTA PÄRSKATS 8
LIETOŠANAS NORĀDĪJUMI 10
ĀTRĀS SĀKŠANAS CELVEDIS----18
TİRİŞANA UN APKOPE 20
PROBLÉMU NOVĚRŠANA 21
UZSTĀDĪŠANA----24
UTILIZACIJA UN PĀRSTRĀDE----28
DROŠĪBAS NORĀDĪJUMI
Paredzētā lietošana
natural_image
Three identical cooking pots with crossed-out X marks, placed on a flat surface (no text or symbols)natural_image
Simple line drawing of a pot with crossed arrows indicating pressure or movement (no text or symbols)
natural_image
Simple line drawing of a cooking pot on a stand (no text or symbols)- lestatiet laiku, pieskaroties taimera vadībai “-” vai “+”.
- lestatiet laiku, pieskaroties taimera vadībai “-” vai “+”.
natural_image
Technical line drawing of an electronic device chassis with cooling fan and mounting bracket (no text or symbols)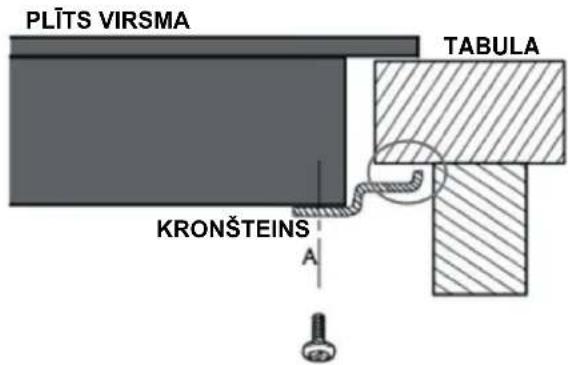

natural_image
Symbol of a trash bin crossed out by two crossed lines, with a solid black rectangle below (no text or labels)natural_image
Recycling symbol with three chasing arrows forming a triangle (no text or labels)INHOUD
VEILIGHEIDSINSTRUCTIES----2
SPECIFICATIES 7
natural_image
Three identical cooking pots with crossed-out kitchen panes, shown in different orientations (no text or symbols)natural_image
Four identical cooking pots with crossed X marks, shown in side-by-side illustrations (no text or symbols)natural_image
Simple line drawing of a cooking pot on a stand (no text or symbols)chemical
Chemical structure diagram showing three identical organic molecules with a central oxygen atom labeled 'OF'natural_image
Simple line drawing of a hand holding a finger with a plus sign (no text or symbols)natural_image
Technical line drawing of an electronic device chassis with cooling fan and mounting bracket (no text or symbols)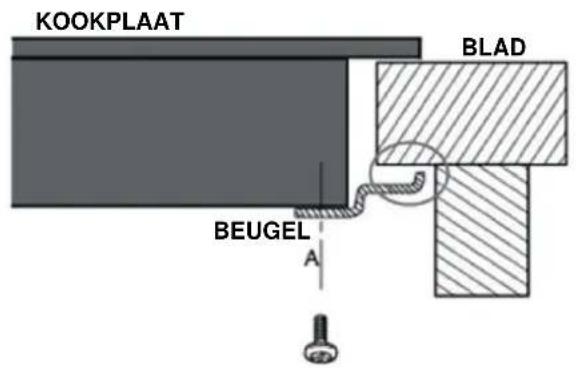

natural_image
Symbol of a trash bin crossed with no text or numbers, representing waste sorting or disposal (no text present)natural_image
Recycling symbol with three chasing arrows forming a triangle (no text or labels)SPIS TREŚCI
INSTRUKCJE BEZPIECZEŃSTWA----2
SPECYFIKACJA 7
PRZEGLĄD PRODUKTU----8
INSTRUKCJA OBSŁUGI----10
INSTRUKCJA SZYBKIEGO STARTU 18
CZYSZCZENIE I KONSERWACJA 20
ROZWIAZYWANIE PROBLEMÓW 21
INSTALACJA 24
UTYLIZACJA I RECYKLING----28
INSTRUKCJE BEZPIECZEŃSTWA
natural_image
Three identical cooking pots with crossed-out X marks, placed on a flat surface (no text or symbols)natural_image
Simple line drawing of a pot with crossed arrows indicating opposing pressure or flow (no text or symbols)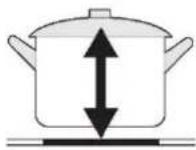
natural_image
Simple line drawing of a cooking pot on a stand (no text or symbols)natural_image
Technical line drawing of an electronic device with a fan and mounting bracket (no text or symbols)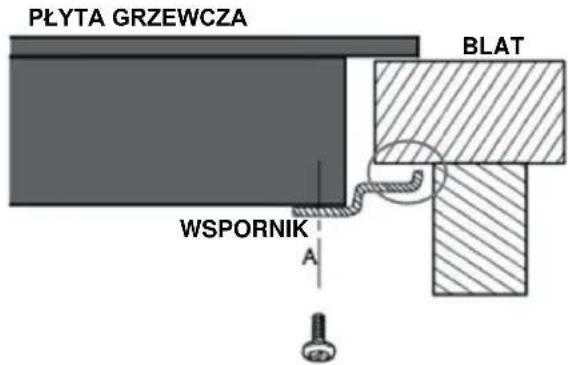

UTYLIZACJA I RECYKLING
natural_image
Symbol of a trash bin crossed with no text or labels, accompanied by a solid black rectangle below (no text or symbols present)natural_image
Recycling symbol with three chasing arrows forming a triangle (no text or labels)ÍNDICE
INSTRUÇÕES DE SEGURANÇA ----2
ESPECIFICAÇÕES 7
natural_image
Three identical cooking pots with crossed X marks, placed on different positions (no text or symbols)natural_image
Simple line drawing of a pot with crossed arrows indicating opposing pressure or flow (no text or symbols)
natural_image
Simple line drawing of a cooking pot on a stand (no text or symbols)natural_image
Simple line drawing of a hand holding a plus sign (no text or symbols present)natural_image
Technical line drawing of an electronic device chassis with cooling fan and mounting bracket (no text or symbols)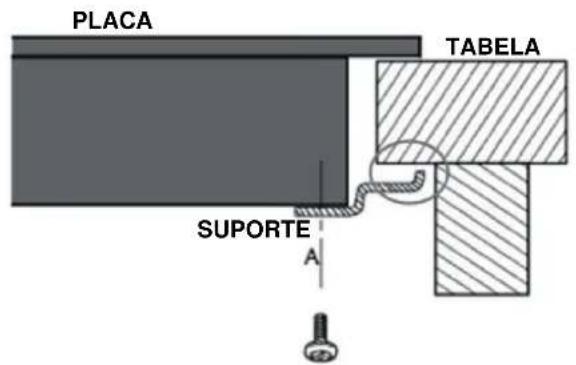

natural_image
Symbol of a trash bin crossed out by two crossed lines, with no text or labels present.natural_image
Recycling symbol with three chasing arrows forming a triangle (no text or labels)CUPRINS
INSTRUCTIUNI DE SIGURANTĂ ----2
SPECIFICAȚII 7
PREZENTAREA GENERALĂ A PRODUSULUI ----8
INSTRUCTIUNI DE UTILIZARE 10
GHID DE PORNIRE RAPIDĂ----18
CURĂȚARE ȘI ÎNTRETINERE----20
DEPANARE 21
INSTALARE 24
Alegerea vaselor de gătit corecte

natural_image
Three identical cooking pots with crossed X marks, no text or symbols presentnatural_image
Simple line drawing of a pot with crossed arrows indicating pressure or force (no text or symbols)
natural_image
Simple line drawing of a cooking pot on a stand (no text or symbols)natural_image
Technical line drawing of an electronic device chassis with cooling fan and mounting bracket (no text or symbols)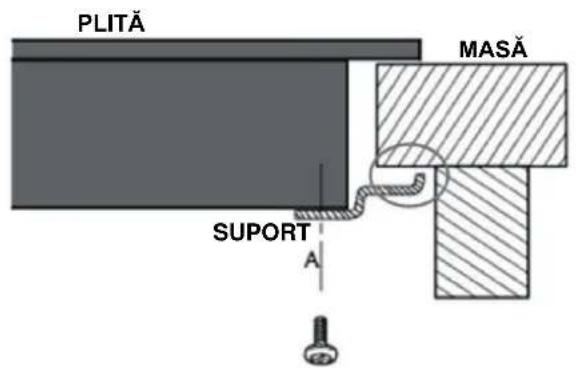

natural_image
Symbol of a trash bin crossed with no text or labels, accompanied by a black rectangular block below (no text or symbols present)natural_image
Recycling symbol with three chasing arrows forming a triangle (no text or labels)СОДЕРЖАНИЕ
natural_image
Three identical cooking pots with crossed X marks on their bases, placed horizontally on a flat surface (no text or symbols)natural_image
Four identical cooking pots with crossed-out X marks, shown in a row (no text or symbols)natural_image
Simple line drawing of a cooking pot on a stand (no text or symbols)natural_image
Simple line drawing of a hand holding a plus sign (no text or symbols present)natural_image
Technical line drawing of an electronic device with a fan and cooling fins (no text or symbols)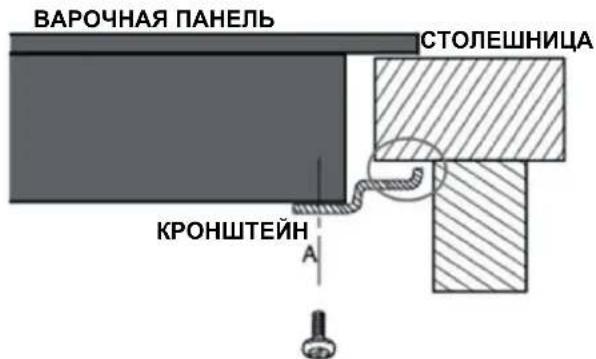
natural_image
Symbol of a trash bin crossed with no text or numbers, representing waste sorting or disposal (no text present)natural_image
Recycling symbol with three chasing arrows forming a triangle (no text or labels)
natural_image
Three identical cooking pots with crossed X marks placed on their bases, no text or symbols present.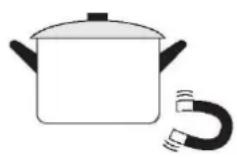
natural_image
Simple line drawing of a cooking pot with crossed arrows indicating opposing directions (no text or symbols)
natural_image
Simple line drawing of a cooking pot on a stand (no text or symbols)natural_image
Technical line drawing of an electronic device chassis with cooling fan and mounting bracket (no text or symbols)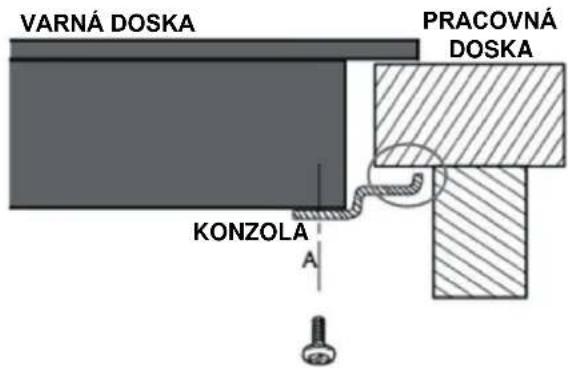

natural_image
Symbol of a trash bin crossed out by two crossed lines, with a solid black rectangle below (no text or labels)Súlad so smernicou RoHS
natural_image
Recycling symbol with three chasing arrows forming a triangle (no text or labels)VSEBINA
VARNOSTNA NAVODILA 2
SPECIFIKACIJE 7
PREGLED IZDELKA 8
NAVODILA ZA UPORABO 10
PRIROČNIK ZA HITER ZAČETEK 18
ČIŠČENJE IN VZDRŽEVANJE----20
ODPRAVLJANJE TEŽAV----21
VGRADNJA 24
ODSTRANJEVANJE IN RECIKLIRANJE----28
VARNOSTNA NAVODILA
Predvidena uporaba
Izbira ustrezne kuhinjske posode

natural_image
Three identical cooking pots with crossed-out diagonals placed on their bases, no text or symbols present.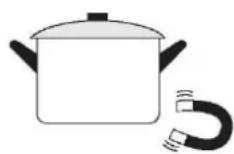
natural_image
Simple line drawing of a cooking pot with crossed arrows indicating opposing directions (no text or symbols)
natural_image
Simple line drawing of a cooking pot on a stand (no text or symbols)- Dotaknite se gumba za izbiro ogrevalne cone, da začne utripati indikator zraven tipke.
natural_image
Technical line drawing of an electronic device chassis with cooling fan and mounting bracket (no text or symbols)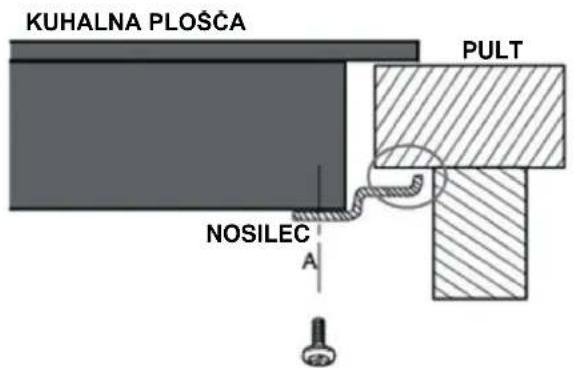

natural_image
Symbol of a trash bin crossed with no text or labels, accompanied by a black rectangular block below (no text or symbols present)Skladnost z direktivo RoHS
natural_image
Recycling symbol with three chasing arrows forming a triangle (no text or labels)SADRŽAJ
BEZBEDNOSNA UPUTSTVA 2
SPECIFIKACIJE 7
PREGLED PROIZVODA----8
UPUTSTVO ZA RAD 10
KRATKA UPUTSTVA ZA UPOTREBU----18
ČIŠĆENJE I ODRŽAVANJE 20
REŠAVANJE PROBLEMA 21
UGRADNJA 24
ODLAGANJE I RECIKLAŽA 28
BEZBEDNOSNA UPUTSTVA
Namena
Izbor odgovarajućeg posuđa

natural_image
Three identical cooking pots with crossed-out X marks, placed on different scales (no text or symbols)natural_image
Simple line drawing of a pot with crossed arrows indicating pressure or direction (no text or symbols)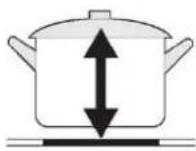
natural_image
Simple line drawing of a cooking pot on a stand (no text or symbols)- Izaberite podešavanje grejanja dodirom na upravljački element „-“ ili „+“.
- Podesite vreme tako što ćete dodirnuti upravljački element tajmera „-“ ili „+“ Podsetnik: Jednom dodirnite upravljački element tajmera „-“ ili „+“ da bi se vreme smanjilo ili povećalo za 1 minut. Dodirnite i zadržite upravljački element tajmera „-“ ili „+“ da biste smanjili ili povećali tajmer za 10 minuta.
natural_image
Simple line drawing of a hand holding a plus sign (no text or symbols present)- Kada dodirnite „-“ i „+“ u isto vreme, tajmer se poništava, a na displeju minuta se prikazuje „00“.
- Kada se vreme podesi, odbrojavanje počinje odmah. Displej prikazuje preostalo vreme i indikator tajmera treperi 5 sekundi. Ako dodirnete upravljački element tajmera tokom treperenja indikatora tajmera, on će odmah prestati da treperi.
-
Podesite vreme tako što ćete dodirnuti upravljački element tajmera „-“ ili „+“. Podsetnik: Jednom dodirnite upravljački element tajmera „-“ ili „+“ da biste smanjili ili povećali tajmer za 1 minut. Dodirnite i zadržite upravljački element tajmera „-“ ili „+“ da biste smanjili ili povećali tajmer za 10 minuta.
-
Kada dodirnite „-“ i „+“ u isto vreme, tajmer se poništava, a na displeju minuta se prikazuje „00“.

-
Kada se vreme podesi, odbrojavanje počinje odmah. Displej prikazuje preostalo vreme i indikator tajmera treperi 5 sekundi. Ako dodirnete upravljački element tajmera tokom treperenja indikatora tajmera, on će odmah prestati da treperi.
-
Kada tajmer za kuvanje istekne, odgovarajuća zona za kuvanje će se automatski isključiti.

NAPOMENA
Crvena tačka pored indikatora nivoa snage svetli da označi da je zona izabrana.

Min. 3 mm
| A (mm) | B (mm) | C (mm) | D (mm) | E (mm) | F (mm) | G |
| 268+4-0 | 500+4-0 | 50 min. | 50 min. | 50 min. | 50 min. | 3 mm min. |
natural_image
Technical line drawing of an electronic device casing with cooling fins and mounting brackets (no text or symbols)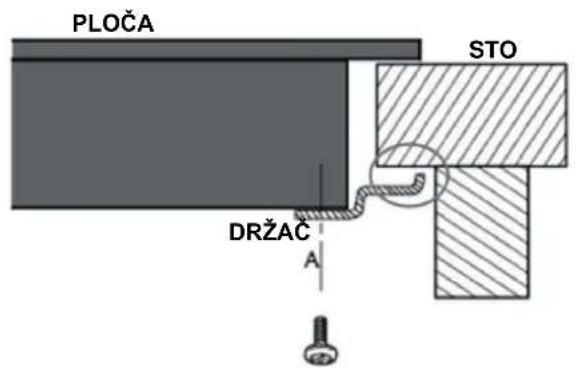
natural_image
Symbol of a trash bin crossed out by two crossed lines, with no text or labels present.Usklađenost sa direktivom RoHS
Proizvod koji ste kupili je u skladu sa Direktivom RoHS EU (2011/65/EU). Ne sadrži štetne i zabranjene materijale navedene u Direktivi.
Informacije o pakovanju
Materijali za ambalažu proizvoda proizvedeni su od materijala koji se mogu reciklirati u skladu sa našim nacionalnim propisima o životnoj sredini. Ne odlažite materijale za ambalažu zajedno sa kućnim ili drugim otpadom. Odnesite ga na mesta za sakupljanje materijala za ambalažu koja su odredile lokalne vlasti.

natural_image
Recycling symbol with three chasing arrows forming a triangle (no text or labels)3MICT
natural_image
Three identical cooking pots with crossed-out X marks, placed on different scales (no text or symbols)natural_image
Simple line drawing of a cooking pot with crossed arrows indicating crossed sides (no text or symbols)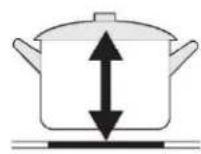
natural_image
Simple line drawing of a cooking pot on a stand (no text or symbols)natural_image
Technical line drawing of an electronic device with cooling fan and mounting bracket (no text or symbols)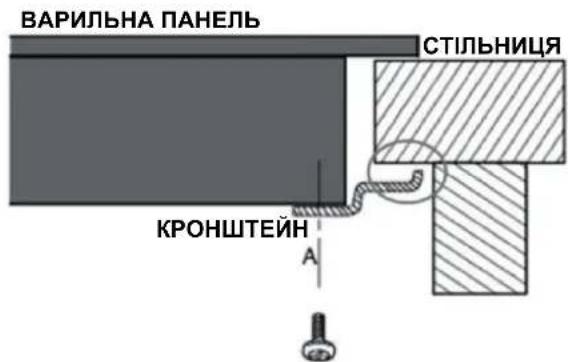
natural_image
Symbol of a trash bin crossed with no text or labels, accompanied by a solid black rectangle below (no text or symbols present)natural_image
Recycling symbol with three chasing arrows forming a triangle (no text or labels)المحتويات
2 ---- ---- ---- ---- ---- ---- ---- ---- ---- ---- ---- ---- ---- ---- ---- ---- ---- ---- ---- ---- ---- ---- ---- ---- ---- ---- ---- ---- ---- ---- ---- ---- ---- ---- ---- ---- ---- ---- ---- ---- ---- ---- ---- ---- ---- ---- ---- ---- ---- ---- ---- ---- ---- ---- ---- ---- ---- ---- ---- ---- ---- ---- ---- ---- ---- ---- ---- ---- ---- ---- ---- ---- ---- ---- ---- ---- ---- ---- ---- ---- ---- ---- ---- ---- ---- ---- ---- ---- ---- ---- ---- ---- ---- ---- ---- ---- ---- ---- ---- ---- ---
7 --- --- --- --- --- --- --- --- --- --- --- --- --- --- --- --- --- --- --- --- --- --- --- --- --- --- --- --- --- --- --- --- --- --- --- --- --- --- --- --- --- --- --- --- --- --- --- --- --- --- --- --- --- --- --- --- --- --- --- --- --- --- --- --- --- --- --- --- --- --- --- --- --- --- --- --- --- --- --- --- --- --- --- --- --- --- --- --- --- --- --- --- --- --- --- --- --- --- --- --- --- 7 ---- --- --- --- --- --- --- --- --- --- --- --- --- --- --- --- --- --- --- --- --- --- --- --- --- --- --- --- --- --- --- --- --- --- --- --- --- --- --- --- --- --- --- --- --- --- --- --- --- --- --- --- --- --- --- --- --- --- --- --- --- --- --- --- --- --- --- --- --- --- --- --- --- --- --- --- --- --- --- --- --- --- --- --- --- --- --- --- --- --- --- --- --- --- --- --- --- --- --- --- ---- --- --- --- --- --- --- --- --- --- --- --- --- --- --- --- --- --- --- --- --- --- --- --- --- --- --- --- --- --- --- --- --- --- --- --- --- --- --- --- --- --- --- --- --- --- --- --- --- --- --- --- --- --- --- 7 ---- ---- ---- ---- ---- ---- ---- ---- ---- ---- ---- ---- ---- ---- ---- ---- ---- ---- ---- ---- ---- ---- ---- ---- ---- ---- ---- ---- ---- ---- ---- ---- ---- ---- ---- ---- ---- ---- ---- ---- ---- ---- ---- ---- ---- ---- ---- ---- ---- ---- ---- ---- ---- ---- ---- ---- ---- ---- ---- ---- ---- ---- ---- ---- ---- ---- ---- ---- ---- ---- ---- ---- ---- ---- ---- ---- ---- ---- ---- ---- ---- ---- ---- ---- ---- ---- ---- ---- ---- ---- ---- ---- ---- ---- ---- ---- ---- ---- ---- ---- -----
20 --- --- --- --- --- ---
28 --- --- --- --- --- --- --- --- --- --- --- --- --- --- --- --- --- --- --- --- --- --- --- --- --- --- --- --- --- --- --- --- --- --- --- --- --- --- --- --- --- --- --- --- --- --- --- --- --- --- --- --- --- --- --- --- --- --- --- --- --- --- --- --- --- --- --- --- --- --- --- --- --- --- --- --- --- --- --- --- --- --- --- --- --- --- --- --- --- --- --- --- --- --- --- --- --- --- --- --- ---
natural_image
Three identical cooking pots with crossed X marks, no text or symbols presentnatural_image
Simple line drawing of a pot with crossed arrows indicating opposing pressure or flow (no text or symbols)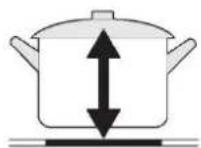
natural_image
Simple line drawing of a cooking pot on a stand (no text or symbols)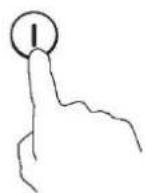
natural_image
Three abstract line drawings of human-like figures with no text or symbols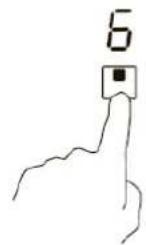
natural_image
Simple line drawing of a hand holding a plant stem with a plus sign (no text or symbols)
natural_image
Technical line drawing of an electronic device chassis with cooling fan and mounting bracket (no text or symbols)