HMB5A 021 - Coffee machine HAIER - Free user manual and instructions
Find the device manual for free HMB5A 021 HAIER in PDF.

| Brand | Haier |
| Model | HMB5A 021 |
| Product Type | Multi-drink Coffee Machine |
| Power Supply | 220-240 V~, 50/60 Hz |
| Power | 700 W |
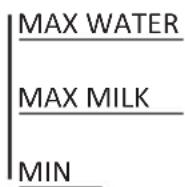
| Maximum Water Capacity | 350 ml |
| Maximum Milk Capacity | 210 ml |
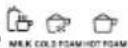
| Preparation Functions | Hot milk, cold foam, hot foam, hot chocolate, coffee, tea, infusion |
| Milk Preparation Temperature | 65 °C |
| Coffee/Chocolate Preparation Temperature | 95 °C |
| Tea Preparation Temperature | 85 °C |
| Frother | Integrated, removable |
| Filter | Metal filter provided |
| Level Indicator | Yes, on the bowl |
| Drainage Holes | Yes, on the base |
| Mute Function | Yes, via chocolate button (3 seconds) |
| Automatic Shut-off | After 10 minutes of inactivity |
| Standby Mode | Automatic after heating cycle |
| Cleaning | Bowl and accessories hand washable (not dishwasher safe) |
| Safety | Do not immerse, do not exceed max levels, do not use empty bowl |
| Standby Consumption | 0.5 W |
| Usage | Indoor, altitude ≤ 2000 m |
| Spare Parts | Original Haier, available at authorized service centers |
| Warranty | According to purchase country conditions (invoice required) |
Frequently Asked Questions - HMB5A 021 HAIER
User questions about HMB5A 021 HAIER
0 question about this device. Answer the ones you know or ask your own.
Ask a new question about this device
Download the instructions for your Coffee machine in PDF format for free! Find your manual HMB5A 021 - HAIER and take your electronic device back in hand. On this page are published all the documents necessary for the use of your device. HMB5A 021 by HAIER.
USER MANUAL HMB5A 021 HAIER
natural_image
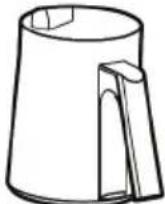
Line drawing of a coffee maker with lid and handle (no text or symbols)User manual (GB) ......P5
* Content may vary according to your model.
natural_image
Line drawing of a water heater with a plug inserted, no text or symbols present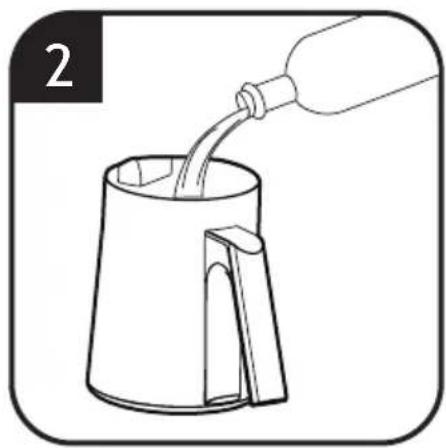
natural_image
Line drawing of a kettle pouring liquid from a bottle into a container (no text or symbols)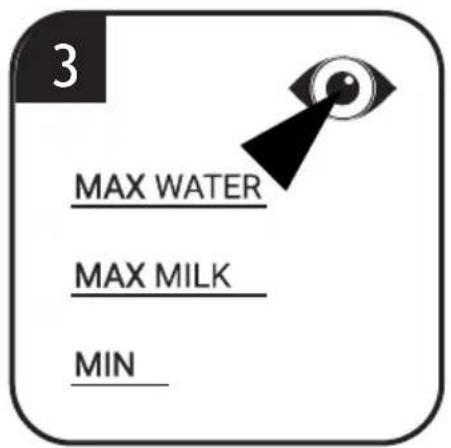
natural_image
Line drawing of a coffee maker with a left-handled arrow indicating the process (no text or symbols)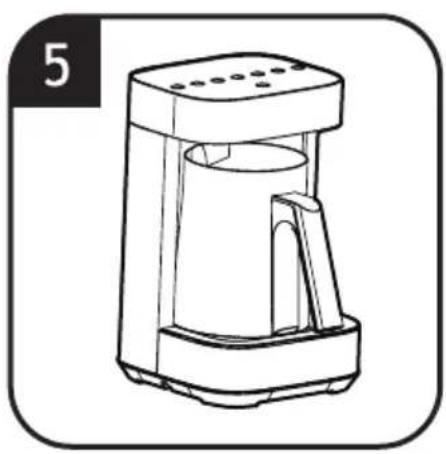
natural_image
Line drawing of a portable coffee maker with handle and spout (no text or symbols)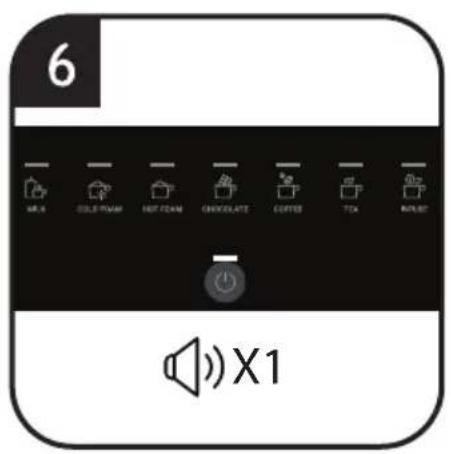
natural_image
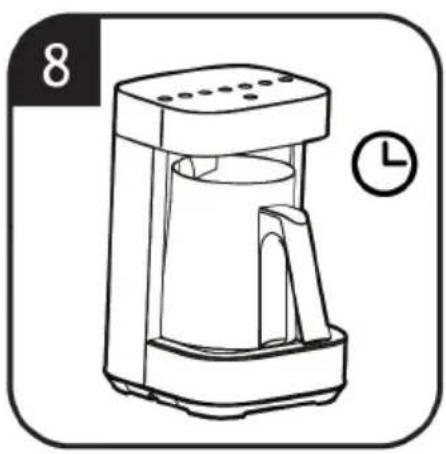
Line drawing of a coffee maker with a side panel and clock face (no text or symbols)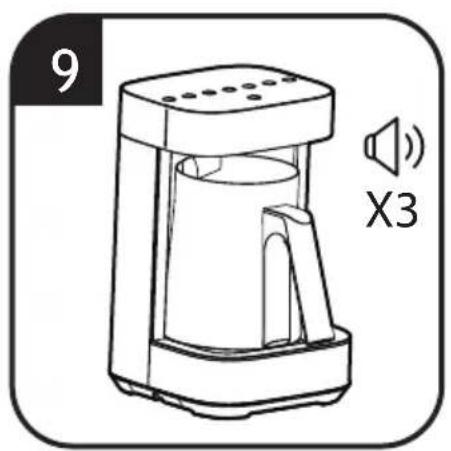
natural_image
Line drawing of a coffee maker with speaker icon and label X3 (no text or symbols on device)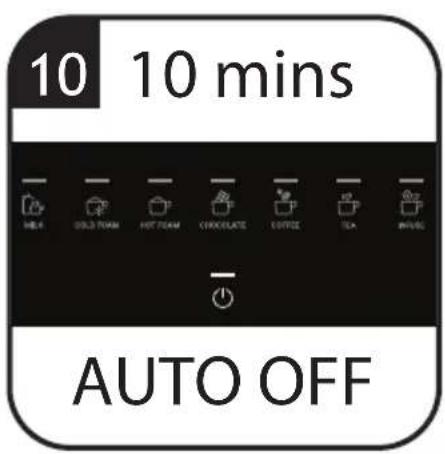
natural_image
Line drawing of a coffee maker with a handle and spout, showing internal components and a directional arrow (no text or symbols)
natural_image
Illustration of a pitcher pouring liquid into a cup (no text or symbols)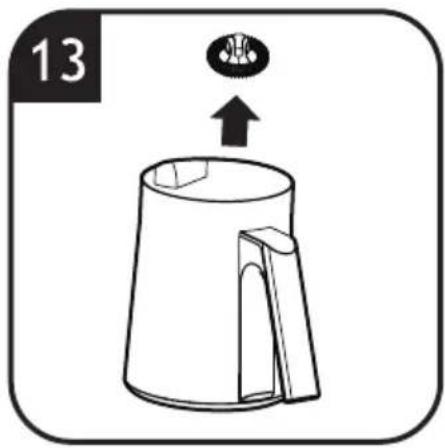
natural_image
Line drawing of a teapot with an arrow pointing to a circular inset (no text or symbols)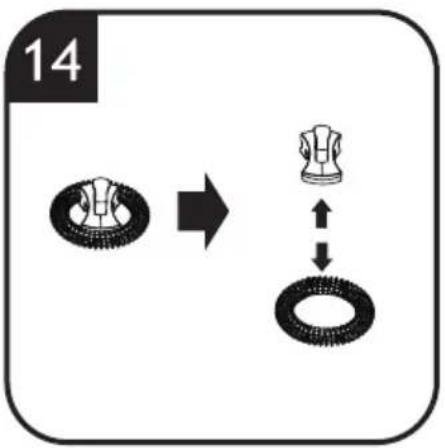
flowchart
graph TD
    A["Circle Component"] --> B["Single Ring"]
    style A fill:#f9f,stroke:#333
    style B fill:#ccf,stroke:#333
15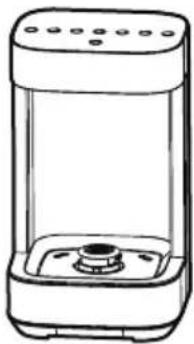 |  |  | 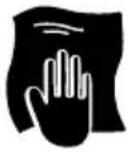 |
| × | × | √ | |
 |  |  |  |
  |  |  |  |
This appliance is intended for domestic use only as described in this user guide. Please ensure that this guide is fully understood before operating the appliance. This appliance can be used by children aged from 8 years and above and by persons with reduced physical, sensory or mental capabilities or lack of experience and knowledge if they have been given supervision or instruction concerning use of the appliance in a safe way and if they understand the hazards involved. Keep children under 8 years of age away from the appliance and connecting cable and do not allow them to use the appliance. Children shall not play with the appliance. Cleaning and user maintenance shall not be made by children unless they are older than 8 years and supervised.
Only use the appliance indoors and at altitudes not exceeding 2 000m above sea level.
If the power cord is damaged stop using the appliance immediately. To avoid a safety hazard, an authorized Haier service engineer must replace the power cord.
Use only attachments, consumables or spares recommended or supplied by Haier.
Only use the appliance in accordance with the power specification on the rating plate.
This appliance is intended to be used in household and similar applications such as:
- Staff kitchen areas in shops, offices and other working environments;
- Farm houses;
- By clients in hotels, motels and other residential type environments;
- Bed and breakfast type environments.
The appliance is only to be used with the base provided.
CAUTION: Never fill the container above the maximum level since hot foaming coffee or other liquids (e.g. milk) might overflow during heating.
WARNING Avoid spillage on the connector. Never immerse the appliance.
The Environment
The symbol on this appliance indicates that this appliance may not be treated as household waste. Instead, it must be handed over
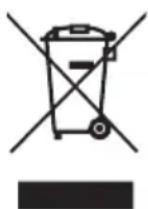
to the applicable collection point for the recycling of electrical and electronic equipment. Disposal must be carried out in accordance with local environmental regulations for waste disposal. For more detailed information about treatment, recovery and recycling of this appliance, please contact your local city office, your household and waste disposal service or the shop where you purchased the appliance.

This appliance complies with the European Directives 2014/35/EU, 2014/30/EU
and 2011/65/EU.
CANDY HOOVER GROUP S.r.l.
Via Comolli,16
20861 Brugherio (MB) Italy
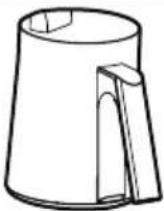
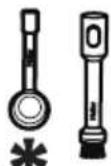
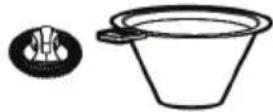
2. Getting to know your Multi Beverage
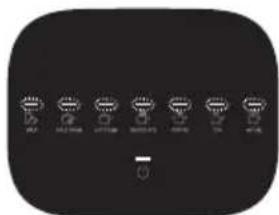
COMPONENTS & FEATURES:
A. Main product
B. User interface
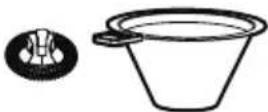
C. Jug
D. Frother
E. Level indicator
F. Metal filter
G. Cleaning brush
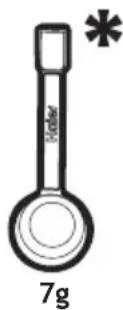
H. Coffee Spoon*
I. Drain hole
3. Before first use
- Remove all the parts and the accessories from the package and read this manual carefully.
- Pay attention to the safety instructions, warnings and important notes to prevent any injury or damage.
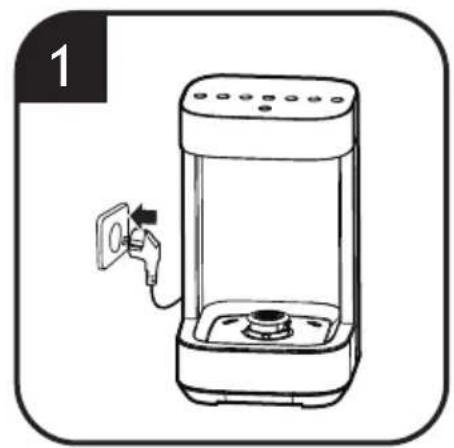
- Release the required amount of cable from the cable tidy and plug the appliance into a socket.
- Before you use the appliance and accessories for the first time, thoroughly clean the parts that contact with food. Before you clean the appliance, unplug it. (For cleaning details refer to Chapter 5)
- The base is designed with drain holes, it can drain water to the table.
WARNING:
- Use the main product only with the jug provided.
- Do not turn on the appliance if the jug is empty, the overheat control will engage.
- To prevent spillage, do not fill liquid more than the maximum capacity of the jug level indicator.
- When you process milk or ingredients that tend to foam, do not put more than MAX MILK 210 ml in the jug.
- Do not fill the jug with hot milk, this will increase the risk to overflow.
- The brush and spoon incorporate a magnet. Keep the magnet away from the heat source.
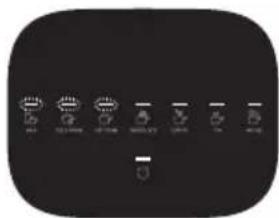
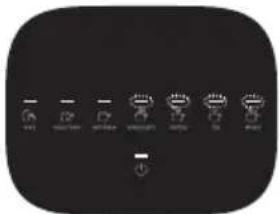
4. Using your Multi Beverage
Make your drink
- Remove the jug from the base.
-
Fill the jug with the desired amount of milk or water, [2] reading the level indicator inside of the jug. [3]
-
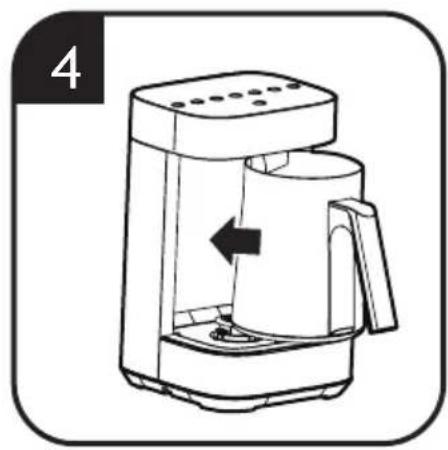
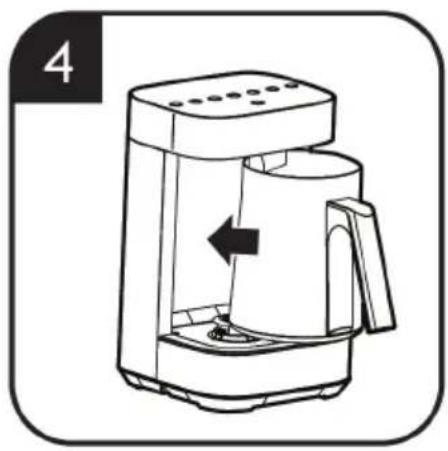
Place the jug onto the base. [4] [5]
-
Press the ON/OFF button on the control panel. [6]
-
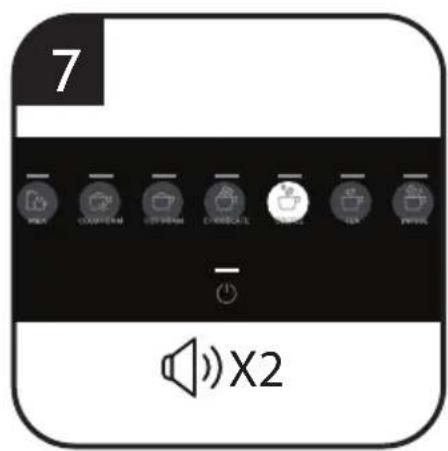
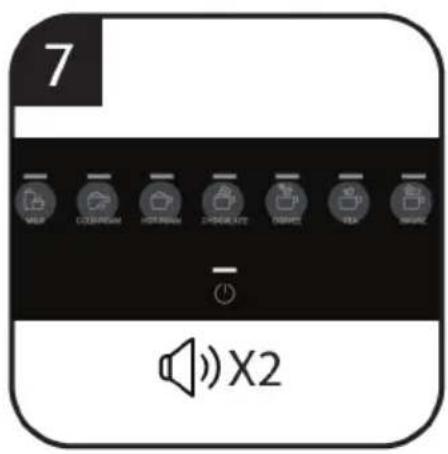
Select the desired drink button on the control panel. The selected drink setting will illuminate, and you will hear 2 audible beeps, [7] the heating process will automatically start. [8]
a. Note: Do not select any drink button when jug not in place, it will enter Error Mode and turn off automatically. (Refer to Error Mode)
b. Note: During preparation process, when the jug is extracted from the base the function is paused. When the jug is put back in place the process resumes.
c. Note: Pressing the drink button during preparation will stop the process.
-
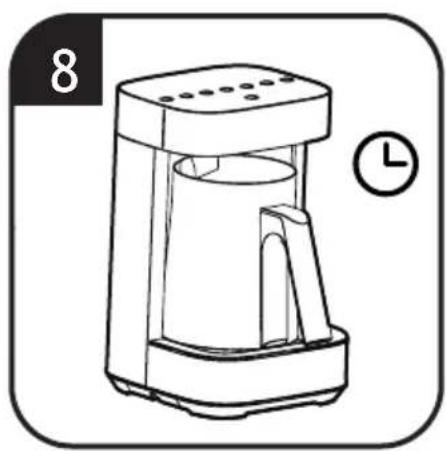
When the preparation process is finished, you will hear 3 audible beeps. [9]
-
The product will automatically turn off after 10 min. [10]
-
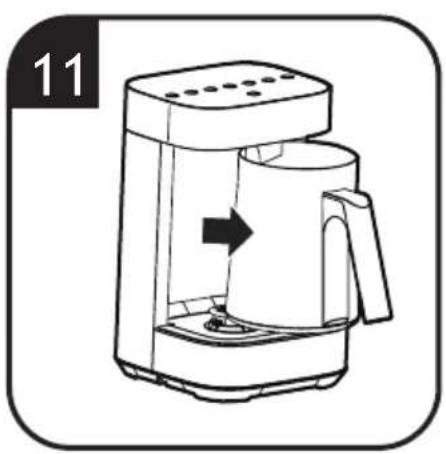
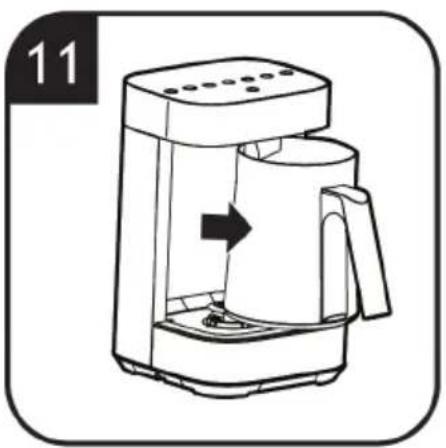
Carefully remove the jug from the base and pour your drink. [11] [12]
-
Clean your jug after use and return the jug to the base. [15]
WARNING:
Make sure the underside of the device and area underneath the base is dry. Do not operate with a damaged cable or plug.
For making a delicious drink, make sure that the jug is clean and dry before use.
Milk preparation (Milk, Cold foam, Hot foam)
-
To prevent spillage, do not fill milk above the MAX MILK level indicator.
-
For optimal milk froth use semi skimmed, refrigerated(4-6°C) milk, milk which has been frozen will not froth.
-
See recipe table for ingredients.
Chocolate preparation

-
To prevent spillage, do not fill milk above the MAX MILK level indicator.
-
To ensure the chocolate dissolves, it is recommend to cut the chocolate bar into small pieces (max 5*5mm).
-
See recipe table for ingredients.
Coffee preparation

-
To prevent spillage, do not fill water above the MAX WATER level indicator.
-
Only use coffee powder as the ingredient.
-
When coffee is prepared, pour into your cup through the supplied metal filter.
-
See recipe table for ingredients.
Tea & Infuse preparation

-
To prevent spillage, do not fill water above the MAX WATER level indicator.
-
For tea bags, add bag directly into jug. When prepared, pour water into your cup and dispose of the tea bag.
-
For Tea leaves & herbs, add the ingredients and water. When prepared, pour into your cup through the supplied metal filter.
-
See recipe table for ingredients.
MUTE FUNCTION
Your product is fitted with a mute function, this will turn off all button sounds from the appliance.
- The mute function can be turned on by pressing and holding the chocolate button for 3 seconds.
- To turn off this function, press and hold the chocolate button again for 3 seconds and the function is deactivated.
Note: The mute function will only turn on/off the button sound. The audible beeps indicating start or finish of the preparation will not be muted.
STANDBY MODE
After the heating cycle, the product will turn to standby mode automatically, only the ON/OFF indicator will be illuminated.
The product will automatically power off after 10 minutes of further inactivity.
ERROR MODE
When an error is detected, the product will enter into error mode with blinking lights, audible beeping sounds, and will turn off automatically.
There are 3 conditions in ERROR MODE: Temperature Sensor Error, Frother Error and Heating Element Error. (For solutions refer to Chapter 6)
5. Cleaning & Maintenance
Refer to image 15 to clean your product. [15]
- Before cleaning the main product, please unplug it.
- Do not use abrasive chemicals, metal objects or hard brushes to clean the appliance.
- Remove the frother from the jug.
- The cleaning brush delivered with the appliance is recommended to be used.
- Never wash the jug in the dishwasher.
• Make sure the connector and the recessed areas are clean and dry before next use.
6. Troubleshooting
Drink overflow
» Cause 1: Milk or water exceed the Max level.
» Cause 2: The jug inner has scale or is not clean.
- Solution: Ensure the milk and water does not exceed the max level (Max water 350ml, Max milk 210ml). Clean jug inner, ensure it is clean. [3]
Temperature sensor Error (All lights blinking for 5 seconds, and an audible beep sounds 3 times)
» Cause 1: The jug not in the base but drink function selected.
» Cause 2: The temperature sensor has short circuited.
- Solution: Ensure the jug is placed in the main product.
If the problem persists contact Customer Service.
Frother error (Left 3 lights blinking for 5 seconds, and an audible beep sounds 3 times.)
» Cause 1: The ingredients are too large and have jammed the frother.
» Cause 2: Agitator motor broken.
- Solution: Remove all ingredients in the frother and clean thoroughly, ensure the ingredient is cut into pieces less than 5*5mm.
If the problem persists contact Customer Service.
Heating element error (Right 4 lights blinking for 5 seconds, and an audible beep sounds 3 times.)
» Cause: Heating element broken.
• Solution: Contact Customer Service.
7. Technical data
| Electrical connection 220-240V~50/60Hz | |
| Power 700W | |
8. Important information
Haier Spares and Consumables
Always replace parts with genuine Haier spares. These are available from your local Haier dealer or direct from Haier. When ordering parts always quote your model number.
Quality
Haier's factories have been independently assessed for quality. Our products are made using a quality system which meets the requirements of ISO 9001.
Your Guarantee
The guarantee conditions for this appliance are as defined by our representative in the country in which it is sold. Details regarding these conditions can be obtained from the dealer from whom the appliance was purchased. The bill of sale or receipt must be produced when making any claim under the terms of this guarantee.
| EU 2023/826 | |
| Power Consumption Off Mode | N.A. |
| Power Consumption StandBy Mode | 0.5W |
| Power Consumption StandBy Mode with info display | N.A. |
| Power Consumption Networked StandBy | N.A. |
| Time to reach Off Mode/ StandBy/StandBy with display/ Networked StandBy | 10min |
- Recipe table
| Item Preparation | Heating Temperature | Recipe Instruction Max Capacity | |||
| 1 | MILK | 65°C | MILK | 210ml (MAX MILK) | |
| 2 | COLD FOAM | N/A | MILK | 210ml (MAX MILK) | |
| 3 | HOT FOAM | 65°C | MILK | 210ml (MAX MILK) | |
| 4 | CHOCOLATE | 95°C | MILK + CHOCOLATE OR COCOA | 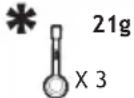 | 210ml (MAX MILK) |
| 5 | COFFEE | 95°C | WATER + COFFEE POWDER | 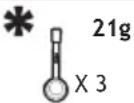 | 350ml (MAX WATER) |
| 6 | TEA | 85°C | WATER + TEA | 350ml (MAX WATER) | |
| 7 | INFUSE | 95°C | WATER + FRESH/DRY HERBS | 350ml (MAX WATER) | |
This table is a recommended guideline only and may vary depending on personal preference, tea/coffee type and age.
* Content may vary according to your model.
1. INSTRUCTIONS POUR UNE UTILISATION EN SÉCURITÉ
natural_image
Black rounded rectangle with six small white icons arranged in a row (no text or symbols)EAU MAX LAIT MAX MIN
natural_image
Black rounded square icon with six small icons below, no text or symbols visible- Bed and breakfast.
natural_image
Black rounded square icon with six small icons and a plus sign, no readable text or symbols.natural_image
Black rounded rectangle with six small white icons on the right side, no text or symbols present.natural_image
Black rounded rectangle with six small icons on the top, no text or symbols visible» Oorzaak: Verwarmingselement defect.
- Oplossing: Contacteer de Klantenservice.
natural_image
Pure electrical circuit lines without any symbolsnatural_image
Pure electrical circuit lines without any symbolsnatural_image
Black rounded square icon with six small white icons and a central plus sign (no text or symbols)natural_image
Black rounded rectangle with six small white icons arranged in rows (no text or symbols)natural_image
Black rounded rectangle with six small white icons on the right side, no text or symbols present.natural_image
Black rounded rectangle with six small icons arranged in rows, no text or symbols visiblenatural_image
Pure electrical circuit lines without any symbols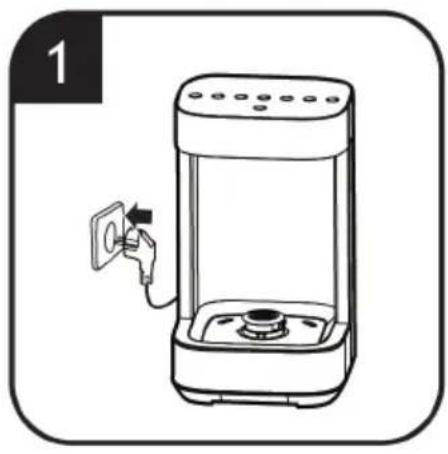
natural_image
Line drawing of a digital kitchen appliance with a power outlet and plug, no text or symbols present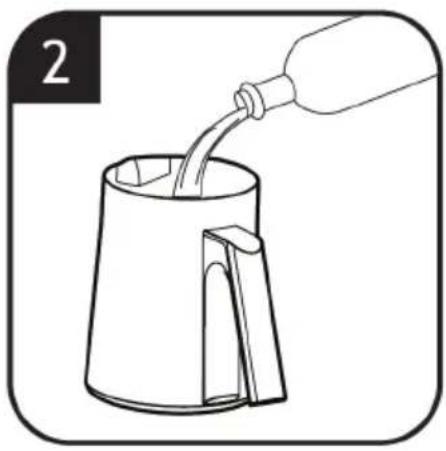
natural_image
Line drawing of a kettle pouring liquid into a container (no text or symbols)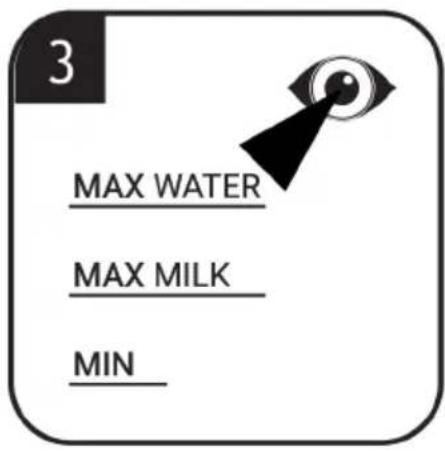
natural_image
Line drawing of a coffee maker with a left-handled arrow indicating the process (no text or symbols)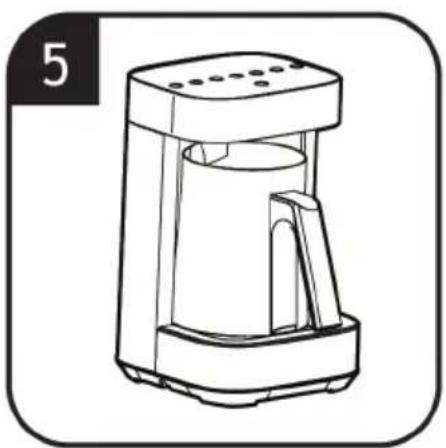
natural_image
Line drawing of a modern coffee maker with handle and side panel (no text or symbols)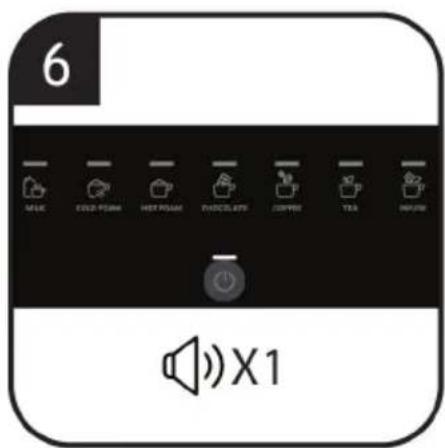
natural_image
Line drawing of a coffee maker with a side panel and clock face (no text or symbols)
natural_image
Line drawing of a coffee maker with speaker icon and label X3 (no text or symbols on device)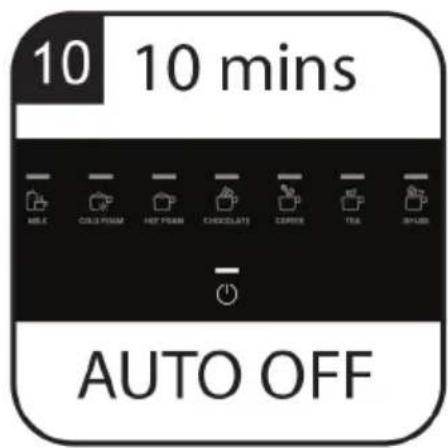
natural_image
Line drawing of a coffee maker with a handle and spout, showing internal components and a directional arrow (no text or symbols)
natural_image
Illustration of a pitcher pouring liquid into a cup (no text or symbols)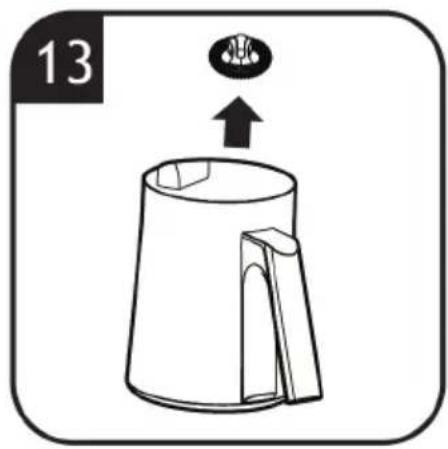
natural_image
Simple line drawing of a teapot with an arrow pointing to a circular inset (no text or symbols)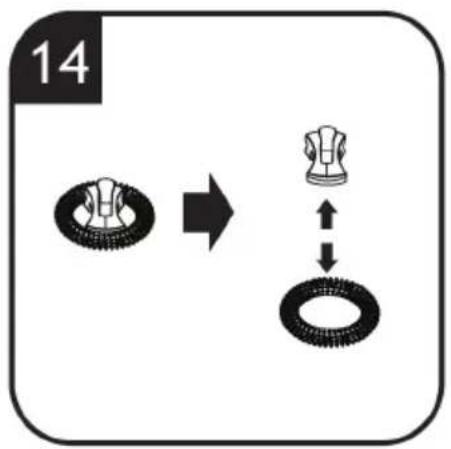
flowchart
graph TD
    A["Gear 1"] --> B["Tire"]
    C["Gear 2"] <--> D["Tire"]
15 |  |  |  |
 |  |  | |
 |  |  |  |
  |  |  |  |