
WMN8000SXT - TV Stand SAMSUNG - Free user manual and instructions
Find the device manual for free WMN8000SXT SAMSUNG in PDF.
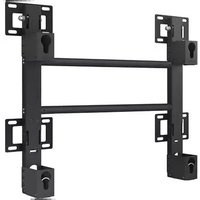



| Product Type | Wall mount for TV |
| Brand | Samsung |
| Model | WMN8000SXT |
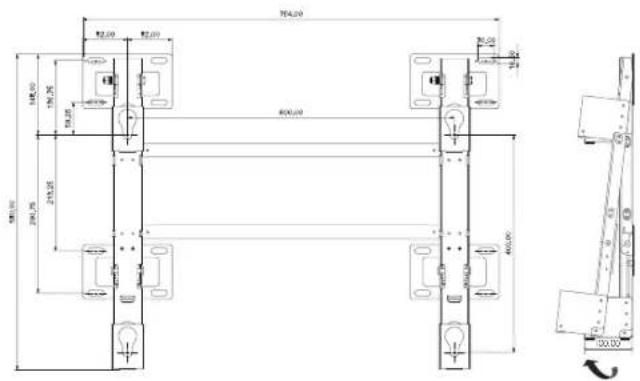
| Dimensions (normal type) | 764 x 580 x 100 mm |
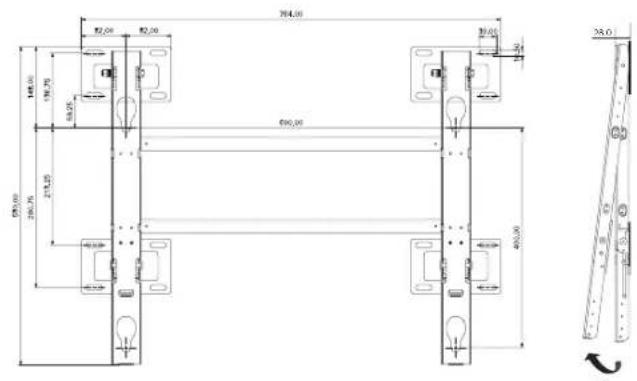
| Dimensions (slim type) | 764 x 580 x 28 mm |
| Weight (normal type) | 4.6 kg |
| Weight (slim type) | 3.4 kg |
| VESA standard | 600 x 400 mm |
| Tilt angle | Varies by model |
| Material | Steel |
| Power supply | None (passive device) |
| Main functions | Wall mounting, height and tilt adjustment, two configurations (normal and slim) |
| Package contents | Wall mounts, adjustment bars, screws, wall plugs, safety hooks |
| Compatible wall type | Concrete or interior wall of sufficient thickness |
| Minimum distance from wall | 28 mm (slim type) or 100 mm (normal type) |
| Installation | By a qualified technician |
| Safety | Do not hang, keep children away, professional installation recommended |
| Maintenance | Clean with a soft, dry cloth |
| Repairability | Spare parts available through Samsung after-sales service |
| Available manuals | Multilingual: FR, DE, EN, ES, HU, IT, JA, KO, PL, PT, RU, SV, TR, ZH |
Frequently Asked Questions - WMN8000SXT SAMSUNG
User questions about WMN8000SXT SAMSUNG
0 question about this device. Answer the ones you know or ask your own.
Ask a new question about this device
Download the instructions for your TV Stand in PDF format for free! Find your manual WMN8000SXT - SAMSUNG and take your electronic device back in hand. On this page are published all the documents necessary for the use of your device. WMN8000SXT by SAMSUNG.
USER MANUAL WMN8000SXT SAMSUNG
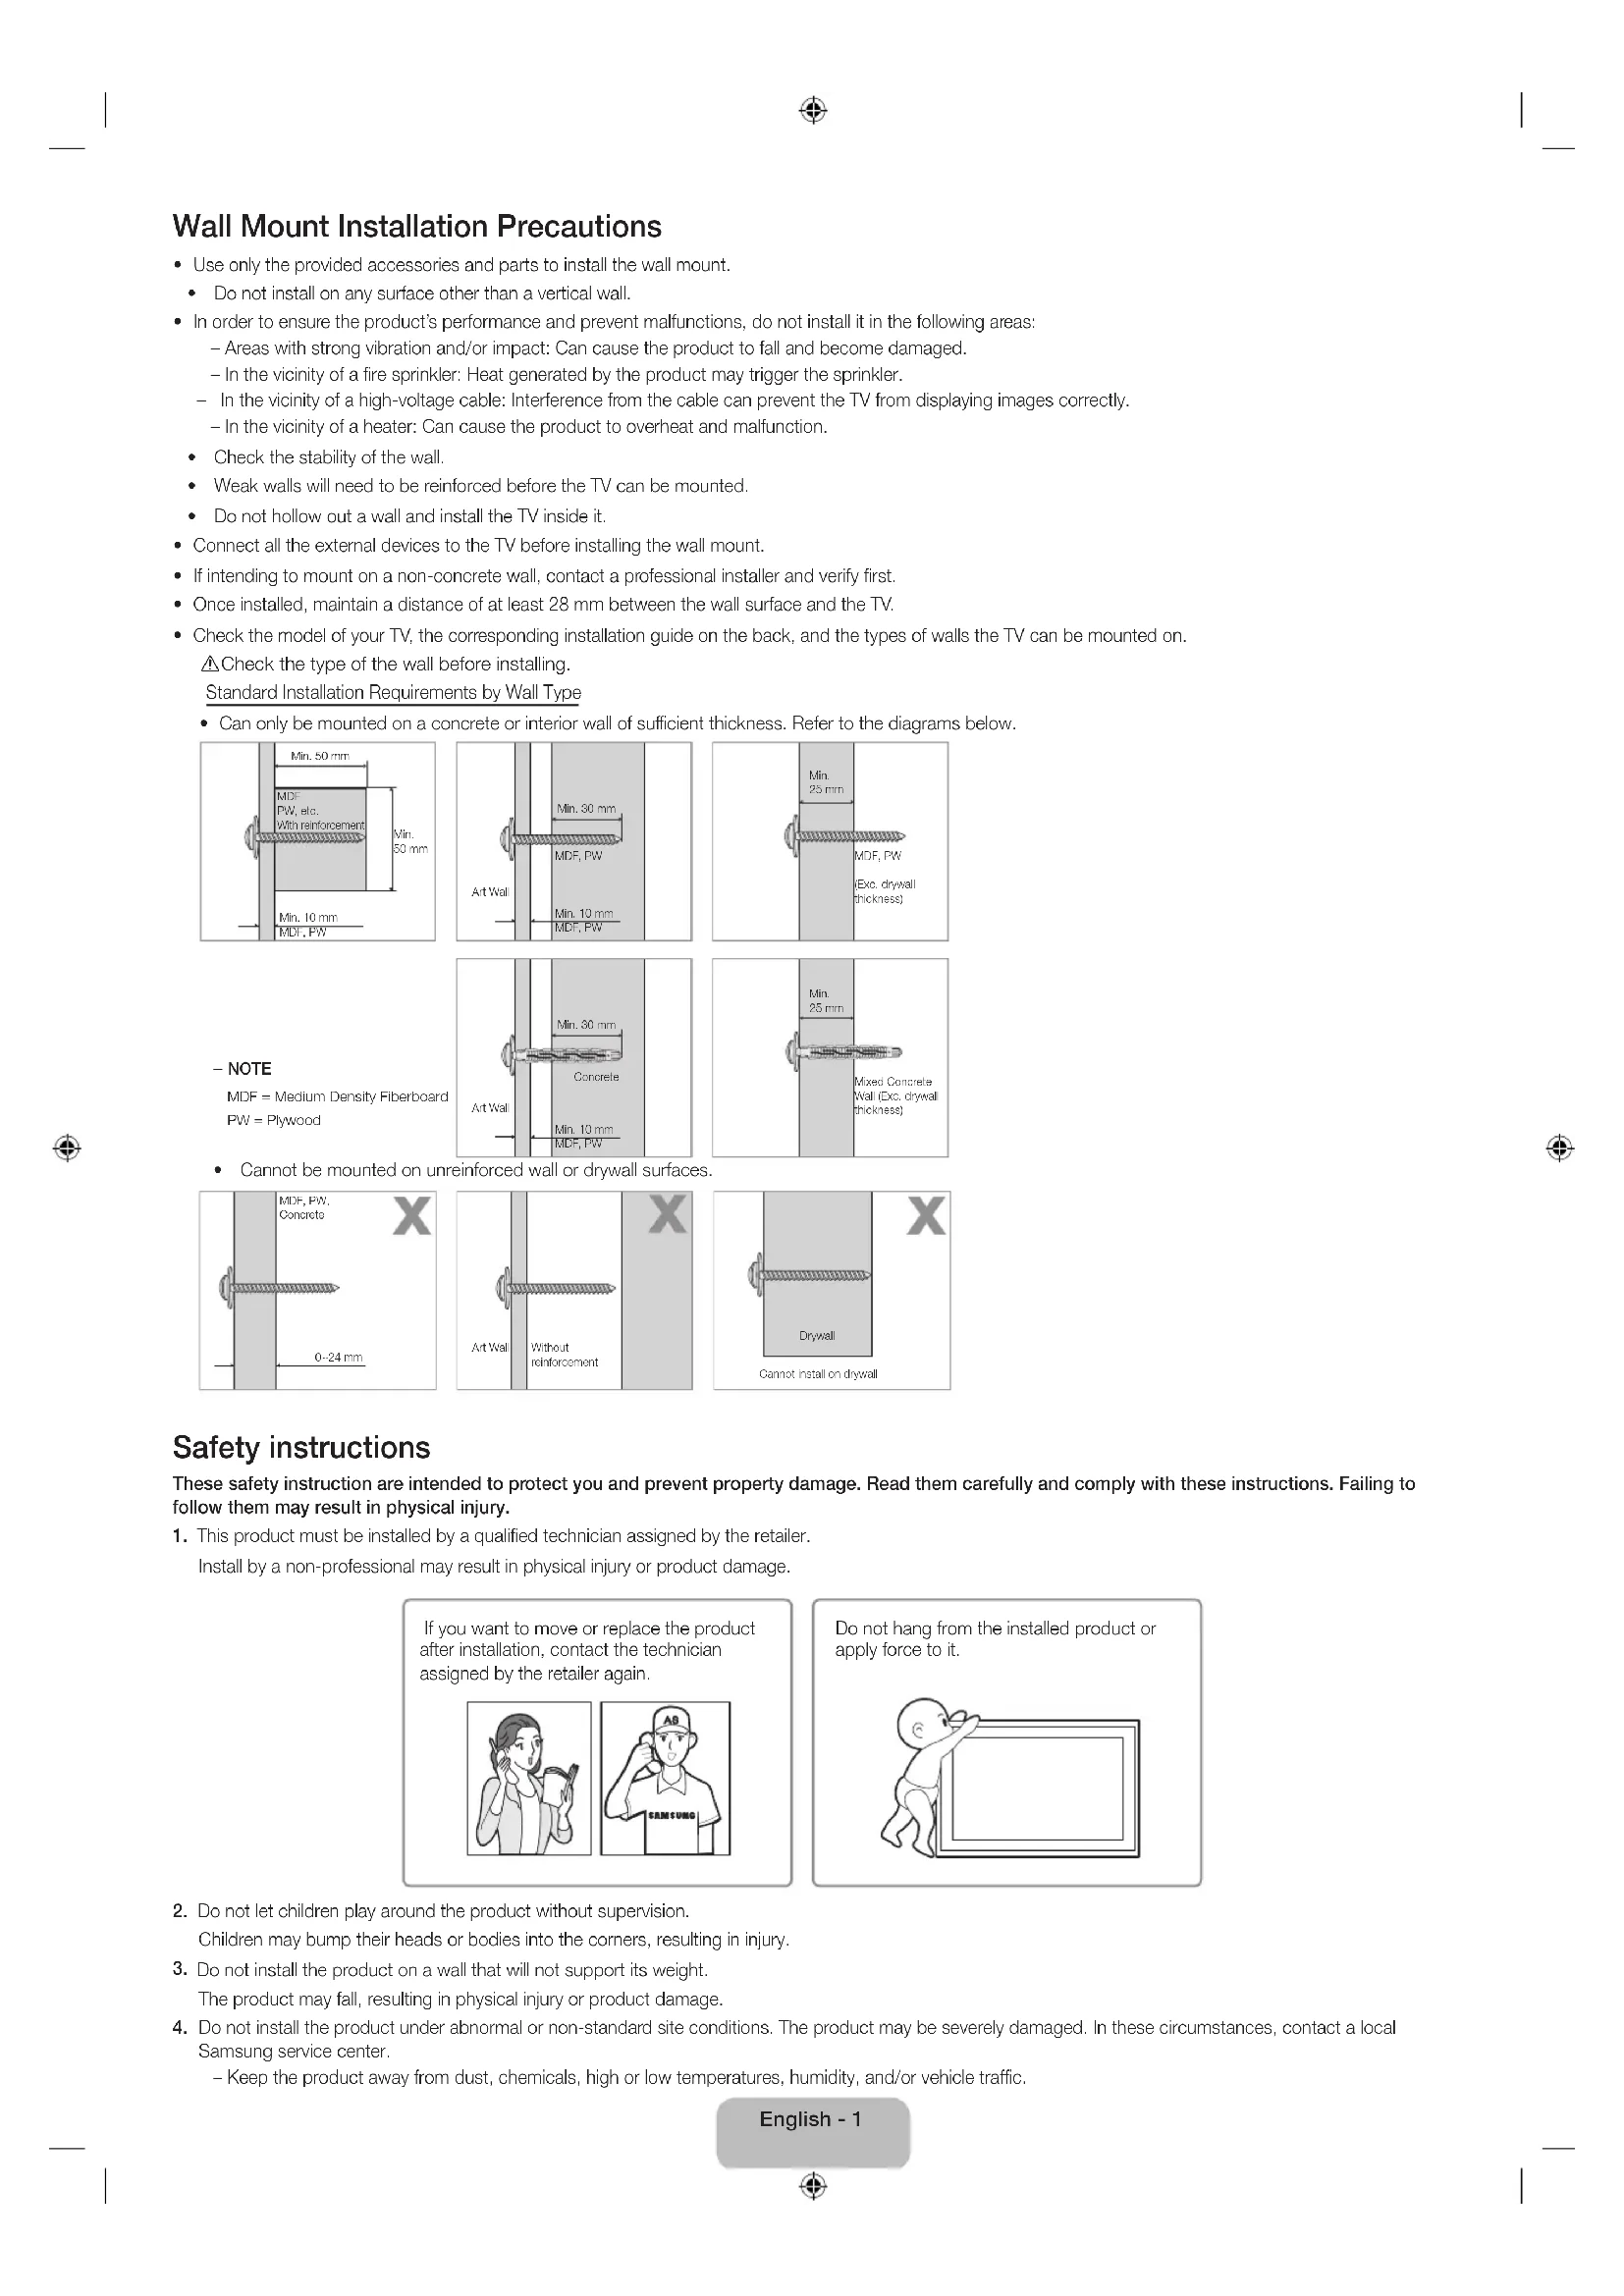
Wall Mount Installation Precautions
- Use only the provided accessories and parts to install the wall mount.
- Do not install on any surface other than a vertical wall. In order to ensure the product's performance and prevent malfunctions, do not install it in the following areas:
- Areas with strong vibration and/or impact: Can cause the product to fall and become damaged.
- In the vicinity of a fire sprinkler: Heat generated by the product may trigger the sprinkler.
- In the vicinity of a high-voltage cable: Interference from the cable can prevent the TV from displaying images correctly.
- In the vicinity of a heater: Can cause the product to overheat and malfunction.
- Check the stability of the wall.
- Weak walls will need to be reinforced before the TV can be mounted.
- Do not hollow out a wall and install the TV inside it.
- Connect all external devices to the TV before installing the wall mount. If you intend to mount on a non-concrete wall, contact a professional installer and verify first. Once installed, maintain a distance of at least 28 mm between the wall surface and the TV.
- Check the model of your TV, the corresponding installation guide on the back, and the types of walls the TV can be mounted on.
Check the type of wall before installing.
Standard Installation Requirements by Wall Type
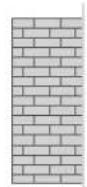
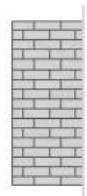
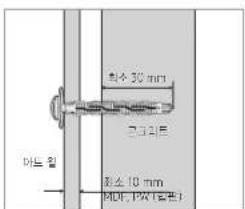
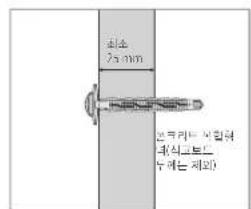
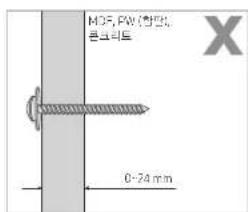
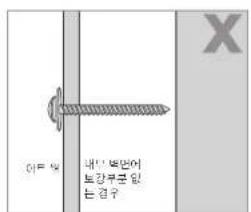
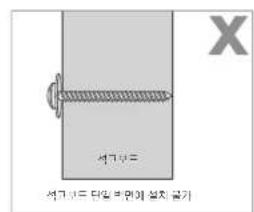
- Can only be mounted on a concrete or interior wall of sufficient thickness. Refer to the diagrams below.
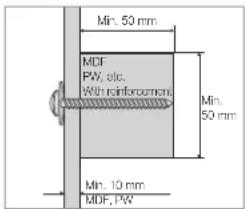
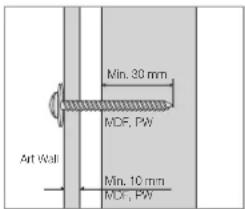
- NOTE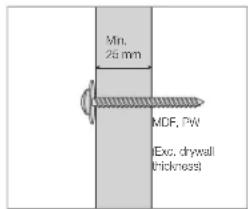
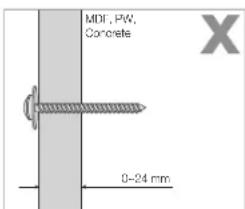
MDF = Medium Density Fiberboard, PW = Plywood
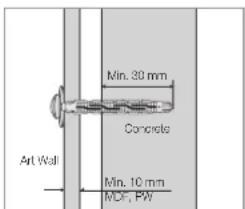
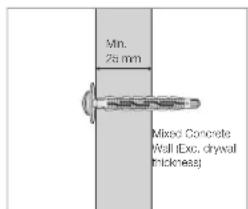
- Cannot be mounted on unreinforced wall or drywall surfaces.
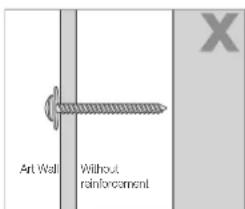
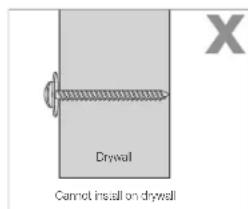
Safety Instructions
These safety instructions are intended to protect you and prevent property damage. Read them carefully and comply with these instructions. Failing to follow them may result in physical injury.
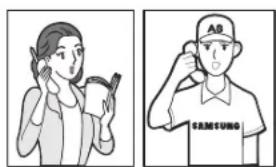
- This product must be installed by a qualified technician assigned by the retailer.
Installation by a non-professional may result in physical injury or product damage.
If you want to move or replace the product after installation, contact the technician assigned by the retailer again.
Do not hang from the installed product or apply force to it.
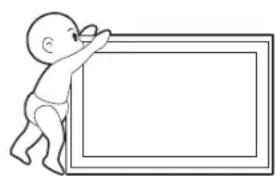
- Do not let children play around the product without supervision.
Children may bump their heads or bodies into the corners, resulting in injury.
- Do not install the product on a wall that will not support its weight.
The product may fall, resulting in physical injury or product damage.
- Do not install the product under abnormal or non-standard site conditions. The product may be severely damaged. In these circumstances, contact a local Samsung service center.
- Keep the product away from dust, chemicals, high or low temperatures, humidity, and/or vehicle traffic.
Accessories
Use only the provided accessories and parts to install the wall mount.
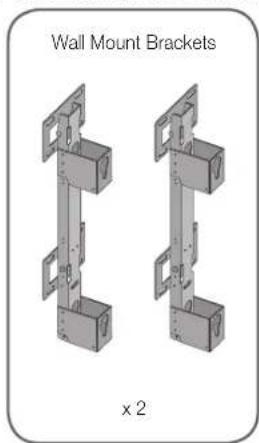
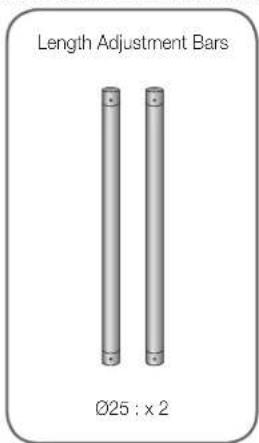
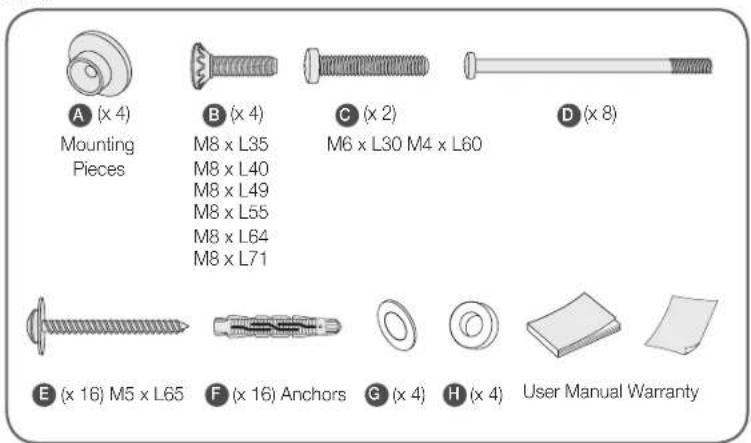
Installation Guide
- First, check the status of the wall (type, thickness, flatness).
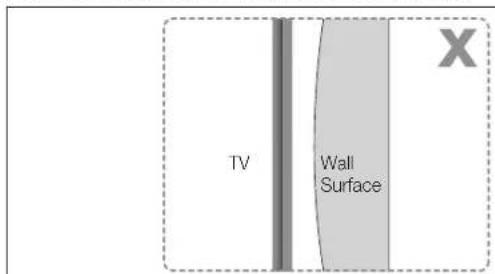
1-1. If the wall surface isn't completely flat, unsightly gaps may form after installation.
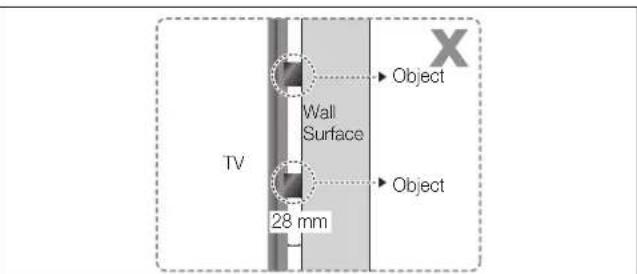
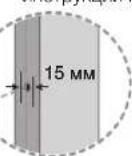
1-2. It is not possible to mount the TV to the wall if there are objects that are 28 mm or thicker attached on the wall surface.
- Check the installation conditions.
Verify the type (normal or slim) based on the TV model.
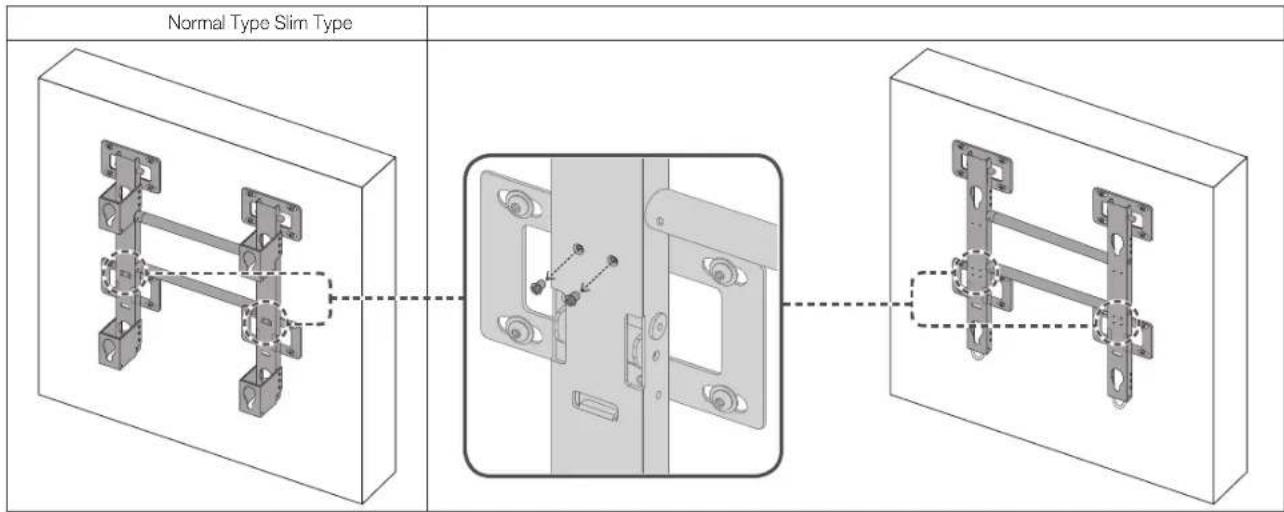
| Normal Type Slim Type | |
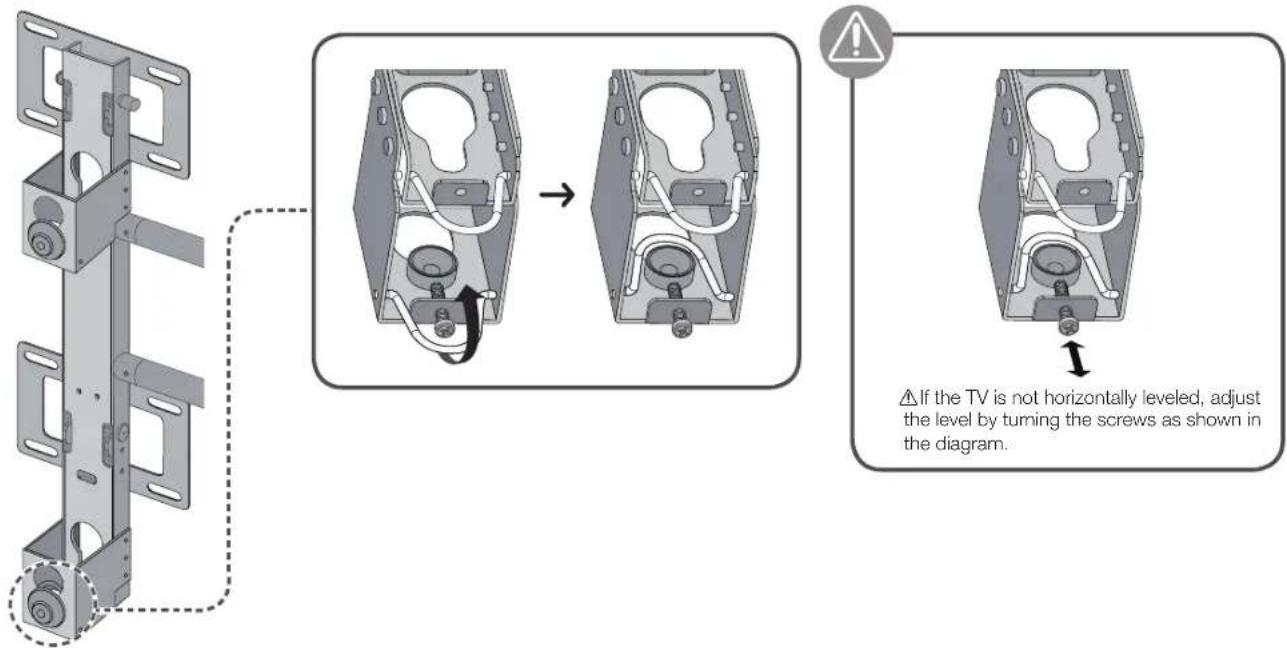
- Insert the leveling screws just enough so that they don't fall off.
| Normal Type Slim Type | |
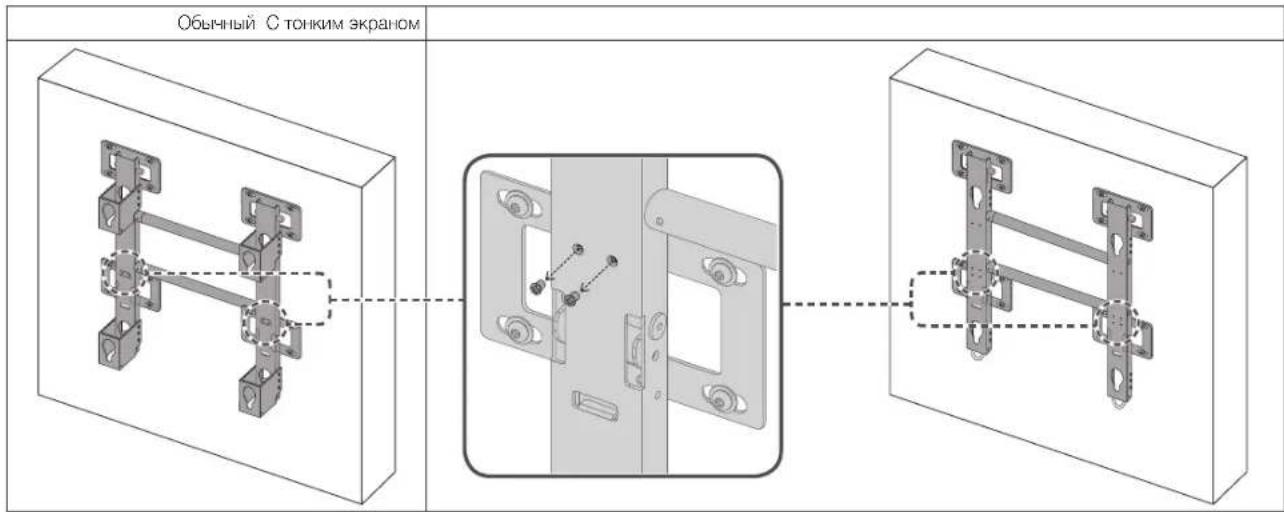
- Adjust the length adjustment bars for the chosen orientation.
4-1. Adjust the height-adjustment brackets.
Normal Type Slim Type (remove 4 height-adjustment brackets.)
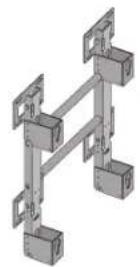
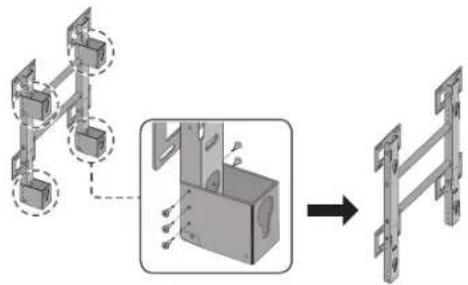
4-2. Assemble the length adjustment bars onto the two wall mount brackets using screws.
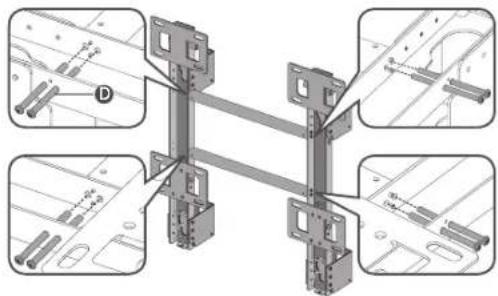
- Place the assembly against the wall you wish to mount it on, and then mark the anchor insertion points on the wall.
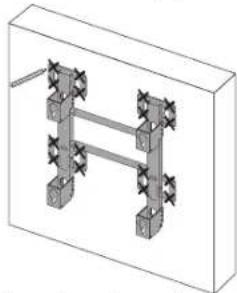
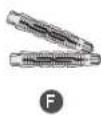
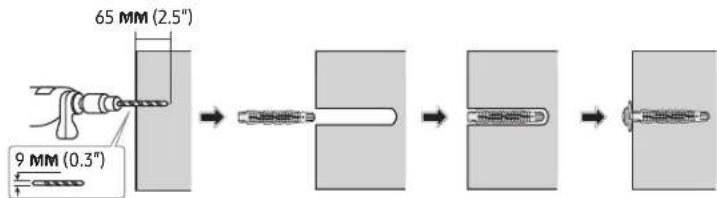
- Insert the anchors and screws where marked.
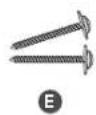
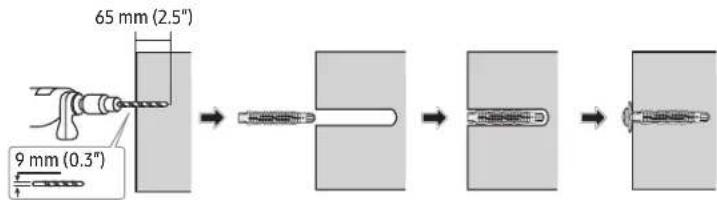
Installing on a drywall with stud reinforcements
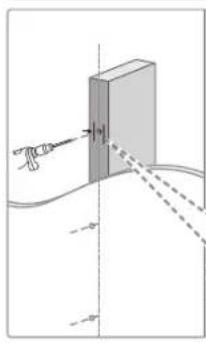
Installation Requirements
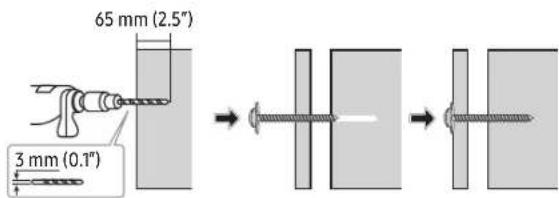
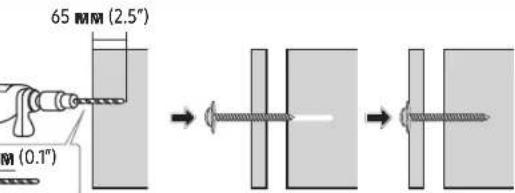
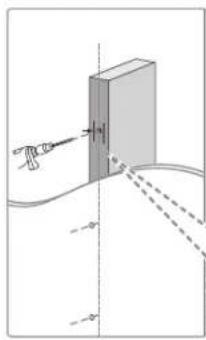
- Check the location of the studs and then insert the screws. Minimum Stud Size: 51 mm x 102 mm (2 inch x 4 inch), Predrill 3 mm holes before inserting the screws. The holes must be drilled along the center axis of the studs.
- Inserting the screws without predrilling can split the studs.
Manufacturer will not be responsible for any issue arising from your failure to follow these installation instructions.

- Remove the screws holding the wall mount brackets in place.
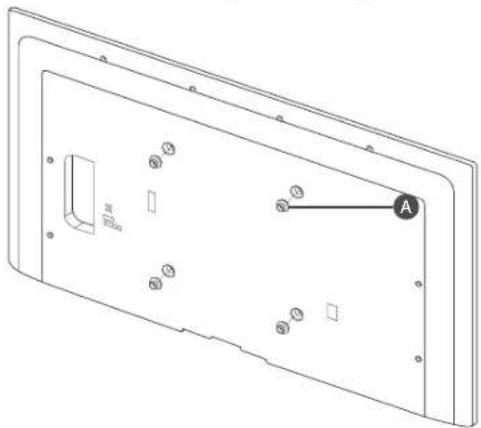
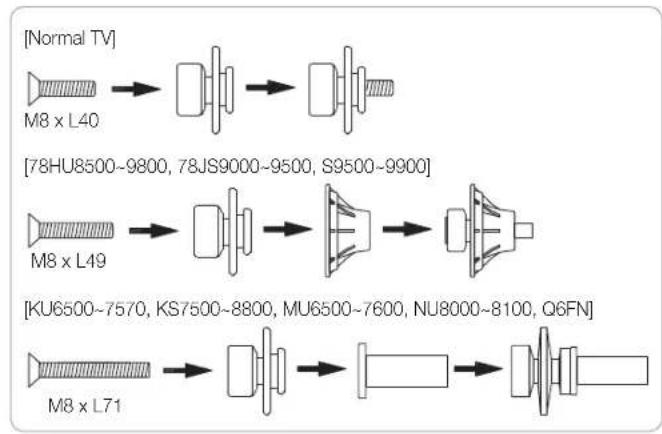
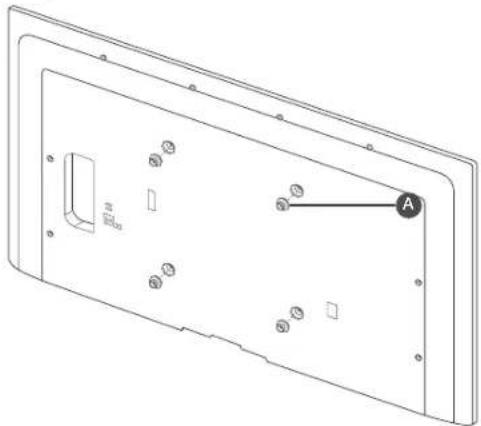
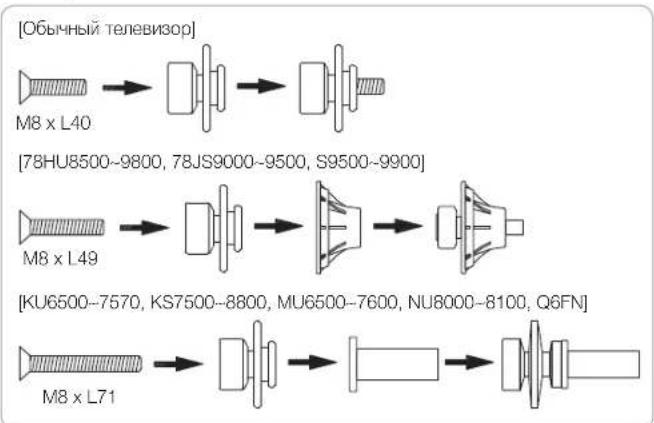
- Assemble the mounting pieces A to the back of the TV as shown in the diagram.
Make sure to insert the pieces into the right holes.
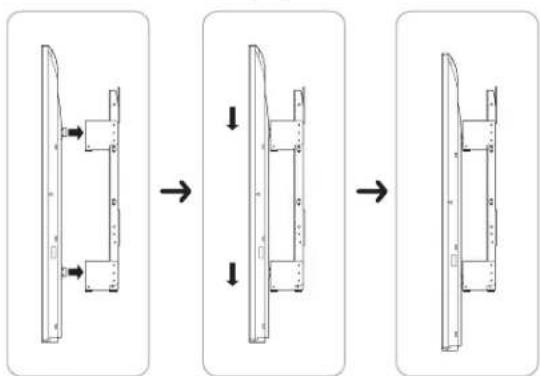
- Work with at least two other people to lift the TV and mount it onto the bracket as shown in the diagram.
- Lift the bottom of the TV and then secure it in place as shown in the diagram. Connect the cables.
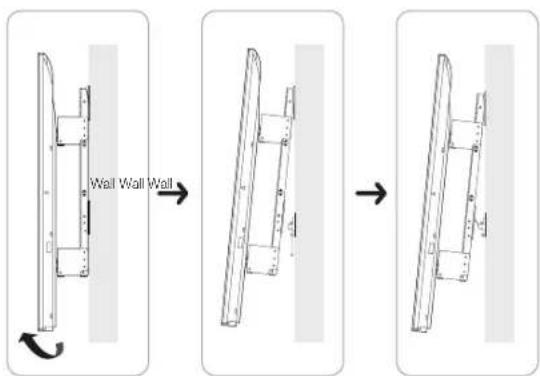
- Lift up the bottom of the TV and then turn the bottom safety hooks on either side to secure the mounting pieces in place.
Product Specifications
Tilt angle may vary depending on the model.
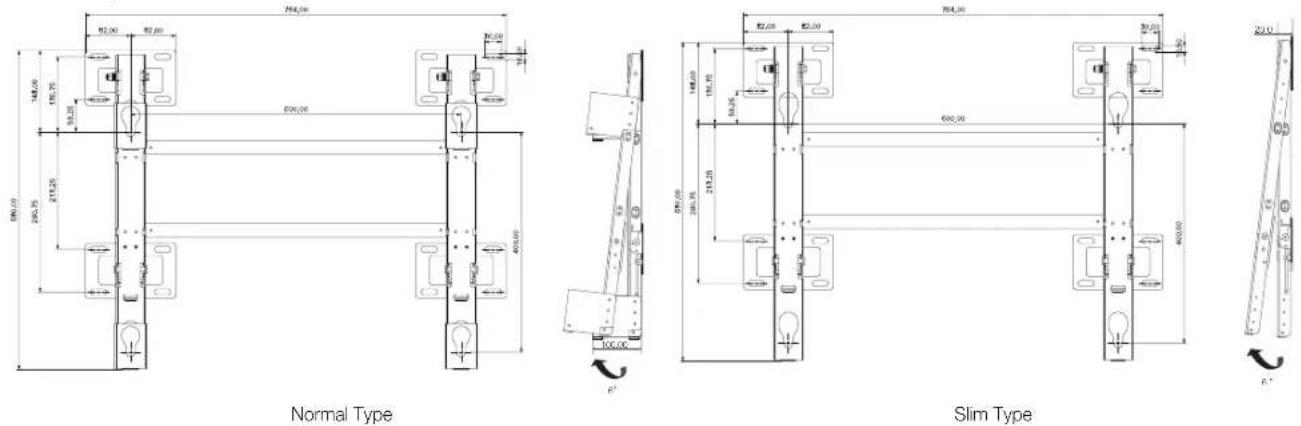
| Width (mm) 764 | |
| Height (mm) 580 | |
| Depth (mm) 100 | |
| Weight (Kg) 4.6 | |
| Wall Mount VESA Specifications (mm) 600 x 400 | |
| Width (mm) 764 | |
| Height (mm) 580 | |
| Depth (mm) 28 | |
| Weight (Kg) 3.4 | |
| Wall Mount VESA Specifications (mm) 600 x 400 | |

Installation Manual
3. Mount the TV on a wall that is strong enough to support its weight.
The product may fall and cause injury if not installed properly.
- Do not install the product in places with unstable or non-standard conditions. The product may be seriously damaged. In such circumstances, contact the Samsung service center.
Do not store the product in humid places or places with excessive vibration; do not expose it to chemical substances, high or low temperatures, or high humidity.


Accessories
For wall mount installation, use only the accessories provided in the kit.
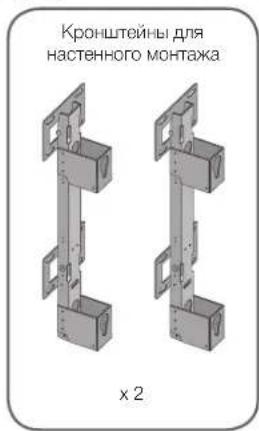
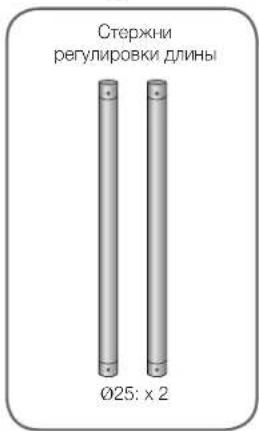
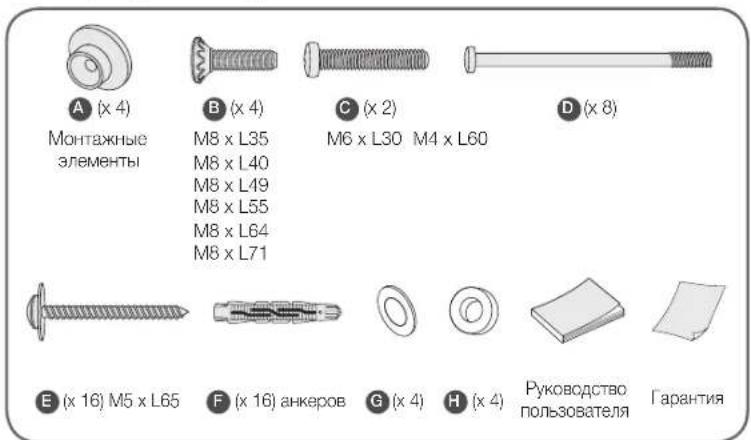
Installation Guide
- First, check the condition of the wall (type, thickness, flatness).
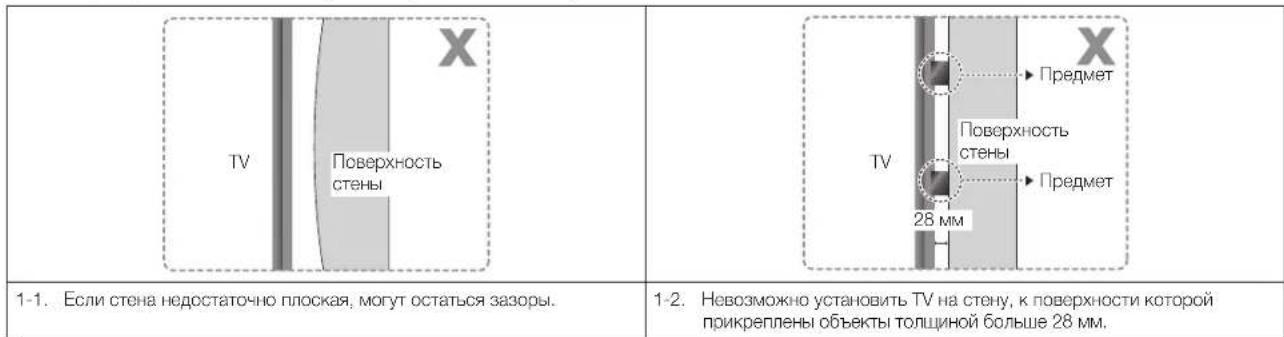
2. Check the mounting holes
Check the TIN (thin screen model) of the IV model.
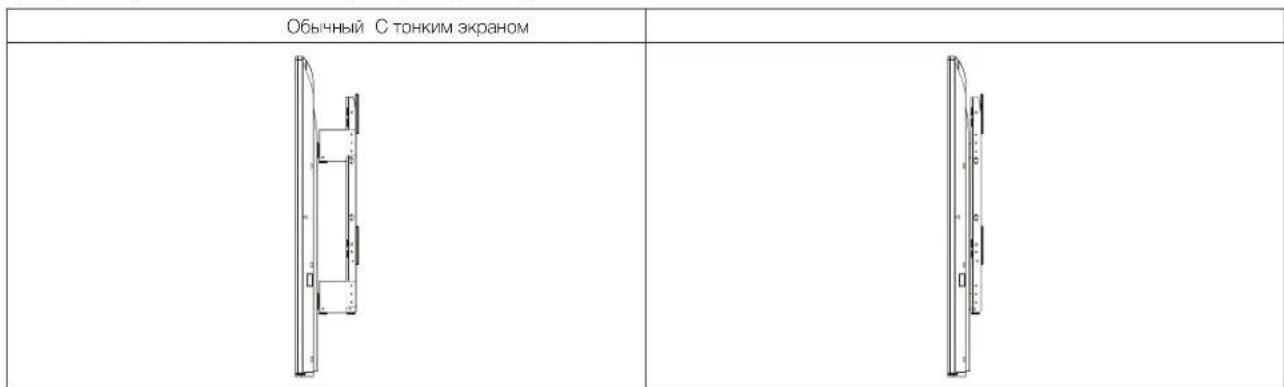
3. Insert the mounting screws in such a way that they do not protrude.
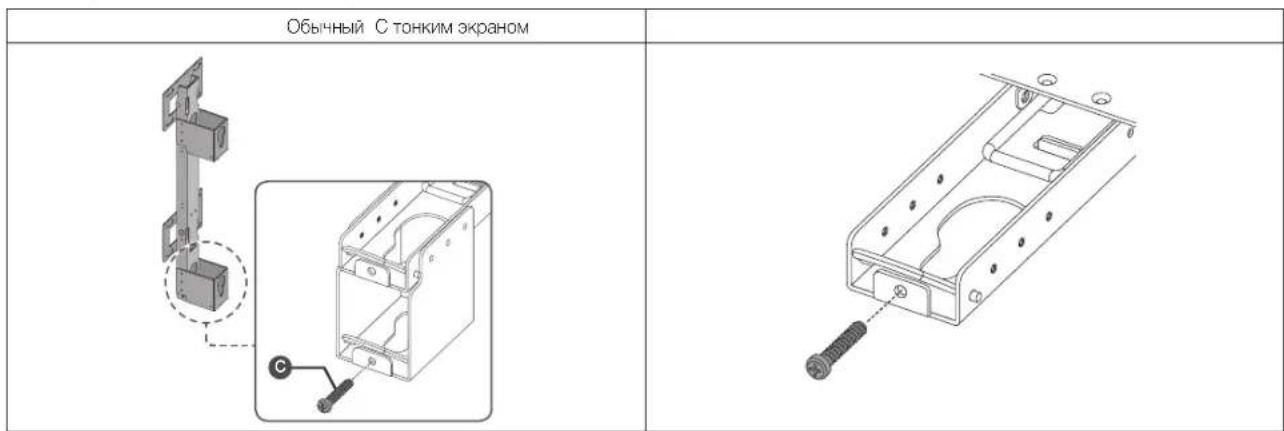
- Adjust the length adjustment rods to the selected mounting position.
4-1. Adjust the height adjustment brackets.
For thin screen models, remove the 4 height adjustment brackets.
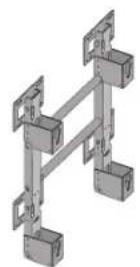
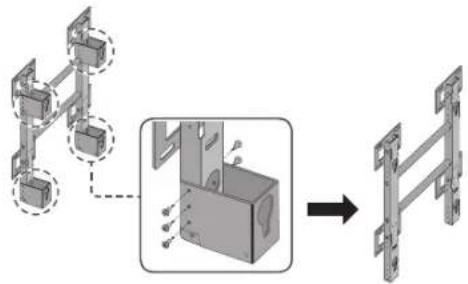
4-2. Secure the length adjustment rods with screws on the two brackets for wall mounting.
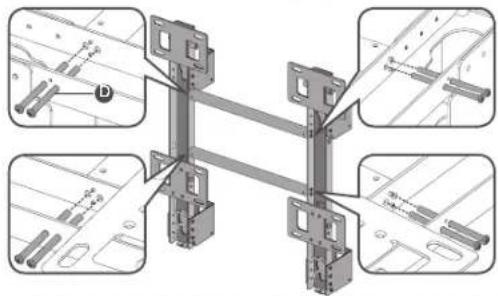
- Hold the structure against the wall where you want to install it, and mark the wall for the anchor installation points.
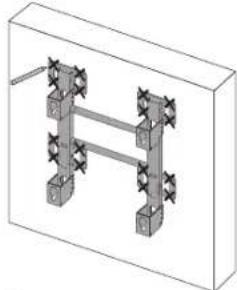
- Insert the anchors into the marked locations.

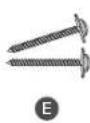
E F
WALL MOUNTING ON PLASTERBOARD WITH REINFORCEMENT OR STUDS
E
Installation requirements
Check the position of the studs and insert the screws. Minimum stud dimensions: 51 mm x 102 mm (2 inches x 4 inches). Before installing the screws, pre-drill holes with a 3 mm diameter. The holes must be drilled along the center of the stud. - Installing screws without pre-drilling may cause the studs to split.
The manufacturer is not responsible for problems arising from failure to follow this installation instruction.

- The brackets are designed for wall mounting.
- Attach the mounting elements A to the rear of the TV panel as shown in the diagram. Ensure that the screws are tightened to the appropriate torque.
9. To install the TV panel on the bracket, at least two people are required.
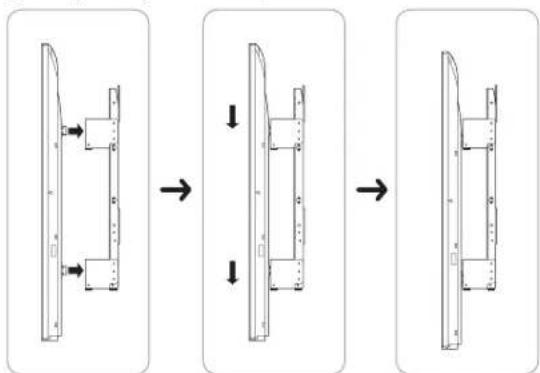
- Lift the lower part of the TV panel and secure it as shown in the diagram. Connect the cables.
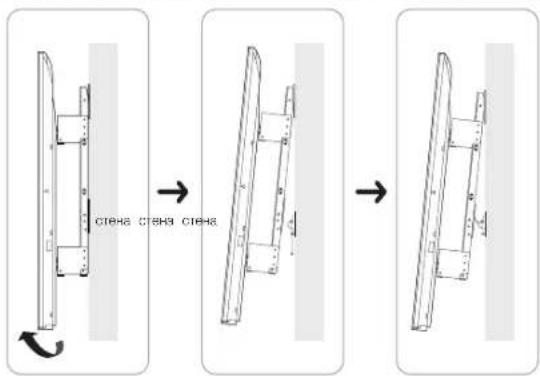
- Lift the lower part of the TV and turn the necessary hooks on each side to lock the mounting elements.
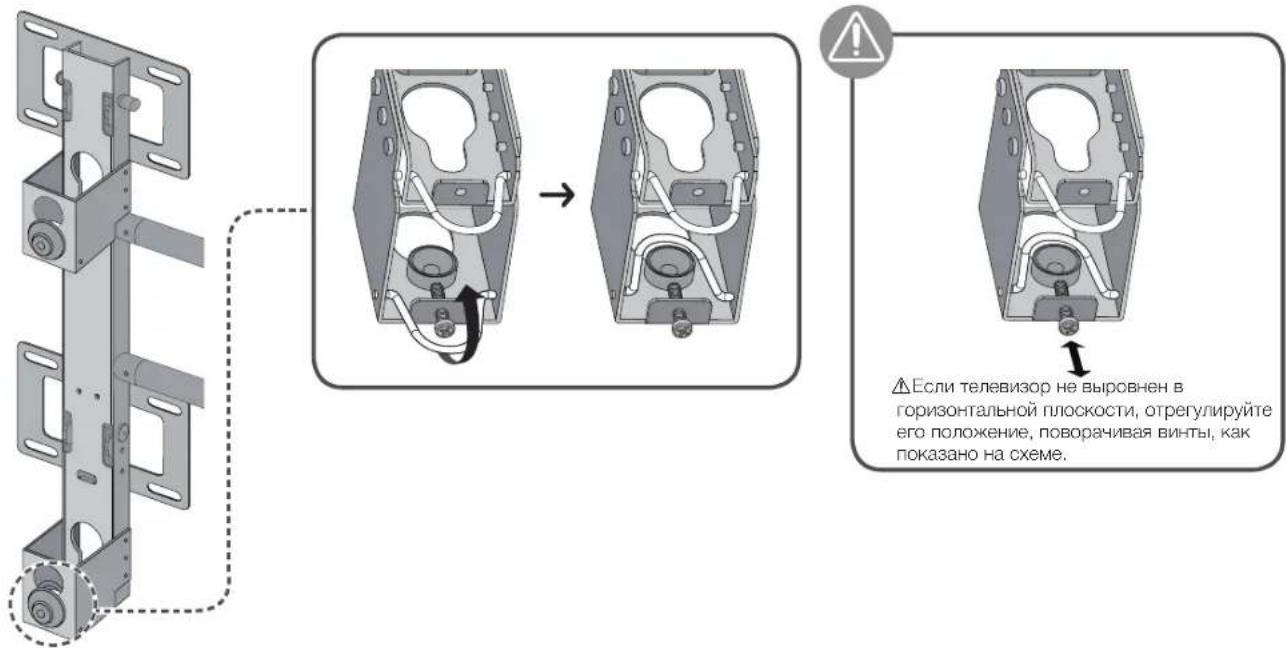
Technical specifications of the product
The tilt angle may vary depending on the model.
Standard
MDF = Medium Density Fiberboard
(Medium density fiberboard or compact board)
PW = Plywood (plywood)
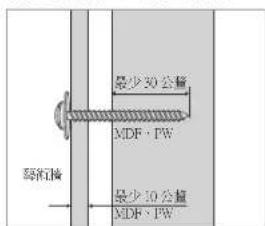

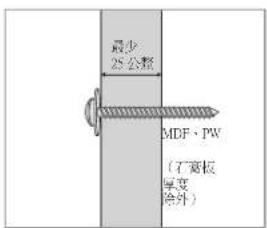

MDF = Medium Density
Fiberboard
PW = Plywood
Normal Type Slim Type

Brand : SAMSUNG
Model : WMN8000SXT
Category : TV Stand