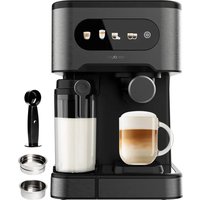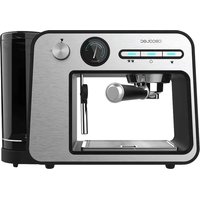
Power Espresso 20 Square Pro - Coffee machine CECOTEC - Free user manual and instructions
Find the device manual for free Power Espresso 20 Square Pro CECOTEC in PDF.


User questions about Power Espresso 20 Square Pro CECOTEC
0 question about this device. Answer the ones you know or ask your own.
Ask a new question about this device
Download the instructions for your Coffee machine in PDF format for free! Find your manual Power Espresso 20 Square Pro - CECOTEC and take your electronic device back in hand. On this page are published all the documents necessary for the use of your device. Power Espresso 20 Square Pro by CECOTEC.
USER MANUAL Power Espresso 20 Square Pro CECOTEC
natural_image
Exterior view of a modern coffee maker with open lid and control panel (no visible text or symbols)Safety instructions 7
- Parts and components 37
- Before use 37
- Operation 38
- Cleaning and maintenance 42
- Troubleshooting 42
- Technical specifications 43
- Disposal of old electrical and electronic appliances 44
- Technical support and warranty 44
- Copyright 44
SOMMAIRE
Read these instructions thoroughly before using the device.
- Keep this instruction manual for future reference or new users.
- All safety instructions must be closely followed when using the appliance.
- This symbol means "Caution, hot surface".

- Accessible surfaces are likely to heat up during use.
- Be careful not to burn yourself.
- This device is designed for domestic use only and is not intended for bars, restaurants, farmhouses, hotels, motels, and offices.
- The appliance must not be used by children.
- Keep this appliance and its power cord out of their reach.
- This appliance can be used by persons with reduced physical, sensory, or mental capabilities or lack of experience and knowledge if they have been given supervision or instruction concerning the use of the appliance in a safe way and understand the hazards involved.
- Children must not play with the device.
- Cleaning and user maintenance should not be carried out by unsupervised children.
- WARNING: the filling opening must not be opened during operation.
- WARNING: take precautions to avoid spillage of liquids on the cable.
- WARNING: incorrect or improper use can be dangerous for the user and damage the appliance.
- Use the appliance only for the purposes described in this manual.
- The surface of the heating element is subject to residual heat after use.
- Switch off and unplug the appliance before changing accessories or nearby parts that move during use.
- Ensure that the mains voltage matches the voltage specified on the device rating label and that the plug is earthed.
- Do not immerse the cable, plug, or any other non-removable part of the device in water or any other liquid or expose electrical connections to water.
- Make sure your hands are dry before handling the plug or switching on the device.
- Warning: If the appliance falls accidentally in water, unplug it immediately. Do not touch the water!
- Check the power cable regularly for visible damage.
- If the cable is damaged, it must be repaired by the official Cecotec Technical Support Service to avoid any type of danger.
- Warning: do not use the appliance if its cord, plug, or housing are damaged, nor after it malfunctions or has been dropped or damaged in any way.
- Do not twist, bend, pull, or damage the power cable.
- Protect it from sharp edges and heat sources.
- Do not allow the cable to touch hot surfaces.
- Do not let the cable hang over the edge of the working surface or worktop.
-
This appliance is not intended to be operated by means of an external timer or separate remote-control system.
-
Turn off and unplug the appliance from the mains supply when not in use and before cleaning it.
- Pull from the plug, not the cable, to disconnect it from the outlet.
- Supervise children to prevent them from playing with the appliance.
- Close supervision is necessary when the appliance is being used by or near children.
- Place the appliance on a dry, stable, flat, heat-resistant surface.
- Do not use the appliance under the following circumstances:
- On or near a gas or electric hob, in heated ovens, or near open flames.
- On soft surfaces (such as carpets) or where it may tip over during use.
- Outdoors or in areas with high humidity levels.
- Do not cover the appliance during operation.
- Never leave the device unattended during use.
- Unplug it from the mains supply when you finish using it or when you leave the room.
- Do not try to repair the device by yourself.
- Contact the official Cecotec Technical Support Service for advice.
- Cleaning and maintenance must be carried out according to this instruction manual to make sure the appliance functions properly.
- Turn off and unplug the appliance before moving and cleaning it.
- Do not wash the appliance in dishwashers.
- No liability is accepted for any eventual damage or personal injuries derived from misuse or non-compliance with this instruction manual.
INSTRUCTIONS DE SÉCURITÉ
A. Steam tube
B. Water tank
C. Mode Selection icon
D. Tank cover
E. Waste-water tray
F. Portafilter
G. Control panel
H. Cup warmer plate
Note:
The graphics in this manual are schematic representations and may not exactly match the appliance.
2. BEFORE USE
- This device is packaged in a way as to protect it during transport. Take the device out of its box and remove all packaging materials. You can keep the original box and other packaging elements in a safe place. This will help you prevent damage to the device when transporting it in the future. In case the original packaging is disposed of, make sure all packaging materials are recycled accordingly.
- Make sure all parts and components are included and in good conditions. If there is any piece missing or in bad conditions, contact the official Cecotec Technical Support Service immediately.
Box content
- Coffee machine
- Portafilter
- Simple coffee filter
- Double coffee filter
- Pressing spoon
- Cleaning pin
- Hand water pump
ENGLISH
3. OPERATION
Control panel

On/off button
Turn the device on and off.

Single coffee function button
Press the "single coffee" button, the light flashes slowly, the coffee machine will start brewing coffee and will automatically stop after preparation.


Double cup function button
Press the "double coffee" button, the light flashes slowly, the coffee machine will start brewing coffee and will automatically stop after preparation.
Mode selector

Hot water indicator
Turn the selector towards this icon to prepare hot water. The light blinks fast when hot water is being prepared.

Steam indicator
Turn the selector towards this icon to prepare steam. The light blinks fast when steaming

Coffee function indicator
Turn the selector towards this icon to prepare coffee. Then, on the control panel, you can select whether you want single or double coffee.
Preparation before start-up
- Place the selector

Open the water tank cover.
- Introduce water into the tank up to the MAX line. Only use purified water to reduce incidences and at room temperature. Put the tank cover back on.
- Plug the device into the corresponding power supply and press the on/off button.
- Each function indicator flashes and the machine heats up. All indicators light up after
preheating.
- Take the portafilter and insert the single or double coffee filter according to your choice. When fitting the filter, please note that the filter has a small outlet which must fit into the filter holder recess.
- Insert the ground coffee into the filter with the help of the spoon/presser, then press the coffee into the filter with the back of the spoon without letting it exceed the MAX line; otherwise the filter holder will not be able to close properly.
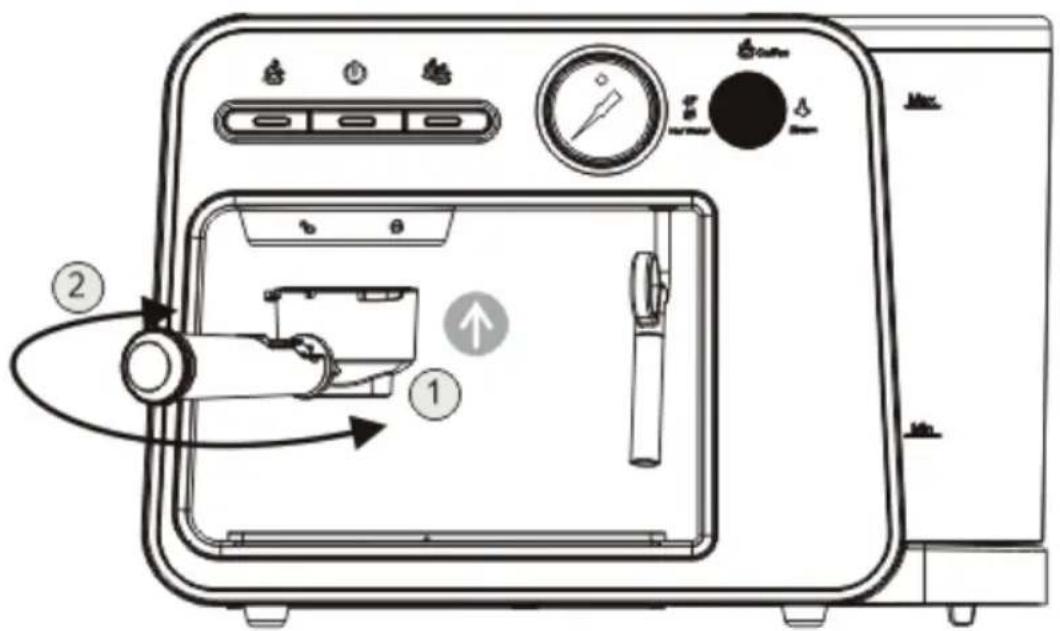
- Position the portafilter in line with the "Unlock" position (Fig. 2) shown on the coffee diffuser and turn the portafilter clockwise to the "Lock" position (Fig. 2).
- Place the cup on top of the waste-water tray (make sure that there is more than 150 ml of pure water in the water tank so that the coffee is not interrupted in the middle of the process).
- Press the button for the desired amount of coffee (single or double) until brewing is complete.
- When the button is pressed, the light in the button flashes while the coffee is being made. At the end of the process the light will flash twice.
Note: please note that it will take a few seconds for coffee to brew due to preheating.
Milk preparation (Steam)
- Pour at least 50 ml of cold whole milk into the cup.
- Place the cup of milk in the steam pipe, making sure that the steam pipe is submerged in the milk.
- Turn the selector towards the steam icon 📋, at this point, the steam indicator light flashes rapidly and the machine enters steam mode. At the beginning, it will be necessary to wait for some time for the machine to warm up. This is normal. After heating, the steam will automatically expel the frothy milk.
Note: before releasing steam, the device usually releases a little water, this is completely normal because it is the residual water in the duct.
- After finishing this process, turn the selector until the coffee icon , to pause the process.
Note: after 120 seconds of continuous steam blowing, if the rotary knob does not return to the coffee position, it will automatically stop blowing steam. It is necessary to turn the rotor back to the coffee position and then turn it to the steam position so that steam is released again.
Reminder: as the machine has just finished steaming, the heating body inside the machine is at high temperature to ensure the effect and taste of coffee, please, do not start the coffee mode immediately to brew coffee. If you wish to use hot water after using steam at the beginning of the process, some steam may be expelled.
Note: it is very important to clean the vaporiser after each use, by generating steam again in a glass of water. Then, very carefully due to the high temperature, remove the protector from the vaporiser and clean with a damp cloth the internal duct through which the steam comes
ENGLISH
out.
Hot water preparation
- Place the cup in the steam pipe
211
- Turn the selector until the hot water icon, in that moment, the hot water indicator flashes, and the machine enters the hot water mode and starts producing hot water.
- After finishing this process, turn the selector until the coffee icon , to pause the process (make sure there is more than 150 ml of purified water in the tank).
Note: make hot water continuously for 120 seconds. If the rotary knob does not return to the coffee position, it will automatically stop producing hot water. It is necessary to turn back to the coffee position and then turn to the hot water position to restart the hot water.
Energy saving mode
-
The machine has an energy saving mode.
-
The machine will automatically switch off after 15 minutes and all function indicators will be displayed.
-
When the machine is off, press the power button again and restart the machine.
Setting the energy saving mode
- At the same time, press and hold the single and double coffee buttons, plug in the power supply and the on/off button will light up.
- Press the single coffee key, the light of the single coffee button will go out and the power-saving mode will be cancelled.
- Press the single coffee key, the light of the single coffee button will turn on and the power-saving mode will be activated.
Descaling mode
-
Place a cup in the water outlet in front of the machine.
-
Put an adequate amount of descaler in the water tank according to the proportion stipulated by the manufacturer.
-
Press and hold down the single coffee button at the same time and plug in the power supply.
-
When the lights on the power button and the single coffee button are on, press the single coffee button to start the descaling function. The device will stop when it runs out of water.
-
Repeat the process from point 2, but in this case put only purified water to clean the internal ducts before making coffee again.
Press the single coffee button to stop the process if desired.
Note: it is important to perform periodic descaling every two months to reduce incidences caused by the accumulation of mineral debris in the ducts.
Coffee quantity programming
The operating time of each coffee can be changed and saved for future coffees with the following process:
- Place a cup in the water outlet in front of the machine.
- With the selector on the coffee and the 3 lights on the control panel lit, press and hold the single or double coffee button depending on which you want to change and the machine will start to operate. The machine starts preparing coffee. When the desired infusion time has elapsed, release the button. The time is saved for future coffees. The adjustable minimum and maximum times are 10 to 90 seconds in both coffee modes.
Resetting to factory settings
Press and hold the double cup button, plug in the power supply and power button and the double coffee button and the control panel will flash twice to indicate that it is resetting to factory settings.
Procedure after shutdown due to lack of water in the tank
Situation 1: In the coffee brewing process, due to the lack of water in the water tank and the addition of water again, air enters the internal water path, causing no water to come out in the coffee brewing process.
Process to continue:
Turn the selector to the icon ,make sure you have filled the water tank and placed a cup under the steam pipe.
Situation 2: When the new machine is used for the first time, or is not used for a long time, the internal drying of the water pump causes the machine not to discharge water.
Process to continue:
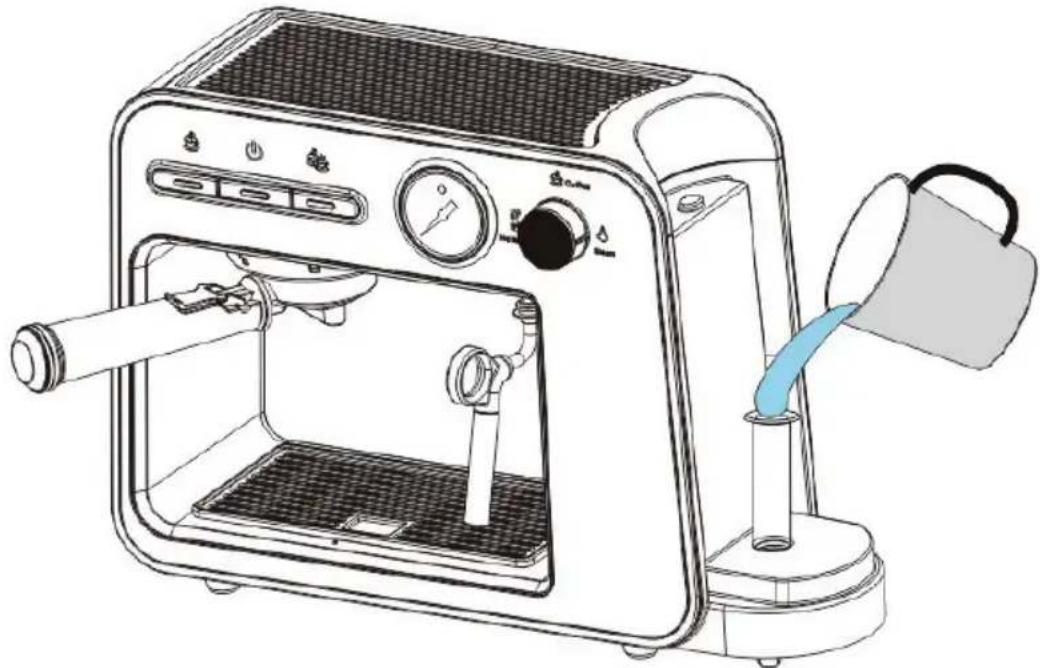
- Turn the rotating key until
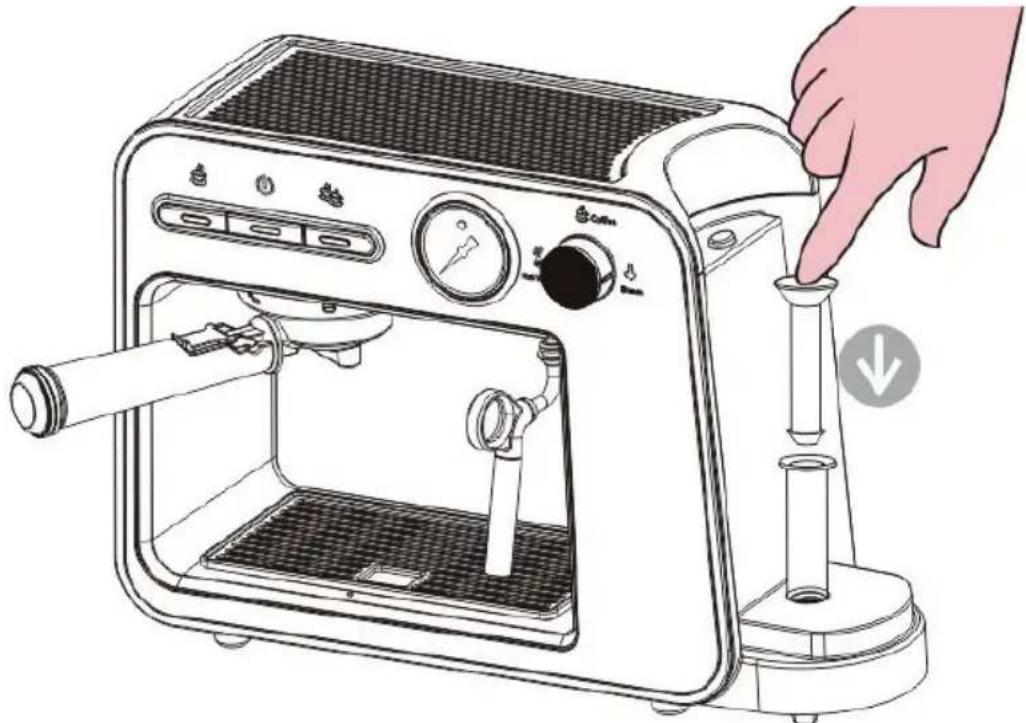
- Insert the air pump into the water inlet hole of the water tank, then add the appropriate amount of water. (Fig. 3).
- Pump water into the machine with the water pump. (Fig. 4)

ENGLISH
4. CLEANING AND MAINTENANCE
- Do not immerse the machine in water.
- Before cleaning the machine, be sure to unplug the power cord.
- Do not use strong detergents, sharp objects, brushes or other objects to clean the machine.
- Clean with a soft, dampened cloth.
- Clean the filters with water and a cloth to remove any coffee residue that may have adhered to them.
- Disassemble and clean the steamer after each use.
- Descale the entire machine after two months of use.
5. TROUBLESHOOTING
| Fault Possible causes Solution | ||
| The indicator light does not work. | 3. The power supply is not connected.4. The function is not pressed. | 4. Check if the power supply is connected properly.5. The switch button is not pressed,6. Make sure that the power supply is properly plugged in and correctly matched. If the problem remains, contact the official Technical Support Service of Cecotec. |
| No coffee or coffee drips too slowly. | 3. No water in the water tank.4. The coffee is too finely ground or too fine. | 3. Add water to tank.4. Use a coarser ground coffee and/or do not press as hard. |
| Water leaks or seepage. 3. The water tank leaks4. Brewing container with handle is leaking | 4. Check if the water tank is installed in place or damaged.5. The ground coffee in the brewing container with handle is not pressed properly.6. The ground coffee is very fine and does not allow passage. | |
| The machine cannot operate normally, all displays are on, but do not light up when pressed. | The power supply is not connected | Check if the socket is properly plugged in. If the problem remains, contact the official Technical Support Service of Cecotec. |
| The tank has run out of water and when I try to make another coffee it does not come out and makes a metallic rattling noise. | The device has run out of water in the pipe circuit. | Follow the procedure explained in the section “Procedure after shutdown due to lack of water in the tank”. |
6. TECHNICAL SPECIFICATIONS
Product reference: 01983
Product: Power Espresso 20 Square Pro
Power: 1450 W
Voltage: 220-240 V
Frequency: 50/60 Hz
Technical specifications may change without prior notice to improve product quality.
Made in China | Designed in Spain
7. DISPOSAL OF OLD ELECTRICAL AND ELECTRONIC APPLIANCES
This symbol indicates that, according to the applicable regulations, the product and/or batteries must be disposed of separately from household waste. When this product reaches the end of its shelf life, you should dispose of the cells/batteries/accumulators and take them to a collection point designated by the local authorities.
Consumers must contact their local authorities or retailer for information
concerning the correct disposal of old appliances and/or their batteries.
Compliance with the above guidelines will help protecting the environment.
8. TECHNICAL SUPPORT AND WARRANTY
Cecotec shall be liable to the end user or consumer for any lack of conformity that exists at the time of delivery of the product under the terms, conditions, and deadlines established by the applicable regulations.
It is recommended that repairs are carried out by qualified personnel.
If at any moment you detect any problem with your product or have any doubt, do not hesitate to contact the official Cecotec Technical Support Service at +34 963 210 728.
9. COPYRIGHT
The intellectual property rights over the texts in this manual belong to CECOTEC INNOVACIONES, S.L. All rights reserved. The contents of this publication may not, in whole or in part, be reproduced, stored in a retrieval system, transmitted, or distributed by any means (electronic, mechanical, photocopying, recording or similar) without the prior authorization of CECOTEC INNOVACIONES, S.L.
1. PIÈCES ET COMPOSANTS
Img. 1
text_image
H G F E D C B AFig./Img./Abb./Afb./Rys.1
text_image
Diagram of a microwave oven with labeled parts including air conditioner, fan, and control panelFig./Img./Abb./Afb./Rys.2
natural_image
Line drawing of a modern espresso machine with control panel and water dispenser (no text or symbols)Fig./Img./Abb./Afb./Rys.3
natural_image
Line drawing of a standard espresso machine with hand pointing to the lid (no text or symbols)Fig./Img./Abb./Afb./Rys. 4
www.cecotec.es